
Welcome to the unofficial guide to "Universe at War: Earth Assault" PC video game. This guide consists mainly of a very detailed walkthrough of all three campaigns of the singleplayer mode of the game. I guess it should be fairly obvious to all fans of the strategy genre that "Universe at War" is a very similar game to an other RTS product developed by Petroglyph studios - "Star Wars: Empire at War". I'm sure you'll encounter a lot of similarities during the course of the game. Nevertheless, you should take your time to familiarize yourself with some of the basic functions. Tutorial videos are a big help here. There's also a short tutorial mission, however two prelude scenarios are a better choice if you ask me. It's very important that you understand some of the major differences between the playable factions - Masari, Hierarchy and Novus. My guide focuses not only on the main objectives of each mission, but also provides a lot of hints concerning building your own base and army. I've also said a lot of things about new units, technologies and other important aspects of the game.
Have fun playing the missions and good luck with conquering the planet!
Stranger
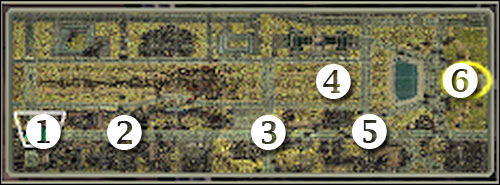
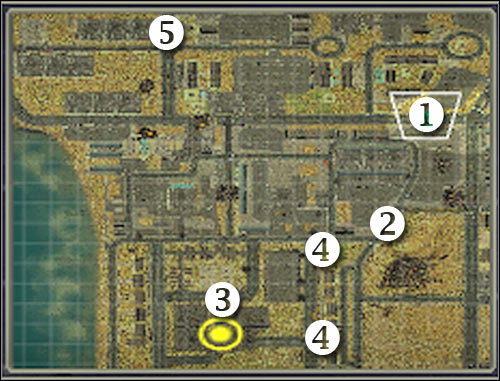
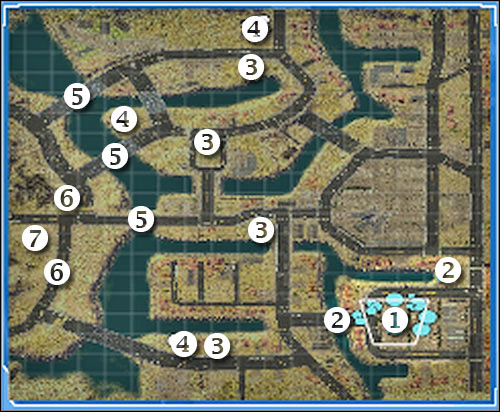
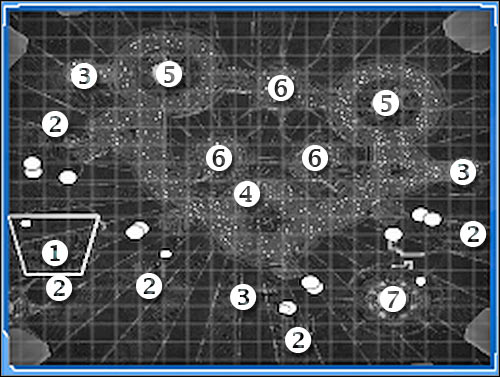
Map legend:
1 - starting area
2 - roadblock (second objective)
3 - military checkpoint (third objective)
4 - Reaper Drones and reinforcements (tanks)
5 - enemy Brute units - they need to be taken care of
6 - capitol building
Important! Before you decide to proceed with the first prelude mission, I'd strongly recommend that you take a few minutes to familiarize yourself with the basics. Head on to the main menu of the game and choose Tutorials. You won't have to watch all movies right away, however most of them are very important. Make sure that you've chosen at least Resource Collection, Research Tree, as well as Novus Power & Flow and Novus Patch System. You will command human forces during the course of the prelude missions, however you will be able to take over Novus units soon enough. You should also consider playing a short tutorial mission by choosing Play Interactive Training from the menu. Sadly, it can little bit confusing, because it focuses on Hierarchy units and you won't be able to command them until you've reached the second campaign of the game.
Your duties during the course of the mission:
You will take control over a small squad of American soldiers. They're being led by colonel Randal Moore. Your main objective will be to reach the capitol building in order to rescue the president from alien invaders.
Detailed mission walkthrough:
First objective: Secure the Capitol Building and rescue the President
You'll start the game in the lower left section of the map (1 on the map). You won't have to worry about being attacked by any of the invaders, so you should take your time to familiarize yourself with the surroundings and with your squad. Your main hero for both Prelude missions will be colonel (later he'll be promoted to general) Randal Moore. As you've probably noticed, he's only got one ability at the moment - MedPack. This skill allows you to regenerate health at a much faster rate. As for the rest of your squad, you will be issuing commands to flamethrower units (Flamethrower Squad), as well as a lot of marines (Marine Squad). I would recommend that you group all of your standard soldiers together. As for Moore, you should be dealing with him separately. Don't worry, though. This is going to be a very easy mission and it will allow you to find out more about the basic functions of the game. Also, you won't be allowed to construct any bases and you won't be attacked by anyone new unless you've approached an unexplored area of the map.
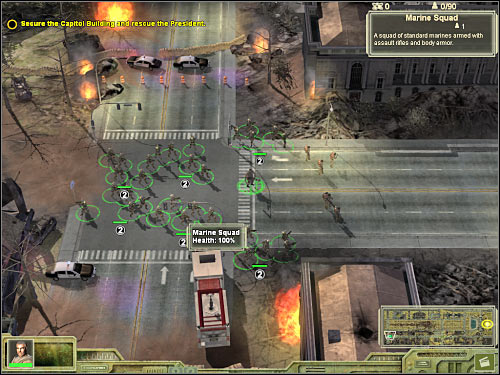
Select your units and start moving east. Obviously the colonel should be staying somewhere in the front, because he's the only one with a capability of regenerating himself. You will be encountering single enemy units (Lost One) along the way. Killing them is going to be very simple. Ignore the civilians, because you don't have to help them. Eventually you'll come across a roadblock. That's where you'll see more monsters (2 on the map). Select only colonel Moore and leave everyone else behind. Wait for the game to display a new mission objective.
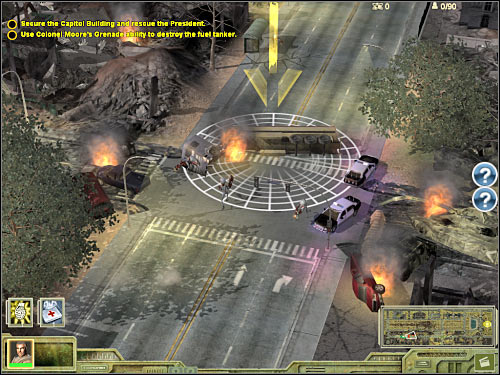
Second objective: Use Colonel Moore's Grenade ability to destroy the fuel tanker
Like I've already said, you will only have to choose Moore for this task. As you've probably noticed by now, he's been given a new ability - Grenade. Choose it from your task bar and aim it at the cistern (screen). The explosion should allow you to neutralize all of the nearby Hierarchy units.
Keep heading east and make sure that all regular soldiers are following colonel Moore's lead. You are soon going to be attacked by stronger enemy units, called Grunt. It's very important that everyone takes part in these battles, not only the colonel. Keep moving towards your current destination. Thankfully, you will be dealing with smaller groups of alien creatures. Eventually you'll come across a junction. That's where some of the allied units are defending themselves against enemy attacks (3 on the map). Your task will be to assist them.
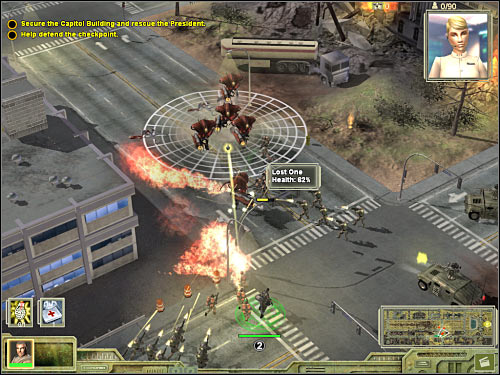
Third objective: Help defend the checkpoint
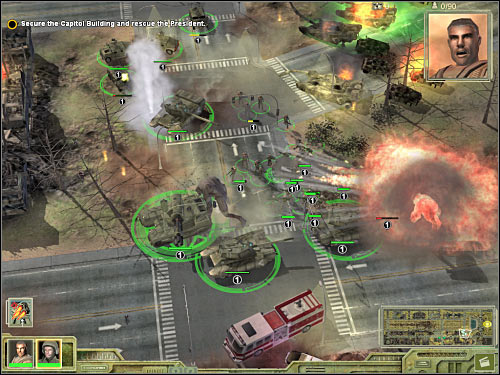
The largest group of alien creatures is going to approach the military checkpoint from the north. You'll be dealing mostly with Grunt units. The easiest way to get rid of the monsters would be to throw a grenade at them (screen) by using colonel Moore's special ability. Now you'll only have to deal with the rest of the Hierarchy units. Once this is done, allied soldiers will automatically join you. Add them to your main squad. Thankfully, you won't have to worry about them too much, because you'll receive reinforcements in about 60-120 seconds (depending on how fast you're moving to the capitol building).
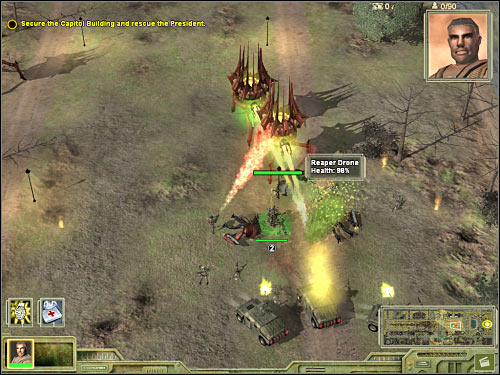
As you've probably noticed, you won't be allowed to go east, because the main road was destroyed. Instead, you will have to head north. Start off by neutralizing new Grunt units. They will approach this area from north and north-west. Once they're gone, focus all of your efforts on destroying an alien turret (Spitter Turret). Keep moving north, however you'll have to turn north-east at some point of the game. Once again, you will be dealing with very small groups, so it should be fairly easy to move on. Allied gunships will appear on the map, however they are going to be shot down by alien saucers. Sadly, you weren't able to prevent this from happening. Start moving east. Eventually you will come across several Reaper Drones (4 on the map). Destroy these units. Don't worry about the outcome of the battle, because you'll be rewarded with reinforcements. A small group of allied tanks is going to join your army. Use them to get rid of the alien threat and wait for additional reinforcements. Gather everyone around Moore's position. It would be a good idea to divide your units to several groups.
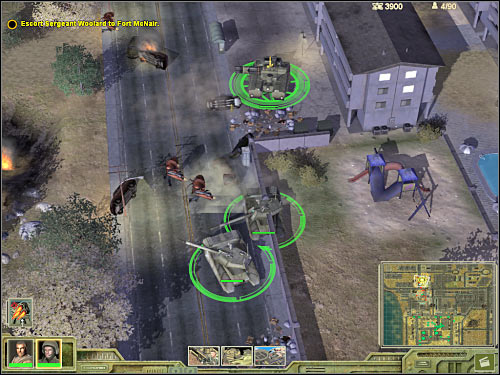
Make sure that your army is moving east. Sadly, your troops will come across a huge cloud of deadly radiation. As a result, it won't be possible to get to the capitol building by moving in a straight line. Instead, you will have to go south-east. You should receive a warning that new monsters have appeared in the area (screen). You will be able to see them if you zoom in the view on the southern building. Get ready, because Brute units will attack your soldiers. This isn't going to be an extremely difficult fight, however you must watch out for their bodies, because they'll explode. Don't worry if you lose the soldiers. Instead, try saving most of your tanks.
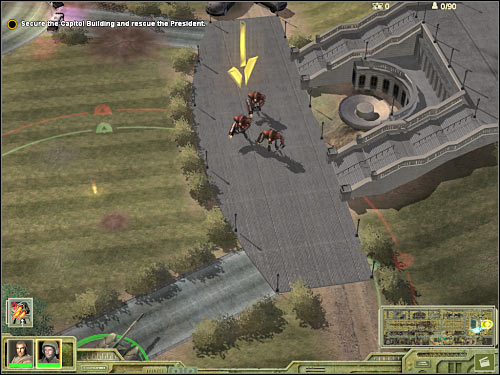
Once the monsters are gone, start moving east, however you will be allowed to turn to north-east. This will allow you to get closer to the capitol building. Keep moving towards your final destination. Obviously you will come across several Hierarchy units along the way. The last group (screen) is marked with a yellow arrow and it's guarding the entrance to the capitol. Use your tanks and your main character to deal with the monsters. Once they're gone, you will be rewarded with a very interesting cut-scene.
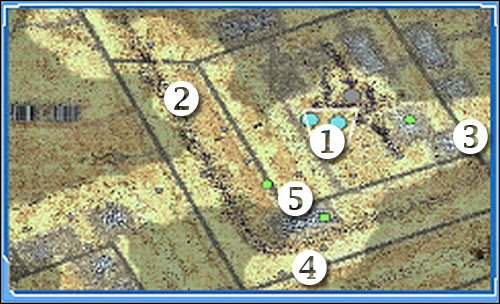
Map legend:
1 - starting area
2 - road which leads directly to the fort
3 - fort McNair (objectives 1 & 3)
4 - eastern passageways (they lead to the fort area)
5 - area where sergeant Woolard and his troops show up (second objective)
Your duties during the course of the mission:
Your first main task of the mission will be to escort an ambulance with a wounded president to a nearby military camp. Once you've arrived at the fort, you will have to defend it against massive enemy attacks. The final part of the mission will require you to take command over Novus forces in order to destroy an enemy Walker.
Detailed mission walkthrough:
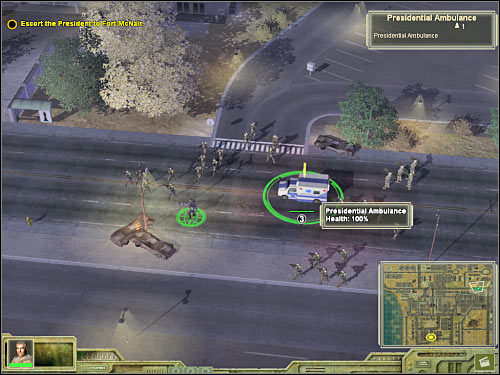
First objective: Escort the President to Fort McNair
The first part of the mission is going to be quite simple, so there's nothing you should be worried about. Just make sure that the ambulance stays somewhere in the back, so it won't be attacked by enemy units. You won't have to prepare your army for defending against attacks coming from different directions, so it's going to be much easier to move forward. Take your time and familiarize yourself with your new squad. You've probably noticed that some of your soldiers are carrying rocket launchers. Try and keep them alive as long as possible. Start moving south. You should be staying closer to the eastern section of the map.
There's going to be a road here (2 on the map) and you should stay close to it. Obviously you will encounter enemy units along the way. If you're going against Lost One units, you may consider sending only colonel Moore into battle, because he won't have any problems killing the monsters. As for Grunt units, you will have to attack them with everything you've got. Keep heading south-west. Remember that you don't have to be in a lot of hurry. Make sure that the ambulance stays safe. It's also a good idea to send Moore to scout the area, so you'll know where to position your troops.
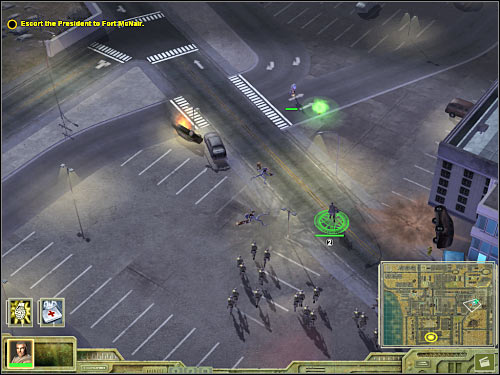
I would recommend moving all the way to the south end of the map. Sadly, you'll be encountering more Grunt units along the way. Watch out once you've reached a larger junctions because additional Hierarchy troops may appear there. Eventually you should be able to reach the lower passageway (4 on the map; screen). Start moving west. Once you're close enough to the fort, you'll lose control over the ambulance. It would be a good idea to wait for the game to display a new mission objective.
Second objective: Escort Sergeant Woolard to Fort McNair
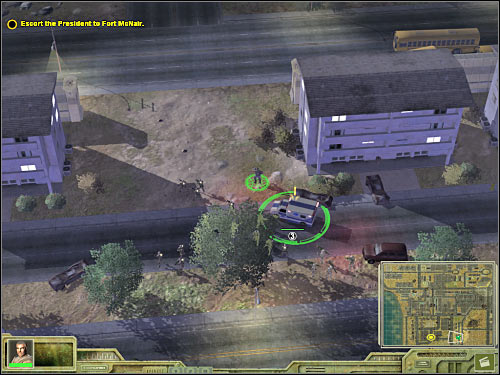
Despite what you might have thought, you won't have to send your units to the north or assist Woolard in any other way. You won't receive this task right away, so it would be a good idea to do something else in the meantime. Make sure you're familiar with the layout of the fort. As for your team members, you may leave them near the red flare or you may move them to the north. There's also a car park there (screen). Thankfully, you will be allowed to select the tanks and other vehicles. There are also a few helicopters to your left. Make sure they've left the ground, however don't order them to attack anyone. The base is safe for at least one more minute and the active turrets in the fort are going to be fine on their own.
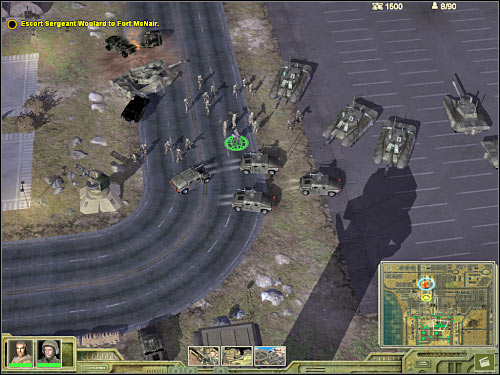
Sergeant Woolard's team will appear to the north of your current position (5 on the map) and it's going to be attacked by Hierarchy units almost instantly. A large enemy mech will also appear there. Those things are called Walkers and you'll encounter a lot of them during the course of each campaign of the game. Like I've already said, you won't have to order your men to leave the fort. Instead, select the tanks (including Woolard's unit) and order them to get to the southern base by double-clicking on it. As a result, they will try to get there as soon as possible, without engaging enemy forces. Just make sure they're not lost somewhere along the way. You should also consider constructing a few units in the meantime. Tanks seem like a good idea, however you should also recruit 3-4 rocket launcher squads. I would recommend sending all troops to the car park. You should also consider ordering your gunships to head south-east.
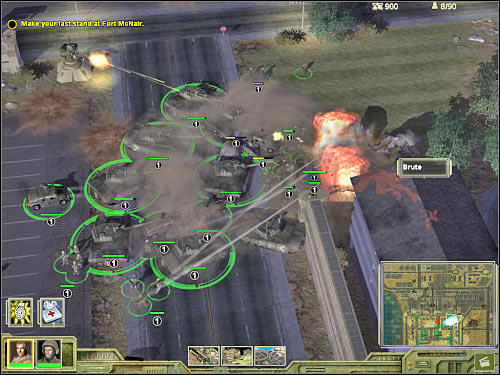
Third objective: Make your last stand at Fort McNair
Don't worry that an enemy Walker is heading your way, because you won't be able to stop it. Instead, focus all of your efforts on destroying smaller Hierarchy units. Move your main army to the east and make sure that it stays near the northern passageway (4 on the map). You are going to be attacked by larger group of enemy monsters, including Brute and Grunt units. Try and kill them in the first place, before switching to weaker units. You probably won't lose too many tanks and humvee vehicles here, however you won't need them later during the course of the mission, so ignore the fact that some of them may explode.
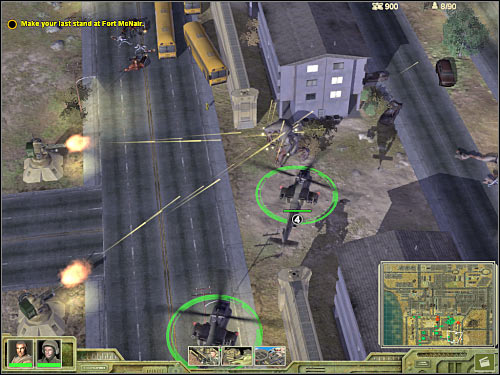
As for your gunships, they should guard the lower passageway (4 on the map). You've used it yourself a few minutes ago, so you should remember exactly where it its. Thankfully, you won't have to worry about losing your gunships, because enemy troops won't be able to attack air units. If you don't feel comfortable using only helicopters, you may consider sending a few tanks there as well. Don't attack the Hierarchy walker. Allow it to enter the base. It will get closer to one of the buildings of the fort. Once this has occured, you are going to be rewarded with a longer FMV sequence. As a result, you will take control over a new faction, called Novus.
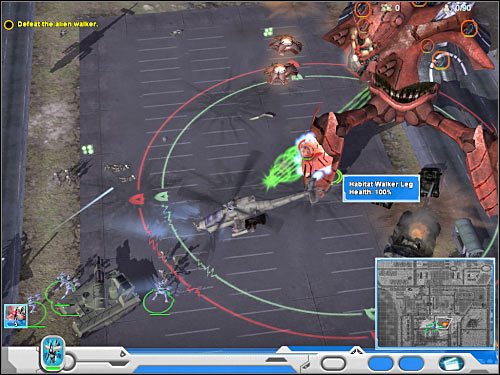
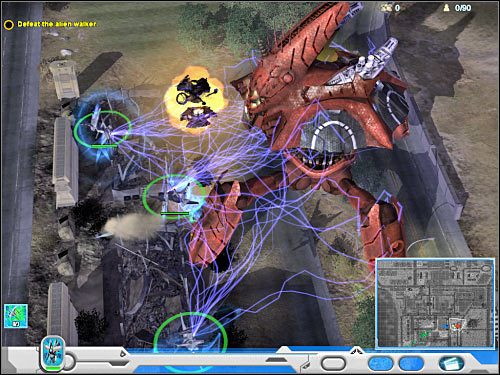
Fourth objective: Defeat the alien walker
You won't have to find out everything there is to know about the Novus race for obvious reasons. Destroying a Hierarchy walker is going to be a fairly simple challenge, however you should still listen to what Mirabel has to say to you. She'll tell you how to react in order to secure the best possible outcome. You'll have to start off by destroying some of the plasma turrets. They're attached to the legs of the Walker (screen). Choose a group of allied units and designated such a target for them. Additionally, make sure your units aren't moving too close to the Walker. Otherwise they would have been crushed by its huge legs.
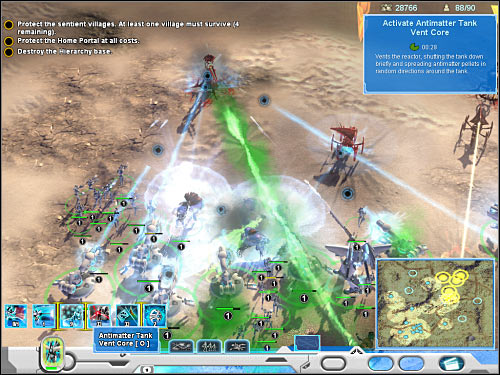
Keep attacking the legs of the Walker and eventually you'll be rewarded with a small squadron of air units. Allow them to get closer to the Walker. Select these units and activate their special ability - Death Bloom. Wait for them to activate this function (screen). Now you'll be able to take control over a small group of Antimatter Tanks. They will appear to the north-west of the Walker. Once again, you should be aiming at the legs of the Hierarchy unit. You'll probably notice that the leg hardpoints of the Walker will start losing energy points.
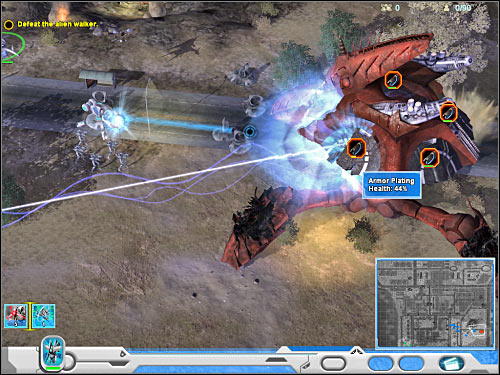
Once again, you should listen closely to what Mirabel has to say to you. Follow her orders by aiming at the upper shell of the Walker. You should be on a look out for Armor Plating hardpoints (screen). Try and destroy at least a few of them. I'd strongly recommend that you allow all of your units to take part in this battle. As long as they stay away from the legs of the Walker, they should be fine. Thankfully, there aren't any other Hierarchy units in this area.
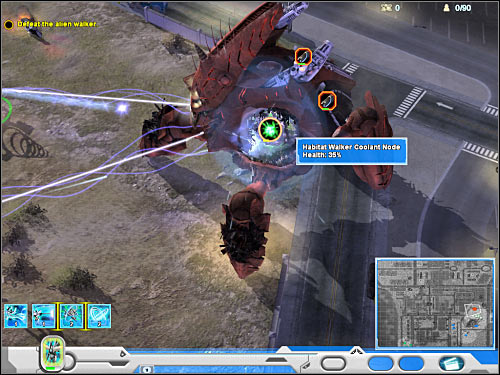
Some of the destroyed hardpoints of the Walker will expose its coolant code (screen). This is what you've been looking for. Your objective will be to weaken at least two of these nodes by ordering your units to attack them. Neutralizing the nods should allow you to destroy the Walker. As you've probably suspected, you are going to be rewarded with a new cut-scene. You'll also automatically begin playing the first campaign of the game.
Map legend:
1 - base - starting area
2 - area where the first group of enemy units will appear (fourth objective)
3 - area where the second group of enemy units will appear (fourth objective)
4 - area where the third group of enemy units will appear (fourth objective)
5 - area where you'll have to neutralize two enemy Walkers
Your duties during the course of the mission:
You will have to ensure that your base has expanded and that new buildings were built. After that, you will have to deal with three groups of enemy units. The final part of the mission will require you to take out two enemy Walkers before they'll get close enough to your base of operations.
Detailed mission walkthrough:
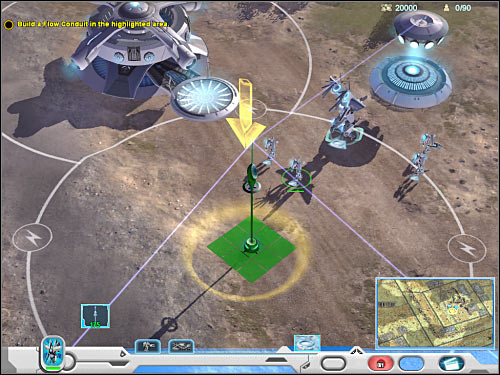
First objective: Build a Flow Conduit in the highlighted area
The first part of this mission is going to be EXTREMELY simple. You won't have to worry about being attacked by Hierarchy units. Enemy troops won't appear on the map unless you've done everything you've been asked for. Don't forget to read additional hints by clicking on ? icons. You should also listen to Mirabel, because she'll tell you what to do next. Your first assignment will be to construct a flow conduit tower. This will allow for the main section of your base to receive much needed power. Select your Constructor units by clicking on them. Try selecting all of them in order to speed up the building process. Choose a Flow Conduit tower from the lower menu and place it under the yellow arrow (screen). You should also take your time to familiarize yourself with other important features of the game. You may choose one of the available patches from the lower menu. You may only have one active patch at a time. The second slot is going to be unlocked once you've placed more advanced buildings. You will be allowed to choose between Radiation Shielding (better protection against radiation) and Coolant Boost (better protection against fire).
Second objective: Build Recycling Centers in the highlighted areas
This is going to be a similar challenge to the previous one, mostly because you will have to construct a specified building. Start off by selecting your Constructor units. As you've probably noticed, a new icon has appeared on your task bar - Recycling Center. You will have to place two of these objects in marked locations, inside the white circle. As you've probably noticed, allied drones have left the centers. They will automatically begin collecting resources. Wait for the game to display a new mission objective.

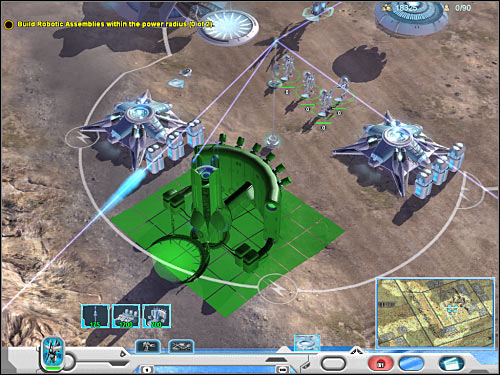
Third objective: Build Robotic Assemblies within the power radius
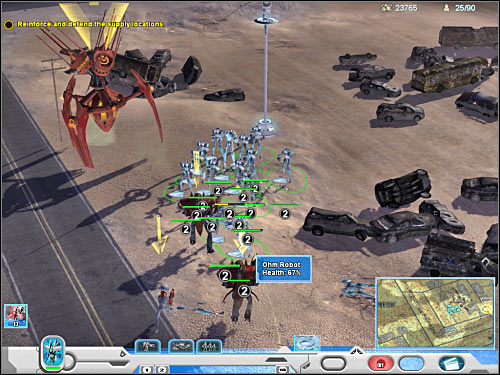
This time you will finally be given a freedom of choice, because you'll be allowed to place the Robotic Assembly buildings anywhere you want. The only thing you have to make sure of is that they will be connected to the main power grid. As a result, you will have to place them somewhere close to the Flow Conduit towers. Thankfully, you'll know whether you can attach them or not before buying them. Be on a look out for green areas. I would recommend placing the factories somewhere in the central area of your base. They should automatically begin manufacturing robots. You can build only the weakest units at the moment - Ohm Robots. Make sure both factories are manufacturing them. Order your robots to wait for your orders somewhere inside the base. Position them close to each other, so it'll be easier to select them later on during the course of this mission.
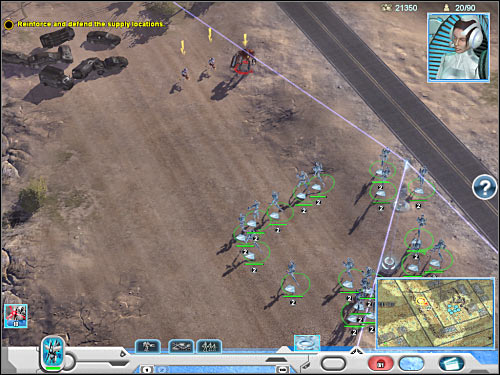
Fourth objective: Reinforce and defend the supply locations
This is going to be your main objective for this mission. You will have to defeat three different groups of enemy units. Thankfully, it's going to be very simple to get rid of Hierarchy troops, because they won't attack your base. Instead, they'll focus their attention only on destroying your resource drones. Wait for your factories to manufacture at least 20 Ohm Robots. The first group of Hierarchy units will appear to the north-west of your base (2 on the map). Zoom in the view on that location and find a nearby conduit tower. Double click on that area and your units should automatically use the available grid to get there quickly. Check one of the tutorial movies if you want to find out more about this feature of the game.
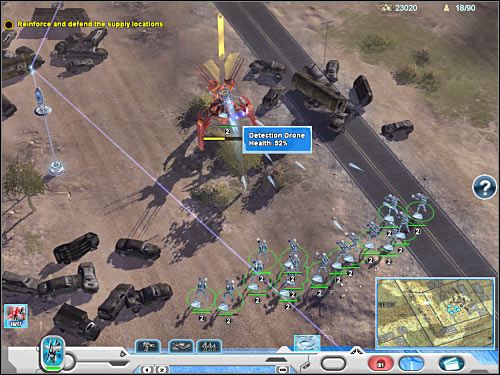
Mirabel will suggest you that you should start each fight by taking out Grunt units. Thankfully, this first group contains only one unit of that type. Once the Grunt has been killed, focus your attention on smaller enemies. Leave the Detection Drone for later. You may use your standard attacks to destroy the drone or you may sacrifice one of your robots by activating its special ability - Swarm. This skill allows your robots to leap over to the drone and self-detonate in order to damage it. Thankfully, you won't have to worry about finding resources, so you may proceed with the sacrifice in order to end this battle quickly. Your objective will be to destroy all enemy units.
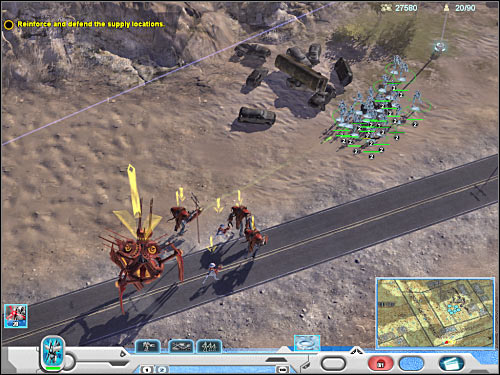
The second group will appear in just a few seconds. It would be a good idea to use that free time wisely by ordering construction of a few additional robot units. Now you will have to go east (3 on the map). Just as before, start off by neutralizing Grunt units and leave the Detection Drone for later, because it won't be able to damage your units. You may wait for it to be destroyed or you can use the Swarm ability to get rid of it almost instantly.
The final third group will appear to the south of your main base (screen). Just as before, you should consider choosing some of the available connections to get there quickly and without any unwanted delays. Nothing will change here. Start off with Grunt and Lost One units. Once they're gone, destroy a Detection Drone. Wait for the drone to be neutralized. Once this is done, ORDER your squad to get back to the base.
Fifth objective: Defend the base
Sadly, you won't be able to prevent the saucers from destroying one of the main buildings of your base, because it's tied directly to one of the objectives of this mission. Like I've already said, you are going to be attacked by several flying saucers. You were able to encounter them during the first mission of the prelude section (they've destroyed your allied gunships back then). You could try and attack them, however they'll still be able to destroy your Flow Generator. Thankfully, they will leave your base afterwards, so you won't have any problems proceeding with a new task.

Sixth objective: Rebuild the Flow Generator in the highlighted area
You won't have to perform any additional tasks here. Your goal is going to be a very obvious one and you won't be attacked by any Hierarchy units for the time being. Choose your Constructor units. You will have to build a Flow Generator, so click on the icon of that building. You will also have to place in the designated area of the map (screen). Be patient, because one of the nearby buildings will start charging itself. It's going to be a Black Hole Generator. Achieving full power is going to take it about one minute.
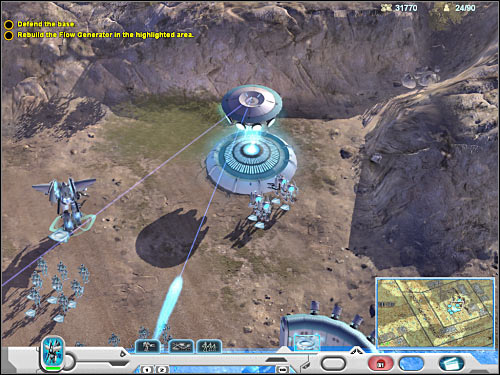
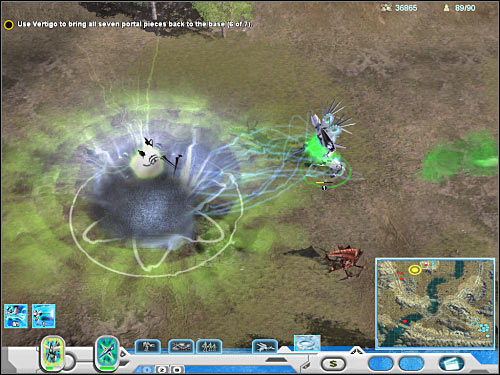
You'll probably notice that two enemy Walkers are heading towards your base. Don't panic and don't send any of your units to that area. Wait for the Black Hole Generator to charge itself. Once this is done, click on its icon which can be found in the lower right corner of the HUD. After that, you will have to designate an area to create a black hole (5 on the map). I would recommend clicking on the ground, somewhere between two Walkers. If you've done everything according to the plan, you will be rewarded with cool special effects and both Hierarchy units are going to be neutralized. This will also allow you to proceed with the second mission of this campaign.
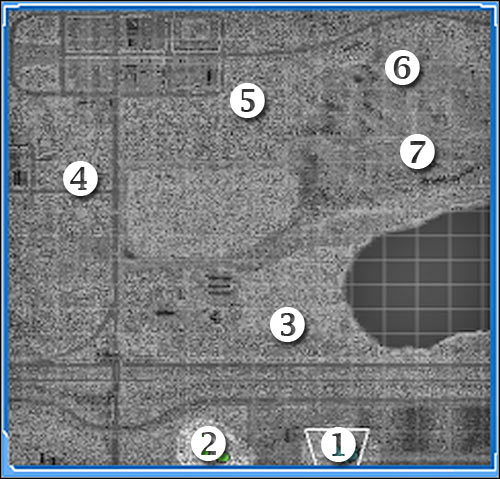
Map legend:
1 - starting area
2 - glyph (first objective)
3 - first holding pen (second objective)
4 - second holding pen (second objective)
5 - third holding pen (second objective)
6 - northern entrance to an enemy camp
7 - Detection Drone (third objective)
Your duties during the course of the mission:
Once you've successfully investigated the glyph, you will have to reach three different holding pens in order to rescue innocent civilians. Allied soldiers will provide a small help during these fights. Your final objective will be to get to an enemy base in order to acquire full control over a Detection Drone unit.
Detailed mission walkthrough:
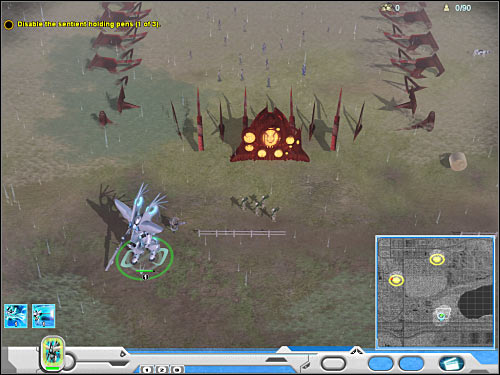
First objective: Investigate the glyph to the west
Completing this mission isn't going to be difficult, however you will have to remember about a few important things. First of all, you don't have to be in a lot of hurry. You also don't have to engage all enemy groups, however I wouldn't recommend allowing them to surprise you. Each time you lose some of your units, an allied plane will appear on the map and it will reward you with reinforcements. Just as before, take a closer look at your squad. As you've probably noticed, Hacker units have joined Mirabel. They won't be of much use on the battlefield, because trying to take control over enemy units is just a waste of time. You'll need one of the hackers to fulfill the final objective, so try to keep them safe. As for Variant units, they should assist Mirabel in destroying enemy units. Tanks can camouflage themselves, however you won't be using this feature too often during the course of the mission.
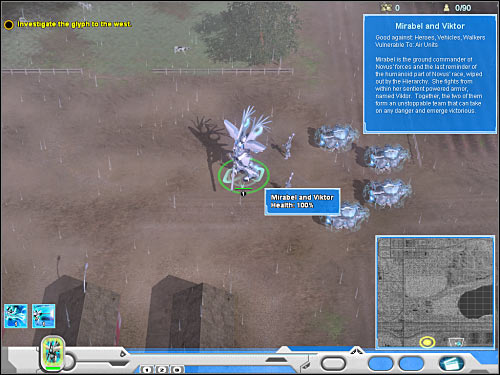
Start off by moving west, because that's where you'll find your first target. Be careful, though. Enemy Defiler units will poison some of the civilians and turn them into zombies (Slaves). Prevent zombies from getting too close to your units. Obviously you should allow Mirabel (Viktor) to engage enemy forces, because she can heal herself. Once you've reached the glyph, a new cut-scene is going to be displayed on your screen. As you've noticed, a small group of marines will start following your lead. Don't worry about them. Even if you lose them, you won't receive any penalties. You will have to act quickly, because Defiler units have appeared in this area. Their attacks are quite powerful and they can poison your units, so make sure they've been taken care of quickly. It would be a good idea to use one of the missile attacks of Mirabel against them. Make sure that Hacker units stay somewhere in the back, so they don't lose any health points. You could also try using Purge Systems ability, however it shouldn't be necessary.
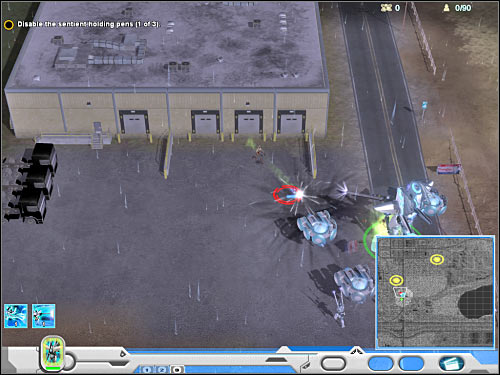
Second objective: Disable the sentient holding pens
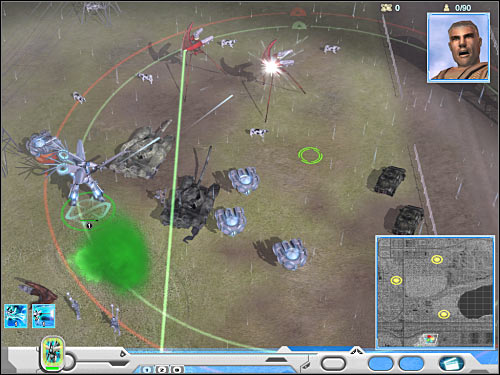
Start moving towards the nearest holding pen which can be found to the north-east (3 on the map). You'll probably encounter a much larger flying saucer. Don't attack it. Instead, get ready to take on additional enemy forces. It would be a good idea to use Mirabel's attacks as often as possible. Use Variant tanks only if you notice that Mirabel can't handle enemy troops on her own. Like I've already said, you don't have to be in a lot of hurry. Secure each area before proceeding to the next one.
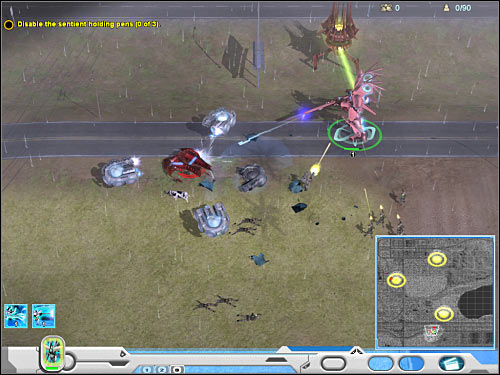
Reaching the first holding pen shouldn't take you too much time. I guess you won't be surprised by the fact that you'll have to take out additional enemy units here, including Defilers. Remember that you should be using mostly Mirabel, so you won't have to wait for allied planes to grant you with reinforcements. You should also know that each time you've been granted new units, a large group of enemy forces appears in the vicinity. Thankfully, you won't have to destroy the holding pen. It's going to be neutralized automatically. All you have to do is to get close enough to it. Make sure that your Hacker units stay safe. Keep them in the back and explore new areas before allowing them to get closer.
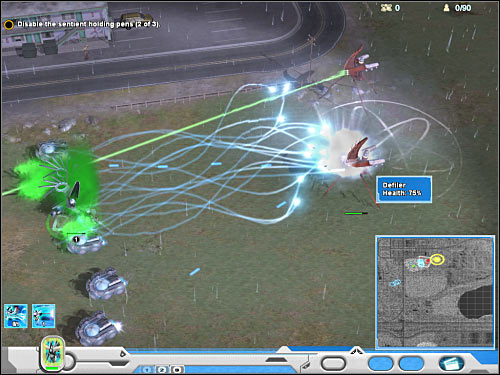
The second holding pen can be found to the north-west (4 on the map). As you've probably noticed by now, there's a longer journey ahead of you and you'll encounter a lot of enemy units along the way. You'll also be dealing with Brute units, so you have to be more careful, because it's going to take you more time to neutralize them and they won't have any problems destroying your tanks. I would recommend heading towards the western edge of the map. Watch out for additional zombies. They will appear mostly near a large building which can be found to the south of the second holding pen (screen). Approach your target from the south-west. Deal with the remaining enemy units and disable the shields.
The final holding pen is located to the north-east (5 on the map). This time you can travel there by moving in a straight line. Be careful, though. Don't let any of the Hierarchy units surprise you. Watch out for your Hacker units and prevent enemy forces from killing them. I guess you won't be surprised by the fact that your third target is going to be well defended (screen). Try using Viktor's missile attack to take out Defiler units. Get closer to the holding pen and disable it. Move your hero to the south, because a new group of enemy units will probably appear there. Wait for the game to display a new mission objective.
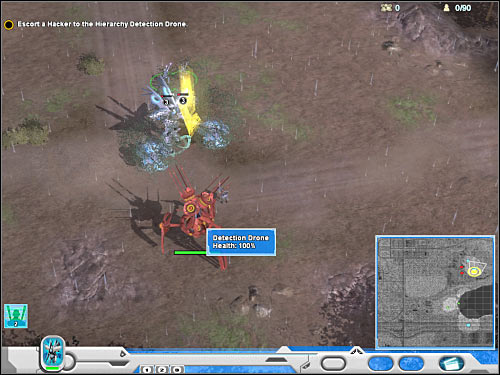
Third objective: Escort a Hacker to the Hierarchy Detection Drone
The main entrance leading to the camp is located to the east, however I wouldn't recommend going there, because it's being heavily defended (by two guard towers and several Hierarchy units). Ignore general Moore's actions, because you won't be able to control him. Allow him to engage on a suicide mission by breaking through the main entrance. You should consider moving north-east. You'll encounter a few enemy units along the way. Eventually you will reach a road which leads directly to the camp (6 on the map).
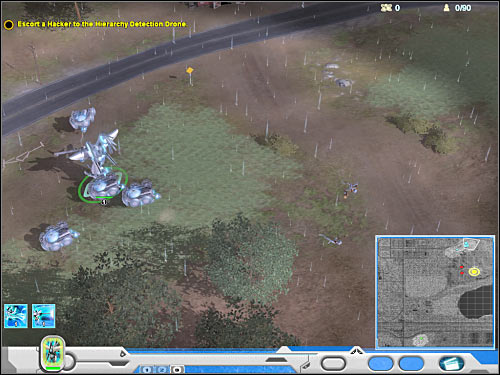
Now you will have to start moving south. Obviously you will come across new enemy units along the way. Additionally, you will have to be on a look out for an enemy saucer, because it'll probably drop a few units nearby. Protects your hackers at all costs. They should stay close to the tanks and your main character. You will have to escort them to the Detection Drone (7 on the map). A nearby building is probably destroyed, so you won't encounter any Hierarchy units inside the camp. Just make sure you're not too close to the western turrets. Allow one of your hackers to get here. Once he's done taking control over the drone, this mission will come to an end.
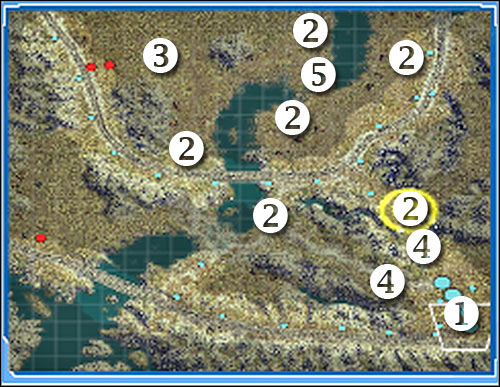
Map legend:
1 - base - starting area
2 - six out of seven pieces of the portal (first objective)
3 - final (seventh) piece of the portal, which is located inside an enemy camp (first objective)
4 - main roads leading to an allied base (enemies will use only those)
5 - main passageway leading to an enemy base
Your duties during the course of the mission:
The primary objective of this mission is to retrieve seven pieces of the portal. Collecting the first set of three portal fragments is going to be very simple, however it's going to get more difficult with the remaining four elements. You will have to defend against enemy attacks, as well as avoid Hierarchy Walkers. Collecting the final piece will also require you to destroy a few turrets inside an enemy base.
Detailed mission walkthrough:
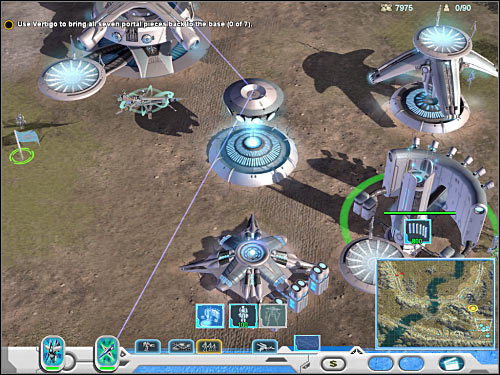
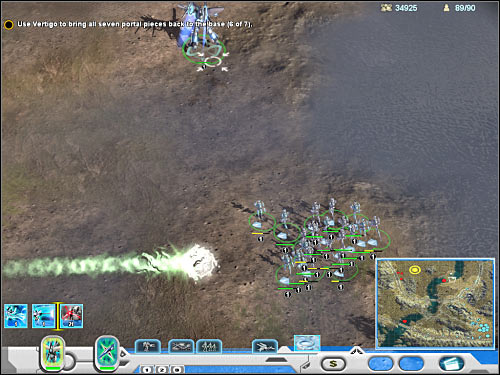
First objective: Use Vertigo to bring all seven portal pieces back to the base
This is going to be a more difficult mission. You won't have much time to decide on how to expand, because your enemy has set up a base of his own. It's very important that you play very aggressively. You will have to focus on obtaining resources and building an army. Start off by constructing at least one Recycling Center. This will allow you to begin gathering much needed resources. You should consider building two other Recycling Centers as soon as possible. A Robotic Assembly building will allow you to manufacture Ohm Robots. Don't worry, because you won't need any stronger units for this mission. You should consider building a second factory once you've expanded your base and gathered enough resources. I would recommend placing new buildings only inside the main section of the base, because otherwise you would have to spend more time and money to assure their full protection.
You could also spend some of the obtained resources on a plane factory - Aircraft Assembly. I wouldn't recommend doing that, because you don't need any air units for this mission. Instead, focus on expanding by building new structures (including robot factories). Like I've already said, you will have to create an army. Make sure you've started manufacturing Ohm Robots as soon as possible. You may also consider sending Mirabel to the west. An enemy Reaper Drone should appear there (screen). Destroy it in order to prevent your enemy from gathering more resources. You could also use your second hero Vertigo to do the same thing, however he would be vulnerable to Drone's attacks. Focus all of your attention on gathering resources and ignore the portal pieces for the time being. Place your army to the north and to the north-west of your base in order to secure two main roads (4 on the map).

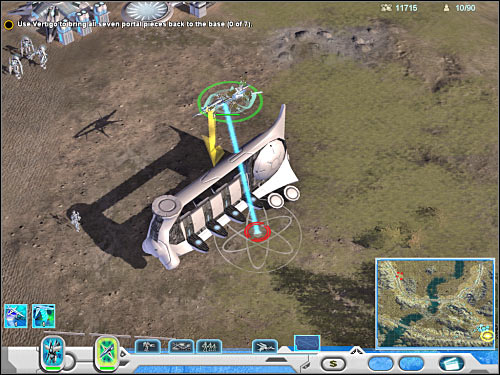
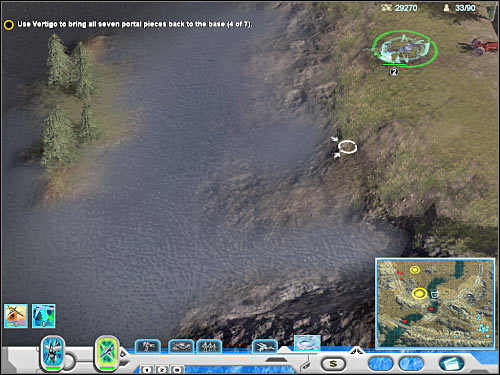
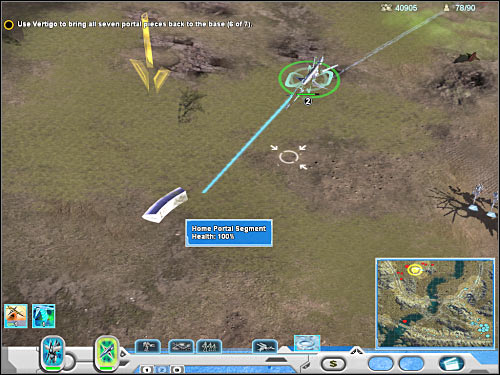
I think it's about time to switch your attention to obtaining portal pieces. The first piece can be found near your base. Select Vertigo and order him to go there. As you've probably noticed, two flying saucers are guarding the portal piece. Thankfully, Vertigo will be able to attack them from a safe distance (screen). Once the saucers are gone, approach the portal piece. You will have to choose one of the abilities of your hero character - Upload. Once this is done, click on the portal fragment and wait for Vertigo to take it.
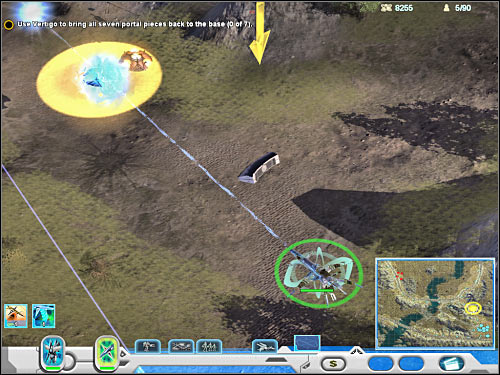
Once you've obtained the portal piece, you will have to return with it to your base. Head on to a single building which can be found in the lower right corner of the map - Novus Portal Piece Transport. Wait for Vertigo to get here. This time you will have to choose Download from his task bar. Don't click directly on the building. Instead, click on the ground somewhere near it (screen). If you've done everything according to the plan, Vertigo will drop the fragment and it'll automatically disappear.
Now you will have to focus your attention on obtaining other pieces of the portal. They will appear on your map one at a time. You will have to approach each piece and use an Upload ability to pick it up. After that, you will have to go back to your base and drop it near a Portal Piece Transport building. Collecting two other portal pieces will allow you to proceed with a new part of the mission. Watch a short cut-scene. Sadly, obtaining four remaining pieces is going to be more difficult. Ignore the glowing icon and wait for a few seconds. You should be manufacturing Ohm Robots. Make sure that you have at least two factories at your disposal.
Several Hierarchy Walkers will appear on the map. Don't attack them, because you would only lose your troops. You will have to wait for the Walkers to take their positions. It's going to take some time, so focus on manufacturing new units. Thankfully, they won't attack your base. You should also protect your existing power grid against single enemy attacks. As you've probably noticed, Grunt units have arrived in the area. A large group of these creatures is heading towards your base. Allow Vertigo to attack them, because Grunts can't defend themselves against air units. You won't have to construct any other planes. Instead, allow Mirabel to activate missile strike against enemy forces. You will have to prevent Grunt units from reaching your base. Order your main army to engage enemy forces if your heroes can't stop them on their own. You will have to kill all Grunt units in order to secure the safety of your camp, at least for a few minutes.
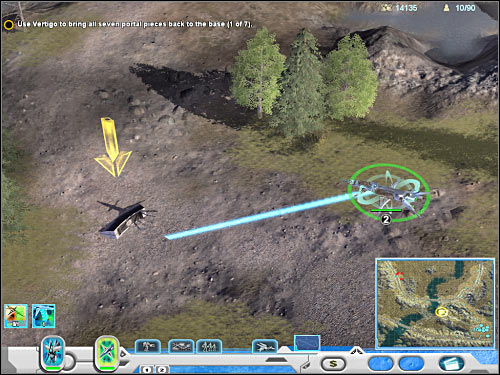
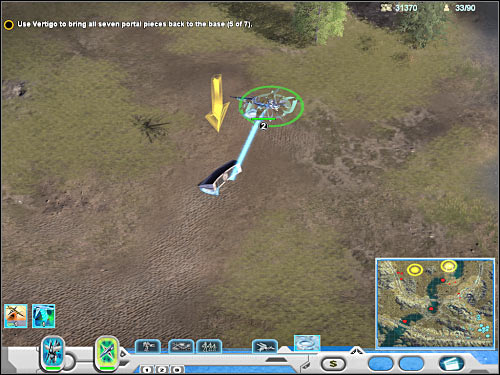
Now you should focus your attention on obtaining the fourth piece of the portal. It can be found to the north of your position. That's where enemy Walkers appeared in the first place. Sadly, you won't be allowed to send Vertigo there right away, because the artifact is probably being guarded by a few Lost One troops and they're fully capable of destroying air units. Allow Viktor to get there and use your missile strike ability to get rid of alien creatures (screen). Once this is done, allow Vertigo to pick up the fragment. Obviously you will have to transport it back to your base.
The fifth fragment of the portal is to the north-west, near one of the enemy Walkers. Obviously you can't get too close to the Walker, because it would be able to respond to your attacks. Choose Vertigo and approach this area from the north-east (screen). I wouldn't recommend making any unnecessary stops. Focus only on obtaining the marked object. Once you've got it, return to your base the same way you came before. Lower the fragment and wait for the game to show you where to look for next.
The sixth fragment is located to the north of your main base. I would recommend going there in a straight line, because you'll find an alternative route which leads to an enemy base. You'll have to use it in a few minutes, so it's best to know where exactly it is. Vertigo will probably encounter several Grunt units along the way. You may try neutralizing them or you may focus only on collecting the sixth fragment of the portal. Obviously you will have to transport this object back to the base. Now you must continue building your army, so you'll achieve the limit which is 90 points (points doesn't equal units, because larger units take more than one point).
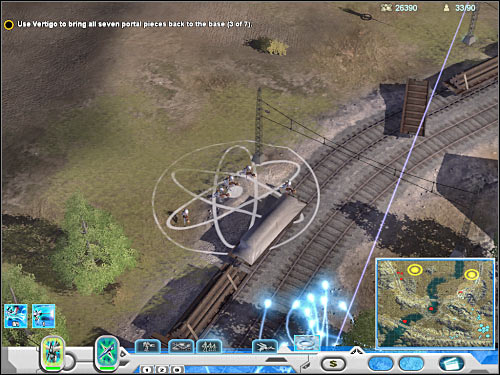
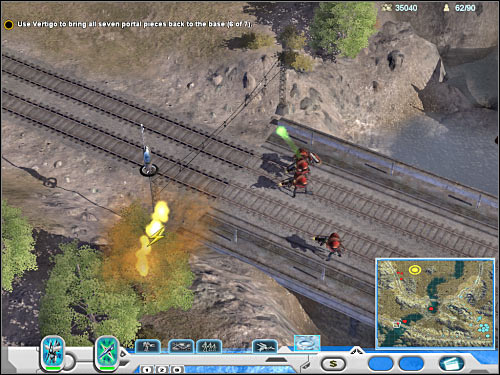
Get ready, because your base is going to be attacked simultaneously from two directions (4 on the map). Thankfully, you won't be dealing with extremely large groups. Focus mostly on defending the northern route, because only a few units will arrive from the west. If you're lucky, Vertigo will take care of them without your immediate assistance. Additionally, a small group should appear near the train tracks, to the west of your base (screen). You may attack them right now or you can wait for them to show up near your camp. If you decide to proceed with the assault, use some of the available power lines to get there quickly. You won't have to defend the train tracks area, because no one will show up there. Focus only on two remaining passageways.
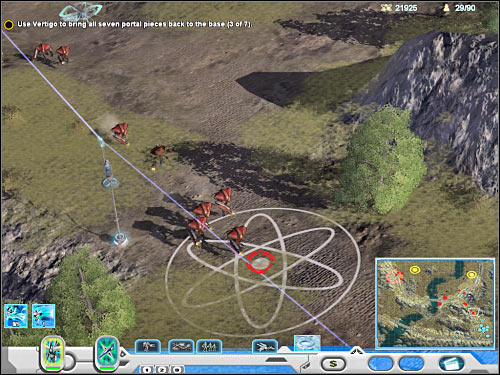
It isn't over yet. The main assault will take place very shortly. There are two groups of enemy units heading towards your base. The first group will arrive from the north, while the other one will show up to the north-west (screen). I would strongly recommend that you divide your army into smaller groups, so you'll be able to defend both passageways at the same time. It would also be wise to assign one hero to each group, so you won't have to rely only on the strength of your Ohm Robots. You should also make sure that your factories will produce new units to replace fallen troops without any longer delays. Prevent Hierarchy forces from destroying or damaging your buildings. You will have to kill a lot of alien creatures before this assault ends.
Well, the good news is that you won't have to prepare for any other major assaults. The bad news is that Vertigo can't reach the final piece of the portal, because it's inside a heavily defended enemy base. You will have to get there with a little help from your ground units. Select Viktor and a group of Ohm Robots. You must leave a similar army to defend your base. Vertigo should also stay put, because you won't be able to use his powers at the moment. Start moving north, towards an alternative entrance leading to an enemy base (5 on the map). Be careful, though. There's a Hierarchy Walker to the west. You will have to get to the northern edge of the map quickly, so the Walker won't be able to kill your troops. Thankfully, it won't move, so you will only have to disappear from its line of sight. You should be able to reach an area where you found the sixth fragment of the portal. It's to the east of the Hierarchy base.
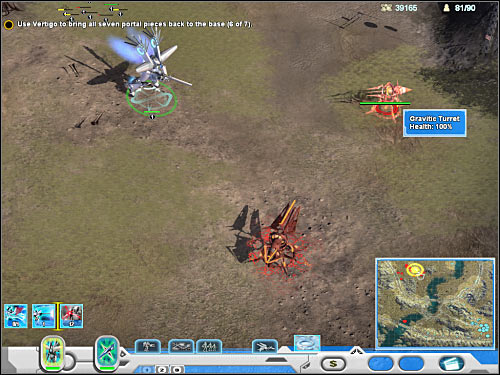
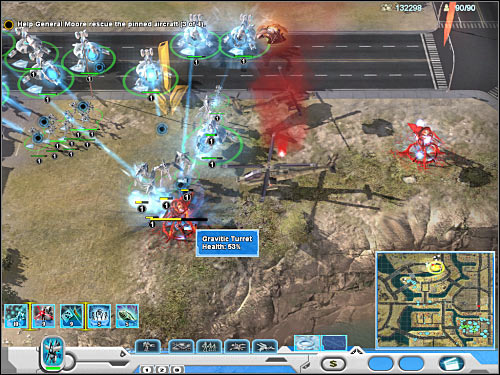
Obviously you will have to start moving west, towards the final piece of the portal (3 on the map). You should also remember to stay near the northern edge of the map, so you won't be attacked by the Walker. Destroy a Gravitic Turret and proceed to the next section. Thankfully, this turret won't damage your ground units. The second turret (Spitter Turret) is more dangerous. I would recommend destroying it with a missile strike, so you won't have to lose a lot of robots here. Keep moving towards the final piece, so your opponent won't have enough time to respond to your actions.
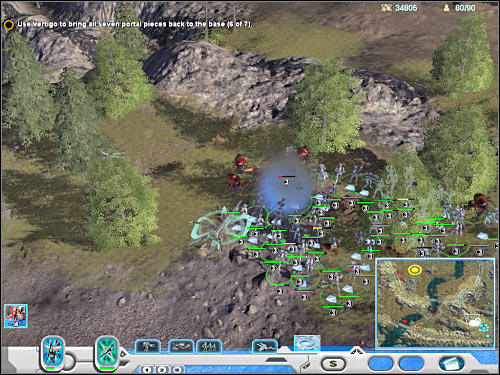
You will probably encounter several Glyph Carver units along the way. Destroy them, so they won't be able to rebuild destroyed turrets. You will also come across a few Monolith flying units. Don't bother trying to destroy all of them. Focus mostly on securing the area around the portal fragment. You will have to destroy a new Spitter Turret. Once this is done, move to the south. There are three Gravitic Turrets in that area (screen). Your objective will be to find them and to destroy them. Otherwise Vertigo wouldn't be able to pick up the final fragment. Make sure that the area has been properly secured. Your units should stay here, so the Hierarchy Glyph Carvers won't rebuild any of these structures in the near future. Just make sure that you're not standing too close to the main buildings of the base and you should be fine.
You may resume control over Vertigo. If you don't want to risk too much, send him over to the north and then order this unit to go west. It will allow you to avoid dealing with several other problems. Approach the final fragment and pick it up. Once this is done, go back to your HQ. You won't have to move other units out of the area, because this mission will end very shortly. All you have to do is to place the final object near the designated building of your base.
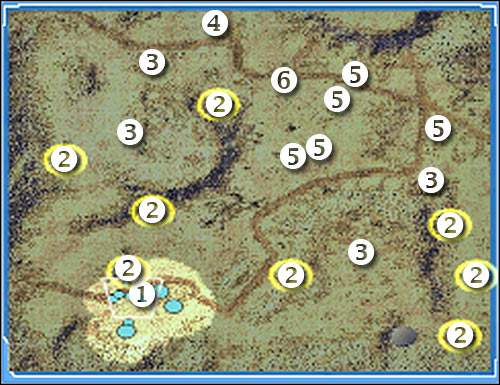
Map legend:
1 - base - starting area
2 - hydraulic pumps
3 - villages that need your protection (second objective)
4 - area where an enemy Walker appears on the map (fourth objective)
5 - enemy base - main structures and units (fifth objective)
6 - final target - second Walker (fifth objective)
Your duties during the course of the mission:
Your first assignment will be to ensure that a portal is built. You will have to begin construction before a certain time limit runs out. After that, you will have to defend yourself against enemy attacks, including a Walker unit. The final phase of the mission will require you to assault enemy base in order to destroy certain units and structures.
Detailed mission walkthrough:
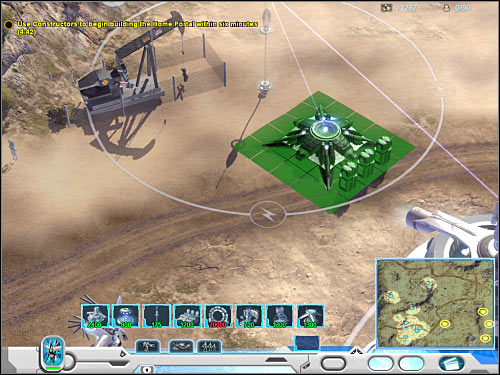
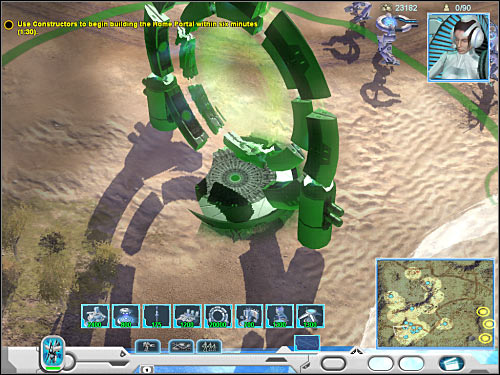
First objective: Use Constructors to begin building the Home Portal within six minutes
As you've probably suspected, you will have to be in A LOT of hurry, because building a portal will require you to double the amount of your funds. As a result, you will have to make quick and accurate decisions in order to obtain necessary resources. This will also be your first opportunity to practice constructing a power grid. You've probably noticed by now that you have some new units at your disposal. Field Inverter vehicles are capable of activating a force field. Doing this not only allows to shield them, but also protects everything inside the force field. One of these units is already active, so you may observe how this works. You were also given three Constructors. Gather them together and order your units to begin construction of the first Recycling Center. You should build a second Recycling Center as soon as possible, however you will also be dealing with other problems at the same time. Make sure that both Recycling Centers are powered correctly, so they won't have any problems dispatching drones to collect much needed resources.
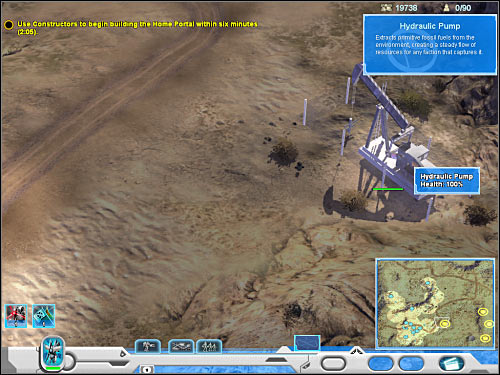
You will also have to take interest in other problems. As you've probably noticed, the game has designated several hydraulic pumps on your map. You will have an opportunity to take control over these objects. Each time you must select a single Ohm Robot. You probably have several of these units at your disposal, so you don't have to build more at the moment. Dispatch your robots to some of the nearest pumps. One of the pumps can be found near your base and you should start with that one. Once you've selected a robot, choose one of its abilities - Capture. After that, click on the pump and wait for your unit to take control over it. You won't have to perform any other actions, because you'll start receiving resources automatically. Nevertheless, you can consider using one of your Constructors to expand the existing power grid. As a result, you will be building Flow Conduit towers. Doing this will allow you to reach the pumps quickly in order to defend them against enemy attacks. You can also expand your power grid to the west.
Focus on taking control over other pumps. Remember that you won't have to capture all of them. I would recommend going to three pumps which can be found to the north of your base. Also, one of the pumps is located to the east (screen). Ignore some of the more distant objects, because you'll receive plenty of resources from your existing structures. Make sure that you're expanding the grid in order to be able to travel around the map more freely. This isn't a necessary thing to do, however it can make your progress a lot easier. It's very important that new conduit towers are connected to the existing ones. You will have to see whether a straight line appears on the screen. If you don't see one, it means that it's too far away from other towers. I would recommend leaving two Constructors inside the base. You should have plenty of time left, so I would recommend building a Robotic Assembly in order to be able to manufacture robots. You should also consider buying a third Recycling Center. Make sure that your new buildings are being placed near the south edge of the map. You can also use other Field Inverter units to surround them with force fields.
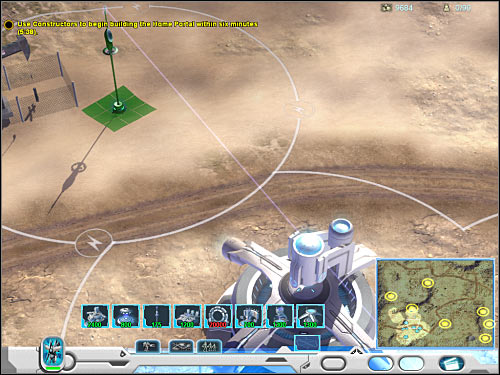
I'd strongly recommend that you delay building a portal to the last minute, because you won't be attacked unless you've decided to place this structure. Don't worry. 30 seconds seems like the best choice here. You should have plenty of time to move your unit and to find a suitable location for the portal. Order only one of your Constructors to build the portal, because you won't be able to finish activating it. As for your remaining Constructor units, it would be a good idea to order them building a Vehicle Assembly factory. Your existing factory should also begin manufacturing Ohm Robots. Once you've built a new factory, place an order for a few Antimatter Tanks. Gather your new units somewhere to the north of the base.
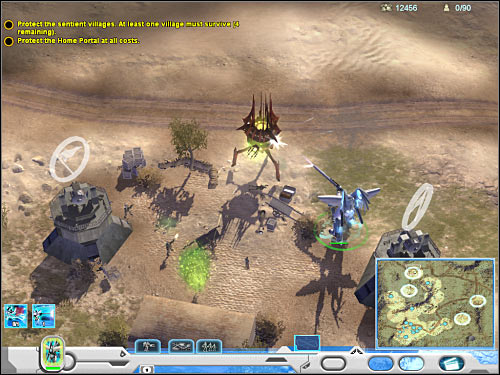
Second objective: Protect the sentients
Third objective: Protect the Home Portal at all costs
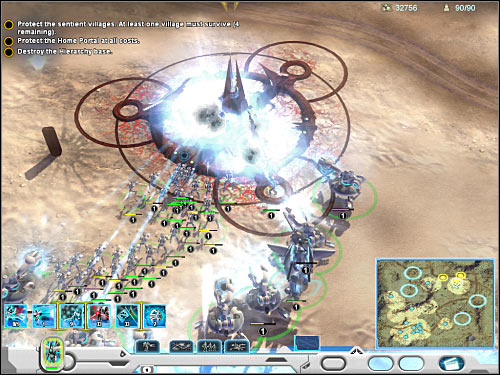
Fulfilling the second mission objective won't be too difficult, because the villages will probably be attacked by only a few enemy units and your foes won't try to take out all of them (3 on the map) at once. As a result, you should take your time planning the counterattack, especially since no one's assaulting your base at the moment. Destroying enemy units would on the other hand attract the attention of the main group of Hierarchy forces. Try building a huge army with a little help from your existing structures. You can consider building new factories, however it won't be necessary. When you're ready, order Mirabel to attack enemy units in order to save at least one village (screen). Once this is done, move back your hero to your base and get ready to defend this area against enemy attacks.
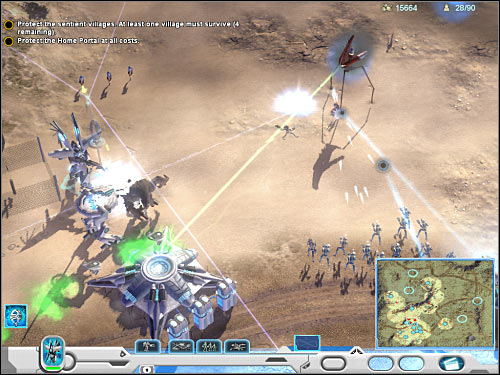
Enemy units will appear to the north of your base. Just as before, you should consider dividing your forces into two separate groups. I assume you've built a portal somewhere close to the western edge of the map, so you will have to place more allied units there in order to ensure its safety. The rest of your troops should be standing to the north-east of the base. Prevent enemy units from getting too close to your buildings. Brute and Grunt units will probably try to take out your Recycling Centers. You can't allow them to do that. It would be a good idea to surround these structures with force fields (Field Inverter) even before the battle has started. Once you've dealt with all enemy units, you will receive a warning that a Walker is heading your way.
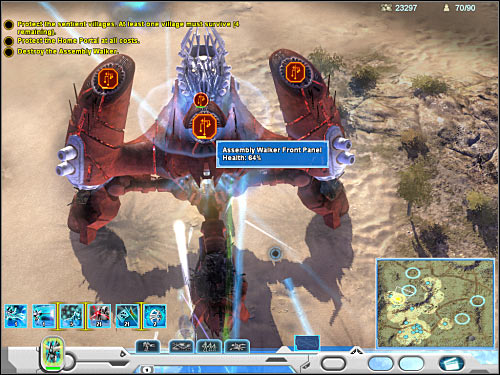
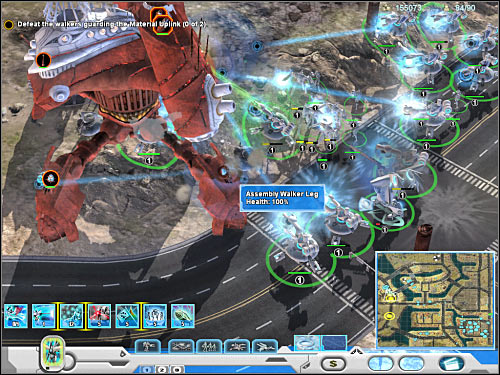
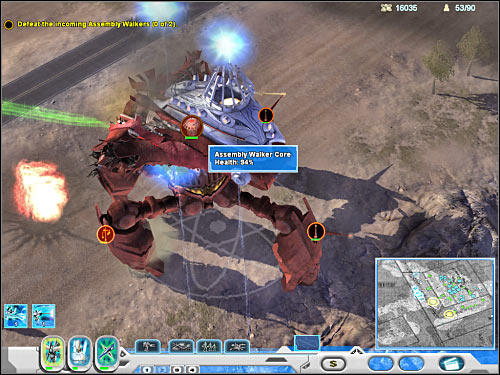
Fourth objective: Destroy the Assembly Walker
The Walker will appear near the northern edge of the map (4 on the map). I wouldn't recommend going there right away. Instead, use the fact that it's moving very slowly and get ready to defeat it by building additional units. Obviously you should try to reach the maximum population cap by manufacturing tanks and robots. Attack the Walker once it's close enough to one of your hydraulic pumps. You've been there before, so you should know where it is (screen). Send everyone you've got, including Mirabel. Only a small group should be left to defend your base, however you don't have to worry about being attacked at the moment.
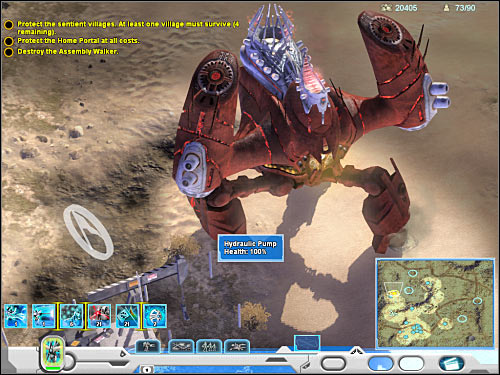
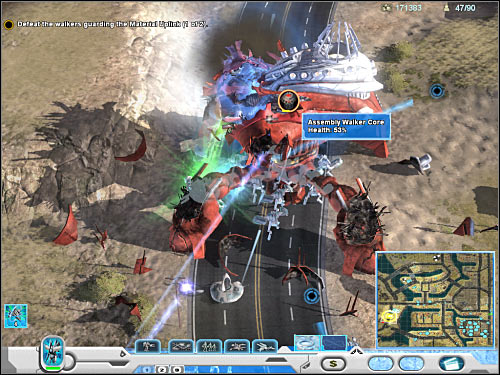
You had an opportunity to destroy a Walker before, so you should still remember what has to be done in order to get rid of this threat. Start off by attacking the legs of the Walker in order to weaken it and to disable some of the plasma guns. Make sure that all of your units are focus on that specific targets. You should also try to replace them with new troops being manufactured in your factories. Now you will have to focus on the upper arms of the Walker, as well as its front panel (screen). Once it's destroyed, two shields are going to be exposed (left shield & right shield). Disabling those will make the Walker totally vulnerable to your attacks. Aim for the core and you shouldn't have any other problems destroying this Hierarchy unit. Once this is done, move back everyone to your base.
Fifth objective: Destroy the Hierarchy base
Your main objective will be to destroy some specific buildings, however this is equal to taking down an entire Hierarchy base. It shouldn't be too difficult, especially since your enemy won't receive any additional reinforcements and you won't be attacked by a surprise. Obviously you will have to make sure that your army is strong enough to proceed with the assault plans. Start moving north-east, because that's where you'll find the Hierarchy base. You will encounter a few enemy units along the way, however killing them should be fairly easy. I would recommend attacking the base from the south. This will allow you to destroy Spitter turrets a lot faster, because you'll be attacking one turret at a time. You should also focus on destroying designated structures and units. Glyph Carvers are among your targets.
There are three targets in the lower section of the base. Don't move towards the northern target (6 on the map), because it would be better to leave it for later. Instead, move north-east. You should also consider ordering new units to get here, so they'll replace neutralized members of your army. You shouldn't have any problems collecting and spending resources at this point of the game, so you should be able to perform these actions instantly. Now you will have to destroy the main building of the Hierarchy base (screen). Once it's gone, target a nearby Detection Drone. Resupply once again, because you'll have more problems destroying the final target.
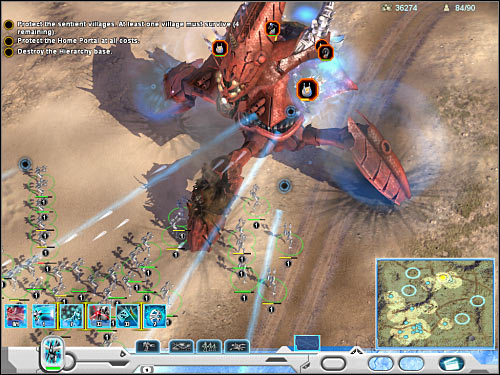
Head on to the final target. It turns out that it's a second Walker. Obviously you will have to destroy it in order to succeed. Nothing will change here, so you should start off by aiming at its legs in order to neutralize the plasma weapons. After that, aim at the front panel and at some of the attached pods. Your objective will be to expose the core of the Walker. Attacking it will allow you to neutralize this threat. Once the Walker has been destroyed, this mission will come to an end.
Map legend:
1 - base - starting area
2 - main roads leading to your base
3 - pinned gunships (second objective)
4 - large resource stockpiles
5 - bridges leading to enemy Walkers
6 - enemy Walkers (third objective)
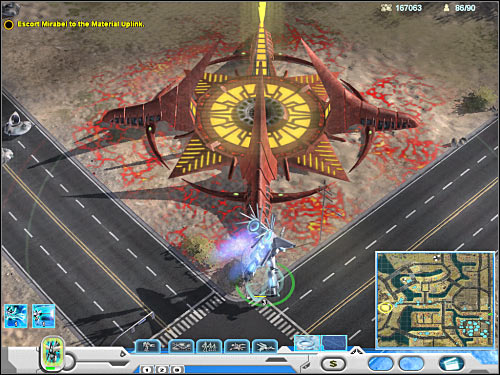
7 - Material Uplink building - main goal area (fourth objective)
Your duties during the course of the mission:
You will have to start the mission by constructing several important buildings. This will allow you to acquire necessary upgrades, as well as better units. After that, you will have to rescue several groups of pinned gunships by destroying nearby hostiles and turrets. The final part of the mission will require you to take down two enemy Walkers and to escort Mirabel to the Material Uplink building.
Detailed mission walkthrough:
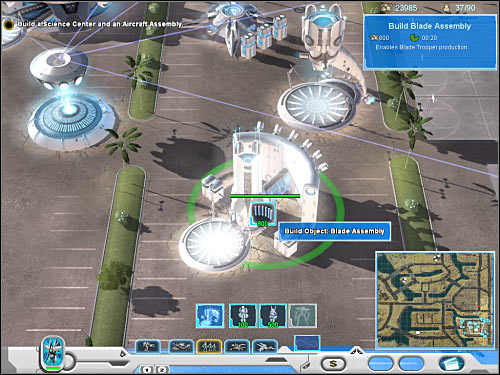
First objective: Build a Science Center and an Aircraft Assembly
This isn't going to be a difficult mission, mostly because your enemy won't bother you with any powerful attacks. You will only be attacked when you've succeeded with one of the main objectives of the mission. This means you will have an unlimited amount of time to prepare your army. You should also know that your enemy doesn't have any bases and he won't attack you directly with its Walkers. You'll start the mission in the lower right corner of the map. This isn't a good spot, because your base is fully exposed to enemy fire. Thankfully, you may ignore the upper road. Move your units to the western exit, so they'll position themselves near the bridge. You should also place manufactured units there. Take your time to familiarize yourself with your units. You should also choose one of the available patches from the lower menu. I would recommend upgrading a Robotic Assembly building. This will allow you to recruit stronger Blade units (screen), however you shouldn't drop the idea of manufacturing Ohm Robots. They're also quite good. Build a few units, however you won't need a large army at the moment.
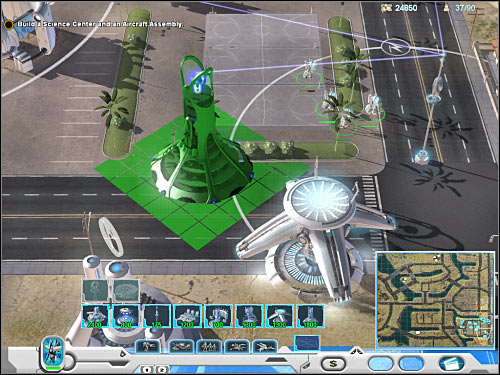
As you've probably noticed, you already have a Recycling Center building, as well as Vehicle Assembly. You might want to consider building a few Antimatter Tanks right now. If you choose to manufacture them, place them near the western bridge. You should also construct a second Recycling Center in order to be able to gather more resources. As for your power grid, you should build more towers on the island where you base have been set up. This will allow you to arrange locations of defense towers and buildings more freely. I wouldn't recommend expanding the grid to the north or to the west, because your Constructors would encounter heavy resistance. Once you're ready, start placing necessary building - a Science Center and an Aircraft Assembly. I'd strongly recommend that you place them somewhere near the southern edge of the map (screen). You can choose your newly purchased Aircraft Assembly building. Click on a Dervish Assembly upgrade. This will allow you to build Dervish aircrafts in the future and you'll need them to defend your base and to attack some of the enemy positions. You can also take control over the northern Military Laser Turret. There's a grey icon hovering over it, so you shoudln't have any problems finding it.
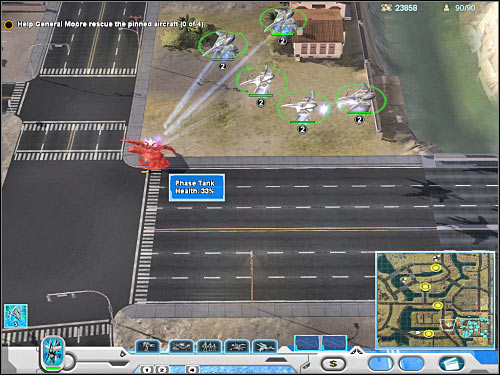
Second objective: Help General Moore rescue the pinned aircraft
I wouldn't recommend waiting for the conversation to end. You should act right away, because enemy saucers, as well as a monolith are heading your way. You will also have to deal with similar problems in the future. As a result, you must buy a newly acquired object. It's going to be a Redirection Turret. You will have to purchase a lot of these objects. Start placing them to the west and to the north-west of your buildings. Thankfully, you won't have to worry about anything else, so may even buy 10-15 of them. Remember that more turrets will allow you to increase your chances of destroying every air unit which appears near your base. Use your Dervish aircrafts if you weren't able to construct the first turret before enemy units have arrived. Thankfully, you won't have to worry about any other attacks, so you may proceed with building new turrets.
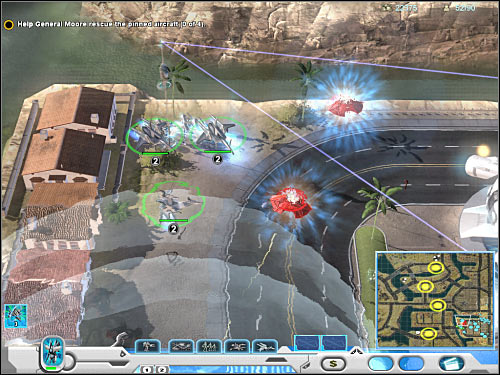
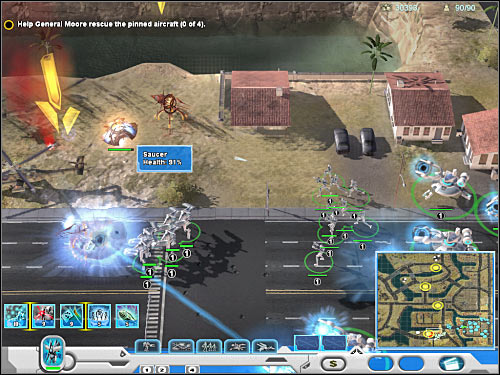
You will have to reach the maximum population cap by building an army. I would also recommend increasing the number of purchased Dervish aircrafts to 5-6 units. As for your ground units, you should manufacture Ohm Robots, as well as a few Blade Troopers. You should also allow Mirabel to take part in some of the upcoming battles. You may leave the base undefended, mostly because your enemy will only use flying saucers and monoliths to attack you and you probably have a lot of turrets at your disposal. Start off by moving towards the southern helicopters (3 on the map). I would recommending sending your Dervish units to the west, because they'll be able to attack some of the Hierarchy units without risking being shot down (screen). It's very important that your aircraft stay away from the main targets, because there are gravitic turrets there. Once you've secured the road leading to the first target, order your main army to cross the bridge. Obviously they will be moving west.
Order your main army to start moving towards the first (southern) target. Once you've arrived at your destination, you will have to neutralize several enemy units. Make sure that you've destroyed gravitic turrets in the first place, because this will allow your Dervish units to get here in order to assist ground forces. You will have to neutralize all Hierarchy units. You'll probably notice that allied helicopters automatically take off. They will return to your base. Order your Dervish units to go back there as well, because you are going to be attacked by new saucers and monoliths. If you've constructed a lot of turrets, you won't have to worry about these units damaging your main structures. Just make sure that you've repaired the turrets once the air units have been destroyed.
Don't leave this area of the map just yet. I would recommend that you take your time to expand your existing power grid. As a result, you will have to start building Flow Conduit towers. Doing this will allow your units to reach new areas of the map faster than using usual methods of movement. Try building a lot of energy towers in the southern section of the map, however don't even think about crossing the bridge which leads to the western island. You should also consider building a new Recycling Center somewhere in this area (screen), because there are a lot of unguarded resources nearby. You will also be able to take control over several military turrets, however this isn't necessary.
Now you will have to order your army to go north, because that's where you'll be able to find the second landing site. Nothing will change here. Start off by ordering your Dervish jets to clear a route for the main army. They will be able to neutralize Grunt units, as well as enemy tanks. Make sure that your air units have stayed away from the main target. Order your ground units to go there. Once again, you will have to neutralize a few gravitic turrets which will allow everyone to participate in this battle. Rescuing the gunships will result in new saucers and monoliths to be dispatched to your base. Defend your structures. You can also try to defeat the saucers while they're still on route to your base. Use your free time to expand the power grid to the new sections of the map. This will allow your newly constructed units to join the main army without any major delays.
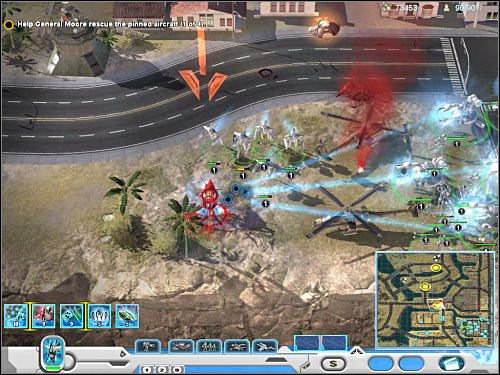
The third group of gunships is pinned down nearby, so you will be able to participate in this battle almost instantly. You could consider sending your Dervish jets there, however I would recommend using only the ground forces. Just as before, try to take out gravitic turrets. Once they're gone, deal with the remaining threats. You should also notice that there are a lot of resources in the area (screen). Build a new Recycling Center here if you want to and don't forget to expand your power grid even further. There's only one more target for you to attack. I guess you should already know what has to be done in order to succeed. This time you will be able to choose whether you want to attack enemy forces from the east or from the west. Make sure that your main base defends itself against flying saucers and monoliths. Use Constructor units to repair damaged turrets and buildings. Once you've rescued all gunships, wait for the game to grant you with a new task. You should also rebuild your army by building new units. Sell your Constructors if you want to, because your base won't be attacked by anyone else.
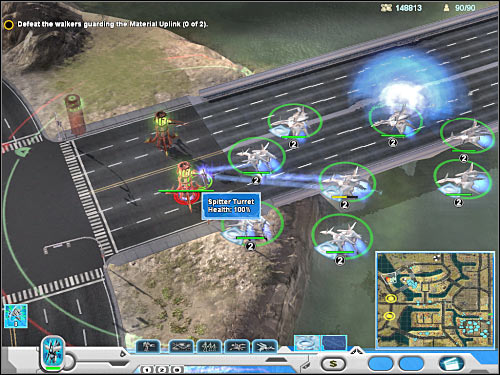
Third objective: Defeat the walkers guarding the Material Uplink
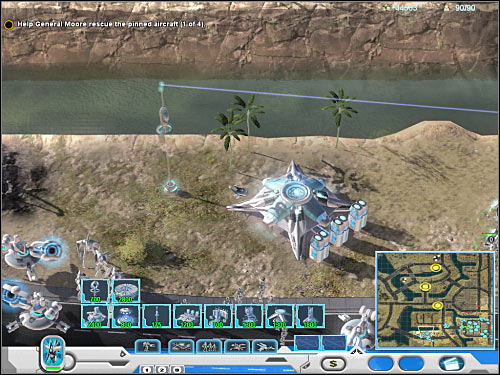
This is going to be a fairly simple objective, however you will have to remember about a few important things. Your first task will be to secure the bridges leading to the western island. There are three of them (5 on the map) and you should focus your attention on the upper two. Send your jets over to these locations and destroy Spitter Turrets to secure a safe passageway for your main army (screen). Thankfully, the turrets aren't capable of responding to air attacks. You will only have to watch out for enemy monoliths. Don't get too close to the Walkers, because they would be able to attack your jets.
Now you will have to transport your army over to the western island. I would recommend choosing the northern bridge, so you won't end up being attacked by the first Walker. Take your time and wait for all of your units to cross the bridge safely. Proceed south, because that's where you'll find your first target. You will have to be careful here, because Mirabel may die during the attack. Observe her health bar and move her away every time she loses a large portion of health. As for the Walker itself, you will have to start off by destroying its repair chambers. This will prevent your target from regenerating itself. After that, focus your fire on some of the main turrets of the Walker, so you won't lose too many units. Your final goal will be to expose the core of the Walker in order to damage it. I wouldn't recommend allowing your air units to take part in these fights, unless you've been able to take out all main turrets of the Walker. Keep attacking it until it's destroyed.
Start moving south. You will probably come across a Material Uplink building along the way. Sadly, you won't be allowed to use it right away. Instead, you will have to focus your attention on destroying the second Walker. The tactical approach should be the same. Start off by destroying the repair chambers and some of the larger cannons. Make sure that all of your units are taking part in this battle. You should also consider building additional troops in order to replace some of the fallen units. You would have to do this before deciding to attack the Walker. Destroying your target should be fairly easy, as long as you watch out for Mirabel. You can't let her die. Otherwise you would have failed the mission.
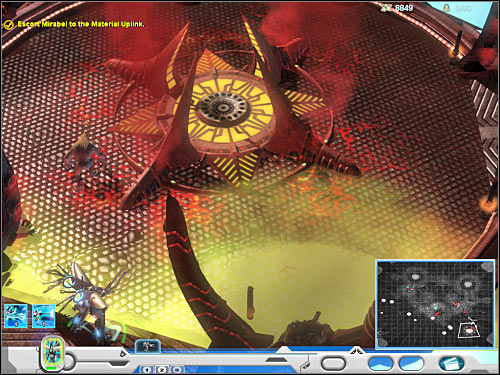
Fourth objective: Escort Mirabel to the Material Uplink
This is going to be a formality. You won't have to prepare yourself in any way for this particular mission objective. Also, you don't have to construct any new units. Zoom in the view on the Material Uplink building (7 on the map). Once this is done, select Mirabel and order her to show up near the Material Uplink. Wait for her to approach the enemy building. Once she's close enough to it, this mission will come to an end.
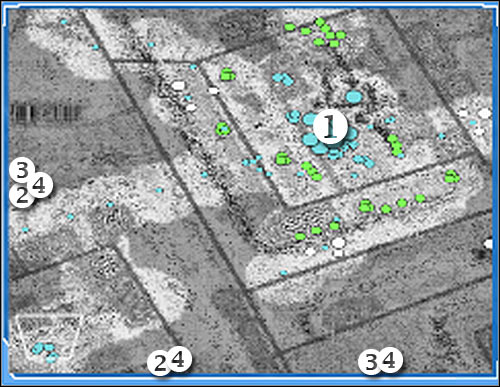
Map legend:
1 - starting area
2 - imprisoned allies - Blade Trooper & Ohm Robot units
3 - imprisoned allies - Constructor units
4 - communications trailer (first objective)
5 - areas being guarded by enemy Walkers
6 - power cores (second objective)
7 - exit - second Material Uplink building (third objective)
Your duties during the course of the mission:
The first part of this mission will require you to get to a communications terminal which is located in the central area of the Hierarchy spaceship. After that, you will have to repair three different power cores. Performing these actions will allow you to leave the alien ship safely.
Detailed mission walkthrough:
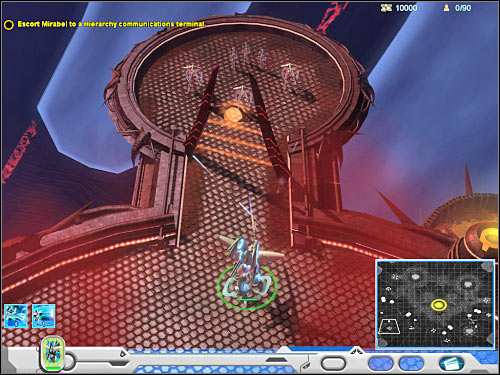
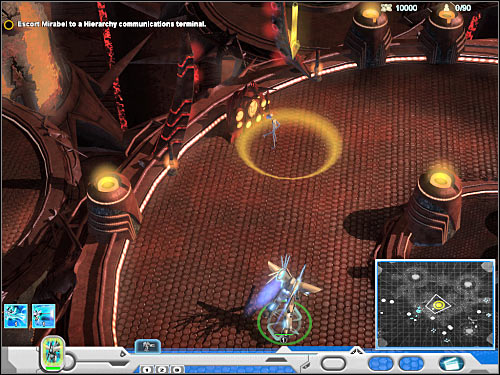
First objective: Escort Mirabel to a Hierarchy communications terminal
This isn't going to be a difficult mission, however you will have to watch out for your troops, because you won't have too many of them at your side. Thankfully, you will be allowed to use your Constructor units to repair them. The first part of the mission is extremely simple. Head on towards the nearest force field and destroy it (screen) by clicking on it. Doing this will allow you to rescue the first group of imprisoned units. Now you will have to go north. There's a larger enemy drone there. Destroy it. Use the missile strike if you don't want to spend too much of precious time here. Approach the second cage and destroy the barrier in order to rescue a second squad of allied units.
You may proceed to the east. This means you'll be moving towards the central area of the ship. You've got two choices here. If you want to add Constructor units to your army right now, you will have to go north. Be careful, though. This area is being guarded by an enemy Walker (5 on the map). You can't defeat it for obvious reasons. Instead, move to the west quickly and disable the force field. Constructor units were being held there. Go back to the Walker and attack it in order to distract its attention. Your Constructor units will have to move to the south quickly. Once this is done, move back your main character before Mirabel dies. If you don't want to risk engaging the Walker, proceed to the south-east without any other delays.
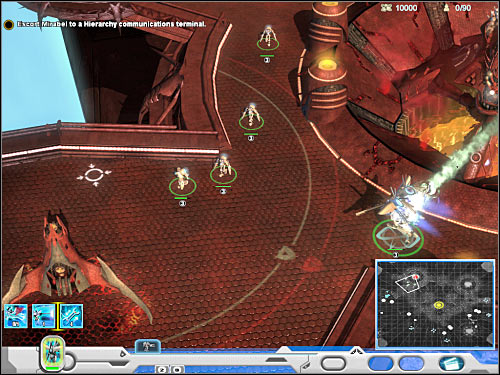
Start moving towards the communications terminal (4 on the map) which is your main objective at the moment. You will be allowed to turn south-west along the way in order to reach a new group of imprisoned allied units. You would have to destroy an enemy vehicle there and you would also have to disable a force field. Go back to the central area and approach the terminal. You must kill a single enemy unit here (screen). Allow Viktor to get closer to the terminal and you'll be rewarded with a cut-scene.
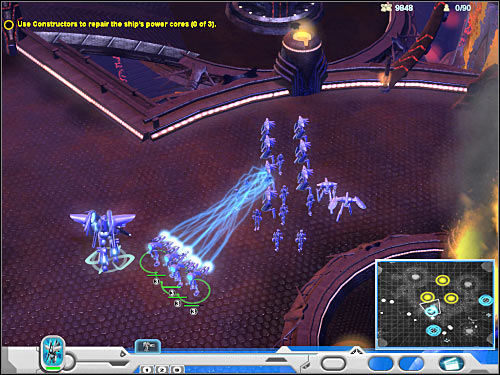
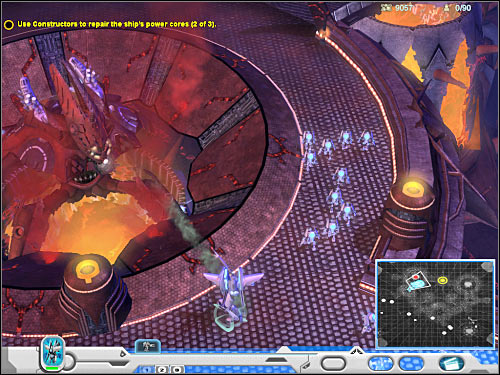
Second objective: Use Constructors to repair the ship's power cores
It turns out it was a trap. As a result, you will have to help Mirabel escape. Before you can leave the ship, you will have to repair three different power cores. Gather the rest of your squad around your main character. Make sure that Constructor units are standing somewhere in the middle, because you will have to use them very soon, so you can't allow enemy forces to destroy them. Take out several groups of enemy troops. I'd strongly recommend sending your main character to deal with the alien creatures, so you won't have to worry about losing more units. Once the battles have ended, select your Constructors and order them to begin repairing other units. You'll have to pay for the damages, but you have plenty of resources at your disposal, so there's nothing you should be worried about.
Head south, because that's where you'll be able to free some of the imprisoned units. New Constructors will be among the rescued allies, so make sure that they're safe. I would recommend ordering all of your squad members to take part in these battles, because you'll be dealing with larger groups of enemy forces (screen). Now you will have to proceed towards the eastern section of the ship. Mirabel will have an opportunity to rescue two other groups of allied forces. Remember to surround Constructor units with stronger troops in order to prevent them from being destroyed.
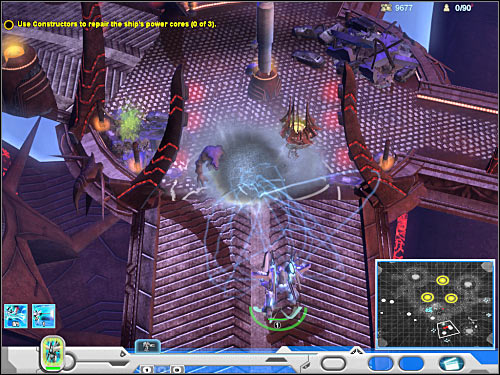
Gather everyone around your main character and proceed towards the nearest power core (6 on the map). It should be located to the north-west of your current position. Leave your main army somewhere near the main deck of the ship and allow only your Constructor units (screen) to get closer to the power core. It would be a good idea to have a large group of these units selected, because it'll speed up the process. Head on to your west and approach the second generator. You will have to repair it as well. You've only got one more object on your map, however reaching it is going to be more difficult. Make sure that you've repaired the other two.
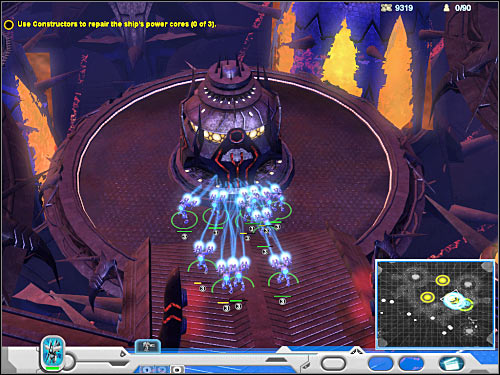
Like I've already said, repairing the final third generator is going to be more difficult, because both passageways leading to it are being guarded by enemy Walkers (5 on the map). As a result, you will have to distract one of these units. Choose Mirabel and a few standard troops. Start attacking the Walker, however make sure that your main character doesn't lose too much health. Send the rest of your army towards the power core. You will have to order your Constructor units to get there as well. Order them to repair the power core. Thankfully, you won't have to worry about the safety of your troops, because you won't need them anymore once this is all over.
Third objective: Escort Mirabel to the Material Uplink
Before this task officially appears on your list, you should consider sending Mirabel to the south, so you won't have avoid the hazards all the way to the Material Uplink. Your objective here will be to reach the exit (7 on the map). Double-click on that area and wait for your main character to get there. Mirabel shouldn't lose too much health along the way and you won't have to take special interest in the safety of your remaining units. Also, ignore some of the nearby explosions. Allow Mirabel to get closer to the Material Uplink building (screen). Doing this will allow you to end the mission. Get ready for the final battle!!
Map legend:
1 - base - starting area
2 - areas where Walkers from the first group will appear (Assembly Walkers; first objective)
3 - areas where Walkers from the second group will appear (Habitat Walkers; second objective)
4 - areas where Walkers from the third group appear (Science Walkers; third objective)
Your duties during the course of the mission:
You will have to defend Novus base against MASSIVE enemy attacks. You won't be dealing with standard units. Instead, you will have to take out SEVEN Walkers. They will arrive in three waves.
Detailed mission walkthrough:
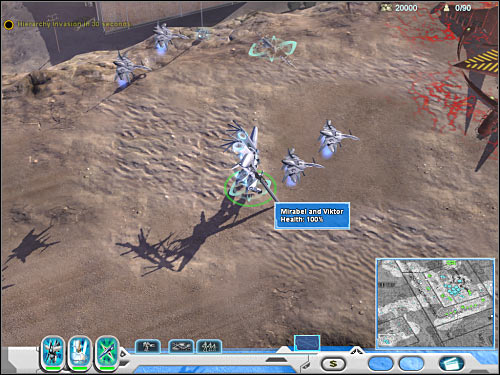
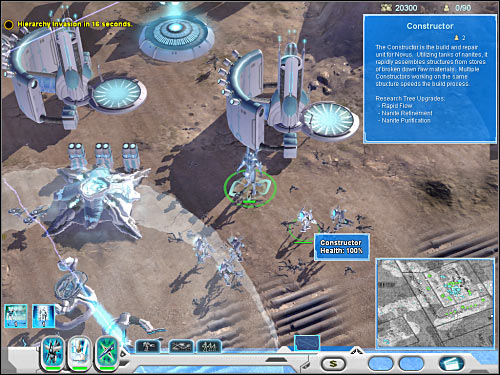
First objective: Defeat the incoming Assembly Walkers
This is the final mission of the Novus campaign. As you've probably suspected, it's going to be difficult. This may come as a surprise, though, because some of the previous missions of this particular campaign very extremely easy and didn't require you to act in a lot of hurry. You will have to make quick and accurate decisions. Having a steady flow of new units will also be very important, because your starting units are going to die (sooner or later). It's also extremely important to keep your main heroes alive. Losing any of them is going to be equal to an instant failure. Once you've regained full control over your units, you will only have 30 seconds to prepare for the arrival of the first wave of enemy Walkers. As you've noticed, Vertigo has automatically picked up Mirabel using its Upload ability. Move back all of your units to the main base. You may consider allowing Mirabel to go back to the battlefield by choosing the Download ability or you can wait with this decision for the first battle to commence. Right now you should focus only on preparing for the enemy assault.
You should notice that your base has automatically been fitted out with a Robotic Assembly building. This isn't enough. Find your Constructor units quickly (screen) and order them to build at least TWO Vehicle Assembly factories. It's also very important that both factories begin manufacturing new tanks as soon as possible. You won't have to construct more advanced units. Assembly Tanks will do the trick. Start gathering them somewhere to the west of your base. You should also order your main characters to remain there. You're going to need to build a decent army in a very short period of time.
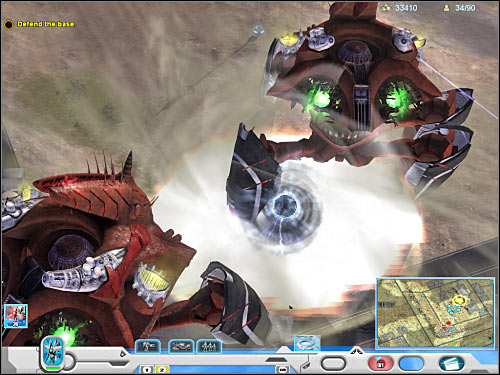
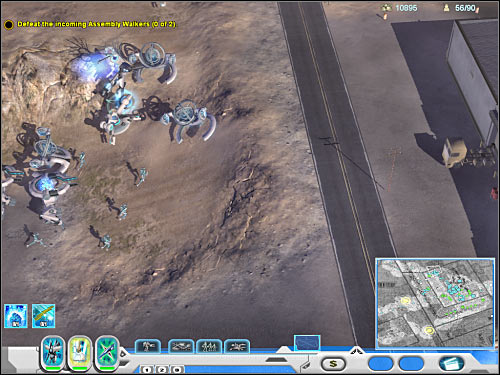
You should receive your first objective in just a few seconds. You'll also notice that two enemy Walkers have arrived in the area (2 on the map). This means you will have to act quickly, because they won't stop at nothing. Instead, they are moving continously towards your base. I would recommend taking care of the western Walker in the first place, because reaching your base is going to take it less time. Order your army to leave the hill and wait for your troops to get closer to the position of the Walker.
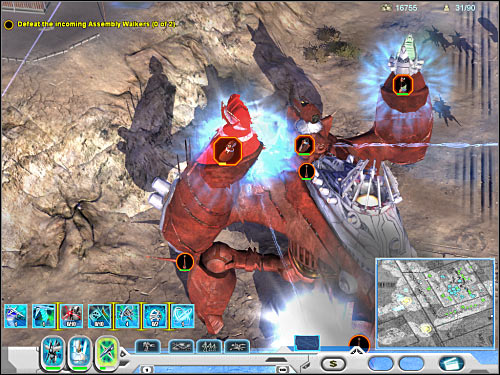
Defeating both Walkers is not going to be simple, mostly because their armors can withstand a lot of damage. I would recommend that you start off by aiming at the upper arms of the first Walker, because that's where its main cannons can be found (screen). Once you've destroyed both Mass Driver Cannons, try aiming at the outer arms (the left one, as well as the right one). Make sure that your units have focused their attention only on these components. You will also have to watch out for your main characters. You can't lose any of your heroes, so if you notice that they're losing on health, send them back to the base. You should also consider manufacturing new units to replace the destroyed ones. I would recommend building only tanks, because you wouldn't achieve much by creating weaker robots.
Keep firing at the upper arms of the Hierarchy Walker. Eventually they should explode. It's going to take some time, so you must be patient. Make sure that your units aren't standing too close to the Walker, because they would have been crushed by its huge legs. Try maintaining a safe distance. It shouldn't be a problem, as long as you move back the units by yourself. Once you've destroyed the arms, you will have to focus on disabling the shields - Left Shield & Right Shield (screen). You may have some problems finding the correct hardpoints, but it's very important that you start weakening the shields.
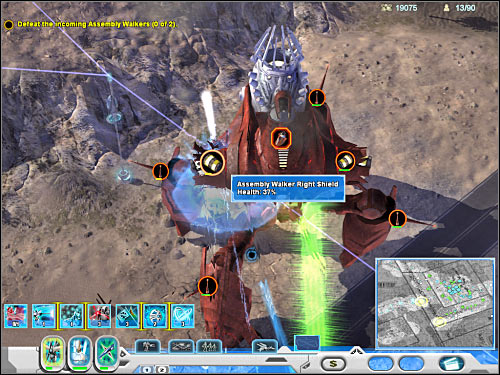
Obviously you will have to disable both shields. It shouldn't be too difficult, especially since they can't withstand too much damage. Make sure that all of your units are aiming at them and it'll only take a few seconds to destroy them. Doing this will allow you to expose the main core of the Walker (screen). This is the final phase of this battle. Order your units to start firing at the core. Destroying it will also neutralize the Walker. MOVE BACK your units QUICKLY. I would recommend ordering them to go back to your base, so they'll be able to team up with your newly manufactured units (I assume your factories were creating new units to replace the fallen ones).
It's very important that you destroy the first Walker before the other one manages to get too close to your base. Otherwise it would have been able to destroy some of your main buildings and obviously you'll need those for later. Watch out especially for your factories. If one of them gets destroyed, build a new one as soon as possible. Thankfully, you won't have to worry about your power grid, because you wouldn't be using it anyway. Don't waste your time trying to repair the towers or trying to build some new ones. Gather everyone together and order your units to proceed towards the second Walker. This is going to be a very similar battle, because both Walkers were of the same type (Assembly). Start off by aiming at the upper cannons in order to prevent the Walker from damaging your units. Once this is done, destroy the outer arms completely. Walker shields are next. Once they're gone, focus on destroying the core of this Hierarchy unit. Make sure that your factories are building new tanks, however allow them to stay near the base. Destroying the first group of Walkers won't solve the problem, because a second group will arrive here shortly. You will have to attack the new Walkers almost instantly, without being able to plan your next moves or to expand the base.

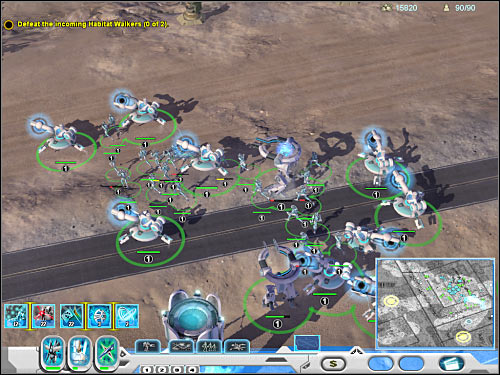
Second objective: Defeat the incoming Habitat Walkers
I guess it won't be much of a consolation to you if I say that neutralizing the second group is going to be easier, mostly because you will be dealing with weaker Walkers, built mostly for production purposes. Nevertheless, you shouldn't ignore them, because you'll still spend a lot of time trying to prevent them from reaching your base. Thankfully, you will be allowed to expand your base by constructing new buildings. Increasing the number of factories should be your top priority. You can also consider building a research center. This would allow you to manufacture stronger units and to buy several interesting upgrades in order to increase your chances of defeating the Walkers. You should especially consider manufacturing Assembly units, because they're very effective against slow targets. I would recommend that you start off by attacking the southern Walker (3 on the map), because it has appeared closer to your base.
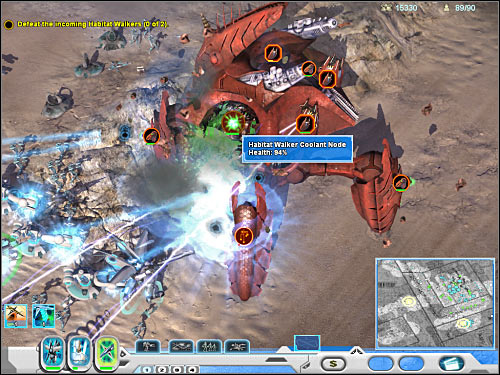
It's going to get a little easier to take down Habitat Walkers. Just as before, you will have to watch out for your units, so they won't end up being smashed to pieces. Try focusing on the side panels of the Walkers. This should allow you to expose their cores without having to wait too long (screen). Obviously destroying the core will allow you to take out each Walker. Make sure that you've rearmed yourself after the first fight. The second Walker should be far away from your main buildings, so you'll have plenty of time to get everyone together. Use similar attacks to destroy the second Walker. Once this is done, move your ENTIRE army to the south. Don't wait for the game to display a new objective. As for your newly manufactured units, I would recommend stationing them to the west of the main buildings. You will have to leave a small group there, because your base is going to be attacked by smaller units and the AI controlled tanks are probably gone by now.
Third objective: Defeat the incoming Science Walkers
This is going to be the final objective of this mission. Destroying all three (yes! THREE!) Science Walkers is going to be very hard, so make sure that you have saved your progress once you've destroyed the previous Hierarchy mech. Obviously the biggest problem is that you'll be dealing with three Walkers, instead of two. They will appear around your base (4 on the map). I would recommend taking them down one at a time. You shouldn't try dividing your army into smaller groups. Like I've already said, you must post a few units near your base, because smaller enemy troops will arrive there (screen). Your buildings need protection and you don't have enough time to place proper turrets. Try preventing enemy units from destroying your main buildings, especially factories. You won't have to worry about less important structures. Just make sure that your main HQ stays put. If you decide to place the turrets anyway, build them to the west of your buildings. As for the Science Walkers, you should start off by engaging a Walker which has appeared to the south of your base. It's very important that your units are already there, so you won't have to waste precious seconds by trying to reach that location. You will also have to take your main heroes, however make sure that they don't die during some of the upcoming battles.
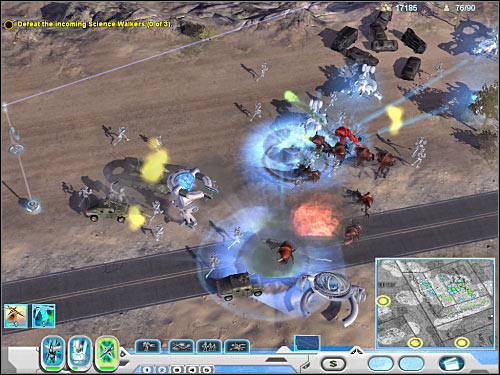
Your main concern while trying to take down all three Science Walkers is that you'll have to avoid their most powerful attack. These units are capable of attacking you with a massive and an extremely deadly wave of radiation (screen). Anything that's caught up in the wave gets destroyed or killed, including your main heroes. You will be able to deal with this problem using various approach methods. The best choice is to select Mirabel and Vertigo. You will have to attack the Walker, so it'll focus its attention on your main characters. Wait for it to use the wave, however make sure that your main units have enough time to dodge this attack. Vertigo seems to be the best choice here, because he can move really fast.
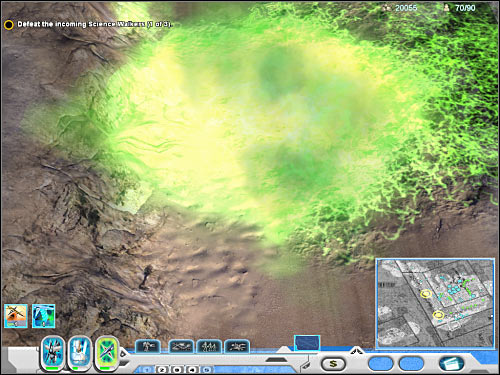
As for your attacks, you will have to aim for the upper arms of each Walker in order to destroy Cascade Reactors. Try eliminating them one at a time, instead of shooting randomly at all of them. You'll probably notice that the Science Walker is losing on health and shield. Try eliminating the first Hierarchy unit quickly, before it's capable of regenerating its wave attack. Once it's gone, start moving north-west. You should also call for reinforcements. I assume that your base has built a lot of units in the meantime. You should also watch out for your heroes. If anyone is seriously injured, prevent that character from taking part in the second battle. Remember that you can't afford losing any of your heroes.
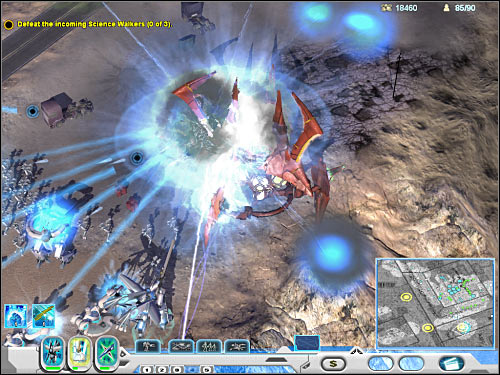
I assume that you've destroyed the first Science Walker quickly. As a result, the second mech should be far away from your base and a hill which leads directly to it. You won't have to change anything in your approach. Try to encourage the Walker to use its wave attack against one your heroes or a smaller group of units (you would have to sacrifice them). After that, attack it with everything you've got. Aim for the Cascade Reactors in order to take it down quickly. If it starts climbing on top of the hill, move back your units to the north and attack it from a higher ground.
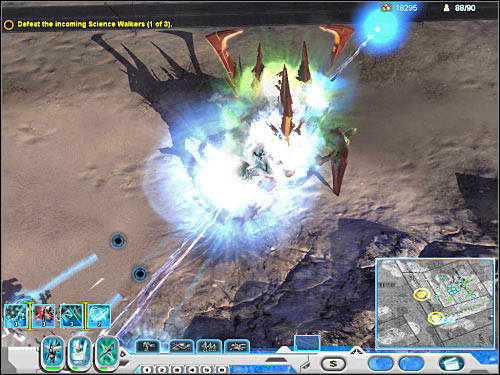
You will have to be extremely fast here. I suspect that the third Science Walker (the one that's appeared to the north) is already near your base. Allow all of your units to take part in this final battle. If you're lucky, the Science Walker won't be able to use its main attack. Make sure that new tanks appear somewhere near it, so they can attack it without any unwanted interruptions. You will have to prevent the Walker from destroying your base, because if you had lost the HQ, you would fail the mission. Destroying the third Walker will allow you to succeed. You've also completed the Novus campaign! Get ready for the second campaign. This time you'll be commanding Hierarchy forces.
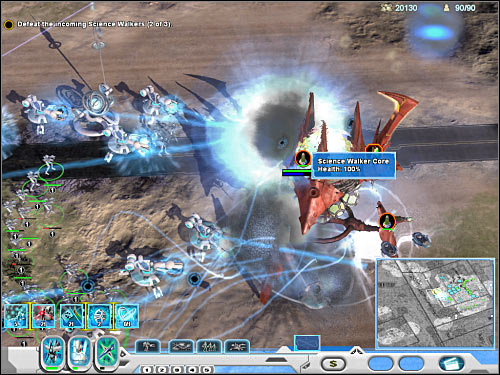

Map legend:
1 - starting area
2 - first enemy base (first objective)
3 - second enemy base (second objective)
4 - area where you'll receive a Walker
5 - third enemy base (third objective)
Important! I'd strongly recommend that you take your time to familiarize yourself with a new alien race, especially with some new features of the game. It would be a good idea to open the Tutorials menu once again. This time you should click on Hierarchy Walker Hardpoints. Seeing this movie will allow you to understand some of the basics about commanding and upgrading your Walkers. It's very important, because you'll be allowed to command a lot of these units and you'll modify their modules anyway you want to.
Your duties during the course of the mission:
Your primary objective for this introductionary mission will be to destroy three small bases of the Novus organization. You will be commanding a small squad of units, as well as one hero character. Additionally, you will receive an opportunity to test your first Walker. You'll use it to destroy the third Novus base.
Detailed mission walkthrough:
Objective 1: Assault the first Novus base cluster
The first mission of the Hierarchy campaign is going to be relatively simple, however you may be scared a little bit that you have to take out three different bases. Thankfully, your units are quite powerful and your main character can take out a lot of enemy units without any help. You'll also be given a chance to take control over a huge Walker. You'll start the game to the south of the first Novus base (2 on the map). Just as before, you should take your time to familiarize yourself with your units. Grunt soldiers are very similar to Ohm Robots and Blade Troopers. Your teammates should automatically attack the first group of Novus robots (screen). As for your main character, it's going to be Orlok. Take a closer look at his abilities, because they're extremely helpful. Nevertheless, you won't have to activate them right away. It would also be good idea to allow Orlok to take out some of the nearby enemy units, because he's the only one with healing capabilities.
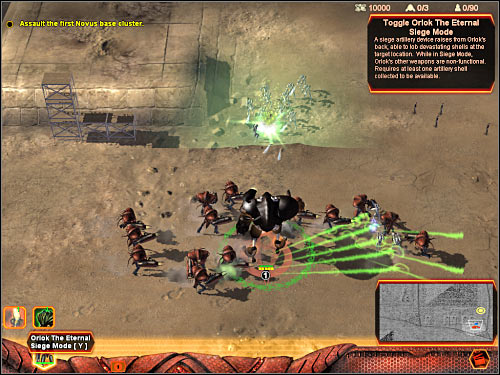
I wouldn't recommend making any unnecessary stops, because you would only have to deal with additional enemy troops. Instead, keep moving north. You will be dealing mostly with Novus robots, however you will also have to destroy several tanks. Use all of your units to take them out, not only Orlok. Reaching the first base is going to take you only a few seconds, because it's located near the starting area. You will have to find the central building of the base. It's going to be a Flow Generator. Your primary objective will be to destroy it. You could order your units to open fire, however it would be better to try out one of Orlok's abilities. Activate the Siege Mode and target the building. As a result, Orlok will use mortar rounds to destroy it (screen).
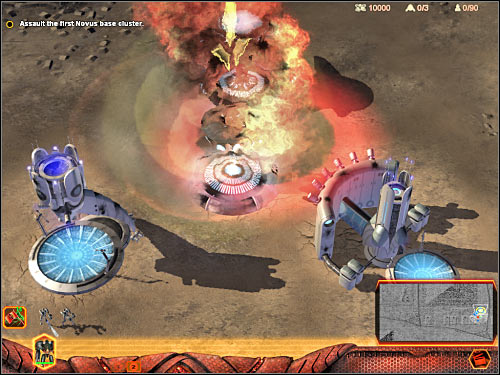
Once you've destroyed the Flow Generator, assault the base and take out all of the remaining buildings. I would recommend choosing only the Grunt units for this task. As for Orlok, he should try destroying a few tanks in the meantime. Destroying the first Novus base will allow you to find out the exact location of the second target. You should also consider testing one of Orlok's primary abilities. By engaging the Endure Mode you can make him more resistant to enemy fire. He'll also start healing rapidly. The down side is that he won't be able to use his primary weapon. Nevertheless, you should be using this ability each time he's been badly injured.
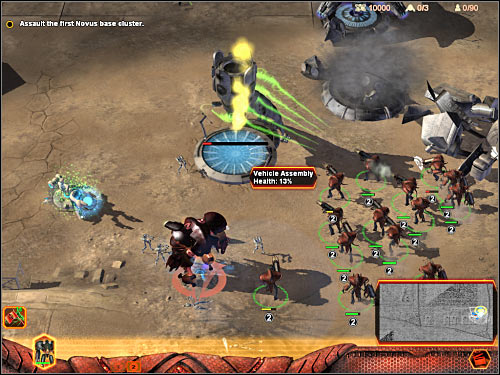
Second objective: Assault the second Novus base cluster
The second base is to the west of your current location (3 on the map). Obviously you will have to go there right away. Also, it won't be that easy, because you'll encounter a lot of tanks and robots along the way. You should be fine as long as you're not moving too fast. Don't waste any more time trying to test out Orlok's Siege ability. You won't need it to destroy mobile targets. Once you've reached the second base (screen), focus all of your attention on the Flow Generator. Now you should finally consider using the Siege Mode. This will allow you to destroy the generator almost instantly. Once this is done, start firing at the remaining buildings of the base. You won't leave this area for at least one more minute, so make sure that you've neutralized all nearby objects, including enemy units.
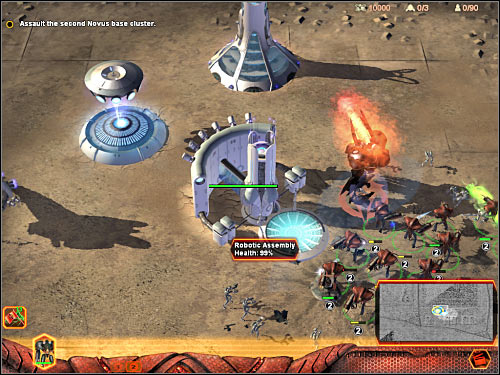
Third objective: Assault the third Novus base cluster
Fourth objective: The Habitat Walker must survive
Now you'll finally find out more about the most interesting aspect of being able to command Hierarchy units. You will have to wait for your leader to grant with a possibility of using a Walker (4 on the map). You will be allowed to take full control over it. Before you decide to proceed any further, make sure that you've familiarized yourself with the basics (question icons). You should listen to a few hints and don't forget that you can see a movie about Walkers. It's accessible from the main menu of the Tutorials section. Click on your newly acquired unit and you should notice that a lot of icons have appeared on the screen. Those are called hardpoints. You will be able to fill them by buying various types of components. I'd strongly recommend filling all slots, so that the Walker isn't exposed anywhere. You should also remember that placing a few modules of the same type allows you to increase their overall strength.
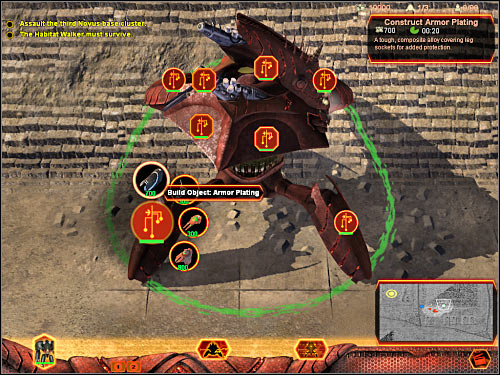
You won't have to do anything perfectly, because obviously this is an introductionary mission, so it's not going to be too difficult. Try filling all available slots. Start with the lower legs of the Walker. I would recommend buying at least one Armor Plating module, so your Walker will be able to withstand more damage. You should also acquire an additional Plasma Turret. As for the upper arms, you should consider buying upgrades which will allow you to summon new types of units. Lost One Pod seems like the best choice here. I would recommend manufacturing a few units right away. Build both types of units - Grunts and Lost One troops. Try spending all available resources on them. Alternatively you could save some credits for the additional upgrades of the Walker, however this won't be necessary.
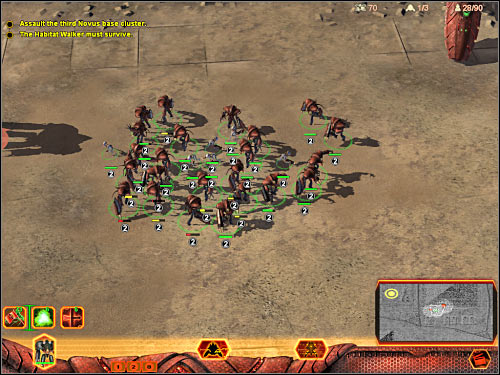
The final phase of this mission is going to be quite simple. Select all your units and start moving north-west. That's where you'll be able to find the third Novus base (5 on the map). Obviously you will have to remember that your Walker is moving very slowly. Prevent your standard units from moving too close to the base. That also includes your main character Orlok. Wait for the Walker to reach this new area. Once it's there, focus on destroying the Flow Generator. Once again, you should consider activating the Siege Mode ability. After that, deal with the remaining Novus buildings. Nanocenter seems to be the most important one, so make sure that it goes down quickly. Allow all your units to take part in this battle. Once you've destroyed the third base, this mission will come to an end. You'll also be rewarded with a longer cut-scene.
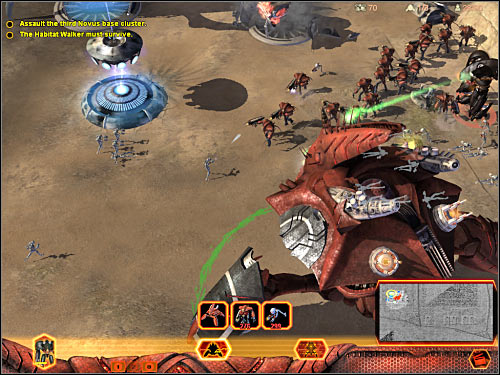
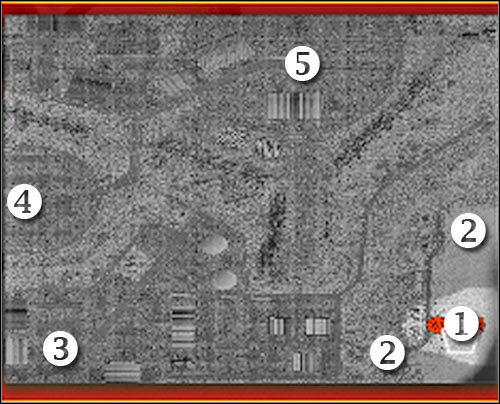
Map legend:
1 - base - starting area
2 - main roads leading to your base
3 - southern missile facility (fifth objective)
4 - western missile facility (sixth objective)
5 - northern missile facility (seventh objective)
Your duties during the course of the mission:
Your first task will be to summon some of the most important Hierarchy units and structures. You'll need them to be able to proceed with the main part of the mission. Your objective will be to find and destroy three missile facilities before they're able to damage your motherships.
Detailed mission walkthrough:
First objective: Use Glyph Carver to summon a Reaper Drone
For the first time you'll be allowed to find out how the expansion looks like from the Hierarchy perspective. I assume you might be a little overwhelmed by their unusual tactics, mostly because you'll be using Walkers, instead of standard bases. You'll also summon some of the larger units, instead of manufacturing them. Thankfully, you won't be attacked by anyone for the next few minutes (as long as you don't move your troops to the west). As a result, you'll have plenty of time to understand how this works. Start off by focusing on how to fulfill your first objective. You have two Glyph Carver units (screen) at your disposal. They're very similar to the Constructor units which you'll probably still remember from the previous campaign.
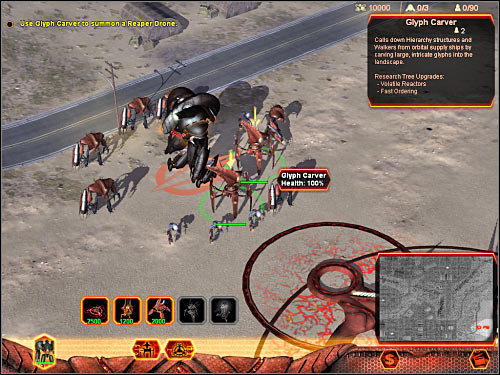
Select your Glyph Carver units. You will have to order them to summon a new type of unit, called a Reaper Drone. You must spend 1200 credits, but don't worry, because soon you'll start gathering resources. Wait for the Reaper Drone to reach the map. As you've noticed, it's been summoned, so it won't take precious space. You'll also receive new resources automatically. Sadly, you will have to spend more time protecting your Reaper Drones against enemy attacks. They're capable of returning fire or even harvesting your enemies, but they'll be helpless against larger groups of Novus units. Allow your Reaper Drone to go north, because that's where it will find a large stash of resources. I would also recommend summoning at least two more Reaper Drones in order to speed up this process. Additionally, it would be a good idea to command the Monolith units. Teleport them to the northern edge of the map and you should be able to find more resources there. Your Reaper Drones are fine right away, but you'll have to transport them to that location in a few minutes.
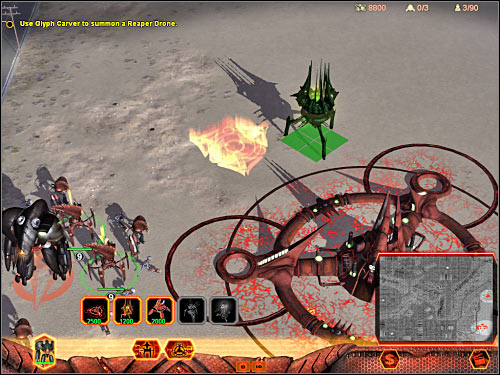
Second objective: Summon a Detection Drone
Fulfilling this mission objective shouldn't be a problem and it's only going to take you a few seconds to issue a specific command. Also, you don't have to worry that summoning the detection drone will attract the attention of enemy soldiers. You could try to gather more resources first, however it won't be necessary. I would recommend summoning the drone somewhere to the right of your main base building. You won't have to focus too much on finding a good landing zone, because you'll be able to move the drone once it has landed. Move it away from the western hill, so it won't get destroyed during some of the upcoming fights. You should also take your time to familiarize yourself with this new Hierarchy unit.
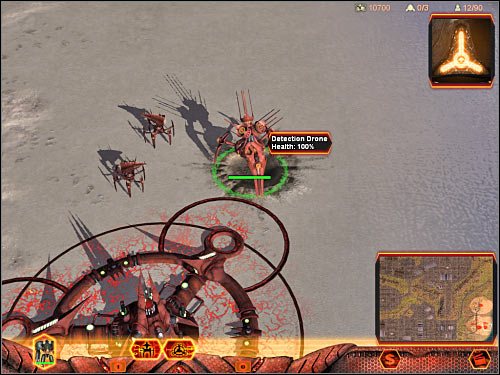
Third objective: Summon a Habitat Walker
You've probably noticed by now that you're being limited by two population cap meters. The left meter tells you how many Walkers you can summon to the battlefield. You will be allowed to have a maximum number of three of these units. I guess I should also tell you that summoning all three Walkers isn't going to be a problem here, however you should focus only on the first Walker for the time being. Wait for this unit to be summoned. Once this is done, start buying upgrades for it. I would recommend choosing offensive modules (plasma turrets, armor platings), because enemy forces won't bother you with any powerful attacks. There's only one exception - you should consider equipping the Habitat Walker with a Lost One Pod. Make sure that all hardpoints have been used. You can't leave any of them exposed. Buying the upgrades is going to cost you a lot, however your Reaper Drones should collect a lot of resources by now.
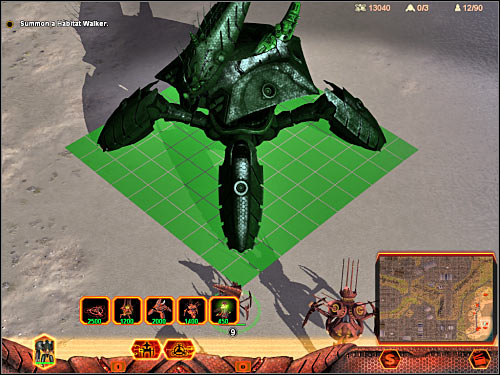
You will have to deal with some other problems at the same time. Your base is going to be attacked from the west and these attacks will be repeated every 30-60 seconds. It's not a major threat, because enemy forces are using mostly human tanks, however once you've equipped the Walker, you should focus on securing the western road. You will also have to find new resources for your Reaper Drones. Like I've already mentioned, you should consider moving them to the north. There are a lot of valuable objects there, including buildings (screen). Make sure that your Reaper Drones are being properly protected. You can't use only Monolith units, because they're too weak. You will have to assign Grunt & Lost One units as well.
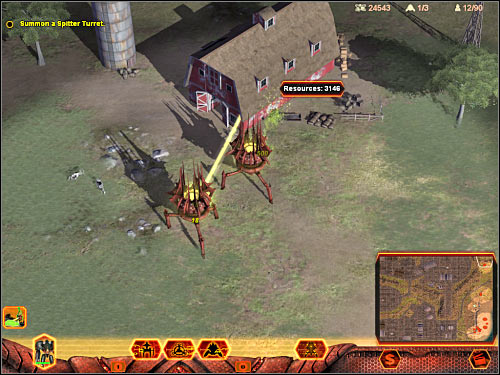
Fourth objective: Summon a Spitter Turret
As you've probably noticed, your Glyph Carver units are capable of summoning new types of structures - Spitter Turrets. You will have to start placing these objects to the west of your main base. Try securing this entire area with them. A large number of turrets will grant you safe haven, because all enemy units are going to be destroyed almost instantly (screen). You may ignore defending the northern section of the map, because enemy forces shouldn't appear there. Move your army to the north in order to ensure protection for your Reaper Drones. If you've built enough turrets, your base won't need anyone else to defend it and you can always send your first Walker to the south. It'll be able to fire at enemy troops from a larger distance. It would also be a good idea to summon Grunt & Lost One units using the pods of your Habitat Walker.
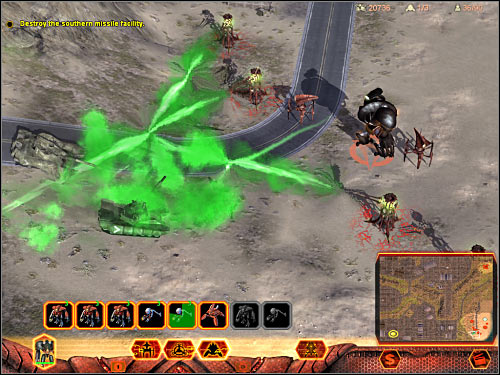
Fifth objective: Destroy the southern missile facility
Despite what you might have thought, you don't have to be in a lot of hurry. The missile threat is real, however nothing bad will happen until you've reached the first missile facility. As a result, you will have plenty of time to plan your next moves and to expand by collecting more resources and summoning new units. You will have to prepared, so don't go west right away. Instead, stay where your are and take your time. Your primary objective at the moment will be to secure the western section of the base by placing more Spitter Turrets. You will also have to start summoning standard troops. Additionally, I'd strongly recommend buying a second Walker. Just as before, try fitting it with a lot of armor plates and plasma turrets, so you'll be able to use it during some of the upcoming battles. You will also have to keep protecting your Reaper Drones. Eventually they'll run out of resources. As a result, they will probably move to the south or to the south-west. You will have to be very careful there, because a lot of enemy units in patrolling these areas (screen). Thankfully, you won't have to stay there for too long. Summon a third Walker or reach your second population cap (standard units). You should also leave some credits for later, just in case you'll need to upgrade something or buy new units. If you decide to buy the third Walker, place it near the northern road, so it'll be able to defend this area on its own.
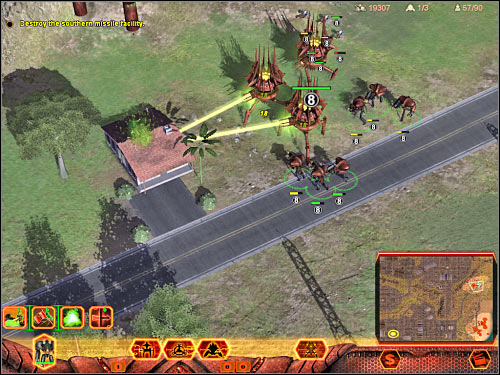
Remember that you'll have to be well prepared before you give the order to proceed with the assault. Reach the population cap for your standard units. Don't worry that you'll be using weaker troops, because you'll be allowed to summon new troops directly onto the battlefield. Obviously this can be done only if you've equipped your Habitat Walker with proper pods. I would recommend ordering at least one of your Walkers to start moving towards the southern facility (screen). Just as before, prevent your units from moving away from the Walker. They should stay close for better protection. Obviously you will encounter a lot of enemy units along the way, including tanks and vehicles. Use the plasma turrets to take out most of these targets. You should also remember about some useful abilities of Orlok.
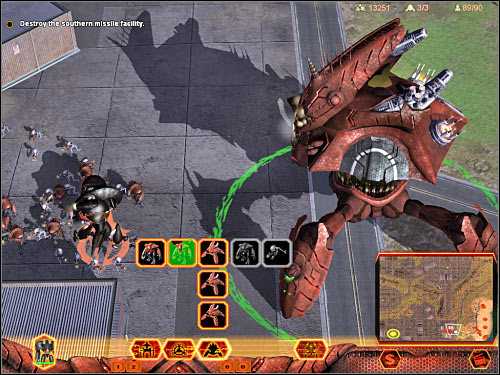
You will probably encounter at least three enemy structures along the way. Neutralize them as soon as possible, as they're capable of manufacturing new units. Doing this will cripple enemy production, at least for the surrounding area. Two of these buildings are capable of manufacturing vehicles and the remaining one is for standard troops. Also, one of these factories is to the north-east of the main target, so you probably won't find it right away. Try eliminating everything that stands in your way. Don't leave anything or anyone behind. It shouldn't be too difficult, especially if you decide to choose Orlok for this task. As for your Walker, it should be moving towards the first facility (3 on the map).
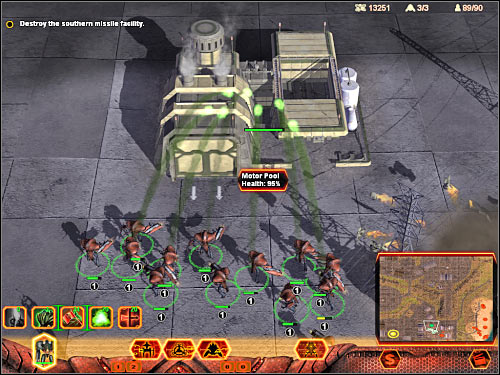
Your main target building (screen) is going to be guarded by a small group of enemy units. As you've probably noticed, you'll also be dealing with a small number of Novus tanks. You won't have to prepare for this battle. Just make sure that all your units have engaged enemy forces, including the Walker. Once you've neutralized enemy targets, focus only on destroying the missile facility. It should only take a few seconds, especially if your Walker has used its powerful plasma turrets. Now you will have to start moving north in order to get closer to the second facility. You'll also encounter an enemy structure along the way (the one I was telling you about earlier). I would recommend sending your Reaper Drones to the southern section of the map. If you've secured this area, they shouldn't encounter any additional problems. Allow them to begin gathering resources. Your Reaper Drones should also be on a look out for extra valuable stashes (supplied by the military). If you're not feeling too comfortable sending them alone, leave a few grounds units or monoliths near them.
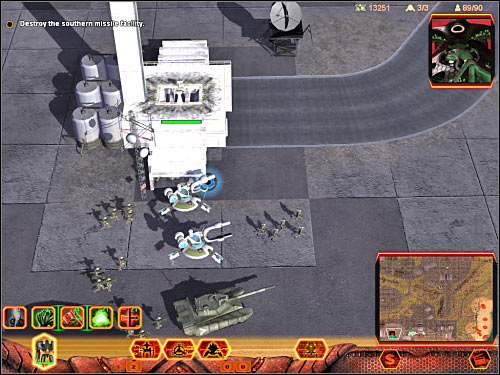
Sixth objective: Destroy the western missile facility
Seventh objective: Destroy the northern missile facility
Remember that there's no rush. You won't have to assault the remaining two facilities right away. Instead, use the free time to summon more units. Thankfully, you should have a Habitat Walker somewhere near the first (destroyed) target, so your troops won't have to travel all the way to the west to reach your main army. You should also remember that you can always exchange existing modules for something else. Acquire a Lost One Pod if you don't have it. Either way, try reaching the maximum population camp by summoning Lost One & Grunt units. Move up north. You should be able to reach a small junction (screen). The nearby road leads directly to the western facility (4 on the map). Wait for the Walker to get here before you decide to assault enemy positions.
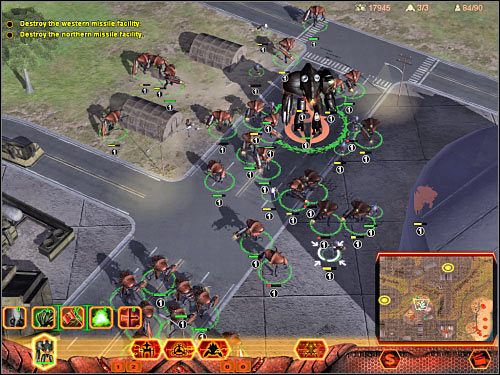
I would recommend that you divide your army into two smaller groups. The second facility is being guarded by a lot of enemy units. You will have to watch out especially for Amplifier tanks (screen). You've been able to test them before (during the course of the Novus campaign), so you should remember that they're very efficient against slow targets. As a result, leave your Walker behind and allow the main army to take out the tanks. Once they're gone, assault the main base. Your standard units should take care of other buildings, such as factories. As for the main missile facility, your Walker should be able to destroy by itself. Once this is done, wait here for at least a few seconds. Summon more units in order to regain full strength.
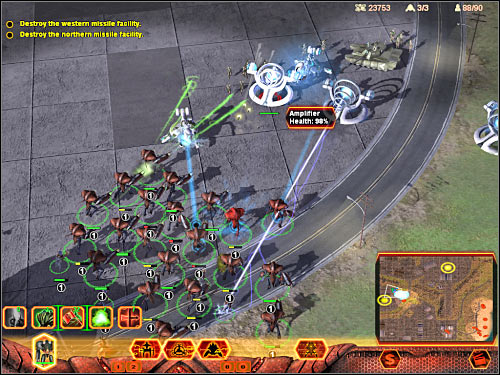
Make sure that you have a large army at your disposal. The final missile facility can be found to the north-east, so that's where you'll need to move your troops. You shouldn't have any major problems finding a correct route to your destination since there's only one large road here. At first you'll only encounter a few enemy units, however gradually you'll be dealing with larger groups. Don't worry, because your troops will handle almost anything. Don't forget to destroy buildings along the way (screen) in order to prevent your enemy from manufacturing more units.
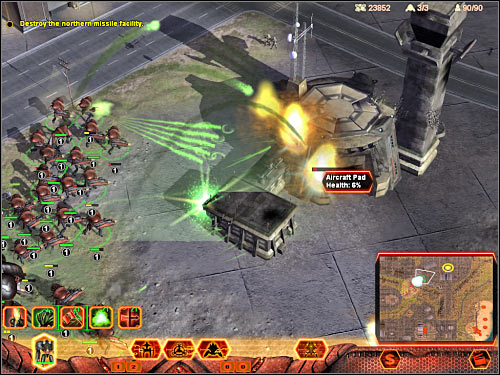
Finding the northern facility is going to be fairly easy. Just as before, you will have to deal with a much larger group of enemy units. Focus mostly on destroying Amplifier units (screen), because they can hurt your stronger units. You won't have to divide your army into smaller groups, because this is the final battle of the mission. Instead, use Orlok's ability and aim at one of the groups of Amplifier tanks. You should also wait for one of your Walkers to get here. Remember that you don't have to destroy any of the surrounding buildings. Focus only on finding and destroying the third missile facility (5 on the map). Doing this will allow you to proceed with the next mission of the Hierarchy campaign. You'll also be rewarded with a new cut-scene during which you'll be introduced to a completely new faction.
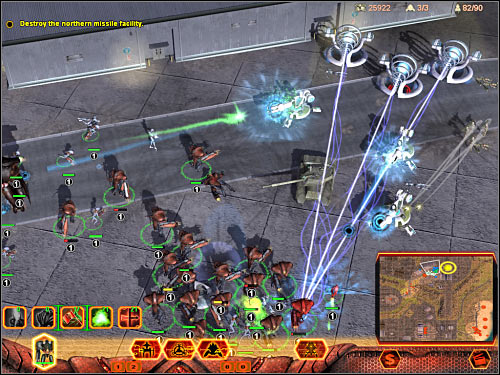
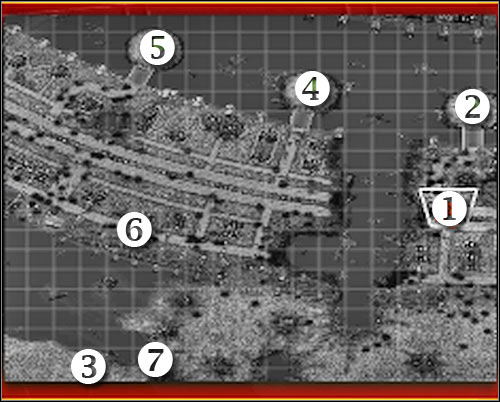
Map legend:
1 - starting area
2 - first transmitter (first objective)
3 - area where reinforcements will show up
4 - second transmitter (second objective)
5 - third transmitter (third objective)
6 - Masari structures (fourth objective)
7 - extraction zone (fifth objective)
Your duties during the course of the mission:
Once you've landed safely on board of an enemy mothership, you will have to find and destroy three transmitters. You'll also take out a few Masari buildings in order to prevent your enemy from calling reinforcements. The final phase of the mission will require you to get to the extraction zone safely, without letting your main character die.
Detailed mission walkthrough:
First objective: Destroy the first transmitter
Just as before, you should take your time to familiarize yourself with the surroundings. You should also notice that you've been rewarded with a new type of units. They are called Defilers and I'm sure that you remember them to be tough opponents from the Novus campaign. This time you'll be able to command them. It shouldn't come as a surprise that these units can be quite helpful. You should take a closer look at their abilities, because they're very useful. Thanks to Project Radiation you'll be able to increase your firepower. This is good against slow targets and enemy structures. Bleed Mode is also quite interesting. Activating this mode results in a cloud of radiation being created around your Defiler units. The cloud will increase in size over time. Choosing this ability not only will allow you to poison your enemies, but also to heal your own units. The only disadvantage of using the Defilers is that they've been equipped with a very weak armor, so it's easy to lose them if you're not careful enough. I wouldn't recommend ordering them to attack every enemy unit. They should stay somewhere in the back, especially since you'll be allowed to send other units (including Orlok) into battle.
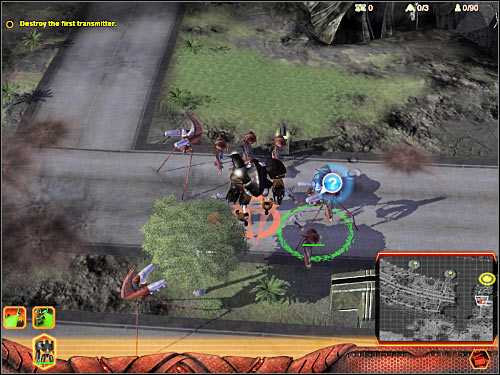
Your primary goal at the moment will be to reach the first transmitter which can be found to the north of your current location (2 on the map). Try sending only your main character Orlok there. The rest of the troops should stay somewhere near the start area. Alternatively you could send a few units to assist Orlok, however he has to do all the dirty work. You'll encounter a few Masari units in just a few seconds. Those are weak Disciple units, so getting rid of them shouldn't be a major problem. You could also attack them from a distance using some of the Defiler abilities, however it won't be necessary. Proceed to the first transmitter. This object will be guarded by a small group of Masari units. Kill them and order your troops to attack the transmission tower (screen). This is a well armored object, so destroying it may take a few seconds. Thankfully, the tower can't protect itself and you won't be attacked by anyone else.

Second objective: Destroy the second transmitter
Third objective: Destroy the third transmitter
Now you will have to go south. That's where you've started this mission. Sadly, you won't be able to get to the second transmitter by going in a straight line. Be careful, because once you've returned to the starting point, you will have to deal with a larger group of Masari units. Allow your standard troops to take part in these fights. Just make sure that your Defiler units don't lose too much health. You'll need for most of them to survive. The only passageway leads to the south. After that, you will have to turn west. You'll encounter some additional enemy units along the way. Killing them shouldn't be a problem, however watch out for surprise attacks (screen). You are going to be warned about them and you should be very careful, so you won't lose too many units by a mistake. Defend your Defilers at all costs. Allow your other troops to take out enemy units. Obviously Orlok also should engage enemy troops.
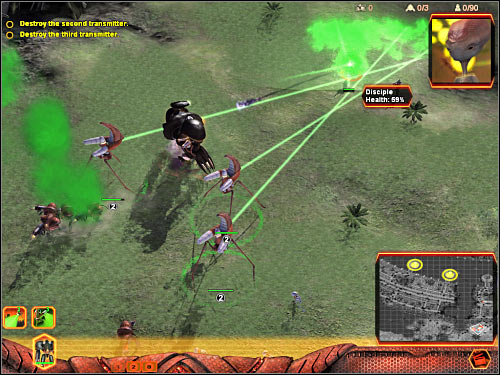
Once you've arrived at the southern section of the map, you will have to turn right in order to proceed west. You'll soon be informed that other allied units were able to get on board of this mothership. As a result, you will be allowed to wait for them to show up. They will arrive to the west of your current location (3 on the map). You've got two choices here. You could try and leave your allies near the extraction zone, however I would recommend ordering them to rejoin with your main squad (screen). Make sure that your army is heading their way, so it won't take forever for both groups to team up. Your new allies are going to be attacked by enemy troops, however they will be fine as long as they reach your main army quickly. Once this is done, deal with the Masari forces. Now you will have to proceed north-east. This will allow you to reach the western areas of the ship. Be careful, because this new section is going to be defended by a large group of Masari units, including one Conqueror. Wait for the game to display a new mission objective. It's important, because you'll have to deal with this new threat right away, before proceeding to the second transmitter.
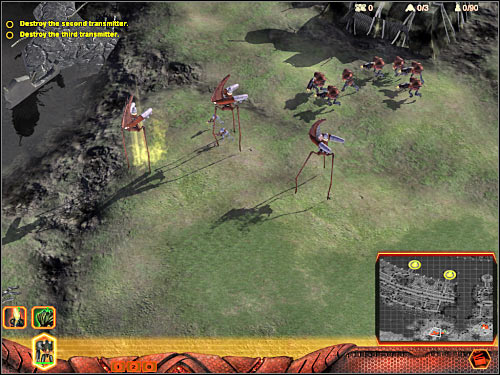
Fourth objective: Destroy the Masari Machinae
This is going to be a fairly simple task. I would recommend sending all your units into battle in order to ensure that the Masari aren't capable of building too many new units. Your target buildings can be found to the west of your current location (6 on the map). You could try and test one of the abilities of the Defiler units, however I wouldn't recommend wasting any time. Order your troops to destroy the buildings. You can activate Orlok's Siege Mode in order to take out one of these structures instantly. You should also neutralize an additional building - Knowledge Vault. It can be found to the left of the destroyed Machinae structures. Now you will have to defend yourself against a massive enemy assault. Make sure that you've destroyed all enemy units. It would be a good idea to activate Bleed Mode (Defilers) in order to heal your troops.
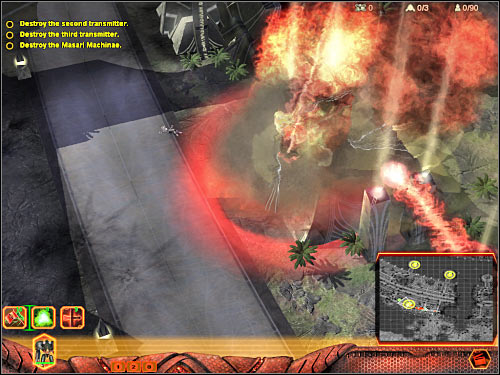
I would recommend that you start off by going towards the eastern transmitter (4 on the map). This means you'll be travelling north-east. Remember that some of the Disciple units will try to take you on by a surprise. If you don't want to risk losing your units, order only Orlok to get closer to your current target. You will have to defeat a new Conqueror (screen), as well as several weaker units. Once this is done, start firing at the transmitter. Obviously you will have to wait here until it's destroyed. After that, go back to your army and start moving west, because that's where you'll find the third target (5 on the map).
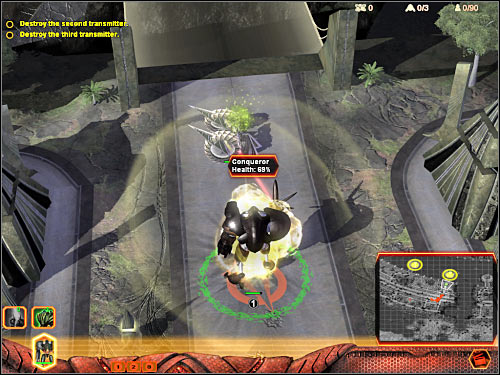
Just as before, you will have to be ready in order to repel all surprise attacks. Sadly, you won't be allowed to get to the transmitter by approaching it from the south-east. Instead, you will have to go around a destroyed fragment of the mothership. This means you'll have to continue moving west. Thankfully, you shouldn't encounter any additional units along the way. Watch out only for one larger group which may attack you from the east (screen). I guess you won't be surprised by the fact that the bridge which leads to your target is going to be guarded by a single Conqueror unit (screen). Destroy it, however don't choose Orlok to take down the transmitter. Order someone else to deal with this problem. As for your main character, move back Orlok somewhere to the south, so he won't have to travel a long way once the transmitter has been destroyed. You'll find out soon enough why I prohibitted you to use him.
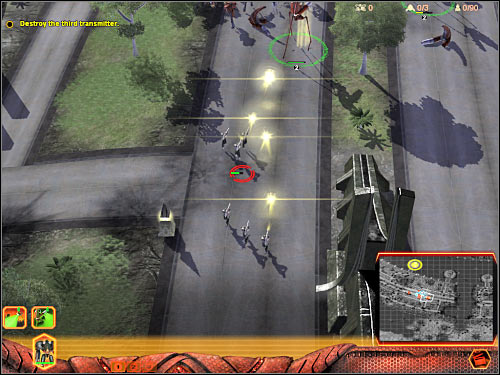
Fifth objective: Move Orlok to the transport
I guess you may have some serious difficulties reaching the extraction zone safely, because Masari forces have begun waking up. As a result, you will have to avoid them at all costs, because your army is far too small to deal with this new threat. Thankfully, if you follow my instructions, you should be fine. Start off by ordering Orlok and his troops to go south until they've reached an inaccesible area (screen). This will allow you to avoid the largest group which has appeared to the east. You will have to start moving south-east, without moving too far to the north. If you've done everything according to the plan, you'll only come across a few enemy units. Don't stay in one spot for too long. Keep pushing towards the extraction area.
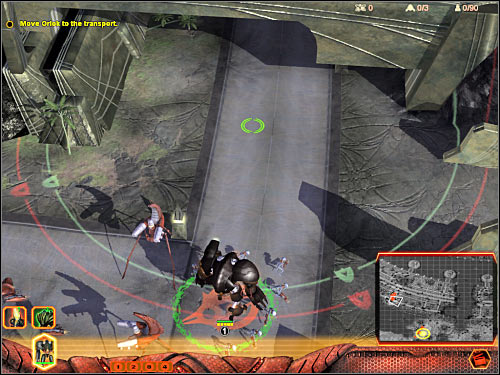
As you've probably noticed, a second group of reinforcements has arrived on the map. I would recommend sending your new allies to the north-east in order to secure a safe passageway for Orlok. Your troops will probably engage Masari forces without your assistance (screen). Enemies will appear to the east. Make sure that Orlok is heading towards the final destination. You may leave the rest of the troops behind, because you won't need them anymore. Focus only on reaching the extraction point (screen). Orlok must stay safe until the end. Once he's close enough to an allied ship, this mission will come to an end.
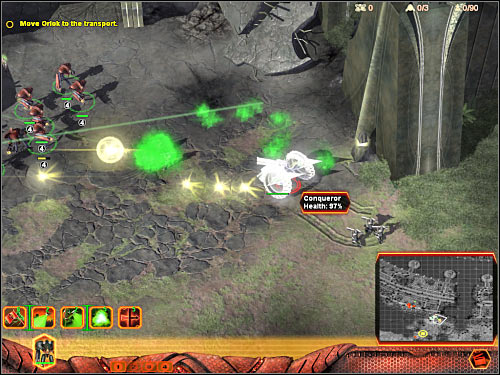
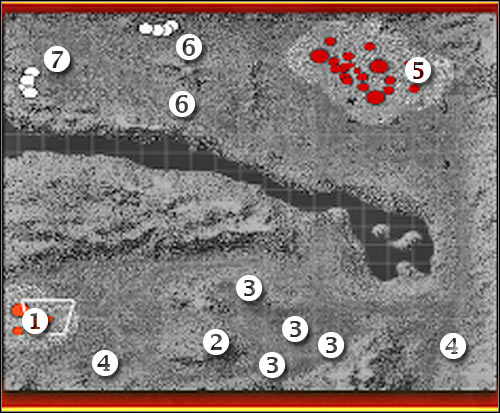
Map legend:
1 - starting area
2 - observation post (first objective)
3 - weapon crates (second objective)
4 - main supply stashes
5 - Material Uplink - Hierarchy base (third objective)
6 - main roads leading to an enemy base
7 - Novus base (fifth objective)
Your duties during the course of the mission:
Your first task will be to neutralize a large group of Novus forces in order to assure the safe passage of an allied Purifier. Once this is done, you will have to escort the Purifier to a Hierarchy base. The final phase of the mission will require you to destroy a nearby Novus base.
Detailed mission walkthrough:
First objective: Post a scout on the ridge
This isn't going to be a difficult mission, however you will have to perform several unusual actions in order to succeed. You'll start the game near the western edge of the map (1 on the map). I guess I should calm you down a little by saying that you won't have to race against the clock and you won't have to focus your attention only on securing a safe passage for the Purifier. You start the game in a safe area, so you won't encounter any hostile units right away. Familiarize yourself with your troops and divide them into several groups. As you've noticed, you will be able to use a Reaper Drone during the course of this mission. Protect it at all costs, because you won't be allowed to replace it and you'll need all the resources you can get. Like I've already said, you won't have to worry about the Purifier, because it'll be attacked only a few times and it has a great armor. Send Orlok to the south-east. He will have to deal with several Ohm Robots. Once they're gone, order your Grunt units to show up here. Take control over all three hydraulic pumps (screen). Obviously you will have to use the Capture ability. Doing this will provide you with a small but steady income.
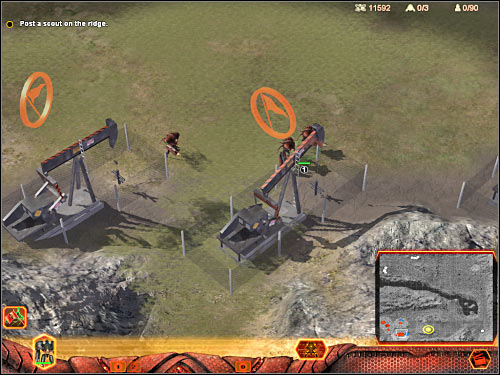
Now you should consider sending your main character to the north and to the north-east. Orlok will come across several other hostiles, however he will also find other interesting objects. Your Reaper Drone will be able to transform them to resources. Order your troops to move to the east and make sure that your Reaper Drone is collecting resources safely. You won't find a lot of them, but you'll come across a larger stash in a few minutes. Sooner or later you'll have to start thinking about fulfilling this first mission objective. Send over a single Lost One unit to the ridge (screen). The rest of your army should be stationed somewhere to the north. Getting to the ridge will allow you to uncover an enemy base. Once this is done, you may leave this hill, however I would recommend leaving one unit at the designated area, so you'll be able to observe enemy movements. You should also ask Orlok to come here, because there are a few Ohm Robots to the south. Neutralize them as soon as possible.
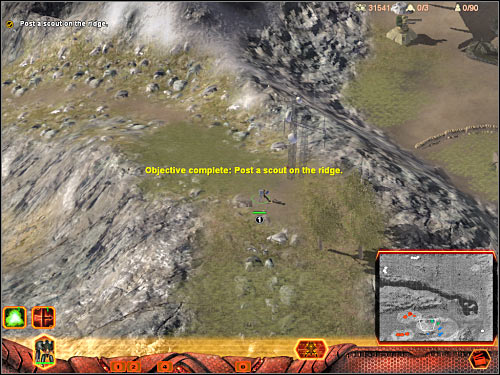
Second objective: Destroy the Novus weapon crates
It might seem that neutralizing all enemy forces would be next to impossible. Thankfully, you will be allowed to choose a different approach method. Listen closely to what your superiors have to say. Choose a single Lost One unit and get it closer to the ridge. Now you must order this unit to go south. After that, turn to south-east and finally start moving eastwards. You will have to get closer to the first designated crate. Wait for your unit to be attacked. Once this has occured, activate the Phase Self ability. This will allow you to make it immune to enemy fire and invisible to Novus units for 25 seconds. You will have to be quick if you want to reach the goal area before the meter runs out. Keep heading towards the first crate (screen).
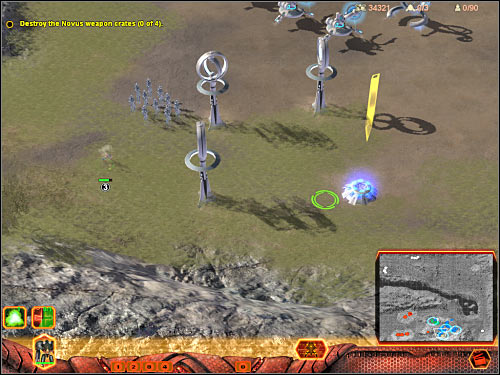
Leave the Phase Self mode activated. Don't turn it off. Instead, choose a second ability from the lower bar. It's going to be a plasma bomb. Once this is done, click on the ground, somewhere near the crate. You can't click directly on the crate, because nothing will happen. Don't worry that placing the bomb has exposed your unit, because it will be a sacrifice. You're going to be rewarded with a HUGE explosion (screen). As a result, all nearby turrets and units are going to be destroyed. Sadly, you can't rely on the plasma bombs in other missions, because they aren't that powerful. This explosion has occured only because you've triggered a chain reaction. Now you will have to choose a new Lost One unit. Try destroying a second crate using the same tactics. I would recommend that you choose the crate that's located to the north-west. I wouldn't recommend approaching it from the north. Instead, get closer to it from the south side. Otherwise you wouldn't have enough time to place the bomb. Wait for the second explosion.
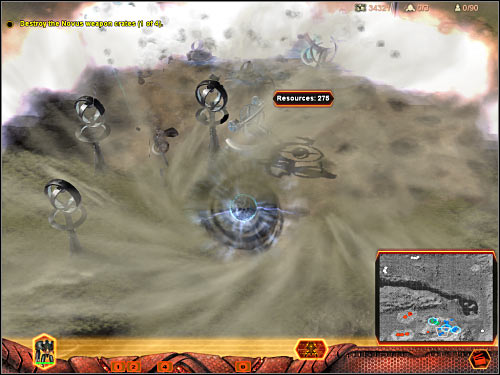
You've only got two more crates to blow up. Just as before, you should start off by visiting the ridge. After that, your units have to go south and east. Make sure that you've used both abilities in order to ensure that everything goes according to the plan. Once you've destroyed all four crates, allow your main character to approach this area. He must take care of the remaining enemy forces. Now you may allow your Reaper Drone to collect more resources, especially from the wreckages left behind by destroyed enemy tanks and vehicles.
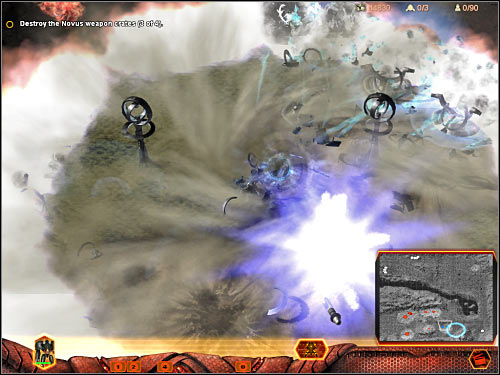
Third objective: Escort the Purifier to the Material Uplink
Make sure that all Lost One units are currently stationed somewhere near the Purifier. It's very important, because your Walker is going to be attacked by a small group of enemy air units. You will have to take them out as soon as possible. Thankfully, these attacks won't be repeated in the future. You'll also be given reinforcements. New units will arrive from the northern base. You can't control the Hierarchy units stationed there, however it's not a problem. Wait for the flying saucers to show up here. Take your time to familiarize yourself with their ability. Activating the Repair Mode allows them to repair nearby units. Choose this mode and wait for the Purifier to regain full strength. You should also remember that your saucers can't attack enemy forces while being in Repair Mode.
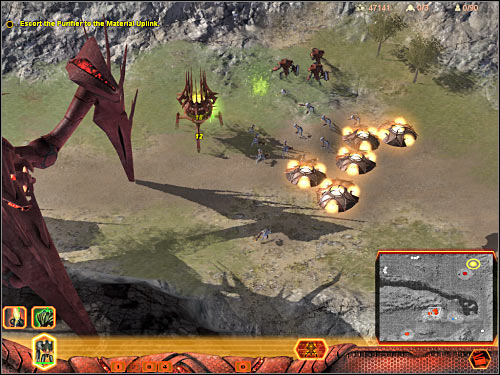
Now you will have to start moving south-east. Your main hero will encounter several enemy tanks along the way. It would be a good idea to allow your flying saucers to take part in this battle, because enemy units can't defend themselves against air attacks. You will have to secure the surrounding area. You'll come across A LOT of resources here. Make sure that your Reaper Drone starts collecting those (screen). You will also come across a new set of hydraulic pumps. You should capture them for obvious reasons. You can wait for the Reaper Drone to collect more resources or you can proceed to the north right away. I wouldn't recommend waiting, because you won't need a lot of credits to win this mission. Ignore the fights which are taking place near your base. Select your Walker (The Purifier) and order it to start moving towards the Material Uplink building (5 on the map). Other units should also begin moving towards an allied base. Make sure that they're always stationed somewhere near the Purifier. As for the Reaper Drone, leave it near the resource stockpile, because it won't be attacked by anyone.
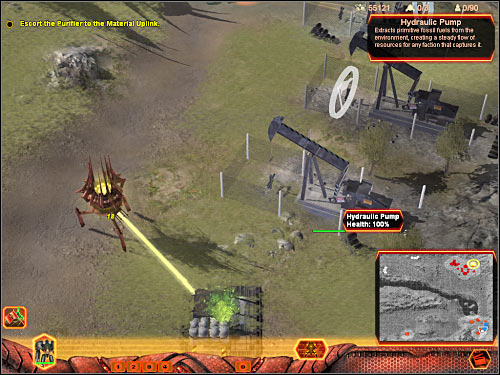
Fourth objective: Defend Nufai and the Purifier while Nufai activates the Material Uplink
Fifth objective: Destroy the Novus base
These new objectives won't appear on your list unless the Purifier is close enough to the Hierarchy base and the Material Uplink building. Make sure that your Walker has stopped in the upper right corner of the map, because it'll be safe there. Enemy units will attack only the western side of your base, so that's where you'll have to move your troops. The good news is that you'll receive control over two other Walkers. The bad news is that you won't be able to modify their hardpoints. You can only move the Walkers on the map. Start off by summoning some Grunt units. You should also consider building more flying saucers. Leave the first group of saucers near the western turrets (screen), so they'll be able to repair them. Wait for your main army to reach the Hierarchy base before you decide to move on.
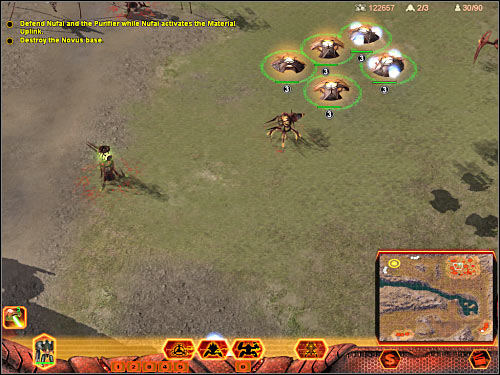
You will be allowed to move to the Novus base without any major preparations or delays. You will only have to make sure that your newly built flying saucers have repaired both Walkers. The saucers can patch up even serious damage as long as you give them some time. It's crucial that your Walkers don't have any unprotected hardpoints. Send your mechs to the west. Your main character and his army should go there as well. I would also recommend taking a second group of flying saucers, so they'll be able to heal your units once the main battle has started. Start moving south-west. As a result, you should choose the lower road loading to an enemy base (6 on the map). Doing this will allow you to avoid some of the enemy troops which are heading towards your main encampment. The base can defend itself, especially if the other group of saucers is repairing your turrets. Turn on the repair mode for your "Walker saucers" before you decide to get closer to Novus base.

You'll be moving west, however you should stop your Walkers once you're close enough to an enemy base (6 on the map). The entrance to the base is being guarded by a few powerful turrets (Redirection Turret). They are capable of bouncing back your projectiles, so you can't attack them with stronger units. Instead, allow your main army to eliminate the turrets (screen). You should also divide your troops into several smaller groups, so they'll be more scattered throughout the area. Also, don't forget to build more Grunt units in order to replace the killed ones. You will have to destroy all Redirection Turrets before moving on to your final destination.
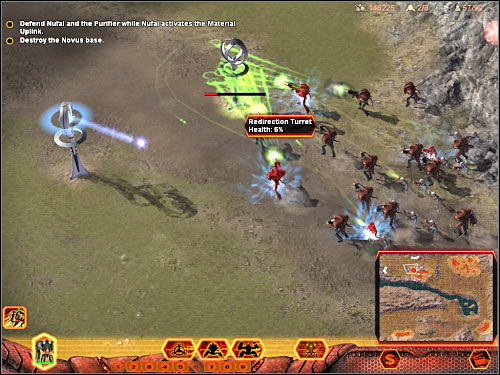
The final phase of this mission is going to be relatively simple. Start moving your army towards the western base. You will have to eliminate a lot of tanks along the way, but soon you'll switch your attention to enemy buildings. Remember to destroy a Flow Generator in the first place. This will allow you to cripple enemy defences. Once this is done, focus on the main buildings and factories. You will have to destroy all Novus structures in order to succeed. Get ready for the next assignment.

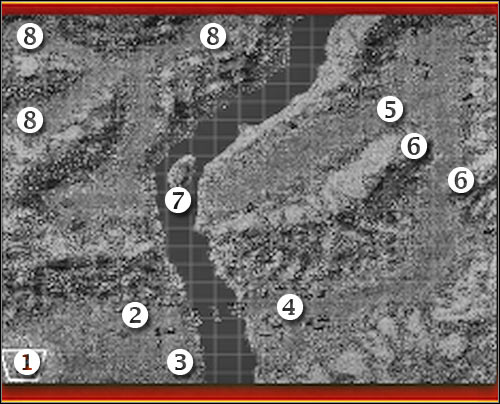
Map legend:
1 - starting area
2 - first village (second objective)
3 - Masari forces and a force generator (objectives 1 & 3)
4 - second village
5 - landing site (fifth objective)
6 - Masari turrets (sixth objective)
7 - second bridge
8 - Masari campsites (you'll be teleported there)
Your duties during the course of the mission:
The first part of this mission will require you to reach a landing site and secure it. Once this is done, you will have to proceed towards a Masari campsite in order to capture one of its leaders.
Detailed mission walkthrough:
First objective: Destroy the nearby Masari resistance
Second objective: Use the Defilers to enslave the nearby primitives
I would recommend that you wait for the second objective to appear on your screen. You should also listen to what your leader has to say. Don't worry that you only have two Defiler units at your disposal. You'll still be able to finish this mission, because we'll use one of the most interesting abilities of the Defiler units. Start moving towards a nearby village which is located to the north of the Masari forces. You will have to allow your Defilers to enter the village. Stop them somewhere in the middle and choose the Bleed Mode from the lower bar. Doing this will allow you to create a cloud of poisonous radiation. You'll also start turning civilians into obedient zombie creatures (Slaves). This won't happen right away, but you only have to wait for a few seconds and you should notice that some of the civilians have already been transformed. Acquire a bigger army, however you can't wait for too long, because your Slaves will start losing health.

Once you're ready, select all available Slave units by double-clicking on one of the monsters. After that, send them south. Obviously you will have to order your army to attack Masari forces. You shouldn't have any problems performing this action and it's not going to take too long to eliminate enemy troops. Leave the Defiler units in the village in order to turn everyone into a zombie.
Third objective: Destroy the barricade force generator
This is going to be a very simple objective. The generator can be found near the killed Masari units. Your slaves should destroy it, however the Defilers have probably cleared out the village by now, so they may also proceed to the south. Destroying the generator will allow you to activate a bridge which leads to the eastern sections of the map.
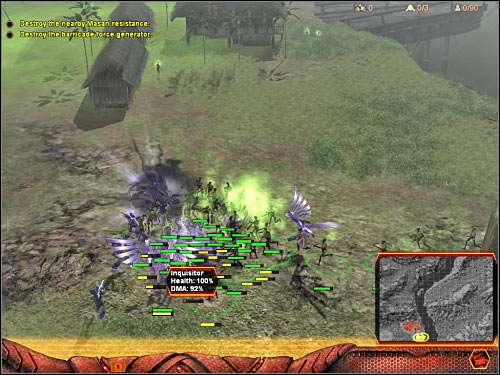
Fourth objective: Find the Masari leader
You won't receive any specific orders at the moment, however it's not a problem. Select your Slave units once again and order them to go east. Your zombies will have to take care of a Masari turret, called a Guardian (screen). Now you may consider sending them north in order to disable the second turret. You'll probably lose your units somewhere around here. Don't worry about it, because there's a second village in the area. All you have to do is to allow your Defiler units to get there. You've already destroyed the turrets, so they won't get attacked. Activate the Bleed Mode and start turning new civilians into zombies.
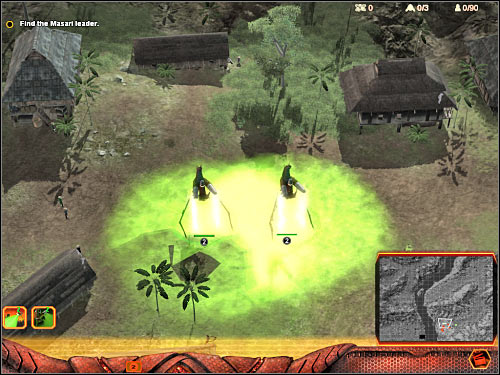
I guess it should be fairly obvious that you must gather a new army. Doing this will allow you to disable the third Guardian turret which can be found to the east. Once this is done, send your Slave units to the north-east. Your allies will come across several Masari units along the way. It's going to be fairly easy to get rid of enemy troops, especially if you decide to choose Defiler units for this battle (screen). You should receive an information that you'll be rewarded with reinforcements. Order your Defilers to stay put. As for the Slaves, send them over to the landing site area, because they'll die eventually and you'll at least kill a few other Masari units while they're still alive. Don't worry if you lose your entire army. Go back to the Defiler units and wait for the reinforcements to arrive.
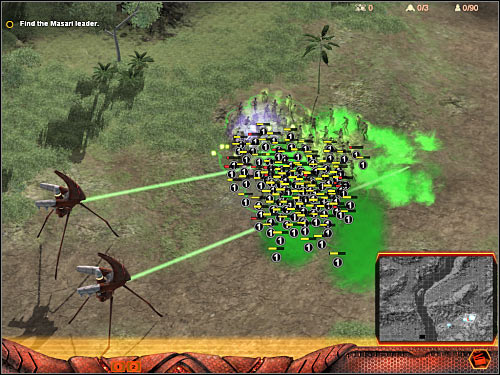
Fifth objective: Secure the landing site for Commander Orlok
Sixth objective: Use your Brutes to destroy the Masari turrets
If you have sent your Slaves over to the landing site, you should receive both of these tasks at the same time. Start moving towards your new goal area. You'll soon come across new Masari turrets. Leave your army behind and choose only Brute units. You've been able to deal with these creatures before, but this is the first time you're actually able to issue orders to them. As you've noticed, these units can use a Leap ability. Activate it and click on one of the areas with the Masari turrets. You will have to wait for the Brute units to land near the turrets. Once this is done, order them to attack Guardian structures. You will have to secure two locations in order to fulfill this task. You should also notice that you can use a Charge ability. Additionally, Brute units can heal over time. Allow your main army to get closer to the landing site. Deal with the remaining Masari units. You have to kill them all in order for the allied plane to arrive. Wait for Orlok to join your squad. You'll also be rewarded with several flying saucers. Use their most precious ability to repair Defiler units.
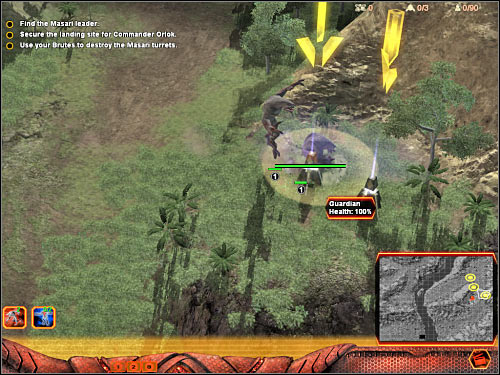
You won't receive any additional orders for the time being, however your previous objective hasn't changed. You still have to find and capture one of the leaders of the Masari organization. Start off by moving south-west. I guess I should remind you to place your main hero in front of the group. He can be accompanied by Defiler and Brute units. It's also very important to use flying saucers to heal your units. You will have to deal with two groups of Masari units. I wouldn't recommend moving in a lot of hurry, because you don't want to lose any of your troops. You'll need them all for the final battle of the mission. You should also know that the second group will be much stronger. Eliminate the Inquisitor unit before taking care of the rest. Eventually you'll come across a disabled bridge (7 on the map). Wait for the game to display additional hints. You won't receive a proper task, so pay attention.
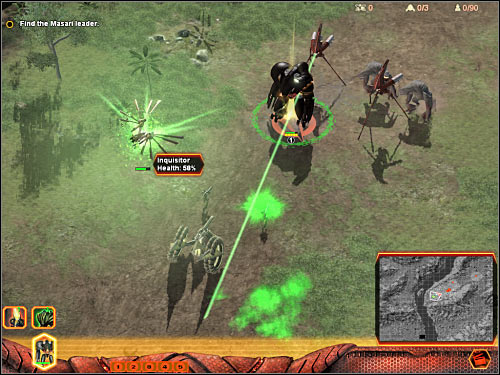
You will have to repeat one of the previous actions. Start off by selecting all Brute units, including the ones you've been given a short while ago. You will have to force these units to jump over to a small island. Look at the screen if you're having some difficulties finding it. Once this is done, wait for the Leap ability to regenerate itself for all available units. After that, perform a second set of jumps. This time you will have to get to the western section of the map. Order your Brute units to go south. Destroy the generator which is marked as a Hardpoint. This will result in activating the second bridge. Wait for your main army to cross it, however BEFORE you decide to move on any further, make sure that your flying saucers have stayed somewhere behind. You can't use them here, because there are some anti-aircraft turrets in the area. You will have to take them out in the first place.
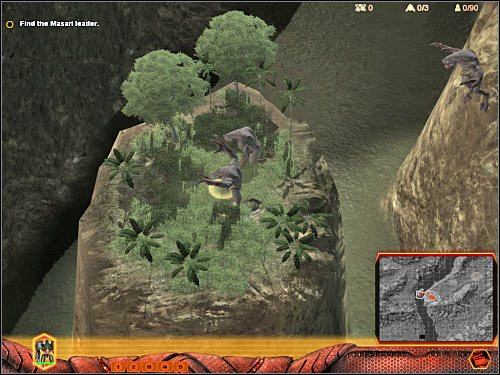
I would recommend moving to the west before going to the final area. You'll find a small campsite there. Obviously it's being guarded by Masari forces and it'll be up to you to smash them up to pieces. It would be a good idea to choose Orlok as well as Brute creatures for this battle, because those are the only units capable of regenerating themselves. I wouldn't recommend using Defilers, because you can't afford losing any of them. Start off by neutralizing some of the nearby Guardian turrets. You should also take out a Sky Guardian turret (screen) as soon as possible. Doing this will allow your flying saucers to arrive here. Otherwise you would have to prey that your troops can withstand the injuries. Once you've dealt with all units, destroy the enemy structures and go back to the bridge. Gather everyone around your position and heal your units. Once again, you will have to leave flying saucers behind. Start moving north.
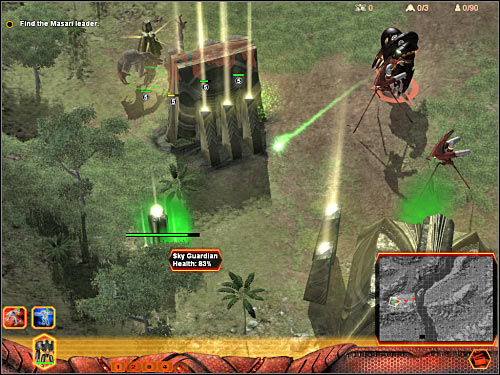
You will probably notice that there are Sky Guardian turrets in this area. You could try destroying some of them, however I think that it would only be a waste of your time, because there's more of them and soon you'll have to take part in something that looks like a typical boss battle. Prince Zessus will appear on the map and he'll try to approach Orlok. Doing this will allow him to teleport your character to the first campsite (8 on the map). You can't prevent this from happening, however you can prepare yourself for his attack. Form only one group and start planning your actions before he shows up. Order your troops to go to the western camp. As a result, even if Zessus manages to teleport Orlok to the camp, the rest of your army will still be heading that way, so you'll only lose a few seconds waiting for them to show up.
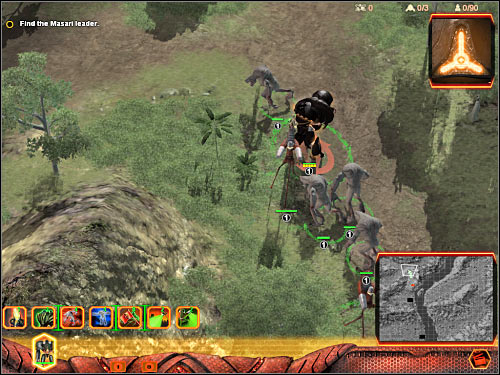
Now you will have to start destroying some of the nearby Guardian turrets. This is going to be extremely important. You will have to prevent Orlok from losing too many health points. Your standard army is equally important here, because you're going to need a lot of units in order to succeed. Once you've destroyed all Guardian turrets, don't wait for Zessus to arrive. Instead, move your army over to the northern camp. You will have to perform this action before Zessus is able to teleport Orlok there.
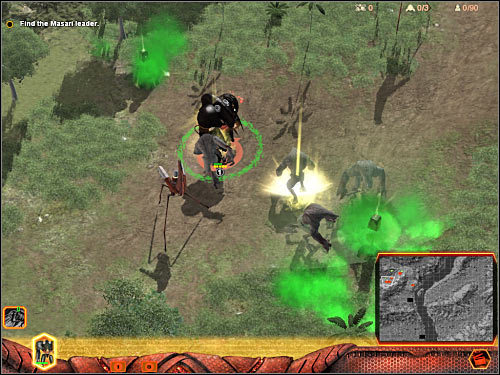
I urge you to observe Orlok's health bar. Keeping him in good shape is very important here. He may take part in some of the upcoming fights, however when he's lost about 40-50% of his health, you should consider switching him to Endure Mode. This will allow him to increase the power of his armor and he'll start to regenerate himself. You can't do this too early, because your units can't handle all enemy structures and units on their own. The next phase of this battle will require you to move your troops to the eastern camp. You'll also be teleported there in the meantime. Destroy the final set of Guardian turrets.
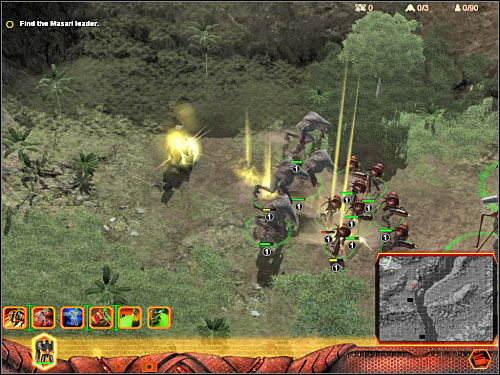
The final phase of this battle is going to be even more difficult, because once you've exterminated all enemy forces, you will have to take on Prince Zessus. Divide your army into two groups. I would recommend giving separate orders to Orlok. As for the second group, it should be your remaining army. Your main objective here will be to prevent Zessus from getting too close to Orlok. Otherwise he would have used his most powerful attack and he would probably kill your character (or at least seriously injure him). If you're lucky, you should be able to stop him with your main army and he'll be too focused on his objective to attack your troops. Depleting his health bar will allow you to win this mission.
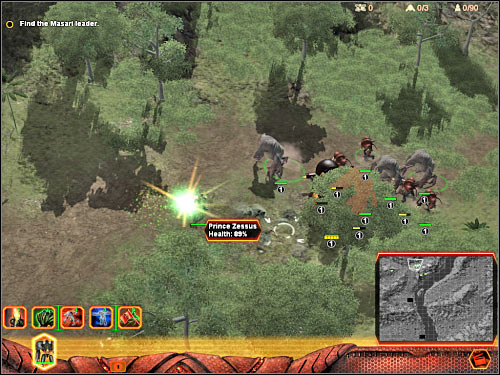
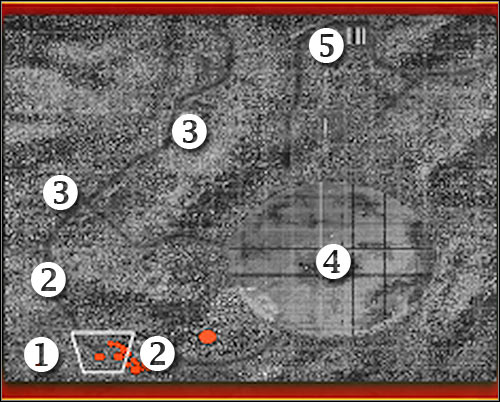
Map legend:
1 - starting area
2 - main road leading to an allied base
3 - resources
4 - transmitter (second objective)
5 - enemy base
Your duties during the course of the mission:
Your first objective will be to provide your base with the main building. You'll also need to summon certain types of units. After that, you will have to build a large army in order to escort Orlok to the transmitter. The final phase of the mission will require you to take out his biggest adversary.
Detailed mission walkthrough:
First objective: Build an Arrival Site
This is going to be the final mission of the Hierarchy campaign. Don't worry, because it won't be as nearly as difficult as the last mission of the Novus campaign. You shouldn't have any major problems creating the main structure, summoning the units and collecting resources, as long as you plan everything correctly and as long as you protect your most precious units. You'll start the mission without any buildings or Walkers, however this isn't a serious problem. I would recommend acting quickly by moving back all allied units. At the moment they're running to the east, however they would die, so you will have to order them to retreat. There's also a single Walker to the east, but it's going to get destroyed and you can't prevent that from happening. Ignore its destruction, especially since you'll build your own Walkers very soon. Make sure that your army (including Orlok) is stationed somewhere near the lower left corner of the map. That's where you'll have to set up your base. Select a Glyph Carver unit and build the Arrival Site building. Place this object as far away from the road as possible (screen). Now you will only have to wait for the Glyph Carver to finish summoning it.
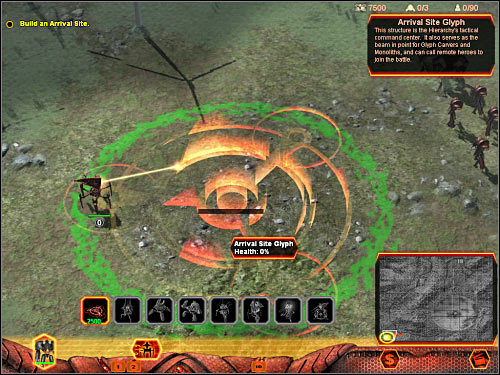
Second objective: Escort Orlok to the transmitter and activate it
Ignore this objective, because for the next 15-25 minutes you'll be focused only on summoning new units and acquiring resources. Your first step will be to summon the basic unit of the Hierarchy organization. Obviously this is going to be a Reaper Drone. Summon at least three of those. You should also click on the Arrival Site building in order to create a second Glyph Carver. This will allow you to speed up some of the summoning actions. Your Reaper Drones will focus their attention on some of the nearby structures, so you won't have to grant them with any kind of protection right away. I would recommend summoning a Detection Drone and placing it somewhere in the back. You can also use a monolith unit and send it to the north. This would allow you to find new resources (3 on the map).
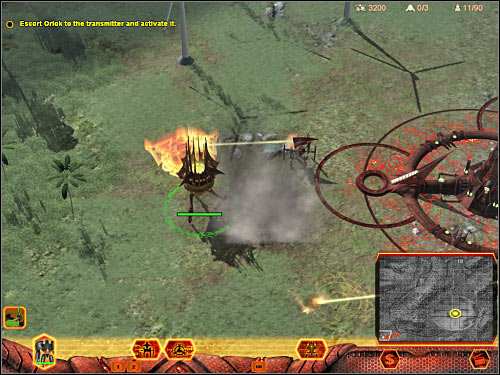
You should notice that a Masari ship has appeared on the map. Don't worry, because you won't get attacked. Prince Zessus will try helping you from now on. You won't be allowed to control him or his troops, however he should automatically follow Orlok wherever he goes, so it won't be a problem. He's quite powerful and his units are also very helpful, so his presence will make this mission a lot easier. As for your structures, I would recommend summoning at least two Spitter Turrets, so you won't have to worry about the safety of your main building. You could also focus on building a stronger army, instead of purchasing turrets. The choice is yours, however it's extremely important that you summon the first Walker as soon as possible. I would recommend choosing a Habitat Walker from the list. Place the glyph somewhere to the west of the base, however don't move it too close to the central area of the map, because you can't go there right now. You may also summon a second Walker if you have enough resources. This time you should choose an Assembly Walker. Place the second glyph somewhere to the north of your base.
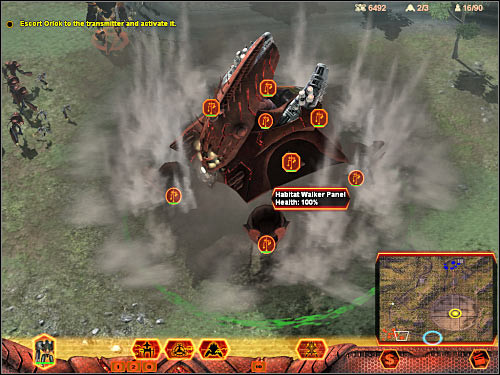
You will probably have to defend yourself against a few attacks in just a few minutes. An enemy base can be found to the north of your current location, so obviously you will have to guard the northern passageway. You will also have to send your Reaper Drones to the north, because there are a lot of resources out there (screen). I would recommend sending Orlok there as well, because he'll be able to protect the drones, especially with prince Zessus at his side. You should be able to continue your expansion without any other interruptions, because Orlok and Zessus will guard the road leading directly to your base. Also, you shouldn't be attacked by any air units.
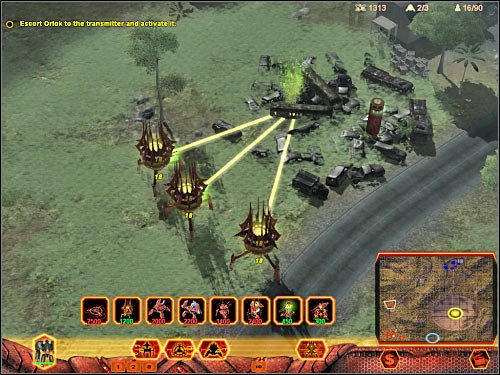
Now you should start equipping your Walkers with new modules. You'll be allowed to choose between a larger number of components, however you won't have to spend a lot of time trying to decide what's best for your current situation. As for the Habitat Walker, you should really consider buying one of the new pods in order to be able to summon much stronger Brute units. You won't have much use of the Lost One pods, not unless you plan on using them to repel air attacks. As for the Assembly Walker, it would be a good idea to buy a component which will allow you to build Defiler units. You'll need them, especially for the final battle of the mission. I would also recommend buying a lot of armor plates and plasma turrets. Acquire the necessary funds to summon the third Walker. You can choose to have a second mech of the same type, however acquiring a Science Walker will make this mission more interesting. Don't forget to buy Cascade Reactor hardpoints for your Science Walker. Doing this will allow you to unlock the most powerful attack of this mech unit. It's going to be a large wave which I'm sure you still remember from the final mission of the Novus campaign. Sadly, you will have to buy all three reactors. Having one or two of them isn't good enough.
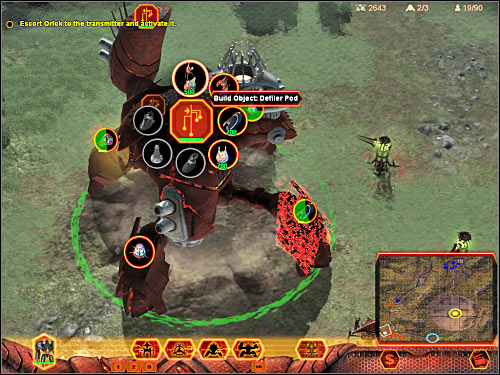
I'd strongly recommend that you start constructing new units right away. Having Brute units should be your top priority, however you can also consider buying 10 or more Defilers. Make sure that a lot of turrets have been placed around your main base. I would also recommend summoning a few flying saucers. Switch them to a passive mode in order to allow them to repair some of the nearby units. Your final task here will be to summon at least 4-5 Gravitic turrets. This will prevent enemy flying saucers from destroying your base or attacking your Walkers. Place these turrets to the north and to the north-east. Don't worry if they're far away from your main forces. You'll need them to destroy enemy saucers before they get too close to your army (screen). Don't worry about your main character Orlok, because he'll be protected by Zessus. You should also notice that new allied forces have arrived on the map, including soldiers equipped with rocket launchers.
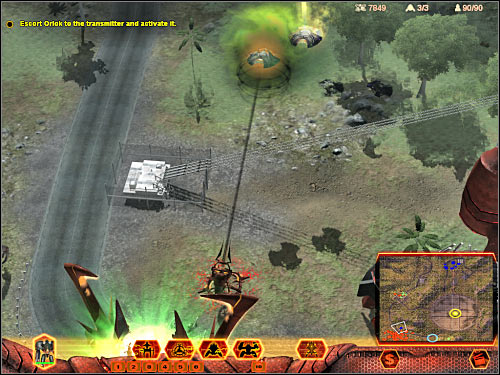
Try gathering at least 20000 credits before you decide to proceed with the final assault. You must have a lot of resources at your disposal, so you'll be able to construct new units instantly in order to replace killed creatures and drones. Make sure that you've been to all nearby resource stockpiles (3 on the map). You can also be on a look out for destroyed enemy tanks, because your Reaper Drones will able to harvest them. Once you're ready, move back your Reaper Drones to the main base. The same goes with Orlok. Wait for them to show up and start moving your ENTIRE army to the east (screen). Not only you'll have to command standard units, but also the available Walkers. Obviously Orlok should join your main army.
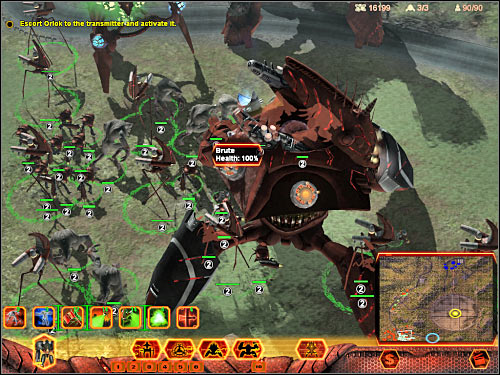
I wouldn't recommend placing any units inside the highlighted area of the map. Teleporting them would be a bad idea, because they would immediatelly end up being shot from all possible directions. Ignore the highlighted zone and keep moving east. You will have to wait for your Walker units to reach the large round structure (screen). Don't worry if it's going to take a while. Don't attack enemy positions unless everyone is ready.
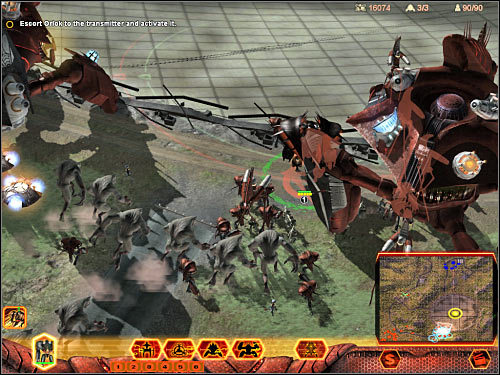
I guess you won't be surprised by the fact that your enemy will also have three Walkers at his disposal. Destroying them will be your top priority. The first enemy Walker should appear somewhere to the left of the transmitter (screen). Assign your standard units to destroy it, as well as two of your Walkers. You can also allow your main character to attack the enemy unit, however make sure that Orlok doesn't lose too much health. You should still remember how to destroy enemy Walker units. Start off by disabling their main guns. After that, destroy the armor plates and shields. Finally, you must expose the core in order to neutralize the Walker. It's very important that you destroy the first mech quickly. Once this is done, select Orlok and approach the transmitter. Doing this will allow you to receive a new mission objective.
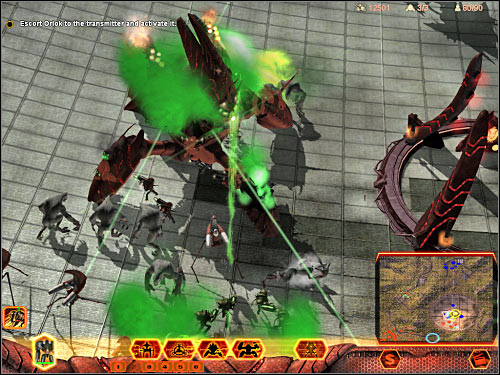
Third objective: Keep Orlok near the transmitter for two minutes
It's extremely important that Orlok doesn't end up getting shot at from all possible angles. He must also remain there for two minutes. He can't get too far away from the transmitter. Otherwise the timer would have been resetted and you would have to repeat all of these actions. I guess it should be fairly obvious to you that you must switch Orlok to Endure Mode, so he'll be able to withstand more attacks. As for your main army, you should focus on destroying the second Walker which will probably appear somewhere to the right (screen). The tactics are still the same, however it's important that your three Walkers survive. Also, don't forget to build new units, so you won't have to command a smaller army.
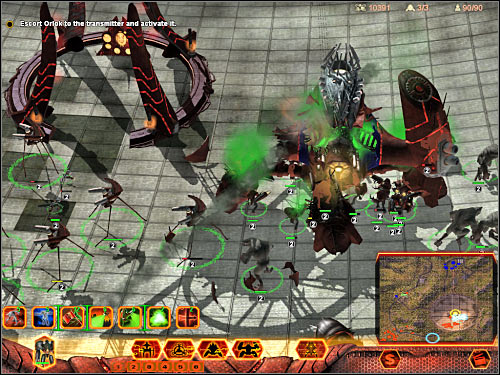
Once you've neutralized the second enemy Walker, focus mostly on destroying standard units. There should be a lot of enemy forces in the area. Observe Orlok's health bar and provide him with much needed help if he's being attacked by a larger group of Hierarchy forces. Finally, you should consider destroying the third enemy Walker. It'll probably be a Science Walker. You can use the same mech to perform this action. Activate the deadly wave ability in order to take out an enemy Walker (screen). I would recommend that you do this quickly, because an enemy Science Walker is probably capable of disorientating some of your units. As a result, you would lose control over them. Now you will have to wait for the timer to reach two minutes. Make sure that at least two of your Walkers are still active. Summon new units if you have some free time, however you are probably low on supplies right now.
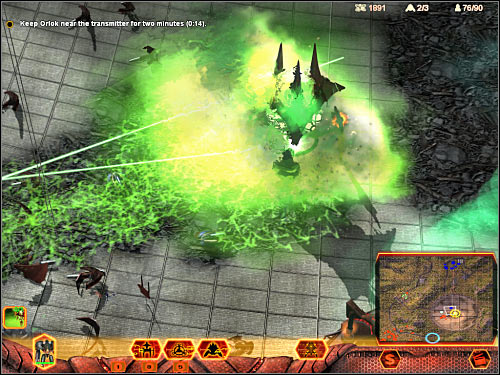
Fourth objective: Defeat Kamal Re'x
You will be rewarded with a new cut-scene, however this isn't over yet. You must still defeat Kamal Re'x. Once you've regained control over your troops, move back Orlok IMMEDIATELY. He should go somewhere to the south. It's extremely important, because otherwise he may die. You should also know that you don't need him to win this mission. I assume you've still got two Walkers, as well as several standard units. Order your troops to attack Kamal Re'x (screen) by clicking on him. You won't be able to kill him, however you will only have to injure him in order to achieve victory. Wait for a new cut-scene to be displayed on your screen. After that, you'll proceed to the third campaign of the game. This time you'll be playing with Masari units.
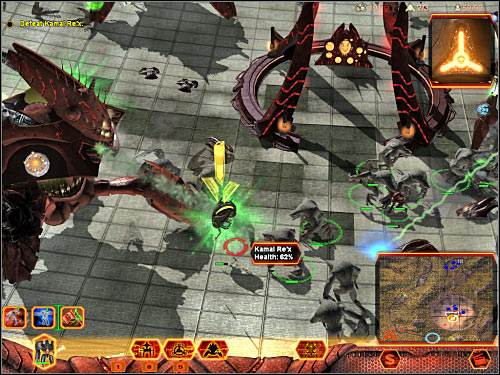
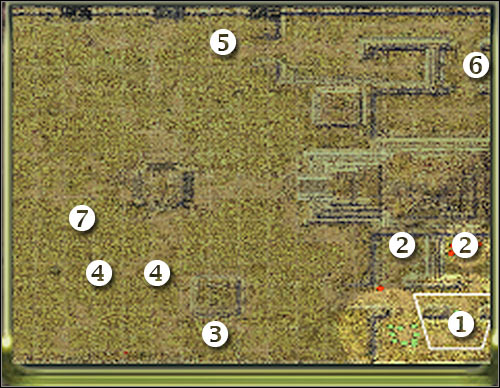
Map legend:
1 - starting area
2 - force field switches
3 - main Masari base
4 - areas being heavilly attacked by enemy troops
5 - Hierarchy Walker
6 - third switch
7 - area where a second Walker will appear
Important! I'd strongly recommend that you to go back to the main menu of the game. Open the Tutorials section in order to find out more about the Masari race. You will have to see two movies - Masari Architects and Masari Light/Dark Energy. The second movie is much more important. You will have to understand the differences between light and dark matter. It'll be crucial to your success, especially later during the course of this campaign and while playing skirmish battles.
Your duties during the course of the mission:
You will have to assist prince Zessus and his loyal followers, so they'll be able to escape from the prison compound. Once this is done, you will have to rebuild a nearby Masari base in order to build a large army. You'll have to use your newly acquired units to rescue the final group of prisoners. You will also have to take out two Hierarchy Walker units.
Detailed mission walkthrough:
First objective: Escape the Hierarchy prison compound
This is the introductionary mission for the Masari race, however finishing it is not going to be easy. You'll have to construct a lot of buildings. Assuring their safety is going to be equally important. You start the game inside the prison compound and your first objective will be to escape this facility. You're able to command only two units - prince Zessus and one of his followers. This is a simple Disciple unit. Obviously keeping Zessus alive is more important. I would recommend switching to Dark Energy by clicking on a button on the HUD. This will allow your faction to rely on the dark matter, instead of the light version. Doing this will increase your defensive capabilities, mostly because your units will receive an additional armor. This armor gets more powerful over time by consuming energy from nearby objects. Head on to the north. You will have to kill a few Grunt units. It shouldn't be too difficult.
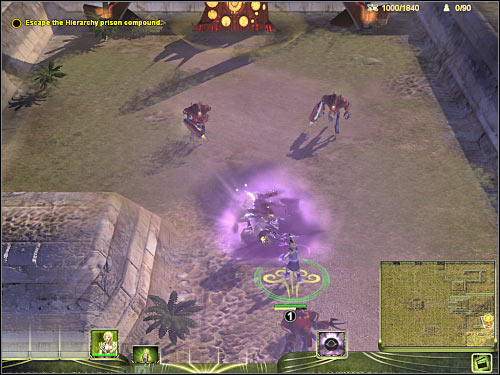
Once you've successfully killed all Grunt units, get closer to something that looks like a control panel. It can be found to the north (2 on the map). You won't have to press anything. The second set of force fields is going to be shut down automatically. Start moving south-west in order to assist your new allies. Try moving some of them away from the alien creatures in order to allow prince Zessus to take care of the Hierarchy forces. Similar to other heroes, he can heal himself and he won't lose too many health points here, so his life won't be in danger. Once you've taken care of a new group of enemy units, head on towards the second switch (screen; 2 on the map). Using it will allow you to turn off the main force field. Exit the prison complex by moving west. Soon you'll receive a new mission objective.
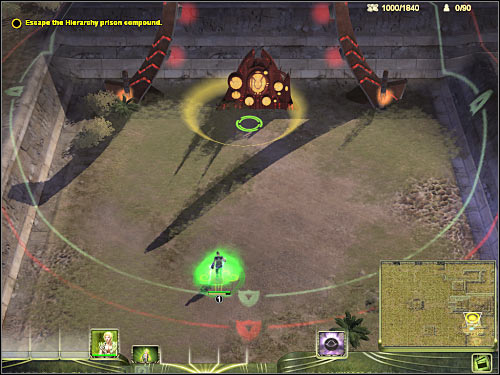
Second objective: Build a Matter Engine with your Architect
Now you'll be allowed to rebuild the unactive Masari base. Before you decide to place any new structures, try repairing some of the buildings which are already here. Start off by repairing objects which can be found near your characters, in the eastern section of the base. There are a lot of Matter Engine structures here. Obviously you will have to use specific units in order to for these tasks to be fulfilled. Find and select Architects. You were able to find out more about them from one of the tutorial movies. Use them to repair several structures. You should also repair the main building of the unactive base. It's a Citadel (3 on the map). Once this is done, purchase three additional Architects and divide them to equal groups. Now you should consider moving your units to the west, because enemy flying saucers may appear there. Your Disciple soldiers will be able to attack air units, so make sure that they've taken care of the saucers. Otherwise these Hierarchy units would be able to destroy some of the unrepaired structures. This isn't a massive failure, however you would have to spend more time building them by yourself.

You should take your time to familiarize yourself with the layout of your new base. You'll also be given a lot of hints, so make sure that you've read them all by clicking on specific icons. Your Architects should try to repair all of the remaining buildings. You've probably lost a few structures during the saucer attack, however the central area of the base is probably intact. As for your troops, place them to north-west of the Citadel building, because that's where Hierarchy forces will appear every 30-60 seconds (screen; 4 on the map). You should also begin recruiting new units. You can do this by clicking on the Skirmisher Portal building which has probably survived the initial enemy attack. You can only build Disciple units at this time, but it's not a problem. Place your new units somewhere near your existing army. Your main hero (prince Zessus) should also be standing there. You may also allow him to move forward a little, because he can't withstand a lot of injuries. Once you've repaired the base, select two Architects and build a new Matter Engine by choosing it from the lower menu. Take a closer look at its operating range. You will have to place these buildings everywhere, not close to each other. Don't worry, because you'll be allowed to build up to 20 Matter Engines, so you won't have to worry about losing one of them or not having enough resources.
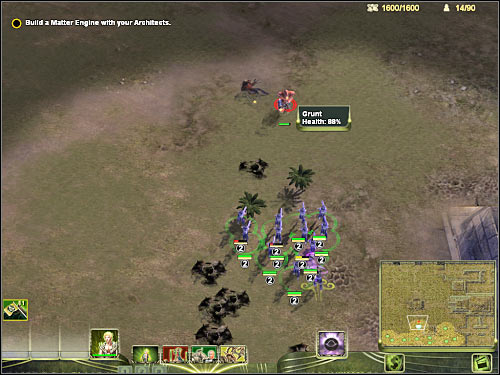
Third objective: Build a Knowledge Vault
Buying this structure is going to be important, not only now but also during the course of every other Masari mission. Knowledge Vault allows you to acquire upgrades, necessary to unlock new types of units, better turrets and other technologies. This is all needed if you want to improve the strength and the quality of your army. You may place it anywhere you want to, however I would recommend choosing the southern edge of the map, so it won't be exposed to enemy fire. You should also find a spot somewhere near the Citadel. You may also begin manufacturing Conqueror units by finding the Machina building. If you don't have it, build one. Place the Conqueror units near your Disciple troops.
Fourth objective: Upgrade the Knowledge Vault
Click on the Knowledge Vault building and choose the only available upgrade - Ancient Knowledge. Acquiring this technology will allow you to unlock a new unit for the Machina structure. You'll also be allowed to purchase upgrades for other types of buildings. Remember that you can speed up the upgrading process by allowing the Architects to use their powers.
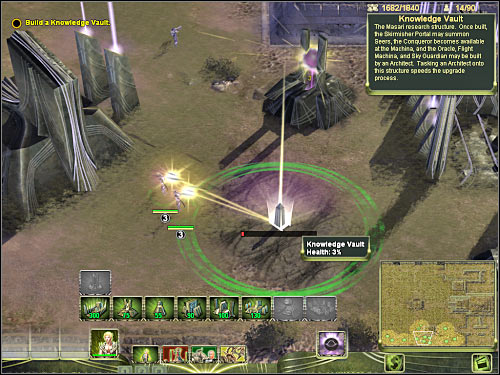
Fifth objective: Build a Sky Guardian
The Sky Guardian turret became available once you've built the Knowledge Vault structure. Purchasing these turrets is extremely important, because you'll be allowed to use them to take down enemy flying saucers. Ignore what you're being told, because having only one Sky Guardian turret isn't enough. You will have to place more of them. Place them to the north-west of the Citadel and to the west of your main army, because this area may be attacked by enemy air units. Eventually you should consider filling this entire section of the map with Guardian and Sky Guardian turrets. Make sure that they're close to each other, so more turrets will be able to attack a single target at the same time. You will probably have to build additional Matter Engine structures, but it shouldn't be a problem. As for the area to the east of the Citadel, you won't have to worry about any enemy units showing up there, however you may consider building only a few turrets just to be sure.
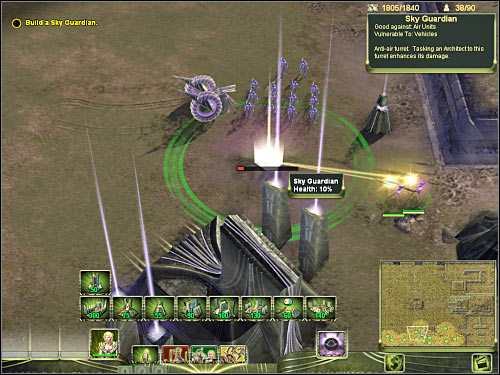
Sixth objective: Build a Flight Machina
You should take your time to perform several other actions before constructing the Flight Machina. Click on the Knowledge Vault structure and buy the second upgrade (Forbidden Knowledge). Doing this will allow you to unlock several new units, as well as better technologies. You won't have to spend a lot of resources on the second upgrade, so it won't halt your expansion. I would also recommend buying a Detection of Motion upgrade for the Oracle building. Purchasing this technology will allow you to prepare for enemy attacks. You'll be able to see where to position your units in order to prevent enemy forces from performing a surprise attack. As for the Flight Machina, place it anywhere you want to (screen) and wait for it to be built. It would be a good idea to recruit several Inquisitor units right away, however if you plan on relying on dark matter for the most of the time, it would be better to construct more Conqueror tanks.
Seventh objective: Upgrade the Matter Engines
Click on one of the available Matter Engine buildings and purchase this upgrade. It's called Matter Sifter. Doing this will allow the building to collect and hold more energy (360 units instead of 240). You should also know that the upgrade has been acquired only for this specific building, so you will have to spend more credits if you plan on upgrading the rest as well.
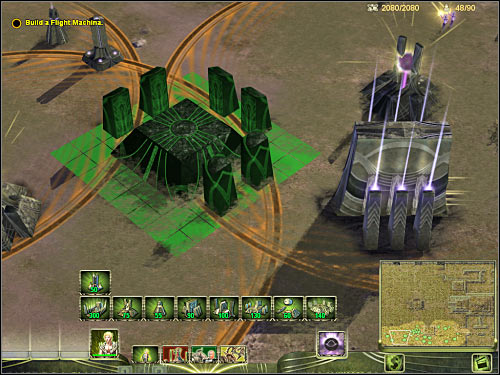
Eighth objective: Rescue the captives in the northern Hierarchy prison compound
You will finally be allowed to focus on rescuing your allies. As you've probably noticed by now, you won't have to be in a lot of hurry, because the prisoners won't be executed. This means you'll be allowed to plan your attack carefully. Start off by expanding your base and by building new units. Try reaching the maximum population cap. As for your army, you should mostly consider buying Conqueror tanks, however it would be a good idea to recruit a few Disciple units as well. The Inquisitior units are also quite good, however they won't be of much use if you plan on staying in the dark matter mode. If your plans include switching to the light energy, you may consider purchasing a few of these units. I would recommend sending your entire army, because your base will be defended by the turrets. Also, don't forget to build new units instantly, so your forces aren't weakened. You can speed up the building process by using your Architect units.
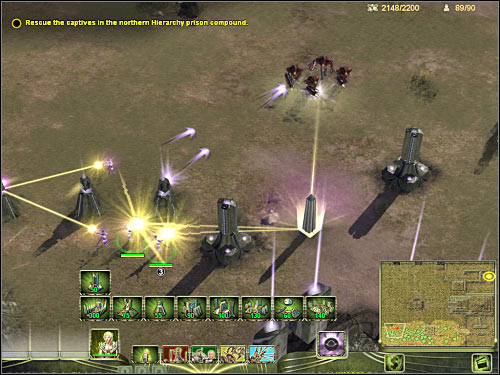
Start moving your army to the north. Obviously Zessus also must take part in this assault. You will have to turn to north-east. It might seem that theoretically you could reach your target easily. You would have to use the teleportation ability (prince Zessus). Doing this would make your return a lot more difficult. As a result, it would be a good idea to deal with all enemy units in the first place, especially since your base will be attacked only by smaller groups and your turrets are capable of protecting your main buildings against these types of attacks. You will have to make an important decision here. If you plan on using the Dark Energy mode, your units will be able to withstand more damage, however their firepower is going to be their main weakness. Choosing the Light Mode will allow you to take out enemy units from a larger distance and they'll suffer more injuries. The downside is that you're going to have to replace your units more often, because their armor will only withstand a few hits. Make sure that your Architect units are currently focused on your factories, so you won't have to wait for too long for news units to be built. Start off by destroying Hierarchy Spitter Turrets, as well as enemy troops. Watch out for Defiler units and prevent them from poisoning your army with radioactive clouds.
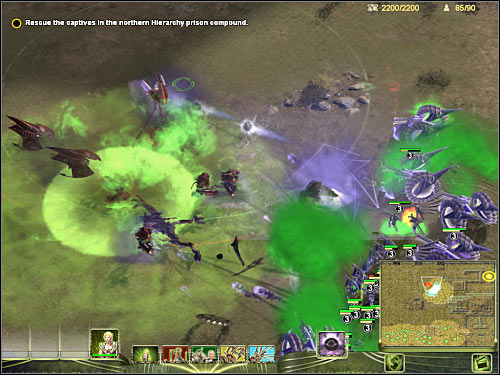
Once you've secured this southern section of the enemy encampment, move over to the north and focus all your attacks on an enemy Walker. This time you should consider switching to the Light Energy mode, especially since the Walker is well armored. I guess you should still remember how to play this out. Start off by neutralizing the plasma cannons and some of the upper arms. After that, destroy armor platings and shields. This will allow you to expose the main core of the Walker. You will also have to make sure that your units aren't stationed somewhere near the radiation clouds. Avoid them at all costs. Once you've destroyed the Walker, wait for new units to arrive. I would recommend recruiting a lot of Disciple units, because you'll need them to get to the hostages. Make sure that your base is well defended and use the architects to repair damaged Guardian/Sky Guardian turrets.
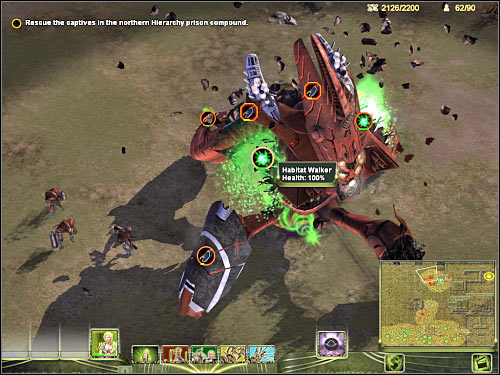
You will have to wait for the Disciple units to arrive at the northern section of the map. Build at least ten of them. You've probably noticed that you can't use vehicles to get to the hostages. Also, you can't use any air units, because there are a lot of Gravitic turrets in the area. Select your main character, as well as Disciple units. Start moving north-east. You won't have to be too careful here, because you'll encounter only a few Grunt units. Ignore the Gravitic turrets, because you won't have to go back here. You may only consider destroying one Spitter turret. Your objective here will be to reach a well-known control panel (6 on the map). Zessus will use it automatically. As a result, all prisoners are going to be freed. You may add them to your army. Ignore the standard soldiers, because you don't have any control over them. Start moving your units back to the base. I would also recommend that you order your Conqueror units to go back to the southern section of the map even before reaching the prisoners. This will allow them to avoid being attacked by Hierarchy flying saucers.

Ninth objective: Defeat the Hierarchy Assembly Walkera
This isn't going to be a difficult task. Before you decide to take on the Hierarchy Walker, you will have to take care of a few other things. As you've probably noticed by now, your base is being attacked by smaller Hierarchy units. Use your Conqueror tanks to defeat enemy forces. You've probably moved back your units to the south, so it won't be a problem. You will also have to watch out for enemy flying saucers. Avoid them, especially if you're using tanks which are unable to respond to air attacks. If you have them at your disposal, move them back to the base and the Sky Guardian turrets will take care of the flying saucers. The group which has rescued the prisoners should start moving towards the Walker. The AI controlled marines will do the same thing.
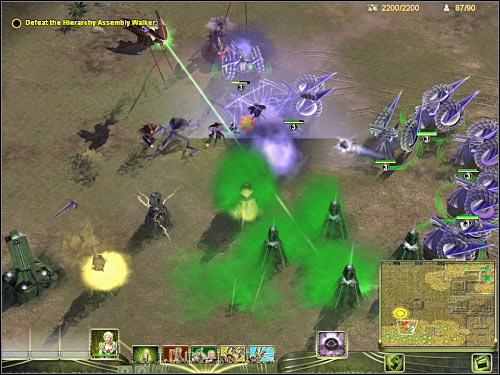
If you've done everything according to the plan, you will be allowed to attack the enemy Walker from two different directions. Your Conqueror units will attack it from south-east and the Disciple units (as well as prince Zessus) will arrive from north-east. You'll have plenty of time to destroy it before it gets too close to your main base. Build additional Conqueror units if you have to, but it shouldn't be necessary. I think it's fairly obvious that you must target certain hardpoints of the Walker. As a result, you will be able to destroy it. You'll also end this mission.
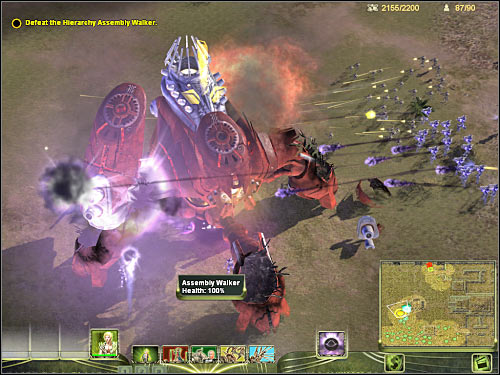
Important! Before you decide to take any actions, save your current progress and exit the game. Go back to the main menu and choose Tutorials. I'd strongly recommend that you see all three movies. Global Mode - Basic Controls will teach you how to operate on a global map and how to understand the differences between three playable factions. Global Mode - Command Structures will tell you more about building global structures and upgrading them with available components. Global Mode - Heroes & Strike Forces can teach you how to create strike forces and how to move them on a global map.
You were able to see the global map before, but this is the first time you actually have to do something in order to proceed with the campaign. Take your time to familiarize yourself with the controls. You should also take a look at visible objects and zones. Your primary objective for this campaign will be to reach Anahuac sector which can be found in North America. Don't expect to get there right away. You will have to take part in several optional missions along the way in order to take away certain territories from Hierarchy control. You start off in East Africa, near two hostile territories (Congo & Sahara). This will change once you've progressed in the campaign. You should also notice that you already have one global building at your disposal. It's the main headquarters of the Masari organization. Obviously you will be allowed to upgrade this building using various types of components. These components will change depending on the type of a global building you want to upgrade. As for HQ, I would recommend purchasing Basic Defense in order to ensure the safety of this structure. The second component is less important here. You can consider buying Repair in order to be able to heal your strike forces. The next big step is to prepare a hero and its army. Armies are called strike forces here. Obviously you will be allowed to participate in battles without using any additional units, however it's best to go in prepared. This is very important, because most of these side missions are quite difficult and it'll be much easier to defeat your opponent if you already have a small army at your disposal. Try reaching the maximum population limit for the current strike force before proceeding with the first assault. As for lord Charos (he will be your main character for the next few missions), his population limit is set to 50 points. I would recommend purchasing Conqueror and Inquisitor units. Conqueror tanks will allow you to repel ground attacks and Inquisitior units will prevent your enemy from using flying saucers in order to destroy your buildings. You'll need them at the start of each mission, because you won't be allowed to construct Sky Guardian turrets right away.
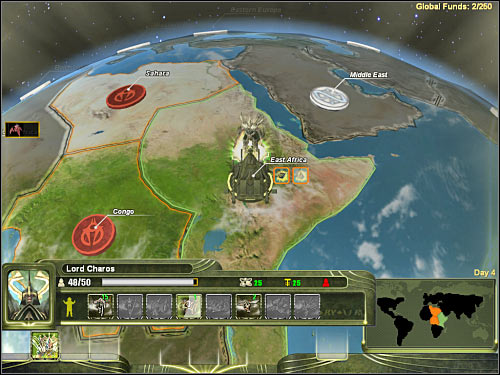
Like I've already said, your first step will be to attack one of the nearby territories. You will be allowed to choose between Congo and Sahara. It doesn't really matter which one you'll decide to attack. Don't worry that you won't receive any specific objectives once you've arrived at your destination. Your only goal will be to destroy all enemy forces in order to take full control over the sector. This will also occur during other missions. You will be allowed to choose a landing zone by sending your ship wherever you want to. You can also choose to retreat by selecting a certain option from the main menu. Obviously I wouldn't recommend doing that. If you plan your moves carefully, you won't spend more than 30 minutes on each map.
I've already said that all these secondary missions are very similar to each other, mostly because you'll always be going for the same thing and you'll have a lot of time to prepare your final assault. Here's an example of what you should do. I've picked North Africa for this presentation. You will be able to get there after you take control over Congo or Sahara.
1) Quick start
Every secondary mission begins the same way. You'll be commanding a Masari space ship. This plane contains all your units, including your main character (Lord Charos) and his strike force which you have picked earlier. I wouldn't recommend losing too much time while trying to find the best landing site. Usually you're starting the mission in a safe area and you will only have to locate a larger field to set up the base. I would recommend choosing the corners of the map, so you won't have to worry about being attacked from more than two directions (or even one - if the enemy base is near your position or if the alternative route leads nowhere). You should also consider switching your default setting, so you'll rely on Dark Matter. Your final preparation should be to choose options from the technology tree. At first you can only pick one technology, but if you buy specific global buildings, you will be allowed to purchase more technologies. As for your choice, the Dark Energy branch seems to be the most useful one, especially if you can only develop the first level. The choice is yours, however don't spend too much time trying to decide what to buy.
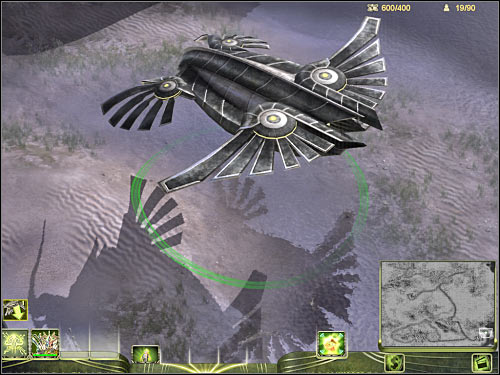
2) First set of buildings
Land and wait for your units to leave the plane. I would recommend moving your hero as well as his army to the front, so he'll be able to engage anyone who tries to get close to your buildings and construction units. Choose architects and start building a Citadel. Otherwise you wouldn't be able to expand. Once you've built a Citadel, construct several Matter Engine objects. This will allow you to start gathering much needed resources. It would also be wise to recruit two additional Architect units. You can order them from the Citadel. Divide your architects into two separate groups (two of them for each group). New architects should also focus on building as many Matter Engine structures as possible. You will have to prepare for an initial enemy assault. If you didn't spot any flying saucers or monoliths, stay with the Dark Matter. Otherwise switch back to the light version, so your Inquisitior units will be allowed to fly. Thankfully, it should be quite easy to defeat enemy forces. Just make sure that your main character has taken on most hits, because he can regenerate himself.
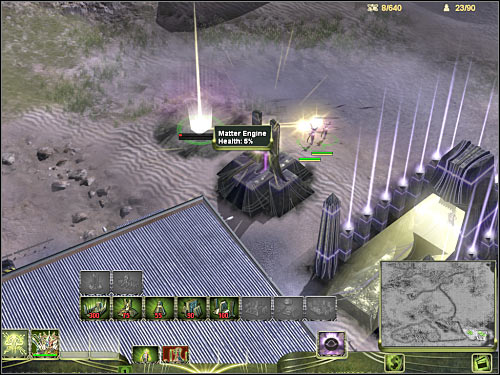
3) Skirmisher Portal, Knowledge Vault
Try building at least 6-8 Matter Engine structures before you decide to place something else. You will have to buy more Matter Engines once your base has expanded. The buildings from the first set may be built close to each other, so you won't have lose too much time trying to plan where to place them. You will have to do this while buying them in the future. If your Inquisitor are grounded, try building a Skirmisher Portal as soon as possible. Once this is done, recruit 10-15 Disciple units. It's very important, because they'll be able to attack flying saucers and monoliths. You should also consider purchasing a Knowledge Vault. Buying both upgrades (Ancient Knowledge & Forbidden Knowledge) for this building is equally important. Obviously you should place the Knowledge Vault somewhere far away from your troops, so it won't get destroyed.
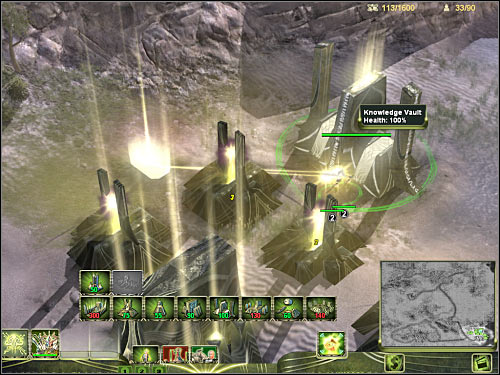
4) Turrets, Machina, Oracle
You won't have to buy a lot of Guardian turrets unless your base is being attacked from several directions. If enemy forces are coming only from one direction, you will only have to place your units correctly, so no one gets close enough to your main buildings. As for Sky Guardian turrets, you will have to purchase a few of them no matter what you plan on doing next. I'm sure that you know by now where to expect enemy attacks. Sadly, you won't be able to prevent enemy Monolith units from scanning your base. I would recommend buying a Machina structure as soon as possible. Doing this will allow you to manufacture Conqueror units (only if you've already built a Knowledge Vault). Place them near your troops (screen). I would also recommend buying an Oracle building and upgrading it at least once. Doing this will allow you to find out where to look for your enemy. This is important if you don't want to scout the entire map searching for your opponent.
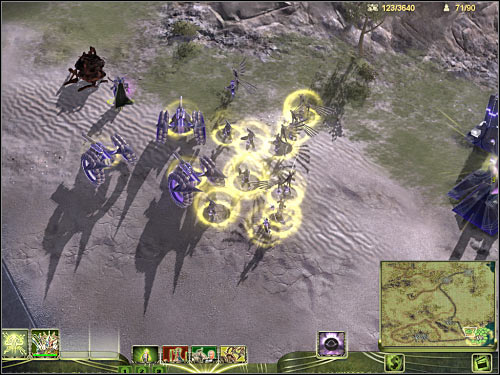
5) Matter Controller, final preparations
It's also important that you buy a Matter Controller building. Doing this will allow your superweapon to start charging itself. Make sure that you don't switch matter modes in the meantime, because it would only result in resetting the clock. You will probably receive an information that your enemy is preparing a superweapon of its own using a Material Conduit building. As you've probably suspected, finding this building will be your top priority. Focus on manufacturing new tanks in order to improve your army. You should consider acquiring a second Machina factory. I would also recommend ordering your Architect units to speed up the process by interacting with the existing factories.
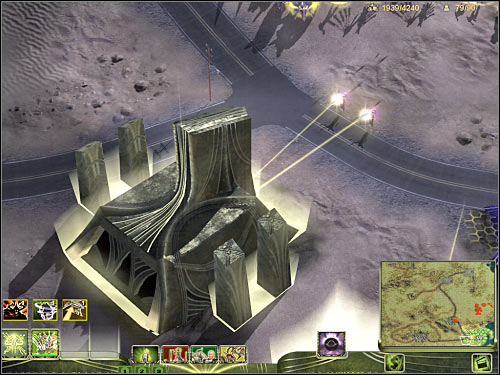
6) Neutralizing main Hierarchy buildings
Start moving towards an enemy base. If you're not sure where to find it, look at the map and go towards the big ret dots. There's a high probability that it's your target. Each Hierarchy base is being guarded by three Walkers, however you will have to destroy two enemy buildings in the first place. Destroying the Material Conduit building will prevent your enemy from using its superweapon. Neutralizing an Abduction Core building will unable him to expand. You should also destroy Reaper Drones and Glyph Carvers while you're at it. I would recommend using the superweapon a moment before this assault has occured. Target one of the buildings or a larger group of enemy units. Once this is done, switch back to the light mode in order to increase the firepower of your tanks. Doing this will allow you to destroy both buildings mach faster than you've anticipated. Watch out for your main character. Move him back if he has suffered major injuries.
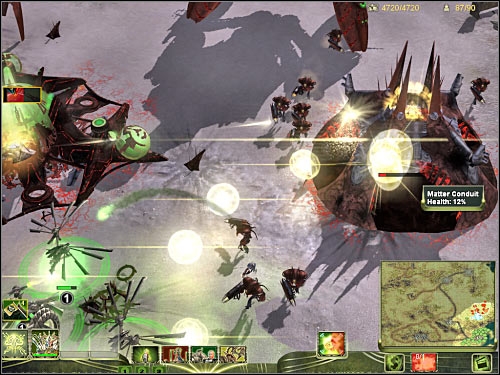
7) Destroying enemy Walker units
I suspect you may have lost your entire army during the first attack. As a result, you should consider retreating with your remaining troops. Start rebuilding your army. You can speed up this process by building a third Machina factory. If you're feeling lucky, you can consider using air units by constructing Flight Machina. Either way, you will have to try to reach the maximum population cap as soon as possible. I would recommend building mostly Conqueror units. They're very fast, so you won't have any problems returning to your enemy. There's also very efficient against enemy Walker units and their production doesn't take too long. Send your new army towards enemy Walkers. Make sure that you're in a Light Energy mode. Start aiming at the available hardpoints of each Walker. Your attacks will be very powerful, so it won't take for these components to be destroyed. You can also activate your superweapon, however in the Light Matter mode it's going to be far less powerful. You will have to hunt down and destroy all three Hierarchy mechs.
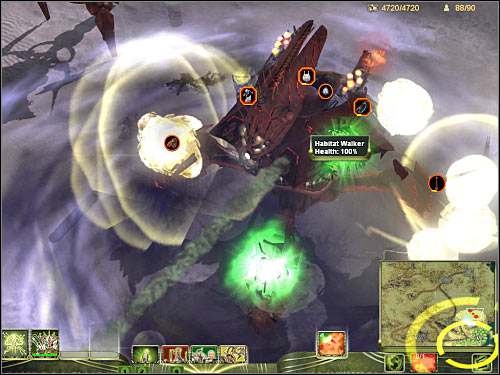
8) Securing the area
This final part of each mission is very ungrateful, because you will have to find and destroy all remaining enemy units. You shouldn't have any problems locating the remaining forces of the main Hierarchy army, as well as Reaper Drones. It's going to get more difficult with smaller units. You will have to be on a lookout for defensive turrets which may have been captured by your enemy. I would also recommend recruiting at least 10 Inquisitor units. They'll be able to scout the map quickly and they're good against flying saucers and monoliths. You should also consider rebuilding your army, because at the end of the mission you will have to make an important decision. You can choose whether to add some of the existing units to your strike force or to convert them into resources. I would recommend taking only Conqueror and Inquisitor units with you. Get rid of the rest of your troops.
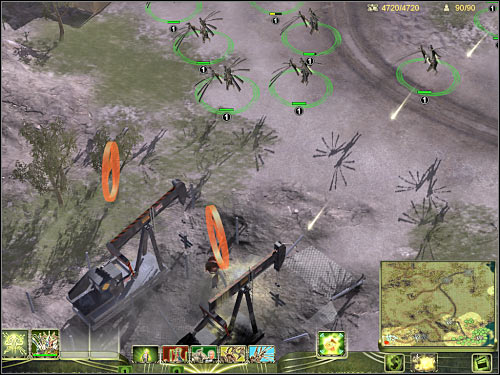
1) I've already reminded you that you've started the campaign in East Africa. That's where you'll also find your main headquarters. I would recommend buying both upgrades right away, because you won't have to worry about being attacked by your enemy. You should also remember about your main character. Buy new units in order to increase the strength of his strike force. Attack Congo or Sahara. You will be allowed to choose only between them.
2) Once you've taken control over the first hostile zone, you will have to make a very important decision. You will be allowed to proceed directly to North Africa, however if you plan on dominating all areas, attack the remaining sector. You won't receive any penalties for attacking North Africa right away, especially since this is a much easier version of the Global Mode, so you won't have to worry about the enemy attacking your positions. Before you decide to proceed with the assault, build a global structure in a recently rescued zone. I would recommend purchasing an Energy Magnet, so you'll receive more funds from now on. Also, don't forget to upgrade this building.
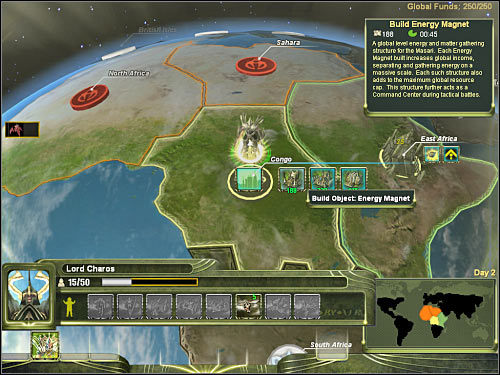
3) If you want to get to your main objective right away, capture only two sectors. Otherwise take control over the third one as well. Remember to place a global structure once you've taken control over a new area. Otherwise you wouldn't be able to control it. As for global buildings, I would recommend purchasing mostly Energy Magnets. A Key Inspiration structure shouldn't be built until you've reached South America. As for Will Processor building, buy it only if you want to use more technologies during the upcoming missions.
4) Make sure that you've built a proper strike force before proceeding to the next continent. You will have to move your main character to an unoccupied zone, called Brazilian Highlands (screen). You won't have to fight any enemies there. Take control over this sector by building a global structure.
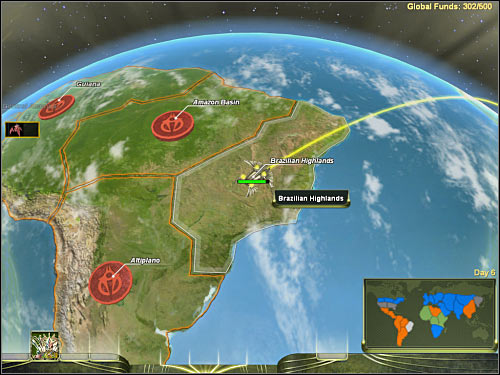
5) Just as before, you will have to make an important decision. If you want to get to Anahuac as soon as possible, start conquering zones which are located in the northern section of South America. Amazon Basin is the closest sector. Otherwise you should consider attacking Altiplano, before proceeding to the north.
6) Taking control over one of the available sectors of South America not only will allow you to increase your overall power but you'll also be rewarded with a new hero. It's going to prince Zessus. I'm sure that you still remember him from the previous missions of the game. You'll find out that before attacking Anahuac you will have to destroy enemy defences which can be found in Central America. You won't be allowed to proceed there right away. First of all, you will have to attack the northern sector. It's going to be Guiana. I would recommend sending lord Charos to deal with this problem. Don't forget to place new global buildings. You can also grant prince Zessus with a strike force, however his population limit is much smaller - 25 points.
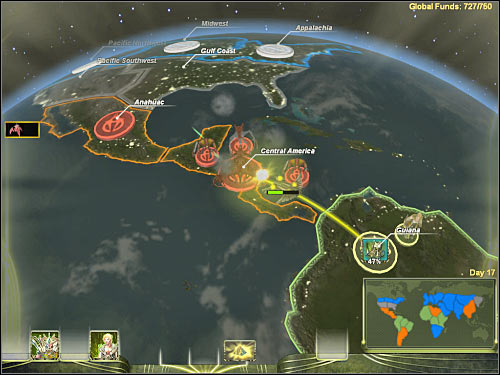
7) Once you've taken control over Guiana, you will have to purchase a global building in order to assure your full control over this sector. I would recommend buying the Key Inspiration building. Doing this will allow you to purchase more advanced units and you'll need some of them to prepare for the upcoming battle.
8) Now you'll have to make a final choice on how to proceed. Obviously you will have to attack Central America in order to be able to get closer to the location of the Purifier. By choosing prince Zessus you wouldn't be allowed to construct a base. As a result, you would have to rely only on his abilities in order to destroy enemy structures. This can be very difficult, so I would recommend choosing lord Charos instead. Make sure that his strike force is up to the challenge. You must have a lot of ground units, as well several Inquisitor troops. It's very important that your strike force will be capable of attacking air targets and that it's strong enough, because you're going to be attacked on your way to the target area (screen). As a result, you'll lose about 50% of your troops and many of them will start the new mission with a shorter energy bar. Don't worry, because you'll still be able to succeed. Check the next section of my game guide for more clues on how to win the mission in Central America.
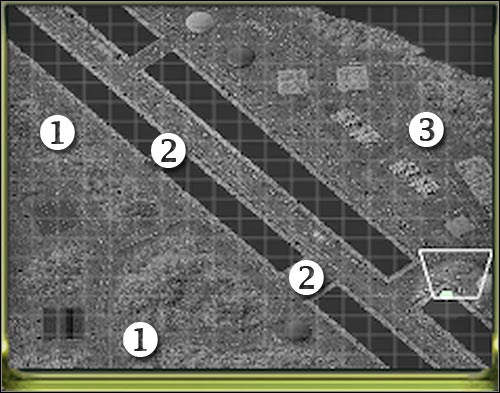
Map legend:
1 - best locations to set up a new base
2 - bridges leading to the eastern section of the map
3 - Origin Core building (main objective)
Your duties during the course of the mission:
You will have to set up a new base and prepare an army in order to be able to proceed with the assault. After that, you will have to advance towards enemy base. Your objective will be to find and destroy Origin Core building.
Detailed mission walkthrough:
Theoretically it might seem that this is a very similar mission to your previous assignments. You won't be rewarded with any specific mission objectives. I can assure you that it won't be easy to win here. You will have to defend yourself against massive enemy attacks right from the beginning of the mission. Thankfully, you won't have to neutralize all enemy units. Your primary and your only objective will be to destroy the central structure of the Hierarchy base. It's going to be an Origin Core building. Doing this will allow you to proceed with the final mission of the Masari campaign. You'll start the mission inside an allied ship. I would recommend that you take your time to explore the surroundings, because you'll be allowed to reload the mission. Take a closer look at the bridges, because you'll have to use them to get to the eastern island. They'll be your only way to reach the goal area, as long as you'll be using ground units. Enemy has set up his base near the eastern edge of the map, so you should go somewhere to the west. I wouldn't recommend trying to build your base somewhere near enemy positions, because you would have to deal with constant attacks and you may be even attacked by an enemy Walker. Take a look at my map and choose one of the recommended landing sites. The northern landing zone is much better, because there's only one bridge in that area, so it's going to be easier to fight back against enemy attacks and you won't have to divide your army into smaller groups. Try getting there as soon as possible. Unload your units and start building primary structures (Citadel & Matter Engines).
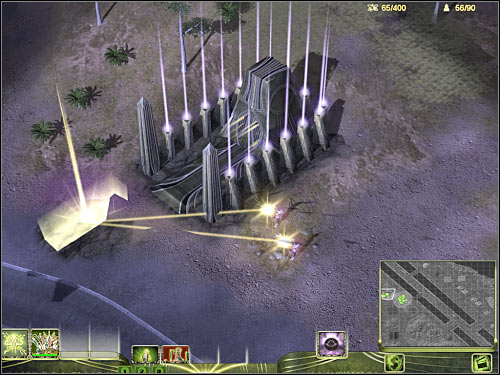
You should remember what has to be done in order to ensure a safe expansion of your base. I will only tell you about additional problems that you'll have deal with in order to win. I assume you've decided to switch to Dark Energy mode. The only exception would be if you had some Inquisitor units at your disposal. I suspect you only have Conqueror tanks, so you may as well protect them with better shields. You will also have to construct a Skirmisher Portal building (screen) in order to be able to defend the base against enemy air attacks. This has to be done almost right away, because your enemy will try to attack you flying saucers. You'll only need a few Disciple units to attack the saucers and eventually they should return to the Hierarchy base. Just make sure that you're selecting these targets for your Disciple units, because they may not be able to take out the targets on their own. Don't worry about Monolith units and don't waste your time trying to prevent them from scanning your base. You will also have to take interest in defending your buildings, because your enemy will use ground units to attack you. Focus mostly on killing Brute units, as they're capable of inflicting serious damage. You will have to prevent them from getting too close to your buildings. Also, keep shooting at Defiler units, because they'll be able to poison your units with deadly radiation.
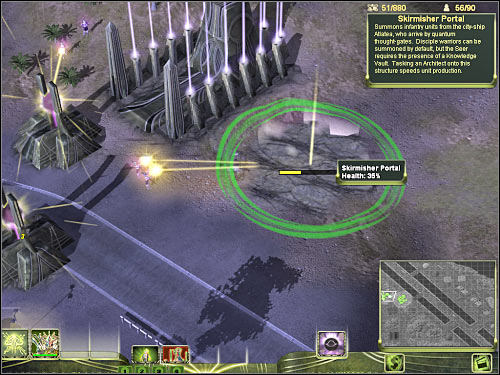
Obviously you will have to start building your army. Just as before, I would recommend buying a lot of Conqueror tanks. You should also consider constructing several Sky Guardian towers in your base. You will have to place them to the east and to the south-east of the main buildings, because that's where enemy units tend to show up. Also, don't forget to purchase Matter Controller building and start charging your superweapon. Now you've got two choices - you can either build a few turrets or you can leave 3-6 Conqueror to protect your base. As for the rest of your army, start moving it to the east. Cross the first bridge. Be careful, though. There's a military turret here and it's probably occupied by Hierarchy forces (screen). Destroy it and wait for the superweapon to charge itself before you decide to get closer to the Hierarchy base.
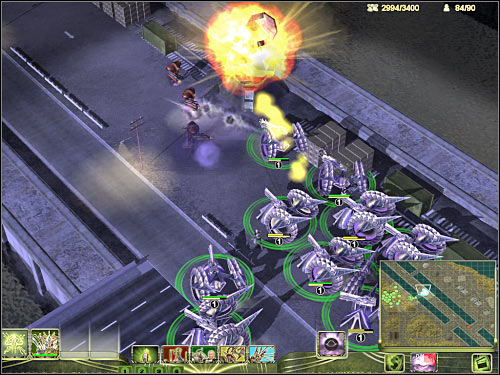
Depending on where you've decided to start the game, you will be attacking the Hierarchy base either from the north or from the south. You should be on a look out for additional enemy units along the way. Eliminate mostly Defiler units, so they won't be able to poison your troops once you've begun the attack. Get closer to the Origin Core building (3 on the map). Once this is done, use your superweapon to weaken it and to neutralize all nearby Hierarchy units (screen). After that, switch to Light Energy mode and start firing at this building. Remember to move back your main character if he has suffered major injuries. You shouldn't have any major problems destroying this building. Doing this will allow you to win the mission. Get ready for the final challenge!

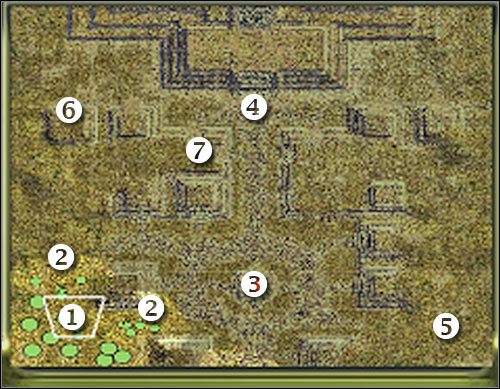
Map legend:
1 - base - starting area
2 - main passageways leading to the base
3 - initial position of the Purifier (second objective)
4 - final location of the Purifier (second objective)
5 - Novus base (allies)
6 - passageway which leads directly to the Purifier
7 - main Hierarchy building (Arrival Site)
Your duties during the course of the mission:
Your primary objective during the course of this final mission will be to destroy an enemy Walker, called a Purifier. You will also have to protect your main heroes, including the leaders of the Masari organization, general Moore and the leader of the Novus organization. Once you've destroyed the Purifier, you will also have to defeat Kamal Re'x.
Detailed mission walkthrough:
First objective: Altea, Zessus and Charos must survive
Second objective: Destroy the Hierarchy Purifier
I guess that you may be surprised a little bit by the fact that the final mission of the Masari campaign is going to be relatively simple. I'm sure you'll want to find out why, so here are the answers. First of all, your base isn't going to be attacked too often by Hierarchy forces. Additionally, you will be given support from the Novus organization, so the Hierarchy units will be distracted. You won't be able to control your allies (other than a few exceptions), however thanks to them a lot of Hierarchy structures and units are going to be neutralized without your immediate assistance. You should also notice that you have a large base at the start of this mission, as well as a decent army. This will make your expansion a lot easier, since you won't have to build any primary structures. I would recommend that you start the mission by taking a look at the surroundings, especially your base. You should notice that your main heroes are stationed here. I would recommend gathering them together, so they'll act a single group. Move them to the northern exit (2 on the map).
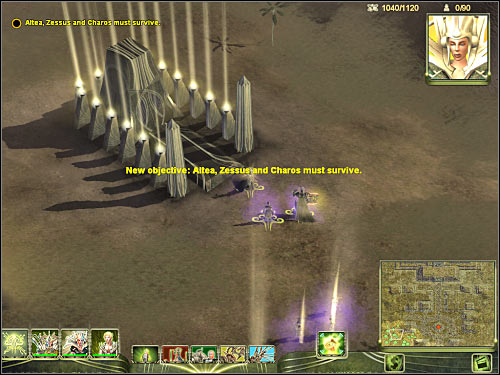
Choose your Architect units, because you will have to build some additional structures in order to ensure a proper expansion of your base. Start off by constructing a second Machina factory, so you'll be able to manufacture more tanks. The existing factory should begin building Conqueror units, because once again they'll be your best choice. Now you should find the Knowledge Vault building. Purchase both upgrades in unlock new features. Don't forget to click on the remaining buildings in order to acquire other upgrades. Purchasing global technologies is equally important. Depending on how many global objects you've decided to built, you'll be allowed to buy at least one technology. Make sure that your two factories are building tanks. Gather them to the north or to the west of your key structures.
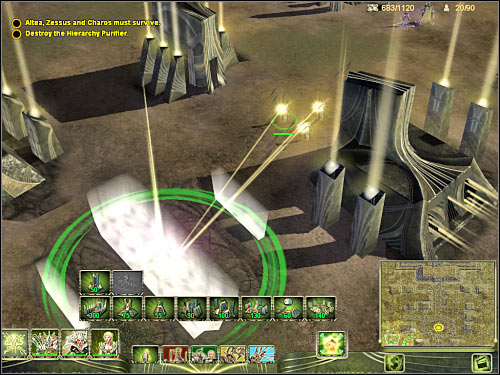
You should notice that allied units have arrived on the map. Your new allies will automatically attack the Purifier. I wouldn't recommend sending your units to that area, because you won't be able to destroy this Walker unit right now. The attack will end in a failure. You will see that the Purifier has moved back to an enemy base and it'll stop to the north-west of your location (screen). You'll also be given a new task.
Third objective: Protect Mirabel and General Moore while Novus establishes a base
After an unsuccessful attack on the Purifier, Novus forces will start moving west. That's where they plan on building their base of operations (5 on the map). Your new allies shouldn't be attacked by Hierarchy units, however you may consider sending five Conqueror units to that area (screen), so they'll be able to protect Mirabel and Moore. You should also activate Dark Matter mode in order to be able to play more defensively.
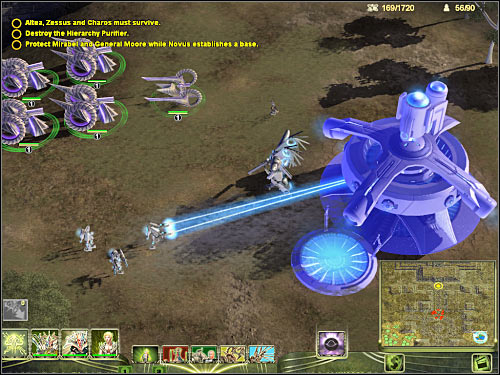
Now you should focus on upgrading your own base. Like I've already said, you won't have to worry about being attacked by a lot of Hierarchy forces. Enemy troops will be coming from the north, so that's where you'll need to move some of your troops. Don't stop them too far to the north, so you won't attract the attention of an enemy Walker. If you stay where you are, you should be just fine. I would recommend building additional Matter Engine buildings and upgrading the existing ones, so you'll be allowed to gather more resources. It would also be good idea to place a lot of Guardian turrets to the north of your base (screen). You won't have to worry about any air attacks, however you may consider purchasing 1-2 Sky Guardian turrets just to be sure. Finally, you should buy a Matter Controller building, so you'll be able to charge your superweapon. Make sure that you stay in the Dark Energy mode, so you won't have to reset the clock of the superweapon.
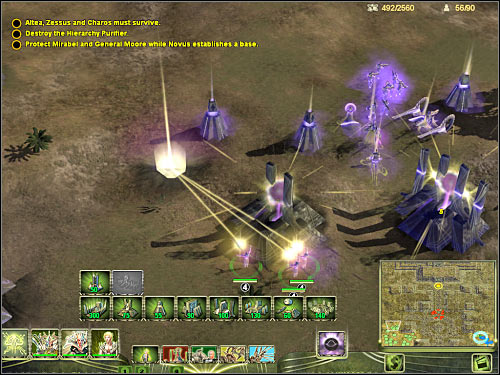
Obviously you will have to focus on gathering a strong army. Fortify the northern road, so you won't allow any Hierarchy units to get too close to your buildings. You should also notice that several Novus units have appeared near your base (screen). You probably remember them from the previous missions of the game. You will be allowed to issue orders to them, however it won't be necessary, because they'll place themselves correctly. Focus on the final preparations for the assault by ordering your army to head on to the northern passageway. I would recommend choosing only the standard units. Your heroes don't have to take part in the upcoming battles. Otherwise you would have to spend a lot of time trying to keep them in good shape. You should also notice that Novus forces have begun their assault. You can assist them by using your superweapon against enemy units. Alternatively you could save this attack for later, planning to neutralize something or someone else. This isn't necessary, because you'll have to switch back to the Light Energy mode very soon.
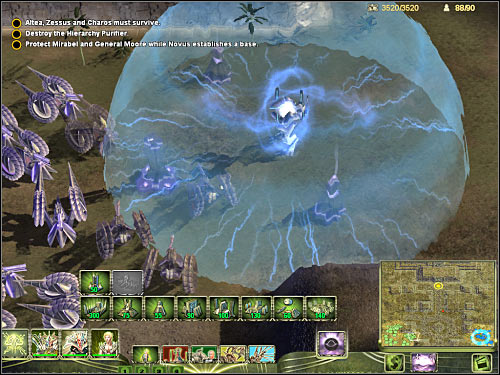
Start off by ordering your army to go north. Your objective will be to reach a small passageway which leads directly to the area with the Purifier (6 on the map). At first, you'll encounter enemy turrets, as well as single units. You will have to destroy the first Walker in just a few seconds. Use your superweapon against it or switch back to the Light Energy mode in order to inflict more damage. The Walker should be there all by itself, so destroying it is going to be much easier. You shouldn't suffer any heavy losses here, so keep heading towards the northern section of the map. A second Walker will be waiting for you there (screen). Just as before, you won't encounter any additional units, so focus only on destroying the Walker. Once this is done, proceed to the passageway I was telling you about (6 on the map).
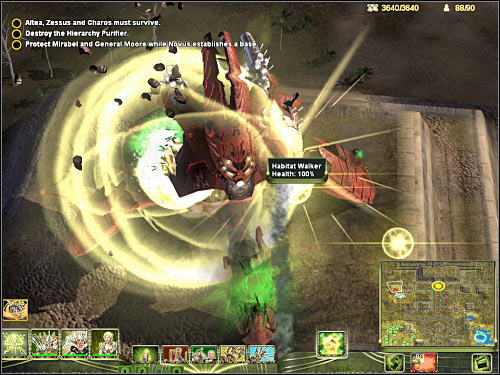
If you've done everything according to the plan, you should be somewhere to the west of the Purifier. You've got two choices here. You may consider proceeding with the assault right away or you can wait for your superweapon to regain full strength. The choice is yours. Either way, destroying the Purifier isn't going to be too difficult. Just make sure that all your units are taking part in this battle and prevent them from moving too close to the Purifier. You can also destroy the main building of an enemy base which can be found to the south-west of the Purifier (7 on the map). Build more units to replace the destroyed tanks. Gather them in your base, instead of moving them towards the Hierarchy base. Keep firing at the Purifier until it's destroyed.
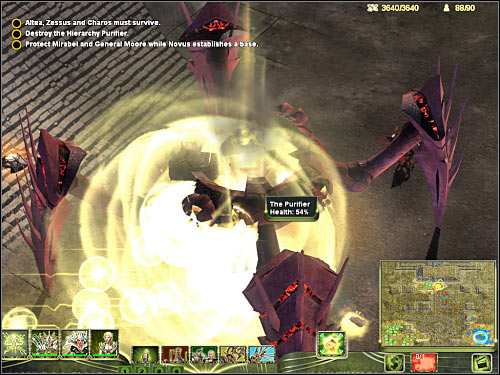
Fourth objective: Defeat Kamal Re'x
You won't have to prepare for this task in any special way. If your heroes have taken part in the assault on the Purifier, move them back to the base quickly (you can use the teleport ability). Kamal's location will be visible on your map. He will approach your main base from the north. Eliminating him is going to be very simple, because you only have to choose your new Conqueror tanks. After that, attack him. If you have any Guardian turrets near the base, you can consider waiting for him to get closer. You should be able to take him out in just a few seconds. Defeating Kamal is equal to winning this mission. Congratulations! You've just finished the final campaign of the game! Make sure to put your skill to the test while playing other available game modes.
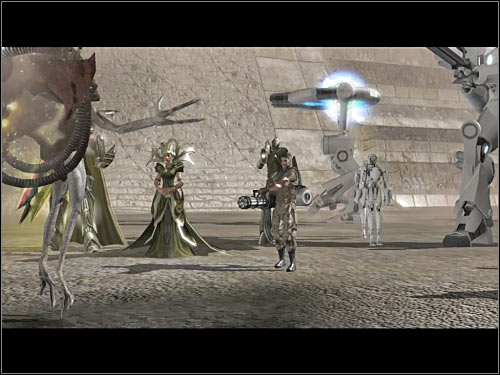
FLOW BRANCH

Rapid Flow (Level 1)
An interesting feature. Thanks to it you can increase the flow capabilities of your power grid. It's very useful, especially if you're playing on a larger map.

Patch: Visual Amplifier (Level 1)
Activating this patch will increase the line of sight of your units and buildings by 25%. Not too helpful, especially if you have some scout units at your disposal.

Call Hero: The Founder (Level 2)
This is the least useful hero of the Novus organization, at least in my personal opinion. It's better to use Vertigo or Mirabel.

Stealth Upgrades (Level 2)
Field Inverter is capable of hiding other units within the range of its force field. I wouldn't say that it's useful, especially if you're playing against a computer opponent.

Patch: Spectrum Cycle (Level 2)
Detecting hidden enemy units isn't something you would want to have at all costs, however it may come in handy from time to time. Nevertheless, you should be on a look out for something else.

Advanced Flow (Level 3)
This is an upgrade for the Rapid Flow technology. Your energy grid becomes capable of transporting other types of units (including tanks and planes), not only standard troops. Extremely helpful!!

Power Efficiency (Level 3)
Increasing the range may seem to be a poor technology, however if you connect it with the previous upgrade, it becomes an interesting feature.

Nanite Purification (Level 3)
I don't think that you'll be using this technology too often. Acquiring it allows your units to neutralize all side effects (including radiation) while being transported to a new location.

Cascade Resonance (Level 4)
This is an upgrade for the Amplifier unit. Acquiring this technology allows your unit to increase the power of its beam, so it can injure several targets. Choose it only if you plan on destroying Walkers.

Patch: Emergency Flow (Level 4)
This is a fairly interesting patch. Activating it allows you to restore the proper flow functions of the base which is helpful in critical situations. You will have to be quick, though. This patch won't last for long.

Patch: Overclocking (Level 4)
This technology can increase the movement speed of your units, however it makes them more vulnerable to enemy attacks. Bad choice, especially since Novus units aren't too powerful even in standard mode.
NANOTECH BRANCH

Clone Stability (Level 1)
This technology becomes useful only if you plan on duplicating your Blade Troopers units using one of their abilities. They can remain on the map for a longer period of time.

Patch: Backup Systems (Level 1)
Activating this patch extends the energy bar of your units and buildings for a short period of time. This is an interesting upgrade and you should consider using it frequently.

Call Hero: Mirabel (Level 2)
You probably remember Mirabel from the campaign mode of the singleplayer mode. I think she's the best character for the Novus race. You should definitely consider recruiting her.

Collection Efficiency (Level 2)
This technology increases the speed in which the resources are being collected. It would be a good idea to develop it as soon as possible, so you'll have an easier start.

Patch: Optimized Collection (Level 2)
I would also recommend activating this patch as soon as possible. Using it will allow you to gather more resources, because your drones will be able to collect more cargo before going back to base.

Matter Conversion (Level 3)
This technology becomes useful only if you plan on selling some of the previously constructed buildings. Doing this will allow you to receive a full amount of credits you've spent on constructing them.

Rapid Rebuild (Level 3)
I think it's one of the less useful technologies. Your damaged buildings are capable of refilling their power bar, however only if they aren't attacked by anyone.

Nanite Refinement (Level 4)
An interesting technology. It becomes useful when you plan on creating a larger army. The costs of purchasing new units are being decreased by 25%.

Patch: Optimized Assembly (Level 4)
An excellent patch. It becomes useful when you plan on building new units. The speed in which they're being manufactured is increased by 100%!!
COMPUTING BRANCH

Rapid Patching (Level 1)
This isn't a useful technology. Developing it will allow you to use patches more frequently. That's it. Don't count on receiving any other bonuses.

Viral Contagion (Level 1)
The main advantages of having this technology are quite easy to comprehend. The Novus virus is able to infect nearby enemy units and structures.

Call Hero: Vertigo (Level 2)
Calling Vertigo is especially advised if you plan on having a powerful air unit, used not only to scout the area, but also to attack smaller groups of enemy units.

Patch: Viral Reboot (Level 2)
This is an interesting patch. Activating it allows you to infect enemy units with a virus, so they'll become inactive for a short period of time.

Patch: Reboot (Level 2)
Choosing this patch enables you to neutralize all side effects. The downside is that this process requires your units and structures to reboot, so they'll become inactive for a short while.

Improved Manipulation (Level 3)
Unlocking this technology will provide you with several interesting bonuses. Hacker units can interact with several object at once, while Field Inverter units can reflect enemy projectiles. Definitely worth buying.

Patch: Viral Cascade (Level 3)
A very useful patch. Using it allows you to infect all units which are in range of your power grid. This occurs automatically.

Viral Magnetics (Level 4)
It's an upgrade for the EM Destabilizer superweapon. If you decide to buy it, not only you'll damage enemy objects, but you'll also infect them with a virus.
LIGHT MATTER BRANCH

Burning Brilliance (Level 1)
While being in the Light Matter mode, your buildings will emit a special type of an energy which can damage enemy units. Not useful since you'll want to prevent your enemies from reaching your base.

Remote Harm (Level 1)
The Seer receives an additional ability - he can harm enemy objects with the light matter.

Call Hero: Lord Charos (Level 2)
I'm sure that you're familiar with lord Carhos by now, because you were controlling him during the course of the third campaign. This is an useful character, so you should consider summoning him.

Burning Fury (Level 2)
This technology upgrades your most useful units - Conqueror tanks. They receive a new ability - Energy Vortex. Quite useful, so you should consider reaching the second level of this technology tree.

Immolation (Level 2)
This is a useless technology, at least in my personal opinion. You don't need it, unless you're a rookie player. Buying this technology allows your Matter Engine buildings to activate self-destruct feature.

Molecular Instability (Level 3)
Acquiring this technology grants your Peacebringer units with a new ability. You won't be using them too often, so you may as well ignore it.

Phoenix (Level 3)
This is also a poor technology. There's a chance that some of your air units (Sky Lords & Inquisitors) may be resurrected once they've been killed.

Piercing Gaze (Level 4)
This is an upgrade for the Oracle building. Acquiring this technology increases the chance of sending a deadly ray which damages your enemy. I would recommend spending a research point of something else.

Burst Threshold (Level 4)
This is an interesting choice. Having this technology increases the duration of your superweapon attack by 100%.
DARK MATTER BRANCH

Unseen Barrier (Level 1)
This technology gives your Sky Guardian turrets a Gust ability which may be quite useful. As a result, you should consider unlocking this first level of the Dark Matter branch.
Advanced Dark Matter Amor (Level 1)
Your structures receive a much better armor. The effects are visible only if you're using the Dark Energy mode (for obvious reasons).

Call Hero: Queen Altea (Level 2)
Altea is one of the most interesting characters of the Masari organization. I'd strongly recommend that you consider summoning her to the battlefield.

Aversion (Level 2)
This technology isn't too useful, because it concerns only your Sky Lord units. They receive a new ability which allows them to "push back" enemy units.

Area Denial (Level 2)
This is an upgrade for the mines used by Figment units. I would recommend acquiring this technology if you're using them, especially since you'll receive bonuses for both matter modes (they're different).

Facilitated Growth (Level 3)
You will receive a very good bonus for the Inquisitor units. It's important, because they can't leave the ground in the Dark Energy mode. Instead, they can increase the regeneration process of DMA shields.

Dark Matter Affinity (Level 3)
This is an interesting technology. Unlocking it allows your units to receive a fully charged armor by default, instead of having to wait for it to regain full power. I'd strongly recommend choosing this bonus.

Dark Embrace (Level 4)
This is a very similar technology to Burst Threshold. The main difference is that the Dark Matter version of the superweapon is improved. It can stay active for a longer period of time and it heals your units.

Dark Matter Mastery (Level 4)
This is also a very interesting technology, mostly because it allows your DMA shields to keep regenerating, even if your units are engaged in battle.
BALANCE BRANCH

Stationary Revelation (Level 1)
Useless technology, at least in my personal opinion. Line of sight for your structures is increased by 25%. That's it.

Methods of Deception (Level 1)
This technology is also one of the least useful ones. Your Sentry units are invisible to enemy radars and your Seer receive an additional bonus to protection.

Call Hero: Prince Zessus (Level 2)
Prince Zessus is the worst character of the Masari race, at least in my opinion. You can try him out if you want to, because he appears often during the course of the third campaign.

Reconstruction (Level 2)
An interesting technology. Your Architect is able to reconstruct the vehicle for Avenger.

Stasis (Level 2)
This is an interesting ability, reserved only for Inquistior units. Affected units (friend or foe) become unavailable to everyone else. This means they can't be attacked, moved or injured.

Unregulated Conversion (Level 3)
This technology seems to be useless, however only if you tend to prevent enemies from attacking your base. Unlocking this option allows your Matter Engine buildiungs to feed on nearby enemies.

Cleansing Energy (Level 3)
A very useful technology. Unlocking it allows you to heal available units from all side effects while switching between available matter modes.

Energy Stream (Level 4)
This is also an interesting achievement. Matter Engine buildings start gathering 50% more energy.

Shadowed Perception (Level 4)
You shouldn't be too interested in this bonus. Your Seer is capable of hiding buildings and units which are located around him.
ASSAULT BRANCH

Hardpoint: Range Enhancer (Level 1)
Unlocks the Range Enhancer module for the Walker. Choosing it allows you to increase the range of all weapons and some components. I'd strongly recommend unlocking this level of the branch.

Hardpoint: Arc Turret (Level 1)
Unlocks the Arc Turret module for the Walker. This is an offensive component. Arc Turret are being used to attack enemy air units. It's very good to have them, especially if you don't want to build saucers.

Plasma Weapons (Level 1)
Lost One units are capable of using plasma bombs and Grunt units can start using plasma grenades. These objects aren't too powerful, so you may as well ignore this achievement completely.

Call Hero: Orlok the Eternal (Level 2)
I'm sure that you remember Orlok from the second campaign of the game. You should exactly know what to expect of him. He is a very useful character and it would be a mistake not to hire him.

Death From Above (Level 2)
This technology unlocks a new ability for your Brute units. They can damage targets while performing jumps. You should be interested only if you like using these creatures. Otherwise ignore this bonus.

Foo Longevity (Level 2)
An excellent technology, especially if you like healing your units and Walkers. Your flying saucers can withstand more damage and the effectiveness of using Repair Chambers is increased.

Hardpoint: Mass Driver (Level 3)
Unlocks the Mass Driver module for the Walker. This component increases the damage done to enemy structures.

Hardpoint: Visual Optimizer (Level 3)
Unlocks the Visual Optimizer module for the Walker. As a result, your line of sight is increased. The only advantage is that you can place these objects on a Science Walker in order to reveal the entire map.

Hardpoint: Beam Cannon (Level 4)
Unlocks the Beam Cannon module for the Walker. This weapon can be mounted only on Assembly Walker units. It's very powerful, so you should decide to purchase it.

Locomotor Enhancement (Level 4)
A very interesting invention which I'm sure you'll find to be useful. The movement speed of your Walkers is increased by 60%(!!). Buy it at all costs if you're using these units during the attacks.
MUTAGEN BRANCH

Volatile Reactors (Level 1)
I personally didn't find this technology to be useful to me. Destroyed Walkers and vehicles can now explode. Additionally, they create a poisonous cloud around them.

Irradiated Shots (Level 1)
This technology is very useful. Your units can now fire irradiated projectiles to inflict more damage to enemy troops and vehicles. I'm sure that you will notice the difference once you've started using it.

Call Hero: Nufai (Level 2)
This hero is often being used by AI opponents, however I prefer hiring other Hierarchy heroes. You can try him out if you want to, but don't expect him to be a big help.

Hardpoint: Brute Pod (Level 2)
Unlocks the Brute Pod module for the Walker. It's simple - you can now attach these pods to your Walkers in order to summon Brute units.

Hardpoint: Radiator Artillery (Level 2)
Unlocks the Radiator Artillery module for the Walker. This component can only be mounted on Habitat Walkers. Obviously it uses the effect or radiation.

Gamma Radiation (Level 3)
Interesting achievement. Unlocking this technology allows you to increase the negative effects coming from radiation by 50%. Additionally, radiation heals your units more rapidly.

Advanced Mutagens (Level 3)
This technology allows you to unlock a bonus that's very similar to one of the main abilities of Defiler units. Civilians and smaller enemy units can now be turned into mindless Slaves.

Hardpoint: Radiation Cascade (Level 4)
Unlocks the Radiation Cascade module for the Walker. This is BY FAR the most interesting option of this branch of the technology tree. These hardpoints allow you to use the main attack of Science Walkers.
QUANTUM BRANCH

Phase Modules (Level 1)
Unlocking this technology allows your Lost One and Monolith units to use Phase Self ability. Not useful. You were able to test this feature during the course of the second campaign.

Mental Frequency (Level 1)
This is also an achievement you can ignore. Mental Frequency allows you to neutralize all negative technologies being used by your enemies to take control over your troops.

Call Hero: Kamal Re'x (Level 2)
Kamal Re'x has appeared often during the course of the game, however you weren't able to control him back then. He's a pretty useful character and you should consider hiring him.

Hardpoint: Phase Tank Pod (Level 2)
Unlocks the Phase Tank Pod module for the Walker. I think you won't have any problems understanding this achievement - you can start building Phase Tanks.

Fast Ordering (Level 2)
This technology isn't something you would want to have at all costs. Units summoned by your Glyph Carver appear on the map 25% faster. Nothing else.

Quantum Ordnance (Level 3)
An interesting achievement. This technology increases the damage done by your plasma weapons by 20%. Can be quite useful, especially if you have these weapons mounted on your Walkers.

Molecular Armor (Level 3)
This is also a very useful technology. It puts a better armor on all hardpoints of your Walkers. As a result, enemy troops will have more problems destroying your mech units.

Hardpoint: Targetting Jammer (Level 4)
Unlocks the Targetting Jammer module for the Walker. This upgrade can only be used by Science Walkers and it makes them harder to being targetted.

Hardpoints: Mind Magnet and Machine Magnet (Level 4)
Unlocks the Mind and Machine Magnet modules for the Walker. They're very useful, because they can allow you to take control over enemy troops and vehicles. Definitely worth a try!