
Tornado Boss Fight
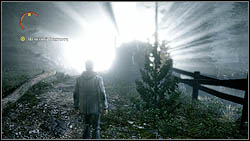
To the left in the darkness beyond the light is a shack, and if you go in you will find a supply chest (Supply Chest 28/30) with a flare gun and ammo in it. Do grab those, you will need the extra flare gun ammo, and then return to your truck, pull forward and park by the gate. Jump out and run up the stairs and go inside this building, then drop through the floor to the floor below.
On the side is a cart you need to push forward that is blocking the opening in the wall - use B to engage and then push A a lot to move it. Once it is moved, exit via that hole in the wall and run around to the front of the building where you will find a fresh truck with a pump shotgun leaning against it. I don't know about you but I was happy to see that pump shotgun! After you swap your double-barrel out for it, you can look around a bit but you will quickly trigger a CS and then the Tornado will put in an appearance.
In the first building on the right you can grab some pistol ammo, and when you exit confront a brute and a chainsaw wielding Taken. Kill them and then go into the next building on the right side of the road (it has a sign above that says Hollowax on it) to grab the next collectible (Coffee Thermos 96/100). On shelves in here there is also a pistol, a rifle, and a double-barrel shotgun just to be complete.
Exit this building and head for the searchlight ahead (there is nothing in the other buildings) and, at the light, use it to hold off the wave of Taken until some appear to your left. Leave the light pointed ahead to the left, then use your torch and flashbangs to take out the Taken trying to flank you. Once they are dead, use the searchlight to take out the remaining few Taken and you are good for this ambush!
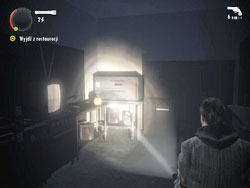
If you look to the left of the light you will see supplies -- flares and flare gun ammo -- and you really should grab those! Now head to the building behind the searchlight with the mine cart on it, and push the cart until it stops. Inside here near the fireplace is our next collectible (Manuscript Page 90/106) so grab that and read it, and then push the mine cart blocking the door out of the way.
As you exit the building you will see the next Haven Light nearby, so go there to checkpoint, and then follow the path to the wooden structure and clean out the flare gun ammo and batteries from the red supply box there. In a hole in the floor is a mine cart that you can jump down into, and then release the brake on to go for a little ride. Do that!
You will be attacked by birds, and when the car arrives at the end of the track and you climb out, the tracks -- and the car -- collapse and fall! Ahead is a Haven Light and checkpoint, so go ahead and run to that to save and escape the birds, who will kill themselves flying into the light. Just past the light is a train car with open ends that you can run through, and out the other side around the rocks is our next collectible (Supply Chest 29/30) from which you will get flare gun ammo, flares, and grenades. Near the chest is also a pump shotgun and shotgun shells, so grab it all!
Backtrack to the Haven Light again and you will see a ladder nearby that you can climb. After the birds attack push the mine cart here along the track until you reach the end, and it falls down the gap. Now jump across and continue along the tracks to the shed ahead of you, where you will find the next collectible (Coffee Thermos 97/100).
As you follow the path you will be attacked by birds -- take them out with your hand torch, pausing after each kill to allow it to recharge before continuing. Up the hill you will be ambushed, and after you kill those Taken you need to mind your feet for the dark pools, which you should destroy with your torch. There is a Haven Light and checkpoint ahead if you do get hurt, and in that same building in the next room there is a red supply chest. You exit out the back of this building and continue along the path.
Eventually a large truck will fall from the sky, and a fast Taken will attack when that happens. Kill it and continue on the path and you arrive at a red shed with a generator in front of it. Start that to activate the next Haven Light and checkpoint, and gather the supplies that are here before you continue on the path. A large object will fall - it is not a truck, maybe scrap metal? After it falls you will be attacked again, so defend yourself.
Ahead of you a boat will fall out of the sky as you approach a box car, and then you are attacked. Climb into the boxcar (it offers a bit of protection from being flanked) and inside you will find some grenades and our next collectible (Coffee Thermos 98/100) which you should also grab. Kill the Taken and then get back on the path, and again be attacked. This is a tough area so take care and fight defensively!
Eventually you make it to another generator to activate the next Haven light and checkpoint (though this one only lasts for a few seconds before the light burns out), and you heal. Continue up the path here and narrowly avoid being crushed by a falling train car before you head up the slope, past more falling stuff, and finally reach the wooden stairs that lead to the next Haven Light. Be careful and destroy the dark pools on the stairs, and make your way to the light and checkpoint above.
At the top of the next stairs is a building, and after you enter it and turn right, the final supply chest! Go ahead and empty that (Supply Chest 30/30) and you will unlock the Achievement "Every Nook and Cranny" for a very nice 30 GP!
Head upstairs for some shotgun shells and a pump-action shotgun, and then drop down onto a crate below to leave the building. Nearby is an old rusty metal structure -- either an old windmill or maybe water tower? Behind that structure is your next collectible (Coffee Thermos 99/100) so go and collect that now,
Ahead is a switch, but to use it you need to find the generator and get it running, so look around and you will see a large gas tank with the generator by it. Once you get it running there is now power to that switch, but you also have a wave of Taken coming for you, so defend yourself as best you can, and then make your way to the switch. Click it, and face another wave of Taken while the lift lowers for you.
As soon as the lift arrives get on and push the button, and when it stops and you step off, look down at your feet to see the next (and last) regular Manuscript Page (Manuscript Page 91/106). Picking this up unlocks the Achievement "Picking Up After Yourself" for a very nice 30 GP! This is the last collectible for this chapter! Well done!
You have really irritates the Dark Force now! It blocks the path with possessed objects and starts sending waves of Taken after you. Could it be that it is afraid of you? I think it is!
As you make your way through he passage she throws a few objects at you, and when you reach the other end, look! The Tornado! Could this be the showdown fight?! Why yes... Yes it is!
Your best strategy here is to get nice and close and -- remember all the flare gun ammo I said you should save up? Oh yeah, it is shake-n-bake time!
Drop down and get closer. Drop down again and get still closer. When you can use your torch to destroy some of the objects that it is using as offensive weapons. Be careful not to fall down and die when you get to the last section of the path, and when Alan tells you that you have to get light into its heart, you are almost close enough to start killing it!
If you do not already have a full load of flare gun ammo, stop at the box on the path and fill up, then jump to the next platform and start pumping rounds into the Tornado, and it will quickly die! Not a bad boss fight after all!
[ ] Coffee Thermos 96/100
On a shelf in the Hollowax building after you get past the gate.
[ ] Coffee Thermos 97/100
Under the shed-like structure on the elevated wooden tracks after the Haven Light.
[ ] Coffee Thermos 98/100
Inside the red boxcar on the path after the boat falls from the sky.
[ ] Coffee Thermos 99/100
Behind the rusty metal structure after dropping down from the building onto the crate.
[ ] Manuscript Page 90/106
Near the fireplace in the building with the mine cart.
[ ] Manuscript Page 91/106
On the floor after you step off of the lift.
[ ] Nightmare Mode Manuscript Page 106/106
Behind the generator that you need to start to activate the lift.
[ ] Supply Chest 28/30
In a shack to the left of the Haven Light after driving up the hill from the junkyard.
[ ] Supply Chest 29/30
Through the train car past the Haven Light, and around the rocks. Do not forget to grab the shotgun and shells.
[ ] Supply Chest 30/30
Inside the building at the top of the wooden stairs.


