
The wood bridge puzzle
You awaken in your car -- which is totally wrecked -- down an embankment and you can hear your wife's fearful cries in your head as you awaken! As you narrate your situation, and take stock of your situation, you come to the conclusion that you must go for help! A quick check of the car turns up the book written by the doctor of the local nuthouse -- which brings the fight back clearly in your mind. Not so good.
The path you need to follow is not real obvious, but if you look towards the ground you will see it. Before we get to the run through the woods I want to remark upon the collectibles in this game -- they are actually pretty easy to spot because they glow in the dark. All that you really need to do is keep your eyes open and look around.
Speaking of collectibles - and you approach the first glowing light you will find two pages of your manuscript (Manuscript Page 1/106 and 2/106) so go ahead and grab and read those now (yes, you can actually read the pages).
As you continue along the path you encounter one of the Taken (the Taken are the people taken by the shadows). You can see the gas station in the distance, but there are lights closer to you, which you think might be good news. You approach a fence at the end of the path to discover a logging yard!
To enter this you need to climb along the trunk of a tree that has fallen against the fence. Once inside the yard, you spot a shadowy form but it turns out to be a Taken. You have your first encounter with the Taken form of Carl Stucky -- who reads you the terms and conditions of your cabin rental!
As you run along the logs towards the pickup truck, here is your first Thermos collectible in the yard - pick that up (Coffee Thermos 7/100), and then move along the other side of the nearby stack of logs to find another manuscript page (Manuscript Page 3/106). A nearby stack of logs collapses - avoid that and run past it and along the path towards the light ahead.
The light is the open door of a nearby building and that is where you want to go first, because wandering through the log piles without the ability to defend yourself will just get you killed! Note that if you do end up getting killed, all of the collection items and resources that you picked up will have to be re-picked up unless you are notified that you have hit a checkpoint, as death puts you back to the start of the last checkpoint.
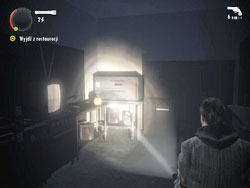
Now enter the building and you will find a pistol and hand torch, and to the right of these some batteries on the table there. On a shelf in the next room is some ammo. There is also a phone, but when you try to use it, Stucky cuts the line and knocks down the power pole, and then uses a piece of heavy equipment to push the building you are in over the edge of the embankment -- now would be a good time to bail out of the building through the door that has just opened, right?
You are attacked by some Taken -- and hopefully defend yourself well! Once you have taken out the immediate threat, use the flashlight to reveal a portable light with its own generator -- turn that on, and you will notice that there are arrows and signs painted in yellow that is only revealed when you shine light onto it. How convenient! Before you follow those, turn around and grab the ammo off of the oil drum here.
If you follow the arrows you will encounter a hidden chest (Supply Chest 1/30) with a flare gun in it first, and then an electrical box inside the overhanging building - you want to smash that to cut the power that is electrifying the fence, because you cannot get over the fence here with the juice on!
With the power now off you can safely climb over the fence. After you do that and as you approach the log picker, look to the left up the hill in the woods and you will notice a sparkling silver glow -- that is our next collectible! Go ahead and run in that direction to get the next collectible (Manuscript Page 4/106) now. Once you have that, head back towards the picker and you will see a lit supply box to the right with some ammo and batteries in it -- empty it and then head towards the broken fence.
There is a dangling power line here - mind that you do not walk into it as it will hurt you - but head past it and down the slope, and you arrive at the river. There are a series of logs falls that you can use to cross, so go ahead and cross the first one now, but do not head to the right to cross the second one yet! Head to the left instead and follow the path past some fallen logs to a rock with a Thermos on it (Coffee Thermos 8/100) that you should collect.
Now backtrack all the way to the right and cross the narrow triple-log bridge here to grab the next collectible that is on a crate at the end of the logs (Manuscript Page 5/106). Once you have that, backtrack tot he previous island and turn right, where you will cross the next log bridge, and you will eventually reach a checkpoint on the other side of the river, and do battle with three more Taken.
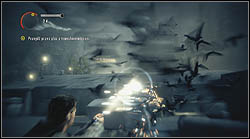
A word on battling the Taken: If you use your torch to damage them until their shadow disappears, it only takes a single gun shot to kill them. You also do not need to always use new batteries to recharge your torch, as it will recharge on its own over time (albeit slowly), so only use the batteries when you actually have to, like in the middle of a fight, and let it recharge on its own when you are not in battle or threatened.
Also not that you do not have to fully engage the light in order to aim your weapon -- try gently pulling the left trigger just a bit so that it engages the aiming mode but not the extra power through your torch -- there! Now you can put the bullets where you need them without draining the power from your torch!
Back on the path through the Logging Yard again, and as you regress along you will see more of the yellow arrows - follow those to a wood pile with a ladder and climb up -- from here you can actually get a better idea of where you need to go. Jump on the nearby bank and head up to the shack ahead, and you will see a message painted on the side. Inside the shack you will find another supply chest (Supply Chest 2/30), this one has some batteries in it for your torch, which is always a good thing to find!
Now backtrack to the log pile and go back down the ladder -- jumping will cause you to be hurt so I do not recommend that as a general tactic -- and once you are down the ladder head to the left and pick up the thermos (Coffee Thermos 9/100) just past the broken stairs that you see in a CS. To your immediate left in a red supply box mounted on a pole are some batteries and some pistol ammo - go ahead and grab those now.
Beside the pole is a winch system, which should clue you in on your next challenge -- you need to move that load of logs that is hanging from the drag line above to bridge the gap in the nearby log piles so that you can make your way up and across to the next area of the yard!
In order to do that you need to use the winch controls (the nearby red box with the blinking red light) but it presently has no power, so you need to locate the generator. The easy way to locate it is to climb the ladder nearby and look around - from up here you can see the generator in the distance, then just climb down and make your way to it, but as you approach another trio of Taken appear to hinder your progress. You will need to take them out before you can access the generator!
Once you have the gennie cranked up the lights come on and you now easily see the nearby well-lighted door! Head inside the building here and grab a manuscript page (Manuscript Page 6/106) and a shotgun!
Now return to the controls for the drag line and use that to move the logs to the point where they bridge the gap you need to cross, then use the ladder nearby the controls to climb up to the top of the stand, and running along the center of it, jump to the center of the suspended logs, work your way across and jump to the center of the next stack, gaining access to the next area! How very clever of you!
After you cross over look to the right and you will see the top landing of the broken stairs from below. On that landing is a table, and on that table is your next Pyramid Can stack (Pyramid Cans 2/12)! Go ahead and shoot those now!
As you head towards the light you will see that it is at a shed - and inside the shed is a radio and a box of shotgun ammo. Grab the ammo then turn on the radio (Radio Program 2/11) and listen to the program (there is an Achievement associated with listening to all of the radio programs).
As you continue on the path shine your light to the left to reveal another trail of yellow arrows that lead to another hidden supply box (Supply Box 3/30) in a shed -- this one has a flare gun! Take a moment to reload all of your weapons now if you need to, and then move back to the path and follow it to a manuscript page (Manuscript Page 7/106), which you should pick up, and then a little ways down the path on the right behind a small rock is a thermos bottle (Coffee Thermos 10/100). Grab that and then follow the path through the next section of woods.
After you drop down to the area below move straight ahead to the generator and start it to turn on the light. If you need to heal here, and grab the ammo and batteries on the ground as well. Ahead of you is an outcropping of rack -- move towards it but stay to the left (so that the rock is on your right) and you will find the next collectible (Coffee Thermos 11/100). Grab that after you fight off the three Taken, then head back to the light to heal.
You will have a few fights with more Taken, and then find another manuscript page (Manuscript Page 8/106) on the trail. At the next light spot there is a supply box with ammo and batteries, and then you continue on the path.
When you reach the fence follow the arrows to the left and grab the flare gun from the hidden supply chest (Supply Chest 4/30), then resume your path along the trial past the log claw, where you will encounter a group of slightly more robust Taken near a closed gate - you will need to kill them all before you can continue here.
On the ground in front of the gate is the next collectible (Manuscript Page 9/106) so grab that and then enter the gatehouse on your right. Grab the shotgun, shotgun ammo, and then move to the table where you will find a TV -- turn it on and watch the program (TV Program 1/14) and then, when it is done, use the controls to open the gate!
Exit the gatehouse and pass through the now open gate, and use the controls on the PTO on the left through the gate. Now head through the log piles towards the light to trigger the next Taken encounter - battle them and win, and then you will face Stucky (a mini-boss) who is a lot harder to kill. Be patient, take your time, do not waste resources, and you should easily manage to kill your first mini-boss!
There is a chest of ammo on the left of the path just before this big fight -- I would fill up on ammo here if I were you, and after the fight, before you continue along the path, return to the chest and fill up on ammo to replace what you used during the fight.
If your experience is similar to mind you will not actually defeat Stucky until after you reach the control box for the next gate -- I was able to open but not activate the gate controls before my final confrontation with him -- and killing him unlocks the Achievement "Nordic Walking" for 10 GP!
Take my advice, head back to the ammo crate and fill up, then on your way back after you pass under the swinging logs head to the right of the crane and grab the collectible here (Coffee Thermos 12/100) pass through the gate and head along the path to the gas station, where you will find it deserted. Go around the fence and grab the manuscript page (Manuscript Page 10/106) and thermos (Coffee Thermos 13/100) in the parking lot.
Once you have that Thermos, head out onto the road and along it to the left and into the fog. You will be attacked by a pair of Taken, and once they are dead, you will see that the road is blocked off by some trucks. On the road to the right of the trucks is the last Thermos for this chapter (Coffee Thermos 14/100). When you pick this one up it will force the spawn of three more Taken so be ready to fight them -- it would be a really bad time to end up dead, trust me on that.
Now you should head back to the gas station -- halfway there another trio of Taken will spawn for you to kill, but you are getting really good at taking them out by now so that should not be a problem! Once you arrive at the station go ahead and enter, but resist the urge to rush inside and use the phone to call for help just now, we will be doing that but there are a few other things that we need to do first!
At the station, enter via the garage, and head towards the office. The TV in the garage will turn on and you get a focus prompt - focus on the TV and watch the Alan Wake show (TV Program 2/14). When it is over enter the office and look ahead and to the left on the end of the merchandise rack where there is a sign for the Deer Fest -- you will be prompted to hit the B-button to read the sign and you should do that for your next collectible (Sign 1/25).
At this point you should check your statistics (hit Start then select Statistics in the menu) to verify that you have everything. You should have:
• Manuscript Pages 10/106
• Coffee Thermos 14/100
• Can Pyramids 2/12
• Chests found 4/30
• Radio Programs 2/11
• Signs 1/25
In the Achievement department you should have unlocked a minimum of the following:
• Follow the Light (10 GP)
• Let there be Light (10 GP)
• Nordic Walking (10 GP)
Now go ahead and pick up the phone on the counter and call for help if everything above matches, otherwise check to see that you got the last few and when you have all of the spots ticked, use the phone! This will unlock another Achievement -- Bright Falls' Finest (20 GP) for a total of 50 GP minimum!
Shortly the County Sheriff herself shows up, and you try to explain the situation but she immediately starts poking holes in your story. You get into her car and she takes you to your cabin... But it is no longer there! The cabin, the island, the bridge -- all gone! You are stunned, and she has this look on her face that clearly indicates she thinks she is dealing with a wack-a-doo here!
Thus Episode One ends with a fade to black and some music.... I am pretty sure that it is either Roy Orbison or someone who sounds a lot like him. Pretty cool anyway.
[ ] Can Pyramid 2/12
On a table on the top of the landing for the broken stairs.
[ ] Coffee Thermos 7/100
Beside the pickup truck by the fence inside the logging yard.
[ ] Coffee Thermos 8/100
On the far left-end of the first "island" in the river after crossing the first log bridge. The Thermos is on a rock here.
[ ] Coffee Thermos 9/100
Just past the broken stairs in the yard.
[ ] Coffee Thermos 10/100
Behind a rock on the right towards the end of this section of the path.
[ ] Coffee Thermos 11/100
Along the left side of the rock outcropping after the light.
[ ] Coffee Thermos 12/100
On the right side of the crane after defeating Stucky.
[ ] Coffee Thermos 13/100
In the parking lot of the gas station by the sign.
[ ] Coffee Thermos 14/100
On the road near the roadblock to the right of the trucks.
[ ] Manuscript Page 1/106
You receive this in a CS that is part of the story line and cannot be missed.
[ ] Manuscript Page 2/106
You receive this in a CS that is part of the story line and cannot be missed.
[ ] Manuscript Page 3/106
Around the corner of the small log stack on the way back from getting the thermos.
[ ] Manuscript Page 4/106
Up the hill on the wall of the small cutting shed before you pass through the broken fence with the dangling power line.
[ ] Manuscript Page 5/106
On a crate at the far right end of the first island in the river as you are crossing.
[ ] Manuscript Page 6/106
Inside the building after you get the generator started in the yard.
[ ] Manuscript Page 7/106
Found on the path - you cannot miss this one.
[ ] Manuscript Page 8/106
On the trail headed towards the next light.
[ ] Manuscript Page 9/106
On the ground in front of the closed gate.
[ ] Manuscript Page 10/106
In the parking lot of the gas station.
[ ] Nightmare Mode Manuscript Page 92/106
On the fallen tree past the fence as you enter the Logging Yard.
[ ] Nightmare Mode Manuscript Page 93/106
On a rock by the river after you complete the log bridge puzzle challenge.
[ ] Nightmare Mode Manuscript Page 94/106
On the door of the bathroom in the back of the service station.
[ ] Radio Program 2/11
In the shed with the light at the top of the hill after shooting the Can Pyramid at the top of the broken stairs.
[ ] Sign 1/25
On the end of the merchandise rack in the gas station.
[ ] Supply Chest 1/30
Behind the truck after following the arrows after you exit the building that Stucky pushes over.
[ ] Supply Chest 2/30
In the building at the top of the bluff after you use the ladder to climb up the stack of logs while following the yellow arrows.
[ ] Supply Chest 3/30
In the shed at the end of the yellow arrow trail.
[ ] Supply Chest 4/30
At the end of the arrow trail to the left of the fence.
[ ] TV Program 1/14
On the table in the Gatehouse.
[ ] TV Program 2/14
The TV is inside the garage at the gas station. It will come on all on its own, you just need to focus upon it and watch the show.


