
NOTE: A ticklist for the collectible items is included at the end of each chapter -- you will want to review this before you begin the chapters to familiarize yourself with these.
The plot thickens
The game opens with a narrative that is punctuated by dramatic if spooky scenery, and you are introduced to the protagonist - Alan Wake - who you are going to play in this mystery-horror survival adventure. While it is not instantly apparent that this is a dream sequence - it is - your first indication is when the hitchhiker you hit with the car disappears!
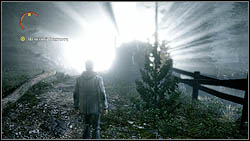
Move along the road and you will see the bridge ahead and a path to the right -- as you approach the path there is a CS and you are shown the lighthouse, and then you are back in control of yourself. Instead of taking the path, keep moving up the road to the bridge - it has collapsed so you were not going to be driving over that anyway! On the the bridge to the left just inside is the first Thermos Collectible (Thermos 1/100). Grab that now!
Backtrack to the entrance of the Rain Cove Point Lighthouse Hiking Trail and enter the trail -- at this point you will get a checkpoint and a Taken will appear.
Your task is to run like hell towards the lights that mark the path. Some of these will disappear when you reach them, while others remain for a short period or longer, and are there for you to use to recover your health. Let me underscore that - the red circle in the upper left corner of the screen is your health indicator, and when you stand in the light, it recharges.
As you progress towards the first light the Hitchhiker appears, and has his opening say to you -- this is a character that you created in your most recent novel - a novel you do not remember writing which is a pity, since knowing his weaknesses might help out here (grin). Okay, one of his weaknesses is the light - a pretty sound case can be made that this is a battle between light (good) and dark (bad), you being the former, the Hitchhiker representing the latter.
The deck will collapse here - if you are on it so will you so do not stand at the very end - and you can now run down the ramp that it forms. At the bottom, if you look to the right on the bulletin board as the Hitchhiker is having his say, you will notice a Missing Person poster with YOUR face on it. Very curious!
As you move along the path you will encounter some barriers and pick-up items -- this is the basic tutorial for the game, and you will learn how to interact with things through it, so go ahead and interact with anything that you encounter, right?
Your first respite is in a house a little ways along the path -- but the price of that respite is the death of a good Samaritan who tries to help you! Once the Hitchhiker has given him the ax he comes for you - and that is something of a problem as you need to flounder around in panic until a mysterious voice begins talking to you - and blows open the back door with the Tom the Poet poster on it!
This voice is something of an enigma, and despite its importance to you throughout the game, we never do learn just who - or what - it represents. There are clues throughout, and at the end, but they are highly subjective and must be interpreted, so I challenge you here and now, at the beginning of the story: pay close attention to the voice and the clues that it gives to you, and when we reach the end of the game, decide what the origin of the voice is. There is a prize involved here -- I'll tell you more about that at the end of the walkthrough -- so keep this challenge in mind mate, you could end up winning it!
Now back on the path -- after we see the Hitchhikers eyes on the TV's in the cabin everything goes sideways, and we are attacked and hurt! The voice tells us to follow the light, and explains why it is important both as a temporary haven and as a heal point.
The voice then riffs a verse from a poem, asking if you understand? Well, no! Me either!
The voice repairs the stairs, allowing us to progress - thank you voice! Shortly along the path we encounter a box with pistol ammo -- fill up on that now -- and a flashlight (hand torch). Grab the light as it is a good weapon to use against the darkness -- and of course a gun (of course a gun, we got ammo didn't we?!).
After you follow the tutorial and kill the Taken with the combination of the light and the gun, look on the right side of the path at the fence and you will see a pyramid stack of cans sitting on the top fence rail - half-squeeze the left trigger to aim (but not use the high-power setting of the hand torch) and shoot the cans (Can Pyramid 1/12) to begin the second collectibles quest!
Alan resumes his narrative and then you head for the lighthouse down the now obvious path. We jump over a few things along the way -- now we know how to jump! -- and we learn how to dodge attacks, which is a useful skill.
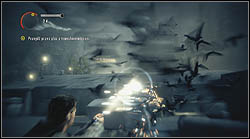
Using the light (Left Trigger) and the gun (Right Trigger) lets us kill the darkness faster, which is good considering that batteries and ammo are in short supply, so faster is better! When we reach the post there is a box with a flare gun and some flares - we obviously want to grab that, but here is a not so obvious point that you need to be aware of: the Flare Gun is an instant-kill weapon, which means ammo for it is in much shorter supply, and you can carry only a handful at any time. That being the case, we want to hold off using the Flare Gun on the darkness -- save it for the birds, who are a much tougher enemy!
After you grab the flares and flare gun from the box look a little ahead and to the right -- you see the stone stairs going down into that concrete bunker? Go down there and grab the next collectible (Thermos 2/100), and then head back up onto the path.
So we have defeated the trio of darkness or have run away - and we arrive at the lighthouse - Yay us! At the fence in front of the lighthouse on the right side there is a bench with the next collectible on it (Thermos 3/100) so go ahead and grab that now! As we head into the lighthouse, and just as we start to feel a sense of accomplishment a new voice starts to whisper in our ear and... We wake up! It was a dream! A nightmare! It meant nothing! Or did it?
[ ] Coffee Thermos 1/100
After the CS that shows you the lighthouse head forward to the covered bridge - it is collapsed, and the thermos is sitting on the bridge just inside.
[ ] Coffee Thermos 2/100
On a crate in the concrete bunker just off the path when you get the flare gun.
[ ] Coffee Thermos 3/100
On a bench to the right just before you arrive at the lighthouse.
[ ] Can Pyramid 1/12
On the fence on the right side of the path after you receive the pistol.


