

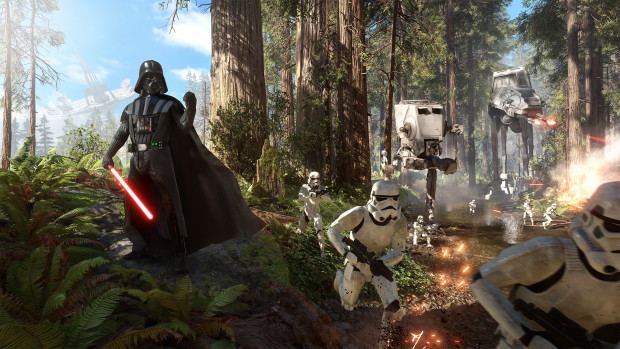
Players can bring 2x Star Cards and 1x Charged Star Card to battle. SCs provide players with a special ability or weapon and CSCs provide boosts such as increased accuracy, personal shield, and more.
Note that both SCs and CSCs are only available for infantry units as heroes and villains have their own unique abilities.
There are multiple ways of earning SCs and CSCs which include earning mission stars, completing challenges, earning XP; all of which will net credits to buy them.
In addition to this, each SC and CSC can also be upgraded. Each SC and CSC also has a cooldown time which prevents players from spamming them in the field. Players must consider their individual playstyle and the type of game before going with a SC.
Note that a single SC cannot be effective for all players and game modes. Therefore, players should experiment with different things and see what works well for them.
Lastly, players can also customize a hand with different combinations of SCs and CSCs and use them according to changes in a game. The following section provides a brief description of each SC along with some other information:
Barrage — Star Card
Unlocks At: 24
Unlock Charges: 4,000 Credits
Upgrade Charges: 7,000 Credits
This allows players to shoot a volley of three grenades which detonate upon impact. It is ideal to eliminate group of enemies and in order to clear an area. Consider using it before heading inside an area to capture an objective.
Bowcaster — Star Card
Unlocks At: 32
Unlock Charges: 4,000 Credits
Upgrade Charges: 7,000 Credits
The Bowcaster can be charged and allows players to shoot up to 5 explosive bolts. The display HUD shows the number of bolts that can be fired at any time.
In addition to this, white dots signify that the bolts might miss their target while the red dots mean that an enemy has been targeted. It’s better to charge it in an alone place as it leaves the caster vulnerable to all damage.
The Bowcaster should be used to eliminate group of enemies and should be combined with Jump Pack for maximum effectiveness.
Cooling Cell — Charged Star Card
Unlocks At: 7
Unlock Charges: 2,200 Credits
Upgrade Charges: 9,000 Credits
This basically prolongs a blaster’s overheating duration renders it useful for longer durations of time. This should be used before intense gunfights.
Cycler Rifle — Star Card
Unlocks At: 28
Unlock Charges: 4,000 Credits
Upgrade Charges: 7,000 Credits
Cycler Rifle is extremely durable when it comes to eliminating enemies at insanely long range and penetrating shields. Contrary to popular belief, crouching while using the Cycler Rifle does not affect accuracy. Players should consider bullet drop when using this weapon.
Explosive Shot — Charged Star Card
Unlocks At: 18
Unlock Charges: 2,200 Credits
Upgrade Charges: 9,000 Credits
This charges a blaster to fire explosive rounds for about 10 seconds. This should be used just before eliminating a group of enemies or in order to clear out an area. Note that it only applies on Primary Blasters.
Flash Grenade — Star Card
Unlocks At: 20
Unlock Charges: 4,000 Credits
Upgrade Charges: 7,000 Credits
Although it does not deal any damage, this grenade temporarily blinds enemies with a bright white light and also impairs their hearing.
It is a pretty useful grenade which should be used before heading in an area in order to capture an objective. Lastly, a Flash Grenade can also affect the thrower if tossed too close.
Focus Fire — Charged Star Card
Unlocks At: 7
Unlock Charges: 2,200 Credits
Upgrade Charges: 9,000 Credits
This greatly enhances the accuracy of any Primary Blaster for about 10 seconds.
Although this can be applied on any blaster, it should be used on long ranged blasters which lose accuracy after their effective range is over. Since it is short-lived, it should be used just before starting an engagement.
Homing Shot — Star Card
Unlocks At: 11
Unlock Charges: 4,000 Credits
Upgrade Charges: 7,000 Credits
Like its name suggests, this basically locks on an enemy soldier and follows him around the map. However, it should be used in a secluded location since the user becomes vulnerable while aiming.
Impact Grenade — Star Card
Unlocks At: 6
Unlock Charges: 2,200 Credits
Upgrade Charges: 7,000 Credits
This grenade detonates as soon as it makes contact with any solid object. Although it has a small explosion radius, players can use it to clear an area or in order to destroy a vehicle and all nearby infantry units.
Ion Grenade — Star Card
Unlocks At: 4
Unlock Charges: 600 Credits
Upgrade Charges: 7,000 Credits
This grenade does not affect enemy soldiers, but is extremely effective against vehicles, shields, and droids. It detonate as soon as a vehicle enters its blast radius and is a real blessing in game modes such as Supremacy, the Walker Assault, and Survival.
Ion Shot — Charged Star Card
Unlocks At: 7
Unlock Charges: 2,200 Credits
Upgrade Charges: 7,000 Credits
This changes Primary Blaster’s ammo to Ion Bolts which have same effects as the Ion Grenade. With this, the damage against human enemies drops by 50 per cent.
Ion Torpedo — Star Card
Unlocks At: 9
Unlock Charges: 3,000 Credits
Upgrade Charges: 7,000 Credits
This launcher performs the same function as an Ion Grenade and is extremely useful for destroying vehicles, droids, shields, and stationary weapons.
Jump Pack — Star Card
Unlocks At: 16
Unlock Charges: 4,000 Credits
Upgrade Charges: 7,000 Credits
This allows players to make huge jumps and reach otherwise inaccessible areas. It is not only ideal for poking enemies, but is also a decent escape tool.
In addition to this, it also has its uses in collecting collectibles in Battle Missions and Survival Missions. The best to use the Jump Pack is to combine with other SCs, CSCs, and other power-ups.
Personal Shield — Charged Star Card
Unlocks At: 22
Unlock Charges: 2,200 Credits
Upgrade Charges: 9,000 Credits
When used, the player basically surrounds himself with a personal shield which blocks all energy weapon damage, though damage from grenades and Cycler Rifle is not blocked.
The duration for which the Personal Shield stays is more than enough to complete certain objectives or at least escape an area.
Pulse Cannon — Star Card
Unlocks At: 6
Unlock Charges: 2,200 Credits
Upgrade Charges: 7,000 Credits
This is a very powerful long range blaster which can be used to eliminate enemies at insanely long distances. Its damage depends upon the charge time. It is particularly useful in environments where players have access to long range sights.
Scan Pulse — Charged Star Card
Unlocks At: 13
Unlock Charges: 2,200 Credits
Upgrade Charges: 9,000 Credits
This can basically be considered as U.A.V from Call of Duty games, but has a short radius.
Once activated, it reveals all nearby enemies on the mini-map — even if they are behind cover or something. It is particularly useful when it comes to capturing a point or in order to defend one.
Scout Pistol — Star Card
Unlocks At: 4
Unlock Charges: 600 Credits
Upgrade Charges: 7,000 Credits
It is a two-shot burst pistol which excels at short range, but loses all its capability at longer ranges. It should only be used when it comes to close-quarter combat.
Smoke Grenade — Star Card
Unlocks At: 13
Unlock Charges: 4,000 Credits
Upgrade Charges: 7,000 Credits
Once toss, it creates a smoke screen which renders it greatly impairs vision. It should be used in order to escape vehicles, snipers, enemy lock-ons as well as in order to catch enemies by surprise.
Thermal Detonator — Star Card
Unlocks At: 2
Unlock Charges: 100 Credits
Upgrade Charges: 7,000 Credits
This grenade is specifically useful against enemy players, but not vehicles, droids, and shields. Players should use it to eliminate group of enemies close together. Once used properly, this thing can easily turn the tides of a game.
Found anything missing or confusing? Let us know in the comments section below!
 Star Wars Battlefront Best Loadouts Guide - Best Hands, Blasters
 Star Wars Battlefront Hoth Multiplayer Map Guide - Tips, Strategy, Locations
 Star Wars Battlefront Weapons Guide - Best Blasters, Tips, How to Unlock
 Star Wars Battlefront Walker Assault Tips and Strategy Guide
 Star Wars Battlefront Cargo Tips and Strategy Guide