


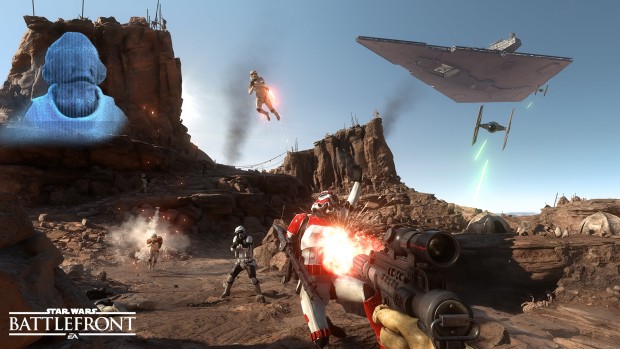
Tatooine encourages combat in out-of-door combat where you must get behind cover in a moment’s time or die.
It contains four multiplayer locations, all of which are summarized below:
Supremacy
You should consider your surroundings before heading in the center of the area. Make sure to use vehicle debris to use as cover, toss in a couple of smoke bombs, and cover your team as capture the first control point.
In case of Rebels’ push forward, you will need to head inside the Jawa Village. This area has a lot of cover so make sure to use it and avoid surrounding enemy troops.
You need to secure the Sandcrawler to continue forward. As Imperial, use the Jump Pack and try to head inside through the most unexpected positions. In case of Imperial’s push forward, you will need to head inside the depot which is a really compact area.
It is a good idea to bring some smoke grenades and flash grenade and simply stick close to capture point as it is really hard to head inside the area from the outside. It is also recommended to place some proximity mines in order to prevent invaders from the outside areas.
While controlling the final position, it is a good idea to place a few of your troops near your final capture point and send the rest to deal with enemies trying to head in.
Fighter Squadron
For this game mode, remember that all the power-ups and pick-ups are extremely close to the ground in addition to the terrain being extremely treacherous.
You should also consider the suns in the area which can render your vision impaired. During such instances, you should perform a couple of stunts and avoid enemy fire.
Walker Assault
The first couple of uplinks are located in the Jundland Wastes and Jawa Village. Due to the openness of the areas, make sure your deploy shields for your allies.
Moreover, also try and have the Cycler Rifle to help your allies. When the Y-wings arrive, make sure to use Homing Shot, Barrage, and Bowcaster to deal damage to AT-ATs.
In order to reach the second location behind the sandcrawler, use the Jump Pack and reach through otherwise inaccessible areas.
One uplink is located inside a mountain and the other one is located towards the depot. Make sure to avoid proximity mines and use smoke grenades to conceal your arrival.
The final location has two more uplinks; one inside the mountain near the transport depot and one in the outside area.
You should definitely consider using heroes or villains to clear out these areas. As for the final phase deploy as much vehicles as possible and end the game.
Blast
Jawa Refuge is a small area with a lot of cover so make sure to utilize it properly and keep an eye out on the cliffs. Be on your toes when roaming the cliffside to avoid being sniped and be prepared to escape on a short notice.
If you get a couple of Infantry Turrets, make sure to place them in a wide area to score multiple kills. In Rebel Depot, you can either roam and inside circle or the outside circle and continue to eliminate enemies.
Make sure to drop in some proximity mines in tight corners and stick to close-quarter blasters while roaming the outside circle. When roaming the inside circle, try and have an ally to watch your back and constantly look for flanks.
Also place some Infantry Turrets to help your allies out. Lastly, you should also consider locking down x-wing hanger and the area outside the cargo.
In Dune Sea Exchange, the transport ship is located in the center of the map where most of the engagements take place not to mention this area also has the most cover. You can also use the barge to have a wide-angle of the areas near the transport ship.
Do not forget to use the cargo containers on the ship’s stern for some extra cover. The shipping dock is another good area to get a breather and to avoid pursuing enemies.
Drop Zone
Due to the openness of Jawa Village, make sure to deploy squad shield or infantry turret to eliminate approaching enemies. Use smoke grenades to conceal your movement and make sure to deploy the Jump Pack to run to next drop pod ASAP.
In Rebel Depot, you should definitely consider the x-wing hanger, the intelligence center, the depot entrance, the Millennium Falcon hanger, and the outdoor cargo area for drop pods. Pages: 1 2
 Star Wars Battlefront Tatooine Map Guide - Locations, Tips and Strategy
 Star Wars Battlefront Supremacy Tips and Strategy Guide
 Star Wars Battlefront Sullust Multiplayer Map Guide - Tips, Strategy, Locations
 Star Wars Battlefront Fighter Squadron Tips and Strategy Guide
 Star Wars Battlefront Walker Assault Tips and Strategy Guide