Minecraft construction is all about the buildings! You can’t really have a building without some basics — floors, roofs, and walls are what make a building a building, right? You can build some basic objects, but why not make them truly interesting and cool?
Plain floors made from a single kind of block are dull. To add a little “oomph” to your rooms, use a variety of stones to make a path, pattern, or symbol. A floor with a checkerboard pattern or a zombie face on it would really grab a visitor’s attention!
If you want to cover a floor with a tiled pattern, in other words a pattern that iterates itself across the floor, follow these steps:
Create an interesting tile that’s a bit on the smaller side.
Arrange some blocks that work well together, but make the tile small enough that 9 or more of them can fit in the room. You can make carpets, wood, quartz, or anything else.
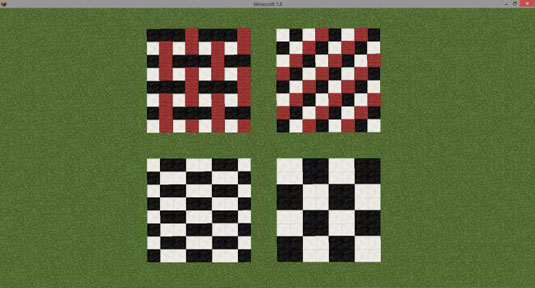
Outline a room large enough to fit the tiles comfortably inside.
The room should be just large enough that the tiles can neatly fit inside. For example, if you’re using 5x5 tiles, you can fit them in a 20x25 room.
Put the tiles together.
Starting from one corner, build the tile repeatedly inside the room until the entire floor is covered.
The fun stuff isn’t limited to floor designs. Using blocks to make patterns in the wall or adding slabs to make a 3D design can add to the wow factor.
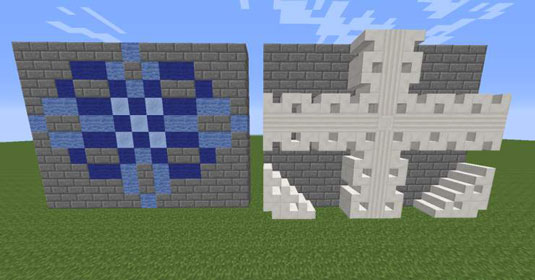
To make a nice pattern in the wall, add in different kinds of blocks as you build, as spelled out in this step list:
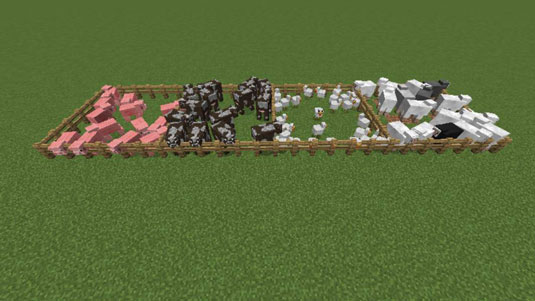
Choose a set of similar blocks.
Select blocks that look similar and have similar textures. Avoid objects such as slabs and stairs when the wall is 1 block thick.
Create an interesting shape or pattern.
Use one of the blocks to create the centerpiece of the pattern, and fill the rest of the wall with your other blocks.
Make corrections until you create the pattern you want.
Don’t worry if you don’t get it right the first time. After you finish the wall, you can easily spot any areas that look out of place — and then fix them.
If you want to go for it, you can make a 3D wall. Generally speaking, a 3D wall starts with a regular run-of-the-mill wall, but then you add slabs and stairs. These blocks can be crafted with wood, cobblestone, stone bricks, and the slabs can be crafted with smoothstone. These can make your design stick out a little from the original wall.
For specific instructions on creating a 3D wall, check out these steps:
Build the backboard for the wall.
A 3D wall has a front and a back — so what do you want to appear in the back? You don’t need to put lots of effort into this step, because a tiny portion of this backboard is visible. However, think about what sort of block you want to see through the foreground.
Create a pattern primarily from slabs, stairs, and other blocks containing cutouts.
The idea here is to place blocks close enough together to act as a wall but that “wall” needs to contain a number of holes through which you can see the backboard.
Make corrections until you create the pattern you want.
The backboard should be moderately visible throughout the wall. If a part of the wall looks weird or wrong, revise some of the blocks in the foreground.
A 3D wall takes up more space, so use them outside or in a large room.
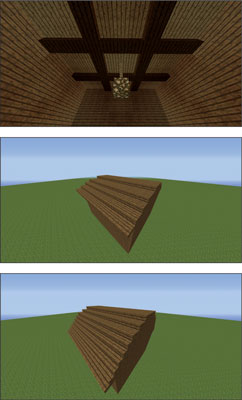
You don’t have quite as many options for making a roof stand out. You’re basically limited to manipulating its shape. You can make three kinds of roofs:
Short: Made from half-slabs, short roofs are the easiest to customize — you can vary the shape and even make awesome roof shapes such as domes or waves. How cool would it be to have a beach house with a wave roof?
Flat: Flat roofs are about as simple as it gets. The good news is that they work well for cabins and the like. The bad news is that they’re so simple to make that just about the only way to spice one up is to add support beams or a pattern. You build flat roofs using slabs (or similar items).
Slanted: Slanted roofs are okay by themselves, but they’re most interesting when you use them with other types of roofs. Slanted roofs are made with stairs.
To build a roof that converges at the top, as just described, follow these steps:
Build the base of the roof.
It’s normally just a rectangular or rounded outline — a house without a ceiling.
Create another group of blocks, but make sure that the blocks are slightly smaller in width than the blocks used to create the base walls. In other words, try to make it so that the next layer on the roof gets slowly smaller.
Starting on the topmost row of the base walls, place a row of l blocks flush against the row’s inner edge.
This group is just large enough to fit neatly inside the base, but it is also higher up. It creates a staggered look, like a series of small steps meant to lead up to the peak of the roof.
Repeat Steps 2 and 3 as needed.
These roofs are made of many layers stacked on top of each other, each slightly smaller than the one below. No matter what the shape of the roof is, you can use this technique to build it easily.

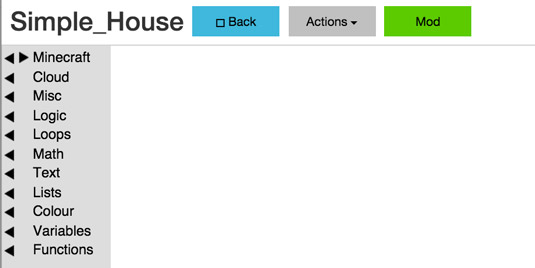 How to Write and Debug the First Function to Build a One-Click House in Minecraft - For Dummies
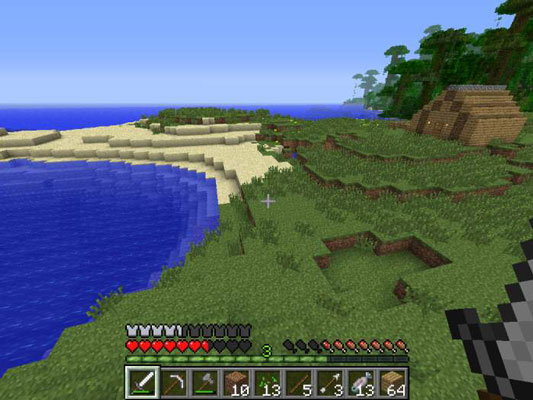 Minecrafts Basic Controls - For Dummies
 How to Design an Exploding Projectile in Minecraft Modding - For Dummies
 How to Apply Dye to Minecraft Items - For Dummies
 Designing Your Minecraft Minigame - For Dummies