

Here, you learn how to plan a mod that, when run in Minecraft, causes a block to be thrown from your location. When the block lands, it causes an explosion, destroying anything around it. You can later modify this fun, powerful mod to have it do other things also, such as teleport you to where it landed.
Before you start coding, plan your strategy. Writing this exploding projectile mod isn’t as complex as a minigame mod, but you need to design its complex pieces still.
For starters, you have to define these two actions to make the block
Launch when the mod is run
Explode when it lands
When you run your mod, make a block (maybe bedrock) to start from your position and move up and away from you. Designing the code for a three-dimensional (3D) mod is kind of tricky because you can’t draw it easily on paper. (3D involves six directions: up, down, left, right, forward, and backward).
To write this 3D mod, you use x-, y-, and z-coordinates to plan out where the block will start and how it will move. Check out the following paragraph for an explanation of x-, y-, and z- coordinates, if you don’t already know about them.
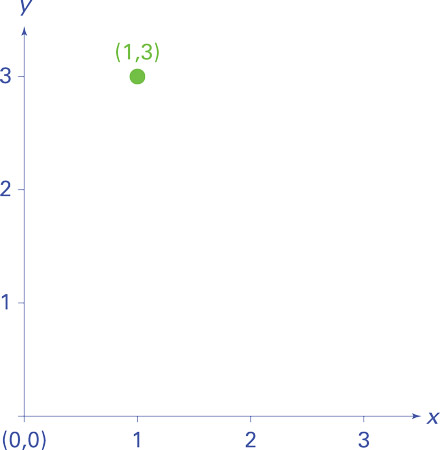
When you draw something on paper, you’re making a 2D drawing. You know that something is 2D because it has only four directions (up, down, left, and right). In math, up and down are represented by the y-axis (a higher value for y is up and a lower value for y is down). Left and right are represented by the x-axis (a higher value for x is right, and a lower value for y is left). This makes x-coordinate and y-coordinate easy to see in 2D space.
Here is a 2D x-y plane with a dot at the position x=1 and y=3, which can also be represented as (1,3).
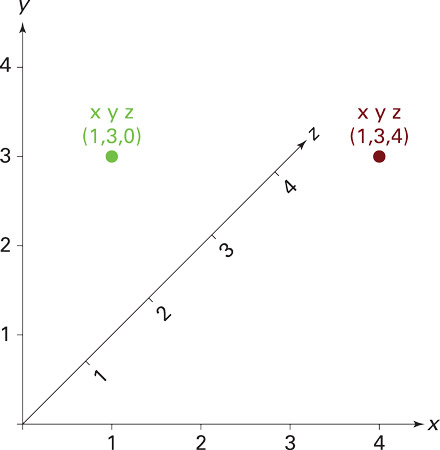
To understand the 3D world, you have to introduce another direction (forward and backward), and in math, this is represented by a third coordinate: z. This image shows a third line that represents the z-plane moving into the screen. The green dot is the same dot from above; it’s at (1,3,0). The red dot is at (1, 3, 4) and is actually deep into the screen.
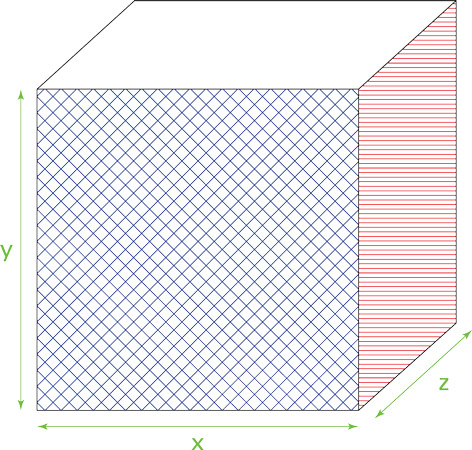
This shows how a cube would look on the x-, y-, z-planes. The green dot from above would be on the blue side, flat up against the screen, and the red dot would be along the red side, deep into the screen.
One way to make the block launch is to teleport (move) the block to a specific location using the teleport block in LearnToMod. You can teleport the block to (1,1,1) then (2,2,2) then (3,3,3) then (4,4,4) and so on. This could work, but if you search through your LearnToMod blocks, you will find some useful blocks in the Minecraft→Block category.
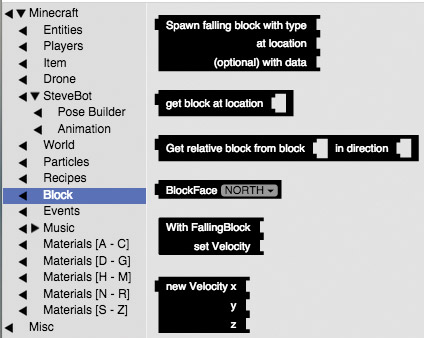
A falling block can be launched, and it falls as it moves through space, just as though you were to throw a ball in the real world: It would go up into the air first, and then it would fall in a 3D space (the real world).
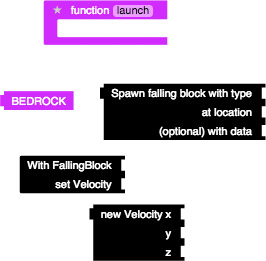
Even without writing the code yet, you can plan out the final code by dragging blocks into the programming environment that you’re likely to use.
Once you launch your block, you should make it explode when it hits the ground. You can review the LearnToMod blocks to find the create explosion block under the Minecraft→World category, which you can use to make the block explode when it hits the ground.

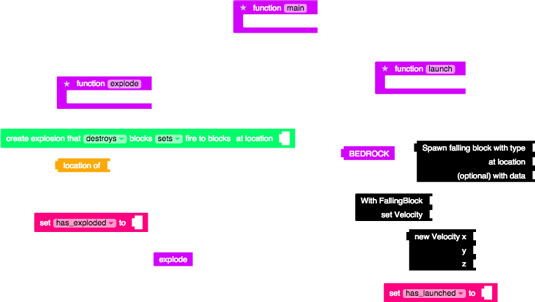
You can plan out the explode function like this.

An important aspect to keep track of in the exploding projectile mod is the state of the block. State describes what the block is doing at this moment. To see an example, you can track your own state for an entire day, and you can use a state-machine (a diagram that tracks data about the events in the world) to keep track of it.
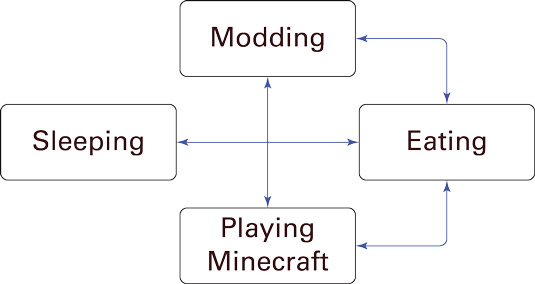
In this mod, state is important to keep track of because you don’t want the block to explode before you launched it, or before it lands. If it explodes too soon, it won’t destroy your target. State-machines are useful representations of all possible states in the world. The image above shows you how to make a state-machine about your real life, as it applies to playing Minecraft.
You might be in one of these four states (in real-life):
Asleep
Eating
Modding
Playing Minecraft
If you follow the direction of the arrow from the Asleep state, you can see that the only action you can take when you leave that state — or when you wake up — is to eat.
By following the directions of the arrows again, you can see that after you eat, you can either mod or play Minecraft. You can rotate between eating, modding, and playing Minecraft all you want. But if you want to go to sleep again, you have to eat first.
The state-machine for your block looks something like this. The lines show actions that must happen if the previous one happens, and once the block is destroyed, the mod is over and you can run it again.
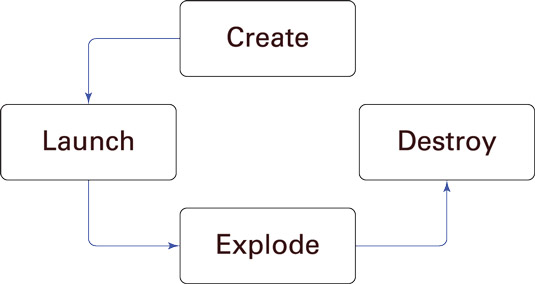
The state-machine in above is simpler than your Minecraft day state-machine because your block can take only one path through it. Once it is created, it must be launched, then it must explode, then it must be destroyed. Once it has been destroyed, the mod is completed.
Running the mod initiates the create state, but it is useful to keep track of whether the block has been launched and whether it has been exploded. Here are the two variables you should add to keep track of the state of the block.

 How to Use Redstone Comparators in Minecraft - For Dummies
 The Minecraft Heads-Up Display (HUD) - For Dummies
 Create a Constant Signal Switch in Minecraft with the RS-NOR Latch - For Dummies
 How to Use Fire in Minecraft - For Dummies
 Minecraft Modding: How to Create the Basic Spleef Scene - For Dummies