

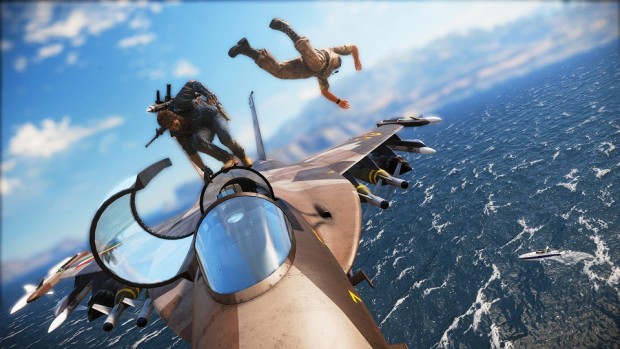
There are a total of 30 DareDevil Jumps in Just Cause 3. Performing these insanely dangerous stunts need you to be smart about it. Ram the accelerator only when you need it and do not forget to use your Parachut and Hook to avoid bumping into buildings and cover some extra distance.
For more help on Just Cause 3, read our Challenges Guide, Unique Weapons Locations and Unique Vehicles Locations.
Performing all these 30 DareDevil Jumps will reward you with Custom Kletter 300, Custom Geschwind, and Incendario Monster Truck in the Rebel Drop list. This guide provides an overview of all the DareDevil Jumps locations in Just Cause 3:
Completing all 10 DareDevil Jumps in this region will unlock Custom Kletter 300 in the Rebel Drop list:
DareDevil Jump # 1
Coordinates: Petra – N-40: 41.24, E-5: 37.34
Acquire the vehicle from the northern guarded area and jump from the ramp located on the south side of Puncta Sud.
DareDevil Jump # 2
Coordinates: Petra – N-40: 42.06, E-5: 36.76
For this DareDevil Jump, you need to jump over the large area in the Espia Bassa – use your hook and parachute to cover the remaining distance.
DareDevil Jump # 3
Coordinates: Petra – N-40: 42.15, E-5: 36.83
This DareDevil Jump can be performed from the road on the upper-north side of the Espia Bassa.
DareDevil Jump # 4
Coordinates: Corda Dracon – N-40: 42.79, E-5: 36.59
This DareDevil Jump can be performed from the north road leading out of the Corda Dracon: Centcom; near a dead end.
DareDevil Jump # 5
Coordinates: Corda Dracon – N-40: 42.89, E-5: 36.29
This DareDevil Jump can be performed northern road leading out of the Corda Dracon: Centcom.
DareDevil Jump # 6
Coordinates: Trio – N-40: 42.40, E-5: 35.37
This DareDevil Jump can be performed from the ramp located in the dusty area accessible from the east road out of the Guardia Trio I.
DareDevil Jump # 7
Coordinates: Capite West – N-40: 43.49, E-5: 35.58
This DareDevil Jump can be performed from a desert road, but since there are no fast vehicles available nearby, it is a good idea to chain it with DareDevil Jump 8.
DareDevil Jump # 8
Coordinates: Capite West – N-40: 43.51, E-5: 35.60
This is probably one of the easiest DareDevil Jumps in the game and can be chained into completing DareDevil Jump 7 as well.
DareDevil Jump # 9
Coordinates: Capite Est – N-40: 43.79, E-5: 36.15
This DareDevil Jump is located on the eastern Espia Alta; it is a good idea to liberate the entire area before heading in for the stunt.
DareDevil Jump # 10
Coordinates: Capite West – N-40: 43.80, E-5: 34.94
This DareDevil Jump can be performed from the southern edge of the airstrip in the Porto Cavo.
Completing all 13 DareDevil Jumps in this region will unlock Custom Geschwind in the Rebel Drop list:
DareDevil Jump # 1
Coordinates: Feno – N-40: 42.68, E-5: 42.87
The access to this DareDevil Jump is blocked and you will need to follow the dirt road to get on the main road and eventually on to the jump.
DareDevil Jump # 2
Coordinates: Plagia – N-40: 42.54, E-5: 43.30
Cut through the northern side of the highway and follow the dirt road on the west side to find the DareDevil Jump location.
DareDevil Jump # 3
Coordinates: Feno – N-40: 42.13, E-5: 42.44
This DareDevil Jump is performed from the south side of Feno and terminates into the Lavanda.
DareDevil Jump # 4
Coordinates: Lavanda – N-40: 41.89, E-5: 42.61
This DareDevil Jump is located on the northern side of the dirt path leading towards the Sancte Lucas.
DareDevil Jump # 5
Coordinates: Feno – N-40: 41.68, E-5: 43.05
This is one easy DareDevil Jump as you are required to head downhill which allows some natural momentum and speed.
DareDevil Jump # 6
Coordinates: Lacos – N-40: 40.76, E-5: 43.47
With this DareDevil Jump, you will land on the south side of the main road; near a wind turbine.
DareDevil Jump # 7
Coordinates: Lacos – N-40: 40.87, E-5: 43.74
For this DareDevil Jump, head down the trail towards the ramp on a dirt road and perform the jump.
DareDevil Jump # 8
Coordinates: Lacos – N-40: 41.01, E-5: 44.41
This DareDevil Jump is located on the east side of Fortalessa, on the main road before it begins to turn.
DareDevil Jump # 9
Coordinates: Baia – N-40: 40.30, E-5: 44.62
This is probably one of the easiest DareDevil Jumps in the game as you land straight on the southern road.
DareDevil Jump # 10
Coordinates: Baia – N-40: 40.15, E-5: 44.56
You need to head towards the southeast edge of the wind turbine to start the DareDevil Jump.
DareDevil Jump # 11
Coordinates: Baia – N-40: 40.02, E-5: 43.77
This DareDevil Jump requires insane speed and you will also have open up your parachute and use your hook to land to safety.
DareDevil Jump # 12
Coordinates: Sirocco Nord – N-40: 39.04, E-5: 42.87
You need to head south from the main road and follow the dirt path leading towards the ramp.
DareDevil Jump # 13
Coordinates: Sirocco Nord – N-40: 38.51, E-5: 42.50
In order to perform this DareDevil Jump, you need to follow the dirt path from Cirilla.
Completing all 7 DareDevil Jumps in this region will unlock Incendario Monster Truck in the Rebel Drop list:
DareDevil Jump # 1
Coordinates: Libeccio – N-40: 45.74, E-5: 35.18
This DareDevil Jump can be performed from the west side of Vista Dracon.
DareDevil Jump # 2
Coordinates: Val De Mar – N-40: 44.73, E-5: 42.36
This DareDevil Jump can be performed from the western fence of Guardia Val De Mar IV.
DareDevil Jump # 3
Coordinates: Costa Sud – N-40: 44.30, E-5: 45.45
This DareDevil Jump is located on the main road and takes you all the way to southern Perla Est.
DareDevil Jump # 4
Coordinates: Costa Sud – N-40: 46.12, E-5: 44.42
This DareDevil Jump can be performed from the ramp located on the mountaintop on the east side of Sancte Evita.
DareDevil Jump # 5
Coordinates: Val De Mar – N-40: 46.73, E-5: 42.06
This DareDevil Jump can be performed from the small dirt road branched from the main road on the east side of the Mountain Pass Sprint.
DareDevil Jump # 6
Coordinates: Litore Torto – N-40: 47.42, E-5: 45.72
You simply need to follow the dirt path leading out of the city in order to reach the ramp from the second to last DareDevil Jump of the game.
DareDevil Jump # 7
Coordinates: Litore Torto – N-40: 49.22, E-5: 45.05
The final DareDevil Jump of Just Cause 3 can be performed from the road leading up to Sancte Malco.
If there is something else you would like to know, make sure to let us know in the comments section below!

 Just Cause 3 Vintage Parts Locations For Weapons and Vehicles, Old School Cool Guide
 Just Cause 3 Unique Vehicles Locations Guide
 Just Cause 3 Unique Weapons Locations Guide
 Just Cause 3 DareDevil Jumps Locations 'Consummate Daredevil Guide
 Just Cause 3 Insula Dracon Liberation Guide