
Before Halo and before Call of Duty there was Wolfenstein. Wolfenstein 3D, first released in May of 1992, is widely recognized as one of the granddaddies of the FPS genre that is so popular today. Though the Wolfenstein series isn’t often regarded as the FPS juggernaut it once was among the Halos and Call of Dutys of today, that doesn’t make the release of a current-gen iteration any less exciting.
Having not seen a proper sequel since 2001, Raven Software, id Software and others have brought us a new game in the series, simply titled Wolfenstein. As with most of the previous games, players take on the role of agent William "B.J." Blazkowicz, an all-American, Nazi-killing machine. The Axis has acquired some dark technology, and B.J. must help the rebel factions in Isenstadt prevent the Nazis from unlocking the power of the mysterious occult force known as Black Sun.
Need help stomping Nazis? Look no further than our complete guide to Wolfenstein. In it you’ll find detailed walkthroughs for every mission and side mission with every valuable, enemy Intel, and Tome of Power pointed out along the way. You’ll also find treasure maps for the Midtown West, Midtown East, and Downtown areas of Isenstadt, as well as information on multiplayer and a complete listing of Xbox 360 achievements and PlayStation 3 trophies.
This guide was written based on the NORMAL difficulty level. If you are playing the game on a higher difficulty level, the strategies and directions contained within will still apply, but the enemies you face will have more health and will deal more damage. Furthermore, this guide was written based on the Xbox 360 version of the game, but effort has been made to include PlayStation 3 controls where applicable. If you’re playing the PC version and are using a keyboard and mouse, refer to the Controls section of the options menu or the instruction booklet that came with your packaged game for a listing of the controls.
Single Player Xbox 360 Controls
Left Bumper - Throw Grenade.
Left Trigger - Zoom, Iron Sights.
Right Bumper - (Tap) Cycle last weapon. (Hold) View weapons menu.
Right Trigger - Fire weapon.
Left Stick - Move. (Click) Sprint.
Right Stick - Look/Aim. (Click) Melee.
Y Button - Use (when prompted).
B Button - Crouch.
A Button - Jump.
X Button - Reload weapon.
D-pad UP - Toggle Shield
D-pad DOWN - Toggle Veil Sight.
D-pad LEFT - Toggle Empower.
D-pad RIGHT - Toggle Mire.
Back Button - View Journal.
Start Button - Pause menu.
Multiplayer Xbox 360 Controls
Left Bumper - Throw Grenade.
Left Trigger - Zoom, Iron Sights.
Right Bumper - Switch between selected weapon and Luger.
Right Trigger - Fire weapon.
Left Stick - Move. (Click) Sprint.
Right Stick - Look/Aim. (Click) Melee.
Y Button - Class support packs/Use (when prompted).
B Button - Crouch.
A Button - Jump.
X Button - Reload weapon.
D-pad UP - Toggle class-specific Veil Power.
D-pad DOWN - Toggle Veil Sight.
Back Button - View class/upgrade menu.
Start Button - View scoreboard/pause menu.
Single Player PlayStation 3 Controls
L1 Button - Throw Grenade.
L2 Button - Zoom, Iron Sights.
R1 Button - (Tap) Cycle last weapon. (Hold) View weapons menu.
R2 Button - Fire weapon.
Left Stick - Move. (L3) Sprint.
Right Stick - Look/Aim. (R3) Melee.
Triangle Button - Use (when prompted).
Circle Button - Crouch.
X Button - Jump.
Square Button - Reload weapon.
D-pad UP - Toggle Shield
D-pad DOWN - Toggle Veil Sight.
D-pad LEFT - Toggle Empower.
D-pad RIGHT - Toggle Mire.
Select Button - View Journal.
Start Button - Pause menu.
Multiplayer PlayStation 3 Controls
L1 Button - Throw Grenade.
L2 Button - Zoom, Iron Sights.
R1 Button - Switch between weapon and Luger.
R2 Button - Fire weapon.
Left Stick - Move. (L3) Sprint.
Right Stick - Look/Aim. (R3) Melee.
Triangle Button - Class support packs/Use (when prompted).
Circle Button - Crouch.
X Button - Jump.
Square Button - Reload weapon.
D-pad UP - Toggle class-specific Veil Power.
D-pad DOWN - Toggle Veil Sight.
Select Button - View class/upgrade menu.
Start Button - View scoreboard/pause menu.
---
If you’re playing the PC version and are using a keyboard and mouse, refer to the Controls section of the options menu or the instruction booklet that came with your packaged game for a listing of the controls.
MP40
Found: Various (first Train Station).
Description: A light-weight sub-machine gun. Allows full movement speed while equipped (sans Veil). A decent weapon once fully-upgraded. Ammo is plentiful.
Available Upgrades: Recoil Compensator ($1000) - Reduce recoil and muzzle climb.
Silencer ($500) - Add a silencer to the weapon; reduces detection by enemies when firing.
Drum Magazine ($500) - Twice as many rounds before reload.
Big Bore ($2000) - Significantly increases damage.
Improved Rifling ($1000) - Improves weapon accuracy.
Kar 98
Found: Various (first Train Station).
Description: Your run-of-the-mill sniper rifle. Useful for taking out distant targets and thinning enemy ranks. Effectiveness increases significantly once fully-upgraded. If you plan on using this weapon often, make the Sniper Scope upgrade an early purchase.
Available Upgrades: Improved Rifling ($500) - Improve weapon accuracy.
Silencer ($500) - Add silencer to the weapon; reduces detection by enemies when firing.
Stripper Clip ($1500) - Adds the capacity of five rounds before reloading and speeds reloading process overall.
Big Bore ($1000) - Significantly increases damage.
Sniper Scope ($2500) - Attach a telescopic scope to the weapon, greatly increasing its effectiveness.
Bayonet ($500) - Attach an eight inch blade to the end of the barrel, greatly increasing effectiveness as a melee weapon.
MP43
Found: Various (first Train Station).
Description: Standard assault rifle. Very powerful once fully-upgraded, even more so when coupled with Empower. Can effectively take down all non-boss enemies. Ammo is much more common in the later stages of the game (SS units carry one); make this your all-purpose weapon when the ammo for it becomes plentiful.
Available Upgrades: Improved Rifling ($500) - Improve weapon accuracy.
Drum Magazine ($500) - Twice as many rounds before reload.
Ammo Pouch ($750) - Carry more ammo for the weapon (460).
Big Bore ($1500) - Significantly increases damage.
Tactical Scope ($3000) - Attach a medium power telescopic scope to improve aiming at distant targets. An unessential upgrade and rather costly.
Recoil Compensator ($1000) - Reduce recoil and muzzle climb.
Particle Cannon
Found: Various (first Church).
Description: Weapon used by Veil Heavy Troopers. Great for clearing out a room of enemies quickly. Effective against Despoiled and Veil Assassins.
Available Upgrades: Particle Lens ($1500) - Increases maximum range of particle beam and improves beam consistency.
Veil Catalyst ($500) - Reduces start-up time.
Improved Veil Capacitor ($1000) - Increases total ammo capacity.
Beam Intensifier ($1000) - Significantly increases damage.
Flux Arc ($2000) - Particle beam tracks enemies.
Panzerschreck
Found: Various (first Farm).
Description: A rocket launcher with limited use. Ammo is quite uncommon. Most useful for clearing small rooms full of enemies or setting off explosive barrels in the distance.
Available Upgrades: Light Weight Build ($1000) - Improve B.J.’s movement speed while weapon is equipped. Improve sighting.
High Explosives ($500) - Increase rocket blast radius and damage.
Ammo Pouch ($500) - Carry more ammo for the weapon (13 rockets).
Stabilized Rockets ($500) - Improve rocket accuracy and range.
Magazine ($2000) - Allows firing of three rounds before reloading.
Seeker Crystal ($2500) - Adds homing to rockets.
Flammenwerfer
Found: Various (first Cannery).
Description: Not the most useful weapon. Only truly effective at close range, as it can sometimes be used to get out of a bind. You can set yourself aflame and take damage, so be careful while wielding this weapon.
Available Upgrades: Improved Fuel Pump ($1000) - Increases maximum burst duration.
Expanded Tank ($1000) - Double ammunition capacity to 60.
Carburetion ($2000) - Significantly increase damage.
Pump Overdrive ($500) - Increase weapon range.
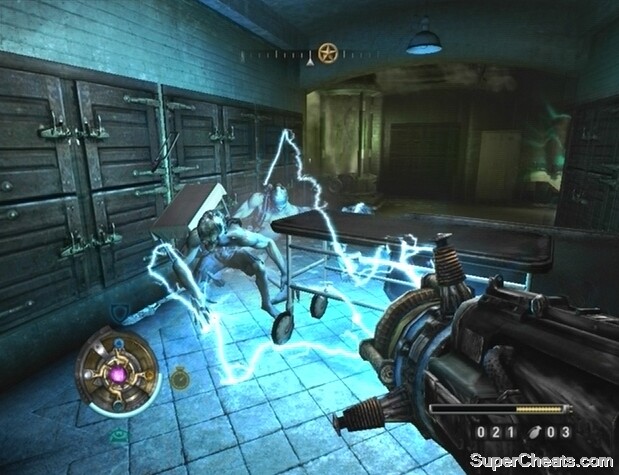
Tesla Gun
Found: Hospital.
Description: A powerful weapon useful for taking down groups of enemies. Electricity arcs can target several enemies at once. Most enemies remain stunned while being electrocuted. Effective against Veil Assassins, Scribes, and Sniffers. Ammo quite uncommon.
Available Upgrades: Upgraded Battery ($1000) - Double ammo capacity to 120.
Step Transformer ($1000) - Significantly increase damage.
Mk2 Generator ($500) - Reduce start-up time.
Arc Nodes ($500) - Attach metal reinforced nodes to the device’s barrel, greatly increasing effectiveness as a melee weapon.
Coil Upgrade ($2000) - Generate more arcs, increasing ability to damage multiple enemies.
Current Induction ($2000) - Arcs can chain through multiple enemies.
Leichenfaust 44
Found: Castle.
Description: This weapon offers the highest damage output. Can dissolve most enemies with a single shot; enemies that survive the initial blast will be launched into the air due to the weapon’s gravity wake. Effective against most enemies, but most importantly Altered, Scribes, Despoiled, and Veil Assassins. Ammo is quite rare, so use only when necessary.
Available Upgrades: Gallium Transformer ($1000) - Reduce recharge time after firing.
Nacrite Resonator ($1000) - Projectiles travel faster.
Planck Refractor ($2000) - Widens radius of effect.
Iridum Canister ($1500) - Increase ammo capacity to 30.
Mdl. 24 Grenade
Found: Various (first Train Station)
Description: Effective in close quarters. Hold to decrease detonation time before throwing.
Available Upgrades: High Explosives ($3000) - Expands blast radius.
Ammo Satchel ($2000) - Carry more grenades (6).
Fragmentation ($1000) - Thrown grenades produce metal fragments on detonation to increase damage.
There are three different types of collectibles in Wolfenstein: Gold, Intel, and Tomes of Power. There are collectibles hidden in each level, as well as in the mission hubs Midtown West, Midtown East, Downtown, and Downtown West.
This guide contains directions to each and every collectible in the game, including a map of all of the treasure hidden in Isenstadt. For the mission collectibles, see the appropriate section of the guide and follow the walkthrough to completion to collect each one. For the mission hub collectibles, refer to the Midtown West Treasure Map, Midtown East Treasure Map, or Downtown Treasure Map section of the guide to find a map and explicit directions to each treasure marked on it.
Gold - Can be used to purchase upgrades for your weapons and Veil Powers.
Intel - Unlocks specific purchasable weapon upgrades.
Tomes of Power - Unlocks purchasable upgrades for your Veil Powers. The number of Tomes collected determines which upgrades are unlocked.
The Thule Medallion image in the bottom-left corner of the screen displays your Veil Powers. Using Veil Powers requires Veil Energy; the meter along the bottom-half of the Thule Medallion image will deplete while one or more Veil Powers are active. To recharge your medallion, stand in a Veil Pool, next to a wall Veil Energy source, or absorb energy from a Veil Energy container.
As with your other weapons, you can upgrade Veil. The following upgrades are available under the “Veil” section of the Upgrade Purchase menu.
Inner Light ($1500) - Increase Veil Energy pool (2 Tomes).
Veil Sight ($2000) - See enemies through walls and other solid matter (4 Tomes).
Inner Brilliance ($1500) - Increase Veil Energy pool further (8 Tomes).
Crystal Harmony ($2000) - Increase Veil Energy pool to maximum amount (16 Tomes).
Veil Sight
Found: Dig Site.
Description: Used to reveal hidden Veil Doors, Veil Ladders, and to highlight enemy weak points and secrets. Also increases movement speed. Consumes the least amount of Veil Energy, so use this rather than another power when the need to use a Veil Door or Veil Ladder arises.
Mire
Found: Dig Site.
Description: Slow time to dodge bullets (such as those from an MG42), traps, and other projectiles. Can also be used to slow down quick enemies such as the Veil Assassin. Drains Veil Energy noticeably quicker than other powers.
Available Upgrades: Slowing Crystal ($1000) - Enemies move even slower while Mire is active.
Shearing Crystal ($3000) - Projectiles damage nearby enemies and objects when Mire is activated.
Shield
Found: Farm.
Description: Stop enemy bullets and explosions (provided they go off outside of the shield). Enemies can still melee you, however, and those within the protective ring can even shoot you, so don’t get too comfortable.
Available Upgrades: Reflective Crystal ($1000) - Stopped bullets bounce back.
Reactive Crystal ($3000) - Shield will disintegrate some enemies who touch it.
Empower
Found: Hospital.
Description: Damage output is greatly increased while this power is active and you can shoot through Veil Shields. Weapon accuracy also greatly improves.
Available Upgrades: Piercing Crystal ($1000) - Attacks can pass through most light cover such as boxes, crates, and so on.
Penetrating Crystal ($2000) - Attacks can pass through metal, stone, and concrete.
Scribe - Can shield allies and self, throw projectiles, and use the Veil Speed power. Before you have access to Empower, use your Kar 98 to headshot the Scribe while he is busy shielding his allies. Once you have Empower, use it along with an upgraded MP43 or MP40.
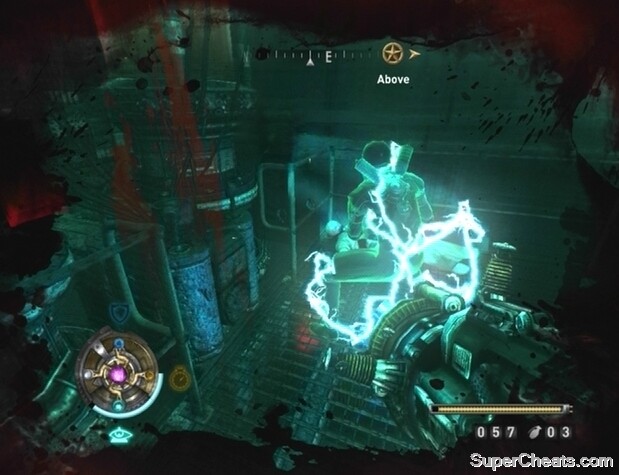
Heavy Trooper - A heavily-armoured, Particle Cannon-wielding enemy. Though quite fearsome, Heavy Troopers can be brought down without too much difficulty. Switch on Veil Sight and you’ll see that the crystals on the Heavy Troopers shoulders are his weak points. Shatter both of these crystals with gunfire and a third crystal will rise up from the back of his armor; blast this last crystal and he’s finished.
The trick to beating a Heavy Trooper is to stay close and circle around him to avoid his deadly Particle Cannon. The Mire ability can come in handy here, though the Heavy Trooper possesses the ability to temporarily disable your Veil Powers. If done quickly enough, you can activate Mire, take aim to shatter the two crystals on his shoulders, and then destroy the crystal that appears behind his neck before he is able to deactivate your power.
When all three crystals have been shattered, keep your distance, as the Heavy Trooper will soon explode. If you lack Veil Energy and come up against a Heavy Trooper, just get really close to him and circle around firing your gun without aiming in an attempt to shatter the crystals on his shoulders. Then, back away and blast the third crystal to put an end to him.
Despoiled - These undead enemies move quickly and can throw projectiles with considerable accuracy. The Particle Cannon, Tesla Gun, or Leichenfaust 44 will make short work of this enemy, but if you lack ammo or don’t have access to those weapons you may have a tougher time. The Despoiled seems to be immune to Mire, so just keep your distance and hit him with an upgraded MP40 or MP43 and Empower (if unlocked). Elite Guards can summon these enemies using the bodies of fallen Nazis.
Sniffers - Feral enemies that travel in packs and can inflict lethal melee damage. Sniffers can only swipe when close, so the key to killing a pack of them unscathed is to keep your distance. Back away from approaching Sniffers and fire at them; they don’t take much to kill. You can target the machinery strapped to their backs to cause them to explode.
Veil Assassin - This frighteningly fast enemy remains cloaked until he strikes he is ready to strike his target. While cloaked, Veil Assassins can be seen with Veil Sight. If you have Veil Energy, you can use Mire to slow him down. Then, get behind him after he misses an attack and continuously hit him with gunfire until he falls. If you don’t have enough Veil Energy to make this tactic worthwhile, killing a Veil Assassin just comes down to reaction time. It doesn’t take much to kill an Assassin, but they’re deadly at close-range.
Facing a Veil Assassin can be tough in narrow corridors. Just don’t back yourself into a corner if you see him running at you; try dodging his initial swipe, as he is slow to recover after an attack. The Particle Cannon can make short work of him, but if you don’t have any ammo for that weapon, an upgraded MP40 or MP43 should work just as well.
Drache Trooper - Wields a Flammenwerfer (flamethrower), so keep your distance when you spot one to avoid being set aflame. Activate Empower and attack the Drache Trooper with your MP43 or MP40. He moves very slowly, so all in all he isn’t much of a threat as long as you’re aware of his presence while he’s distant.
Jetpack Trooper - Flying enemies that drop explosives. Seek cover and use Empower and an upgraded MP43 or an upgraded Kar 98 to shoot them out of the sky.
Elite Guard - Quick female warriors who excel in close quarters combat. Some wield a whip-like weapon that can launch projectiles. Very deadly if they manage to get up close as their strikes will cause you to stagger, so back away when you spot one and continuously fire until she falls. Can summon Despoiled using the bodies of fallen Nazis.
Altered - A large brute of an enemy. The first is encountered via a boss battle to end a level, and those encountered after it can be dissolved with ease using the Leichenfaust 44 weapon.
Geist - These creatures are only visible while Veil is active. While not enemies per se, those in the area can become hostile if you kill one of their kind. Killing a Geist that is floating near an enemy will often cause a stream of electricity to zap that enemy. Don’t use this tactic too often though, as the next time you enter Veil you may find yourself overwhelmed by hostile Geists.
Objective: Meet the Resistance.
Wait until the train comes to a stop, then follow the man through the open door up ahead and drop down the hole that you come to. Press the B/Circle button to crouch and move through the low tunnel here. Move through the next one and continue heading in this direction toward the waterfall in the distance. Use the Y/Triangle button to open the case behind the waterfall to reveal GOLD (1/11). Take the treasure, then click and hold the Left Stick and sprint down the adjacent tunnel. Use the A/X button to hop up the two ledges you come to, and then climb up the ladder at the end.
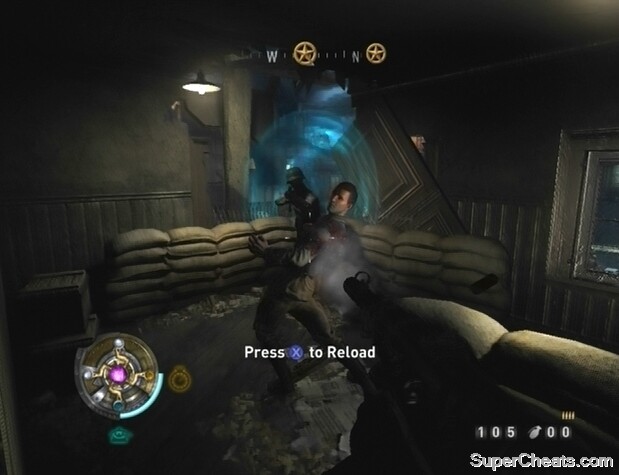
Once up the ladder you’ll meet Erik Engle. When he is finished speaking, look to the counter on the east side of the room to spot GOLD (2/11) next to an oven. Then, approach the weapons on the table next to the hole you just climbed out of to pick them up. When you have the weapons, proceed into the next room and look for INTEL (1/5) on the diner table to your right. Pick up the Intel and take position by the door at the north end of the room. Three Nazis will soon enter the room, so be ready for them.
Help the rebels kill the Nazis that come through the door.
Objective: Clear out the Nazis.
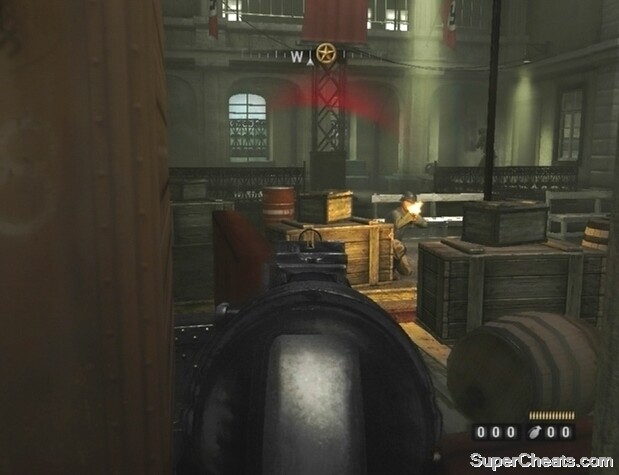
When the trio of enemies has been taken care of, proceed through the door and look on the cabinet behind the counter straight ahead to spot GOLD (3/11). There are many more enemies in the station through the door at the west end of this room, so don’t just charge in there. You can press the B/Circle button to crouch and hold down the LT/L2 button to look through the iron sight of your MP40. The enemies will likely take cover below the windows next to the door, so wait until they pop up to shoot and then blast them.
Once the doorway is clear, move through and take cover behind the railing there. Take aim and fire at the enemies on the other side of the tracks when they pop out from cover. You can lob a grenade over by pressing the LB/L1 button; hold the button to decrease the detonation time. When you are no longer being fired at, go down the steps and start heading north along the platform. There is likely a Nazi or two at this end, so gun them down before doing anything else.
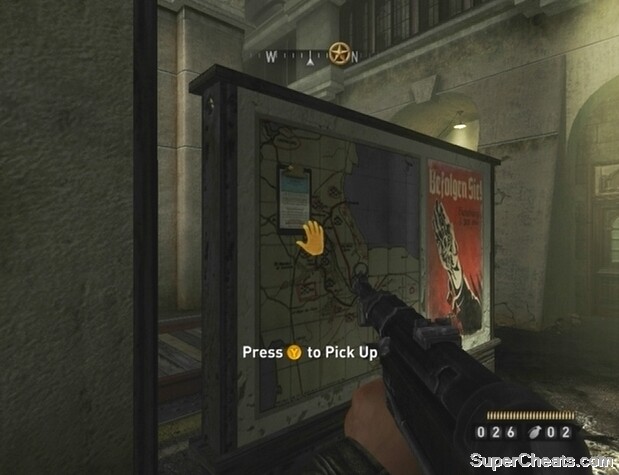
At the north end of the platform, look for a crate in the alcove up the two steps beyond the pillars; move up to it, and click the Right Stick twice to break it. With the crate out of the way, press the B/Circle button to crouch and move through the low opening to find the case that holds GOLD (4/11). Crouch back through the opening and look on the city map and propaganda bulletin board to spot INTEL (2/5). Continue to the very north end of the platform and look for GOLD (5/11) in the corner there.
Collect enemy Intel to unlock purchasable weapon upgrades.
After collecting the treasure at the north end of the platform, move west across the tracks to the platform on the other side. Keep an eye out for explosive barrels, as these will explode when shot. When targeting one to take out an enemy, just be careful not to be caught in the blast yourself.
Objective: Dynamite the door.
Before attaching dynamite to the door that your compass is pointing to, make your way to the platform at the west end of the station and hug the wall there. Walk south along this wall while looking to the ground and you’ll soon come across GOLD (6/11). At the edge of the track right across from the gold is INTEL (3/5).
When you have the gold and Intel item, return to the door at the north end of the station. Approach the door and hold the Y/Triangle button when prompted to begin planting the dynamite. With that done, move away from the door until the onscreen proximity indicator disappears to ensure that you won’t be killed in the blast.
Objective: Get to the train.
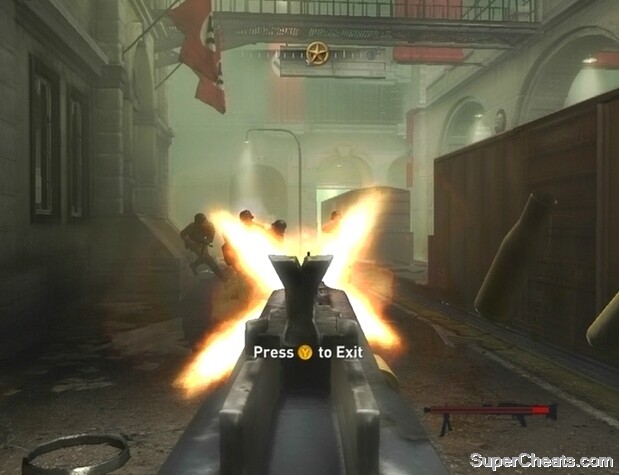
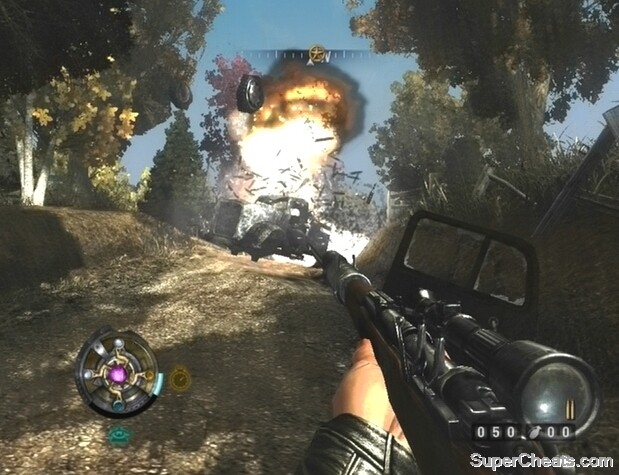
Follow Erik Engel and the others through the door once it’s been destroyed by the dynamite and crouch behind the train car you come to. There will be some Nazis on the western platform; look for an explosive barrel nearby and set it off with gunfire to hopefully take out a couple of them. The other enemies will likely take cover along the railing at the southwest end of the platform, so consider tossing a grenade or two over to scatter them.
Target conveniently-placed explosive barrels to wipe out nearby enemies.
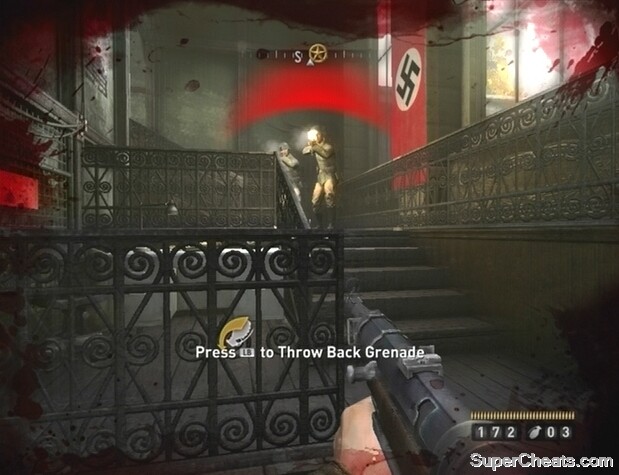
Keep an eye out for thrown grenades yourself; when the grenade indicator appears onscreen, either move away until it disappears, or frantically search for the thrown grenade and attempt to throw it back. If you’re sitting right on the thrown grenade, press the LB/L1 button to toss it back (when prompted). Unless the grenade is in plain sight, you’ll just want to move away, as attempting to throw it back can be risky.
If you picked up a Kar 98, use it to pick off the remaining enemies on the western platform. Be sure to use the iron sight (hold down LT/L2) to improve accuracy. When the western platform is clear, move in and pick up as much ammunition as you can carry from the dropped weapons. Then, start walking north down the platform and keep an eye on your left. When you come to some crates and barrels, look behind them for a case containing GOLD (7/11).
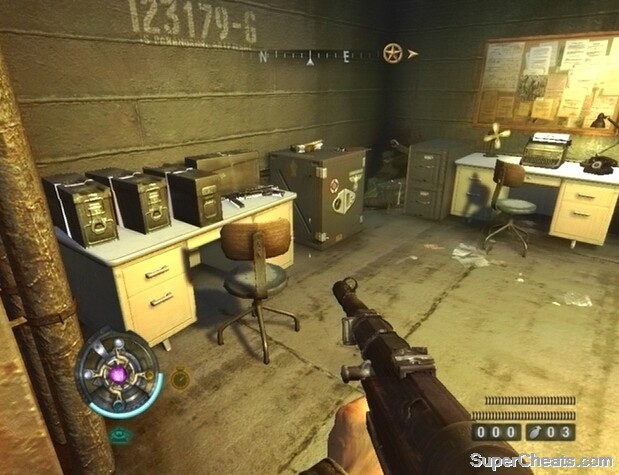
When you have the gold, continue through the doorway in the middle of the western platform and start toward the stairs at the other end. There is a group of enemies through here, so keep your distance when they appear and take them out before moving on. When the way is clear, look on the desk in the small area between the two sets of steps for INTEL (4/5). Continue all the way up the steps and onto the upper level. Look for GOLD (8/11) next to the desk in the southwest corner of this area.
Fight your way up the stairs.
There are more enemies on the walkway across the two bridges at the east end of the area. Use the Kar 98 to kill any enemies on the walkway, and then cross the bridge, crouch, and move along the railing between the two. There are still more Nazis in the building across from the second set of bridges; hit them through the windows when they pop up to fire (or try to set off the explosive barrel visible through the right-most window), and then continue down either of the bridges and into the next area. INTEL (5/5) is on the desk in the compartment at the north end of this area. GOLD (9/11) is next to some crates near the edge of the platform in the northeast corner.
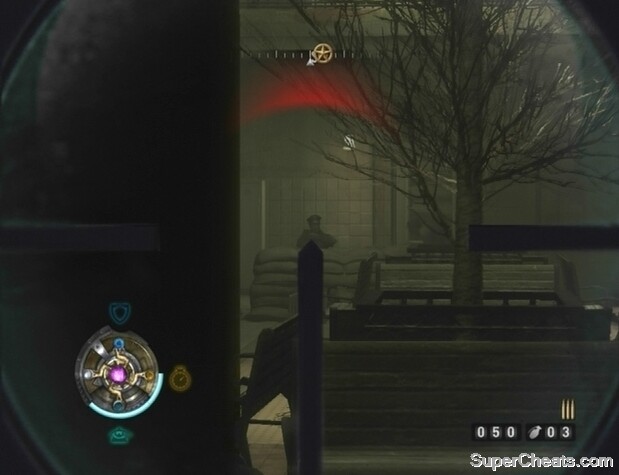
After collecting the Gold and Intel, climb down the steps at the southeast end of the area and be ready to shoot some Nazis. Kill the enemies downstairs, and then move toward the doorway in the northwest corner. You should be able to see more enemies through here, particularly one on a mounted MG42 behind some sandbags. Kill the gunner with the Kar 98 or a thrown grenade and then take to the others on the platform.
Objective: Use the MG42.
When the platform is clear, approach the mounted MG42 at the north end and take control of it. Use the MG42 to cut down the two waves of enemies that appear. The gun will lock if the meter in the bottom-right corner of the screen fills up, so don’t fire unless there’s something in your sights to avoid having the weapon overheat. When the two waves are down, one of your allies will plant dynamite on the train car. Move away until the dynamite indicator disappears to ensure that you aren’t caught in the blast. The train car seems to have been carrying some strange cargo, as everyone in the near vicinity will be set floating in the air when the dynamite goes off.
Use the MG42 to mow down the approaching Nazis.
Objective: Escape the Station.
Continue through the door behind the MG42 and up the stairs at the northeast end of this area. You’ll encounter two Nazis through the doorway, but another explosion will go off, sending the two of them—and you—floating into the air. Blast the airborne Nazis until they drop their weapons. Once things are back to normal, open the container in the column at the east end of the area between the two sets of steps to collect GOLD (10/11).
Another explosion will go off upstairs. Kill any airborne Nazis you can see, and then quickly head west to the other end of the room. When the environment returns to normal, look around for any grounded Nazis struggling to get back on their feet and quickly finish them off. Then, look in the small compartment between the rubble in the middle of the area for GOLD (11/11) on the ground by some rubble.
Take cover behind the railing at the northeast end of the room. There are some enemies on the platform at the north end; try throwing a grenade up there to hopefully clear most of them out. Throw it at the door and it should bounce back down to the platform. When the way is clear, hop up onto the platform and proceed through the door to Midtown West.
Kill three floating enemies to unlock the “Enemies in a Barrel” achievement or trophy.
Before moving on to this mission, you first must visit the Black Market in Midtown West. Follow the man through the marked door and drop down the trap door to reach the Black Market. By speaking to the man standing in front of the opening in the wall, you can buy upgrades and ammo for your weapons. Collecting enemy Intel in the levels will unlock new upgrades for purchase. Select a locked upgrade to determine in which level the Intel to unlock that upgrade is found.
Once you’ve been to the Black Market, climb back up the ladder and follow the man to the Kreisau Circle Safe House to meet with Erik Engle. At the Safe House, make your way down to the basement and speak to Erik Engle and Caroline Becker.
After a short chat, you’ll be instructed to meet your driver at the mission start point. Exit the safe house and start following the man to the truck. You’ll meet some resistance along the way, so take the time to clear them out before pressing on. Once through the Nazi road block, open the large wooden door and interact with the truck when prompted to travel to Dig Site.
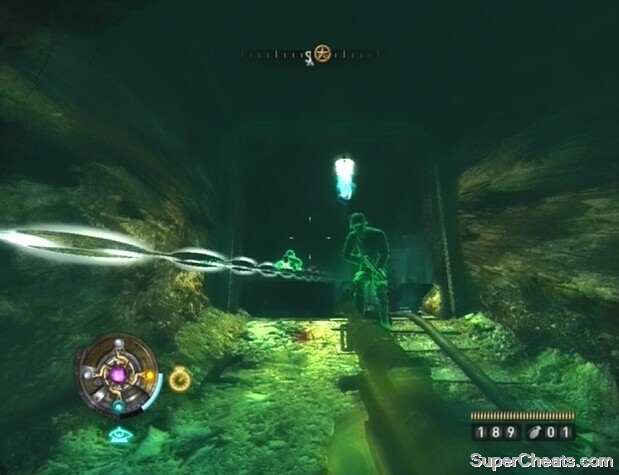
Objective: Find the Thule Medallion
After the cutscene, turn left and look next to the wooden shelf to spot GOLD (1/11). Leave the tent and hit the Nazi outside with a melee attack by clicking the Right Stick. Do the same to the Nazi behind the sandbags further up, and then head northwest and enter the tent there. Open the container between two of the beds in this tent to find GOLD (2/11). Look for an identical container between two of the beds on the opposite side of the tent and open it to find GOLD (3/11).
Use your Kar 98 to kill the Nazis in the opening area.
When you have the two pieces of gold, head back outside and start picking off the Nazis in this area with your Kar 98. There are a couple of conveniently-placed explosive barrels in this area, so make use of them. Try tossing a grenade behind the overturned pillar through the opening at the north end of this room to blow apart the enemies there.
There’s a bunch of ammo and INTEL (1/6) below the canopy in the southeast corner of this area, so be sure to collect those items before moving on. When you have the first piece of Intel, enter the corridor through the opening in the wall at the north end of the area. As you move down the corridor, keep an eye on your left for INTEL (2/6) on a table next to some ammo and grenades. With that, continue moving to the end of the corridor to reach some steps.
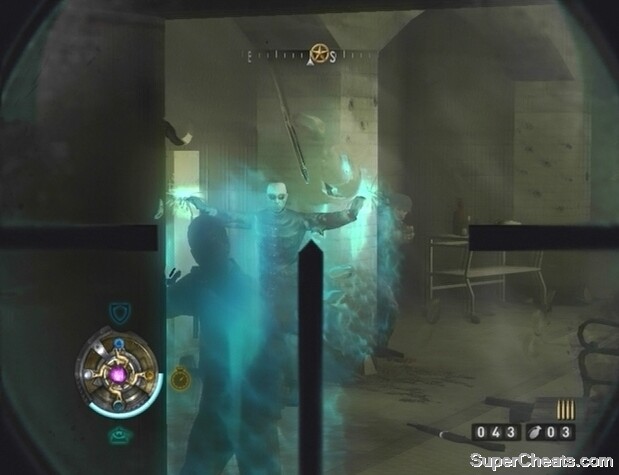
A Scribe and some Nazis guard the Thule Medallion. Scribes are powerful enemies who use magic to shield their allies and launch projectiles. They can also use a Veil Speed power to avoid enemy fire. Before starting up the steps, crouch and slowly move up until the Scribe, who has his back turned, is in view.
Nazi Scribes can shield their allies with Veil and throw projectiles.
Switch to your Kar 98 if you don’t have it out already and take aim at the Scribe’s head. If you can manage a headshot, the Scribe will slump over immediately after, saving you the trouble of facing him normally. The accompanying enemies will scatter, so use your Kar 98 to pick them off as they pop out from cover.
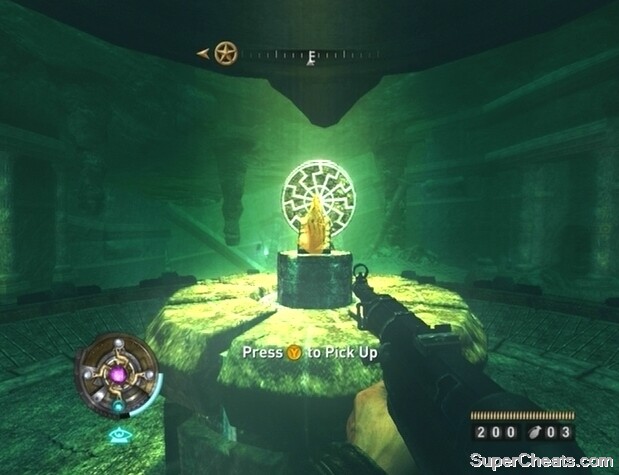
When the room is clear, the Thule Medallion is yours for the taking. Approach the strange object in the middle of the room and press the Y/Triangle button when prompted. The Thule Medallion will appear, allowing you to pluck it up for your own use.
Objective: Follow Sergei’s Instructions.
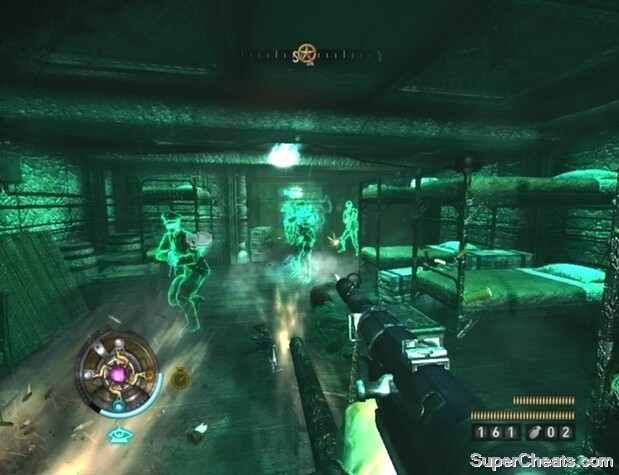
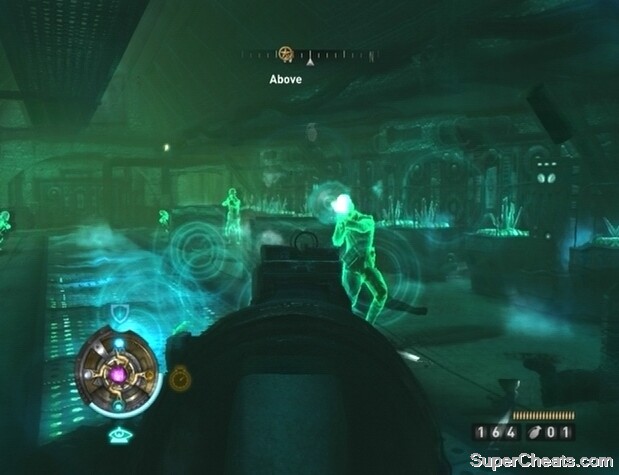
Sergei is well-versed in the mysterious powers that the Nazis seek to control, and so he will teach you about the Thule Medallion. With the Thule Medallion, you can trigger Veil Sight by pressing down on the D-pad. While active, you will be able to see strange spectres called Geists. While not enemies per se, those in the area can become hostile if you kill one of their kind. Killing a Geist that is floating near an enemy will often cause a stream of electricity to zap that enemy. Don’t use this tactic too often though, as the next time you enter Veil you may find yourself overwhelmed by hostile Geists.
The main purpose of Veil Sight is to identify enemy weak points and also reveal secret passages.
Stand in Veil Pools to recharge your medallion.
Objective: Recharge your Medallion.
As Sergei explains, the meter on the medallion in the bottom-left corner of the screen represents how much longer you can utilize an active Veil Power. Veil Pools can be used to replenish your Veil Energy. Toggle Veil Sight and look to the south or north end of the room to spot a Veil Pool. Stand in one of these pools and your medallion will soon be recharged. Though Veil Pools are more evident while using a Veil Power, you can still use them to recharge your medallion without a Veil Power active.
Objective: Use the Veil Door.
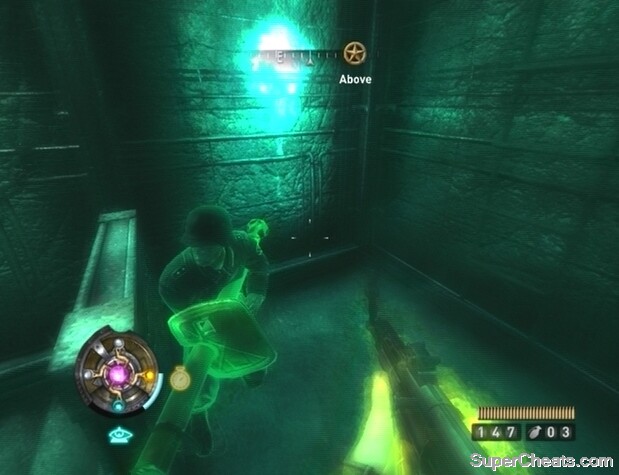
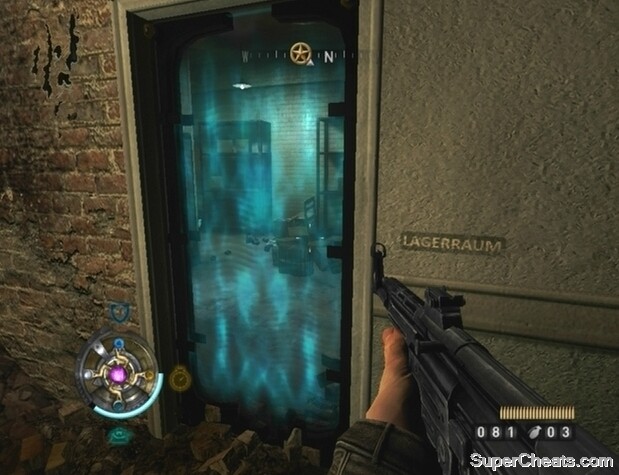
With Veil Sight active, you can move through Veil Doors. To identify a Veil Door, look for a Black Sun symbol on the wall. While moving through a Veil Door, do not switch off Veil Sight, as doing so will effectively kill you.
Objective: Find the Crystal.
Once through the Veil Door, move to the other end of the corridor and blast the Nazis through the Veil Door at the opposite end. There’s another Scribe in this room, so try to headshot him with your Kar 98 while he is busy shielding his allies. When the immediate area is clear of enemies, look for INTEL (3/6) by the broken crate and scaffolding right by the Veil Door you entered through. GOLD (4/11) is in an open container below the Nazi flag across from the Intel.
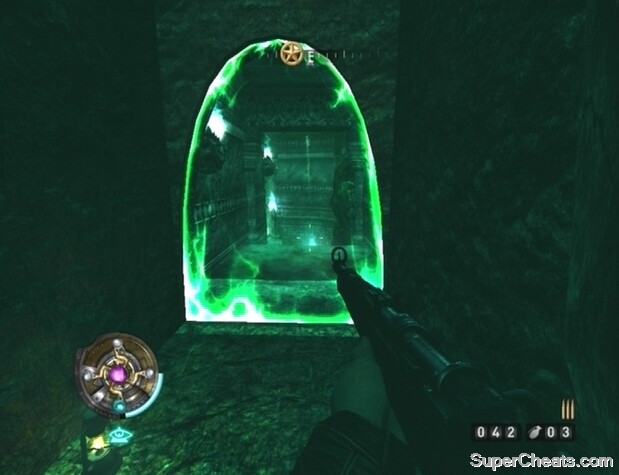
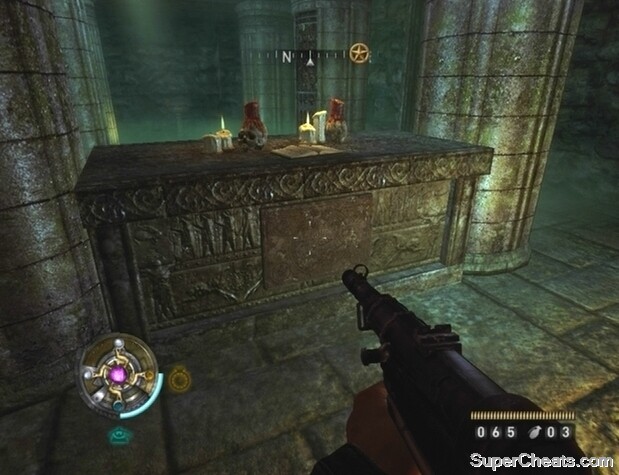
Activate Veil Sight to reveal and access secrets such as the Veil Door pictured here.
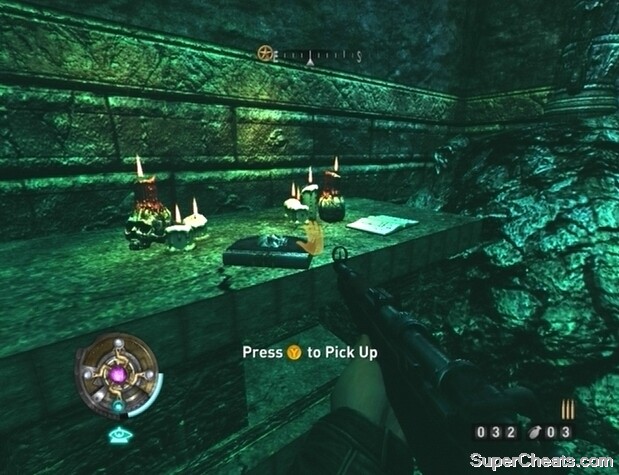
When you have the Intel and Gold, move further north into the area. There may be a couple of enemies by the mine cart track; if so, kill them before doing anything else. With the immediate area clear, look northwest from the west end of the mine cart track to spot another Veil Door. Toggle Veil Sight, hop through the Veil Door, and move to the end of this corridor to spot TOME (1/1) on the table there. Tomes of Power are used to unlock upgrades for your Veil Powers, but are usually quite hard to find.
With the Tome in your possession, hop back through the Veil Door. Climb up the ladder right next to the Veil Door and continue climbing up to the top platform. GOLD (5/11) is in an open container on this platform; you’ll have to crouch to reach it. When you have the Gold, drop down and look for GOLD (6/11) on the ground between the two pillars just before the bridge. Cross the bridge and proceed through the opening in the wall. Through the opening, look north to spot a ladder. Climb up the ladders to the top platform. Move to the north end of the platform along the western side of the corridor and drop down to the lower platform; GOLD (7/11) is in the open container in the alcove here.
Collect Tomes of Power to unlock purchasable upgrades for your Veil Powers.
Once you’ve collected the Gold, drop down and move to the end of the corridor to reach the next area. There’s another Scribe here, as well as a large masher in the middle of the room. Try your best to headshot the Scribe through the opening while his back is turned. If you fail to do this, just be sure to shift to the right to avoid being hit by the projectiles he throws at you.
When the Scribe id dead, hang back and pick off the Nazis through the doorway. When the room is clear, approach the steps that lead up to the crystal and look for INTEL (4/6) on the table northwest of them. GOLD (8/11) is on the ground along the platform east of the Intel. Return to the steps and look for a broken crate southeast of them; GOLD (9/11) is in the open container in front of the crate.
After collecting the treasures in this room, start up the steps that lead to the crystal. Toggle Veil Sight and walk along the highlighted path on the circular platform to avoid being crushed.
Activate Veil Sight and walk on the highlighted path to reach the crystal without being crushed.
Objective: Find a way out before you are crushed.
Collecting the crystal grants you the Mire Veil Power. When toggled, Mire will slow everything around you. Your New Veil Power will be triggered automatically at this point, allowing you to escape before the masher crushes you. Walk down the steps as they descend and look for an opening in the middle of the platform (west) that they surround. Hop through the opening to safety.
Objective: Navigate the temple traps with Mire.
Recharge your medallion using the Veil Pool at the north end of the corridor. The first trap is at the south end of this corridor. Standing on the two panels before this stretch will trigger a group of mashers. Wait until the mashers have retracted completely, and then trigger Mire and sprint through to the other side. Once through to the other side, use the Veil Pool to your left to recharge your medallion.
The next two traps continuously launch projectiles at the wall at the other end of the stretch. The Mire ability comes in handy here once again. Activate Mire and enter the shooting range. Dodge to the left or right in accordance with the approaching projectiles to avoid them and continue forward. At the end of the first stretch, switch off Mire and use the Veil Pool in the alcove to recharge your medallion. Use Mire again to cross to the other end of the second firing range. Stand in the Veil Pool at the end to recharge your medallion. Then, activate Veil Sight and climb up the now visible ladder.
Using Mire to navigate the temple traps.
Walk up the pillars at the top of the ladder and hop onto the higher platform. Continue heading east here—hopping past the overturned pillars and rubble and ignoring the doorway that you come to—and you’ll reach GOLD (10/11) on the broken piece of ground at the end. When you have the Gold, hop back over the rubble and proceed through the doorway there.
Objective: Cross the bridge to reach the excavation area.
Use the Veil Pool to the left of the bridge to recharge your medallion. Then, stand before the bridge and activate Mire when it begins to crumble. With Mire triggered, walk along the remaining bits of bridge to cross to the other side. As soon as you are on the other side, turn left (east) to spot INTEL (5/6) on top of an open crate. With that, head up the steps and into the next area.
Objective: Dynamite the Portal.
Stand on the platform at the other end of the room to raise the door there. Step off of the platform and the door will fall back down. While standing on the platform with the door fully raised, activate Mire and sprint through the door while it slowly falls. A steam of Veil runs through the middle of this area; activate Mire and effortlessly kill the soldiers in this room and the next, running back to the Veil stream to recharge your medallion as necessary. You can also absorb energy from the blue Veil Energy containers.
When the room is clear, approach the Portal and hold the Y/Triangle button to plant the Dynamite. With the Dynamite set, move far enough away for the dynamite indicator to disappear to ensure that you won’t be caught in the blast.
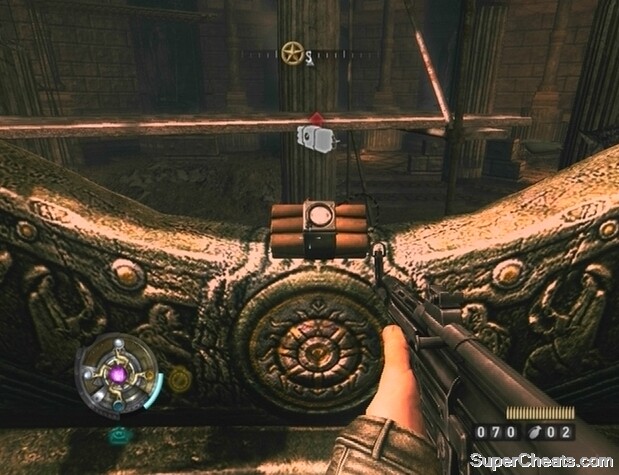
Plant Dynamite on the Portal and back away until the onscreen proximity indicator disappears to avoid being caught in the blast.
Objective: Escape to Midtown.
When the Portal has been destroyed, start following the marker on your compass back to the previous area. Once you’re back in the room with the crumbling bridge, look west to spot a tunnel opening and some enemies. Clear away the enemies and follow the tracks directly west to reach an open container with GOLD (11/11). With that, start following the tracks south. Toggle Veil Sight if you’re having difficulty seeing, and look on the support to the left of the solitary mine cart that you come to for INTEL (6/6).
At the top of the incline just beyond the Intel is an enemy on a mounted MG42. Use the Veil Pool west of the incline to recharge your Medallion and then activate Mire. Move up the incline, dodging the fire from the MG42 as you do so, and blast the gunner and any other soldiers you can before your Veil Energy is completely depleted. If your Veil Energy is low and you are so far unsuccessful at killing the gunner, sprint back to the Veil Pool to recharge and try again.
Use Mire to get close enough to kill the MG42 gunner in the tunnels.
When the way is clear, continue to the other end of the tunnel. This next room is full of enemies, so take your time or activate Veil Sight and rush through. Follow the marker on your compass to a lift. Use this lift to return to Midtown West.
Back in Midtown West, you’ll meet some resistance right out the gate. Take cover behind the door and gun down the Nazis as they pop out from cover. Watch out for thrown grenades as always, and keep up the fight until your enemies lie dead
Following the skirmish, consider visiting the Black Market in Midtown West to upgrade your weapons, particularly the MP40. At this point you can also purchase the Slowing Crystal and Shearing Crystal upgrades for the Mire Veil Power, though they are quite costly. Also, if you look around the map of Midtown West you may notice a Mission Giver marker; visit this marker to take on an optional side quest.
To start this mission, you must visit Caroline Becker in the Kreisau Circle Safe House, so make your way over there. Ensure that “Return to the Kreisau Safe House” is set as your active mission, and follow the marker on your compass. The way to the Church is through Midtown East, so after speaking to Caroline Becker, follow the marker on your compass to reach the mission start point.
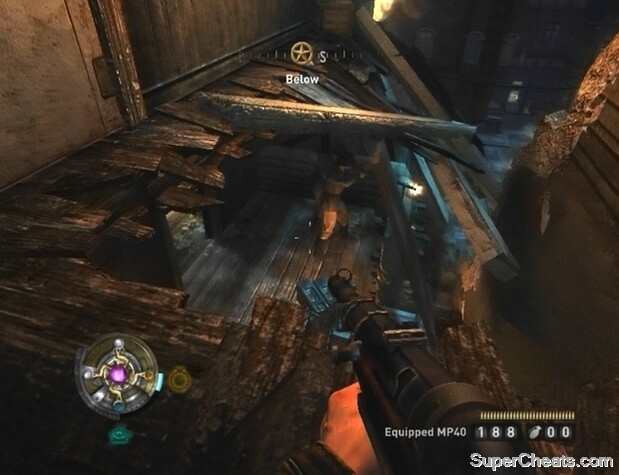
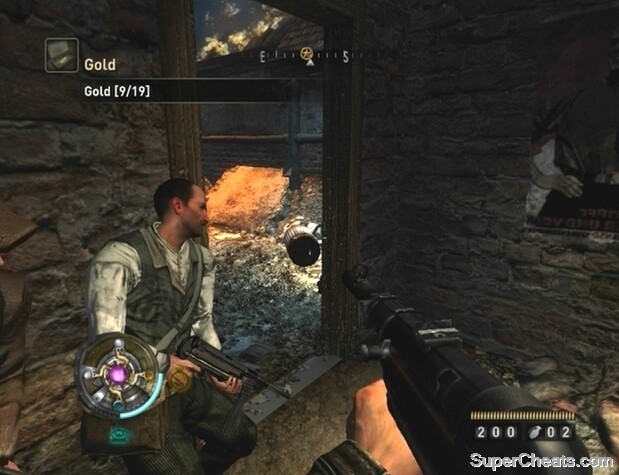
Objective: Clear the Gun Nests (1/2).
Head south and drop down to the mid-level when you reach the ruined stairs. Crouch to avoid taking fire and look for GOLD (1/19) by the post office boxes along the west wall. When you have the Gold, continue to the bottom of the stairs and take to the streets. As soon as you’re through the doorway, turn right (south) and look for some stairs leading up. Take the stairs up to a balcony and collect GOLD (2/19) from the container behind the chair. You’ll be taking heavy fire from the enemy MG42s, so activate Veil Sight, quickly grab the Gold, and duck behind the sandbag near the stairs to recover if you’re wounded.
The Gun Nests are covered by a Veil shield.
When you have the Gold, head back down to street level and sprint up the pile of rubble southeast from the bottom of the steps. Climb up the first set of steps and turn right to spot GOLD (3/19) in the corner there. The first gun nest is nearby, so when you have the Gold, head north and turn right when you can. Proceed through the doorway up ahead and gun down the enemies inside the building. When the room is clear and the gunner is dead, look for INTEL (1/6) on the ground near the MG42.
Objective: Clear the Gun Nests (2/2).
After clearing the first gun nest and collecting the Intel, sprint with Veil Speed active to the northwest end of the street. Look for GOLD (4/19) in the corner at the top of the steps there. Then, climb up the ladder along the building across from the steps (east). Crouch once up the ladder to avoid taking fire from the gun nests, then toggle Veil Sight and move through the Veil Door in the wall at the north end of the walkway. Look for GOLD (5/19) at the end of the corridor beyond the Veil Door.
When you have the Gold, crouch and climb through the window at the top of the rubble next to the collectable. Look next to the door up ahead for INTEL (2/6). With that, walk along the ledge behind the ruined wall south of the Intel and look for GOLD (6/19) behind the boxes at the end. Cross back to the other side of the ledge and blast the Nazis below to clear the second gun nest.
Clear the second gun nest from above.
Objective: Breach the Door.
Once the room below is clear, drop down, collect any ammo on the floor, and then exit into the hallway. Upon entering the hallway, turn right and look on the bottom of the shelf to spot a container; open the container to find GOLD (7/19). With that, move to the end of the walkway and down the steps to meet with your allies outside. Dynamite has been placed on the wooden door at the west end of the area, so keep your distance until it goes off to avoid being caught in the blast.
Objective: Go to the Church.
When the door has been breached, proceed through and head south down the hallway to find plenty of ammo. Upon entering the second room, turn right to spot GOLD (8/19) in the corner there. Exit this room and turn right. Look between the breakable boxes and rubble across from the doorway for GOLD (9/19).
Gun down the Nazis in the ruined building and across the street, then cross the street east and enter the building with the open wall (at the south end of the street). Look behind the stairs to find several boxes of ammo and the container that holds GOLD (10/19). Then, head up the stairs and look on the desk there for INTEL (3/6). Return to street level and regroup with your allies by following the marker on your compass.
Fight your way through the streets.
Objective: Defeat the Heavy Trooper and retrieve the Particle Cannon.
When you reach your allies, a Veil Heavy Trooper will break through a nearby wall and effortlessly dissolve your allies with his Particle Cannon. Heavy Troopers are powerful enemies that you will face regularly from now on. Though quite fearsome, these enemies can be brought down without too much difficulty. Switch on Veil Sight and you’ll see that the crystals on the Heavy Troopers shoulders are his weak points. Shatter both of these crystals with gunfire, and a third crystal will rise up from the back of his armor; blast this last crystal and he’s finished.
The trick to beating a Heavy Trooper is to stay close and circle around him to avoid his deadly Particle Cannon. The Mire ability can come in handy here, though the Heavy Trooper possesses the ability to temporarily disable your Veil Powers. If done quickly enough, you can activate Mire, take aim to shatter the two crystals on his shoulders, and then destroy the crystal that appears behind his neck before he is able to disable your power.
When all three crystals have been shattered, keep your distance, as the Heavy Trooper will soon explode. If you lack Veil Energy and come up against a Heavy Trooper, just get really close to him and circle around while firing your gun without aiming in an attempt to shatter the crystals on his shoulders. Then, back away and blast the third crystal to put an end to him.
Once the Heavy Trooper has been taken care of, pick up the Particle Cannon he leaves behind and test it out on the enemies that rush through the nearby door. You’ll want to conserve the ammo of this weapon however, as the Particle Cannon will make killing the enemy near the end of this level much easier.
Defeating a Veil Heavy Trooper.
Objective: Continue to the Church.
When the Heavy Trooper has been defeated, look for GOLD (11/19) in the western corner of the building that he broke out of. With that, proceed through the door and fight your way into the warehouse across the way. Clear the enemies in the warehouse, then enter the cage at the north end and look for GOLD (12/19) on the bottom shelf. Make your way to the stairs and hop over the two cars behind it (south); GOLD (13/19) is in the corner here.
After collecting the Gold, climb up the steps and kill any enemies upstairs. When the area is clear, look for INTEL (4/6) next to the lectern in the northwest corner of the upstairs level. GOLD (14/19) is behind it.
Follow the marker on your compass and exit the warehouse via the doorway that you come to. Move through the opening in the wall, drop down to street level, and get below the awning. The area is being shelled; activate Mire and run southeast to the ruined building there while avoiding the falling bombs. Once you’ve made it through the square in one piece, look for GOLD (15/19) behind the table in the room at the northwest end of the ruined building. When you have the Gold, follow the marker on your compass down a corridor and to a room with a couple of Nazis and several boxes of ammo. Take the ammo and proceed through the doorway.
Use Mire to make it past the falling bombs in the square.
Back outside, you’ll need to enter the building at the northeast end of the road. The front doors are boarded up, but you can use Veil Sight to move through the secret Veil Door by the windows. Kill the two enemies inside and look at the other end of the lobby for the container that holds GOLD (16/19). When you have the Gold, exit the building via the Veil Door and walk south down the road across from the boarded front doors. Enter the building at the end of the road and look for INTEL (5/6) on the ground by the sandbags inside.
Climb up the stairs at the south end of the room and kill the Nazis upstairs. Walk across the planks and fire at the Nazis in the building across the street. Walk down the second set of planks, then move along the ledge and up another plank to the large opening in the side of the building. Head up the stairs to the third floor, gun down the Nazi in the building across the street, and then walk along the series of planks to reach that building. Once there, move down the hallway and enter the bedroom. Look for GOLD (17/19) behind the tub in the bathroom across from the bed.
The route to the church is complex and hazardous.
In the bedroom, crouch down and click the Right Stick to break the shoddy flooring that light can be seen flashing through. Drop through the opening in the floor and proceed down the steps at the other end of the room. Downstairs, look for INTEL (6/6) on one of the tables along the southern wall.
When you have the final Intel, enter the sewers through the opening in the wall and follow the marker on your compass to enter a tomb. Once there, go behind the bier at the south end of the room, face it, and toggle Veil Sight to reveal a secret. Fire at the highlighted panel on the bier to reveal TOME (1/1). After collecting the Tome of Power, start following the marker on your compass. Collect the ammo that you come to along the way, and then follow the man out to the graveyard. Follow your allies outside and start firing at the Nazis in the area. There’s likely to be a Scribe among them, so be careful.
Fight your way to the other end of the graveyard to reach the church. Look for GOLD (18/19) below the bench at the east end of the graveyard.
Shoot the panel on the bier in the tomb to uncover a Tome of Power.
Objective: Destroy the Machine.
Kill the Nazis in the church and then shoot the Veil Inhibitor at the base of the machine to re-enable your Veil Powers. GOLD (19/19) is between two of power terminals at the north end of the church, so collect that before doing anything more. There’s an abundance of ammo in the church, so stock up before taking to the machine.
To destroy the machine, toggle Veil Sight, look up at the spinning rings, and break each of the highlighted bands.
Objective: Kill the Despoiled.
After the cutscene, you’ll be faced with a Despoiled. The Particle Cannon can make short work of this guy, but if you lack ammo for that weapon you may have a tougher time. Do not use Mire, as the Despoiled seems to be immune to it. Instead, move behind the pillars on either side of the church and switch to your weapon of choice.
If you have the Particle Cannon, simply keep the beam trained on the Despoiled and move back and forth to dodge his projectiles as necessary. If you lack ammo for the Particle Cannon, use either the MP40 or the MP43. If you’ve upgraded one of them, use that one. Just move back and forth to dodge the Despoiled’s projectiles and continuously fire at him without aiming through the iron sight.
Killing the Despoiled with the Particle Cannon and then the MP40.
Objective: Return to Midtown.
When the Despoiled has been defeated, exit the church and head through the door directly across from the entrance. Interact with the truck when prompted to return to Midtown East.
Set “Find the Golden Dawn Safe House” as your active mission and follow the marker on your compass to the Golden Dawn Safe House in Midtown East. There, speak to Leonid Alexandrov, who will direct you to a Tavern.
Follow the marker on your compass to the Tavern in Midtown West. After the cutscene, follow the signalling man into the back room and speak to him for a briefing. You can purchase ammo and upgrades for your weapons by speaking to the other man in this room. Provided you have the cash and have collected at least two Tomes of Power, consider purchasing the Inner Light upgrade ($1500) for your Veil to increase your Veil Energy pool.
Make your way to the mission start point in Midtown East and use the truck there to travel to Farm.
Objective: Search the area.
Cross the stream west of the truck and blast the Nazis in the field. Crouch behind one of the barrels of hay and use your Kar 98 to pick off the enemies in the farmhouse further up. Killing distant enemies is made much easier if you’ve purchased the Sniper Scope upgrade for the weapon. When the stables are clear, make your way over there and head inside. Look for a ladder along the first wall and climb up; GOLD (1/19) is in a container at the other end of the attic.
The Sniper Scope upgrade for the Kar 98 is essential for sniping distant enemies.
Leave the farmhouse and approach the road behind it. There’s an MG42 gunner at the other end, so activate Mire and use your Kar 98 to take him out. When the gunner is down, stand just where the road begins to curve north and look south. Hop over the fence along the side of the road, switch on Veil Sight, and look around for a red panel; shoot the red panel to uncover TOME (1/2). GOLD (2/19) is on the ground next to the mounted MG42 at the other end of the road.
When you have the Tome of Power and Gold, continue down the road. A truck full of Nazis will soon appear; toss a couple of grenades at the truck when it comes to a stop to kill the passengers before they can even get a shot off. There’s another MG42 gunner behind some sandbags further west, so switch on Mire and headshot him with your Kar 98.
With the gunner dead, continue west down the road and keep an eye on your left for a building. Approach the building and use Veil Sight to move through the Veil Door on it. Look for a ladder along the west side of the dividing wall and climb up. Look below the window on the northwest side of the attic for GOLD (3/19) and GOLD (4/19).
Toss a grenade or two when the truck comes to a stop to kill the Nazis in the back.
After collecting the Gold, exit the building through the Veil Door and continue heading west. Another enemy may have taken control of the MG42; if so, be sure to pick him off before continuing on.
Objective: Investigate the Farmhouse.
Enter through the backdoor of the farmhouse along the north side of the road. Upon entering, head through the doorway at the other end of the room and then turn through the doorway on your right. Look for INTEL (1/5) on the table along the west wall of this room, and search the cabinet by the windows for INTEL (2/5). GOLD (5/19) is in the closet next to the table along the west wall.
Return to the first room and head up the stairs to reach the second floor. There are sure to be enemies on this level, so be careful. At the top of the stairs, enter the room straight across and look for INTEL (3/5) on the desk along the north wall. The cabinet next to this desk holds plenty of Kar 98 and MP43 ammo. Head through the doorway next to the desk and then through the doorway on your left. GOLD (6/19) is under the bunk bed along the south wall of this room, and INTEL (4/5) is on the table in the northeast corner.
When you have the Gold and Intel, return to the previous room and activate Veil Sight to reveal a Veil Door along the north wall. Move through and cross the ladder to the upper level of the barn. Drop down to the first floor and look for GOLD (7/19) by the skids in the northwest corner.
Drop down the trapdoor in the barn to reach the tunnels.
Objective: Explore the Tunnels.
Drop down the trap door in the northeast corner of the barn and follow the corridor to the next room. There are sure to be plenty of Nazis in the opening area, so don’t just rush in there. Be ready with a grenade, and hopefully you’ll be able to clear out the majority of them. When the room is clear, collect GOLD (8/19) next to the bunk bed just before the doorway, and then continue on into the next area.
There are several soldiers and one or two Scribes in the next area. Try to headshot each Scribe while he is busy shielding the soldiers. If you can’t get past the shielded soldiers to kill the Scribes, try toggling Mire and rushing past them. When the area is clear, look for GOLD (9/19) on the ground next to the large, unbreakable crates along the north wall.
One of the soldiers in the next corridor is wielding a Panzerschreck (rocket launcher), so you definitely want to be able to use Mire to avoid being gibbed. There’s a Veil Pool at the east end of the previous area, so be sure to recharge your medallion before continuing on. Before turning the corner in the corridor, activate Mire. Then, turn the corner, run up the steps, and melee the soldier there to death. He shouldn’t be able to fire a missile, but just dodge to the side if he does.
Use Mire to reach the Panzerschreck-wielding soldier before he gibs you.
Climb up the ladder and look for GOLD (10/19) on the shelf before the Veil Pool at the other end of the room. Enter the next room and crouch behind the barrels of hay just past the door. Gun down the enemies here, prioritizing those on the upper walkway, and then head up the stairs at the other end of the room. Some enemies will come from the lift here; kill them, and then use the lift to travel to the Caverns.
Objective: Search the underground complex.
When you reach the caverns, climb up the ladder and start by gunning down the Nazis in the area below. Look for an explosive barrel and several enemies on a platform at the other end of the area; set off the explosive barrel there to wipe them out. There are more explosive barrels on the walkways below, so target those as well. Take cover behind the tanks up here to avoid taking enemy fire and look for GOLD (11/19) in the container behind them. Watch for thrown grenades as always, and toss them back if possible. If you have the Kar 98 Sniper Scope upgrade, use it to pick off the remaining enemies on the walkways below.
After clearing the walkways, drop down and make your way to the middle platform that has a pipe connected to it. Hop over the railing and onto the pipe. Walk up the pipe, jump onto the platform at the top, head through the doorway, and activate Veil Sight to reveal a red panel. Blast the panel to reveal TOME (2/2) behind it. With that, walk back down the pipe and hop back onto the walkway.
Collecting the second Tome of Power.
Make your way to the east end of the walkway and head through the door in the southeast corner. GOLD (12/19) is next to the machine in this room. When you have the Gold, leave the room and take the nearby steps down to the lower walkway. Proceed through the open double-door at the bottom of the second set of steps. Clear the next room of enemies, and then untie the bound agent.
Objective: Find a way down.
Look for INTEL (5/5) on the container in the northeast corner of the office in the middle of the area. Move through the shielded door when the agent deactivates it for you. Turn left through the open gate and activate Veil Sight in the next room to reveal a Veil Door. Move through the Veil Door and look for GOLD (13/19) at the foot of the locked door at the other end of the walkway.
Return to the previous hallway and walk down the steps. Step into the lift at the other end and use it to reach the lower level.
Objective: Descend to the next level.
Fight your way down the corridor until you come to a locked double-door. There’s a shielded gun nest at the other end of the corridor across from the locked double-door. To get past it, activate Veil Sight, rush into the corridor and look for a Veil Door near the start of the south wall. Move through the Veil Door and to the other end of the secret passage to reach the gunner. Kill the gunner and then return to the corridor through the Veil Doors.
Killing the shielded MP42 gunners in the Caverns.
Head to the other end of the corridor and blast the soldier and Veil Inhibitor in the next room. Jump over the railing around one of the pillars to drop down to the ground below the walkway. GOLD (14/19) is in the northwest corner of this area. When you have the Gold, climb up the ladder in the southeast corner to return to the walkway. Back on the walkway, approach the seemingly inaccessible double-door in the northwest corner and activate Veil Sight to reveal a Veil Door. GOLD (15/19) and GOLD (16/19) are on the table along the west wall of this secret area.
After collecting the Gold, return to the previous area and follow the marker on your compass into the next area. Fight your way across the bridge and proceed through the open double-door at the other end. There’s another shielded gun nest at the end of this corridor. Take care of this gunner the same way you did the last: activate Veil Sight, duck through the Veil Door along the east wall, walk to the end of the secret passage to get into the gun nest, and blast him. Look for GOLD (17/19) on the ground next to the mounted MG42.
Follow the marker on your compass to the double-door and enter the next area. Climb down the spiral steps to complete the objective.
Objective: Continue downwards.
Proceed through the doorway at the bottom of the steps and gun down the Nazis in the hallway. There is plenty of ammo for your weapons in the windowed office, so be sure to head in there to stock up. Head up the steps across from the doorway back to the spiral stairs and open the double-door. Fire at the enemies on and below the catwalk, taking advantage of any conveniently-placed explosive barrels, and make your way to the control room at the other end. Look for GOLD (18/19) on the ground between the two computers.
Fill your weapons before moving on.
When you have the Gold, return to the previous area and follow the marker on your compass. Make your way to the other end of the generator room and proceed down the stairs there.
Objective: Find the Crystal.
Follow the marker on your compass to a room with some scientists, and then proceed through the double-door. Use your Kar 98 to kill the Nazis on the bridge, along the adjacent walkway, and those closer up. When the area is clear, go to the south end of the walkway you are on; GOLD (19/19) is on the large, circular drum here. To get to it, hop on the railing along the walkway, then up onto the platform and over to the top of the drum. Open the container here to collect the Gold.
Cross to the other side of the bridge and open the door there. Use the switch to bring up the contraption that holds the crystal in the next room. Sprint to the other end of the room behind the switch and activate the machine to reveal the crystal. Pick up the crystal to gain the Shield Veil Power. The Shield power can stop enemy bullets and protect you from explosions that occur outside of it. Enemies can still melee you, however, and those within the protective ring can even shoot you, so don’t get too comfortable.
The Shield Veil Power stops enemy bullets while still allowing yours to pass through.
Achievement Tip -- Bubble Boy: You have unlimited Veil Energy while in this room, so stay at the back and allow the enemies to continuously fire at you until the Bubble Boy achievement or trophy is unlocked (block 1000 shots with Shield power). You can do the same for the Time Out achievement (use Mire for one hour total) if you feel like leaving the game for an hour.
Objective: Escape to the Surface.
Kill the enemies in this room with the Shield power active, and then disable it to conserve your Veil Energy. Follow the arrow on your compass back to the previous area and proceed through the passage that was previously blocked by a shield. Some monsters have been set loose in the facility, and a number of them will pop up from the open grates in the floor of the room you come to.
Sniffers can only swipe up close, so the key to killing a group of them unscathed is to keep your distance. Back away from the approaching creatures and fire at them; they don’t take much to kill. You can target the machinery strapped to their backs to cause them to explode. Keep moving and firing at the creatures and follow the arrow on your compass up some steps.
Kill the Sniffers before they can get close enough to swipe you.
An explosion will occur as you enter the generator room, so quickly clear the steps to avoid getting caught in the blast. Walk past the generators where there isn’t fire and blast any Sniffers that you see. Make your way to the steps at the other end of the generator room. There’ll be more explosions through this hallway, so quickly move through.
Objective: Escape the Caverns.
Head up the spiral steps and stop when you come to the malfunctioning computer. Activate Mire and move through when the streams of electricity disappear. Continue into the next room and move down the corridor until you come to stretch blocked by electricity. Use the Shield power to pass through unharmed. If you don’t have enough Veil Energy, there’s a Veil Pool through the gate just before the doorway.
Once you’re past the electricity, move to the end of the corridor to reach the next area. An explosion will destroy a section of the walkway here, but you can still jump to the other side. Activate Veil Sight, run and jump to the mid-section of the damaged bridge, and cross to the other side. Then, get to the lift at the other end and use the switch to ascend to the upper level.
Use Shield to move through the electricity unharmed.
Follow the marker on your compass to a train and hop on the car to take control of the MG42. Blast the Sniffers running allowing the tunnel walls, targeting the explosive barrels along the way, until the train exits the tunnel.
Return to the Golden Dawn Safe House and speak to Leonid Alexandrov there. Then, follow the marker on your compass to the mission start point in Midtown East.
Objective: Investigate the Hospital.
After the cutscene, look for GOLD (1/23) by the chair in the southwest corner of the waiting room. Step into the hallway and enter the operating room on the other side; INTEL (1/6) is sitting on the patient. Step back into the hall and go through the next door along the east wall. GOLD (2/23) is on the floor below the window in the northeast corner. With that, leave the room and look for GOLD (3/23) behind the chair at the north end of the hall.
The Veil Assassin is somewhere in the hospital.
Continue to the door at the west end of the hall. INTEL (2/6) is on the desk next to the door along the south wall of this room. Head through the door next to the desk and exit the bloodied booth through the door at the other end. Through the double-door across the hall, open the first locker in the northern operating room to find GOLD (4/23). Before leaving, look for GOLD (5/23) in the southern operating room. Step back into the hall and open the second locker along the east wall at the south end to find GOLD (6/23). Toggle Veil Sight and look next to the same locker to discover a red panel. Blast the panel to find TOME (1/2).
When you have the Tome and Gold, walk north down the hall to reach the stairs to the second floor. Open the second locker at the bottom of the stairs to find GOLD (7/23). With that, head up the stairs and open the first locker that you come to along the north wall of the second story hallway to find GOLD (8/23). Continue down the hall, turn the corner, and open the second locker you come to along the west wall to find GOLD (9/23).
Some wreckage around the corner blocks the stairs to the next floor. Stand before the shielded doorway into the stock room and activate Mire when it flickers off. Quickly move through the doorway to make it past the shield. Look for GOLD (10/23) among the junk in the northeast corner of this room. Proceed through the doorway, out the opening in the wall, and up the steps to the third floor. Along the wall straight ahead, open the second locker from the left to find GOLD (11/23).
Use Mire to slip through the shield door when it flickers off.
A grisly scene and some resistance await you in the patient ward at the end of the hall. Fight your way to the other end of the room and step into the hallway there. Enter the file room to find more carnage. GOLD (12/23) is on the cupboards at the southwest end of the room.
Objective: Defeat the Assassin.
Continue up the steps at the west end of the file room. The Veil Assassin is cloaked but can be seen with Veil Sight. At the top of the steps, move to the end of the hallway and turn the corner; you should be able to see the Assassin at the other end of this stretch of hallway. If you have Veil Energy, you can use Mire to slow him down. Then, get behind him after his initial attack and continuously hit him with gunfire until he falls. If you’ve purchased the Shearing Crystal upgrade, you can severely damage the Assassin if you activate Mire while he is close. If you don’t have enough Veil Energy to make this tactic worthwhile, killing him just comes down to reaction time. It doesn’t take much to kill an Assassin, but they’re deadly at close-range.
It’s a bit tough to face an Assassin in this narrow hallway. Just don’t back yourself into a corner if you see him running at you; try dodging his swipe, as he is slow to recover after an attack. The Particle Cannon will make short work of him, but if you don’t have any ammo for that weapon, and upgraded MP40 or MP43 should work just as well.
Defeating the Veil Assassin in the hospital.
Objective: Access the Laboratory Wing.
When the Veil Assassin has been defeated, head back down the steps and return to the file room. Go through the open door at the southwest end of the room and activate Veil Sight to reveal a Veil Door. Before moving through, open the first locker along the east wall to find GOLD (13/23). After collecting the Gold, proceed through the Veil Door to complete the objective.
Objective: Storm the Secret Labs.
After turning the first corner, look for INTEL (3/6) next to the door along the north wall. Continue down the steps and blast the enemy in the cage. Use the switch in the cage to open the door across from it. The blast door will only remain open for a short while, so activate Mire right after using the switch and duck through before it closes. If you don’t have enough Veil Energy, there are several Veil containers in the corridor that you can absorb to recharge.
Enter the room at the west end of the first stretch of hallway. Look for GOLD (14/23) behind the bucket that the tortured man is sitting on. Exit the room and look for GOLD (15/23) in the second locker along the west wall. Continue down the steps at the end of the hall and open the double-door there.
Keep the MG42 at the far end of the room clear.
There’s a ton of enemies in this area, so don’t stand in the doorway for too long. There’s a mounted MG42 at the far end of the area, so switch to your Kar 98 and try to shoot the gunner. Shut the door if you’re taking a lot of damage, or duck back up the steps to heal. Another soldier is likely to take control of the MG42 soon after the first gunner falls, so keep it clear. The biggest nuisance in this area is the Scribe; try to headshot him while he’s busy shielding his allies.
When the area is clear, head through the doorway in the northwest corner. Look for GOLD (16/23) under the bed in the northwest corner of this room; you may have to nudge the bed with gunfire to reach it. There are more enemies around the corner, so be careful. After collecting the Gold, make your way to the other end of the room and look for GOLD (17/23) in the third locker behind the mounted MG42.
Continue up the steps at the southwest end of the room. The upper level is similarly occupied by enemies. There’s an MG42 mounted on a desk around the corner; the gunner should be surrounded by several allies, so try tossing a grenade or two to hopefully clear them out. Kill the soldiers on the walkway across from you and then look for INTEL (4/6) next to the filing cabinet along the west wall.
Headshot the Scribe while he’s busy shielding his allies.
When you have the Intel, continue through the doorway in the northeast corner of the room and start down the walkway. You’ll soon encounter some Sniffers and a Scribe. Back away from the Sniffers as they scamper toward you and fire at them. If the Scribe follows you too, return to the previous room and battle him there. There’s also another Veil Assassin about, so toggle Veil Sight and take this one out the same way you did the other. After dealing with those enemies, continue through the double-door at the southwest end of the walkway. Fight your way down the corridor and open the first locker at the east end to find GOLD (18/23).
There’s yet another mounted MG42 in the area at the bottom of the stairs. If you lack Veil Energy, head back up the steps and use the Veil container at the start of the corridor to recharge. Use Shield or Mire to kill the gunner, and then look for INTEL (5/6) on the desk that the MG42 is mounted on. When you have the Intel, proceed through the double-door next to the MG42. You are unable to use Veil Powers in this are until the Veil Inhibitor is destroyed. Head through the doorway next to the gate and destroy the Veil Inhibitor in the other room. Look for INTEL (6/6) next to the first doorway.
Once the Veil Inhibitor has been destroyed, activate Veil Sight to reveal a Veil Door. Move through the Veil Door to reach the next area.
Objective: Destroy the Machine.
Climb down the ladder, walk to the other end of the catwalk, and pick up the Tesla Gun powering the machine. Use the Tesla Gun to fry the Veil Assassin that runs at you. As you can see, the Tesla Gun should be your weapon of choice when facing an Assassin.
The Tesla Gun is effective against most enemies—including Veil Assassins.
Objective: Destroy the Veil Inhibitor.
Climb back up the ladder and move to the other end of the upper catwalk. Open the door at the other end and shoot the Veil Inhibitor to destroy it. There’s another Veil Assassin nearby, so immediately switch on Veil Sight after destroying the inhibitor and use the Tesla Gun to kill him.
Objective: Continue through the Labs.
Activate Veil Sight and move through the Veil Door. Use the Tesla Gun to zap the group of soldiers around the corner and continue down the steps.
Objective: Investigate the Morgue.
Use the Tesla Gun to clear away the soldiers at the bottom of the stairs and then head into the next room. Continue down the hall until you reach an open double-door. Once through the open double-door, walk to the double-door at the other end of this section and turn into the room to your right. GOLD (19/23) and GOLD (20/23) are between the two desks in this room. When you have the Gold, continue down the steps and into the next area.
The Tesla Gun can stun several enemies at once.
The Tesla Gun also works well against Sniffers, which you are sure to encounter once down the stairs. Fry them as they scamper towards you, unless a Scribe is shielding them. Kill the Sniffers and the Scribe, and then look for GOLD (21/23) in the locker at the end of this stretch. Kill the soldiers in the hallway before doing anything else. GOLD (22/23) is between the two shelves in the first alcove along the west wall.
Once you’ve collected the Gold, open the door at the south end of the hall. Toss a grenade at the soldiers covering below the window and clear out the others. GOLD (23/23) is on the ground between the file cabinet and the door. With that, follow the marker on your compass to a double-door and head through.
Objective: Destroy the Veil Portal.
After the cutscene, sprint down to the area below. You need to goad the Altered into destroying the three remaining pillars powering the Veil Portal. Stand behind one of the pillars and fire at the Altered to get his attention. He must hit the pillar twice to destroy it. The Altered is fast, so activate Veil Sight if you have the Veil Energy to spare. Just keep a pillar between you and the beast at all times and be ready to sidestep if he throws a boulder your way. When all three of the remaining pillars have been destroyed, you’ll be sucked into the portal along with the Altered.
Killing the Altered and destroying the Veil Portal.
Objective: Recover the Crystal.
After the cutscene, activate the machine on the east side of the ruined portal to bring up the crystal. Pick the crystal up to gain the Empower Veil Power. With Empower active, your damage output is upped and you can shoot through Veil Shields. Your accuracy also greatly improves. A highly useful power indeed.
Objective: Escape to Midtown.
You have unlimited Veil Energy for the time being, so toggle Shield as well and take out the soldiers at the other end of the room. When the room is clear, proceed through the double-door in the southwest corner. Move to the end of this room and look for a glowing red panel. Shoot the panel to reveal TOME (2/2).
When you have the Tome, return to the previous room and approach the shielded doorway at the east end. Shoot at the stack of explosive barrels through the shield to set them off, destroying the switch that controls the shield. Proceed up the steps beyond the doorway to reach a door back to Midtown East.
Empower improves weapon strength and accuracy, as well as allow you to shoot through shields.
Back in Midtown, set “Return to the Safe House” as your active mission and follow the marker on your compass to the Golden Dawn Safe House. Speak to Sergei Kovlov to complete the mission.
Set “Return to the Kreisau Safe House” as your active mission and follow the marker on your compass. Once there, speak to Caroline Becker to get started. Follow the marker on your compass to the mission start point in Midtown East.
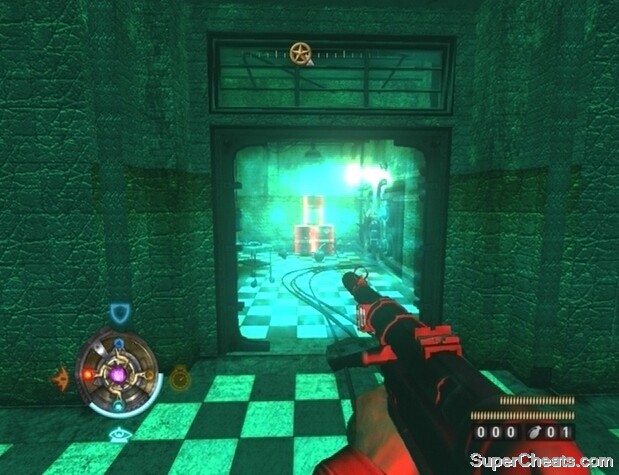
Objective: Infiltrate the Cannery.
Start down the tunnel, gun down the Nazis that you come to, and shoot the explosive barrel by the broken brick wall to create a larger opening. Switch on Veil Sight and be on the lookout for a Veil Assassin. Equip your Tesla Gun or Particle Cannon if you have ammo, though an upgraded MP40 or MP43 would work just as well. Look for GOLD (1/20) behind the skid at the end of the tunnel just before the steps. Use the switch to send the Nazis below to the large fans at the other end of the room. When the area below is clear, switch off the fans and climb down the ladder.
Activate Veil Sight to detect the Veil Assassin in the tunnels.
Climb up the ladder through the doorway at the other end of the area. Walk down the tunnel and turn into the room that you come to on your left. Kill the Nazis inside and then activate Veil Sight. Look for a red panel along the west wall of this room; break the panel to reveal TOME (1/1). Look for INTEL (1/6) on the table next to the doorway before heading out.
Continue down the tunnel and be ready for some resistance. A Drache Trooper is among the enemies in the next area. This guy wields a Flammenwerfer (flamethrower), so keep your distance to avoid being set aflame. Activate Empower and down him with your MP40 or MP43. He moves very slowly, so all in all he isn’t much of a threat if you manage to spot him while he is distant. Be sure to pick up the Flammenwerfer for your own use.
When the room is clear, stand in the Veil Pool under the walkway to recharge your medallion if necessary, and then continue up the steps in the southeast corner of the room. Make your way over to the steps at the other end of the walkway and activate Veil Sight. There’s another Veil Assassin in the tunnel, so be ready with your Particle Cannon or Tesla Gun. To make matters worse there’s also a Veil Inhibitor somewhere nearby, so Veil Sight will be switched off as you move further down the tunnel. Hopefully you can catch sight of the Assassin before that happens, and then just back away and attack him while he runs at you. GOLD (2/20) is in the container behind the stack of breakable crates at the northeast end of the tunnel, and GOLD (3/20) is in the container at the southeast end (just to the left when you first enter the tunnel).
Drache Troopers wield flamethrowers; they’re quite slow, so back away when you spot one to avoid being set aflame.
After collecting the Gold and killing the Veil Assassin, start following the marker on your compass through the tunnel. The Veil Inhibitor is behind the railing next to the steaming tanks. There’s another Veil Assassin in this area, so destroy the Veil Inhibitor from afar and then immediately switch on Veil Sight. When the Assassin and Veil Inhibitor are destroyed, look for GOLD (4/20) below the punctured pipes along the east wall. Turn right at the bottom of the decline west of the Gold and look for GOLD (5/20) behind the barrels in the alcove there. With that, continue down the stairs across from the alcove.
There’s another Drache Trooper in the area through the west tunnel. Activate Empower and gun him down with your MP43 or MP40 before he can get too close. When the Drache Trooper has been dealt with, proceed through the tunnel. There are several soldiers along the walkway in this area, so fallback to the previous area if you’re wounded. Clear out the enemies and then approach the gate in the southeast corner of the area. GOLD (6/20) is in the container behind the gate; it’s close enough to reach through and grab, so crouch, hug the gate, and open the container to retrieve it.
Proceed through the tunnel at the west end of the area. Destroy the Veil Inhibitor and activate Veil Sight to reveal a Veil Door. Move through the Veil Door, up the steps, and look for GOLD (7/20) behind the breakable objects at the north end of the walkway. GOLD (8/20) is on the shelf at the other end. When you have the Gold, follow the marker on your compass to a ladder. Climb up the ladder to reach street level.
Objective: Get to the Factory.
Once on street level, look for GOLD (9/20) behind the barrels along the side of the house south of the sewer opening. With that, start east down the road, mowing down any enemies that you encounter, and duck into the building along the south side of the road. A Veil Heavy Trooper should soon break through the wall; destroy the crystals on his shoulders and the one on his back, and then keep your distance to avoid taking damage from his dying blast. There’s a mounted MG42 on the sandbags outside, so try to take out the gunner and other troops around him before stepping outside.
A Veil Heavy Trooper will break through the wall when you enter the building across from the sandbags.
When the Heavy Trooper has been dealt with, move through the opening on the east wall. Look for GOLD (10/20) next to the tank along the south wall of this room. Exit through the door at the east end of the room and fire at the enemies outside. Set off any explosive barrels you see as a precautionary measure. There is likely a soldier on the rooftop of the building you just came through, so whip around and gun him down before he can do any damage. Use your Kar 98 to pick off any other soldiers up on a rooftop or balcony and then look for GOLD (11/20) between the large, unbreakable crates at the east end of the area.
After collecting the Gold, head northwest to the factory entrance. GOLD (12/20) is in the wrecked train-car nearby. Proceed through the door and blast the two enemies in the opening area. Grab INTEL (2/6) on the table by the door before moving on.
Objective: Search the Factory.
Once through the door, look for GOLD (13/20) between the two shelves straight ahead. With that, follow the marker on your compass to the door into the next area. Kill any enemies you can see, then hop over the railing along the catwalk and down to the area below. GOLD (14/20) is in the container by the large pipe along the north wall. GOLD (15/20) is behind the breakable boxes across from the steps at the west end. At the top of the steps, shoot the explosive barrels and any enemies that are visible through the window. Then, make your way to the other end of the catwalk.
Fight your way through the factory.
Follow the marker on your compass until you come to a room with a Veil Pool, some crates, and a conveyer belt. Look for GOLD (16/20) behind the stack of breakable boxes next to the conveyer belt. With that, stand in the Veil Pool to recharge your medallion if necessary, then continue through the doorway along the north wall and head up the stairs. There’s a Scribe and a couple of soldiers here, so switch on Empower and mow them down. GOLD (17/20) is behind the breakable crates in the corner at the south end of the walkway. Follow the marker on your compass through the corridors until you come to a room with another Veil Pool. Look for INTEL (3/6) on the table by the door at the other end of the room. Be sure to restore your Veil Energy before moving on.
Proceed through the door in the northwest corner of the room to enter a warehouse. You’re up on a catwalk and there are several enemies below, so your Kar 98 will come in handy here. Pick off the enemies below, retreating to the previous room to heal or restore your Veil Energy as necessary, and then approach the steps at the other end of the walkway.
Objective: Disable the Shield Door.
When the area below is clear, climb down the steps and make your way over to the conveyer belt at the northeast end of the room. Jump onto the conveyer belt and then onto the platform with the switch. Use the switch to disable the shield door. A group of enemies will then enter the warehouse, so be ready.
Use the switch on the platform behind the conveyor belt to disable the shield door.
Objective: Get to the Control Room.
Once you’ve killed the reinforcements, exit through the disabled shield door. Switch on Veil Sight and run along the cover to avoid the blasts from the Test Weapon. When you’ve made it past the Test Weapon, climb up the ladder behind it to reach the control room. There’s a Scribe and several soldiers in the control room, so switch on Shield and Empower and quickly clear them out.
Objective: Disable the Super Weapon.
Interact with the highlighted switch in the control room to take control of the weapon. Use it to obliterate the Nazis at the other end of the yard, and then take to destroying the four electric coils along the walls on either side. Before leaving the control room, look for INTEL (4/6) behind the table in the northeast corner of the control room.
Climb back down the ladder and look for some large, unbreakable crates and some steps along the southeast end of the yard. Jump on top of the single crate and look for GOLD (18/20) behind it. Climb back up to the control room and proceed through the doorway at the other end. Head up the steps and look for GOLD (19/20) under the machine by the metal door. Through the metal door, look for INTEL (5/6) beneath the counter in the southwest corner.
Target the four electric coils to disable the Super Weapon.
Objective: Disable the Shield Door.
Through the second metal door, head south and enter the cage that you come to. Look for GOLD (20/20) in the corner by the machine. When you have the Gold, climb up the steps across from the cage and use the switch in the control room to disable the shield door. INTEL (6/6) is under the sink along the west wall through the shield door.
Go down the steps in the northeast corner of room and turn into the caged area to find a bunch of ammo for your guns. Stock up and then follow the marker on your compass to the next area.
Objective: Defeat General Zetta.
This boss battle is a cinch with Empower and an upgraded MP43. You should have collected plenty of ammo for that weapon and your MP40 in the previous room. Switch on Veil Sight and you’ll see that General Zetta is more creature than human. He’s fast and has a number of damaging attacks in his arsenal, but thankfully the multiple Veil Energy sources in this room will permit you to make prolonged use of your Veil Powers.
At the start of the fight, activate Empower, equip your MP43, and back away from Zetta while firing at him. His close-range melee attacks can be devastating, so you’ll want to keep your distance for the entirety of the battle. Pieces of Zetta’s armor will fall off as he takes damage. When he’s had enough, he’ll retreat to one of the Veil Energy sources to recharge. With Empower still active, move over to one of the other Veil Energy sources and stand in it. Then, look to the machine that Zetta is using to recharge and fire at the highlighted upper portion of it. Destroy the two pieces that make up the machine to destroy it. As soon as the machine has been destroyed, switch off Empower and recharge as much Veil Energy as you can before Zetta gets too close.
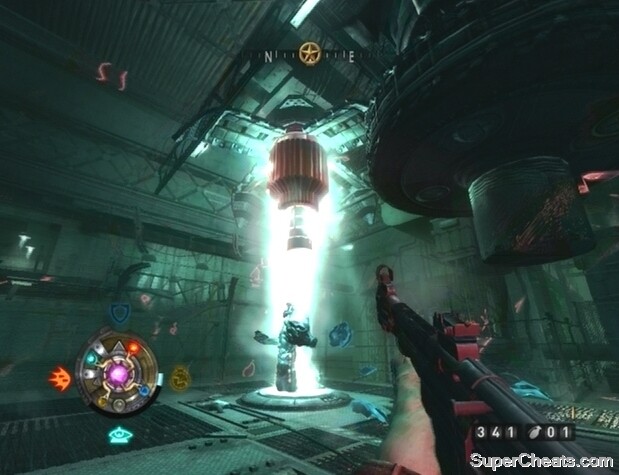
Target and destroy the machine while Zetta restores his energy.
Zetta has a number of ranged attacks. One is a circular shockwave that expands in size until it finally reaches you. You can crouch to avoid this attack, but another variant is too low to crouch under. He may also throw a number of small projectiles that spread apart as they travel further out. To avoid this, simply back away, side step to one of the higher projectiles, and crouch to avoid it.
Destroy the three Veil Energy sources in the same fashion to kill General Zetta. Then, follow the marker on your compass out of the Cannery to complete the mission. Back in Midtown, return to the Kreisau Circle Safe House in Midtown West and speak to Caroline Becker there. You’ll be pointed to the new safe house Downtown.
Killing General Zetta.
Follow the marker on your compass to reach Downtown. If you haven’t already, purchase the Sniper Scope and other upgrades for the Kar 98, as you’ll definitely need them for the mission to come. Once Downtown, continue following the marker to reach the new Kreisau Circle Safe House. You’ll have to travel through the sewers to get there. Speak to Erik Engle to start the next mission, and then follow the marker on your compass to the mission start point. Use the truck to travel to Castle.
Objective: Storm the Outer Courtyard.
Sprint to the gatehouse at the end of the bridge. There, look for a narrow ledge along the right side of the gatehouse wall. Walk along the ledge, jump up onto the boulder, and look for GOLD (1/16) on the piece of stone behind it.
Finding the first valuable of the level.
Continue through the gatehouse and take cover along the bridge. There’s a mounted MG42 and a couple of snipers in the windows above the portcullis. Equip your Kar 98 and use it to take out the gunner and snipers. Another soldier will likely take control of the MG42 soon after the first gunner is killed, so keep it clear. With that, move up and pick off the soldiers in the gatehouse.
In the gatehouse, take cover behind the large, unbreakable crate and use your Kar 98 to take out the soldiers along the walkway and in the gatehouse across the bridge to the west. There will be some Jetpack Troopers flying above the next bridge; these guys drop a ridiculous amount of explosives, so remain in the gatehouse and shoot them down with Empower and your MP43 or an upgraded Kar 98. Before leaving the gatehouse, look for INTEL (1/6) next to the unbreakable crate in the northeast corner.
When the gatehouse at the other end of the bridge seems to be clear, start across. Be careful, however, as there may be some stragglers who can take control of the mounted MG42s there. When the gatehouse is completely clear, cross to the other end of the bridge to complete the objective.
Objective: Infiltrate the Inner Courtyard.
Move through the gatehouse to reach the next area. Look for GOLD (2/16) next to one of the large, unbreakable crates on the platform along the southwest wall of the gate. There’s a Veil Pool next to the south tower through the gate, so sprint over to it and recharge your medallion if necessary. You’ll encounter a Despoiled through the gate, so be ready with your Particle Cannon or Empower and an upgraded MP40 or MP43. When the Despoiled has been taken care of, destroy the Veil Inhibitor at the west end of the area
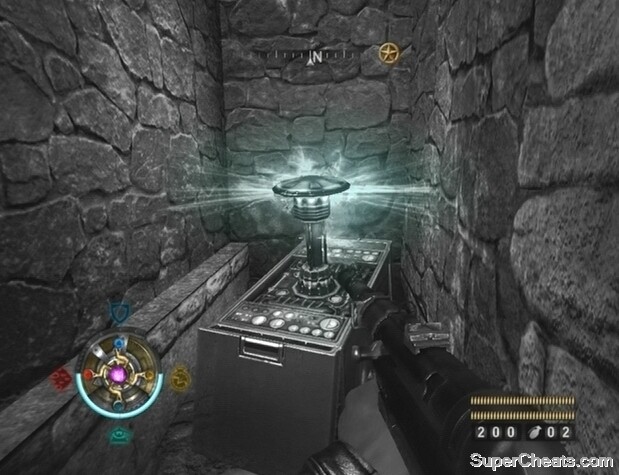
Nearby Veil Inhibitors will prevent you from activating Veil Powers.
Activate Veil Sight and look for a Veil Door next to the gate at the north end of the area. Through the Veil Door, look for INTEL (2/6) on top of the large, unbreakable crate through the open gate. After collecting the Intel, proceed through the door at the other end of the room to reach the inner courtyard.
Objective: Cross the Inner Courtyards.
Upon entering the inner courtyard, turn right and head east to the unbreakable crates along the wall there; look for GOLD (3/16) on the ground behind the crates. Head up the steps along the north wall. A wave of enemies will appear from around the corner, so be ready with your Particle Cannon, Tesla Gun, or Empower and an upgraded MP40 or MP43.
Up the steps, look for GOLD (4/16) on top of the haystack along the wall. When you have the Gold, follow the marker on your compass until you encounter some more enemies. At the top of the incline, kill the enemies in the shelter at the top of the steps, and look behind the sandbags in front of the tower at the west end of the walkway for GOLD (5/16). Look for GOLD (6/16) behind the two stacked unbreakable crates in the corner across from the steps.
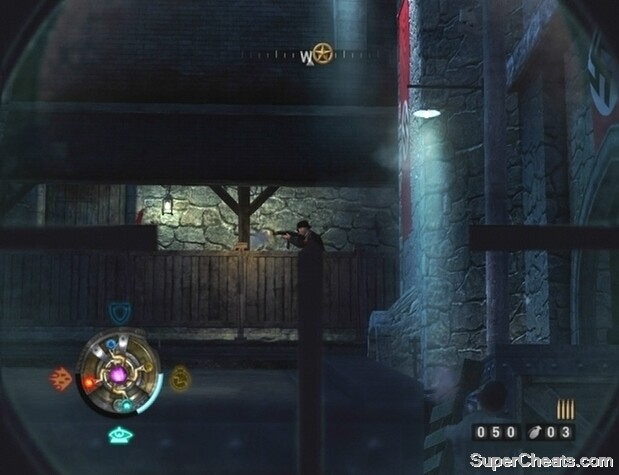
Use your Kar 98 to pick off the soldiers on the upper walkway.
When you have the Gold, use your Kar 98 to kill the enemies on the upper walkway at the west end of the area, and then sprint to the other end of the wall. Enter the tower through the door next to the portcullis. Look for GOLD (7/16) below the wooden steps in the tower. With that, proceed through the door at the top of the steps.
Objective: Raise the Portcullis.
Activate Veil Sight and move through the Veil Door at the end of the corridor. Kill the two enemies on the walkway and those in the area below and then jump down. Take the Leichenfaust 44 and exit through the door along the south wall. Blast the portcullis with the Leichenfaust 44 and fire another shot at the Altered outside to dissolve him. Shoot the second portcullis along the north wall to complete the objective.
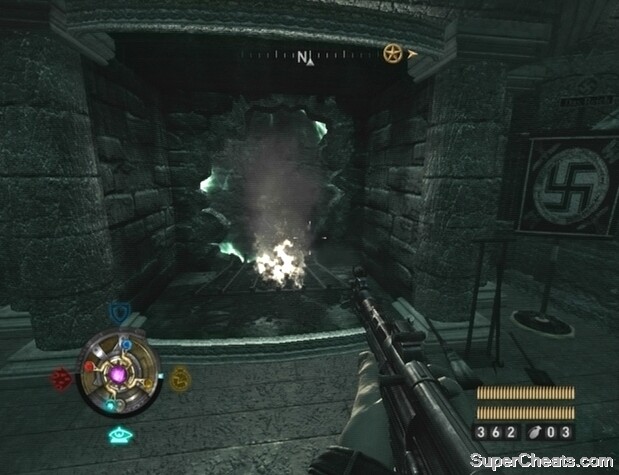
One hit from the Leichenfaust 44 and the Altered is as good as gone.
Objective: Ascend to the Inner Keep.
Proceed through the gate and go through the opening in the wall at the end of the corridor. Look for GOLD (8/16) behind the lift. Step on the lift and use the switch to travel up. When the lift reaches its destination, head down the steps and go through the door. Open the container in this room to find GOLD (9/16).
With that, head up the steps and go outside. Step onto the walkway and stand in the Veil Pool there to restore your Veil Energy. Stand on the highlighted panel next to the Veil Pool. The gate into the inner keep will remain open while this switch is pressed down, but will close when you step off. While standing on the pressure switch, activate Mire and sprint through the open gate.
Objective: Search the Inner Keep.
Destroy the Veil Inhibitor in the hallway and blast the Nazis there. At the end of the hall, you should be able to see another Veil Inhibitor at the other end of the dining room below. Destroy that Veil Inhibitor, and then look for yet another one at the other end of the walkway. Look for GOLD (10/16) on top of two stacked containers along the west side of the walkway.
Activate Veil Sight to reveal a secret passage through the fireplace in the castle dining room.
Head down the stairs to the dining room, kill any enemies (there’s a Scribe and maybe a Despoiled among them, so be careful) and then approach the fireplace at the north end. If you haven’t destroyed the Veil Inhibitor next to the fireplace yet, do so, then activate Veil Sight and move through the Veil Door in the fireplace. Drop down the opening in the floor at the other end of the corridor. Kill the Sniffers that charge you, and continue into the next room. There’s a ton of exotic ammo for your weapons in this room, and GOLD (11/16) and GOLD (12/16) can be found on the ground next to the table. Toggle Veil Sight and look for a highlighted panel along the south wall; break it to reveal TOME (1/2). Be sure to grab the Tesla Batteries by the Veil Pool across from the table as well.
After collecting the ammo, Gold, and Tome of Power, backtrack to the ladder and through the Veil Door to the dining room. Head up the stairs at the east end of the dining room and kill the enemy troops at the top. Look for GOLD (13/16) behind the crate and painting along the start of the walkway. Kill the Nazis at the other end and destroy the Veil Inhibitor there. Go through the door at the southeast end of the walkway and look for GOLD (14/16) on the floor there. Careful, as there is likely an enemy in this room.
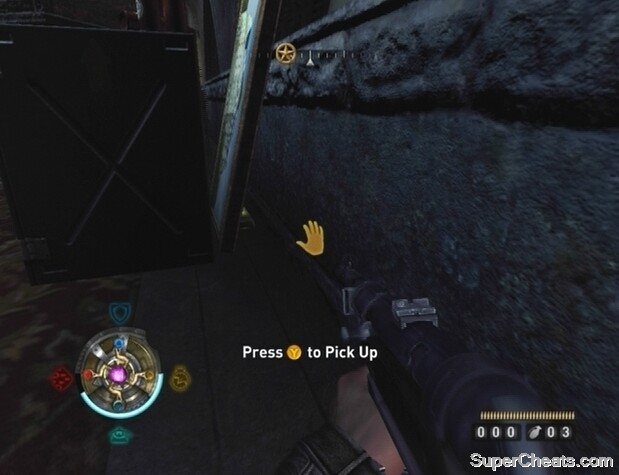
Look for Gold behind the container and painting along the walkway.
When you have the Gold, proceed through the metal door at the other end of the corridor.
Objective: Disable Lower Shields.
Push through to the south end of the walkway and look for INTEL (3/6) on the desk there. Clear out the enemies in the area at the bottom of the steps and search the highlighted cabinet along the east wall for INTEL (4/6). INTEL (5/6) is attached to the wall by the locked door at the southwest end of the area. When you have the Intel, proceed through the doorway in the northwest corner.
Make your way to the shield door at the other end of the corridor. Use the switch next to the shield door to complete the objective.
Objective: Disable the Upper Shields.
You’ll encounter an Altered in the dining room, so take out the Leichenfaust 44 and blast him with it. When the way is clear, cross to the other end of the dining room and move through the door directly across from the one you just came through. Start down the corridor and be on the lookout for three stacked crates with a lantern on top. Crouch and look for GOLD (15/16) between the two crates that form the bottom of the stack.
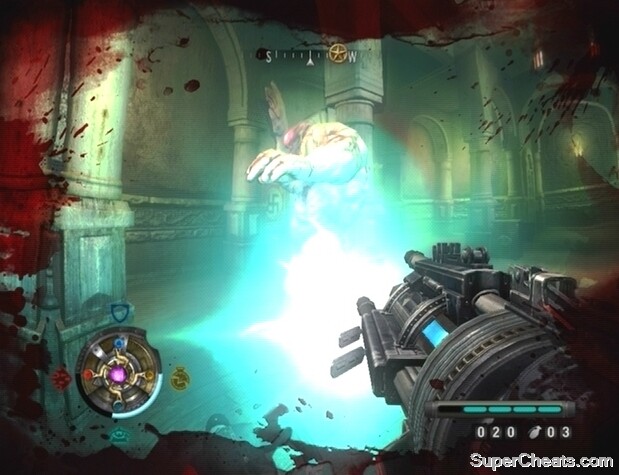
Use the Leichenfaust 44 to kill the Altered in the castle dining room.
Continue to the other end of the corridor and you’ll come to a Veil Energy container and a table with some ammo for your weapons on it. Stock up and continue through the doorway further ahead. Switch on Veil Sight and be ready with your Tesla Gun or Leichenfaust 44, as there’s three Veil Assassins and a Scribe in the castle library. Take your time moving through this area, as facing all four enemies at once would likely spell disaster. When the Scribe and trio of Assassins have been dealt with, continue up the steps at the south end of the library.
At the top of the steps, look for INTEL (6/6) on the table along the right side. Then, make your way to the metal door at the northeast end of the upper level and then through the metal door at the other end of the room you come to. Use the switch to deactivate the shield door and complete the objective.
Objective: Intercept Hans Grosse.
Fight your way to the other end of the dining room and head up the steps to reach the walkway. Follow the marker on your compass until you reach another walkway overlooking a room. Look for two narrow beams connected to the walkway; jump over the railing and onto one of the beams, and cross over to the small office at the other end. Drop down through the opening in the roof and unlock the safe inside the office to find TOME (2/2).
Finding the second Tome of Power.
After collecting the Tome of Power, follow the marker on your compass back up to the walkway and continue through the metal door at the other end. Activate Veil Sight and move through the Veil Door in the small room. Make your way to the other end of the corridor and proceed through the door there to reach a room with a ton of ammo for all of your weapons. GOLD (16/16) is in the southwest corner of this room. Stock up and continue through the wooden door at the other end of the room. Head up the stairs to trigger a cutscene.
Objective: Defeat the Queen Geist.
When you regain control, immediately start firing at the Queen Geist’s face and chest. Don’t let up until she falls on her side. Then, direct your fire to one of the two visible Egg Sacks on her side. Continuously fire at the Egg Sack until it is destroyed. When one of her Egg Sacks has been destroyed, the Queen Geist will get back up and retreat momentarily. While she is gone, you’ll be facing several waves of her minions. She’ll either send waves of flying Geists that explode on impact, or four-legged Geists that move quickly and deal melee damage when close enough.
Use the turret to defend yourself from the approaching Geists. Take too much damage and you’ll die, so try your best to down the enemies before they can get too close. Eventually the Queen Geist will return and destroy the turret you’re using. Immediately after, activate Mire and start toward the intact turret at the other end of the area. Make sure you have your MP40 equipped to avoid being slowed by a heavier weapon. While running to the turret, avoid the glowing blots on the ground, as they mark where the Queen’s projectiles are going to land.
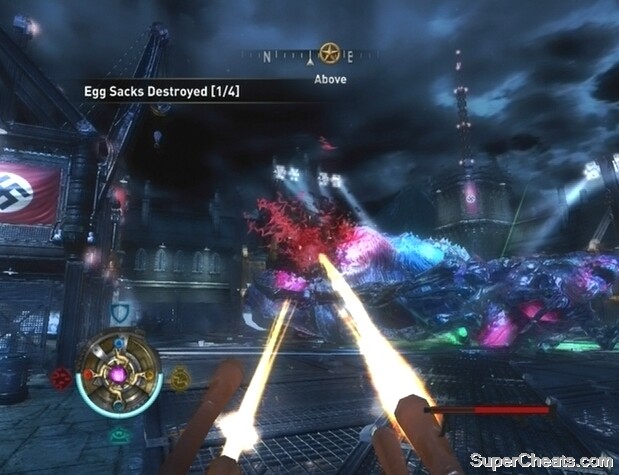
Target the Queen Geist’s Egg Sacks while she’s on her side.
Once you’ve made it to the turret in one piece, switch off Mire and use one of the Veil Energy containers behind the turret to recharge your medallion. Then, hop on the turret and continuously fire at the Queen Geist until she falls. When her Egg Sacks are visible, continuously fire at the one that isn’t spewing out guts to destroy it.
You must destroy all four of the Queen Geist’s Egg Sacks to move on. Repeat the above strategy two more times to move on to the next phase.
Objective: Finish the Queen Geist.
When you’re back at the start of the castle, equip your Leichenfaust 44 (which you should have plenty of ammo for from the room just before the boss fight) and start toward the door back to Downtown. When the Queen Geist appears, back away, switch on Empower, and hit her as she approaches. If she begins to get too close, turn around and sprint to the other side of the road. She’ll drop down to block your path there too. Continue firing at her with your Leichenfaust 44 to fell her. Then, approach her head, plant the Dynamite there, and get a safe distance away.
Defeating the Queen Geist.
Once the Queen is dead, follow the marker on your compass to the door back to Downtown and proceed through to complete the mission. Report back to Erik Engel in the Kreisau Circle’s Downtown safe house to complete that objective.
Set “Find Erik Engel” as your active mission and follow the marker on your compass to the Golden Dawn Safe House in Downtown Isenstadt. Speak to Erik Engle there and he’ll point you to the Airfield outside of town. Then, start following the marker on your compass to Downtown West.
Once in Downtown West, you must kill some troops and destroy an enemy tank. After clearing the soldiers, equip your Panzerschreck and recharge your medallion using the Veil Pool at the west end of the street. Then, start toward the tank, moving to the side to dodge cannon fire when necessary, and activate Empower. A rocket or two with Empower enabled is enough to destroy the tank. With that, clear away the other enemies down the street and then use the truck near the tank to travel to Airfield West.
Using the Panzerschreck and Empower to destroy the enemy tank in Downtown West.
Objective: Infiltrate the Airfield.
Start by killing the enemies on the upper walkway. There is a Scribe among them, so use Empower to send your bullets through their shields. GOLD (1/21) is in the pit below the truck that you start by; fall through the gap in the tracks and climb back up using the ladder after collecting it. GOLD (2/21) is on the bottom of the shelf along the south wall. When you have the Gold, exit via the doorway at the northwest end of the room. Kill the enemies in this room, and then look for INTEL (1/8) on the table on the east side. GOLD (3/21) is between the shelf and workbench across from the Intel.
Proceed up the stairs through the doorway at the south end of the room. When you step onto the walkway, look north to spot a Drache Trooper. Activate Empower and gun him down with your MP43 or MP40 before he can get too close. When the walkway is clear, hop onto the metal barrels across from the doorway you just came through and then onto the steel bars alongside the platform. GOLD (4/21) is in the container along the adjacent steel bar.
Walk along the steel bars connected to the upper walkway to reach the container that holds the Gold.
Enter the room at the north end of the walkway and look for GOLD (5/21) on top of the file cabinets along the south wall. Collect the ammo in the next room (the Leichenfaust 44 ammo especially), and then look for INTEL (2/8) on the desk in the northwest corner. With that, exit through the door at the north end of the room.
Objective: Access the Hangar.
Outside, a group of enemies will approach from the north. Quickly drop down from the platform and take cover by the Veil Pool below. Just be sure to set off the explosive barrel nearby to prevent future incident. The enemies have shields and there’s a Scribe too, so use the Veil Pool to restore your Veil Energy if necessary, and then use Empower and your MP43 or Kar 98 to push through. When the area is clear, look for GOLD (6/21) behind the sandbags at the northwest end of the field.
Make your way east and keep an eye out for Jetpack Troopers in the sky. Activate Empower and gun them down with your MP43 before continuing on. When you pass the brick walls, booth, and pass a checkpoint, kill the Sniffers that appear, and then make your way northwest to a second booth and look for GOLD (7/21) by the walkway. Make your way to the south end of the field and look for GOLD (8/21) among the breakable crates and skids. After collecting the Gold, follow the marker on your compass into the next area.
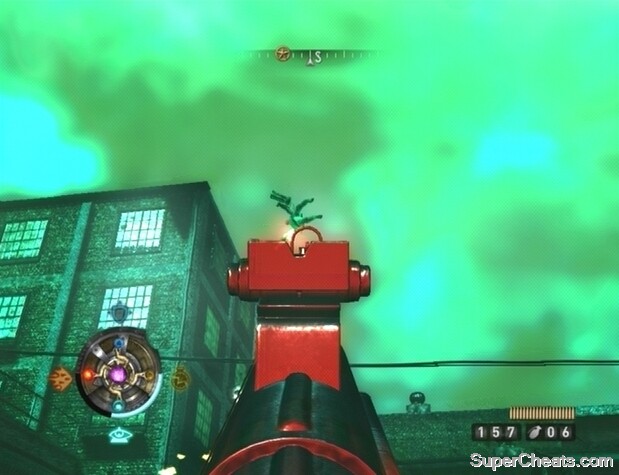
Activate Empower and use your MP43 to shoot the Jetpack Troopers out of the sky.
Climb up the steps and move down the walkway to the control room. Look for GOLD (9/21) by the machine in the northeast corner. Proceed through the door at the opposite end of the control room and descend the stairs to the large machine in the middle of the hangar.
Objective: Destroy the Machine.
The Leichenfaust 44 is the gun for this job. Make sure the weapon is fully-loaded and activate Veil Sight before approaching the machine. Start toward the machine and look for three highlighted generators along the west side of it. Run north and blast each of the generators with your weapon as you approach
The enemy inside the machine is able to spawn Despoiled, and will spawn an additional one for each generator that is destroyed. Facing four Despoiled at once is no easy task, so you’ll have to run to somewhere more suitable. Right after destroying the third generator, activate Veil Shield, switch to your MP40, and start heading east to the chain-link fence at the other end of the hangar. On your way there, be on the lookout for a Veil Energy container near an unremarkable generator. Use the container to recharge your Veil Energy as you run by and continue sprinting until you are behind the fence.
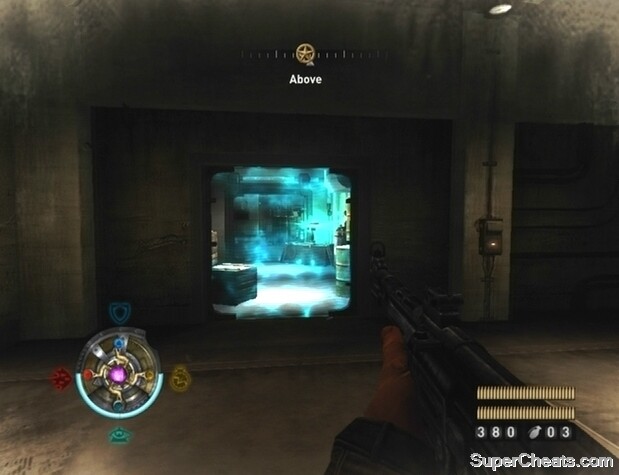
Activate Veil Sight and destroy the highlighted generators to destroy the machine.
Once behind the fence, whip around, equip the Leichenfaust 44, and wait for the Despoiled to appear. When you spot one of her minions, hit him with the L44 to launch him up into the air and then back to the ground if not kill him. If you’re facing more than one Despoiled at once, immediately hit the second one after the first if both weren’t affected by the first shot. If the Despoiled is still alive and gets back up, hit him with another shot to most likely end him. Trouble may come if you have to reload, but try your best to dodge the enemies’ projectiles until you are able to shoot again.
The woman who was in the machine will come after you as well; she’s carrying a long-range weapon—a whip that can launch projectiles—so be ready for her. Shoot at her with the Leichenfaust 44; if she survives and gets back up, hit her again.
If you’re having difficulty facing the four Despoiled at once, another way to go about completing this objective is to only destroy one generator at a time. Then, when you’ve dealt with the Despoiled the enemy spawns, destroy another one. Repeat this until all three generators have been destroyed and the woman is dead.
Destroying the machine and dealing with the enemies that spawn.
Objective: Make your way East.
Proceed through the door in the southeast corner of the room and climb up the steps there. Kill the Sniffer in the room at the top and then look for INTEL (3/8) on the middle desk along the north wall. Continue through the door at the southeast end of the room and head to the other end of the walkway.
Kill the officers in the room at the end of the walkway and then look for GOLD (10/21) on one of the desks behind the low wall. Collect the ammo here (especially the Tesla batteries and Leichenfaust 44 ammo) and then head back to the stairway at the other end of the walkway.
Follow the marker on your compass out of the hangar. Outside, activate Empower, equip your MP43 or MP40, and be ready to gun down the Drache Trooper that breaks through the adjacent door. When the Drache Trooper is dead, enter the small building southeast of there and open the container in the back room to find GOLD (11/21). After collecting the Gold, follow the marker on your compass to the door that the Drache Trooper came through. GOLD (12/21) is by the steps behind the truck, and INTEL (4/8) is attached to the west wall at the north end of the room.
Activate Empower and use your MP43 to quickly kill the Drache Trooper outside.
Interact with the trap door to travel to Airfield East.
Objective: Search the Tunnels.
Set off the explosive barrels below to kill the officer standing there and then look for GOLD (13/21) underneath the steps. Equip your MP43 if you haven’t already and start down the tunnel. You’ll encounter another Drache Trooper, so be ready to activate Empower to easily take him out. When you reach some stairs, look for GOLD (14/21) on the ground by the tanks along the north wall.
Continue up the steps and look through the first doorway on your left. Set off the explosive barrel at the other end of the room to hopefully kill the two soldiers and destroy the Veil Inhibitor. If not, do so yourself and then look for GOLD (15/21) on the ground behind the broken Veil Inhibitor. There’s a bunch of ammo in the room through the doorway a bit further up, so set off the explosive barrels in there too and then clear out any enemies that remain. GOLD (16/21) is inside of the container in this room.
After collecting the Gold and ammo, continue down the stairs at the other end of the corridor. Kill the troops in this area and then look for GOLD (17/21) below the large pipe at the east end. Climb up the steps, use the Veil Energy container to recharge your medallion, and proceed through the double-door to complete the objective.
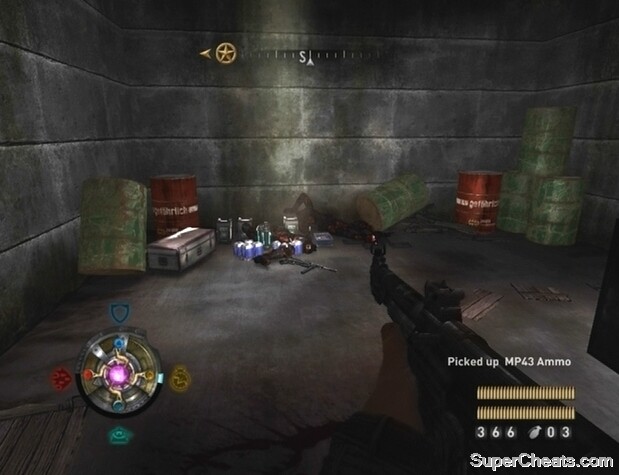
Refill your weapons before moving on.
Objective: Storm the Hangar.
There’s a couple of Scribes, a Drache Trooper, and some soldiers in the hangar, so don’t just rush in. Have your MP43 equipped and be ready to activate Empower to quickly gun them down. When the hangar is clear of enemies, look for GOLD (18/21) by the side of the ramp on the west side of the platform. INTEL (5/8) is on the table in the northeast corner of the walkway at the north end of the hangar. With that, use the switch in the middle of the walkway to disable the shield door.
Once the shield door is down, use an intact Veil Energy container to recharge your medallion, then proceed through the doorway and look for INTEL (6/8) on the containers just outside. Gun down the troops that appear at the east end of the hallway; there’s a mounted MG42 there, so be careful. GOLD (19/21) is by the propane tanks at the south end of the hall
When you have the Gold, activate Veil Sight and enter the large room through the doorway at the start of the hall. A Scribe and a couple of Veil Assassins will enter the room soon after you do, so you must be extremely cautious. There are plenty of Veil Energy containers around the room, so sprint over and use one to recharge your medallion if necessary. Use Empower to demolish the trio and then look for INTEL (7/8) on the table along the south wall of the room. Proceed through the deactivated shield door. Look for GOLD (20/21) behind the stack of containers at the start of the hall.
Stand against the wall and use Empower to destroy the Veil Inhibitor through the shielded door.
There’s a Veil Inhibitor between two shield doors at the other end of the corridor. Hug the wall across from the shield door, activate Empower, and shoot through the shield door to destroy the Veil Inhibitor. Then, stand in front of the shield door, activate Empower, and shoot through the shield to set off the explosive barrel near the door. Doing so will damage the first shield door and completely disable the second; activate Mire and slip through the first door when the shield flickers off.
Move through the second shield door and approach the platform in the middle of the room. Two Scribes and a Drache Trooper will enter the room through the door along the west wall as soon as you step onto the platform. Activate Empower and start firing at the enemies. If you’re taking a lot of damage, activate Shield. Shield and Empower use a lot of Veil Energy, so look around for a Veil Energy container to recharge your medallion if necessary.
When the first batch of enemies has been taking care of, the shield door covering the elevator will lower and a few more troops will enter the room. Kill the troops, step onto the lift, and use the switch to ascend to the upper floor.
Objective: Reload and Rearm.
Open the container on the ground next to the man to find GOLD (21/21). Speak to the Black Market representative to purchase upgrades for your weapons and Veil Powers. This is your last chance to do so unless you abort the current mission and return to Isenstadt, so make sure you buy everything you can afford. A fully-upgraded MP43, Particle Cannon, and Leichenfaust 44 would serve you well in the final battle. Most importantly, purchase as many of the upgrades under the “Veil” menu as you can. The upgrades available depend on the Tomes of Power and Intel you have collected.
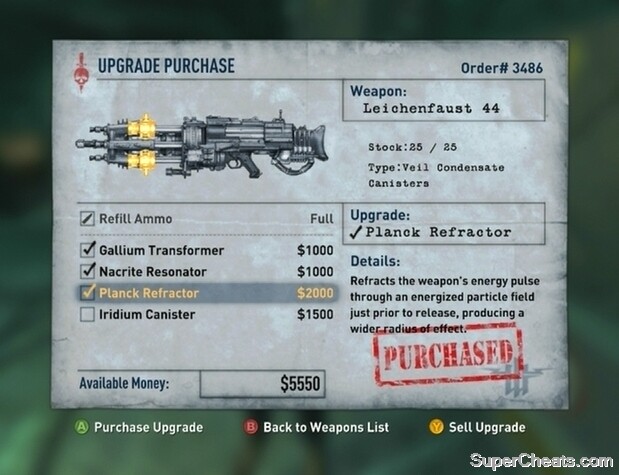
The Black Market representative near the end of the level is your last chance to use collected Gold to purchase upgrades for your weapons and Veil Powers.
Objective: Board the Zeppelin.
The way to the Zeppelin is peppered with enemies, so take your time moving through. Use your Kar 98 to pick off the sniper on the walkway at the west end of the area. There is an Elite Guard, a Despoiled, and some more troops at the other end of the bridge. Activate Empower, gun them down with your MP43, and then head up the steps at the northwest end of the platform. Fight your way up to the control room and use Empower to take out the Scribe and soldiers inside.
INTEL (8/8) is on the terminal at the south end of the control room. Use the switch next to the stairs to lower the bridge and cross to the Zeppelin mission start point.
Fight your way down the stairs along the west side of the Zeppelin. Be on the lookout for an explosive barrel on the platform at the bottom of the stairs and set it off with gunfire when the group of soldiers appears. A Heavy Trooper will break through the wall when you reach the bottom of the stairs. Shatter the crystals on his shoulder and then the one on his back to end him. When the way is clear, move through the opening along wall and look for INTEL (1/9) on the container in the southwest corner of the area.
After collecting the Intel, exit through the door in the southeast corner of the area and make your way to the bottom of the steps there. Upon entering the next room, turn around and look for INTEL (2/9) attached to the wall by the door. Use the Veil Energy container by the door to recharge your medallion and then start down the bridge across from it. Activate Empower and mow down the group of enemies strolling down the bridge. At the end of the bridge, turn right and look for INTEL (3/9) on top of the container there.
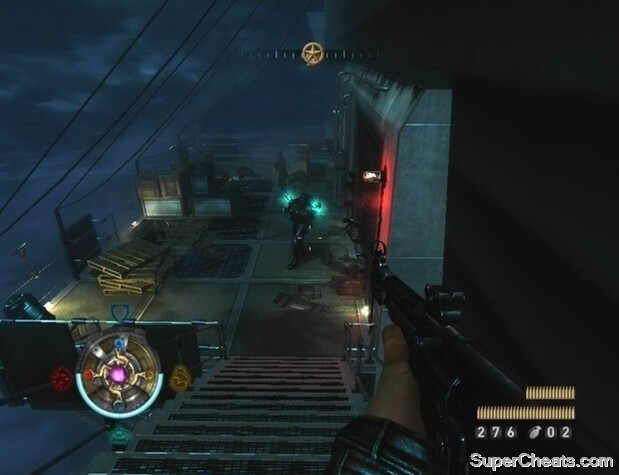
Enemies are abundant aboard the Nazi zeppelin.
Enter the control room and attach Dynamite to the machine there. With that done, step out of the room to avoid getting caught in the blast.
Objective: Destroy the Main Propulsion.
Step back onto the bridge and sprint over to the lift down the middle. Kill the soldiers that come up and then use the switch to travel down to the lower level of the zeppelin. When the lift reaches its destination, kill the soldier standing at the bottom of the steps and head down. A Drache Trooper will come through the double-door across from the bottom of the steps, so activate Empower and use your MP43 or MP40 to blast him to pieces before he can do any damage.
Kill the other troops along the walkway and then approach the double-door at the other end. Use the Veil Energy container by the door to restore your energy (provided it’s still intact) before entering the next area. A boatload of soldiers will enter through the double-door at the other end soon after you do, so equip your MP43, activate Empower, sprint forward, and spray the group of enemies as soon as the door opens. With any luck you’ll have taken out the majority of them, including the Drache Trooper and Scribe among them. There may be a few stragglers, so pick them off and then look for INTEL (4/9) on top of the container along the side of the catwalk.
Through the next door are four engines that power the zeppelin. First and foremost, shoot down the four or so Jetpack Troopers flying near the AA Guns on either side of the walkway. There’s no need to use one of the AA Guns to shoot them down; Empower and an upgraded MP43 work just as well, and you’re likely to take much less damage. When the sky is clear, hop in one of the AA Guns and destroy the two engines on that side of the zeppelin (activate Veil Sight to highlight them). Then, move to the AA Gun at the other end of the walkway and use it to destroy the two engines on that side.
Use the AA Guns on the zeppelin to destroy the engines.
Objective: Dump the Planes.
When all four engines have been destroyed, make your way up to the double-door at the top of the steps at the center of the walkway. Some enemies, including an Elite Guard, will burst through the door as you approach, so activate Empower and mow them down with your MP43. Through the double-door, use the switch on the west wall to lower the shield door. Proceed through the deactivated shield door to trigger a cutscene. After the cutscene, follow the marker on your compass to reach a control platform. Kill the two soldiers there and then look for INTEL (5/9) on the container at the northeast end.
After collecting the Intel, exit through the door along the north wall. Through there, you’ll come to a section of corridor blocked by electricity. Activate Shield and sprint through the electricity to get to the other side unharmed. When you reach the shield door along the walkway at the other end of the corridor, activate Empower and shoot at the explosive barrel through both shields to set it off and destroy the generator.
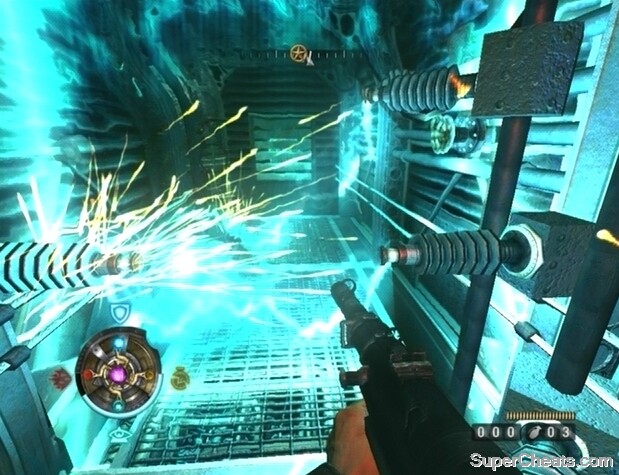
Use Veil Shield to move through the electricity unharmed.
Through both deactivated shield doors, move to the end of the corridor, use the Veil Energy container past the door there to recharge your medallion if necessary, and then start down to the north end of the walkway. There’s a Scribe among the soldiers on the walkway, so activate Empower to shoot through shields if the need arises. Proceed through the door at the northwest end of the walkway and use the switch by the window to complete the objective.
Objective: Stop the Super Weapon.
Proceed through the double-door across from the switch and start down the corridor. Keep an eye on your left as you move down the corridor and look for a partially-opened door. The shelves in this room are stocked with ammo for your weapons, and you can find INTEL (6/9) on the container in the southeast corner. When you’re ready to continue, step onto the lift at the other end of the corridor and use the switch to descend.
The flight deck is packed with enemies, so equip a weapon such as the Particle Cannon or Tesla Gun and go to town. Crouch and take cover behind the table by the door if you’re taking too much damage or activate Shield to recover. When the area is clear, look for INTEL (7/9) on the counter in the middle of the platform.
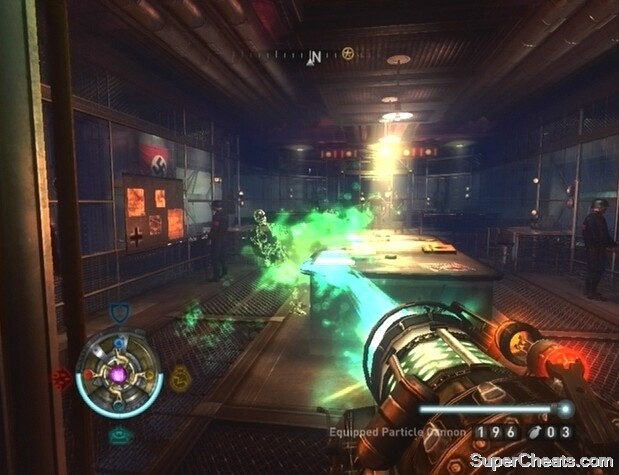
Use a power weapon to clear out the enemies on the flight deck.
Exit through the door at the southwest end of the area and head up the ramp outside. Go through one of the double-doors on either side of the south end of the walkway to reach the next area. Use one of the switches at the east end of the first section of walkway to extend a bridge to the second walkway. Then, use the switch in the middle of the second walkway to extend a bridge to the third walkway.
There is a large number of enemies at the other end of the area; it would be best to take them out before attempting to progress any further. Equip your Kar 98 and pick off the enemies from the second walkway. There are two Scribes among them, so use Empower to plug through their shields. Use the Veil Pool between the containers near the west end of the walkway to restore your Veil Energy if necessary.
When the other end of the area is clear, cross to the third walkway and look for INTEL (8/9) on the container near the east end. Use the switch in the middle of the walkway to extend a bridge to the fourth walkway and then cross to the other side. Proceed through one of the double-doors along the walkway.
In the Super Weapon room, activate Empower and destroy the two portable shields on either side of the machine. A Veil Assassin will enter the room when you approach the steps west of the machine, so equip your Particle Cannon or Tesla Gun, activate Veil Sight and kill him before he kills you. When the room is clear, head up the steps west of the machine and enter the control room. INTEL (09/09) is on the control panel; can’t miss it. Use the switch next to the control panel to complete the objective.
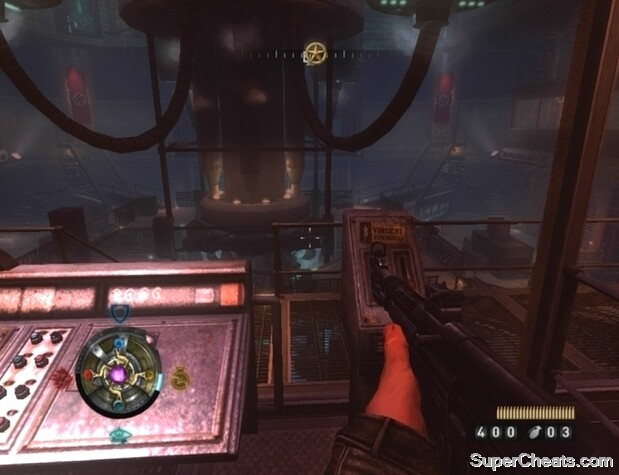
Use the switch in the control room to open the portal.
Objective: Open the Portal.
Use the switch on the north side of the portal to open it and complete the objective. A couple of Elite Guards will appear soon after, so be careful.
Objective: Enter the Portal.
As the portal opens, a bunch of soldiers and a Heavy Trooper will enter the room. If you don’t feel like fighting them, activate Shield and keep it active (provided you have the Veil Energy to do so) until the portal is opened. If you lack Veil Energy, just run around the room and then sprint back up to the platform and through the portal when the time comes.
Grab the ammo on the table along the walkway and approach the portal at the other end to face Hans Grosse.
Objective: Defeat Hans Grosse (Phase 1)
Hans Grosse is on the platform in the middle of the arena. A shield surrounds the platform, so you must use Empower to plug through it. The Leichenfaust 44 is the weapon to use here; it’s even better if fully upgraded. Dodge the line of bullets at the start, equip the Leichenfaust 44 if you haven’t already, activate Empower, and blast Hans Grosse through the shield.
If you’re playing on the normal difficulty level and have a fully-upgraded Leichenfaust 44, Hans Grosse should falter for the first time after only one hit. After he falls to one knee, he’ll destroy one of the pillars circling the platform. There’s a Veil Energy source on each pillar; immediately after downing Hans Grosse, deactivate Empower, activate Shield, and sprint toward one of the approaching pillars.
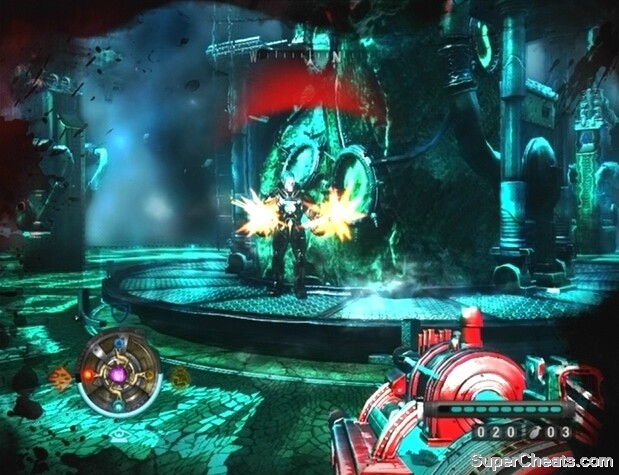
Use Empower to hit Hans Grosse through the shield surrounding the platform.
The pillars are fast, so don’t try chasing after one; sprint to an approaching one and hug it to be pushed around the arena. You’ll restore some Veil Energy (a half or three-fourths of your meter depending on the upgrades you’ve purchased) while hugging one of the pillars. When the Veil Energy source disappears, activate Shield and Empower. Then, fire at Hans Grosse while sprinting toward another approaching pillar. You should be able to hit Hans Grosse once or twice before your Veil Energy is completely depleted.
When you reach another pillar, allow it to push you around the arena. If you downed Hans Grosse and he destroys the pillar you’re hiding behind, activate Shield and Empower and sprint towards another approaching pillar. Even if the pillar you hide behind is destroyed soon after you reach it, your Veil Energy should have been restored enough to allow you to seek out another without taking too much damage.
Repeat the above strategy until Hans Grosse falls. At that point, approach him, press the Y/Triangle button to grab him, and then RT/R2 to have B.J. stab him with the Shield crystal.
Completing first phase of the Hans Grosse battle.
Objective: Defeat Hans Grosse (Phase 2)
You’ve lost the Shield power, so you must be especially careful here. During this phase, Hans Grosse will race around the arena and fire his machine guns at you. When he’s damaged significantly, he’ll retreat to the sky and shower the area with missiles. There are plenty of obstacles to hide behind but Hans Grosse’s speed can be a problem. The Mire power can fix that, though.
At the start of the round, head straight and turn left when you reach the wall. Continue heading south until you encounter Hans Grosse. If you reach him fast enough he should be inactive; don’t shoot him yet, as you’re shots won’t register until he starts moving. When he speeds off, head a bit further south until you come to spinning cog on a pillar with a Veil Pool beneath it. Wait around here until Hans Grosse appears, at which point activate Mire and fire at him with the Leichenfaust 44 (or, if you’re out of ammo, another weapon such as the Particle Cannon) until he falters and retreats to the sky. Deactivate Mire as soon as you see him falter to conserve energy.
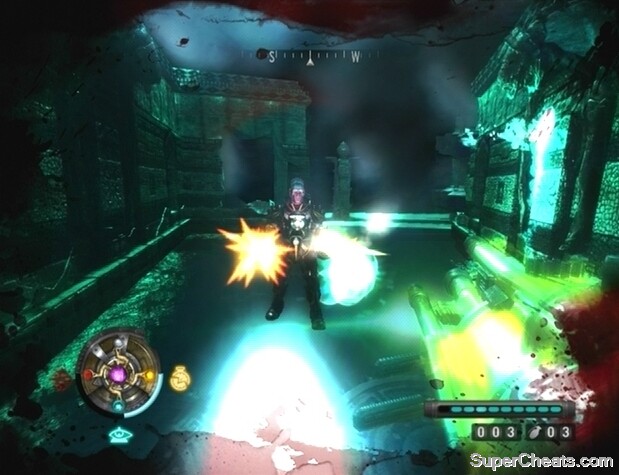
Use Mire to slow Hans Grosse down.
While in the sky, Hans Grosse will fire missiles at you. Stand in the Veil Pool under the spinning cog on the pillar to restore some of your Veil Energy, and also shield yourself from the falling missiles. The Veil Pool will soon disappear, but will eventually reappear, allowing you to restore even more energy. Remain below the cog until Hans Grosse lands. Even while Hans Grosse is on the ground, remain around the cog so you can return to it as soon as he takes to the sky. When you encounter Hans Grosse, activate Mire and fire at him until he falters, or until you run out of Veil Energy.
Repeat the above strategy until Hans Grosse falls. Then, approach him, press the Y/Triangle button, and then RT/R2 to have B.J. stab him with the Mire crystal.
Completing second phase of the Hans Grosse battle.
Objective: Defeat Hans Grosse (Phase 3)
When you hit the ground, collect the ammo on the tables below the tent (particularly the Leichenfaust 44 ammo) and start toward the walkway to the east. Hans Grosse is sitting on the side of the mountain further up; he’ll continuously fire missiles along the path, so you’ll have to sprint through. It’s nearly impossible to get through this without taking damage, but dodge the missiles to avoid taking a direct hit, which would surely result in death.
Once you’re past Hans Grosse, stand on the magic lift at the end of the path to ascend to the next level. Here, look up to spot a mass of red crystals. Fire at the red crystals with your Leichenfaust 44 to destroy the rock bridge. Make your way to the end of the path to uncover a Veil Ladder.
Completing third phase of Hans Grosse battle.
Objective: Defeat Hans Grosse (Phase 4)
Before climbing up the Veil Ladder, equip the Tesla Gun. There are Sniffers at the top of the ladder, so sprint away from them as soon as you’re at the top of the ladder and use the Tesla Gun to zap them. When the first batch of Sniffers has been taken care of, start down the path. More Sniffers will appear, so zap them with the Tesla Gun and continue following the path. At one point the Sniffers seem to spawn indefinitely, so you’ll have to sprint through while holding down RT/R2 to reach the pillar Grosse is standing on.
When you reach the pillar, Grosse will hop off and run to the end of the path. There, he will continuously fire at you as you approach. Sprint and dodge to the side to avoid taking damage, and then hit Grosse with gunfire to push him off of the ledge. You should automatically begin to ascend to the final battleground.
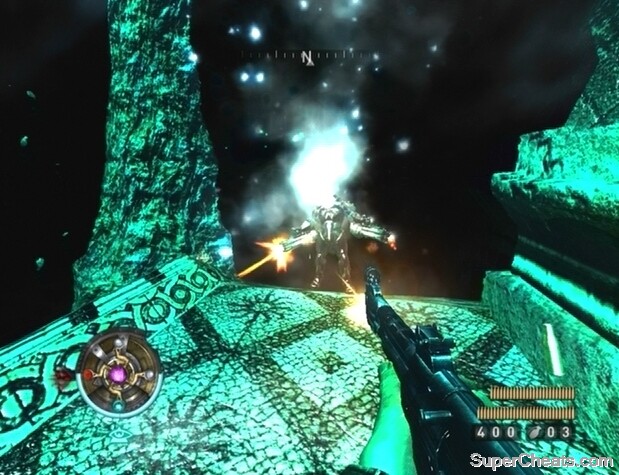
Hit Hans Grosse with gunfire to push him off of the edge.
With Empower and a fully-upgraded Particle Cannon you can end this fight quite quickly. Sprint to the machine in the middle of the arena and take cover behind some rubble as Hans Grosse descends. Equip your Particle Cannon (which you should have plenty of ammo for) and wait until Hans Grosse steps off of the lift.
With Hans Grosse in your sights, activate Empower and move around while firing at him with your Particle Cannon. While hitting him with the beam, dodge to the side to avoid taking fire. Grosse is weak at this point, so even if you don’t have enough Particle Cannon ammo, any other big weapon with Empower would do.
Continue attacking Grosse until he falls. Then, approach him, press the Y/Triangle button, and then RT/R2 to have B.J. stab him with the last crystal. That last stab will do him in.
Defeating Hans Grosse.
That’s it; you’ve just completed the Wolfenstein single player campaign! Be sure to sit through the credits to view an additional cutscene.
This mission becomes available following Dig Site. It is an optional mission that can be missed, so complete it as soon as possible. This mission starts in Midtown West. Following Dig Site, look to your map, locate the Mission Giver marker, and make your way there. Speak to the wounded agent to trigger the mission. Set Warehouse as your active mission and follow the marker on your compass to the mission start point.
Objective: Open the Warehouse Door.
Through the door, open the container next to the doorway in the northeast corner of the room for GOLD (1/7). Proceed through the doorway next to the shelf and clear out the Nazis upstairs. Approach the highlighted cabinet along the east side of the room and hold the Y/Triangle button until you receive INTEL (1/4). When you have the Intel, proceed through the doorway adjacent to the one you used to enter the room. Blast the Nazis along the walkway and make your way to the other end. Use the switch at the other end to open the warehouse door below.
The switch that opens the warehouse door is at the end of the second floor walkway.
Before dropping to the area below, look for GOLD (2/7) next to the desk in the room across from across from the Switch.
Objective: Retrieve the Codebook.
Drop down and approach the warehouse door to trigger a cutscene. Outside, hop up the boxes next to the parked truck (west) and jump over to the balcony. Open the door at the south end and enter the room there. Search the cabinet next to the door for INTEL (2/4) and look for GOLD (3/7) next to the shelf in the northwest corner of the room. When you have the Intel and Gold, head back outside and enter the room at the north end of the balcony. There are sure to be enemies in this room, so clear them out before doing anything else. When the room is clear, look for GOLD (4/7) between the two desks in the western corner.
Continue through the door along the west wall and take the stairs down to the lower level. Kill the enemies downstairs, and search the cabinet in the southwest corner of the room for INTEL (3/4). Look for GOLD (5/7) in the container at the bottom of the shelf across from the cabinet. With that, head back upstairs and proceed through the door along the northern wall. As soon as you’re through, turn right to spot another door. Head through the door and look for GOLD (6/7) in the southeast corner of this room. INTEL (4/4) is tucked below the desk in northwest corner.
The last Intel is hidden underneath the desk.
When you have the Gold and Intel, continue through the doorway at the east end of this room and follow the corridor to a bunch of large crates. Crouch and move through the opening in the crates; keep an eye on your left for GOLD (7/7). When you reach the Black Sun symbol at the other end, activate Veil Sight and blast any enemies you can see below. When the way seems to be clear, drop down and hold the Y/Triangle button to unlock the Safe. Pick up the Codebook inside to complete the objective.
Objective: Escape the Warehouse.
Follow the marker on your compass and exit Warehouse the same way you entered the level.
After completing Warehouse, set “Speak with the Partisan” as your active mission and follow the marker on your compass to the wounded agent in the Kreisau Circle Safe House.
Objective: Find General Kraig.
Go through the first door, gun down the two Nazis in the room through the archway, and look for GOLD (1/11) between the table and heater along the north wall. Then, approach the desk next to the door and hold the Y/Triangle button to search the desk to find INTEL (1/4). When you have the Intel and Gold, return to the first room and head through the doorway below the stairs. Follow the corridor to the kitchen, take out any enemies there, and then look below the sink along the north wall in the second kitchen for GOLD (2/11).
Fight your way through the house in search of General Kraig.
Head through the door in the southwest corner of the kitchen and start up the stairs. GOLD (3/11) is next to the dresser at the east end of the room at the top of the stairs. Back downstairs, use the elevator in the southeast corner of the kitchen to reach the second floor. On the second floor, turn into the room on the left and look for INTEL (2/4) on top of the chest in front of the first bunk bed along the west wall. Look for GOLD (4/11) under the second bunk bed along the west wall.
When you have the Gold and Intel, make your way to the end of the hall to reach the stairway. Proceed through the doorway up ahead and then through the door at the other end of this room. GOLD (5/11) and GOLD (6/11) are on the table along the north wall of this bedroom. Return to the stairway and head up to the third floor. Go through the door at the other end of the railing and blast the enemies in this room. GOLD (7/11) is in the armoire to your right as soon as you enter the room, and GOLD (8/11) is along the south wall of the seating area. Open the glass double-door and search the desk along the south wall for INTEL (3/4). GOLD (9/11) sits on the same desk.
Approach the bookcase along the east wall of this room and look for a highlighted book. Use this book to open a secret room.
Objective: Kill the General.
As soon as the bookcase slides open, fire at General Kraig until he falls.
Use the highlighted book to uncover General Kraig’s hiding place.
Objective: Find the Decoder.
GOLD (10/11) and GOLD (11/11) are in the northwest corner of the secret area. Search the highlighted cabinet to find INTEL (4/4). Toggle Veil Sight and fire at the painting on the south wall to uncover a safe. Unlock the safe to find the Decoder. Open the small container below the painting to find TOME (1/1).
Objective: Escape the House.
Leave the room, fight your way down the stairs to the first floor, and exit back to Midtown West.
This mission becomes available after Hospital. Look for a Mission Giver icon on the map of Midtown—most likely in Midtown East near the Golden Dawn Safe House—and make your way over there. Speak to the man there to get started. Set SS Headquarters as your active quest and follow the marker on your compass to the mission start point.
Objective: Look for information.
Blast the Nazis in the reception area and then look for GOLD (1/7) on a file cabinet behind the front desk. Search the same file cabinet to find INTEL (1/4). Proceed through the door in the northwest corner of the room and move down the hall until you reach the next area. Gun down the enemies here, and then enter the storage room in the southwest corner. Open the container on the shelf to find GOLD (2/7). Look for GOLD (3/7) and INTEL (2/4) through the door along the same wall.
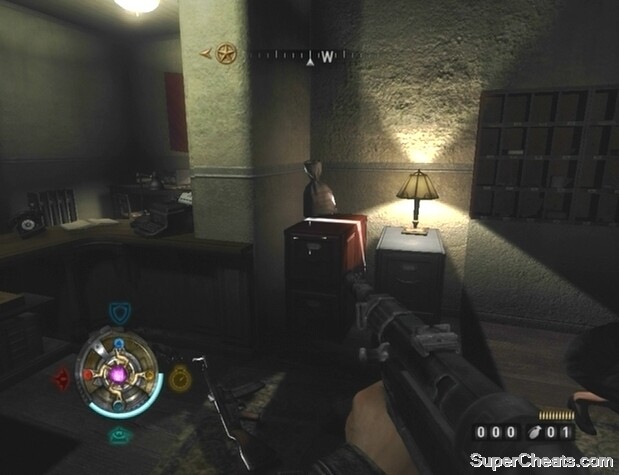
Collect the Gold and enemy Intel behind the front desk.
When you have the Intel and Gold, return to the previous room, walk back down the hall, and head up the stairs there. At the top of the stairs, go through the door along the north wall. Kill the Nazis in here, then look for GOLD (4/7) on the desk with the two typewriters and search the file cabinet along the same wall for INTEL (3/4). With that, leave the room and step into the hallway next to the stairs. Start down the hall and turn right when you can. Go through the door along the north wall and look for GOLD (5/7) on the desk in this room and search the highlighted file cabinet to find INTEL (4/4).
After collecting the Gold and Intel, walk to the north end of the hall to complete the objective.
Objective: Access the Office and destroy the Veil Inhibitor.
Go through the door at the south end of the hall and then through the door in the southwest corner of this room. Climb up the ladder and destroy the Veil Inhibitor in the attic.
Objective: Find Prisoner Location.
Before leaving the attic, unlock the safe in the northeast corner to find GOLD (6/7). Climb back down the ladder and go through the door at the start of the hall. Toggle Veil Sight and move through the Veil Door between the two file cabinets along the north wall. Interact with the billboard along the west wall of this room to complete the objective.
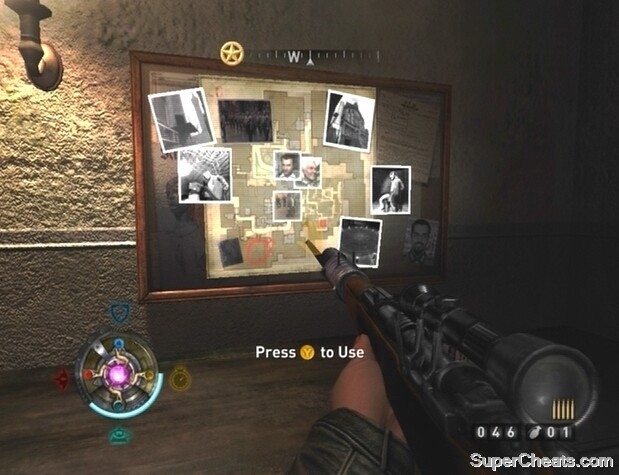
Steal the prisoner location map to complete the objective.
Objective: Escape the Building.
You’ll have to grab the last Gold on your way out, since the door to the basement was previously locked. Head back down the stairs and fire at the Nazis waiting for you there. Rather than returning to the reception room, go down the hall to the office space there and enter the second door along the west wall. Upon entering this room, turn right and open the door there. Take the stairs down to the basement and look for GOLD (7/7) next to the Veil Pool behind the shelf.
With that, follow the marker on your compass to a sewer grate, climb down the ladder, and travel through the sewers back to Midtown East.
This mission becomes available following the SS Headquarters side mission. Set “Meet your Contact” as your active mission and follow the marker on your compass to the Golden Dawn Safe House in Midtown East. Speak to the marked man there, and then follow the marker on your compass to the mission start point.
Objective: Rescue the Agents (1/3).
At the start, walk through the doorway, activate Veil Sight, and look for a red panel on the wall right next to the doorway. Shoot the panel to reveal TOME (1/1). GOLD (1/10) is below the stairs. Proceed up the stairs, gun down the Nazis there, and look for INTEL (1/4) on top of the large, unbreakable crate along the north wall. With that, untie the bound agent to free him.
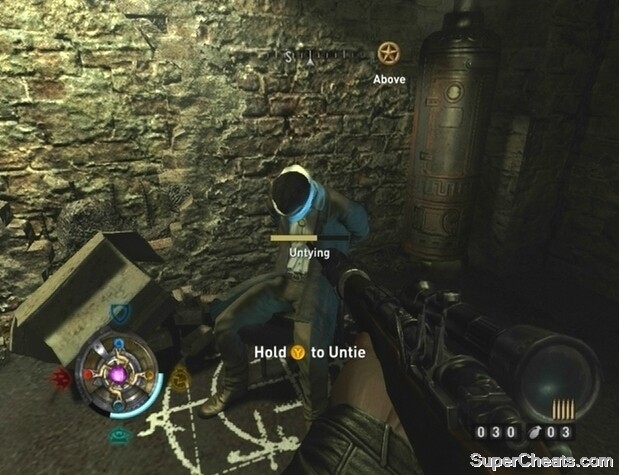
Untie the bound agents to free them.
Objective: Rescue the Agents (2/3).
Head up the steps and start firing at the enemies at the top. There’s a Scribe or two among them, so knock each one out with Empower while he is busy shielding his allies. There may be an enemy on the upper walkway as well, so be sure to blast him. You’ll likely also encounter an Elite Guard; she’s very quick and can deal lethal melee damage, so back away if she gets too close and fire until she falls. Look for GOLD (2/10) and GOLD (3/10) next to the first set of steps. When the room is clear, jump down from the walkway to the altar below and look for GOLD (4/10) on the table across from it.
Climb up the steps near the altar and enter the ritual room. Kill the Nazis inside and proceed through the door in the northeast corner. GOLD (5/10) is in the container on the shelf in this room. Return to the ritual room and go through the double-door along the north wall. Look for GOLD (6/10) and INTEL (2/4) in the room through the doorway along the west wall.
Go up the steps in the ritual room and through the door at the top to reach the upper walkway. Enter the next room along the north wall. There may be another Elite Guard in here, so be ready. Search the highlighted file cabinet to find INTEL (3/4), look under the table in the southeast corner for GOLD (7/10), and untie the bound agent.
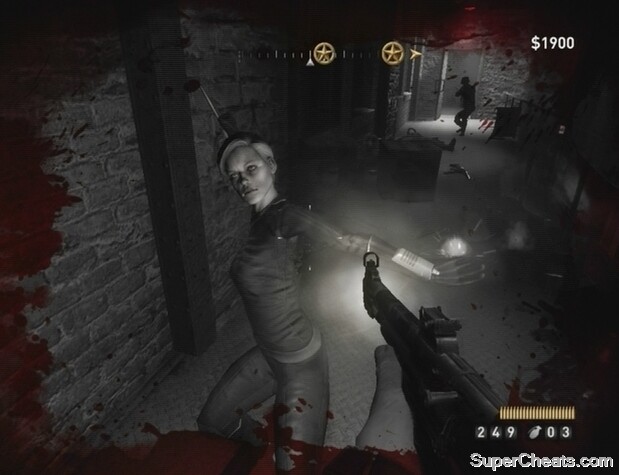
Elite Guards excel at close range combat.
Objective: Rescue the Agents (3/3).
After freeing the second agent, leave the room and move to the south end of the walkway. Peer over the railing; you should be able to see a highlighted container on the stack of large, unbreakable crates. Jump on the railing and over to the crates below; open the highlighted container to find GOLD (8/10). Make your way back to the upper walkway and exit through the door at the south end.
Look for GOLD (9/10) between the stack of breakable crates. Proceed through the next door to find the final agent in the room at the end of the upper walkway. GOLD (10/10) is on the desk in the northeast corner of this room, and INTEL (4/4) can be found by searching the same desk. Untie the bound agent and exit the level through the door along the west wall.
This mission starts Downtown and is unlocked after Castle. After completing Castle, look for a Mission Giver icon on the map of Downtown and make your way over to it to trigger a cutscene. When you regain control, kill the two Nazis and then equip your MP43. You must defend the man from Nazis while he overloads the tower.
The biggest threats here are the Jetpack Troopers. Due to their presence, avoid taking control of one of the mounted MP42s at the start; instead, crouch, activate Empower, and fire at the first Jetpack Troopers with your MP43 or MP40 to shoot him out of the sky. Then, hop on one of the MP42s and start firing at the Nazis in the street below. If you’re taking too damage, get off the gun and crouch to avoid taking fire. Another Jetpack Trooper will soon appear overhead, so step away from the MG42 and take him out before doing anything else.
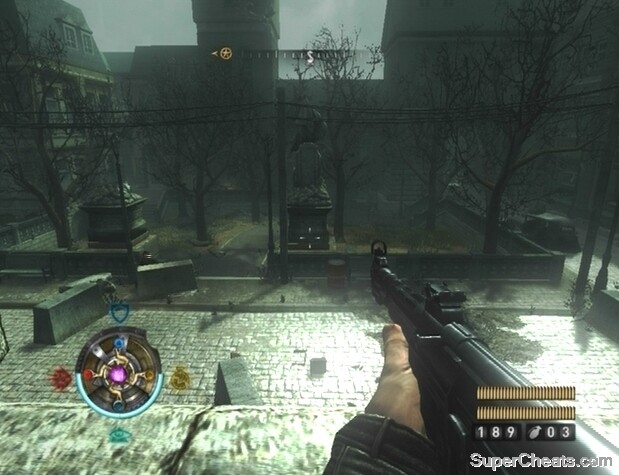
Defend the agent while he disables the Nazi tower.
Two Elite Guards will eventually show up; be careful, as they are quite quick and will run up to melee you. Elite Guards can also spawn Despoiled using the bodies of fallen Nazis, so be ready to switch to your Particle Cannon or to activate Empower.
When the area is clear, ensure that “Radio Tower” is set as your active mission and follow the marker on your compass to the mission start point in Downtown West.
Objective: Get to the Roof.
Go through the double-door along the south wall and shoot the Nazis standing outside. INTEL (1/4) is on the table just past the door. There are some enemies hiding behind mobile shields at the other end of the street. There’s a Veil Inhibitor further up, so hang back at the sandbags and pick off the shielded Nazis with your MP43 or MP40 and Empower active. Shoot at the highlighted generators at the base of the portable shields to disable them.
When the street is clear, start through the archways along the west side and look for GOLD (1/8) behind the pile of rubble under them. Then, go to the southeast end of the street, activate Veil Sight, and look for a Veil Ladder along the side of the building there. Climb up to the top of the ladder, open the door on the balcony, and open the container in the small room to find GOLD (2/8).

The way to the Radio Tower is abound with Nazis.
After collecting the Gold, drop back down to street level and start west toward the mounted MG42 and sandbags. Take control of the MG42 and gun down the Nazis as they come through the tunnel. There’s a Scribe among them, so activate Empower and continue firing if he’s shielding his allies. With that, walk to the end of the tunnel and step into the corridor there. Move to the end of the corridor and look for GOLD (3/8) in the northeast corner of the walkway in the display room there.
Take the stairs near the shielded door up to the second floor walkway. Look for TOME (1/1) in the broken display case on the east side of the walkway. Use the switch further up to deactivate the shield door below. Remain on the walkway and pick off the Nazis that come through the door when the shield is lowered. Watch out for the Elite Guard especially.
Proceed through the deactivated shield door at the bottom of the stairs when the room is clear. In the next room, approach the doorway at the north end. A shield blocks your path. Activate Empower and sprint to the double-door at the other end of the room. A Scribe and a few soldiers will come through, so quickly gun them down as well as the troops that come through the side door. When the Heavy Trooper breaks through the wall, clear out any remaining enemies, then take to breaking the crystals on his shoulders and back to destroy him.
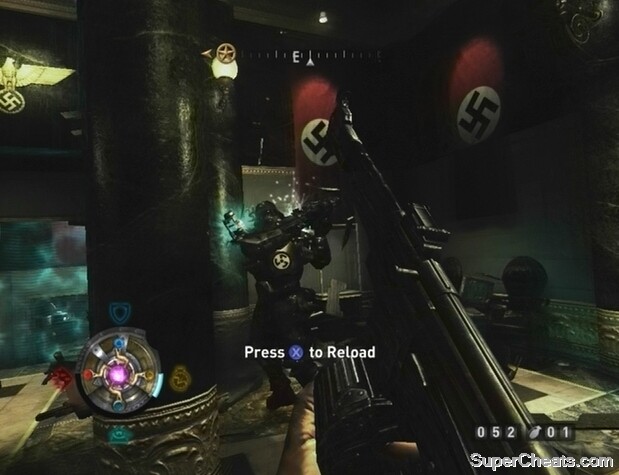
A Veil Heavy Trooper will break through one of the walls on the first floor of the museum.
With that, use the switch through the opening that the Heavy Trooper created to deactivate the shield. Through the doorway, look for GOLD (4/8) in the northwest corner by the vent. After collecting the Gold, crouch and enter the vent. At the other end of the vent, kill the two soldiers standing by the shield door, then walk up the ramp across from it and jump onto the large, unbreakable crates. Walk to the end of the boards and jump onto the pipes along the wall. From there, jump up onto the platform and open the container at the end to find GOLD (5/8).
When you have the Gold, jump back down to the boards and activate Veil Sight. Climb up the Veil Ladder to reach a higher platform, and start through the vent along the wall there. Make your way to the other end of the vent and drop down to the area below. Kill the soldiers in this room, and then look for INTEL (2/4) on the desk across from the lockers along the east wall. Continue through the doorway and look for GOLD (6/8) in the corner at the south end of the hall.
Move through the doorway at the top of the steps and kill the soldiers in the stairway. Sprint up the steps and enter the hallway at the top. INTEL (3/4) is attached to the wall by the door at the other end of the hall. Open the door and step out onto the rooftop.
Objective: Disable the Shield Door.
There are snipers on the building across the street, so switch to your Kar 98 and take them out. Activate Veil Sight and you should be able to spot an explosive barrel; set it off to hopefully wipe out most of the group. When the building across the street is clear, look for GOLD (7/8) along the storage shed in the southwest corner of the rooftop.

Use the Panzerschreck to destroy the electric generator through the window in the building across the street.
Equip your Panzerschreck (there’s some ammo for it on the table at the north end of the rooftop) and activate Veil Sight. Look for an open window on the building across the street. Take aim and blast the highlighted energy source to disable the shield blocking the way to the tower.
Objective: Destroy the Nazi Tower.
After disabling the shield door, head up the steps and through the doorway at the top. There are more soldiers up here, so be ready with Empower. Target the explosive barrel and the explosion will most likely set off a Veil Energy container, sending your enemies floating in the air. When the enemies have been dealt with, proceed down the steps in the northwest corner to reach an AA Gun. Before taking control, go through the double-door in the northeast corner and look along the north wall of this room to find INTEL (4/4).
Once you’ve collected the Intel, hop on the AA Gun. A number of Jetpack Troopers will appear, so gun them down before targeting the Nazi tower.
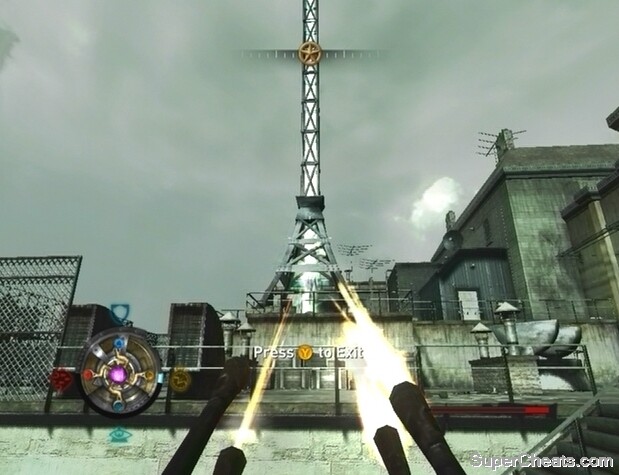
Use the AA Gun on the rooftop to bring down the Nazi Tower.
Objective: Escape the Building.
When the tower is destroyed, go through the opening that was created in the southeast corner. Make your way to the other end of the room and drop through the opening in the floor. Run through the flames straight ahead and open the container on the steps to find GOLD (8/8). After collecting the Gold, follow the marker on your compass down the stairs until you’re back on street level. Proceed through the double-door at the other end of the street to complete the mission.
Once back in Downtown, report your success to Hans Schmidt at the Kreisau Circle Safe House. If this is your first time visiting the safe house since completing Castle, you’ll have to defend the safe house from a Nazi attack immediately after reporting to Schmidt.
Along with the Radio Tower side mission, this mission tasks you with destroying two converted Veil towers in Downtown Isenstadt. Set “Destroy the Towers” as your active mission to mark both of the towers on your map and compass. Simply follow one of the markers on your compass to the tower, clear out the Nazis in the surrounding area, and then approach the tower and affix Dynamite to it.
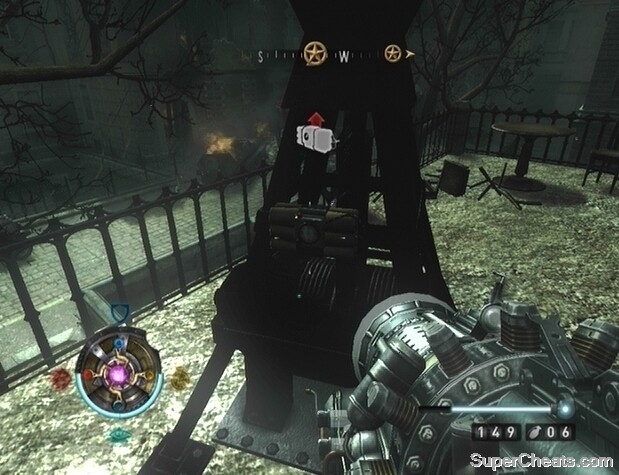
Use Dynamite to destroy the two Nazi Towers in Downtown Isenstadt to complete the mission.
When the Dynamite is planted, move away until the onscreen proximity indicator disappears to ensure that you aren’t caught in the blast. The Dynamite will soon go off, levelling the Nazi tower. Do the same to the second tower to complete the mission. Blowing up each tower is worth $500 for a total of $1000.
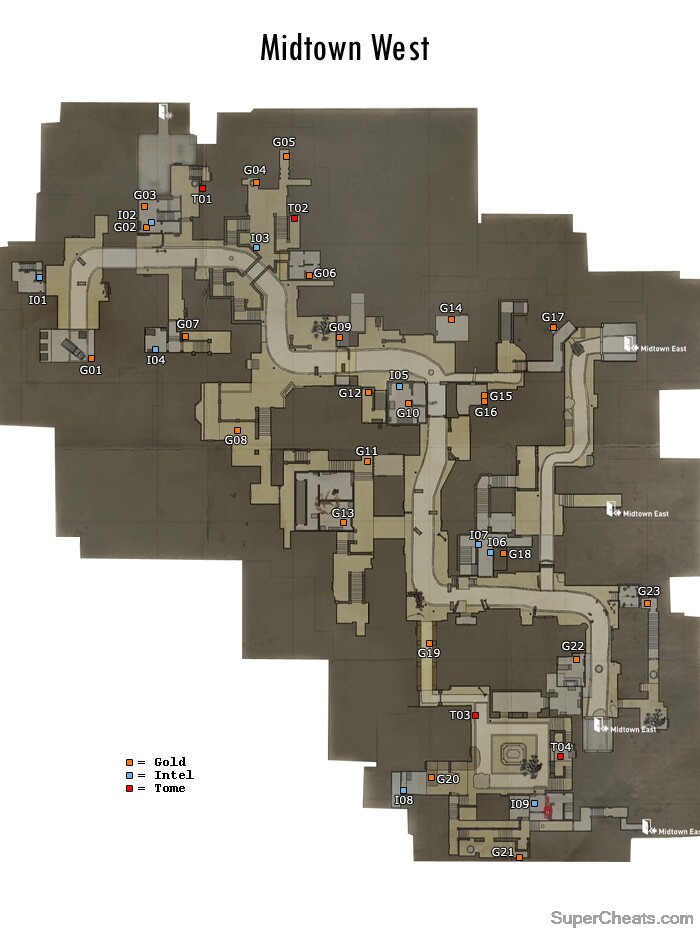
There are 23 Gold, 9 Intel, and 4 Tomes of Power to be found in Midtown West.
Match map points with the corresponding text description below if necessary.
GOLD (01/23): On the corner of the support beam in the southeast corner of the room. Jump onto the crates along the east wall and walk along the south-most beam to reach the Gold on the other side.
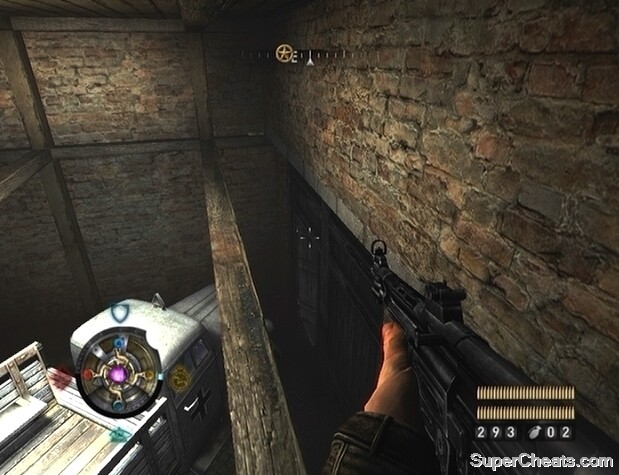
GOLD (02/23): In the locked safe on the second floor of the house. The safe is next to the bed in the southwest corner of the second floor.
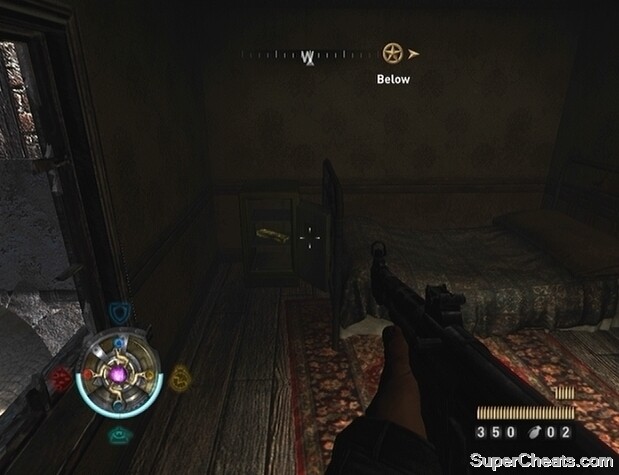
GOLD (03/23): By some crates in the sewers below the house. There’s an entrance to the sewers through the door in the northeast corner of the first floor of the house.
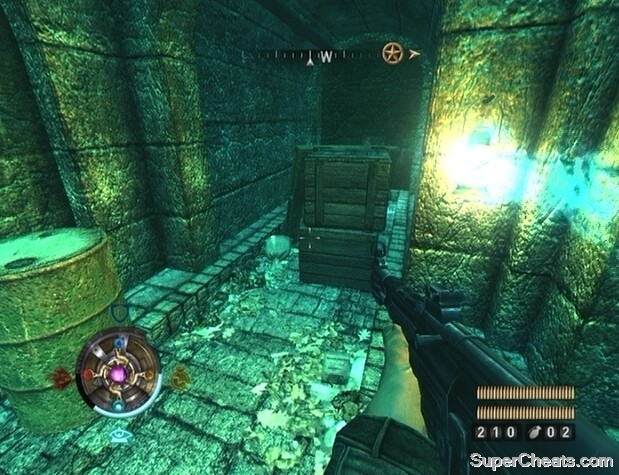
GOLD (04/23): In a container visible through an opening in the wall at the bottom of the ladder.
GOLD (05/23): On a breakable crate in the alcove.
GOLD (06/23): Activate Veil Sight and look for a Veil Ladder at the end of the alley between the two houses below where the Gold is marked on the map. Climb up the ladder, walk along the plank of wood and through the window to enter the house. Look for the Gold between the two boards next to the doorway along the west wall.
GOLD (07/23): Behind the two barrels in the northwest corner at the top of the stairs.
GOLD (08/23): Through the open archways and along the wall behind the gate.
GOLD (09/23): Jump onto the low railing east of where the Gold is marked on the map and then onto the low roof from there. Hop up to the roof of the building and break one of the windows on the west side. Crouch through the broken window, open the door, and head down the stairs behind it. The container that holds the Gold is in the crawlspace along the side of the stairs.
GOLD (10/23): On top of the bookshelf on the first floor of the building.
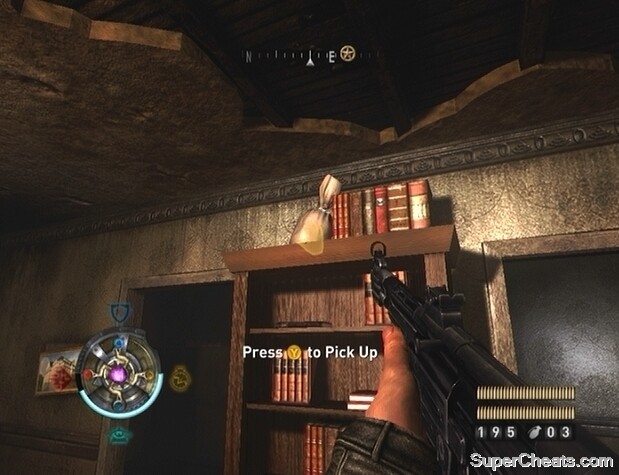
GOLD (11/23): By some trashcans and a breakable crate between the two sets of steps.
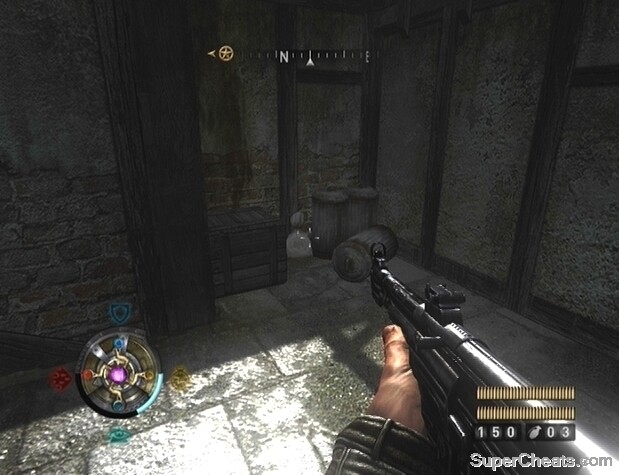
GOLD (12/23): Start at the top of the steps south of the Kreisau Circle Safe House. Jump onto the low piece of roof there to get onto the building. Walk north along the roof until you come to the platform at the other end. Run and jump to the platform on the building across the street. Drop down the north side of the building and look for the Gold behind the breakable crates next to the stairs.
GOLD (13/23): In the attic of the Kreisau Circle Safe House. The ladder up to the attic is on the second floor of the safe house; look for a door along the west wall of the southeast room.
GOLD (14/23): Jump onto the low railing west of where the Gold is marked on the map and then onto the low roof from there. Hop up to the roof of the building and break one of the windows on the east side. Crawl through the broken window, open the door, and head down the stairs behind it. The container that holds the Gold is in the crawlspace along the side of the stairs.
GOLD (15/23) and GOLD (16/23): Jump onto the low railing west of where the Gold is marked on the map and then onto the low roof from there. Hop up to the roof of the building and break one of the windows on the east side. Crawl through the broken window, activate Veil Sight, and move through the Veil Door along the south wall. Walk across the roof, across the plank, and through the window to enter the building there. The first Gold is next to the overturned armoire along the east wall. Jump onto the armoire and look for the second Gold on the support beam.
GOLD (17/23): On the third floor of the building along the east wall.
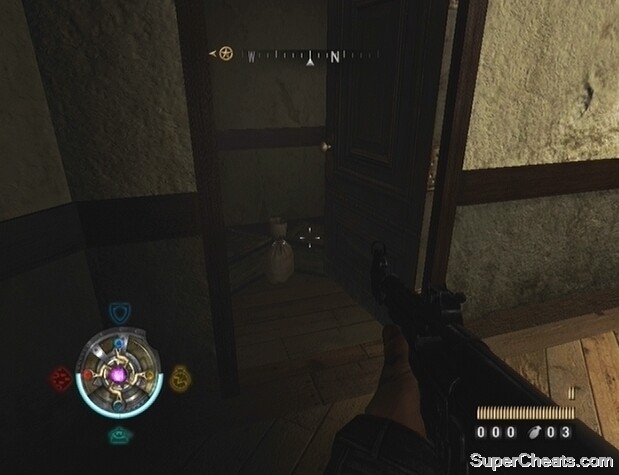
GOLD (18/23): In the small room along the west wall of the corridor.
GOLD (19/23): Start at the top of the steps south of the Kreisau Circle Safe House. Jump onto the low piece of roof there to get onto the building. Look for a walkway southeast of the edge of the roof and jump over to it. Go through the door and look for the Gold on the stack of file cabinets.
GOLD (20/23): Activate Veil Sight and climb up the Veil Ladder on the building along the west side of the square. Climb up the ladder and drop down to the awning to your left. Walk to the balcony at the end of the awning, hug the wall to your left, then jump onto the damaged section of wall and onto the balcony from there. Look for the Gold behind the board on the balcony.
GOLD (21/23): In a container in the sewers. Enter the sewers through the grate west of where the gold is marked on the map.
GOLD (22/23): Activate Veil Sight and look for a Veil Ladder along the east side of the building. Climb up to the balcony and look for the Gold on the table in the room there.
GOLD (23/23): In a container in the small storage room through the boarded doorway.

INTEL (01/09): In the small storage room next to the stairs that lead up to the second floor.
INTEL (02/09): Search the dresser in the southwest room on the second floor of the house.
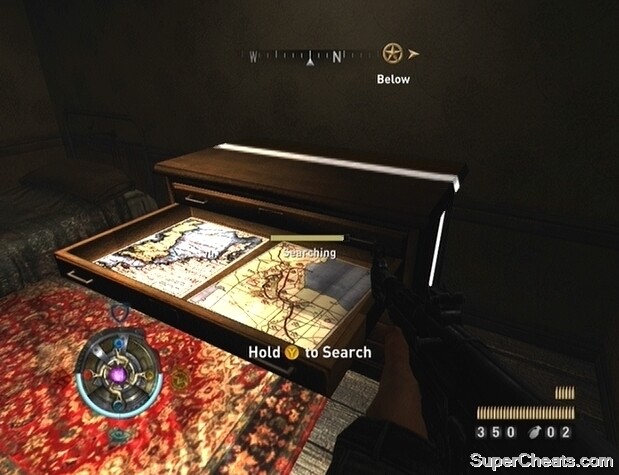
INTEL (03/09): On the railing overlooking the street.
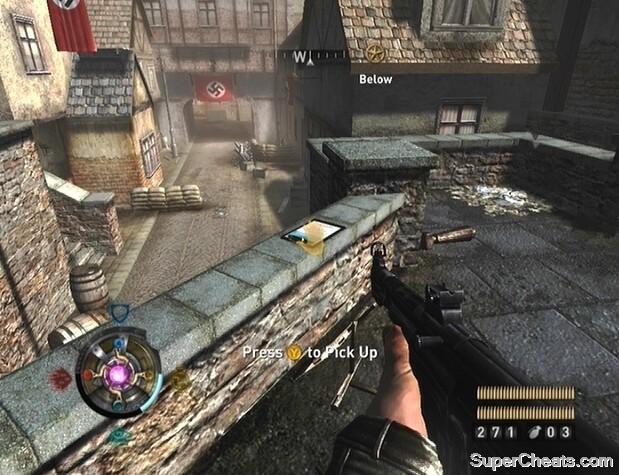
INTEL (04/09): On the table in the room through the Veil Door.

INTEL (05/09): Search the file cabinet on the second floor of the building.
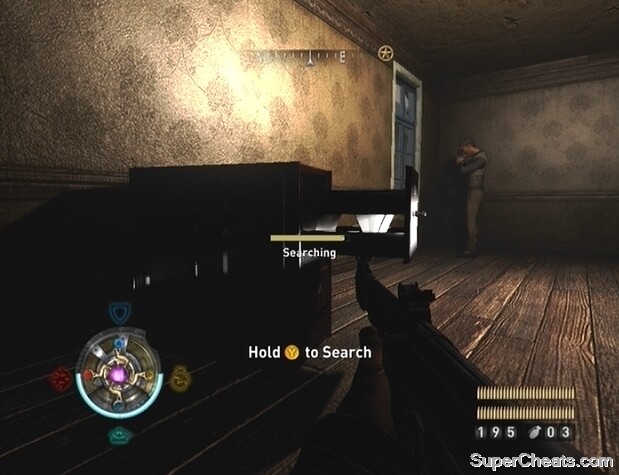
INTEL (06/09): On the table in the entrance way.
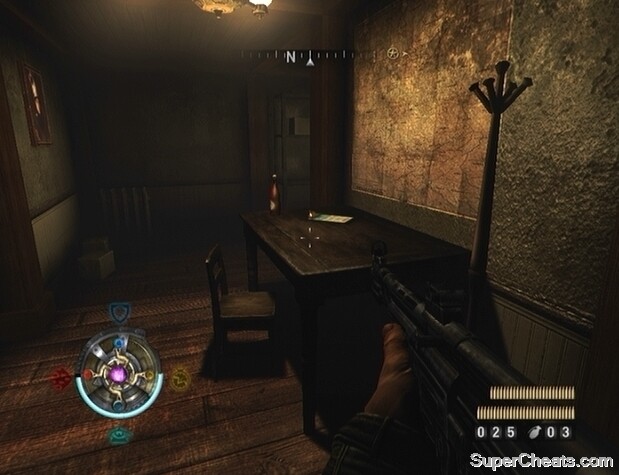
INTEL (07/09): Search the highlighted cabinet on the second floor of the building.
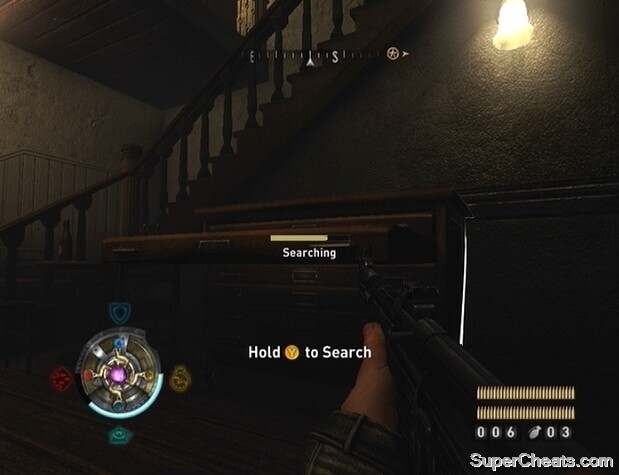
INTEL (08/09): Behind the breakable crates near the door.
INTEL (09/09): In the armoire on the second floor of the Black Market safe house.
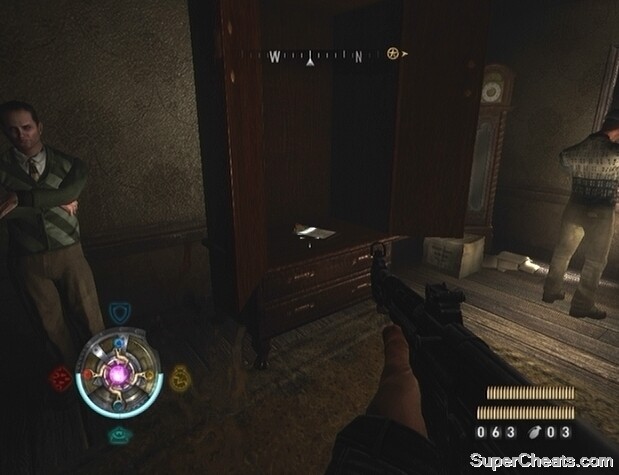
TOME (01/04): In the sewers behind the panel along the south wall right by the ladder. Activate Veil Sight to spot the red panel along the wall.

TOME (02/04): Behind the panel on the wall next to the stairs.
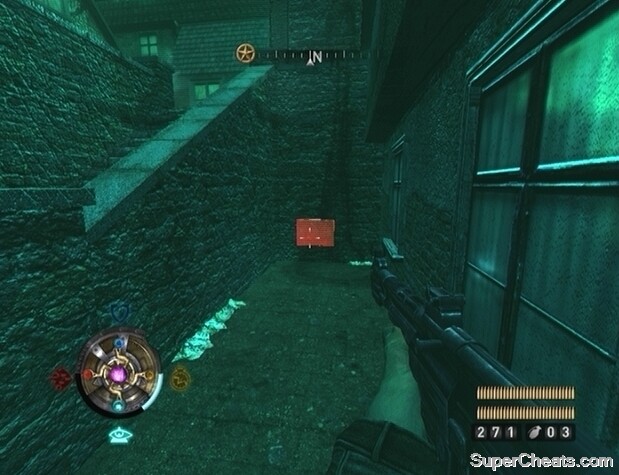
TOME (03/04): Activate Veil Sight and look for a Veil Ladder on the building along the west side of the square. Destroy the highlighted panel on the walkway to reveal the Tome.
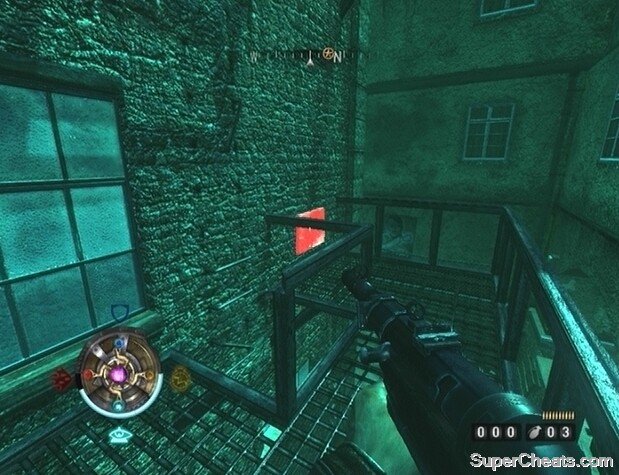
TOME (04/04): In a niche along the lower part of the south wall adjacent to the Tavern door.
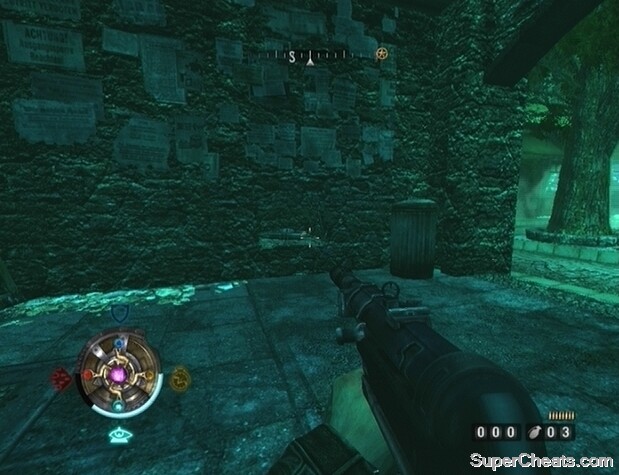
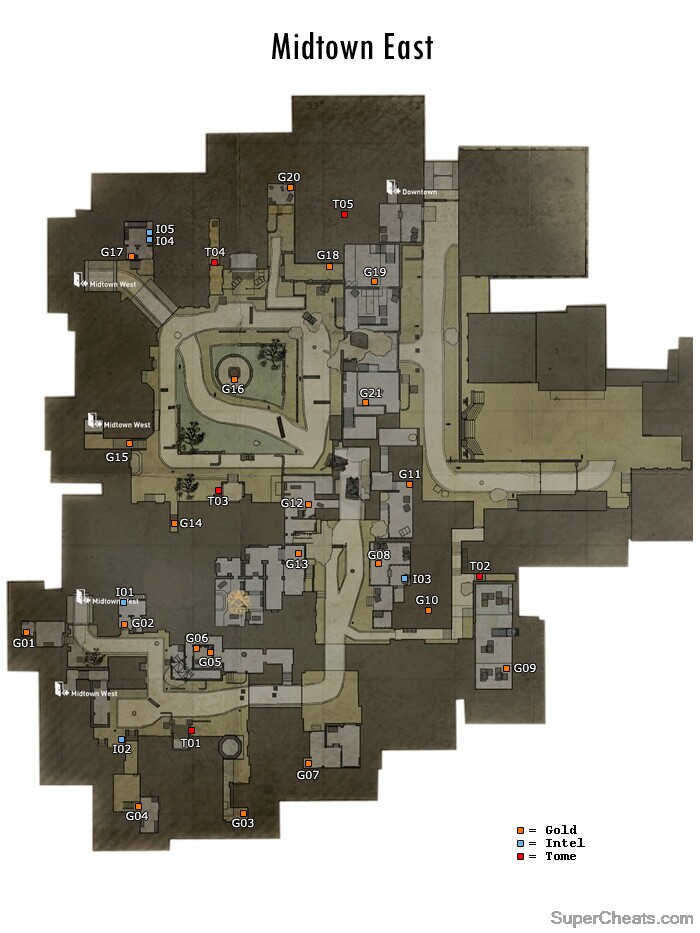
There are 21 Gold, 5 Intel, and 5 Tomes of Power to be found in Midtown East.
Match map points with the corresponding text description below if necessary.
GOLD (01/21): On the shelf in the empty room at the back of the house.
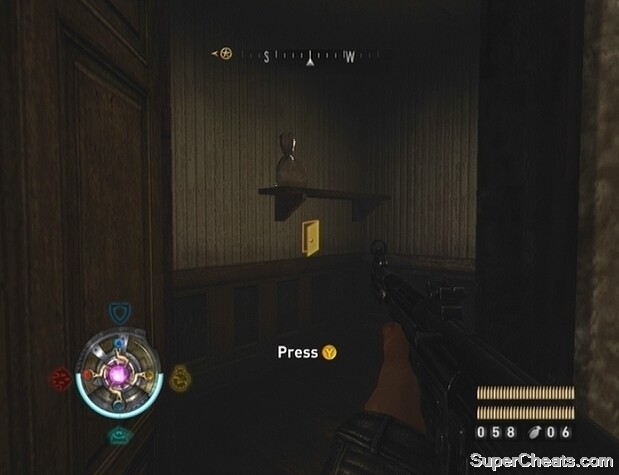
GOLD (02/21): In a container under the table in the room on the southwest side of the second floor of the house.
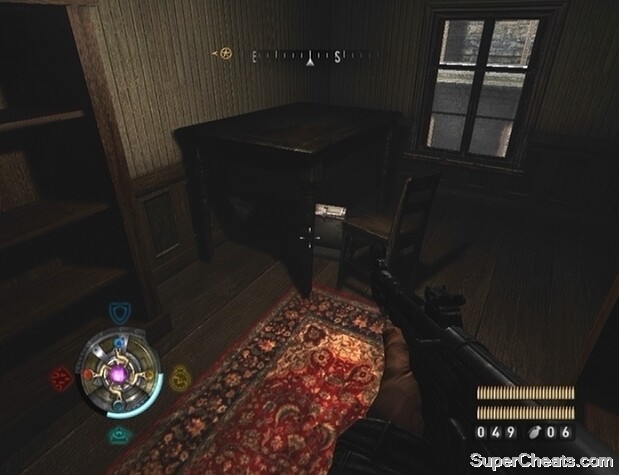
GOLD (03/21): In a container on top of a large, unbreakable crate at the back of the alley.
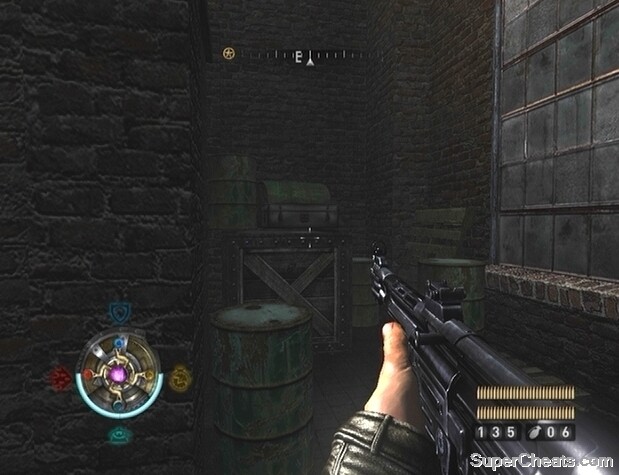
GOLD (04/21): To get to this one you must have unlocked the Paranormal Base side mission by completing the SS Headquarters side mission. If you haven’t completed either of these missions, refer to the appropriate sections of this guide for instructions. If you have completed Paranormal Base, press the Back/Select button to view your journal. Then, press the RB/R1 button to shift over to the Objectives tab and scroll down to the greyed-out “Paranormal Base” text. Press the Y/Triangle button to replay the mission. After the load screen, open up your journal and press the Y/Triangle button on the Objectives tab to abort the mission.
Once out of the mission, exit the room and look for the Gold in an opening in the wall underneath the steps.
GOLD (05/21): On the table in the room at the center of the building.
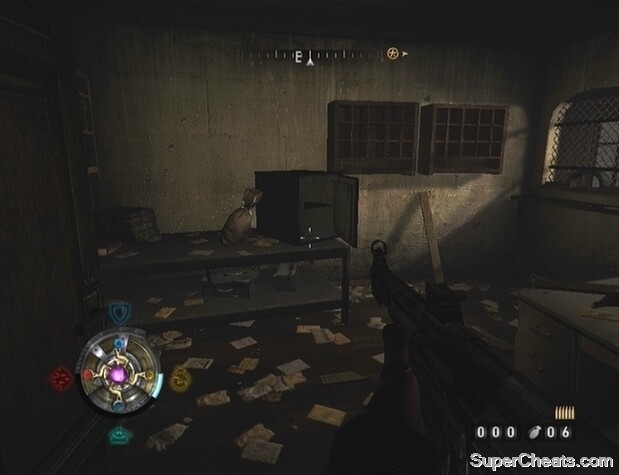
GOLD (06/21): Look for a ruined wall in the northwest corner of the building where the Gold appears to be marked on the map. There will be two large, unbreakable crates along the same wall. Stand on the dirt mound next to one of the crates and jump up onto the crates from there. Next, you’ll need to jump onto the crumbled wall behind the crates. Face south and hug the south-end of the crumbled wall. Try jumping to the side until you’re on top of the narrow wall. When you’ve managed that, walk along and hop over the gap on the adjacent wall. Then, crouch and crawl into the attic space at the other end. A container in the corner of this area holds the Gold.
GOLD (07/21): Between the skid and metal barrel in the southeast corner of the room.
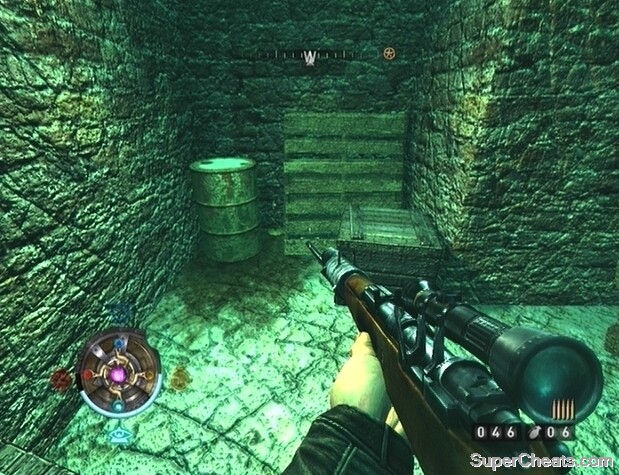
GOLD (08/21): Look for a stack of large, unbreakable crates in the northeast corner of the room. Jump onto the top of the stack and look south. Jump over to the support beams there and look for a container among the breakable boxes. Open the container to find the Gold. Make sure you have your MP40 equipped, otherwise you likely won’t able to make the jump.
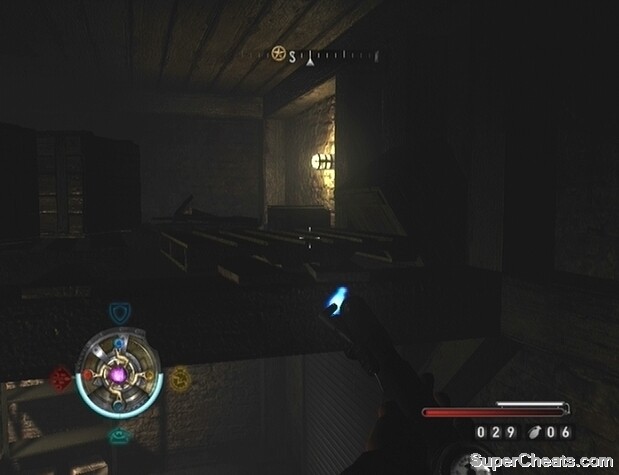
GOLD (09/21): Jump up to the top of the stack of crates in the middle of the warehouse, then look south and (with your MP40 equipped) run and jump over to the platform. The Gold is on this platform.
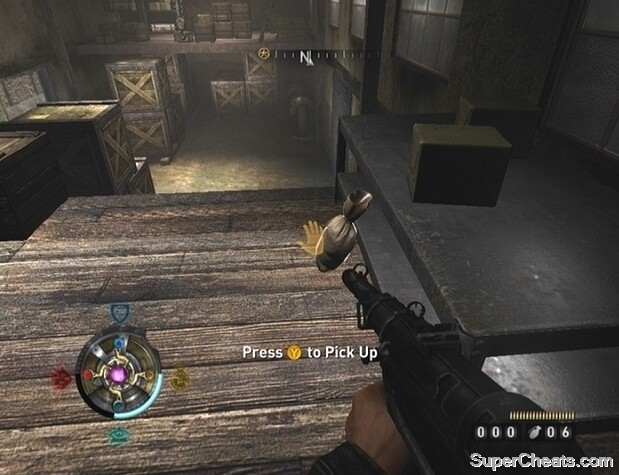
GOLD (10/21): Look for a ladder and fire escape at the northwest end of the street below where the Gold is marked on the map and climb up. The Gold is in the container on top of the large crate in the room through the door at the top of the fire escape.
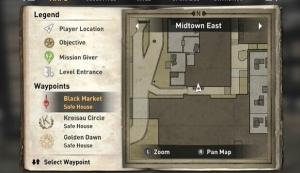
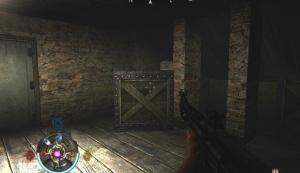
GOLD (11/21): Activate Veil Sight and climb up the ladder along the west wall of the room. The Gold is in the container on the broken platform in the northeast corner.
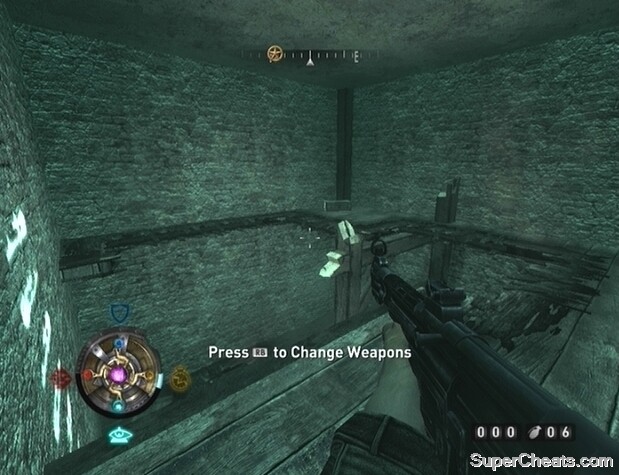
GOLD (12/21): Climb up the ladder along the west side of the building in the southeast corner of the park. Enter the room at the other end of the walkway and look for the Gold on one of the shelves.
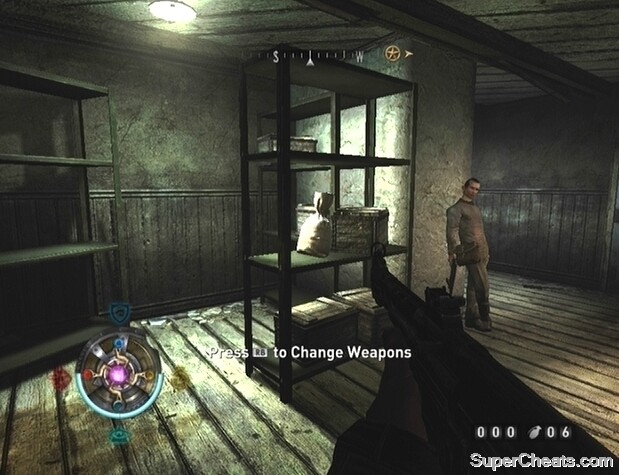
GOLD (13/21): Climb up the ladder along the west side of the building in the southeast corner of the large park in the northwest quadrant of the map and enter the room at the other end of the walkway (i.e., where G12 was found). Exit through the smoke-filled doorway in the southwest corner of the room. Hug the south wall and cross the very narrow piece of floor to a small adjacent section. The Gold is behind the small box in the corner here.
GOLD (14/21): Behind the large, unbreakable crate in the middle of the alley.
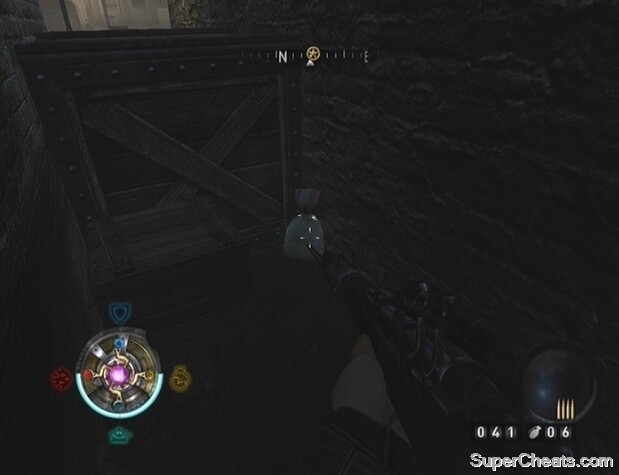
GOLD (15/21): Activate Veil Sight and look for a Veil Ladder on the building just south of where the Gold is marked on the map. Climb the ladder up to the balcony and look for the Gold on one of the beams above the steps below. Jump up onto the railing and to the Gold from there. Make sure you have your MP40 equipped otherwise you might not make the jump.
GOLD (16/21): Below the stream of water on the south side of the fountain.
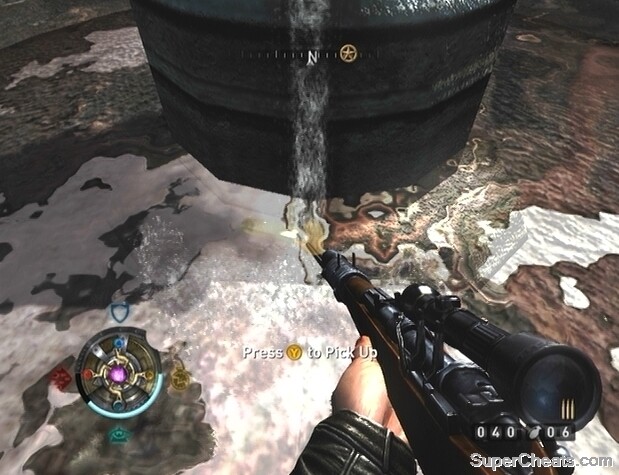
GOLD (17/21): Underneath the table in the southwest corner of the first floor.
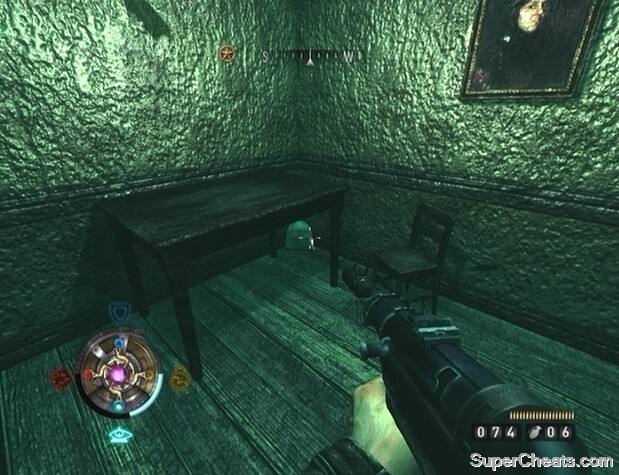
GOLD (18/21) and GOLD (19/21): Look for a door along the wall south of where the Tome is marked on the map. Proceed through the door and then through the door at the other end of the corridor. Drop down the hole in the northeast corner of this area. The first Gold is on top of the boxes next to the ladder.
After collecting the first Gold, activate Veil Sight, destroy the red panel, and collect the Tome if you haven’t already. Climb up the ladder at the other end of the sewer. Head up the wooden steps to the third level of the area that you come to and look for the second Gold on the table there.
GOLD (20/21): Activate Veil Sight and climb up the Veil Ladder on the west side of the building at the end of the street. Go through the door at the top of the ladder and look for the Gold behind the overturned file cabinet in the northeast corner of the room.
GOLD (21/21): Behind two boxes on the top floor of the building.
INTEL (01/05): Under the table across from the door on the second floor of the house.
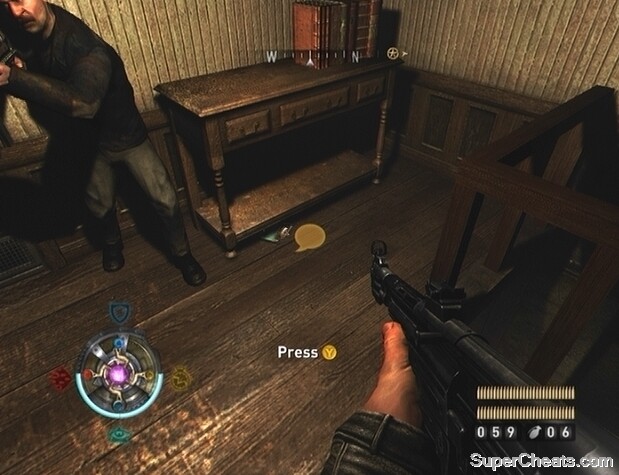
INTEL (02/05): By the table and chairs between the two barricaded doors.
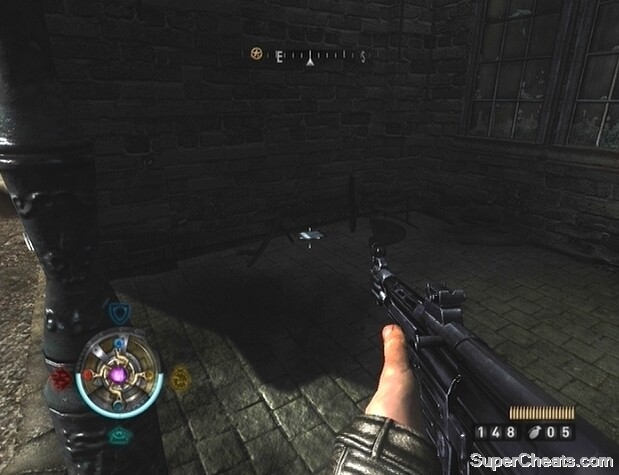
INTEL (03/05): On the table by the door at the southeast end of the room.
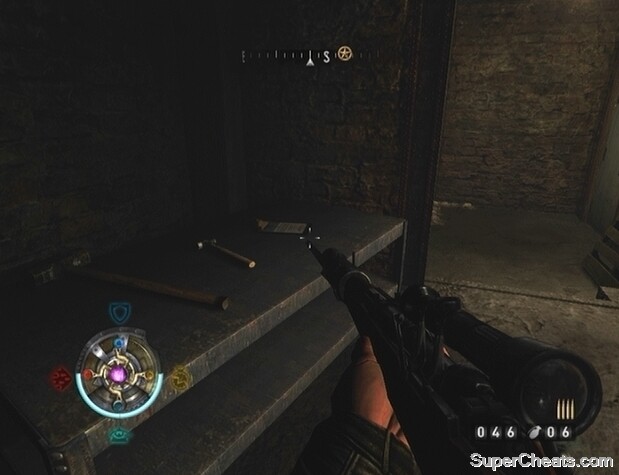
INTEL (04/05): Search the highlighted cabinet on the second floor.
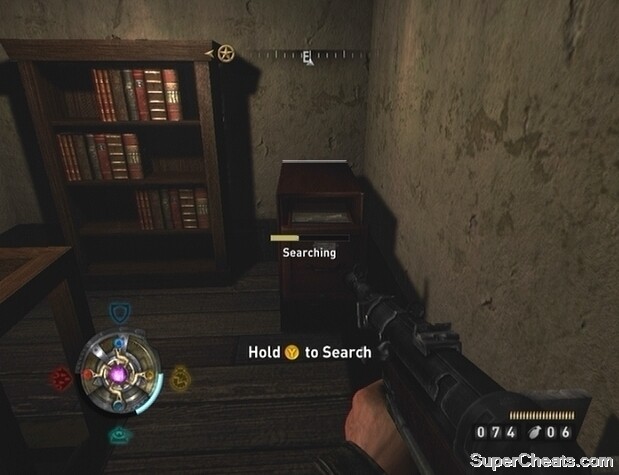
INTEL (05/05): On top of the bookshelf next to the cabinet on the second floor.
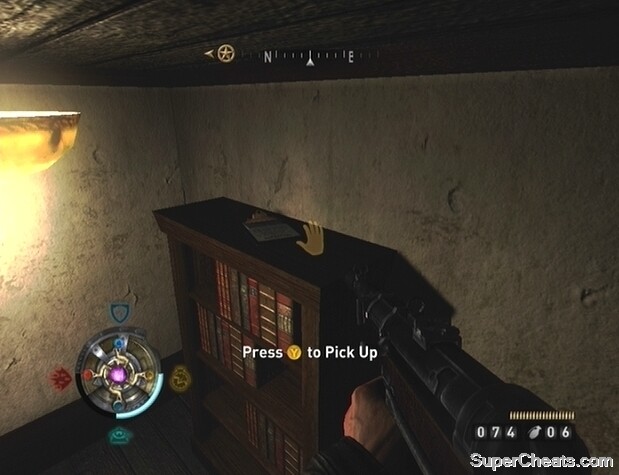
TOME (01/05): Behind the panel on the east side of the stairs. Activate Veil Sight to highlight the panel.
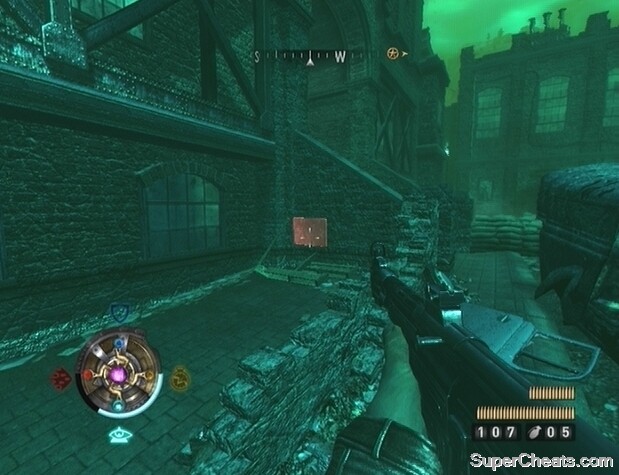
TOME (02/05): Behind the panel in front of the fence between the two buildings. Activate Veil Sight to highlight the panel.

TOME (03/05): Next to the door at the top of the steps. Activate Veil Sight to highlight the panel.
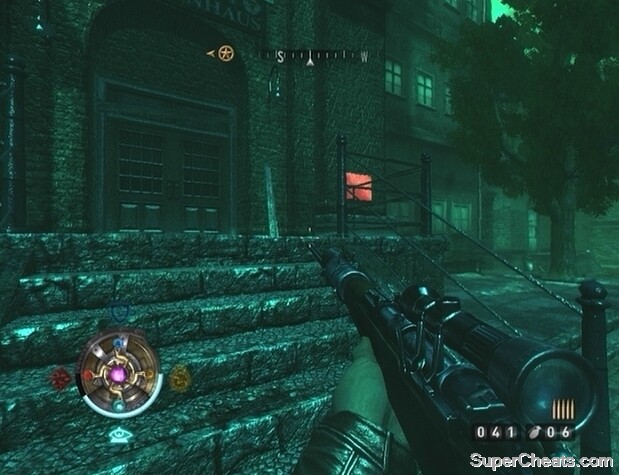
TOME (04/05): Climb up the ladder on the east side of the building. Activate Veil Sight and look for a red panel behind the smaller ladder on the north side of the platform.
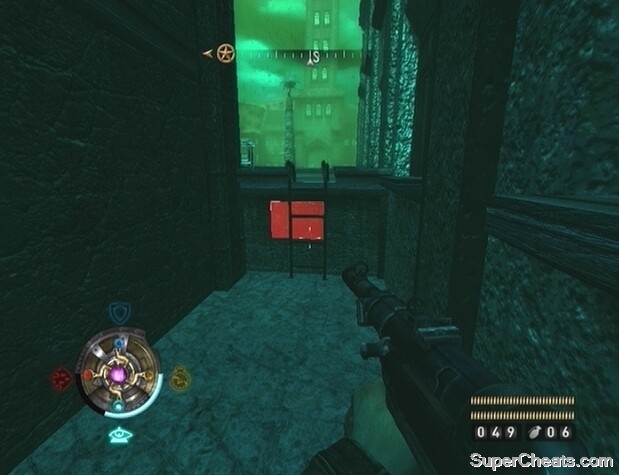
TOME (05/05): Look for a door along the wall south of where the Tome is marked on the map. Proceed through the door and then through the door at the other end of the corridor. Drop down the hole in the northeast corner of this area. Grab the Gold on the boxes if you haven’t already, and then activate Veil Sight. The Tome is behind the red panel on the wall up ahead.
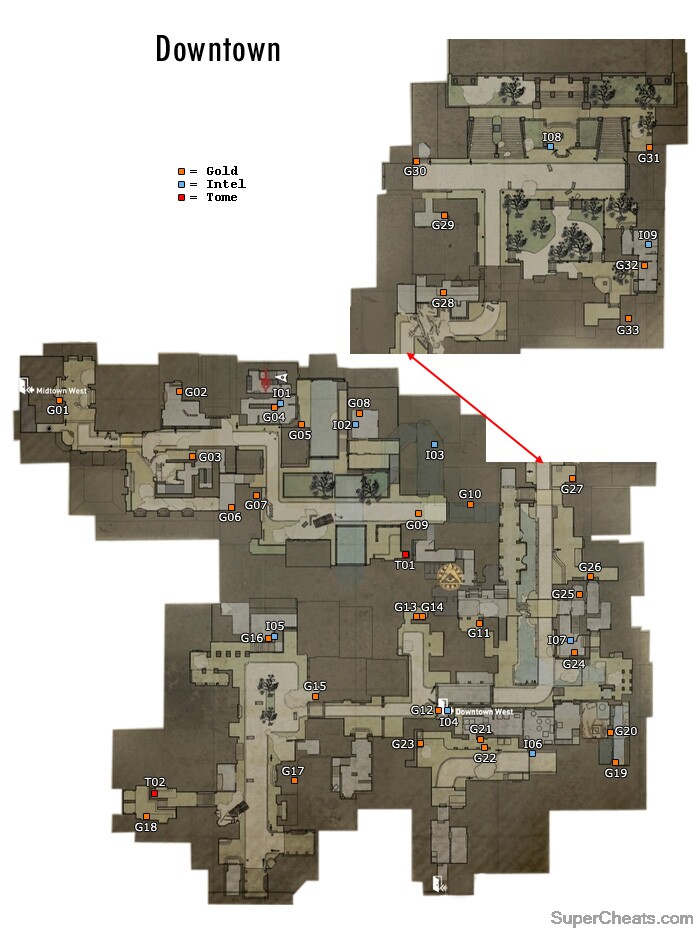
There are 33 Gold, 9 Intel, and 2 Tomes of Power to be found in Downtown Isenstadt.
Match map points with the corresponding text description below if necessary.
GOLD (01/33): In the corner at the top of the steps through the stone archways.
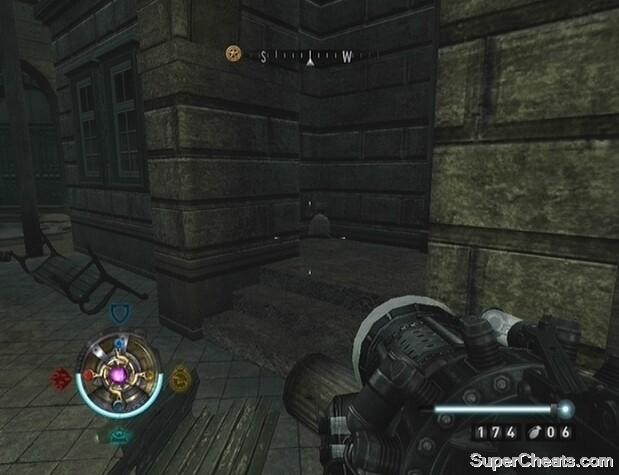
GOLD (02/33): Behind some breakable crates between the two caged doors.
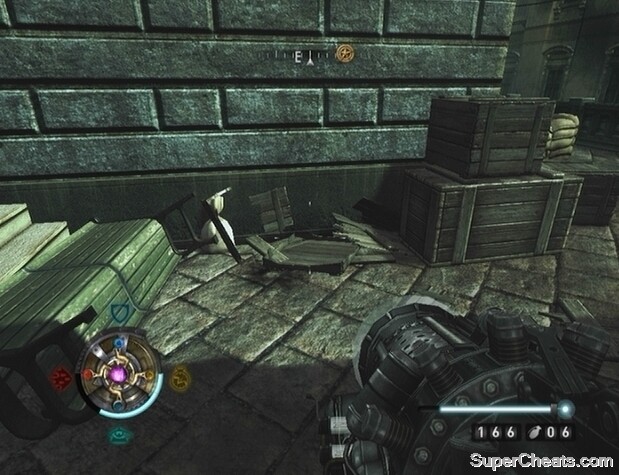
GOLD (03/33): Below the walkway with arched sides (across from the location of G02). The Gold is behind a skid near the crates and metal barrels behind the Veil Pool.
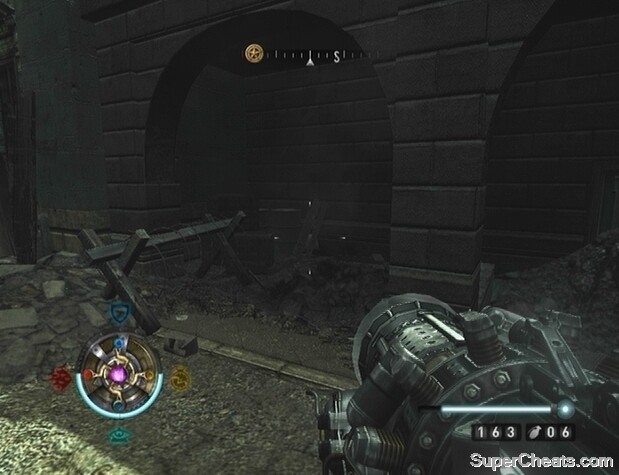
GOLD (04/33): On the shelf behind the bar counter.
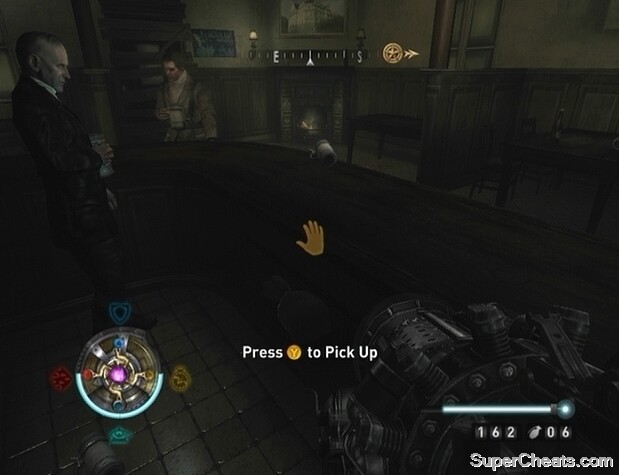
GOLD (05/33): Activate Veil Sight and look for a Veil Ladder along the west wall of the irrigation tunnel. Climb up and look for the Gold in the southwest corner of the walkway.
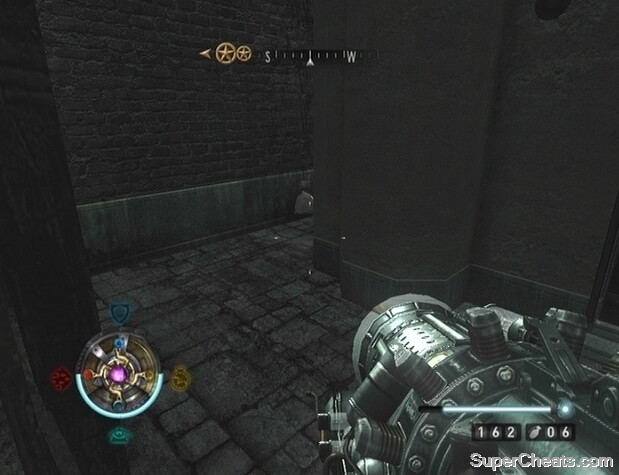
GOLD (06/33): By some unbreakable crates east of the flaming rubble.

GOLD (07/33): Activate Veil Sight and look for a Veil Ladder along the side of the building north of where the Gold is marked on the map. Climb up the ladder and walk along the roof ledge. When you reach the window, look south to spot a balcony. The Gold is in the container on this balcony. You must jump over to the balcony, first hitting the ledge and then jumping up over the railing. Make sure you have your MP40 equipped and Veil Sight enabled otherwise you might not make the jump. When you have the Gold, jump back across to the roof and carefully drop back to street level.
GOLD (08/33): Next to the couch along the north wall of the entrance room.
GOLD (09/33): In the irrigation tunnel below the street. The Gold is behind the gate on the west wall; it’s close enough to the bars to be picked up.
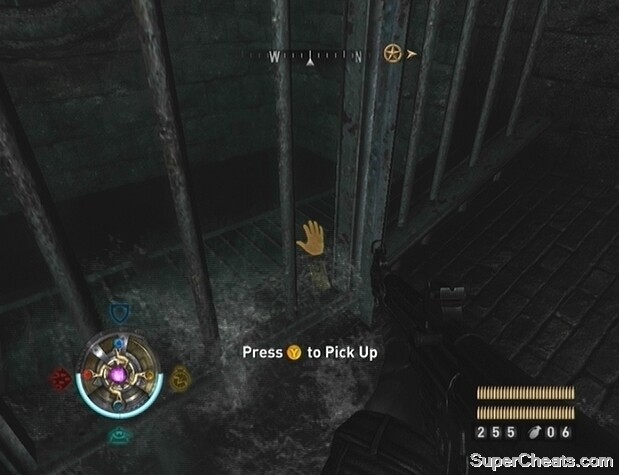
GOLD (10/33): Below the stack of crates on the wooden platform.
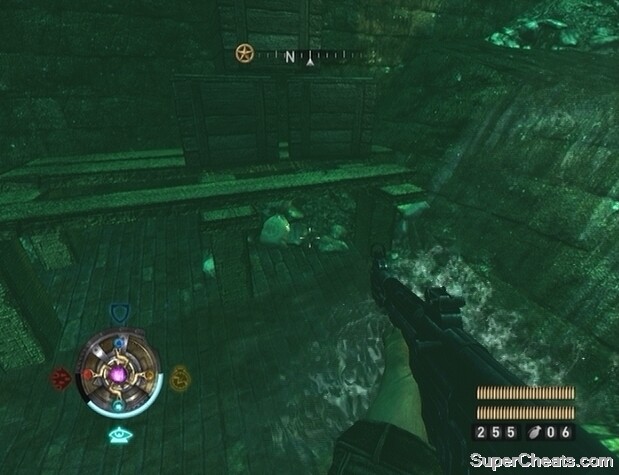
GOLD (11/33): In a container below the stone archways.

GOLD (12/33): In the small room through the door to Downtown West. The Gold is below the table in the northwest corner.
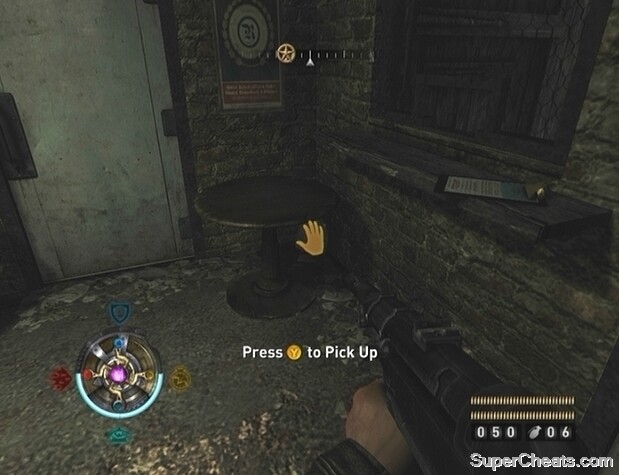
GOLD (13/33) and GOLD (14/33): Along the wall through the archway.
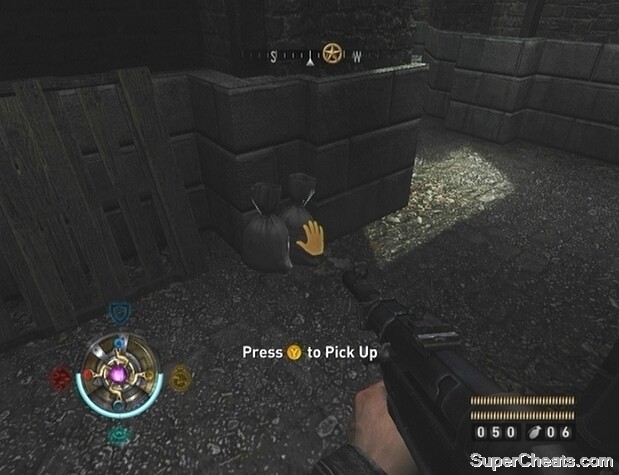
GOLD (15/33): In the display window behind the rubble.
GOLD (16/33): Behind the sandbags at the top of the stairs.
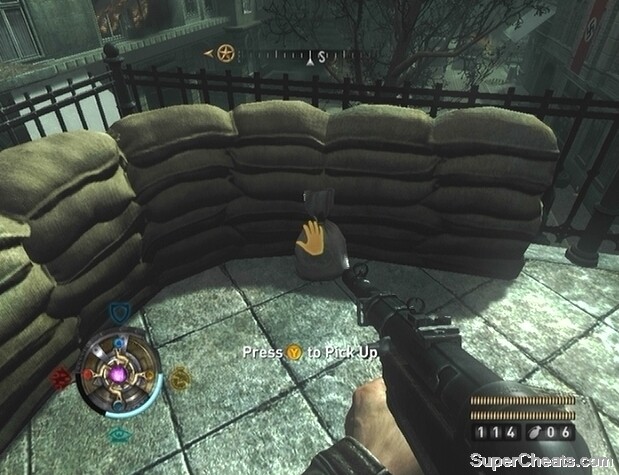
GOLD (17/33): Activate Veil Sight and look for a Veil Ladder on the building along the street between G12 and G15. Climb up the ladder, walk along the narrow ledge, and move through the Veil Door. Exit through the broken window and walk along the ledge and through a second Veil Door. The Gold is behind the breakable crates at the south end of the room.
GOLD (18/33): Activate Veil sight and look for a ladder along the wall. Climb up to the top of the ladder, jump onto the walkway, and open the container to find the Gold.
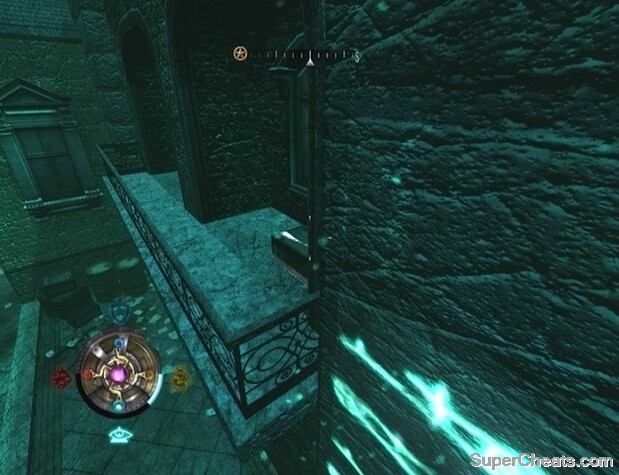
GOLD (19/33): In the sewers outside of the Kreisau Circle Safe House. The Gold is in the container next to the doorway that leads to the ladder up to the safe house.

GOLD (20/33): In the Kreisau Circle Safe House, go through the doorway along the west wall (it should be open after the Castle mission) and head up the stairs in this room. At the top of the steps, walk to the northeast end of the platform and activate Veil Sight. Look east and jump over the railing and onto the pipes there. Move through the Veil Door at the other end and look for the Gold at the far end of the support beams.
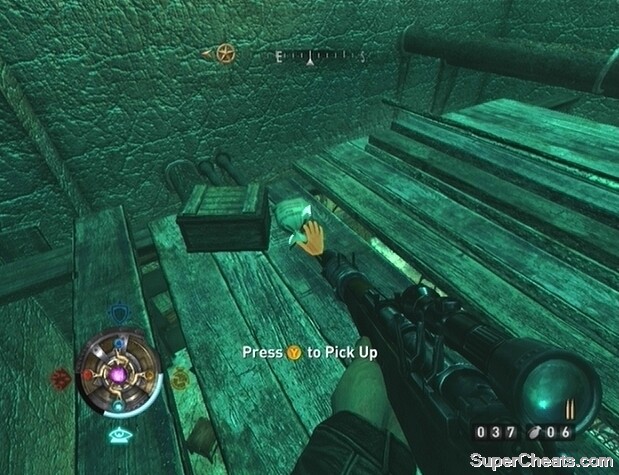
GOLD (21/33): In the room at the end of the Kreisau Circle Safe House (you should be able to access this area after the Castle mission, if not then the Radio Tower side mission), head up the stairs across from the open doorway and enter the room at the other end of the walkway. Open the first locker along the north wall to find the Gold.
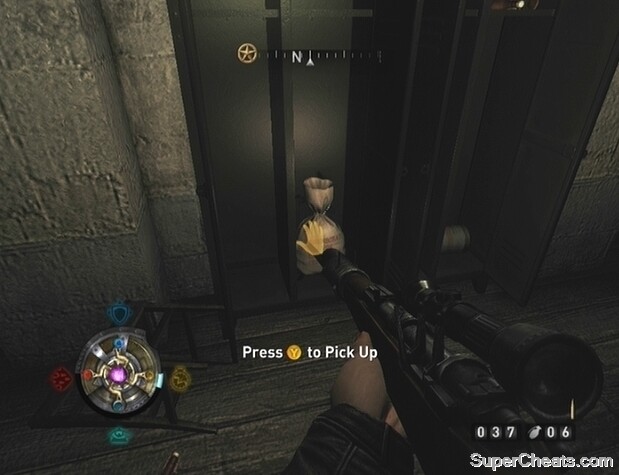
GOLD (22/33): In the room at the end of the Kreisau Circle Safe House (you should be able to access this area after the Castle mission, if not then the Radio Tower side mission), head up the stairs across from the open doorway and enter the room at the other end of the walkway. Look behind the two beds in the southeast corner of the room.
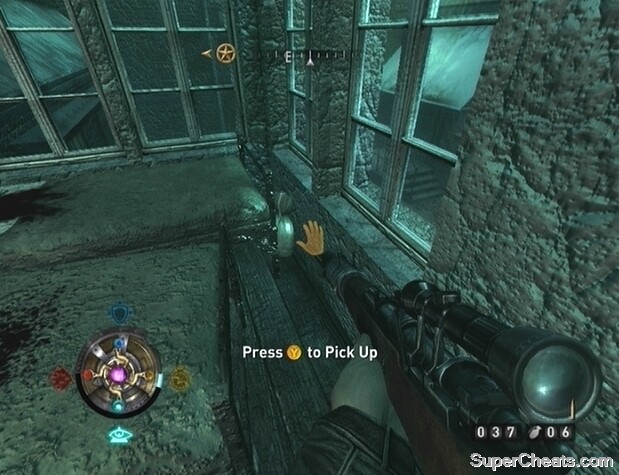
GOLD (23/33): On the platform at the top of the ladder in the northwest corner of the street.
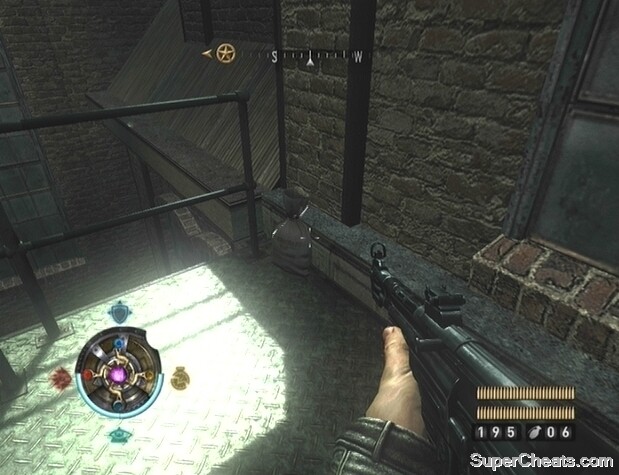
GOLD (24/33): By the sandbags along the ruined wall on the second floor.
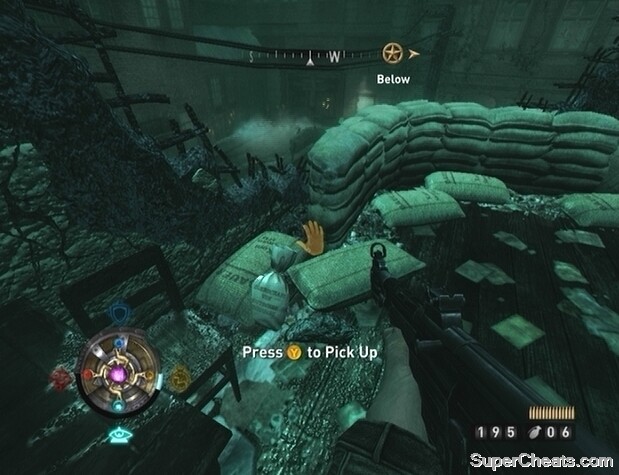
GOLD (25/33): Activate Veil Sight and look for a Veil Ladder north of the bottom of the stairs. The Gold is in the container in the alcove at the top of the ladder.
GOLD (26/33): Activate Veil Sight and look for a Veil Ladder on the building along the south side of the street. At the top of the ladder, jump onto the first balcony and from there onto the other to find the Gold.
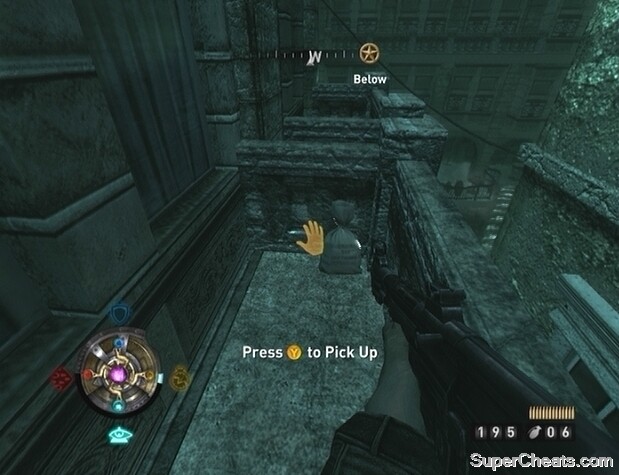
GOLD (27/33): In the corner at the top of the steps.
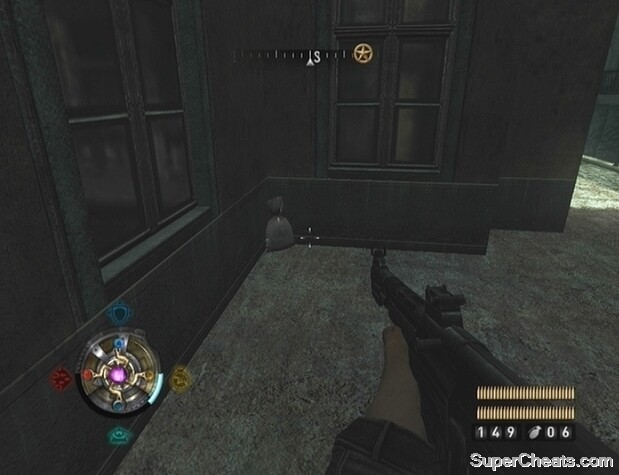
GOLD (28/33): Activate Veil Sight and look for a Veil Door on the wall west of where the Gold is marked on the map. Move through the Veil Door and then the wooden door. Climb up the steps; the Gold is in the container at the top of the steps.

GOLD (29/33): Behind the skid in the northeast corner of the entranceway.
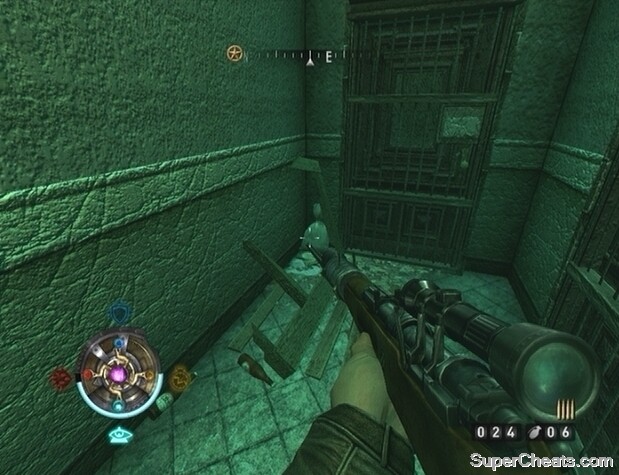
GOLD (30/33): Next to the steps along the north side of the road near the start of the tunnel.
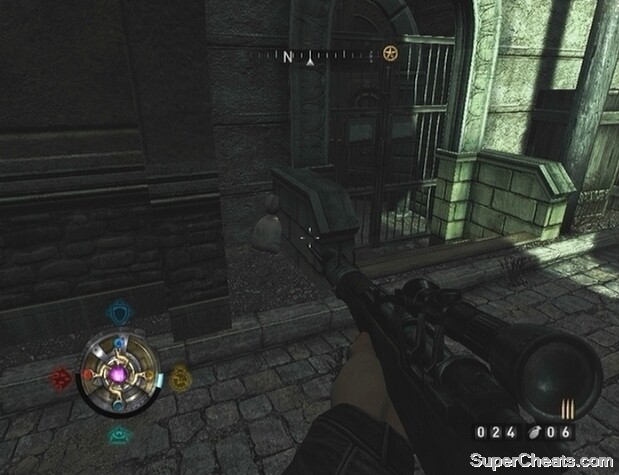
GOLD (31/33): In the container in the southeast corner of the walkway.
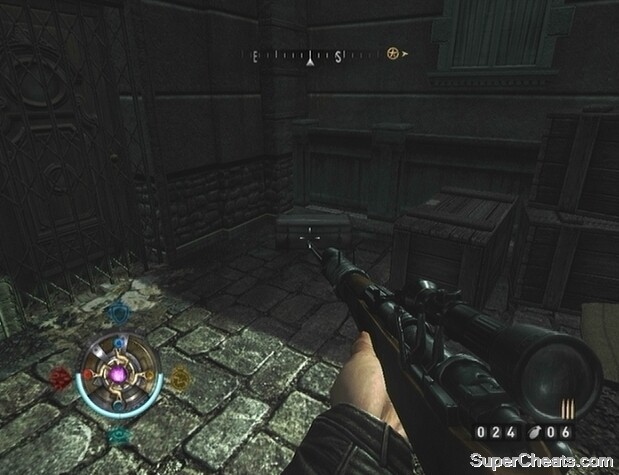
GOLD (32/33): On the floor next to the armoire in the middle room.
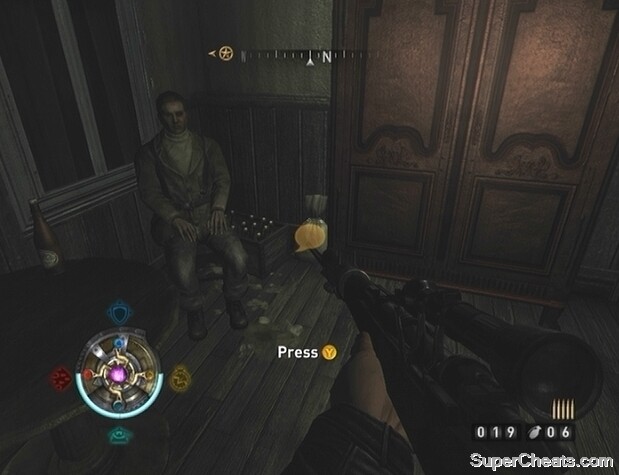
GOLD (33/33): Activate Veil Sight and look for a Veil ladder along the building north of where the Gold is marked on the map. Climb up the ladder and jump onto the balcony. The Gold is in the container there.
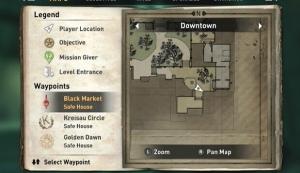
INTEL (01/09): On the bar counter.
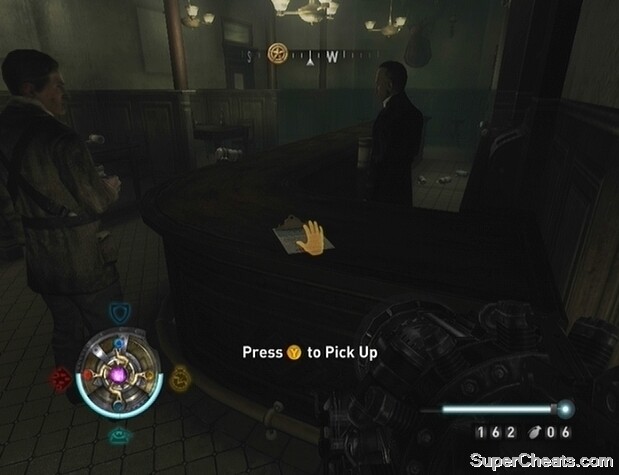
INTEL (02/09): On the couch along the west wall of the entrance room.
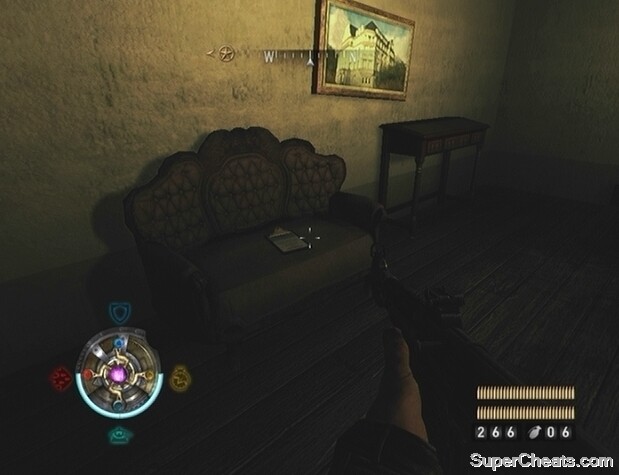
INTEL (03/09): On some rubble along the east wall of the irrigation tunnel.

INTEL (04/09): On the window sill in the small room through the door to Downtown West.
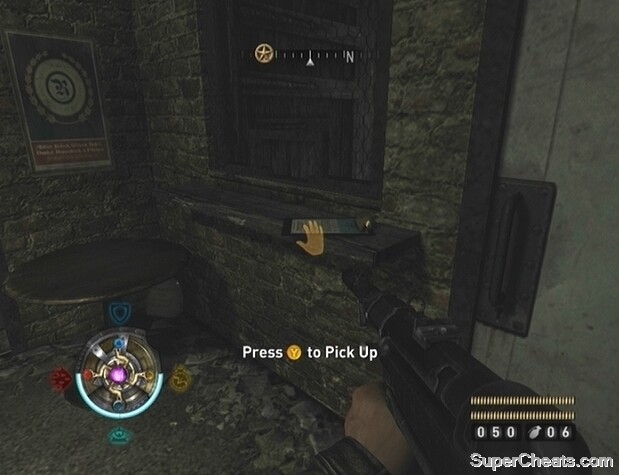
INTEL (05/09): On the sandbags at the top of the stairs.
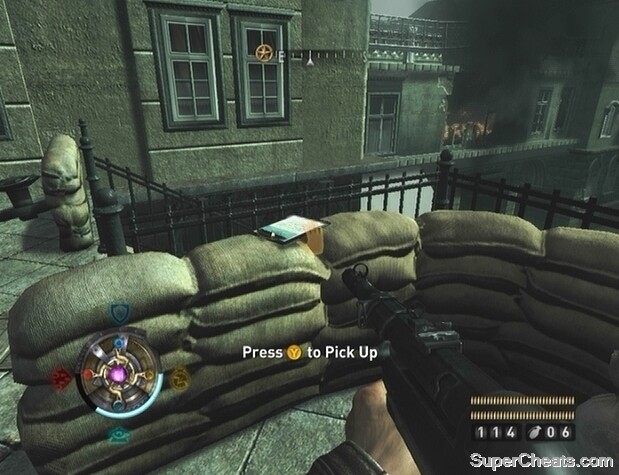
INTEL (06/09): In the northwest corner of the gate tunnel.
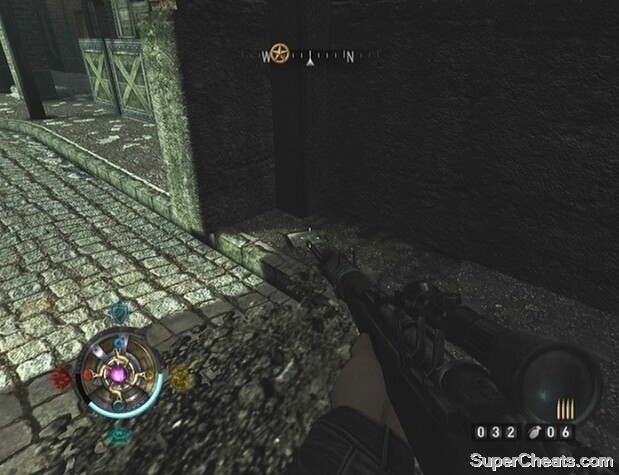
INTEL (07/09): On top of the stack of shelves on the second floor.
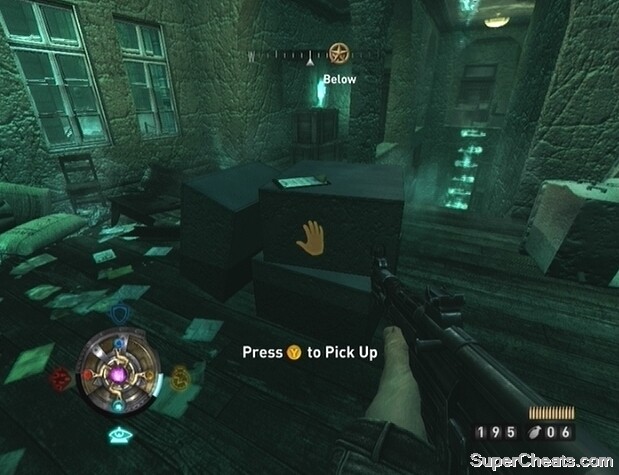
INTEL (08/09): Along the railing near the mounted MG42s at the top of the steps.
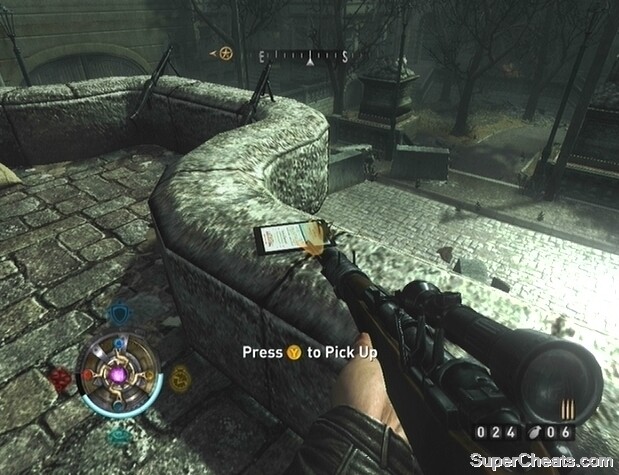
INTEL (09/09): At the end of the bed in the room.
TOME (01/02): Behind the panel on the wall east of the gated double-door behind the gate. Activate Veil Sight to highlight the panel.
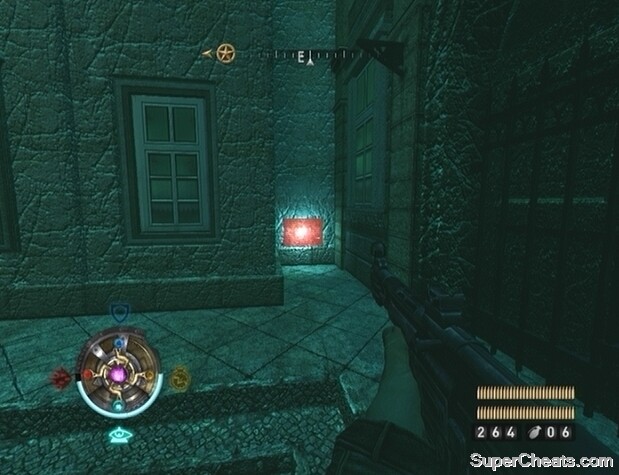
TOME (02/02): Behind the panel along the side of the steps next to the gated double-door.
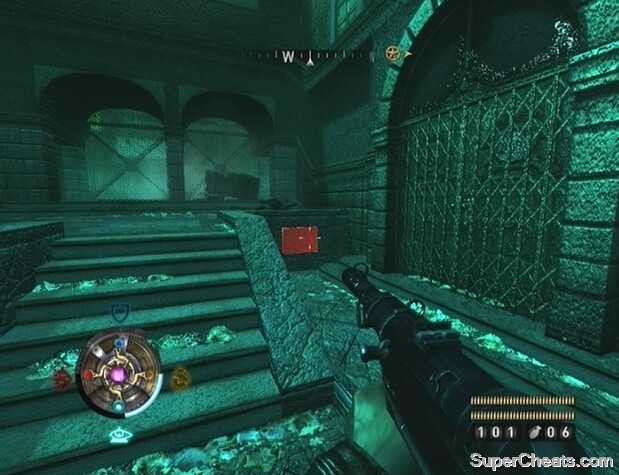
More Cheats for this game can be found on the following webpages on SuperCheats:
PC:
http://www.supercheats.com/pc/wolfensteincheatcodes.htm
PlayStation 3:
http://www.supercheats.com/playstation3/wolfensteincheatcodes.htm
Xbox 360:
http://www.supercheats.com/xbox360/wolfensteincheatcodes.htm
For Xbox 360 and PS3:
Complete the game once on any difficulty level to unlock the following cheats on subsequent playthroughs: Pumpkin Heads, Give All Weapons, Give All Veil Upgrades, and Give $1000.
You can only enable cheats when starting a new game. Note that enabling cheats when starting a new game will prevent you from unlocking achievements or trophies using that save file. Save files with cheats enabled will be marked with an asterisk in the load menu.
To activate cheats while playing a save file that has cheats enabled, pause the game, enter the Gameplay section, and move down to the Cheats menu. Then, press the A/X button over each cheat you wish to activate.
Activating cheats on a cheat-enabled save file.
Players rank up by collecting Gold. Gold is awarded for killing enemies, dealing damage, healing allies, dispensing ammo or health packs, completing objectives, and so on. Collected Gold can be used to purchase new abilities, as well as upgrades for available weapons.
At the start of the match, players can enable purchased upgrades after selecting their class and weapon. Only one upgrade under each category can be active at a time, however, so make initial purchases with that limitation in mind.
There is a weapon upgrade category (specific for each weapon), a general upgrade category (applies to all classes), and a class-specific Veil Power category. Players can also pay to start off each spawn with an extra Satchel, Health Pack, or Ammo Pack. Look for a description of each upgrade on the right side of the Purchase Upgrades menu while an upgraded is selected.
As a Soldier, Medic, or Engineer fighting for the Axis or Resistance, players must work together to best the other team in the multiplayer mode.
Wolfenstein offers three different multiplayer modes: Team Deathmatch, Objective, and Stopwatch. Below is a short description of each mode.
Team Deathmatch - The FPS staple multiplayer mode. The two teams battle each other and aim to rack up the higher kill count before the time limit is up. Players respawn in mere seconds to keep the action going.
Objective - Each team must work together to accomplish a common goal. Players on the Resistance side must complete several secondary objectives and then a primary objective ranging from stealing Nazi intel and loading it onto a getaway truck to overloading generators in a Nazi power station. The secondary and primary objectives for the Resistance differ on each map. Players on the Axis side must work together to prevent the Resistance from completing their objectives. The Resistance must complete all of the objectives within the time limit, and the Axis must prevent them from doing so until time runs out.
Stopwatch - Like the Objective multiplayer mode, but with two rounds where the teams take turns being on the Axis side and the Resistance side. The team which completes the Resistance objectives the fastest wins.
Upon entering a match, players must choose from three different classes: Soldier, Medic, or Engineer. Below is an overview of each class and its uses.
Soldier - The main killing force. Has access to the big guns (MP43, Panzerschreck, and Flammenwerfer). Starts with Satchels that can be planted and detonated remotely (press the Y/Triangle button to throw, and Y/Triangle button again to set it off). Can use the Veil Strike Veil Power.
Medic - Responsible for healing teammates and dispensing health packs (Y/Triangle button). Can only use the MP40 or the Kar 98. Healing Aura Veil Power allows the Medic to heal nearby teammates and can be upgraded to heal him at the same time. Can also revive downed allies to eliminate spawn time. At least one Medic is a must for any team. Effective Medics should keep an eye on allies’ health bars and dispense health packs as necessary.
Engineer - Can dispense ammo packs (Y/Triangle button), complete every objective in Objective and Stopwatch games, and build ladders, cover, bridges, MG42 emplacements, and so on. Can only use the MP40 or the Kar 98. At least one Engineer is absolutely required for an Objective or Stopwatch game. Though every class can complete some of the objectives, only Engineers can plant/diffuse dynamite or build structures. Can use the Veil Speed power to greatly increase movement speed, making them effective at getting away with documents, artifacts, or catching up with fleeing enemies.
Wolfenstein features a total of 49 different achievements. Each achievement unlocked contributes a certain amount of points to your overall Gamerscore. You can acquire a grand total of 1000 gamer points by playing Wolfenstein.
 1. Safe Keeping
 2. Route Canal
 3. Chemical Burn
 4. Facilitated
 5. Hospitalized
 6. Mind your Manors
 7. Pirate Radio
 8. Shock and Awe
 9. Test Subject
 10. Veilophile
 11. Ley Vacuum
 12. Surgical Striker
 13. Sneaky Pete
 14. Unholy Lifeline
 15. Focal Point
 16. Quartermaster
 17. Run-gineer
 18. Engineering Corps
 19. Beatdown
 20. Bubble Boy
 21. Buster
22. Conservationist
21. Buster
22. Conservationist 23. Endgame
 24. Gadget Freak
 25. Game Hunter
 26. Gold Digger
 27. Gun Nut
 28. Honorary Geist
 29. Nerd Rage
 30. Librarian
 31. Man About Town
 32. Blitzkrieg
 33. Master Spy
 34. Monitor Tan
 35. Newbie
 36. Rampage
 37. Single Quarter
 38. Slumming
 39. Super Soldier
 40. Time Out
 41. Warchest
 42. Enemies in a Barrel
 43. Career Soldier
 44. Das Big Man
 45. Boot Camp
 46. Heavy-Handed
 47. Med School
 48. Basic Training
 49. Johnny-on-the-spot
Wolfenstein features a total of 50 unlockable trophies. There are 33 Bronze trophies, 15 Silver trophies, one Gold trophy, and a Platinum trophy unlocked by earning every other trophy available in Wolfenstein.
1. Safe Keeping
Finish a match on Bank, spending the majority of your time on the winning team. (1 min minimum)
Bronze
2. Route Canal
Finish a match on Canals, spending the majority of your time on the winning team. (1 min minimum)
Bronze
3. Chemical Burn
Finish a match on Chemical, spending the majority of your time on the winning team. (1 min minimum)
Bronze
4. Facilitated
Finish a match on Facility, spending the majority of your time on the winning team. (1 min minimum)
Bronze
5. Hospitalized
Finish a match on Hospital, spending the majority of your time on the winning team. (1 min minimum)
Bronze
6. Mind your Manors
Finish a match on Manor, spending the majority of your time on the winning team. (1 min minimum)
Bronze
7. Pirate Radio
Finish a match on Rooftops, spending the majority of your time on the winning team. (1 min minimum)
Bronze
8. Shock and Awe
Finish a match on Tesla, spending the majority of your time on the winning team. (1 min minimum)
Bronze
9. Test Subject
Use every Veil ability once in multiplayer.
Bronze
10. Veilophile
Spend 5 minutes in the Veil in multiplayer.
Bronze
11. Ley Vacuum
Suck up 5 Veil Pools' worth of Veil energy in multiplayer.
Bronze
12. Surgical Striker
Kill 200 enemy players using the Veil Strike in multiplayer.
Silver
13. Sneaky Pete
Kill 100 enemy players with the Satchel Charge in multiplayer.
Silver
14. Unholy Lifeline
Revive 250 teammates, including 10 revives in a single match in multiplayer.
Silver
15. Focal Point
Restore 5000 points of health to teammates using the Healing Aura in multiplayer.
Silver
16. Quartermaster
Give 100 Health Packs to teammates in multiplayer.
Silver
17. Run-gineer
Use Veil Speed for 30 minutes in multiplayer.
Silver
18. Engineering Corps
Complete 30 primary objectives and 50 secondary objectives in multiplayer.
Silver
19. Beatdown
Kill 50 enemies with melee attacks in a single player campaign.
Bronze
20. Bubble Boy
Block 1000 shots with Shield power in a single player campaign.
Bronze
21. Buster
Destroy 1000 breakable objects in a single player campaign.
Bronze
22. Conservationist
Complete a story mission in the single player campaign without reloading a gun.
Silver
23. Endgame
Finish the single player campaign on any difficulty.
Bronze
24. Gadget Freak
Purchase all the upgrades for one of your weapons in the single player campaign.
Bronze
25. Game Hunter
Kill an enemy of every type in a single player campaign.
Bronze
26. Gold Digger
Collect all the valuables in a single player campaign.
Silver
27. Gun Nut
Collect all the weapons in a single player campaign.
Bronze
28. Honorary Geist
Spend two hours in the Veil in a single player campaign.
Bronze
29. Nerd Rage
Complete the single player campaign on Hard or Über difficulty.
Silver
30. Librarian
Collect all the Tomes of Power in a single player campaign.
Bronze
31. Man About Town
Complete all the Downtown missions in a single player campaign.
Bronze
32. Blitzkrieg
Complete the single player campaign in under 12 hours.
Silver
33. Master Spy
Collect all the Intel in a single player campaign.
Bronze
34. Monitor Tan
Collect every collectible in a single player campaign.
Silver
35. Newbie
Complete the Train Station mission in a single player campaign.
Bronze
36. Rampage
Kill 200 enemies with Empower in a single player campaign.
Bronze
37. Single Quarter
Complete the single player campaign with less than three deaths.
Silver
38. Slumming
Complete all the Midtown missions in a single player campaign.
Bronze
39. Super Soldier
Complete the single player campaign on Über difficulty.
Gold
40. Time Out
Use the Mire power for more than an hour in a single player campaign.
Bronze
41. Warchest
Collect more than $30,000 in a single player campaign.
Bronze
42. Enemies in a Barrel
Kill 3 floating enemies.
Bronze
43. Career Soldier
Reach Rank 25 in multiplayer.
Bronze
44. Das Big Man
Reach Rank 50 in multiplayer.
Bronze
45. Boot Camp
Get a kill with each Soldier weapon, the Satchel Charge and Veil Strike in multiplayer.
Bronze
46. Heavy-Handed
Kill 200 enemy players with either the Panzerschreck or the Flammenwerfer in multiplayer.
Silver
47. Med School
Revive a player, supply a Health Pack, and heal someone using Healing Aura in multiplayer.
Bronze
48. Basic Training
Complete a primary objective, supply an Ammo Pack, and use Veil Speed once in multiplayer.
Bronze
49. Johnny-on-the-spot
Give 100 Ammo Packs to teammates in multiplayer.
Silver
50. Platinum
Unlock all other trophies.
Platinum


 Battlefield 4 Wiki : Everything you want to know about the game .
 GTA Online Guide: Replay Missions after Patch to Farm Money
 Devil May Cry 4 Special Edition tips
 Four Big Reasons Diablo IIIs Auction House Might Fail
 Five Nights at Freddy's 4 Guide - How to Survive Night 5