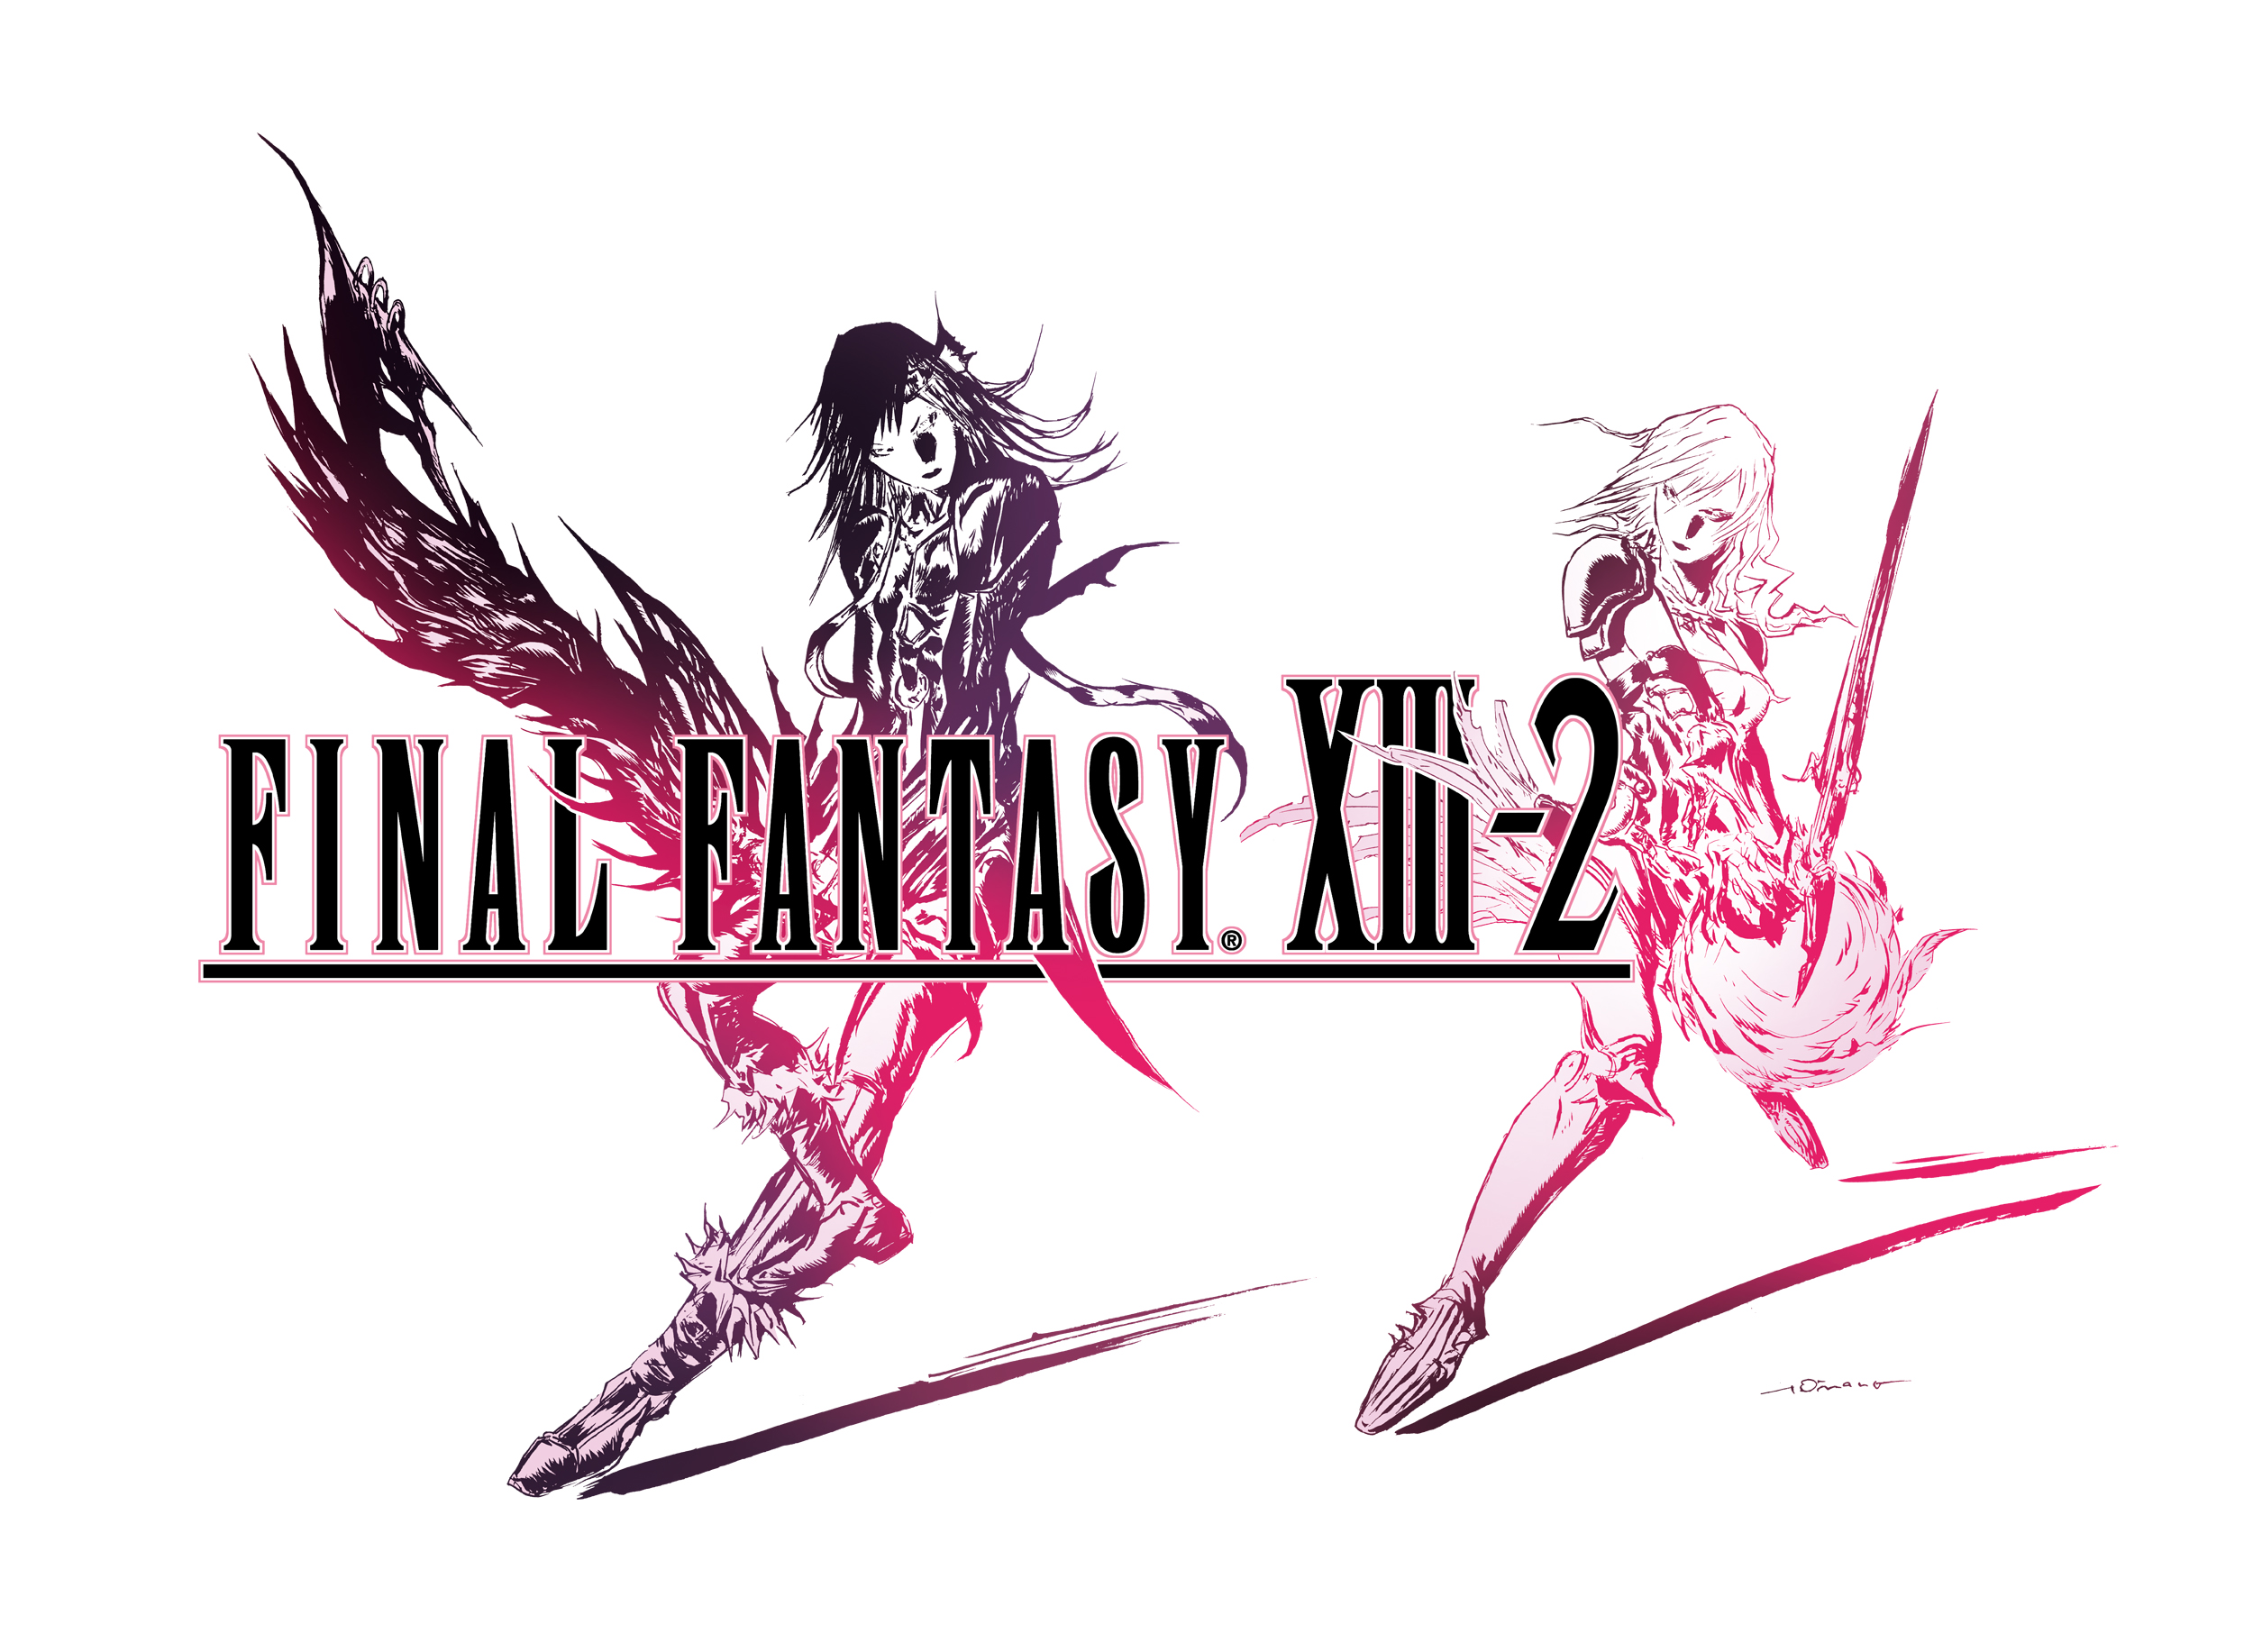
Final Fantasy XIII-2 Unofficial Guide by CM Boots-Faubert for
"Three years after the events in Final Fantasy XIII, Lightning has gone missing and largely unremembered by the very people who were her closest mates, while Snow is nowhere to be found and Serah appears to be the only member of NORA that actually remembers what happened to her big sister... Present in a world that is slowly rebuilding following the disasters that struck during the war, Serah notices that something is seriously amiss and, after a fortuitous encounter with a mysterious man named Noel who quite literally seems to appear out of nowhere -- or perhaps noWHEN is a better term -- the pair set off on an adventure built upon their resolve to find Lightning -- the warrior and hero who Serah remembers as her older sister, and who Noel remembers as the woman who set him upon the course that he now follows!"
Back in May 2010 when I wrote the walkthrough and guide for Final Fantasy XIII I found it to be one of the most intense and complicated play experiences in the series -- and if you are familiar with the series, that is saying something. The amazing graphics and well-engineered battle systems were a particularly strong element in that judgment, but like a lot of gamers I experienced the narrow structure of certain battles -- which really could only be won using specific tactics that the player was left to discover on their own with no in-game guidance -- to be something less than a favorite part of the game. The now familiar ATB system reappeared and, in spite of reasonable criticism that the fighting system has received over the years, is nonetheless one of the better systems for the JRPG format that we have seen. While this is an adventure and the continuation of the story that was presented in XIII, it is also a fighting game that maintains the traditions and the level of concentration that the JRPG genre is so well known for -- and that being the case it is in your best interest to learn how the fighting system works, and get good at it.
The paragraph above neatly describes the opening moments of this newest addition to the Final Fantasy series and the continuation of the FFXIII sub-series (it being the direct sequel to FFXIII) we begin what is destined to be an epic adventure that fills in the middle of the planned three-act arc that is the story of Final Fantasy XIII and the fall of the powers.
Back in 2010 when I prepared for the process of writing the unofficial SuperCheats Walkthrough and Guide for Final Fantasy XIII one of the issues that I emphasized was how different these games are. Long-time fans of the Final Fantasy series will have no difficulty in acknowledging this -- but gamers who have only played one or two of the games may not fully understand or appreciate that far from being one long and directly connected series that takes place in the same universe as it were, the series that is known as Final Fantasy is, by the reckoning of most gamers, more of a collection of stories that take place in parallel and similar (but at the same time very different) universes in which much is the same and yet little is the same...
Each major number in the series is not created as the next chapter in the story from the previous major number, but usually presents as its own unique and involved story, with new and original characters, that happens to exist in one of the variations of the Final Fantasy Universe -- perhaps in a different time, certainly in a different place, with just enough that is familiar to the gamer that it really requires very little explanation beyond setting up the story.
Just so that it is clear that you understand this, when a major number in the Final Fantasy game series has a sequel to its established story, that sequel always carries a dash number indicator. Prior to the release of Final Fantasy XIII-2 we saw the same system used in the sequel for 2001's Final Fantasy X, which was a more romantic manifestation of the series, in 2003's Final Fantasy X-2 (the first game in the series to have a direct sequel). The use of the dash number is now solidly established as the symbol to indicate when a game is a direct sequel, using the major number plus the sequel number, so the title Final Fantasy XIII-2 is all the indication that you should need to know that this title is the direct sequel to Final Fantasy XIII.
One of the most popular games in the series was Final Fantasy XI, which was an MMORPG rather than a stand-alone single-player game, so it opened a new journey for FF fans adding another genre to the established set. Over the course of the past few years Square has introduced the next MMO in the series, Final Fantasy XIV, but that title has been plagued by major shake-ups in its development team and issues that have, at least so far, created circumstances that have not lead to the level of success that is usually enjoyed by games in the series.
I mention this because while the MMO titles in the series have loosely followed the basic world structure and included familiar elements, items, characters, and magic, they also contained content that was unique to them, and that is not found in other major numbers in the series. This is significant because so many more players were introduced to the Final Fantasy series through the MMO versions than all of the single-player versions combined, and as a result have formed expectations that often are not easily met when they finally get around to playing one of the other games.
If that describes you -- if your initial exposure to the world of Final Fantasy was through the MMO's -- you will find game play in the non-MMO games to be very different than what you are used to. That is not a bad thing really, especially considering that the single-player games are a much more intense play experience and tend to offer a stiffer challenge and, naturally, require more self-sufficiency and a measure of play confidence that sets them apart since you cannot rely upon the assistance of other human players in playing through both the story and the adventure.
The best advice that I can give you when you are approaching a game in the series from that point of view -- and particularly this game if you have not played FFXIII -- is to accept it for what it is, and try not to have any expectations that the play experience will be similar to a previous title in the series -- unless, as is the case here, it is a sequel sharing the title number.
If you have the time and are so inclined, even though you do not have to play FFXIII to play and enjoy FFXIII-2, I firmly recommend that you do so anyway, since playing the previous game in this major number for the series will offer you experiences and insights that you can only get through play that will, naturally, allow you to form much deeper attachments to the characters and provide the sort of background knowledge that will easily increase your enjoyment of the story ten-fold.
The starting montage and intro CS
Happily gameplay in XIII-2 unfolds in a manner that quickly shows that the folks at Square recognized the disadvantages that existed in the previous game, and went to considerable efforts to correct them in this sequel; and those tweaks and fixes do not apply strictly to combat, but other aspects of the game as well! While much of the good stuff that made XIII the very cool adventure that it was returns here -- which is sort of the point -- the fact that this game was created with a zen-like flow in mind so that it unfolds in a way that allows the player to really enjoy playing it rather than having to work hard at it, the improvements turn out to be a well-balanced and very good thing addition to the game.
Another happy point is that, in contrast to the Achievements that were built into the previous title, many of which could be missed, save for one lone exception that is difficulty based, the path for the Achievements in XIII-2 is a natural one, and players should find that unlocking them really is part of the story and play rather than something that they have to actively pursue.
-- About the Special Resources in this Game --
The end of the Introduction for most game guides often contains suggestions and general guidance for the gamer to help them in maximizing their enjoyment of the game, and this one is no different in that regard, but unlike most guides this one is about to take a sharp detour as we review some of the most valuable assets in the game -- its finely constructed and well-defined record of practically every aspect of the story that precedes it.
Great care and considerable skill went into crafting the Datalog pages, The Beastiary, and the many individual "files" that make up the pages for each of the Fragments -- many of which tell individual stories in their own right and for that reason and others, encourage us to encourage you to read and embrace them and make them a natural part of your game play experience, because they add so much -- and they represent the potential to add so much -- in both story depth and reach, and in breathing true life into the events that came before, during, and thanks to the time-travel aspect of the various and sundry plots, after...
If that was all that there was to it it would be enough to simply recommend that you read each page as it is presented to you, but we want more than that for you -- and from you! We want to encourage you to drink in the details and soak up all that is implied in between the revelations, the background and the foreground, as speaking of the Zen-like manner in which the games actions were made to flow, an equally balanced approach was taken in preserving the information and the story-based retelling of the events so that far from merely informing, it embodies the carrying forth of that information like the bearer of a lantern on the darkest shore, providing light for your attention in order to both deepen and quicken the process of absorption and at the same time build into that very same process elements of mystery that revolves around what is concealed in plain sight.
What we are saying in so complicated a manner can easily be summed up in much more simple terms: within this game the creators have gone to significant effort to include within the documentation a balance that will, if you let it, add to and heighten the entertainment that it can offer you in the following forms:
-- The Datalog --
Your Encyclopedia and History Library, your Intelligence Files and your Biographies -- it exists to teach you about the world and the people in it who will, if you allow them to, become important to you.
It is there to fill in the blanks you have with respect to lore, legend, and what came before. In short it exists to breath real life into the events and characters, their actions in victory and defeat, and the color that fills in the edges of the world in which you are adventuring. And as a bonus, concealed among this information are elements of the current story, its plots, and the details that might be found or inferred and that -- wholly dependent upon the effort that you willingly make to hunt for it -- add to the richness of your adventures, layer by layer.
Considering all of the effort that went into not simply making this game world but in crafting the many stories that help to bring it to life, it would be a genuine shame for you to ignore its contents in favor of the half-remembered details of Cut Scenes that have faded in your memory -- especially when those details and stories contained within the pages here exist to bring the game world and its people alive, to preserve the record for you...
You owe it to yourself to embrace it. Read it. And truly enjoy it. Because the more you know about the world and your adventures in it, the stronger your feelings will be for it, and the deeper its hold will become upon you.
-- The Beastiary --
A record of the beasts that you have encountered and seen, and a valuable reference source that can teach you about the strengths -- and the weaknesses -- of each type of mob you battle in the game, The Beastiary is that and so much more.
When you are planning out the acquisition of mobs with which to build your Monster Teams you will find this to be invaluable, because it is more than simply a record of each mob, it is a dossier of their strengths, their weaknesses, and what you need to do to make them dead.
-- Fragments --
The Fragments pages of are more than simply a means of keeping track of the ones you have found and the ones you have not, because in addition to serving that function, each entry for each Fragment willingly offers up to you its portion of the story as it unfolds, filling in details and bringing the events that they reflect to life.
Like the Datalog itself, reading the information and the entertainment that is presented within this part of your library is its own reward. Indulge in being entertained! This is a game to be sure, but it is also a branch of one of the longest-running and most intense and enthralling game series every created. And it is all right here, waiting for you to click on it...
-- The Focus of this Guide --
Finally before we close out the Introduction and jump into game play, it is important that we discuss what this Guide was created to do... This is not an encyclopedia of FFXIII-2 and it is not intended to take you by the hand and walk you through every single element of game play in the game. It was conceived and created to assist you in making your way through the six episodes and their various levels that make up the story being told, providing you with guidance and a path that will be especially valuable to you when you reach the points in the game -- there are several -- in which your forward momentum is temporarily stymied by the fact that the game, for those brief sections, did a rather poor job of guiding you in the direction of the next set of challenges and the next chapter in the story!
What this Guide and Walkthrough is not is a comprehensive step-by-step set of instructions for completing every aspect of the game as soon as you are able to do so. The reason it does not take that direction is that if it did, it would take away from you some of the best parts of this game! The process of discovery, of learning about the plots, subplots, and added story elements, and in finding for yourself the different Monsters and NPC's whose presence in the game, when you combine that with the distinct choices that you make as an individual, serve to make your game play a unique one that only shares the major and minor plot points and actions with that of your friends. Yes, it is that sort of game.
In each of the coming sections we cover the important elements and reveal the objects, actions, and items you do not want to miss doing or finding, with an eye towards and a focus upon completing the story. In the process we may suggest at strategic points that you spend some time grinding levels, or obtaining the materials that you need to improve the level and capabilities of the Monster pets who are now valued members of your team -- but all of that is strictly voluntary. You can ignore it if you want, as the only differences that you will experience first-hand would be a slightly more challenging measure of play when facing boss mobs if your levels are less than ours were at that stage in the game.
If you tend to rely upon guides like this one for guidance in playing RPG games in order to maximize your enjoyment of the story and so as to not miss out on strategically important elements, why then it is in your best interest to follow our advice and improve your characters and Monsters levels when we do, but again that is still a voluntary thing.
After we complete the main story -- during which we will naturally complete many of the missions and quests and a fair bit of the small stories that are part of the many sub-plots that are built into the greater narrative that is FFXIII-2 -- we will return to the world in the game and pursue many of the elements that we did not pursue while completing the story, and we cover that process at the end of this guide, so in that respect it is a complete guide and walkthrough, but try to remember that it is intended that you play this game the way that you want to, doing -- or not doing -- missions and quests as you want to.
For the most part when we include a mission or a quest in each section of this guide we did so because either the reward or the locations visited were helpful, granted a desirable item or ability, or in some other way benefited our characters in their quest to complete the story. That being the case you may want to complete those side-missions as well, both to maintain parity with the guide, and what is usually the case, make your game play experience better and more complete in the process.
That nicely sums up the information that you need about the game and this guide, so it is time to delve into this rich fantasy world and make your mark on it. As you do so, please know that this guide was written with you in mind, and that we derived great satisfaction from creating it.
Active Time Battle System
While it is true that you can follow the tactics that are presented in this WTG up to a point, I honestly believe that doing so without understanding what they do detracts from your potential enjoyment of the game. Just because I chose to fight a battle the way I did does not mean that you must do so -- in many cases the choices that I made were not the only way that the battle could be fought, they were simply how I chose to fight it.
-- Understanding the limits on Attacks and Abilities --
When the game first begins you have three segments to your Action Time Battle System (from here on we abbreviate that to ATBS) -- these segments are basically power bars, which recharge over time and which dictate which and how many attacks or abilities you can take. While most attacks and abilities only use a single segment, some will use more -- and while you begin the game with three segments (which is what the enemies you will face have) you will eventually upgrade your ATBS Bank to a total of six (6) segments as the game progresses, which gives you something of an edge in battle.
Active Time Battle System Tutorial
The upgrades to the ATBS Bank are obtained in several ways -- two segments are obtained through choices that you make as you expand the Crystarium, and the third is obtained when you acquire an item that has the ATB 1 passive ability imbued in it.
At the bottom-left corner of the screen is your ATBS Gauge, which contains your ATSB Bank (segments), and below those the timer bar that must fill before you can use them. You have the choice of choosing the attacks and abilities that you use, or simply using the Auto Battle mode, and you can stack and activate the attacks immediately but they will not actually go into effect until the timer bar is fully charged. As you become more familiar with the different jobs, spells, and abilities you will start to develop your own preferred combinations, but for now you know what you need to about that.
Located in the upper-right corner of the screen is your Stagger Meter -- which naturally fills as you attack the enemy and, once it reaches the required percentage for that enemy, staggers them. You fill the meter by attacking, and magic-based attacks will fill it much faster than physical attacks -- though it should be noted that direct attacks decrease the rate at which the meter drains. There is actually an Achievements associated with staggering enemies, but it is not something you need to work towards as it will come naturally as you play, so do not worry about that.
-- Encounter Circles --
In the previous game battles generally took place when your character arrived at the static location of specific mobs, or at their current location, and battle commences. In XIII-2 it works a little different... While there are instances where you will do battle with the mobs at specific locations, battles can also happen randomly, using the Encounter Circle System -- which is a circle that appears on the ground that changes in color depending upon the circumstances.
When the circle is Blue it means that there is a distant enemy that you can do battle with if you want to, or you can head away from them to remove the circle and thus avoid the battle -- which you might want to do if you are not prepared or need to restock items. When the circle is Yellow it means that an enemy is nearby that wants to fight you -- and again the decision as to whether that is going to happen is mostly up to you. When the circle is Red however, it usually means that battle is imminent and the enemy is close by.
Once the battle commences a Mog Clock will appear on the screen at your feet that represents the three stages of battle -- Stage 1, the green stage, indicates that you can engage the enemy with a preemptive strike (and if you can you should). Stage 2, the yellow stage, indicates that the enemy is combat active and can attack you -- or rather can try to attack you -- you can still retreat from it at this point. Note that depending upon the speed rating of the enemy they may not have a green stage and so the battle will actually begin in Stage 2, which means you could not have launched a preemptive strike against them anyway.
The last stage is Stage 3, the red stage, when the Mog Clock Hand has swung around to the other side. At this point battle is imminent and there is no running away from it.
Remember to keep an eye out for the Cinematic Action Segment during boss battles, and to try to hit each button/action successfully, as that not only improves your damage on the boss but also counts for one of the Achievements/Trophies.
Status changes are an integral part of the battle system in the game, and represent effects that you really should be very familiar with, because they are often the key to completing battles with high score and effectiveness, as well as surviving battle damage. Any character or enemy can have up to 8 Status elements active at any time.
Status changes come in two forms: Buffs (good effects) and Debuffs (bad effects). You will be using both types, and often.
When a character is knocked out in battle they lose all of the buffs that have been applied, so if/when you heal/revive them they will need their buffs re-applied.
-- Buffs (the good stuff) --
BRAVERY -- has the effect of increasing the targets STR by 75% for a specific period of time. This improves the physical damage that your characters do to the enemies they are battling, and also modifies the Ravager skills. This buff can be applied to character through gear imbued with Bravery as well as by direct buff.
The Bravery buff is removed using the Debrave debuff, and can be dispelled.
ENAERO -- adds wind damage to attacks and has the effect of increasing the wind damage dealt by attacks for a specific period of time. This buff can be applied to character through gear imbued with Enwind as well as by direct buff.
The Enaero buff is removed using the Enfire, Enfrost and Enthunder debuffs and can be dispelled.
ENFIRE -- adds fire damage to attacks and has the effect of increasing the fire damage dealt by attacks for a specific period of time. This buff can be applied to character through gear imbued with Enfire as well as by direct buff.
The Enfire buff is removed using the Enaero, Enfrost and Enthunder debuffs and can be dispelled.
ENFROST -- adds frost damage to attacks and has the effect of increasing the frost damage dealt by attacks for a specific period of time. This buff can be applied to character through gear imbued with Enfrost as well as by direct buff.
The Enfrost buff is removed using the Enaero, Enfire and Enthunder debuffs and can be dispelled.
ENTHUNDER -- adds lightning damage to attacks and has the effect of increasing the lightning damage dealt by attacks for a specific period of time. This buff can be applied to character through gear imbued with Enthunder as well as by direct buff.
The Enthunder buff is removed using the Enaero, Enfire and Enfrost debuffs and can be dispelled.
FAITH -- has the effect of increasing the targets MAG by 75% for a specific period of time. This improves the magical damage that is done to enemies, and also has positive effects upon the Medic and Saboteur jobs, increasing the amount of HP that is restored by the use of the Medic skill. This buff can be applied to character through gear imbued with Faith as well as by direct buff.
The Faith buff is removed using the Defaith debuff and can be dispelled.
HASTE -- has the effect of increasing the targets ATB recharge rate by 33% for a specific period of time. This allows the character to recast faster. This buff can be applied to character through gear imbued with Haste as well as by direct buff.
The Haste buff is removed using the Slow debuff and can be dispelled.
PROTECT -- has the effect of reducing the amount of damage taken by the target by 25% from physical attacks for a specific period of time. This buff can be applied to character through gear imbued with Protect as well as by direct buff.
The Protect buff is removed using the Deprotect debuff and can be dispelled.
REGEN -- has the effect of slowly restoring the targets HP over a specific period of time. The effect can be obtained from items and through monster abilities.
This effect cannot be dispelled.
RERAISE -- has the effect of reviving a target who has been incapacitated in battle. The effect can be obtained from items and monster abilities.
This effect cannot be dispelled.
SHELL -- has the effect of reducing the amount of damage taken by the target by 25% from magical attacks for a specific period of time. This buff can be applied to character through gear imbued with Shell as well as by direct buff.
The Shell buff is removed using the Deshell debuff and can be dispelled.
VEIL -- has the effect of increasing the amount of resistance to negative status effects by the target by 50% for a specific period of time. This buff can be applied to character through gear imbued with Veil as well as by direct buff.
The Veil buff can be dispelled.
VIGILANCE -- has the effect of increasing the targets skill success rate, and reduces the chances of an enemy successfully interrupting their attacks for a specific period of time. This buff also improves the character's resistance to being wounded by 33%. This buff can be applied to character through gear imbued with Vigilance as well as by direct buff.
The Vigilance buff is removed using the Curse debuff and can be dispelled.
Achievement equals a journey of 10,000 steps and a sore bottom
-- Debuffs (the bad ones) --
CURSE -- has the effect of increasing the likelihood of the target failing an attack/action/ability for a specific period of time, and being interrupted by attacks. It also has the effect of increasing damage from wounds by 30%.
The Curse debuff is removed using the items Holy Water, Remedy, and Unicorn Horn. It can also be removed using the Medic Spell Esuna, which removes the two most recent ailments and has an upgraded version called Esunada, which can only be learned by monsters that removes the most recent status ailment from the whole party.
DAZE -- has the effect of paralyzing the target for a specific period of time, and delivers twice the usual amount of damage from the next attack, which then removes the debuff automatically.
The Daze debuff is removed using the items Remedy, Foul Liquid, and Unicorn Horn. It can also be removed using the Medic Spell Esuna, which removes the two most recent ailments and has an upgraded version called Esunada, which can only be learned by monsters that removes the most recent status ailment from the whole party.
DEBRAVE -- has the effect of reducing the STR of the target by 50% for a specific period of time, and reduces the physical damage that the target can do to enemies through attacks. Adversely impacts the strike skills for the Ravager job.
The Debrave debuff is removed using the items Remedy and Unicorn Horn. It can also be removed using the Bravery buff and the Medic Spell Esuna, which removes the two most recent ailments and has an upgraded version called Esunada, which can only be learned by monsters that removes the most recent status ailment from the whole party.
Note that some enemies project this effect onto the player characters as a base ability.
DEFAITH -- has the effect of reducing the target's MAG by 50% and reducing the amount of magical damage done by the target's attacks for a specific period of time. This debuff adversely impacts the skills of the Saboteur job, and reduces the effectiveness of HP recovery spells for Medics.
The Defaith debuff is removed using the items Remedy and Unicorn Horn. It can also be removed using the Faith buff and the Medic Spell Esuna, which removes the two most recent ailments and has an upgraded version called Esunada, which can only be learned by monsters that removes the most recent status ailment from the whole party.
DEPROTECT -- has the effect of reducing the resistance of the target to physical attacks by 30% and increases their vulnerability to physical damage for a specific period of time.
The Deprotect debuff is removed using the items Remedy and Unicorn Horn. It can also be removed using the Protect buff and the Medic Spell Esuna, which removes the two most recent ailments and has an upgraded version called Esunada, which can only be learned by monsters that removes the most recent status ailment from the whole party.
Note that some kit is imbued with Deprotect, and being hit by a weapon so imbued can activate the debuff.
DESHELL -- has the effect of reducing the resistance of the target to magical attacks by 30% and increases their vulnerability to magical damage for a specific period of time.
The Deshell debuff is removed using the items Remedy and Unicorn Horn. It can also be removed using the Shell buff and the Medic Spell Esuna, which removes the two most recent ailments and has an upgraded version called Esunada, which can only be learned by monsters that removes the most recent status ailment from the whole party.
Note that some kit is imbued with Deshell, and being hit by a weapon so imbued can activate the debuff.
DOOM -- a linear timer-based debuff that causes the target to become incapacitated after the timer counts down. There is no defense or cure.
FOG -- has the effect of blocking the target's use of magical abilities for a specific period of time.
The Fog debuff is removed using the items Remedy, Mallet, and Unicorn Horn. It can also be removed using the Medic Spell Esuna, which removes the two most recent ailments and has an upgraded version called Esunada, which can only be learned by monsters that removes the most recent status ailment from the whole party.
IMPERIL -- has the effect of reducing the elemental resistance of the target, and causes them to take twice the normal amount of elemental damage from attacks for a specific period of time.
The Imperil debuff is removed using the items Remedy, Unicorn Horn, and Wax. It can also be removed using the Medic Spell Esuna, which removes the two most recent ailments and has an upgraded version called Esunada, which can only be learned by monsters that removes the most recent status ailment from the whole party.
PAIN -- has the effect of paralyzing the physical abilities of the target for a specific period of time.
The Pain debuff is removed using the items Painkiller, Remedy, and Unicorn Horn. It can also be removed using the Medic Spell Esuna, which removes the two most recent ailments and has an upgraded version called Esunada, which can only be learned by monsters that removes the most recent status ailment from the whole party.
POISON -- has the effect of dealing 1% Maximum HP damage conterminously to the target, and if left untreated will eventually incapacitate the target.
The Poison debuff is removed using the items Antidote, Remedy, and Unicorn Horn. It can also be removed using the Medic Spell Esuna, which removes the two most recent ailments and has an upgraded version called Esunada, which can only be learned by monsters that removes the most recent status ailment from the whole party.
PROVOKE -- has the effect of causing the target to focus their attacks and attention on the caster for a specific period of time, and is most often used to tank an enemy.
There is no cure and the effect cannot be dispelled. Some weapons are imbued with this effect and can activate it by striking.
SLOW -- has the effect of reducing the recharge rate for the ATB Gauge of the target by 30% for a specific period of time.
The Slow debuff is removed using the items Remedy and Unicorn Horn. It can also be removed using the spell Haste, and the Medic Spell Esuna, which removes the two most recent ailments and has an upgraded version called Esunada, which can only be learned by monsters that removes the most recent status ailment from the whole party.
WOUND DAMAGE -- has the effect of reducing the maximum HP of the target as much as 30% of their maximum HP and the effect remains in force until the battle ends or the character is incapacitated.
The Wound Damage debuff is removed using the items Phoenix Down and a Wound Potion. Targets with the Wound Damage debuff who are incapacitated and then revived using Raise will retain the effects of this debuff unless they are removed using one of the items. The effects naturally are removed after the battle ends.
-- Using Buffs and Debuffs Effectively --
While this guide will often recommend the buffs and debuffs that you should use for a particular battle or type of enemy, understanding what these do will invariably guide you in their use. As a general rule when going into battle with enemies that tend to favor specific attack types you will want to use the buff that helps to protect against them. An enemy that is particularly vulnerable to a specific elemental force is a good reason to buff that force, and combining elemental and physical damage can be a very effective approach.
While the game does a good job of illustrating the use of buffs and debuffs during the tutorial phase of play, learning the effects and the counters for these is a really good idea, as is keeping a supply of the counters on hand when you know you are going to be facing a boss battle.
Remember that your grading and overall scoring in battle has more to do with how quickly you complete the battle -- and win of course -- so getting to a point where all of these are second nature to you is an obvious advantage in that direction.
Once you slot the game disc in your console and it loads, chances are that it will prompt you to download and apply the most recent patches to the game -- do that -- and then sit back and enjoy the opening Cut Scenes (hereafter abbreviated as "CS") in which you see a series of scenes unfold that do not mean much to you now, but will later. As the credits unfold and the CS plays out we are seeing characters who will become very familiar and important to us in the week of game play that will follow.
The woman you see in the battle scenes is the protagonist from the previous game, Lightning, and the man that she is battling is Caius Ballad (the antagonist of the game) -- a battle that you will soon be completing yourself! But first we have to get the normal game start process completed -- and as the CS ends and the main menu loads you will see that you have five options: New Game, Downloadable Content, Beginner's Primer, Extras, and Settings.
These are mostly obvious, but we will start with the Beginner's Primer, which is a re-telling of the story from Final Fantasy XIII.
The Story up to Now
-- The Beginner's Primer --
When you select a chapter from the Primer you can both read and/or listen to the story as it is told, starting with the Prologue, which explains how the government acted against the people, progressing to the chapters which detail the resistance and the reasons for it. During the narrative you see glimpses of the events in the clock face, and you are introduced to the primary characters of the game -- and if you have come to FFXIII-2 without having played FFXIII you really should play through the entire Primer because it will help to add meaning and urgency to the story that is about to unfold -- and for your convenience the video above includes that information in one go, so you do not have to push the buttons yourself!
One of the elements that you should take away from the Primer is that some of the characters you will be using (the protagonists in the game) are actually l'Cie -- having been turned into that special magical form by the fal'Cie who basically rule the worlds. This is important to know because it explains why, for example, Lightning can summon her avatar companion Odin, and why other l'Cie can do the same by summoning their own unique avatar companions. This will be explained more fully as the story progresses, but if you played the previous game you should already know about it.
The Extras Menu selection is where you can obtain the special items/themes you have unlocked through game play, Achievements, and by having a save from the previous game on your hard drive, while the DLC selection is, naturally, where you will go to purchase DLC for the game when it is available and if you desire to.
-- Starting the Game --
From the main menu select New Game and you will then be prompted to choose the difficulty level under which you will play: Normal or Easy Mode. The differences between them are actually very significant in that under Easy Mode the mobs you face will be marginally easier to beat, your characters will take more damage before being incapacitated, and you will find that overall the game is a bit easier in play. The downside to that is that you receive less rewards for your play -- as Normal Mode delivers considerably more rewards in drops, rare and unusual items, and XP. In addition to that there is one Achievement/Trophy that is difficulty-dependent and can only be unlocked in Normal Mode, so you may want to consider that when deciding on the mode if Achievements/Trophies are important to you...
Whichever mode you select, you will be prompted to confirm it and informed that you can change the mode at any time via the options selection on the main menu. After you agree to the mode you have selected, IF you have a save from the previous game you will see the following notice on your screen:
FINAL FANTASY XIII save data detected!
You can now select an item from Extras on the title screen, and will also obtain a special reward within the game. Be on the lookout for other, hidden bonuses!
Among the bonuses that you receive if you still have your Final Fantasy XIII save data on your console -- and thus get the above notification -- is the ability to watch the summary movie that brings you up to speed with the events of XIII using different characters as the narrator. In addition to the choice of narrator, you receive character pictures, bonus monster decorations, an increased success rate when your characters gamble in the game, and a special theme as well. Deeper into the game you can obtain Lightning and Serah Mask adornments, while the Eternal Crystal is instantly in your bag.
The game then informs you that it must create a save game block -- and prompts you to choose between your hard drive or the cloud... Once you confirm your choice you are informed about the Autosave system -- basically pointing out that an icon will appear when the game is saving and reminding you not to turn off the console or remove your hard drive when it is using it. Bear in mind that unlike the previous game, you can actually save whenever you like while playing XIII-2 so the Autosave system is really just for safety sake and often follows major events in the game.
This brings us to the point where the game officially begins with the start of the Prologue CS and battles (plural -- they are divided by story content) so there you go!
Now that you have completed all of the starting items the game begins with a very impressive CS of Lightning in her tower in Valhalla and as she tells you about the events that put her where she is, you are introduced to one the antagonist, and one of the protagonists of the game. Caius is seen placing Yeul's body into the water for her funeral, and then turning his attention to Lightning -- whose butt he plans on kicking!
A war now breaks out between the forces of Lightning and the forces of Caius -- and you eventually gain control of Lightning for a brief battle that is more tutorial than it is a challenge, because as long as you hit the prompted actions you should win it...
Your part in this begins with the Active Time Battle Tutorial - you may as well go through that now to refresh yourself if you played the previous game and to learn the system if you did not. Using the auto battle option gives you a preview of the different types of attacks so go ahead and do that, and when you are prompted to complete the cinematic action sequences that progress your encounter. Try to nail these perfectly if you can since there is an Achievement / Trophy for getting a certain number perfectly.
Cinematic Action Sequences
-- Cinematic Action Sequences --
Basically this is what Timed Button Sequences are called in XIII-2 -- short segments of battle in which you must wait to be prompted on screen to perform a specific action, like push up on the left joystick, hit a designated button, or rapidly hit a designated button. If you complete these without missing any in the sequence it is added to your stats and, when you reach the required number (I believe that is 50) you unlock an Achievement/Trophy for your troubles!
The thing about the CAS is that in addition to counting towards that stat it also causes decent amounts of damage to the enemy, and in places even allows you to choose the type of damage that you will deliver, which makes the battle a little shorter when you succeed in getting off the attack, and keeps you a bit healthier when you succeed in getting off the defensive move. That being the case, you have very good motivation to try to always succeed at this!
-- Introducing Noel Kreiss --
At the mid-point in the battle it will appear as if it is over, and as that happens Lightning notices the gate opening and a human form being ejected from it high in the sky and summons Odin to fly up and rescue the endangered fellow -- who as it turns out is one of the game protagonists, Noel Kreiss. After Lightning rescues him the battle resumes and, assuming you are diligent in using the auto attack option or you experiment with choosing the attacks yourself and are successful, the battle will carry out to its conclusion.
Bear in mind that even if you use the auto attack option, as long as you are diligent about doing so on time you should finish this battle with 5-stars -- with an average battle time of around 1 to 2 minutes for a battle with a target time of 15 minutes... An easy 5-star battle to be sure, but then it is also a battle for which you receive no rewards -- no Gil (the money in the game is called Gil) and no drops. But that is OK, this was really a tutorial after all, and you should not expect to be paid for learning, right?
Now about Noel Kreiss -- he is one of the primary protagonists in the game as mentioned above, and happens to be the last remaining human from 700 years in the future. He has traveled into the past hoping to change the fate that befell his world/time, and this quest began with a wish that took him through space and time to Valhalla where he meets Lightning, who will set him on the path towards his goal but also for her own selfish reasons, towards a goal of her own.
Noel Kreiss gets his Mission
Noel is something of an enigma -- and not just because the journey through time and a few paradoxes have given him memory issues -- but mostly because he is not really used to dealing with other humans... Because of that unfamiliarity he does not react the way that most of the people he meets expect him to, which while useful in battle (he tends to remain calmer than those around him) is a decided disability when it comes to issues that he himself finds emotional. He feels overly protective towards the people he has decided that he likes, and very protective over the humans he decides he loves, which leads to some confrontations later.
Just 18-years-old, Noel is skilled in dual-hand swords, and sports a Flame Fossil (dual swords/lance) and a plain gladius-style blade in his off-hand, though technically since he is ambidextrous, he does not have an off-hand, so you will have to work that out for yourself... His own time has instilled in him a marked reluctance to hurt or kill people, though when forced to he will, and it has given him a deep-seated dislike for people who he considered to be too violent. Still, Lightning could not have chosen a better protector for her little sister, and that is sort of the point to all of this.
After the battle ends and the two are safely on the ground Lightning tells Noel what she wants him to do -- find her sister Serah and bring her to Lightning. She confirms for him that with her sister he can change the future -- and as that is what he wants, it is welcome news. Lightning summons a Moogle that turns into a weapon as a gift for her sister, and then they are once again visited by Caius, and as Lightning and he do battle, Noel leaps for the gate and is gone.
A note about Moogles: in the worlds of Final Fantasy there are certain iconic creatures who factor into the stories and about whom a great deal of fan/gamer appreciation and like is involved. The Moogles factor in as a sort of companion and servant to to different races of characters in the FF worlds -- perhaps more prominently in games like Final Fantasy XI (which was an MMO in which every player had a Moogle Servant in their home), so the inclusion of the Moogles here really sort of carries on a well established tradition. Like the Moogles, another being that appears in many of the FF games are Chocobo, a bird-like mount that the characters train, ride, and race.
Before we get to the actual game play there are a few minor issues that we need to cover that are reflected in the guide -- the first is that throughout the game you will have conversations with different characters that include optional answers. The answers or statements that you choose to use with each of these characters can actually influence how the game goes, or result in your receiving rewards every now and then if you make the best (note that I did not say "right") answer. Basically using humor is almost always better than intentionally pissing the characters off... I am just saying. But what you decide to do is entirely up to you -- I am not going to be telling you how to play the game at that level, because this is a role-playing game and you should have the pleasure to play it in the role you adopt.
The second point we need to cover is items -- throughout our game play there will be in each chapter a selection of items that can be acquired. Some of them are Key Items that are really necessary, while others are more optional. Basically the guide is going to cover all of the items that are important but not necessarily all of the items in an area if the getting of the item does not mesh with the unfolding arc of play. That means, for instance, you may end up going to a corner of the game I did not, so you may find some Gil or a potion that I missed. That is fine, and taking those items is a good idea, but you can be reassured that no important items are being missed in this narrative guide.
Meeting Serah
-- Arrival at the Beach --
You are now introduced to Serah at the beach in New Bodhum. It is AF003 -- which means the third year following the events that ended Final Fantasy XIII -- and you are now taking control of Lightnings little sister, who is having a vision of Lighting's battle in Valhalla though she thinks it is a dream. She is awoken by the meteor strike, and you now begin another brief section of tutorials...
The thing you do is decide on how you want the camera to work -- right now up is up and down is down, left and right are also, you know, left and right... But you can invert the camera control if that is the way you are used to playing games -- go ahead and do that -- if not, say no and leave the camera settings as they are.
The next lesson is the Datalog, which is the encyclopedia for this game, and includes information on key characters, monsters, items, and locations and control/play information. If you are new to the game now is a great time to take a look through the current Datalog entries, and particularly the Primer entries. After you absorb all of that, do the following:
Check your Inventory: If you had a FFXIII save on your hard drive you will notice that you possess an Eternal Crystal -- if not, then not. The Eternal Crystal is a Key Item (more on that later). Under Items you will see that you have Potion X3, and under Weapons, Accessories, and Components, you have nothing. You also have no Gil -- you are broke!
Above you can see your stats for Strength, Magic, and Capacity. That pretty much wraps this part up, so back out of that and look at the Map, then Outfits and finally Settings. If there is anything you want to change in the Settings you can do that now, or not. I did not need to change anything and you probably do not need to either. When you are done back out to the character level of the interface.
Now head outside by examining the door to get the Live Trigger Tutorial -- after you decide what to tell yourself, open the Datalog and read the new section on Live Triggers to gain complete grasp of their function.
Now you learn how to jump over a pair of objects on the floor and head outside where some very strange visions confuse you! This opens another Live Trigger -- clearly Serah is a very confused young lady -- clothes that are not hers, a place she does not recognize, and then she is back in a place that she does recognize and there is a bloody battle underway between the forces of NORA (the resistance) and a variety of monsters!
Just when things look grim Noel finally appears, making a heroic vow and handing Serah the weapon that Lighting gave him for her, asking her the all-important question: can you fight? The answer to that is obviously yes, and a doubles battle now commences in which Noel and Serah face-off against a pair of monsters.
You can use the Auto Attack for this battle if you like -- but doing so will cause it to last longer than it should and likely will not score you a 5-star outcome... But it should score you at least a 3-star rating, and since 3 to 5 stars are considered the good result, a 3-star rating is nothing to sneer at!
You will still pick up some Gil though, and Crystogen Points as well as a Potion or two so that is OK - the higher the star count the more likely it is you will get an extra piece of loot or better loot, I am just saying... But not 5-staring these battles is not that big a deal right now, learning to fight and how battle works is more important, and you can always come back later and replay these chapters for a different or better outcome if you want to. But really the battles with non-boss mobs that you do not 5-star are not really that big a deal.
The Paradigm Shifts Tutorial
-- Paradigm Shifts Tutorial --
The next battle will cover the tutorial for Paradigm Shifts -- following the on-screen prompts which leads you to Staggering an enemy -- and the game will give you two more battle opportunities in order to reinforce these skills as you battle with Noel by your side. After the third battle you should have achieved a Stagger in both.
A brief CS in which NORA heads out to check out the meteor leaves Serah and Noel tending to the wounded -- and Serah finally gets introduced to Noel properly -- revealing the nature of the weapon that he gave her and who it is from. Serah immediately begins to interrogate you about Lightning and Valhalla -- and she tells you about her dream. You agree that checking out the meteorite is a good idea -- but before you do that, why not check out the area around the beach first?
After Serah's CS reviewing the past, you should unlock your first Achievement/Trophy (hereinafter I will just be referring to them as Achievements though you should assume I mean both), "Early Riser" (15 G) for Accepting a new fate in a world where everything has changed.
If you read the Datalog entry on Paradigm Shifts you will learn that the default Paradigm, Double Trouble, has each of your characters focus on their own enemy, while the Paradigm Slash and Burn has then focus upon the same enemy -- which is good for Stagger and Kill approaches. The Paradigm Twin Shields is used to reduce the amount of damage coming in from powerful enemies. Experimenting with the different Paradigms is really REALLY a good idea.
Of the jobs that you have available to you (depending upon the Paradigm you choose of course) you can use:
Commando -- which has augmented attacks dealing extra damage
Ravager -- which has a boost bonus gives to chain attacks
Sentinel -- which gets damage reductions from being attacked
The other jobs that become available later have other strengths -- and weaknesses!
Chained attacks are what increases the Stagger Meter (also sometimes called the Chain Meter) -- the idea being to get the enemy to its Stagger point as fast as you can so you can really damage it.
During battle you can choose to use an item -- like a healing Potion -- instead of initiating your abilities or attack for that stage -- bear this in mind so that if one or both of your team is injured you remember to use a bloody Potion! Potions will only heal a small amount of damage, but they can keep you alive and in action.
-- This and That on the Beach --
Before you head for the meteorite spot why not run around the beach and have a few conversations with the NORA fighters who are still here? You can have mutliple conversations with them, some of which will give you the current report on the situation at the beach... Once you have spoken to the NORA fighters you want to, jump over the barrier at the end of the beach and talk to Noel -- you get an LT opportunity with him in which you can choose what to ask him about with respect to himself of Lightning, after which the dialogue options with him are pretty boring.
About now would be a great time to save your game don't you think? Unlike the previous game which used save points, in this one you can save whenever you like -- and you should do that! In fact you may want to create a series of saves, especially before major events and boss battles, in case you do not like the way things work out and want a do-over.
With that out of the way, head down the beach to trigger the Mog Clock Tutorial.
-- Mog Clock Tutorial --
The tutorial basically shows you the Mog Clock and explains the meaning of the colors -- which we have already covered -- and then presents an enemy for you to battle. What you want to do is engage and attack the enemy quickly in order to get the preemptive strike flag that you get for attacking while the Mog Clock is in the green (Stage 1).
For this battle Slash and Burn Paradigm works really well to Stagger the enemy quickly, after which it should die in the next set of attacks. Noel will want to go up the stairs here, but if you run around the beach towards the tree line you can find another battle or two in which to practice the Mog Clock usage and get some additional preemptive strikes in, and maybe some extra Gil and loot, so why not?
The Mog Clock Tutorial
You can find another battle by the water past the stairs, and then several more random battles that you can get preemptive strikes in with some four-legged cat-like mobs. Doing a few of these is a good idea just to get you used to initiating preemptive strikes and for the Gil and loot you can get, which while the Gil is not going to be huge, should include some potions.
The cat-like creature is called a Gorgonopsid, and if you use the Right Bumper when you initiate the battle you can get its stats screen, which will show you its habitat information, its vulnerabilities (fire is one) and its Stagger rate. You can also see what its common loot drops are!
Remember that a few extra battles now is strategically a good thing for many reasons -- it gets you used to combat, it gets you used to the Mog Clock and gaining preemptive strikes, it earns you money and XP, and it also gains you items like Potions which will be useful to have later. Remember that hitting X will bring up the tasks and map screen, and Y gets you your menu screen, which you can use to check the Status of your characters, which includes the levels that they have reached in their jobs.
For instance after just a few battles when I checked Serah's Status she gained a nice piece of CP for her efforts -- which will come in handy when we an actually spend that CP... In addition to the job levels and CP you can also see the abilities for each job and their corresponding ATB costs. While I may be repeating myself, banking CP and Gil is a very good idea so spending as is practicing combat.
Depending upon how much practice battling you decide to do on the beach here you can easily unlock the Achievements:
Budding Hunter (30 G) Defeated an army's worth of enemies -- which is unlocked for killing 100 enemies.
No Retreat (16 G) Fought a significant number of battles without using "Retry" option -- which is unlocked for completing 50 battles without using retry.
Staggering (15 G) Staggered a significant number of enemies -- which is unlocked for Staggering 50 enemies.
After you have practiced the Mog Clock, Preemptive Strikes, and battle to your satisfaction and you are happy with your grasp of Paradigm Shifting, it is time to head to the wooden walkway ramp and up to the jump point, on our way to the Meteor Strike.
At the top of the ramp when you jump up to the next level immediately to your right is a Treasure Sphere with three Potions in it, so be sure to grab those because you can never have enough Potions! Ahead you have a Chat opportunity with Noel -- if you ask what he means by the "Legend" that will get Serah wondering how it is that he considers something that happened three years ago to be a legend...
The path ahead splits with the path towards the site to the right and, to the left a shallow area with a wrecked piece of equipment and some NORA soldiers -- this is an area that spawns a lot of smaller multi-opponent battles, and depending on how much practice you put in before could easily result in your unlocking the Achievement "Quick Draw" (15 G) Performed a significant number of preemptive strikes -- which is awarded for performing 50 of them.
Opening your first Treasure Sphere nmjk
As you head down the ramp you may encounter a Pulsework Soldier who, while not really all that strong from a defensive point of view can actually dish out considerable damage, which should make you glad you obtained the extra Potions as loot!
You may have acquired some items that can be equipped by this point -- to use them open the character menu and select Equipment, and then the character you want to equip an item on -- Noel or Serah -- and then Equip followed by moving the cursor down to the first Accessories slot and hitting the action button. You very likely have an Iron Bangle or two, and a Power Wristband or two -- each of your characters can equip one item of that type (bracelet) in a slot -- so go ahead and do that!
In the lagoon to the right is a Treasure Sphere you cannot get to for now, so ignore that and then move ahead on the path past the structure to another Treasure Sphere with the Key Item Map of Bodhum in it. Take that now of course, as maps are useful things indeed!
Taking the map will open the Primer Window on Maps, and explain to you the function, along with the different icons, and tell you how to open the map window when you want it. When you open the map window you will notice that there is a new stat on the bottom left of the screen, Explored, followed by a percentage -- that is how much of the current map you have explored. You can now see where you are, where the impact site is, and the likely path you will need to travel to reach it. You can also see the other areas on the map that you can -- and should -- explore!
When you move forward from here Gadot will jump down and you have a chat with him in which you introduce him to Noel -- you get a chat prompt and hey, remember that flattery will get you places, I am just saying...
Head up the path to the left beyond Gadot to clear that, as it contains a Treasure Sphere with a Librascope and also leads to the path we need to take anyway -- you will get a few battles in as you progress along it, after you jump on the logs you get an odd effect that Noel sees as well that is similar to what happened when you first entered the beach.
-- Meeting Yuj --
Continue along the path and a double jump to meet Yuj -- who comments on Serahs new clothes -- giving you another opportunity for a funny reply -- remember using humor almost always obtains better results than sarcasm...
Ahead on the path is a Treasure Sphere with Pheonix Down in it -- after you grab that if you check the map you will see that ahead and to the right is an area that is not on the way to the Strike location -- may as well check that out now -- which triggers a CS in which Cacoon disappears and you are presented with your first boss battle with an intimidating mob called Gogmagog.
The first battle with Gogmagog
The game will open the Paradigm window to tell you about using Sentinel to reduce the impact of his attacks - and shifting to Double Shield is a good idea, but you will be shifting out to more offensive Paradigms to actually hurt this guy, and likley using some Potions as well to heal up. After the battle you receive your first (of 160) Key Items called Fragments -- in this case Gogmagog Fragment Alpha -- and a reward of 500 CP, so good on ya! You will be collecting Fragments through battle, buying, and other methods and there is an Achievement associated with collecting them all.
After the battle is completed the Primer will open on the Fragments Page -- reading that will teach you that these fragments are created when you resolve anomalies in the timeline -- and are basically memories of time that have solidified into shards.
Considering how low-level your characters are and the limited abilities that they have for their jobs, you should not be overly concerned about the poor showing in stars in the battle resolution screen -- in fact you should not worry about it at all, since (A) you can come back later to 5-Star this battle, and (B) when you do it will be after you have better developed your characters, making gaining that 5-Star rating a bit more easy. Remember, right now you are operating with severe limitations on your abilities.
Jump across the gap ahead and take the 300 Gil from the Treasure Sphere here, then jump down ONE jump and STOP. Concealed here is another Treasure Sphere with two Gysahl Green in it -- so be sure to take those now, and then head down to join your mates and examine the Meteor.
A CS now begins in which more of Noel's backstory plays out, and you learn that in his world Cacoon never filled the sky. You learn that for Noel 700 years have passed for the three years that have passed in your world. Gadot goes all macho for a bit and then Noel shows Serah the truth, revealing that the meteor is a Time Gate -- and then Serah goes into reminiscence mode -- and you are back at the beach in Serah's house, where Noel briefs Serah and NORA about the artifacts, and what is needed to use the gate.
-- The Following Day --
Some of the NORA folks believe, and some do not, but as it is late they all believe it is time to go to bed, and we take up with Serah again in the morning, when we are presented with the Primer for Preparing for Adventure -- reading that will tell you that you now have access to the Party Paradigms, as well as the Crystarium -- which is a really good thing, believe me!
You access these two new features by hitting the character menu -- Y for the Xbox -- and then selecting them from the menu. After you close the Primer window a Treasure Box will materialize in the room -- basically this is the reward you get for the LT choices that you made, and will either be Lebreau's Olive Tattoo or a Golden Flower -- both of which are adornments. If you do not like the one you got you can always come back later and replay the chapter to get the other, so do not worry about that for the time being, right?
-- The Crystarium --
Now that you have collected your reward, open the character menu and select the Crystarium, which is where you do your character job and skill development at. We need to cover this in some detail so grab your beverage or libation of choice and relax for a moment, right?
If you played the previous game you already know what the Crystarium is, and what it does -- but if not, then you need to quickly get up to speed with this because it is important. Basically the Crystarium is where you spend the CP you have acquired and where you level jobs/skills and obtain new abilities and spells in the process. This is way more important than it sounds -- because it is how you shape your characters and how you give them the ability that they need to progress either easy -- or hard. Easy if you make the right choices, hard if you do not.
Improving your Characters in the Crystarium
The first question you have to ask yourself as you approach spending what amounts to hard-won CP is what direction do these characters need to go in? What are their core skills and abilities? What jobs have they been filling?
For Serah that has largely been Ravager, and for Noel it has been Commando -- so sticking with those as their strengths is a very sound strategy, but it is not the only focus you should be considering... When you open the Crystarium you will notice that there are large and small nodes in it -- the large nodes take more CP to fill, and apply bonuses that are not easily apparent unless you know it is what they do -- while the small nodes generally apply skills and stats consistently.
A sound approach is to use the large nodes -- and their bonuses -- for each characters primary job (Rav for Serah, Com for Noel) while using the small nodes for their secondary jobs (Com for Serah, Sentinel for Noel). Doing it this way is a more balanced approach to advancement, and will offer a more well-rounded set of abilities. Alternatively you can focus on their main jobs exclusively, which will make them very effective in battle but not so versatile. It is your call, but I chose to take the balanced approach and this guide reflects that.
If you watch the video above you will notice that I made specific efforts to level each of the two complimentary jobs as evenly as possible, while applying the large nodes to the main job for each character. Because I did a little extra battle for practice, I had more than enough CP to completely fill the first Level of the Crystarium, and when I did so I was prompted to select the bonus for each character for doing that -- and you will note that I chose to increase each of their ATB Gauges rather than one of the other good choices -- as it adds a segment to the gauge and that makes Serah and Noel stronger as they are able to execute more attacks per turn in ATB!
We actually have a fair amount of work to do here following the upgrades to our characters that we have completed in accessing and using the Crystarium -- basically what we have are a bunch of optional activities and some required ones, all of which you really will want to complete!
Outside Serah's bedroom are some of the NORA folks -- talk to Maqui, then Yuj, and then Gadot who is sitting on the couch in an alcove in the living room. You can talk to each of them several times to get different dialogue, and learn of their concern for you. Talk to Noel and he will tell you to meet him outside when you are ready, and finally, talk to Lebreau behind the counter in the kitchen to get an LT and get her bubbly take on things. Among all of NORA she is the only one that supports your feelings and tells you so.
Finally finding the artifact...
When you exit the house you hit the next checkpoint and get a CS with Noel who basically outlines the facts -- and then you get a Primer window of The Moogle's Bobble and you learn that it can actually detect the presence of special items and treasures -- including artifacts! When the bobble is triggered you locate the item/piece that did it and use the action button to uncover and take it.
Now talk to Noel again for an LT -- now with that out of the way go ahead and chat with the NORA folks on the beach and the kids -- this will get you more background as well. When you move around you will encounter a garden that you can examine that triggers a CS with Noel and another LT.
On the beach are stairs with some cats (house cats, not dangerous ones) that Moogle has reacted to -- follow the marker (your Moogle) who is chasing your cat (who you names Snow). When you get to the third stop point you trigger a CS in which the memory of acquiring Snow is played.
After the CS talk to Noel for another LT, and you can get a little more information about gates and artifacts -- and he gives you a little helpful guidance as to what to do now. Back on the beach Moogle reacts to the children from your class -- so you should head over and chat with them, which triggers yet another LT with Noel... And we get more proof that he is having memory problems.
Maqui yells at one of the kids, and the kid runs away -- talk to Maqui then chase after the kid, who leads you on a wild chase through the dangerous areas above the village where you finally catch him, getting an LT with him -- Rhett freaks if you threaten him, and if you tell him you will not be mad he tells you just makes him more evasive, but asking him directly why he was running from Maqui starts to pull the truth out of him! Using a guilt-trip works from there, and Rhett hands over Snow's Necklace (which is what he took from Maqui).
That raises the question of what Maqui was doing with Snow's Necklace -- and triggers a CS with Snow in which Serah remembers receiving the necklace from him, triggering another LT with Noel.
After the conversation if you check the map you will see that the upper route to the Meteor Strike site is now blocked by a guard and barricade (a red circle on the map) but the red circle that was blocking the unexplored area to the right side of the map is now gone! Why not head there now? Alas the second stretch of that area is also guarded and barricaded. All is not lost though, because on the section you can access there is a Treasure Sphere with an Iron Bangle in it.
Take that and then head up the center section, where you can spend a little time getting pickup battles to try out your new abilities and spells and combat prowess -- and pick up some CP to use in further expanding your skills and levels, it is your call... Since this process really slows down your story advancement here, it really is a personal call, though bear in mind that the better your skills and job levels the easier you are going to find the battles ahead, and spending a little time here, now, leveling those skills will seriously reduce the number of failed battles you get later.
When yo notice that Noel has a chat bubble, talk to him for another LT in which he asks you about who Snow is to you -- the answer that you choose is going to subtly flavor how Noel feels about you so the most harmless one you can use is to tell the truth: that Snow is your Hero.
When you head back for the beach your Moogle will glow, leading you to the checkpoint at the tree on the beach where you will find Lightning's Knife -- triggers a CS flashback about how she acquired the knife, bring the saga full-circle, ending in an LT with Noel.
At this point you have wrapped up everything important that needs to be done here -- the next checkpoint is in Serah's bedroom -- on the way you have a few conversations with the NORA members leading to CS's and then you have the option of hearing more about the history of the settlement by talking to her again.
In Serah's room is a mirror she does not recognize and, when she interacts with it the mirror delivers the artifact that they were looking for! A bit more self-reflection from Serah, and then a Treasure Box appears with either the Aqua Ribbon or Summery Parasol. Exit the building to trigger another CS with Noel and the artifact -- and you have a meaningful exchange of desires in a lengthy CS.
-- Accepting a Mission in the Mission System --
As you approach the barricade on the way to the Meteor Site you will see a young girl sitting on the beach by the water named Nell -- she is the NORA Medic and she has a mission for you -- if you see a Medical Kit (that has gone missing) she needs you to bring it back to her. This is the first taste of the Mission System in the game, and how cool is that?!
The second battle with Gogmagog
As you progress towards the far side of the zone when you talk to the NORA soldiers they will suggest that you take the route along the shore -- and you should really as that works out well for our own needs... As you progress grab the Phoenix Down from the Treasure Sphere and then move ahead where you will have your second battle with Gogmagog, who upon being beaten delivers unto you Gogmagog Fragment Beta -- the second and last from him.
After the battle resolution screens clear you find yourself facing a Chocobo! The window pops up to tell you about the beast -- a rideable bird that will allow you to mount and ride it if you feed it the special item called Gysahl Greens. You actually possess two of these, but as there is nothing really pressing in the area for you to use a Chocobo with here -- and unless you absolutely must ride one right now -- you would be better off holding onto the greens you possess for later, more tactical use. I know I held onto mine.
Now, before you continue along towards the Meteor Site, instead head up the hills here and at the top you will find a Treasure Chest in which is found the missing Medical Kit! Collect that and then backtrack to the beach and turn that over to Nell to complete your first Quest and obtain the Heart Prism Fragment -- so good on ya!
Before you head to the gate to leave you should check the map and make sure that you have explored it to 100% before you leave -- as that factors into a later quest.
At this point we have completed everything that we need to do here -- we have the artifact from the time that we need to go to, so all that is left is to head for the gate and use it... If you have been picking up battles and doing well with the boss battles and using the balanced advancement you should be close to or over Level 20 on your main job, and close to Level 20 on your alternate -- if you are not, you may want to go ahead and grind some CP to upgrade them to around there, as it will make the next section just a bit easier. Your call.
As you head towards the gate there will be a few more battles to be fought and, if you have been good about getting the preemptive strikes in, this may be where you unlock the Achievement "Clock Stopper" (15 G) Responded swiftly to the appearance of enemies -- which is unlocked by getting 100 preemptive strikes in a row.
After you approach and interact with the Gate, Noel asks if you are sure you are ready to go in an LT and of course you are. The CS plays out in which Serah explains her position, and Noel vows to help in the success of finding Valhalla -- and Lightning. In the next CS we see the NORA folks are watching from above, and then give Serah the opportunity to say goodbye formally. It seems that they are more supportive of her adventure than it seemed before.
Serah says goodbye -- and the way she acts and looks really reminds me of Vanille -- then Noel opens the gate and we get picked up and pulled in along with Moogle -- and then Lightning adds her take on the matter. Wait, was that Caius?!
Discovering the Historica Crux
After a very brief CS of entering the Gate and the Crux, we are presented with the Primer page for The Historia Crux, which explains lightly that it is the compass by which we will be navigating the rivers of time -- and answers the question of how we will be keeping track of the Gates we open and all of the destinations that we can visit from here on out... The next page explains how we can return to the Historia Crux via the Pause Menu -- and that the option may not always be available.
Revising some gates requires that they be closed first, and then when you revisit them you basically replay the levels behind them -- which is a good thing because it means that we can return to a level and play it out with different choices in order to unlock different rewards or obtain different results. Another aspect of revisiting areas is that, until we unlock the key abilities in the game, there are items like Fragments and Treasure Spheres or Boxes that we cannot access on our first visit. I mention that so you bear in mind that each of these areas save for specific exceptions (which will be noted in their individual sections of the guide) can usually be revisited and replayed.
-- The Historica Crux Interface --
Basically the Left Joystick allows us to select the destination and the action button will take us there. Closer examination of the Historia Crux interface shows us the Gate Matrix (a ticklist of Gates and it seems their relation to one another) that uses yellow lights to depict the gates we have access to, as well as a Total Fragment Count (3 at the moment).
There is a Share Button and LB allows us to toggle the view in order to see the Gates and their directly-connected related Gates (or perhaps times is a better phrase), of which we presently do not have any unlocked -- and later as we progress through the story and begin unlocking different times for the same destinations that alternate menu display will become important.
When a Gate is unlocked (and thus accessible) we also get a count of how many fragments are available inside it right on this screen when the gate in question is highlighted, and in addition to telling us how many fragments exist through that gate, it tells us how many of them we have already obtained, which is a stat that will be very helpful to us when we start to track down and complete the fragment collection later in our game play.
For now it is time to head to the Bresha Ruins in AF005, so select that Gate and hit the Action Button!
Selecting the gate gives us a briefing about society and then the visual of travel to the destination, where we arrive to find Cocoon and are instantly thrust into battle with Paradox Alpha -- or at least his hand anyway! Using RB will get you the stats on this bad boy -- and then you can kick his butt!
Your first hit from him after the battle begins in earnest introduces you to Wounding -- a state in which you lose a segment of your HP that cannot be replaced until after the battle ends... Later you will be able to obtain more advanced Potions that can heal Wounding damage, and some monsters that you can capture, add to your group, and train have the ability to heal some Wounding as well... For now try to make this a fast and efficient battle though so any Wounding you receive does not matter.
During the battle you will get several Cinematic Sequences -- try to ace them and remember when a button is flashing it means you need to tap it fast to fill its meter and not just hit it. The Cinematic Sequences really do help you in the battle. Midway into them you will get an assist from a trio of military attack ships that show up and from their radio chatter appear to be aware of the nature of the beast -- that it is a time paradox -- as they begin attacking it too.
Assuming that you remember to go to Double Shield to avoid major damage when the hand attacks, and remember to switch back to damage dealing Paradigms otherwise -- and you do the Cinematic Sequences perfectly -- what should happen here is you will begin to crank up the Stagger Meter and then, when Noel jumps up on to him and you complete the button-presses, you will Stagger him, after which the military attack will finish him off provided that you fill the meter quickly when you are prompted to tap the button (Y for Xbox) -- watch the video above to see what I mean.
You should easily five-star this battle if you follow those standard tactics -- and in so doing score yourself some tasty loot as a result -- like a Silver Gear.
The Paradox Alpha Battle
-- After Battle Report --
You will have unlocked the story-based Achievement "Time Traveler" (15 G) Left behind a normal life, and began a journey through time -- which you get for using the Gate with Noel.
The battle is over, Atlas has been subdued, the Army has arrived, and Serah is happy -- until they arrest you as unauthorized intruders and accuse you of setting off the event that is! Serah, Noel, and even poor Moogle have no choice but to raise their hands in surrender, whereupon they are lead off to incarceration, a bread and water diet and torture by water boarding as the... No, sorry, I was thinking of Blackhawk Down, my bad...
When the CS ends and you are in the cell the LT symbol in the upper left corner should clue you in on what you need to do -- so talk to Noel then talk to the guard and you will have the opportunity to get information -- or be funny (I went for be funny myself). Unfortunately the Guard must have once worked for TSA because he has no sense of humor -- but we are saved by a stranger name Alyssa who spins a cock-and-bull story that the Guard believes, and so we are released! Yay us!
Alyssa is a member of the research team under the Academy, and she seems to know you! After a brief LT opportunity she asks you to follow her and then runs off -- she has a waypoint marker over her head so she will not be hard to follow -- but you can take a quick look around now if you like -- and then follow her to receive an Academy Communicator and a Map of the Bresha Ruins.
After you get the two key items Alyssa explains why she helped you -- and during that conversation Noel ends up vowing to take care of Atlas for Alyssa -- since his presence is a threat to her research. Yeah, Atlas should be a push-over, right? Right?! Errr...
The Primer now shows the Change Leader page, which explains to you how you go about changing the party leader so you can choose who to control in battle -- and while exploring -- adding the Change Leader option to the Character Menu. That page is followed by the one on Types of Gates -- and remember you can read these pages again any time you want by accessing the Primer via the Character Menu screen.
As the page explains there are three types of Gates -- the shining ones that require a special artifact, the crystal ones that require Wild Artifacts (and are single-use), and the Scorched Gates that we have already used. The Scorched Gates can be used to gain access to the Historia Crux whenever you like.
The Chocolina - A Time-Traveling Merchant
-- Having some Chats --
Before you continue along the story line why not explore this area of the map to fill it in and have a chat or three with the different people who have the chat bubble above their heads? That will fill you in on the situation and add to your understanding of the situation here, and of course fill in the map, which you want to do anyway...
Facing the Gate that you came through in the back of the area, if you head left and up the stairs there is a Treasure Sphere with 400 Gil in it -- and to the right in the shallow alcove at the top of the stairs is a Treasure Box with a Key Item: Leaving' Gate Seal inside -- so be sure to grab those now!
Heading up the stairs on the right side of the zone (east) you can have a few more chats as well as get 350 Gil from a Treasure Sphere, and then find your first Chocolina shopkeeper! After you chat her up you get the Primer page on Chocolina Shops -- the mysterious traveling merchants who will become your best friend when you end up with lots of redundant loot you want to get rid of and have supply needs that they can also manage for you!
As they can also upgrade and create weapons, and can be a source for special equipment, your local Chocolina is going to be a must-do stop for you when you encounter them...
The next lesson you learn is equipping Accessories -- something that you should have done before now, but if not, read the instructions and give it a go! Now would be a good time to sell off the extra Iron Bangles and Power Wristbands that you are carrying -- and picking up 5 of each of the utility items that she has in stock may also be a good idea. I bought some extra Greens as well -- you never know when you will need to ride a Choco and while the Yellow Chocobo will allow you to ride as long as you like on a single Green, others consume multiple Greens as you ride them, so a few extra is always a good idea, but do not bankrupt yourself here -- remember that there will always be loot and treasure ahead!
Ideally you do want to have a few (as I said, five was the magic number for me) Remedy, Painkiller, and the like on hand... You cannot sell items that are equipped by a character, so you do not have to worry about selling an item that they are wearing by the way.
If you look up the stairs on the left as you head back into the main area there is a Treasure Sphere with the Black Belt Accessory which offers 15% passive Physical Resistance. Not a bad accessory!
The marker for Atlas is deep in the Ruins -- and as you approach the stairs and chat with the Guard there you learn that you new ID's gain you access beyond his Guard Post -- which is a good thing since that is where we need to go.
Up the stairs at the top you will find a Treasure Sphere with 2 Potions in it, and a few steps deeper into the Ruins will trigger a battle in which, among other things, you are introduced to the Monster Taming System -- and score your first Monster Crystal and unlock a Paradigm Pack. Moogle then explains to you a little about monsters and how you can train them to fight with and for you. Read the Monster Crystals Primer Page that opens, and you now know that you can access Monsters from the Character Menu (they call it the Main Menu but that is confusing since there is an actual Main Menu so I will continue to call it the Character Menu, but you get the idea).
You need to open the menu and select Paradigm Pack within the Party Paradigm menu to add your new Monster to your party -- and remember that Monsters also get upgrades within the Crystarium so do not neglect to boost their levels and skills, right? After you close the Primer page you are given the option to take the Paradigm Pack Tutorial -- and I think you should do that!
Adding your first Monster companions
After you complete that tutorial you will get the Feral Link Tutorial and I really recommend that you complete that since it will give you a sample battle in which you use it to get to know it. As you likely have guessed there is a lot more information on the Monsters and their abilities and uses in the Primer Pages of the Datalog, so after you complete the tutorials why not spend a little time reading the pages so you are well informed?
You can now access the Monster selection from the Character Menu and do things like choose custom names, apply adornments, and the like. When you enter the Crystarium you will notice that in place of CP you upgrade your Monsters using special items that you have collected -- and you can apply an upgrade to one of your Monsters now!
By this point you should be pretty familiar with the Monsters, how they work, and how they will best serve you -- if not, re-read the Primer Pages for them again, seriously, because they represent an important element in your battle capabilities from here on out!
Now would be an excellent time to save your game...
-- Now let's examine this Monster Thingy --
Now that you have obtained your first Monster Crystals, added your first Monsters to your Party, edited your Paradigms, and maybe enjoyed a few battles with your new Monsters present, it is really time for us to take a closer look at this Monster thingy -- and why it factors as an important element not only of game play but also as a focus for your strategic play...
The first thing you need to understand is that you can fight specific monster types in several encounters and NOT obtain a Monster Crystal for them -- and when you DO obtain that Crystal you will not obtain any more for THAT Monster, unless you use the one you have to boost the skills of one of your other Monsters. I can hear you saying "Whhhaaaaat?!"
OK, in addition to being able to apply certain items in the Crystarium in order to level-up your Monsters, you can also have them absorb OTHER Monsters that you have captured. The good news is that once they do that, you can capture another one of the same Monster now that you no longer have that crystal in your inventory.
The other good news is that absorbing Monsters really does increase the effectiveness of your Monsters if you do it right. What do I mean by "if you do it right?" Simple really, because when you examine the individual Monsters you have in your kit you will notice that they have different attributes and stats -- and if you find, for instance, that one of the Monsters in the trio that are your active group can use one of those stats, you can try to absorb it from a Monster you are not leveling.
Remember that you only absorb passive abilities through Infusion, and it is not guaranteed, but you can obtain new passive abilities in the process.
If you open the Character Menu then the Monster Menu you can look at each of the ones you have, and you will notice that there are boxes on their screens that show you their stats and traits -- for example my Cait Sith (who I named Catty) and have raised to Level 15 is a Medic and has the attributes/stats Late Bloomer, Hexproof, and Calm. Her Passive Abilities give her Improved Cure, Resist Magic 15%, and Resist Curse 15% -- and I have outfitted her with the Aqua Ribbon Adornment because it looks cute on her...
I happen to have an Uridimmu Commando with the stats Well-Grown, Flameprone, and Vicious, and if I were to Infuse it with Catty there is a chance (not a guarantee) that she might receive a good ability from the process. Before you go hog-wild and start Infusing Monsters left and right you should be aware that there are some rules that apply to the process -- for example when you examine the Passive Abilities of the Monster you are considering Infusing and see that there are padlock symbols beside some of their Passive Abilities, this indicates that those abilities CANNOT be Infused. If there are no Passive Abilities (for example on a low-level Monster) Infusion is not going to help.
Adding passive abilities via Infusion
After that you must consider what abilities you are actually trying to pass on -- they need to be complimentary to the job of your Monster and ideally make it a better whatever it is -- so for instance boosting the ATB recharge or adding healing ability to a MED would be the way to go in that case, whereas you would want a completely different set of abilities for a SEN or COM... But before you get too deeply into focusing upon that, it should be pointed out that the Monsters you are going to be using now are very likely not the ones you will be using down the road... Your focus should be to build a decent set of Monsters with jobs that will help you now while you go about acquiring the Crystals and materials you will need for making the more permanent team you will be creating.
Bear in mind also that this guide is not an in-depth treatise on the care and training of Monsters -- it is in fact intended to help you get through the game with good success and cover most other subjects in general. There are some very good in-depth Monster guides to be had online when you are ready for advanced study on the subject.
You can eventually Infuse up to 10 Passive Abilities on a Monster, and if you take care to go after the ones that are particularly useful or helpful for your Monster, you can create an amazing team of Monsters to fight with -- but carelessness in the process of development almost always leads to mediocrity, so spend some time in study and SAVE before you start Infusing and leveling in case you make a mistake and need to back out!
The different stats/abilities are:
Balanced -- Balanced parameter growth
Brainy -- Learns many abilities
Early Peaker -- Reaches a maximum level of 20
Flameprone -- Weak against Fire
Flameproof -- Strong Fire resistance abilities
Fogproof -- Strong Fog resistance ofr learns Fog resistance abilities
Frostproof -- Strong Ice resistance or learn Ice resistance abilities
Hearty -- High HP growth
Hexproof -- Strong Curse resistance or learns Curse resistance abilities
Late Bloomer -- Reaches a maximum level of 70 to 99
Loyal -- Learns abilities that will be activated when allies are in danger
Magical -- High Magic growth
Manaproof -- Strong magic resistance or learns magic resistance abilities
Meleeproof -- Strong physical resistance or learns physical resistance abilities
Painproof -- Strong Pain resistance or learns Pain resistance abilities
Pinch Hitter -- Learns abilities that can be activated when in danger
Rare -- Difficult to encounter or recruit
Resourceful -- Learns abilities that improve post-battle rewards
Sparkprone -- Weak against Lightning
Stoic -- Has numerous resistances or learns many resistance-based abilities
Strong -- High Strength growth
Thunderproof -- Strong Lightning resistance or learns Lightning resistance abilities
Venomproof -- Strong poison resistance or learns Poison resistance abilities
Well-Grown -- Reaches a maximum level of 30 to 60
Wimpy -- Has multiple weaknesses
Windprone -- Weak against Wind
Windproof -- Strong Wind resistance or learns Wind resistance abilities
Zippy -- Speedy monster with abilities such as Auto-Haste or Critical: Haste
As you can see there are a number of good -- and bad -- stats/abilities that your Monster can have, and while there is a Rare one, just because a Monster is Rare does not necessarily mean that it is either desirable or that it will fit into your team dynamic... But still, Rare is generally good.
Once you have the team candidate your thoughts should be turning towards improving their effectiveness and that means leveling them -- but as you will quickly see, they do not level the same way as your other characters through CP, but rather through special items that you need to acquire either as loot or purchase from the Chocolina.
This can be a little complicated in that there are three types of Material that you will need to use, distinguished by Material Grade, Material Type, and Material Variety... These break down and apply in the game as follows:
Material Grade: this is related to the actual improved level of your Monster -- which you can tell by how many of the five yellow faces are lit on their individual screen. There are five cat-like faces, and when they are lit in yellow it indicates the improved level of that Monster. The more that are lit, the higher grade of material is required to improve and level them.
Material Type: this relates directly to the bonus stats granted for each node in the Crystarium that you unlock -- and include Vitality (HP), Power (Strength), Mana (Magic) or a special type called Potent that will raise all three. Which you raise has everything to do with what job the Monster has -- for instance if it is a COM or RAV, you will want to focus on Speed, and so on.
Material Variety: basically this just refers to the appropriate type of material, either mechanical for constructs or organic for creatures.
Generally speaking the higher the level of the Monsters you are battling, and the better you do, the more likely you are to obtain materials you can use and that you want. But the only way to do it is, generally speaking, to spend a fair amount of time farming -- an action you can combine with grinding CP to make it less painful! In fact the process of Monster Grinding is something that we should do a little of now, just to get our new friends some better abilities and levels so that they can help us better now!
Monster Grinding to improve your lot
-- A Little Monster Grinding --
Now that you have added Monsters to your party you may want to take a little time to run around in circles after the brief CS ahead and pick up a few dozen battles in order to gain more crystals and drops so you can diversify your Monster collection and upgrade the ones you decide you want to have active to get them a little closer to your own level capabilities -- after all going in with them in their current low-level state does not really help you as much as it will if they have more umph, and more capabilities...
Like before when you were learning the Mog Clock and practicing preemptive strikes, you can just run around to flag random battles and grab the items and experience you need right here, before you have your confrontation with Atlas.
The idea is to not only acquire a bunch of new Monster Crystals, but to level these new Monsters so that you can see what passive abilities that they gain, and then if they have one or more that you want to add to one of your team trio to then Infuse them to see if you can add that passive ability to your teammate. Obviously you should save before trying that in case you get a passive you do not want -- remember each Monster can only have a maximum of 10 Passive Abilities.
Considering that the area that you are in right now will drop an abundance of the quality of materials that are required for the lower form of leveling you should find this to be a very quick and easy process -- simply run around to spawn pickup battles, ace them, and collect the materials and crystals, then level the Monsters and see which have the abilities you want, then infuse them to see if you get them. If a leveled Monster does not have abilities you want, release it and get another of its Crystal type so you can try again.
-- Monsters, Paradigms, and You --
One of the things that adding Monsters to you party will impact is the Paradigms that you use, and you will notice that yours have changed now and, depending on whether or not you fill all three optional Monster Slots, additional ones will be available that you can add to or replace the ones in your party list with. Bear in mind that just because you obtain a Monster does not mean you will actually want to or need to use it -- each one has a job, and you want to select the Monsters that will compliment your current setup.
Obvious choices include Medic, Saboteur, and Ravager -- though do not overlook the benefits of adding a Sentinel to your party, since that can really help reduce damage, especially when you go with a SEN/SEN/SEN Paradigm! I am pretty flexible when it comes to my approach to combat -- I like to go with what works best for me -- and I like having a Medic handy because it can often make all the difference in the world -- assuming you are keeping your Monsters leveled with your characters that is...
My preferred Paradigm setup at this point is:
Tireless Charge (COM/COM/MED)
Diversity (RAV/COM/MED)
Solidarity (COM/SEN/MED)
Consolidation (SEN/SEN/MED)
Relentless Assault (RAV/COM/RAV)
Ruthless (RAV/COM/SAB)
This works OK for pickup battles and adventuring, but when heading into a Boss Battle adding a Monster with SEN for solid damage reduction makes sense.
As you proceed up the steps and turn left you will see another gate with guards surrounding it -- when you examine it Noel explains that you cannot open this one until you figure out what is needed to open it, and if you select Atlas from the LT menu he adds detail to the idea -- and then Moogle flits off calling for your attention.
Following Moogle leads to a guard who you can talk to, which triggers the Primer Page for The Moogle Hunt -- and reading the page explains how you can collect items and spheres that are out of phase with your time when you encounter their ghostly forms.
Behind Moogle is a sparking object and, when you step over near it and use RB to reveal it you find a Wild Artifact -- good on ya! Another guard appears and when you talk to him you flag the mission Defeat the Cie'th -- which you may as well accept unless you do not plan on doing side-missions until after you complete the main story, which you can do if you like -- in fact there are a lot of side-missions that will not be covered in this guide since its main function is to get you through the story mode of the game and not really as a comprehensive everything guide -- but since this mission takes place in the zone there is no reason not to flag it...
A new Gate and Moogle Hunting
Now talk to the nearby Captain who is standing near the Gate and learn about another mission -- Retrieve the two capsules -- that he asks you to help with. May as well flag it now as well, right? There is a Chocolina nearby if you need to restock on anything -- and then as you proceed towards the unexplored area to the left and you will notice a Moogle Hunt Sphere that once you reveal it contains a Capsule which you should grab.
On the left as when you reach the turn in the path are tunnels you can go into and explore and in which you will a Moogle Hunt Sphere with a Rune Bracelet in it out on the walkway. Further inside you find another Gate and have a chat with Noel and Alyssa about it. To the left is a short passage that leads back to the main path that you should head into far enough to clear on the map, and then backtrack and continue to follow the tunnel path until you reach the end where you will find a Treasure Sphere with 8 Mana Droplets for you to claim. You get the LT indicator here and the option of chatting with Noel for the LT event -- go ahead and do that to learn a little more about Noel and his past.
Now head back to the right branching tunnel and into it and take the first right down the terraced levels until you find the dead-end walkway with the Treasure Sphere containing the second Capsule you need for the mission. Once you have that backtrack to the tunnel split and stop for a moment... You may have noticed that the battles with the Hoplite construct Monsters are yielding some materials that you have not seen before -- materials that are very useful in leveling that type of Monster! That being the case you may want to do a little grinding here for materials before you move on, and you may want to decide if you want to add a Hoplite to your team?
When you are happy with your Monster Grinding head back along the branching path that runs above and back to the first Gate, and turn in the Capsules to complete that quest obtaining the Unio Mystica Fragment for your reward...
-- Deeper into the Ruins --
Now backtrack along the left path and make the right turn instead of going into the tunnels and follow that towards the unexplored area to get another CS with Atlas --- he has risen. Before you head towards him to have your battle look at your Map and you will see that just ahead on the left side of the path is a platform that doubles back and heads into the tunnels to the north -- taking that will lead you to another Chocolina if you need to sell or restock, and then just past her take the left path to find the Ghast you need to battle.
Taking out the Ghast earns you 3 Cie'th Tears -- and the Ghast Fragment -- and Moogle tips you to use Moogle Hunt to reveal a Treasure Sphere with a Star Pendant inside! Now that you have that minor matter out of the way, backtrack and continue along the eastern tunnel ahead to discover the machine that Noel and Alyssa were talking about before -- and your team gets pulled into a time labyrinth (paradox).
Solving the Temporal Rift Tile Trial
You now get the Primer Page for Temporal Rift -- Tile Trial, and learn that in order to escape you must unravel the mystery in the crystals and resolve the anomaly. Sounds simple enough, right? Basically you need to devise routes along the disappearing tiles so that you can collect all of the crystals and reach the gate ahead -- there are several levels to this, which grow progressively more complex, so examining and planning out your route is a good idea before moving.
Resolving the anomaly gains you the Delicate Crystal Fragment and now you can see that the machine is functional -- when you examine it you discover that it has some sort of effect upon Atlas that has slowed it down -- and it just may provide the edge that you need to take him out. Before you do that however it would be an idea to head back to the main area via the upper tunnel back at the junction that you have not explored. On the way to that you should find a Treasure Sphere with an Orange Newsboy Cap inside -- so grab that on the way!
When you get outside if you did not already get this, open the Treasure Sphere here and collect the two Gysahl Greens, and then access the Crystarium to spend any CP you have available in upgrading yourself, and use any materials you have available in upgrading your Monsters, and then save your game, because it is time to face Atlas!
-- The Second Atlas Battle --
This battle does not have to be a hard one -- in fact it is sort of a proof-in-concept that the boss battles in the game are only really as difficult as you make them, with the secret to making them easier being to understand your Paradigms and to level-level-level! By the time that I reached this Atlas battle I had both of Serah and Noel's jobs to Level 50 just from the Monster Grinding I did earlier combined with the battles that I fought up to this point, and I expect you are pretty close to the same...
The strategy that works best here is a simple one -- after you have weakened Atlas by completing the tile crystal puzzle and using the machine (you do NOT want to try to battle him unless you have done that first) your primary goal is to Stagger him as quickly and efficiently as you can. What I found worked the best was the following Paradigms:
-- Attacks --
Aggression-X: RAV/COM/COM
-- Defensive --
Delta Attack: RAV/DEN/COM
Diversity: RAV/COM/MED
Basically when Atlas is not attacking YOU, use the Attack Paradigm Aggression-X as that very nicely brings on the Staggering damage.
Smashing Atlas a second time with Grace and Poise!
When Atlas IS attacking you, switch to Delta Attack so that you continue to damage him and build the Stagger Meter while at the same time limiting the damage you take, then immediately switch to Diversity AFTER his attack so that you heal whatever damage you took while STILL building the Stagger Meter.
By using these tactics you should very quickly Stagger him -- at which point you trigger the Cinematic Sequence, and as long as you perfectly execute that (if you do not, I would seriously consider restarting this from your save) you will easily end the battle taking out his weak spot and gaining all of the goodness that comes with victory!
If you do well in the battle -- and you should -- you will receive a Silver Bangle, Fragment Crystal, and 10 Potent Bolts for your victory as well as the CP and Gil and unlock the Achievement 'Scarlet Medal' (14 G) Defeated a powerful enemy with graceful poise -- which you get for staggering Atlas and then completing the Cinematic Sequence flawlessly.
After the battle Atlas disappears as does the damage from the paradox and the world reforms around you to the way that it was before the paradox effected the ruins. You get a CS and then an LT, and then you get the Atlas Fragment notice. Good on ya mates! Well done!
You are contacted by Alyssa -- or you contact her -- and share the good news, and then head into the end of the area to the graveyard and examine the stone that Alyssa is interested in. It commemorates victims of the Purge -- and as you read it Alyssa shows up and you get a CS -- and you learn that Alyssa was present during the Purge. She sees her friends name and then tells you about the events that lead to her friend's death.
After the CS with Alyssa you are shown the unlocking of the area that was previously not accessible to you due to a locked gate and have revealed to you the object at the ivy-covered stones -- and you should notice that you now have access to a Chocobo in the immediate area -- which you might be thinking the only use for that beautiful bird would be if you would prefer to ride back to town rather than have to fight your way back, but that is not all that it has to offer you mates -- it is, in point of fact, your key to an area we could not get to previously because we cannot jump as high as a Chocobo!
So we are going to be taking things out of what might seem like the logical order here -- first thing first, once the CS ends and you are in control of your team again, assuming you purchased Gysahl Greens before when I suggested it you should have plenty, but if not, head over to the Chocolina and get some. Actually while we are on that subject I want to share with you on the Greens...
Collecting the Artifacts and Flagging the remaining Missions
-- Gysahl Greens --
Gysahl Greens are not really greens at all but are actually a type of carrot that has its greens attached to the top, and they are a recurring item in the Final Fantasy series that, while usually directly connected with Chocobo riding in the minds of most FF gamers, were in fact originally a somewhat magical plant and veggie.
First introduced way back in Final Fantasy III, they were a merchant-obtained purchased item that was used to summon the infamous Fat Chocobo -- which was more of a utility mob than it is what the present-day incarnation of Chocobo represent. Also known as the "Chubby Choco, and the "Godsbird" to veteran FF gamers, gamers used Greens to summon El Chubbo not to ride, but to be a beast of burden in the literal sense of the phrase, as the Fat Chocobo appeared equipped with massive pack bags in which vast quantities of items, supplies, extra kit, and the like could be stored and transported.
One of the major limitations in the previous games in the series was the items and treasure that the players collected while playing the games. In addition to factoring in simply the number of items that a character (or party) could carry, they also factored in weight, and sometimes dimensions using more or less reasonable presumptions of limitations for the characters. That being the case, El Chubbo was a Godsend of a utility mob, since you could offload all of the stuff you wanted to keep but could not conveniently carry on your person into their bags.
I should also mention that in some of the games El Chubbo functioned as a summoned battle companion as well, able to land on enemy combatants and do pretty good damage to them due to his or her (never was clear on what sex it was) mass and claws. My all-time favorite game in the series is FFVII, and El Chubbo did appear in it, but it was actually a rare alternate summons with a very slim chance of appearing in place of the regular Chocobo -- but when it did it would land on your enemies with a satisfying thunk!
So yeah, the Greens first appeared in the games in FFIII, being sold by merchants in the small town of Gysahl -- hence their name. They appeared in FFIV as carrots in the Nintendo SNES verison of the game, and as Greens in the later port of the game to Sony's original PlayStation -- and they appeared in FFVII in several alternate forms (they were variously known in VII as Gizzard Greens, Gysahl Greens, and just plain "Choco Greens") and cost twice as much in VII as they did in IV (inflation I guess?).
The use of the greens in VII changed radically from its use in the previous games in the series in that in VII they were a multifunction strategic resource that could be fed to Chocobo during battle to distract them, and if applied to one of your allies in the game functioned as a healing herb. In addition to that they had a third use in the game, specifically for the Gold Saucer Chocobo Races, where you could use them as a speed and stamina booster by feeding them to your racing Choco, though they were not the best feed item for that purpose so most players did not use them that way...
In Crisis Core (VII) they had the added function of being one of the stack-able ingredients for Materia Fusion, adding 1 Luck up to a maximum of 100 Luck, and were dropped by the Kactaars family of mobs (they could actually be stolen from Kactaars). In VIII they were used to summon 'Boco' (the named Chocobo, with similar treatment in IX as well as being a cure for Berserk during battle...
In X-2 they are used as bait for capturing Chocobo, but it was not until the release of Final Fantasy XI (the MMO) that the greens finally matured into their present primary function, which is the form of payment that is used to ride Chocobo! Similarly in XII, and in XII-2 they are required in quantity in order to ride even Yellow Chocobo because they were timed rides and running out of greens would cause the Choco to buck you off and abandon you!
Interestingly in FFXI the primary function (other than being used as feed in raising your own Choco) was as payment for the digging services of a Chocobo -- rented or owned -- as digging was actually a level-based skill in the game, and you had to go through a tremendously large number of them in order to level up your Choco Digging skills, but as they could also be grown in pots in your Mog House as well as purchased from specific merchants.
That pretty much is the history of the Gysahl Green in the worlds of Final Fantasy -- pretty cool eh? Bet you did not know most of that, right? If you did know most of it, well hey, cool, you are a true Final Fantasy Fan!
-- Back to the Game --
Now that you know all the important stuff about Gysahl Greens check your inventory to make sure that you have some (you should have bought some when I mentioned them earlier prior to our entering the Ruins)... But if you did not for whatever reason you did not there is a conveniently handy Chocolina nearby where we are right now, so head over and allow her perky happy goodness to sell you that historical veggie for your riding pleasure!
Now before we head on over to the nearby Chocobo and rent it we need to have a chat with Alyssa to obtain the closure dialogue from the CS so that you know for sure that she is OK with the revelation that her dreams were purely imaginary, or at worse the ripple of some other not-to-be-true-now timeline. With that mischief managed, take a few steps to the side and speak to her friend Jed who will tell you about the Silver Petals and then offer you the Anima Miseria Mission (to find a Silver Petal).
From the mission description page you get the hint that you need to search in the vicinity of the paradox effect to learn how to find this but, obviously, since they are only found in the Winter this is one of the items we will get while we time-travel to the other incarnations of this zone! Go ahead and accept the mission -- and then head over to where Moogle is hovering near the Ivy-covered stones -- remember the Ivy-covered Stones? They were the second revealed location that we were shown after the gate was unlocked as part of our reward for defeating Atlas.
When you use the Moogle Hunt ability Moogle reveals another Artifact -- this is the Eclipse Artifact --- which is an Artifact of unknown properties that resembles an image projector of some kind... It is very different than the Wild Artifact you found earlier.
I know that I did not mention this earlier, but you do recall the Leaving Gate Seal that we obtained when we first arrived in Bresha right? That actually is part of the ability to close gates that we now have, which allows us to revisit areas that we have to close the gates to in order to reopen them in order to go there -- something that we will actually do quite a bit and so I am just mentioning it here so that it is planted in the back of your mind for later recollection :)
-- Treasure Box --
If you look to the left of the stones (if you are facing them, right if facing away) you will notice the hovering Treasure Box that contains the LT reward for this section -- head over and open it to receive either the Lucky Clover (A charm to make you feel that your luck has gotten better, but really it hasn't) or the Chocobo Figurine (Depnding upon the colour adds a specific passive bonus to the Monster that has it equipped).
-- Checking the Map --
A brief check of the map should reveal the marker for the Artifact you are looking for, as well as the Silver Petal Mission Marker, Gate locations, Chocolina and Chocobo locations, and any obstacles that remain in the zone. You will also notice that there are three distinct dark (unexplored) areas within the largely explored area that we have already been through, as well as a long unexplored tunnel network that is presently blocked by an obstacle.
Now that you have all the intel and your situational awareness is at maximum, rent the Chocobo and ride all the way back along the path past the gate to the long set of stairs that we came up what seems like forever ago -- and look to the left as you go down the stairs and you will see that ledge demarcation for the dark area here -- which you can now access by jumping up onto the stairway ledge with your Chocobo's very strong legs!
In this area is a Treasure Sphere containing Power Droplets x8 and along the wall to the north you should temporarily hop off of your Chocobo and use Moogle Hunt to reveal the Graviton Core Beta and 500 CP -- if you open the Character Menu and then select Fragments > Categories > Graviton Core > Graviton Core Beta for a single page description that reveals an image of Snow and a message entitled "The Hero's Trail" that suggests that Snow is having visions of the gates and artifacts that implies that Serah has a sort of mental connection to Snow that is leaking bits of the events that she is experiencing to him... Maybe?
Now that you have cleared out the gimme items for this area and of course turned it from the dark of unexplored to the light blue of explored, hop back onto your trusty Chocobo and run back along the path past the Gate to the marker on the Map for the still undiscovered Artifact that you need to discover!
-- The Reunion Artifact --
When you ride back to the path where the Artifact marker is you will of course instantly recognize the metal gate that was highlighted as the first of the pair of objects that were revealed after the CS's following our defeating Atlas! Excellent! We have now uncovered both we should take the Reunion Artifact (A curious artifact carved into the shape of a flan monster). Now that you have obtained the second Artifact head back to the Excavation site (the first area where we arrived at) and look for a girl named Cordelia -- when you speak with her she will tell you a story about the stupid lock on the stupid drawer of her stupid desk in which there is a stupid file that she really needs... Err.. Yeah...
At the end of this one-sided conversation Cordelia offers you the mission Ars Symphonica, the objective of which is to locate Cordelia's Personal Notes for her. This is a nice and easy (and quick) mission so why not say yes? Yes!
With the mission flagged head into the researcher's meeting chamber (the one with the long table and the displays) and head to the back right side and use Moogle Hunter to reveal the Treasure Box, and obtain the Personal Notes from within it, then return to Cordelia and talk to her to hear her enthusiastic thanks -- and then she reveals an anomaly that must be paradox related... In addition to the Ars Symphonica Fragment you also receive 100 CP as part of your reward for helping her -- sweet!
Inside the Researcher's Meeting Chamber is the guard who locked you into the cell at the start of the chapter -- his name is Morris -- and if you chat him up he tells you about a problem that he is having with someone using the same electronic ID that he is using which is causing him all sorts of trouble, and he asks you to help him to find the Comm Device that is the source of the difficulty -- which is the basis for the Vita Lyrica Mission. Go ahead and flag that mission now (you actually cannot complete it yet though), and that wraps up this section nicely!
When we pass through the Gate and arrive back at New Bodhum Gadot is waiting for us, and it seems that we only departed a few hours before in his timeline, while considerably more time has passed for us than for Gadot -- and he recognizes that. From his comments he is starting to believe Noel finally about the whole time-travel thing.
Collecting the final Fragment in New Bodhum
From the Gate follow the left-hand path along the water and when you reach the Chocobo at the end of the jumping path, look at the platform on the right just past him and you will see a shadow object -- using Moogle Hunter reveals it for what it is: the Graviton Core Alpha Fragment! Cool that.
Now that we have that -- and chances are really good that you have also picked up a new Monster Crystal or two from the unique Monsters that are found here -- and then if you like you can head into town and chat with whoever you like that has a chat bubble, but as they mostly wonder what in the heck we are doing back so soon those chats are something of a let-down...
The real point to coming back here was just to get that last Artifact we could not get before, and pick up a few Monster Crystals like Tabasco Toad, Spiceacillian, and Sarracenia -- and once we have done that, it is time to head back to the Gate and through it and back to Historia Crux.
Now that the side-trip home is completed and we have all of the Fragments from there, we return to the Ruins and head back into the Ruins area on a Chocobo to the entrance to the southwestern tunnels -- where we want to locate the Gate that we saw there earlier -- and use it and the Reunion Artifact to take us to the Sunleth Waterscape in AF300!
Arrival in Sunleth unleashes a painful vision for Serah
We get an introspective CS with Serah and then we unlock the new destination -- and find ourselves in the Historica Crux and the ability to select the new destination -- and we do! Now if you are low-level this might be a bit of a challenge -- but if you have been following the guide and doing the grinds then you should be in the 50's in both of your jobs on both Serah and Noel, which means you are not going to have too much trouble here...
After we enter the new area we get a foreboding CS and then unlock the Achievement "Past Gazer" (15 G) Visited the place where the saviors of the past dream in crystal.
You play as Noel now and follow Serah along the path to where she encounters the missing Snow! And then a massive Tomato attacks us! Seriously! OK it is not really a giant Tomato, it is a really a boss mob whose name is Royal Ripeness and who is made up of one big Flan that is being made by the joining of thousands of regular Flan, and as Serah points out, it must be a paradox effect. That being the case we still have to battle it!
-- The Giant Flan Battle --
The strategy for dealing with this thing is actually pretty straight-forward really - in fact I beat it with 5-Stars using only two Paradigm:
Aggression-X COM/RAV/COM
Diversity COM/RAV/MED
Using these two alone what I did was started with Diversity to Stagger the Giant Flan, and as soon as it was Staggered I switched to Aggression-X to deal damage. This quickly took me to a brief Cinematic Sequence, then back to Diversity to Stagger it again, and then Aggression-X to deal the hurt that triggered a longer Cinematic that as long as you pull-off perfectly quickly leads to the temporary defeat of the Giant Flan and a 5-Star rating.
If you run into trouble with taking damage after you have it Staggered you are better off using Potions to heal rather than switching out Paradigms when you are in damage mode (Aggression-X) since you want to maintain that flow of damage-dealing and the change to Diversity will interrupt that.
The first battle with Royal Ripeness
The thing is it is not dead -- it is just blown apart -- and all the regular Flan that were the Giant Flan begin to form back up and it grows, at which point Snow wants to attack it again but Noel convinces Serah to retreat with him and where goes Serah so goes Snow. Thus we find ourselves viewing a testosterone-fueled debate between Noel and Snow in which they eventually have a meeting of the minds and agree to a plan of cooperation -- but it has to start with finding an Artifact, because it seems that we have to do some traveling to find a way to deal with the Giant Flan, or at least that is the consensus of the assembled team.
-- Cinematic Sequence Button Presses --
Note that the boss battle Cinematic Sequences are usually broken up into several parts, the idea being that the Cinematics are more than simply an excuse to have you pushing buttons, but that your actions actually have a strategic impact upon the outcome of the battle -- in this case a mixture of offensive and defensive actions.
Cinematic Part One
(1) Push 'X'
Cinematic Part Two
(1) Push the Left Joystick 'Up'
(2) Push 'X'
(3) Rapidly Tap 'X' to fill the Attack Meter
(4) Rapidly Tap 'B; to fill the Attack Meter
(5) Push the Left Joystick to the 'Right'
For getting the Perfect rating in the Cinematic Sequences you are awarded with a Crystal Heart Adornment, just so you know... That and getting this with a 5-Star and Perfect rating actually applies to some Achievements that you may unlock later...
-- Post Battle Action --
The first thing you should do is speak with Snow to obtain a Map of this new area, and then head south and open the Treasure Sphere to snag 625 Gil -- and then head south some more and swing over a gap with a vine thanks to Moogle discovering it. Continue along in a Southwestern trail when you reach a split and you will encounter a large Tortoise that you can ride!
As it moves along you are prompted to use a new ability that you now learn -- Moogle Tossing -- in which you can use LB to grab the Moogle, and once you have your aim down, RB to fire him at the target, which in this case is Treasure Spheres! Well what the heck, why not?!
Taking the Tutorial has you fire the Moogle at a Sphere that yields Mana Chips x8, a Sphere with a Librascope, and one with a Silver Bangle. After the Tutorial ends as you begin to move look off to the left at a distant Sphere that, when you hit it with the Moggle turns out to have a Wild Artifact in it!
Moogle Tossing for Fun and Profit
When the Tortoise stops and you jump off of its back there is a Chocolina Shop here if you need it, and nearby off the edge is a Treasure Sphere with Vitality Chips x7 that you can toss the Moogle to get. Moogle spots something with Moogle Hunter and indicates the direction you need to travel in -- which is over a gap you will need to climb the fallen tree trunk and then swing across using the vines. On the other side is a Treasure Sphere with a Zephyr Ring in it!
There is the Gate ahead of you here but it does not work because we do not have the right Artifact -- we need to hunt some down and then best way for us to do that is to head back to the Historica Crux and then back to the Bresha Ruins (remember we have cleared all of the Artifacts from New Bodhum already). So use the Pause Menu to access the quick route back to the Histrorica Crux and then select Bresha Ruins from the map.
We arrive at the Gate inside the tunnels in the Bresha Ruins (which is where we departed from) so head back to the town square and look at the fenced-off area where the hand of Atlas was originally placed when we first arrived here... See that Treasure Sphere floating out there with the marker on it? Throw Moogle at it to score the Key Item: Holding Cell Key -- no pun intended -- which is exactly what you need to be able to get through the locked gate that is blocking our access to the tunnels out of this section! Excellent!
-- Into the Tunnels --
Run through the Researcher's Chamber and use the Key on the metal gate here. Just inside is a Treasure Sphere with Vitality Chips x10 so grab those and continue forward where you will see Moogle trigger his Moogle Hunt alarm -- he has found something important it seems, so follow him and you arrive at the dead-end walkway and use Moogle Hunter to reveal the Treasure Sphere with the Army Comm Device in it.
Completing the Rogue Comm Device Mission
Check the map and follow the route south to find a new Gate! We will be checking it out momentarily since it is the sort that will work with Wild Artifact and we have some of those but for now continue along the path to the east and you will find a Treasure Sphere that contains a Butterfly Bow... This is a significantly better weapon than the one we are presently using, so having Serah equip it is really a good idea...
Now backtrack to the Gate and head along the western tunnel to find another dead-end with a Treasure Sphere that holds a Unicorn Horn (a seriously awesome and valuable piece of kit) which, when used, removes ALL status ailments and ehancements from all allies AND enemies... This is more or less a doomsday device as far as buffs and debuffs go, but it does have its applications, you just need to use it strategically -- which means you want to hold on to this for now.
Now backtrack all the way out of the tunnels and turn in the currently active quest to Morris the Guard and collect your reward, which is the Vita Lyrica Fragment and 200 CP. Good on ya mate!
Before we proceed from here now would be a good time to save your game...
If you have not already spent some time looking at each of the basic consumable items that make up the bulk of what can be purchased at Chocolina Shops and that you obtain as loot drops from battle and, naturally, in Treasure Spheres, now would be an excellent time to do this. I know that this may feel like an obvious point -- and you may be very familiar with each of these and what they do -- but on the off-chance that you are not, learning about them is a very good idea!
Pay a visit to the nearby Chocolina Merchant so that you can stock up on any consumable items that you may have used, or add the consumable items you have yet to add... You used some of your Gysahl Greens during the half-dozen Choco rides that we took recently, so replacing those would be an idea, and in addition to that, now would be an excellent time to list the consumable items that you can obtain from the Chocolina -and- define what each one does so that you know -- just in case you do not know...
While it is true that the bulk of the items below can also be obtained as loot and from Treasure Spheres, the Chocolina are a reliable source for these items in quantity -- and while we are on that subject you are aware that once your stack of items reaches 99 you no longer keep any of that item that you find as loot, right?
That being the case -- with items like the regular Potion being so common a loot drop -- it is generally a good idea to sell off 20 or 25 of the items you have capped the stack on so that you continue to collect them when they are dropped as loot and you enjoy profiting from them as well. Not only does that ensure a steady stream of money, it keeps you more aware of what you have, and what you do not, what drops as loot frequently, and what is more rare -- a level of situational awareness towards your kit and consumable items that will pay off in dividends later, when awareness of those items is also a matter of survival!
Examining the Consumables offered by Chocolina Shops
-- Chocolina: a Source for Consumable Supplies --
Under Items in the Menu are the following:
Potion (80 Gil) -- Restores a small amount of HP to all allies.
Phoenix Down (500 Gil) -- Revives one ally from KO and grants Protect and Shell.
Remedy (125 Gil) -- Removes one ally's most recently inflicted status ailment.
Wound Potion (150 Gil) -- Restores 100 HP for all allies, and maximum HP reduced by wounding.
Antidote (50 Gil) -- Removes Poison from one ally.
Holy Water (50 Gil) -- Removes Curse from one ally.
Painkiller (50 Gil) -- Removes Pain from one ally.
Mallet (50 Gil) -- Removes Fog from one ally.
Wax (50 Gil) -- Removes Imperil from one ally.
Under Monster Materials in the Menu are the following:
Potent Droplet (80 Gil) -- increases biological monster Attribute Grade.
Power Droplet (80 Gil) -- increases biological monsters Strength Grade.
Mana Droplet (80 Gil) -- increases biological monsters Magic Grade.
Vitality Droplet (80 Gil) -- increases biological monsters HP Grade.
Potent Bolt (80 Gil) -- increases mechanical monster Attribute Grade.
Power Bolt (80 Gil) -- increases mechanical monster Strength Grade.
Mana Bolt (80 Gil) -- increases mechanical monster Magic Grade.
Vitality Bolt (80 Gil) -- increases mechanical monster HP Grade.
Under Special in the Menu is:
Gysahl Greens (300 Gil) -- Chocobo love this leafy green. You will need one for each Choco ride.
In addition to the above, through looting you should have at least some of the following:
Librascope (500 Gil) -- Reveals detailed status information on all enemies.
Unicorn Horn (1600 Gil) -- Removes Status ailments and enhancements from all allies and enemies.
As far as your stocking the items above, obviously the consumable items are a focal concern -- the monster items not so much, and you should use your own judgment on what if any of those you should be buying...
At a minimum you should have a reasonable supply of the consumables in your bag (10 or 15 of each seems reasonable) though you probably will not have to buy some of them as they are popular loot drops. Items like regular Potions you should end up with more of than you know what to do with, I am just saying...
Unlocking the Choco-boco-holic Achievement
I have mentioned previously that it is a good idea to have a supply of Greens on hand so you can ride when you want to, and you should be aware that with Yellow Chocobo you will only need one Green to ride them -- though it uses an additional Green if you get off of the Choco to do something and then get back on after you do it. For other color Chocobo though, you end up paying Greens for each block of time that you ride them (usually measured in 3-minute blocks), so you will want to have more than just two or three Greens in your bag. I find that 15 or so is just the right number for me.
Finally there are the loot-specific items such as the Librascope and Unicorn Horn. You can use the Librascope to get a small edge in battle, since it scans the enemy and briefs you on their strengths, weaknesses, and other information, so using those will be pretty much your call as to when, how often, and upon whom. A lot of gamers consider using them on Boss Mobs to be a given tactic, but YMMV.
The other special item that you should have at least one of by now is the Unicorn Horn (found in Menu > Inventory > Items) that we got from a Treasure Sphere earlier. This is an item that you should be holding on to as it is particularly useful under specific circumstances with boss monster battles -- and when there is a situation that it can be useful for I will mention that in the appropriate section of the guide.
Beyond that the other purpose of this section is to get you thinking about the items that you obtain in the game and how they can best be used. If you took the time to read Part 2 of the guide (the section on Buffs and Debuffs) you will notice that many of the consumable items are used as cures for those status ailments in addition to the spells that you Medic can cast. That list of useful consumable items includes Remedy, Antidote, Holy Water, and Wound Potions just to name a few. If you are not yet fully versed in the debuffs and what consumable items can be used to treat them, refreshing your memory by re-reading Part 2 is an idea -- and making notes that you can refer to as you play is also a good way to start to memorize which items to use when.
Having these items is no good if you do not actually use them -- and believe it or not in some of the more rapid battle situations they can (and often will) prevent you from having to shift Paradigms in the middle of battle, a preventative measure that often means the difference between scoring 5-Stars and only 4-Stars, which you can see is important... And that wraps up this section nicely, so let us head back to the story!
You will recall that we just obtained the iron gate key using Moogle Throw and opened the gate that previously blocked off access to the Secure Tunnels to the west of the Excavation Site with that newly acquired key -- and now that we have completed the steps of obtaining the items from the Treasure Spheres, and the Radio that we needed (and used) to complete the related mission, it is time to head back into the Secure Tunnels for some strategic grinding and farming.
Generally speaking, inside the tunnels we will randomly encounter monsters to battle who typically drop slightly better rewards than the monsters we can encounter in the Ruins areas north of the Excavation Site as well as other areas in this time/zone.
The average rewards that we obtain from these random battles include from 50 to 800 CP per normal battle -- higher if there is a rarer special Monster in the group we encounter -- and 50 to 2000 Gil -- more if there is a rarer Monster in the group we encounter -- and assuming that you are playing the game on the Normal Mode of difficulty, you should be getting the Rare Drop 200% and Item Drop 200% flags for all of your battles, which means that you absolutely should be seeing a selection of the following items dropping randomly as loot from your battles:
-- Antidote (Consumable)
-- Phoenix Down (Consumable)
-- Pot Shard (Component for Witch's Bracelet Accessory)
-- Potent Bolt (Monster Material)
-- Potent Droplet (Monster Material)
-- Potent Sliver (Monster Material)
-- Radial Bearing (Component for General's Belt)
-- Remedy (Consumable)
-- Thickened Hide (Component for General's Belt and Witch's Bracelet Accessories)
-- Vitality Sliver (Monster Material)
As is always the case with Farming and Grinding opportunities in the game as it is covered by this guide, taking the time to pause in your pursuit of the story in order to do some grinding or farming (well, really it is not either/or since we grind as we farm and farm as we grind anyway) is entirely your call and voluntary. That being the case, I feel compelled to explain why this is a good spot to do a little farming and so pause our pursuit of the story: the items list for loot above should clue you in as to why this is a good spot, since the battles here are an excellent source for the specific consumable items Remedy and Phoenix Down (the latter while it is a common loot drop in each time/zone is one I think having a stack of is a good idea since it is used to revive your teammates when they fall in battle, and it would totally suck to (a) have to pay for these, and (b) not have an adequate supply when you really need them.
In addition to the consumable items, which are really a bonus more than a reason for doing the farming here, the real reason that we are farming is to work on filling a stack of the Monster Materials that are dropped here -- as they will be very useful in the process of leveling up our Beta Team later and, at least initially, adding some extra oomph to our Alpha Team now (once we have already obtained a full stack of the relative item, the idea being that since you cannot hold more than one stack of each you may as well use them so that you actually get to collect the ones that drop after you cap-off the stack).
In addition to the above reasons there is one more justification for farming this particular area, and that is the presence of rare and hard to find monsters who appear here. Now you should be aware that just because you encounter a rare and hard to find Monster in battle here does NOT mean you will actually obtain their Crystal when the battle phase ends and the loot is passed out. In fact the odds of actually obtaining their Crystals are very low, which is why you want to have as many opportunities to do battle with them as you can manage, in the hopes of actually scoring one of the illusive Crystals, which I have to say is something of a rush and a very satisfying conclusion to battle when it happens!
The following rarely encountered monsters appear in this area:
-- Albino Lobo (cat-like varient of the Uridimmu) Organic / Ravager
-- Amanojaku (Gremlin-like variant) Organic / Synergist
-- Notsugo (a Gremlin-like monster) Organic / Ravager
It should interest you that among these tameable monsters is the Albino Lobo, which is one of the monsters in the game that almost always comes with the ability to Poison its victims as a natural consequence of its attack. Its Rare Drop is the Vitality Sliver, and its common drop is Phoenix Down. It is wicked cool looking and, if you plan on having a Cat-like Ravager for your team you could do way worse than the Albino Lobo, I am just saying...
Capturing the Rare Albino Lobo Requires Patience and Grinding
-- Monster Notes --
You may also obtain Monster Crystals from battles with Monster types that you do not possess a Crystal for -- just to remind you, you can only possess ONE Crystal for each Monster type at a time, so if you use the Infusion selection to absorb them in order to add their ability to one of your teammates, you can then acquire another Crystal in a subsequent battle. Certain Monsters will be desirable members of your party and you will want to retain them, while others? Not so much.
Monsters come in two basic types -- Mechanical and Organic -- the difference being one is actually a machine and the other is a living creature. Each type of Monster favors a specific Job, and each has its own inherent strengths and weaknesses. You will eventually want to possess a complete set of Crystals for the in-game quest requiring that.
Just to be clear at this point in your adventures you should -- at a minimum -- possess Monster Crystals for the following Monsters (if you have been following this guide):
- - - - - - - - - - - - - - - - - - - - - - - - - - - - - - - - - - - - - - - - - - - -
Listing Key:
Monster Name (basic description) Monster Type / Job
- - - - - - - - - - - - - - - - - - - - - - - - - - - - - - - - - - - - - - - - - - - -
-- Albino Lobo (cat-like varient of the Uridimmu) Organic / Ravager
-- Amanojaku (Gremlin-like variant) Organic / Synergist
-- Cait Sith (the Cat-like hovering monster) Organic / Medic
-- Ceratosaur (a lizard-like monster) Organic / Saboteur
-- Dendrobium (the large flower-like hovering monster) Organic / Saboteur
-- Garchimecora (A more colorful Gremlin) Organic / Ravager
-- Gremlin (a greyish Flying birdball sort of monster) Organic / Ravager
-- Hoplite (the droid-like monster) Mechanical / Commando
-- Miniflan (a tomato-like blob) Organic / Commando
-- Nekton (a smaller insect-like monster) Organic / Ravager
-- Notsugo (a RARE Gremlin-like monster) Organic / Ravager
-- Pulse Knight (a one-armed droid-like monster) Mechanical / Sentinel
-- Sarracenia ( a slug-like plant monster) Organic / Commando
-- Spiceacillan (a lizard-like monster) Organic / Ravager
-- Tabasco Toad (a hot-colored lizard-like monster) Organic / Ravager
-- Uridimmu (A cat-like monster with pointy spikes) Organic / Commando
Of the list above the only one that you may not have -- or perhaps a better way to say this is the only one that you have not had a large number of opportunities to capture -- is the Notsugo, who is likely to be the first Rare-flagged Monster you will add to your collection of Monster Crystals.
Chances are good that the Notsugo you capture will have the Well-Grown trait, and it will be a Level Two Monster (have two of the five cat faces lit) when you capture it. Upgrading Level Two Monsters requires the rarer materials like Potent Slivers, and since they are rarer you may want to not do that until you have determined what Monsters will be on your Beta Team (that being the team you will complete the bulk of the final third of the story with and all of your adventures that take place after you complete the story) since the cost in terms of time (if you grind for them) and money (if you pay for them) for the materials for raising the level and abilities of Monsters from Level Two up makes it an expensive process.
Unlocking the Strategist Achievement
During the grind to obtain the Monsters for this area as well as to gain materials and CP I was shocked to see the Achievement "Strategist" (18 G) unlock -- I understood that this required 1000 Paradigm Shifts and there is no way that I completed that many in the process of the two grinds and the adventuring that I have completed, but there you have it!
Once you have finished your grinding having captured the Monsters that there are to be captured and gained what levels there are to be gained in the time that you took in the doing of it, head towards the nearby Gate at the junction where the two dead-end tunnels are and use a Wild Artifact upon it to unlock access to Bresha Ruins AF300 -- and then step into the Gate!
At this point you will need to show better judgment -- if you have leveled up your jobs you can easily handle the combat here but if you have not you are better off avoiding and either riding a Choco or simply running from battles... Either way it is time to make our way back to the graveyard in this time, and just ahead of us on the way we will encounter an NPC named Jonah who will give us the "Fragment: Platinum Ring" quest. Go ahead and accept that, and then head the rest of the way to the Graveyard.
Jonah's Fragment: Platinum Ring Quest
Near the Choco that is at the entrance to the Graveyard there is a ghostly looking figure -- I actually had to use Mooglehunt to get the Talk prompt with him but I am not sure that was not a bug? Either way once you talk to Lex he offers the quest "Fragment: Iridium Ring" and you may as well flag it.
Now head to the far end of the Graveyard and grab the Silver Petal there, then on the way out you will notice that the area here to the north we could not clear before is now open, and has a Gate in it! Go ahead and clear it on the map but ignore the gate for now... There is a Unicorn Horn in a Treasure Sphere here -- be sure to grab that!
-- A Chocolina Visit --
Inside the tunnels to the right here on the way out you can find a Chocolina deep inside and some new Monsters to battle and tame -- a Circuitron -- and as the Chocolina has some better weapons that you can obtain for Noel it is probably an idea to go ahead and do that :)
I chose to go with the Rune Tooth because I liked its stats and it does better damage than the weapon we have (the one we started with actually) -- but you can also get the Howling Soul or Volatile Spark here as well.
Once you finish with the Chocolina head west and then south along the path here towards the Choco, and in the northeast corner of that dead-end area use Mooglehunt to reveal the Recording Device and take it! Now head back towards the exit and south to the bend that turns east, but do not take the bend -- instead enter the southern tunnels here.
Lex's Fragment: Iridium Ring Quest
Head down to the left to find Brant -- Lex's joker buddy -- who will challenge you to a game of sorts! Basically you need to pick the funniest phrase choice during the Live Triggers and then talk to him again for a total of three really bad jokes... It turns out that Lex is dead! Three years dead! No wonder we needed to use Mooglehunt to talk to him!
After you talk to Brant head to the end of the area to the east and talk to Thurston to flag the quest "Fragment: Mythril Ring" which entails talking to a soldier back in the main area of the Ruins. We will do that in a bit...
-- Return to Lex --
Now it is time to return to Lex with the message -- he takes it happily but it seems that he is aware of his fate even though we did not tell him of it. After thanking you and rewarding you with the Iridium Ring Fragment he disappears, leaving a Wild Fragment in his place which you definitely want to grab since it nicely replaces the one that we used to get here...
Thurston's Fragment: Mythril Ring Quest
-- Return to Jonah --
Now it is time to return to Jonah -- but on the way as we reach the central area of the Ruins you will spot a soldier just before the stairs down who has a chat bubble -- that is the Commander -- and when we talk to him he tells us about the report that he has prepared and asks us to deliver it to his client (Thurston) -- and of course we will!
Now head down the stairs and chat with Jonah to complete his quest, turning over the Recording Device and collecting our reward. With that done, it is time to wrap up the quests for this part of the zone and head back to Thurston to deliver the Commander's Report.
-- Return to Thurston --
After we hand over the report Thurston reads it -- and seems a bit disappointed with the conclusions but accepting nonetheless. He cheerfully hands over our reward and here is the third quest completed -- well done mates!
If you want to grind a little in this area and even if you do not (assuming you are leveled enough to survive the battles that is) you can acquire the following loot items:
Cobaltite (Component)
Lightning Aegis (Accessory)
Potent Engine (Material)
Power Booster (Material)
Vitality Booster (Material)
You can also acquire the Monster Crystals for:
Circuitron (a ball-shaped monster) Mechanical / Ravager
Munchkin (a droid-like monster) Mechanical / Commando
Assuming that you can, after you have tamed those two head back towards the point where we entered this time/area and when you reach the gate enter it to return to the Historia Crux now, since we have done all we need to do here for the moment. I had a few battles along the way and unlocked another Achievement for my troubles:
Unlocking the Wild Thing Achievement
-- Unlocking the Wild Thing Achievement
Another one that caught me by surprise is the Achievement "Wild Thing" (16 G) -- Successfully used Feral Link abilities a significant number of times -- which I unlocked
Wild Thing is unlocked for successfully using the Feral Link ability 100 times -- bear in mind that when it says "successfully use" it does not mean trigger it, it means trigger it and then complete the required combination of button presses or control movements so that the Feral Link executes, causing your monster teammate to deliver their damage or spell against one of the opponents in your battle.
That distinction is important since you can actually trigger the ability but fail to complete it (which does not count against the required total of 100), so if you like unlocking Achievements and you want to unlock this one, it would be an idea to actually complete executing the attack each time, right?
Now it is time to return to Jed at the Graveyard and turn in his quest, which scores us the Fragment: Anima Miseria (you should be reading the pages for each Fragment in the Fragments Section of the Character Menu).
Delivering the Silver Petal to Jed
He has a sad story to tell us -- why are so many of the stories here sad?
Now that we have completed this quest, backtrack to the central area of the Ruins and the Gate that we have been ignoring all this time -- the golden one that requires the Eclipse Fragment to open -- and use that to open it revealing that it leads to Yaschas Massif AF010!
What a wonderful coincidence -- as Yaschas Massif AF010 is just the place that we want to go next! Step into the gate and be transported!
After we arrive we get another CS introduction from Lighting, and then a long CS in which Noel briefs us about the events of his past -- namely the Eclipse -- and Serah speculates that this is a Paradox event, unlocking the Achievement "Future Espier" (15 G) Visited the place were clues to the future lie waiting to be discovered.
After the CS concludes scan the area and you will see a figure ahead -- this is the Researcher -- and when you chat them up they give you a map of the region. Chat him up again to get more background information on what has happened here -- that triggers an LT -- after which you can grab 500 Gil from the nearby Treasure Sphere and then head directly across the area to the far wall where there is a Mooglehunt Treasure Sphere containing a Metal Armband.
Now head back across the clearing past the first Treasure Sphere to the jump-down point and, well, jump down! Following the path here east and then north where you will find a woman who will advise you to take the path with the searchlights since the monsters will avoid that -- but do we actually want to avoid the monsters? Actually since this is where you encounter the Feral Behemoths and as you need one of their Fangs for a quest coming up, it would be an idea to grind them to get it now... And as they are a tameable monster you should get one to add to your Monster Crystal collection too!
The Fal'cie are Bored and a Pearl Necklace
Grab the 960 Gil from the Treasure Sphere on the left of the dark area and then continue along the left (west) wall of the canyon to find another Treasure Sphere with x8 Mana Slivers, and then search along the east wall for an alcove in which you will find a Treasure Chest containing a Tablet of Paddra, and a Treasure Sphere with x8 Mana Bolts!
Ahead in the light at the narrowed opening to the next area is a Chocolina -- and if you check the Accessories you will note that she has some interesting ones that you may want... Check it out.
Around the next bend is a Treasure Sphere with a Gysahl Green -- nice one! Just out of the light here is your first opportunity to battle a Spiranthes and a Mandrake -- you may as well add their Crystals to your collection right? In the next narrow path there is a Treasure Box with a Key Item: Scar's Gate Seal in it -- so grab that.
-- A Significant Monster Adjustment --
Chances are pretty good that you have been using your Cait Sith as your MED pretty much all this time -- and that makes perfect sense as it was the best MED you had access to -- but now that we have reached this area that is no longer true... The Spiranthes you can capture here has certain strengths that the Cait Sith does not -- starting with the fact that it learns Raise quickly, and has the Item Hunter ability. Basically what you want to do is Infuse your Cait Sith into the Spiranthes IF your Cait Sith has learned Curasa -- then do the Infusion and switch to the new Monster as your healer -- or not, your call...
-- Grinding Opportunities --
If you want to grind a little in this area you can acquire the following loot items:
Mana Sliver (Material)
Molted Tail (Component)
Potent Droplet (Material)
Potent Sliver (Material)
Power Chip (Material)
Power Sliver (Material)
Remedy (Aid)
Shattered Bone (Component)
You can also acquire the Monster Crystals for:
Feral Behemoth (large cat) Organic / Commando
Gahongas (large dancing bird-thing) Organic / Synergist
Gandayaks (large dancing bird-thing) Organic / Commando
Mandrake (hovering flower) Organic / Commando
Spiranthes (a slug-like monster) Organic / Medic
Ahead at the next light is a Treasure Sphere with 540 Gil in it -- there is really only one path you can take from here as the path to the right is blocked, so continue around the rock here and use Mooglehunt to find a Treasure Sphere with a Pearl Necklace -- and if you look at Noel he has a chat bubble active -- talk to him for a CS and LT in which you discuss the motives of the fal'cie here -- I decided that the fal'cie was bored but Noel did not think much of that suggestion... Go figure!
With any luck you will battle your first few Gandayaks here and obtain their Crystal -- well done!
Aloedidai Battle and Fragment
-- Aloeidai Battle --
Ahead is another Chocolina and a marked Researcher who triggers a CS in which you are forced to battle Aloeidai, who in addition to having over 52K in HP also has a pretty high Chain Resistance... But I found that the best tactic that worked on him was a combination of RAV/COM/COM and RAV/COM/MED which easily resulted in a 5-Star battle.
After the battle you are nearly sucked into the time vortex but at the last second you get saved -- by Hope! What a reunion! Hope fills you in and though the story that he relates is a rather sad one, still a reunion is a reunion!
After Hope's assistant arrives you receive the Aloeidai Fragment and 3,500 CP, and then Hope asks you to come with him as there is something that he wants to show you...
Follow Hope up the stairs and chat with him and his assistant Alyssa, then chat with the Guard to open the blockade. Follow Hope again and when he stops have an LT event with him -- I chose to talk about Lightning since that would clearly be what Serah wanted to discuss with him... Talk to him again for the next LT -- I asked about Snow next -- then talk again and ask about Sazh and Dodge. Lastly discuss the ruins for the final LT event that triggers an extended CS in which you learn more about the city and ruins around you.
Now follow Hope to the top of the platform and talk to him again to get another CS in which you learn the fate of this civilization. Alyssa goes spastic to show you the Oracle Drive, and Hope tries to explain what it is to you -- and then Noel triggers the device and you see a projection of a very dire battle indeed. Hope now shows you the projection that has them concerned -- look familiar? It should!
Hope gives you the Hollow Artifact and then you get another reminiscence from Serah, then the Datalog and Fragments entries are updates -- so go ahead and read those to learn more about the Oracle Drive and the Farseers -- and about Hope, Sazh, and Alyssa!
Obtaining the Misery's Bead Fragment
-- Search the Area --
Before we go off looking for the Gate that Hope was talking about we need to do some basic searching here for the various items that the area will provide to us -- so head all the way back to where we entered it from and you will see a Researcher near the Chocolina -- talk to her twice and another MPC named Brenda will appear -- talk to her and she gives you the quest Fragments: Misery's Bead which is the one that requires you to obtain a Behemoth Fang -- which we already have! Excellent!
Accept the quest and then talk to her again to complete it -- she is very happy with you -- and hands over your reward: Misery's Bead Fragment and 300 CP! A quick read of the new Fragment Page tells us about Lenora's Garage. Cool that.
-- Pathos Jewel --
Up the western ramp is a deck and a well-lit platform with a ghostly chest on it -- use Mooglehunt to reveal the chest, and then toss your Moogle over to it to collect it, gaining yourself the Pathos Jewel and 200 CP for your efforts! Pathos Jewel is one of the Fate's Recollections Fragments, and offers more info on Lenora's Garage on its Fragment Page. Good on ya mates!
Nearby is a Treasure Sphere with a Carbuncle Figurine -- grab that and backtrack down below and grab the x3 Remedies from the Treasure Sphere on the lower deck if you did not get it on the way up -- then head back to the lower level. There are a lot of people you can talk to here -- and you should since some of them offer quests!
Talk to Shannon to flag the Fragments: Innocence's Sacred Sphere quest, which has you finding her lost watch for her -- nearby her is a shadowy Treasure Sphere that contains Serenity Sachet, an Accessory that increases Deshell resistance by 66% which is a good find mates! So use Mooglehunt to reveal it and then grab the Sachet.
In the northeast corner of the area up the stairs is a Mooglehunt Treasure Sphere with Gysahl Greens in it -- in the opposite corner of that area is a Treasure Sphere with a Warding Talisman in it -- and near the stairs going up in the adjacent corner is a bloke named Cole who needs you to find him a battery for the Fragment Quest: Amur's Sphere so flag that now and then head up the stairs to chat with Hope again for another LT.
You have done everything that you need to do here, now, so head back to the entrance to this area where the Chocolina is and look at the map -- see the dark area with the Gate in it ahead that we passed without exploring before? Head there now and use the Hollow Artifact to open it -- triggering a CS in which Noel gets a little personal stuff off of his chest... Then the Gate activates and Serah goes into reflection mode.
When the Gate finally opens it leads to Oerba in AF200 -- so head on there and get a CS in which we learn that space time is being twisted! Facing the Gate on its left side is a time-shifted object that, when you use Mooglehunt on, reveals a Fragment: Giant Egg whose Page is from a Research Director's Notebook.
Head to the bridge and use Mooglehunt to reveal the next checkpoint -- use it and you will find yourself in the next puzzle game -- basically all that you need to do is observe the Temporal Rift Crystal Bonds puzzle you are shown, and then re-create that puzzle.
Solving the first Rift Puzzle
To do this head to one of the top corners of the puzzle and then hold down 'A' and move to the next crystal as soon as it changes to match the one you are on at the start. The next crystal will change to match and so on, so just keep moving to draw the puzzle before the timer runs out! Easey Peasy!
Once you complete the recreation of the puzzle walk to the Gate to end the challenge and be transported back to the zone. Your reward for completing this puzzle is the Fragment: Time's Stardust and 300 CP -- the page for this Fragment is called Mog Confidential.
-- Grinding Opportunities --
If you want to grind a little in this area you can acquire the following loot items:
Cie'th Tear (Component)
Holy Water (Consumable)
Mana Chip (Material)
Mana Sliver (Material)
Painkiller (Consumable)
Potent Bolt (Material)
Potent Droplet (Material)
Potent Sliver (Material)
Potion (Consumable)
Power Sliver (Material)
You can also acquire the Monster Crystals for:
Chelicerata (large bug-type) Organic / Saboteur
Clione (small bug-type) Organic / Synergist
Frag Leech (a slug-like monster) Organic / Commando
Lucidon (an armidillo-like monster) Mechanical / Commando
Zwerg Scandroid (spinning droid) Mechanical / Ravager
-- Back on Task --
Ahead on the right is a Treasure Sphere with Gysahl Greens near a jump point to jump down -- but before you jump down take the left turn street and at the end find a Treasure Sphere with a Power Wristband in it by the tree at the end. Now jump down and explore the area below, and you will find a walkway that runs around the back of the building here.
In the back is a Chocolina -- hit her up if you need her services -- then head up the first set of stairs and to the back for a Treasure Sphere with a Map of Oerba -- nice one! Up the next flight of stairs is a Treasure Chest with a Vision's Gate Seal in it so be sure to grab that -- and then head downstairs to the ground level.
Head immediately north to the edge of the swirling flow and use Mooglehunt to reveal the next checkpoint -- and use it to go to the next puzzle!
Solving the second Rift Puzzle
-- Temporal Rift Puzzle --
This one comes in multiple stages and is identical to the first one that we did -- simply connect the crystals to recreate the pattern that you are shown at the start of each stage. The second stage is a little harder than the first one and resolving these wins you Fragment: Time's Shell along with 300 CP so well done!
The Fragment Page for this one is another Mog Confidential -- this one about the Moogle Clock...
From here head between the stairs and the building down the alley and around back where you will find a Treasure Sphere with a Magician's Mark in it -- and then backtrack and head up the ramp, where you will see directly ahead of you a Treasure Sphere with 550 Gil. Grab that and continue forward to the stairs and head down to use Mooglehunt to reveal the next puzzle checkpoint!
Solving the third Rift Puzzle
-- Temporal Rift Puzzle --
Just as before only this time there are three stages that grow progressively more complicated -- simply do as you have been doing and you should have no trouble -- if you do, watch the video. Completing this puzzle earns you Fragment: Time's Coral and 300 CP.
Before you head along this new path, turn around and go up the stairs we just came down and turn left at the top, run to the other side of the front of this building here and look south to the roof top of its wing -- see that Treasure Sphere? Throw your Moogle at it and he will grab you a very welcome Wild Artifact -- good one!
Now head back down the stairs and follow this new path but stay to the right, go down the stairs and grab the x3 Cie'th Tears from the Treasure Sphere -- then backtrack and head around and then down the stairs to the beach, pausing to grab the Librascope form the Treasure Sphere here. With that in hand follow the beach along and up the stairs into the building to grab 600 Gil from the Treasure Sphere here.
The Caius Ballad Boss Battle
-- Caius Ballad Battle --
On the roof double back and you will find an Oracle Drive, and activating it triggers an interesting CS. After the CS ends and Caius Ballad appears with his partner Yeul -- you might be worried that this is going to be an epic boss battle but not really, he is not as strong here as he was in the first part of the game... In fact the combination of RAV/COM/COM for damage and RAV/COM/MED for healing will easily see you five-star this battle.
After you win -- and you will -- grab the Artifact of Origins and then watch the CS, do the LT event, and the CS finishes, leaving you standing on the roof... Drop down the broken skylight and get the x10 Power Bolts from the Treasure Sphere, then head to the exit and drop down. Now that you have completed the boss-side of the zone there is a Chocobo rental here if you want it to avoid having to do battle...
Follow the path back to the stairs and up then head over to the Gate here and trigger a CS in which you get an LT with Noel that sort of continues the personal line of chat -- then the Gate opens and your party goes through as Serah does a summary for Lightning. Depending upon how you answered the LT's you will get a Live Trigger Reward here -- I got the Whimsical Headdress -- and then you are put back to the Historica Crux and get a Primer Page on changing the past.
This explains that when you unlock a parallel world you will find it as a destination in the Historia Crux, but it will have an X replacing the last number to indicate that it is an alternate reality...
This nicely wraps up this part of the adventure!
At this point you might be thinking that it is time to go back to Oerba to finish up those quests that we appeared to simply walk away from when we hit the gate -- but that would be a mistake because we really did not walk away from anything, as the Behemoth Fang quest was really the only one that we could actually do in that zone! In fact we actually need to travel to Yaschas Massic AF01X in order to make some progress -- which if you count them is two zones away from the one we got the quests in...
So now that you have hit the Gate and are in the Historica Crux, select the AF01X Gate and continue to this new alternate world of newness where some things are possible, and you find yourself in a version of the world where the eclipse is no longer present. After the conversation plays out turn and jump up the small cliffs here and, on the second one, open the Treasure Chest and grab yourself an Encounter's Gate Seal -- then note the chat bubble on your partner and jump up to the next cliff to talk to them for an LT event.
Fragment: Orb of Clotho Mission
With more of the story now starting to unfold in these conversations it really is a good idea if you read the Fragment Pages and keep reading them if you already have been, since it adds depth to the story...
At the top of the cliffs you can go straight towards the town, or left towards the area with the Gate we used to arrive in the other timeline... For the moment turn left instead of heading directly to the town -- because you will be able to obtain x10 Power Chips with a Moogle Throw to the roof of one of the outpost buildings at the very end of the path then head back to the split and towards town. In the area below the stairs you jump down to get to the gate in the cul-de-sac below you will find a Treasure Chest with an Ivory Crystal -- the first of three Crystals we need -- in it so be sure to grab that!
On the way back when you reach the junction of the three paths (one is still blocked to you) look behind the rock here for the hidden Treasure Chest that you reveal using Mooglehunt. Inside is the Onyx Crystal -- which is second of three Crystals that we need.
Now head back to the clearing area with the Gate and look for a hole in the ground (a fissure) and you will see a Treasure Chest in there! Throw Moogle at it to collect the third and final Crystal that we need, the Emerald Crystal. These three Crystals are for a Fragment mission that we will be flagging later, so getting them now is a really good idea as it will save a lot of time and effort.
Note that you can encounter a Behemoth-type mob on steroids called a Narasimha here that is pretty tough if you have not been doing grinding sessions and leveled your characters -- if you are at or near cap on your main job this guy is a piece of cake, but if you are low-level you are better off running away from battles with him.
When you reach the area just before the town you trigger a CS in which you are greeted by Yeul who tells you about what she does -- and you learn that Serah has the same power as Yeul! After that CS ends when you take a few more steps you get another CS in which Serah does her little retrospective, and then you are free to explore this alternate city before we speak to Hope -- so let's do that!
Fragment: Mirror of Atropos Mission
-- Exploring the City --
If you need to hit the Chocolina now is a good time to do that, and then as you head up the stairs to the upper plaza turn a hard right and find a Treasure Chest behind some crates and a girder in the corner. You cannot actually reach this yourself, you need to toss your Moogle to get it -- and you score the Old Batteries you need for one of the quests! Well done!
Now head up to the top and chat with the Hope from this world, and you learn that the eclipse never happened in this world... And now you get to see the full recording -- and it is good news as far as Hope and Serah are concerned since it proves that Lighting is alive.
After he shows you that Hope then launches into a learned description of the facts that he has deduced, and then we get another CS within a CS in which we see the fall of Cocoon (or a variation of the event) and that adds a bit of confusion to the story... An agreement and a plan is reached, and the CS ends with Lightning asking you a question.
Turn around and talk to Noel next -- he has a chat bubble -- and when he is done talk to Hope again for a continuation of the conversation and an LT event -- after the conversation with Hope, talk to Noel again (this is basically chat tennis). Now walk a little distance away to trigger the end of the Live event with a CS of Serah declaring her wants. Moogle tells you to find the Gate and Key.
On the left side of the building that Noel is standing is will appear a Treasure Chest that contains the LT reward -- depending on the choices that you made it will either be a Potion, a Red Silk Hat, or an Academic's Hat.
Now you will notice that the area that was blocked off past here is now unblocked -- talk to the guard there to learn why the area is now open to you -- and then enter the new area and use Mooglehunt to score 600 Gil from the hidden Treasure Sphere and then use it again to reveal the Mysterious Artifact that is at the far end of the platform.
Down in the plaza below head to the far corner for some new chat opportunities, one of which is a bloke named Marlow who tells you about a tablet that they found -- and lost -- and asks you to take on the Fragment: Orb of Clotho mission. Since we already have the Tablet go ahead and chat with him again to complete this mission now! That gains us 300 CP and the Fragment: Orb of Clotho.
Nearby is Lester -- talk to him and he will tell you about some strange lights and then ask you to take on the mission Fragment: Mirror of Atropos. Go ahead and do that, and then talk to him again since we already have the three Crystals he is seeking -- and he rewards you with his story, 300 CP, and the Mirror of Atropos Fragment. Check the Fragment Page to learn about The Book of Haerii.
-- Grinding Opportunities --
If you want to grind a little in this area you can acquire the following loot items:
Mana Sliver (Material)
Molted Tail (Component)
Potent Droplet (Material)
Power Sliver (Material)
Remedy (Consumable)
Shattered Bone (Component)
You can also acquire the Monster Crystals for:
Necrosis (floating flower-like) Organic / Saboteur
The Gorgyra Boss Battle
-- Gorgyra Battle --
Talk to Duncan by the stairs and he will tell you about a Seer and ask you to take the mission Fragment: Gorgyra Fragment -- this one is a bit more complicated because while the Cie'th we need to find her and this is not a random encounter... Her location is near the Chocobo in the plain above the clearing where the Gate is located -- and you need to know going in that even if you have your jobs capped this is still going to be one challenging battle to survive let alone win...
The problem is that she dishes out major damage, and has a deep HP pool -- so five-starring this battle is not really likely unless you are very good and your jobs are capped up. One tactic that works is to use RAV/COM/MED to Stagger her and of course to heal and debuff, and either RAV/COM/COM or RAV/COM/RAV to damage her once you have her staggered. The thing is once she is staggered you do not want to be shifting Paradigms so remember to use Potions to heal and whatever other items you think will help instead.
When the battle is over and you have won you will receive 500 CP and the Gorgyra Fragment -- whose Page is about the Best of the Bestiary.
Bear in mind that this is not one of the missions where we have to return to the giver in order to complete it -- we just completed it by killing the Cie'th who was the target of it -- and that is a good thing because this is actually the end of the zone we want to be in!
-- The Gate we are Seeking --
The Gate that we are seeking is the one down the canyon at the outpost that you have to jump down the stairs to reach (the one we got the Ivory Crystal from under the stairs). So head there and approach the Gate and activate it.
Using this Gate changes the Mysterious Artifact into the Illusionary Artifact, which is the correct Key to open this Gate! We get the usual Gate-opening CS with a brief chat and a reminiscence by Serah, and then we see Caius arrive and Yeul die again... Enter the Historia Crux with the new Gate destination now open.
-- Locked Location AF???
Go ahead and choose the unknown destination we have unlocked (it does not actually ID itself) first. To the left of the gate after the CS is a Treasure Sphere with a Casino Ticket inside -- grab that and then return to the Historia Crux and select The Void Beyond.
Wrapping up the Side Stuff
-- The Void Beyond AF??? --
There is not really a lot that we need to do here at the moment -- but there are some things we can do like grab the Map of The Void Beyond from the nearby Treasure Sphere and then do a long throw over the rail to get x6 Potent Chips from the far away Treasure Sphere. Use Mooglehunt at the rail on the opposite side to reveal a Treasure Sphere with 800 Gil in it -- which you also need to throw your Moogle to get.
Head back through the Distortion Gate to learn about Time Reversal and return to the Historia Crux now...
-- Yaschas Massif AF010
Now head back to Yaschas Massif and turn in the Old Battery to complete the quest and obtain 300 CP and Amur's Sphere. Well done mates!
At this point considering the various grinding points that have been encountered you should have capped your main job and made a good dent on another -- so it is time to return and finish off this level mates. When you arrive it will be at the location that we departed from -- jump up on the nearby tree-bridge and work your way across where you will find a Treasure Sphere to throw Moogle at with an Ember Ring in it.
When you turn to go you have an unavoidable battle with some Miniflan, the winning of which gains us the Combat Artifact and instructions to head for the Gate -- but we are not quite ready to do that just now, as there are some other items in the zone we want to get.
Cross back over the tree-bridge and go to the north side of this area and use Mooglehunt to reveal the hidden vine -- then cross the gap using that vine. On the other side grab the Frost Ring from the Treasure Sphere and then use Mooglehunt to reveal the Treasure Sphere with the Unicorn Horn in it.
Take the vine to the right of the first Sphere and as soon as you land use Mooglehunt to reveal the hidden vine on this side that will allow you to make the reverse trip. Now backtrack all the way south to the Gate and use the Combat Artifact we just obtained to activate it and head to the Historia Crux and then to the Colosseum (which is where the Gate actually leads).
Obtaining the White Hole Gem Fragment
-- Colosseum AF??? --
This is NOT the other Colosseum that we do the challenges at it is a different one... And you cannot do anything until you walk forward and confront the Arbiter of Time so go ahead and do that now.
Noel makes a deal with the Arbiter to obtain the Artifact -- which turns out to be the White Hole Gem Fragment and 300 CP. On your way out reveal the hidden Treasure Sphere by the Gate to get a Map of the Colosseum and then use the Gate to return to Sunleth Waterscape.
-- Sunleth Waterscape AF300 --
We arrive just where we departed from -- so head north from here to the Chocolina and when you get to her, partake of her goods if you need to and then get back on that giant turtle and continue north. If there are any Treasure Spheres along the way you did not get when we first game south here get them now, right? Just be sure you get all the Treasure Spheres here, and if you do not, take the trip a few times to get them.
Head east of the Chocolina here and you will spot some hidden Flan -- Mooglehunt them to cause them to jump down, then jump down yourself and follow the tree to the Treasure Sphere to get the 960 Gil from it. This is a dead-end but the path above that heads east is not, so jump back to the ground and use the east path by revealing the second group of hidden Flan and jumping down the path that they open for you.
Hit the Treasure Sphere for x9 Vitality Droplets and continue along the path to the Vine and look down below to spot the Extraordinary Egg -- toss your Moogle down there to collect it and then swing across, and jump up for a Flan battle and a CS if you grabbing the Crystal here -- which leads to an LT event, and the LT reward Treasure Chest spawning. I got the Blue Flower for my responses but if you have poor responses you can get just a Potion...
Obtaining the Extraordinary Egg
Instead of immediately swinging back jump down below at the Vine and run along this section to clear it from the map. You can also capture an Unsaganashi (Organic / Saboteur) here, and since this did not appear elsewhere in this zone it may be specific to this bottom area so you may as well get one now, right?
Now that we have everything that we need, backtrack to the Vine and swing over, then head all the way to the west past the Chocolina and the Gate that leads to the Historica Crux, and clear the small dark area to the west that has a Gate we cannot open on it just now (just to clear it from the map). Heading North from here run past the Royal Ripeness (you may be tempted to battle it but even if you have several of your jobs on both Serah and Noel capped this is still a battle you will likely lose, so just run past for now).
When you reach the gate above use it (it uses the Thundering Artifact) it will open the way to the Archylte Steppe AF??? for you.
If you played Final Fantasy XIII this will be familiar ground for you though it looks a bit different here. After the CS ends and you have control again head towards the marker in the village ahead, grabbing the x2 Remedies, x3 Potions, and x8 Mana Droplets from the Treasure Spheres here. When you reach the marker you talk to Tipur who gives you a map of the region and asks for your help. Talk to him again to flag the mission Fragment: Goblin Fragment. To prove your abilities as a Hunter you need to get rid of the Monsters for them!
You do not need to search -- there is a marker laid down you can head right over to -- but as you approach you will notice a red statue-like Cactaur -- go ahead and examine that now to be teleported back to the camp and obtain the Crimson Crystal Fragment for your effort! Read the Fragment Page which is about the Tablet of Memory, then grab the 600 Gil from the Treasure Sphere ahead of you and the Grimoire Hat from the Treasure Sphere by the edge of the platform. Now would be a good time to equip the Grimoire Hat on Serah as her second item now that she can have one since in addition to Kill: Libra it also increases the effectiveness of Potions.
Now backtrack to the marker for the Goblin battle -- in which you take on both Goblins and a Chocobo and, with any luck, score the Monster Crystals for both as part of your reward! You also obtain 300 CP and the Goblin Crystal Fragment, and are prompted to return to the village to report your success, so why not do that? Use the statue to teleport back and head up the stairs to talk to Tipur again.
He thanks you and asks for another favor -- he needs you to help them get wool... Wool... Really? Head down the stairs and talk to Myta who needs you to collect will from the sheep that are wandering the plains. This is the Fragment: Wooly Stone mission so go ahead and accept it! She tells you to target the larger sheep and harvest their wool.
The Goblin Battle
Head out onto the plains and you will see that the larger sheep have chat bubbles and, when you select them you gather their wool, which comes in three types: Rough Wool, Thick Wool, and Fluffy Wool. Once you have all three you can return to turn in the mission and collect 300 CP and the Wooly Stone Fragment -- good on ya mates!
Talk to Myta again to learn about the storm and the weather control device which you should use to bring on a heat wave -- well, after you do a little exploring that is since we want to make the most of the current weather as we can for picking up more Monster Crystals, right?
-- Exploring the Zone --
If you look at your map there should be a small dark area to the southeast -- head over to that to remove it from the map, and then follow the wall south to clear the area along it and the double back to remove that great swath to match the top area. When you reach the area to the south you will see a large cactus and your Moogle will go a little nuts -- follow her and use Mooglehunt to reveal another Cactaur Statue! Using this will teleport you back to the village as well as reward you with 300 CP and the Azure Crystal Fragment. The Fragment Page for this one is called Tablet of Memory as well, and is worth the read.
Backtrack to the statue and resume exploring to find the hidden Treasure Sphere in the southeast corner with x9 Vitality Slivers in it. In the small alcove to the south is a hidden Treasure Sphere with a Phoenix Down in it that you can grab, and right next to it is a Treasure Sphere with x8 Mana Bolts in it.
In the trench to the north is a hidden Treasure Sphere with a Single Horn Adornment in it, and at the east end of the trench if you pop-out and head around and over the bridge that spans the trench you will see a whirlwind nearby that if you Mooglehunt it you will reveal another teleport statue that you can now use to teleport to the western center of the map (this was a yellow and not red statue, the red ones go back to the village). Using the statue rewards you with 300 CP and the Forest Crystal Fragment for your troubles.
Now head back to the east to resume your exploration, grabbing x6 Vitality Chips from the Treasure Sphere on the way back. In the trench to the north of the main area is a Treasure Sphere with x2 Fractured Horns in it that you should be sure to grab, and then with the main area clear head back to the yellow teleport statue in order to get back over the berm to the west side of the map.
-- The West Side of the Map (Clearwater Marshes) --
Nearby our arrival point is a Treasure Sphere with 700 Gil in it. On the north cliff is a Treasure Sphere you can toss Moogle at to get a Guardian's Edge -- a weapon for Noel that is better than what we have, so you may want to equip it.
To the northwest is a hidden Treasure Sphere with a Unicorn Horn in it, and to the southwest in the water is another teleport statue that, when used, rewards you with 300 CP and the Amber Crystal Fragment. No reason not to go ahead and collect that now, then backtrack to the yellow statue and return to the west to complete our exploration.
-- Changing the Weather --
Now that we have revealed the whole area of the west use the statue to return to the village and then head towards the marker on the map and talk to Hunter to learn the details of the weather machine -- she offers you a tutorial on how the machine works. Pay attention but to make this easier for you here are the combinations:
Lever Settings / Weather
- - - - - - - - - - - - - - - - - - -
Up-Up / Cloudy
Up-Down / Rainy
Down-Down / Sunny
Down-Up / Stormy
- - - - - - - - - - - - - - - - - - -
Our task is to make a heatwave, so that means down and down -- and if you are happy that you have obtained all of the Monster Crystals that you can for the current weather, which is Cloudy, then by all means pull the levers!
Head to talk to Tipur, and he will tell you about the massive power of the beast. You get an LT event and then decide to go check it out, realizing that it is a Paradox. Bear in mind that this is a boss mob, it has a massive HP pool (over 100K) and a high Chain Resist. It is immune to Launch and it has a pretty hefty magic ability...
The Faeryl Battle
-- The Faeryl Battle --
Head for the marker on the map and prepare for battle! Or not... There is a Long-Gui here blocking your path and while you may be a pretty good fighter, you are not really ready to take this thing on mates... We need an alternative. Head back to the village and talk to Tipur, who has some advice and an LT event for you. Of course! Change the weather! Head to the machine and pull the right lever so that it is in the Up position, turning the weather Stormy and driving away the Long-Gui. Now we can have our battle!
If you are good with picking your moves then selecting electric attacks will rule the day, but if you are not, or you prefer to use the auto-attack system, you will be best served by immediately using a Librascope on the Faeryl to ID its weaknesses and then aggressively use Agression-X (RAV/COM/COM) switching to Diversity (RAV/COM/MED) only if you absolutely must do so. The reason for this is that as soon as you Stagger it, it will take massive damage from your electric attacks, and you will find that if you Stagger it quickly you will also kill it quickly.
Victory gives you 3500 CP and the Black Hole Gem Fragment, and reveals a Treasure Chest nearby that contains the LT Reward for this part -- I found a Dragon Hide Backpack, but you can also get a Mog Clock from it...
Reading the Fragment Page for the Black Hole Fragment reveals what must have happened here...
With the battle done it will be suggested that you return to hook up with Snow -- we actually do not want to do that just yet as there are some minor tasks to accomplish here first. We want to collect some more Monster Crystals, and we need to locate the fifth and last teleport statue to collect the Fragment that it will reward us with.
-- Wrapping things Up Here --
Head to the nearby teleport statue and teleport back to the village, then change the settings on the weather machine to Stormy (Down-Up). With that done, head to the Yellow teleport statue and use it to return to the west side of the map (Clearwater) and you will find the now revealed teleport statue
Warning: In addition to the statue that you are looking for you will also find one just to the southeast of first one we found here that you will need to use Mooglehunt to reveal. This is a Green Statue, not a Red one, and it does NOT teleport you, it actually summons a Gigantuar -- so don't use it unless you actually want to summon and battle that, right?
The final Red teleport statue is in the southwestern corner of the area, just above the little hook that pops up and to the left at the bottom -- using it rewards you with 300 CP and the Violet Crystal Fragment, whose Page is another Tablet of Memory one. If you look over the western edge not too far away from the last statue you will notice a ledge below with a Treasure Sphere -- toss your Moogle down there to get the Wild Artifact that it holds.
Now that you have that out of the way it would be a good time to save, and to check the Grinding section below to see what Monsters you have and which you still need, then set the weather accordingly!
-- Grinding Opportunities --
This is actually a very unique area in which you will want to spend some time grinding as there are a number of unique loot items as well as a bunch of different Monsters that you can get here -- the latter being partly dictated by the weather that you have set into the machine.
Grinding here you can acquire the following Loot Items:
Cie'th Tear (Component)
Chocobo Plume (Component)
Entite Ring (Accessory)
Fractal Pot (Component)
Healer's Emerald (Accessory)
Holy Water (Consumable)
Impeder's Opal (Accessory)
Mana Chip (Material)
Mana Essence (Material)
Molted Tail (Component)
Painkiller (Consumable)
Phoenix Down (Consumable)
Potent Crystal (Material)
Potent Droplet (Material)
Potent Essence (Material)
Potent Generator (Material)
Potent Orb (Material)
Power Bolt (Material)
Power Essence (Material)
Power Orb (Material)
Power Sliver (Material)
Remedy (Consumable)
Ribbon (Accessory)
Sinister Fang (Component)
Sunpetal (Component)
Thrust Bearing (Component)
Vitality Chip (Material)
Vitality Essence (Material)
Vitality Generator (Material)
Vitality Orb (Material)
You can also acquire the Monster Crystals for the following (Note the locations and Weather):
Changing the Weather Changes the Monsters
-- Clearwater Marsh --
Blue Chocobo (bird-type) Organic / Ravager (Sunny)
Caterchipillar (slug-type) Organic / Medic (Rainy)
Gancanagh (goblin-type) Mechanical / Saboteur (Sunny)
Gancanagh Ace (goblin-type) Mechanical / Synergist (Cloudy, Sunny)
Hedge Frog (frog-type) Organic / Saboteur (Sunny, Rainy)
Major Moblin (goblin-type) Mechanical / Sentinel (Sunny)
Mewmao (cat-type) Organic / Synergist (Rainy)
Microchu (plant-type) Organic / Synergist (Stormy)
Moblin (goblin-type) Mechanical / Commando (Cloudy)
Mud Frog (frog-type) Organic / Ravager (Rainy)
Navidon (armadillo type) Organic / Sentinel (Rainy)
Swampmonk (sahagin) Organic / Ravager (Rainy)
-- Grave Ridge --
Barbed Specter (floating-thingy) Organic / Saboteur (Cloudy)
Buccaboo (goblin-type) Mechanical / Ravager (Sunny)
Buccaboo Ace (goblin-type) Mechanical / Ravager (Sunny)
Debris (bomb-type) Mechanical / Ravager (Cloudy)
Pulsework Gladiator (robot-type) Mechanical / Sentinel (Cloudy)
Red Chocobo (bird-type) Organic / Commando (Cloudy, Sunny)
Samovira (demon-bird) Organic / Saboteur (Cloudy)
Scutari (robot-type) Mechanical / Commando (Sunny)
Testudo (robot-type) Mechanical / Synergist (Cloudy)
Vodianoi (demon-bird) Organic / Commando (Cloudy)
-- Plains of Eternity --
Cactuar (cactaur type) Organic / Commando (Sunny)
Cactuaroni (cactaur type) Organic / Commando (Cloudy, Rainy, Stormy)
Chelicerata (bug-type) Organic / Saboteur
Chocobo (bird-type) Organic / Commando (Cloudy, Rainy, Stormy)
Clione (bug-type) Organic / Synergist
Flanbanero (tomato-type) Organic / Ravager (Sunny)
Flangonzola (tomato-type) Organic / Commando (Sunny)
Flowering Cactuar (cactaur type) Organic / Medic (Sunny)
Goblin (goblin-type) Mechanical / Commando (Sunny)
Goblin Chieftain (goblin-type) Mechanical / Sentinel (Sunny)
Miniflan (tomato-type) Organic / Commando (Sunny)
Reaver (behemoth-type) Organic / Commando (Sunny)
Silver Lobo (cat-type) Organic / Saboteur (Sunny)
Triffid (flower) Organic / Synergist (Sunny)
Voulvre (Wyvern-type) Organic / Commando (Sunny)
-- Stonestump Wastelands --
Barbed Specter (floating-thingy) Organic / Saboteur (Cloudy)
Buccaboo (goblin-type) Mechanical / Ravager (Sunny)
Buccaboo Ace (goblin-type) Mechanical / Ravager (Sunny)
Cloudburst (bomb-type) Mechanical / Ravager (Cloudy)
Major Moblin (goblin-type) Mechanical / Sentinel (Sunny)
Metal Gigantuar (cactaur-type) Organic / Sentinel (Sunny)
Microchu (plant-type) Organic / Synergist (Rainy)
Moblin (goblin-type) Mechanical / Commando (Sunny)
Pulsework Gladiator (robot-type) Mechanical / Sentinel (Cloudy)
Red Chocobo (bird-type) Organic / Commando (Cloudy, Sunny)
Scutari (robot-type) Mechanical / Commando (Sunny)
Testudo (robot-type) Mechanical / Synergist (Cloudy)
-- Back on Task --
Speaking frankly and considering how much time and effort it requires -- especially for the really tough monsters (the ones you encounter in Stormy weather) -- you really should just use your best judgment for how long you grind for Monster Crystals and which you go for. When you feel you have what you want -- and remember to apply all that wonderful CP to your levels -- head for the Historica Crux.
When we arrive back in the Waterscape Snow is missing -- and we are prompted to go and defeat the Giant Flan -- so we may as well head in that direction now... The area that was previously blocked off is now open so we can ran around and -- but what is this?! The giant red Tomato is gone! In its place is an... Um... Less giant green tomato called Mutantomato -- who we have to beat. When we CS into the battle we see that Snow has gotten himself hurt trying to fight the thing.
The strategy for this fight is actually pretty straight forward: use Solidarity to deal damage and heal as needed, and Delta Attack to deal damage to it. The logic behind this is that Delta Attack (RAV/SEN/COM) gives basic protection and damage dealing while Solidarity (COM/SEN/MED) gives protection healing damage.
The Mutantomato Battle
Your reward for this battle is 3500 CP and the Mutantomato Fragment -- and the chance to hear Snow explain why he tried to take the thing on by himself. Then things go pear-shaped as Serah discovers that Snow has a l'Cie Brand on his back and what is worse, is being removed from the timeline by their resolving the paradox. Sad times, sad times indeed. Serah declares that she must save Snow from himself -- and vows that she will not stop until she finds him, and Noel enlists -- then we get another Lightning voice-over.
Now head south to the marker and throw your Moogle to collect the Mysterious Artifact -- after which you are prompted to head for the Gate, which is an excellent idea so you do! At the Gate you trasform the Mysterious Artifact into a Restoration Artifact and open the Gate, arriving in the Historica Crux with access now open to The Void Beyond AF??? which is in the middle of a locked area and the Colosseum.
You have probably been hearing about the Casino for a while if you don't just play the game but actually read about it online -- and if you were wondering about it, well, here it is! Before we get too far into the actual zone I wanted to comment about the Casino and the games available here -- the Slot Machine and Chocobo Races specifically (there will be additional games made available through DLC in the future too) -- because they have been a subject of heated commentary on fan sites and chat boards all over the world in which they are variously despised and declared a massive time-sink and even the representation of grief code in the game.
There have been some very heated attacks against these mini-games, with some gamers going so far as to suggest that by connecting them to an Achievement / Trophy as well as to Fragments the developers basically insult the gamers by subjecting them to a pair of games that are basically random in their play and that are too luck-oriented to be fair... Honestly I do not believe that this is a fair representation of these mini-games, mostly because except for the Achievement / Trophy that is connected to their play and a handful of special items that can only be obtained through them, they are strictly a voluntary element of the game...
Let's be honest here -- while the Fragments do certainly play into the story and so are a required element the facts are that they can easily be obtained through regular play. The Achievement is a different story, because unlocking that with any sort of speed requires the player to be very careful in how they play the games, particularly the Slot Machine, even to the point that their play is somewhat unnatural -- but remember that Achievements are completely separate from the game and story here. They are not required for you to actually complete the game is all that I am saying. But I am aware that most gamers consider them a part of game play, and that they WANT to unlock them -- so part of this section of the guide includes specific instructions on how you can do that without all of the problems that other gamers bemoan online.
There is perhaps a little accuracy in calling both of these games a time-sink if only because a lot of time can be wasted in playing them if you just play them willy-nilly without taking the precautions that must be taken with the Slots, or the effort in leveling and infusing your Chocobo. These are two issues that you should bear in mind as you approach this part of the game.
-- Back to the Casino --
As you enter the zone you will recall that we were here once before -- but the door was barred to us. Since we already have the ticket from the Treasure Sphere in the corner we can go ahead and pass through the now open doors, where we find that Serah was correct: it is a Casino -- no, THE Casino!
Standing in the entrance is an NPC woman who will tell you -- in what sounds like an enthusiastic Indian accent -- where you are and why it is here, followed by a "Hitting the Casino" Datalog Page (you can find this under Datalog > Primers: Casino > Hitting the Casino later if you want to re-read it) that explains the purpose of the place for you, and then you receive the Key Item: Map of Serendipity and another Casino Ticket from her.
As you enter the Casino after chatting her up, your Moogle heads off to play on her own, and you can now head inside and, as suggested, trade in some of your Gil for Casino Coins.
An Enthusiastic Casino Introduction
There are people that you can talk to here -- guides and other types -- and you should be sure to grab the Fall Gate Seal from the Treasure Chest on the left side of the spinning wheel, and then chat up the Guide there to learn about the Slot Machines and Chocobo Races... And about those -- you will likely find that the Slot Machines are more useful to you if you are working towards unlocking the Achievement for winning 10,000 Coins, but please do bear in mind that this Achievement is for WINNING 10,000 Coins -- the ones you buy do NOT count for that total, and if you start buying and losing coins you can easily push that Achievement into a much more difficult to unlock challenge, so before you do that continue reading this section...
To the right of the spinning wheel is a Treasure Sphere containing a Lighting Mask (IF you have an FFXIII save on your console that is), and entering the door to the structure on the right (The Hall of Gaming) will take you to the gaming area, where you can learn about the games available there from the Greeter just inside. If you don't know how they work it would be an idea to read up on that.
In the back of the gaming building is a Chocolina who will sell you Coins and with whom you can exchange any Casino Tickets you have, and also Purchase Prizes. Speaking of Prizes, there is actually a reason why we want to play here besides the fun, and the Achievement -- some of the prizes you can get here are really useful and this is also the only place they can be obtained. After you win some serious Coin you should check them out!
The Prizes you can obtain here include a bunch of Adornments but the ones you will want to seriously work for are the following:
-- Chaos Crystal (10,000 Coins)
-- Wild Artifact (10,000 Coins)
-- Elixir (30,000 Coins)
-- Summoner's Mask (5,000 Coins)
As I said, in addition to the above there are a variety of Adornments and a selection of Chocobo Racing items here as well -- you can easily spend loads of Gil/Coins on this stuff -- but as you can return here and play any time you want there really is no rush on that -- and if you are a gamer who places a high value upon unlocking the Achievements in the games you play, then you will want to go ahead and work on the Achievement: "Serendipitous" (12 G) Amassed a fortune in casino coins. Unlocking this Achievement can be a daunting challenge if you are not careful, but we cover using the Slot Machines to do it below -- and since the Slot Machines do not require the massive amount of effort that the Chocobo Races will and also have a Fragment inside them (the Lucky Coin) that you need to get as well, it is the obvious choice for this...
-- The Slot Machine --
Talk to the hostesses -- the one standing by the first slot machine (towards the entrance that looks like a large exercise bike) who will tell you whether the condition of the machines and whether they are hot or cold -- obviously hot is better than cold. The condition will be one of the following:
-- Not a Happy Camper
-- In the dumps
-- It's not doing well, but it's not doing poorly either...
-- Nothing special...
-- That machine's on fire!
-- It's like a hot summer's day.
Playing the Slots here can be a very time-consuming effort by design -- after more than 20 hours of experimentation with the Slot Machines alone I have concluded that how you play them really does not matter in the end, save for when they are in one of the special modes, because the result for each play in the normal mode is determined as soon as the lever is pulled, and is based solely upon the role of the random number generator in the game code. That being the case you can either play by hand, or you can use the auto-play button while in normal mode -- but once you actually draw three-9's and enter the special mode, you are best served by playing by hand.
Some gamers suggest that it is easier to just use a rubber band to hold down the auto-play (LB) and let the game run on its own -- but if you are contemplating doing that you should be aware that when you use the rubber band and auto-play method this reduces the chances of winning roles for the non-special-mode wins by as much as 33% depending upon the feelings of the machine. Not only that but it will, unless you are very lucky, result in losing a lot of coins, which in turn ends up requiring you to have to win more in order to recover what you lost before you can put yourself in a positive balance when working towards the Achievement.
Considering that the Achievement is really the only thing that you actually MUST win coins for (you can buy coins with Gil to purchase the items in the store) the process of unlocking that Achievement is better served by a more focused approach, and that starts by understanding how the Slots work, which is really a lot simpler than it may appear.
There are three modes of play: Normal (x5 Coins), Victory (x10 Coins) and Super Victory (x100 Coins) -- each mode being attained by rolling a jackpot followed by three-9's -- and the higher the mode, the higher the pay-out, but with each of the higher modes there are certain symbol combinations that, if you get them, it will reset you to the lowest mode. With respect to the conditions, you should only play the Slots if the Hostess says that they are on Fire, or Like a Hot Summer Day, which are the two highest streak levels. Anything other than that and it is not worth playing.
Please understand that even with the highest streak setting this is not intended to be -- nor will it be -- a rapid progress. While it is true that you cannot win if you don't play, you will only win slowly here and, while that will not prevent you from achieving the first goal associated with the Slot Machine, obtaining the Lucky Coin Fragment, it may very well prevent you from achieving the second, which is an actual Achievement.
-- Slot Strategies --
Your first objective is to roll long enough to accumulate 7,777 coins in winning (you do not have to have all 7,777 at once, it adds up all that you have won) by getting the three-9's and thus receive the Lucky Coin Fragment that is inside the Slot -- you will know when this happens when you hear the remark about the special coin.
With that done you have to decide whether or not you want to try to continue for the second objective, which is to get the 10,000 coins required to unlock the Achievement. I chose to, and while it was a rather boring process once it unlocks you are all the happier with the knowledge that you never ever have to do this again! Interestingly I unlocked the Achievement BEFORE obtaining the Fragment, but your mileage may vary on that score.
You now know what is required but in addition to this basic requirement there is a catch to this that you need to be aware of: unlocking the Achievement requires that you win a profit of 10,000 coins -- which means that you must have in your possession 10,000 more coins that you have spent or lost -- and that is why this is perhaps the most elusive and difficult Achievement in the game for most players...
Working the Slots for an Achievement and a Fragment
To understand this consider the following situation -- you spend 100,000 Gil to purchase 10,000 coins from the Casino Chocolina. That puts your current total at -10,000 coins -- and then you play the Slots with each roll deducting from your total. To unlock the Achievement all that you need to do is obtain a total of 20,001 coins and then quit the Slot Machine, and the Achievement will unlock. But if you play and lose all or most of the first 10,000 and then visit the Chocolina and buy an additional 10,000, the total that you now need to obtain is 30,001 and not the original 20,001 because you must now account for the 10,000 coins you have already lost. For that reason you do not want to save if you have lost a significant amount of coins!
It is possible to hit a roll in the top mode that will pay-off 50,000 coins, but the odds of actually hitting that role are estimated to be 320,000-to-1, re-calculated for EACH ROLL. That means that the odds apply to every roll -- each subsequent roll does not increase the chances of hitting that combination.
If you only care about completing the game and story and the Achievements do not matter to you, then you do not need to complete the second goal at all -- you can simply play until you obtain the Lucky Coin Fragment and then use Gil to buy the coins needed to purchase the items that you want from the Casino Chocolina. Alternatively if you are willing to put out a massive amount of time and effort you can obtain a Silver or Gold Chocobo and then level them up by farming the required components and infusing the right Monsters, and then unlock the Achievement by racing it (there is an item you need to obtain through racing that we will cover shortly in the racing section) -- but that actually takes a lot more effort and time than the Slots will if you follow the strategy outlined below:
-- Basic Slot Strategy --
To unlock the Achievement "Serendipitous" (12 G) Amassed a fortune in casino coins -- you should approach this in a very structured way. Purchase your first (and ONLY) 10,000 coins for your efforts in gaining the Fragment and Achievement, and then go to the Slot Machine and save your game. That creates the base save that you will be building upon as follows:
(1) Talk to the Slots Hostess to learn the condition of the Slot Machine -- if it is "On Fire" or "Like a Hot Summer Day" get into the machine and start playing.
(2) If your losses exceed 250 coins, quit, get out of the machine, quit the game, and then reload so that you are back where you started standing by the Slot Machine with your original 10,000 coins. Talk to the hostess to learn the condition of the machine -- if it is lower than the two target conditions, quit and reload the game and repeat until it is one of the two target levels, then get in and play. Rinse and repeat until;
(3) You win -- the first level pays off in 250 coins. Exit the Slot Machine and save your game. With that save you have now built a higher amount of money in your purse. Get back into the machine and continue playing. If you hit another three-9's or any substantial increase in your purse, exit the machine and save. If your purse drops below 10,000 coins, exit the machine, quit the game and reload.
REMEMBER: Always bet the maximum amount that you can bet -- when you switch from auto-play to manual play, which you should be doing once you get to the higher modes, you have to actually hit the betting button (RB) multiple times to increase the bet -- for example once for x5, twice for x10, and three times for x100. Be sure that you do that as it obviously impacts the pay-off at the higher modes!
You may be thinking that this strategy sounds like it will require a lot of time -- and it will, but unless you are really unlucky we are talking about time measured in just an hour or at the most two, and not the massive amount of time that it can take using the rubber band method... Using the Slots in this way is really a lot faster than the Choco Races -- though it will not keep you from eventually having to put in that time if you want The Collector's Catalog -- but still, adding to your base purse this way will see you reaching the point where you unlock both the Fragment AND the Achievement quicker than you will otherwise...
Luck does play a major role in all this as you can probably guess, and for some of you the effort described above may take less than half-an-hour, whereas for others it will take longer, based only upon luck, but if you watch the video embedded above you will see that sometimes the jackpots come quickly and with very little effort!
Once you have obtained both the Fragment and the Achievement you are basically done with the Slot Machine -- and good on ya! Unless you actually want to, you will never have to think about it again or even touch the Slot Machine, and that will be a relief right?
Obtaining the Rest of the Fragments for Serendipity
Now that we have completed unlocking the Achievement and obtaining the Fragment: Lucky Coin, there are a few things that we still need to do -- and hopefully you have the Coins to do them thanks to your winnings (and the Gil to buy any additional coins you will need). Basically there are some Fragments and items we want to snag -- so head to the Casino Chocolina at the back and purchase the following:
Chaos Crystal (10,000 Coins)
Priceless Gift (9,800) AKA "Just 1 Gil"
Setzer's Dice (10,000)
Those are the three Fragments that we needed to get here in addition to the Lucky Coin -- there is one more (the 5th Fragment) but we get that in the lobby of the Chocobo Races Building, and not in here. In addition to the three items above, you may want to buy some of the other things that she offers for sale -- but those are all totally optional and up to you, so I am not going to advise on that.
With these managed it is time to exit the games area back into the Casino proper...
-- Back in the Casino --
Now that we are finished with the Hall of Gaming, go ahead and exit, then head to the other (left) side of the Casino and enter the Chocobo's Mystical Chamber, where you will encounter The Mystic, who you can show the Fragments that you have collected to in order to unlock additional abilities. For example at the moment you should (if you have been following the guide) have enough Fragments so that you can unlock the abilities Improved Moogle Throw and Haggler.
Note: to enable the Improved Moogle Throw and Haggler Skills you have to access the Fragment Skills Selection from the Character Menu of the game and turn them on...
Improved Moogle Throw allows you to throw your Moogle pretty much anywhere with a chanced it will find something (and throw it in specific places to get specific things, like the Silver Chocobo that we are about to go after)... Haggler on the other hand increases the sale price for items that you sell to the Chocolina by 10% and how cool is that? We are done here for now so exit and head up to the Chocobo Races now!
In the Chocobo Races Lobby head to the left of the Chocolina Clerk on the left side (that is the race clerk, as opposed to the one on the right, who is a Chocolina Vender who sells the same items as the one in the Games Area) and, looking on the bench seats along the wall here you will spot a baby Chocobo -- select that to get a brief CS and the 5th and final Fragment for Serendipity -- the Chocochick Down Fragment. Well done mates! You have all five Fragments for this area, and the Achievement associated with the Casino! Very nice!
All that is left for us now at the moment is obtaining The Collector's Catalog -- but to do that we have to have a Chocobo to race... So first read the next part of this section on Chocobo Racing to learn what you need to know about that and getting the Silver Chocobo we will need to race.
Obtaining the Additional Fragment Skills from the Mystic
-- Chocobo Racing --
Similar to FFVII and very much like in FFXI, you actually race YOUR OWN Chocobo here, it is not like you are going to the track and just betting on the Chocobo of other racers, though you can bet on them too. With that in mind, a regular Chocobo or even most of the colored ones are not going to cut it -- you need to have a Silver Chocobo as a minimum, and a Gold Chocobo ideally if you are going to really do well here, but then having one or the other is not really the end so much as the beginning since you also need to level it up and infuse some useful passive abilities.
-- Obtaining your Racer --
First you need to be aware that the Silver and Gold Chocobo are not like the other colored birds -- you can only obtain their Crystals once, so you need to be sure that you level them exactly the way you want and need to since you cannot simply get another one and start over.
To obtain the Silver Chocobo visit Academia AF4XX and use the Improved Moogle Throw (that we obtained in the Casino) on the small platform situated below the projection of Cocooon near the green sphere inside the inner lobby of the Academy HQ -- actually you do not need to even think about this at the moment -- we will be getting this as part of the guide later so no worries (but if you want that information look in the guide for the sections marked with "(Silver Chocobo)" in their titles).
Alternatively you can obtain the Gold Chocobo from the Treasure Chest in the northern area of A Dying World 700AF; the Treasure chest is in the north, a bit east of the bridge. But really the Silver Chocobo is best... I am just saying.
With one or the other obtained you will also need to gather the following Monster Items in order to level one up: 25 Potent Crystals (Microchu -- Rainy), 50 Potent Essences (Catcherpiller / Hedge Frog / Mud Frog / Swampmonk -- Rainy), and 40 Potent Orbs ((Buccaboo/Buccaboo Ace). One of the best (and obvious) places for farming these is the Clearwater Marsh in The Archylte Steppes, which we just left.
-- Leveling Your Choco --
Four critical factors are taken into consideration for the outcome of the races: Abilities, Speed, Stamina, and Race Points -- all of which are directly impacted by the level of your Chocobo which you raise in the Crystarium.
So approaching the races you will want to have a Silver Chocobo that has been leveled up, with high numbers in each of these four stats. The ideal racing Chocobo has at least 800 Strength, 800 Stamina (raised by increasing Magic in the Crystarium), and 600 RP (which is raised by the HP in the Crystarium so you will want to get as close to 5000 HP as you can).
Those three are actually the easy part of building a racing Choco... The HARD part is getting the right passive abilities onto your bird. The following are the targets and you will want at least one -- but more is better -- on your Choco:
-- Blue Streak (Silver has it by default, infuse a Level 30 Tonberry for Gold)
-- Dark Horse (Microchu Level 18)
-- Free Spirit (Microchu Level 35)
-- Health Nut (Microchu Level 24)
-- Lightning Bolt (Zwerg Metro)
-- Limelight (Goblin Chief Level 22)
-- Marathoner (Microchu Level 5)*
-- Perseverance (Ravager)*
-- Rocket Blast (Frag Leech Level 30, Pulse Gladiator Level 50)
-- Runaway (Chichu/Nanochu)
-- Second Wind (Pulse Gladiator)
-- Sprinter (Ravager Level 14)*
-- Supersonic (Chocobo)
-- Turbo (Cait Sith)
Where a specific level is required it is noted above -- in the case of Monsters where no level is indicated that means that the default level that they are when you tame them and get a Crystal is sufficient.
* Good base abilities to target.
A fully-leveled Silver Choco at Level 45 will be able to easily win all but the higher races at the track -- to win those you are going to need to infuse them with a few of the above abilities.
-- Racing Rewards --
In addition to the Gil and the highly desirable special item called The Collector's Catalog that you get for winning the Dahaka Stakes Race (in the Fal'Cie Class which is the highest) you can win by taming, training, and racing your Chocobo, there are a number of random items that you are awarded for winning each race, as well as a set of different Adornment items you can only obtain through racing by fulfilling specific conditions. These include the following:
Race Title / Conditions / Reward
- - - - - - - - - - - - - - - - - - - - - - - - - - - - - - - - - - - - - - - - - - - - - - - - -
All-Rounder / Win a 600m, 1,200m, and 1,800m race in a single career / Tropical Tree
Bird on Fire / Win 10 consecutive races / Red Chocobo Chick
Derby Champ / Win all races with the Derby suffix in a single career / Blue Moogle Bobble
Fortitude / Win an 1,800m race / Lebreau's Violet Tattoo
Grade-Getter / Win all 10 Graded Races in a single career / Tonberry Figurine
Guardian Eliminator / Win all Guardian Class races in a single career / Mark of Lindzei
Moneybags / Win 3,000 coins in a career / Halo
Speedster / Demonstrate speed in a short race / Electric Guitar
Super Sleuth / Win all 10 secret races in a single career / Crown
Supreme Fal'Cie Chocobo / Win all Fal'Cie Class races in one career / Mark of Etr
Trooper / Compete in 20 races in a single career / Frying Pan
Underdog / Win a race where your Chocobo isn't favored / Ripe Apple
Victorious / Win five races in a single career / Train Conductor Cap
And the trio of medals:
King of Cocoon / Win all Cocoon Class races in a single career / Bronze Medal
Monster Hunter / Win all Monster Class races in one career / Silver Medal
Weaponmeister / Win all Weapon Class races in a single career / Gold Metal
Note that in order to even get to the Dahaka Stakes Race you will need to have caught and leveled either a Silver or a Gold Chocobo at a minimum, and then properly leveled them and added one or more of the passive abilities, since this is really necessary for you to win with anything like a predictable rate -- which means that obtaining the Catalog will require specific and special effort on your part.
If you are pressed for Gil you can farm the Catalogs and sell them (you can only have one at a time though so you have to sell the one you have before doing the race to get another) for pretty decent Gil...
This should provide you with all the information you need to play through the races for the purposes of obtaining the items that we want to obtain -- but Chocobo Racing can be a fun mini-game event in and by itself. Just like in FFXI mastering it requires extensive knowledge and the use of tactics -- there are a number of really good guides available online that specifically address this part of the game, and if you really want to master racing, we suggest that you Google for them as that level of play is beyond the scope of this guide.
When you arrive in The Void you are treated to a CS in which you see a familiar area and Serah and Noel have a conversation about Lightning and Yeul -- with Noel explaining a lot about her. Examine the crystal throne and then throw Moogle to the Treasure Chest on the right side to obtain the Calm Gate Seal, and the Treasure Chest on the left to obtain the Prediction Gate Seal.
The Void Beyond
This accounts for everything that you can do here -- so after you take a good look around for the fun of it, head for the Gate in the rear of the area and use that to return to the Histroica Crux, unlocking access to both Academia AF400 and Serendipity AF??? -- with our destination being Serendipity.
Having done all that there is to do at the Casino in the Void, it is time to get back on the adventuring trail, and head for Academica AF400 -- when you arrive you get a lengthy CS in which you obtain a bit deeper notion of Noel and how he feels about Yeul and his situation. As the CS ends things go sort of pear-shaped as a hidden Fal'Cie transforms some of the locals into enemies and you have a battle to wage... This really should not be much of a challenge for you since by now you have capped a few jobs.
When the battle is over, head to the east to fight another group and rescue some locals -- once you clear away another few groups move to the ramp controls and use them to change both the ramp color and direction from Red/Down to Blue/Up. With that done, head up the ramp to the top and follow the path north, battling as needed until you reach a turn where you trigger a CS in which the city is put on High Alert. Once the CS ends access the terminal that was pointed out to you.
Accessing the terminal reveals the Academia Defense System Datalog Page, and gives you a Map of Academia Key Item.
Talk to the NPC ahead (Miss Horizon) who tells you that the Paradox is corrupting the local database -- and she asks you to provide 100% completed area maps from other areas (now you know why clearing the maps is a good thing) giving you the mission Fragment: Academic Rank: Paradox Professor.
Obtaining the Map - and the Map Quest
You should be able to turn in the map for Sunleth Waterscape now, since we completed exploring it -- so talk to her and she will award you with the Fragment: Travel Guide Sunleth Waterscape for your efforts! Well done! Now check the Datalog for the page on the Proto Fa;'Cie Adam, and the page on Locales for info about Academia. With those two tasks managed, continue forward and speak with the Chocolina for some background and to buy/sell as you need.
The Chocolina has two weapons on her -- one for Serah called Raging Arc, and one for Noel called Blazing Spirit -- that are better than the ones we currently have equiped -- so you may want to buy those. Each is 4,500 Gil. Open the nearby Treasure Chest to obtain the Farewells Gate Seal and then follow the path to the east, taking out the various enemy you encounter, which in addition to the ghouls are some Koboldroids who are holding down a barricade. After you defeat them the barricade is dropped and you can continue along the path.
Head south and then east from here and battle the Fencer at the next barricade, then grab the Mark of the l'Cie form the Treasure Sphere before turning left and heading up the stairs -- at the top you trigger a CS in which you encounter more enemy and a forced battle with Taxim and some Ghouls -- then Caius shows up in the CS. He declares more of the same argument then thrusts you into a Ghoul battle.
Use the terminal to reverse the ramp and then head down and down again to explore the street area and trigger a CS in which you encounter Caius again -- followed by a series of demon battles as you pursue Caius through the area. Follow him down the ramp for a CS in which a bridge collapses, and then work your way to the far side of the bridge and use the console in the corner to reverse the ramp and go up. Note that this can be a really annoying task to complete because of the rapid waves of demons who can easily prevent you from using the console if you are not quick about it.
Head up the ramp and through the alley to spot Caius again -- have a battle and continue along the path -- the fact that these battles are frequent and pay off poorly in CP and Gil make them more of an annoyance than anything else but you will get through it...
When you reach the other side of the path to the right is a Fencer to battle and a ramp leading up -- to the left is the console that controls the red ramp that is back along the path (you will see which when you use it). So, use the console, then backtrack to the ramp it reversed and run down it and around in a u-turn to grab 2000 Gil from a Treasure Sphere. Backtrack to the main path -- to the left is the Gate, to the right is an area with some freaked out locals and dark map area to reveal.
-- Grinding Opportunities --
If you want to grind a little in this area you can acquire the following loot items:
Begrimed Claw (Component)
Potent Chip (Material)
Potent Engine (Material)
Potent Orb (Material)
Tear of Remorse (Component)
You can also acquire the Monster Crystals for:
Koboldroid Yan (droid-like) Mechanical / Ravager
The battles you are getting down here actually offer decent CP and are fast enough that you can easily earn enough to cap another job in a very short period of time... But do not fixate upon this since we will shortly be doing some major grinding to level our Racing Choco after we obtain it and that will very likely be sufficient to take you to cap. I am just saying.
Before we can use the Gate we have to get the appropriate Artifact to open it -- so we want to head along the right path and use the console to reverse the ramp here, then go up and grab the Phoenix Down from the Treasure Sphere before going up the nearby blue ramp and heading left to the marker to trigger a CS.
We have a forced battle with a Cocytus and a Netapsi, and then another battle to rescue Yeul from more Cocytus -- after which she is attacked by the boss monster Zenobia!
The Zenobia Battle and the Tower Fragment
-- Zenobia Battle --
First thing you need to understand is that you cannot directly attack Zenobia while the outrider tentacles are present -- those little independent ones called Vaballathus -- because until you take them out Zenobia's large tentacles will block all of your attacks.
The easiest approach to use here is to use the attacks Agression-X (RAV/COM/COM) to damage and as needed Diversity (RAV/COM/MED) to heal... I will really be surprised if you need to heal though...
After you take out the outriders you can attack Zenobia -- and once you Stagger him and beat him down he will re-spawn another set of outriders for you to defeat. Once you do that you attack him again and he appears to be killed -- but no, when Noel tries to run past him triggering the Cinematic Sequence for this zone. Bearing in mind that this is the 4th of the 5 that you need to nail perfectly, make a serious effort to perfectly pull off the Cinematic here, OK?
The Cinematic Sequence is:
Left Stick UP
Left Stick LEFT 'B'
Left Stick RIGHT 'B'
Left Stick RIGHT
Rapid-Tap 'A'
After the Cinematic ends Zenobia is well and truly dead, and you get the CS that wraps things up in which Yeul gives you the Tower Artifact as a dying gesture -- though remember that there are many versions of her in the world, so we will likely be seeing her again -- and you get the Fragment: Zenobia Fragment and 6000 CP for defeating Zenobia. Well done!
With the Tower Artifact now in hand we want to return to the the Gate we found earlier -- which is NOT the actual Gate that we want mind you -- and use a Wild Artifact upon it to open it, which gives access to Yaschas Massif AF100. We do not actually need to go here just now, so check the map and then backtrack to the marked Gate from here -- grab the 1050 Gil from the Treasure Sphere near the gate and then use the Artifact on it to open it and enter the Historia Crux!
You arrive on an upper floor of the tower and find yourself in a room with consoles in it. Examine each console until you get the response "Thank you for accessing the Academy Datanet" at which point you get a CS in which the program is explained to you, and you learn about the artificial Fal'Cie which is Hope's project. Now that you have accessed this information the security lockdown is removed -- head outside and turn to the right, grabbing a pair of Remedies from the Treasure Sphere. Toss Moogle to the far Sphere for a Librascope -- and then toss Moogle to the north down to the level below to get the PSICom Lapel Pin.
Head down the corridor and into the room on the left and use the terminals in there to access the Datanet and enter code 9261 ('A') to access a CS and learn that the machine that Hope has built can monitor other times. As the CS plays out you learn more about Noel and his past -- the fact that he was a Guardian with Caius!
In addition to the CS you are rewarded with the Key Item: Augusta Tower Map. You also unlock access to the other side of the floor now. Head back outside and grab the 1500 Gil from the Treasure Sphere and then head back to trigger a CS in which you see Caius -- continue back to the first room we entered and out the now open other side, then head left and grab the Wild Artifact from the end of the walkway.
Now head to the marker to trigger another CS and vision of Caius -- then try to head to the next marker using the terminal to raise the path only to discover that you cannot -- you need to obtain a key but that is located in another time... So we are going to do that really quick now!
-- Head back to the Historica Crux --
Now select the Gate for Yaschas Massif AF01X which we have previously unlocked and visited and, when you arrive there, head along the pass on the western side of the map to locate the gate that leads to Augusta Tower AF300 and take that Gate using one of your Wild Artifacts.
-- Augusta Tower AF300 --
When you arrive you get a time and paradox lecture and then you need to use the consoles here to rotate the rooms giving you access to the different walkways. After the CS ends examine the switch in front of you to turn the first room -- head outside and left to the marker to examine the next switch, connecting the next room. Move through the room to the opposite walkway and you are prompted to examine the next switch -- before you do that go all the way to the left for a Treasure Sphere with x9 Mana Slivers and then backtrack and continue along to the next switch and using it twice to align the doors.
Go through to the other walkway for a short CS and instructions to use the lift in the center area to go to the next floor. Before you do that head all the way to the left for a Treasure Sphere with 800 Gil! Now backtrack and use the lift controls.
-- 14th Floor --
As you step off the lift you get a mini-CS with instructions to get to the top floor -- if you check the map the route you need to take should be clear enough -- and ahead you will find a console and Chocolina if you need her. Use the console twice and then go in, grabbing the x8 Vitality Bolts from the Treasure Sphere and then exiting the other door.
Inside the next room use the console twice to line up the doors and then exit to the north to clear the map area and then back in and east to the marker. Step on the lift and use the console to get to the next floor.
-- 15th Floor --
Once you arrive on 15 head through the room to the middle ring and to the right all the way to the end to clear the map then backtrack a few feet and toss your Moogle towards the Treasure Sphere on the outer edge for a Librascope. Return to the switch and use it three times to set the doors properly then re-enter the room and continue along the path to the marker, clearing the map before using the switch twice to set the door.
Enter the room and use the Datanet Terminal, selecting 1237172 ('X') as the passcode for the Live Trigger event. With the password accepted you get a CS that resolves the network errors, followed by an analysis by the datanet that indicates that one of the futures has been eliminated. You then unlock and receive the Key Item: Access Key 50, and Fragment: Entropy Board. Well done!
That nicely wraps up our duties here, so jump back to the Historica Crux and then select Augusta Tower AF200 and open that Gate!
-- Augusta Tower AF200 --
Upon our arrival back in AF200 Serah reviews the events and makes an observation or two, and then Noel makes his own observations -- exit the room via the middle ring and head to the left, tossing your Moogle over the gap to the Treasure Sphere there to get the Train Conductor Beret Adornment, then backtrack in the other direction to the console that refused to cycle before and use it -- it works now!
After the floors reconfigure you spot Alyssa -- who really should not be here -- walk over to her (she is marked) and chat with her to discover she does not know you... It quickly becomes obvious that this is not Alyssa but a hologram of Alyssa -- a greeter of sorts.
Run to the end of the walkway to clear the map then head back and into the building to say hello to the Chocolina, then head outside on the outer ring and go all the way to the left end to clear its map. Turn around and use the console at this end to access the building here and clear it on the map, accessing its console to activate the mission Fragment: Idea Circuit. With that mission flagged, head back out onto the outer ring and all the way to the right to clear it on the map.
Neutralizing Paradox Agent Type A
Look for the darkened room with the Chocolina in it and, standing in the center of the room look up in the right-hand corner near the cieling looking towards the lift and you will see a Treasure Cube -- throw Moogle to collect Paradox Agent Type A. Now return to the other room where we flagged this mission and use the console there to turn in the object so that it gets neutralized.
Now use the console on the desk across from the one we just used to flag the mission Fragment: Enigma Codex which requires us to find Paradox Agent Type B -- which we will do later! Well done!
With that mischief managed, grab the Twist Headband from the Treasure Sphere and then make your way towards the marker on the inner ring where the lift is, using the middle-ring console switch to reorient the path. Before you talk to Alyssa clear the center area of the map and then talk to her about Caius and Yeul -- triggering an LT in which you speculate. Clearly we need to talk to Caius and maybe Yeul -- so we ask Alyssa to take us to the top floor.
Once she is on the lift talk to her and she raises it to the top floor!
You then get a CS in which you see Hope being attacked, Alyssa disappears, and you are forced into battle! Alyssa explains that you just witnessed a paradox event in which Hope and Alyssa are murdered by the AI -- oh yeah, and you are next!
After another forced battle Alyssa continues the story -- Serah and Noel make some shrewd guesses and then you have another forced battle!
Alyssa observes that you have now witnessed the forbidden history and so must be eliminated -- does that mean Caius is a construct as well? Speaking of which we now replay the last words of Caius and speculate on the events that he was referring to -- the death of Serah and Noel...
-- 51st Floor --
New consoles are deployed along the paths and you find yourself addressing another paradox event -- with the familiar ring layout and the switches and rooms to be dealt with. We want to do all that and clear the map as much as we can to make for less work later -- so start by clearing the first ring as much as you can without using a switch, grabbing the Bloodguard from the Treasure Sphere, and throwing Moogle to get the Platinum Casino Ticket from the Treasure Sphere over the gap...
A Ghost in the Machine?
Using the nearer switch on the inner ring turn the building to make the door accessible and head inside, exiting the other door and clearing the map for that walkway. Backtrack to the inner ring and head to the other switch, using it three times to line up the doors with the outer walkway we just cleared. Head back through the first room along the walkway and into the second room, through the other side and along the walkway to the third room, and exit to the outer ring from there.
Clear the map left and then right, throwing Moogle to get the Phoenix Down from the Treasure Sphere on the outside edge, before backtracking all the way back to the inner ring and using the next switch three times and the one after that twice.
Now backtrack through all the previous buildings and you will see that the path is now open to the far room that was previously not accessible. Inside is the marked terminal -- use that and then use the switch in the room to rotate so you have access to the last dark section here and clear it, then use the switch to return the room to the previous position and head to the new switch on the lift platform in the center of the area.
-- 52nd Floor --
Using the lift you get a CS and then an LT event -- and then you are prompted to obtain the access key for the top floor... Before you do anything else go ahead and clear the map parts that you can first, and grab the x8 Vitality Orbs form the Treasure Sphere on the center path.
Notes on Clearing the Map: there is a small path that projects out the wrong side of Room 3 that basically requires you to go though Room 1 to the second one, go out on the orphaned walkway and position Room 3 so you can access that stub, then run all the way back rotating the rooms as needed to get to it, clear it, and then run all the way back and reset Room 3 to lead to the outside ring -- a pain in the bum to be sure, but still, if you plan to clear this map it is required. On that stub is a Treasure Sphere with 1,450 Gil so it is not a totally worthless effort!
Use the switch inside the first room to rotate it once and grab the Magistral Crest from the Treasure Sphere at the end of the short walkway -- then enter the next room and rotate it to access the orphaned walkway in the middle, clearing that and getting the x8 Mana Engines from the Treasure Sphere and using the switch to rotate room 3 to make it accessible to the outside ring and the marker.
Now just make your way along the main path through the rooms to Room 3 and out to the outside edge, grabbing the Treasure Sphere with the x8 Vitality Engines just outside, then before you reach the marker in the final room now would be a good time to spend your CP and upgrade your team as much as you can and then save your game...
-- Grinding Opportunities --
If you want to grind a little in this area you can acquire the following loot items:
Analog Circuit (Component)
Iron Shell (Component)
Mana Engine (Material)
Potent Chip (Material)
Potent Engine (Material)
Transparent Ooze (Component)
Vitality Engine (Material)
You can also acquire the Monster Crystals for:
Dragoon (mech-type) Mechanical / Commando
Flanborg (slug-like) Organic / Commando
Flanitor (slug-like) Organic / Medic
Orion (mech-type) Mechanical / Commando
Thextoron (cat-like) Mechanical / Synergist
Vespid Soldier (bug-type) Organic / Commando
Zwerg Metro (droid-like) Mechanical / Ravager
-- Back on Track --
Assuming you have done all of the grinding and obtained all of the above Monster Crystals that you need, head inside the room and use the console to acquire the Top Floor Key and update the lift controls -- so backtrack to the lift and examine the switch to head to the top floor.
-- The Top Floor --
On the lift you battle a Greater Behemoth who really should not be much trouble for you -- and when we arrive before we actually head to resolve this zone there is a side-trip we need to complete first! So activate the lift switch and you will see that you can now select the floor you actually go to -- select Floor 49 and ride the lift down!
-- Floor 49 --
As before the floor is laid out in rings -- and as before you should clear the map here first. Rotate Room 2 so that you have access through the side entrance and the outer ring, then clear the outer ring and you will find a Gate here! This is a Wild Artifact Gate and you may as well unlock it since we are here and all -- it gives access to Oerba AF300 -- and once it is unlocked return to Augusta Tower AF200 and continue along to the end of the ring using Moogle Hunt to reveal the hidden Treasure Sphere with a Gold Casino Ticket inside.
Head back to the switch near Room 1 and rotate Room 1 to give you access and finish clearing the map. With that done, it is now time to find Paradox Agent Type B, which is in a Treasure Chest along the outside edge of the area by the yellow checkered panels just past the yellowish room...
Neutralizing Paradox Agent Type B and C
When you spot the Chest Moogle Throw to grab Paradox Agent Type B, and then head to the lift and up to Floor 50, and run to the console, where you turn in the Agent to be neutralized and score yourself the Fragment: Enigma Codex, the second of the four Fragments for this zone, and good on ya mates!
Now use the console on opposite the one that we just used (it has a chat bubble now) and you flag the mission Fragment: Difference Engine! Go ahead and flag that mission, as it now wants you to locate Paradox Agent Type C.
Return to Floor 49 and follow the path all the way to the other side through the two rooms so you are standing on the ddle ring and look down at the base of the pillars on the outside edge and you will spot the Treasure Chest we are looking for! Throw Moogle down to open it and grab Paradox Agent Type C, and then backtrack to the lift and return to Floor 50 and turn in the Agent to be neutralized, and you collect the third of the four Fragments for this zone, the Difference Engine Fragment, and the Key Item: Access Key 13, which is required to access specific areas in the Tower.
At this point it is time to return to the Top Floor -- as you have taken care of the missions for the zone and you are now ready to complete this puppy!
-- The Top Floor --
Grab the x3 Potions from the nearby Treasure Sphere and then say hello to the Chocolina and do your shopping... When you are done head up the nearby stairs and you will trigger a CS in which you meet with Yeul who gives you a Crystal -- and as she answers your questions and fills you in on her background you learn that Caius has a special ability -- no wonder you don't recognize him as your old mate.
Now that the CS is done it is time for a string of boss battles!
Your first battle is with the Proto Fal'Cie Adam who has two outriders -- a Left Manipulator and a Right Manipulator -- you will need to take out the two outriders first but they are very easy kills -- and then take out the Proto Fal'Cie Adam, who is also a very easy takedown once you have him Staggered. So dish out the damage using Agression-X or a similar setup and you will quickly get through this battle!
The next boss battle is with another version of Proto Fal'Cie Adam -- maybe the real one since he does a bit more damage, takes a bit more damage, and has a Cinematic Sequence as part of the battle. As before, take out the two outriders first (he will re-summon them once you damage him significantly so you will need to take them out again).
Basic tactics for this fight include using Agression-X or its equal switching to Diversity if you need to heal / debuff.
Boss Battle: Proto Fal'Cie Adam
The Cinematic Sequence that is about to happen is really important to you if you are a gamer who values the Achievements or Trophies since this is the 5th of the five perfect Cinematic Sequences that you need to do to unlock the associated Achievement. That being the case you will want to try to do this perfectly!
Cinematic Sequence
Left Stick RIGHT
Left Stick UP
Left Stick RIGHT
Press 'B'
Rapid-Tap 'A'
Left Stick RIGHT
Rapid-Tap 'A'
You were probably thinking that our boss battle was done, right? Well, not so much really -- another version of Proto Fal'Cie Adam appears along with the outriders -- and an LT event is also triggered -- so you have to decide how to respond to that -- select 'B' Lure out the original.
After you defeat it again you get another LT event as it regenerates -- this time select 'A' Keep fighting until it disappears. After you defeat it it regenerates and you get another LT event -- this time select 'X' Scream at Hope -- and the situation changes -- the timeline is altered and you get a CS reflecting that!
After that choice you get a summary CS from Serah that talks about Noel -- you unlock the Fragment: Proto Fal'Cie Adam, and a marker appears on the console nearby. Head over and use the console in order to trigger the CS in which you activate the Gate here -- and then the CS ends and you are prompted to enter the Gate.
Before you do that look for the Treasure Sphere with the Live Trigger Reward in it (I got the Blue Newsboy Cap), and then use the Artifact of Rebirth to open the Gate, and re-enter the Historica Crux, unlocking the Gate to Academia AF4XX! Excellent! Access to that zone is key to our mastery of Chocobo Racing, which is something we will be doing soon, but not before we wrap up a bunch of other minor items and opportunities...
You should have unlocked the following Achievements in the process of finishing this zone:
'Trigger Finger' (30 G) Obtained five Cinematic Bonus Rewards.
'Cerulean Medal' (14 G) Defeated a powerful enemy with valiant skill.
Again, well done!
This will be relatively quick -- there is a series of quick side-trips we are going to do just to take care of some strategic exploring and to obtain certain items and Monster Crystals -- so from the Historica Crux head here and, when you arrive you will recall that the zone is covered in snow in this era... Remember to throw your Moogle places as there are some items you can get here that are unique to the zone, like the Gold Anchor Adornment.
Catching a Purple Chocobo
Head for the area by the Graveyard and throw your Moogle as you go so that you eventually obtain the Gold Anchor -- when you get to the area by the Graveyard you will randomly encounter different monsters -- do that until you fight and tame a Purple Chocobo (Chocobo) Organic / Synergist so that is added to your collection!
Now head back towards the Gate and, when you are on the stairs before the Gate look over the wall to the left and you will see a Treasure Chest -- throw your Moogle over the wall to the Chest to snag the Labyrinth Gate Seal. Right!
We are now done here so head towards the Graveyard and use the Gate that is on the left just before it, using a Wild Artifact to unlock the Gate to Yaschas Massif AF110!
One of the reasons that we took these side-trips is so we can wrap up some outstanding missions as well as because we need to start unlocking and visiting the other timelines anyway... When you arrive here you get a CS in which you learn about the hovering red orbs and the missing scientists.
You can actually talk to the Orbs when they have a chat bubble over them -- and this one does! So go ahead and talk to it to flag the mission Fragment: Gerhilde's Blossom -- then head up the nearby ramp to the tent where we first hung out with Hope and use Mooglehunt to reveal the hidden Treasure Chest that contains the Service Manual.
Check the map and you will see that the small section of canyon that was blocked off in the other timelines is open here -- head there and you will find a dark red woman you cannot talk to walking through the area. Use Mooglehunt on her to bring her back into this timeline and spawn a chat bubble on her. Talk to her to learn her story -- she gives you a message and a piece of Wedding Jewelry.
The Three Orb Missions and Their Fragments
Finish exploring the area to clear the map -- which should give you 100% of the map! Now head back to town to deliver the message and complete the mission, obtaining the Gerhilde's Blossom Fragment.
Now head down the stairs and chat up the Orb there to flag the mission Fragment: Waltraute's Flower -- for the technician trapped in the Orb...
Run down to the large clearing in the southwest and find the deep ravine on the northern end of it and look down and throw your Moogle at it to find Treasure Box inside of which is the Outdoor Watch we have been looking for since forever!
To the east along the south wall is a raised area you need a Choco to jump up onto which is where the Technician is that we are looking for as well as a Treasure Sphere with Unicorn Horn (be sure to grab that). Talk to the Tech to tell him about the error -- when he demands to know who told you this and denies it (you get an LT event) select 'The Manual' to properly complete this encounter. After you talk to the Tech ride back to town and turn in the mission to receive the Waltraute's Flower Fragment. Well done!
Now head up to the upper plaza and up the ramp past Hope's tent all the way to the top to talk to another Orb who will give you the mission Fragment: Ortlinde's Bloom -- who wants you to find proof of terrorism being involved in some of the disappearances.
Rent a Choco and ride back to the middle clearing in the southwestern side of the map and look for the crevice in the middle with the pole/tree trunk sticking out of it. Look along the side for a hidden Treasure Chest and use Mooglehunt on it to reveal it, then take the Terrorist's Mark from it. Rent another Choco and head back to town and turn this mission in to the Orb to collect the Ortlinde's Bloom Fragment. Well done!
-- Spacetime Distortion --
After you turn in this last mission you are notified that a spacetime distortion has appeared -- check the map and you will see that it is marked in the bottom clearing to the southwest so rent a choco and ride there now!
When you arrive you will find the glowing pillar -- so select it and go in!
Chances are you are going to be hoping for a step-by-step solution to this series of puzzles -- sadly there is none because they are all randomly generated... The deal here is simple though: each number pulls the hands of the clock into it, and then spreads them by whatever its number is. When the number is a five it is going to place the hands opposite of it on the face.
What you need to do is plan out your moves so that you are always landing one of the hands on a number -- if you land on a cleared spot the puzzle fails and you must restart. You are going to have to play this by ear -- but watch the video below to see how I did it, as that will likely help you to learn to do it yourself!
Completing the five levels of the Paradox rewards you with the Book of Avalon Fragment and 500 CP. Good on ya!
Solving the Clock Spacetime Distortion
We are now done here -- but there is the matter of the lost watch that needs to be returned -- so jump to the Historica Crux and select the Gate for Yaschas Massif AF010, and head into town to the woman we flagged that mission from, Shannon. Your reward for completing this mission is the Innocence's Sacred Sphere Fragment (the 5th of the 5 Fragments for this location).
That wraps up the old business so head back to the Historica Crux now...
Now it is time to head back here and finish the remaining items in the zone that we did not end up doing because we departed for the Tower before getting around to it. So upon arrival hit the Map NPC to turn in any of the zones you have uncovered the map for 100% to collect the Fragments for that, and then retrace your steps all the way to the Chocolina near where we battled Zenobia.
Cleaning up some odds and ends in Academia AF400
On the way grab the Kaiser Knuckles from the Treasure Sphere you need to jump up to get just before you turn to go onto the broken bridge, and then cross and battle your way along until you reach the path that is below the Chocolina -- she is at the top of the upper ramp where the two ramps are right next to each other -- head down and near the control panel we used earlier to turn the ramp we just had to hop down to the up direction is a hidden Treasure Sphere with Phoenix Blood in it to grab...
Now head back up and then up again until you are standing beside the Chocolina and look at the red ramp directly to the north right here... Jump down this ramp (it is going in the wrong direction) to the bottom, where you will find a small landing -- use Mooglehunt and you will reveal a hidden Treasure Sphere that contains the Graviton Core Delta Fragment. Well done!
Now that you have that head back up and save your game. Take a look at the map -- are there any areas we can clear on it? If not then we are done here for now!
Return to the Historia Crux now, and select the Gate for Academia AF4XX.
We are only coming here for a specific reason -- we are not actually doing this zone right now...
When we arrive we get a CS in which we see a thriving human-filled city and we are greeted by Hope and Alyssa, and Hope invites us to visit him at the Academy HQ. Good, we will eventually be doing that, just not right now.
Obtaining the Silver Chocobo
When the CS ends look around and you will see the moving walkway that heads north -- step on that and ride it to the end and then take the left-hand moving walkway further north towards the HQ. There is a set of stairs going down on the left -- take those and then head north to the marker and use the door it is in front of to enter the HQ.
Run north across the lobby to the next door and go through, and then run up the ramp and to the right until you have a clear shot to throw your Moogle on top of the huge glowing green Sphere here! Moogle will now score you a tasty Silver Chocobo! Well done!
For the record the Silver Chocobo is:
-- Silver Chocobo (Chocobo-type) Organic / Sentinel -- Level 1 (Rank 3).
The one that I tamed (well, caught really or Moogle Captured... Whatever!) is Loyal, Well-Grown, and Resourceful (those are its traits). It came with the passive ability "Ally KO Power Surge: Boosts Strength and Magic each time an ally is KO'd" which while it may not be one of the best passives is still pretty cool...
I named her "Stella" after the character of Stella Kowalski from the Tennessee Williams play A Streetcar Named Desire (I actually liked the play more than I liked the movie, as Marlon Brando did an exceptional job of it in his role as Stanley Kowalski, and Kim Hunter played Stella Kowalski... You may not know this but she was also in Planet of the Apes (she played Dr. Zira).
You will notice that we did not speak to Hope (who we passed a second ago at the top of the ramp) -- we did not speak to him for a reason... And that reason is that we are not doing this zone right now, we only came here for the Silver Chocobo, so now it is time to hit the Historia Crux -- so hit the Start Button, save your game and then Return to Historia Crux!
OK! Now that we have our Silver Chocobo we need to obtain the necessary stuff to level it -- and that stuff consists of the following items:
-- 25 Potent Crystals (Microchu -- Rainy)
-- 50 Potent Essences (Catcherpiller / Hedge Frog / Mud Frog / Swampmonk -- Rainy)
-- 55 Potent Orbs (Buccaboo/Buccaboo Ace)
You do not actually need as many as I listed above -- but you will need the extras to level the monsters you will want to infuse, so I buffed up the numbers a little so that you end up having what you need when you go to infuse the abilities and will not have to spend extra time impatiently farming the items before you can do the infusions...
As the best (and obvious) place for farming these is the Clearwater Marsh in The Archylte Steppes, that is why we have headed here!
So the first thing that we want to do is head to the village and use the weather machine to change the weather to Rainy -- the machine settings are:
Lever Settings / Weather
- - - - - - - - - - - - - - - - - - -
Up-Up / Cloudy
Up-Down / Rainy
Down-Down / Sunny
Down-Up / Stormy
- - - - - - - - - - - - - - - - - - -
With the weather set to Rainy we now want to go to the Marshes -- which means head to the stables in the back of the village and rent a regular Chocobo, and ride it all the way to the western side of the map. When you reach the berms you will jump over them with your Chocobo (actually that is the reason we are riding since you cannot jump the berms that block off the Marshes on foot -- there is a teleport stone we could have used but I like riding Choco and so do you!).
If you are wondering, yes, this effort is really worth it as it will pay off big time later for you in a number of ways... Plus the farming process here will help us get closer to capping-off our last two jobs -- and won't it be bitchin' to have all the jobs capped-off?!
So, ride your rental Chocobo to the west and, when you reach the berms, jump over into the Marshe area proper, and find a convenient place to dismount! Welcome to the Clearwater Marshes! Now save your game!
-- Farming for Leveling Items --
So to fully level our Silver Chocobo with the *right* items, we need to obtain 25 Potent Crystals (Microchu -- Rainy), 50 Potent Essences (Catcherpiller / Hedge Frog / Mud Frog / Swampmonk -- Rainy), and 40 Potent Orbs (Buccaboo/Buccaboo Ace) -- so you know the monsters we need to focus upon. You should check to see how many of each of these you already have before you begin so you have a solid idea of what you need -- for instance I already have 28 Potent Crystals, so I do not need any of those; I only had 6 Potent Essence so I need lots of those; and ditto on Potent Orbs, which I only had 3 of!
So I am looking to farm Buccaboo's, Catcherpillers, Hedge Frogs, Mud Frogs, and Swampmonks...
Farming is simply a matter of running in circles and beating up on pretty much everything that pops!
Now that we have the full amounts of the items that we need, it is time to apply them to our Silver Chocobo... before we do that though it would be an idea for you to read (re-read really since you read this once before) the following:
Infusing Racing Abilities
-- Leveling Your Choco --
Four critical factors are taken into consideration for the outcome of the races: Abilities, Speed, Stamina, and Race Points -- all of which are directly impacted by the level of your Chocobo which you raise in the Crystarium.
So approaching the races you will want to have a Silver Chocobo that has been leveled up, with high numbers in each of these four stats. The ideal racing Chocobo has at least 800 Strength, 800 Stamina (raised by increasing Magic in the Crystarium), and 600 RP (which is raised by the HP in the Crystarium so you will want to get as close to 5000 HP as you can).
Those three are actually the easy part of building a racing Choco... The HARD part is getting the right passive abilities onto your bird. The following are the targets and you will want at least one -- but more is better -- on your Choco:
-- Blue Streak (Silver has it by default, infuse a Level 30 Tonberry for Gold)
-- Dark Horse (Microchu Level 18)
-- Free Spirit (Microchu Level 35)
-- Health Nut (Microchu Level 24)
-- Lightning Bolt (Zwerg Metro)
-- Limelight (Goblin Chief Level 22)
-- Marathoner (Gold starts with this by default, Silver must infuse a Microchu at Level 5) *
-- Perseverance (Ravager)*
-- Rocket Blast (Frag Leech Level 30, Pulse Gladiator Level 50)
-- Runaway (Chichu/Nanochu) **
-- Second Wind (Pulse Gladiator)
-- Sprinter (Ravager Level 14)*
-- Supersonic (Chocobo)
-- Turbo (Cait Sith)
* Good base abilities to target.
** Chichu and Nanochu are exclusive monsters -- if you infuse one of them you lose it and cannot replace it with another since only one of each is available in the world.
One factor that you should be aware of (and that has caused a LOT of confusion) is that the racing abilities DO NOT show up when you look at your Monsters. I have spoken with a lot of gamers in the process of writing this guide to help with distilling how the game is perceived, and which sections that they felt they really needed help with, and one of the most common issues that cropped up was their uncertainty that the infusions that they were doing on their Choco were actually resulting in obtaining the abilities that they desired... The reason? They could not SEE them in their Choco stats.
The issue is not really that they could not see them, but that they did not know what they were looking for in order to READ them. Each of the racing abilities actually corresponds to the passive ability it is associated with -- so for instance the presence of Improved Counter I on your choco MEANS that it has the racing ability Second Wind!
Obtaining the Exclusive Monster Chichu
To make this process easier for you I am including the corresponding passive ability in parenthesis with the racing abilities below so you can assess what you have and what you still need:
-- Attention Hog (Feral Speed II / Gilfinder II)
-- Blue Streak (Ally KO: Power Surge II / Critical: Protect)
-- Dark Horse (Item Collector / Item Scavenger II)
-- Free Spirit (Auto-Bravery / Auto-Vigilance / Critical: Faith)
-- Health Nut (Rapid Recovery)
-- Lightning Bolt (Chain Bonus Boost II / Stagger Maintenance)
-- Limelight (Kill: ATB Charge / Kill: Libra)
-- Marathoner (Critical: Tetradefense / Critical: Vigilance)
-- Perseverance (ATB Charge I / Improved Raise)
-- Rocket Blast (Feral Surge/Fatigue / Role Resonance)
-- Runaway (Hindrance / Pack Mentality)
-- Second Wind (Fettered Magic / Improved Counter I)
-- Sprinter (Critical: Bravery)
-- Supersonic (Critical: Power Surge II)
-- Turbo (Improved Cure / Critical: Shield)
All you need do is compare the passive abilities on your Choco and translate them to their racing abilities to see where you stand and where you need to be.
-- Monsters with Multiple Infusable Abilities --
Ceratoraptor
Default: Blue Streak
Level 2: Lightning Bolt
Microchu
Level 05: Marathoner
Level 18: Dark Horse
Level 24: Health Nut
Level 35: Free Spirit
Pulse Gladiator
Default: Second Wind
Level 23: Marathoner
Level 50: Rocket Blast
Reaver
Default: Perseverance
Level 14: Sprinter
Where a specific level is required it is noted above -- in the case of Monsters where no level is indicated that means that the default level that they are when you tame them and get a Crystal is sufficient.
A fully-leveled Silver Choco at Level 45 will be able to easily win all but the higher races at the track -- to win those you are going to need to infuse them with a few of the above abilities.
In retrospect as we build the abilities to race I am reminded that Choco Racing in this game seems to have more in common with that of Final Fantasy XI than it does Final Fantasy VII, but it is the latter and not the former that everyone mentions when they talk about racing in the game... Still, no matter which game you think of the facts are that including Choco Racing in the game was brilliant.., It adds a measure of fun to the game and gives you something else to do with your monsters, and how cool is that?
-- The Three Gigantaur Boss Mobs --
Before we leave here there is a major task that we need to complete but ONLY if you think you can do it at the level you are at... If you have not capped off most of the jobs (and ideally ALL of the jobs) on Serah and Noel, it will be a lot less sure than if you have -- chances are you will not get wiped trying to handle these -- but you should be pretty close to having them capped at this point anyway, especially with all the grinding you have been doing to get Materials to level your Chocobo and raise your Monsters to infuse abilities into them...
With all or most of the jobs capped this is a cakewalk -- if you only have one or two capped not so much but it is still doable assuming you have a decent Monster with Sentinel skill that has more than 5000 HP... I used my Silver Chocbo Stella for this and it made it wicked easy... You should do the same as it is one of the reasons that we took the route that we did in leveling her up (not just to master the Chocobo Racing you see?).
You need to defeat the trio of Gigantaur here because (1) it gets you some desirable Exclusive Monster Crystals and more important than that, (2) it unlocks a Gate you are going to need access to shortly. So, with those very worthwhile goals in mind, if you have yet to level up the jobs to a reasonable point, now is the time to do that -- and when you have, let's continue below!
For these battles you will require a reasonably leveled Sentinel -- as I said above I used my Silver Chocobo and I really urge you to do the same since it is ideally suited for this role. It will be able to absorb tremendous damage from these guys while the rest of your team delivers tremendous damage. That is what we call a win-win situation!
The tactics that work best on these beasts are Fire, Magic, and Physical attacks, and debuffs like Deprotect and Deshell. If you are a player who prefers to use auto-attack you will want to ID these guys using a Librascope at the start of the battle so that your team is using the correct attacks...
You will want to buff yourself, and you will need to stay healed -- which means a set of Paradigm with Sentinel plus two damage dealers, Sentinel plus a damage dealer and Med, and perhaps a dual-Sentinel for when you get hit with the 1000 Needle attacks (if you can learn to spot those coming).
I used the following Paradigm setup for all three battles:
Delta Attack-X (RAV/COM/SEN)
Diversity (RAV/MED/COM)
Seriously that was all that it took for me (I did not have to use any of the others) and it should work for you too. You should have already revealed all of the marker statues that trigger these battles so weather is not really a concern. Just head out to the statues and use them to spawn the enemy.
Taking on the Three Gigantaur and Unlocking the Vile Peaks Gate
ow that we have fully leveled up our Silver Chocobo, and we have added the passive abilities that we want to it, it is ready to race! And since it is ready to race and we went to all of the trouble of making it ready to race... Well... It would be a shame not to race it!
So return to the Historica Crux and select the Gate for Serendipity AF??? and, when we arrive, make a straight run for the Chocobo Race Building! Inside we will want to stop off at the Registration Desk (the Chocolina on the left) and register our Silver Chocobo for the races... Bear in mind before you try to register your Choco that you can NOT register a Choco that is an active member of your party -- if you have them as one of your party you will need to remove them from the party list before you can register them to race.
Also you need to be aware that once registered, that Choco is no longer available for combat or inclusion in your party after you leave the track unless their career has ended and they are no longer registered... Think of it like this: once registered they become residents of the track stables and until you de-register them or they complete their career, they are not available for battle.
We can buy racing aids from the Chocolina on the right (assuming we have the coin, which probably we do not at the moment)... But we do not really need those items for the early races, and by the time we do need them or want them we will have won some coin so it all works itself out in the end!
Before we get to the nitty-gritty of racing we should talk about the different Chocobo, because most players who are serious about racing will not simply level up the Silver Chocobo and just race it alone, they will want to have a stable of racers of all different types to see what the best they can do with them is -- and that being the case we should first examine what the different Chocobo are that you can race, and what their advantages and disadvantages are...
Your first Chocobo Race at the Lower Stakes
Most players collect Chocobo not for racing but to build Chocobo Combat Teams, and when they are properly trained they easily rival the majority of the other monsters in their various classes (though to be fair there are better monsters in each class).
In addition to using them as members of their combat teams, because they can be raced, many players do that as a sort of value-added abvility and to earn extra coin.
- - - - - - - - - - - - - - - - - - - - - - - - - - - - - - - - - - - - - - - - - - - - - - - -
-- Black Chocobo (Availability: Uncommon)
Found primarily in the Vile Peaks in AF010, Black Chocobo are a highly desired addition to most player Monster stables in their role as Saboteur, which they are very effective at when they are properly leveled up. While they are not a popular choice for racing, the Black Choco does have slightly more flexibility on the track than the Blue.
- - - - - - - - - - - - - - - - - - - - - - - - - - - - - - - - - - - - - - - - - - - - - - - -
-- Blue Chocobo (Availability: Common)
The Blue Chocobo are more commonly found in the Archylte Steppe in the Clearwater Marshes during both Sunny and Rainy weather, and are a more commonly encountered Choco but, despite that are not easy to tame.
Blues are modeate level racers, though most players consider them to be better serving in their compbat capacity as a Ravager. Properly trained and with decent abilities a Blue can easily dominate the first two categories of races.
- - - - - - - - - - - - - - - - - - - - - - - - - - - - - - - - - - - - - - - - - - - - - - - -
-- Gold Chocobo (Availability: Exclusive)
The second-best racing Choco available in the world of FFXIII-2 the Gold is an exclusive monster -- only ONE can be caught in the game period, so it should always be managed with care in both its leveling and training, and its use. Because it cannot be replaced, Gold Choco should NEVER be infused into another monster or released.
The Gold Chocobo is obtained in the A Dying World AF700, where its Monster Crystal is found inside a Treasure Chest located in the northern area, east of the bridge. In addition to being the second best racing Choco, Gold's are also considered to be desirable in their combat role as a Commando as part of a Chocobo Combat Team.
The Gold Chocobo caps out at Level 45, making it an easy to max-out racer. Compared to Silver Chocos, the Gold is considered slightly weaker due to its maximum STR/MAG stats, which are an average estimated 800/600, while Silver's stats are an average estimated 800/800.
- - - - - - - - - - - - - - - - - - - - - - - - - - - - - - - - - - - - - - - - - - - - - - - -
-- Green Chocobo (Availability: Uncommon)
Found mostly in the Yaschas Massif in AF100 / AF110, Green Chocos are a desirable addition to your party making excellent Medics, and while they are not really overly popular as racers, they are slightly better than Blue Chocos in that respect, it is not uncommon to see them used for the lower levels of racing for the fun of it.
- - - - - - - - - - - - - - - - - - - - - - - - - - - - - - - - - - - - - - - - - - - - - - - -
-- Purple Chocobo (Availability: Very Common)
Found primarily within the Bresha Ruins in AF300, Purple Chocobo are encoutnered more often near the Cemetery on the far side of the Ruins, and are a very common encounter, and easily tamed. Widely considered to be very good Synergists when they are properly leveled, Purple Chocos are not a popular choice for racing, being similar to the Blue Choco in capabilities.
- - - - - - - - - - - - - - - - - - - - - - - - - - - - - - - - - - - - - - - - - - - - - - - -
-- Red Chocobo (Availability: Uncommon)
Red Chocos are a lot harder to catch largely because they appear infrequently, and even when they do appear your chance of taming them are low if you do not have an ability item that improves monster taming rates on you and equipped. They are found in the Archylte Steppe during Sunny weather, mostly in the desert area west of the plains.
While they are not widely considered to be a good choice for racing, they do have some racing ability once they are leveled and have decent abilities -- but most players find them to be a more valuable addition to their stable in their active combat role of Commando -- being effective fighters when properly leveled and trained.
- - - - - - - - - - - - - - - - - - - - - - - - - - - - - - - - - - - - - - - - - - - - - - - -
-- Silver Chocobo (Availability: Exclusive)
The best racing Choco available in the world of FFXIII-2 the Silver is an exclusive monster -- only ONE can be caught in the game period, so it should always be managed with care in both its leveling and training, and its use. Because it cannot be replaced, Silver Choco should NEVER be infused into another monster or released.
The Silver Chocobo is obtained in the inner-lobby of the Academy HQ in Academia AF4XX, using the Advanced Moogle Throw from on top of the massive green sphere in the lobby. In addition to being the best racing Choco, Silver's are also considered to be desireable in their combat role as a Sentinel as part of a Chocobo Combat Team.
The Silver Chocobo caps out at Level 45, making it an easy to max-out racer. Compared to Gold Chocos, the Silver is considered slightly better due to its maximum STR/MAG stats, which are an average estimated 800/800, while Gold's stats are only an average estimated 800/600.
- - - - - - - - - - - - - - - - - - - - - - - - - - - - - - - - - - - - - - - - - - - - - - - -
-- White Chocobo (Availability: Very Uncommon)
The White Chocobo is very uncommonly found in the Oerbra zone in AF300, being found within the vicinity of the Big Tree for the most part... Moderately valued as a combat team member, the White Chocobo is widely considered to be a great racing Choco -- though not as capable as a Silver of Gold Choco, when properly trained they easily surpass an average or moderately trained Gold, or a poorly trained Silver.
- - - - - - - - - - - - - - - - - - - - - - - - - - - - - - - - - - - - - - - - - - - - - - - -
--Yellow Chocobo (Availability: Very Common)
The Yellow variety of Choco are by far the easiest to catch/tame, being present in great numbers on the plains of the Archylte Steppes during Sunny weather. In addition to being the easiest to tame they also happen to be the least flexible as racers, in fact most players do not consider them worth the effort of leveling and infusing as racers because to be competitive they have to be a very high level indeed.
- - - - - - - - - - - - - - - - - - - - - - - - - - - - - - - - - - - - - - - - - - - - - - - -
When you are evaluating the stats of your Choco take the following into consideration:
Strength = Speed
Stamina = Magic
Hit Points = Race Points
Abilities = Leveling / Infusion
Your Choco can learn different abilities, but not all of them will directly translate into racing skills.
While each of the above types of Chocobo can be caught / tamed as soon as access to their home zones is obtained, they cannot be raced until the Serendipity Casino is accessed.
The process of training a Choco for racing is integral to the process of upgrading (leveling) the Choco -- the emphasis being primarily on the stats of Strength (STR) and Magic (MAG). As they apply to racing, Strength = Speed and Magic = Stamina, and as such they are used to determine how a Choco ranks in the racing system. The following table details the basic minimums and their Ranks, starting with the lowest Rank/Class and working to the highest:
Rank E: Less than 150 STR/MAG (150 -- 199)
Rank D: Over 200 STR/MAG (200 -- 399)
Rank C: Over 400 STR/MAG (400 -- 599)
Rank B: Over 600 STR/MAG (600 -- 699)
Rank A: Over 700 STR/MAG (700 )
While each Choco will differ based upon type, the optimal levels for bot stats are widely considered to be 800 STR / 800 MAG -- though most Choco will be considerably below those targets save for Silver, Gold, and White Choco.
Chocobo Racing is a Career-Based System -- that is to say that each individual Chocobo that you want to race will have a finite capacity for racing that is based upon their actual Race Points (RP) stat. Understand that whatever their RP Stat is, that will control how many times that your Choco can be raced before it must retire -- and it is largely the RP stat that makes most Choco types unsuited to racing, and why most players only treat Chocobo other than Silver, Gold, and White as casual or recreational racers.
The Career Span (CS) of your Choco is based upon the cost in RP for a given race -- as each race costs a set amount of RP to race. Your Choco will begin their CS with only a specific amount of RP ()the actual value of its stat), and so will only be able to race a specific number of races before it must be retired. Fortunately the RP for the CS resets once the Choco is officially retired, which means that you can re-register them for a new CS using the base RP over again.
-- Adding Abilities --
The process -- and what abilities you choose -- is purely a matter of personal choice, though many trainers consider the combination of Marathoner / Perseverance / Sprinter to be the defacto base foundation for most serious racers.
Some abilities lend themselves to each other in complimentary ways -- for example trainers who do not want to have to use boosting items (meaning that they do not want to have to pay for them) often choose to add "Health Nut" to their Choco, in which case it is also a good idea to add "Attention Hog" to it. If you are planning on mostly betting upon your own Choco to win -- and thus planning on it winning a lot -- you do NOT want to add "Health Nut" to its abilities, since that is adverse to "Dark Horse" ability. If you are using the "Blue Streak" ability it is a good idea to also add "Second Wind" since that will help with the counter and extend the effectiveness.
A known winning combination of skills for a well-leveled well-trained Silver/Gold/White Chocobo includes the following abilities:
-- Attention Hog (Feral Speed II / Gilfinder II)
-- Free Spirit (Auto-Bravery / Auto-Vigilance / Critical: Faith)
-- Health Nut (Rapid Recovery)
-- Marathoner (Critical: Tetradefense / Critical: Vigilance)
-- Second Wind (Fettered Magic / Improved Counter I)
-- Turbo (Improved Cure / Critical: Shield)
Alternatively you can build a basic Silver Choco that uses the Stay at the Back of the Pack strategy for racing using Blue Streak for the final dash at the end of the race by doing the following:
(1) Level your Silver Choco to Level 45;
(2) Infuse Silver Chocobo with Pulse Gladiator at Level 1 / Default Level (Second Wind ability);
(3) Infuse Silver Chocobo with a Reaver or Cactaur at Level 1 / Default Level (Sprinter ability);
(4) Level the Microchu to Level 24 using any class items;
(5) Infuse Silver Chocobo with Microchu at Level 24 (Marathoner & Health Nut abilities).
When racing this choco select the "Stay at the back" race mode, and do not initiate boost until Blue Streak is active.
Other Choco can be Effective Racers
-- Choco Races (by Class) --
These are the actual Chocobo Races broken out by class, with each of the races listed alphabetically with their particulars. Note that there are 3 types of race under each class: Normal, Graded, and Secret.
(C5) Cocoon Class (Cost = 10 RP)
- - - - - - - - - - - - - - - - - - - - - - - - - - -
Name (Length) -- Type (Reward)
- - - - - - - - - - - - - - - - - - - - - - - - - - -
Bodhum Derby (1200 m) -- Normal (Potion)
Bresha Classic (1200 m) -- Normal (Chocoboost)
Euride Stakes (1200 m) -- Normal (Mana Bolt)
Fifth Ark Cup (1200 m) -- Secret ( Guard's Ravager Badge / Mana Droplet)
Gapra Classic (1200 m) -- Normal (?)
Hanging Edge Classic (600 m) -- Normal (Potion)
Nautilus Derby (600 m) -- Graded (Witch's Bracelet)
Orphan's Cup (600 m) -- Secret (Cute Cactaur Figurine / Power Droplet)
Palumpolum Cup (600 m) -- Normal (Power Bolt)
Sanctum Special (1200 m) -- Graded (Zealot's Amulet)
Sunleth Cup (600 m) -- Normal (?)
Vile Peaks Classic (600 m) -- Normal (Chocoboost)
(C4) Monster Class (Cost = 15 RP)
- - - - - - - - - - - - - - - - - - - - - - - - - - -
Name (Length) -- Type (Reward)
- - - - - - - - - - - - - - - - - - - - - - - - - - -
Adamantoise Classic (600 m) -- Normal (Vitality Droplet)
Ahriman Cup (1200 m) -- Graded (Auric Amulet)
Behemoth Special (600 m) -- Graded (Silver Bangle)
Bomb Classic (600 m) -- Normal (?)
Cactaur Cup (1200 m) -- Secret (Pilot's Badge / Mana Droplet)
Flan Stakes (600 m) -- Normal (Chocoboost)
Garchimacera Cup (1200 m) -- Normal (?)
Goblin Derby (600 m) -- Normal (Librascope)
Marlboro Classic (1200 m) -- Normal (Librascope)
Ochu Classic (1200 m) -- Normal (Vitality Bolt)
Sahagin Derby (1200 m) -- Normal (Chocoboost)
Tonberry Cup (600 m) -- Secret (Cie'th Wing / Power Droplet)
(C3) Weapon Class (Cost = 20 RP)
- - - - - - - - - - - - - - - - - - - - - - - - - - -
Name (Length) -- Type (Reward)
- - - - - - - - - - - - - - - - - - - - - - - - - - -
Airwing Cup (600 m) -- Normal (Power Chip)
Altair Stakes (600 m) -- Normal (Chocobull)
Binding Rod Classic (1200 m) -- Normal (Mana Chip)
Blazefire Saber Classic (600 m) -- Normal (Phoenix Down)
Durandal Cup (1200 m) -- Normal (Phoenix Down)
Gungnir Special (600 m) -- Graded (Durable Warding Amulet)
Hawkeye Derby (1200 m) -- Normal (?)
Nirvana Cup (1200 m) -- Secret (Cataur Figurine / Potent Droplet)
Omega Weapon Cup (600 m) -- Secret (Mog Figurine / Potent Droplet)
Partisan Stakes (1200 m) -- Graded (Pain Dampener)
Pleiades Classic (1200 m) -- Normal (Chocobull)
Wild Bear Derby (600 m) -- Normal (?)
(C2) Guardian Class (Cost = 25 RP)
- - - - - - - - - - - - - - - - - - - - - - - - - - -
Name (Length) -- Type (Reward)
- - - - - - - - - - - - - - - - - - - - - - - - - - -
Aster Cup (600 m) -- Normal (Vitality Sliver)
Dreadnough Special (1200 m) -- Normal (Chocobull)
Enki Enlil Classic (1200 m) -- Normal (Vitality Chip)
Garuda Stakes (600 m) -- Normal (Chocobull)
Havoc Stakes (1200 m) -- Normal (Dark Matter)
Kalavinka Classic (600 m) -- Graded (Nagaraja)
Manasvin Cup (600 m) -- Normal (Elixir)
Myrmidon Derby (1200 m) -- Normal (Elixir)
Proudclad Classic (1200 m) -- Graded (The Tower)
Shaolong Gui Cup (1200 m) -- Secret (White Choco Figurine / Mana Sliver)
Undying Cup (600 m) -- Secret (Onion Knight's Helm / Power Sliver)
Ushumgal Derby (600 m) -- Normal (Adamantine)
The Dahaka Stakes pays off in The Collector's Catalog
(C1) Fal'Cie Class (Cost = 30 RP)
- - - - - - - - - - - - - - - - - - - - - - - - - - -
Name (Length) -- Type (Reward)
- - - - - - - - - - - - - - - - - - - - - - - - - - -
Anima Stakes (1200 m) -- Normal (Mana Orb)
Atomos Derby (600 m) -- Normal (Vitality Orb)
Bismark Cup (1200 m) -- Normal (Bloodguard)
Carbuncle Classic (600 m) -- Normal (Power Orb)
Dahaka Stakes (600 m) -- Normal (Collector's Catalog)
Eden Stakes (600 m) -- Graded (Entite Ring)
Kujata Classic (1200 m) -- Normal (Potent Sliver)
Lindzei Cup (600 m) -- Secret (?)
Orphan Special (1200 m) -- Graded (Potent Orb)
Pheonix Cup (600 m) -- Normal (Potent Sliver)
Pulse Cup (1800 m) -- Secret (Coyo Logo / Potent Orb)
Titan Classic (1200 m) -- Normal (Potent Sliver)
Note: Secret Class races are locked until the related Graded Race has been won in that Race Class...
-- Notes on Betting --
You cannot have a racing section without some thoughts on betting... Optimally assuming you built a really great racer your strategy will be straight-forward: bet on your Choco! But if it is not an optimal ride or, perhaps more likely, you are in the higher class races and there are higher-rated chocos among the competition, you may want to both bet on yourself and lay off a bet on the choco in the race that you think might actually beat you...
By betting for and against yourself you increase the chances that you will walk away with jingle in your pockets, since they pay-out will still be in the green on a two-bet race.
If you are racing to farm money one of the most profitable methods in racing is to simply race the Dahaka Stakes and win (obtaining the Collector's Catalog) and then sell your prize to the Chocolina for 11,000 Gil (you must sell it though because you can only have one of them at a time, and if you already have one when you run the race, you do not get a second).
You will want to pay particular attention to the odds that are being applied on the pre-race stats screen and the condition of the chocos... Bearing in mind that condition is not always a key factor when the choco is of higher quality and superior training -- and also that you can purchase racing items from the Chocolina that can be used to buff the different conditions -- a practice that can be a bit expensive but is often worth the time and effort required to learn what to use and when to use it.
It is time to visit and clear some of the areas we have unlocked -- and this red-tinted time is as good a place to resume that process as any now that we have mastered Chocobo Racing! If you chat with the locals you will learn what has them so upset -- people are disappearing and the red blobs are appearing and in this timeline they have not figured out the connection yet.
In the back of Hope's tent is a hidden Treasure Chest that, when you use Mooglehunt on it, deliver the Key Item: Bulb of Hope to you. The Bulb of Hope is a flower bulb that glimmers with hope... Yeah.
Talk to the red sphere in the plaza below -- Karl -- to flag the mission Fragment: Helmwige's Nightshade, and then head down to the main plaza to the north. Behind the shipping crates under the ramps on the northwest side is a Treasure Chest that contains the Key Item: Sealed Tablet (a stone tablet engraved with the horrifying past of Paddra) that you have to use Moogle Toss to obtain. It may take a few tries to get your Moogle into the right spot.
Gathering the Seven Fragments
Now head up the ramp that leads to the valleys and canyons outside of town and at the landing before the last flight up, look over the right-hand side and you will see another Treasure Chest that contains the Key Item: Reminiscence Gate Seal. Grab that with Moogle Toss and then head up the ramp to the exit. A short walk up on the right is a pair of fallen rock slabs that you will spot a hidden Treasure Chest on -- use Moogle Hunt to reveal the Treasure Chest and obtain the Key Item: Comm Device (a portable comm device containing one unsent message).
Follow the main path to the end where you have to jump down the ledges and, at the bottom, notice the hidden Treasure Chest. When you reveal it with Mooglehunt you will obtain the Key Item: Picture Frame (A 3D hologram machine projecting the image of a little girl).
Heading back towards town take the left turn and then another left and you will find a Treasure Chest on the path with a Blessed Blade (one of Noel's weapons). Keep following the path staying to the left at each split and you will find a glowing golden Anomaly Gate -- enter that to find the Clock-type Anomaly. Obviously I cannot tell you the solutions to these as they are random each time and the ones that I got will not be the ones you get -- but the solutions just require basic math skills so doodle them out on paper mates! Solving the Anomaly earns you 500 CP and the Book of Valhalla Fragment which is a nice addition to our Fragment collection!
Just beyond where the Anomaly was is a Wild Fragment Gate that leads to Sunleth Waterscape AF400 -- go ahead and open that Gate now, and then head right back to Yaschas Massif AF100! That way you have access to that Gate without us having to come all the way back here later. You should have a few Wild Artifacts but we will want to be on the lookout for more obviously...
-- Grinding Opportunities --
If you want to grind a little in this area you can acquire the following loot items:
Mana Sliver (Material)
Potent Sliver (Material)
Power Orb (Material)
Power Sliver (Material)
Vitality Droplet (Material)
Vitality Orb (Material)
Vitality Sliver (Material)
You can also acquire the Monster Crystals for:
Ahriman (demon-bird) Organic / Saboteur
Bunkerbeast (armadillo-type) Organic / Sentinel
Crawler (slug-like) Organic / Commando
Pitterpatter (lizard-type) Organic / Saboteur
-- Back on Task --
Now that you have that it is time to return to the city, where you need to talk to the red sphere (Karl) to turn in his mission and collect Helmwige's Nightshade Fragment and 500 CP. With that managed leave the city and head back to the pass to the first split (where the Chocobo is) and talk to the red sphere there to flat the mission Fragment: Siegrune's Spiritbloom -- we already have the item that is needed for the mission so talk to it again to get 500 CP and the Siegrune's Spiritbloom Fragment. Well done!
Now head into the large clearings to the southwest -- remember the large crevice on the north side with the pole / tree trunk poking out of it? Look midway along it on the west side for a glittering hidden object upon which to use Mooglehunt and you will reveal the Fragment Graviton Core: Epsilon. Grab that and add it to your collection now!
Resolving the Clock Anomaly
From here head to the southeast along the path to where we did the Anomaly earlier and find the next red sphere to talk to and flag the mission Fragment: Schwertleite's Flower -- we already have the item for this so talk to it again to turn it in and obtain 300 CP and the Schwertleite's Flower Fragment. Again, well done!
Now follow the path along to get to the north-most of the clearings to the west (yes I know we just came from there a minute ago) and you will find the next red sphere -- talk to it to flag the mission Fragment: Rossweisse Skyblossom. As we already have the item for this, talk to it again to complete the mission and gain 500 CP and the Rossweisse Skyblossom Fragment.
You get the message that another Anomaly has appeared -- so it is time to return to town and deal with that now!
This is another of the clock-type, and again, I cannot tell you exactly how to solve each, but you should be able to doodle it out -- I did! Once you resolve this Anomaly you are rewarded with 500 CP, the Book of Shambala Fragment, and a Wild Artifact. Hey! How about that? And we were just talking about needing to replace that Wild Artifact we used to open the Gate earlier!
As the CS plays out after you leave the Anomaly you should unlock the Achievement "Fragmented" (30 G) Completed an entire fragment category.
That wraps up all 7 Fragments for this zone -- so well done mates! Really! Our work is done here so unless you need to get some of the Monster Crystals for here you did not get or you want to do some grinding, it is time to head back to the Historia Crux!
When you arrive Moogle hears voices -- and when you round the corner ahead you discover a group of different colored Flan... It seems that a bunch of thier freinds are lost and we need to help find them and... Whhhaaaaaaaattt?! Noel points out to Serah that you know, he being a Monster Hunter and not a Monster Finder this is a rather odd situation... But no, she is not having any of that... So yeah, it looks like instead of killing them, we are going to help them... Maybe we can kill them later?
Take a few steps forward and use Mooglehunt even if you cannot spot the thing you are revealing and you will obtain 800 CP and the Lapis Lazuli Fragment for your troubles and rescue the Red Flan. Nice one!
If you look at the map you will notice that there is actually an area behind us we have not explored, so head to the south and east jumping and crossing the tree trunks until you get down to the grass with the White Flan on it -- you will find another shadowy thingy that, when you Mooglehunt it scores you 800 CP and the Cosmo Aura Fragment. The White Flan now hop off in the direction of their mates, so mischief managed! Now backtrack to the other side where we were...
Rescuing the Flan and Obtaining Seven Fragments
As you will recall we only briefly visited this zone to grab the Silver Chocobo in order to proceed with mastering the Chocobo Racing mini-game -- but now it is time for us to return to this much brighter, much happier alternate reality so that we can strip it of all the good stuff it has to offer and maybe uncover a few more secrets in the process...
Before we do anything else (or think about heading to the Academy HQ again) take a look at your map and you will notice that there are areas (some very small) that are still dark and unexplored. We need to make an effort now to clear those areas, so head through them and you will, in the process, obtain the following items:
-- Facts Gate Seal from a Treasure Chest in front of Academy HQ.
-- Gold Casino Ticket from a Treasure Sphere outside the Academy HQ Gate.
-- 1200 Gil from a Treasure Sphere in a shop off of Grand Avenue.
-- A Gold Gear from a Treasure Sphere inside a shop on the east side of the town.
On the left side as you leave the HQ you will encounter a half-formed Gate that you can examine for a hit at a future mission...
The Academy-sponsored quiz game that can be found at terminals marked in purple on the map is just what it sounds like -- a quiz game! There are several terminals and each one will award you with a special prize for getting all of the questions correct.
Each terminal has a large list of questions that it can ask -- I have included the ones that I was asked in the many times that I have played the terminals but there may be some that I was never asked... I recorded the questions and answers until I played a match in which there was no new question and then called it a day mostly because there could be a huge list of questions -- if you run in to one that is not included below I suggest you Google it.
There are ten questions to the official quiz, and you should be aware that every so often they throw in a question that is purely luck based -- like guessing Odds or Evens -- and you really just have to be lucky to get the correct answer... But I have found that more often than not when the questions are left and right, that 'X' is usually correct, and up and down, 'Y' is usually correct -- but that is not true all the time so don't blame me if you get it wrong mates.
The Academy HQ Brain Blast Terminal and Fragment
-- Academy HQ Terminal --
Your reward for getting all 10 questions right the first time with this terminal is 500 CP and the Stoic Virtue Fragment.
Each time that you answer all ten questions correctly, a Treasure Chest appears behind the terminal that can contain the following rewards: Gadot's Red Emblem, Orange Beacon, Yellow Rimmed Glasses. After you receive these you no longer get prizes for successfully playing at this terminal.
-- The HQ Terminal Questions and Answers --
During the Sanctum rule, the film 'Free Will' was banned due to a scene filled with what kind of questionable content? Answer = Becoming a Cie'th by will.
In the cop drama 'Cactuar Files' what is the first line of the opening song? Answer = A five-freger discount will result in a thousand needles.
In the popular holo-comic ''Bombtanian,' what is the secret phrase used by the main character and his friends? Answer = Sacrifice yourself to save others.
In the proverb 'One ??? is better than a million l'Cie,' meaning one should take on a single task before taking on many, what goes in the blank? Answer = Crystal.
In the song 'Tiny Lulu,' to which city did the little girl's best friend move away? Answer = Bodhum.
Lebreau is skilled in cooking and fighting. How does she train to be such a great warrior? Answer = She works out using kitchen utensils.
Many chocobos participate in the chocobo races. Which of the following does not exist? Answer = Thunder Chicken.
Many flan make up the enormous Royal Ripeness. Which does not make up part of this creature? Answer = Elderly.
Sazh is best-known for his abilities as a pilot, but what is his former occupation? Answer = Train conductor.
The Eden Literary Award is handed out only to those who make a positive impact on society. Rodrick won this award for which novel? Answer = Secrets of the Crystals.
The investigations around the mountain ranges of Gran Pulse revealed which children's story to be true? Answer = L'Cie Extermination Mountain.
The l'Cie incident that occurred before Cocoon fell is sometimes referred to as 'Cocoon's dusk,' but is more commonly referred to by the media as what? Answer = Sunset.
The weather controlling device in the Archylte Steppe can't do which of the following? Answer = Make it snow.
The Yellow Bird is a story about a chocobo living on Gran Pulse. What is the name of the heroine? Answer = Coco.
There is a certain stuffed animal sold only in Nautilus. What is the name of the creature that possesses a gem on its forehead? Answer = Carbuncle.
What act performed by the comedian Fl-Fl-Flan got him booted off of every TV station? Answer = Wanna touch my shaolong gui?
What coat pattern does Serah's cat Snow have? Answer = Calico.
What color are Serah's eyes? Answer = Bluish.
What company became famous for their sales copy 'It's moogle o'clock, it's time to enjoy moogle bread'? Answer = Stiltzkin's Bakery.
What color were the orbs that appeared in Yaschas Massif AF100 when a group of Academy staff members disappeared? Answer = Red.
What did Serah get Lightning for her birthday? Answer = A knife.
What disparity, only noticeable by outsiders transferring in, was revealed in the tall-all book written by a disgruntled former Academy employee? Answer = Treatment of subsidiary organization graduates.
What do you call an incompetent person who climbs the corporate ladder? Answer = A cactuar.
What does Serah do for a living? Answer = Teacher.
What flan is the same color as a rust pudding? Answer = Ferruginous Pudding.
What hobby became popular among the feeble elderly who moved from Cocoon to Gran Pulse? Answer = Gardening.
What is Hope's unparalleled attack? Answer = Last Resort.
What is Lightning's unparalleled attack? Answer = Army of One.
What is one way Serah and Noel use Mog to retrieve treasure that's out of reach? Answer = They throw Mog at it.
What is Sazah's unparalleled attack? Answer = Cold Blood
What is the bow used by hunters in the Steppes to protect themselves from wild animals? Answer = Wild Chorus.
What is the name of the book of photographs shot by photographer Mich Rockfit during his numerous visits to New Bodhum? Answer = Meowillow Days.
What is the name of Maqui's shop? Answer = Lenora's Garage.
What is the name of the movie about the friendship of a boy and his bot? Answer = The Boy and His Bot.
What is the tallest mountain on Gran Pulse? Answer = Mt. Fairne.
What sport is gaining popularity among the adventurous young residents living in the Steppes? Answer = Ding dong ditch.
What was the name of the gambler who won the most number of coins at the slot machines in a single day in the casino Serendipity? Answer = Gabbiani.
What was the name of the popular game show where eliminated contestant would get pushed off the stage? Answer = To the Underworld.
What was the one famous dessert pastry chefs couldn't make because the couldn't get their hands on the creature? Answer = Carmelized shaolong gui.
When Storm Motors was in danger of getting bought out, which corporation swooped in to save the day? Answer = Blue Unicorn Inc.
Where is the one place Chocolina doesn't open up shop? Answer = Serendipity
Where on Serah's head is her side ponytail? Answer = By her left ear.
Which creature moves with such grace and beauty that a dance was created mimicking its motion? Answer = Stikini.
Which Eidolon is used by Vanille? Answer = Hecatoncheir.
Which monster dons colorful garb? Answer = Apotamkin.
Which of the following are not found in Oerba? Answer = People.
Which of the following has not been observed in Sunleth? Answer = Gold Ore.
Which of the following is not a nickname for the jet used by the former Sanctum army? Answer = Orion.
Which of the following is the Academy not responsible for? Answer = Running Serendipity.
Who has scored the most points and is known as the king of Cocoon's Premium League? Answer = Cazzaro 'The King' Mueller.
Who is not a part of Team NORA? Answer = Cid.
Who is the mathematician behind Hart's last theorem, the biggest breakthrough in mathematics since the birth of Cocoon? Answer = Smith Hartford.
Why can't Mog help Serah and Noel in Serendipity? Answer = Mog is off playing on his own.
The West Side Brain Blast Terminal and Fragment
-- West Side Brain Blast Terminal --
Located in the west side of the middle section of the city in an alcove up a ramp, this out of the way Brain Blast Terminal rewards you with 500 CP and the Academia Wisdom Fragment.
Getting all ten questions right also rewards you with Treasure Chests containing the following items: Behemoth Crest, Red PSICOM Spaulders, and Grudge Knife.
-- West Side Brain Blast Terminal Questions and Answers --
According to the philosopher Denrith, humans are merely an intellectual version of a certain monster, with the ability of looking innocent on the outside, but being conniving on the inside. Which monster was he referring to? Answer = Cactuar.
Around 100 AF, a TV show based on the battle of the l'Cie was in production, but got canceled at the last minute. What was the name of the show? Answer = Don't Mess with the Fro.
Around 100 AF, which test was proved invalid and superfluous by the Academy? Answer = Role-based personality test.
Around 400 AF, the '??? male' became a popular phrase. What goes in the blank? Answer = Armored.
BBQ Ben's is famous for their cheap, but delicious behemoth meat. Rumor has it they have close ties with certain government officials. How are they able to serve meat at such a reasonable price? Answer = They got leftover beasts from research labs.
During the festival of the Day of Rebirth, which food stand gets the most business from children? Answer = Microchu mousse.
How do people refer to the day of Cocoon's fall? Answer = The Day of Rebirth.
How does Hope refer to Lightning? Answer = Light.
How does Hope's time capsule work? Answer = It slows down time within the device.
The Lumeritz singing competition began 100 years after the first paradox. What year was that? Answer = 103 AF.
The monster movie 'The Imp' was a big hit among the niche crowd that raved about its cuteness. What did half of the movie consist of? Answer = Dancing imps.
The popular DJ DK sports thick sideburns and a mohawk. What is the name of this hairstyle? Answer = Chocobo hair.
What accessory is considered to grant wishes, but is seldom used because of its smell? Answer = Chocobo feather.
What advertising media was widely seen in Palumpolem as a result of energy conservation? Answer = Blimps.
What coarse substance is known as a fast-acting cold reliever? Answer = Microchu baby teeth.
What company's business has been booming due to the numerous deliveries required between Cocoon and Gran Pulse? Answer = Chocobo Delivery Service.
What does the cactuar sign seen at amusement parks imply? Answer = Emergency exits.
What happens to a l'Cie once they complete their Focus? Answer = They turn to crystal.
What happens to a l'Cie that's unable to complete their Focus? Answer = They become a Cie'th.
What is someone who sits at home all day generally called? Answer = Bear.
What is the acronym for the Academia Central Broadcasting Station? Answer = ACBS.
What is the famous painting by Geraint, the artist representing the new way style of post-Cocoon? Answer = Cosmos.
What is the full name of Professor Garnett, the editor-in-chief of the modern history textbook of 400 AF? Answer = Micah Garnett.
What is the name of the elevator connecting Gran Pulse with Cocoon? Answer = Gran Elevator.
What is the orobon incapable of doing? Answer = Exploding into a pile of dust.
What meat is used in the popular hunter's dish, Chef's Grudge? Answer = Cooked tonberry tail.
What mythology-based movie won the Tantalus award for Best Film in 328 AF? Answer = From Etro with Love.
What popular game do kids play on the shores of New Bodhum? Answer = Hopscotch.
What project is being criticized by reformist groups for pushing Academia to become a closed city? Answer = Elimination of foreign trade.
What topic is most touched upon in the modern history textbook of 400 AF? Answer = Paradox.
What was Dajh's ability as a l'Cie? Answer = Sensing power of Pulse origin.
What was the name of the device used by Sanctum's elite soldiers that allowed one to control gravity? Answer = Grav-con Unit.
What was the name of the military squad led by Cid Raines? Answer = Rapid Response Team.
What was the name of New Bodhum's soccer team, one of the few teams that participated in the first season on Gran Pulse in 4-5 AF? Answer =The Enterprise.
What was the task of the government-operated PSICOM? Answer = Protecting Cocoon from Pulse.
What was the name of the weapon used to shoot Cocoon's garbage into outer space? Answer = Megajunk cannon.
What water sport requires athletes to wear floats on their legs as they fight over a flag? Answer = Waterstrike.
When the Academy discovered the crystal pillar was in bad condition, what solution did they come up with to try and secure living space? Answer = Build a new Cocoon.
Where is the ideal place to raise a chocobo chick? Answer = Humid plains.
Where was Proto fal'Cie Adam created? Answer = Augusta Tower.
Which architect designed the congress hall founded in the capital city of Eden? Answer = Augustio Camille.
Which invaluable ore is sought after by miners everywhere? Answer = Uraninite.
Which monster wields the Centurion Blade? Answer = Immortal.
Which of the following did not occur directly after the publication of Woolrich's novel 'Humans Belong to the Fal'Cie'? Answer = It became a bestseller.
Which of the following is not programmed into the sunglasses of the Serendipity card dealers? Answer = X-ray vision.
Which movie portraying a couple torn apart by the Purge won the Tantalus Award for Best Film? Answer = My Gran Pulse Lover.
Who is the distinguished economist who said, 'Humans are merely animals that earn gil'? Answer = Gilmay Erskine.
Whose life revolves around collecting data on monsters? Answer = Dr. M.
Why was the piece 'Cocoon and the Five Moons' stripped of its title for first prize in the 35th Academia Photo Exhibition? Answer = It was digitally altered.
The East Side Brain Blast Terminal and Fragment
-- East Side Brain Blast Terminal --
Located in the east side of the middle section of the city at the end of the wide avenue, this out of the way Brain Blast Terminal rewards you with 500 CP and the Epicurean Song Fragment.
Getting all ten questions right also rewards you with Treasure Chests containing the following items: a Flower Pattern, a Sky Blue Silk Hat, and a Carnival Mask.
-- East Side Brain Blast Terminal Questions and Answers --
Before the crystal pillar appeared, in what state was Cocoon? Answer = Floating in midair due to the fal'Cie's powers.
Being oblivious to small, everyday occurrences is called a tonberry's what? Answer = Stealthy walk.
How does Hope's Eidolon, Alexander, make his exit? Answer = Breathes fire and flies off.
In 1 AF, an old flanbanero flower was discovered in crystal. The color was a cross between crystal and a flanbanero. What was the color? Answer = Muddy Violet.
In 2 AF, an air shuttle became available in the Yaschas Massif. What are the condensation trails of the shuttles that were named after shooting stars called? Answer = Comet trails.
In 20 AF, which region was crawling with bounty hunters due to the growing number of monsters in the area? Answers = Bresha Ruins.
In Noel's world, the earth was barren and there was little sign of life. What did his people use to build their homes? Answer = Scraps.
In what region of Gran Pulse can the ruins of Paddra be found? Answer = Yaschas Massif.
Jones is an infamous treasure hunter who always seems to engulf his discoveries in flames and fail in his excursions. What kind of weapon does he wield? Answer = A flamethrower.
Of all the chocobo toys sold in Nautilus, there are rare ones called Happy Chocobo. What creepy characteristic makes it different from other toys? Answer = Its eyes are bloodshot.
On what part of his body does Odin wear his cape? Answer = Over his right shoulder.
Since the massive relocation to Gran Pulse, a world much less peaceful than Cocoon, which item has considerably risen in sales? Answer = Potions.
The annual Gysahl Cup that presents the winner with more gysahl greens than it can eat in a lifetime was held every year except for one. Why wasn't it held in 394 AF? Answer = Lack of gysahl greens.
Two sisters work in Serendipity as casino staff. How does the younger sister describe her older sibling? Answer = Shy.
What caffeine-filled snack was popular among the Academy scientists of 10 AF? Answer = Bobblicious.
What does Noel have equipped on his left hand? Answer = Black armlet.
What does Yuj think of Serah's outfit that seemed to appear out of nowhere? Answer = Stylin'.
What happens to Fang's Eidolon, Bahamut, in gestalt mode? Answer = It flies with Fang on its back.
What is the creature shown on the giant roulette wheel in the central area of Serendipity? Answer = Carbuncle.
What move was invented by Cocoon's 13th boxing champion? Answer = Goblin Roll.
What refreshment do chocobo race contestants drink before their race? Answer = Chocobo XS.
What role is Serah capable of? Answer = Commando.
What title was awarded to the winner of New Bodhum's swimming competition? Answer = Speedy Sahagin
What was the name of the mission to drive out the inhabitants of Bodhum when a Pulse fal'Cie was discovered? Answer = The Purge.
What weapon does Mog transform into for Serah's use? Answer = Bowsword.
When Cocoon residents relocated to Gran Pulse, what dish became widely popular as a way to diminish the natural smell of Pulse ingredients? Answer = Curry.
Where are Eidolons said to be from? Answer = Valhalla.
Which Academy team was ordered to investigate the disturbance in the Vile Peaks in 10 AF? Answer = Blitz Squadron.
Which creature has large eyes? Answer = Neochu.
Which creature has the longest legs? Answer = Shaolong gui.
Which creature has white fangs? Answer = Ahriman.
Which event was the most popular at Nautilus Park? Answer = The hologram dance parade.
Which monster is not found on the slow machine reels in Serendipity? Answer = Flan.
Which of the following is coarse? Answer = Scalebeast's back.
Which role allows you to heal yourself and your allies instead of attacking the enemy? Answer = Medic.
Which role allows you to strengthen your allies by infusing their attacks with elemental power? Answer = Synergist.
The Southwest Side Brain Blast Terminal and Fragment
-- Southwest Side Brain Blast Terminal --
Located in the southwest side of the middle section of the city at the top of a ramp at the end of the narrow avenue, this out of the way Brain Blast Terminal rewards you with 500 CP and the Lyceum Knowledge Fragment.
Getting all ten questions right also rewards you with Treasure Chests containing the following items: Snow Fairy Wings, an Orange Pilot’s Badge, and a White Bushy Mustache.
-- Southwest Side Brain Blast Terminal Questions and Answers --
4D fireworks are used at ceremonies. Besides sight and hearing, what other sense does it stimulate? Answer = Smell.
After the annual singing competition, people shower each other with an alcoholic beverage to celebrate the new year. What is the name of this beverage created using chocobos' favorite vegetable? Answer = Mimett.
Around 20 AF, higher-ups of the provisional government and the Academy butted heads, leading to the disappearance of a key person. How did they refer to this period? Answer = The Dark War.
As Serah and Noel appeared in the past time and time again, what research project received lots of funding and donations? Answer = Moogle throw simulator.
As the population on Gran Pulse increased, what business took off? Answer = Private military companies.
During their journey, when did Mog decide he needed to go on a diet? Answer = When Serah had trouble swinging her sword.
Located in the southwest side of the middle section of the city at the end of the wide avenue, this out of the way Brain Blast Terminal rewards you with 500 CP and the Epicurean Song Fragment.
Getting all ten questions right also rewards you with Treasure Chests containing the following items: a Flower Pattern, a Sky Blue Silk Hat, and a Carnival Mask.
How did the Academy revamp their program in order to provide more opportunities for the less fortunate? Answer = They improved their scholarship programs.
In 2 AF, what did the civilians create to signify their independence from the fal'Cie? Answer = An oath of autonomy.
In 320 AF, what city was voted the best place to live by Academy scientists? Answer = Academia.
In Academia's popular woman’s magazine, what is the number one attribute to look for in a man? Answer = Academy Job.
In Sazanbar Cape, one of the famous tourist spots in New Bodhum, what contest is held that is painful to watch? Answer = Student poetry reading.
In the story Three Little Microchus, what did the youngest use to build his house? Answer = Stone.
Many people gather at Yaschas Massif to watch the sunrise. What is a necessary item to have in your possession when walking along the dangerous monster-infested path at night? Answer = Something that emits light.
Mythril Hearts Co. is famous for their mythril accessories. Which creepy-yet-fashionable accessory is the most popular? Answer = Oneiric Bangle.
Subject Zero was the first experimental subject to undergo the duplicate creation process. Because they didn't have the technology to create synthetic flesh at the time, which of the following was used as the test subject? Answer = A Behemoth bioweapon.
The baghorn is an instrument used in Nautilus's parade. Why is this instrument so hard to make? Answer = The intricate carvings require too much work.
The Cocoon Firefly discovered on Pulse does not exist on Cocoon. How did it get its name? Answer = To remember Cocoon.
The Flying Tortise was Bodhum's most famous hotel that was booked till the end of time. What was the attraction that made the resort so popular? Answer = An aerial hot tub.
The most common variety of cactuar is used for cooking. What color is it? Answer = Green.
The National Weather Service controlled Cocoon's weather and what? Answer = Seasons.
The Sabbath is an event where people gather to watch monsters dance and frolic. Which is the best dancer of them all? Answer = Succubus.
The Sanctum army tried to create a bioweapon using a mu, but realized enemy soldiers wouldn't take it seriously for which reason? Answer = They were too adorable.
The women of Academia are raving about a new powder foundation called Adam. What is the main ingredient of this product? Answer = Adamantoise fang.
What is the common name for the Helix breshantha, a conch shell found only in the Bresha region? Answer = Soilentoise.
What is the hit song of Bombtanians, Cocoon's all-violin band known for their melancholy sound? Answer = Beautiful Ballad.
What is the main ingredient of phantom honey, a condiment with a rather pungent smell? Answer = Ochu flower honey.
What is the main ingredient of the exquisite maple honey, a sugary sweet condiment said to be developed from crystals? Answer = Sunleth tree sap.
What is the relationship between the two runners who placed first in the 106th Eden Marathon thanks to their unbreakable bond? Answer = Rivals.
What is the title of the dark fantasy show based on this world? Answer = Highway to the Chaos Zone.
What part of the weapon does Mog's bobble become? Answer = A decorative jewel.
What takes place at the annual Gran Pulse festival La Prettian, an event that celebrates the coming of spring? Answer = People throw flan at one another.
What was the name of the scandal involving the provisional government and blank documents? Answer = Blank sheet incident.
When a woman calls someone a 'chocobo feather man,' what does she mean? Answer = Someone who won't commit.
When someone with a pure heart rides a chocobo, heavenly music rings in their ears. The sound comes from which part of the chocobo? Answer = Chest feathers.
Where is hoax herb, a plant not readily spotted by hikers, generally found? Answer = Yaschas Massif.
Which stupidly strong alcoholic beverage known to 'taste like death' is popular among the elderly? Answer = Cie'th Killer.
Who is the cute mascot of the popular game show Cue This? Answer = Cuebat.
Who was the first female prime minister to represent the Sanctum? Answer = Ivory Marilia.
Who was the girl that won the 41st Junior Sports Hunting Championship with a perfect score? Answer = Elle Larskin.
-- Back on Task --
When you ace the last quiz to get the third prize you are informed that you have obtained perfect scores in all of the different quiz terminals and that your name will be added to the list in the Academy database. Well done mates! Well done indeed! Not only did you get your name in the lists but you scored four Fragments and some nice prizes for your troubles!
You should have also cleared the map 100% -- if you did not look carefully on the east side of the center of the map, where there is a very shallow shop on the south side of the avenue that you might not have cleared as it is sort of on a narrow side strip running parallel to the main avenue as part of it... Getting the map to 100% is one of our remaining tasks...
Obtaining the Wild Artifact and Opening the Vile Peaks Gate
Heading back towards the east side of the center area as you cross the bridge between the two sides be sure to access the data terminal in the middle to learn about the Thirteenth Ark... There is a Chocolina here if you need her as well, otherwise continue to the east side and then head to the southeast corner of this area bottom-most (watch the video above if you cannot find it) to find a hidden Wild Artifact by a closed set of doors -- you should grab this as there is a Gate we want to open in this zone and this way you will have the Artifact to open it!
With that Wild Artifact in your possession, head north to the other side of the east side almost straight above you and open the Gate for Vile Peaks AF010. You just need to open the Gate so that it is added to the Historia Crux and then head right back to Academia AF4XX.
-- Back in Academia AF4XX --
Now we have managed most of the mischief that we needed to manage here -- so it is time to head back towards the Academy HQ. Enter the outer lobby of the HQ and look for a man with a chat bubble -- that is Dr. M. Talk to him to flag the mission Fragment: Academic Rank: Monster Professor now. Accept the mission and note that he wants you to show him your personal database on every Monster in the known worlds... And times. Obviously you do not have that in the bag now, and it is a long-term mission, so just be sure you try to capture / tame every Monster you can, and battle the ones you cannot to get their records completed!
Now we have dealt with everything we needed to outside of HQ, so head through the doors to the north and into the inner lobby -- ignore Hope for the moment and talk to Alyssa to learn about what Hope has been doing, and to learn about the battle with the Proto fal'Cie and all that did not happen because of Serah... Talk to Alyssa a second time and she then tells you about the Time Capsule -- with maybe not as many details as you would like -- Alyssa and Serah have some girl bonding, and then another chat bubble appears over her head.
Your Meeting with Hope and Alyssa at Academy HQ
Talk to her again to learn about the Thirteenth Ark -- and about the Graviton Cores -- which you need to collect for them. That was the good news. The bad news is that Hope has determined that they need multiple cores -- but then we were going to find them anyway, right?
Now talk to Hope and he explains why they came to the future. After you get the first Datalog updated notice, talk to Hope again for an LT event -- it does not seem to matter which of the chat choices you make -- but ask the question you are the most curious about since you get a specific response to your question. When this conversation ends a Treasure Cube appears nearby containing the Crystal Star Adornment (the LT reward) so go grab that.
You will notice that Alyssa has a Quest Mark over her head -- that is to go to her to turn in the Graviton Core Fragments -- but if you check your Fragment Library you will note that you only have five of the seven cores at the moment -- so it is not the time to turn them into her just now.
If you run a little north of where you talked to Hope and Alyssa and look down to the next level you will notice a Treasure Sphere happily bouncing around down there -- toss Moogle at it to grab a Platinum Casino Ticket to go with the Gold one you got earlier outside...
You may have run across Captain Cryptic outside -- he also has quiz questions that he will ask and rewards Fragments for them, but right now we are not interested in dealing with that -- it will be dealt with as a separate section later in the guide, so just pass over that for now if you like -- or head to the section set aside for it and get it out of the way, either choice works for me!
You should also bear in mind that if you have been throwing Moogle around in the different sub-areas of the zone you will be obtaining some interesting loot -- I only mention that to remind you to do it, right?
And that nicely wraps up the zone!
This is the zone that we unlocked back when we were working on leveling our Silver Chocobo -- and now it is time to deal with it! When you arrive you get a CS that explains partly why the place is as dismal as it is -- the spacial distortion that makes this place a danger to Academy soldiers...
As you approach the bridge your Moogle reveals the presence of a hidden item -- and when you Mooglehunt it you discover that it is one of the missing Academy Security Soldiers -- a block named Torreno -- who you have pulled back into this time. In addition to learning about what happened to him, you flag the mission Fragment: Blitz Squadron Mission Report, which has you seeking out all six of the survivors.
Torreno gives you the Map of the Vile Peaks, and the Fragment Torreno's Last Light along with 500 CP for your efforts. Folllow the path and when you get through the tunnel you encounter a solder named Falcon who panics and runs off. Follow him and talk to him when he stops, and he tells you his story. He gices you 500 CP and the Fragment Falcon's Last Light, and tells you he will go check on Torreno -- warning you not to go any further into the zone and avoid the abomination that is ahead!
Fragments from the Rescue Mission
Back through the tunnel and you battle your way to the second tunnel at the end of which you will find a Treasure Sphere with a Phoenix Down in it. Run ahead and speak to Corporal Thunder who gives you a basic sitrep and then you flag the mission Fragment: Twilight Fragment Beta from him.
He tells you to talk to Falcon before you attack the beast, and then gives you 500 CP and the Fragment Thunder's Last Light. Backtrack to Falcon and talk to him to learn he doesn't believe you. You get an LT in which you have to give the Corporal's call sign (Thunder), after which he cooperates, giving you the Falcon's Compass Fragment for cooperating with the unit.
Now that you have the information head back to the Corporal to report what you learned. He tells you to investigate in other times... Hmm... Well, we have unlocked The Vile Peaks AF010 haven't we? It is time to head there to see what we can see!
-- Grinding Opportunities --
If you want to grind a little in this area you can acquire the following loot items:
Mana Droplet (Material)
Mana Sliver (Material)
Millerite (Component)
Molted Tail (Component)
Power Bolt (Material)
Vitality Chip (Matieral)
Vitality Droplet (Material)
You can also acquire the Monster Crystals for:
Garuda (wyvern-type) Organic / Saboteur
Koboldroid Yang (droid-like) Mechanical / Ravager
Viking (mech-type) Mechanical / Saboteur
When you arrive and move forward you encounter Baxter, a wounded member of the Squad who you reveal using Mooglehunt. Serah summarizes the situation and Baxter gives you a sitrep and you can flag the mission Fragment: Ray's Last Light. He then gives you 800 CP and the Fragment Baxter's Last Light for your efforts.
Follow the path to the right to reach the marker and Ray -- and he has you prove to him that you are who and what you say you are. He gives you a sitrep and then you flag the mission Fragment: Twilight Fragment Alpha. He then gives you 800 CP and the Fragment Ray's Last Light.
Return to the path and head north up the ramp where you find a Treasure Sphere with a Royal Armlet in it. Ahead of you is the boss battle for Twilight Odin -- which will be fairly easy if you are well-leveled but otherwise something of a struggle if not...
Once you examine the marker you get a CS with Lightning narrating, and then Serah identifies this as a shadow... The thing about this battle is to five-star it you will need to Stagger it is quickly as you can and then take it out in that single Staggered timer... Otherwise not.
The Twilight Odin Battle
I found that the best approach is to use Diversity (RAV/COM/MED) until it was Staggered and then Aggression-X (RAV/COM/COM) to kill it.
When the battle ends you get the Martyrs Badge as loot, and 3000 CP plus the Twilight Fragment Alpha.
Continue along the path around the silo deck where you find an Entite Ring in a Treasure Sphere, and further down the path a Saint's Amulet in another Treasure Sphere. Almost to the end is another Treasure Sphere with a Zealot's Amulet that you can get with Moogle Throw.
Sergeant Blitz is ahead and you reveal him with Mooglehunt -- and get a sitrep of sorts from him... It seems he knows Lightning -- served with her -- and he fills you in a little about your sister. After hte CS you receive 800 CP and Sarge's Last Light Fragment.
Farther along the path is a hidden Treasure Sphere with a Platinum Casino Ticket for you to grab, and then you just finish off the map and jump down to grab another Platinum Casino Ticket from a Treasure Sphere below.
-- Grinding Opportunities --
If you want to grind a little in this area you can acquire the following loot items:
Mana Sliver (Material)
Power Engine (Material)
Rhodochrosite (Component)
You can also acquire the Monster Crystals for:
Black Chocobo (choco-type) Organic / Saboteur
Cryohedron (bomb-type) Mechanical / Ravager
Yaksha (dancing-bird) Organic / Commando
Return to the Historia Crux and then to The Vile Peaks AF200 now.
When we arrive back it is time to take on this timeline's version of Odin -- and while you should have a similar success with him using the previous tactics I think you should be aware that THIS Odin has a special attack that does area-of-effect damage, so you will want to keep an eye on your health as the battle commences.
Remember what you want to do here is Stagger him as quick as you can managed, then take him out in a single Stagger Timer. Do that and you are guaranteed a five-star outcome!
Your reward for this battle is the Twilight Odin Monster Crystal, a Martyr's Badge, 3,000 CP, the Twilight Fragment Beta, the Return Gate Seal, and the Afterimage Gate Seal -- quite a nice haul!
The Second Twilight Odin Battle
If you want to grind a little in this area you can acquire the following loot items:
Mana Droplet (Material)
Mana Sliver (Material)
Millerite (Component)
Molted Tail (Component)
Power Bolt (Material)
Vitality Chip (Matieral)
Vitality Droplet (Material)
You can also acquire the Monster Crystals for:
Garuda (wyvern-type) Organic / Saboteur
Koboldroid Yang (droid-like) Mechanical / Ravager
Viking (mech-type) Mechanical / Saboteur
-- Back on Task --
In the cave-like opening there is a hidden Treasure Sphere with x8 Mana Orb in it, and then you should head back to the Gate area where the soldiers are.
Head directly back and you will see a shadowy figure on the path -- Sazh! Mooglehunt to reveal him and he has a chat with you and then gives you the Father's Song fragment and 500 CP. When you get to the Gate area and talk to Torreno you receive the Blitz Squadron Mission Report Fragment and 500 CP.
Now before we leave here and return to the Historia Crux look to the south side of the Gate clearing and you will see another shadowy figure -- Mooglehunt it and waaaaahhhhhhhrrrrr? She gives you a monologue and then you receive the Words of Light Fragment and 500 CP. Well done mates!
Now hit the Historica Crux and considering the wealth of Fragments that we have now would be a great time to duck over to the Casino at Serendipity and meet with the Mystic to show her our Fragment collection and obtain the Fragment Skill Monster Collector -- and turn that on in the Character Menu!
Back to the Historica Crux now!
When you select the Gate in the Historica Crux and listen to the description from the Datalog you should pick up on the note that your Moogle has a particular concern for this region and world. Upon your arrival Serah has a rather long conversation with Moogle -- and then we are thrust into a world that is presently in a dust storm.
There is an Anomaly Pillar to the southeast of the Gate we arrived through, and that is a good place for us to begin our adventures in Oerba!
We have completed this sort of puzzle before -- it was the first type that we faced in the game -- though this one is not quite as orderly in how you complete it as the previous ones. Once you are shown the outline you have to connect the lines by holding 'A' and moving from like-color to like-color but in this case the process is not linear -- you will not simply start at one end and work your way through the design, as it requires a more disjointed approach.
There are two stages to this puzzle, and completing then rewards you with 500 CP and the Sparkling Runestone Fragment. When you emerge from the puzzle Moogle points out that the world has not changed...
Heading down the ramp to the north towards the beach takes you to the next Anomaly Pillar -- and when you enter it you get a brief CS with Moogle -- who smells something it remembers...
The Mystery of the Puzzles of Oerba AF300
This set of puzzles is the disappearing tiles one which we are also familiar with -- all that we need to do is plan out our route to pick up the crystals without losing the path. Two very basic stages that, when resolved awards us with 500 CP and the Astonishing Limestone Fragment.
Now continue to the north and head onto the beach and, as you work your way along Moogle will react to a hidden object -- use Mooglehunt to reveal the next Anomaly Pillar. When you enter you will find another disappearing tiles puzzle.
This one is a lot harder because the crystals move around -- you may need to watch the video to understand the process -- basically it is more of a strategic waiting game mixed with slower more planned-out movements. Completing the puzzle rewards you with 500 CP and the Bubbly Stone Fragment.
Tossing Moogle out onto the water... Err... Sand? Whatever -- will score you the Sahagin Hide Backpack Adornment so you may as well do that! Now head back up the stairs and follow the path along to the west to the end of the path where Moogle again reacts and, when you use Mooglehunt you reveal another hidden Anomaly Pillar.
Look for the floating Treasure Chest in the air ahead as you progress with the Flight Gate Seal and be sure to grab that with your Mog.
This time it is the Clock Face type (which I secretly like a lot more than the other ones because it lets me take advantage of two really odd aspects of my biological makeup -- you see I think in pictures, not in words and I can do math in my head which made diffy-q and trig really easy for me).
I have to admit that this one was a bit more challenging -- I got the first one bang-on but the second took two tries... The reward is 500 CP and the Lovely Starstone Fragment. Nice one!
Head up the stairs and you will find the next Anomaly Pillar at the very top on the right, where we find another Clock Face puzzle! This one though is a bit simpler -- actually it is dead easy really -- so getting the 500 CP and Spinning Moonstone Fragment is a snap!
From here head east to the next Pillar which you can easily see as you approach -- this is a pattern one and you know how these work -- this one though is a four-stage puzzle and the complexity is a bit higher but you should still have no trouble with it. Easey Peasy! The pay-off is 500 CP and the Dewey Bloodstone Fragment.
At the main avenue look over the edge to the north to spot another floating Treasure Chest -- this one has the How Things Were Gate Seal in it -- Moogle Toss to get that now.
From here head south down the main avenue to the intersection where you find the next Pillar and a Gate! Entering this Anomaly Pillar triggers a CS with Moogle again -- and then we land on another Clock Face puzzle. I have to admit that this one was really hard -- the presence of so many 4's makes it difficult to plan out... But getting this one resolved pays off in 500 CP and the Scorching Firestone Fragment as well as unsealing the Gate behind the Anomaly.
The Clock Puzzles get Tougher
Use your Wild Artifact on the Gate to open the way to Oerba AF400 -- and then immediately return to Oerba AF300.
Now head up the avenue to where you can jump down to the plaza on the other side and jump, heading to the Anomaly Pillar there to enter the Shape Puzzle -- you know the drill for this -- at least you do tor the first four stages... I have to warn you the 5th and last stage for this puzzle is a very frustrating one, because you have to hit each of the links perfectly. If you have to backtrack on it you will fail, and really if we are honest here, you are probably going to fail this one a lot...
If there is any example of grief code in the game this would be it -- and it is odd that they did this considering how HUGE this game is and considering the obvious nasty bit of grief that the Casino represents. You would think that this game would not need another time-sink, and yet here it is...
Resolving this Anomaly gains you 500 CP and the Thrilling Milestone Fragment, and unlocks and reveals another Anomaly Pillar that is at the end of the main avenue above.
Head to the corner and take the walkway around the building and down to the area below, up the ramp to the main avenue and then follow that to the end for the last Anomaly Pillar!
When you enter Moogle tells you a story about this place and what she finally remembers -- and then you find yourself on another Shape Puzzle. This one is a bit more complex than the previous shapes but the 5th Stage of this one is as bad as the previous one... So be prepared to not make mistakes and try not to backtrack as you complete it and you will find that works as the best strategy...
Resolving this Anomaly gains you 500 CP and the Mossy Rosetta Stone Fragment! You are then informed that a labyrinth has appeared in a different time -- that is in Oerba AF400 actually, the time for the Gate we just unlocked a while ago... But before we head there you may want to do some grinding here -- especially if you somehow did not get a White Chocobo...
-- Grinding Opportunities --
If you want to grind a little in this area you can acquire the following loot items:
Chocobo Plume (Component)
Cie'th Tear (Component)
Holy Water (Consumable)
Mana Sliver (Material)
Millerite (Component)
Painkiller (Consumable)
Potent Chip (Material)
Potent Engine (Material)
Power Sliver (Material)
You can also acquire the Monster Crystals for:
Bloodfang Bass (lizard-like) Organic / Ravager
White Chocobo (chocobo-type) Organic / Medic
-- Back on Track --
Once you have completed all of the Grinding you want to do here, either head to the Historica Crux or to the Gate (whichever you prefer) and to the next puzzle-filled zone!
You should be aware that this is basically a continuation of the side-story that we have been following in the previous zone -- the idea is to continue solving the Anomaly Puzzles that are part of the Labyrinth in order to help Moogle discover more of her memories. This place looks very different than the previous zone -- much better weather :)
The first Anomaly Pillar is ahead on the left -- and it turns out to be a Crystal Puzzle with the disappearing tiles. This one is on the tricky side so you will want to watch the video below to see the solution to it if you cannot figure it out on your own... Your reward for this one is 800 CP and the Farewell Madeleine Fragment.
The Crystal Puzzle Solutions
Continue east to the main avenue and then down the ramp below to the next Anomaly Pillar -- revealing itself to be a Shape Puzzle. Resolving the Anomaly rewards you with 800 CP and the Bittersweet Chiffon Fragment.
Head around to the ramp leading down towards the beach and descend, and at the bottom of the ramp look directly to the left in the corner where there are some large roots with a Treasure Chest at the top of the roots. Toss Moogle up there to obtain the Hometown Gate Seal for your efforts.
-- The Beach Area --
Heading down to the beach go to the Anomaly Pillar on the right as you descend, which turns out to be a Clock Face Puzzle! Completing the three stages earns you 800 CP and the Beloved Cinnamon Fragment.
Head west across the beach to the next Pillar and a CS with Moogle that adds to the story -- then you find yourself facing another Clock Face Puzzle. This one has six (SIX) levels to it! Resolving the Anomaly delivers 1000 CP and the Pink Parfait Fragment. We get a lengthy CS after we resolve the puzzle in which more is learned about Moogle -- and then a decision is in the offing. We do not learn the result of the decision until after we leave the labyrinth and re-enter the world.
Head along the beach to the stairs leading into the building there -- head all the way up to the roof and then use Mooglehunt to reveal the Anomaly Pillar located here which contains a Clock Face Puzzle. Resolving the Puzzle earns you 800 CP and the Teatime Mont Blanc Fragment.
Head back up the stairs and along the path west to the next Pillar which contains a Pattern Puzzle. Resolving this delivers 800 CP and the Selfish Pancake Fragment. Head up the nearby stairs to find another hidden Treasure Sphere with a Hypnocrown in it.
Back down the stairs continue along the path to the far stairs and head up to the street and then to the main avenue, turning onto it and continuing to the jumping point and jump down to the plaza below where you find the next Pillar.
This one is a Crystal and disappearing Tile type -- solving it requires just some patience and well-planned steps and delivers to you 800 CP and the Tremulous Muffin Fragment.
Follow the path around the side of the building and then follow your excited Moogle inside the building where, deep in the back there is a hidden Anomaly Pillar that, once revealed turns out to be a Pattern Puzzle. You know how to do these so it should go rather quickly,
Obtaining the Graviton Core Zeta
Completing it delivers to you 800 CP and the Dishonest Mille-feuille Fragment for the six stages.
Now for a quick side-trip, head up to the main avenue and run all the way to the end into the sand dunes and grab the Platinum Casino Ticket from the Treasure Chest there.
Now that we have obtained all eight of the puzzle-based Fragments there is just one more (that has now been revealed) for us to obtain... Head back to the beach now and, starting in the northeast corner, along the edge of the beach all the way to the east you will spot a hidden object -- a Treasure Sphere with the Wild Chorus weapon in it. Continue west along the edge of the water to find another hidden Treasure Sphere which has a Platinum Casino Ticket in it.
Near the building on the beach is a hidden object -- look carefully and you will see it -- and using Mooglehunt reveals the Fragment Graviton Core Zeta. This is the 6th of the 7 Graviton Cores we need to find so well done mates!
Check the grinding list below for anything that you want and do the grind!
-- Grinding Opportunities --
If you want to grind a little in this area you can acquire the following loot items:
Cie'th Tear (Component)
Mana Essence (Material)
Painkiller (Consumable)
Potion (Consumable)
Power Essence (Material)
You can also acquire the Monster Crystals for:
Forked Cat (pole cat-type) Organic / Saboteur
Zaghnal (behemoth-type) Organic / Ravager
-- Back on Track --
When you are happy with your progress through this zone and have all the items and have done the grinding you want to do, return to the Historica Crux and then select the Gate for Oerba AF200.
When you arrive in Oerba AF200 check the map and head for the Chocolina, and rent a Chocobo. Ride up onto the avenue above and, using the Choco jump on to the roof that the Chocolina is standing beside, then dismount and use Mooglehunt to reveal Graviton Core Gamma and 500 CP! That is the final Core that we need, so hit the Historica Crux and select the Gate for Academia AF4XX.
When you arrive head for the Academy HQ and find Alyssa inside -- talk to her and begin handing over the Cores to her -- after you give the third Core you get a CS in which Hope tells you about the new weapon he is building and mentions that he needs a Chaos Crystal -- and what do you know?! We have one of those!
Turning in the Graviton Cores
Continue handing in the Cores, and after two more you get another CS in which Hope is surprised you have collected all of the Core Fragments. You get the summary and the news that they repaired the broken Gate in town. Serah then receives the Vagabond Artifact.
With the Gate now restored to working condition -- and the Artifact we need in hand, it is time to head towards the marker on the map and the now repaired Gate and enter it!
WARNING: When you proceed to the next location you will be temporarily cut off from some of the rest of the Historica Crux... Be sure you have done EVERYTHING you need to do BEFORE you hit this zone!
At the exit you have a chat event with Noel and discuss Caius with him... This updates the Datalog, and then you can use the exit door... Pass through the exit to the outside and head to the marker, where you will find the Gate ready and waiting!
The CS you get when you use the Gate the first time reminds you that this is a jumping-off point. If you are not ready -- if you are not confident that you have trained and leveled your team, you have all the items you need, any other issue -- then now is not the time to go through this particular Gate mates. But you are ready! Of course you are! (And if you are not, go GET ready then come back!)
Ready? Are you sure? Really really sure? Totally... Alright! Sorry! Well? Hit the Gate!
You get another lengthy CS with Alyssa and Noel -- there is a reason for this... You realize you are heading directly towards one of the game endings, right? Well, you are!
As you pass through the Gate something goes wrong -- you get separated from Noel and then you get a strange message from Lightning... Select the Gate for The Void Beyond and enter it.
Your first major Caius Battle
-- Into The Void --
After the CS with Caius killing Noel, you arrive and, due to that separation, you will need to set up some new Paradigms. You unlock the Achievement "Sooth Seeker" (15 G) Prepared to face a test of your determination in the rift where hidden truth slumbers -- and you seem to have lost Mog!
Before you can reset your Paraidgms you need to complete the LT event that is active -- so head along the path and talk to Yeul -- one of the many it seems. After your conversation with her she will gift you with the Fragment Etro's Sorrow and 600 CP and you are shown the location of the next Yeul.
Now the LT event is over, so before you set out to have any more battles you need to create a new set of Paradigms -- you will be doing this battle alone with only your Monster as your company -- and because of that you need to set up Paradigms that will work for it. First you should change your Monster layout so that you have your Silver Choco as part of your party, as well as a MED and a COM -- I used the following:
Arcane Defense-X (RAV/SEN)
Yin & Yang (RAV/MED)
Slash & Burn (RAV/COM)
Supersoldier (SYN/COM)
Lifeguard (MED/SEN)
Slumbering Block (SAB/SEN)
I found that these worked pretty well for me... I saved them as the third Paradigm Set.
-- Back on the Path --
Continue along and speak the next Yeul -- after the chat with her she gives you the 600 CP and the Fragment Pulse's Resolution. Nearby is a Treasure Chest containing Caius's Sword -- take that and
Up the stairs ahead is the path to the next Yeul -- and midway up the stairs on the right (if you have an FFXIII Save) is a Treasure Sphere with a Serah's Mask in it. When you reach the next Yeul you have a chat and she gives you the Fragment Lindzei's Desire and 600 CP.
Head back down the stairs and, just beyond the next Yuel is a Treasure Sphere with a Librascope. Grab that and then talk to her to receive the Fragment Mwynn's Tenderness and 600 CP.
You should probably save you game often here... I am just saying...
Head up the stairs to the next Yeul and have a chat, and receive the Fragment Bhuniveize's Sleep and 600 CP.
Continue up the path to the next Yeul who you chat up and then the Battle begins!
-- The Caius Ballad Boss Battle --
If you are well-leveled you should be able to five-star the battle using just Arcane Defense-X (RAV/SEN) -- else switch as you need to. Once the battle is over you get a lengthy CS in which you and Caius tabgle -- and then you do something that alters the timescale.
Now we learn what is motivating Caius -- he has been watching his companion die over and over again but we knew that... Now we know why. This guy is a total nutter!
This does not seem to be going very well, does it?
-- Grinding Opportunities --
If you want to grind a little in this area you can acquire the following loot items:
Mana Sliver (Material)
Potent Droplet (Material)
Potent Sliver (Material)
Potion (Consumable)
Power Sliver (Material)
You awaken in what appears to be home... And with all your mates around you... Moogle is still phased out however, so no, this is not what it seems. Talk to each one of your mates and then save the game -- and then go to the Historica Crux and make a new Game Save as well -- before you enter the NORA house.
Head back to the beach after you create the new save and go into the house to see -- Snow! You get a lengthy CS during which everything is simply too good to be true... But when you look closer you see that nothing here is actually real -- and now it begins to fade.
The Fate and Freedom Ending
Head out on to the docks and talk to your sister Lightning -- you get a CS and then you are asked to make a decision (Lightning tells you the truth sort of) and since this is one of the possible endings you should go ahead and say yes when she asks you to accept the dream... Say yes and you receive the Paradox Ending: Fate and Freedom -- your first alternate ending! Nice one!
When the CS ends you recieve 1500 CP and the Transcript: Fate and Freedom Fragment, and are put back into the Historica Crux. Now select the Hollow Seclusion Gate again and go back to the beach, but this time say NO when you are asked in the LT.
Saying no causes everything to fade and you to be free of the visions. Head towards where the meteor was and you will encounter Vanille at the location where the Gate was. You have a chat with her and then Fang shows up -- they are here to help you get out of the dream you are trapped in!
After they summon the Gate and disappear head to the north to find a Treasure Chest that contains 600 CP and Vainille's Fruit Fragment. On the south side of the area is another Treasure Chest with 600 CP and Fang's Crown Fragment -- once you have those, head into the Gate.
When you reach the other side enter the Gate for A Dying World AF700 and you will find that the CS fills you in properly as to what your goal is here... Head west on the path until you trigger a CS in which you encounter Noel! But as you watch he runs right through you -- run after him to get another CS in which he meets with Caius -- who you will then be able to talk to in order to further the level but do not do that just yet.
If you look to the north of him you will find up the stairs behind the shed a Treasure Sphere with Pain Dampener (Accessory) in it.
Now chat up Caius for a CS in which you learn more about what is happening here from Noel. Run forward and you will spot a hidden Treasure Sphere -- use Mooglehunt on it to obtain the Map of the zone. In town by one of the houses is a Treasure Chest with the Promises Gate Seal in it -- be sure to grab that -- and then continue along the path to run along the edge of the area revealing it on the map. You will find a Treasure Sphere with 1500 Gil in it as you go, grab the White Cape from the Treasure Sphere up the stairs on the top of one of the houses.
This may be a bit frustrating as finding Noel unless you pay attention to Moogle is difficult -- but I show where he is in the video so you can use that... Use Mooglehunt on him to trigger a CS with him and Yeul and then talk to Yeul to get another CS -- follow Noel to trigger yet another CS in which Caius confronts Noel again -- and Noel learns that the plan he thinks is the plan is not really the plan...
Your second Caius Battle
-- The Second Caius Battle --
This one is really brief and should be no trouble for you to five-star at all... You do it as Noel and this time around Caius is a wuss. Or maybe not since we did not actually kill him...
Caius declares his intention to go to Valhalla to slay the Goddess -- and so you learn the rest of Noel's story -- what he could not remember before.
Follow Noel to get a sad CS and then follow him again to get another CS and then follow him some more and get another CS -- do that again and eventually you see him fall to his knees in another CS, and get raised into the light -- at which point you grab his hands and fill him in on what has taken place and what you need to do for him...
Just as things are looking up you find yourself in a Boss Battle!
-- Gogmagog Battle --
The beauty of this is that you area already set up for this battle with Delta Attack-X (RAV/COM/SEN) so it should be a very short very easy five-star battle!
Once you defeat him the dream ends and you get an LT event with Noel -- he tries to talk you out of continuing the journey to save your life -- regardless of your answer you should receive 15,000 CP, the Gogmagog Fragment Gamma, and a Crystal Rose in a nearby LT-Reward Treasure Chest.
Head back to town following Noel for a long and battle-filled run, and you will eventually arrive at the marker -- which you use to trigger a CS with a vision of the future that actually has some good news in it... The Oracle Drive then restores everything to the way that it was, with Moogle back and a gate now present!
Talk to Moogle to learn the truth about Caius and it is not good news...
Before you step through the Gate here go back to the village and look for a well on the right side near the center and throw Moogle into it to obtain 600 CP and the Ultima Brand Fragment.
Now head back to the Gate/Pillar and step through it to end this dream! On the other side you find yourself witnessing a world you do not recognize and yet you do -- New Bodhum of AF700!
-- Grinding Opportunities --
If you want to grind a little in this area you can acquire the following loot items:
Cie'th Tear (Component)
Holy Water (Consumable)
Painkiller (Consumable)
Phoenix Blood (Component)
Potent Booster (Material)
Potent Essence (Material)
Potent Orb (Material)
Tear of Remorse (Component)
You can also acquire the Monster Crystals for:
Garganzola (sludge-type) Organic / Commando
Pantopode (bug-type) Organic / Saboteur
Pleuston (bug-type) Organic / Ravager
The first thing that we want to do is head towards where the beach used to be and use the Pillar by the docks to trigger a CS in which we are confronted by a projection of Lightning we fills you in on the reason for this areas desolation.
You learn a lot more about what happened before and what it lead to and about the event that caused the changes and separation that you have been trying hard to correct. A lot of this makes more sense now -- the cohesiveness of the story that has been unfolding was not as tight as I suspect most of us would have liked... The Datalog and the Fragment Pages helped, but not as much as knowing the details from Noel and Lightning...
Moogle reveals the Gate at the end of the docks, and you watch Lightning disappear into the Pillar. In addition to gaining this new information you also obtain the Improved Mooglehunt ability (that is what you need to reveal the objects inside the round starburst thingies we have been encountering.
Advanced Mooglehunt in Practice
Head back to the one we just saw and Mooglehunt it to obtain the Map of New Bodhum AF700, then work your way along the beach and through the town obtaining the following items:
-- Artifact of the Ark near the old house.
-- Cartesian Board Fragment (above the beach under the tree roots) use Mooglehunt and Throw.
-- Hope's Message Fragment (see Supply Sphere Access Code.
-- Laplacian Board Fragment from the hidden Treasure Chest with Mogthrow.
-- Phoenix Blood from a hidden Treasure Chest.
-- Supply Sphere Access Code (Set A) Mooglehunt on rocks near center.
This nicely wraps up what we needed to do here so, if you have done your grinding to your satisfaction, head to the Gate at the end of the docks and use the Artifact to unlock it then go to the Historia Crux!
Going through the Gate unlocks the Gates for New Bodhum AF700 and Academia AF500...
-- Grinding Opportunities --
If you want to grind a little in this area you can acquire the following loot items:
Cie'th Tear (Component)
Holy Water (Consumable)
Painkiller (Consumable)
Potent Booster (Material)
Potent Essence (Material)
Potent Orb (Material)
Segmented Carapace (Component)
Tear of Remorse (Component)
You can also acquire the Monster Crystals for:
Apotamkin (demon-bird) Organic / Ravager
You will recall that when we left there we also left some unfinished business... So now would be a good time to return and clear away that stuff before we get too far into the next alternate ending right? Right!
So head back there now and you will arrive at the Gate location (we have not actually been on this side of the map before). A few Mog Throws will net you some neat stuff so remember to do that every now and then, right?
To start with we should explore this new area by heading west along the wall, where we will encounter a Treasure Sphere in the shallow alcove with 1625 Gil in it, and a little further down on the wall above another Treasure Chest with a Omega Brand Fragment and 800 CP in it.
When you reach the glowing bridge use Mogglehunt to phase it into this timeline -- and then cross over and look for the Chocobo on the hill, next to which is a hidden Treasure Chest with a Chaos Brand Fragment and 800 CP in it.
Run back to the gap and follow the edge of it and then the walls all the way around the zone heading west to start until you reach the bridge again -- you will encounter a Treasure Sphere with a Sacred Cross in it near the overturned trolly -- and as you continue to follow the walls around you will find a Treasure Sphere with x8 Mana Boosters in it.
As you work your way along you will locate stone pillars and a Gate -- if you have a Wild Artifact you can open this Gate and obtain access to Bresha Ruins AF100 if not, you will have to come back after you obtain one... You will notice that there is a Treasure Sphere in the branches of the tree that, if you throw Moogle delivers x9 Power Boosters.
When you are near any area with burnt sand you should be tossing your Mog out at least until you obtain the Monster Crystal for Cactuarama, which is a type of Cactuar Medic.
About now you should be reaching the point where you have maxed out levels for all of your jobs, unlocking the Achievement "Supreme Being" (30 G) Fully developed all abilities. If you have not actually reached this point you should be close so keep an eye on that and remember to spend your CP on levels until you add this Achievement to your collection -- it is actually more than just for the Achievement mind you, it also adds to your HP and stats.
Cleaning up the Treasure and Items in A Dying World
This is perhaps one of the more interesting timelines in the game if only for the more mercenary approach that has been taken towards life... When you arrive walk forward and speak with the armored Government Agent who will fill you in on the situation here -- and the bounty hunter situation.
In the distance you will see a woman named Pat with a chat bubble -- chat her up to flag the mission Fragment: Palladium Ring. Ahead of you is the Chocolina next to the tunnel entrance, so hit her up if you need her services and then, the tunnel entrance being so convenient here, head on in to clear this area for searching.
Ahead of you on the far walkway is a hidden Treasure Chest with Weapon Material in it -- grab that and then head out the south exit tunnel (there is nothing else to be had here) and continue south to the other tunnel, at the entrance of which is a rental Choco and The Professor who has lost his assistant... Flag the mission Fragment: Osmium Ring which requires you to find the Monster Analysis Report, and then head into the tunnel.
At the far end of the walkway is a hidden person -- the Assistant -- who you use Mooglehunt on and then speak with to obtain the Monster Analysis Report. Nice one!
A battle with Don Tonberry and an Achievement
-- Don Tonberry Battle(s) --
This is very likely the first place that you will encounter the rare Monster called Don Tonberry -- a VERY difficult to tame and hard to find Monster that has an Achievement attached to it. Battling it is almost a boss battle itself, and hopefully you will get lucky and tame it your first go... It could happen...
With the Don you will need to use a variety of buffs and debuffs and keep a close eye on your health as he can dish out significant damage and will often ignore SEN tanks... If you do not tame him straight away you can grind for him here until you do if you like -- and if you have yet to cap-off all of your jobs this will help in acquiring the CP to do so...
If you intend to grind for him to get the Monster Crystal and Achievement then you may want to set up the following Paradigms:
Cerberus (COM - COM - COM)
Tri-Disaster (RAV - RAV - RAV)
Discretion (MED - MED - COM)
Basic tactics are to Stagger him as fast as you can and then kill him as fast as you can. Natch!
If you are the sort of gamer who finds the challenges of this sort to be irresistible and prefers to pause story progress to lock it down and pick up an Achievement you need to understand that the average number of encounters before actually taming this guy can be well over 20... So this could occupy serious time for you...
Taming the Don unlocks the Achievement "Beast Tamer" (90 G) Befriended a most unfriendly monster.
-- Back on Track --
Once you have what you want here leave via the tunnel that exits in the main area in the center of the Ruins and look by the pillar and wall on the right in the area where the Choco rental is to find a Treasure Chest with the Eternity Gate Seal in it. After you grab that check your map and head east to the dark area on it.
Just before you enter there is a bloke named Walter who you can flag the mission Fragment: Ruthenium Ring. Flag that and then head into the dark area to clear it from the map -- behind the Mercenary is a Treasure Sphere with a Chrysalis Arc in it. Grab that and then talk to the Mercenary for his LT events. You basically want to flatter him several times to complete this mission -- Are you the famous Raymond? That's an extraordinary weapon! I'd love for you to teach me how to fight!
Those three answers earn you 1000 CP and the Ruthenium Ring Fragment. Well done!
In the corner of the area is a hidden Treasure Sphere with an Elixir -- be sure to grab that -- and then talk to Walter again to get his reactions.
Your map should be at 98% now and, if you look at the map, all that is lacking is a small stretch of walkway in the town area -- but you cannot get there from here in this timeline so just store that in the back of your head for the moment...
It is time to return to the Professor and hand in the report to receive 1000 CP and the Osmium Ring Fragment. Now head back to Pat and collect 1000 CP and the Palladium Ring Fragment.
Over by the Gate is a bloke named Ronan who you can flag the mission Fragment: Rhodium Ring. This is the guy that created the tech that Hope uses later to learn about the nature of the Paradoxes -- how cool is that?
Hit the Gate now and head to the Historica Crux and select the Gate for Bresha Ruins AF300 -- which is the time we need to go to in order to retrieve his data -- head to the cemetery and, near the large stone check the stuffed animal there to obtain the Old Device.
Now head back to the Historica Crux and visit the Gate for Bresha Ruins AF005. Rent a Choco nearby and ride to the village, climb the stairs and clear the last map section to 100% the map (if the map is not 100% that is -- for all I know you already cleared this bit). Now return to the Historica Crux and head back to Bresha Ruins AF100!
-- Back in Bresha Ruins AF100 --
Head over to Ronan and talk to him to receive 1000 CP and the Rhodium Ring Fragment. You learn that the Atlas Control Room is the source of the problem so head there now and grab the Disaster Gate Seal from the hidden Treasure Chest in the corner before talking to Porter who fills you in on the situation -- you need two passwords it seems...
Right, so flag the mission Fragment: Adamantite Ring, and then head directly to the Historica Crux and go to Yaschas Massif AF100, where you will find Uma up at Hope's tent and obtain Thorne's Information. Head to the Historica Crux now, and into the Gate for Yaschas Massive AF110.
You will find the hidden Thorne in the southeast cul-de-sac and use Mooglehunt to reveal him -- talk to him for an LT event in which you basically tell him his name and then obtain 300 CP and the Control Device Password 1 Fragment.
Before you head back to the Historica Crux why don't you head towards town and by the Chocolina you will find a red sphere that belongs to Yeul -- well, Paddra Nsu-Yeul but still -- and when you talk to it you trigger the final red sphere Fragment mission, Fragment: Ugallu Fragment. Flag that and then head to the clearings below where you will find and battle Ugallu!
Head to the marker on the map to spawn Ugallu and kick its ass... For our efforts we receive 2000 CP and the Ugallu Fragment!
You know, if we had tried this way back when we were not well-leveled this battle would have gone very differently... We would have had our asses handed to us.
That is all of the Fragments for this timeline so well done mates! Now we have a few minor chores to take care of quickly... First return to the Historica Crux and then head to Yaschas Massif AF01X where we have one Fragment outstanding...
Grab a Choco and jump up onto the low mesa above the clearing in the north canyon and talk to the Researcher Bridget to flag the mission Fragment: Sword of Lachesis -- then return to the Historica Crux and open the Gate for Yaschas Massic AF010 and grab a Choco to go to the same location she was at and grab the Fruit of Fenrir from the Treasure Chest there.
Now return to the Historica Crux and select the Gate for Yaschas Massif AF01X and grab a Choco and return to Bridget, talking to her to give her the item and receive 300 CP and the Sword of Lachesis Fragment. And that wraps up all of the Fragments for all of the Yaschas Massif timelines!
-- Serendipity --
Make a quick trip to Serendipity now that you have unlocked 128 Fragments you unlock the Fragment Abilities Encounter Master and Eyes of the Goddess. Eyes of the Goddess allows you to control the camera during events -- a very cool perk! Encounter Master allows you to increase or to decrease the number of wild encounters you have with Monsters -- use your best judgment as to whether to enable that and which setting to use, right?
Now back to the Historica Crux and this time pick the Gate for Bresha Ruins AF300.
A final set of Crystal Puzzles
-- Bresha Ruins AF300 --
Head directly for the Atlas Control Room and talk to the Government Agent again -- he is something of a wanker that one! Head over to the machine and access it to do some Rift Puzzles -- the Crystal Puzzles that grow progressively more difficult (watch the video) -- for resolving them you receive 400 CP and the Control Device Password 2 Fragment.
Now that we have what we were seeking it is time to return to the Historica Crux.
-- Bresha Ruins AF100 --
Back in the Ruins speak to Porter and he uses the passwords to activate the machine... He fills you in on the details for how the world went wonky, and then he awards you with 1000 CP and the Adamantite Ring Fragment. Well done!
Speak to Porter again and you get a CS in which something goes wrong -- he asks you to investigate and you can then flag the mission Fragment: Kalavinka Fragment. Do that and then head to the marker and do battle with Kavalinka!
He has a nasty electrical attack so I recommend that you tank him with your Silver Chocobo -- do that and this battle is cake. Taking it out gets you 4,500 CP and the Kalavinka Fragment -- and a Coupon for a 10-year supply of Toilet Paper that goes nicely with the fit Moogle throws LOL.
That completes all of the Fragments for all of the Bresha Ruins timelines. Well done mates!
-- Grinding Opportunities --
If you want to grind a little in this area you can acquire the following loot items:
Potent Engine
Power Booster
Rhodochrosite
Scarletite
Wind Aegis
You can also acquire the Monster Crystals for:
Don Tonberry (tonberry) Organic / Commando
Tempest (bomb-type) Mechanical / Ravager
BEFORE you go to Academia AF500 you need to return to Academia AF4XX (unless you already did this -- I chose to hold off until it made more sense and I had more Fragments to better power the weapon) and talk to the Hope, handing over the Chaos Crystal -- then head to the Receptionist in the lobby -- who will offer you the choice of two different weapons -- the one for Noel is called Odinblade and you should take that one and equip it now.
Return to the Historica Crux and head to Serendipity now and hit the Casino Chocolina to obtain Serah's weapon, which is on sale there for 750 Gil called Odinbolt - buy and equip it now.
Now visit the Mystic to obtain the Fragment Ability Rolling in CP and then hit the Historica Crux.
Obtaining the Odin Fragment Weapons
What you should be aware of is that we have seen some good weapons on the Chocolina for Serah but not so much for Noel -- and using the Odinblade for Noel is a really good idea at this point -- he has one weapon (Blessed Blade) with slightly better magic but way less physical damage -- so for him Odinblade is the one to go with. That may not be true for Serah though, depending on what weapons you have been buying.
With Odinbolt Serah gets almost 500 Physical and almost 800 Magical stats -- Wild Chorus will provide more physical but considerably less Magical so you have to decide where the balance is. I chose to keep her using Odinbolt because while the Physical is lower she relies on Magical attacks more than Physical ones. YMMV.
With that taken care of it is time to head to the end game mates!
-- On to Academia AF500 --
Right, so... What comes next is a very very complicated level with a lot of things you will need to do to do everything that you need to do here... You will be facing some of the most powerful monsters in the game so far (more powerful than you faced before save for perhaps Long Gui) and you will very likely be dying... So before we head here -- this is the end game, you know that right? -- before we head here I want to remind you that you should be well prepared, you should save often, and you should try to be careful in not making this harder on you than it needs to be.
I apologize in advance for what is coming -- it is complicated and perhaps more than a little frustrating but it is what it is.
When you arrive you trigger a lengthy CS in which you see a very confusing world that appears to be deconstructing itself. Serah and Noel discuss the situation and then you are shown the Labyrinth of Chaos Page and regain control over the characters. The Datalog is updated with a page on Unseen Chaos, and you unlock the Achievement "Promise Keeper" (15 G) Turned your back on empty dreams and joined the battle to save mankind. That is the Achievement for starting Episode Six (the final Episode).
Remember to save often, right?
There is a Treasure Chest on this platform with the Determination Gate Seal in it -- so grab that and then head up the north path (be aware that you CAN fall off here and if (when) you do it resets you to the platform).
Now head east to the end of the path and grab the Phoenix Down from the Treasure Sphere here, then head back to the Chocolina, activate the Statue in front of her, and then head north, triggering a brief CS in which Serah points out that the blocks are moving in a pattern -- and lucky for us they are!
When the block to the east rotates head over it to the next platform, and wait for the block to the north to line up and run across and east to the next platform and get the Phoenix Blood from the Treasure Sphere here. Head north up the stairs where you will encounter a Proto-Behemoth and a group of Bamapama with him. You are in the correct configuration to deal with him -- using SEN to tank and just dishing damage -- concentrating on maintaining your health. This is one tough bugger so be careful!
Battling the Spawned Proto-Behemoth
At the top of the stairs is a platform with a Cactaur Statue on it -- use it and then backtrack all the way to the place where we went east after the Chocolina platform and continue to the west, turning north and then continue in those directions until you go up the stairs and find the next Cactaur Statue and use it.
Don't assume that since a block is in the position you need it to be that it will stay there -- if you did not just see it slip into position then according to Faubert's Law it WILL move when you are half-way across! Now head north and then west, then north again to the end and you will find a Treasure Sphere with a Shaman's Mark in it.
Turn around and head back to the Cactaur Statue (yes you can reach the marker by continuing east but we do not want to do that just now... Instead head to the east to the platform with the Treasure Sphere in it and grab a Map of Academia AF500 from it. Now you can see where we have been and where we are going -- and why!
Continue east but when you step onto the block stop and wait for it to rotate and then drop down to the area below where there is a Treasure Sphere with a Brawler's Wristband in it. You could have tossed Moogle but that would not have cleared the map for this area and we want to do that...
Now step off of the platform to respawn back at the Statue and then make your way to the Marker for our first dual-boss battle!
-- Pacos Amethyst & Pacos Luvulite Boss Battle --
The first thing that you need to know about this is that they have the ability to raise each other when one or the other is KO'd so what you need to do is focus on one, take it down to around 25% health, then focus on the other and kill it, quickly killing the first one once it is dead. Do that and this is a relatively short battle! Fail and, well, not so much.
You get a message from Yeul about not killing the Goddess and then the battle commences!
When I was little we visited Luna Park in Sydney and there was a bloke there who created glass animals while you watched. He was wicked clever and skilled -- a real artist -- and he actually made animals that looked a lot like these two out of colored (maybe tinted?) glass that had the same sort of glowy color to it. My sisters each got a pink pony but I wanted a purple Wombat posed so it was standing on its back legs sort of snarling at you -- it turned out pretty good actually...
This really is not a hard battle and your current Paradigm setup should be fine but later we will be altering it... Just be sure to take the first one down to under 25% health and then kill the second, so that you can kill the first quickly and voila! Mischief Managed! After the battle the voice of Yeul goes away and you are introduced to Chaos Blocks.
You unlock the Achievement "Obsidian Medal" (14 G) Defeated a powerful enemy with perfect execution. Or rather you unlocked this if you did the battle correctly and five-starred it which I know you did!
Read the Page for those and know that by changing the color of the block you re-arrange the platforms and paths -- and you will be doing that in a moment. If you had any trouble with the battle, watch the video.
After you close the page you are awarded 8000 CP and the Amethyst and Luvilite Fragment, so well done mates! Well done indeed!
Pacos Amethyst & Pacos Luvulite Boss Battle
-- Chaos Blocks --
This is where things get a little complicated... You have to do most of this in order to progress as well as to obtain some Key Items that you will need later on, so it is worth doing, but as I say it is rather complicated. I will try to make this as clear as I can here...
(1) Use the Chaos Block here once to turn it blue and then work your way west and south to the next platform, then continue south down the platform stairs and use the path to the east and south and then east to get back to the platform that leads to where the Chocolina is but continue east to the next platform. From here head north and then east to the platform and north up the stairs to activate the Cactaur Statue here -- the reason you are doing that is so that you can warp back here -- which will be obvious in a moment...
Now backtrack to the Chocolina Platform and change the Chaos Block there so it is Red, then jump off the edge to warp back to the Statue we just set as our warp point. From here head north up the moving stairs and wait at the top until you can then get onto the next path north and east to the platform above, following it to the north where you will find a Chaos Cube at the bottom of the stairs -- change it to Blue and then head back up the stairs to the top and you can now take the L-shaped path west and then north to the long platform above in the center area.
Head west up the stairs and save before you reach the marker -- where you will find a Cactaur Statue -- activate it to set your warp point here and then continue west to clear that side of the platform from the map... Then backtrack to the Statue and change the Chaos Block Red, then head north on the T-Shaped path and get off to the east on the platform where there is a Treasure Chest with the Sister's Gate Seal in it.
With that in hand, get back on the T-shaped path and get off on the west platform, changing the Chaos Cube to Blue and then getting back on the T-shaped path and returning to the east platform, where you now continue east and up the stairs to the next platform where you activate the Cactaur Statue you find there.
Change the Chaos Cube here to Red and then use the north path when it points to the east, run to the end and drop down to the platform below, where you will use Mooglehunt to reveal a Treasure Sphere with an Elixir in it! Now step off the edge to warp back to the previous platform and when the north path is faced to the west change the Chaos Block back to Blue.
Head north and west and wait for the T-shaped path to connect and ride it across to the west platform where you will toss Moogle to the north platform to get x7 Vitality Boosters from the Treasure Sphere there. Head back to the T-shaped path and use it to get back to the east platform and then use the moving stairs to head west to the lower platform.
Use the T-shaped path to the west and ride it to reach the platform to the west and get off, then change the Chaos Cube color to Red, and get back on the T and ride it to the south platform. Change the Cube there to Blue and jump off to warp back to the Statue.
Head north and west and ride the T-shaped path to the platform, cross it and ride the T-shaped path to the next path (west) and follow the path west and south the the marker where you will find a Cactaur Statue which you should activate -- turn the Cube Red before heading north and west and dropping off the end to the platform below, where there is a Treasure Sphere with a Royal Armlet inside! Once you have that, warp back to the Statue.
Now wait to go north and east, then onto the T-path and off of it at the north platform, where you will then run up the stairs to the west and, when the L-path is pointed west and north, along it and up the stairs for a battle with a Proto-Behemoth who happens to have its own healer with it and, look mates, I really think this is a battle best avoided... Though really even a no-star victory is a victory, right?
Either way head east and up REMEMBERING TO JUMP onto the stairs, onto the next stairs, and then to the platform on the top where the marker is, and then you trigger a CS in which Yeul appears to be trying to convince is to give up?
After the CS take the Final Battle Gate Seal from the Treasure Chest and activate the Cactaur Statue just in case... Save your game and then open the Paradigm Menu and make the following changes to it:
Delta Attack-X (RAV/COM/SEN)
Conservation (SYN/SEN/SEN)
Cerberus (COM/COM/COM)
Entourage (RAV/MED/SEN)
Attrition (SAB/MED/SEN)
Combat Clinic (MED/MED/SEN)
Actually you can do whatever else you like in place of Entourage and Attrition those are just extra suggestions for you but the rest? Yeah, you will need those for the coming battle -- seriously -- and about that battle...
Tactics are straight-forward here -- use Delta Attack-X and Cerberus for damaging, Entourage for light healing and Combat Clinic if you get into trouble. You will want to use Attrition just to stick him with Deprotect and Deshell to make things easier on yourself...
With a well-leveled party this will be a challenge but doable -- with a moderately leveled party you will have to work a lot harder at it, and with a low level party, well, you have to ask yourself, should you be here at all?
The Chaos Bahamat Boss Battle
-- Chaos Bahamut Boss Battle --
As the battle begins Caius is above you and unleashes Bahamut as Hope appears, and you climb aboard Sazh's shuttle. Sazh chases him down and you begin the battle -- with the Paradigm above you should have no trouble quickly taking him down -- but watch out for his AOE attacks (Megaflare) and try not to let anyone die, right?
After you defeat Bahamut you face Caius -- but again with the Paradigms you have active you should have very little trouble with him, just keep an eye on health. After you defeat him you get a lengthy CS with Noel confronting Caius and they talk and fight, then a rift opens and you all get sucked into Valhalla!
-- Grinding Opportunities --
If you want to grind a little in this area you can acquire the following loot items:
Potent Booster
Potent Essence
Potent Orb
Starblossom Seed
You can also acquire the Monster Crystals for:
Bamapama (demon-bird) Organic / Saboteur
Manegarmr (behemoth-type) Organic / Commando
Mimi (demon-bird) Organic / Saboteur
Yooman (droid-like) Mechanical / Commando
When they arrive Serah and Noel are met by Odin, who carries them onto the field of battle where Caius and the Chaos await you!
The battle resumes and Caius starts with full protections up so use your SAB to take away his protection and then kick his ass! You tear down his health and then he re-surges back at full health and you do it again for the win!
After you defeat him (an easy five-star battle) and then you get a lengthy CS in which Caius is confronted with the truth. A painful truth, a truth that Caius cannot handle, and he shows that by resisting it...
This goes on until Noel is forced to deliver the killing blow -- and that unleashes the Chaos! What? You though this was over? Cha! Right!
Start out by activating your SAB MED to debuff and heal then switch to attack, and you will easily take out the summoned versions that serve as his outriders. When you take them out you get to wail on him -- ideally you will take him out in two complete Staggers -- triggering another CS in which Caius begs Noel again to kill him -- and claims that he has killed Lightning...
Noel refuses to kill Caius -- then Caius tries to force the issue -- you get a Cinematic and if you pull it off you stop short of the kill -- but then Caius takes matters into his own hands...
The closing CS plays out and I have nothing to say about that -- it and the last boss fight are yours to experience for your own, which is only right. They are personal experiences after all... You worked hard to get here, you don't need to see how I did it. You should celebrate your victories and your defeats yourself. I am OK with that.
While the story has come to an end -- sort of -- the game is not actually over for you mates! After the credits play out (and you should watch them, after all these people made this most excellent game!) you will be awarded 30,000 CP, and receive the Paradox Scope, and the Hope Gate Seal, as well as unlock Valhalla AF???. You will also unlock the Achievement "Epic Finisher" (90 G) Followed the story to its conclusion.
I do not know how important the CP will be for you, but getting the Paradox Scope is really important since it is crucial to seeing the alternate endings...
At this point all that you should have left are a handful of Achievements that mostly amount to mopping up the collection side of the game -- both Fragments and Monsters -- and battling certain monsters to collect their information for the research catalog you are helping to create. You will also need to finish exploring all of the maps to 100% and then turn those in as well for their Fragments.
What that amounts to is a bunch of post-game odds-and-ends that you can pursue at your leisure! There will be more of course if you have purchased the active content DLC that has been coming out, but that and the odds-and-ends are really beyond the scope of this guide mates, but there are ticklists included in it to help you in accomplishing those tasks.
It was a long and interesting adventure and one that was certainly worthy of the series overall and the sub-series that XIII has become. One thing you should bear in mind when completing the different endings that you should always check your consumables and replace any that you use just to be safe and not run out on one of these endings...
-- Alternate Endings / Paradox Endings --
A paradox ending is a side-ending that results from choices that Serah and Noel make elsewhere in the timeline as part of their regular play that deviates from the anticipated events. There are several paradox endings hidden within the Historia Crux that you will find, as well as several alternate endings that are caused by specific and direct actions and choices.
The following list represents the alternative endings that are outstanding following your completing the main storyline, being what is available if you were following the guide. There is one ending that is not present below -- the Fate and Freedom ending (Transcript: Fate & Freedom Fragment) -- which you should have already unlocked and witnessed while following the guide.
While completing these is strictly voluntary (technically once you unlock the Achievement: "Epic Finisher" (90 G) Followed the story to its conclusion -- you have completed the game). If completing the main storyline was your primary concern than you are done -- if on the other hand you are a gamer who is concerned with unlocking all of the Achievements that a game has to offer or you are what is often called a "completest" who simply has to experience every aspect of a game, well then unlocking the alternate endings is a no-brainer!
So here -- in some detail -- are the steps you will need to take to do that:
- - - - - - - - - - - - - - - - - - - - - - - - - - - - - - - - - - - - - - - - - - - - - - - - - -
(I) -- Paradox Ending: A Giant Mistake
Location: Bresha Ruins (AF005)
Requirement: Paradox Scope On
Brief Instructions: Replay the Atlas Battle but do not weaken him with the machine -- you must defeat his fully-powered version. Once he is defeated, you unlock the ending.
More Complex Instructions: Verify that Paradox Scope is enabled and then lock the Gate for Bresha Ruins AF005 and enter it. After the CS plays out and you arrive in the zone, progress to the point where you encounter the fully-powered Atlas and instead of heading into the tunnels to locate the machine and weaken him, rush forward and kick his buttinsky!
This is actually a fairly straight-forward proposition as long as you remember that the point to this is not to five-star it, but simply to defeat Royal Ripeness no matter what the score you end up with! One way to do that is to set your Paradigms to include the following:
-- Delta Attack-X (COM/RAV/SEN)
-- Mystic Tower (SEN/RAV/RAV)
-- Offensive Screen (COM/COM/SEN)
-- Attrition (MED/SAB/SEN)
-- Protection (MED/SYN/SEN)
-- Combat Clinic (MED/MED/SEN)
Basically the combination of Paradigms above allows you to proactively buff and debuff as needed while you are more or less protected by your tank, while still providing the opportunity to really dish out the damage when you want to.
Once you get him KO'd you will have to do the Cinematic Sequence again, hitting
Left Joystick RIGHT
'B'
Left Joystick RIGHT
'A'
Left Joystick RIGHT
Push 'A'
Left Joystick RIGHT
Push 'A'
You are then thrust into the Historica Crux and unlock the new Gate The Archylte Steppes AF??? -- head in and you get a CS and the alternate ending and a reward of 10,000 CP and the Transcript: A Giant Mistake Fragment. Well done!
Loose Ends: Unlocking the Long Gui Fragment
- - - - - - - - - - - - - - - - - - - - - - - - - - - - - - - - - - - - - - - - - - - - - - - - - -
(II) -- Paradox Ending: Vanille’s Truth
Location: Oerba (AF200)
Requirement: Paradox Scope On
Brief Instructions: Return to the beach building roof and defeat Caius with the Paradox Scope on.
More Complex Instructions: Verify that the Paradox Scope is enabled in Character Menu > Fragment Skills > Paradox Scope (it should read "Challenge history's possibilities" under Current Settings), and then lock the Gate for Oerba AF200.
When you enter the zone head along the beach to the abandoned building with the garden on its roof and the broken skylight, head up the stairs from the beach and when you reach the roof you will find an Oracle Drive at the marker. Trigger it and you get a CS in which Serah sees Lightning and embraces her, and then the events on the beach at the end of the previous game plays out, and then Lightning disappears and Serah senses that the prophecy has changed.
Caius and Yeul appear and Caius delivers his warning: If you change the future, you change the past! He begins to explain the nature of Yeul and then he attacks! This is really just about beating him to a standstill and not killing him -- you should find this to be a relatively easy battle though once Caius drops to a certain point in health he will heal himself completely. He is pretty good about maintaining and replacing his buffs so a certain amount of Paradigm shifting will be required to end this quickly.
Bear in mind that this battle is a lot tougher than the previous one that you had during the story, but how you score here is not as important as just winning the battle, since score has nothing to do with you seeing the paradox ending or obtaining the rewards. If things go rougher than expected try to remember that Caius is particularly vulnerable when poisoned. I am just saying...
Defeating him on the roof at the beach unlocks the Gate for a new zone -- Oerba AF??? -- and thrusts you into the Historica Crux outside of that Gate. When you enter you experience a CS in which you see the paradox ending Vanille’s Truth! Vanille tells the story (with Serah's help) and then you receive the reward of 10,000 CP and the Transcript: Vanille’s Truth Fragment. Well done mates!
- - - - - - - - - - - - - - - - - - - - - - - - - - - - - - - - - - - - - - - - - - - - - - - - - -
(III) -- Paradox Ending: Mog’s Marvelous Flan Plan
Location: Sunleth Waterscape (AF300)
Requirement: None
Brief Instructions: Defeat the Royal Ripeness with Snow twice to unlock a Paradox Ending.
More Complex Instructions: Verify that the Paradox Scope is enabled and then go to the Historica Crux and select the Gate for Sunleth Waterscape AF300, locking the Gate down and entering it. Once you arrive the story resumes back where it was when you first arrived here -- where you fought the Royal Ripeness briefly with Snow and then headed off to solve the paradox that made Royal Ripeness into the much weaker green tomato -- but this time that is not the plan. Instead you battle Royal Ripeness as before but, rather than heading off to resolve the paradox to weaken it, you battle it a second time with Snow in its current very red and dangerous state!
This is actually a fairly straight-forward proposition as long as you remember that the point to this is not to five-star it, but simply to defeat Royal Ripeness no matter what the score you end up with! One way to do that is to set your Paradigms to include the following:
-- Delta Attack-X (COM/RAV/SEN)
-- Mystic Tower (SEN/RAV/RAV)
-- Offensive Screen (COM/COM/SEN)
-- Attrition (MED/SAB/SEN)
-- Protection (MED/SYN/SEN)
-- Combat Clinic (MED/MED/SEN)
Basically the combination of Paradigms above allows you to proactively buff and debuff as needed while you are more or less protected by your tank, while still providing the opportunity to really dish out the damage when you want to. Remember to use debilitating attacks like Poison and Wound to help create an edge when you are battling mobs who are particularly susceptible to that strategy.
When you arrive in the zone follow Serah after the CS ends (just like before) and when you arrive at the clearing ahead and step into the marker you will encounter Snow and Serah -- after she has her say and they have their reunion, it is time for the first battle.
Your first Cinematic Sequence requires you to hit 'X' and then Left Joystick UP, push 'X' followed by a rapid-tap 'X' and then Left Joystick RIGHT, another rapid-tap but with 'B' this time, and you get a perfect second Cinematic Sequence that ends the battle with a nice 5-star rating.
The Miniflan head towards Royal Ripeness to help it recover, and Noel convinces Snow to retreat -- at least for the moment. Now when we played this zone previously we headed for the Gate to deal with the paradox and thus to weaken Royal Ripeness -- but this time that is not the plan! Instead we go ahead and take on Royal Ripeness in all its power and glory and, with patience and dedication (and a fair number of Potions mind you) we defeat that bad boy! Or is it a girl? How do you tell with a giant tomato anyway?
During the LT event select Let's defeat the Flan and then Noel tells you what dorks you are being -- OK he doesn't really say that, but he does urge you to not attack the Flan... Well, bugger him!
This battle is tough but nowhere near as tough as the ones we did with Caius... Using the Paradigms outlined above you should have no trouble at all in dealing with him/her/it -- if you do bear in mind this advice: always heal when you lose more than 20% health from any of your characters using Potions. Try to remember to buff, and debuff, and stick it with negative conditions like Poison.
Using these tactics and remembering to dish out the damage should see you easily five-star this battle. After which you are thrust into the Historica Crux and presented with a new Gate -- Sunleth Waterscape AF??? -- which you should enter immediately to get the CS in which the Paradox Ending: Mog’s Marvelous Flan Plan unrolls and, at the end of which you receive the rewards of 10,000 CP and the Transcript: Mog’s Marvelous Flan Plan Fragment and the satisfaction of unlocking yet another paradox alternate ending!
- - - - - - - - - - - - - - - - - - - - - - - - - - - - - - - - - - - - - - - - - - - - - - - - - -
(IV) -- Paradox Ending: Test Subjects
Location: Augusta Tower (AF200)
Requirement: Paradox Scope On
Brief Instructions: Defeat the Proto fal’Cie at the top floor with the Paradox Scope On.
More Complex Instructions: Verify that your Paradox Scope is engaged and lock the Gate for Augusta Tower (AF200) and enter -- where you will get a brief CS and then play through the level starting with accessing the terminals in the room you are in and then head down the path to the next room and use the terminals there hitting 'A' to insert the correct password.
Head back to the first room and exit the other side stepping into the marker for a CS -- use the switch and learn that it is jammed just like before... but now you have the key so use the switch and you are good to go! Head for the lift and talk to Alyssa's doppelganger. After your conversations with her she takes you on the lift and you get attacked as per the plan...
Use the lift controls to go to the 52nd floor and then use it again after the CS to get to the Top Floor where you have your battle with a Greater Behemoth (all of like five seconds right?) and then head upstairs for the CS with Yeul.
Finally you battle the Fal'cie Adam and beat him, unlocking the new Gate Augusta Tower AF??? and entering it, obtaining the next to last Paradox Ending -- from which you earn the rewards of 10,000 CP and the Transcript: Test Subjects. Nice one!
- - - - - - - - - - - - - - - - - - - - - - - - - - - - - - - - - - - - - - - - - - - - - - - - - -
(V) -- Paradox Ending: The Future Is Hope
Location: Academia (AF4XX)
Requirement: Paradox Scope On
Brief Instructions: Turn in the Graviton Cores to Alyssa with the Paradox Scope On, watch the full CS, and then during the LT conversation, refuse to accept the Artifact.
More Complex Instructions: Check to be sure that the Paradox Scope is on and then select and lock the Academia AF4XX Gate and head in. When you arrive go into the Academy HQ and speak to Noel, and then to Alyssa, giving her the five Graviton Cores and watching the CS's that this generates -- I don't think you can skip any of them BTW... When she offers you the Artifact in the LT event, say NO (do not accept it) and you immediately get the alternate ending CS in which Alyssa gets... Well, you should watch this and be surprised!
Your reward is 3,000 CP and the Transcript: The Future Is Hope Fragment.
Loose Ends: Unlocking the Ochu Fragment
- - - - - - - - - - - - - - - - - - - - - - - - - - - - - - - - - - - - - - - - - - - - - - - - - -
(VI) -- Paradox Ending: Beneath a Timeless Sky
Location: The Void Beyond
Requirement: Paradox Scope On
Brief Instructions: Go back to Academia (AF4XX) and give the Gravitron Cores to Alyssa, and accept the artifact. Fight Caius again at the Throne of the Goddess.
More Complex Instructions: Lock the gate for Academia AF4XX and then enter it, making your way to the Academy HQ and going inside where you speak with first Noel and then Alyssa, before turning in the five Cores that are required to trigger the LT event in which you either accept or decline the Gate Artifact. In this case you want to accept it -- after which the marker is placed on the now repaired Gate (that you now possess the Artifact for) -- so exiting the HQ and heading to the Gate is your next step.
After you go through the gate you follow the course of the game just as you did before, speaking to each of the Yeul's and eventually doing battle with Caius -- but this Caius is a VERY different Caius than the one you previously fought right here. In fact the battle you are about to have is in almost every respect a completely different one, starting with the fact that Caius uses his AOE attack much more often and with more effect than previously, he is well-buffed and he is anal about re-applying his buffs, and what is more, when you get him whittled down to a certain health level he casts an ability that completely restores his health! (Note that he only can do that once).
The battle with Caius can be approached in two different ways -- fast and slow -- so assuming you are confident with the different jobs and you have Monsters that are well-leveled and whose strengths and weaknesses you understand a blitz approach may well be the way to go, bearing in mind that keeping an eye on your health and that of your companion is a critical matter.
Alternatively you can take the "slow-and-steady-wins-the-race" approach (which is how I prefer to do it)... Understand that at best you will three-star this battle that way and, at worse, no-star it. The good thing is that it really does not matter how you score with it, because your objective is to simply complete it any way that you can so that you get to see what follows -- the alternate ending!
After you defeat Caius you are thrust back into the Historica Crux and a new Gate is now unlocked (bear in mind that this is the case with a lot of these -- completing them unlocks one of the many Gates that remained gray and inaccessible on the Historica Crux chart until you unlock them this way). As the CS plays out you instantly grasp that perhaps killing Caius in this way was probably not a good idea, but Serah never gives up and continues looking for a Gate that will allow her and Noel to resume their adventuring -- and that is where this alternative ending (technically this is actually a paradox ending) ends!
Your reward for completing this -- in addition to getting to see an alternate ending for the game -- is a whopping 10,000 CP and the Transcript: Beneath a Timeless Sky Fragment.
- - - - - - - - - - - - - - - - - - - - - - - - - - - - - - - - - - - - - - - - - - - - - - - - - -
(VII) -- Paradox Ending: Heir to Chaos
Location: A Dying World (AF700)
Requirement: Paradox Scope Off and On
Brief Instructions: Go to Academia (AF4XX) with the Paradox Scope OFF at first and turn in the Gravitron Cores to Alyssa, accept the artifact during the LT event. Now fight Caius, continue the story until you reach New Bodhum, at which point you now turn ON the Paradox Scope. Play through to the Dying World (AF700) where you battle Caius with Noel alone with the Paradox Scope still ON.
More Complex Instructions: Right, so first thing you need to do is access the Fragment Abilities Menu and disable the Paradox Scope. With that done, lock the Gate for Academia AF4XX and enter it, then go to the Academy HQ and speak to Noel and then Alyssa, turning in the five Graviton Cores to trigger the LT event in which this time you accept the Artifact.
Head for the Gate and get through the long CS and then, saying goodbye to Hope and his shadow head into the Gate and you arrive at the ambush site in The Void Beyond (Year Unknown) for your with Yeul and then a battle with Caius that sends you to the dream world of New Bodhum (year unknown).
Now head over and talk to Snow and, when you finish the conversation with him but BEFORE you talk to Lightning on the dock, turn the Paradox Scope ON (in other words enable it). After you have enabled the Paradox Scope, talk to Lightning and refuse to accept the dream (selecting 'A' "No"), which causes this sister to break up.
Now run to the meteor clearing where the Gate should be and talk to the image of Vanille there -- and then Fang -- who will help you to wake up! After the CS ends enter the Spacetime Distortion and you get another brief CS before you enter the Historica Crux and then the Gate for A Dying World AF700, where you run forward to encounter Noel and his slain birthday dinner beast.
Work your way through the rest of this part of the story following Noel back to his meeting with Caius where you observe again the interaction of what was obviously a deep friendship... Talk to Caius to trigger the next CS, and then run forward and use Mooglehunt to reveal shadow Noel and his conversation with Yeul.
After the conversation ends Yeul has a chat bubble above her -- activate it to spawn the next CS of Noel and then follow him for another CS in which he is once again confronted by Caius, who again asks Noel to kill him. Noel refuses, and then Caius disabuses him of his fantasy notions.
-- Paradox Scope Battle: Noel vs. Caius --
The battle now commences, and as it turns out this is perhaps the most frustrating battles you faced in the game so far... If not the most frustrating than it is certainly one of the top three at least in part due to the nature of the attacks that Caius uses, which consist of a mixture of healing and interruption... It is very disheartening for you to expend considerable effort at killing him only to have Caius snap his fingers and become fully healed over and over again...
When you combine his unfortunate ability to heal himself with his very effective (and effectively used) interruption attacks you find yourself either stunned or thrown in the air (or both) and thus unable to attack, cast spells, or even use items (like the Potions that you will use a lot of).
There are several ways that this can play out -- you could, for instance, continue to burn through your Potions while blitzing him and if you are really lucky that might work... Or not... Alternatively you can spend some time Poisoning him, Wounding him, and then while he is Poisoned (and thus very vulnerable) smack him around good!
Obviously you need to keep an eye on your health and while you are about it try never to allow it to drop below 4000 HP because he has a series of attacks that, if you are debuffed badly and you fail to get healing he can actually kill you rather quickly. The best strategy if you have a hard time of it is to use Wound to get his health bar to half capacity, and then simply Poison him and then switch to your damage-dealing Paradigm and KO him quickly. You will find that when Poisoned Caius is very easy to Stagger, and once Staggered very easy to damage... You just need to try to time it so that you are fully healed or nearly so at the start of your blitzing -- that way you can take full advantage of the Stagger Meter.
After you defeat him you are pushed into the Historica Crux where you find yourself outside of the Gate for A Dying World AF??? which, when you enter it, triggers a CS in which Noel reflects upon the events that immediately follow his defeat of Caius and how things go wrong from there...
When the CS ends you are rewarded with 10,000 CP and the Transcript: Heir to Chaos Fragment.
Loose Ends: Unlocking the Fragment of Invincibility
he landscape of the modern console video game has changed so much in the last ten years, with the revenue stream of games also changing. It used to be the box price that represented the sole income for game publishers, but the introduction of Downloadable Content (DLC) changed the basic equation. That addition to gaming has some controversy associated with it, particularly when a game developer includes DLC content in the main release and then sells the DLC in the form of codes that unlock the content already on the game disc, a development that has been met with hostility by many gamers who do not feel that it is a fair way to sell added game content, but most gamers agree that expanding games via DLC is still a good thing.
In the case of Final Fantasy XIII-2 the types of DLC available spans the entire spectrum, with the traditional expansion content, plus new special weapons, armor and outfits, accessories, and added battles for the arena. As of press time the following DLC has been released for the game (some of which was originally released as pre-order bonus content):
Arriving at Serendipity AF??? Gate
-- Coliseum Battles DLC --
-- A Study in Elegant Death (240 MSP / $2.99) - DLC that makes Jihl Nabaat appear within the Coliseum to fight (available after Episode 2). She can be recruited into Serah and Noel's party once beaten.
-- Bringer of the End (240 MSP / $2.99) - Face the dreaded Omega in the Coliseum! Use the crystals of defeated foes to summon them as allies in battle.
-- Clash on the Big Bridge (320 MSP / $3.99) - DLC that makes Gilgamesh of Final Fantasy V appear within the Coliseum to fight.
-- Operation XIII-2 (240 MSP / $2.99) - Face Lightning and Lieutenant Amodar in the Coliseum! Use the crystals of defeated foes to summon them as allies in battle. The Coliseum appears in the Historia Crux (available from Episode 2 onwards).
-- Take Me to Your Leader (160 MSP / $1.99) - DLC that makes PuPu of Final Fantasy VIII appear within the Coliseum to fight.
-- Uninvited Invertebrate (320 MSP / $3.99) - DLC that makes Ultros of Final Fantasy VI appear in the Coliseum.
-- Costume DLC --
-- Beachwear (240 MSP / $2.99) - The perfect costume for soaking up the sun and hanging out with friends on the shores of New Bodhum. Fore Serah.
-- Black Mage Attire (240 MSP / $2.99) - A Black Mage outfit for Noel.
-- Blade Attire (240 MSP / $2.99) - A battle attire in gold and crimson which wraps you in the leather of some strong beasts. Only for the chosen warriors. For Noel.
-- Ezio Auditore (240 MSP / $2.99) - DLC outfit for Noel based on the garments of Ezio Auditore from Assassin's Creed: Revelations.
-- N7 Armor - Noel (240 SP / $2.99) - DLC outfit for Noel based on Commander Shepard from Mass Effect 3.
-- N7 Armor - Serah (240 MSP / $2.99) - DLC outfit for Serah based on Commander Shepard from Mass Effect 3.
-- Spacetime Guardian (240 MSP / $2.99) - This garb is said to be a gift of the goddess to those who fight to correct the anomalies of time. For Noel.
-- Style and Steel (Free) - One of two outfits designed by AKB48's Yuko Oshima voted on by fans. For Serah.
-- Summoner's Garb (240 MSP / $2.99) - This ethnic costume from another world is born from the consciousness of time-traveling Serah and the soul of the summoner from a parallel universe. For Serah.
-- White Mage Attire (240 MSP / $2.99) - A White Mage outfit for Serah.
Yori Dori Midori 16 Costume Pack (240 MSP / $2.99) - Set of outfits for Mog. Includes White Mage, Cat, Teddy Bear, Pirate, and Panda style costumes.
Meeting the Owner of the Casino at Serendipity
Sazh Katroy is one of the primary protagonists form the original Final Fantasy XIII -- a middle-aged black man who was a soldier and a pilot, as well as a train conductor, and whose stand-out feature for most players is his distinctive afro-style hair in which he keeps an unnamed Chocobo Chick as a pet or possibly companion?
His iconic olive coat over khaki trousers, white button-down shirt, and black buckled engineer boots and the l'Cie mark is on his chest that remains half-hidden under his shirt mark him as a principle character in the story, and his two pistols provide remarkable assistance to Lightning as she worked to solve the mystery of her sister and what was happening to their world...
Much of his personality revolves around his relationship with his young son, Dajh, who he tries and fails to keep safe due to elements that he never appears to fully understand until the end of the first story -- and while that seemed to end happily, when we finally meet him in the sequel things to quickly wrong for him and once again his son goes missing -- with the primary focus of this DLC being (in addition to adding two new Casino games) finding a way to recover him safely.
We pick up the story and begin playing the DLC right at the start of the gate tree, the selection we want being Serendipity ??? AF that is right at the bottom on the far-left of the tree.
-- Welcome to Serendipity --
Standing in the casino Sazh experiences a time-stopping series of mini-events, and then reflects upon the events that lead up to his arriving there in Serendipity. One moment he is flying along in his transport and the next Dajh is warning him that something is coming -- then all hell breaks loose and he finds himself in the casino...
When Sazh first arrives he meets the enigmatic owner and manager of the casino here, who provides a cryptic welcome, and invites Sazh to save his son -- and himself -- and in the process, perhaps learn that the ultimate goal and the solution to his problem is to collect 30 Fortune Medals...
Bear in mind that you cannot win Fortune Medals from the Slot Machines, but you can amass coins to use for gambling playing it, so you have to decide what you are going to play: Serendipity Poker, Chronobind, and Slot Machines? The table games are the fastest way to obtain the Medals, but a lucky pull on the slots can pay off a stack of coins...
The game prompts you to speak with the Owner to collect some coins -- and he gives you a stack of 10,000 coins but no information on what the true cost of those coins could be... The game tells you that if you run out of coins you can ask him for help again, but there is a limit to how many times you can do that.
Now that you have your initial stack of coins it would be an idea to save your game. You will notice if you look at your inventory that in addition to the 10K in coins you have from the Owner, you also have whatever your coin balance was from the game, and you have your inventory of items and kit as well...
Hold'em Poker - a shower of coins and Fortune Medals!
-- Serendipity Poker --
The nearby tables offer you the chance to play the game Serendipity Poker -- a game that is based upon a straight draw game like Texas Hold'em with no card exchanges -- basically the best dealt hand wins, so you have to know when to bet and when to fold...
When the game begins each player is dealt two cards, and then the initial bets are made, then the three cards of the Flop are dealt, you bet, and then the Turn card is dealt and you bet, followed by the River card, and another bet, and then you see who won!
While you can walk away from the game at any time with your coins and winnings in your hands, if you stay and beat out all of the players at the table you can win special bonus prizes as well...
Once the initial cards are dealt you actually hear the comments of the other players -- this can make for slow play, but when you decide to fold you can play through the current game at high speed so you do not have to just sit and wait for the other players to talk and bet...
-- Raking in the Rewards --
Remember that the entire point is to obtain the Fortune Medals that you need to progress this DLC expansion -- a minimum total of 30 Fortune Medals to be exact -- and that may seem like a lot of them if you are thinking that you can only win them one at a time, but that is not actually the case. In addition to receiving one for winning your first poker game, you also receive bonus Medals for specific actions during the game, such as Winning Streaks and All-In Bets...
The first game of Texas Hold'em can be a fun game but if you end up with the last opponent being a very cautious player then it can be downright boring because it can take as long as two hours to play out, but then the reward is commensurate with the time, believe me!
Playing your three opponents and taking ALL of their money from them earns you a bonus for clearing the opponents at the table -- to the tune of winning the 30,000 coins of your opponents (assuming you started with a kitty of 10K each, you receive a bonus of 20,000 coins for cleaning out your opponents, and you receive a Fortune Medal to commemorate your first win, and the additional bonus Fortune Medals. To put this in perspective for you, I obtained the following bonus Medals for my first game:
-- 1 Medal to commemorate your first poker win.
-- 1 Medal in recognition of your victory.
-- 5 Medals / 1 for each winning streak.
-- 2 Medals / 1 for each rare hand played.
-- 2 Medals / 1 for every All-In.
-- 2 Medal as a blessing of the goddess.
For a total of 13 Medals for the one Poker game... Just rinse and repeat until you have more than 30 Medals!
-- Lost Chocbo Chicks --
Now that you have secured the Fortune Medals you need -- do not go and talk to the Owner yet! Instead head outside and to the building on the lower left that normally houses the Mystic, where you will find instead a Chocolina! Not only that, but she has a problem and needs your help! It seems that there is a group of Chocobo Chicks lost in the Casino, and she needs you to help her by finding them and bringing them back to her.
A Chocobo Chick Scavenger Hunt
Talk to her again to learn that the first chick is actually wandering around outside in the lobby by the Choco Races, so go out and you will find it, and talk to it to tame/recruit it. Returning to her she tips you that the next one is outside somewhere wandering around, so head back into the Lobby and search for it until you find it, then return to the Chocolina for the next hint.
The next location is the casino game room (where you played Poker) -- grab the chick from there and bring it back to the Chocolina, to learn about the love birds -- which you will find in the center of the spinning roulette wheel.
You will need to run back and forth between the two a few times to deliver messages and then bring them together so that they chat... And then it is time to see the Chocolina again.
The next chick you need to find has been victimized by a conniving chocobo chick it seems... You will find them in the casino game room on one of the empty tables -- you need to figure out which is the victim and talk to it to get it to join you!
When you report back to Chocolina that wraps up the choco-chick wrangling, and then she asks you to answer a question, after which she tells you her secret...
-- Back to the Casino --
Now that we have managed this mischief, it is time to head back to the Casino Owner and have a chat with him -- after congratulating Sazh the Owner stands back and the world conforms to his desires -- and Dajh shows up!
You get a CS with the Owner in which certain future issues are resolved, though it is still a bit enigmatic... Make of it what you will, Sazh decides that he is not willing to give up and asks to be sent to where he can make a difference. You can now summon Sazh as one of the monsters on your team and have him fight beside you! Nice one!
There are a total of 31 achievements worth 1000 Gamerscore, divided between revealed Achievements and secret ones.
-- Regular Achievements --
Budding Hunter (30 G) Defeated an army's worth of enemies.
Choco-boco-holic (14 G) Spent a fortune at shops.
Clock Stopper (15 G) Responded swiftly to the appearance of enemies.
No Retreat (16 G) Fought a significant number of battles without using the "Retry" option.
Quick Draw (15 G) Performed a significant number of preemptive strikes.
Staggering (15 G) Staggered a significant number of enemies.
Strategist (18 G) Performed a multitude of paradigm shifts.
Wild Thing (16 G) Successfully used Feral Link abilities a significant number of times.
-- Secret Achievements --
The practice of concealing Achievements in games is a controversial one, with many gamers wondering what the point is to concealing Achievements that do not factor into the story itself, and thus would not really serve as a spoiler -- though the practice of concealing details that would serve as plot and story spoilers is not generally considered to be a bad thing...
The secret Achievements below represent a mixture of the two -- some may include spoiler information, most do not. Fair warning...
Anomalous (30 G) Witnessed every possible Paradox Ending.
Beast Tamer (90 G) Befriended a most unfriendly monster.
Big Game Hunter (30 G) Defeated every worthy opponent.
Cerulean Medal (14 G) Defeated a powerful enemy with valiant skill.
Chronosavior (90 G) Obtained the highest possible result in the battle to determine the fate of the world.
Defragmented (90 G) Completed every fragment category.
Early Riser (15 G) Accepted a new fate in a world where everything has changed.
Epic Finisher (90 G) Followed the story to its conclusion.
Fair Fighter (90 G) Defeated a powerful enemy on equal terms.
Fragmented (30 G) Completed an entire fragment category.
Future Espier (15 G) Visited the place where clues to the future lie waiting to be discovered.
Giant's Fist (90 G) Dealt 99,999 damage with a single attack.
Obsidian Medal (14 G) Defeated a powerful enemy with perfect execution.
Past Gazer (15 G) Visited the place where the saviors of the past dream in crystal.
Promise Keeper (15 G) Turned your back on empty dreams and joined the battle to save mankind.
Saddle Sore (12 G) Went the distance on chocobo-back.
Scarlet Medal (14 G) Defeated a powerful enemy with graceful poise.
Serendipitous (12 G) Amassed a fortune in casino coins.
Sooth Seeker (15 G) Prepared to face a test of your determination in the rift where hidden truths slumber.
Supreme Being (30 G) Fully developed all abilities.
Threat Facer (15 G) Acknowledged the threat facing the world, and decided to fight back.
Time Traveler (15 G) Left behind a normal life, and began a journey through time.
Trigger Finger (30 G) Obtained five Cinematic Bonus rewards.
-- Rift Beast - Vermin --
o - Clione
o - Pleuston
o - Nekton
o - Meonekton
o - Chelicerata
o - Pantopoda
-- Rift Beast - Voidborn --
o - Gogmagog AF003
o - Gogmagog AF700
o - Aloeidai
-- Rift Beast - Crystalspawn --
o - Paco Amethyst
o - Paco Luvulite
-- Feral Creature - Beast --
Silver Lobo
o - Gorgonopsid
o - Uridimmu
o - Managarmr
o - Ugallu
o - Albino Lobo
-- Feral Creature - Terraquatic --
o - Bloodfang Bass
o - Breshan Bass
o - Hedge Frog
o - Mud Frog
o - Ceratosaur
o - Ceratoraptor
o - Spiceacilian
o - Tabasco Toad
o - Pitterpatter
o - Chunerpeton
-- Feral Creature - Spook --
o - Gremlin
o - Garchimacera
o - Imp
o - Ahriman
o - Bamapama
o - Mimi
o - Fachan
o - Unsaganashi
o - Amanojaku
o - Notsugo
o - Apotamkin
-- Feral Creature - Demon --
o - Yaksha
o - Yakshini
o - Gandayaks
o - Vodianoi
o - Shaguma
o - Gahongas
o - Samorvira
o - Haguma
-- Feral Creature - Stalker --
o - Barbed Specter
o - Triffid
o - Clematis
o - Dendrobium
o - Mandrake
o - Necrosis
-- Feral Creature - Armadillon --
o - Navidon
o - Bunkerbeast
o - Calautidon
-- Feral Creature - Nudibranch --
o - Crawler
o - Caterchipillar
o - Exoray
o - Spiranthes
o - Sarracenia
-- Feral Creature - Wyvern --
o - Svarog
o - Vouivre
o - Kanna Kamuy
o - Deathgaze
o - Illuyankas
-- Feral Creature - Woodwraith --
o - Xoloti
o - Miquiztli
o - Tezcatlipoca
-- Feral Creature - Oretoise --
o - Long Gui
-- Feral Creature - Flan --
o - Flanbanero
o - Seeping Brie
o - Flangonzola
o - Flandit
o - Garganzola
o - Miniflan
o - Blue Miniflan
o - Yellow Miniflan
o - Black Miniflan
o - Pink Miniflan
o - Mutantomato
o - Royal Ripeness
o - Royal Ripeness (Paradox Ending)
-- Feral Creature - Behemoth --
o - Feral Behemoth
o - Greater Behemoth
o - Reaver
o - Zaghnol
o - Narasimha
-- Feral Creature - Goblin --
o - Goblin
o - Goblin Chieftain
o - Munchkin
o - Munchkin Maestro
o - Moblin
o - Major Moblin
o - Buccaboo
o - Buccaboo Ace
o - Gancanagh
o - Gancanagh Ace
-- Feral Creature - Sahagin --
o - Oannes
o - Swamp Monk
o - Apkallu
o - Sahagin Prince
-- Feral Creature - Ochu --
o - Ochu
o - Microchu
-- Feral Creature - Cactuar --
o - Cactuar
o - Giant Cactuar
o - Metallicactuar
o - Cactuaroni
o - Flowering Cactuar
o - Gigantuar
o - Metal Gigantuar
-- Feral Creature - Tonberry --
o - Tonberry
o - Don Tonberry
-- Feral Creature - Potcat --
o - Cait Sith
o - Mewmao
o - Schrodinger
o - Forked Cat
-- Feral Creature - Chocobo --
o - Chocobo
o - White Chocobo
o - Black Chocobo
o - Blue Chocobo
o - Red Chocobo
o - Green Chocobo
o - Purple Chocobo
-- Feral Creature - Wrathwyrm --
o - Faeryl
-- Militarized Unit - Tilter --
o - Orion
o - Viking
o - Yeoman
o - Fencer
-- Militarized Unit - Golem --
o - Dragoon
o - Lancer
-- Militarized Unit - Razorclaw --
o - Thexteron
o - Luminous Puma
-- Militarized Unit - Zwerg Droid --
o - Zwerg Scandroid
o - Zwerg Metrodroid
o - Koboldroid Yin
o - Koboldroid Yang
-- Militarized Unit - Vespid --
o - Vespid
o - Vespid Soldier
-- Militarized Unit - Leech --
o - Frag Leech
-- Militarized Unit - Armadon --
o - Lucidon
o - Thermadon
-- Militarized Unit - Flan --
o - Flanitor
o - Flanborg
-- Militarized Unit - Behemoth --
o - Proto-Behemoth
-- Militarized Unit - Annihilator --
o - Garuda
o - Kalavinka
o - Pink Lily
-- Militarized Unit - Giant --
o - Paradox Alpha
o - Atlas (Strong)
o - Atlas (Weak)
-- Ancient Automata - Pulsework Soldier --
o - Pulsework Soldier
o - Pulsework Knight
o - Pulsework Gladiator Archylte Steppes
-- Ancient Automata - Combat Engineer --
o - Hoplite
o - Testudo
o - Scutari
-- Ancient Automata - Centaurion --
o - Immortal
o - Centaurion Blade
-- Ancient Automata - Bomb --
o - Bomb
o - Circuitron
o - Cryohedron
o - Cloudburst
o - Tempest
o - Debres
o - Grenade
-- Ancient Automata - Armament --
o - Dreadnought
-- Cie-th - Shambling Cie'th --
o - Ghoul
o - Ghast
o - Strigoi
o - Taxim
o - Vampire
o - Geiseric
o - Fomoire
o - Wladislaus
o - Malebranche
-- Cie-th - Winged Cie'th --
o - Nelapsi
o - Varcolaci
o - Chonchon
o - Cocytus
-- Cie-th - Unusual Cie'th --
o - Ispusteke
o - Seeker
-- Cie-th - Undying Cie'th --
o - Yomi
o - Zenobia
o - Vaballathus
o - Gorgyra
o - Raspatil
-- Special - Fal-Cie --
o - Proto fal'Cie Adam
o - Right Manipulator
o - Left Manipulator
-- Special - Eidolon --
o - Chaos Bahamut
o - Twilight Odin
-- Special - Winged Chaos --
o - Jet Bahamut
o - Garnet Bahamut
o - Amber Bahamut
Fragments marked with an '*' are the ones that you MAY NOT obtained through following this guide and will need check to see -- print out this ticklist and then go through it to mark off the ones you have obtained, and then you know what is left to be found after you finish the story!
-- New Bodhum AF003 (4)
o - Gogmagog Fragment Alpha (Story)
o - Gogmagog Fragment Beta (Story)
o - Heart Prism (Side Quest)
o - Graviton Core Alpha (Story)
-- New Bodhum AF700 (5)
o - Cartesian Board (Hidden Item)
o - Laplacian Board (Hidden Item)
o - Hope’s Message (Treasure Chest)
o - *Noel’s Message (Alternative History)
o - *Serah’s Message (Alternative History)
-- New Bodhum Year Unknown (3)
o - Vanille’s Fruit (Treasure Chest)
o - Fang’s Crown (Treasure Chest)
o - Transcript: Fate and Freedom (Paradox Ending)
-- New Bodhum AF??? (1)
o - Transcript: Beneath a Timeless Sky (Paradox Ending)
-- Bresha Ruins AF005 (8)
o - Atlas Fragment (Story)
o - Ghast Fragment (Side Quest)
o - Delicate Crystal (Side Quest)
o - Vita Lyrica (Side Quest)
o - Anima Miseria (Side Quest)
o - Unio Mystica (Side Quest)
o - Ars Symphonica (Side Quest)
o - Graviton Core Beta (Story)
-- Bresha Ruins AF100 (6)
o - Kalavinka Fragment (Side Quest)
o - Ruthenium Ring (Side Quest)
o - Rhodium Ring (Side Quest)
o - Palladium Ring (Side Quest)
o - Osmium Ring (Side Quest)
o - Adamantite Ring (Side Quest)
-- Bresha Ruins AF300 (4)
o - Control Device Password 2 (Side Quest)
o - Iridium Ring (Side Quest)
o - Platinum Ring (Side Quest)
o - Mythril Ring (Side Quest)
-- Yaschas Massif AF010 (5)
o - Aloeidai Fragment (Story)
o - Pathos Jewel (Side Quest)
o - Misery’s Bead (Side Quest)
o - Amur’s Sphere (Side Quest)
o - Innocence’s Sacred Sphere (Side Quest)
--Yaschas Massif AF01X (4)
o - Gorgyre Fragment (Side Quest)
o - Orb of Clotho (Side Quest)
o - Sword of Lachesis (Side Quest)
o - Mirror of Atropos (Side Quest)
-- Yaschas Massif AF100 (7)
o - Schwertleite’s Flower (Side Quest)
o - Helmwige’s Nightshade (Side Quest)
o - Siegrune’s Spiritbloom (Side Quest)
o - Rossweisse Skyblossom (Side Quest)
o - Book of Shambala (Side Quest)
o - Book of Valhalla (Side Quest)
o - Graviton Core Epsilon (Story)
-- Yaschas Massif AF110 (6)
o - Control Device Password 1 (Side Quest)
o - Ugallu Fragment (Side Quest)
o - Waltraute’s Flower (Side Quest)
o - Gerhilde’s Blossom (Side Quest)
o - Ortlinde’s Bloom (Side Quest)
o - Book of Avalon (Side Quest)
-- Oerba AF200 (5)
o - Time’s Stardust (Story)
o - Time’s Shell (Story)
o - Time’s Coral (Story)
o - Giant Egg (Collectable)
o - Graviton Core Gamma (Story)
-- Oerba AF300 (9)
o - Spinning Moonstone (Temporal Rift)
o - Sparkling Runestone (Temporal Rift)
o - Astonishing Limestone (Temporal Rift)
o - Thrilling Milestone (Temporal Rift)
o - Lovely Starstone (Temporal Rift)
o - Bubbly Stone (Temporal Rift)
o - Scorching Firestone (Temporal Rift)
o - Dewy Bloodstone (Temporal Rift)
o - Mossy Rosetta Stone (Temporal Rift)
-- Oerba AF400 (9)
o - Bittersweet Chiffon (Temporal Rift)
o - Temulous Muffin (Temporal Rift)
o - Beloved Cinnamon (Treasure Chest)
o - Selfish Pancake (Temporal Rift)
o - Farewell Madeleine (Temporal Rift)
o - Teatime Mont Blanc (Temporal Rift)
o - Dishonest Mille-feuille (Temporal Rift)
o - Pink Parfait (Temporal Rift)
o - Graviton Core Zeta (Story)
-- Oerba AF??? (1)
o - *Transcript: Vanille’s Truth (Paradox Ending)
-- Sunleth Waterscape AF300 (2)
o - Mutantomato Fragment (Story)
o - Extraordinary Egg (Story)
-- Sunleth Waterscape AF400 (7)
o - Miniflan Fragment (Side Quest)
o - Lapis Lazuli (Side Quest)
o - Heliodor Ore (Side Quest)
o - Carnelian (Side Quest)
o - Celestine (Side Quest)
o - Cosmo Aura (Side Quest)
o - Graviton Core Eta (Story)
-- Sunleth Waterscape AF??? (1)
o - *Transcript: Mog’s Marvellous Flan Plan (Paradox Ending)
-- Coliseum -- Year Unknown (1)
o - White Hole Gem (Story)
-- The Archylte Steppes -- Year Unknown (12)
o - Black Hole Gem (Story)
o - Goblin Fragment (Story)
o - *Fragment of Invincibility (Side Quest)
o - *Ochu Fragment (Side Quest)
o - *Long Gui Fragment (Kill Long Gui)
o - *Yomi Fragment (Side Quest)
o - Woolly Stone (Story)
o - Crimson Crystal (Side Quest)
o - Azure Crystal (Side Quest)
o - Forest Crystal (Side Quest)
o - Amber Crystal (Side Quest)
o - Violet Crystal (Side Quest)
-- The Archylte Steppes AF??? (1)
o - *Transcript: A Giant Mistake (Paradox Ending)
-- Serendipity --Year Unknown (5)
o - Chaos Crystal (Prize)
o - Setzer’s Dice (Prize)
o - Chocochick Down (Collectable)
o - Lucky Coin (Slot Machine)
o - Priceless Gift (Prize)
-- Academia AF400 (13)
o - Zenobia Fragment (Story)
o - *Academic Rank: Paradox Professor
o - *Travel Guide: New Bodhum (100% Map)
o - *Travel Guide: Bresha Ruins (100% Map)
o - Travel Guide: Massif (100% Map)
o - *Travel Guide: Oerba (100% Map)
o - Travel Guide: Sunleth Waterscape (100% Map)
o - *Travel Guide: Academia (100% Map)
o - *Travel Guide: Augusta Tower (100% Map)
o - *Travel Guide: Vile Peaks (100% Map)
o - Travel Guide: Archylte Steppe (100% Map)
o - *Travel Guide: A Dying World (100% Map)
o - Graviton Core Delta (Story)
-- Academia AF4XX (11)
o - *Academic Rank: Monster Professor
o - *Quiz Rank: Private (Captain Quiz's Questions)
o - *Quiz Rank: Sergeant (Captain Quiz's Questions)
o - *Quiz Rank: Lieutenant (Captain Quiz's Questions)
o - *Quiz Rank: Colonel (Captain Quiz's Questions)
o - *Quiz Rank: General (Captain Quiz's Questions)
o - Stoic Virtue (Brain Blast Terminal)
o - Epicurean Song (Brain Blast Terminal)
o - Lyceum Knowledge (Brain Blast Terminal)
o - Academia Wisdom (Brain Blast Terminal)
o - *Transcript: The Future is Hope (Paradox Ending)
-- Academia AF500 (2)
o - Paradox Scope (End Boss)
o - Amethyst and Luvulite (Story)
-- Augusta Tower AF200 (4)
o - Proto Fal’Cie Adam Fragment (Story)
o - Idea Circuit (Side Quest)
o - Enigma Codex (Side Quest)
o - Difference Engine (Side Quest)
-- Augusta Tower AF300 (1)
o - Entropy Board (Story)
-- Augusta Tower AF??? (1)
o - *Transcript: Test Subjects (Paradox Ending)
-- Vile Peaks AF010 (4)
o - Twilight Fragment Alpha (Side Quest)
o - Baxter’s Last Light (Collectable)
o - Ray’s Last Light (Side Quest)
o - Sarge’s Last Light (Side Quest)
-- Vile Peaks AF200 (8)
o - Falcon’s Compass (Side Quest)
o - Twilight Fragment Beta (Side Quest)
o - Torreno’s Last Night (Side Quest)
o - Falcon’s Last Light (Side Quest)
o - Thunder’s Last Light (Side Quest)
o - Blitz Squadron Mission Report (Side Quest)
o - Words of Light (Side Quest)
o - Father’s Song (Side Quest)
-- A Dying World AF700 (4)
o - Gogmagog Fragment Gamma (Story)
o - Ultima Brand (Hidden Treasure Chest)
o - Omega Brand (Treasure Chest)
o - Chaos Brand (Hidden Treasure Chest)
-- A Dying World AF??? (1)
o - *Transcript: Heir to Chaos (Alternate Ending)
-- The Void Beyond --Year Unknown (5)
o - Etro’s Sorrow (Story)
o - Pulse’s Resolution (Story)
o - Lindzei’s Desire (Story)
o - Mwynn’s Tenderness (Story)
o - Bhunivelze’s Sleep (Story)
The process of leveling the Monsters/Characters for your Monster Slots on your team can be accomplished in two different ways -- either through carefully Infusing to gain abilities, or in normal leveling using specific materials to obtain desired results.
The following recommended builds can be obtained by following the instructions included with each. These were gathered from discussion threads, and from conversations with different gamers (proper credit is given to each gamer).
If you are simply looking to complete effective upgrading for temporary team members, bear in mind that each Monster can unlock abilities simply by infusing Monsters of the opposing role (job) with a combined total of 99 Levels...
Opposing Jobs Are:
Commando <> Ravager
Synergist <> Saboteur
Medic <> Sentinel
Bear in mind that the more common jobs you will find most often are Commando, Ravager, Saboteur, and Medic -- effort may be necessary in the first half of the game to locate and capture useable Monsters with the jobs Sentinel and Synergist, and sometimes Medic, so you will want to note down where you obtained them in your notes so that you can go back there when you need more of that Monster and type.
(A) Normal Leveling by Material Type
Leveling Monsters/Characters (the distinction here is that Monsters are captured and tamed while Characters are obtained via buying and downloading DLC Packs to your game) is accomplished through applying particular materials via the Crystarium Menu. Each Monster/Character has a total of five (5) Levels that they can be raised to (which are represented by the five Cat Faces in their individual page (reached via Menu > Monsters > Monster/Character Name).
By using specific materials in leveling them you attain specific effects, with the following "recipes" designed to obtain the listed results:
-- Maxed Lighting (by jdawg59) --
Leveling Lightning (obtaining Lightning requires the purchase of the Lightning DLC Pack via PSN or the Xbox LIVE Marketplace -- the DLC costs are $4.00 on PSN, and 240 Microsoft Points on Xbox LIVE). Once the character is added to your game and to your Monster Party, Lightning must be leveled using ONLY Power Crystals.
Leved "Power Lightning" using only Power Crystals for all of the Crystarium Leveling and targeted Infusions resulting in the following abilities/attributes in her leveled form:
(01) ATB Charge II;
(02) Chain Boost II;
(03) Siphon Boost II;
(04) Quick Stagger;
(05) Stagger Maintenance II;
(06) Role Resonance;
(07) Strength 35%;
(08) Magic 35%;
(09) Resist Physical 36%;
(10) Resist Magic 36%
(B) Infusion Recipes
The process of Infusing Monsters does NOT level them -- to do that you will need to apply materials in the Crystarium. Which materials you use will largely dictate what abilities and stat boosts you end up with on the base monsters, which is why some of the "recipes" contained here require you to level the Monster you are going to Infuse into your base Monster to a specific level, so that they have the passive abilities and stats that are desired.
The following "recipes" will obtain the listed (repeatable) effects:
-- Apkallu Rapid Strength (by widget624) --
This repeatable "recipe" results in a Apkallu with a maximum cap of Level 45, using only Power Materials in its base build, which results in 1550 or greater Strength when maxed with 35%.
This build attacks quickly -- it attacks twice per ATB (10 times per round based upon 5 ATB segments). Use Siphon Omega build and he will be pecking nonstop at the enemy. Each of his two hits per ATB counts towards the chain gauge (while Omega's three lasers per ATB count as one hit towards chain).
(01) Infuse a Level 45 Chunerpeton into a Level 24 Tonberry;
(02) Infuse a Level 2 Miniflan into a Level 2 Chunerpeton;
(03) Infuse the Tonberry into the Chunerpeton (Locks Strength 35% and Siphon Boost II);
(04) Infuse a Level 33 Caterchipillar into the Chunerpeton;
(05) Infuse a Level 23 Mewmao into the Chunerpeton (Locks HP 25%);
(06) Infuse the Chunerpeton into a Level 19 Mud Frog (Locks HP 25% / Locks Strength 35% / Locks Siphon Boost II and results in Resist Elements 30% / Resist Magic 36%);
(07) Infuse a Level 1 Yeoman into the Apkallu (Locks Attack: ATB Charge II);
(08) Infuse a Level Thermadon into the Apkallu (Learns Lifesiphon and Blindside);
(09) Infuse the Mud Frog into the Apkallu;
(10) Infuse a Level 48 Green Chocobo into the Apkallu;
(11) Infuse a Level 54 Forked Cat into the Apkallu;
(12) Infuse a Level 30 Frag Leech into the Apkallu (Learns Faultsiphon and Powerchain).
Following the recipe above results in a final skill set of:
(L) HP 30%
(L) Strength 35%
(L) Siphon Boost II
(L) Attack: ATB Charge II
Resist Elements 30%
Role Resonance
Resist Physical 36%
Resist Magic 36%
Auto-Bravery
**(Rank 4 skill)
**Depending upon whether you infused first or leveled Apkallu first, the Rank 4 skill will either be Resist Dispel 44% or Magic 16%. Feel free to replace with any skill you like (Pack Mentality is certainly a possibility).
-- Black Chocobo (by widget624) --
The following "recipe" results in the build of a Black Chocobo Saboteur with the following:
01. ATB: Advantage
02. Improved Debuffing
03. HP 30%
04. Resist Magic 36%
05. Magic 35%
06. Resist Fog 66%
07. Chain Bonus Boost II
08. Stagger Maintenance II
09. Attack: ATB Charge II
10. Resist Physical 36%
-- The Building Process --
(01) Infuse a Level 1 Luminous Puma > Black Chocobo;
(02) Infuse a Level 60 Forked > Black Chocobo (Take Dispel and Dispelga);
(03) Infuse a Level 64 Ahriman > Black Chocobo (Take Curse, Imperilga, and Cursega);
(04) Infuse a Level 47 Deathgaze > Black Chocobo (Take Pain and Painga);
(05) Infuse a Level 33 Pitterpatter > Black Chocobo (Level);
(06) Infuse a Level 80 Dendrobium > Black Chocobo (Level. Take Poison, Fog, and Poisonga);
(07) Infuse a Level 38 Mimi > Black Chocobo (Level. Take Deshellga);
(08) Infuse a Level 4 Mewmao > Black Chocobo.
(09) Infuse a Level 22 Tonberry > a Level 39 Xolotl;
(10) Infuse a Level 39 Xolotl from Step (09) > a Level 7 Purple Chocobo;
(11) Infuse a Level 1 Yeomen (a) > Level 7 Purple Chocobo;
(12) Infuse a Level 1 Yeomen (b) > Level 7 Purple Chocobo;
(13) Infuse a Level 30 Pink Lily > Level 7 Purple Chocobo;
(14) Infuse a Level 1 Zwerg Metro > Level 7 Purple Chocobo;
(15) Infuse a Level 20 Zwerg Metro > Level 7 Purple Chocobo;
(16) Infuse the Level 7 Purple Chocobo > Black Chocobo;
(17) Infuse Level 15 Fachans (a) > the Black Chocobo;
(17) Infuse Level 15 Fachans (b) > the Black Chocobo;
(17) Infuse Level 15 Fachans (c) > the Black Chocobo;
(17) Infuse Level 15 Fachans (d) > the Black Chocobo;
(17) Infuse Level 15 Fachans (e) > the Black Chocobo;
(17) Infuse Level 15 Fachans (f) > the Black Chocobo;
This completes the build...
-- Blue Chocobo Fast Break Build (by Savok1) --
This build results in a highly desirable Blue Chocobo with the following finished stats and abilities:
Level: 99
HP: 7049
Attack: 532
Magic: 1328
ATB: Level 6
Kill: ATB Charge (red)
HP: 30% (yellow)
Quick Stagger (yellow)
Role Resonance (yellow)
Magic: 35% (yellow)
Stagger Maintenance II (yellow)
Attack: ATK Charge II (yellow)
Siphon Bonus Boost II (yellow)
Chain Bonus Boost II (yellow)
Auto-Faith.
This repeatable build is accomplished by following these steps:
Stage I: Creating a Filter Monster from a Level 19 Mud Frog with 5 Red Locks
(1) Mud Frog lv19 with 5 red lock
(2) Infuse Mud Frog with <--- Level Zwerg Metrodroid #1
(3) Infuse Mud Frog with <--- Level 20 Zwerg Metrodroid - Stagger Maintenance II (Yellow Lock)
(4) Infuse Mud Frog with <--- Level 1 Luminous Puma #2
(5) Infuse Mud Frog with <--- Level 54 Forked Cat - HP 30% (Yellow Lock)
(6) Infuse Mud Frog with <--- Level 1 Yeoman #1
(7) Infuse Mud Frog with <--- Level 1 Yeoman - Attack: ATB Charge (Yellow Lock)
(8) Infuse Mud Frog with <--- Level 19 Fencer #1
(9) Infuse Mud Frog with <--- Level 19 Fencer - Quick Stagger & Siphon Boost II (Yellow Lock)
Stage 1 Notes:
#1 base to make yellow lock
#2 lower base for HP 10%
Stage II: Preparing the Blue Chocobo
(1) Level a Blue Chocobo to at least Level 86 (Resist 44%)
-- Level 11 thru 40 take Potent Material, the rest all Mana Material.
-- The priority is to increase the ATB gauge bonus.
(1) Blue Chocobo Level 86 and up
(2) Infuse Blue Chocobo with <--- Level 30 Frag Leech #1
(3) Infuse Blue Chocobo with <--- Level 30 Frag Leech - Role Resonance (yellow lock)
(4) Infuse Blue Chocobo with <--- Level 45 Flanbanero #3
(5) Infuse Blue Chocobo with <--- Level 22 Tonberry - Magic 35% (yellow lock)
(6) Infuse Blue Chocobo with <--- Level 30 Pink Lily - Chain Bonus Boost II (yellow lock) #3
(7) Now Level 86 Blue Chocobo has 1 Red Lock, 3 Yellow Lock and 4 White.
Stage II Notes:
#3 Take all of the magic spells Fire, Fira, Thunder, and etc..
Stage III: Final Assembly
(1) Infuse Level 86 Blue Chocobo with <--- Level 19 Mud Frog
(2) The fully-built Level 86 Blue Chocobo will now have the following:
(a) Kill: ATB Charge (Red)
(b) HP: 30% (Yellow)
(c) Quick Stagger (Yellow)
(d) Role Resonance (Yellow)
(e) Magic: 35% (Yellow)
(f) Stagger Maintenance II (Yellow)
(g) Attack: ATK Charge II (Yellow)
(h) Siphon Bonus Boost II (Yellow)
(i) Critical: Haste
-- Proto-Behemoth maxed-out Attack Build (by Savok1) --
This is the final version of a Proto-Behemoth that is basically perfect.
(01) Level a Mud Frog to Level 19;
(02) Level a Tonberry to Level 24 (Magic & Physical 35%);
(03) Infuse into Level 19 Mud Frog;
(04) Level a Mewmao to Level 23 (Resist Magic 36% 25% HP);
(05) Infuse into Level 19 Mud Frog;
(06) Level a Narasimha to Level 29 (Auto-bravery);
(07) Infuse into Level 19 Mud Frog;
(08) Level a Green Chocobo to Level 49 (Resist Physical 36% this will push out Magic 35%);
(09) Infuse into Level 19 Mud Frog;
(10) Level Forked Cat to Level 54 (30% HP will override the existing 25%);
(11) Infuse into Level 19 Mud Frog;
(12) Level Proto-Behemoth to Level 40 ONLY USING POWER materials bought from Chocolina;
(13) Infuse Level 40 Proto-Behemoth into the Level 19 Mud Frog;
(14) Infuse Level 30 Frag Leech into Level 19 Mud Frog;
(15) Infuse Level 1 Yeoman (ATB Charge II) into Level 19 Mud Frog;
-- Pulse Gladiator (by widget624) --
The following "recipe" results in the build of a Level 68 Pulse Gladiator with 12,680 HP. an Attack of 450 and Magic of 100, along with the following passive abilities:
01. HP 30% (y)
02. Critical: Shield II (y)
03. Improved Guard (y)
04. Improved Ward (y)
05. Resist Elements 30%
06. Rapid Recovery
07. Resilience 40%
08. Critical: Tetradefense
09. Resist Magic 36%
10. Resist Physical 36%
(01) Begin by leveling the Pulse Gladiator using only Vitality Materials to Level 68, where you must STOP leveling -- because levels above 68 include a Red Lock;
(02) Infuse a Level 2 Koboldroid Yin (adds Critical: Shield);
(03) Infuse a Level 39 Swampmonk (adds Critical: Shield II with a Yellow Lock);
(04) Infuse a Level 20 Lancer (adds Improved Guard & Improved Ward / inherits Mediguard);
(05) Infuse a Level 99 Flandit (adds HP 25% and Improved Guard II with Yellow Locks);
(06) Infuse a Level 40 Bunkerbeast (adds Improved Guard with Yellow Lock and HP 25%);
(07) Infuse a Level 33 Caterchipillar (adds Resist Elements 30%);
(08) Infuse a Level 72 Necrosis (adds HP 30% with a Yellow Lock and Resilience 40%);
(09) Infuse a Level 39 Xoloti (adds Resist Physical 36% and Resist Magic 36%);
(10) Infuse a Level 92 Haguma (adds Rapid Recovery).
This completes the build.
-- Strong Cactuar with Tank Stats (by widget624) --
If this "recipe" is completed correctly it results in a VERY impressive ~1500 attack, and while it only results in an HP pool of 4000, it includes tank-like defenses to keep you alive. Note that the leveling process for this build uses all Power materials, and you MUST max-out its Level BEFORE applying the Infusion processes.
Stage I: Creating the Filter Monster
(1) Capture a Level 19 Mud Frog and/or Level it to Level 19;
(2) Infuse with Chocobo with minimum Strength 5%;
(3) Infuse Level 24 Tonberry (adds Strength 35% Yellow Locked and Magic 35%);
(4) Infuse Level 33 Caterchipiller (adds Resist Elements 30% and Auto-Veil);
(5) Infuse Level 23 Mewmao (adds Resist Magic 35% and HP 25%, bumps Magic 35%);
(6) Infuse Level 54 Forked Cat (adds HP 30% overwriting and Yellow Locking HP 25%);
(7) Infuse Level 48 Green Chocobo (adds Resist Physical 35% and gets rid of Auto-Veil).
Completing Stage I will result in a Mud Frog with the following:
(5 Red-Locked Passive Abilities)
1. HP 30% (YL)
2. Strength 35% (YL)
3. Resist Elements 30%
4. Resist Physical 35%
5. Resist Magic 35%
Stage II: Processing the Cactuar
(1) Infuse the Mud Frog > Cactaur;
(2) Infuse Level 30 Frag > Cactuar (adds Role Resonance / Faultsiphon / Lifesiphon);
(3) Infuse Level 18 Fencer > Cactaur (adds Siphon Boost II);
(4) Infuse Level 1 Yeoman > Cactaur (adds Attack: ATB Charge II)
(5) Infuse *EITHER* a Level 1 Gancanath for Feral Speed II *OR* a Level 70 Necrosis for Resilience 40%.
His Feral Link does pathetic damage, BUT if you use it at JUST THE RIGHT TIME, it has a synchronization of 777%, perfect for capturing. If you choose Feral Speed, it is fairly simple to change your mind to Resilience later on the road. If you choose Resilience, it's almost impossible to get rid of.
Following this build obtains the following:
01. HP 30% (YL)
02. Strength 35% (YL)
03. Resist Elements 30%
04. Resist Physical 36%
05. Resist Magical 36%
06. Role Resonance
07. Auto-Bravery
08. Siphon Boost II
09. Attack: ATB Charge II
10. Feral Speed II/Resilience 40% (Resilience is placed under Resist Elements 30%)
-- Super Kichu (by Savok1) --
To max out Kichu -- and that means max and place all stat onto the ATB gauge:
(1) Level a Mud Frog to Level 19;
(2) Level a Tonberry to Level 24 and Infuse to Mud Frog;
(3) Level a Nyaomao to Level 23 and Infuse to Mud Frog;
(4) Level a Moblin Center to Level 40 and Infuse to Mud Frog;
(5) Level a Green Chocobo to Level 48 and Infuse to Mud Frog;
(6) Level a Nekomata to Level 54 and Infuse to Mud Frog;
(7) Now Infuse the Mud Frog to the maxed-out Kichu and that's that!
The Unofficial SuperCheats Guide to Final Fantasy XIII-2 and its text content (not videos or images) are Copyright © 2012 Web Media Network Ltd. All rights reserved.
SuperCheats, www.SuperCheats.com, and its associated websites and their content is Copyright © 2012 Web Media Network Ltd. All rights reserved.
The SuperCheats Unofficial Guide to Final Fantasy XIII-2 (hereinafter referred to as the "Guide") was written by CM Boots-Faubert as a work-for-hire for Web Media Network, Ltd. The Guide is licensed to appear exclusively upon the website SuperCheats.com and other websites licensed to display the Guide under agreement with Web Media Network Ltd.
Attribution: Acknowledgment is hereby officially extended to jdawg59, Savok1, widget624, www.xbox360achievements.org, SuperCheats.com, Square-Enix.com, www.finalfantasy13-2game.com, Takeshi Iwabuchi, Shinya Ukawa, finalfantasy.wikia.com/wiki/Final_Fantasy_XIII-2, Tri-Ace, and Laura Shiraishi.
-- Shout Outs --
The process of playing through the game and writing this walkthrough and guide was a tough and lengthy one, and in the process delivered much satisfaction to the author, who is a long-time fan of and player of the Final Fantasy series. The massive efforts that were undertaken in creating this guide and the accompanying support and reference matter was not accomplished alone or in a vacuum...
There are specific people who need to be both acknowledged and heartily and sincerely thanked and who should be thanked in a more profound manner than is possible using only the written word... The following individuals therefore should consider themselves vigorously thanked, slapped on the back, hugged, in some cases kissed, their hand being shaken with great force and emotion, while large mugs of imaginary ice-cold beer is placed on the table in front of them along with heaping baskets of hot and steaming but very tasty onion rings or their favorite pub food, while words of thanks overflow from the mouth of the author, including:
Rich -- to whom many thanks are offered and given for your incredible patience and willingness to tolerate both the extra time and the technical issues that crop-up from time to time in the often exciting process of guide creation in general and this guide in particular... Muchos y gracias sinceras por ser un redactor y un editor más excelentes -- and also for not shooting us as a result of the unexpected delays of which there were many -- Usted el hombre! In the end what we ended up with is a better guide thanks to your patience and your willingness to be pleased. Thanks mate!
Laura Shiraishi -- our PR Rep at Square who has been extremely helpful in providing information, codes, and assistance as we set out to write this guide. Good on ya Laura! And doumo arigatou gozaimasu!
Swash01 (Peter) -- The bloke who compiled many of the lists that are included in this guide and who helped with things like alternate tactics, dissecting the story until we could better understand the points that were being made in it, and who sat beside us as we played and offered very good advice -- helped play and replay the videos for editing -- and otherwise put out massive effort all for the goal of making this guide better. Good on ya mate!
YvonneBF -- Who in addition to magically appearing at my elbow with a cup of tea and a biscuit and a few kind words (which helped immensely) at just the right moments, and for the awesome job that you did in formatting and editing this guide, making us look good (and better than we should have considering all the typos we left in this bloody thing) you are thanked profusely!
Finally we need to thank YOU -- because without YOU this guide would never have been commissioned. Thanks mates! ¡Gracias amigo! Dank u vriend! Merci ami! Danke Freund! Grazie amico! Obrigado amigo! Thank YOU!
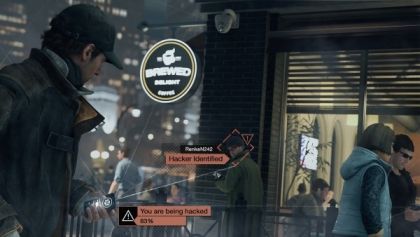
 How to Complete Destiny Mars Dust Palace, PlayStation Exclusive, Strike Mission
 Fallout 4 Guide: How to Recharge Fusion Cores and save caps
 PS4 vs. Xbox One vs. Wii U: Which Games Console Will Win Out? [MakeUseOf Poll]
 5 Nights at Freddys animatronics guide Bonnie, Chica, Freddy, Foxy
 Scares On The Cheap! Modern Horror Games Under $20