Unofficial Farmville Guide by Chris Boots-Faubert for SuperCheats.com
Updated: 16 May 2011, V1.0
Welcome to the Unofficial SuperCheats Gameplay Guide and Walkthrough for the Zynga/Facebook Social Game Farmville, a game that takes farming simulation to new levels of entertainment. This is Version 2.0 of our Farmville Guide, and the major version number increase indicates that new content as well as updated content is present. To get the most efficient and productive use from this guide we recommend that you take the time to patiently read through the entire guide, from beginning to end, making notes on the sections that best apply to your play style.
You may find it very helpful to print out the various tables and reference sections that we have created in order to refer back to them, as needed, and put them in a format and upon a medium that both encourages underlining and making your own notes -- that was the intention when we created each of those reference points.
Farmville is arguably still the most popular and complex game on Facebook today, although in recent months it has been joined by other games that rival it in complexity and entertainment potential, most notably The Sims Social, and some new Zynga titles including Hidden Chronicles, YoVille, and the increasingly popular CityVille.

G'day G'day! Welcome to Farmville!
This guide to Farmville provides gamers of every skill level with useful information, tips, strategies, and hints, serving as one of the most effective road maps for attaining the highest levels of enjoyment, entertainment, and progress in the game without spending real-world money in the process -- in fact it is fair to say that the underlying motivation for the creation -- and the updating -- of this guide was primarily to assist gamers in finding different ways to maximize their enjoyment of the game and its fascinating world without it costing them money to do so.
The objective from the start in writing this guide was to chart out a course that packs in all of the fun of playing the game while at the same time removing the burden of having to spend real-world money getting there, which is a much more complex challenge than you may think. Obviously a willingness to spend money -- and the ability to do so -- is one of the surest methods by which a gamer can save time and cut corners, but having said that it is our belief that avoiding that approach not only leads to a much more satisfying gaming experience, but also tends to promote a higher value for most players in their accomplishments in the game!
According to the most recent statistics, on an average day between 50 and 80 million people spend at least some of their online time tending to a farm in the Facebook game Farmville -- an increase of around 30-million over the statistics when the first version of this guide was written. As a web-based Flash game Farmville features about what you would expect from a game that loosely simulates farming, though the addition of new buildings, quests, missions, and crops/animals as well as four all-new farms has increased the fun potential of the game as well as added diversity to its farming environments.
If you are interested in statistical data you may find it fascinating to learn that for average players, eight out of every ten gamers will regularly spend real-world money purchasing virtual currency and coin in the game, with a weekly amount that still hovers around $20 -- and if you do the math that averages out to well over the $800 a year that Zynga suggests is average... Another statistic you may find startling is that it takes the average player just over one year to reach Level 50 in the game, and seven months to reach the "Plantation" Level of Farm size.
About seven out of every ten players collects one or more types of animal in the game as a hobby, with the most popular being event-specific and Limited Edition cows, while just over half of the gamers who consider themselves to be regular Farmville Players today actually began playing the game within the past year.
One of the secrets to the incredible success that Farmville has enjoyed since it was launched on 19 June 2009 is the measure of instant gratification the game offers, while its social-gaming elements makes up the number one reason given by regular players for the attraction that they feel for it. Statistically the average gamer ends up playing the game because one of their friends invited them to -- the same reasons given in mid-2010 when a survey was conducted online via Facebook to learn what it was about Farmville that struck so solid a chord for most gamers. The fact that Farmville is widely considered by the gamers who play it to be a near-perfect fit for the social networking platform that is Facebook is a significant factor in its continued success, but in the end it is the fun that is to be had within the game more than any other factor that gamers say motivates them to build, craft, and otherwise enjoy the game.
-- Collectible Content --
While the special buildings, event-based and theme items, and the many holiday items that can only be acquired by playing the game daily serve as the foundation for much of the collection behavior experienced by most gamers in Farmiville, the most popular single item or theme for collecting turns out to be the often cute and sometimes spooky Garden Gnomes that appear in almost every special event, holiday event, or new location in the game.
In addition to the Gnomes -- of which at last count there exists more than 165 unique and distinct examples -- for bovine collectors there are over 140 unique types of Cow, special types of Bulls, and over seven species of horned cow-like animals to be collected, among horses there are over 200 different unique collectible horses, and this does not factor in the additional dozens of unique "Mini Horse" species, nearly 100 "Mini-Horse" types, the 20 types of Stallions, or the incredible number of "Fantasy" horses, which include a wide variety of types based upon the Unicorn and Pegasus arch-type, and combinations that mix the two with horned and winged beasties!
If that fascinates and stimulates your urge to begin collecting, you may also want to bear in mind that the numbers above only cover the adult variates -- most of which, like cows, does not factor in the matching variates of baby versions obtained by breeding the different types using the special buildings set aside for that purpose in the game!
-- Keeping up with the Jones' --
Competition plays a major role in the game, with friends competing to make their farm better than their neighbors, to have the best collection of a particular animal, or Gnomes, or even flower collection, and then there is the added challenge of Crop Mastery that provides special, very attractive signs that each Farmer can place on their farm to illustrate their success in mastering each, and do not even get us started on the different trees, or the special types of plants within the crop structure. Add in the various crafting elements that facilitate your indulging in the long and satisfying path towards becoming a master Baker, Vintner, or even operating your own Health Spa at which you craft many of the special treatments that are offered to your guests, and you should begin to sense the complexity of the gaming challenges that await you!
Recent additions to the game include the crafting system, special bonus-adding tree orchards, and expanded buildings that not only add to the different aspects of game play but also add entirely new paths of game play to the game, permitting gamers to diversify their play in order to stand out in a particular area in contrast to their mates.
-- A Constantly Evolving World --
That sums up the technical details that contribute to the success of Farmville on Facebook, and it also nicely illustrates why this Guide and Walkthrough are necessary for most players. It has been pointed out that even if a gamer wanted to, it is nearly impossible for any one gamer to master all of the different types of game play in this game -- a situation that is common in the MMO and Action-Adventure genres, but rare indeed in the world of social gaming!
In simple terms, at least part of the reason that this game is so successful is that it is fun. If the statistics are correct, about half of the gamers who visit our site either play Farmville, or have played it in the past, and the rest are likely to try it at some point in the future, and how cool is that?!
Despite a clear system of play that is outlined in the game there are still many aspects that elude even the most expert of players, making the journey from new player to expert a long and often frustrating one, and neatly explains why the creation of this updated guide ended up requiring a team of players in order to manage it! Fortunately you have decided to avail yourself of this guide -- which allows you to benefit from our collective experiences and learn from our mistakes and our triumphs... This guide eventually teaches you all of the things that you need to know to go from newbie scratch-farmer to natural-pro very quickly -- and with its aid you will turn your farm from a generic agribusiness into a showfarm that is the envy of all of your mates!
The SuperCheats Unofficial Guide to Farmville Version 2.0 provides a solid reference manual for every aspect of play, includes tips, hints, and tricks that are used by players who rank in the top 1% in the game, and provides you with just the edge you need to master this and to excel while making it look effortless and easy! Bookmarking the guide is your obvious first step -- though printing out your own personal copy AND grabbing the mobile version for your smartphone is also a good first few steps in the process -- especially when you consider that the reference sections which include the crop and tree tables, mastery information, and the tick-lists in the Appendixes are nearly indispensable to you as you start out and as you progress!
-- HELP A GAMER --
As we wrap up this Introduction we want to remind you that if you have questions about the game -- chances are very good that this guide already answers them -- so you will want to take the time to read through it FIRST. We suggest that you sit down at your computer with your beverage of choice and a nice snack, and spend a few hours reading this guide from start to finish. If after that you end up with a question that is still not covered by the guide, you should then access the celebrated "Help a Gamer" mechanism and feature that SuperCheats is growing more well-known for since it was established as a primary feature on the site.
It may help you to understand that in addition to researching, playing, and writing these guides, the games journos, previewers, reviewers, guide writers, and Staff Writers as well as the editors from both SuperCheats AND our sister publication, Gaming Update (www.GamingUpdate.com) also regularly participate in the Help A Gamer system -- so asking your question there is the BEST way to get a fast and reliable answer!
Thanks to this now well-established and reliable Q&A system for games and gaming on SuperCheats, the author no longer accepts questions about the games covered in the guides via email, but only through the Help A Gamer system. If your question does not qualify as a game-related question, or you feel that it is better served by asking it privately, via email, you can still do that, but if the author disagrees or feels that your question should have been submitted through the Help A Gamer system, they may very will bin the email unanswered, so bear that in mind won't you?
-- An Expert Education in Farmville --
By the time that you come out at the other end of this guide you will have acquired a level of knowledge and familiarity with Farmville that, when combined with your experiences in actually playing the game, will have turned you into something of an expert in Farmville in your own right -- that being the case, and in consideration of the many tricks for maximizing fun, profit, and advancement that you may find on your own, we hope that you will consider making use of that knowledge and experience by registering an account on the site and participating yourself in the Help A Gamer system as well as the more social-aspect of gaming via our chat boards, and matchmaking for gamers!
The Unofficial SuperCheats Farmville Guide and Walkthrough Version 2.0 Team wishes you good luck and good fortune in your gaming and your life -- and wants to remind you that despite the science and the techniques, this is still just a game -- and it is a game that you are meant to enjoy and find entertainment in. So make sure you are having fun!
Farmville is a game about farming, and its central focus includes the avatar that represents you in the game -- a farmer who does all the farming!
Because of this there are a number of issues that pertain to your Farmer/Avatar, and we cover them all here, in this section of the guide, which naturally appears at the beginning, since that is where you undertake to prepare your game play foundations, and your Avatar and Farmer is a major part of that. We have yet to discover the glossary of words that are a particular element in game play and your use of this guide, so we are going to address many of these issues in a rather basic and hopefully easy-to-follow fashion -- so please bear with us while we address all of that and more!
The game play process begins with the creation of the Avatar of your Farmer -- an image of a person who is meant to represent you in the game. Accomplished via the Avatar Creation Menu when you first begin to play the game, your Farmer can be customised to resemble you, as a person, as closely or as little as you like -- it is entirely your call mates!
Customizing your Avatar
-- The Basics of You --
When you create your account at the start of your farming career you make some basic decisions, starting with the sex and appearance of your Farmer/Avatar, including the clothes they wear. Later you will have the opportunity to add more clothes to your farmer's wardrobe, but for now the basic set that you start out with should be more than sufficient since you are not, at this point, setting out to make any sartorial or social statements.
-- Basic Statistical Information --
The name of your farmer is dictated by the name on your Facebook account -- so if for any reason you want to change the name of your farmer in Farmville, you must therefore change your Facebook Account name, a decision that should not be taken lightly since it is how your mates and others know you on the site...
To make your Farmer look unique you can change the appearance and clothing as you create them -- but do not worry about the choices that you make here because you can access the farmer customization menu later on and throughout your game play, and you will want to alter some of this anyway -- mostly their outfits, since there is an Achievement associated with that -- but we will get to that later!
-- Customisation of your Farmer --
In the customisation menu there are choices for each major element of your farmer's appearance -- for example when you select “Facial Features” this pulls up a sub-menu that lists all of the features that you can change in your farmer's face.
Your options for customizing your farmer's face include:
Ears
Eyebrows
Eyes
Face
Facial Hair
Hair
Mouth
Nose
Skin
Select an area that you want to change and then add it to your avatar to see if you like it -- the item or choice will be reflected in the image of your avatar in the menu. Once you have adjusted your avatar's face to your satisfaction, accept the changes and move on to the next area!
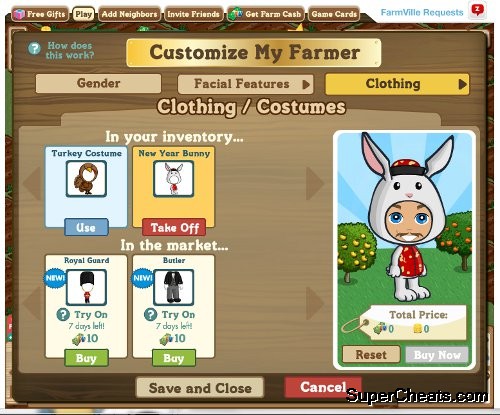
Clothes include Holiday Event Costumes
-- Clothes Make the Farmer -- Sartorial Expression in Farmville --
The final stage for creating your new avatar is selecting the clothing that they will wear each time that you log into the game. Select "Clothing" from the main character customization menu, and then begin dressing them up using the sub-menu choices listed.
Clothing is one of the primary game play features in Farmville that allows each player to make their Farmer Avatar distinctly different from those of their mates and other players, a significant set of choices both because it adds to your overall expression in the game, and because
The clothes are available to level 1 farmers and above. Some are for free and can be found in farmer's inventory, while others can be purchased from the Market for Coins or Farm Bucks, and yet others are obtained as rewards for accomplishments in the game -- for instance there is a set of T-Shirts that are the same colour as the Achievement Ribbons in the game that can be obtained for unlocking X-number of Ribbons...
You can select clothing for the following garments:
Hats
Shirts
Bottoms
Shoes
Accessories
In addition to the above, you can select from pre-set outfits, and later after you purchase them, you can also select Costumes -- for instance during the Thanksgiving Holiday in America they added a Turkey Suit to the clothing you can purchase, and for Halloween they added a Ghost Costume.
Each choice that you make is reflected in the image of your avatar that is part of the menu -- and once you have obtained the outfit that you like, all that you need to do is save the avatar form and you are done! Well, sort of done -- you still have to play the game of course!
-- Basics on Levels and Leveling --
This section of the guide addresses levels and leveling in some detail, and is intended to be a general introduction to the concept that underscores the importance that your level plays in the game due to the fact that many of the crops in the game are level-locked, and cannot be accessed until you reach the minimum level listed in the guide for each.
All farmers begin the game at Level 1 -- and gaining levels means collecting XP (experience points) -- but fortunately you gain XP from almost everything that you do in the game, so it is more a process of putting in the time and effort than it is doing any one particular thing.
As you acquire XP for most actions -- planting crops and trees, placing and constructing buildings, and buying items from the market -- all of these activities can earn you XP. You can also earn XP through helping out on your neighbors on their farms -- actions that also count towards unlocking some of the in-game achievements as well as that factor as an important part of being a good neighbor! This is covered in some detail in the chapter on Being a Good Neighbor, so for now just be aware that it is one of the methods that you will use. For now simply bear in mind that most of your actions will result in acquiring XP, and with each new level you reach in addition to unlocking new crops you also earn a new title.
Levels and Related Level-Based Unlockables
Lvl
No.
XP
Required
Level
Title
Unlocked Specials /
Buildings / Machines
Unlocking of
Gift Selections
1
0
Field Hand
2
15
Kinderfarmer
Stone Villa
3
30
Amateur Farmer
Green Hay Bale
4
70
Able Farmber
Rest Tent
Chicken
5
140
Handy Farmer
Greenhouse, Turkey Roost, Winter Workshop
Shovel Set
6
250
Nimble Farmer
7
400
Savvy Farmer
Sheep
8
600
Fancy Farmer
Tool Shed
9
850
Sophisticated Farmer
10
1150
Splendid Farmer
Bike Shop, Fruit Stand
Pig
11
1500
Farming Magician
12
1900
Farming Wizard
Red Tractor, Pink Tractor
Rabbit
13
2400
Jolly Rancher
Grain Silo / Harvester
14
3000
Produce Professional
Seeder
15
3700
Professor of Agriculture
Craftshop, Market Stall, Workshop
Duck
16
4500
Hot Shot Farmer
Storage Cellar
17
5400
Super Shoveler
Post Office
18
6400
Super Grower
School House
Goat
19
7500
Professional Plower
Plain-Pink-Black Cottage
20
8700
Green Giant
General Store, Wedding Gazebo / Co-Op Farming
21
10000
Rockstar Farmer
Horse
22
11500
Barnyard Behemoth
Garage / Baby Bunny Rescue Job
23
13500
Magnificent Farmer
24
16000
Cream of the Crop
Log Cabin
25
19000
Sensational Sower
26
22500
Sultan of Soil
Farmhouse
27
26500
Thrill of the Till
28
31000
Master of Pasture
29
36000
Sensation of the Plantation
Estate
30
42000
Lord of the Plow
Glass House
31
49000
Bastillion of the Barn
Lodge / Combine / Tea Party Job
32
57000
Ace of Acerage
33
65000
Livestock Lord
34
74000
Practiced Farmer
Villa / The Hottest Chili in Town Job
35
83000
Skilled Farmer
36
93000
Green Ribbon Farmer
37
103000
Clever Farmer
38
113000
Great Farmer
39
123000
Smart Farmer
40
133000
Model Farmer
41
143000
Frugal Farmer
42
153000
Hot Shot Farmer
43
163000
Proficient Farmer
44
173000
Sophisticated Farmer
45
183000
Accomplished Farmer
Wind Turbine
46
193000
Brilliant Farmer
47
203000
Prominent Farmer
48
213000
Expert Farmer
49
223000
Genius Farmer
50
233000
Big League Farmer
Azaleas
51
243000
Master Farmer
52
253000
Grand Master Farmer
53
263000
Farming Authority
54
273000
Yellow Ribbon Farmer
55
283000
Farmer Cash Crop
56
293000
The Real Deal
57
303000
Killer Tiller
58
313000
Farm-O-Saurus Rex
59
323000
White Ribbon Farmer
60
333000
I Can Haz Farm?
61
343000
Old Mc-Who?
62
353000
Educated Farmer
63
363000
Red Ribbon Farmer
64
373000
Hay Roller
65
383000
Farming Virtuoso
Silo Home
66
393000
Blue Ribbon Farmer
67
403000
Purple Ribbon Farmer
68
413000
County Fair Champ
69
423000
State Fair Champ
70
433000
World Fair Champ
Mansion
Floral Container
71
443500
Beyond Fairs Farmer
72
454500
Farm Fanatic
73
466000
Head Honcho
74
478000
Livestock Broker
75
490500
Tractor Tycoon
76
504000
Market Master
77
518500
Talk of the Town
78
534000
Plant's Best Friend
79
550500
Cow Whisperer
80
568000
Farm Hero
Mangrove Decoration
81
587000
Farm Idol
82
607500
Agriculture Aficionado
83
629500
Soil Sage
84
653000
Crop Connoisseur
85
678500
Dirt Disciple
86
706000
Big Ole' Boss
87
735500
Farm Fiend
88
767000
Plow Plant Reap Repeater
89
801000
High Harvester
90
837500
Farm Freak
Dutch Rabbit
91
876500
Veni Vidi Agri
92
918500
Incomparable Farmer
93
963500
Soil Savant
94
1012000
Farm Overlord
95
1064000
Stellar Farmer
96
1120000
Transcendent Tiller
97
1180000
Universal Farmer
98
1244500
Paragon Farmer
99
1313500
Epic Farmer
100
1387500
Omnipotent Agriculturalist
Jacaranda Tree
101
and
Up
150000
Plus 1-Level
Per 100,000
N/A
Note: The table above does not include items and unlockables that are accessible at Level 1, as that is the starting level of the game. If the building or item you are looking for does not appear in this table, chances are it is a Level-1 Base Item.
-- Avatar Traps --
The game play design for the world interface is avatar-centric, which means that the mechanism for play and for actions is avatar-based, requiring the avatar to interact with the object or objects being manipulated, the crop being planted, or building being used and, as such, the avatar will try to walk to the location of the game object or get as close as it physically can if it encounters environmental objects that block its access to the game object.
This is also true when your avatar is visiting another farm (not your own), in which case when you click on the Feed Chickens Icon on the left side of the screen, your avatar will then seek out the physical location on the farm for the Chicken Coop, since that is the game object that is relative to the command to feed the chickens.
When a farm has been expanded to the very large sizes the process of the avatar seeking out and moving to the related game object can take a considerable amount of time, especially when it must negotiate a path when it is partly blocked. Many players find this to an annoying game play element, and to avoid what is commonly viewed as an unnecessary delay, build into their farms a strategically constructed intentional terrain-blocking construct that is commonly called an Avatar Trap.
Contrary to the negative implications of its name, an Avatar Trap is widely viewed as a positive -- or good -- object to have on your farm and to encounter on the farms of your neighbors. In fact many players will refuse to visit farms that do not provide the basic courtesy of an Avatar Trap, and in view of the fact that there are certain events and/or special activities in which having other players visit your farm and complete specific co-operative actions, it is in your best interest to construct and maintain an Avatar Trap on your farm!
While it is not as crucial a courtesy when your farm is Level 0 or Level 1, once you get beyond Level 1 it is generally considered to be a courteous act to construct an effective Avatar Trap, which is at its most basic a simple set of blocking objects that are placed around the edges of the square on the grid where avatars will arrive on the map when the farm is loaded. This square is the default entrance to the map and is generally located in a spot slightly-offset-from-center on the map. When the size of a farm is increased, the square is relocated one diagonal square southeast from its original spot for each level the farm is increased.
That being the case, whenever you increase the size of your farm you will need to relocate the Avatar Trap so that it now occupies the current entrance square for the map. The images above depict typical Avatar Traps and their construction, however you can be creative in making yours as long as it fulfills the basic requirement of the Avatar Trap -- that is to say it is constructed from objects that both your Avatar AND the Avatars of visiting players cannot pass through.
-- Courtesy Buildings and Structures --
A number of optional buildings/structures exist in the game that can be used by players visiting your farm to obtain XP and/or special items and rewards, and as such the deployment of these buildings and structures is considered to be a polite courtesy by many players, who consider their presence on a map to be desirable, and their lack on a map to be reason not to visit that player's farm in the future.
That being the case, and to ensure that you are providing the basic game elements that other players expect to find and that they, themselves provide on their farm, every effort should be made to deploy the following buildings/structures on your farm and on any additional farms that you may leave your Avatar on (and thus leave as the "active" farm for your account):
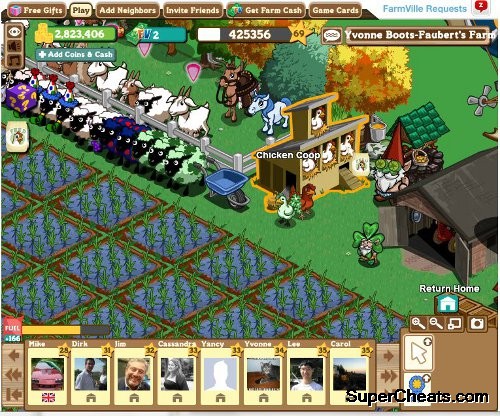
(1) Chicken Coop (Required Level: 1)
The feature of feeding your neighbor's chicken coops was introduced to the game on 6th January 2010, and when you visit a neighbor's farm (or they visit yours) an icon of a white sack with blue lettering appears on the left-hand-side of the screen indicating that you can feed the chickens on this map.
Because the mechanism for awarding XP and items on a visited farm is predicated upon the visitor assisting their neighbor by helping them with crops, some reward elements are not available unless the visitor first either selects the five (5) crop actions that they can effect each day when they visit, or completes the five (5) animal actions that they can effect each day when they visit. Failing to first complete the Crop/Animal Actions can result in failure to obtain XP for other Visiting Actions, so it is generally considered to be a wise practice to get into the habit of completing Crop/Animal actions prior to accessing any other action on the map.
Crop Actions include but are not limited to plowing a fallow field, fertilizing a plowed or planted field, and/or fertilizing a fully-grown crop square, as well as harvesting any Tree-object with an active harvest symbol above it. Animal Action are restricted to harvesting of any animal that has the harvest indicator above its head. Note that while these actions are recorded on your game window as having taken place, they do not actually occur until the player whose farm you are visiting confirms the action on their game screen. When you revisit their farm after having completed an assistance action if the owner has not confirmed and accepted your assistance action it will not appear on the updated map, so it is possible to accidentally complete an assistance action on the same square more than once. Each day you can complete a total of five (5) Crop or Animal assistance actions per farm/farmer...
In addition to obtaining a small amount of XP for the effort, feeding the chickens may result in the discovery of a Mystery Egg -- the color of the Mystery Egg the visitor may discover is based largely upon type of chickens that live in the coop; having more of a particular chicken type in the coop will influence the chance of finding that chicken's egg, however it is still possible to obtain a lower-colored egg as a result of the RNG controls for the structure...
When the farmer finds a Mystery Egg on his own farm (in a Chicken Coop that belongs to them), they will NOT receive that egg in their Gift Box, but rather will be given the option of sharing the egg with their neighbors, via their feed. They will obtain a small amount of XP as their karmic reward however. When a player finds a Mystery Egg in the Chicken Coop of their neighbor one copy of the egg that is found is placed in the gamer's Gift Box, and they are given the option to share another copy (or copies) of that Mystery Egg with their neighbors via their feed. It is generally considered to be a good and friendly gesture to always share the eggs you find...
In addition to a very small chance of the egg you find yelding a live chicken of one of the species that is associated with that egg, there is a much larger chance of receiving a special item or game object as your reward. The general consensus is split on whether or not it is better to receive a live chicken or a game object -- most players consider the live chicken to be the better reward, especially when it is one of the rarer species, some of which were a product of special events and thereafter can only be obtained in this fashion.
The Chicken Coop is widely listed in polls as the primary motivation that most players have for visiting their neighbor's farms, and many players indicate that they favor (and thus visit more frequently) players who take care to ensure that their Chicken Coop is the largest size, and contains a selection of the rarer species of chicken (and specifically does NOT contain common species). The act of placing a representative sample of one of each of the chickens that occupy the coop outside and nearby it is generally considered to be a courteous gesture.
-- Mystery Eggs and Their Rewards --
Each type of Mystery Egg has a different collection of possible rewards associated with it, many of which are highly desirable and rare. The following list is not a complete list of the possible rewards that can be obtained from the designated egg colour, but rather is a list of the rare and/or highly desirable items associated with that egg.
Listed below are each of the Mystery Egg types that can be encountered by feeding the chickens of your neighbor, followed by the type of live chicken that can be given as the reward (this is a very rare occurrence however) and then the more desireable of the object rewards that can also result. The awarding of the actual reward is a product of the Random Number Generator (RNG) and cannot be influenced by the player's actions.
The Mystery Eggs are listed below in alphabetical order, and the order in which they are listed in no way reflects their relative or presumed value or scarcity:
Mystery Egg Name
Possible Live Chicken Reward
Other Possible Rewards
Aloha **
Aloha / Giant Aloha
Apple
Dorking / Old English Hen / Rainbow / Silkie
Araucana
Araucana / Dorking / Old English Hen / Orpigton / Rainbow / Sebright / Silkie
Chicken Gnome / Gold Gnome
Black
Chicken / Black / Brown / Golden
x10 Fuel Refills
Brown
Black / Brown / Chicken
x1 Fuel Refill
Buttercup
Buttercup / Dorking / Rainbow / Silkie
Chicken Gnome / Gold Gnome / x20 Fuel Refills
Candycane
Candycane / Cornish / Rainbow / Rhode Island Red / Scots Grey
Chicken Gnome / Frozen Pond / x20 Fuel Refills
Candycorn
Candycorn / Dorking / Old English Hen / Rainbow / Silkie
Chicken Gnome / Gold Gnome / x20 Fuel Refills
Carnival
Carnival
Chicken Gnome
Cochin **
Cochin
Cornish
Black / Brown / Chicken / Cornish / Golden
Chicken Gnome / Windmill / x20 Fuel Refills
Crystal **
Crystal
Cupid **
Cupid
English
Black / Brown / Chicken / Cornish / Dorking / Golden / Modern Game Hen / Old English Hen / Rhode Island Red / Scots Grey / Sebright / Silkie / Susex
Butler Gnome / Town Fountain / x20 Fuel Refills
Faverolles
Dorking / Faverolles / Old English Hen / Rainbow / Sebright / Silkie / Sussex
Chicken Gnome / Gold Gnome / x20 Fuel Refills
Fall Fairy **
Fall Fairy
Golden
Black / Brown / Chicken / Clover / Cornish / Golden / Pilgrim / Plush
Gold Gnome / Shoolhouse / x20 Fuel Refills
Green Silkie
Green Silkie / Silkie
Hawaiian **
Hawaiian
Headdress **
Headdress
Love
Love / Big Love
Marans
Clover / Cornish / Dorking / Marans / New Hampshire Red / Old English Hen / Silkie
Butler Gnome / Town Fountain / x20 Fuel Refills
New Year
New Year
Party
Dorking / Party / Old English / Rainbow / Sebright / Silkie
Chicken Gnome / Gold Gnome / x20 Fuel Refills
Rainbow
Cornish / Rainbow / Rhode Island Red / Scots Grey
Chicken Gnome / Gold Gnome / Rainbow Cottage
Rhode Island Red
Black / Brown / Chicken Cornish / / Golden / Rhode Island Red / Scots Grey
Chicken Gnome / Post Office / x20 Fuel Refills
Scots Grey
Black /Brown / Chicken / Cornish / Golden / Rhode Island Red / Scots Grey
Chicken Gnome / Red Barn / x1 Farm Buck / x20 Fuel Refills
Shamrock
Shamrock
Snowflake
Skiing / Snowflake
Tourist
New Year / Tourist
White
Brown / Chicken / Chicken Cheer / Chicken Joy
x20 XP Star
** Unreleased Chicken and Unreleased Egg -- The chicken and the egg are listed here so that the list is complete and reflects all of the combinations that are present in the game code, however this particular chicken and egg has yet to be added to the live version of the game...
Mystery Eggs are related to the "Egg-celent Discovery" Achievements (discover x5 Mystery Eggs for Yellow Ribbon / x25 Mystery Eggs for White Ribbon / x50 Mystery Eggs for Red Ribbon / x100 Mystery Eggs for Blue Ribbon), and the "Cracked" Achievements (crack open x5 Mystery Eggs for Yellow Ribbon / x25 Mystery Eggs for White Ribbon / x75 Mystery Eggs for Red Ribbon / x150 Mystery Eggs for Blue Ribbon).
(2) Fishing Hole (Required Level: 1)
The following materials are required for you to actually build and then upgrade the Fishing Hole on your Farm:
Stage 0: x10 Lily Pad x10 Fishing Poles x10 Lures
Stage 1: x12 Lily Pads x12 Fishing Poles x10 Lures
Stage 2: x14 Lily Pads x14 Fishing Poles x11 Lures
Stage 3: x16 Lily Pads x16 Fishing Ppoles x12 Lures
Once the Fishing Hole is actually placed and constructed, each day you -- and your farm visitors -- can harvest it to obtain Special Delivery Boxes as its reward (Special Delivery Boxes can be exchanged for random rewards, including building materials) according to the following schedule:
Level 1: 1 Special Delivery Box
Level 2: 2 Special Delivery Boxes
Level 3: 3 Special Delivery Boxes
Level 4: 6 Special Delivery Boxes
The presence of a leveled Fishing Hole is considered to be a very courteous gesture on the part of each farmer and is one reason why other farmers might visit your farm on a daily basis.
(3) Greenhouse (Required Level: 5)
Introduced on February 05, 2011 the Greenhouse is the crafts building on your farm that is used to cross-breed different crop seeds to obtain specialized crops.
Once a tray is planted with seeds to create a Hybrid crop, it takes 3 full for the new seeds to grow unless your visiting neighbors help you by clicking on your Greenhouse, shortening the growth time by one day. In addition to helping you out, your neighbor receives a random packet of 5 seeds for their efforts as reward.
(4) Water Wheel (Required Level: 1)
Placed on your farm in kit form, using Axles, Gears, and Rope the primary stage is built and can be harvested once per day for the chance to obtain x1 Watering Can; the structure can then be upgraded twice, adding an the possibility of an additional Watering Can for each upgraded stage, for a total of x3 Watering Cans possible for the final stage each day.
The Water Wheel is harvestable by visitors to your farm, who also have the chance to obtain Watering Cans.
(5) Other Clickables
In addition to the buildings noted above, your visitors can also access your various collection storage buildings by accessing the following:
-- Animal Mastery Billboard: to see your Animal Mastery Sign Collection
-- Crop Mastery Billboard: to see your Crop Mastery Sign Collection
-- Tree Mastery Billboard: to see your Tree Mastery Sign Collections
-- Gnome Garden: a special building for storing a player's collection of Gnomes and for showing them off. Visitors can click upon the building to access it and review the collection of Gnomes that belongs to their neighbor.
In addition to the above, during special events and holidays there are event-specific buildings that visitors are encouraged to click upon.
When you load the game for the first time and get past all of the choices you are asked to make, you will find yourself at the main game interface screen -- this section is here to help you in understanding what you are seeing on the screen, and making good use of the information contained there. Note that the following only applies with the game in window rather than full-screen mode. So keep the game in windowed mode for now.
The Main Game Play Interface Screen
Across the very top of the interface is a set of tabs (Designated Part 'A' of this section) with the following options (and their descriptions):
(A1) Free Gifts: This is nor really what it sounds like, as it is not where you go to GET free gifts, it is where you go to GIVE them! When you click on this tab you are presented with a large menu of the different gifts that you can give to your friends. Please read the section on gifts and gifting to learn how to be strategic and effective here.
(A2) Play: Just what it sounds like! Click on this tab and you are taken to the main play interface.
(A3) Add Neighbors: When you select this tab you are presented with a screen that displays not just the friends that you can invite to be your neighbor, but also the friends who are already your neighbors, the friends who you have sent neighbor requests to but who have not yet replied/accepted, and at the top a list of friends you have not sent requests to but who you can.
Note that in the first group -- friends you have yet to request to be your neighbors -- there is basic information that tells you about each of your friends and from that you can learn who is already playing the game, and who is not. Each listing will show you your friend's Level in the game, how many Achievements they have earned so far, and how many neighbors that they have in the game right now.
The second group on this screen is the friends who are already your neighbor -- and each of these listings includes the information in the first group -- Level/Achievements/Neighbors -- but also has a button that you can use to remove them as a neighbor if you need to do that. You are only allowed to have a certain number of neighbors, so if you have one who no longer plays the game, you may want to remove them from your active neighbor list.
At the bottom of the second section below the Neighbors List are the listings for friends who you have sent a request to, but who have not yet accepted your request. This shows you who you have already sent invitations to so you do not wonder why they don't appear in the list at the top of friends you could invite.
(A4) Invite Friends: This tab takes you to a screen that consists of all of the people you know on Facebook who are not presently your neighbor, and who you have not sent neighbor requests to. The difference between this tab meny and the previous one is that it contains no information about their participation in the game -- if there is any.
(A5) Get Farm Cash: This tab is precisely what it sounds like -- the tab you click on to purchase the money that is used in the game -- using real world money! There are two types of game money you can buy here -- Farm Cash (Bucks) and Farm Coins -- though to be honest there is no good reason to buy Coins as they are very easy to obtain in the game! As for Bucks, well, this is one of the easier ways of obtaining them, and the only way to get them in useful quantities when you really need them.
(A6) Game Cards: You choose this tab when you have a Farmville/Zynga card that you purchased at a retail bricks-and-mortar store in the real world. These small plastic cards can be obtained at Walmart, GameStop, 7/11, and a lot of grocery and game stores.
On the back of the card is a small square area that, when scratched off with a coin, reveals the code number for the card that you need to type into the box under the prompt to "Enter PIN Code" on this page.
After you enter in the PIN Code you will be taken to a screen that will ask you things like what game you want to apply the credits to, and what form you want the credits applied in -- Farm Cash (Bucks) or Farm Coins. The decision you make here cannot be reversed so make sure that you actually select what you really want here!
-- The Game Play Window --
Hit the Play tab and wait while the screen loads. You may be prompted to send gifts, and you may be shown the most recent set of advertisements and news screens, but eventually you will end up at the main play window, where you are looking at your farmer, standing in the center of your farm. Ideally you should also be looking at the farmer trap that has them restricted to the center plot of your farm -- you can read more on that in the Good Neighbor section of the guide -- but for now you are where you need to be for this part of the guide!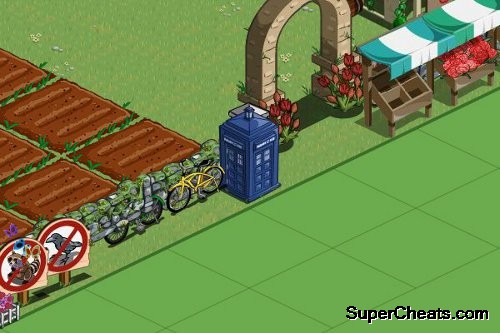
The Doctor Visits My Farm
Farm Navigation
You move around your farm with your mouse. First, use your mouse wheel to zoom in and out, making your farm bigger and smaller and thus increasing and decreasing the parts that you can see on the screen at any moment. Now, zoom all the way in so you are as close to your farmer as you can get visually.
Your next navigation method is the pointer -- move the mouse pointer to a spot at the edge of the area that you can presently see, then hold down the left mouse button and drag the pointer in the opposite direction of the direction that you want to move in and the screen will move! Just release the left mouse button when you are at the edge to rinse and repeat until you arrive at the part of your farm that you wanted to get to.
The last element to farm navigation are the two buttons you can use in the bottom right-hand side of the screen that allow you to zoom in or out in increments.
The Bottom of the Screen
Contained along the bottom of the screen is a menu of all of your neighbors. To the left and the right of this picture-based menu are three sets of arrows that are used for navigation of the neighbor menu. The single arrow will mote one spot left or right depending on which one you click, while the double-arrow will move one full set of selections in the direction you push. Finally the arrow and line will move you all the way to the left or right of this menu, allowing you to quickly find its start and end!
On the left side above the arrow menus is your Farm Fuel Meter -- this is a gray box with a petrol can on its left side that shows you your current amount of petrol in the current can you are using. You see the red petrol can with a number below it? That number tells you how many cans of petrol you own -- while the line itself tells you the contents remaining in the petrol can you are currently using. When you use up all of the fuel in this can, the line resets to all yellow and a can is deducted from the count below the petrol can, to show that you are using a new can.
The Main Menu Interface
To the far-right of the bottom of the screen and to the right of the neighbor menu is the Main Menu Interface --- which contains three lines of selections and is designated part 'B' of this section.
The Top Line: The two zoom buttons which allow you to zoom in and out, and to their right is the button you use to toggle to full-scree mode (try that now), and to the right of THAT is an icon for a camera that, when pressed, allows you to capture the contents of the game window, making a nice screen-shot for you to share with your mates!
(B1) Zoom In: A magnifying glass with the ' ' symbol in it that you can use to zoom the screen in increments making it smaller so that it contains less space and greater detail.
(B2) Zoom Out: A magnifying glass with the '-' symbol in it that you can use to zoom the screen out in increments making it larger sp that it contains more space but less detail.
(B3) The Full-Screen Toggle Button: The button that allows you to toggle the game to full-screen mode. To exit full-screen mode you can click this button again or hit the ESC button on your keyboard.
(B4) Camera Button: The button that you use to make screen-shots.
The Camera Button Explained
The first time that you press this you will be prompted to grant permission for the app to access your wall. The reason for this is simply that you can instantly share any pictures you take in the game via your wall in Facebook -- in fact that is the core function of the camera!
When you press the camera button a thin red outline appears on the screen that represents the are of the screen that will be captured when you take the photo. Simply move to the area of the screen that you wanted to capture, center the box so that it frames the image you want, and click the left mouse button to take the picture!
When you click the camera button the game interface is removed, so that none of the buttons or menus get in the way of the farm scene -- and when you click the left mouse button to take your picture you are instantly shows a small window with the photo that you just took, along with a caption box in which you can write your own caption, be that a description of the photo, or what you want to say about what it shows.
After you type in the caption you can either choose cancel, which will delete the photo, or Share, which will post the photo along with the caption that you just wrote, to your Wall in Facebook. Every image that you share is automatically placed in your Farmville Photo Album in the Photo Album Section of Facebook, so you can copy and save that to your PC when you like and view and review whenever you feel that urge!
The Middle Line contains three buttons -- the first two of which have their own selections that pop-up when you move the move over them.
(B5) The Pointer Button: When you mouse over this button you reveal the sub-menu for it, which include the Multi-Tool, the Move Tool, and the Recycle Tool.
The Multi-Tool is the most commonly used of these and takes the form of the standard mouse pointer. When it is selected and you move the mouse over an object in the interface that can be acted upon, the Multi-Tool changes to whatever the default action is for that object. For example, when you move it over a plot that has not been plowed (is fallow) it changes to the plow tool. When you move it over a plowed plot, it changes to the Seed Tool.
When you target an object and click the left mouse button it causes the objects use menu to appear. For instance, when you move the Multi-Tool over a Gnome on your farm and left-click you get a menu with the options to Move, Sell, or Store Item.
The Move Tool: Changes the pointer to a hand and allows you to move any object that you click it on. This is particularly useful for any object that has a default action when it is clicked upon, as using this tool is often the only way to actually move such an object.
The Recycle Tool: This is precisely what it sounds like -- selecting this tool and then selecting an object on our farm will prompt you to delete or sell that object. Using the tool will pop up a window with a radio button that you can click that will automate Recycling, so that you can quickly delete or sell many items without the need to confirm each decision. Great care should be taken in this mode to be careful not to recycle an object accidentally, since once it is recycled it is gone and cannot be recovered!
(B6) The Farm Machinery Button: The center button on row two is the interface to your farm machinery. It can be used to access your farm machinery -- including any that are stored inside the garage!
Mousing over this button will prompt with a meny that includes the Plow Tool (a hoe that allows you to plow one plot at a time), the Combine (a vehicle that automatically can do all of the standard farming actions on its own), the Harvester, the Seeder, and the Tractor.
Note that the Combine can do all of the normal farm machine actions, but it is not very bright and often does not make the right decision for what you want to do. The Harvester allows you to harvest multiple crops, the Seeder to seed multiple plots, and the Tractor to plow multiple plots. The Biplane allows you to quickly and instantly grow your current crop and trees, or just one of them, but to do so requires you to spend Farm Bucks -- generally 1 Buck for every hour remaining in the growth of the primary crop.
(B7) Travel/Co-Op: This button opens a pop-up menu for the Travel Meny and the Co-Op Jobs Menu -- which is the interface for the Co-Op Farming System in the game.
The Bottom Line contains three buttons -- the first and third having their own pop-up button menu -- including the Ribbon, Market, and Gift Box.
(B8) The Trophy button contains Four choices -- Leaderboards, Ribbons, Collections, and Mastery.
The Leaderboard launches the whatever the current leaderboard challenge is -- this changes based on the current targeted task or crop. At the time that this entry was written the challenge was growing Rainbow Crops, with the Leaderboard broken out into weekly competitions to see who among your peers would get 1st, 2nd, and 3rd place, with different prizes for each.
The Ribbon launches the Achievements Menu and shows you your progress in earning the different game Achievements that are represented by the four-ribbon system in the game: Yellow, White, Red, and Blue (lowest to highest).
Collections opens the Collection Menu which shows you your progress towards completing the currently available collections in the game. Note that this meny no longer includes summary or details for collections that are retired or no longer active in the game.
The Mastery Button spawns the Mastery Menu, which in turn permits you to pick between Seeds and Trees, and displays your progress towards mastery of the specific crops/trees.
(B9) The Market Button: clicking this opens the Market Interface in the game.
(B10) The Gift Box: moving the mouse over this shows you its sub-menu which contains two buttons -- the Gift Box and Storage buttons. The Gift Box is the default option for this button, and clicking on it opens your Gift Box, allowing you to make use of the gifts stored there. You can also click its button in the pair that appear on mouse-over.
Storage Button: The Storage Button opens the menu that gives you full access to all of the items that you have stored in Storage Buildings in the game regardless of which building they are stored in.
Animated Farm Decorations are Plentiful
Top of the screen
The top of the screen contains a combination of buttons and information. Starting at the top left and using 'C' to designate the various items they are:
(C1) Environment controls: A set of three vertical buttons that toggle -- from the top down -- Graphics Quality, Sound Effects, and Music.
The Graphics Quality toggles between low-rez and high-rez so if you are playing on a slower PC you can speed up the display. The Sound Effects toggle turns the animal noises and the like on and off, and of course the Music toggle turns the background music on and off.
(C2) Your Bank Account Balance: Next to the right is a green display with the icon got Farm Coins and your balance in Farm Coins.
(C3) Your Farm Cash Account Balance: Next to the right of Coin Balance is your Farm Cash Balance, a small green box that has the icon for Farm Cash (Bucks) and the number that represents your current balance. Note that in addition to adding to the amount by purchasing Bucks, you will receive 1 Buck for each level you reach in the game, and you can receive Bucks as rewards for some quests -- for instance you receive some as part of your reward for completing the 3rd step in the new Craft Building quest.
(C4) The XP and Level Meter: As previously mentioned, in the top center of the screen to the right of the Coin and Cash Balance displays is your XP and Level meter.
(C5) Sign Post and Message Button: Next to the right is the button for placing a sign post and leaving a message -- which is the only mechanism for directly communicating with the people who visit your farm. You can ask a question, or post a notice, and they can read it and reply to it via the sign post!
(C6) Travel Button: In the upper right-hand corner is the large button that you use to travel via airship to your farm in Britain -- assuming that you have one. In order to take advantage of the second farm in the English Countryside you must be Level 20 or higher - more detailed information is available in the chapter on The English Countryside.
(C7) Awards Statistics Button: Directly below the Travel Button is a very small button that, when you click it, drops down icons that represent the various Achievements you can earn in the game. This drop-down box contains -- from left to right -- the following displays:
-- Your current Level Number
-- Your Ribbon Count (clicking it drops down a detailed count by colour)
-- Your Mastery Count (clicking it drops down a detailed count by star number)
-- Your Medal Count (clicking it drops down a detailed count by metal colour)
-- Collection Count ( the total number of collections completed and turned in)
-- Constructed Building Count (the total number of buildings built on your farm)
Missions / Quests / Prompts
Lastly on the far left below the environment buttons you will variously see displayed an icon for any current mission or quest that you are on as well as an icon prompting you to gift Special Delivery Boxes to the friends who have actually played the game today, with a number count attached.
When you click on these icons you receive specific information related to each -- either a quest or mission screen listing your current completion status for that quest or mission, and in the case of the prompts, the screen for fulfilling the gifting.
That concludes the game interface chapter! You now know everything that there is to know about the interface, and from that, how to best use it!
While we touched upon levels and leveling earlier in this part of the guide, and reviewed the various levels, their titles, and the special unlocks for them, there are some additional issues that relate to the process of leveling your farmer that it is important that we cover, because, as mentioned above, there are many aspects of game play that are level-based. For example the Co-Op Jobs, certain buildings, and other activities are only accessible to farmers who have reached key levels.
One thing you may not know is that you are rewarded for leveling your farmer. Each time you gain a new level, you are rewarded with 1 Farm Buck, which means that you can actually obtain some of the items that require Farm Bucks without ever making a real life purchase!
Farmville may be a great simulated farming, and cute fun, but at its heart it is a game and, like any other game, is largely level-based. What that means is that as you play it -- and as you level up -- more content is available to you.
In addition to the content that is level-restricted, there are also prerequisites that you may have to meet on other areas, for example some seeds can only be planted after your farmer reaches a specific level and additionally has mastered a specific crop.
To learn what your farmer's current level is, look at the game screen and you will see at the very top center a black and white bar with a gold star on its right side. Inside of the gold star is the number of your farmer's current level, while inside the black and white bar is your current XP total. The white part of the bar represents your progress towards unlocking your next level -- when the bar is completely white, you unlock the next level, and it goes back to being completely black so you can full it up with white again.
It takes a lot of XP to climb the ranks in this game -- and the higher your level is, the more XP it will take to reach the next level -- so it is a good thing that you gain XP for practically everything that you do in the game!
The Marketplace Seed Catalog Includes Locked Seeds
Breaking the Crop Locks
The first level-related subject for us to cover is Crop Locks -- many of the crops in the game have minimum level requirements before you can purchase the seeds for them and plant and harvest them, which are often called the Lock Level for a crop, or Crop Lock. The following table lists the basic level requirements that you will want to use as goals as you play the game, since you cannot grow these crops before the minimum level has been reached.
Knowing what the minimum levels are is important, so that you can begin to plan for activities like Co-Op farming and crafting, and so we include the Crop Level Requirements for all of the basic (meaning not special) crops below.
The Level listed here is your farmer's level and not the level of the crop. The Seed Name is self-explanatory, while the Additional Requirements are just that, additional steps you must fulfill in order to plant that crop. Usually these consist of having already mastered a different crop.
Unlock
Level
Seed Name
Requirements
0
Bamboo Orchid
Hawaiian Paradise Event
0
Barley
0
Bells of Ireland
2012 St. Patrick's Day Event
0
Birthday Cake
2011 Birthday Event
0
Black Tea
0
Bluebell
0
Butter & Sugar Corn
0
Candied Yam
0
Cara Potato
0
Carrotcicle
0
Cauliflower
0
Chandler Blueberry
0
Cornflower
0
Cove Cranberries
0
Darrow Blackberries
0
Daylilies
0
Dill
0
Double Grain
Wheat and Rice Crossing in Greenhouse
0
Double Pikake
0
DREYER'S Fruit Bars
0
EDY'S Fruit Bars
0
English Peas
0
English Roses
0
Fairy Flower
0
Field Beans
0
Fire Pepper
Peppers and Jalapeno Crossing in Greenhouse
0
Foxglove
0
Frozen Grapes
0
Gingerbread
0
Glacial Rose
0
Golden Poinsettia
0
Golden Sugar Cane
0
Grass Widow
April Showers
0
Gumdrop
0
Gummi Bear
0
Habanero Chili
Mexico Event
0
Hawaiian Ginger
0
Hawaiian Orchid
0
Hay
0
Hilo Pineapple
0
Holly
0
Hops
0
Iceberg Lettuce
0
Iced Rice
0
Kelp
0
Kennebec Potatoes
0
King Cake
2012 Carnival Event
0
Kona Coffee
0
Lady Slippers
0
Lilac Daffy
Lilac and Daffodils Crossing in Greenhouse
0
Lilikoi
0
Long Onions
Onion and Leeks Crossing in Greenhouse
0
Mint Candy
0
Multicolor-Corn
2011 Autumn Event
0
Mussel
0
Night Cereus
April Showers
0
Ono
0
Oyster
0
Pink Asters
0
Purple Tomatoes
Blueberries and Tomatoes crossing in Greenhouse
0
Radish
0
Red Clovers
0
Red Currant
0
Red Iceberry
0
Red Spinach
Spinach and Rhubarb Crossing in Greenhouse
0
Rock Crab
0
Royal Hops
Hops Mastery
0
Royal Taro
Taro Mastery
0
Shrimp
0
Snow Tulip
0
Spring Squill
0
Squmpkin
Squash and Pumpkin Crossing in Greenhouse
0
Straspberry
Strawberries and Raspberries Crossing in Greenhouse
0
Sun Poppy
Sunflowers and Golden Poppies Crossing in Greenhouse
0
Super Candied Yam
Candied Yam Mastery
0
Super Chandler Blueberry
Chandler Blueberry Mastery
0
Super Gingerbread
Gingerbread Mastery
0
Super Gummi Bear
Gummi Bear Mastery
0
Super Hay
Hay Mastery
0
Super Hops
Hops Mastery
0
Super Kennebec Potato
Kennebec Potato Mastery
0
Super Lady Slipper
Lady Slipper Mastery
0
Super Pink Aster
Pink Aster Mastery
0
Super Snow Tulip
Snow Tulip Mastery
0
Taro
0
Tarragons
0
Turnip
0
Whiskey Peat
Rye and Corn Crossing in Greenhouse
0
White Asters
0
Yam
0
Yellow Fin Tuna
0
Yellow Hibiscus
1
Balloons
2011 New Year Event
1
Black Rose
2010 Halloween Event
1
Candy Cane
Donation to UCSF Benioff Children's Hospital
1
Chrome Daisies
2011 Lady Gaga Event
1
Crystals
2011 Lady Gaga Event
1
Daikon
2011 Japan Earthquake Relief Event
1
Eggplant
1
Electric Roses
2011 Lady Gaga Event
1
Goji Berry
2010 7-11 Event
1
Majestic Roses
Enchanted Love Event
1
Organic Blueberries
Cascadia Farms Organic Advertising Promo Event
1
Peanuts
1
Pink Carnation
2011 Mother's Day Event
1
Snow Cone
2011 Summer Event
1
Soybeans
1
Star Flower
2011 July 4th Event
1
Strawberries
1
Super Peanuts
Peanut Mastery
1
Super Pumpkin
2010 Limited Edition Event
1
Super Strawberry
Strawberry Mastery
1
Sweet Beets
2010 Relief Fund for Haiti Event
1
Wheat
1
White Poinsettia
2010 Holidays
1
White Pumpkins
2010 Thanksgiving Event
4
Lilac
4
Squash
4
Tomatillos
2010 Cinco de Mayo Event
5
Candy Corn
2010 Halloween Event
5
Cupcakes
2010 Farmville's 1st B-Day Event
5
Cupid Corn
2011 Valentine's Day Event
5
Nachos
2011 Football Field Event
5
Peppermint
5
Poinsettia
2010 Winter Holiday Event
5
Pumpkin
6
Artichokes
6
Golden Poppies
6
Spinach
7
Rice
8
Daffodils
8
Raspberries
9
Cotton
9
Super Cotton
Cotton Mastery
10
Chickpea
Soybeans Mastery
10
Cranberries
10
Super Cranberry
Cranberry Mastery
11
Bell Peppers
11
Rhubarb
12
Peppers
12
Pinto Beans
2010 Wild West Event
12
Super Pepper
Peppers Mastery
13
Morning Glory
13
Super Morning Glories
Morning Glory Mastery
14
Aloe Vera
14
Super Aloe Vera
Aloe Vera Mastery
15
Pineapples
15
Red Tulips
15
Super Pineapple
Pineapple Mastery
16
Jalapeno
16
Pattypan Squash
16
Super Pattypan Squash
Pattypan Squash Mastery
17
Blueberries
17
Lupine
2010 Wild West Event
17
Super Blueberry
Blueberries Mastery
18
Watermelon
19
Grapes
19
Leeks
19
Super Grapes
Grape Mastery
19
Super Watermelon
Watermelon Mastery
20
Pink Roses
20
Super Hops
Hops Mastery
20
Super Pink Aster
Pink Asters Mastery
20
Super Pink Roses
Pink Roses Mastery
20
Tomatoes
21
Potatoes
21
Rye
21
Super Potatoes
Potato Mastery
22
Carrots
23
Coffee
23
Pink Hibiscus
2011 Island Event
23
Triticale
Rye & Wheat Mastery
24
Corn
24
Dog Rose
Pink Roses Mastery
25
Sunflowers
26
Ghost Chili
27
Cabbage
27
Super Cabbage
Cabbage Mastery
27
Zucchini
Pattypan Squash Mastery
28
Gladiolus
Daffodils Mastery
28
Green Tea
29
Black Berries
29
Super Black Berries
Blackberry Mastery
29
White Grapes
30
Green Roses
2011 St. Patrick's Day Event
30
Red Wheat
30
Zinfandel
Grapes Mastery
31
Sugar Cane
32
Peas
32
Super Peas
Peas Mastery
33
Super Yellow Watermelon
Yellow Melon Mastery
33
Yellow Melon
34
Onion
35
Broccoli
35
Fire & Ice Roses
2011 Valentine's Day Event
35
Lilies
36
Acorn Squash
37
Asparagus
38
Purple Poppies
39
Elderberry
39
Hollyhocks
2010 New England Event
40
Purple Pod Peas
Peas Mastery
42
Ginger
43
Cucumber
45
Chardonnay
White Grapes Mastery
45
Iris
47
Purple Asparagus
Asparagus Mastery
48
Basil
50
Lemon Balm
52
Square Melon
Watermelon & Yellow Melon Mastery
53
Oats
54
Posole Corn
Corn Mastery
57
Heirloom Carrot
Carrots Mastery
59
Orange Daisies
Gladiolus Mastery
60
Bamboo
63
Carnival Squash
Pattypan Squash Mastery
64
Saffron
70
Clover
76
Amaranth
80
White Roses
Pink Roses Mastery
90
Forget-Me-Not
98
Electric Lilies
(1) Cascadian Farms was founded in 1972, and is one of the leading brands of organic foods in North America, offering more than 85 natural food products cereals to frozen fruits and vegetables, as well as organic snacks and juices. The Cascadian Home Farm is nestled in the foothills of the North Cascades Mountain Range in western Washington State within the area known as the Upper Skagit Valley, and the advertising tie-in with Famville offered players the opportunity to grow Organic Blueberries on their farms while receiving a variety of coupon offers via email, so it sort of ended up offering gamers the opportunity to actually buy and consume real farm-grown versions of the crops that they planted in the game, and how strange is that?
XP Boosting
When you are starting a new character getting it to Level 25 is generally considered to be an important first goal, since so many different aspects of the game become available after that pivotal level. Many players choose to boost levels to get there as fast as they can, and you may want to do that as well.
Boosting levels is accomplished by planting crops and performing activities that provide the best income rate you can achieve, and then using the coins gained in the process to basically turn them into XP. There are several ways to do this, but the most common methods are listed below:
(1) Soybean Method
This method involves plowing a plot and then planting soybeans, and then immediately deleting the plot, and doing it over again. You gain 1 XP for plowing, and 2XP for planting the Soybeans for a total of 3 XP for the cycle. As Soybeans only cost 15 coins, and plowing costs 15 coins, you are getting the XP for 10 coins per point, which is about as cheap as you can do it.
Gaming The System: Turning Coin into XP
(2) Hay Bales
Each hay bale you purchase from the Market costs 100 coins, but gives 5 XP. This is a faster method than the Soybean Method but a more expensive one as well. Using this method you purchase a hay bale for 100 coin, which nets you 5 XP, and then sell it back to the Market for 5 coins, with a net cost of 95 coins per 5 XP.
Non-Boosted XP
In addition to boosting there are also the normal ways that you earn XP in the game, which include:
-- Buying Animals
-- Buying Buildings
-- Buying Decorations
-- Buying Vehicles
-- Completing a Collection
-- Co-Op Farming
-- Feeding Neighbors Chickens
-- Fertilizing Neighbors Crops
-- Harvesting Fertilized Crops
-- Harvesting Crops which have been Mastered
-- Opening a Mystery Box
-- Planting Crops
-- Planting Trees
-- Plowing Harvested Plots
-- Plowing New Plots
-- Receiving Ribbons
-- Receiving from a Mystery Egg
-- Receiving from a Mystery Gift
-- Selling items from your Bakery, Spa, or Winery
-- When a neighbor takes a bushel from your Market Stall you can claim XP
As you can see, practically everything that you do in the game pays off in XP, so the path to leveling and reaching your goals should be an easily managed and predictable one!
This part of game play only has to be as complicated as you make it -- and making it simple is really just a matter of establishing a routine. Having said that, it should be emphasized that this is a very important part of game play in Farmville, as being a good neighbor pays major dividends because it also encourages your neighbors to be good to you!
Fortunately this is a mostly painless process -- in fact you can do it by the numbers below.
(A) The Art of Being a Good Neighbor
This is your daily routine for the Good Neighbor System -- once you get used to doing this on a daily basis it will become an automatic part of your regular play. You log into the game, you do your Good Neighbor tasks, and the benefits come flowing to you!
We have touched upon the various elements of this as part of the game and, while trying to be diplomatic, we have also briefly touched upon motivation -- now if you will excuse the following for its baldness and honesty, at the risk of appearing mercenary we need to specify the key issues that relate to this in order to emphasize the importance of this as a core element of basic daily play so that we all can agree why it is important.
In simple terms, while this game can be played solo, with no cooperative assistance from other players, the facts are that having the willing cooperative assistance of your friends and neighbors easily cuts in half (or more) both the time and the effort that is often required to reach goals in this game!
It may be a self-serving and selfish fact, but inducing your neighbors into assisting you by both offering them the same assistance and by smoothing the path for them through making the elements available on your farm that allow them to assist you is, simply put, mutually beneficial. In other words, why make things harder on yourself when they can be easy?
It is for that reason that it is a good idea to scan the feeds of your mates and your neighbors specifically to identify other gamers who are very active in game play. Yes, we are saying that you should send friend invites and then neighbor invites based solely upon the prolific game activities rather than the interest of being mates, mateship, or the fact that you know people in common. If it occurs to you that others may judge so mercenary a decision harshly it should not -- this is so common a strategy by top-level players that they don't even consider it worthy of comment!
If your plan is to climb into the top 10% of players in Farmville, then the bulk of the people who appear in your neighbor list at the bottom of the game play interface had better be hard core players, even at the expense of having people you actually know in the list!
And once you have populated your neighbor menu with that caliber of player, it should be clear to you that maintaining the Good Neighbor Tasks and facilities on your farm is even more important. Enough said on that!
Fertilizing the Five Crops
Good Neighbor Tasks
Each day when you sign in to Facebook you should do the following steps:
(1) From your Facebook Home Page click the link in the upper left-hand corner that is your name (below it is the link to edit your profile). On the left a bit way down the page is a partial list of your friends above which is a link titled "Friends" with the number of friends you have. Click on the Friends link to open the page that lists all of your friends.
Now go down the list, stopping when you reach a friend who is also one of your Farmville neighbors! Right-click on their name, and select 'Open Link in a New Window', which will cause your friends Feed Page to appear!
Now carefully check their feed for any assistance requests that they may have made -- Barn Raising requests, postings asking for certain items or resources, that sort of thing -- and help them out.
(2) Daily Visits with your Neighbors
On the very bottom of the game interface you will find the images of and a list of your neighbors. Note that this is not your Friend List, it is the list of the friends who you have specifically asked to be your neighbor or who have asked you to be their neighbor and you have accepted their request.
To start your farming day you want to visit each of your neighbors' farms and do -- at a minimum -- the following chores (assuming that they are a good neighbor and have provided you with the necessary buildings for the doing of it):
-- Fertilize Crops: You are provided by the server with 5 bags of fertilizer every 12 hours that you can use to fertilize five of your neighbor's plots -- and in addition to earning XP for doing so and the chance to find a bag of fertilizer you can use to fertilze all of your crops in one click back on your farm, you can also find collection items in the process of fertilizing their crops, and surplus cans of petrol!
There is a ribbon associated with fertilizing your neighbor's crops called 'Crop Whisperer' that is awarded for the number of times you have fertilized a neighbor's crops. The awards are made at Yellow (100), White (250), Red (500), and Blue (2,500).
Once you have earned the Blue Crop Whisperer Ribbon you should change to harvesting trees or animals as there are other collectibles that can be obtained for doing that and you are allowed five such actions in place of fertilizing crops.
Feeding Your Neighbor's Chickens
-- Feed the Chickens: You are provided with a bag of Chicken Feed every 12 hours for each farm that you visit that can be used to feed their Chicken Coop -- assuming that they have one -- and you should always do this because there is a random chance that you will find a Mystery Egg inside, and because you earn a small amount of XP for doing it! Note that this can potentially result in obtaining the rarer eggs...
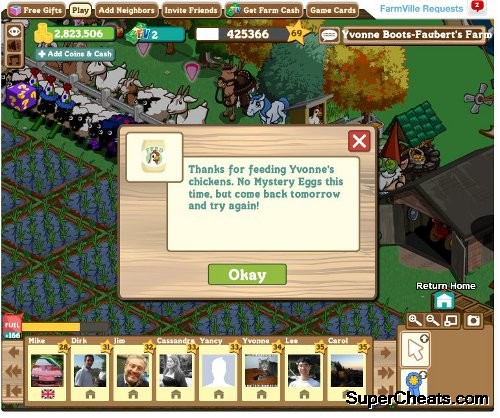
Usually You Don't Find a Mystery Egg
-- Visit their Greenhouse: Visiting (clicking upon) your neighbor's greenhouse accomplishes several things all at the same time -- it earns you 20 seeds of a randomly selected hybrid plant, it earns you a small amount of XP, and it helps your neighbor by filling one of the "help" spots for one of their trays, shortening the time it takes for them to create a set of hybrid seeds! This will also add a post to your wall allowing your neighbors to obtain the 20 seeds as well.
-- Visiting their Animal Trough: this not only helps them to fill their Trough but randomly can obtain two scoops of feed for you to take with you, as well as a small amount of XP and potentially some coin! It will also add a post to your wall that will allow them to obtain extra scoops as well!
-- Holiday / Event Buildings: Visit any Holiday or Special Event Buildings that are active on their farm. During holidays and special events certain buildings can be clickable -- for instance during Valentine's Day the Valentine Castle gave you Valentine Cards and XP for visiting it, while St. Patrick's Day gave Gold and XP for visiting the Leprechaun’s Tree House. Sometimes clicking the special event buildings has a beneficial effect on your neighbor as well. You should always try to do this!
(B) Building the Good Neighbor Farm
Now that you are familiar with the numbered list of all of the things that a good neighbor does daily, we need to talk about the Good Neighbor Farm -- think of this as the other side of the Good Neighbor Coin -- which is literally the infrastructure that is required for your friends and neighbors to do their own daily list of tasks. These are the elements that you need to have on your farm so that your neighbors can do their good turns for you!
(1) The Minimum Buildings
-- The Chicken Coop: Open the Marketplace and select the Building Menu and then purchase a Chicken Coop for 5,000 Coins and place it on your farm. It should be placed in an obvious and easy to spot location and not hidden by trees or other buildings as you want your friends and neighbors to be able to quickly find it and feed your chickens in it!
-- Fishing Hole: Placed and then upgraded to the cap this pond delivers free Special Delivery Boxes to the neighbors who visit you and click upon it.
-- Greenhouse: Purchased for 5 Coin in the Building Menu, you will place the Greenhouse in an easy to spot location and then begin expanding it to increase the number of trays inside. You will want to get it to its largest size as quickly as you can.
-- Holiday/Event Buildings: During Holidays and Special Events the buildings that are part of these events are usually an important element for completing the quests or missions for that event, and both you and your neighbors benefit from your having the buildings built -- and improved to their highest level.
-- Water Wheel: placed and upgraded to the cap this building offers your visitors a chance to receive a Watering Can for their efforts of clicking on it.
(2) Advanced Buildings
In addition to the basic buildings above, the following buildings provide additional benefits for you and your neighbors though for the most part the benefits are largely passive with respect to your friends and neighbors -- still it is important to have them, for the reasons noted in each listing below.
-- Beehive: Constructing this requires you to purchase the kit from the Marketplace and then place the kit and begin adding the required resources. Once all of the building materials are added, you will then need to obtain a Queen Bee from a neighbor’s feed and as many worker bees as you can managed. You can obtain more worker bees from Special Delivery Packages and you will be adding more as time passes -- the importance of the worker bee population is more because it increases the chance of pollination during harvesting than in increasing the size of your beehive.
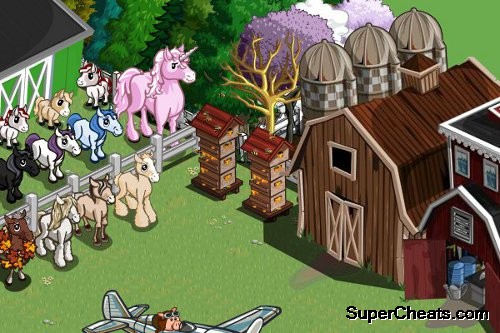
Beehives
grow larger as worker bees are added
Once you have the beehive in place and functioning, you will be harvesting it once a day for the chance to obtain a bag of fertilizer that will fertilize your entire farm in one click, which is the main benefit for you -- and as mentioned above, the presence of the beehive provides a random chance that you will obtain pollinated seeds during crop harvesting.
Pollinated seeds significantly increase the chances of obtaining bushels from each harvest of a crop, which is a very useful element when you are working towards crafting projects. Additionally when you find pollinated seeds that fact is posted to your feed, where your neighbors can share in your good luck.
-- Dairy Farm: In addition to providing you with a place to store your cows and obtain dairy-related collectibles, the Dairy Farm allows you to breed cows -- which in turn allows you to share baby cows with your friends and neighbors, and that increases their ability to do the same.
-- Horse Stables: In addition to providing you with a place to store your horses, the Stables allows you to breed horses -- which in turn allows you to share baby horses with your friends and neighbors, and that increases their ability to do the same.
-- Market Stalls: The base storage in a Market Stall is 100 Bushels -- but this can be expanded to 200 Bushels by adding an additional four Stalls (25 more storage per Stall) with the added benefit of allowing you to sell 5 crops at any time, which is a major element in your Good Neighbor efforts!
-- Orchards: In addition to providing you with a place to store your trees, the Orchards are a constant source for saplings and Watering Cans -- which you share with your neighbors via your feed. The Orchards are one of the best sources for new trees and so having several and using them to share these resources is considered to be a very important element in being a good neighbor!
-- Pigpen: In addition to providing you with a place to store your pigs and obtain truffles that can be traded for prizes, the Pigpen allows you to breed pigs -- which in turn allows you to gift baby pigs to your friends and neighbors, and that increases their ability to do the same.
-- Primary Crafts Building: Adding a Bakery, Spa, or Winery to your farm significantly expands the crafting opportunities for you and your neighbors, stimulating the crafting economy and giving both groups the ability to make and sell craft goods, buy craft goods, and trade them for fuel. These are the starting point for entering the crafting system, and encourage participation in the Co-Op Farming projects. All in all it is an incredibly valuable building for several reasons and should really be a primary requirement.
(C) Farmer Traps
Setting up a Farmer Trap literally means blocking off the plot that your Farmer spawns in when you enter the game, the same plot being where your neighbors will spawn when they visit your farm. This plot moves when you expand your farm size, which means that each time that you expand you will have to reset the trap, but doing this is, despite ominous sounding name, actually a good thing.
First though, if you are worried about this being illegal or considering a cheat, it is not. You will not get into trouble with Zynga for doing this -- it is a perfectly accepted practice because it saves time and is much appreciated by other players.
Setting the Trap
To trap a Farmer you first must buy four or more objexts to use for the trap. We say four or more because in theory you could just use four objects that you place at the cardinal points of the compass directly adjacent to the very spot where the avatar enters your farm, and they are trapped. Some players actually do this -- but most prever to block the entire plot by placing eight objects around the edge of the plot, as that looks nicer.
Hay Bales work great for this, as do Fences -- either way, when a farmer is trapped they are unable to move, which means that they will not have to move to the location of whatever item you have clicked on before it can be acted upon, saving loads of time for yourself and your visitors!
Being forced to wait for a farmer to walk between plots is widely viewed as a frustrating burden, and most players consider placing traps on your farm to be a good neighbor action -- and you always want to be a good neighbor! Note that some neighbors will refuse to visit farms that do not have a farmer trap in place -- something you will want to bear in mind.
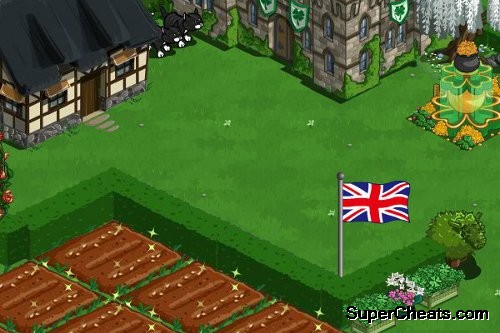
A Little
Farm in the English Countryside
The English Countryside
The game was recently expanded to include a second farm -- the English Countryside -- and this is obviously something that you are going to want to explore once you reach Level 20 and can take advantage of it. The English Farm can be worked at the same time as your regular one, or you can choose to have it (or your regular one) suspend time while you are at the other.
In terms of progression you should probably treat the second farm as a goal to work towards after you are a very high level player, and focus all of your efforts and income on the main farm first. As for working the farm, save for minor differences all of the information that applies to the main farm in this guide applies to that one as well.
Lighthouse Cove
The game was recently expanded to include a third farm -- Lighthouse Cove -- and this is obviously something that you are going to want to explore once you reach Level 20 and can take advantage of it. Lighthouse Cove can be worked at the same time as your regular one, or you can choose to have it (or your regular one) suspend time while you are at the other.
In terms of progression you should probably treat the third farm just like the second -- as a goal to work towards after you are a very high level player, and focus all of your efforts and income on the main farm first. As for working the farm, save for minor differences all of the information that applies to the main farm in this guide applies to that one as well.
Winter Wonderland
The game was recently expanded to include a Fourth farm -- Winter Wonderland -- and this is obviously something that you are going to want to explore once you reach Level 20 and can take advantage of it. Winter Wonderland can be worked at the same time as your regular one, or you can choose to have it (or your regular one) suspend time while you are at the other.
In terms of progression you should probably treat the fourth farm just like the second -- as a goal to work towards after you are a very high level player, and focus all of your efforts and income on the main farm first. As for working the farm, save for minor differences all of the information that applies to the main farm in this guide applies to that one as well.
Hawaiian Paradise
The game was recently expanded to include a Fifth farm -- Hawaiian Paradise -- and this is obviously something that you are going to want to explore once you reach Level 20 and can take advantage of it. Hawaiian Paradise can be worked at the same time as your regular one, or you can choose to have it (or your regular one) suspend time while you are at the other.
In terms of progression you should probably treat the fifth farm just like the second -- as a goal to work towards after you are a very high level player, and focus all of your efforts and income on the main farm first. As for working the farm, save for minor differences all of the information that applies to the main farm in this guide applies to that one as well.
This is the part of the guide where we address farming-related issues and discuss ways to make your farming more productive and profitable.
Farmville is, first and foremost, a game about farm simulation, so the value of being well-grounded in the basic and the advanced strategies of farming in the game should be obvious. Much of the process here comes with experience, and as you will be doing most of these tasks over and over again without thinking about them, once they become automatic, you will find that applying the advanced farming strategies is really where your interest will concentrate when the game changes, and new crops and recipes are added.
The fact that you will get very good at quickly mastering and leveraging these new new elements is barely worth noting since it is a byproduct of play -- the fact that you will develop a sense for which of the new additions to the game are actually important and, more to the point, begin to prioritize your use of these is probably worth noting. Remember that from a value judgment approach, you should be giving more weight to any crop that can potentially play into the crafting system later than crops that are not likely to.
As a general rule, when you are planning out your farm and, when you expand it, setting aside 75% of the land area that you control and dedicating that 75% to crop plots is not just a good idea, it is the very basis for the success that most top-level players enjoy. Logic may suggest that everything that you do early in the game should be oriented towards reaching the conditions that are required to obtain the largest amount of land for your farm that the game allows -- but the reality here is that effectively using what you have is always a more important consideration.
This chapter is a basic introduction to the game -- it will provide you with all of the information that you need to begin playing with an edge, so read it before you begin to play to get that edge.
The chapters that follow will provide you with in-depth knowledge that will allow you to quickly surpass even those mates who have been playing longer than you have, turning you into a Farmville Wizard!
When you start playing the game you begin with a small farm -- in order to increase its size you either have to add a certain number of neighbors, or spend real-world money to purchase Farmville Bucks (in-game virtual currency) in order to pay to expand your farm. If you go the neighbor route, you still have to spend a form of in-game money called Farmville Coins, but coins are earned in the game for completing various tasks, including harvesting crops and collecting resources from the animals on your farm, rather than exchanging real-world money.
While we are on the subject of virtual money trade, using Bucks to buy items in the game is how Zynga -- the company behind Farmville and many other similar games -- profits from hosting the game. Players are not forced to participate using real money -- most of the items in the game can be acquired using coins earned in the game -- and while a smaller percentage of items can only be obtained using Bucks, most of the items that sell for Bucks can also be obtained either with coins or as free items received from the "feeds" of your friends and neighbors (more on that in a bit).
Every new farmer starts out with the same potential, a plot of land upon which they can plow and seed, and harvest their crops. New players should complete a few crops to earn some working capital in coin -- a good target is around 20,000 coins -- of which they should always retain 10,000 for use in planting the next crop, as seeds cost money to buy.
Once extra coins are available, the player should purchase a Chicken Coop and Dairy Barn from the in-game store, as these two buildings can hold a certain number of chickens and cows (respectively) allowing the player to store them and harvest from them in one click.
The Chicken Coop also serves as an interactive element in the game for your friends, who can visit your farm and, once a day, feed your chickens for you, providing the opportunity for them to find a special egg that can contain rarer chickens, buildings, or special items when it is opened.
In addition to feeding your chickens, visiting friends can also help fertilize your field, thereby finding collectible items or cans of fuel, and once you have constructed one of the recently added special buildings -- like a greenhouse -- they can also help you with the process of combining seeds to make new plants. Each gesture of assistance that you provide to a friend -- or they provide to you -- is rewarded with coins and potentially, special items.
Once you have those two instant-structures installed on your farm, you can begin building the structures that take materials to complete -- a Nursery and Stables -- that come in kit form. You can obtain the materials that you need by either asking your friends to gift them to you (you are allowed to send free gifts twice a day) or by obtaining the items from their feed. Either way, building the stables and nursery early is a good idea, as the stables allow you to store and harvest horses as well as breed new horses, and the nursery allows you to take young cows and horses and raise them to their adult forms.
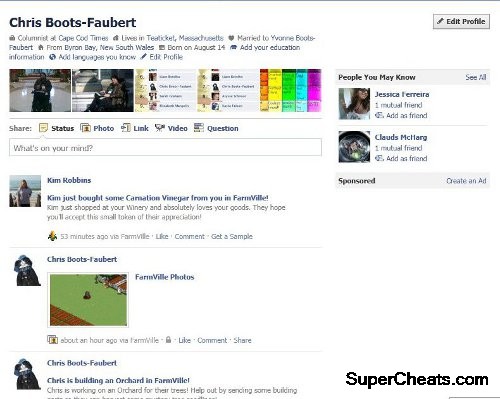
The Feed is the Source for Valuable Resources
-- The Feed --
Like most apps on Facebook, Farmville writes events to your Wall -- these events and your Wall are called "The Feed" by Farmville veterans, as the events are a constant source of new material, items, and sometimes rare and special animals and plants.
Each time you find an object in the game, or create something new, you are given the opportunity to post that to your feed -- and in the process share one or more of that item or resource with your friends. For example, when you feed your chickens or those of a neighbor, and find one of the special eggs, you have the option to "share" that find on your Wall. Any of your friends can then click on that post to receive one of that item as a bonus, thanks to you. There are limits however -- for example with eggs and building parts, only a certain number of people can claim a bonus, then they are exhausted.
Players are allowed to obtain up to 125 items each day from the feeds of their friends -- but items like rare animals and special trees only contain one bonus copy, so it is first come, first served, a limitation that has a lot of serious players stalking the feeds of their friends throughout the day, hoping to grab good items. Obviously spending a few minutes reviewing the feeds of your mates is a good idea, as you never know when you could be the first in on a claim!
-- Crop Strategy --
One of the bigger mistakes that most new farmers -- and some vets -- make, is planting a crop with a bad time-cycle on it. Each type of crop takes X number of hours to grow. Once it completes growing, after a few hours if you do not harvest it, the plants begin to wither, and die, rendering them useless to you.
When your crops wither, you lose their value and what you spent in planting them, so the first strategy in farming in the game is to always pick plants whose grow time is convenient to your play schedule. If you know you are not going to be on over the weekend, pick a plant that takes 3 or more days to grow. If you will be available all day, you can grow several crops of shorter duration.
-- Fertilization = Better XP --
Fertilized crops deliver a bit of extra XP when they are harvested, which is why in the past players tried to encourage their friends to visit and fertilize their crops by doing the same for them, but a recent addition to the game has changed how that works.
A new item, called the "Fertilize All" bag can be obtained by visiting your neighbors and fertilizing their crops. If you are lucky, the item will pop up and you can then both obtain it -- and share it with your mates. This special bag of fertilizer can also be obtained as a random reward for harvesting your beehive, and in posts to your friend's feed page -- as whenever they find one they can post and share it to their feed, as can you. And you should!
That being the case, it is a good idea to grab a bag whenever you see it shared on one of your mates' feeds so you can stockpile it, allowing you to quickly level up in the game by earning double XP from every crop! There is a limit to how many items you can store unused in your Gift Box, but save for when a holiday or special event includes a large number of items that you need to store in the Gift Box temporarily, the chances are slim that you will hit that item limit. That being the case, stockpiling bags of fertilizer is a good idea.
In addition to obtaining the Fertilize All from your mates farms, it can also be obtained by building a beehive and stocking it with a Queen Bee and Worker Bees on your farm. Each day you can harvest the hive, and each time that you do, there is a random chance for obtaining a Fertilize All bag, so that should be on your list of building projects as you work on improving your farm.
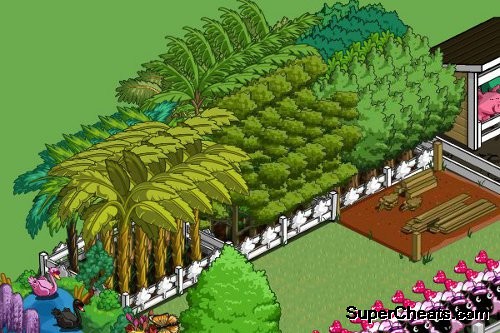
Orchards are The Source for Seedlings
-- Trees, Orchards, and You --
A new addition to the game is a building project called an "Orchard" that can hold 20 trees in a smaller, more compact area, and that allows you to conveniently harvest all 20 trees after two days time has passed regardless of the grow times for the trees individually.
That makes Orchards a blessing in Farmville for new farmers, not just because of the convenience of having all of the trees in a compact area when you do not have a large farm (though that is a convenience), but also because the filled Orchards have the potential to give you a special item called a Watering Can with each harvest, as well as a Seedling of one of the forms of the trees inside the Orchard.
Seedlings can also be obtained from your mates' feeds, and are one of the best ways to obtain the rarer trees that you do not have. Simply collect the Seedlings and Water Cans from feeds, and then "grow" them by placing a Seedling and applying 8 Water Cans to it, and you have a new tree for your farm.
About half-way through watering the Seedling you have the chance to share either a Seedling or Water Can with your mates, and you get that chance again when 3/4 of the way through. When you grow the tree at the end, you can also share one on your Feed, so this approach is a great way to both share resources and trees with your mates, and obtain plenty yourself from their feeds -- which is something to think about.
-- Understanding Wither --
All of the crops in FarmVille will wither if they are not harvested within a certain amount of time after they have fully matured. The only exception to this is when the powers-that-be turn withering off, which they only do for special events or because of trouble with the servers so you cannot count on that happening often.
Once a plant withers you basically have two choices -- you can plow it under, eating the cost of what you spent to plant and grow it, and then replant the crop and try to be on time for your next login to harvest it -- or you can purchase an Unwither from the market and use that. Actually there is a third choice -- but that only comes into play if you own an Unwither Ring, which alows you to unwither any withered crops for free pretty much forever...
What you need to understand is that all of the crops in FarmVille will wither in roughly 2.5 times their growing time. For example a 12 hour crop will wither fully in 30 hours -- but that does not mean that if you get there before 30 hours have elapsed from the time that the plant was fully grown you are OK. Not at all!
That 30 hour marker for a 12 hour crop is the point at which ALL of the crop has withered. At 15 hours you can count on roughly half of the crop having withered, and so on, so if you show up at 28 hours, you can expect to see a rotting field with a handful of crops left to be harvested!
The process is easy to understand: 12 hours x 2.5 = 30 hours to full withering means you have 12 hours to grow fully, and then 12 hours of safety before the crops begin to wither and rot. There is no point in taking chances though -- you know from when you planted the crop when it needs to be harvested, so if you cannot log in at that time, do not plant the crop!
-- More Advanced Strategies --
This pretty much concludes the basics -- the following chapters in the guide will look at more advanced strategies and tricks, and how to maximize your best results for special event and holiday play. But before we sign off on this first piece, a warning...
Farmville is possibly the most addictive game on Facebook. It can easily suck away hours of your life -- hours you can never get back! We are not suggesting that you play the game, we are only giving you useful information if you choose to do so. The point to this? Just that moderation is a good thing, and if you have issues with obsessing and video games, perhaps a good game of chess would be a better choice for you?
Growing crops in Farmville is in part related to whatever your present goal is in the game. This is especially true if you are working towards crafting in the special Craft Building you have built (that is covered in detail in a later chapter) but for now, we will focus upon Crop Mastery, which is both a way that players keep score of who is doing well, and the best way for you to maximize the profits and XP you earn from growing crops.
As you approach the subject you may find that a focus upon a particular type of crop will help you -- in this example we will focus upon Berries -- both because many have very short growing times that are often measured in hours, and because the Mastery Signs for berries are more interesting in appearance than many of the other plants you can grow -- being able to display them makes them a stand-out and an attention drawing feature of your farm. After all, this is mostly about standing out, isn't it?
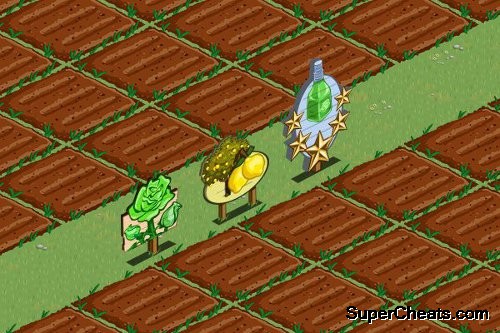
The Different Mastery Signs
-- Crop Mastery 101 --
Each crop (plant type) has three levels of mastery. When you reach the third and final level, you earn a Mastery Sign and any more of that crop that you grow will pay dividends in the form of extra XP -- and if you are still working towards reaching Level 100 in the game, that is a very important aspect of the process!
To begin we will pick a simple crop -- Strawberries -- and examine the requirements for its Mastery.
Level 1: 500 Crops
Level 2 1,000 Crops
Level 3 3,750 Crops
So to reach the third level of Crop Mastery and obtain the Mastery sign you will have had to grow -- and harvest -- 5,250 crops. Obviously you are not going to be accomplishing that in one sitting.
Strawberries are in the Fruit class of seeds and, no surprise, are the cheapest of the crops to plant and grow -- from planting the seen to harvesting takes just 4 hours, and they are a fairly profitable crop to grow: a seeding of one crop square costs 10 coins, and when you harvest it, you receive 35 coins, which is not a bad return on your investment!
Strawberries are also a crop that is part of the Co-Op Farming System (that is covered in a later chapter) which means you will be growing a lot of them later, so having them Mastered is a very good thing from a strategy point of view.
Normally when you plant a crop you gain whatever XP you would get for the planting -- in the case of Strawberries that is 1 XP point -- and no more XP for harvesting them -- but if they are fertilized that changes, and each harvested crop turns into an extra point of XP. If you have them mastered, you get extra XP in planting them, and as they are a common element in the Co-Op recipes, you can probably see the advantage already.
-- To Fertilize or Not to Fertilize --
The issues with fertilization is that it is largely the result of the kindness of your neighbors when you first start out (read the chapter called Being a Good Neighbor for more information on that), as each of your neighbors who visits your farm each day can fertilize five crop squares each -- which means you have to have a lot of neighbors visiting your farm every day to make that work.
Fortunately there is another way to handle this -- use a bag of fertilizer! These are obtained in three ways -- completing a collection, randomly obtained from a completed bee hive, or -- and this is the easiest way -- obtained as a reward when you visit your neighbors and fertilize THEIR crops. If you are good about being sure to do that each session, you will quickly build a surplus stock of bags of fertilizer, which you can then use strategically to help boost your XP gains and bushel production -- which brings us to Bushels.
The whole issue of Bushels is covered in its own chapter, but you need to know a but about them now. There is a chance whenever you harvest a crop -- a small chance if it is not fertilized -- for you to gain a bushel of that crop to sell in your Market Stall (assuming you have one).
These bushels actually double -- as you get one for your own use, and one to sell in your stall to a neighbor -- whenever you find one in a crop during harvesting. Bushels are used for crafting and will become an important resource for you at later levels, but for now that is all you need to know about how they apply to crafting -- but as far as crop growing goes, they are an INCREDIBLY important resource!
After you plant your seeds, and after you fertilize them, you grow the crop. BEFORE you harvest however, you should open up your Market Stall (buying one is not just a good idea, it is critical to your increasing productivity and XP), locate the Strawberry Bushels, and then USE one of them. Doing so increases your chance of obtaining more bushels, and also gives you an extra Mastery Point for that crop -- which means instead of having to grow and harvest 500 crops, you only have to grow and harvest 250!
Every so often the powers that be in Farmville offer players a double mastery bonus period -- usually on a weekend -- that allows you to really boost Mastery by using a bushel mastery bonus in combination with a double mastery bonus, which results in a total of a 3 Mastery Points when you harvest rather than two.
Using bushels prior to harvesting is one of the most important -- if not the most important -- trick for rapid leveling in the game.
So, the answer to the question should you fertilize is a qualified YES -- but you will want to build up an inventory of fertilizer before you start in on a Mastery project. You should also use a bushel of that crop prior to harvesting, and keep several Market Stalls on your farm in case you end up growing more than one crop per day.
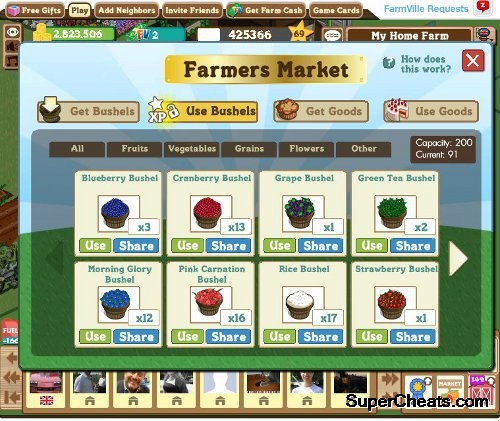
The Market Stall and its Stored Bushels
-- The Market Stall and Bushels --
When you find a bushel of a crop you have mastered, you receive bonus bushels based on your level of crop mastery -- for example, you only receive one bushel for any crop you harvest that you have not mastered, but if you are harvesting a crop which you mastered the first level of (one star) your receive two bushels.
For a crop you have attained second level mastery of (two stars) when you find a bushel you receive three bushels, and for a fully mastered crop (three stars) you receive four bushels, which adds to the usefulness of Crop Mastery!
Using a bushel from your inventory before harvesting -- as we mention above -- gives a mastery bonus, so for every Strawberry crop you harvest, you get 2 Mastery Points. You also have an increased chance for finding bushels (as we mention earlier).
Once you purchase a Market Stall for your farm, you receive an inventory allotment of 100 bushels in storage. Purchasing and placing additional Market Stalls adds 25 Bushel Storage per Stall for a maximum of 5 Stalls in total, with a total storage limit of 200 Bushels.
If you have one Market Stall, and you grow Strawberries during which you harvest bushels, those are offered for sale in the Stall automatically. The more bushels you find, the longer the sale period, so in theory lets say you harvest enough to have an 18 hour sale period. Then you plant Blackberries and harvest those six hours later -- your one Market Stall is selling Strawberries, so while you get to keep the bushels you find in your inventory for your use, you cannot sell the other allotment to your neighbors, because you do not have an open Market Stall to sell them in!
For that reason, part of being a good neighbor is a duty to have more than the one Stall, so that you can provide that resource to your neighbors -- an important resource that you will only appreciate yourself when you start crafting and begin to rely upon your neighbors for getting bushels from their Market Stalls! As soon as you can afford to do so, getting the maximum five Stalls on your farm should be one of your goals.
You cannot increase the number of bushels that you can keep for later use beyond the 200 at the present time, and you cannot have more than 5 Stalls at any one time right now, but that could change. In any event getting your bushel storage limit to 200 as fast as you can is very important if you have constructed a primary crafting building and plan to pursue mastery of the recipes associated with it!
-- The Mastery Process --
Once you settle on the crop you are going to go for Mastery on, you plant and harvest that crop over and over until you have achieved complete Mastery -- using whatever resources you have to make that process more efficient.
The Five Simple Steps of Mastery
As a general rule then, you should be following these steps in the Mastery process:
(1) Determine what crop to master based on the crafting recipe you want to master;
(2) Planting the same crop over until you Master it;
(3) Fertilizing the crop after planting to maximize returns;
(4) Using a Bushel of that crop to double Mastery Bonus Points;
(5) Being careful to always harvest the full crop.
That last is a significant issue -- if you grow a 4-hour crop when you know you will not be able to get back to the game for 8-hours, you should expect to find your crop rotting in the fields when you return! Only plant when you know you can be there at harvest time to harvest, otherwise you waste money and resources, and potential points!
Once you have Mastered a crop, move on to the next crop that is part of the crafting recipe that is par of your current Mastery project! That way when it comes time to start working towards mastery of that recipe you have maximized your bushel potential.
Remember that Co-Op Farming is also a source for bushel sets you can use in working on recipe mastery -- and if you can combine doing a Co-Op Farming quest with a crop you are trying to master already, that adds to the entire value of the process!
In the previous chapter we talked about Crop Mastery in general terms, and in this chapter we list the mastery requirements for the regular crops and discuss the process in more specific terms.
When you are deciding upon a crop to go for mastery on, chances are that decision is part of a larger project or goal -- more often than not the decision is related to your contemplation of the mastery of a specific recipe in your chosen Crafting Avocation (Bakery, Spa or Winery) that will require planting large numbers of a specific group of crops. In that case, having all of the crop types that are called for by the crafting recipe mastered is not just a good idea, it is often key to an efficient attempt at the mastery of that recipe.
The reason for that is very simple: any crop that you have mastered gives you a better chance of obtaining bushels -- and a higher number of bushels when you do obtain them -- when you harvest. Remember that for a crop you have not mastered, you only get one bushel each time a bushel finding event occurs -- but with each mastery star for that crop, a bonus bushel is included, and for a crop you have fully mastered, that means that the event generates FOUR bushels rather than ONE.
As bushels are the resource that you need in the mastery of a primary craft recipe, the matter is simpatico! Mastery of the crops directly equates to faster mastery of the recipe.
The Secret Motivation that is Not a Secret
It would be easy enough to stop the logic train right here, but that would ignore the other primary (and perhaps even stronger) motivation for crop mastery -- the Mastery Signs.
Gamers do not often discuss this aspect of playing the game on the public boards -- mostly I suspect because they do not want to frame their efforts in terms that are so baldly competitive and obvious -- but the truth is that often obtaining Mastery Signs is the primary motivation behind a farmer working on building mastery points for a crop!
In this case the usual priority in selecting the crop being mastered has a greater emphasis upon smaller mastery point requirements rather than grow times, since the fastest growing crops often have the largest mastery point requirements. If obtaining signs is the motivation behind your mastery plans that is not something that you need to be sensitive about. After all, in spite of the fact that hardly anyone who plays the game willingly admits to it, status is a legitimate motivation. That is all that we really need to say about that.
Regardless of what motivates you in seeking crop mastery, the following tables will help to guide you in the process by providing the requirements for all three levels of mastery for each crop. Following the tables we discuss some of the strategies that you may find helpful in determining the course you will take towards crop mastery.
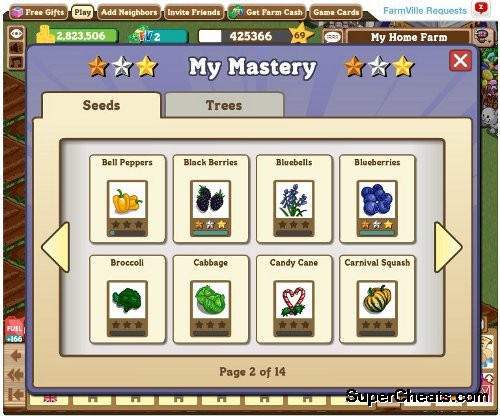
The
Mastery Tracking Menu
Note: These tables only include the crops that are part of the crafting system, and the crops and trees that are considered to be part of the base farming system. Crops or trees that either cannot be mastered (i.e. exist solely as decorations) and those that have no practical application in crafts -- or are thought to lack that attribution -- are not included in these tables.
Seed Crops Mastery Table
Level /
Event(*)
Seed/Crop Name
Cost
Level 1
Mastery
Level 2
Mastery
Level 3
Mastery
36
Acorn Squash
175
1000
2000
3000
27 E
Agave (1)
120
N/A
N/A
N/A
14
Aloe Vera
50
800
1600
2400
29 E
Alpine Rose (1)
29
N/A
N/A
N/A
76
Amaranth
220
1200
2400
3600
6
Artichoke
70
125
250
375
37
Asparagus
220
825
825
4125
1
Balloons
15
80
160
240
60
Bamboo
420
1200
2400
3600
0 LE
Bamboo Orchid (1)
5
N/A
N/A
N/A
0
Barley
80
750
1500
2250
48
Basil
300
1200
2400
3600
11
Bell Pepper
75
350
270
455
0
Bells of Ireland
25
500
1000
1500
0 LE
Birthday Cake
Licensed
250
750
1000
1 E
Black Rose
Licensed
100
200
300
0
Black Tea
50
900
1800
2700
0 E
Black Tulip
50
410
820
1230
29
Blackberry
75
1200
2400
3600
0
Bluebell
120
850
1700
2650
17
Blueberry
50
1000
2000
3000
35
Brocolli
200
550
1100
1650
0
Butter & Sugar Corn
90
425
850
1275
27
Cabbage
140
500
375
665
0
Candied Yam
20
30
195
225
1 E
Candy Cane
15
500
1000
1500
5 E
Candy Corn
20
525
1050
1575
0
Cara Potato
250
450
900
1350
63
Carnival Squash
355
2000
4000
6000
22
Carrot
110
500
1000
1500
0
Carrotcicle
125
70
600
1200
0
Cauliflower
125
150
300
450
0
Chandler Blueberry
45
350
700
1050
45
Chardonnay
200
1500
3000
4500
10
Chickpea
80
400
800
1200
1
Chrome Daisy
30
450
900
1350
0
Clover
325
2500
5000
7500
23
Coffee
120
350
700
1050
44
Columbine
340
2200
4400
6600
24
Corn
150
200
400
600
0
Cornflower
60
600
1200
1800
9
Cotton
75
150
300
450
0
Cove Cranberry
65
225
450
675
10
Cranberry
55
450
650
2900
1
Crystals
50
300
600
900
43
Cucumber
290
820
1640
2460
5 E
Cupcakes
25
150
350
500
0
Cupid Corn
10
250
500
750
0 LE
DREYER'S Fruit Bars
20
250
250
500
8
Daffodils
60
200
400
600
1 E
Daikon
65
300
300
400
0
Dandelion
20
750
1500
2250
0
Darrow Blackberry
30
400
800
1200
31 E
Daylilies
150
N/A
N/A
N/A
0
Daylily
70
350
700
1150
0
Dill
135
425
850
1275
24 E
Dog Rose
105
550
1100
1700
7
Double Grain
48
450
700
1750
0
Double Pikake
260 Coconuts
135
220
710
50 E
Edelweiss (1)
400
N/A
N/A
N/A
0 LE
EDY'S Fruit Bars
20
250
250
500
1
Eggplant
25
200
400
600
39
Elderberries
195
825
825
4125
98
Electric Lily
950
750
1500
2250
1
Electric Roses
40
400
800
1200
0
English Peas
200
750
1500
2250
0
English Roses
125
950
1900
2850
0
Field Beans
80
600
1200
1800
1 E
Fire & Ice Roses
100
650
1300
1950
16
Fire Peppers
140
613
1225
1837
7 E
Flamingo Flower (1)
35
N/A
N/A
N/A
22 E
Forbidden Rice (1)
300
N/A
N/A
N/A
90
Forget-Me-Not
725
1100
2200
3300
0
Foxglove
101
660
1320
1980
0
Frozen Grape
30
50
325
375
0 LE
Fruitcake
Licensed
600
1200
1800
26
Ghost Chilies
80
1200
2400
9000
42
Ginger
170
650
1300
1950
0
Gingerbread
65
80
670
750
0
Glacial Roses
150
30
195
225
28
Gladiolas
200
1600
3200
4800
1 E
Goji Berry (2)
15
80/300
160/600
240/900
1
Golden Poinsettia
20
275
550
825
6
Golden Poppy
50
320
640
960
0
Golden Sugar Cane
35 Coconuts
100
165
535
19
Grape
85
425
850
1275
0 LE
Grass Widow
Licensed
100
250
450
15 E
Green Hellebore
75
N/A
N/A
N/A
5 E
Green Roses
80
300
600
900
28
Green Tea
105
750
1500
2250
1 LE
Gum Drops
Licensed
400
800
1200
0
Gummi Bears
75
50
325
375
0
Habanero Chilies
50
500
1000
1500
0
Hawaiian Ginger
80 Coconuts
20
35
110
0
Haaiian Orchid
230 Coconuts
80
130
440
0
Hay
30
225
450
675
57
Heirloom Carrot
110
1400
2800
4200
0
Hilo Pineapples
80 Coconuts
170
285
915
0
Holly
80
60
390
450
39 E
Hollyhocks
210
500
1000
1500
0
Hops
150
780
1560
2340
0
Iceberg Lettuce
110
70
530
600
0
Iced Rice
55
70
600
1200
45
Iris
400
600
1200
1800
0 LE
Jack O'Lantern
Licensed
400
800
1200
16
Jalapeno
80
800
1600
2400
0
Kelp
160 Coconuts
165
270
865
0
Kennebec Potato
60
225
450
675
0 E
King Cake
Licensed
400
800
1200
0
Kona Coffee
20 Coconuts
120
200
640
0
Lady Slipper
50
400
800
1200
0
Landini Lilies
25
750
1500
2250
0
Lava Flower
20
650
1300
1950
30
Lavender
160
450
338
590
19
Leek
95
600
1200
1800
50
Lemon Balm
230
2200
4400
6600
4
Lilac
35
450
900
1350
8
Lilac Daffy
85
325
650
975
0
Lilikoi
170 Coconuts
150
250
800
35
Lily
195
500
1000
1500
0
Lokelani
25
650
1300
1950
34
Long Onion
255
713
1012
2963
30 E
Lotus
160
N/A
N/A
N/A
17 E
Lupine
Licensed
610
1220
1830
0 LE
Majestic Roses
Licensed
480
960
1440
0
Mint Candy
120
50
325
375
13
Morning Glory
60
500
1000
1500
0
Multi-Color Corn
15
650
1300
1950
0
Mussels
69 Coconuts
120
205
650
5 E
Nachos
Licensed
200
400
600
0 LE
Nagaimo
Licensed
1200
2400
3600
0 LE
Night Cereus
Licensed
100
250
450
13 E
Nopales
Licensed
N/A
N/A
N/A
53
Oats
225
1850
3700
5550
34
Onion
170
825
825
4125
0
Ono
231 Coconuts
80
130
440
59
Orange Daisies
410
720
1440
2160
1 E
Organic Blueberries
Licensed
200
400
600
0
Oysters
13 Coconuts
245
405
1300
16
Pattypan Squash
65
350
700
1050
32
Peas
190
600
1200
1800
1
Peanut
20
275
550
825
0
Peony
50
600
1200
1800
12
Pepper
70
425
850
1275
5
Peppermint
50
500
1000
1500
15
Pineapples
95
425
325
550
0
Pink Asters
50
310
620
930
1 E
Pink Carnations
11
480
960
1440
23 E
Pink Hibiscus
Licensed
450
900
1350
20
Pink Roses
120
450
338
590
12 E
Pinto Beans
Licensed
750
1500
2250
5
Poinsettia
45
500
1000
1500
54
Posole Corn
280
1500
3000
4500
21
Potato
135
150
300
450
5
Pumpkin
30
500
1000
1500
47
Purple Asparagus
220
800
1600
2400
0
Purple Orchid
25
750
1500
2250
35
Purple Pod Peas
210
525
1050
1575
38
Purple Poppy
200
750
1500
2250
1 LE
Purple Toadstool
Licensed
350
700
1050
20
Purple Tomato
140
875
1750
2625
0 LE
Purple Tulip
Licensed
600
1200
1800
0
Radish
90
600
1200
1800
0
Rainbow
10
650
1300
1950
24 E
Rappi
Licensed
N/A
N/A
N/A
8
Raspberries
20
1500
3000
4500
0 LE
Red Carnations
Licensed
500
1000
1500
8
Red Clover
120
250
500
750
0
Red Currant
40
1100
2200
3300
0
Red Iceberry
40
80
670
750
1 LE
Red Roses
Licensed
100
200
300
11
Red Spinach
90
390
780
1170
1
Red Toadstool
50
650
1300
1900
15
Red Tulips
75
500
1000
1500
30
Red Wheat
180
250
500
750
11
Rhubarb
65
480
960
1440
7
Rice
45
400
400
2000
0
Rock Crab
150 Coconuts
80
135
435
0
Royal Hops
150
900
1800
2700
0
Royal Taro
12 Coconuts
600
1000
3200
21
Rye
140
900
1800
2700
64
Saffron
365
1500
3000
4500
5 E
Shamrock
Licensed
N/A
N/A
N/A
0
Shrimp
25 Coconuts
120
205
650
0
Snow Carnation
40
750
1500
2250
1 LE
Snow Cone
Licensed
250
750
1000
0
Snow Tulip
60
50
325
375
1
Soybean
15
300
600
900
6
Spinach
35
300
600
900
0
Spring Squill
140
780
1560
2340
52
Square Mellon
410
700
1400
2100
4
Squash
40
200
400
600
5
Squimpkin
60
350
700
1050
0
Stallion Flower
20
150
150
300
1 LE
Star Flower
Licensed
350
700
1050
8
Strasberry
20
1000
2000
2250
1
Strawberry
10
500
1000
3750
12 E
Sugar Beat
Licensed
N/A
N/A
N/A
31
Sugar Cane
165
1300
1300
8400
25
Sun Poppy
175
448
895
1342
25
Sunflower
135
575
1150
1725
14
Super Aloe Vera
40
2000
6000
12000
1 E
Super Berries
10
N/A
N/A
N/A
29
Super Blackberries
75
2000
6000
12000
17
Super Blueberries
50
2000
6000
12000
27
Super Cabbage
120
1250
3750
7500
0
Super Candied Yam
20
800
1600
2400
0
Super Chandler Blueberries
45
700
1400
2100
9
Super Cotton
75
750
2250
6750
10
Super Cranberries
55
900
2700
8100
0
Super Gingerbread
65
500
1000
1500
19
Super Grapes
85
600
1800
5400
0
Super Gummi Bears
75
400
800
1200
0
Super Hay
30
450
900
1350
20
Super Hops
150
1000
3000
6000
0
Super Kennebec Potato
60
450
900
1350
0
Super Lady Slippers
50
800
1600
2400
13
Super Morning Glory
60
1000
3000
6000
16
Super Pattypan Squash
65
700
2100
4200
1
Super Peanuts
20
1000
2000
3000
32
Super Peas
190
1800
5400
10800
12
Supper Pepper
70
600
1800
5400
15
Super Pineapples
65
950
2850
5700
20
Super Pink Aster
50
600
1800
5400
20
Super Pink Roses
65
1300
3900
7800
21
Super Potatoes
135
500
1500
3000
5 E
Super Pumpkin
30
1000
3000
9000
0
Super Snow Tulip
60
400
800
1200
1
Super Strawberries
10
1250
3750
11250
18
Super Watermelon
130
400
1200
3600
33
Super Yellow Melon
205
600
1800
5400
1 E
Sweet Beets
Licensed
500
1000
3750
1 E
Sweet Corn
Licensed
N/A
N/A
N/A
1 E
Sweet Potatoes
Licensed
N/A
N/A
N/A
1 E
Sweet Yams
Licensed
N/A
N/A
N/A
6 E
Swiss Chard
Licensed
N/A
N/A
N/A
0
Taro
10 Coconuts
300
500
1600
0
Tarragon
110
350
700
1050
4 E
Tomatillos
Licensed
80
160
240
20
Tomato
100
750
1500
2250
23 E
Triticale
Licensed
800
1600
2400
0
Turnip
160
600
1200
1800
42 E
Wasabi
200
N/A
N/A
N/A
18
Watermelon
130
150
300
450
1
Wheat
13
500
1000
1500
24
Whiskey Peat
280
550
1100
1650
0 LE
White Asters
Licensed
300
600
900
1 E
White Corn
Licensed
N/A
N/A
N/A
29
White Grapes
245
1200
2400
3600
1 LE
White Poinsettia
Licensed
250
500
750
1 E
White Pumpkin
100
1000
2000
3000
80
White Roses
620
900
1800
2700
0
Yam
80 Coconuts
200
335
1065
0
Yellow Fin Tuna
100 Coconuts
80
135
435
0
Yellow Hibiscus
86 Coconuts
200
335
1065
5 E
Yellow Lentils
20
N/A
N/A
N/A
33
Yellow Melon
205
150
300
450
1 E
Yellow Roses
20
N/A
N/A
N/A
30
Zinfandel
50
500
1000
1500
27
Zucchini
120
550
1100
1650
(*) In the first column the minimum level that is required to plant the crop is listed, and when it applied a code letter is also listed to indicate whether or not the crop is a special event - E - crop, or a Limited Edition - LE - crop, which may not be currently available for planting.
(1) While a Crop Mastery sign was added to the graphical files for the game, it was not implemented for this crop; mastery of this crop was not added as a player-attainable activity in the game.
(2) The Goji Berry Crop was released twice for two individual special events, with different mastery requirements, hence the listing of two different mastery target numbers for each of the releases. The two releases were treated as separate crops for the purposes of mastery, so if a player had only reached the 2nd level of mastery on the first release, the progress did NOT pick up from there on the second, but required that all three mastery levels be unlocked instead.
Tree Mastery Table
Level /
Event (*)
Tree Name
Cost
Level 1
Mastery
Level 2
Mastery
Level 3
Mastery
0 (E)
Acacia
150 C
75
150
225
1
Acai
27 FB
75
150
225
0 (E)
African Tulip
15 FB
75
150
225
0
Alma Fig
Seed
75
150
225
0
Almond Tree
3 FB
75
150
225
0
American Aspen
8 FB
75
150
225
0
Amherstia
15 FB
113
226
339
0
Angel Red Pomegranate
40 FB
68
136
204
0
Angel Trumpet
Event
75
150
225
1
Apple Tree
325 C
75
150
225
8
Apricot
5 FB
57
171
342
1
Arjuna
Gifted
75
150
225
1
Ash
10 FB
75
150
225
1 E
Asian Pear
10 FB
113
226
339
0
Asteroxylon
6 FB
75
150
225
1
Autumn Ginko
25 FB
113
226
339
5
Avocado
3 FB
75
150
225
1
Azalea Bonsai
75 FB
75
150
225
0
Azalea Bonsai II
75 FB
75
150
225
0 E
Baby Bundle
6 FB
75
150
225
1
Bahri Date
20 FB
113
226
339
1 E
Balloon
Event
75
150
225
1 LE
Bamboo Orchid
6 FB
75
150
225
14
Banana
4 FB
113
226
339
0 E
Banyan
Event
75
150
225
0 E
Baobab
12 FB
?
?
?
0 E
Bare Crystal
8 FB
75
150
225
0
Basket
Quest
?
?
?
0 E
Bay Laurel
5 FB
75
150
225
0 E
Beads
6 FB
?
?
?
1 E
Bell Flower
Event
75
150
225
0 E
Big Bell Flower
Event
75
150
225
0 E
Big Blossoming
14 FB
75
150
225
0 LE
Big Candy Pumpkin
17 FB
75
150
225
0 E
Big Caramel Apple
10 FB
75
150
225
0 E
Big Chocolate Apple
12 FB
?
?
?
1 E
Big Chrome Apple
12 FB
75
150
225
1 E
Big Chrome Cherry
12 FB
75
150
225
0 E
Big Cocoa Truffle
10 FB
75
150
225
0 E
Big Crystal Cave
14 FB
75
150
225
0 E
Big Dinosaur Eggs
14 FB
?
?
?
1 E
Big Fall Ribbon
14 FB
75
150
225
1 E
Big French Bread
10 FB
75
150
225
0 E
Big Frozen Apple
12 FB
75
150
225
0 E
Big Golden Holiday
10 FB
75
150
225
0 E
Big Gummi Bear
14 FB
75
150
225
1 E
Big Halloween Candle
14 FB
75
150
225
0 E
Big Halloween Candy
14 FB
75
150
225
0 E
Big Halloween Cookie
14 FB
75
150
225
0 E
Big Heart Cotton Candy
14 FB
75
150
225
0 E
Big Holiday Cookie
12 FB
75
150
225
0 E
Big Holiday Lantern
14 FB
75
150
225
0 LE
Big Impressionist
7 FB
75
150
225
0 LE
Big Impressionist II
6 FB
75
150
225
0 E
Big July Balloon
10 FB
75
150
225
0 E
Big Mini Cupcake
14 FB
?
?
?
0 E
Big Mother's Cookie
14 FB
?
?
?
0 E
Big New Year Lantern
12 FB
75
150
225
0 E
Big Pink Gem
12 FB
75
150
225
0
Big Potato Chips
Mystery Seedlings
75
150
225
0 E
Big Rainbow Shower
14 FB
?
?
?
0 E
Big Rocky Candy
12 FB
?
?
?
0 E
Big Snowflake II
14 FB
75
150
225
0
Big Spruce Birdhouse
Mystery Seedling
12
20
39
0 E
Big Star Flower
12 FB
75
150
225
0 E
Big Strawberry Cake
12 FB
?
?
?
0 E
Big Valentine Cookie
14 FB
?
?
?
0 E
Bird Cherry
Mystery Seedling
75
150
225
0 E
Birthstone
8 FB
75
150
225
0 E
Bitter Cherry
8 FB
75
150
225
0
Bitternut Hickory
Quest
75
150
225
0 E
Black Cherry
10 FB
75
150
225
0
Black Gum
7 FB
12
24
36
0 E
Blackhaw
6 FB
75
150
225
0 LE
Black Locust
10 FB
75
150
225
2
Blood Orange
15 FB
57
114
171
0
Blossoming
8 FB
75
150
225
0 E
Blue Cloud
12 FB
75
150
225
0 E
Boom
10 FB
75
150
225
0
Borealis
8 FB
75
150
225
0
Brazil Nut
N/A
75
150
225
0
Breadfruit
Gifted / 4 FB
75
150
225
1
Breadnut
20 FB
75
150
225
0
Bristle Pinecone
Quest
75
150
225
0
Broken Heart
6 FB
75
150
225
0 E
Brownea
6 FB
?
?
?
0
Bubble Gum
30 FB
75
150
225
0 E
Bumble Bee
8 FB
?
?
?
0 LE
Bur Oak
10 FB
75
150
225
1
Butterfly
8 FB
75
150
225
0 LE
Cake Pop
8 FB
75
150
225
0
California Fan Palm
8 FB
?
?
?
0
California Laurel
5 FB
75
150
225
0 E
California Redbud
12 FB
75
150
225
0 E
Callery Pear
6 FB
?
?
?
0 LE
Camellia Bonsai
25 FB
75
150
225
0 E
Candelabra
150 C
75
150
225
0 LE
Candle
8 FB
75
150
225
0 E
Candle Nut
12 FB
75
150
225
0 LE
Candy Apple
10 FB
75
150
225
0 E
Candy Bouquet
Reward
?
?
?
0 E
Candy Cane
6 FB
75
150
225
0 E
Candy Corn
8 FB
75
150
225
1 E
Caramel Apple I
8 FB
75
150
225
0 E
Carnation
6 FB
?
?
?
0 E
Carnival
Event
N/A
N/A
N/A
0 E
Carob
14 FB
75
150
225
7
Cashew
Gifted
75
150
225
0 E
Catawba Crape
6 FB
75
150
225
0 E
Celtic Knot
8 FB
75
150
225
0 E
Chainfruit Cholla
12 FB
?
?
?
0
Chanee Durian
Mystery Seed
57
114
171
0 E
Cherry Plum
8 FB
75
150
225
1
Cherry
225 C
113
226
339
0
Chestnut
6 FB
75
150
225
0
Chicle
Seedling
75
150
225
0 E
Chinese Lantern
10 FB
75
150
225
0 E
Chinese Strawberry
10 FB
75
150
225
0 LE
Chinese Tamarisk
10 FB
75
150
225
0 E
Chinese Tulip
Event
75
150
225
0 LE
Choco Macadamia
12 FB
75
150
225
0 E
Chocolate Apple
6 FB
?
?
?
1 E
Chocolate Heart
5 FB
75
150
225
0 E
Chrome Apple
7 FB
75
150
225
0 E
Chrome Cherry
12 FB
75
150
225
1 E
Cinnamon Heart
5 FB
75
150
225
0 E
Clover
6 FB
?
?
?
0 E
Cocoa
5 FB
75
150
225
0 E
Cocoa Truffle
5 FB
75
150
225
0
Coconut
10 FB
50
100
150
0
Coin
Quest
75
150
225
0 E
Colville's Glory
8 FB
?
?
?
0 E
Conch Shell
14 FB
75
150
225
0 E
Confetti
Event
75
150
225
0 LE
Cork Oak
10 FB
75
150
225
0 E
Cornelian Cherry
8 FB
75
150
225
0 E
Cornucopia
8 FB
75
150
225
0 E
Corsage
6 FB
?
?
?
0 E
Cottoncandy
Event
75
150
225
0 E
Crab Apple
Event
75
150
225
0 E
Crack Willow
Event
75
150
225
0 E
Crystal Cave
8 FB
75
150
225
1
Cuban Banana
15 FB
113
226
339
0 E
Cupcake
Event
75
150
225
0 E
Cycad
6 FB
?
?
?
1
Cypress
Event
75
150
225
0 E
Cypress Sculpted
Quest
75
150
225
0 E
Dahlia
6 FB
75
150
225
1
Dahurian Birch
14 FB
75
150
225
0 E
Daisy
12 FB
?
?
?
0 E
Damson
5 FB
75
150
225
0 E
Dark Apple
8 FB
75
150
225
0 E
Dark Heart
6 FB
75
150
225
0 E
Dark Willow
8 FB
75
150
225
1 E
Date Palm
14 FB
?
?
?
20
Date
Gifted / 5 FB
113
226
339
0 E
Dawn
6 FB
75
150
225
0 E
Diamond Ring
Quest
?
?
?
0 E
Dinosaur Eggs
8 FB
?
?
?
2 E
Disco Ball
15 FB
75
150
225
1
Discover
Reward
75
150
225
0 E
Dogwood
5 FB
75
150
225
0 E
Dollie
8 FB
?
?
?
0 E
Downy Birch
Event
75
150
225
1
Durian
Gifted
57
114
171
0 E
Dusk
12 FB
75
150
225
1
Dwarf Almond
15 FB
75
150
225
0 E
Earth
8 FB
?
?
?
0
Eastern Redbud
6 FB
?
?
?
1
Eastern Red Cedar
7 FB
12
20
39
1
Elberta Peach
15 FB
57
114
171
0 E
Emerald
8 FB
?
?
?
0 E
Empress
14 FB
?
?
?
0 E
Enchanted Iris
Reward
?
?
?
1 E
English Elm
10 FB
75
150
225
1 E
European Aspen
Seedling
75
150
225
0 E
European Beech
Event
75
150
225
0 E
European Pear
Event
75
150
225
0 E
Fairy
7 FB
75
150
225
0 E
Fall
Event
12
24
36
1 E
Fall Ribbon
8 FB
75
150
225
0 LE
Fan Palm
Prize
?
?
?
0 E
Father
Event
75
150
225
3
Fig
Gifted
75
150
225
0 E
Fire Apple
6 FB
N/A
N/A
N/A
0 E
Fire Gem
8 FB
75
150
225
1 E
Fire Peach
Event
75
150
225
0 E
Firework
8 FB
75
150
225
0 E
Fleur de Lis
5 FB
75
150
225
0
Flip Flop
8 FB
75
150
225
0 LE
Flowery Bonsai
50 FB
75
150
225
0 LE
Flowery Bonsai II
50 FB
75
150
225
0 LE
Forbidden Gem
8 FB
75
150
225
0 E
Fortune
5 FB
75
150
225
0 E
Foxtail Palm
12 FB
75
150
225
0 E
Fraiser Fir
6 FB
75
150
225
0 E
French Bread
5 FB
75
150
225
0 E
French Tamarisk
5 FB
75
150
225
0 E
Fringe
6 FB
?
?
?
1 E
Frosted Fairy
Event
75
150
225
0 E
Frozen Apple
6 FB
75
150
225
0 E
Frozen Gem
6 FB
75
150
225
1
Frozen Spruce
5000 C
75
150
225
0 E
Fuchsia Bonsai
25 FB
75
150
225
0 E
Gem
Event
75
150
225
0 E
Gem Fruit
Event
75
150
225
0 E
Gerber
12 FB
75
150
225
1
Giant Amethyst
Seedling
75
150
225
0 E
Giant Baby Bundle
12 FB
75
150
225
0 E
Giant Balloon
10 FB
75
150
225
0 E
Giant Bare Crystal
14 FB
75
150
225
0 E
Giant Beads
12 FB
?
?
?
0 E
Giant Birthstone
14 FB
75
150
225
0 E
Giant Black Cherry
5 FB
75
150
225
0 E
Giant Boom
10 FB
75
150
225
0
Giant Borealis
Seedling
75
150
225
0 E
Giant Broken Heart
12 FB
75
150
225
0 E
Giant Bubblegum
30 FV
75
150
225
0 E
Giant Bumble Bee
14 FB
?
?
?
1 E
Giant Butterfly
14 FB
75
150
225
0 E
Giant Cake Pop
14 FB
75
150
225
0 E
Giant Candy Apple
Event
75
150
225
0 E
Giant Candy Cane
12 FB
75
150
225
0 E
Giant Candy Corn
Event
75
150
225
0 E
Giant Celtic Knot
14 FB
75
150
225
1 E
Giant Chocolate Heart
10 FB
75
150
225
1 E
Giant Cinnamon Heart
15 FB
75
150
225
0 E
Giant Clover
12 FB
75
150
225
0 E
Giant Cocoa
5 FB
75
150
225
0 E
Giant Coconut
12 FB
24
216
240
0 E
Giant Coin
Event
75
150
225
0 E
Giant Confetti
Event
75
150
225
0 E
Giant Cornucopia
14 FB
75
150
225
0 E
Giant Corsage
12 FB
?
?
?
0 E
Giant Cotton Candy
Event
75
150
225
1 E
Giant Cupcake
8 FB
75
150
225
0 E
Giant Cupid
15 FB
?
?
?
1 E
Giant Dark Apple
14 FB
75
150
225
0 E
Giant Dark Heart
12 FB
?
?
?
0 E
Giant Dark Willow
14 FB
?
?
?
0 E
Giant Date
13 FB
29
?
?
0 E
Giant Disco Ball
12 FB
75
150
225
0 E
Giant Earth
14 FB
?
?
?
0 E
Giant Emerald
14 FB
?
?
?
0 E
Giant Fairy
Event
75
150
225
0 E
Giant Father
10 FB
75
150
225
0 E
Giant Fire Apple
12 FB
?
?
?
1 E
Giant Fire Peach
Seedling
75
150
225
0 E
Giant Firework
14 FB
75
150
225
0 E
Giant Fleur de Lis
10 FB
75
150
225
0 E
Giant Flip Flop
14 FB
75
150
225
0 E
Giant Forbidden Gem
14 FB
75
150
225
0 E
Giant Fraiser Fir
12 FB
75
150
225
1 E
Giant Frosted Fairy
14 FB
75
150
225
0 E
Giant Frozen Gem
12 FB
75
150
225
0 E
Giant Gem
12 FB
75
150
225
0 E
Giant Gem Fruit
12 FB
75
150
225
0 E
Giant Gingerbread
14 FB
75
150
225
1 E
Giant Gnarled
10 FB
75
150
225
1 E
Giant Golden Apple
10 FB
75
150
225
1 E
Giant Golden Fairy
14 FB
75
150
225
0 E
Giant Gorse
10 FB
75
150
225
0 E
Giant Gum Drop
14 FB
75
150
225
0 E
Giant Halloween Lantern
Event
75
150
225
0 E
Giant Hard Candy
12 FB
?
?
?
0 E
Giant Heart Balloon
14 FB
?
?
?
0 E
Giant Heart
12 FB
75
150
225
0 E
Giant Heart Candy
25 FB
75
150
225
0 E
Giant Holiday Candle
12 FB
75
150
225
0 E
Giant Holiday Chocolate
12 FB
75
150
225
0 E
Giant Holiday Corn
12 FB
75
150
225
0 E
Giant Ice Cream
12 FB
75
150
225
0 E
Giant Instrument
12 FB
?
?
?
2 E
Giant Jack O'Lantern
Event
75
150
225
0 E
Giant Jewel
Seedling
75
150
225
2 E
Giant Jingle Bell
Seedling
12
20
39
0 E
Giant July Confetti
10 FB
75
150
225
1 E
Giant July Ice Cream
10 FB
75
150
225
0 E
Giant Kwanzan
12 FB
?
?
?
1 LE
Giant Labyrinth
14 FB
75
150
225
0 E
Giant Lace
14 FB
75
150
225
0 E
Giant Lava Banyan
12 FB
?
?
?
0 E
Giant Lava Stone
16 FB
?
?
?
0 E
Giant Lollipop
12 FB
?
?
?
0 E
Giant Lucky Charm
12 FB
?
?
?
0 E
Giant Lucky Cookies
10 FB
75
150
225
0 E
Giant Mac & Cheese
Seedling
75
225
450
0 E
Giant Magic Orange
Event
75
150
225
0 E
Giant Magic Peach
Event
75
150
225
0 E
Giant Mardi Gras
10 FB
75
150
225
0 E
Giant Mask
14 FB
?
?
?
0 E
Giant Miracle-Gro
Seedling
?
?
?
0 E
Giant Nutcracker
14 FB
75
150
225
0 E
Giant Origami
14 FB
?
?
?
0 E
Giant Pink Pearl
14 FB
?
?
?
0 E
Giant Poinsettia
18 FB
20
40
60
0 E
Giant Present
Event
?
?
?
0 E
Giant Purple Bubble Gum
6 FB
75
150
225
1 E
Giant Purple Crystal
14 FB
75
150
225
0 E
Giant Queen's Crape
14 FB
N/A
N/A
N/A
0 E
Giant Rainbow
10 FB
75
150
225
0 E
Giant Red Gem
8 FB
75
150
225
0 E
Giant Ribbon Candy
14 FB
N/A
N/A
N/A
0 E
Giant Ribbon Glower
Event
75
150
225
0 E
Giant Sand Dollar
12 FB
N/A
N/A
N/A
0 E
Giant Santa Hat
14 FB
75
150
225
0 E
Giant Sapphire
12 FB
75
150
225
0 E
Giant Sea Shell
14 FB
N/A
N/A
N/A
0 E
Giant Sequin
Event
N/A
N/A
N/A
0 E
Giant Shamrock
12 FB
75
150
225
0 E
Giant Snowcone
10 FB
75
150
225
0 E
Giant Sour Apple
Event
75
150
225
0 E
Giant Spiral Crystal
14 FB
75
150
225
0 LE
Giant Spring Egg
Seedling
75
150
225
0 E
Giant Star Fish
14 FB
N/A
N/A
N/A
0 E
Giant Stocking
10 FB
N/A
N/A
N/A
0 E
Giant Wedding
Seedling
75
150
225
0 E
Giant Whittled
Seedling
75
150
225
0 E
Giant Wilted
Seedling
N/A
N/A
N/A
0 E
Giant Wing
14 FB
N/A
N/A
N/A
0 E
Giant Winter Spirit
Event
N/A
N/A
N/A
0 E
Gingerbread
8 FB
75
150
225
60
Gingko
Gifted / 8 FB
113
226
339
1 E
Gnarled
5 FB
N/A
N/A
N/A
0 E
Gold Tinsel
14 FB
75
150
225
1 E
Golden Apple
5 FB
75
150
225
1
Golden Apricot
25 FB
57
114
171
1 E
Golden Bell
14 FB
75
150
225
1 E
Golden Fairy
8 FB
75
150
225
0 E
Golden Holiday
6 FB
75
150
225
1
Golden Malayan Coconut
40 FB
50
100
150
1
Golden Plum
10 FB
75
150
225
1
Golden Starfruit
15 FB
57
114
171
0
Goldenchain
12 FB
N/A
N/A
N/A
0 E
Gorse
Event
75
150
225
1
Granny Smith Apple
15 FB
113
226
339
11
Grapefruit
Gifted / 4 FB
113
226
339
15
Guava
5 FB
113
226
339
1
Gulmohar
3 FB
75
150
225
0
Gum Drop
8 FB
75
150
225
0 E
Gummi Bear
8 FB
N/A
N/A
N/A
1 E
Halloween Candle
8 FB
75
150
225
0 E
Halloween Candy
Event
75
150
225
0 E
Halloween Cookie
8 FB
75
150
225
0 E
Halloween Lantern
Event
75
150
225
0
Hard Candy
6 FB
N/A
N/A
N/A
1
Hass Avocado
15 FB
75
150
225
0
Hawaiian Cherry
Removed
24
216
240
0 E
Hawthorn
Event
75
150
225
0
Hazelnut
14 FB
75
150
225
0
Heart
6 FB
75
150
225
0
Heart Balloon
6 FB
N/A
N/A
N/A
0 E
Heart Candy
15 FB
75
150
225
0 E
Heart Cotton Candy
8 FB
75
150
225
0 E
Heart Shape
14 FB
75
150
225
1 LE
Heirloom Apple
5 FB
113
226
339
0 E
Holiday
Gifted
75
150
225
0 E
Holiday Candle
6 FB
75
150
225
0 E
Holiday Chocolate
6 FB
75
150
225
0 E
Holiday Cookie
6 FB
75
150
225
0 E
Holiday Corn
6 FB
75
150
225
0 E
Holiday Lantern
8 FB
75
150
225
0
Holly Oak
5 FB
75
150
225
0
Honeycrisp Apple
8 FB
75
150
225
0 E
Honey Locust
Event
75
150
225
0 E
Ice Cream
Event
75
150
225
0 LE
Ice Cream Mango
Reward
N/A
N/A
N/A
0 E
Ice Cream Sundae
6 FB
75
150
225
0 E
Ice Crystal
15 FB
25
50
75
0 E
Ice Sculpture
Event
75
150
225
0 E
Impressionist
4 FB
75
150
225
0 E
Impressionist II
3 FB
75
150
225
0
Incense Cedar
6 FB
N/A
N/A
N/A
1
Indian Laurel
Seedling
75
150
225
0
Instrument
6 FB
N/A
N/A
N/A
0 E
Intertwined
8 FB
75
150
225
0 E
Ironwood
Event
75
150
225
0 E
Jacaranda
Event
75
150
225
0 E
Jack O'Lantern
Event
75
150
225
0
Jackfruit
Gifted
75
150
225
0
Japanese Maple
15 FB
75
150
225
0
Japanese Persimmon
12 FB
N/A
N/A
N/A
0 LE
Jewel
Event
75
150
225
0 E
Jingle Bell
Event
12
20
39
0 E
Joshua
6 FB
N/A
N/A
N/A
1 E
July Balloon
5 FB
75
150
225
0 LE
July Confetti
Event
75
150
225
0 E
July Ice Cream
Event
75
150
225
0 E
Juniper
Event
75
150
225
0
Kalamata Olive
12 FB
75
150
225
0
Kamani Nut
6 FB
75
150
225
0 E
Kermes Oak
6 FB
75
150
225
1
Key Lime
15 FB
45
90
135
0
Koremeiki Olive
6 FB
75
150
225
0
Kou
8 FB
75
150
225
0
Kwanzan Cherry
14 FB
75
150
225
1
Labyrinth
8 FB
75
150
225
0
Lace
8 FB
75
150
225
0
Large Fire Gem
14 FB
N/A
N/A
N/A
0
Lava Banyan
6 FB
N/A
N/A
N/A
0
Lava Stone
8 FB
N/A
N/A
N/A
0 E
Lavender
8 FB
75
150
225
7
Lemon
475 C
75
150
225
10
Lime
750 C
45
90
135
0
Lollipop
6 FB
N/A
N/A
N/A
0
Lombardy Poplar
15 FB
75
150
225
1
Longan
Seedling
75
150
225
0
Loquat
6 FB
N/A
N/A
N/A
0
Lucky Charm
6 FB
N/A
N/A
N/A
0
Lucky Cookies
6 FB
75
150
225
0
Lucques Olive
Event
75
150
225
0
Lychee
10000
75
150
225
0
Mac & Cheese
Event
75
150
225
0
Macadamia
6 FB
75
150
225
0 E
Magic Orange
7 FB
75
150
225
0 E
Magic Peach
Event
75
150
225
0
Magnolia
Event
75
150
225
0 LE
Magnolia Bonsai
25 FB
75
150
225
0 E
Majestic Redwood
12 FB
75
150
225
0
Mandarin
Gifted / 850 C
57
114
171
40
Mango
Gifted / 8 FB
85
170
255
1
Manila Mango
25 FB
85
170
255
1
Maple
5 FB
75
150
225
0
Mardi Gras
5 FB
75
150
225
0 E
Maritime Pine
5 FB
75
150
225
0 E
Mask
8 FB
N/A
N/A
N/A
0 E
Mastic
8 FB
75
150
225
0 E
May Ribbon
Reward
N/A
N/A
N/A
0 E
Midland Hawthorn
Seedling
75
150
225
0 E
Milky Way
8 FB
75
150
225
0 E
Milo
6 FB
N/A
N/A
N/A
0
Mimosa Silk
5 FB
75
150
225
0 E
Mini Cupcake
8 FB
N/A
N/A
N/A
0
Mint Candy
30 FB
75
150
225
0 E
Miracle-Gro
Event
?
?
?
1
Mission Olive
20 FB
85
170
255
1 E
Mistletoe
5 FB
75
150
225
0 LE
Money Bush
100 FB
N/A
N/A
N/A
0
Money Plant
50 FB
N/A
N/A
N/A
0
Money Tree II
260 FB
N/A
N/A
N/A
0 E
Monkey Puzzle
6 FB
?
?
?
0
Monterrey Cypress
15 FB
75
150
225
0 E
Montmorency Cherry
14 FB
75
150
225
2 E
Moon
8 FB
75
150
225
2 E
Moth Orchid
12 FB
75
150
225
0 E
Mother's Cookie
8 FB
?
?
?
2
Mountain Ebony
15 FB
75
150
225
0 E
New Year Lantern
6 FB
75
150
225
0
Noir
Quest
?
?
?
0
Northern Red Oak
Quest
75
150
225
0 E
Norway Spruce
6 FB
75
150
225
0 E
Nutcracker
8 FB
75
150
225
0 E
Oak
Event
75
150
225
0 E
Octopus
14 FB
?
?
?
0
Ohia
14 FB
75
150
225
0
Ohia Ai
12 FB
?
?
?
0 E
Oklahoma Redbud
12 FB
?
?
?
32
Olive
Gifted / 5 FB
85
170
255
1
Orange
425 C
57
114
171
0 LE
Orange Bonsai
25 FB
75
150
225
0 E
Origami
8 FB
?
?
?
0 E
Ornament
15 FB
75
150
225
1 E
Ornament I
20 FB
113
226
339
1 E
Ornament II
15 FB
113
226
339
0 E
Paper Flower
Quest
?
?
?
0 E
Paperbark Maple
12 FB
75
150
225
17
Passion Fruit
Gifted
68
136
204
4
Peach
500 C
57
114
171
1
Peach Palm
50 FB
75
150
225
0
Pecan
5 FB
75
150
225
0 LE
Persimmon
Promotion
?
?
?
0 E
Picholine Olive
Seedling
75
150
225
0
Pin Oak
Event
75
150
225
0
Pine
10 FB
113
226
339
1 E
Pink Bubblegum
5 FB
75
150
225
1 E
Pink Cloud
6 FB
75
150
225
1 E
Pink Diamond
8 FB
75
150
225
0 E
Pink Dogwood
Seedling
75
150
225
0 E
Pink Gem
Event
75
150
225
0 E
Pink Hanging Flower
Event
75
150
225
0 E
Pink Hibiscus
8 FB
75
150
225
0 E
Pink Holiday
8 FB
75
150
225
0 E
Pink Magnolia
14 FB
75
150
225
0 E
Pink Pearl
8 FB
?
?
?
0E
Pink Plum
14 FB
?
?
?
0
Pink Plumeria
Event
75
150
225
0 E
Pink Rose
12 FB
?
?
?
0 E
Pink Smoke
14 FB
?
?
?
0 E
Pistachio
10 FB
75
150
225
2
Plum
350 C
75
150
225
0 E
Poinsettia
Seedling
20
39
?
0 E
Polar
7 FB
12
?
?
23
Pomegranate
20 FB
68
136
204
1
Ponderosa Lemon
15 FB
75
150
225
0 E
Present
25 FB
75
150
225
0 E
Puka Shell
8 FB
75
150
225
0
Purple Bubble Gum
Event
75
150
225
0
Purple Crystal
8 FB
75
150
225
0 E
Purple Hanging Flower
Event
75
150
225
0
Purple Magnolia
10 FB
75
150
225
0 E
Purple Willow
6 FB
75
150
225
0 E
Purple Wisteria
Event
75
150
225
0 E
Queen's Crape
6 FB
?
?
?
0 E
Radiant Sun
12 FB
75
150
225
0
Rainbow Apple
iPhone
75
150
225
0
Rainbow Shower
8 FB
?
?
?
0
Rainbow
5 FB
75
150
225
1 E
Rainier Cherry
10 FB
113
226
339
0 E
Red Alder
12 FB
75
150
225
0
Red Cassia
Quest
?
?
?
0
Red Dogwood
Reward
?
?
?
0 E
Red Gem
Event
75
150
225
0
Red Magnolia
Reward
?
?
?
1 E
Red Maple
Gifted / 2 FB
113
226
339
0 E
Red Pine
10 FB
75
150
225
0E
Red Rocket Crape
14 FB
75
150
225
0
Ribbon
14 FB
?
?
?
0
Ribbon Candy
8 FB
?
?
?
0 E
Ribbon Flower
Event
75
150
225
0
Rocky Candy
6 FB
?
?
?
0
Rose
6 FB
?
?
?
0 LE
Rowan
Event
75
150
225
0 LE
Royal Crystal
Reward
75
150
225
0
Royal Poinciana
12 FB
?
?
?
1
Ruby Guava
25 FB
113
226
336
0 LE
Sand Dollar
6 FB
?
?
?
0 E
Santa Hat
8 FB
75
150
225
1 E
Sapphire
6 FB
75
150
225
1 E
Scots Pine
Event
75
150
225
1 E
Service
Event
75
150
225
2
Shinko Pear
40 FB
113
226
339
1 E
Silver Bell
8 FB
75
150
225
1 E
Silver Birch
Event
75
150
225
2
Silver Maple
25 FB
113
226
339
1 E
Silver Tinsel
8 FB
75
150
225
1 E
Sitka Spruce
5 FB
75
150
225
1
Singapore Jackfruit
Seedling
75
150
225
1 E
Snow Cone
Market
75
150
225
1 E
Snowflake II
8 FB
75
150
225
1 E
Sour Apple
Event
75
150
225
0 E
Sparkling Palm
12 FB
75
150
225
1
Speckled Alder
15 FB
?
?
?
1
Spiral Crystal
8 FB
75
150
225
1 E
Spring Egg
Event
75
150
225
0 E
Star
14 FB
75
150
225
1
Star Flower
Event
75
150
225
1
Star Ruby Grapefruit
20 FB
113
226
339
2
Starfruit
3 FB
57
114
171
1 E
Starry Night
12 FB
75
150
225
1 E
Stocking
6 FB
75
150
225
0 E
Stone Pine
12 FB
75
150
225
1 E
Striped Maple
6 FB
75
150
225
1
Strawberry
150 C
75
150
225
1 E
Sugar Plum
Event
75
150
225
0 E
Sunflower
14 FB
75
150
225
0 E
Sunrise
14 FB
75
150
225
0 E
Sunset
8 FB
75
150
225
0 E
Sweet Birch
8 FB
75
150
225
1
Tamarind
4 FB
113
226
339
0 E
Teddy Bear Palm
6 FB
75
150
225
0
Tulip Poplar
7 FB
?
?
?
1 E
Twilight Crape
8 FB
75
150
225
1
Ulu
6 FB
?
?
?
2
Umbrella
15 FB
75
150
225
1 E
Valentine Cookie
8 FB
75
150
225
0 E
Vera Wood
10 FB
75
150
225
1
Walnut
Gifted
113
226
339
1
Wax Apple
5 FB
75
150
225
1 E
Wedding
Event
75
150
225
1
White Apple
Gifted
113
226
339
0
White Ash
5000 C
?
?
?
0
White Cedar
15 FB
?
?
?
0
White Pine
30 FB
113
226
339
1 E
White Plum
8 FB
75
150
225
1 E
White Smoke
8 FB
75
150
225
1
White Walnut
Seedling
113
226
339
1 LE
White Willow
5 FB
75
150
225
0
Wild Cashew
Seedling
75
150
225
1 E
Wild Cherry
Event
75
150
225
1 E
Wild Service
10 FB
75
150
225
0 E
Williamsonia
12 FB
75
150
225
0 E
Winter Spruce
15 FB
?
?
?
0
Wych Elm
Seedling
75
150
225
0 E
Yellow Hibiscus
14 FB
75
150
225
1
Yellow Maple
3 FB
113
226
339
0
Yellow Passion Fruit
Seedling
68
136
204
0 E
Yew
Event
75
150
225
The current rumor is that tree crops are going to be added to the primary crafting system soon. If that happens, you can expect that you will start harvest bushels of fruit from your trees in addition to XP and money! I can easily see how a crafting recipe might incorporate tree fruit -- and though this is just rumor at he present time, it is strong enough and likely enough that it makes sense for you to get into tree farming in a big way!
This guide includes a ticklist in the Appendices for using the Five-By Method of Tree Farming -- and I encourage you to begin that process. Even if they do not integrate tree crops into crafting for a year, that gives you a year to complete the Five-By project, giving you a viable infrastructure that includes five trees of every tree type, which means you will have access to the resources you need faster and more reliably than your competition!
The introduction of Co-Op Farming to Farmville was the first of several planned additions to the game that were intended to enhance the ability of gamers to play together in the game, an element that was previously lacking but was thought to be necessary for a game whose primary vehicle is a social networking site. After the crafting buildings were added to the game, the Co-Op Farming system was given an expansion to include Crafting Co-Op jobs that worked in conjunction with the crafting buildings, giving farmers a means to obtain groups of bushels that could be used for crafting.
Co-Op Farming was created around a simple formula -- one farmer would serve as the leader, picking the job and setting it up, and the other farmers would serve as partners, assisting in the completion of the job. Each of these positions had different Achievement paths associated with it (see the chapter on Ribbons), but each would receive the same reward for completing the job.
To participate in Cooperative Farming a player must have reached Level 21, and should have at least the third farm upgrade, as otherwise they will not have sufficient crop space to be able to contribute to a Co-Op job in a meaningful way.
Cooperative jobs are completed against a timer -- each job has three target levels on the timer, Gold, Silver, and Bronze -- and while each level has a reward associated with it in terms of XP, only the top level -- the Gold Medal -- will result in the participants receiving the special item associated with each of the jobs.
There are two categories of Co-Op Job -- the Basic Job and the Crafting Job.
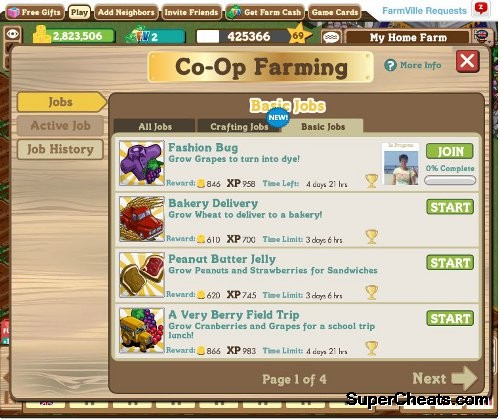
Basic Co-Op Job Farming
-- Basic Co-Op Jobs --
-- A Pack of Pickled Patty Pans (Gold Reward = Mail Truck)
1,500 Pattypan Squash Crops
Gold = 1d 7h / Silver = 2d / Bronze = 3d
-- A Very Berry Field Trip (Gold Reward = School Bus Plow))
1,000 Cranberry / 750 Grape Crops
Gold = 2d / Silver = 3d / Bronze = 4d 21h
-- Baby Bunny Rescue (Gold Reward: Gray Rabbit)
1,350 Carrot Crops
Gold = 23h / Silver = 1d 11h / Bronze = 2d 10h
-- Bakery Delivery (Gold Reward: Pickup Truck Seeder)
1,450 Wheat Crops
Gold = 1d 7h / Silver = 2d / Bronze = 3d 6h
-- Fashion Bug (Gold Reward: Grape Sheep)
1,275 Grape Crops
Gold = 2d / Silver = 3d / Bronze = 4d 21h
-- Frantic for Flowers (Gold Reward: Wedding Gazebo)
1,500 Red Tuplip Crops
Gold = 2d / Silver = 3d / Bronze = 4d 21h
-- Peanut Butter Jelly (Gold Reward: Biplane)
800 Peanut / 1,200 Strawberry Crops
Gold = 1d 7h / Silver = 2d / Bronze = 3d 6h
-- Pumpkin Pie O'Plenty (Gold Reward: Cafe Statue)
1,400 Pumpkin Crops
Gold = 16h / Silver = 1d / Bronze = 1d 13h
-- Rice Paper (Gold Reward: Lantern Tree)
1,200 Rice Crops
Gold = 19h / Silver = 1d 4h / Bronze = 2d
-- Stiring Things Up (Gold Reward: Mini Pagoda)
750 Rice / 500 Pepper / 500 Soybean Crops
Gold = 2d / Silver = 3d / Bronze = 4d
-- Tea Party (Gold Reward: Tea Party Table)
1,000 Green Tea / 250 Sugar Cane Crops
Gold = 19h / Silver = 1d 4h / Bronze = 2d
-- The Hottest Chili in Town (Gold Reward: Joshua Tree)
600 Tomato / 300 Onion / 800 Ghost Chili Crops
Gold = 23h / Silver = 1d 11h / Bronze = 2d 10h
-- Tossin' Tomatoes (Gold Reward: Circus Elephant)
1,300 Tomato Crops
Gold = 16h / Silver = 1d / Bronze = 1d 12h
-- Town Greening (Gold Reward: Farmville Monument)
1,450 Morning Glory Crops
Gold = 16h / Silver = 1d 12h / Bronze = 2d 6h
In addition to the basic jobs above, which are always available, there are special jobs that are added for specific events such as Farmville's Birthday Celebration Event, the Haiti Relief efforts, and a other charity efforts. The special jobs are available only for a limited time, and the rewards for those are often considered a badge of honor among crafters and farmers alike.
-- Crafting Co-Op Jobs --
Crafting Co-Op Farming jobs all have the same reward for Gold Level completion - a set of three bushels for the crafting job you select as your reward, from the jobs available for the specific crafting building that the job is associated with.
The following Crafting Co-Op jobs are available at all times:
-- Bakery Jobs --
The following jobs are available for farmers who own a Bakery. Some jobs are level-restricted.
-- Baked Cucumbers
1,200 Basil / 1,400 Pepper Crops
Gold = 3d 8h / Silver = 5d 18h / Bronze = 10d 12h
-- Carrot Cake
1,000 Carrot / 1,250 Soybean / 800 Cranberry Crops
Gold = 3d 8h / Silver = 5d 18h / Bronze = 10d 12h
-- Ginger Snaps
1,250 Ginger / 1,000 Rice / 1,400 Oat Crops
Gold = 2d 12h / Silver = 4d 7h / Bronze = 7d 20h
-- Mocha-Blackberry Cake
1,400 Coffee / 1,400 Blueberry / 1,200 Rice Crops
Gold = 2d 5h / Silver = 3d 19h / Bronze = 6d 23h
-- Oatmeal Cookies
1,200 Oat / 800 Sugar Cane / 1,400 Wheat Crops
Gold = 1d 15h / Silver = 2d 20 h / Bronze = 5d 5h
-- Pattypan Tart
1,400 Pattypan Squash / 800 Onion / 800 Rice Crops
Gold = 2d 5h / Silver = 3d 19h / Bronze = 6d 23h
-- Peanut Butter Cookies
1,400 Peanut / 1,000 Sugar Cane / 800 Rice Crops
Gold = 2d 5h / Silver = 3d 19h / Bronze = 6d 23h
-- Pizza Bread
800 Tomato / 800 Basil / 1,250 Wheat Crops
Gold = 1d 15h / Silver = 2d 20h / Bronze = 5d 5h
-- Potato Onion Bread
800 Onion / 800 Posole Corn / 800 Wheat Crops
Gold = 1d 15h / Silver = 2d 20h / Bronze = 5d 5h
-- Pumpkin Bread
1,400 Pumpkin / 1,400 Wheat Crops
Gold = 1d 15h / Silver = 2d 20h / Bronze = 5d 5h
-- Raspberry Blondie
1,200 Rice / 800 Raspberry / 1,200 Wheat Crops
Gold = 1d 15h / Silver = 2d 20h / Bronze = 5d 5h
-- Spicy Muffin
1.000 Carrot / 1,400 Pepper / 1,000 Ghost Chili Crops
Gold = 3d 8h / Silver = 5d 18h / Bronze = 10d 12h
-- Strawberry Shortcake
1,500 Strawberry / 1,400 Wheat Crops
Gold = 1d 15h / Silver = 2d 20h / Bronze = 5d 5h
-- Triple Berry Pie
1,000 Blackberry / 1,000 Blueberry / 1,400 Wheat Crops
Gold = 1d 15h / Silver = 2d 20h / Bronze = 5d 5h
-- Vegetable Tart
1,400 Asparagus / 1,400 Pea Crops
Gold = 3d 8h / Silver = 5d 18h / Bronze = 10d 12h
-- Spa Jobs --
The following jobs are available for farmers who own a Spa. Some jobs are level-restricted.
-- Daffodil Lotion
1,000 Strawberry / 1,000 Aloe Vera / 1,400 Lilies Crops
Gold = 3d 8h / Silver = 5d 18h / Bronze = 10d 12h
-- Devotion Perfume
600 Blueberry / 1,000 Lilac / 1,000 Basil Crops
Gold = 1d 9h / Silver = 2d 9h / Bronze = 4d 7h
-- Energizing Lotion
1,400 Red Tulips / 1,000 Aloe Vera / 1,000 Blackberry Crops
Gold = 3d 8h / Silver = 5d 18h / Bronze = 10d 12h
-- Farmer's Frenzy
1,250 Ginger / 1,000 Lilac / 1,000 Purple Poppy Crops
Gold = 2d 12h / Silver = 4d 7h / Bronze = 7d 20h
-- Floral Perfume
1,500 Blueberry / 1,250 Morning Glory Crops
Gold = 1d 15h / Silver = 2d 20h / Bronze = 5d 5h
-- Fresh Breeze Candle
1,000 Lemon Balm / 1,250 Green Tea / 1,250 Ginger Crops
Gold = 2d 12h / Silver = 4d 7h / Bronze = 7d 20h
-- Fresh Sachet
1,000 Pumpkin / 1,000 Cranberry / 1,400 Sunflower Crops
Gold = 3d 8h / Silver = 5d 18h / Bronze = 10d 12h
-- Herbal Lotion
1,400 Aloe Vera / 1,250 Green Tea Crops
Gold = 1d 9h / Silver = 2d 9h / Bronze = 4d 7h
-- Iris Soap
1,000 Iris / 1,200 Aloe Vera / 800 Sunflower Crops
Gold = 3d 8h / Silver = 5d 18h / Bronze = 10d 12h
-- Lily of the Valley
1,400 Lilies / 1,000 Blueberry / 1,000 Morning Glory Crops
Gold = 3d 8h / Silver = 5d 18h / Bronze = 10d 12h
-- Petal Sachet
800 Iris / 800 Sunflower / 800 Pepper Crops
Gold = 3d 8h / Silver = 5d 18h / Bronze = 10d 12h
-- Pick Me Up Sachet
1,400 Coffee / 1,000 Lemon Balm / 1,000 Basil Crops
Gold = 2d 12h / Silver = 4d 7h / Bronze = 7d 20h
-- Relaxation Oil
1,500 Blackberry / 1,400 Morning Glory Crops
Gold = 1d 15h / Silver = 2d 20h / Bronze = 5d 5h
-- Restoring Candle
1,000 Green Tea / 1,000 Ghost Chili / 1,400 Sunflower Crops
Gold = 3d 8h / Silver = 5d 18h / Bronze = 10d 12h
-- Spring Meadow Candle
1,500 Lilac / 1,500 Morning Glory Crops
Gold = 1d 15h / Silver = 2d 20h / Bronze = 5d 5h
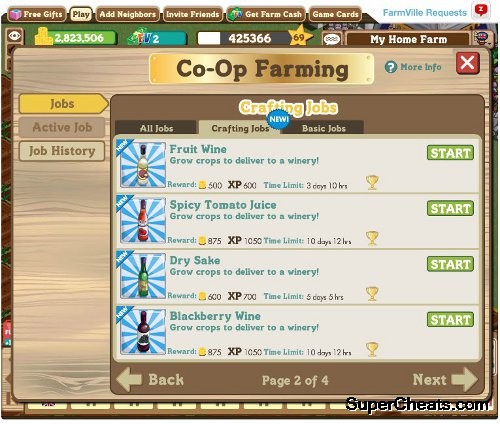
Advanced Co-Op Winery Jobs
-- Winery Jobs --
The following jobs are available for farmers who own a Winery. Some jobs are level-restricted.
-- Blackberry Wine
600 Blackberry / 1,250 Grape / 800 White Grape Crops
Gold = 3d 8h / Silver = 5d 18h / Bronze = 10d 12h
-- Blueberry Wine
800 Blueberry / 800 Blackberry / 1,400 White Grape Crops
Gold =1d 15h / Silver = 2d 20h / Bronze = 5d 5h
-- Cucumber Wine
1,200 Cucumber / 1,000 Acorn Squash / 1,000 Rice Crops
Gold = 3d 8h / Silver = 5d 18h / Bronze = 10d 12h
-- Dry Sake
800 Riuce / 800 Green Tea / 800 Lilac Crops
Gold = 1d 15h / Silver = 2d 20h / Bronze = 5d 5h
-- Fruit Wine
1,400 Raspberry / 500 Sugar Cane / 1,000 Blueberry Crops
Gold = 1d 2h / Silver = 1d 21h / Bronze = 3d 10h
-- Herbal Elixir
1,000 Basil / 1,250 Ginger / 1,000 Green Tea Crops
Gold = 2d 12h / Silver = 4d 7h / Bronze = 7d 20h
-- Melon Juice
1,600 Carrot / 1,400 Strawberry Crops
Gold = 1d 15h / Silver = 2d 20h / Bronze = 5d 5h
-- Pumpkin Vinegar
800 Pumpkin / 1,000 Acorn Squash / 1,000 Rice Crops
Gold = 1d 15h / Silver = 2d 20h / Bronze = 5d 5h
-- Raspberry Wine
1,000 Raspberry / 1,250 Grape / 1,000 Blackberry Crops
Gold = 3d 8h / Silver = 5d 18h / Bronze = 10d 12h
-- Red Table Wine
1,400 Grape / 2,000 White Grape Crops
Gold = 3d 8h / Silver = 5d 18h / Bronze = 10d 12h
-- Rose Petal Water
1,200 Pink Roses / 800 Lavender / 800 Sunflower Crops
Gold = 3d 8h / Silver = 5d 18h / Bronze = 10d 12h
-- Spicy Tomato Juice
800 Tomato / 1,000 Carrot / 1,400 Pepper Crops
Gold = 3d 8h / Silver = 5d 18h / Bronze = 10d 12h
-- Strawberry Cranberry Juice
1,000 Strawberry / 1,000 Raspberry / 1,400 Cranberry Crops
Gold = 1d 9h / Silver = 2d 9h / Bronze = 4d 7h
-- Sweet Sake
1,400 Cranberry / 1,400 Rice Crops
Gold = 1d 15h / Silver = 2d 20h / Bronze = 5d 5h
-- White Sangria
1,400 White Grapes / 500 Sugar Cane / 800 Strawberry Crops
Gold =1d 15 / Silver = 2d 20h / Bronze = 5d 5h
A farmer can only start the jobs for the special crafts building that they own, but they can join and participate in any job started by a friend/neighbor even though they do not own the building associated with that job. The reward that they receive will be for one of the sets they can use.
There are three basic avenues for gaining income and points in the game -- crops, animals, and trees. The process for growing trees is a much longer one, requiring patience, but can also be a very profitable activity in the game.
Most players only discover the benefits and challenges of tree farming late in their game play -- and usually after they are a higher level -- but by learning about it and leveraging it from the start, you give yourself an incredible edge, and shorten the time that it takes to become a higher-level player.
There are three areas that we need to cover with respect to tree farming -- (1) Basic and Advanced Species, (2) Tree Mastery, and (3) The use of Orchards.
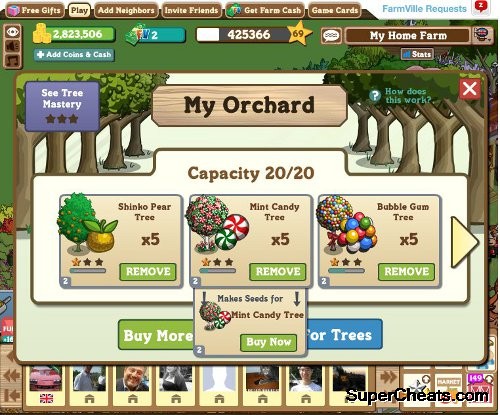
The Five-By Method of Tree Mastery Farming
(1) Basic and Advanced Species
There are usually two levels for each tree type -- Level 1 is the basic tree and for our example we will use the Cherry Tree.
The Cherry Tree is a Level 1 Tree that can be purchased from the Farmville Market for 225 coins, and that is available from the start of the game, to Level 1 Farmers. It has the most common growing time for trees in the game, being harvest-able every two days, and when you harvest it, it rewards you with 5 XP points and 18 coins for each Cherry Tree you harvest. You also obtain 1 Mastery Point each time that you harvest it.
When the Cherry Tree is placed in an Orchard, there is a random chance that harvesting the Orchard will result in obtaining a tree sapling -- but when it does you will receive a sapling for a Rainier Cherry Tree, and not a regular one. The Rainier Cherry Tree is the Level 2 Tree for this species.
Mastery for the Cherry Tree uses the following harvest table:
Level 1: 113 Harvests
Level 2: 226 Harvests
Level 3: 339 Harvests
That means you will need to harvest 678 times to Master the Cherry Tree, at which point you will receive a Mastery Sign and all of the usual bonuses that come with Crop Mastery.
The Rainier Cherry Tree has the same Mastery Requirements as the regular Cherry Tree, and can be harvested every 2 days for 5 XP and 54 coins, making it considerably more profitable to grow, but that is usually the case with Level 2 trees.
-- Basic Tree Farming --
The most basic method for tree farming in the game is to place trees along the edges of the farm and where you have space, usually grouping them tightly to maximize the number that you can place with respect to the space you place them in.
If you are concentrating upon crop mastering and have not increased the size of your farm yet, that makes sense, but your goal during the basic period should be to begin building Orchards, which you accomplish by purchasing the starter Orchard, and then "building" it by adding nails, boards, and bricks, until it is completed.
The game only allows you to have one orchard build in progress at a time, forcing you to complete one before you can purchase the starter for another. An Orchard can hold a total of 20 trees, and you will want to have constructed five Orchards at a minimum prior to beginning the Advanced phase of tree farming.
-- Orchards --
Found in the Market under Buildings and then Storage are the Orchards. There are actually two of them listed -- the first sells for 1,000 Coins, and is the kit that you place and then add Bricks, Boards, and Nails to to build, and when we talk about placing Orchards in the game this is the one we are referring to. The second must be purchased using real world money in the form of 30 Farm Bucks, and we are NOT referring to THAT one when we say buy and place an Orchard!
When you purchase an Orchard from the Market you are put into Placement Mode -- you then place it where you want it to be on your farm. If you have yet to actually free up the space that you wanted to place it on, no worries! You can pick up and move the Orchard any time you want to -- even when it has trees in it!
Once you place the Orchard you are shown its status menu -- and this indicates how much build progress you have in it. Each Orchard comes with one (1) Brick already placed in it, so to complete it you will need 10 Boards, 10 Nails, and 9 Bricks. On the status screen you can ask for more -- which will post a message to your wall telling your neighbors that you need Bricks or Nails or whichever you select.
Most players simply use the Special Delivery Packages that they receive as gifts to generate the building materials that they need -- since that is one of the primary features of that gift -- the game checks to see what it is that you need to complete the various outstanding projects on your farm and then gives you some of each when you turn in the packages. You should be aware though that you should never turn in more packages at any one time than items you need, because any excess ones will become things like Bees for your Beehive, and as you want to use those for building parts it would be a waste to have them turn into something you cannot really use to expand your farm!
Once the Orchard is placed and completed, the fence around it will be raised, and you can then begin placing trees inside. It hold four groups of five trees, for a total of 20, and it fills one line at a time -- so the first five trees you put in will line up in the first line (all the way in back) and so on. This is important to know if you are wanting to group a specific tree type together to make the Orchard look nice.
Using Orchards to organize your trees makes the process of harvesting them much more efficient -- but you should be aware that the special Arborist Helpers that you can get as gifts or rewards that you can use to harvest all of the trees that are ready to harvest on your farm do NOT harvest trees that are placed in an Orchard. You will have to do that yourself -- but you do harvest all 20 trees with one click.
-- Advanced Orchard Usage --
There are two systems that are popular with higher-level farmers with respect to Orchards: the 5-Tree Plan and the 5-Group Plan. The first is meant to decrease the time that it takes to passively master a large number of different tree types, and the second is used for retaining and mastering large numbers of tree types. We will look at each one separately.
Method One: The Five Tree Plan
Using this plan, you obtain (either from gifts, purchase, or growing seedlings) five of one species of tree, and then place all five in an Orchard. Generally speaking these are not trees that you are interested in farming saplings/seedlings from, they are just trees that you are parking to master in as efficient a manner as possible without the great expense of active mastery -- which we discuss in the next part of this section.
The Five Tree Plan allows you to have four species of tree in the mastery stage, and every two days you can harvest them, adding 5 Mastery Points to each. As you can see, the path to mastery is five times faster than if you just did one tree, which is what a lot of low-level farmers do. In addition to mastering the trees quicker, your farm looks nicer and more organized, which is something of a bonus.
Method Two: The Five Group Plan
This method is most often used by farmers who plan to retain breeding trees for every species of tree in the game. There are so many that keeping five of each -- which equals four species per Orchard -- is still a bit much. But retaining four of each allows you to hold five species per Orchard and still have them look nice on your farm. When using this method, you pick the five species you are going to place in the Orchard, and then place one of each so that they line up horizontally instead of vertically.
With this method, once you have placed them in the Orchard that is where they will stay, as you do not plan on breeding them, and you will not need to move them around outside of the Orchard. This method is most often used for the tree species that return the best profits per harvest, with the higher paying trees grouped together.
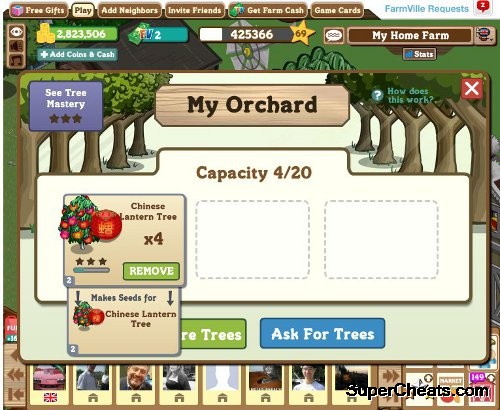
Farming for Specific Seedlings
-- Advanced Tree Farming --
Once you have your five (or more) Orchards built and placed, you will want to approach the process of Tree Mastery in a similar way to that of Crop Mastery -- with focus and intent. Having built your Orchards, place them together in a line -- usually along the back side near one corner or the other -- and then plant them all with the same tree crop -- in our example we use Cherry Trees.
That will give you 100 Cherry Trees being grown, which will quickly begin the process for acquiring the Level 2 Rainier Cherry Trees as you harvest your Orchards. Each time you obtain a Seedling you should plant and water it to grow it into the full tree, and then set the tree aside in a Level 2 Orchard (you will want to build five more Orchards for your Level 2 trees).
To sum this up, when you have the Advanced Tree Farm in full gear it will consist of a total of ten Orchards all lined up with each other, with the five on the right planted with Level 1 trees, and the five on the left empty, so that you can plant the Level 2 trees that you breed from the Level 1 Orchards. Chances are high that you will have fully mastered the Level 1 version prior to obtaining 100 Level 2 trees, but not always.
The objective here is to Master both the Level 1 and the Level 2 trees before you move on to the next tree species, so you will leave the Level 1 trees in place and producing fruit and seedlings for the entire duration of the grow.
Once you have your 100 Level 2 plants, you continue the grow until you have Mastered the Level 2 version, at which point you take one of each type and plant it somewhere on your farm as the seeder in case you want to grow more at a later time, and then you empty out the Orchards, and sell the trees. Once you have sold off the 99 Level 1 and Level 2 trees, you pick your next species and begin the process.
The trees you can purchase with coins make this an easy process, but the types you cannot require a little more preparation -- starting with a few Orchards set aside from the Level 1 and Level 2 sets, that you use for breeding those while you are in the process of completing Mastery of your current species.
Tree Farming is one of the most profitable side-efforts you can pursue in Farmville, and nicely compliments the main game play by providing you with colorful decorative objects that you can also profit from, making your farm unique and interesting.
Raising animals on your farm can be a much more complicated activity than all of the others combined, both because there are buildings that are involved in the process, and because often it is the younger animals that are worth more than the older when it comes time to harvest them -- but as that is not always the case, it takes careful planning to decide which you will keep, and which you will raise to adult form. And that is just one consideration -- there are also the unique and rare animals that you will want to collect.
-- Unique and Rare Farm Animals --
Part of the fun in Farmville centers around the special and holiday events that take place, during which in addition to the special activities there is the opportunity to obtain rare or unique animals that are only available for that event. It is customary for players to put their rare animals on display, both as symbols of their collecting, and to show the longevity of their play.
Most of these animals have interesting appearances so you will likely find yourself wanting to collect them for that reason alone. Just remember that with the baby forms of these you do not want to place them in the Nursery, because baby animals DO NOT mature into the adult form of that species!
That should be repeated to be sure you understand -- we will use an imaginary example to illustrate this point... Lets say that there was an event, and one of the animals was a Superstar Horse. You obtained the Superstar Horse, and you can place it in your Stables and it will breed the Superstar Pony -- which is a unique looking pony and a nice addition to your collection, but it is not a path to additional Superstar Horses.
The reason for that is that if you place the Superstar Pony in the Nursery Barn, it will not mature into a Superstar Horse, but into a Black Horse. The same is true for cows -- a Green Calf will only mature into a regular Cow.
There are exceptions to this rule -- miniature cream foals will mature in to cream horses, but that is the only exception. All other foals will mature into black horses. So why would you want to breed them at all? To make the baby versions -- which you can share with your neighbors via your feed is a good reason, but the real reason you would want to breed is money.
When you harvest the Superstar Horse it pays you 50 coins each time it is harvested. But the Superstar Pony pays 500 coins. That being the case, you would want to have a lot of those around to make extra coin, right?

Breeding Cows Requires a Bull
-- Breeding Animals --
The special buildings that you can build on your farm are the path towards animal breeding. These consist of:
(1) The Stables (Storing and Breeding Horses)
(2) The Dairy Farm (Storing and Breeding Cows)
(3) The Pig Pen (Storing and Breeding Pigs)
(4) The Sheep Pen (Storing and Breeding Sheep)
(5) The Nursery Barn (Raising baby animals to adult)
In addition to these, there are two other buildings that you can build or place on your farm that are animal related -- the Chicken Coup and the Feeding Trough -- but both of these are not part of the breeding system. The Chicken Coup is simply a place to store your chickens that allows you to collect or harvest from them in one go, and the Feeding Trough is a building that, when feed is added to it, can attract special animals to your farm that you can then capture.
All of these buildings except for the Feeding Trough can be upgraded using building supplies to increas the number of the designated animal that they can hold. All of them have some sort of special mechanism in order to actually breed. Each building is discussed in detail below.
-- The Animal Buildings --
There are a number of buildings that are related to animals in the game, from storage and display to breeding. Each is listed and explained here in some detail.
(1) The Stables (Storing and Breeding Horses)
In its first form -- which is available after you place it and finish constructing it, The Stables will hold a total of 20 horses plus one Wandering Stallion -- which is the special event that allows you to breed your horses.
Wandering Stallion: Randomly while you are playing the game, you can receive a message that tells you that a Wandering Stallion has been found on your farm. If you click on it a message is posted to your feed, and one of your neighbors can then adopt it for a day and the Stallion will take up residence in their Stable, and there is a random chance that it will breed with one of the horses inside, creating a baby.
The baby horse is always the type of the mother, and appears in your Gift Box. You can then place it either on your farm or, if you want to raise it to adult, in your Nursery Barn. Remember though that any foal save for the cream foal will become a Black Horse, and not the type that it was as a baby.
Before you place your baby horse in the Nursery Barn, check the Appendix to see what its harvest income amount is -- you may want to keep the baby if it pays more than a Black Horse!
One of the cool things about breeding horses in your stables is that every time a baby is created, you have the option of sharing it via your feed, which will allow your neighbors to collect one, and if it is a type that they do not already have, they may appreciate that very much.
Breeding is not only reliant upon the Wandering Stallion -- if you obtain a Stallion of any type through one of the games or special events, you can place that in your Stables and it will have the same the same random chance to breed as the Wandering Stallion, but of course it is there for as long as you want it to be!
Placing a Stallion in your Stable also halts any further Wandering Stallion visits to your farm.
The Stable scan be upgraded to hold a macimum of 40 horses, through four upgrade efforts, each of which requires specific materials -- Boards, Bricks, Nails, Harnesses, and Horse Shoes. These can all be obtained from gifting by your neighbors or through Special Delivery Packages.
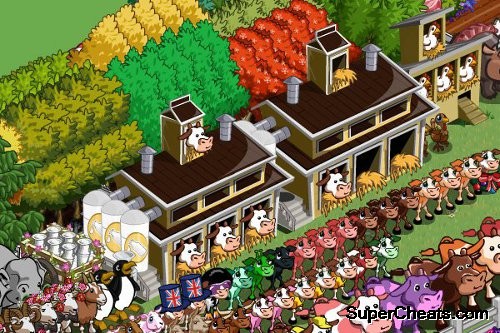
The Diary Farm for Storage and Breeding
(2) The Dairy Farm (Storing and Breeding Cows)
Like The Stables, your Dairy Farm starts with a capacity of 20 cows -- but unlike the Stables it does not have to be built -- when it is placed it is ready to begin use. It can be expanded and features the following capacities:
Stage 1 -- Dairy Farm -- Capacity = 20 Cows 1 Bull.
Stage 2 -- Big Dairy Farm -- Capacity = 30 Cows 1 Bull
Stage 3 -- Huge Dairy Farm -- Capacity = 40 Cows 1 Bull
Obtaining a Bull to place in your Dairy Farm is necessary if you wish to breed babies. A Calf is always the same type as the Cow that is its mother.
As with horses, some baby cows pay a higher harvest value than a regular cow, and as with the Stables, any calf you place in the Nursery Barn and raise to adult form will appear as a regular cow, and NOT as the special type that it was as a baby.
(3) The Pig Pen (Storing and Breeding Pigs)
In addition to storing your pigs, the Pig Pen is also the place you go to obtain Truffels, and through the use of Potions, breed your pigs as well, but breeding does require a boar. The Pig Breeding program is similar to the Sheep Breeding program -- both of which were added to the game in 2011, and both of which allow you to breed specially colored animals.
Like the other buildings the Pig Pen, once placed, can be expanded, with the same basic numbers in capacity.
(4) The Sheep Pen (Storing and Breeding Sheep)
The Sheep Pen is unique to the new British Farm Expansion, and so far is only available there. Like the other buildings its capacity is expandable, and similar to the Pig Pen it uses Potions for breeding.
While sheep have been around in the game for a very long time, the ability to breed them -- and the Sheep pen building -- are all very new. Using potions and different lines of breeding allows the gamer to create interesting types of sheep -- and the process of breeding and bloodlines is to be an integral part to the process, which is why Farmville will be adding a Family Tree tracking page to the menu for this building.
Breeding sheep requires a Ram and a Ewe -- the Potions simply shorten the time it takes to complete the breeding process and produce a lamb. An unusual aspect to Sheep Breeding is the ability to give the resulting lambs as a gift to a friend, or raise it to adult form yourself.
(5) The Nursery Barn (Raising baby animals to adult)
This is the building that is used to mature baby animals -- you place them inside, and they age up one at a time. Like most of the other buildings it places as a kit purchased from the Market -- you complete building it with Boards, Bricks and Nails, and its initial capacity is 20 animals. It can be upgraded to hold 40.
When a baby matures, the adult for is placed in your Gift Box, while the baby disappears from the building.
(6) The Chicken Coop
A storage-only building, while you cannot breed baby chickens using the Chicken Coop, it is a necessary component in the creation of eggs, which are randomly harvested from it when its timer completes. In addition to harvesting normal and special eggs from your own Chicken Coup, you can feed the chickens in the Coups of your neighbors, and obtain eggs that way too.
Chicken eggs act similar to special gift boxes -- unique items that can only be obtained form eggs are found in them when you open the egg. Each egg type has a specific set of items associated with it, and the items list changes every so often, with some items being retired from the game. Actively collecting eggs is therefore a good idea, at least until you have obtained any special items or buildings that can be awarded through them.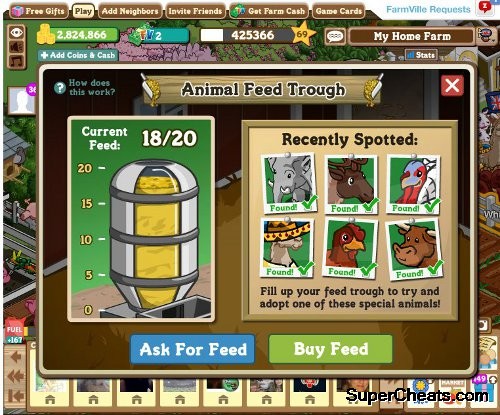
The Feeding Trough Lures in Mystery Animals
(7) The Feeding Trough
This is a special building that you purchase from the Market and place on your farm. It does not require building parts, and it is not expandable. Once you have placed it, you can add Animal Feed -- which you acquire by visiting the farms of your neighbors and feeding their animals via their Feeding Trough.
Once you have placed enough feed into the Trough -- it requires 20 in total to fill it -- there is a chance for a random special animal to wander on to your farm and be caught in it. When an animal wanders in, the system sends you an email notifying you of the event -- this is a time-limited event as well, so if you do not respond within a certain number of hours, the animal will leave, having eaten two or three servings of feed in your absence, and you do not gain anything from the event.
When an animal is present, the window at the top of the Trough is lit green, and when you click on it, if you did so in a timely way, you could capture the animal. You are given the option of sharing it with your neighbors via a post to your feed as well.
The Feeding Trough is one of the only ways to obtain certain rare animals -- like Elephants and White Turkey -- but the types of animals that appear changes every so often, so it is a good idea to read the player boards on the main Farmville site to learn when this happens.
(8) The Duck Pond
At the present time you cannot breed ducks -- though word is that this is planned to be added to the game at some future date. The Duck Ponds are actually a relatively new feature in the game having been added in early 2011, and like the other buildings, they are expandable.
Their unique function is the ability to select a number of ducks to be on display in the pond -- thought they can hold many more ducks than they can display, the addition of the ponds make having ducks in the game a much less cluttered process.
(9) The Beehive
Purchased from the Market, the Beehive is a kit-building, meaning that once you place it, you must add materials to actually build it before it can be used. In addition to the standard Boards, Bricks, and Nails, the Beehive requires Smokers and Beeswax, as well as a Queen Bee and Worker Bees.
The Queen Bee is obtained through an event in which a neighbor finds one while harvesting crops and posts that to their feed -- from which you obtain it by claiming it. Bees can be purchased or obtained from Special Delivery Packages -- and as you add them once you reach specific numbers the graphical representation of your hive will change to show that you are expanding it.
At the present time the only thing that you acquire from harvesting the Beehive is coin and, randomly, bags of fertilizer, but those two are not the primary motivation for having and increasing the size of your Beehive.
The reason that you want to have a Beehive and expand it as much as you can is because having it turns on the random chance of pollination during harvesting. If you crop gets pollinated while you are harvesting, you get special pollinated seeds in the Market that you can plant, which will then provide a greater chance for Bushels!
-- Basic Ranching --
The first thing that you should grasp is that you do not have to have animals on your farm. You can choose not to! Most farmers do have them, and chances are you will as well, because they can be a decent source of income.
In Farmville you do not raise animals for slaughter -- instead you harvest some sort of resource from them. For sheep that would be wool, obviously. For ducks, feathers, and for cows, milk. Chickens give eggs, and many animals do not appear to give any resource at all, but can still be harvested for coin.
At its very basic level, your ranching activities will consist of animals placed on your farm. Whether you place them in groups or they are scattered around makes no impact on the coin you gain from them, or their growth pattern.
You do not have to actively seek out animals for your farm -- you will end up with them as a natural course of playing the game, as many of the special and holiday events include them. Chances are good that you will be gifted some by friends, and of course you can get a practically unlimited supply of baby and adult animals simply by reading your friends feeds and grabbing them from there!
Starting the process by collecting free animals is the best way to do it -- you will probably be surprised though at how quickly you build a large collection of them, which will naturally lead you to the advanced side of ranching!
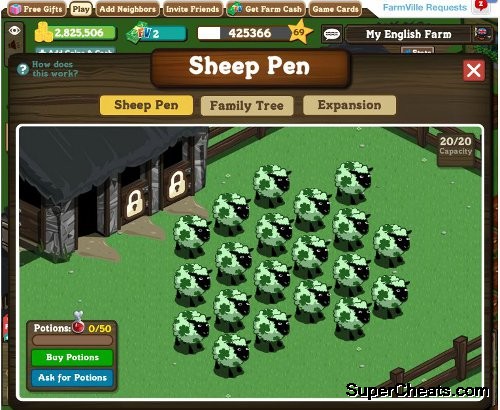
The Sheep Pen is for Advanced Breeding
-- Advanced Ranching --
The core to this side of the process are the buildings. At a very minimum you are going to want at least one of each of the following:
(1) Chicken Coop
(2) Pig Pen
(3) Sheep Pen
(4) Stables
(5) Dairy Farm
(6) Nursery Barn
Those six buildings will take you considerable time and effort to buy and build, and then you will want to expand them, which will take more time, effort, and resources, but the pay-off is significant, and once you have that infrastructure in place, your ranching income can easily equal a third or more of the passive income that you earn on your farm!
Breeding is not part of the vocation, it is usually a natural byproduct of the act of keeping the animals in the buildings, and though some decision making will be involved with breeding sheep and pigs, horses and cows will take care of themselves!
While many animals can be bred, at the time that this guide was written (Summer 2011) you cannot breed Elephants, Goats, Dragons, Unicorns, Ducks, Turkeys, Seagulls, Cats, Dogs, or Seagulls. but all of those exist in the game.
Placing buildings on your farm is many things for most gamers -- it is the first way that you make your farm unique -- it is the first step towards increasing profits -- it is the most efficient way to retain large numbers of cows, horses, pigs, and sheep -- and it is the first step to breeding your own custom animals! Buildings allow you to store animals and stockpile items -- they represent decoration and function -- and they can be an excellent source of XP in the alchemy of exchanging Coins for Experience.
This part of the guide covers the buildings in all their many functions!
The game features a variety of building types, each serving specific functions in the game, as well as buildings that serve only a decorative function, and collectively contribute to making each farm the unique presence that it is. Understanding the function of the buildings will help you in deciding which to use, and how to best use them.
-- Farm Storage Buildings --
One of the most appreciated expansions that has been added to the game so far is the Storage System -- and you will be very thankful for that the more you play the game!
Back when the game first started -- and for the longest time -- the only storage you could obtain was from buildings, and the number of items that you could store was extremely limited. Players would build several barns and sheds in order to obtain decent storage numbers, but those were measured by the dozens not hundreds.
It was not until the Root Cellar was added to the game that massive storage was possible, and today with a Root Cellar in addition to the standard buildings, once you have expanded their storage, you literally can store hundreds of items, which makes all of the holiday items and special event items easier to deal with.
The following buildings are connected to the Storage System:
(1) The Barn-type Buildings
There are actually several types of barn in the game, and each has a different storage capacity. The barns that you purchase using Farm Bucks come with slightly more storage than those purchased with coin -- though they can all be expanded, the difference is in how they are expanded.
Rather than use the standard building materials, when you expand your Barn - just like when you expand the Chicken Coop or the Dairy Farm -- you do so through a special event in the game called a Barn Raising, in which you post an event notice to your feed, and must encourage your neighbors to assist you.
That happens when they click on the feed notice to help you. Once enough have helped, your Barn Raising is a success. If you fail to obtain all of the help you need, the Barn Raising fails, and you have to start over.
There are different barns that you can obtain in the game, and they have different storage amounts based upon the level that they are upgraded to. There are presently three levels in total that can be reached, though this may change in the future -- or not...
The following lists present the barns and sheds you can place on your farm, with the levels noted and, where appropriate, the cost of the barn on the Marketplace (MP = Market Price). Note that not all of the barns can be purchased at the present time.
Adobe Barn         L1=22 items    L2=27 items    L3=34 items
Black Barn         L1=20 items    L2=25 items    L3=32 items    MP=27 Bucks
Blue Barn          L1=20 items    L2=25 items    L3=32 items    MP=27 Bucks
Cowprint Barn      L1=20 items    L2=25 items    L3=32 items    MP=32 Bucks
Groovy Barn        L1=20 items    L2=25 items    L3=32 items    MP=27 Bucks
Japanese Barn      L1=20 items    L2=25 items    L3=30 items
Modern Barn        L1=22 items    L2=27 items    L3-34 items
Pink Barn          L1=20 items    L2=25 items    L3=32 items    MP=27 Bucks
Red Barn           L1=6 items     L2=11 items    L3=18 items    MP=40,000 Coins
Shamrock Barn      L1=22 items    L2=27 items    L3=34 items
Swiss Barn         L1=22 items    L2=27 items    L3=34 items
Tuscan Barn        L1=22 items    L2=27 items    L3=34 items
Weathered Barn     L1=20 items    L2=25 items    L3=32 items    MP=27 Bucks
White Barn         L1=20 items    L2=25 items    L3=32 items    MP=27 Bucks
(2) The Sheds
Sheds are a smaller form of storage but are not exclusively for item storage -- the
Adobe Shed            L1=15 items    L2=20 items    L3=27 items
Cowprint Shed         L1=15 items    L2=20 items    L3=27 items    MP=28 Bucks
Deluxe Tool Shed      L1=15 items    L2=20 items    L3=27 items
Green Tool Shed       L1=15 items    L2=20 items    L3=27 items
Modern Tool Shed      L1=15 items    L2=20 items    L3=27 items
Pink Tool Shed        L1=15 items    L2=20 items    L3=27 items    MP=22 Bucks
Shamrock Shed         L1=15 items    L2=20 items    L3=27 items
Swiss Tool Shed       L1=15 items    L2=20 items    L3=27 items
Tool Shed             L1=2 items     L2=7 items     L3=14 items    MP=14,000 Coins
Tuscan Tool Shed      L1=15 items    L2=20 items    L3=27 items
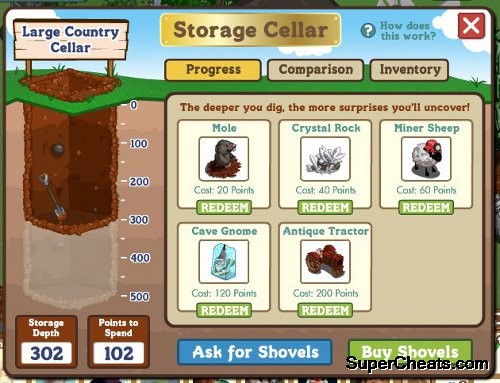
The Multi-Purpose Storage Cellar
(3) The Storage Cellar
Added to the game in August of 2010, the Storage Cellar is purchased from the Market for 1 Coin, and added an amazing and large capacity of item storage to the game -- but at a cost.
The Storage Cellar is a unique storage building in that in order to actually have storage, you have to "dig" the cellar, which means applying shovels you get in the game either buy purchasing them, receiving them as gifts, or obtaining them from the Special Delivery Packages or feeds.
The Cellar stores items in the same way that the other storage buildings do, but unlike the other buildings, which require a Barn Raising to increase the number of items they can store, the Storage Cellar's capacity is increased by collecting and applying shovels -- which not only expand the number of items that you can store equal to the number of shovels used to dig the cellar, but also translate into points that can be used to purchase special items for the game, making it a dual-purpose object in the game!
When your cellar is fully expanded it will hold up to 500 items -- a massive amount considering that in the past storing even 100 items required a massive amount of work. Expanding your storage via the cellar allows you to remove some of the other storage buildings from your farm, freeing up space for other buildings, which makes its tiny footprint doubly useful.
In addition to storage, the following special items can be obtained by spending the points you are awarded for each shovel applied to the cellar:
20 Shovels = Mole Item (a mole hole in which a Mole will appear in when clicked)
40 Shovels = Crystal Rock (a decorative object)
60 Shovels = Miner Sheep (s special sheep to add to your sheep collection)
120 Shovels = Cave Gnome (a unique gnome to add to your gnome collection)
200 Shovels = Antique Tractor (a vintage tractor)
Note that like the other farm machinery the Antique Tractor can have its capacity of crop plots expanded through the use of parts and the Garage.
(4) The Garage
A storage building that is specifically created for storing the many vehicles that you can collect as you play the game, the Garage is a dual-purpose building in that in addition to storing up to 20 vehicles*, it also serves as the mechanism for expanding the number of crop plots (squares) that your farm machinery can process.
In order to expand the capabilities of the farm machinery, the player must have a Garage, must be at least a Level 26 farmer, and must have a supply of Vehicle Parts with which to complete the upgrades.
The garage is a kit-building in the game -- the kit is purchased from the Market, and then must be completed using the standard building resources. Once the Garage is built, up to 20 vehicles can be stored in it, which allows you another avenue to de-clutter your farm, as the vehicles stored in the Garage can be accessed using the tool menu from the main interface or through clicking on the Garage itself.
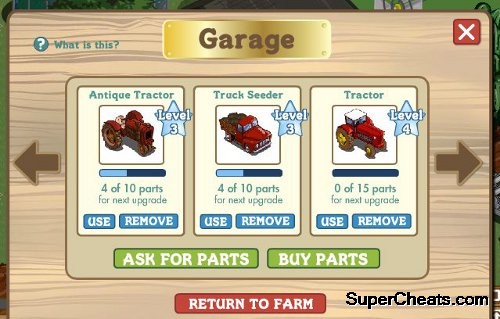
Upgrading Your Vehicles Starts in the Garage
-- Vehicle Upgrade Levels --
Each farm vehicle (as opposed to decorative vehicle) has five levels of upgrade, which increase the effectiveness of the machine for doing its intended task. These are:
Level 1: 2x2 Plots (the base level of each machine)
Level 2: 3x2 Plots (Requires 2 Vehicle Parts to upgrade to this level)
Level 3: 3x3 Plots (Requires 5 Vehicle Parts to upgrade to this level)
Level 4: 4x3 Plots (Requires 10 Vehicle Parts to upgrade to this level)
Level 5: 4x4 Plots (Requires 15 Vehicle Parts to upgrade to this level)
* Note that airplanes cannot be stored in the Garage.
(1) Bakery
(2) Craftshop
(3) Garden Shed
(4) Greenhouse
(5) Spa
(6) Winery
-- Introduction --
The basic idea behind the crafts initiative in Farmville is to create a way to make use of the crops that a farmer grows -- and the system that they created in the game is nothing short of brilliant mostly because of the choke points that are built into it!
These choke points are the bushels that you need to create the craft goods. Under ordinary circumstances you would approach a supply-side problem by seeking a means to create a steady supply of the resource that you need -- but in the case of bushels, you are only permitted to store a maximum of 100 bushels in your Stall at any one time. That may sound like a lot, but it is not when you consider that the variety of crops required for the different recipes can and often does force you into a position of having to throw away some very useful bushels so that you can build the inventory of the type you need for your current project.
To address this limitation, the game includes the ability to acquire bushels from the Farm Stalls of your neighbors -- up to three bushels every day, from each neighbor. By keeping track of the current crop scheme your mates are using so that you can take advantage of that. If, for example, you own a Winery and your mates have Grapes planted, you could plant White Grapes and, when you each harvest, leverage the available bushels to make the Red Table Wine recipe.
Crafting in the game provides you with many rewards, from the Mastery Signs that show the level of progress you have made in the game, to income from selling craft items to your neighbors, and the items you keep from your crafting that you can convert directly into fuel for your farm machinery, which in turn goes back into the process of growing the crops that you use to craft!
When you level a recipe to the first of the three Mastery Levels, you receive a sign with one star on it. This is good, but a sign with two stars is better, and a sign with three stars? Well, that certainly is better, but a sign with all five stars now, that shows that you have fully mastered that particular recipe! Yes, five stars is what you want to shoot for -- but it is along and complex road to that level of mastery, so be patient, and plan well!
If you are contemplating obtaining a second Crafts Building it is probably a good idea for you to complete mastery of all of the recipes in your existing building before you do that -- just a bit of free advice...
The following Crafts Buildings are currently active in the game:
(1) Bakery
One of the three Crafting Buildings that were added to the game in July 2010 as part of the new crafts program, these buildings allowed gamers to make use of the bushels that they harvest from their own crops as well as those they acquire form the Farm Stalls of their neighbors.
At the time of their release the buildings were offered to small groups of players each day, eventually rolling out to the entire user base. If you started playing the game after the release of these buildings you can still acquire them -- one of the buildings can be purchased from the Market for 1,000 coins, after which the other two have their price changed to Bucks.
Players who have already chosen one of the buildings types but later decide that they want one or both of the others can purchase them from the Market for 80 Bucks each -- a bit expensive, but if you want the ability to complete the recipes and obtain the Mastery Signs for the other crafts, that is the only way to get them.
The initial building can be upgraded four times, by spending coin after you have completed the leveling of the required number of recipes for that building, with each increase in building level (measured in stars) adding visual elements to the building as well as increasing the capacity inside for the number of recipes that can be made at any one time, and the complexity of the different recipes you unlock.
Using the Bakery and select bushels, players can complete the three levels of mastery for baked goods like Spicy Muffins or Strawberry Shortcake. and the like, obtaining a Mastery Sign for each. Occasionally special recipes are added to the game -- like Harvest Casserole for the Bakery -- that are only available for a limited time, but that can be fully mastered (all three mastery stars) in just 20 levels, making it much easier to obtain full mastery for these special recipes.
-- Building Stats --
1-Star: Purchased for 1,000 Coins from the Market for the first crafting building and 80 Bucks for additional buildings.
2 Star: Cost to upgrade is 50,000 Coins and 6 Leveled Recipes --or-- 15 Farm Bucks.
3 Star: Cost to upgrade is 100,000 Coins and 18 Leveled Recipes --or-- 25 Farm Bucks.
4 Star: Cost to upgrade is 400,000 Coins and 27 Leveled Recipes --or-- 40 Farm Bucks.
5 Star: Cost to upgrade is 1-Million Coins and 36 Leveled Recipes --or-- 60 Farm Bucks.
-- Recipes --
The recipes you have access to in your Bakery are based upon the level of your Bakery, so the higher you level it, the more recipes you have and the more that you can have in the process of creation at any time. The following are a complete list of the regular recipes that are always available for crafting:
-- 1-Star Bakery --
-- Pumpkin Bread: x4 Pumpkin x4 Wheat
-- Spicy Muffins: x3 Carrots x3 Ghost Chili x1 Peppers
-- Strawberry Shortcake: x4 Strawberries x4 Wheat
-- 2-Star Bakery --
-- Pattypan Tart: x2 Onion x3 Pattypan Squash x3 Rice
-- Peanut Butter Cookies: x2 Peanuts x3 Rice x3 Sugar Cane
-- Triple Berry Pie: x2 Black Berries x3 Blueberries x3 Raspberries
-- 3-Star Bakery --
-- Mocha Blackberry Cake: x3 Blackberries x3 Coffee x2 Rice
-- Raspberry Blondie: x3 Raspberries x3 Rice x2 Wheat
-- Vegetable Tart: x2 Asparagus x1 Broccoli x1 Peas
-- 4-Star Bakery --
-- Baked Cucumber: x4 Basil x1 Cucumber x1 Peppers
-- Oatmeal Cookies: x4 Oats x2 Sugar Cane x2 Wheat
-- Pizza Bread: x2 Basil x2 Tomatoes x4 Wheat
-- 5-Star Bakery --
-- Carrot Cake: x2 Carrots x2 Cranberries x1 Red Wheat x1 Soybeans
-- Ginger Snaps: x2 Ginger x2 Oats x2 Rice x2 Sugar Cane
-- Potato and Onion Bread: x2 Onion x1 Posole Corn x1 Potatoes x2 Wheat
(2) Craftshop
One of the newest buildings in the game, the Craftshop
A multi-level building that requires special resrouces to build and improve, players must obtain the 10 Hammers, 10 Concretes and 10 Spools of Twine for the first level from their neighbors either as gifts or from your neighbors feeds They can also be purchase for 1 Farm Cash (Buck) each from the Market, though that is an expensive proposition.
After you place the building a new quest is added to the quest icons on the left side of your game screen -- a quest that once completed, rewards the player with 100XP, 2,500 Farm Coins, 2 Hammers, 2 Concretes and 2 Spools of Thread! To complete the quest you need to fertilize 25 neighbor crops.
The second stage of this quest requires you to obtain 6 cans of elbow grease from your neighbors and harvest 100 Morning Glory Flower crops. Competing this stage rewards you with 250 XP, 5,000 Coins, and a Milk Jub Cart that was constructed in a Craftshop!
The third stage of the quest requires you to complete the building of your Craftshop by acquiring the resources that are necessary, and to harvest 100 Wheat crops. The reward for this part of the quest is 500 XP, 5 Farmville Bucks, and 7,500 Coins!
Completing the building gives you a nice Craftshop, but as of press time the actual function it serves has not been released, so we do not know yet what we will be able to do with it!
(3) Garden Shed
At the present time there is no inclusion of the Flower Bunches that are collected in the Garden Shed in the existing crafting system, but hints made by Farmville Gnomes suggest that integration of these is planned for a future crafting item or items.
This Garden Shed is purchased from the Market for either 30,000 Coins or 30 Bucks -- .but to purchase it you must have a minimum of 10 neighbors to complete the purcahse with Coins, as any less and you must use Bucks. Initially the Garden Shed was a bonus item that was offered to only some farmers, but it is now a permanent item in the Market inventory, and is available to any farmer who wants it.
The primary function of the Garden Shed is to provide a place for you to store flowers in the form of the Perfect Bunch that can be randomly acquired during the harvest phase of growing Flower crops. You must have a Garden Shed in order to store perfect bunches -- if you do not have one, they are not retained and disappear.
The flowers in your shed can either be used on your farm or posted to your feed to be claimed by your neighbors at present -- and they can be used as a decoration on your farm, but be aware that after a certain number of days (usually 12) they will wither.
When the Garden Shed was originally released it had a storage capacity of just 30 bunches, but this was increased to 100 in October of 2010, in preparation for its use as part of the upcoming crafting system, but for whatever reason the perfect bunches have yet to be included in the recipes.
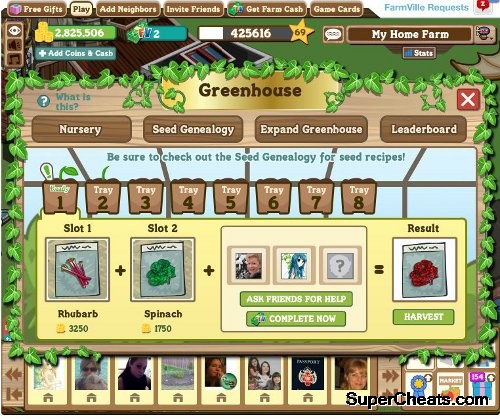
Ideally Suited for Creating Hybrid Seeds
(4) Greenhouse
The Greenhouse is one of the newest buildings in the crafting system to be added to the game that has a direct impact upon farming -- and while at present the output from the new building and resource has not been added to the crafting system, it is planned for addition in the future.
The Greenhouse is a constructable building, introduced in February 2011, and like most of the kit-type buildings the basic frame comes with one brick already applied. Created to allow farmers to create hybrid seeds that grow hybrid crops, with its capabilities being level-based, which is a familiar theme in the game.
There are four levels for your Greenhouse -- Level 1 is the kit level, which does not allow you to actually use the Greenhouse until you add the building resources and take it to Level 2, which makes the building fully functional, but only gives you 1 single tray in which to create your seeds. Level 3 provides you with four trays in which to combine seeds, and Level 4 -- which is the maximum level -- allows you a total of 8 trays in which to combine seeds!
Note that you must be a Level 5 Farmer in order to purchase the Greenhouse Kit -- the Market will not allow you to purchase it if you are below that level.
The building process is:
Level 1: Purchase Kit for 5 Coin from the Market and place it.
Level 2: Add 4 Bricks 4 Boards 4 Nails
Level 2: Add 15 Bricks 15 Boards 15 Nails
Level 2: Add 20 Bricks 20 Boards 20 Nails
Once you have completed building your Greenhouse, there are specific seed combinations that you can create. Until you fully master the hybrid crop, the only source for seeds for it is your Greenhouse, where you have to combine seeds in order to create them for planting.
When you combine two regular seeds, after the required time period (3 days without help, a day if you get three of your neighbors to help you) you harvest 50 new hybrid seeds from each tray. If you notice that one of your neighbors have harvested a hybrid seed in their feed, you can claim some seeds form the feed posting, which gets you 20 of that seed.
Once you have mastered a hybrid crop, you will be able to purchase it in the market without needing to produce further seeds in the Greenhouse.
-- Hybrid Crop Seeds Available in your Greenhouse --
At the present time there are a total of 10 hybrid crop seeds that you can obtain. Those are:
(01) Double Grain = Wheat Rice
(02) Fire Pepper = Peppers Jalapenos
(03) Lilac Daffy = Lilac Daffodils
(04) Long Onion = Leeks Onions
(05) Purple Tomato = Blueberries Tomatoes
(06) Red Spinach = Spinach Rhubarb
(07) Squmpkin = Pumpkins Squash
(08) Straspberry = Strawberries Raspberries
(09) Sun Poppy = Golden Poppies Sunflower
(10) Whiskey Peat = Rye Corn
Nobody knows how the hybrid plants will factor into the crafting system, but there is speculation that they will be included in both the special crafting recipes and as part of the new Craftshops in a later stage.
(5) Spa
One of the three Crafting Buildings that were added to the game in July 2010 as part of the new crafts program, these buildings allowed gamers to make use of the bushels that they harvest from their own crops as well as those they acquire form the Farm Stalls of their neighbors.
At the time of their release the buildings were offered to small groups of players each day, eventually rolling out to the entire user base. If you started playing the game after the release of these buildings you can still acquire them -- one of the buildings can be purchased from the Market for 1,000 coins, after which the other two have their price changed to Bucks.
Players who have already chosen one of the buildings types but later decide that they want one or both of the others can purchase them from the Market for 80 Bucks each -- a bit expensive, but if you want the ability to complete the recipes and obtain the Mastery Signs for the other crafts, that is the only way to get them.
The initial building can be upgraded four times, by spending coin after you have completed the leveling of the required number of recipes for that building, with each increase in building level (measured in stars) adding visual elements to the building as well as increasing the capacity inside for the number of recipes that can be made at any one time, and the complexity of the different recipes you unlock.
Using the Spa and select bushels, players can complete the three levels of mastery for boutique goods like Fresh Sachet or Floral Perfume and the like, obtaining a Mastery Sign for each. Occasionally special recipes are added to the game -- like Harvest Candle for the Spa -- that are only available for a limited time, but that can be fully mastered (all three mastery stars) in just 20 levels, making it much easier to obtain full mastery for these special recipes.
-- Building Stats --
1-Star: Purchased for 1,000 Coins from the Market for the first crafting building and 80 Bucks for additional buildings.
2 Star: Cost to upgrade is 50,000 Coins and 6 Leveled Recipes --or-- 15 Farm Bucks.
3 Star: Cost to upgrade is 100,000 Coins and 18 Leveled Recipes --or-- 25 Farm Bucks.
4 Star: Cost to upgrade is 400,000 Coins and 27 Leveled Recipes --or-- 40 Farm Bucks.
5 Star: Cost to upgrade is 1-Million Coins and 36 Leveled Recipes --or-- 60 Farm Bucks.
-- Recipes --
The recipes you have access to in your Spa are based upon the level of your Spa, so the higher you level it, the more recipes you have and the more that you can have in the process of creation at any time. The following are a complete list of the regular recipes that are always available for crafting:
-- 1-Star Spa --
-- Floral Perfume: x4 Blueberries x4 Morning Glory
-- Fresh Sachet: x3 Cranberries x3 Pumpkins x1 Sunflower
-- Soothing Herbal Lotion: x4 Aloe Vera x4 Green Tea
-- 2-Star Spa --
-- Devotion Perfume: x3 Basil x3 Blueberries x3 Lilac
-- Petal Sachet: x1 Iris x1 Peppers x2 Sunflowers
-- Relaxation Oil: x4 Blackberries x4 Morning Glory
-- 3-Star Spa --
-- Energizing Lotion: x3 Aloe Vera x3 Blackberries x1 Red Tulip
-- Lily of the Valley Soap: x3 Blueberries x1 Lilies x3 Morning Glory
-- Restoring Candle: x2 Ghost Chili x4 Green Tea x1 Sunflowers
-- 4-Star Spa --
-- Iris Soap: x3 Aloe Vera x2 Iris x1 Sunflower
-- Meditation Candle: x2 Ginger x3 Green Tea x3 Lemon Balm
-- Pick Me Up Sachet: x3 Basil x2 Coffee x3 Lemon Balm
-- 5-Star Spa --
-- Daffodil Lotion: x2 Aloe Vera x1 Daffodils x1 Lillie x2 Strawberry
-- Farmers Frenzy Perfume: x2 Ginger x1 Lavender x2 Lilac x2 Purple Poppies
-- Transcendent Candle: x1 Daffodil x2 Lilac x2 Morning Glory x1 Pink Roses
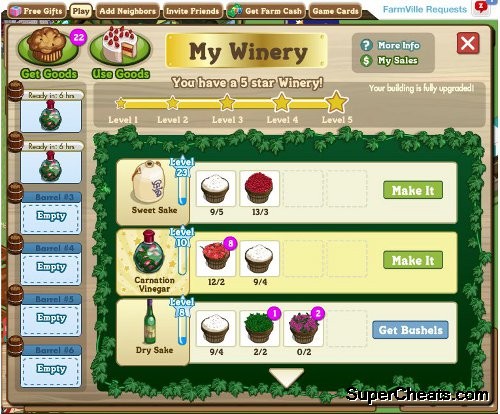
Crafting Wines is Just One Artisan Path
(6) Winery
One of the three Crafting Buildings that were added to the game in July 2010 as part of the new crafts program, these buildings allowed gamers to make use of the bushels that they harvest from their own crops as well as those they acquire form the Farm Stalls of their neighbors.
At the time of their release the buildings were offered to small groups of players each day, eventually rolling out to the entire user base. If you started playing the game after the release of these buildings you can still acquire them -- one of the buildings can be purchased from the Market for 1,000 coins, after which the other two have their price changed to Bucks.
Players who have already chosen one of the buildings types but later decide that they want one or both of the others can purchase them from the Market for 80 Bucks each -- a bit expensive, but if you want the ability to complete the recipes and obtain the Mastery Signs for the other crafts, that is the only way to get them.
The initial building can be upgraded four times, by spending coin after you have completed the leveling of the required number of recipes for that building, with each increase in building level (measured in stars) adding visual elements to the building as well as increasing the capacity inside for the number of recipes that can be made at any one time, and the complexity of the different recipes you unlock.
Using the Winery and select bushels, players can complete the three levels of mastery for beverages like Fruit Wine, Saki. and the like, obtaining a Mastery Sign for each. Occasionally special recipes are added to the game -- like Rose Water for the Winery -- that are only available for a limited time, but that can be fully mastered (all three mastery stars) in just 20 levels, making it much easier to obtain full mastery for these special recipes.
-- Building Stats --
1-Star: Purchased for 1,000 Coins from the Market for the first crafting building and 80 Bucks for additional buildings.
2 Star: Cost to upgrade is 50,000 Coins and 6 Leveled Recipes --or-- 15 Farm Bucks.
3 Star: Cost to upgrade is 100,000 Coins and 18 Leveled Recipes --or-- 25 Farm Bucks.
4 Star: Cost to upgrade is 400,000 Coins and 27 Leveled Recipes --or-- 40 Farm Bucks.
5 Star: Cost to upgrade is 1-Million Coins and 36 Leveled Recipes --or-- 60 Farm Bucks.
-- Recipes --
The recipes you have access to in your Winery are based upon the level of your Winery, so the higher you level it, the more recipes you have and the more that you can have in the process of creation at any time. The following are a complete list of the regular recipes that are always available for crafting:
-- 1-Star Winery --
-- Red Table Wine: x2 Grapes x5 White Grapes
-- Sweet Saki: x3 Cranberries x5 Rice
-- White Sangria: x3 Strawberries x2 Sugar Cane x3 White Grape
-- 2-Star Winery --
-- Dry Saki: x2 Green Tea x2 Lilac x4 Rice
-- Fruit Wine: x3 Blueberries x3 Raspberries x2 Sugar Cane
-- Spicy Tomato Juice: x3 Carrots x1 Peppers x3 Tomatoes
-- 3-Star Winery --
-- Blackberry Wine: x3 Blackberries x1 Grapes x3 White Grapes
-- Raspberry Wine: x2 Blackberries x2 Grapes x3 Raspberries
-- Strawberry Cranberry Juice: x3 Cranberries x2 Raspberries x3 Strawberries
-- 4-Star Winery --
-- Blueberry Wine: x2 Blackberries x4 Blueberries x2 White Grapes
-- Herbal Elixer: x3 Basil x3 Ginger x2 Green Tea
-- Pumpkin Vinegar: x2 Acorn Squash x4 Pumpkin x2 Rice
-- 5-Star Winery --
-- Cucumber Wine: x2 Acorn Squash x2 Cucumber x1 Rice x1 Squash
-- Melon Juice: x2 Carrots x1 Strawberries x1 Watermelon x1 Yellow Melon
-- Rose Petal Water: x1 Lavender x2 Morning Glory x1 Pink Roses x1 Sunflower
If you are a regular gamer you are probably familiar with gaming Achievements -- the system of recognition that is built in to most multi-player games that presents a targeted collection of objectives upon which players focus in addition to the normal goals in a game. On Microsoft's Xbox 360 and Games for Windows Live these actually are called Achievements, while on Sony's PS3 they are essentially the same system but are called Trophies instead, and are represented by four different colored trophy objects.
In Farmville these are represented by four Ribbons for each Achievement: Yellow, White, Red, and Blue from lowest to highest value. Choosing the Blue Ribbon to represent the highest value makes perfect sense to anyone who has visited the crafts contests at a County Fair -- but if you have not, well then you will be interested to know that traditionally Blue is the color for First Place, Red for Second Place, White for Third, and Yellow for Fourth (though usually there is no fourth-place).
Achievements in Farmville center around accomplishments that are interesting, innovative, and often challenging -- and they are wonderful goals to focus upon while you are in the process of a larger project such as crafts or farm expansion, because they give you something short-term to work on when you are involved in the more long-term stuff.
In addition to providing you with a wide variety of goals to focus upon, the Achievement system also happens to be one of the best kept secrets used by serious farmers for quick and significant boosts in XP for leveling. You see, in addition to bragging rights and the personal satisfaction that comes with winning the Blue Ribbon for an Achievement, there is also a chunk of XP awarded for each -- and that is why Achievements and Collections are often a serious focal point for hard core gamers in the leveling process.
With that in mind, we present here a comprehensive examination of the Achievements in the game, and at the bottom of each of the Achievement articles you will find extra information such as strategies, tricks, and notes about the bonuses associated with a particular Achievement.
Like the Collections System, Achievements are an aspect of play that you are going to want to fully embrace and use to your advantage -- and this chapter will help you in doing that.
I mentioned that bragging rights are an element to Achievements in the game above -- and they are -- as completion of each level of an Achievement allows you to post that accomplishment to your wall, for all of your mates to read about and even share in the rewards you receive, or at least pick up a few coin from the feed post on your victory...
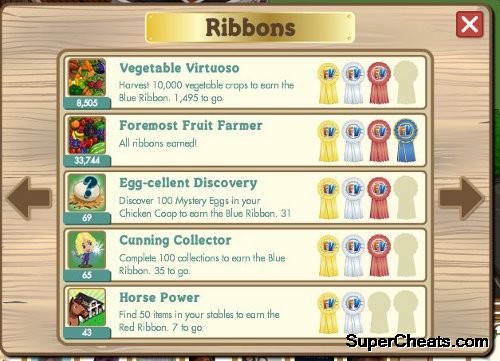
Ribbons are the Achievements of Farmville
When you complete each of the four levels in a particular Achievement you will will receive a prize for that progress -- often this takes the form of some coins, a nice chunk of XP, and sometimes a special gift that is related to the achievement.
You can review your Achievements and your progress towards the next level of an Achievement in some detail by clicking on the Achievement Button on line three of the button box in the bottom right-hand corner of the interface screen.
Clicking the Ribbon Button spawns the Ribbon Menu, which is a complete listing of all of the Achievements in the game, with each listing containing the Achievement name, an icon that represents it with the current progress number below the icon, a description of the requirement for that Achievement, and the outstanding number of items or actions necessary to the completion of your current level for that Achievement.
On the right-hand side of each listing is a graphical representation of the ribbons (levels) you have already unlocked for that Achievement, with the remaining levels appearing as the shadow of a ribbon blank.
When you have fully completed an Achievement all four ribbons are graphically present, and the Achievement description changes to "All ribbons earned!" to let you know that there is nothing left to be done for that particular Achievement.
At the present time (Summer 2011) there are a total of 40 unique Achievements that you can earn in Farmville -- though rumor has it that there will be some new ones added to the game before Christmas.
As you read through the descriptions below for each of the 40 Achievements you will note that the difficulty -- the challenges -- for these has such a wide range that it is fair to characterize them as being everything from dead simple to wicked challenging!
Like a lot of long-term players of the game, I have completed a significant number of these, but there are still a few that elude me to this day -- mostly the ones that have obscure requirements that force you into activities that are outside the normal scope of game play. For example even though I have been playing the game since the week it launched, I still do not have the Cat Lady Blue Ribbon (and I only recently acquired the Red Ribbon for that Achievement).
The Cat Lady Achievement is awarded for Brushing your cats (harvesting them means brushing them) and the Blue Ribbon is awarded for brushing your cats 250 times. I still need to brush them 145 times to obtain the ribbon, having already brushed them 105 times to get the Yellow, White, and Red ribbons. What took me so long?
Well, as you will see when you play the game, despite the fact that they are a common household pet, in Farmville cats are not easy to acquire unless you are willing to spend Farm Cash on them (in other words real-world money), which I am not willing to do. Because of that, the only cats I had were those obtained from special events or holidays -- so for well over a year I only had one cat, the Chrismas Kitty, which is why I gained brushing numbers so slowly.
Fortunately for me a recent event included the Persian Cat as one of its rewards, so I managed to acquire four Persian Cats to join my lonely Holiday Cat -- and this past Christmas one of my mates sent me a limited edition Cat 'n' Boots as a gift that was also a play on my real name. That gives me six cats to brush which is why I suddenly made progress where I was making very little before!
The cat situation is a good lesson to consider when you look at the Achievements -- as there are others that have you doing things you might not ordinarily do in the game -- but the pay-off for unlocking these Achievements is often well worth the extra effort!
Rewards for the four levels/ribbons are not always exactly the same, but in general you can expect to at least receive the following for each that you unlock in addition to any special prize that is part of the individual Achievement:
* Fourth Place -- Yellow Ribbon: 1000 Coins / 50 XP
* Third Place -- White Ribbon: 2,500 Coins / 100 XP
* Second Place -- Red Ribbon: 5,000 Coins / 250 XP
* First Place -- Blue Ribbon:10,000 Coins / 1,000 XP
Those are nice rewards -- particularly the XP for First Place! Now let us examine the Achievements one at a time, so that you can get a better idea of how you will proceed to earn them...
Achievement            Basic                              Requirements for Unlocking
Name                   Description                         Lv 1 / Lv 2 / Lv 3 / Lv 4
-------------------------------------------------------------------------------------
A Pretty Penny         Spend coins at the market            50K / 100K / 500K / 1.5M
Animal Shelter         Adopt lost animals                     2 / 3 / 4 / 15
Architect              Own buildings                          2 / 6 / 15 / 30
Baled Out              Place Hay Bales                        5 / 50 / 100 / 250
Best Buyer             Buy crafted goods from friends         5 / 25 / 100 / 250
Best of the Rest       Earn highest in Co-Op job              1 / 10 / 20 / 40
Bountiful Beekeeper    Find Fertilize All in Beehive          5 / 25 / 50 / 100
Cat Lady               Brush Cats                             5 / 50 / 100 / 250
Cracked                Open Mystery Eggs                      5 / 50 / 75 / 150
Crafty                 Create crafted goods                   5 / 25 / 100 / 250
Cream of the Crop      Harvest crops                         10 / 1K / 5K / 25K
Crop Whisperer         Fertilize neighbor crops             100 / 250 / 500 / 2.5K
Cunning Collector      Complete collections                   2 / 25 / 50 / 100
Egg-celent Discovery   Discover Mystery Eggs                  5 / 25 / 50 / 100
Employee of the Month  Complete job in fastest time           5 / 25 / 50 / 100
Fabulous Foreman       Complete job within time               1 / 5 / 10 / 20
Fenced In              Place fences                           5 / 50 / 100 / 250
Flower Power           Harvest flowers crops                 15 / 500 / 2.5K / 10K
Foremost Fruit Farmer  Harvest fruit crops                   15 / 500 / 2.5K / 10K
Gearhead               Upgrade vehicles                       2 / 6 / 15 / 30
Good Samaritan         Help friends                          20 / 150 / 500 / 2.5K
Green Thumb            Harvest unique crops                   5 / 10 / 14 / 17
High Roller            Earn coins                           25K / 50K / 500K / 1M
Horse Power            Harvest stable buffs                   5 / 25 / 50 / 100
King of Compost        Harvest fertilized crops              75 / 150 / 300 / 600
Knock on Wood          Harvest trees                         20 / 250 / 1.5K / 5K
Local Celebrity        Befriend neighbors                     4 / 8 / 25 / 50
Looking Fresh          Change avatar's clothes daily          3 / 7 / 10 / 20
Lord of the Plow       Use the tractor to plow plots        200 / 1K / 2.5K / 10K
Need for Seed          Use the seeder to plant seeds        200 / 1K / 2.5 / 10K
Noah's Ark             Collect from unique animals            2 / 4 / 6 / 8
Not Spoiled, Gifted!   Collect unique gifts in gift box       3 / 9 / 15 / 21
Pack Rat               Own decorations                       25 / 50 / 100 / 250
Pretty Garden          Place flower bouquets                  5 / 10 / 25 / 50
Style Maven            Buy Clothes for Farmer Avatar          5 / 10 / 20 / 40
Super Salesman         Sell crafted goods to friends          5 / 25 / 100 / 250
They of Mystery        Open mystery boxes                     2 / 6 / 15 / 30
Tree Hugger            Harvest unique trees                   3 / 8 / 12 / 15
Vegetable Virtuoso     Harvest vegetable crops               15 / 500 / 2.5K / 10K
Zoologist              Collect from animals                  15 / 500 / 1K / 5K
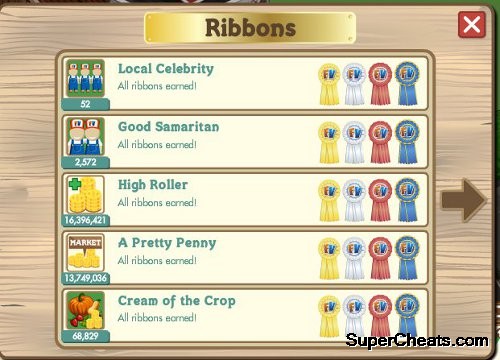
Part of the Reward is Good XP
(01) A Pretty Penny
This one is awarded for the simple act of spending your coins at the Marketplace! You do not need to do it all at once, as the game keeps track of what you have earned -- and in this case -- what you have spent.
When you have spent $50K, $100K, $500K, and $1-Million Coins, the appropriate Ribbon will unlock automatically, and you will receive the reward(s) associated with that level of the Achievement!
(02) Animal Shelter
This may seem like an easy to boost Achievement it is not, mostly because you are dependent upon the animals that are obtained from feed postings on your neighbor's feeds. The best way to boost this is to surf your neighbor's feeds in early afternoon, as that seems to be the time when most gamers play and thus when you are more likely to find these on the feeds.
Note that you do not have to adopt all 15 on the same day/login as it is a cumulative one.
(03) Architect
This Achievement is awarded for the number of buildings that you have built on your farm at any given moment. Constructing a building -- or placing one -- and then storing it -- will NOT count for this. The building needs to be placed on your farm and present in order to count.
Obtaining the Blue Ribbon for this one is an Achievement that requires you to undertake behavior that is not a part of normal play -- and invariably means you will end up having practically every single square of your farm covered in buildings if you have not increased the size of your farm.
Fortunately this is one of the Achievements that is convenient to boost -- as you can simply buy and place the cheapest of the buildings and, once you have unlocked the Blue Ribbon, you can store the ones you want to keep and sell the ones you do not.
(04) Baled Out
This one is boostable -- all that you need to do is purchase the required number of hay bales and place them on your farm, at one time. You cannot place one and then sell it or store it because doing so removes it from the count.
(05) Best Buyer
Being just like what it sounds like -- this is eminently boostable -- you simply need to buy the required numbers of crafted goods from your mates.
(06) Best of the Rest
Earning this Achievement set is simply a matter of participating in Co-Op jobs in which you contribute the largest percentage of crops. This is not boostable in the common sense of the word, but if you can ensure that you turn in the highest percentage you could do job after job to get it.
(07) Bountiful Beekeeper
Chances are that this Achievement will be one of the handful of Achievements in the game that will be the last ones you obtain in the game -- as obtaining the Fertilize All from it is purely a random event. The only method that you can use is to harvest the beehive and hope for a spawn.
Ribbons for Brushing Cats?
(08) Cat Lady
This is not an easy-to-boost Achievement set because it requires cats -- and waiting while they grow to a harvest-able stage. You only get ticks of this when you harvest your own cats and not your neighbors -- so plan on obtaining this one as it comes but try to obtain a good amount of cats, right?
There are only so many ways to obtain cats in the game, including:
Amur Leopard (Mystery Game)
Black Cat (Lost Animal)
Bobcat (Event)
Cat 'n' Boots (Event)
Elf Leopard (Event)
Grey Tabby (Mystery Gift)
Himalayan Cat (Lost Animal)
Holiday Cat (Event)
Invisible Cat (Event)
Lynx (German Event)
Manx (AE Reward)
Orange Tabby (Marketplace)
Panther Cub (Mystery Game)
Persian Cat (Greenhouse Reward)
Pink Persian (Event)
Pub Cat (Marketplace)
Sand Cat (Mystery Game)
Santa Cat (Event)
Short Hair Cat (Event)
Snow Leopard (iPhone)
Sphynx (Mystery Box)
White Kitten (Mystery Game)
White Kitty (Lost Animal)
White Lion Cub (Mystery Game)
White Witch Cat (Event)
(09) Cracked
Obtaining this Achievement set is simply a matter of opening enough Mystery Eggs that you acquire from the Chicken Coops. This is not really boostable -- you just need to be lucky in finding them in the Coops.
(10) Crafty
This may sound more complicated than it really is -- since all that you need do to unlock it is craft the required number of goods! Simply go to you rprimary crafts building and make a list of what you will need and then use the bushels to craft the number of good requried for each of the four ribbons. Simpatico!
(11) Cream of the Crop
The Cream of the Crop Achievement is the general one for harvesting crops -- there are also specific Achievements for harvesting specific types of crops -- Flowers, Fruits, and Veggies if we are being specifically specific...
In this case however, any seed/crop type will count -- though neither trees nor animals will count even if it seems like trees should count, since when you harvest them you are technically harvesting a crop...
This is a super-easy Achievement to get because you are going to be harvesting crops anyway as part of regular play -- so when you harvest your 10th, 1,000th, 5,000th, and 25,000th crop, these automatically unlock, granting you the standard rewards!
(12) Crop Whisperer
This Achievement is not one you will be able to boost as it takes a very long time to acquire all of the Ribbons considering that you need to fertilize 2,500 neighbor crops to get the Blue. Just plug away at it and eventually you will get these.
(13) Cunning Collector
This Achievement set is obtained from turning in completed collections -- you cannot boost this, and will just have to get it when you get it.
(14) Egg-celent Discovery
This Achievement is obtained by finding and opening eggs from YOUR Chicken Coop -- eggs obtained from the Coops of your neighbors do not count. Obviously this cannot be boosted.
(15) Employee of the Month
Earning this Achievement set is simply a matter of participating in Co-Op jobs that result in the award of a Gold Medal while acting as an partner and not the leader of the job. This is not boostable in the common sense of the word, but I suppose if you have a group of gamers who are intent upon obtaining this you could just do job after job until you get it.
(16) Fabulous Foreman
Earning this Achievement set is simply a matter of participating in Co-Op jobs that result in the award of a Gold Medal while acting as the leader and not a follower of the job. This is not boostable in the common sense of the word, but I suppose if you have a group of gamers who are intent upon obtaining this you could just do job after job until you get it.
(17) Fenced In
This is an easy-to-boost Achievement set because all that it requires is for you to place the required number of fences. Note that they have to be all present on the farm at the same time -- you cannot place one and remove it as that will not count. So once you have the coin, simply place the fences until you unlock these Ribbons.
(18) Flower Power
While this is not an Achievement you will boost -- it is one of the Achievements that will come eventually with normal play. Just be patient and let it come when it comes. Actively pursuing this type of Achievement is usually counterproductive, and so it is not a recommended effort.
(19) Foremost Fruit Farmer
Another Achievement set that you will acquire in the normal course of playing the game, and planting and harvesting Fruit crops. Trying to boost this is counterproductive because of the large amount of crops needed.

Gearhead is One of the More Difficult to Get
(20) Gearhead
This is simple -- and boostable if you have a source for Vehicle Parts -- which just means encouraging your mates to gift them to you! You only need to complete the required number of upgrades on any of the following vehicles:
Name (Required Level) Source -- Cost
-------------------------------------------
Antique Tractor (L12) Reward Item -- 2011 Valentine's Event / Cellar Shovel Collection
Combine (L31)Marketplace -- $500,000
Double Deck Bus (N/A) Event Reward
English Countryside's Combine (L31) Special
Haiti Seeder (L20) Sowing Seeds for Haiti Co-Op Job Reward
Harvester (L14) Marketplace -- $30,000
Hot Rod Combine (L12) Marketplace -- $110 Farm Bucks
Hot Rod Harvester (L15) Marketplace -- $55 Farm Bucks *
Hot Rod Seeder (L15) Marketplace -- $55 Farm Bucks *
Hot Rod Tractor (L12) Marketplace -- $55 Farm Bucks *
Lucky Harvester (L15) Event -- No Longer Available
Lucky Seeder (Level 12) Event -- No Longer Available
Lucky Tractor (L15) Event -- No Longer Available
Pickup Truck Seeder (L14) Reward from Bakery Delivery Co-Op Job
Pink Tractor (L12) Marketplace -- $5,000
Platinum Combine (L12) Event -- No Longer Available
Purple Harvester (L13) Citi ThankYou Rewards Program
Purple Tractor (L12) Citi ThankYou Rewards Program
School Bus Plow (L20) -- Reward for Very Berry Field Trip Co-Op Job
Seeder (L14) Marketplace -- $30,000
Sweet Seeder -- See Haiti Seeder
Tractor (L12) Marketplace -- $5,000
* Available for Farm Coins through Mafia Wars cross-promotion
(21) Good Samaritan
The Good Samaritan Ribbon is one of the Achievements that requires concerted effort on your part -- because it is granted for helping your friends by visiting their farms to help them out by completing specific actions on their farm.
It is crucial for you to understand that the process of helping your neighbor begins with using the five (5) Assistance Efforts you get when you visit each farm. Whether you use them all to fertilize your neighbor's crops, or harvest trees, or harvest animals -- or you use them as a mixture of all of these, you must start the process by using up all five Efforts. If you do not use all five up, then none of the helping actions you take on the farm will count for this Achievement.
Failing to use all five of the Efforts on your visit is the most common issue that prevents players from obtaining the assistance credit for the visit. You do not have to spend all five on the same effort -- you can mix them as pointed out above -- do to be clear, the following actions count in use of the five Efforts:
-- Fetilizing a plowed or planted crop plot
-- Harvesting an animal
-- Harvesting a tree
-- Plowing a fallow crop plot
-- Unwithering a withered crop
So that we are absolutely clear on this -- if you visit a neighbor's farm, and you walk over to their Chicken Coop and feed the Chickens in it, then you visit their Greenhouse and help out with that, and then you leave -- NONE of what you just did counts towards this Achievement, and you will NOT receive credit for the assistance that you just gave.
If you visit a farm, use one or more but LESS than five of the allotted daily Effort actions, and then feed the chickens or help with the Greenhouse, NONE of what you did will count and you will not add a tick to the counter for this Achievement.
If you arrive at their farm, and then use ALL FIVE of the daily Effort actions -- wither fertilizing five plots, harvesting five trees, harvesting five animals, unwithering five plots, or any combination of these actions five times, upon completing the fifth action (you know this because you see the counter go down on the left side of the screen) you gain one tick to the Achievement count. Then when you feed the chickens, you gain a second tick.
To illustrate this point we will take the experience of my mate Heather as she works towards this Achievement. When she logged in today and checked her progress she found that for the Good Samaritan Achievement she has both the Yellow and the White Ribbons already unlocked, and she has 314 on her counter, with the note that there are 186 actions remaining to her goal which is currently 500 actions to earn the Red Ribbon.
She visits her mate Tara's farm, where she fertilizes just two plots and then leaves to visit her mate Carnation's farm. The counter for the Achievement still reads 314/186 and her efforts in helping did not count towards this Achievement. Upon arriving at Carnation's farm she finds the crops are all withered and is offered the free unwither spray -- which she uses on Carnation's farm, restoring all of the plots to matured state and thus ready to harvest -- but she does not gain a tick for that action because she has not used the five Efforts for Carnation's farm yet!
Heather decides to fertilize five plots of the now restored crop -- which is Green Roses -- and during that fertilizing she finds some fuel to share and posts that to the wall. When she examines her stats for the Achievement they now read 315/185 -- which correctly indicates that she has obtained a tick towards this Achievement for completing the five Efforts! Good on ya Heather!
Heather now notices that Carnation's Greenhouse is ready to be helped, so she clicks on it, and that results in her finding 5 Red Spinach Seeds as a reward for helping out with the Greenhouse. She claims them and posts that to the wall, and then checks the Achievement to see that it now reads 316/184 -- which is precisely correct because she should receive a tick for assisting Carnation with her Greenhouse! So Heather not only obtained five valuable hybrid seeds for Red Spinach to add to her inventory of seeds for that plant, but she also gained a tick for the Achievement.
Now Heather sees that Carnation's Animal Trough needs some assistance, walks over and clicks on it, spawning a pop-up window that tells her that there was no extra feed available -- but that she has received 100 Coins for being such a thoughtful neighbor -- which she accepts. The Achievement stat still reads 316/184 as it should, because Heather should not have received a tick for that action.
Noticing that the chickens in Carnation's Coop need to be fed, Heather does that, spawning a pop-up that informs her that while feeding the chickens Heather did not find anything special -- but it thankks her for feeding the chickens just the same and wishes her better luck tomorrow. When she checks her Achievement she notes that it now reads 317/183, which means that Heather has obtained a 3rd tick for that Achievement -- as she should have -- and thus on this visit has increaed her progress towards the next Ribbon for this Achievement by three ticks. Good job Heather!
Heather now visits her mate Peter's Farm and, failing to use the five Efforts, feeds his chickens, and in the process finds a Mystery Egg which she shares on the wall. She then realizes that she has completed a help action without first fulfilling the required five efforts, and so will NOT receive a tick for feeding the chickens!
Seeking to correct that Heather harvests five animals, whereupon she notes that the Achievement now reads 318/182 -- and Heather is sad because she realizes that even though she has completed the five Efforts required, she is not going to get credit for the assistance she gave in feeding the chickens in the Coop *prior* to completing the five Efforts because, simply put, that is how this works.
In her haste to feed the chickens Heather has done herself out of a tick towards that Achievement that she might have had, and while she does obtain a tick plus 5 seeds for helping with Peter's Greenhouse, she will not be able to get the tick for the Chicken Coop no matter what else she does, and so Heather mentally kicks herself, and chides herself to remember not to do that in the future!
So endeth the story of Heather...
Now you should have a very firm grasp of how this works, right?
(22) Green Thumb
This is easily boosted -- as it only requires you to harvest unique and different crops! When you are ready to boost it, simply plant 17 different crop types, grow and harvest them.
(23) High Roller
This Achievement is obtained from earning coins in the game -- note that it IS a cumulative count and you do not have to have the coins in your account at the same time in order to unlock it!
Over the course of your play when you have earned 25,000 Coins (even if you have spent all or some of them) the first ribbon unlocks and you receive the reward. The same is true for the other three levels, so when you have acquired $50K, $500K, and finally $1-Million in coins these ribbons unlock automatically!
Since this Achievement will eventually unlock as a normal part of play, it is not one that you need to actively work towards, or do anything special or out of the norm to obtain.
(24) Horse Power
This Achievement requires you to obtain consumable buffs from your Stables -- basically that means Arborists, Farmhands, and free XP boosters. You may not realize this but this Achievement actually IS boostable. There is a trick you can use to get it rather quickly...
To boost this simply remove all of the horses from your Stable, leaving just the Stallion if you have one, or one mare if you do not. Then wait until all of your horses have some percentage towards harvesting (they do not need to be 100%), then pick them up one at a time and place them into the Stable, which causes it to be harvest-able.
Click on it, rinse and repeat until you have used all of your horses, then remove them to mature a little again, rinse and repeat.
(25) King of Compost
Here is another Achievement set that is not easily boosted and instead comes with time. You obtain them by harvesting plots that your neighbors have fertilized on your farm. Simply keep plugging away and try not to focus upon the counter, since the slow progress can be irritating.
(26) Knock on Wood
This Achievement unlocks when you harvest the required number of trees -- any tree counts, as long as it has a harvest-able crop associated to it! The same type, all different types, even a mixture, it does not matter -- you just need to harvest crops from trees.
When you have harvested your 20th, and 250th tree you get the Yellow and White Ribbons and their rewards. The Red Ribbon comes after 1,500 trees, and finally the Blue Ribbon for 5,000 trees! You should find this to be an easy set to unlock if you are taking advantage of this guide -- and moving in the direction of Advanced Tree Farming.
If you are looking for quick XP this is one of the Achievement sets that you may want to actively go after -- just pick a tree with a short growth cycle (2-day) if you do not have any Orchards, or any trees if you do have Orchards since once you put the trees inside an Orchard they all go on a 2-day growth schedule.
(27) Local Celebrity
To earn the Local Celebrity ribbon you simply need to friends -- and you do this by adding neighbors to your farm by inviting your Facebook friends or people you find in the feeds of your mates or people you know play the game, and send them a Neighbor invitation.
The number you need is not a stacking one -- in other words the first 4 neighbors gets you the Yellow Ribbon, and also counts for the 50 neighbors you need for the Blue Ribbon, not in addition to it. You will find that the first 25 neighbors are the hardest, but once you get the Red Ribbon it just seems to be easier to get the other 25 you need.
The operative catch here is that you need to have them all at the same time -- if you remove one it no longer counts towards the goal -- so it is fairer to say that the requirements should really say that you need 50 neighbors at one time to unlock it.
(28) Looking Fresh
This Achievement set is simple to obtain -- all that you need to do is change your avatar outfit once a day, and you will receive the Blue Ribbon after 20 daily outfit changes!
(29) Lord of the Plow
This one is not an easy-to-boost Achievement in that you are required to plow 10,000 plots using an actual plow as opposed to the hoe -- so this will take lots of time and lost of fuel -- so treat it like one of the sort that you get when you get them and do not bother trying to force it along.
(30) Need for Seed
This is another Achievement set that requires lots of time, effort, and fuel -- as you need to seed 10,000 plots with the seeder vehicle -- so take this one as it comes, and it will come over time -- and do not try to boost it.
(31) Noah's Ark
This is an easy-to-boost Achievement -- simply obtain eight different animals from the feeds by adopting them (since this will also help you work towards another Achievement) and then harvest each to obtain all four Ribbons.
(32) Not Spoiled, Gifted!
This will likely be one of the early Achievements you earn -- simply leave the gifts you receive in your Gift Box until you have acquired 21 unique gifts; you only need one in quantity but 21 in types to unlock the Blue Ribbon.
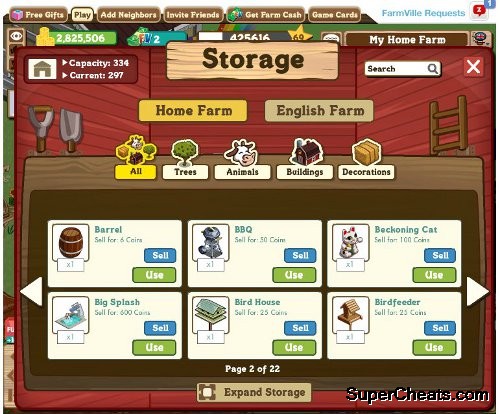
Collecting Stuff Comes Naturally
(33) Pack Rat
Another easy to boost Achievement -- this one will be the more easier once you have placed your Storage Cellar so that you can keep the stuff you buy for this so you can use them later.
As there are other Achievements that relate to items placed on your farm -- the fence and hay bale ones -- it is an idea to boost this while doing those ones at the same time. These Ribbons automatically unlock and you get the rewards when you have the required number of objects placed on your farm.
(34) Pretty Garden
While this is not easily boosted, it is one of the Achievement sets that you can easily work towards since it is cumulative -- meaning that you do not need to have all of the flower bunches placed on your farm at the same time like the fences or bales. Simply surf the feed on a daily basis and, when one of our mates posts bunches to it, be sure to grab one from each post and place it on your farm!
(35) Style Maven
This Achievement set is obtained by purchasing the required number of clothing items for your avatar to meet the requirement for each level.
Note that this Achievement requires you to purchase 5 clothing items (Yellow), 10 clothing items (White), 20 clothing items (Red), or 40 clothing items (Blue) -- which will require you to use Farm Cash (real-world money) to complete the Blue Ribbon.
Alternate Tactic: You can get very close to the completed Blue Ribbon by accessing the avatar menu and changing your avatar's sex to whatever it is not normally, and purchasing all of the clothing items for the other gender -- which when you include the holiday costumes will bring you to only 2 missing ticks for the Blue Ribbon -- making it much less painful and expensive to obtain...
(36) Super Salesman
You have no control over this Achievement -- it is entirely dependent upon your neighbors deciding to purchase the goods that you produce in your primary crafting building. The presumption is that if you are purchasing their goods, they will purchase yours.
(37) They of Mystery
This Achievement set is one of the less easy to earn for gamers who do not spend real money in their game play. Normally you only get ticks towards this one when you have opened mystery boxes purchased at the market for 16 Farm Cash apiece.
Fortunately every so often there are special Mystery Boxes added to the game gift catalog -- the most recent being the American Express Mystery Box promotion -- so it is a good idea to ask your mates to send you these free gifts to quickly unlock these Achievements.
(38) Tree Hugger
This is another easy-to-boost Achievement that only requires you to harvest crops from 15 unique trees. Buying them from the Marketplace is one way you can do it, but as you can easily obtain seedlings and Watering Cans from the feeds, that is a cheaper way to do it, and will almost certainly get you tree species you cannot buy in the Marketplace and may get you some rare ones in the bargain!
(39) Vegetable Virtuoso
Another Achievement set that you will acquire in the normal course of playing the game, and planting and harvesting Vegetable crops. Trying to boost this is counterproductive because of the large amount of crops needed.
(40) Zoologist
Here is another Achievement set that you may want to actively go after for the chunks of XP that it will give you -- plus the animal rewards that are part of each ribbon pay-off. There is something of a catch here tho...
Normally every animal inside a building should count for this, right? Well... Not so much, really. Let's say you have 20 cows in your Dairy Farm, and you harvest it -- that should add 20 ticks to this Achievement, but it does not. It only adds one, and sometimes not even that, which is a bug, but that is not the point.
The point here is that to efficiently work towards this Achievement you are best served by temporarily removing all animals from your animal buildings, and then harvest them individually. This is especially true for chickens -- clear out the Coop and do them one at a time -- because they mature to harvest quickly.
The levels on this start with 15 animals harvested, but then it jumps to 500 animals, then 1,000 and finally 5,000 animals for the Blue Ribbon.
You should make it a point when you visit a neighbor's farm to feed their chickens in thier Chicken Coop because there is a random chance that you will obtain a Mystery Egg just like you do when you feed your own chickens in your Chicken Coop. You are probably aware that you can get good items from the eggs, but have you ever wondered exactly what?
The following list is active as of publication time for this guide, but items are added and removed from the eggs periodically, just so you know. That being the case, if there is a particular item from the lists that you want, it would be a good idea to actively try to maximize your chances of getting it by feeding your neighbor's Coops daily!
There is a random chance for a Chicken in your Coop to lay an egg that hatches into another chicken. The more of a particular type of chicken you have in your Coop increases the chances of obtaining its offspring. In each of the Egg Listings below you will find the possible offspring for each of the egg types.
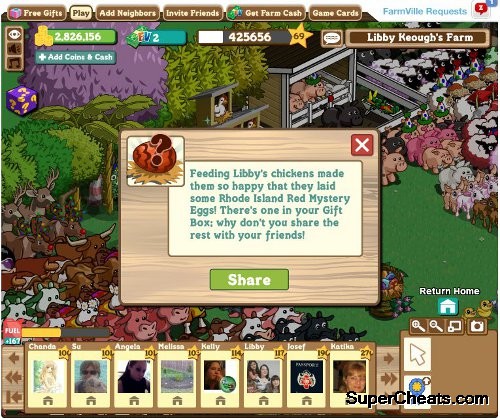
Find Eggs by Feeding Your Neighbor's Chickens
-- The Eggs and their Prizes, Listed in order of Rarity --
Note that each eff contains two different groups of prizes, of which one will be randomly chosen. Those are items and collection items.
== White Mystery Egg ==
The White Egg is obtained from regular chickens as well as Chicken Joy, and Chicken Cheer. A White Egg can randomly spawn a Regular or a Brown Chicken.
-- Standard Items --
1/5 Fuel Refill
Chicken
Chicken Gnome
Brown Chicken
XP-icon.png 20 XP
-- Common Collection Item --
Caterpillar
Hen Feather
LadyBug
Spigot
Trowel
== Brown Mystery Egg ==
The Brown Egg is obtained from Brown Chickens. A Brown Egg can randomly spawn a Brpwn or a Black Chicken.
-- Standard Items --
1 Fuel Refill
20 XP
Black Chicken
Brown Chicken
-- Common/Uncommon Collection Item --
Blue Butterfly
Dapple Plume
Painted Lady
Pocketwatch
== Black Mystery Egg ==
The Black Egg is obtained from Black Chickens. A Black Egg can randomly spawn a Black or aa Golden Chicken.
-- Standard Items --
10 Fuel Refills ( 200 XP)
Black Chicken
Golden Chicken ( 50 XP)
-- Uncommon Collection Item --
Beetle
Red Feather
Salt Shaker
Stick Bug
Swallowtail
Thimble
Twine
== Golden Mystery Egg ==
The Golden Egg is obtained from Golden, Super, Silkie, Red Heart, and Clover Chickens. A Golden Egg can randomly spawn a Golden or a Cornish Chicken.
-- Standard Items --
1 FV Cash
20 Fuel Refills ( 500 XP)
Arborists
Clover Chicken ( 50 XP)
Cornish Chicken ( 50 XP)
Farmhands
Gold Gnome ( 200 XP)
Golden Chicken ( 50 XP)
Red Heart Chicken
Rhode Island Red Chicken ( 50 XP)
School House
Scots Grey Chicken ( 50 XP)
Wax Apple Tree
-- Uncommon/Rare Collection Item --
Copper Butterfly
Pruning Saw
== Cornish Mystery Egg ==
The Cornish Egg is obtained from Cornish Chickens. A Cornish Egg can randomly spawn a Cornish or a Scots Grey Chicken.
-- Standard Items --
1 FV Cash
20 Fuel Refills ( 500 XP)
Arborists
Chicken Gnome
Cornish Chicken ( 50 XP )
Farmhands
Orange Butterfly
Scots Grey Chicken ( 200 XP)
Windmill
-- Uncommon/Rare Collection Item --
Cow Bell
Zebra Butterfly
== Scots Mystery Egg ==
The Scots Egg is obtained from Scots Grey Chickens. A White Egg can randomly spawn a Scots Grey or a Rhode Island Red Chicken.
-- Standard Items --
1 FV Cash
20 Fuel Refills ( 500 XP)
Arborists
Chicken Gnome
Farmhands
Orange Butterfly
Red Barn
Rhode Island Red Chicken ( 50 XP)
Scots Grey Chicken ( 200 XP)
-- Uncommon/Rare Collection Item --
Centipede
Banded Quill
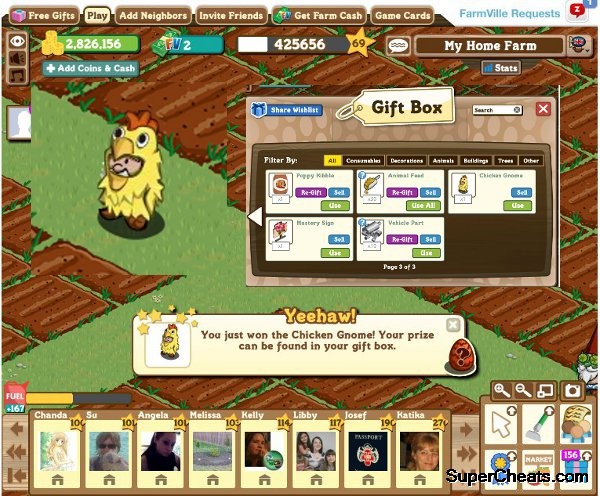
Open the Egg to See what You Get!
== Rhode Island Red Mystery Egg ==
The Rhode Island Red Egg is obtained from Rhode Island Red Chickens. A Rhode Island Red Egg can randomly spawn a Rhode Island Red, Golden, or a Cornish Chicken.
-- Standard Items --
-- Common Collection Item --
1 FV Cash
20 Fuel Refills ( 500 XP)
Arborists
Chicken Gnome
Cornish Chicken ( 50 XP)
Farmhands
Golden Chicken ( 50 XP)
Post Office
Rhode Island Red Chicken ( 50 XP)
Wax Apple Tree
-- Rare Collection Item --
Blue Feather
Shears
== Rainbow Mystery Egg ==
The Rainbow Egg is obtained from Rainbow Chickens. A Rainbow Egg can randomly spawn a Rainbow, Cornish, Scots Grey, or a Rhode Island Red Chicken.
-- Standard Items --
20 Fuel Refills( 500 XP)
Chicken Gnome
Cornish Chicken ( 50 XP)
Gold Gnome
Rainbow Chicken ( 400 XP)
Rainbow Cottage
Rhode Island Red Chicken ( 50 XP)
Scots Grey Chicken ( 200 XP)
-- Uncommon Collection Item --
Formal Button
Jewel Button
Pearl Button
== Candy Cane Mystery Egg ==
The Candy Cane Egg is obtained from Candy Cane Chickens. A Candy Cane Egg can randomly spawn a Candy Cane, Rainbow, Cornish, Scots Grey, or a Rhode Island Red Chicken.
-- Standard Items --
Candy Cane Chicken ( 400 XP)
Chicken Gnome
Cornish Chicken ( 50 XP)
Frozen Pond
Rainbow Chicken ( 400 XP)
Rhode Island Red Chicken ( 50 XP)
Scots Grey Chicken ( 200 XP)
-- Common Collection Item --
None
== English Mystery Egg ==
The English Egg is obtained from Dorking, Sussex, and Sebright Chickens and the Old English Hen. An English Egg can randomly spawn a Cornish, or a Dorking Chicken, or an Old English Hen.
-- Standard Items --
20 Fuel Refills ( 500 XP)
Butler Gnome
Clover Chicken
Cornish Chicken
Dorking Chicken ( 50 XP)
English Bench
Old English Hen
Silkie Chicken
Town Fountain
-- Common Collection Item --
None
In addition to the items that can be obtained from the eggs that you open -- and the chickens you can also get -- there are two Ribbons that are associated with the eggs, one called the Cracked Ribbon, and another called the Egg-celent Discovery Ribbon. Read the Ribbon Chapter for more information, but we should emphasize that a large amount of XP can be awarded when you earn Ribbons.
Gifts in the game are a bit more complicated then it may first appear, because of how they have been implemented. The basic structure of the gifting system makes it easier for a neighbor or friend to send you the same gift you sent them than to make their own choice whenever they log in and have received a gift from you.
Because of that most players assume that any gift that you send to them is a gift that you want to receive -- which can work out very well for you if you remember to send the things you actually want to receive, right? Right!
An overview of the gifts that you may want to be strategic about includes:
-- Mystery Boxes --
As of July 2010, Zynga removed the Mystery Boxes from the game and replaced them with the weekly Mystery Game -- however there are still special Mystery Boxes that are added for events and promotions -- often containing unusual or rare items. The following Mystery Boxes are currently active in the game, and thus are worth trying to get!
Note that these boxes DO count for the 'They of Mystery' ribbon, so if you are trying to complete that you will want to get and open as many of these as you can manage!
American Express Mystery Box (Added May 10, 2011)
--Arjuna Tree
-- Black Pig
-- Durian Tree
-- Farmhands
-- Fertilize All
Spring Mystery Box (Added April 11, 2011)
-- Brown English Lop
-- Garden Table
-- Spring Picnic
-- Mystery Gifts --
First it should be noted that these are NOT the same thing as a Mystery Box -- these are the odd dark purple boxes that have long been available but that have a changing contents to them. The purple Mystery Gifts Box does NOT count towards the 'They Of Mystery' ribbon FYI.
The following items are currently available in the Mystery Gifts box but some of them are very very rare and so will require you to open a lot of these boxes! Each of the items is listed with its rarity noted, the rarity being how likely it is to be obtained with the opening of the box.
20 Free XP (common misc item)
1,000 Farm Coins (rare misc item)
Almond Tree (uncommon tree)
Birdfeeder (common decoration)
Black Pig (common animal)
Blue Butterfly (common decoration)
Breadfruit Tree (uncommon tree)
Brown Cow (common animal)
Brown Squirrel (uncommon animal)
Buffalo Topiary (uncommon decoration)
Calf (common animal)
Can of Fuel (common misc item)
Chicken (common animal)
Chinchilla (ultra rare animal)
Cowprint Stool (ultra rare decoration)
Date Tree (uncommon tree)
Duck Topiary (uncommon decoration)
Elegant Topiary (uncommon decoration)
FarmVille Cash (ultra rare misc item)
FarmVille Flag (common decoration)
Flower Bucket (uncommon decoration)
Grass Pile (uncommon decoration)
Greenery (rare decoration)
Grey Tabby (rare animal)
Guava Tree (uncommon tree)
Harvester (uncommon vehicle) English Farm Only
Hot Air Balloon (ultra rare decoration)
Jackfruit Tree (common tree)
Lawn Chair (common decoration)
Long-tailed Duck (rare animal)
Mandarin Tree (uncommon tree)
No Raccoon Sign (ultra rare decoration)
Old Bike (common decoration)
Olive Tree (common tree)
Ossabaw Pig (common animal)
Owl Statue (common decoration)
Pinwheels (uncommon decoration)
Pomegranate Tree (uncommon tree)
Rose Pinwheel (rare decoration)
Saanens Goat (common animal)
Seeder (uncommon vehicle) English Farm Only
Starfruit Tree (common tree)
Tractor (uncommon vehicle) English Farm Only
Tricycle Planter (common decoration)
Wax Apple Tree (common tree)
Windmill (rare decoration)
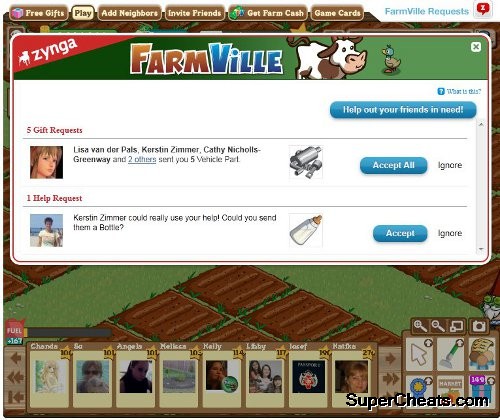
Receiving Your Gifts at Login
-- Gifting Strategies --
You are allowed to send free gifts to your mates several times a day -- and when you log in you are presented with the gifting screen automatically, so sending the gifts is pretty painless, but picking which gift to send? Not so much.
-- A Dangerous Cycle --
One thing you should be careful of -- when you log in for the first time each day the game automatically prompts you to send Special Delivery Packages to the people on your Farmville Friend list. This prompt takes place before you even reach the interface and your farm -- and as convenient as it may appear, should NEVER be used.
The reason you should not use it is that quite often there are important gifts that are part of the main gift menu that apply to special events that are currently on, that your friends may be working towards completing. If you make the mistake of sending the Special Delivery Package gifts when you are prompted to, you will find that you cannot send them the gifts that they actually want and need when you finally end up at your farm in the main interface.
Invariably what happens here is an unintended circle of non-productive-gifting!
Your mates will send you one of the event-related gifts, hoping that you will reply in kind and send them one, but instead because you used the Special Delivery Gift window when you logged in, what they receive is Special Delivery Packages instead of the gifts that they really want.
Because you sent them the Special Delivery Package, they will assume that means that you WANT THEM to send YOU that gift -- so you end up getting them sent to you, instead of the event-related gifts that you also want, and as a result this non-productive circle gets started.
If you are again careless when you log in on the following day and use the SDG window without thinking about it, that simply reinforced the idea that you are actively seeking those and you will find that those are all you end up receiving from your mates no matter what gifts you send in the future.
Frankly speaking, the Special Delivery Packages are really only useful when you are building infrastructure on your farm -- they don't help you in completing the event projects, or in acquiring some of the limited edition and limited time items that also appear in the main gifting catalog, so this is a cycle and phenomenon you should actively try to avoid.
There is NO reason to use that gift window upon log in -- and in fact you better serve yourself and your neighbors by NEVER using it, even when you are in a hurry and just want to get your daily gift sent. Dismiss that window by hitting the Skip button, and then use the main gifting menu via the tab so that you get used to doing it that way and never end up making this mistake.
-- Back to Proper Gifting Discussion --
In your feed you can see posts from your mates when they are looking for a particular item -- and you can also be guided by that. In addition to the regular items and resources that you can gift via the web-based interface, there are also special items like the Tropical Planter and Red Maple Tree that can only be sent if you are logged into the Farmville Client on Zynga's site rather than on Facebook.
There are also special items like the White Apple Tree that can only be sent from the Farmville iPhone client. If you have an iPhone your mates will appreciate it when you send them items that they cannot be gifted any other way, so that is worth a thought.
Always remember that whenever you gift the same gift several times in a row your mates are going to assume that this means that you want them to send you that gift -- so if that is not the case, you should try not to send the same gift over and over.
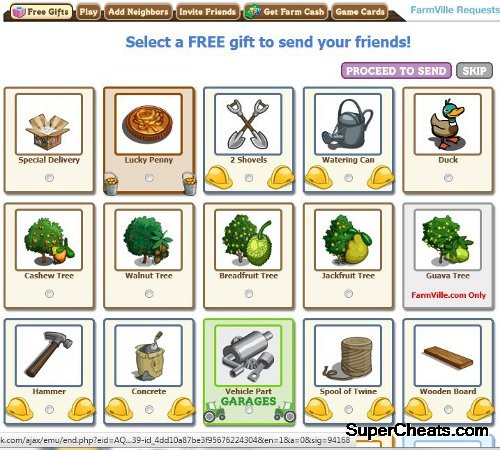
Open the Egg to See what You Get!
-- Special and Limited Edition Gifts --
If you examine the gift catalog that is accessed by using the Free Gift tab on the main interface, you will find that there are, distributed among the regular gifts, almost always a selection of special or limited time gifts that you can give.
At the time that I write this the gift catalog contains the following irregular gifts:
-- American Express Mystery Box
-- Brown Goose
-- Gingko Tree
-- Rainbow Barrel
-- White Apple Tree
-- Concrete
-- Hammer
-- Lucky Penny
-- Spool of Twine
From these unusual selections we find tow distinct groups -- the first group contains limited edition items that are the only means for obtaining a lot of these items and that, clearly, would be very much appreciated by the recipient in place of a gift like the Special Delivery Package, which you can give at any time.
The second group above contains resources that are specifically for special events that are time-limited and important to your mates. The Lucky Penny is for throwing into the Wishing Well -- part of the St. Patrick's Day Event that is still inexplicably available and that serves as the source for several very rare items like the double-decker bus and a collectible gnome as well as an animated flower box. If your mates request this - or you know that they have not completed the Wishing Well quest - then sending them the Lucky Penny would be especially appreciated!
The Concrete, Hammer, and Spool of Twine are the building resources required to complete the new Craftshop that was very recently added to the game and that has three quests associated with it. The function of this new building and how it fits into Crafting is presently unknown -- but helping your mates finish theirs and, thus, complete the quests associated with it, would clearly be seen as a smart and valuable use of the gift system!
While time will cause the above to be less important, the history of this game shows us that there will be new gifts with the same level of value added to the game as it expands, so the lesson from this is both valuable to you, and worth remembering!
-- Making your Farm Unique --
With games like this, making your space unique is a given -- and understandable -- pursuit which is why the folks at Zynga have provided a plethora of items that can be used to do that, from buildings, shrubs, and topiary to fences, flags, and plants -- a wide variety of items that you can use to express yourself.
It is understandable then that most players choose to do this, but when you are first starting out it is a better strategy to restrict your decorating only to items that can return a profit to you -- trees are an excellent example -- or buildings that generate income, like the Stables and Nursery.
That being the case it is a good idea to make your mates aware of what items you would like to receive from the current gifts catalog -- and the easiest way to do that is to send them a personal message asking them if there is anything that they want -- and telling them what you want!
Choosing a vehicle for your farm can serve two functions -- decorate while at the same time make your life easier -- because vehicles in the game are functional. Picking a tractor and putting it on display is a stand-out but did you know that using that tractor to plow your field allows you to plow four plots at the same time rather than one? Of course you have to use up fuel to do that, but getting a tractor as soon as the game allows you to unlocks more opportunities to obtain fuel!
As you level up, there are pivotal levels you will want to reach. At Level 20 you can participate in Farming Co-Op Jobs, which include both XP and income as well as special items you can win by completing the job in a certain time period -- items you can then use on your farm both as decoration and function. For instance, the School Bus Plow and Red Pickup Seeder are pre-upgraded, allowing you to seed and plow nine plots at the same time. There is a job that has a Biplane as its reward -- and while it looks cool to have that Biplane parked on your farm, you should be aware that it can be used to force your crops to mature early if you are pressed for time, or need to quickly grow crops to get a Co-Op job in on time!
When you reach Level 25 you can participate in the crafting system in the game -- and hitting that special level prompts the game to ask you what craft you want to participate in? The choices are a Spa, Winery, or Bakery, and what you choose will influence the crops you grow in the future, as growing crops is the best way to obtain the ingredients that you will need to craft.
Collections are objects that are acquired in the game in several ways that are collected as related sets, usually following a theme. Collections were never intended to be permanent in the game, however after they were first introduced a very long period of time passed with no updates for them, so players started to think that they were permanent.
When several temporary collections were added to the game (limited edition/limited time) that came and went with the main set of collections remaining unchanged, it was widely thought that the main set was permanent -- until May 2011 when they were all removed and replaced with new sets!
The current collections items are obtained through regular play in the game, and can be discovered/acquired by doing normal game activities like harvesting crops, animals, and trees, and other activities.
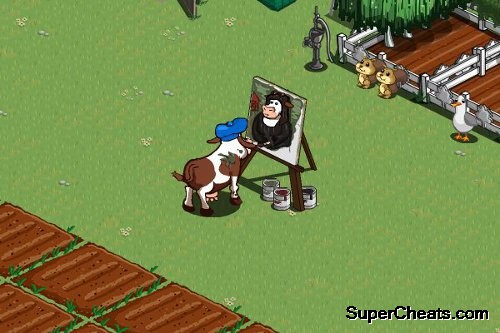
A Unique Collection Reward - Mooonalisa
The current set of collections consists of:
-- Berries Collection --
x3 Fruit Bar / x3 Sorbet / x3 Preserves / x2 Dried Berries / x1 Berry Basket
Level 1 Reward = Bag of Fertilizer 500 Coins 50 XP
Level 2 Reward = Fruit Crate 1,000 Coins 100 XP
Level 3 Reward = White Cherry Blossom Tree 1,500 Coins 150 XP (*)
-- Citrus Collection --
x3 Bubblegum / x3 Sherbert / x3 Juicer / x2 Fruit Wedges / x1 Citrus Peel
Level 1 Reward = Arborist 500 Coins 50 XP
Level 2 Reward = Arbor 1,000 Coins 100 XP
Level 3 Reward = Zesty Pony 1,500 Coins 150 XP (*2)
-- Cow Collection --
x3 Cow Bell / x3 Milking Bucket / x3 Milking Stool / x2 Milk Bottles / x1 More Cowbells
Level 1 Reward = Fuel Can 500 Coins 50 XP
Level 2 Reward = Cow Topiary 1,000 Coins 100 XP
Level 3 Reward = Rainbow Cow 1,500 Coins 150 XP (*3)
-- Flower Collection --
x3 Corsage / x3 Humming Bird / x3 Dried Petals / x2 Butterfly / x1 Pollen
Level 1 Reward = 500 Coins 50 XP
Level 2 Reward = Flower Bucket 1,000 Coins 100 XP
Level 3 Reward = Flowery Cow 1,500 Coins 150 XP (*4)
-- Grain Collection --
x3 Grindstone x3 Scythe x3 Bran x2 Chaff x1 Flour
Level 1 Reward = 500 Coins 50 XP
Level 2 Reward = Wheat Scarecrow 1,000 Coins 100 XP
Level 3 Reward = Spring Water Mill 1,500 Coins 150 XP (*5)
-- Squash Collection --
x3 Pumpkin Seeds x3 Stuffed Pasta x3 Decorative Gourd x2 Yerba Mate x1 Sitar
Level 1 Reward = Arborist 500 Coins 50 XP
Level 2 Reward = Gourd Hat Gnome 1,000 Coins 100 XP
Level 3 Reward = Pumpkin Pig 1,500 Coins 150 XP (*6)
(*) The White Cherry Blossom Tree is a decorative ONLY tree, and does not have a harvest-able element to it.
(*2) The Zesty Pony can be bred in the Stables with a Stallion, and will produce a Zesty Pony Foal.
(*3) The Rainbow Cow can be bred in the Dairy Farm with a Bull, and will produce a Rainbow Calf.
(*4) The Flowery Cow may have a calf and may be able to be bred, but we have not managed to obtain one yet, so we just do not know for sure.
(*5) This collection includes as rewards the decorative items "Wheat Scarecrow" and "Spring Water Mill. We have not actually obtained these items yet so we do not know if the Water Mill is functional or animated. The Wheat Scarecrow is presumed to be a decorative item consistent to the other types of Scarecrow in the game already.
(*6) Possibly the best set of rewards from the new Collections, the Squash Collection includes an awesome Gnome for the Level 2 reward, which should make all of the Gnome Collectors out there wicked happy -- but in addition to that, the Level 3 reward is a specially colored Pig that is fully integrated into the new Pig Breeding System, which means it will turn out to be a rewarding reward... We are just saying...
The rewards above are just the ones that we currently know about -- and while the new collections system includes three reward levels per collection, there may be levels beyond the first three that become available after the first three are completed -- we just do not know about them yet. A source previously employed at Zynga tells us that there were plans to add in special rewards that became available once all of the six collections have all three levels completed, but we have no way to verify that this actually has been implemented in the game.
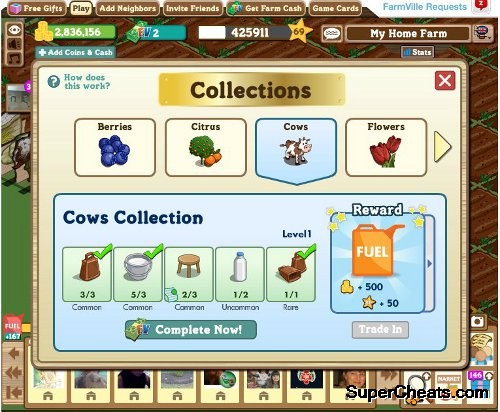
The New Collection Sets
Boosting Collections -- Strategies to Improve Your Chances
While you cannot really boost the collections, there are steps that you can take in your regular game play that significantly increases your chances of obtaining the collection items, so in that sense you can boost them! The following techniques have been carefully tested and are confirmed strategies for working towards completing the collections in as short a period as possible.
We owe a significant debt of gratitude to Farmville Gamer Geofry Glenn (GSGlenn) for his patient work on exploring the new Collections, and working out the new Collection System that has been added into the game. Make no mistake about it, the Collections System in the game has been completely redone, and now operates under a different mechanism than it previously did.
-- Basic Collection Strategies --
The system that was in use in the game prior to May 2011 was split between game actions and the Gifts System in the game, and required the player to rely upon their neighbors for acquiring some of the collection items in order to complete the individual collections. This is no longer the case.
While some collection items can still be obtained through gifting, game play (clicks) are now the primary means for obtaining the items for the new collections.
In May 2011 the original set of basic collections was completely removed from the Collection Menu and replaced with the new collection sets, which consist of the following specific collections:
(1) Berries Collection
(2) Citrus Collection
(3) Cows Collection
(4) Flowers Collection
(5) Grains Collection
(6) Squash Collection
Each of the collections has three levels -- and each level has a basic set of requirements:
-- Level 1: 3 of each common item, 2 of each uncommon item, and 1 of the rare item.
-- Level 2: 6 of each common item, 4 of each uncommon item, and 2 of the rare item.
-- Level 3: 12 of each common item, 8 of each uncommon item, and 4 of the rare item.
Each Collection Level has a basic reward set and a special reward associated with it.
The Random Number Generator (RNG) and You!
From everything that we can tell on the outside looking in, the new mechanism for the Collection System uses the Random Number Generator in the game to trigger the Collectible Events. It appears that the RNG runs multiple times when you use a vehicle or a special harvesting item (Arborist/Ranch Hand) but it also appears that this may not be a one-to-one ratio, and that performing the actions by hand, one at a time, may be beneficial.
In simple terms, each time you make a click-action, there is a chance that doing so will cause the RNG to return a number within the target range to spawn a Collectible item. Usually the use of the RNG to trigger an event is not considered a good thing, because that sort of mechanism provides very little control on the part of the player, but in this case it is actually a good thing!
Since we know that the system is using click-action to trigger the RNG check, it is in our best interests to cause as many individual click-actions as we can, because doing so increases the chance that we will acquire another collectible item!
For example, assume that you have upgraded your Tractors, Harvesters, and Seeders to Level 4 -- that means that whenever you use them, they process a block of 3x4 plots (we plots at a time in other words), so each time you use one of the farm machines you are processing 12 plots and generating several click-actions but not necessarily 12... In addition to that, it may be lumping all 12 actions into the same roll, which means that you are less likely to obtain a variety of the items you could obtain.
That is actually a bad thing for our purposes, because that convenience may actually be costing us items! While there is no way to know for sure, acting with a caution cannot hurt us here, and may be the smartest approach. That being the case, instead of using the farm machinery to do our farming, we do it by hand, so that we generate as many click-actions as we can, and thus a chance for a collectible item with each click-action!
Obtaining Collectible Items
While each of the collections has some unique actions to obtain items for them, generally speaking you have the chance to obtain an item when you:
-- Fertilize
-- Harvest a Crop
-- Harvest an Animal
-- Harvest an Orchard
-- Harvest a Tree
-- Harvest the Dairy Barn
-- Harvest the Stables
-- Plant
-- Plow
Each of the new collections has a specific element associated with it, and that is where the bulk of the items will be found for it. For example:
(1) Berries Collection
Actions related to Berry Crops.
(2) Citrus Collection
Actions related to Tree Crops (note: not just Citrus Trees).
(3) Cows Collection
Actions related to Cows and the Dairy Farms (including both farms).
(4) Flowers Collection
Actions related to Flower Crops.
(5) Grains Collection
Actions related to Grain Crops (Rice, Wheat, etc).
(6) Squash Collection
Actions related to Vegetable Crops (confirmed).
-- Alternate Sources --
Under the previous system it was possible to obtain collectible items from Special Delivery Boxes and Mystery Eggs -- this no longer appears to be true. The only alternate sources for obtaining collectible items in the game now appears to be directly from your friends and neighbors as gifts, or by clicking on a news post in their feed from when they find a collectible item through click-action.
Retired Collections
If you were not playing the game prior to the addition of the new collectible system in May 2011, you may be unaware of the collections that were previously available and that are now officially retired. The following information about the retired collections is presented here to help you better understand the approach that was used and the variety of items and collectibles that have been part of the game in the past...
Art Collection (Moooona Lisa Reward)
Autumn Collection (Leaf Pile Pig Reward)
Bugs Collection (XP Fuel Rewards)
Butterfly Collection (XP Fuel Rewards)
Button Collection (XP Fuel Rewards)
Country Kitsch Collection (XP Fuel Rewards)
Feather Collection (XP Fuel Rewards)
Gardening Tools Collection (XP Fuel Rewards)
Gemstone Collection (Gem Trophy Reward)
Snow Collection (Cow Snow Globe Reward)
Toy Collection (Uber Cool Sheep Toy Reward)
Our very reliable source inside Zynga tells us that additional collections are currently planned in both of the established Collection Types -- Regular (Longer-term) and Limited Time ("Lightning Collections") as well as a third type that previously was not implemented in the game, Special Event Collections. There may be Holiday Collections added as well, but probably not for every holiday.
At the end of your farming day, when the tractor is parked in the Garage with its engine ping-ping-pinging away the heat of the days work, and the crops on their way to market, there is only one real way to determine how well your efforts paid off -- your XP gain for the day.
Most farmers consider any day that ends with a level-up to be a good day; rare are the days when you gain more than one level but, if you could do that, would you? Well as it turns out you can... That is one of the tricks in Farmville that the serious players use, and it is entirely based upon simple alchemy -- the act of turning Coins into XP.
Most players will experience this -- often on their own -- as they realize that they can turn their Coins into XP by plowing a crop plot, planting a seed that pays 2XP and then deleting the plot, turning those 30 Coins into 3 XP. If your first reaction was to feel maybe just a little guilty about doing that -- that is perfectly natural. After all, you are gaming the system. Doing something that was not intended to be a normal part of game play. But are you actually cheating or breaking the rules? The simple answer is no, you are not.
While it is true that the game was not intended to include XP boosting, as long as you are using a legitimate resource to create that XP the powers behind the game have confirmed that it is perfectly acceptable game play. The thing is, trading 30 coins for 3 XP? Yeah, that is not really going to get you where you want to go quickly, is it?
Think Big
If you are going to dabble in coin alchemy you should take the same approach that the big boys do, and go for your XP measured in the hundreds of points -- of course that means transmuting large amounts of Coin, but all that really means is you need to understand how to get large amounts of coin, right?
Translating Coin into XP has a very basic exchange rate that is jokingly called the Double-Ought Exchange. When you see a player saying that, what they are talking about is the fact that you can instantly tell how much XP a building will give by knocking the last two zeros from the price -- so a building that costs 100,000 Coins will pay off 1,000 XP. Now you know what the basic exchange rate is for changing Coins to XP!
Look at the following list to see what your options are:
-- Dairy Farm 10,000 Coins / 100 XP
-- General Store 200,000 Coins / 2,000 XP
-- Glass House 100,000 Coins / 1,000 XP
-- Post Office 100,000 Coins / 1,000 XP
-- School House 50,000 Coins / 500 XP
Right, so you get the idea... Now you need to look into maximizing your Coin income so that you can turn those coins into XP!
You are probably thinking crops right now -- which crop pays off the most Coins? That is a good start, but that is not really how the pro's do it. You see to make money that way takes effort, time, and money. You want to make it, not spend it, right? Right! Still, go ahead and plant profitable crops, because every bit earned helps -- but do not ignore the real money-making opportunities in the game in the process.
There are two areas for you to focus upon -- Trees and Animals. We will discuss trees first.
Buying Buildings for XP
Orchard Farming
All trees are not equal -- that is the first lesson you need to learn. Look at the return rates for the following list of trees and see if you can tell which ones you should be filling your Orchards with:
Tree Name -- Harvest Return -- Source
-- Acai -- 158 Coins -- Market / Seedlings
-- Arjuna -- 140 Coins -- Gift
-- Autumn Gingko -- 390 Coins -- Market / Seedling
-- Jackfruit -- 140 -- Mystery Gift
-- Lime -- 75 Coins -- Market / Seedlings
The list above may seem like an obvious choice -- but it actually represents a logical progression. The Autumn Gigko Tree is what you want your Orchards full of -- but getting those means a lot of breeding, so to start out your Tree Farm you will need a tree that has a decent return that you can easily obtain. That tree is the Lime Tree!
You can purchase Lime Trees all day long from the Marketplace for 750 coins each. No matter what tree you choose, since you are placing them in Orchards, their grow time does not matter. The Orchard has a 2-day grow time so end of discussion!
While you will largely populate your Orchard with Lime Trees, you will want to include any high value trees that you already own in the mix, because money is money. So take stock of your current Tree inventory, set aside the good earners, and get rid of the rest. Then start building Orchards as fast as you can. Once you have your Tree Farm in full production, every two days you will be gaining between 1 and 3 Levels!
Ranching Profits
While Tree Farming is an easier to manage project from a logistics point of view, animals can also provide a very nice income!
Building Hoisting is one of the methods that we touched on earlier in the guide -- this technique is mostly used to boost Ribbons and boost collection items but it also gives coin -- and it can be done on the Stables and the Dairy Farm. Simply use the move tool to move a Cow that is ready to harvest into the already harvested Dairy Farm and it changes back to harvestable -- giving you another chance at spawning a collection item, and the coin for the harvesting.
Animals to Concentrate Upon
The following are the animals you want to have on your Farm for Professional Ranching:
Desired Cows -- Harvest Amount
-----------------------------------------
-- Belted Cow -- 3,000 Coins
-- Baby Cows -- 80 Coins
Desired Horses -- Harvest Amount
-----------------------------------------
-- Baby Horses -- 80 Coins
-- Named Horses -- 140 Coins
Other -- Harvest Amount
-----------------------------------------
-- Arapawa Goat -- 1200 Coins
-- Saddleback Pig -- 1000 Coins
Basic strategy here is to get as many of the higher-value animals as you can (but that is a best case scenario approach and will not often apply to most farmers). The second part of the basic strategy is to pack your buildings to capacity -- even if the animal type is not a high return one -- because you are going on numbers.
The Basic Steps
(1) Build a Dairy Farm
(2) Fill it completely with cows
(3) Immediately begin the expansion process
(4) When expanded, fill it up!
(5) Expand it again to the limit.
(6) Keep it filled.
(7) When you have completed the expansion and filled the Barn buy another, rinse and repeat.
The same logic applies to the Stables -- but NOT the Nursery! The facts are that the baby horses you have are simply worth more you to you placed on your farm in densely packed lines. You should be actively breeding to obtain as many as you can.
The general logic here is numbers -- the more you have the more you make, and animals do not cost you money to keep and raise! The most profitable crop in the game is trees, followed by crops, and finally animals.
Once you have your Tree Farm, your Ranching, and your crops in full production you can average a million Coins or more per day! That translates to 10,000 XP a day which is one heck of a fast track.
Taking Advantage of Free Cash
Every month companies come to Zynga to advertise their services or products via the game -- and these often appear as Free Cash offers in the Sponsored Link section of the main page below the game interface. Sometimes you just have to watch a commercial -- often there is a mini-game involved -- but in the end, you get a few free Farm Cach Bucks for your time, and that is certainly worth doing! Between the Bucks you get for viewing these ads and the Buck you get for each level you reach in the game you can easily acquire enough free Cash to buy some of the special items that you want in the game.
Remember that most of the special items that are cash-only have nice chunks of XP included in the purchase of them!
In all of the talk we have had on the game the one thing that we have yet to address is the actual leveling process -- how much XP does it take? What title are you granted? Knowing that will give you a better idea about estimating times to level and, more significant, help you understand the process as the more advanced stages when you are leveraging the tricks you learned in this guide to pull in large amounts of Coin and transforming that into XP.
The first 30 to 40 levels are going to go a LOT slower than the last 70 or so, simply because you are spending the time during which you make them in building the infrastructure of your farm in order to be able to make massive progress later. Most of your friends and neighbors are not going to understand what you are doing -- they will see you slowly leveling while they rocket ahead, and think that they are just a little better at the game than you are. But you will catch up to them around Level 50, and then suddenly while they are plodding on at their "brisk" pace, you will shoot past them and rocket to Level 100 in what will seem like a blink of the eye to them, leaving them wondering just what in the heck happened here?!
There are several measures of Level in the game, including:
(20A) Leveling your Farmer
Level -- XP -- Title
----------------------------------------------------------------
1 -- 0 -- Field Hand
2 -- 15 -- Kinderfarmer
3 -- 30 -- Amateur Farmer
4 -- 70 -- Able Farmer
5 -- 140 -- Handy Farmer
6 -- 250 -- Nimble Farmer
7 -- 400 -- Savvy Farmer
8 -- 600 -- Fancy Farmer
9 -- 850 -- Sophisticated Farmer
10 -- 1,150 -- Splendid Farmer
11 -- 1,500 -- Farming Magician
12 -- 1,900 -- Farming Wizard
13 -- 2,400 -- Jolly Rancher
14 -- 3,000 -- Produce Professional
15 -- 3,700 -- Professor of Agriculture
16 -- 4,500 -- Hot Shot Farmer
17 -- 5,400 -- Super Shoveler
18 -- 6,400 -- Super Grower
19 -- 7,500 -- Professional Plower
20 -- 8,700 -- Green Giant
21 -- 10,000 -- Rockstar Farmer
22 -- 11,500 -- Barnyard Behemoth
23 -- 13,500 -- Magnificent Farmer
24 -- 16,000 -- Cream of the Crop
25 -- 19,000 -- Sensational Sower
26 -- 22,500 -- Sultan of Soil
27 -- 26,500 -- Thrill of the Till
28 -- 31,000 -- Master of Pasture
29 -- 36,000 -- Sensation of the Plantation
30 -- 42,000 -- Lord of the Plow
31 -- 49,000 -- Bastillion of the Barn
32 -- 57,000 -- Ace of Acreage
33 -- 65,000 -- Livestock Lord
34 -- 74,000 -- Practiced Farmer
35 -- 83,000 -- Skilled Farmer
36 -- 93,000 -- Green Ribbon Farmer
37 -- 103,000 -- Clever Farmer
38 -- 113,000 -- Great Farmer
39 -- 123,000 -- Smart Farmer
40 -- 133,000 -- Model Farmer
41 -- 143,000 -- Frugal Farmer
42 -- 153,000 -- Hot Shot Farmer
43 -- 163,000 -- Proficient Farmer
44 -- 173,000 -- Sophisticated Farmer
45 -- 183,000 -- Accomplished Farmer
46 -- 193,000 -- Brilliant Farmer
47 -- 203,000 -- Prominent Farmer
48 -- 213,000 -- Expert Farmer
49 -- 223,000 -- Genius Farmer
50 -- 233,000 -- Big League Farmer
51 -- 243,000 -- Master Farmer
52 -- 253,000 -- Grand Master Farmer
53 -- 263,000 -- Farming Authority
54 -- 273,000 -- Yellow Ribbon Farmer
55 -- 283,000 -- Farmer Cash Crop
56 -- 293,000 -- The Real Deal
57 -- 303,000 -- Killer Tiller
58 -- 313,000 -- Farm-o-saurus Rex
59 -- 323,000 -- White Ribbon Farmer
60 -- 333,000 -- I Can Haz Farm?!
61 -- 343,000 -- Old Mc-Who??
62 -- 353,000 -- Educated Farmer
63 -- 363,000 -- Red Ribbon Farmer
64 -- 373,000 -- Hay Roller
65 -- 383,000 -- Farming Virtuoso
66 -- 393,000 -- Blue Ribbon Farmer
67 -- 403,000 -- Purple Ribbon Farmer
68 -- 413,000 -- County Fair Champ
69 -- 423,000 -- State Fair Champ
70 -- 433,000 -- World Fair Champ
71 -- 443,500 -- Beyond Fairs Farmer
72 -- 454,500 -- Farm Fanatic
73 -- 466,000 -- Head Honcho
74 -- 478,000 -- Livestock Broker
75 -- 490,500 -- Tractor Tycoon
76 -- 504,000 -- Market Master
77 -- 518,500 -- Talk of the Town
78 -- 534,000 -- Plant's Best Friend
79 -- 550,500 -- Cow Whisperer
80 -- 568,000 -- Farm Hero
81 -- 587,000 -- Farm Idol
82 -- 607,500 -- Agriculture Aficionado
83 -- 629,500 -- Soil Sage
84 -- 653,000 -- Crop Connoisseur
85 -- 678,500 -- Dirt Disciple
86 -- 706,000 -- Big Ole' Boss
87 -- 735,500 -- Farm Fiend
88 -- 767,000 -- Plow Plant Reap Repeater
89 -- 801,000 -- High Harvester
90 -- 837,500 -- Farm Freak
91 -- 876,500 -- Veni Vidi Agri
92 -- 918,500 -- Incomparable Farmer
93 -- 963,500 -- Soil Savant
94 -- 1,012,000 -- Farm Overlord
95 -- 1,064,000 -- Stellar Farmer
96 -- 1,120,000 -- Transcendent Tiller
97 -- 1,180,000 -- Universal Farmer
98 -- 1,244,500 -- Paragon Farmer
99 -- 1,313,500 -- Epic Farmer
100 -- 1,387,500 -- Omnipotent Agriculturalist
(20B) Leveling Your Farm
In addition to leveling your farmer in the game, you also level your farm in the sense of upgrading its size and, thus, its capabilities. Getting your farm to the next level is a very important focus of your play during the first 40 levels of the game -- and you should always have that in mind when making decisions about spending large amounts of Coin early on.
While you will be taking in and spending obscene amounts of Coin from Level 50 onward, between Level 1 and 25 you will need to take extreme care in how you spend your Coin, and from 25 to 40 or thereabouts, your focus is going to be on acquisition not spending, as you build up the warchest that is required to make the final three farm expansions.
For the purposes of evaluation and quantification, we measure our farm land only in plot sizes. The following tables spell out in detail the important numbers for this process:
Regular (default) Farm
Farm Title                 --   Farm Size --  Neighbors   --     Coin       --   Buck
-------------------------------------------------------------------------------------------
Default                    --     12x12     --        0   --         Free   --    0
Homestead                  --     14x14     --        8   --       10,000   --   20
Family Farm                --     16x16     --        9   --       25,000   --   20
Big Family Farm            --     18x18     --       13   --       50,000   --   20
Plantation                 --     20x20     --       16   --       75,000   --   20
Big Ole Plantation         --     22x22     --       20   --      250,000   --   30
Mighty Plantation          --     24x24     --       30   --      500,000   --   60
Grand Plantation           --     26x26     --       35   --    2,000,000   --   80
Farm Estate                --     28x28     --       45   --    4,000,000   --  120
English (English Countryside) Farm
Farm Title                   --   Farm Size --  Surveyors   --     Coin       --   Buck
-------------------------------------------------------------------------------------------
Default                      --     12x12   --        0     --        Free    --    0
English Homestead            --     14x14   --        2     --      25,000    --   20
English Family               --     16x16   --        3     --      50,000    --   30
Freehold                     --     18x18   --        9     --     100,000    --   40
English Plantation           --     20x20   --       12     --     200,000    --   50
English Holding              --     22x22   --       15     --     400,000    --   60
English Estate               --     24x24   --       20     --     750,000    --   75
When you upgrade your farm what happens is that two rows of plots are added to the bottom and left sides of the farm -- nothing is altered or changed on the farm, as your animals and buildings stay right where they are. The added land appears as expanded space along the edges so that does not require that the present contents be disturbed.
The first three expansions will come relatively quick, as they require only 13 neighbors to be added to your farm, and a total of 85,000 coin -- both of which are easy to obtain. After that it can be a bit slower, as most players have to look outside of their friend list to find neighbors to add beyond 13 -- so you will want to begin evaluating the neighbors of your neighbors to see who plays daily, and begin sending them friend invites.
-- Adding Friends and Neighbors --
The process of expanding your neighbor pool will be easier if you are up-front about what you are doing. When you sent the friend request, add in the comment box "Play Farmville please?" or something to that effect so that they know that the request is coming from a gamer for farmville -- as that will make it more likely that they will accept the friend request from someone they do not know.
Once they accept your request, you should promptly send them a Neighbor Request through the game, adding them as quick as you can. Being prompt is a good idea since they are more likely to be expecting the invitation from you and will be prompt in accepting that. Delaying could find you having added a friend but not a neighbor!
Efficiency dictates that you try to add more than you need -- if you are going for the Big Ole Plantation expansion -- which requires 30 neighbors -- go ahead and try to add 60 instead, so that you have the number needed for the expansion that follows, and thus will not have to do that all over again. Note that once you get to the level where you have 60 or more friends and neighbors you can expect to start getting the requests from people you do not know from THIER lists as well, making this all the more easier.
You will notice that in addition to the Neighbor/Coin listing in the tables above, I also list the amount in Cash (Farm Bucks) you would need to spend -- using Bucks eliminates the need to have Neighbors and spend coin -- it is an option -- but honestly I do not recommend it because it is both expensive and, more to the point, leaves you without the neighbors you will need for special event and other assistance as well as the Crafting System. You are much better off going the Neighbor/Coin route than spending cash.
You have now reached the end of the Guide but not the end of your adventures. As with any active and constantly expanding game, new content will be added to Farmville, and as a result of that, this Guide will get updated. Updates will likely happen each fortnight unless the new content in the game is of a nature that demands an immediate update.
This Guide is intended to be a useful resource to you -- and we hope that we have answered all of your questions while at the same time providing you with a useful tool in your game play. In addition to writing this guide, we also play the game, so you can expect us to stay on top of the changes and to explore all of the new content in detail.
Farmville is one of the most addictive games available on Facebook today -- and it is also one of the games that is easy to find yourself spending real money in as you play it. Part of the function of this guide was to provide you with the information that you need to be able to play the game competitively without needing to spend real money -- and we hope that this succeeded.
As with any potentially addictive activity, we hope that you will play this game with moderation -- too much of a good thing is almost never a good thing -- that is all we are saying.
Thank you for reading this guide -- thanks for visiting our site -- and thanks for being a good neighbor!
Cheers!
CMBF
There are a lot of items in the game that are widely collected to show your status and rank, from sheep and cows, to special horses and fantasy creatures like the Hippo in a Tutu, the Unicorn, and the Chinese Dragon -- but there is only one type of collectible in the game that really stands out as the mark of the veteran player -- one item in the game that is collected with serious intend and, understandably, displayed with great pride. What is that item? Why, Gnomes, of course!
In Farmville the Gnomes have a long history, having been present from nearly the fist day. While you probably will not have many of these bad boys, eventually you will acquire some as you begin building your own collection -- but you will still want to know what ones exist, and the story behind them (if there is one), right? Right!
So without further fuss, here is the unofficial Gnome Registry!
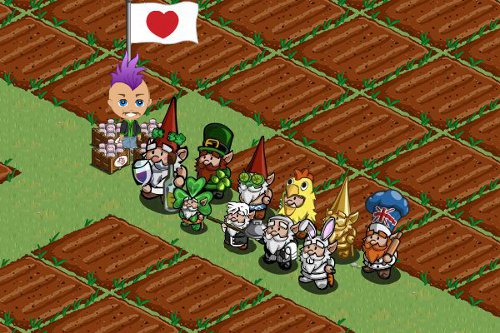
A Small Gnome Collection
Autumn Gnome (Limited Edition) Unavailable
Bacchus Gnome (Limited Edition) Unavailable
Bacchus Gnome Sr. (Limited Edition) Unavailable
Bride Gnome (Limited Edition) Unavailable
Bunny Gnome (Holiday Gnome) Unavailable
Candied Gnome Surfer Gnome (Limited Edition) Unavailable
Cave Gnome (Special) Available from Storage Cellar
Chef Gnome - British (Limited Edition) Available from Wishing Well
Chef Gnome (Limited Edition) Unavailable
Chef Gnome Sr. (Limited Edition) Unavailable
Chicken Gnome (Mystery Egg Prize) Available
Clover Gnome (Holiday Gnome) Unavailable
Cowboy Gnome (Limited Edition) Unavailable
Cowgirl Gnome (Mystery Game Prize) Unavailable
Cricket Gnome (Limited Edition) Unavailable
Cupid Gnome (Holiday Gnome) Unavailable
Detective Gnome (Limited Edition) Unavailable
Dutch Girl Gnome -- Unreleased
Dutch Gnome -- Unreleased
Elf Girl Gnome (Mystery Game Prize) Unavailable
Elf Gnome (Limited Edition) Unavailable
Eskimo Gnome (Limited Edition) Unavailable
Festival Gnome (Limited Edition) Unavailable
Franken Bride Gnome (Holiday Gnome) Unavailable
Franken Gnome (Holiday Gnome) Unavailable
Garden Gnome (Purchased from the Market) Available
Gentleman Gnome (Limited Edition) Unavailable
German Gnome (Limited Edition) Unavailable
Ghost Gnome (Holiday Gnome) Unavailable
Gingerbread Gnome (Limited Edition) Unavailable
Gnome Ref (Limited Edition) Unavailable
Gnome Sprinkler (Mystery Box) Unavailable
Gold Gnome (Mystery Egg Prize) Available
Groom Gnome (Limited Edition) Unavailable
Heart Broken Gnome (Holiday Gnome) Unavailable
Knight Gnome (Limited Edition) Unavailable
Leprechaun Gnome (Holiday Gnome) Unavailable
Master Gnome (Holiday Gnome) Unavailable
Mr. Swiss Gnome (Limited Edition) Unavailable
Mrs. Claus Gnome (Holiday Gnome) Unavailable
Ms. Swiss Gnome (Limited Edition) Unavailable
Mummy Gnome (Holiday Gnome) Unavailable
Mystery Gnome (Limited Edition) Unavailable
New Year Gnome (Holiday Gnome) Unavailable
Nutcracker Gnome (Holiday Gnome) Unavailable
Pancho Gnome -- Unreleased
Pilgrim Girl Gnome (Holiday Gnome) Unavailable
Pilgrim Gnome (Holiday Gnome) Unavailable
Platinum Gnome (Mystery Box) Unavailable
Pocahontas Gnome (Holiday Gnome) Unavailable
Prince Gnome (Limited Edition) Unavailable
Princess Gnome (Limited Edition) Unavailable
Santa Gnome (Holiday Gnome) Unavailable
Silver Gnome -- Unreleased
Spa Gnome (Limited Edition) Unavailable
Spa Gnome Sr. (Limited Edition) Unavailable
Student GnomeSurfer Gnome (Limited Edition) Unavailable
Surfer Gnome (Limited Edition) Unavailable
Swiss Alphorn Gnome (Limited Edition) Unavailable
Trawler Gnome (Limited Edition) Unavailable
Valentine Gnome (Holiday Gnome) Unavailable
Vampire Gnome (Mystery Game Prize) Unavailable
Venus Gnome (Limited Edition) Unavailable
Wizard Gnome (Limited Edition) Unavailable
Instructions: This is a ticklist for the five-by method of tree mastery in which your goal is to obtain five of each tree type, and place them in Orchards. They are placed four tree types per orchard, in four grouped lines, so that with each harvest you add five mastery points to each tree type.
The ticklist is intended to help you keep track of what you have and what you need -- by marking the ticklets -- an example of how to use this ticklist is:
xxxoo O Apple(1) 75 150 225 Granny Smith Apple
xxxxx X Apricot(1) 57 114 171 Golden Apricot
In the example above you have three Apple Trees and they are not placed in an Orchard, because you have not ticked off the Orchard marker, and you have ticked off three of the five inventory markers. Presumedly then these three Apple Trees are placed somewhere on your farm outside of an Orchard.
The Apricot Tree on the other hand has been completed -- hence the five tickmarks -- and those trees have been placed into an Orchard -- hence the tickmark in the Orchard column.
The importance of placing your trees in an Orchard has more to do with equalization of growing time than anything else; the most common grow time is the 2-day cycle, but some trees take longer to grow. When you take two tree groups that are on a 2-day cycle, and 2 that are on a 3-day cycle and place them into an Orchard they all are locked into a 20day cycle because that is the timer affixed to the Orchard structure.
Trees placed in an Orchard have the random chance of spawning a sapling/seedling and the seedling is of the type that is listed in the seedling column here -- so if you place five Chestnut Trees into an Orchard and then harvest it and obtain a seedling, that seedling will be a Hazelnut Tree -- which is the Level 2 tree for that seed line.
Print this ticklist out and use it to keep track of your tree farm as you begin Advanced Tree Farming.
Ticklist
Orchard
Tree Name
Level 1
Mastery
Level 2
Mastery
Level 3
Mastery
Seedling
ooooo
O
Acacia
75
150
225
Candelabra
ooooo
O
Acai
75
150
225
Peach Palm
ooooo
O
African Tulip
75
150
225
ooooo
O
Alma Fig
75
150
225
ooooo
O
Almond Tree
75
150
225
Dwarf Almond
ooooo
O
American Aspen
75
150
225
European Aspen
ooooo
O
Amherstia
113
226
339
ooooo
O
Angel Red Pomegranate
68
136
204
ooooo
O
Angel Trumpet
75
150
225
ooooo
O
Apple Tree
75
150
225
Granny Smith Apple
ooooo
O
Apricot
57
171
342
Golden Apricot
ooooo
O
Arjuna
75
150
225
Indian Laurel
ooooo
O
Ash
75
150
225
ooooo
O
Asian Pear
113
226
339
Shinko Pear
ooooo
O
Asteroxylon
75
150
225
Williamsonia
ooooo
O
Autumn Ginko
113
226
339
ooooo
O
Avocado
75
150
225
Hass Avacado
ooooo
O
Azalea Bonsai
75
150
225
Azalea Bonsai II
ooooo
O
Azalea Bonsai II
75
150
225
ooooo
O
Baby Bundle
75
150
225
Giant Baby Bundle
ooooo
O
Bahri Date
113
226
339
ooooo
O
Balloon
75
150
225
Giant Balloon
ooooo
O
Bamboo Orchid
75
150
225
ooooo
O
Banana
113
226
339
Cuban Banana
ooooo
O
Banyan
75
150
225
ooooo
O
Baobab
?
?
?
ooooo
O
Bare Crystal
75
150
225
Giant Bare Crystal
ooooo
O
Basket
?
?
?
ooooo
O
Bay Laurel
75
150
225
ooooo
O
Beads
?
?
?
Giant Beads
ooooo
O
Bell Flower
75
150
225
Big Bell Flower
ooooo
O
Big Bell Flower
75
150
225
ooooo
O
Big Blossoming
75
150
225
ooooo
O
Big Candy Pumpkin
75
150
225
ooooo
O
Big Caramel Apple
75
150
225
ooooo
O
Big Chocolate Apple
?
?
?
ooooo
O
Big Chrome Apple
75
150
225
Big Chrome Cherry
ooooo
O
Big Chrome Cherry
75
150
225
ooooo
O
Big Cocoa Truffle
75
150
225
ooooo
O
Big Crystal Cave
75
150
225
ooooo
O
Big Dinosaur Eggs
?
?
?
ooooo
O
Big Fall Ribbon
75
150
225
ooooo
O
Big French Bread
75
150
225
ooooo
O
Big Frozen Apple
75
150
225
ooooo
O
Big Golden Holiday
75
150
225
ooooo
O
Big Gummi Bear
75
150
225
ooooo
O
Big Halloween Candle
75
150
225
ooooo
O
Big Halloween Candy
75
150
225
ooooo
O
Big Halloween Cookie
75
150
225
ooooo
O
Big Heart Cotton Candy
75
150
225
ooooo
O
Big Holiday Cookie
75
150
225
ooooo
O
Big Holiday Lantern
75
150
225
ooooo
O
Big Impressionist
75
150
225
ooooo
O
Big Impressionist II
75
150
225
ooooo
O
Big July Balloon
75
150
225
ooooo
O
Big Mini Cupcake
?
?
?
ooooo
O
Big Mother's Cookie
?
?
?
ooooo
O
Big New Year Lantern
75
150
225
ooooo
O
Big Pink Gem
75
150
225
ooooo
O
Big Potato Chips
75
150
225
ooooo
O
Big Rainbow Shower
?
?
?
ooooo
O
Big Rocky Candy
?
?
?
ooooo
O
Big Snowflake II
75
150
225
ooooo
O
Big Spruce Birdhouse
12
20
39
ooooo
O
Big Star Flower
75
150
225
ooooo
O
Big Strawberry Cake
?
?
?
ooooo
O
Big Valentine Cookie
?
?
?
ooooo
O
Bird Cherry
75
150
225
ooooo
O
Birthstone
75
150
225
Giant Birthstone
ooooo
O
Bitter Cherry
75
150
225
Pacific Madrone
ooooo
O
Bitternut Hickory
75
150
225
ooooo
O
Black Cherry
75
150
225
Giant Black Cherry
ooooo
O
Black Gum
12
24
36
Lombardy Poplar
ooooo
O
Blackhaw
75
150
225
Scarlet Buckeye
ooooo
O
Black Locust
75
150
225
ooooo
O
Blood Orange
57
114
171
ooooo
O
Blossoming
75
150
225
Big Blossoming
ooooo
O
Blue Cloud
75
150
225
ooooo
O
Boom
75
150
225
ooooo
O
Borealis
75
150
225
Giant Borealis
ooooo
O
Brazil Nut
75
150
225
Chicle
ooooo
O
Breadfruit
75
150
225
Breadnut
ooooo
O
Breadnut
75
150
225
ooooo
O
Bristle Pinecone
75
150
225
ooooo
O
Broken Heart
75
150
225
Giant Broken Heart
ooooo
O
Brownea
?
?
?
Royal Poinciana
ooooo
O
Bubble Gum
75
150
225
Giant Bubble Gum
ooooo
O
Bumble Bee
?
?
?
Giant Bumble Bee
ooooo
O
Bur Oak
75
150
225
Pin Oak
ooooo
O
Butterfly
75
150
225
Giant Butterfly
ooooo
O
Cake Pop
75
150
225
Giant Cake Pop
ooooo
O
California Fan Palm
?
?
?
Date Palm
ooooo
O
California Laurel
75
150
225
Bay Laurel
ooooo
O
California Redbud
75
150
225
Southern Rosebud
ooooo
O
Callery Pear
?
?
?
Corinthian Peach
ooooo
O
Camellia Bonsai
75
150
225
ooooo
O
Candelabra
75
150
225
ooooo
O
Candle
75
150
225
ooooo
O
Candle Nut
75
150
225
ooooo
O
Candy Apple
75
150
225
Giant Candy Apple
ooooo
O
Candy Bouquet
?
?
?
ooooo
O
Candy Cane
75
150
225
Giant Candy Cane
ooooo
O
Candy Corn
75
150
225
Giant Candy Corn
ooooo
O
Caramel Apple I
75
150
225
Big Caramel Apple
ooooo
O
Carnation
?
?
?
Daisy Tree
ooooo
O
Carnival
N/A
N/A
N/A
ooooo
O
Carob
75
150
225
ooooo
O
Cashew
75
150
225
Wild Cashew
ooooo
O
Catawba Crape
75
150
225
ooooo
O
Celtic Knot
75
150
225
Giant Celtic Knot
ooooo
O
Chainfruit Cholla
?
?
?
ooooo
O
Chanee Durian
57
114
171
ooooo
O
Cherry Plum
75
150
225
ooooo
O
Cherry
113
226
339
Ranier Cherry
ooooo
O
Chestnut
75
150
225
Hazlenut
ooooo
O
Chicle
75
150
225
ooooo
O
Chinese Lantern
75
150
225
ooooo
O
Chinese Strawberry
75
150
225
ooooo
O
Chinese Tamarisk
75
150
225
ooooo
O
Chinese Tulip
75
150
225
African Tulip
ooooo
O
Choco Macadamia
75
150
225
ooooo
O
Chocolate Apple
?
?
?
Big Chocolate Apple
ooooo
O
Chocolate Heart
75
150
225
Giant Chocolate Heart
ooooo
O
Chrome Apple
75
150
225
Chrome Cherry
ooooo
O
Chrome Cherry
75
150
225
ooooo
O
Cinnamon Heart
75
150
225
Heart Candy
ooooo
O
Clover
?
?
?
Giant Clover
ooooo
O
Cocoa
75
150
225
Giant Cocoa
ooooo
O
Cocoa Truffle
75
150
225
ooooo
O
Coconut
50
100
150
Golden Malayan Coconut
ooooo
O
Coin
75
150
225
Giant Coin
ooooo
O
Colville's Glory
?
?
?
Octopus
ooooo
O
Conch Shell
75
150
225
ooooo
O
Confetti
75
150
225
Disco Ball
ooooo
O
Cork Oak
75
150
225
ooooo
O
Cornelian Cherry
75
150
225
Montmorency Cherry
ooooo
O
Cornucopia
75
150
225
Giant Cornucopia
ooooo
O
Corsage
?
?
?
Giant Corsage
ooooo
O
Cottoncandy
75
150
225
Bubble Gum
ooooo
O
Crab Apple
75
150
225
ooooo
O
Crack Willow
75
150
225
ooooo
O
Crystal Cave
75
150
225
Big Crystal Cave
ooooo
O
Cuban Banana
113
226
339
ooooo
O
Cupcake
75
150
225
ooooo
O
Cycad
?
?
?
Tempskya
ooooo
O
Cypress
75
150
225
Monterrey Cypress
ooooo
O
Cypress Sculpted
75
150
225
ooooo
O
Dahlia
75
150
225
Gerber
ooooo
O
Dahurian Birch
75
150
225
ooooo
O
Daisy
?
?
?
ooooo
O
Damson
75
150
225
Crab Apple
ooooo
O
Dark Apple
75
150
225
Giant Dark Apple
ooooo
O
Dark Heart
75
150
225
Giant Dark Heart
ooooo
O
Dark Willow
75
150
225
Giant Dark Willow
ooooo
O
Date Palm
?
?
?
ooooo
O
Date
113
226
339
Bahri Date
ooooo
O
Dawn
75
150
225
Dusk
ooooo
O
Diamond Ring
?
?
?
ooooo
O
Dinosaur Eggs
?
?
?
Big Dinosaur Eggs
ooooo
O
Disco Ball
75
150
225
ooooo
O
Discover
75
150
225
ooooo
O
Dogwood
75
150
225
Pink Dogwood
ooooo
O
Dollie
?
?
?
Ribbon
ooooo
O
Downy Birch
75
150
225
ooooo
O
Durian
57
114
171
ooooo
O
Dusk
75
150
225
ooooo
O
Dwarf Almond
75
150
225
ooooo
O
Earth
?
?
?
Giant Earth
ooooo
O
Eastern Redbud
?
?
?
Oklahoma Redbud
ooooo
O
Eastern Red Cedar
12
20
39
White Cedar
ooooo
O
Elberta Peach
57
114
171
ooooo
O
Emerald
?
?
?
Giant Emerald
ooooo
O
Empress
?
?
?
ooooo
O
Enchanted Iris
?
?
?
ooooo
O
English Elm
75
150
225
ooooo
O
European Aspen
75
150
225
ooooo
O
European Beech
75
150
225
ooooo
O
European Pear
75
150
225
ooooo
O
Fairy
75
150
225
Giant Fairy
ooooo
O
Fall
12
24
36
Speckled Alder
ooooo
O
Fall Ribbon
75
150
225
Big Fall Ribbon
ooooo
O
Fan Palm
?
?
?
ooooo
O
Father
75
150
225
ooooo
O
Fig
75
150
225
Alma Fig
ooooo
O
Fire Apple
N/A
N/A
N/A
Giant Fire Apple
ooooo
O
Fire Gem
75
150
225
Large Fire Gem
ooooo
O
Fire Peach
75
150
225
Giant Fire Peach
ooooo
O
Firework
75
150
225
Giant Firework
ooooo
O
Fleur de Lis
75
150
225
ooooo
O
Flip Flop
75
150
225
Giant Flip Flop
ooooo
O
Flowery Bonsai
75
150
225
Flowery Bonsai II
ooooo
O
Flowery Bonsai II
75
150
225
ooooo
O
Forbidden Gem
75
150
225
Giant Forbidden Gem
ooooo
O
Fortune
75
150
225
Chinese Lantern
ooooo
O
Foxtail Palm
75
150
225
ooooo
O
Fraiser Fir
75
150
225
Giant Fraiser Fir
ooooo
O
French Bread
75
150
225
ooooo
O
French Tamarisk
75
150
225
Chinese Tamarisk
ooooo
O
Fringe
?
?
?
Goldenchain
ooooo
O
Frosted Fairy
75
150
225
Giant Frosted Fairy
ooooo
O
Frozen Apple
75
150
225
Big Frozen Apple
ooooo
O
Frozen Gem
75
150
225
Giant Frozen Gem
ooooo
O
Frozen Spruce
75
150
225
Winter Spruce
ooooo
O
Fuchsia Bonsai
75
150
225
ooooo
O
Gem
75
150
225
Giant Gem
ooooo
O
Gem Fruit
75
150
225
ooooo
O
Gerber
75
150
225
ooooo
O
Giant Amethyst
75
150
225
ooooo
O
Giant Baby Bundle
75
150
225
ooooo
O
Giant Balloon
75
150
225
ooooo
O
Giant Bare Crystal
75
150
225
ooooo
O
Giant Beads
?
?
?
ooooo
O
Giant Birthstone
75
150
225
ooooo
O
Giant Black Cherry
75
150
225
ooooo
O
Giant Boom
75
150
225
ooooo
O
Giant Borealis
75
150
225
ooooo
O
Giant Broken Heart
75
150
225
ooooo
O
Giant Bubblegum
75
150
225
ooooo
O
Giant Bumble Bee
?
?
?
ooooo
O
Giant Butterfly
75
150
225
ooooo
O
Giant Cake Pop
75
150
225
ooooo
O
Giant Candy Apple
75
150
225
ooooo
O
Giant Candy Cane
75
150
225
ooooo
O
Giant Candy Corn
75
150
225
ooooo
O
Giant Celtic Knot
75
150
225
ooooo
O
Giant Chocolate Heart
75
150
225
ooooo
O
Giant Cinnamon Heart
75
150
225
ooooo
O
Giant Clover
75
150
225
ooooo
O
Giant Cocoa
75
150
225
ooooo
O
Giant Coconut
24
216
240
ooooo
O
Giant Coin
75
150
225
ooooo
O
Giant Confetti
75
150
225
ooooo
O
Giant Cornucopia
75
150
225
ooooo
O
Giant Corsage
?
?
?
ooooo
O
Giant Cotton Candy
75
150
225
ooooo
O
Giant Cupcake
75
150
225
ooooo
O
Giant Cupid
?
?
?
ooooo
O
Giant Dark Apple
75
150
225
ooooo
O
Giant Dark Heart
?
?
?
ooooo
O
Giant Dark Willow
?
?
?
ooooo
O
Giant Date
29
?
?
ooooo
O
Giant Disco Ball
75
150
225
ooooo
O
Giant Earth
?
?
?
ooooo
O
Giant Emerald
?
?
?
ooooo
O
Giant Fairy
75
150
225
ooooo
O
Giant Father
75
150
225
ooooo
O
Giant Fire Apple
?
?
?
ooooo
O
Giant Fire Peach
75
150
225
ooooo
O
Giant Firework
75
150
225
ooooo
O
Giant Fleur de Lis
75
150
225
ooooo
O
Giant Flip Flop
75
150
225
ooooo
O
Giant Forbidden Gem
75
150
225
ooooo
O
Giant Fraiser Fir
75
150
225
ooooo
O
Giant Frosted Fairy
75
150
225
ooooo
O
Giant Frozen Gem
75
150
225
ooooo
O
Giant Gem
75
150
225
ooooo
O
Giant Gem Fruit
75
150
225
ooooo
O
Giant Gingerbread
75
150
225
ooooo
O
Giant Gnarled
75
150
225
ooooo
O
Giant Golden Apple
75
150
225
ooooo
O
Giant Golden Fairy
75
150
225
ooooo
O
Giant Gorse
75
150
225
ooooo
O
Giant Gum Drop
75
150
225
ooooo
O
Giant Halloween Lantern
75
150
225
ooooo
O
Giant Hard Candy
?
?
?
ooooo
O
Giant Heart Balloon
?
?
?
ooooo
O
Giant Heart
75
150
225
ooooo
O
Giant Heart Candy
75
150
225
ooooo
O
Giant Holiday Candle
75
150
225
ooooo
O
Giant Holiday Chocolate
75
150
225
ooooo
O
Giant Holiday Corn
75
150
225
ooooo
O
Giant Ice Cream
75
150
225
ooooo
O
Giant Instrument
?
?
?
ooooo
O
Giant Jack O'Lantern
75
150
225
ooooo
O
Giant Jewel
75
150
225
ooooo
O
Giant Jingle Bell
12
20
39
ooooo
O
Giant July Confetti
75
150
225
ooooo
O
Giant July Ice Cream
75
150
225
ooooo
O
Giant Kwanzan
?
?
?
ooooo
O
Giant Labyrinth
75
150
225
ooooo
O
Giant Lace
75
150
225
ooooo
O
Giant Lava Banyan
?
?
?
ooooo
O
Giant Lava Stone
?
?
?
ooooo
O
Giant Lollipop
?
?
?
ooooo
O
Giant Lucky Charm
?
?
?
ooooo
O
Giant Lucky Cookies
75
150
225
ooooo
O
Giant Mac & Cheese
75
225
450
ooooo
O
Giant Magic Orange
75
150
225
ooooo
O
Giant Magic Peach
75
150
225
ooooo
O
Giant Mardi Gras
75
150
225
ooooo
O
Giant Mask
?
?
?
ooooo
O
Giant Miracle-Gro
?
?
?
ooooo
O
Giant Nutcracker
75
150
225
ooooo
O
Giant Origami
?
?
?
ooooo
O
Giant Pink Pearl
?
?
?
ooooo
O
Giant Poinsettia
20
40
60
ooooo
O
Giant Present
?
?
?
ooooo
O
Giant Purple Bubble Gum
75
150
225
ooooo
O
Giant Purple Crystal
75
150
225
ooooo
O
Giant Queen's Crape
N/A
N/A
N/A
ooooo
O
Giant Rainbow
75
150
225
ooooo
O
Giant Red Gem
75
150
225
ooooo
O
Giant Ribbon Candy
N/A
N/A
N/A
ooooo
O
Giant Ribbon Glower
75
150
225
ooooo
O
Giant Sand Dollar
N/A
N/A
N/A
ooooo
O
Giant Santa Hat
75
150
225
ooooo
O
Giant Sapphire
75
150
225
ooooo
O
Giant Sea Shell
N/A
N/A
N/A
ooooo
O
Giant Sequin
N/A
N/A
N/A
ooooo
O
Giant Shamrock
75
150
225
ooooo
O
Giant Snowcone
75
150
225
ooooo
O
Giant Sour Apple
75
150
225
ooooo
O
Giant Spiral Crystal
75
150
225
ooooo
O
Giant Spring Egg
75
150
225
ooooo
O
Giant Star Fish
N/A
N/A
N/A
ooooo
O
Giant Stocking
N/A
N/A
N/A
ooooo
O
Giant Wedding
75
150
225
ooooo
O
Giant Whittled
75
150
225
ooooo
O
Giant Wilted
N/A
N/A
N/A
ooooo
O
Giant Wing
N/A
N/A
N/A
ooooo
O
Giant Winter Spirit
N/A
N/A
N/A
ooooo
O
Gingerbread
75
150
225
Giant Gingerbread
ooooo
O
Gingko
113
226
339
Autumn Gingko
ooooo
O
Gnarled
N/A
N/A
N/A
Giant Gnarled
ooooo
O
Gold Tinsel
75
150
225
ooooo
O
Golden Apple
75
150
225
Giant Golden Apple
ooooo
O
Golden Apricot
57
114
171
ooooo
O
Golden Bell
75
150
225
ooooo
O
Golden Fairy
75
150
225
Giant Golden Fairy
ooooo
O
Golden Holiday
75
150
225
Big Golden Holiday
ooooo
O
Golden Malayan Coconut
50
100
150
ooooo
O
Golden Plum
75
150
225
ooooo
O
Golden Starfruit
57
114
171
ooooo
O
Goldenchain
N/A
N/A
N/A
ooooo
O
Gorse
75
150
225
ooooo
O
Granny Smith Apple
113
226
339
ooooo
O
Grapefruit
113
226
339
Star Ruby Grapefruit
ooooo
O
Guava
113
226
339
Ruby Guava
ooooo
O
Gulmohar
75
150
225
Mountain Ebony
ooooo
O
Gum Drop
75
150
225
Giant Gum Drop
ooooo
O
Gummi Bear
N/A
N/A
N/A
Big Gummi Bear
ooooo
O
Halloween Candle
75
150
225
Big Halloween Candle
ooooo
O
Halloween Candy
75
150
225
Giant Halloween Candy
ooooo
O
Halloween Cookie
75
150
225
Big Halloween Cookie
ooooo
O
Halloween Lantern
75
150
225
Giant Halloween Lantern
ooooo
O
Hard Candy
N/A
N/A
N/A
Giant Hard Candy
ooooo
O
Hass Avocado
75
150
225
ooooo
O
Hawaiian Cherry
24
216
240
ooooo
O
Hawthorn
75
150
225
Midland Hawthorn
ooooo
O
Hazelnut
75
150
225
ooooo
O
Heart
75
150
225
Giant Heart
ooooo
O
Heart Balloon
N/A
N/A
N/A
Giant Heart Balloon
ooooo
O
Heart Candy
75
150
225
ooooo
O
Heart Cotton Candy
75
150
225
Big Heart Cotton Candy
ooooo
O
Heart Shape
75
150
225
ooooo
O
Heirloom Apple
113
226
339
Granny Smith Apple
ooooo
O
Holiday
75
150
225
Ornament II
ooooo
O
Holiday Candle
75
150
225
Giant Holiday Candle
ooooo
O
Holiday Chocolate
75
150
225
Giant Holiday Chocolate
ooooo
O
Holiday Cookie
75
150
225
Big Holiday Cookie
ooooo
O
Holiday Corn
75
150
225
Giant Holiday Corn
ooooo
O
Holiday Lantern
75
150
225
Big Holiday Lantern
ooooo
O
Holly Oak
75
150
225
ooooo
O
Honeycrisp Apple
75
150
225
Big Honeycrisp Apple
ooooo
O
Honey Locust
75
150
225
Black Locust
ooooo
O
Ice Cream
75
150
225
Giant Ice Cream
ooooo
O
Ice Cream Mango
N/A
N/A
N/A
ooooo
O
Ice Cream Sundae
75
150
225
ooooo
O
Ice Crystal
25
50
75
ooooo
O
Ice Sculpture
75
150
225
Giant Ice Sculpted
ooooo
O
Impressionist
75
150
225
ooooo
O
Impressionist II
75
150
225
ooooo
O
Incense Cedar
N/A
N/A
N/A
Western Red Cedar
ooooo
O
Indian Laurel
75
150
225
ooooo
O
Instrument
N/A
N/A
N/A
Giant Instrument
ooooo
O
Intertwined
75
150
225
Heart Shape
ooooo
O
Ironwood
75
150
225
Mimosa Silk
ooooo
O
Jacaranda
75
150
225
ooooo
O
Jack O'Lantern
75
150
225
Giant Jack O'Lantern
ooooo
O
Jackfruit
75
150
225
ooooo
O
Japanese Maple
75
150
225
ooooo
O
Japanese Persimmon
N/A
N/A
N/A
ooooo
O
Jewel
75
150
225
ooooo
O
Jingle Bell
12
20
39
Giant Jingle Bell
ooooo
O
Joshua
N/A
N/A
N/A
Chainfruit Cholla
ooooo
O
July Balloon
75
150
225
ooooo
O
July Confetti
75
150
225
ooooo
O
July Ice Cream
75
150
225
Giant July Ice Cream
ooooo
O
Juniper
75
150
225
ooooo
O
Kalamata Olive
75
150
225
ooooo
O
Kamani Nut
75
150
225
Candle Nut
ooooo
O
Kermes Oak
75
150
225
Stone Pine
ooooo
O
Key Lime
45
90
135
ooooo
O
Koremeiki Olive
75
150
225
Kalamata Olive
ooooo
O
Kou
75
150
225
Ohia
ooooo
O
Kwanzan Cherry
75
150
225
ooooo
O
Labyrinth
75
150
225
Giant Labyrinth
ooooo
O
Lace
75
150
225
Giant Lace
ooooo
O
Large Fire Gem
N/A
N/A
N/A
ooooo
O
Lava Banyan
N/A
N/A
N/A
Giant Lava Banyan
ooooo
O
Lava Stone
N/A
N/A
N/A
Giant Lava Stone
ooooo
O
Lavender
75
150
225
Sunflower
ooooo
O
Lemon
75
150
225
Ponderosa Lemon
ooooo
O
Lime
45
90
135
Key Lime
ooooo
O
Lollipop
N/A
N/A
N/A
Giant Lollipop
ooooo
O
Lombardy Poplar
75
150
225
ooooo
O
Longan
75
150
225
ooooo
O
Loquat
N/A
N/A
N/A
Japanese Persimmon
ooooo
O
Lucky Charm
N/A
N/A
N/A
Giant Lucky Charm
ooooo
O
Lucky Cookies
75
150
225
ooooo
O
Lucques Olive
75
150
225
Picholine Olive
ooooo
O
Lychee
75
150
225
Longan
ooooo
O
Mac & Cheese
75
150
225
Giant Mac & Cheese
ooooo
O
Macadamia
75
150
225
Choco Macadamia
ooooo
O
Magic Orange
75
150
225
Giant Magic Orange
ooooo
O
Magic Peach
75
150
225
Giant Magic Peach
ooooo
O
Magnolia
75
150
225
ooooo
O
Magnolia Bonsai
75
150
225
ooooo
O
Majestic Redwood
75
150
225
Giant Majestic Redwood
ooooo
O
Mandarin
57
114
171
Blood Orange
ooooo
O
Mango
85
170
255
Manila Mango
ooooo
O
Manila Mango
85
170
255
ooooo
O
Maple
75
150
225
ooooo
O
Mardi Gras
75
150
225
Giant Mardi Gras
ooooo
O
Maritime Pine
75
150
225
Umbrella Pine
ooooo
O
Mask
N/A
N/A
N/A
Giant Mask
ooooo
O
Mastic
75
150
225
Carob
ooooo
O
May Ribbon
N/A
N/A
N/A
ooooo
O
Midland Hawthorn
75
150
225
ooooo
O
Milky Way
75
150
225
ooooo
O
Milo
N/A
N/A
N/A
Ohia Ai
ooooo
O
Mimosa Silk
75
150
225
ooooo
O
Mini Cupcake
N/A
N/A
N/A
Big Mini Cupcake
ooooo
O
Mint Candy
75
150
225
ooooo
O
Miracle-Gro
?
?
?
Giant Miracle-Gro
ooooo
O
Mission Olive
85
170
255
ooooo
O
Mistletoe
75
150
225
ooooo
O
Money Bush
N/A
N/A
N/A
ooooo
O
Money Plant
N/A
N/A
N/A
ooooo
O
Money Tree II
N/A
N/A
N/A
ooooo
O
Monkey Puzzle
?
?
?
Baobab
ooooo
O
Monterrey Cypress
75
150
225
ooooo
O
Montmorency Cherry
75
150
225
ooooo
O
Moon
75
150
225
ooooo
O
Moth Orchid
75
150
225
ooooo
O
Mother's Cookie
?
?
?
Big Mother's Cookie
ooooo
O
Mountain Ebony
75
150
225
ooooo
O
New Year Lantern
75
150
225
Big New Year Lantern
ooooo
O
Noir
?
?
?
Giant Noir
ooooo
O
Northern Red Oak
75
150
225
White Cedar
ooooo
O
Norway Spruce
75
150
225
Schreink's Spruce
ooooo
O
Nutcracker
75
150
225
Giant Nutcracker
ooooo
O
Oak
75
150
225
ooooo
O
Octopus
?
?
?
ooooo
O
Ohia
75
150
225
ooooo
O
Ohia Ai
?
?
?
ooooo
O
Oklahoma Redbud
?
?
?
ooooo
O
Olive
85
170
255
ooooo
O
Orange
57
114
171
Blood Orange
ooooo
O
Orange Bonsai
75
150
225
ooooo
O
Origami
?
?
?
ooooo
O
Ornament
75
150
225
ooooo
O
Ornament I
113
226
339
Ornament II
ooooo
O
Ornament II
113
226
339
ooooo
O
Paper Flower
?
?
?
ooooo
O
Paperbark Maple
75
150
225
ooooo
O
Passion Fruit
68
136
204
ooooo
O
Peach
57
114
171
Elberta Peach
ooooo
O
Peach Palm
75
150
225
ooooo
O
Pecan
75
150
225
Pistachio
ooooo
O
Persimmon
?
?
?
ooooo
O
Picholine Olive
75
150
225
ooooo
O
Pin Oak
75
150
225
ooooo
O
Pine
113
226
339
White Pine
ooooo
O
Pink Bubblegum
75
150
225
ooooo
O
Pink Cloud
75
150
225
ooooo
O
Pink Diamond
75
150
225
ooooo
O
Pink Dogwood
75
150
225
ooooo
O
Pink Gem
75
150
225
Big Pink Gem
ooooo
O
Pink Hanging Flower
75
150
225
ooooo
O
Pink Hibiscus
75
150
225
ooooo
O
Pink Holiday
75
150
225
Purple Holiday
ooooo
O
Pink Magnolia
75
150
225
ooooo
O
Pink Pearl
?
?
?
Giant Pink Pearl
ooooo
O
Pink Plum
?
?
?
ooooo
O
Pink Plumeria
75
150
225
White Plumeria
ooooo
O
Pink Rose
?
?
?
ooooo
O
Pink Smoke
?
?
?
ooooo
O
Pistachio
75
150
225
ooooo
O
Plum
75
150
225
ooooo
O
Poinsettia
20
39
?
Giant Poinsettia
ooooo
O
Polar
12
?
?
ooooo
O
Pomegranate
68
136
204
Angel Red Pomegranate
ooooo
O
Ponderosa Lemon
75
150
225
ooooo
O
Present
75
150
225
Giant Present
ooooo
O
Puka Shell
75
150
225
ooooo
O
Purple Bubble Gum
75
150
225
Giant Purple Bubble Gum
ooooo
O
Purple Crystal
75
150
225
Giant Purple Crystal
ooooo
O
Purple Hanging Flower
75
150
225
ooooo
O
Purple Magnolia
75
150
225
ooooo
O
Purple Willow
75
150
225
Pink Magnolia
ooooo
O
Purple Wisteria
75
150
225
White Wisteria
ooooo
O
Queen's Crape
?
?
?
Giant Queen's Cape
ooooo
O
Radiant Sun
75
150
225
ooooo
O
Rainbow Apple
75
150
225
Granny Smith Apple
ooooo
O
Rainbow Shower
?
?
?
Big Rainbow Shower
ooooo
O
Rainbow
75
150
225
Giant Rainbow
ooooo
O
Rainier Cherry
113
226
339
ooooo
O
Red Alder
75
150
225
ooooo
O
Red Cassia
?
?
?
ooooo
O
Red Dogwood
?
?
?
ooooo
O
Red Gem
75
150
225
Giant Red Gem
ooooo
O
Red Magnolia
?
?
?
ooooo
O
Red Maple
113
226
339
Silver Maple
ooooo
O
Red Pine
75
150
225
ooooo
O
Red Rocket Crape
75
150
225
ooooo
O
Ribbon
?
?
?
ooooo
O
Ribbon Candy
?
?
?
Giant Ribbon Candy
ooooo
O
Ribbon Flower
75
150
225
Giant Rainbow
ooooo
O
Rocky Candy
?
?
?
Big Rocky Candy
ooooo
O
Rose
?
?
?
Pink Rose
ooooo
O
Rowan
75
150
225
Ash
ooooo
O
Royal Crystal
75
150
225
ooooo
O
Royal Poinciana
?
?
?
ooooo
O
Ruby Guava
113
226
336
ooooo
O
Sand Dollar
?
?
?
Giant Sand Dollar
ooooo
O
Santa Hat
75
150
225
Giant Santa Hat
ooooo
O
Sapphire
75
150
225
Giant Sapphire
ooooo
O
Scots Pine
75
150
225
Red Pine
ooooo
O
Service
75
150
225
Wild Service
ooooo
O
Shinko Pear
113
226
339
ooooo
O
Silver Bell
75
150
225
Golden Bell
ooooo
O
Silver Birch
75
150
225
Downy Birch
ooooo
O
Silver Maple
113
226
339
ooooo
O
Silver Tinsel
75
150
225
Gold Tinsel
ooooo
O
Sitka Spruce
75
150
225
Red Alder
ooooo
O
Singapore Jackfruit
75
150
225
ooooo
O
Snow Cone
75
150
225
Bubble Gum
ooooo
O
Snowflake II
75
150
225
Big Snowflake II
ooooo
O
Sour Apple
75
150
225
Giant Sour Apple
ooooo
O
Sparkling Palm
75
150
225
ooooo
O
Speckled Alder
?
?
?
ooooo
O
Spiral Crystal
75
150
225
Giant Spiral Crystal
ooooo
O
Spring Egg
75
150
225
Giant Spring Egg
ooooo
O
Star
75
150
225
ooooo
O
Star Flower
75
150
225
Big Star Flower
ooooo
O
Star Ruby Grapefruit
113
226
339
ooooo
O
Starfruit
57
114
171
Golden Starfrui
ooooo
O
Starry Night
75
150
225
ooooo
O
Stocking
75
150
225
Giant Stocking
ooooo
O
Stone Pine
75
150
225
ooooo
O
Striped Maple
75
150
225
Paperbark Maple
ooooo
O
Strawberry
75
150
225
ooooo
O
Sugar Plum
75
150
225
ooooo
O
Sunflower
75
150
225
ooooo
O
Sunrise
75
150
225
ooooo
O
Sunset
75
150
225
ooooo
O
Sweet Birch
75
150
225
Dahurian Birch
ooooo
O
Tamarind
113
226
339
Amherstia
ooooo
O
Teddy Bear Palm
75
150
225
ooooo
O
Tulip Poplar
?
?
?
ooooo
O
Twilight Crape
75
150
225
Red Rocket Crape
ooooo
O
Ulu
?
?
?
ooooo
O
Umbrella
75
150
225
ooooo
O
Valentine Cookie
75
150
225
Big Valentine Cookie
ooooo
O
Vera Wood
75
150
225
ooooo
O
Walnut
113
226
339
White Walnut
ooooo
O
Wax Apple
75
150
225
ooooo
O
Wedding
75
150
225
Giant Wedding
ooooo
O
White Apple
113
226
339
Granny Smith Apple
ooooo
O
White Ash
?
?
?
ooooo
O
White Cedar
?
?
?
ooooo
O
White Pine
113
226
339
ooooo
O
White Plum
75
150
225
Pink Plum
ooooo
O
White Smoke
75
150
225
Pink Smoke
ooooo
O
White Walnut
113
226
339
ooooo
O
White Willow
75
150
225
Crack Willow
ooooo
O
Wild Cashew
75
150
225
ooooo
O
Wild Cherry
75
150
225
Bird Cherry
ooooo
O
Wild Service
75
150
225
ooooo
O
Williamsonia
75
150
225
ooooo
O
Winter Spruce
?
?
?
ooooo
O
Wych Elm
75
150
225
ooooo
O
Yellow Hibiscus
75
150
225
ooooo
O
Yellow Maple
113
226
339
Silver Maple
ooooo
O
Yellow Passion Fruit
68
136
204
ooooo
O
Yew
75
150
225
Oak
This guide and its content is Copyright © 2011 Web Media Network Ltd. All rights reserved.
This website and its content is Copyright © 2011 Web Media Network Ltd. All rights reserved.
The SuperCheats Unofficial Guide to Farmville was written by CM Boots-Faubert as a work-for-hire for Web Media Network, Ltd.
The Guide is licensed to appear exclusively upon the website SuperCheats.com and other websites licensed to display the Guide under agreement with Web Media Network Ltd.
Questions about the contents of the Guide may be directed to its author, CM Boots-Faubert, by email to chris@boots-faubert.com with the subject to include the words ' Farmville Guide' as otherwise your email may not be received due to the odd behavior of the author's spam filter.
Before writing to CM Boots-Faubert, please be aware that he cannot and will not grant permission for you to display this guide on your website no matter how deserving you feel it is. Questions of that sort should be directed at Web Media Network Ltd., the actual owner of the Guide.
Acknowledgment is made to SuperCheats.com for information obtained from the chat boards and users there, to farmville.wikia.com which was used as a second source to verify information obtained in the game and on boards, and to Zynga and the Farmville Chat Boards on the official Farmville Site, where the vast majority of the lists and statistics originated.
Writing game guides is a complex and time consuming craft that cannot be done well without the help of others. Any guide writer who fails to acknowledge the people that helped them to create their guide is a silly git who is only fooling themselves!
I want to thank the following Gamers for their help with many small areas of this guide, and for being there to chat, compare notes, and when needed, play co-op!
AutumnBF -- Who worked out the logistics for the Animal Sections.
GSGlenn -- Who helped in testing the Tree Farming and Co-Op Job stuff.
Nick from Zynga -- An insider who used to work for Zynga and who provided all sorts of information that Zynga would probably rather he had not... Much of which is not yet in the guide but will be added in future revision -- thanks much Nick!
Rich -- a very patient bloke and editor who provides encouragement and assistance whenever it is needed -- Thanks mate!
Swash01 -- Who looked up and wrote down all of the lists and stats that are part of this guide.
YvonneBF -- who did most of the formatting, editing, and who provided a constant stream of encouragement that got us past the frustrating bits.
Finally I need to thank you, because without you this guide would never have been commissioned. Thanks mates!


 Life is Strange Episode 3 Chaos Theory review
 How To Change GamePad Sensitivity In The Witcher 3: Wild Hunt
 Pillars Of Eternity Cheat Codes - God mode, XP and Gold
 Top 15 Best Medieval Games
 The Talos Principle Walkthrough