Unofficial Fallout: New Vegas Guide by Absolute Steve for SuperCheats.

We're working with Absolute Steve again to bring you a complete guide to Fallout 3, many of the pages have tons of content already, check out especially the Mojave Wastlands Map and the Game Tips and Tricks pages. This guide will be updated on a very regular basis until it is complete. We recommend you bookmark this page.
The series of guides I've made for Fallout 3 was created with the intention of not leaving a single irradiated stone unturned, but there's always room for improvement. This guide is the result of many days and nights of long labour, so here's hoping you'll enjoy the redesign of the layout, and may the in-depth strategies and vast descriptions greatly enrich your gaming experience. In any case, be sure to like this guide on facebook (see link above) and tell your friends about this guide!
Fallout New Vegas does feel like a very stretched DLC and hardly has graphical improvements over Fallout 3, but that doesn't take away any of the fun. The game mechanics have been tweaked with, making the game harder and more balanced. There are minigames now, there's still plenty to explore, but the 'Fallout 3' feeling is gone (duh, it's Vegas!), the point being that the game doesn't really breathe the same atmosphere as Fallout 3 both in terms of exciting storytelling and areas. There are once again numerous annoying bugs that shouldn't exist, long loading times included , especially on the Xbox 360. Resetting your Xbox can sometimes do wonders combined with clearing the cache, though. All in all, the game has its improvements, but is hardly as epic or revolutionary as it's big brother. As such, be glad it's not called Fallout 4. :) On a closing note I do want to mention that some events in FNV are painfully unfunny, sometimes even disgusting and on the border of acceptable as to what you can put into a video game. This has nothing to do with gore, more so with ethics. Some of those people at Obsidian should give me a call - as a psychologist student I'd gladly study them as field cases.
Supercheats.com is the only home for the enhanced version of the guide, which will appear here soon, featuring video content at tight spots that might require additional assistance.
Clip from the Intro
                                MAIN CONTROLS:
 __________________ ___________________________________________________________
|      BUTTON:     |IN-GAME ACTION:                                            |
|=-=-=-=-=-=-=-=-=-|=-=-=-=-=-=-=-=-=-=-=-=-=-=-=-=-=-=-=-=-=-=-=-=-=-=-=-=-=-=|
|Left Analog Stick |Move around                                                |
|Right Analog Stick|Look/Turn around                                           |
|      D-Pad       |Swap between weapons located in the Quickswap Menu         |
|Left Stick [push] |Crouch                                                     |
|Right Stick [push]|Pick up/Drop items                                         |
|        A         |Action Button                                              |
|        B         |Bring up/down Pip-Boy 3000                                 |
|     B [hold]     |Turn Flashlight On/Off                                     |
|        X         |Reload Equipped Weapon                                     |
|     X [hold]     |Holster Equipped Weapon                                    |
|        Y         |Jump                                                       |
|        RT        |Attack/Shoot                                               |
|        RB        |Enter V.A.T.S mode [Only possible with targets nearby]     |
|        LT        |Aim/Block                                                  |
|        LB        |Switch between 1st/3rd person camera view                  |
|     LB [hold]    |Adjust camera viewpoint                                    |
|       START      |Pause Menu                                                 |
|       BACK       |Wait [Time will pass; 24h maximum]                         |
 ¯¯¯¯¯¯¯¯¯¯¯¯¯¯¯¯¯¯ ¯¯¯¯¯¯¯¯¯¯¯¯¯¯¯¯¯¯¯¯¯¯¯¯¯¯¯¯¯¯¯¯¯¯¯¯¯¯¯¯¯¯¯¯¯¯¯¯¯¯¯¯¯¯¯¯¯¯¯
                                 V.A.T.S CONTROLS:
 __________________ ___________________________________________________________
|      BUTTON:     |IN-GAME ACTION:                                            |
|=-=-=-=-=-=-=-=-=-|=-=-=-=-=-=-=-=-=-=-=-=-=-=-=-=-=-=-=-=-=-=-=-=-=-=-=-=-=-=|
|Left Analog Stick |Switch between target's body parts                         |
|Right Analog Stick|Switch between different targets                           |
|        A         |Confirm                                                    |
|        B         |Cancel                                                     |
|       RT         |Select target                                              |
|       RB         |Enter V.A.T.S                                              |
 ¯¯¯¯¯¯¯¯¯¯¯¯¯¯¯¯¯¯ ¯¯¯¯¯¯¯¯¯¯¯¯¯¯¯¯¯¯¯¯¯¯¯¯¯¯¯¯¯¯¯¯¯¯¯¯¯¯¯¯¯¯¯¯¯¯¯¯¯¯¯¯¯¯¯¯¯¯¯
The ubiquitous Service and Security Bot
MAIN CONTROLS:
 __________________ ___________________________________________________________
|      BUTTON:     |IN-GAME ACTION:                                            |
|=-=-=-=-=-=-=-=-=-|=-=-=-=-=-=-=-=-=-=-=-=-=-=-=-=-=-=-=-=-=-=-=-=-=-=-=-=-=-=|
|Left Analog Stick |Move around                                                |
|Right Analog Stick|Look/Turn around                                           |
|      D-Pad       |Swap between weapons located in the Quickswap Menu         |
|        L3        |Crouch                                                     |
|        R3        |Pick up/Drop items                                         |
|        X         |Action Button                                              |
|        O         |Bring up/down Pip-Boy 3000                                 |
|     O [hold]     |Turn Flashlight On/Off                                     |
|      Square      |Reload Equipped Weapon                                     |
|   Square [hold]  |Holster Equipped Weapon                                    |
|     Triangle     |Jump                                                       |
|        R1        |Attack/Shoot                                               |
|        R2        |Enter V.A.T.S mode [Only possible with targets nearby]     |
|        L1        |Aim/Block                                                  |
|        L2        |Switch between 1st/3rd person camera view                  |
|     L2 [hold]    |Adjust camera viewpoint                                    |
|       START      |Pause Menu                                                 |
|      SELECT      |Wait [Time will pass; 24h maximum]                         |
 ¯¯¯¯¯¯¯¯¯¯¯¯¯¯¯¯¯¯ ¯¯¯¯¯¯¯¯¯¯¯¯¯¯¯¯¯¯¯¯¯¯¯¯¯¯¯¯¯¯¯¯¯¯¯¯¯¯¯¯¯¯¯¯¯¯¯¯¯¯¯¯¯¯¯¯¯¯¯

                                 V.A.T.S CONTROLS:
 __________________ ___________________________________________________________
|      BUTTON:     |IN-GAME ACTION:                                            |
|=-=-=-=-=-=-=-=-=-|=-=-=-=-=-=-=-=-=-=-=-=-=-=-=-=-=-=-=-=-=-=-=-=-=-=-=-=-=-=|
|Left Analog Stick |Switch between target's body parts                         |
|Right Analog Stick|Switch between different targets                           |
|        X         |Confirm                                                    |
|        O         |Cancel                                                     |
|       R1         |Select target                                              |
|       R2         |Enter V.A.T.S                                              |
 ¯¯¯¯¯¯¯¯¯¯¯¯¯¯¯¯¯¯ ¯¯¯¯¯¯¯¯¯¯¯¯¯¯¯¯¯¯¯¯¯¯¯¯¯¯¯¯¯¯¯¯¯¯¯¯¯¯¯¯¯¯¯¯¯¯¯¯¯¯¯¯¯¯¯¯¯¯¯
The Full-Service Casino on the Strip
At the time of writing I cannot 100% confirm the accuracy of the PC controls as I don't own this version of the game.
MAIN CONTROLS:
 __________________ ___________________________________________________________
|      BUTTON:     |IN-GAME ACTION:                                            |
|=-=-=-=-=-=-=-=-=-|=-=-=-=-=-=-=-=-=-=-=-=-=-=-=-=-=-=-=-=-=-=-=-=-=-=-=-=-=-=|
|      Mouse       |Look/Turn Around                                           |
|        W         |Forward                                                    |
|        S         |Backward                                                   |
|        A         |Strafe left                                                |
|        D         |Strafe right                                               |
|    Left Shift    |Run                                                        |
|    Caps Lock     |Run [permanently]                                          |
|        Q         |Auto-Move                                                  |
|      1 - 8       |Swap between weapons located in the Quickswap Menu         |
|    Left Ctrl     |Crouch                                                     |
|        Z         |Pick up/Drop items                                         |
|        E         |Action Button                                              |
|       Tab        |Bring up/down Pip-Boy 3000                                 |
|     O [hold]     |Turn Flashlight On/Off                                     |
|        R         |Ready/Reload/Holster Equipped Weapon                       |
|      Space       |Jump                                                       |
|Left Mouse Button |Attack/Shoot                                               |
|Right Mouse Button|Aim/Block                                                  |
|        R2        |Enter V.A.T.S mode [Only possible with targets nearby]     |
| F or Mouse Wheel |Switch between 1st/3rd person camera view                  |
|    Mouse Wheel   |Adjust camera distance                                     |
|Mouse Wheel [hold]|Adjust camera viewpoint                                    |
|        `         |Pause Menu                                                 |
|        T         |Wait [Time will pass; 24h maximum]                         |
 ¯¯¯¯¯¯¯¯¯¯¯¯¯¯¯¯¯¯ ¯¯¯¯¯¯¯¯¯¯¯¯¯¯¯¯¯¯¯¯¯¯¯¯¯¯¯¯¯¯¯¯¯¯¯¯¯¯¯¯¯¯¯¯¯¯¯¯¯¯¯¯¯¯¯¯¯¯¯

                                 V.A.T.S CONTROLS:
 __________________ ___________________________________________________________
|      BUTTON:     |IN-GAME ACTION:                                            |
|=-=-=-=-=-=-=-=-=-|=-=-=-=-=-=-=-=-=-=-=-=-=-=-=-=-=-=-=-=-=-=-=-=-=-=-=-=-=-=|
|Left Mouse Button |Select target/Switch between target's body parts           |
|Left [on arrows]  |Switch between targets                                     |
|Right Mouse Button|Exit V.A.T.S./Cancel queued attacks                        |
|        E         |Confirm                                                    |
|        V         |Enter V.A.T.S                                              |
 ¯¯¯¯¯¯¯¯¯¯¯¯¯¯¯¯¯¯ ¯¯¯¯¯¯¯¯¯¯¯¯¯¯¯¯¯¯¯¯¯¯¯¯¯¯¯¯¯¯¯¯¯¯¯¯¯¯¯¯¯¯¯¯¯¯¯¯¯¯¯¯¯¯¯¯¯¯¯

                              PIP-BOY 3000 CONTROLS:
 __________________ ___________________________________________________________
|      BUTTON:     |IN-GAME ACTION:                                            |
|=-=-=-=-=-=-=-=-=-|=-=-=-=-=-=-=-=-=-=-=-=-=-=-=-=-=-=-=-=-=-=-=-=-=-=-=-=-=-=|
|       Tab        |Bring up/down Pip-Boy 3000                                 |
|    Tab [hold]    |Turn Flashlight On/Off                                     |
|        F1        |Bring up/down Pip-Boy 3000 [Directly in stats mode]        |
|        F2        |Bring up/down Pip-Boy 3000 [Directly in items mode]        |
|        F3        |Bring up/down Pip-Boy 3000 [Directly in data mode]         |
|Left Mouse Button |Equip/Unequip/Use selected item                            |
|Right Mouse Button|Drop selected item                                         |
|         R        |Repair selected item                                       |
 ¯¯¯¯¯¯¯¯¯¯¯¯¯¯¯¯¯¯ ¯¯¯¯¯¯¯¯¯¯¯¯¯¯¯¯¯¯¯¯¯¯¯¯¯¯¯¯¯¯¯¯¯¯¯¯¯¯¯¯¯¯¯¯¯¯¯¯¯¯¯¯¯¯¯¯¯¯¯

The Tops -- Strictly Gambling on the Strip
The 'companion wheel' comes up whenever you interact with companions, and provides us with several options. Going clockwise, starting at 12 'o clock:
 ________________________ _____________________________________________________
|         BUTTON:        |IN-GAME ACTION:                                      |
|=-=-=-=-=-=-=-=-=-=-=-=-|=-=-=-=-=-=-=-=-=-=-=-=-=-=-=-=-=-=-=-=-=-=-=-=-=-=-=|
|Be Passive/Agressive    |Modifies companion's AI to act passively/agressively |
|Use Stimpak             |Use a Stimpak on companion                           |
|Wait here/Follow me     |Forces the companion to wait or to follow            |
|Talk to                 |Converse with the companion                          |
|Back up                 |Tells the companion to provide cover tactics         |
|Keep distance/Stay close|Adjusts the companion's proximity to your character  |
|Open inventory          |Opens up the companion's inventory                   |
|Use Ranged/Melee        |Switches between ranged/melee weapons                |
 ¯¯¯¯¯¯¯¯¯¯¯¯¯¯¯¯¯¯¯¯¯¯¯¯ ¯¯¯¯¯¯¯¯¯¯¯¯¯¯¯¯¯¯¯¯¯¯¯¯¯¯¯¯¯¯¯¯¯¯¯¯¯¯¯¯¯¯¯¯¯¯¯¯¯¯¯¯¯
Note: You can have one humanoid and one non-humanoid companion with you at most. Besides these two fixed companions you can get assistance from an NCR Ranger or Trooper (if you're in a good reputation with them). Lastly, hiring a bodyguard in Freeside cranks the maximum up to 4, but these guys only help you during your stay in Freeside, so they hardly count.

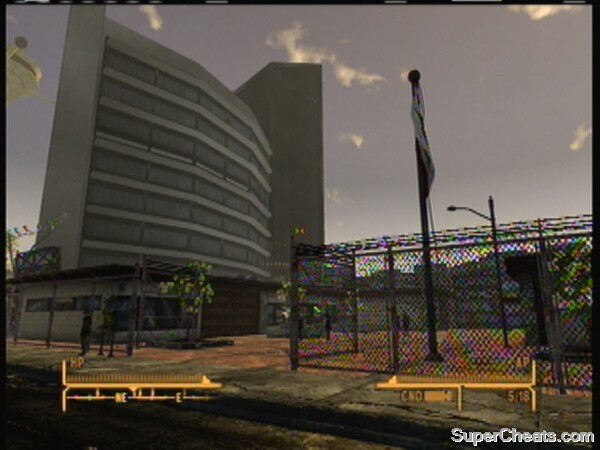
The Lucky 38 - Your Strip Home
|HP
||||||||||||||||||||
|¯¯¯¯¯¯¯¯¯¯¯v¯¯¯¯¯l¯¯¯l¯¯¯
|-.-.-.-.-.-.-.-.-.-.-.-.-
| /\            /\
|NE         E           SE
The compass (left hand corner) is extremely important for exploration. It's not difficult to use, but a thorough explanation might give you a few insights you would've otherwise missed out on. Let's go over all the features one by one, going from top to bottom.
1. Your health is displayed on top and an indication of your remaining health is given by the amount of lines: ||||||||||. In the example above, health is not at it's maximum, but lies around 4/5th of the max.
2. The 'v' in the example is always at the same place. This denotes your current direction. As you'll see below, directions such as NE, E, SE will circle (i.e. move from left to right) as you move around. In the example above, your character is facing E, meaning you're facing east.
3. Various markers can be spotted above or below the line (-.-.-.-.-.-). Markers seen above this line can appear in [GREEN] or in [RED], and are displayed in this example as (l). These markers notify you of any NPC's in the area. Green means the NPC is neutral/good, red means hostile. The higher your Perception SPECIAL stat, the faster these blips appear on your compass.
4. Lastly, notice the markers below the line (-.-.-.-.-.-), as indicated by /\ in the example above. These show the location of your destination(s), such as an active quest. There is a second marker that you'll sometimes notice on your compass, which looks like a small hollow triangle (not covered in the ASCII example). These small triangles denote a primary or secondary location you haven't found yet. A filled small triangle denotes a location which you have explored at least once.
- Considering its simplicity, a short description of the HUD on the right will suffice: It notifies you of your currently remaining AP (Action Points, as used in VATS), denoted by lines ||||||||||. The condition (CND) of your equipped weapon is denoted by the small bar, and this interface also shows the ammunition in your equipped weapon: (Clip/Total).

The best preserved vault in the west!
Save yourself the trouble and read these tips once or twice. They will greatly increase your self-sufficiency during your wasteland travels, and might even prevent you from dying! Definitely read this before your first playthrough, even if you're not planning to use the walkthrough.
Get your Science and Lockpick up to 50 as soon as possible, which allows you to pick locks on all average level locks and terminals. Alternatively boost them to 40 at least, so you can pick locks with the aid of a skill magazine that gives you a temporary 10 boost.
It's the game's intention to make you explore the world. Don't rush through the areas, look in every corner and behind every brick, and you'll be richly rewarded. You propbably don't want to end up missing the neatest secrets.
Fast Travel with your Worldmap! If you are on the worldmap and you find yourself stuck, don't hesitate to use the fast travel option!
Items with no weight (--) should always be picked up. Even if the item seems useless, you can always sell it in larger amounts later on. If an item does weigh something, look at its value. Is the weight 1 and the value 1? Then it might be better to leave the item. Is the value 50 and the weight 2? You can then sell the item later on and make a profit without putting too much weight on your shoulders!
The checklists in this survival guide feature two kinds of brackets:
1. [] means that the item doesn't cost you any Karma for taking it.
2. {} may cost you Karma and indicates you must steal the item. Therefore, these items are optional pickups.
1. Find a merchant that sells two of the same weapon or armor.
2. Buy the cheapest of their two weapons or armors.
3. Sell it back to the merchant with profit.
4. Repeat and profit more.
You have four attempts each time you access a terminal before you get locked out
after the fourth erroneous password attempt. In other words, you have three 'free' tries every time you start up a terminal. The goal is to select the correct password from the gibberish text. Depending on how high your Science skill is, the easier hacking becomes.
Roughly speaking, there are three (combinable) methods for hacking terminals:
1. You try three 'free' attempts and back out of the terminal. Simply try your luck once again and repeat this process until you've figured out the password.
2. Whenever you attempt a password, on the right part of the terminal screen it tells you how many letters you've got at correct places. In other words, if you've got three letters correct, start looking for words that use similar letters in similar positions.
Example:
You attempted "FESTERS" and get 0/7 correct (nothing at all). You can now say to yourself: Okay, all other passwords containing an F as the first letter will be incorrect, all passwords with an E as second letter are incorrect, etcetera. Thus "SYSTEMS" would be incorrect as it contains an E on the fifth spot, and we know thatthis cannot be a possibility.
If you get 1/7 correct, you know that at least one letter is in the right position. This doesn't help you that much, but if you can find any passwords that don't match *any* of the letters in the same positions (compared to "FESTERS", the password "SUCKING" does not contain an "F" at the first spot, not an "E" on the second spot, not a "S" on the third spot, and so on for all other letters. Thus you can conclude that "SUCKING" is not your key inside the terminal. Not this time, at least...
If you get even more letters correct, such as 5/7 with the password "TESTERS", look for words that have various similarities, such as those ending with "TERS".
3. It's possible to replenish your attempts by looking for what I'd like to call bracket combinations. These are brackets such as < >, [ ], () and { } which are linked when highlighted. In other words, when you highlight one of these brackets, more than one character is highlighted, and everything between these brackets is also highlighted. An example would be: {.,::&}. Selecting this can either replenish your attempts, or remove a faulty password from the possibilities. It it wise to first attempt three passwords and then search for brackets, resulting in removing several duds and a possible allowance replenishment, greatly improving your odds.
If this doesn't help, either search for another bracket combination or back out of the terminal and try again.
               EASY:               AVERAGE:               HARD:
            __________            __________            __________
           /::::|     \          / \:::|    \          /  \::|    \
          /:::::|      \        /   \::|     \        /    \:|     \
         / \::::|       \      /     \:|      \      /      \|      \
        |    \::|        |    |       \|       |    |                |
        |      \|        |    |                |    |                |
        |                |    |                |    |                |
         \              /      \              /      \              /
          \            /        \            /        \            /
           \__________/          \__________/          \__________/
VERY EASY and VERY HARD have bigger and smaller correct zones respectively.
Is that a Bobby Pin in your pocket?
___________ _______________
|DIFFICULTY:|REQUIRED SKILL:|
|=-=-=-=-=-=|=-=-=-=-=-=-=-=|
|Very Easy | 0 |
|Easy | 25 |
|Average | 50 |
|Hard | 75 |
|Very Hard | 100 |
¯¯¯¯¯¯¯¯¯¯¯ ¯¯¯¯¯¯¯¯¯¯¯¯¯¯¯
You can only attempt more difficult locks when your lockpick skill has reached a certain level. For example, in order to pick average locks you'll need a lockpick skill of at least 50 , and for hard locks you need 75 . The locks above indicate example ranges of where your bobby pin can be placed at in order to unlock the lock with the screw driver. Placing the bobby pin correct is impossible without trial and error. You know you're close to the correct position (or rather, "correct zone" as shown above) if you can turn the screw driver nearly 90 degrees vertical. The further you can turn the screwdriver, the closer you are.
If you're haven't hit the right spot yet (and I could make a nice analogy here), adjust your BOBBY PIN (if you know what I mean) and turn it to a better position. In other words, you can turn it left or right. If you turn it to, say, the right, and you get the feeling the bobby pin starts to tremble sooner than before, you know the "correct zone" is the other way, and you can move closer. Keep adjusting it until you hit the right spot and the treasures will be yours... If you fail, your Bobby Pin *BREAKS*, and you'll have to try again, that is, if you have another Bobby Pin left in your .. pocket..
Try the video below, or more details can be found here: http://www.gamingupdate.com/articles/1/Fallout-New-Vegas-How-to-Play-Caravan
Game Tips and Tricks
There are four pre-bonuses you could've gotten by pre-ordering the game. It's an extremely lame marketing stunt to have these packages include exclusive items, but that's the kind of modern world we're living in. The following packages are available:
Caravan Pack:
Lightweight Leather Armor, Sturdy Caravan Shotgun, Repair Kits x4, Binoculars.
Available by ordering from Steam, Wal-Mart, Mighty Ape and Play.com.
Classic Pack:
Armored Vault 13 Suit, Weathered 10mm Pistol, Vault 13 Canteen, Stimpaks x5. Available by ordering from GameStop, GAME and EB Games.
Mercenary Pack:
Lightweight Metal Armor, Mercenary's Grenade Rifle, Super Stimpak x3, Doctor's bag x3. Available by ordering from Best Buy and JB-Hi Fi.
Tribal Pack:
Tribal Raiding Armor, Broad Machete, Bleak Venom x5,Throwing Spear x10. Available by ordering from Amazon.com and direct2drive.com.
Note: The armor and weapon in each package are exclusive content and cannot be found in-game. The Vault 13 Canteen is also exclusive.
The New Vegas NCR Embassy
The game's difficulty can be adjusted during gameplay at any time, back and forth, ranging from Very Easy to Very Hard. The table below summarizes the effects of difficulty on gameplay:
                .------------.-----------------.--------------.
                |Difficulty: |Player's Damage: |Enemy Damage: |
                |============|=================|==============|
                |Very Easy   |       200%      |      50%     |
                |Easy        |       150%      |      75%     |
                |Normal      |       100%      |     100%     |
                |Hard        |        75%      |     150%     |
                |Very Hard   |        50%      |     200%     |
                '------------'-----------------'--------------'
Hardcore mode can be turned on at the start of the game, and while you *can* turn it off at any point during the game, you can not turn it back on again. Beating the game on hardcore mode grants you the Hardcore trophy or achievement. Realize that Hardcore is not a difficulty setting, it is merely additional realism making the game harder. This includes:
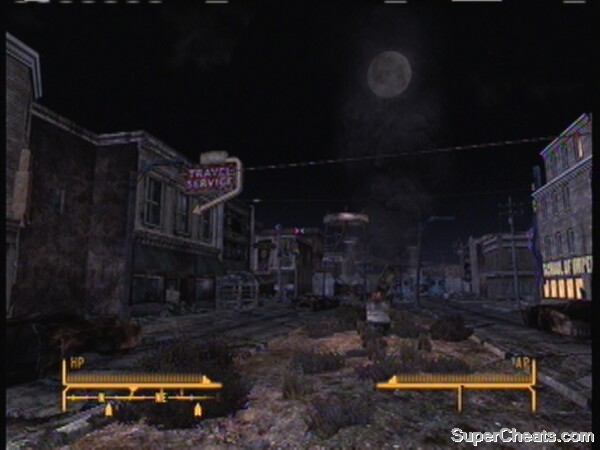
The Freeside Slums
Complete Map of the Mojave Wasteland, please click the image below for the full size version

Mojave Wasteland Map
 ___ _________________________ _______________________________________________
| # |LOCATION:                |DESCRIPTION:                                   |
|=-=-=-=-=-=-=-=-=-=-=-=-=-=-=|-=-=-=-=-=-=-=-=-=-=-=-=-=-=-=-=-=-=-=-=-=-=-=-|
| 1 | Goodsprings Cemetery    | "Goodsprings" - North end of the cemetery atop|
|   |                         | a grave.                                      |
|---|-------------------------|-----------------------------------------------|
| 2 | Hoover Dam              | "Hoover Dam" - Visitor Center - Large curved  |
|   |                         | desk near the terminal.                       |
|---|-------------------------|-----------------------------------------------|
| 3 | Jacobstown              | "Mt. Charleston" - Reception Lobby - Atop the |
|   |                         | large curved desk near the terminals.         |
|---|-------------------------|-----------------------------------------------|
| 4 | Lucky 38 Casino         | "Test Site" - Cocktail Lounge - Behind a cash |
|   |                         | register opposite the entrance.               |
|---|-------------------------|-----------------------------------------------|
| 5 | Nellis Air Force Base   | "Nellis AFB" - Pete's Museum - Corner table   |
|   |                         | underneath the mural.                         |
|---|-------------------------|-----------------------------------------------|
| 6 | Old Mormon Fort         | "Mormon Fort" - Julie Farkas Office - Atop a  |
|   |                         | wooden bookcase.                              |
|---|-------------------------|-----------------------------------------------|
| 7 | Vault 21                | "The Strip" - Sarah's Room - On a vault table |
|   |                         | between the two beds.                         |
 ¯¯¯ ¯¯¯¯¯¯¯¯¯¯¯¯¯¯¯¯¯¯¯¯¯¯¯¯¯ ¯¯¯¯¯¯¯¯¯¯¯¯¯¯¯¯¯¯¯¯¯¯¯¯¯¯¯¯¯¯¯¯¯¯¯¯¯¯¯¯¯¯¯¯¯¯¯
Snow Globe Locations "B2-globes"
                 Tales of a Junktown Jerky Vendor [BARTER]
 ___ _________________________ _______________________________________________
| # |LOCATION:                |DESCRIPTION:                                   |
|=-=-=-=-=-=-=-=-=-=-=-=-=-=-=|-=-=-=-=-=-=-=-=-=-=-=-=-=-=-=-=-=-=-=-=-=-=-=-|
| 1 | Allied Tech. Office     | Entrance Room - Southwest corner of the room  |
|   |                         | on the western side from the entrance. It is  |
|   |                         | next to a Nuka Cola Bottle in front of the    |
|   |                         | soda machine.                                 |
|---|-------------------------|-----------------------------------------------|
| 2 | Cap Counterfeiting Shack| Cellar Room - Head to the cellar of the shack |
|   |                         | and enter the southern room to find the book  |
|   |                         | on a pile of suitcases at the end of a bed.   |
|---|-------------------------|-----------------------------------------------|
| 3 | Primm                   | Bison Steve Casino - Head east to reach the   |
|   |                         | Gift Shop where you will find the book behind |
|   |                         | the counter on the floor near the Floor Safe. |
|---|-------------------------|-----------------------------------------------|
| 4 | Vault 22                | Pest Control Area - Take the elevator to this |
|   |                         | area and go north at the intersection up the  |
|   |                         | steps to reach a lab. Turn left and search the|
|   |                         | nearby lab table for the book.                |
|---|-------------------------|-----------------------------------------------|
 ¯¯¯ ¯¯¯¯¯¯¯¯¯¯¯¯¯¯¯¯¯¯¯¯¯¯¯¯¯ ¯¯¯¯¯¯¯¯¯¯¯¯¯¯¯¯¯¯¯¯¯¯¯¯¯¯¯¯¯¯¯¯¯¯¯¯¯¯¯¯¯¯¯¯¯¯¯
                    Nikola Tesla and You [ENERGY WEAPONS]
 ___ _________________________ _______________________________________________
| # |LOCATION:                |DESCRIPTION:                                   |
|=-=-=-=-=-=-=-=-=-=-=-=-=-=-=|-=-=-=-=-=-=-=-=-=-=-=-=-=-=-=-=-=-=-=-=-=-=-=-|
| 1 | Hidden Valley           | Bunker L1 - Head in to the Bunker located on  |
|   |                         | west and pick the Very Hard lock (or use the  |
|   |                         | key) to enter. Head south then west to find   |
|   |                         | Senior Scribe Schuler's Room where you will   |
|   |                         | find the book in a trash can next to her desk.|
|---|-------------------------|-----------------------------------------------|
| 2 | Old Nuclear Test Site   | Nuclear Test Shack - On the small table on the|
|   |                         | bed on the opposite side of the entrance.     |
|---|-------------------------|-----------------------------------------------|
| 3 | REPCONN Headquarters    | Locked Shipping Room - This room is the top   |
|   |                         | left room that you can only enter via a Very  |
|   |                         | Hard Lockpick or Hack. The book is on the safe|
|   |                         | in the back corner.                           |
|---|-------------------------|-----------------------------------------------|
| 4 | REPCONN Headquarters    | Second Floor Northeast Server Room - On the   |
|   |                         | table with the terminal in the northeast      |
|   |                         | corner.                                       |
 ¯¯¯ ¯¯¯¯¯¯¯¯¯¯¯¯¯¯¯¯¯¯¯¯¯¯¯¯¯ ¯¯¯¯¯¯¯¯¯¯¯¯¯¯¯¯¯¯¯¯¯¯¯¯¯¯¯¯¯¯¯¯¯¯¯¯¯¯¯¯¯¯¯¯¯¯¯
                         Duck and Cover! [EXPLOSIVES]
 ___ _________________________ _______________________________________________
| # |LOCATION:                |DESCRIPTION:                                   |
|=-=-=-=-=-=-=-=-=-=-=-=-=-=-=|-=-=-=-=-=-=-=-=-=-=-=-=-=-=-=-=-=-=-=-=-=-=-=-|
| 1 | Mojave Outpost          | Bar and Barracks - The book can be found on   |
|   |                         | bottom center shelf below the bar counter in  |
|   |                         | the back when facing southwest.               |
|---|-------------------------|-----------------------------------------------|
| 2 | Nellis Air Force Base   | Mother Pearl's Barracks - Check the bookcase  |
|   |                         | on the right side (it's a hanging shelf) to   |
|   |                         | find the book mixed in with some others.      |
|---|-------------------------|-----------------------------------------------|
| 3 | Ranger Station Foxtrot  | In the tent next to the communications center |
|   |                         | where Communications Officer Lenk sits.       |
|---|-------------------------|-----------------------------------------------|
| 4 | Sloan                   | Small Barracks Shack next to the trailer. The |
|   |                         | book is on the left locker shelf near the beds|
|   |                         | in the back.                                  |
 ¯¯¯ ¯¯¯¯¯¯¯¯¯¯¯¯¯¯¯¯¯¯¯¯¯¯¯¯¯ ¯¯¯¯¯¯¯¯¯¯¯¯¯¯¯¯¯¯¯¯¯¯¯¯¯¯¯¯¯¯¯¯¯¯¯¯¯¯¯¯¯¯¯¯¯¯¯
*Note: The book at Ranger Station Foxtrot will not appear unless you have an
       updated version of the game. Make sure you have done at least the first
       official update to find the book here. As of the latest patch this book
       also occasionally bugs out and is there twice.
Guns and Bullets [GUNS]
___ _________________________ _______________________________________________
| # |LOCATION: |DESCRIPTION: |
|=-=-=-=-=-=-=-=-=-=-=-=-=-=-=|-=-=-=-=-=-=-=-=-=-=-=-=-=-=-=-=-=-=-=-=-=-=-=-|
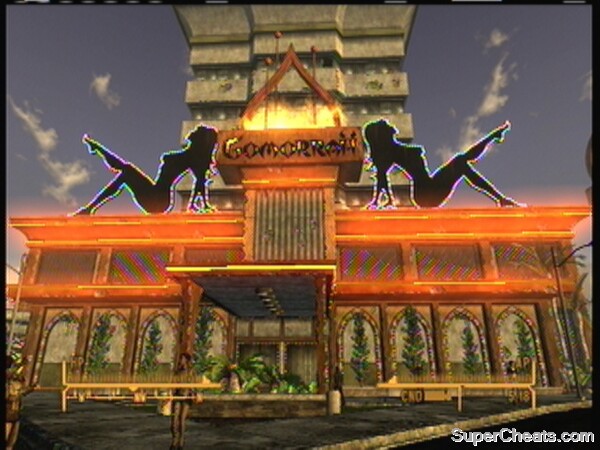
| 1 | Gomorrah | Zoara Club: Big Sal's Office - The book can be|
| | | found on the first low bookshelf (same as the |
| | | wall safe) in the back left corner of the room|
|---|-------------------------|-----------------------------------------------|
| 2 | Nevada Highway Patrol | On the desk without a computer near the open- |
| | | plan office room's entrance. |
|---|-------------------------|-----------------------------------------------|
| 3 | Raul's Shack | In the wooden crate on the floor to the left |
| | | of the entrance. |
|---|-------------------------|-----------------------------------------------|
| 4 | Vault 34 | Armory Commons - The book is found on the |
| | | metal table between the sofas near the pool |
| | | table. This room is the northeastern room. |
¯¯¯ ¯¯¯¯¯¯¯¯¯¯¯¯¯¯¯¯¯¯¯¯¯¯¯¯¯ ¯¯¯¯¯¯¯¯¯¯¯¯¯¯¯¯¯¯¯¯¯¯¯¯¯¯¯¯¯¯¯¯¯¯¯¯¯¯¯¯¯¯¯¯¯¯¯
Tumblers Today [LOCKPICK]
___ _________________________ _______________________________________________
| # |LOCATION: |DESCRIPTION: |
|=-=-=-=-=-=-=-=-=-=-=-=-=-=-=|-=-=-=-=-=-=-=-=-=-=-=-=-=-=-=-=-=-=-=-=-=-=-=-|
| 1 | Bitter Spring Recreation| Office Shack to the west - On the office desk |
| | | in the smaller room; the left of the entrance.|
|---|-------------------------|-----------------------------------------------|
| 2 | Silver Peak Mine | Inside the shack lying in an open locker to |
| | | the right of the entrance. |
|---|-------------------------|-----------------------------------------------|
| 3 | The Prospector's Den | Inside the caves and Den - Far right corner of|
| | | the large barracks room by some mattresses. |
| | | Search the northeast corner. |
|---|-------------------------|-----------------------------------------------|
| 4 | Wolfhorn Ranch | Farmhouse - Under the refrigerator without a |
| | | door near the oven. |
¯¯¯ ¯¯¯¯¯¯¯¯¯¯¯¯¯¯¯¯¯¯¯¯¯¯¯¯¯ ¯¯¯¯¯¯¯¯¯¯¯¯¯¯¯¯¯¯¯¯¯¯¯¯¯¯¯¯¯¯¯¯¯¯¯¯¯¯¯¯¯¯¯¯¯¯¯
D.C. Journal of Internal Medicine [MEDICINE]
___ _________________________ _______________________________________________
| # |LOCATION: |DESCRIPTION: |
|=-=-=-=-=-=-=-=-=-=-=-=-=-=-=|-=-=-=-=-=-=-=-=-=-=-=-=-=-=-=-=-=-=-=-=-=-=-=-|
| 1 | Followers Safehouse | Second Room - The book is on the bedside table|
| | | shelf of the bed in the back right corner of |
| | | this room. |
|---|-------------------------|-----------------------------------------------|
| 2 | HELIOS One | Power Plant - Top Floor where the Holotape |
| | | Password is found. Lying on the bed with a |
| | | pillow to left of the room's entrance. |
|---|-------------------------|-----------------------------------------------|
| 3 | Mesquite Mountain Crater| Hell's Motel - Below the globe with a hat on |
| | | top; right of the entrance Repair Kit is where|
| | | you will find the book on a bookshelf. |
|---|-------------------------|-----------------------------------------------|
| 4 | Novac | Ranger Andy's Bungalow - Look in the middle of|
| | | the queen-sized bed to find this book lying |
| | | there. |
¯¯¯ ¯¯¯¯¯¯¯¯¯¯¯¯¯¯¯¯¯¯¯¯¯¯¯¯¯ ¯¯¯¯¯¯¯¯¯¯¯¯¯¯¯¯¯¯¯¯¯¯¯¯¯¯¯¯¯¯¯¯¯¯¯¯¯¯¯¯¯¯¯¯¯¯¯
Grognak the Barbarian [MELEE WEAPONS]
___ _________________________ _______________________________________________
| # |LOCATION: |DESCRIPTION: |
|=-=-=-=-=-=-=-=-=-=-=-=-=-=-=|-=-=-=-=-=-=-=-=-=-=-=-=-=-=-=-=-=-=-=-=-=-=-=-|
| 1 | Cannibal Johnson's Cave | Look on top of the sleeping mattress near the |
| | | campfire to find this book. |
|---|-------------------------|-----------------------------------------------|
| 2 | Cottonwood Cove | Headquarters Upper Floor - Shelf of the bed- |
| | | side table in the Office of Aurelius of |
| | | Phoenix in the top right corner of the room. |
|---|-------------------------|-----------------------------------------------|
| 3 | Hidden Supply Cave | Lying on the first metal crate in the back |
| | | right hand side of the cave. |
|---|-------------------------|-----------------------------------------------|
| 4 | Jacobstown | Eastern Bungalow by the pond - Lying near the |
| | | cooker on the floor. |
¯¯¯ ¯¯¯¯¯¯¯¯¯¯¯¯¯¯¯¯¯¯¯¯¯¯¯¯¯ ¯¯¯¯¯¯¯¯¯¯¯¯¯¯¯¯¯¯¯¯¯¯¯¯¯¯¯¯¯¯¯¯¯¯¯¯¯¯¯¯¯¯¯¯¯¯¯
Dean's Electronics [REPAIR]
___ _________________________ _______________________________________________
| # |LOCATION: |DESCRIPTION: |
|=-=-=-=-=-=-=-=-=-=-=-=-=-=-=|-=-=-=-=-=-=-=-=-=-=-=-=-=-=-=-=-=-=-=-=-=-=-=-|
| 1 | Abandoned BoS Bunker | Office Area - Atop the metal sill opposite the|
| | | Reloading Bench to the right of the rooms |
| | | entrance. |
|---|-------------------------|-----------------------------------------------|
| 2 | Nellis Air Force Base | Loyal's Workshop House - Long metal counter |
| | | next to the ruined terminal. |
|---|-------------------------|-----------------------------------------------|
| 3 | Sloan | Barracks - Shelf between a Dino Toy and Radio |
| | | above the corner bed to the left of the |
| | | entrance. |
|---|-------------------------|-----------------------------------------------|
| 4 | South Nevada Wind Farm | Shack - On the table in the middle of the room|
| | | search the corner. |
¯¯¯ ¯¯¯¯¯¯¯¯¯¯¯¯¯¯¯¯¯¯¯¯¯¯¯¯¯ ¯¯¯¯¯¯¯¯¯¯¯¯¯¯¯¯¯¯¯¯¯¯¯¯¯¯¯¯¯¯¯¯¯¯¯¯¯¯¯¯¯¯¯¯¯¯¯
Big Book of Science [SCIENCE]
___ _________________________ _______________________________________________
| # |LOCATION: |DESCRIPTION: |
|=-=-=-=-=-=-=-=-=-=-=-=-=-=-=|-=-=-=-=-=-=-=-=-=-=-=-=-=-=-=-=-=-=-=-=-=-=-=-|
| 1 | Brewer's Beer Bootleggin| Shack - In the basement on a table with the |
| | | vial experiment. |
|---|-------------------------|-----------------------------------------------|
| 2 | Camp Forlorn Hope | Command Center - The book is in the right |
| | | corner of the tent on a desk with a computer. |
|---|-------------------------|-----------------------------------------------|
| 3 | Nipton | Town Hall Top Floor - Mayor's Desk. |
|---|-------------------------|-----------------------------------------------|
| 4 | REPCONN Headquarters | Gift Shop Storage - Left of the Rocket |
| | | Souvenirs on the lower shelf on the side of |
| | | room. Requires ability to open a Hard Lock. |
¯¯¯ ¯¯¯¯¯¯¯¯¯¯¯¯¯¯¯¯¯¯¯¯¯¯¯¯¯ ¯¯¯¯¯¯¯¯¯¯¯¯¯¯¯¯¯¯¯¯¯¯¯¯¯¯¯¯¯¯¯¯¯¯¯¯¯¯¯¯¯¯¯¯¯¯¯
Chinese Army: Spec. Ops. Training Manual [SNEAK]
___ _________________________ _______________________________________________
| # |LOCATION: |DESCRIPTION: |
|=-=-=-=-=-=-=-=-=-=-=-=-=-=-=|-=-=-=-=-=-=-=-=-=-=-=-=-=-=-=-=-=-=-=-=-=-=-=-|
| 1 | Camp Searchlight | East Chapel - Basement, at the foor of the |
| | | metal shelves. |
|---|-------------------------|-----------------------------------------------|
| 2 | Goodsprings | Ranch House east of the Schoolhouse - Under a |
| | | book in the lower bookcase against the back |
| | | wall opposite the entrance. |
|---|-------------------------|-----------------------------------------------|
| 3 | NCR Sharecropper Farms | Sharecropper Barracks - This building is best |
| | | identified by the four ferilizer hoppers near |
| | | it. The book is on the floor near a desk in |
| | | the back. |
|---|-------------------------|-----------------------------------------------|
| 4 | Vault 3 | Living Quarters - Go through the locked door |
| | | across from the entrance to this area and turn|
| | | right to find the book on a low bookcase. |
¯¯¯ ¯¯¯¯¯¯¯¯¯¯¯¯¯¯¯¯¯¯¯¯¯¯¯¯¯ ¯¯¯¯¯¯¯¯¯¯¯¯¯¯¯¯¯¯¯¯¯¯¯¯¯¯¯¯¯¯¯¯¯¯¯¯¯¯¯¯¯¯¯¯¯¯¯
Lying, Congressional Style [SPEECH]
___ _________________________ _______________________________________________
| # |LOCATION: |DESCRIPTION: |
|=-=-=-=-=-=-=-=-=-=-=-=-=-=-=|-=-=-=-=-=-=-=-=-=-=-=-=-=-=-=-=-=-=-=-=-=-=-=-|
| 1 | Brooks Tumbleweed Ranch | Tumbleweed Ranch House - Upstairs room with a |
| | | chess board lying on the top shelf of an open |
| | | locker. |
|---|-------------------------|-----------------------------------------------|
| 2 | Cerulean Robotics | Among the office desks inside the building. |
|---|-------------------------|-----------------------------------------------|
| 3 | Lucky Jim Mine | Shack - On the lower metal shelf to the right |
| | | of the empty refrigerators. |
|---|-------------------------|-----------------------------------------------|
| 4 | NCR Correctional Fac. | Administration Building - Desk in the darkest |
| | | room opposite Eddie's. |
¯¯¯ ¯¯¯¯¯¯¯¯¯¯¯¯¯¯¯¯¯¯¯¯¯¯¯¯¯ ¯¯¯¯¯¯¯¯¯¯¯¯¯¯¯¯¯¯¯¯¯¯¯¯¯¯¯¯¯¯¯¯¯¯¯¯¯¯¯¯¯¯¯¯¯¯¯
Wasteland Survival Guide [SURVIVAL]
___ _________________________ _______________________________________________
| # |LOCATION: |DESCRIPTION: |
|=-=-=-=-=-=-=-=-=-=-=-=-=-=-=|-=-=-=-=-=-=-=-=-=-=-=-=-=-=-=-=-=-=-=-=-=-=-=-|
| 1 | Lone Wolf Radio | Radio Trailer - Near the Scrap Electronics in |
| | | the back of the RV. |
|---|-------------------------|-----------------------------------------------|
| 2 | Matthews Animal Farm | Northern Barn - Top balcony near the barrel |
| | | pile and a metal crate. |
|---|-------------------------|-----------------------------------------------|
| 3 | Mesquite Mtn. Camp Site | Western Tent - Between the two rolled-up beds |
| | | and behind a toolbox. |
|---|-------------------------|-----------------------------------------------|
| 4 | Scavenger Platform | Northeastern platform amongst the books in the|
| | | fallen bookshelf. |
¯¯¯ ¯¯¯¯¯¯¯¯¯¯¯¯¯¯¯¯¯¯¯¯¯¯¯¯¯ ¯¯¯¯¯¯¯¯¯¯¯¯¯¯¯¯¯¯¯¯¯¯¯¯¯¯¯¯¯¯¯¯¯¯¯¯¯¯¯¯¯¯¯¯¯¯¯
Pugilism Illustrated [UNARMED]
___ _________________________ _______________________________________________
| # |LOCATION: |DESCRIPTION: |
|=-=-=-=-=-=-=-=-=-=-=-=-=-=-=|-=-=-=-=-=-=-=-=-=-=-=-=-=-=-=-=-=-=-=-=-=-=-=-|
| 1 | Fisherman's Pride Shack | Shack - Bedside table near the lamp and mat in|
| | | the corner of the room. |
|---|-------------------------|-----------------------------------------------|
| 2 | Nipton Road Reststop | Store marked "Lester" - On a bookcase shelf |
| | | near the cash register. |
|---|-------------------------|-----------------------------------------------|
| 3 | The Tops Casino | Presidential Suite - Small table near the pool|
| | | tables. |
|---|-------------------------|-----------------------------------------------|
| 4 | Vault 11 | Living Quarters - Second room on the right |
| | | side in the female dorms. Search near the |
| | | fallen dresser at the rooms entrance. |
¯¯¯ ¯¯¯¯¯¯¯¯¯¯¯¯¯¯¯¯¯¯¯¯¯¯¯¯¯ ¯¯¯¯¯¯¯¯¯¯¯¯¯¯¯¯¯¯¯¯¯¯¯¯¯¯¯¯¯¯¯¯¯¯¯¯¯¯¯¯¯¯¯¯¯¯¯
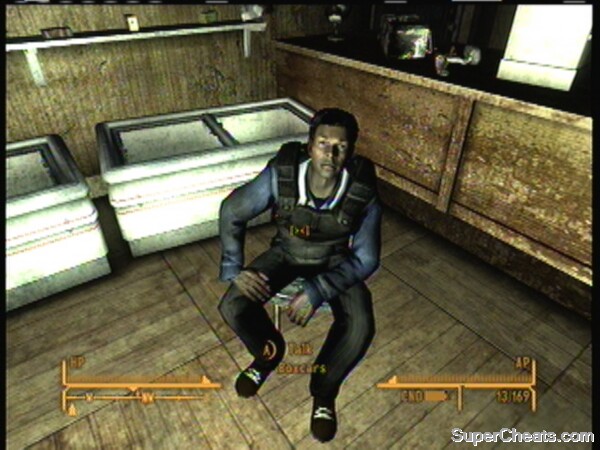
You've just been shot in the head - twice! - and left for dead. Except that you're not dead, so you swear for revenge.
QUEST REWARD: ?? XP PIP-BOY 3000.
QUEST OUTLINE:
1. Walk to the Vit-o-matic tester.
2. Use the Vit-o-matic tester.
3. Sit down on the couch in Doc Mitchell's living room
4. Follow Doc Mitchell to the exit.
Area Item List
A. Today's Physicial . . . . []
B. Blood Pack . . . . . . . []
B. Med-X . . . . . . . . . . []
C. Sunset Sarsaparilla Crate []
C. Broken 9mm Submachine Gun []
D. Stimpak x3 . . . . . . . []
D. Rad-X . . . . . . . . . . []
D. Antivenom . . . . . . . . []
E. Bottle Cap x8 . . . . . . []
F. Pip-Boy 3000 . . . . . . []
F. Mojave Express Delivery Order x6 . . . . . . . . []
F. Bobby Pin x12 . . . . . . []
F. Stimpak x4 . . . . . . . []
F. Bottle Cap x18 . . . . . []
F. Laser Pistol . . . . . . []
F. Energy Cell x20 . . . . . []
F. Vault 21 Jumpsuit . . . . []
G. Ammo Box . . . . . . . . []
G. Buffalo Gourd Seed x3 . . []
G. First Aid Box x2 . . . . []
STARTING OUT:
After the introduction scenes you'll be given the option to customize your character. Select your gender (Note: Female characters no longer have a benefit over men, since male charactershave an equivalent to Black Widow, which gives you an advantage over men, and gives extra dialogue options. There are many men in Fallout New Vegas...) and change your head the way you see fit, then take control of your character. Before walking to the Vigor Tester, do a little exploring of the room first: Grab the [TODAY'S PHYSICIAN] from the desk behind the chirurgic table; it's next to the type writer. To your right you can find a [BLOOD PACK] and a [MED-X] from the medical cabinet, and inspect the Chemistry Set on the desk with the computer: You'll need 25 Science to fiddle with this, so just take note of this for now. Inspect the [SUNSET SARSAPARILLA CRATE] next to the desk and ignore the [BROKEN 9MM SUBMACHINE GUN] lying on top of it for now. The destroyed cabinet to the Doc's left contains [STIMPAK x3], [RAD- X] and [ANTIVENOM]. The [GUN CASE] on the bottom shelf is also worth a look, and contains some ammo and a Laser Pistol. In general, most boxes like these contain semi- random contents, so this guide will give you the general description and locations of these boxes.
THE VIG-O-MATIC VIGOR TESTER
Your SPECIAL stats (which stand for Strength, Perception, Endurance, Charisma, Intelligence, Agility and Luck respectively) can now be adjusted. Each stat starts at a base of 5 points, and you receive 5 spare points to spread over the your stats. It's entirely up to you how you want to play the game, but overall Strength and Intelligence are quite important, so it is recommended to spend extra points on them. Charisma is required for very few perks and has very little value - you can greatly compensate a low Charisma by putting extra points in Speech.
If you want to customize your own build, feel free to do so. If you're a player who likes to snatch the best from everything, creating a very balanced all-round character build, try the following starting stats (and adjust to your liking). It can also be a good idea to look at the stats and perk sections [STA-1] and [STA-3] respectively to see which perks require certain SPECIAL tresholds.
STR: 8, PER: 5, END: 8, CHR: 1, INT: 9, AGL: 6, LCK: 3
Tip: Never go over 9 in your initial build. You will be able to permanently boost all your SPECIAL stats by 1 much later in the game.
Perky Awesomeness: With the above all-round build, the only notable perks you miss out on are the ones that have CHR or LCK requirements. Arguably, of these perks the only one of which it's a shame you must skip it, is the Better Criticals perk, requiring the high amount of 6 Luck. With the above build, useful Perks are maximized, and it serves as the basis for making a superb all-round character.
When you're done with the SPECIAL stats, move to the other side of the wall and loot the cabinet for [BOTTLE CAPS x8]. In any case, sit down on the bench before Doc Mitchell to finalize your character build.
SKILLS AND TRAITS
The Doc will ask you various questions. Depending on how you answer them, your character build changes. You can still adjust the three skills you want to boost in a menu after the dialogue options, and the same applies to traits. Regarding skills, and this is only a personal recommendation, Lockpick, Science and either Guns or Energy Weapon is a decent start. Regarding traits, it's completely up to you, but I'd highly recommend Kamikaze since this boosts your VATS AP by 10 points, and only reduces your Damage Resistance by -2.
Follow the Doc to the exit and he'll give you a bunch of goodies, the most important being the [PIP-BOY 3000]. He'll also hand you [MOJAVE EXPRESS DELIVERY ORDER x6], [BOBBY PIN x12], [STIMPAK x4], [BOTTLE CAP x18], [LASER PISTOL], [20 ENERGY CELLS], and a [VAULT 21 JUMPSUIT].
You can now explore the rooms to the south of the Doc's House for some more items. Remember that you can use the 'compass bar' on the lower left to see which direction you're facing.
The cabinet in the southern hall contains an [AMMO BOX],[BUFFALO GOURD SEED x3], and [FIRST AID BOX x2]. While the bedroom to the east doesn't contain much, you can check the dresser, and there are also packs of cigs in the small cabinet next to the bed, which you can sell back to Doc Mitchell for a small sum of money. Just tell him you need medical supplies to open up the shop window. The last thing to loot is the refrigerator. Exit to the worldmap.
Ain't that a kick in the head - Recovery
Embark on your first real quest. So who exactly is Sunny Smiles?
QUEST REWARD: 10 XP 50 BOTTLE CAPS.
QUEST OUTLINE:
1. Talk to Sunny Smiles in the Prospector Saloon.
2. Meet Sunny Smiles behind the Prospector Saloon.
3. Shoot 3 sarsaparilla bottles outside the Prospector Saloon.
4. Follow Sunny.
5. Kill the Geckos at the well.
6. Talk to Sunny Smiles.
7. Kill the Geckos at the other wells.
8. Talk to Sunny about your reward.
AREA ITEM LIST
A. Fixin' Things . . . . . . {}
B. .357 Magnum Revolver . . {}
C. Varmint Rifle . . . . . . []
C. 5.56mm Ammo x30 . . . . . []
D. 5.56mm Ammo x60 . . . . . []
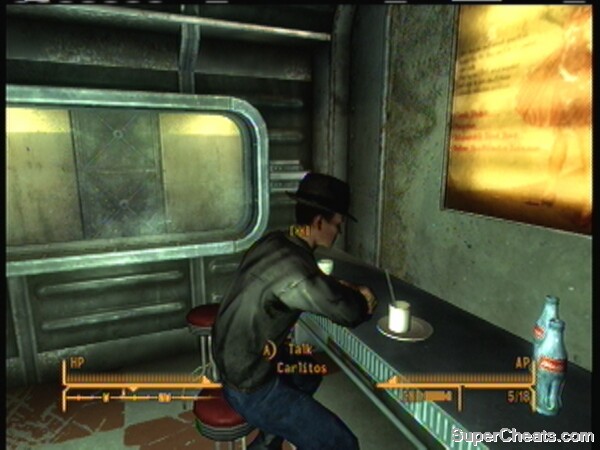
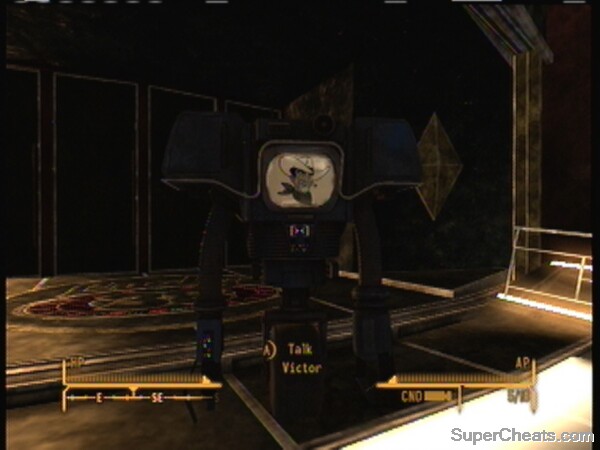
When you're outside, look around the area for a security bot named Victor. This is actually an optional part of the other quest you can currently do (They Went That-a-way). In any case, head into the Prospector Saloon to the northeast.
Inside, Sunny Smiles almost immediately approaches you and tells you to meet her outside. Snatch the {FIXIN' THINGS} skill magazine from the cabinet with the world globe if you'd like, although you'll lose some karma. Stealing things is best done when no one's around, and crouching also makes it less likely to get caught. You can also steal a {.357 MAGNUM REVOLVER} behind the bar, or even open the cash register for a quick buck. From now on, items denoted with {} brackets indicate a stealing procedure. Follow Sunny to the back and approach her (she's standing towards the northwest). She'll then hand you a [VARMINT RIFLE] and [5.56MM AMMO x30]. Shoot three sarsaparilla bottles from the fence and Sunny will ask you to join her and waste some Geckos. You can either end the tutorial, or join her.
Learning to use your rifle
KILLING GECKO'S
Follow Sunny south, then crouch when you're approaching the geckos. Sneak as close as possible to the windmill, then enter VATS (or not) and waste the two geckos. If you've lost any HP, drink from the clean water to replenish your health. Geckos can often be looted for gecko meat and/or gecko hides, so always search bodies, including animal corpses. Report back to Sunny and she'll once again give you the option to kill more geckos. After accepting, she hands you an additional [5.56MM AMMO x60]. Not too shabby!
Follow Sunny to the other wells and kill the remaining geckos. Talk to Sunny for your reward: 50 Bottle Caps. She's still got more to teach you, though! Accept and you'll start the 'By a Campfire on the Trail' quest.
You still need to learn much about your surroundings. So how exactly did you make a Healing Powder again?
QUEST REWARD:
QUEST OUTLINE:
1.0 Find a Broc Flower and a Xander Root.
1.1 Xander Root is found at the large tree trunk nearby Goodspring's Schoolhouse.
1.2 Broc Flower is found at Goodspring's Cemetary.
2. Use the campfire to make Healing Powder.
AREA ITEM LIST
A. Programmer's Digest . . . []
B. Footlocker . . . . . . . []
C. Bobby Pin . . . . . . . . []
D. Safe . . . . . . . . . . []
E. Bobby Pin x2 . . . . . . []
F. Xander Root x3 . . . . . []
G. Broc Flower . . . . . . . []
H. Snowglobe - Goodsprings . []
I. Salesman Weekly . . . . . {}
J. Meeting People . . . . . {}
USING YOUR PIP-BOY FOR FINDING LOCATIONS
By now, you'll need to do some exploring in order to find the Broc Flower and Xander Root that Sunny asked for. Bring up your Pip-Boy and scroll to the World Map screen, located under "Data". The Goodsprings Cemetery is located further north, so we'll explore the Goodsprings Schoolhouse first, which can be found northwest of your location.
Kill the two new enemies in front of the schoolhouse: These Giant Mantis Nymphs aren't very powerful, so a blast or two from your Varmint Rifle should do the trick. Enter the schoolhouse through the eastern door (to avoid confusion, this means that you'll be *facing* west while entering the door).
Learning to craft on a campfire
OPTIONAL: EXPLORING GOODSPRINGS SCHOOLHOUSE
Reload your gun, as there are at least five Giant Mantis Nymphs in this room. After destroying them, grab the [PROGRAMMER'S DIGEST] from the desk next to the [FOOTLOCKER]. There's also a [BOBBY PIN] next to the Easy Terminal, which in turn opens the nearby [SAFE]. Here are, once more, some reminders on how to hack terminals and pick locks.
HACKING TIPS
You have four attempts each time you access a terminal before you get locked out after the fourth erroneous password attempt. In other words, you have three 'free' tries every time you start up a terminal. The goal is to select the correct password from the gibberish text. Depending on how high your Science skill is, the easier hacking becomes.
Roughly speaking, there are three (combinable) methods for hacking terminals:
1. You try three 'free' attempts and back out of the terminal. Simply try your luck once again and repeat this process until you've figured out the password.
2. Whenever you attempt a password, on the right part of the terminal screen it tells you how many letters you've got at correct places. In other words, if you've got three letters correct, start looking for words that use similar letters in similar positions. Grab a notebook and systematically stripe off any incorrect passwords.
Example: You attempted "FESTERS" and get 0/7 correct (nothing at all). You can now say to yourself: Okay, all other passwords containing an F as the first letter will be incorrect, all passwords with an E as second letter are incorrect, etcetera. Thus "SYSTEMS" would be incorrect as it contains an E on the fifth spot, and we know that this cannot be a possibility.
If you get 1/7 correct, you know that at least one letter is in the right position. This doesn't help you that much, but if you can find any passwords that don't match *any* of the letters in the same positions (compared to "FESTERS", the password "SUCKING" does not contain an "F" at the first spot, not an "E" on the second spot, not a "S" on the third spot, and so on for all other letters. Thus you can conclude that "SUCKING" is not your key inside the terminal. Not this time, at least...
If you get even more letters correct, such as 5/7 with the password "TESTERS", look for words that have various similarities, such as those ending with "TERS".
3. It's possible to replenish your attempts by looking for what I'd like to call bracket combinations. These are brackets such as < >, [ ], () and { } which are linked when highlighted. In other words, when you highlight one of these brackets, more than one character is highlighted, and everything between these brackets is also highlighted. An example would be: {.,::&}. Selecting this can either replenish your attempts, or remove a faulty password from the possibilities. It it wise to first attempt three passwords and then search for brackets, resulting in removing several duds and a possible allowance replenishment, greatly improving your odds.
If this doesn't help, either search for another bracket combination or back out of the terminal and try again.
LOCKPICKING TIPS
               EASY:               AVERAGE:               HARD:
            __________            __________            __________
           /::::|     \          / \:::|    \          /  \::|    \
          /:::::|      \        /   \::|     \        /    \:|     \
         / \::::|       \      /     \:|      \      /      \|      \
        |    \::|        |    |       \|       |    |                |
        |      \|        |    |                |    |                |
        |                |    |                |    |                |
         \              /      \              /      \              /
          \            /        \            /        \            /
           \__________/          \__________/          \__________/
VERY EASY and VERY HARD have bigger and smaller "correct zones" respectively.
 ___________ _______________
|DIFFICULTY:|REQUIRED SKILL:|
|=-=-=-=-=-=|=-=-=-=-=-=-=-=|
|Very Easy  |        0      |
|Easy       |       25      |
|Average    |       50      |
|Hard       |       75      |
|Very Hard  |      100      |
¯¯¯¯¯¯¯¯¯¯¯ ¯¯¯¯¯¯¯¯¯¯¯¯¯¯¯
You can only attempt more difficult locks when your lockpick skill has reached a certain leven. For example, in order to pick average locks you'll need a lockpick skill of at least 50 , and for hard locks you need 75 . The locks above indicate example ranges of where your bobby pin can be placed at in order to unlock the lock with the screw driver. Placing the bobby pin correct is impossible without trial and error. You know you're close to the correct position (or rather, "correct zone" as shown above) if you can turn the screw driver nearly 90 degrees vertical. The further you can turn the screwdriver, the closer you are.
If you're haven't hit the right spot yet (and I could make a nice analogy here), adjust your BOBBY PIN (if you know what I mean) and turn it to a better position. In other words, you can turn it left or right. If you turn it to, say, the right, and you get the feeling the bobby pin starts to tremble sooner than before, you know the "correct zone" is the other way, and you can move closer. Keep adjusting it until you hit the right spot and the treasures will be yours... If you fail, your Bobby Pin *BREAKS*, and you'll have to try again, that is, if you have another Bobby Pin left in your .. pocket..
There's nothing of interest in the main classroom, but the storage room to the west contains [BOBBY PIN x2]. Exit the school building.
You can find the [XANDER ROOT x3] on the east side of the school building, buried in the ground nearby the large tree trunk. Now travel to the far northeast, following your compass' quest marker. Go past the Prospector Saloon and head uphill. You might come across a Bark Schorpion around here, which is slightly tougher than the creatures you've faces thus far. Fortunately, it's also slower, so keep your distance and you'll be more than fine.
The cemetary is actually located on top of the hill with the water tower. There are several Bloatflies floating around, but these are easily dispatched. Find the [BROC FLOWER] in the small tree to the east. Before you head back to Sunny, enjoy the northeast sight; it's New Vegas! Also carefully inspect the north-west part of the hill to find a [SNOWGLOBE - GOODSPRINGS] next to a small tombstone. These can be collected and sold to a certain collector which we'll get to later.
While it's not necessary, you can fast travel to Goodsprings Source (where Sunny is waiting for you) by bringing up your Pip-Boy 3000's Worldmap and selecting the location you want to fast travel to. Activate the campfire and select Healing Powder from the Recipe List. After creating this, Sunny hints at a next part of a quest. Fast travel to Goodsprings to find out what's up. Enter the Prospector Saloon and talk to Trudy after she's done conversing. The quest now ends, and a new one starts. Inquire with her about all possible subjects before moving on; she'll even ask you to repair her radio. Check out the supply room to the southwest and at least snatch the {SALESMAN WEEKLY} and {MEETING PEOPLE} from one of the crates. There's also a floor safe here, but it's got a hard lock.
Note: If you have a Repair skill of 20 you can repair Trudy's radio behind the counter. She'll hand you 50 Bottle Caps (or more with 20 Barter).
Looks like a lad named Ringo is in big trouble. It also appears you can earn some reputation around Goodsprings. What will you do?
QUEST REWARD: 50 Bottle Caps.
QUEST OUTLINE:
1. Offer to help Ringo deal with the Powder Rangers
2. Talk to Sunny Smiles about fighting the Powder Gangers.
3. (OPTIONAL) Enlist the help of Trudy.
4. (OPTIONAL) Acquire additional medical supplies from Doc Mitchell.
5. (OPTIONAL) Acquire Easy Pete's Dynamite.
6. (OPTIONAL) Convince Chet to open his store's stock to the town.
AREA ITEM LIST
A. Boxing Times . . . . . . []
B. Duffle Bag . . . . . . . []
C. Floor Safe (Very Easy) . []
D. 9mm Rounds x20 x2 . . . . {}
E. Stimpak x3 . . . . . . . []
GOODSPRINGS GAS STATION
Ringo can be found at the Poseidon's Energy gas station, part of Goodsprings and located to the east. Ringo tells you his situation the second you enter, and proposes to get more people to help.
Explore this room first as there are quite a few handy items lying around here. For starters, collect the [BOXING TIMES] from the shelves in front of you. There are also various sacks and crates on top of and around the counter that may hold various goodies. The cash register holds several bottle caps. More important is the [DUFFLE BAG] in the corner behind the counter, which containsquite a lot of ammunition, among other things. The [VERY EASY FLOOR SAFE] also holds useful ammo. Lastly, you can steal {9MM ROUNDS x20 x2} from underneath the counter, but Ringo is very likely to catch you.
Return to Sunny (who might be located in one of the houses, just follow the quest marker on your compass) and tell her about your situation. Also converse about all other subjects and she'll give you some useful location details and [BOBBY PIN x3] (even though we just cracked that lock open). Several optional parts of this quest can now be done. Depending on how good your skills are, you can (try to) convince some of the people below to help you:
1. Trudy: Found in the house to the south. Requires 25 Speech Skill or 25 Sneak Skill. The Meeting People skill magazine may help to improve your skill enough. Interestingly, a Stealth Boy will instantly raise your Sneak skill to 100, so that does the trick too.
2. Easy Pete: Found in the southeast house. Requires 25 Explosives Skill.
3. Chet: Found in the general store. Requires 25 Barter Skill. Note that you can boost your Barter skill by 10 by using the Salesman Weekly that you found earlier. Alternatively it's possible to buy a Salesman Weekly from Chet himself. Note however that these magazines do NOT stack on top of each other, so you'll need a Barter skill of at least 15 (since 10 is all you'll get from the skill magazine(s).
4. Doc Mitchell: He'll hand you [STIMPAK x3].
Giving Ringo a hand
Return to Ringo at the gas station and tell him you're ready. Follow Sunny and Ringo and help them to defeat the Powder Ganger. Pull out your best weapons and defeat all gang members. Do this successfully (protecting Ringo in the process) and your reputation will change: Better in Goodsprings, worse for Powder Gangers. Be sure to loot the gangers from their armor (equipping this will disguise you as a Powder Ganger, so don't go walking around with it just like that).
In any case, that's enough snooping around Goodsprings for now! Let's move on to bigger things.
Okay, so who the hell was that son of a gun that shot you in the head? Let's find out as soon as possible.
QUEST REWARD: 1000 EXP.
QUEST OUTLINE:
1. (OPTIONAL) Talk to Victor in Goodsprings about your rescue.
2. Inquire about your delivery assignment with the administrator of the Mojave Express in Primm.
3. Find Primm's lawman to get information on where your attackers went.
4. Head to Novac through Nipton. Ask around Novac about your attackers.
(to be continued)
Select They Went That-a-Way in your Quest Menu to activate the quest markers and be headed to Primm, located to the far south. As you traverse the wasteland further, you're given the option to rebuild your character. If it's fine the way it was, great, otherwise apply some changes and be done with it.
PRIMM
If you were expecting Primm to be a friendly place, I have to disappoint you. Escaped convicts have taken over the town. Follow the large road straight through the city, (help the NCR troops out in a firefight if you wish), go under the viaduct and enter the city to your left (east). Dispatch more convicts on your way and follow the quest marker into the Vikki and Vance Casino. Inside, a man named Johnson Nash will tell you a great deal of valuable information, and also gives you the opportunity to do another side quest called 'My Kind Of Town'. While there's plenty to steal in Vikki and Vance, this guide now proceeds with the quest(s).
AREA ITEM LIST
A. Bison Steve Maintenance Key []
B. Med-X x3 . . . . . . . . []
C. 9mm Pistol . . . . . . . []
D. Rad-X . . . . . . . . . . []
E. Bottle Caps . . . . . . . []
F. Blood Pack . . . . . . . []
G. Mentats . . . . . . . . . []
H. First Aid Box . . . . . . []
I. Safe (Average) . . . . . []
J. Bottle Cap x7 . . . . . . []
K. Floor Safe (Hard) . . . . []
L. Purified Water x3 . . . . []
M. Purified Water x3 . . . . []
BISON STEVE HOTEL (GROUND FLOOR)
First, we're absolutely going to go to the Bison Steve hotel across the street. Waste the convict (possibly two) in the first room, then check the counter on your right (south). While the door has a hard lock, the terminal has an easy difficulty and also unlocks the door. In the room behind this door you can find the [BISON STEVE MAINTENANCE KEY] on the table, plus [MED-X x3], [9MM PISTOL], [RAD-X], and [BOTTLE CAPS] from the open locker, and a [BLOOD PACK], [MENTATS] and a [FIRST AID BOX] from the iron cabinet. The [AVERAGE SAFE] also contains some decent stuff, but you might need to read a skill magazine for this.
Tip: Dynamite works especially well to take out convicts in this area. Better yet, most convicts have a stick or two on them, refreshing your supply as you move onward.
Head east and go into the first room labeled 'Gift Shop'. Take note of the various teddy bears and toy cars, then grab [BOTTLE CAP x7] from the counter. Also take note of the [HARD FLOOR SAFE] behind the counter, which you'll most likely need to leave alone for the moment. Go down the hall and enter through the Maintenance Door on the southeast (with the Bison Steve Maintenance Key you found just now).
These halls lead you right to the trapped Deputy Beagle, but you'll need to take out several convicts too. After defeating all of them, including their leader (who comes equipped with an Incinerator, so be careful), rest up in the bed and loot the falled fridge for [PURIFIED WATER x3]. There are [PURIFIED WATER x3] in the cabinet, but that's about it for the kitchen.
Tracking the man in the Daisy Suit
MY KIND OF TOWN?
It requires a 40 Speech Skill to make the deputy talk, so set him free if you
don't fill the requirement.
Note: While the Bison Hotel also has a 1st floor, you may choose to return to explore this at a later time.
Go back outside and talk to the deputy. Now that he's calmed down he'll give you some more information on where to go next. You can either continue with the 'My Kind Of Town' quest, or proceed with the main quest. Reprogramming Primm Slim (the Protectron Robot in the Vikki and Vance Casino) can be done with a 30 Science Skill, or with 3 Fission Batteries and 4 Conductors.
Tip: If you have enough Science Skill (or 20 a skill magazine) it's definitely worth the effort to reprogram Primm Slim. It'll net you an easy 430 EXP! Should this make you reach Level 4, it is advisable to take the Educated Perk, which grants you two additional skill points every time you level up. That's 52 additional skill points all the way to level 30!
NIPTON
Your next location, Nipton, is quite a walk to the south. Follow your quest marker and traverse a small desert until you reach Nipton. If you run into Powder Gangers during your trip, be sure to introduce them to your dynamite sticks.
You're just travelling through Nipton this time to reach your next destination, Novac. If you meet any shady or wierd figures during your trip - no worries. Either ignore them or play the game as you'd like. More details will not be given during the main course of the game, but can be found in the subsections.
Follow through the canyon until you eventually reach train tracks to the north. You'll likely discover the Ranger Station Charlie along the way. When you finally reach Novac, look for the building west of the giant dinosaur.
NOVAC
Enter the Dino Dee-lite Front Desk (center of town, nearby the giant dino). Check the Mojave Express Dropbox to your left: These can be used to store things in, but for now you'll need to wait until you've discoved a second one. Speak with Jeannie May Crawford behind the counter and inquire about the man in the checkered suit. After getting this information, there's not much to do in this room besides snatching the contents from the [FIRST AID BOX] on the south wall.
Go back outside and go through the iron gate to the north/northeast. Manny Vargas, your next source for information, can be found inside the giant dino - the Dino Bite Gift Shop. Head upstairs to find Manny. Sure, he'll help you, but he first he asks you to do a little favor for him in turn.
So there's this bunch of ghouls bothering you, Manny? Shouldn't be much of a problem, right?
QUEST REWARD:
QUEST OUTLINE:
1. Head to the REPCONN facility west of Novac to investigate rumors of ghoul activity there.
2. (Outline yet to come)
Select the 'Come Fly With Me' quest from the Quest Menu in your Pip Boy and
follow the quest marker to the west of Novac. Follow the road and travel past
the viaduct. When you reach the REPCONN facility, clear the area of Feral
Ghouls. They're decently fast, but their amounts are nothing you can't handle.
        AREA ITEM LIST:          REPCONN FACILITY
        ¯¯¯¯¯¯¯¯¯¯¯¯¯¯¯          ¯¯¯¯¯¯¯¯¯¯¯¯¯¯¯¯
A. First Aid Box x2  . . . . []  Go upstairs and enter the double doors of the
B. Hunting Revolver  . . . . []  large building.  A ghoul tells you to hurry to
B. Safe (Easy) . . . . . . . []  a big room with a metal staircase on east side
B. Microfusion Cells x3  . . []  of the building. Since he sounds so
B. .308 Rounds x24 . . . . . []  trustworthy, let's do it.
C. First Aid Box . . . . . . []
D. First Aid Box . . . . . . []  First, explore the ground floor.  Take a look
E. REPCONN Basement Key  . . []  at the corpse of a new type of enemy: The
F. RadAway x3  . . . . . . . {}  Nightkin.  Actually, they just re-skinned a
F. Rad-X x7  . . . . . . . . {}  Super Mutant from Fallout 3, but it doesn't
G. First Aid Box . . . . . . {}  matter.  It's a NIGHTKIN!  Wow!
H. 12 Gauge Rounds x3  . . . []
I. 12 Gauge Rounds . . . . . []  In any case, explore the restrooms west and
J. Jail Key  . . . . . . . . []  east behind the counter to find [FIRST AID BOX
K. .308 Rounds x3  . . . . . []  x2], one in each restroom.  You can now
L. Space Suit  . . . . . . . []  explore ther building by taking one of many
L. Space Helmet  . . . . . . []  paths.  From the entrance, head west and go
M. Med-X . . . . . . . . . . []  upstairs. Be sure to loot the Dead Brotherhood
M. Stimpak . . . . . . . . . []  Ghoul corpses you come across; most have a
M. Mentats . . . . . . . . . []  Stimpak on them.  What could have happened
N. Isotope 239 Igniting Agent[]  here?  Did the Feral Ghouls kill the others?
O. Mr. RADical's Journal . . []
¯¯¯¯¯¯¯¯¯¯¯¯¯¯¯¯¯¯¯¯¯¯¯¯¯¯¯¯¯¯¯  Turn west around the corner.  The door with
the very easy lock doesn't reveal much when opened, so try the second door on
the west for better luck;  this room contains several beds. If you clean the
nearby area of ghouls, you can rest here to recover your health.
Back in the previous hall, turn around the corner east and open the easy door
to reveal a storage room.  There's a [HUNTING REVOLVER] lying on the ground
next to the [EASY SAFE], and on top of the safe are [MICROFUSION CELLS x20 x3]
and [.308 ROUNDS x24].  The other easy door simply leads to one of the main
corridors, and the stairs on your south lead to the main entrance.  Instead,
explore the room east from here and loot the [FIRST AID BOX] on the desk.  The
cafetaria to the far east only contains two vending machines, so travel through
the northern doorway instead.
These halls house several ghouls, so tread with caution.  The offices to the
north don't contain much of interest, and the active employee terminals all
have the same entries.  The only thing of interest is the small storage room
to the far west/northwest of the offices, secured by an easily picked door.
Inside you can find various tool items and a [FIRST AID BOX].
Going east leads to the large room with the metal staircase the intercom was
talking about.  Go to the top and activate the intercom to unlock the door,
then enter the REPCONN Research Labs.
REPCONN RESEARCH LABS
¯¯¯¯¯¯¯¯¯¯¯¯¯¯¯¯¯¯¯¯¯
A strange fellow names Chris Haversam 'welcomes' you.  There's nothing of
interest on this floor (except perhaps the bedroom to the far west), so follow
Chris upstairs and look for Jason Bright (a 'Glowing One' ghoul, follow the
quest marker).  He'll tell you his side of the story and gives you the [REPCONN
BASEMENT KEY] to the basement to deal with the demons (make ONE guess what
they're going to be!)
There's not much to do around here.  You can steal {RADAWAY x3} and {RAD-X x7}
from a cabinet in the room east from the room with stairs, or even snatch the
contents of a {FIRST AID BOX} next to the southwest doorway (but fat chance
you get caught).  Exit the way you came, head down the metal staircase and go
south.  The quest marker points down the south stairs, leading you to the
REPCONN Basement..
REPCONN BASEMENT
¯¯¯¯¯¯¯¯¯¯¯¯¯¯¯¯
Head down the stairs and go through the door.  This room doesn't contain any
items (it does contain makeshift beds, which can proce *quite useful*), so
proceed to the hallways southwest.  You're going to get ambushed any second now,
because - as expected - there are Nightkins roaming around here, which have an
annoying stealth invisibility, and as such do not show up on your compass as
red blips.  They're also incredibly quick and their Rebar Clubs tear you apart
with amounts of punches you can count on one hand.  Nice!
First, head all the way south and pick the easy door.  A Ghoul named Harland has
put up a defensive spot here against the Nightkins.  Stay friendly with him and
an optional part of the quest starts - you need to rescue someone for him.
Before you move into this room, be WARNED that there are various tripwires
linked to shotguns, and various bear traps spread all over the place.  To
make matters worse, there are also countless CONCEALED MINES spread over the
place, which can only be disarmed when you have an Explosives skill of 28 .
An other way to 'disarm' concealed mines is to shoot them from a distance.  They
are difficult to spot, but these are their locations in this room:  1. Right
after the piece of catwalk in the middle of the room. 2. To the east/southeast
nearby the boxes (there are also various bear traps here, as well as a rigged
shotgun).  You can also find [12 GAUGE ROUNDS x12 x3] on or around the desk
with the rigged shotgun.  3. Between the southwest door and the generator-like
machine (next to another beat trap).  4. Right in front of the [FIRST AID BOX]
in the southwest corner.   5. There's a trip wire in front of the terminal
with two rigged shotguns (but the terminal itself is also rigged, so no need
to activate it anyway - although there *is* a [12 GAUGE ROUNDS x12] there).
6. Between the generator device and the boxes.  In any case, don't bother going
up or Harland turns hostile.  (Actually, you (*can* bother and just kill him, or
you can choose to do this optional part of the quest). Head back to the room
with the makeshift beds.
Go around the northwest corner and carefully look around to see if you can spot
the Nightkin here (he might ambush you).  Dispatch it, then continue downstairs
and go around the corner to the north.  The door at the far end leads you into a
room with a Nightkin Jailer with an Incinerator.  He's tough, but defeating him
grants you the [JAIL KEY]. Go through the middle door on the east, go downstairs
and unlock the door with the key.  Unlock the door on the south as well and
inspect the dead prisoner in the east room.  You can now go back to Harald to
let him know the bad news. He'll make a run for it, and you're free to explore
the upper level.
Look for [.308 ROUNDS x24 x3] near the burning barrel, and read the third entry
on the terminal in the southeast corner regarding five missing Stealth Boys.
After having done so, go back to the hallways you came from and immediately
turn left (west) when you go up the small stairs.  Inside you'll find a strange
Nightkin with his Antler who asks you all sorts of questions regarding the
Stealth Boy shipment (they sure do like those, huh!?).  Explain to him that the
Stealth Boys are no longer here and all Nightkin will leave.  Enter the room
to the west, press the electronical switch to reveal stairs and head down.
SPACE SUIT AND ROCKETS?
¯¯¯¯¯¯¯¯¯¯¯¯¯¯¯¯¯¯¯¯¯¯¯
This leads to a sewage tunnel (for some reason, tunnels like these remind me of
the first part of Metal Gear Solid's soundtrack, which in turn reminds me of the
Depeche Mode song The Things You Said). Anyway, you'll come across a room with a
nuclear icon next to it soon, which contains a Reloading Bench.  You can
experiment with this to break down guns, ammo and scrap metal among other
things.  To the far south is a room with a Workbench and a [SPACE SUIT] and
[SPACE HELMET] in the iron cabinet.  The Space Suit and Helmet are not only rare
and valuable, the Suit even grants you  40 Rad. Resistance!
There's also a [MED-X], [STIMPAK] and [MENTATS] on the desk here. Have a look at
the rockets and activate the intercom .. Hmm, something wierd's going on here.
In any case, return to Jason with the good news (you can exit by ladder here to
the Mojave Wasteland and then make your way through the building, or you can
backtrack - whatever you'd like).  Report back to Jason and follow him to the
basement.  Head back into the sewage tunnel and make your way to the rocket
overview room to speak with Jason.  After everything becomes clear, Chris comes
walking in the room.  Speak with him to get your next objective.
COME, FLY WITH ME
¯¯¯¯¯¯¯¯¯¯¯¯¯¯¯¯¯
Note: As a female, if you have the Black Widow Perk you'll get the option to
      convince Chris to sabotage the rockets.  You'll then need to find three
      Sugar Bombs and some other components for Chris.  You can buy Sugar Bombs
      at the Dino Bite Gift Shop (for example).
First we're going to look for atomic fuel for Chris.  Head back to the Mojave
Wasteland by the nearby ladder, then fast travel to Novac.  From here, travel
west/southwest to find a scavenger in a radiation suit.  He holds the [ISOTOPE-
239 IGNITING AGENT] and the [MR. RADICAL's JOURNAL].  Fast travel back to the
REPCONN Test Site and report back to Chris (use the manhole ladder as shortcut).
After handing over the component, fast travel to Novac once again and head
north/northeast this time.  When you reach the Gibson Scrap Yard, enter the
Gibson Garage.  Old Lady Gibson asks a whopping 500 caps for the thruster
control modules, and only a 50  in Barter or Speech will lower this amount.
You can trade some of your items with her to make some cash to pay the caps.
Fast travel back to REPCONN and hand Chris the control module.  After a short
scene, go back to the Research Labs and follow the quest marker to the door
leading to the Test Site viewing platform.
If you have a Science Skill of 55  you can fiddle with the Navigation Console.
Otherwise, activate the Launch Button to complete this quest, granting you
800 EXP.  If this makes you level up, and it most likely will, there are a few
perks not recommended.  It's probably better to leave the following perks alone:
QUICK PERK REVIEW
¯¯¯¯¯¯¯¯¯¯¯¯¯¯¯¯¯
1. Rapid Reload (cute, but not much more).
2. Retention (sounds good, but remember that you'll usually only need the
   duration for a short while anyway).
3. Swift Learner (Level 30 is the maximum, and you'll get there anyway, so this
   only takes up a precious perk spot).
4. Cannibal (hardly useful at all).
5. Lead Belly (cute, but how often are you really irradiated too much?).
Remember, it's *your* choice, but here are some favorites:
1. Intense Training: An extra SPECIAL stat never hurts, right?
2. Comprehension: Take this before you start reading skill books, and you'll
   gain a lot of additional skill points, making it easy to reach a nearly
   maxed character.
3. Bloody Mess: You deal  5% extra damage with *ALL* weapons.  That's a
   no-brainer (get it?), really.
4. Toughness: In Fallout 3 this gave a whopping of  10 Damage Resistance.
   Now it only gives  3, although there are now two ranks to it.  *MUCH* less
   useful than in Fallout 3, unfortunately, and almost semi-lame.
5. Gunslinger: Decent to have an accuracy boost, but it's only for one-handed
   guns, so that limits its usefulness somewhat.
Note: As you backtrack through the research lab, you can now - safely - 'steal'
      the aforementioned RadAway x3, Rad-X x7, and contents of the First Aid
      Box.  You do still lose Karma for doing so.
Fast travel to Novac and speak with Manny, who gladly tells you where the Khans
went.  You're off to Boulder City!
Clearing out the Ghosts
Launching the Rockets
Did you really think you were going to find Checkered Benny that easy? Boulder City holds another quest for you, though.
QUEST REWARD: 1100 EXP.
Find Boulder City to the far northeast of Novac. Look for Lieutenant Monroe who tells you the Khans are in the city. Open the gate (with the yellow sign on it) to enter the Boulder City Ruins. Here, simply head over to the house that the quest marker is pointing at (in southwest direction), and enter this Great Khan Hideout. In here, talk to Jessup and he'll tell you that Benny, the guy you're after, is no longer here. This concludes the 'They Went That-a Way' quest, netting you 1000 EXP! You can either continue with the Boulder City Showdown quest now that you're here anyway, or continue with Ring-a-Ding-Ding.
It requires a 45 Speech skill to convince Jessup, and it takes a 500 caps bribe at Monroe to back away (or less with 45 Barter), so if you've got what it takes, feel free to do so. An alternative option is to untie the hostages yourself, but the Khans aren't going to like it.
This guide will now resume the main quest.
Travel northwest, following the Ring-a-Ding-Ding quest marker until you reach Freeside's East Gate. Inside Freeside you can hire a bodyguard, but it's not really necessary. Head through the streets, turn northwest and keep going until you get to a blue bus door on your left (southwest).
Head to the far southwest to reach 'The Strip North Gate', guarded by no less than five Security Gatekeepers. To pass you'll either need to pay up 2000 caps, have a Science Skill of 80 , show a valid passport, or destroy all five Security Gatekeepers. Hmm.. Maybe you should start making some money first.
Revenge is a dish best server... Period!
The King has work for you to do, and that's just what you happened to need. Pay him a visit at the King's School of Impersonation.
QUEST REWARD: 1650 EXP.
QUEST OUTLINE: To follow...
LONG LIVE THE KING!
Backtrack and go inside the King's School of Impersonation. Pay Pacer 50 caps to speak with the King. Tell him you paid to see him and you can get your money back. Get back to business and he'll tell you to hire a guard named Orris at the northern gate of Freeside. He'll hand you 200 caps to close the deal with Orris. Hire him (as mentioned before, at the northern gate of Freeside) and follow him around. After a while he'll "kill" four thugs. If you have 6 or more Intelligence (and you should), use this option. You can also inspect the thug bodies if you have a 30 Medicine Skill.
Alternatively, a more universal approach would be to just pop a bullet into one of the "corpses" and see what happens. Orris and the four thugs will turn against you, so be prepared for this to happen. His Hunting Revolver is extraordinary powerful, so you may want to move to the far northwest and shoot one of the corpses from afar (and at least save before attempting). Look for back up near the King's School of Impersonation - Orris usually gets into trouble with the Security Gatekeepers. When the thugs have been taken care of by you and the Kings, loot Orris' body or lure him to the Kings as well. As mentioned, his Hunting Revolver is not only very powerful, but very valuable as well. His Metal Armor isn't too bad either. Return to the King and report. Don't let the question marker fool you; the King's (sometimes) located in his suite on the third floor.
Working for The King
THE NCR AND THE KINGS
The next task for you is to head to Old Mormon Fort and ask the locals about their assailants. Find Old Mormon Fort northeast/east of Freeside and enter through the large wooden gate. Speak to Roy (and Wayne too, who probably has an IQ of 83), then return to the King with the information. This time, inquire about his dog, Rex, and you can even start a new quest: Nothin' But a Hound Dog. Return to Old Mormon Fort and speak with Julie Farkas about the NCR troops. She tells you to speak with Major Elizabeth Kieran, telling her to mention her name. You can also start yet another new quest at Julie regarding trouble in Freeside: High Hopes. Let's first continue with G.I. Blues.
Tip: Head into Fort Mormon through the door in the west corner and look around the bedroom upstairs to find the [SNOWGLOBE - MORMON FORT] in the cabinet, and a {TODAY'S PHYSICIAL} on the desk.
Travel around Old Mormon Fort, heading southeast/east, and locate the missionary to the northeast. He's part of the NCR and wants you to take a quiz before telling you the password. The correct answers are: Tandi, Shandy Sands, Bear. With the password, travel down the street northwest, then follow the destroyed highway southwest until you reach the NCR Ruined Store to your left (southeast). Speak with Elizabeth Kieran here to get the information you came for. Return to the King's School of Impersonation and Pacer approaches you, asking (telling) you not to tell the King what you just found out. You can bargain with him and he'll give you 200 caps (what is the amount with 50 Barter, anyone know?).
COMPANION REX
Speak with the King anyhow, and inquire about Rex first (if you spoke with Julie about this earlier). Tell him that Rex can be cured, and the King will actually lend you Rex! This gives you a companion similar to Dogmeat in Fallout 3, and arguably cooler! This also grants you the Search and Find perk as long as Rex is a companion: It's more nifty than extremely useful, but when zooming the camera will highlight chems, firearms and ammunition in the surroundings, making them slightly more easy to find. You need to know about Rex that he chases off after rats (and probably after people with hats, too). You can also view Rex as an important expansion of your inventory, as he can carry 240 weight. Do be careful on hardcore mode: If Rex dies, he'll be gone forever.
GETTING INTO THE STRIP
Also tell the King what Elizabeth told you, then head back to the NCR Store and you'll find Pacer under fire by NCR troops. Speak with Elizabeth nearby the outpost tower to the northwest to defuse the situation and report back to the King. This concludes the G.I. Blues quest.
You can now ask the King for a favor:
1. Join the Kings. This makes you one of them, and you're less likely to be attacked around Freeside.
2. Get into the Strip. The King sends you to Mick and Ralphs where you can claim the [COUNTERFEIT PASSPORT], allowing you to access the strip.
3. Money. This gives you 1000 caps.
Since you'll want to get into the strip, option two is currently recommended. Of course, you can also pick one of the others but you'll have to figure out a different way to get into the strip. Mick & Ralph's is located in the same area as Mormon Fort, and is located southeast from there (check your local map). Head inside and talk to Ralph, telling him the King sent you regarding a favor he owes you. Ralph will then give you the counterfeit passport. With this in your posession it's finally time to enter the strip.
THE STRIP
After entering, a security bot tells you to visit Mr. House, which initiate the 'The House Always Wins, I' quest. Let's first continue with the Ring-a-Ding-Ding quest and continue to the Strip. You'll also be able to buy some weapons you can sneak into casino's (such as a silenced pistol(!!) or switchblades). It's a good idea to buy at least a Silenced .22 Pistol if you don't already have one.
THE TOPS CASINO
Proceed to the next part of the Strip, and enter the The Tops Casino (with the circling flashy lights). Hand over your weapons (not everything, of course), then meet Benny who's in the north area of the casino. There are a few approaches you can now take:
1. Attack Benny (highly unrecommended, you barely stand a chance).
2. Meet him in the VIP suite (you go first).
3. Use the Black Widow Perk to get a hilarious conversation and Benny will leadyou to the suite.
4. Use Barter (35 ) or Speech (60 ) to get Benny to follow you to the suite.
The 'Wild Card: Ace In The Hole' quest now also starts.
[video=6634 tite=GI Blues - Hacker]
You and Benny have a score to settle, and you're finally face to face. Let's not hope things get more complicated..
QUEST REWARD: 110 EXP.
QUEST OUTLINE:
1. Search Benny's room in the Tops for clues.
2. Talk to Yes Man about how to take over Vegas.
AREA ITEM LIST
A. Pugilism Illustrated . . []
B. Bottle Cap x10 . . . . . []
C. Tales of Chivalrie . . . []
D. Benny's Suite Key . . . . []
THE TOPS CASINO SUITES
In the presidential suite, look for a [PUGILISM ILLUSTRATED] on the small wooden table in the northwest corner of the main room. Also explore the kitchen to the southeast and grab the [BOTTLE CAP x10] from the table, and a [TALES OF CHIVALRIE] from the desk. When you're all done, try to exit by elevator and Benny betrays you (how surprising). You'll now have to deal with four of his goons, so pull out your gun and waste them. It helps if Rex is your companion, otherwise rely on taking cover in one of the other rooms, aiming for their heads. Loot their bodies for [BENNY'S SUITE KEY], then exit by the elevator. You can also have fun with Benny through the intercom :p.
Massive Failure! After Benny Again!
Down in the casino, turn around the southwest corner and follow the quest marker to the elevator leading up to the 13th floor. Go through the double doors and explore Benny's Suite. Inside you'll find the rather helpful bot Yes Man. This eventually concludes the Ring-a-Ding-Ding Quest and Wild Card: Ace In The Hole quest, (netting you 1100 EXP and 110 EXP respectively), and inquiring with Yes Man about all subjects not only gets you tons of information, but also starts various new quests, including: Wild Card: Side Bets, Wild Card: You and What Army?, and How Little We Know. This guide first continues with 'Wild Card: Change In Management' first.
Yes Man has been very helpful to say the least. It's time for you to gain a little more power in New Vegas...
QUEST REWARD: 500 EXP.
QUEST OUTLINE: To follow
Before continuing with the game, look around the room with Yes Man to find a [LOCKSMITH'S READER] lying on one of the machines. The door to the northeast leads to a hall with a locked door leading to the Sub-Basement, so ride the elevator down to the main floor again. Exit the casino. In case you were wondering, there's no need to collect your equipment - they're automatically put back in your inventory when you leave the casino.
One of Caesar's men, Vulpes Inculta tells you that Caesar wants to see you. This will automatically start the 'Render Unto Caesar' quest. Additionally, you also receive a note from Ambassador Crocker from the Republic. You're pardonned any crimes against both factions. So... Let's just continue our pursuit of Benny for now. Fast travel to Novac, which is closest to your destination. Travel to the far southeast until you reach a canyon. Head down and travel through the canyon until you finally reach Cottonwood Cove. Speak to Cursor Lucullus who's waiting for you at the dock, and travel to the Fort by boat.
THE FORT
Go uphill (people are quite unfriendly around here, huh? They keep telling you to go .. "away"... How contradictory). Enter the fort and look around for Caesar's tent, easily spotted by two flags and a luxurious look.
Note: Sometimes you're told you cannot enter the tent because you must enter by yourself. This is an annoying bug, especially of your companion (Rex) is still already waiting at the entrance of The Fort. To fix this, go back to your companion and specifically tell them to wait. You can then enter the tent.
When speaking to Caesar, responding with "How may I serve your Legion, Caesar?" will increase your fame for Caesar's Legion. Ask what you need to do and he'll hand you [THE PLATINUM CHIP]. Head to the Weather Monitoring Station (and activate the 'Render Unto Caesar' quest), west of Caesar's tent. Inside, place the Platinum Chip in the device and head downstairs into the Securitron Vault.
THE SECURITRON ARMY
Here, speak with Mr. House over the screen. He'll ask you to work for him instead. Considering he's very powerful, let's play the game along .. for now, shall we? Might as well get the best out of this complex situation. Equip a radiation suit, or better yet, the space suit, to help protect you from the rad increase (even though it'll say 1 RAD every second, it does actually decrease the amount).
Go downstairs and destroy the Protectron, then go through the southern door, leading you to the security room. Be sure to grab the valuable and powerful [PLASMA RIFLE] from the corner, and loot the [GRENADE BOX x2] and [AMMO BOX]. The Average Turret Operation Terminal can deactivate the turrets in this area, and the Hard Protectron Opration Terminal can deactivate, well, Protectrons, although you likely don't have 75 Science. Do what you can - unfortunately the Sentrybot Terminal is inactive.
Head through the door at the end of the hall leading west. Destroy the two Protectrons (and possibly a Mark VI Turret, if you hadn't disabled these) in this hall, then go downstairs, dispatch another Protectron and go through the generator hall, destroying another three to four Protectrons. Inspecting the generotors in the adjacent chambers reveals that these can be destroyed. For now, head west (destroy the Mark VI Turret) and go upstairs (destroying yet two more turrets). It helps to toss Pulse Grenades at turrets and/or groups of Protectrons. You should've gotten some from the Grenade Box earlier on.
Select the 'Wild Card: You and What Army?' quest.
You must now make a decision. You have two options:
1. Mr. House. If you side with Mr. House, activate the 'The House Always Wins, II' quest in your Pip-Boy 3000 and then activate the Securitron Operations Console in the Security Room (at the red lights).
2. Destroy the three reactors in the adjacent rooms of the generator hall to overload the bunker's reactor. This also activates FOUR Sentry Bots near the exit, which you'll want to quickly run past - you're by far outmatched by these.
You'll receive 750 EXP for finishing the 'Wild Card: You And What Army?' quest. Now report back to Mr. House, and then to Caesar, also completing the 'Render Unto Caesar' quest, granting you 500 EXP. After this, deal with Benny. You can either kill him right away, crucify him (at a loss of karma), or face him in the arena (which allows you to loot him from his unique [BENNY'S SUIT] and [MARIA] Silenced 10mm Pistol). You can also pickpocket this pistol from him when he's still tied up, but the suit requires some gladiator efforts.
All your equipment is returned to you after killing Benny in the arena. Return to Caesar to receive 100 EXP and the task to kill Mr. House. Fast Travel to The Strip North Gate and from here, go to The Tops Casino to meet up with Yes Man who's waiting right outside. I think it's time to pay a visit to the Lucky 38 Casino.
Go inside the Lucky 38 Casino and take the elevator to the Penthouse. Jane, one of the bots around here collects Snow Globes for Mr. House, giving you 2000 caps as a reward a piece! Mr. House can be found in the room to the east.
OPTION 1: THE HOUSE ALWAYS WINS
Simply hand the Platinum Chip over to Mr. House. He'll show you what the Platinum Chip does. Now that you know, you've completed the quest ( 500 EXP). Next goal is to meet the Boomers as part of 'The House Always Wins, III'.
OPTION 2: CHANGE IN MANAGEMENT
If you turn against Mr. House, this will turn all security bots hostile. Should you want to pick this option, activate a Stealth Boy, sneak upstairs and wait half a minute or-so. Then, in the room with Mr. House's main screen, use the terminal behind the stairs to your left (northeast) to open the antechamber to the right. Go inside and use the terminal next to the elevator to access the secret chamber with the 261 year-old Mr. House inside. Open his chamber and kill Mr. House. After you've done this, head to Yes Man at the Tops Casino to take over Mr. House's mainframe. Yes Man will then show you what Mr. House intended to do with the Platinum Chip.
A Strategic Move for Power
NOTE: Things get more complicated to describe from now on, due to the various possibilities you have. Soon enough, this guide goes over all possible options, but for now OPTION 1 (MR. HOUSE) will be followed.
Regardless of your actions, ride the elevator to the Lucky 38's Presidential Suite and check out the room with the pool table (to the northeast). Search the wooden cabinet in the southeast corner to find a [FUTURE WEAPONS TODAY] skill magazine. In the casino on the ground floor, check out the VIP section to the west - head upstairs - and check behind the bar: The cabinet contains [GOLDEN GLOVES].
Make your way to the northeast side of the map and follow the highway. You'll eventually come across a Field Shack to your left (north). The pickup next to it contains an [AMMO BOX] and Sunset Sarsaparilla Crate, and inside the shack are [AMMO BOX x3].
until you run into a fellow named George. He tells you it'd be unwise to continue, and offers you an alternative for a measly 300 caps (or 50 with 40 Barter). The only thing he actually does is sell you the 'Nellis Artillery Timing Details', which reads:
"The key to avoiding the artillery is to move from building-to-building up the northern side of town toward the front gate. Stick to the high cover in the northeast corner of the two buildings, then make a bee line for the gate. The Boomers won't shoot at their own people, so stick to the fence until you make it to the gate. Also, I know there is an old train tunnel that enters the area from the south, but no one has ever come back out of there to say it is safe."
In case you're wondering, the train tunnel has a Very Hard lock, so there's not much for you to do there right now.
It says what it says. To elaborate: Do NOT go east or southeast or you will get killed. Look for the higher piece of corner in the northeast corner of the first "house" (it's basically destroyed to the ground). You can stay in this corner until the firing ceases. Then immediately rush over to the next house to the northeast, which is more intact; hop inside and shelter in the northeast corner. When the firing ceases once again, make a break for the fence to the far north. Hug the fence and travel east to the main gate of the Nellis Air Force Base.
You're automatically spoken to and brought to Pearl, one of the elders. A new quest will start, Volare!, and by the look of things you can do various other quests as well. While it's possible to kill the Boomers, there's too many things to do and doing so would be a waste of gameplay. Let's start with the 'Volare!' quest.
The Boomers have several problems they need help with. YOUR help. Something involving giant ants and a sunken B-29? You're in, right?
QUEST REWARD: 400 EXP.
QUEST OUTLINE:
1. Help the Boomers around Nellis.
2. Help Agryll with his patients.
3. Do the Sunshine Boogie quest.
4. Listen to all of Pete's stories.
5. (OPTIONAL) Do the Ants Misbehavin' quest.
6. Return to Pearl.
7. Speak to Loyal about the Boomer's plan to raise the bomber from the bottom of Lake Mead.
8. Attach the ballast from Loyal to the B-29 at the bottom of Lake Mead.
9. (OPTIONAL) Talk to Jack about getting a rebreather to swim to the bottom of Lake Mead.
10. Return to the shore near the tow winch and use Loyal's detonator to float the B29 to the surface
11. Let Pearl know your job is done.
AGRYLL: LET'S PLAY DOCTOR TOGETHER
Select this as your active quest and head to the northwest marker, leading you to the Nellis Medical Station. Here, speak with Argyll and ask him what you can mean for him. If you have 40 Medicine or 35 Speech you can convince him to help treat the patients. These require 40, 50 and 60 Medicine respectively. If you have a Today's Physician magazine (along with the Comprehension Perk) you can boost your Medicine up to 20 points, possibly recovering all three patients. You get 40, 50 and 60 experience points for helping the patients.
PETE: A BOOMING STORY
Continue to the Nellis Boomer Museum, marked by the northwest quest marker. Enter the building and look to your right (north): Is that a [SNOW GLOBE - NELLIS AFB] lying on the table? Yes it is! There's also an {iLA FANTOMA} magazine on the bed - it's best to grab this while Hidden/Crouched when Pete's asleep. Speaking of Pete, talk to the kid and listen to the story (this will increase your fame with the Boomers). Go over all options, sometimes using Science and Repair to impress - and it'll all increase your fame. You're done here now.
LOYAL TO THE BOOMERS: SUNSHINE BOOGIE
Find the Boomer named Loyal, usually found inside the Hangar, but also found wandering around the Hangar outside. He'll give you an additional quest, namely, repairing the broken solar array panels. The Nellis Array Panels are easily found, located to the northeast/east of the base. You require either a 65 Repair skill, or some array parts to fix the panels. If you have the required skill, consider yourself lucky; you get to choose if you'd like to do the next part. Otherwise, let's get down to business.
The parts you're looking for can be found in the Helios One Power Plant, located nearby Gibson Scrap Yard. Fast travel there and approach the place. Lt. Haggerty halts you; talk your way in with 30 Speech or Science.
25 Speech to make him hand over 100 caps. He'll also give you the 'That Lucky Old Sun' quest. Also speak with Ignacio Rivas to learn several things about the Brotherhood's and NCR's interests in this location. Exit through the door.
Here, look around for five broken solar array panels. This requires 20 Repair, but I have faith you have at least that amount. Otherwise, well, either boost it some by levelling up or use a skill magazine. There's an array panel to the west, behind a tent that contains [AMMO BOX x2]. The tent to the right contains a [FIRST AID BOX]. There's a second broken array panel nearby, just southeast from the tents, next to the fence. While you're here, inspect Terminal 1 inside the fence, BUT be warned that there are several traps set up - save your game and disarm these first. Resetting the mainframe will complete one of your goals for the 'That Lucky Old Sun' quest.
There's a third broken array panel to the north of the area, a fourth to the northeast, and a final fifth nearby the tents on the east side. One of these tents contains an Easy [AMMO BOX]. The fenced area to the southeast is guarded by several violent dogs, but it also houses Terminal 2 on which you need to reset the mainframe on. Waste the doggies and do so.
Ignore the 'That Lucky Old Sun' quest for now, because it's a little hard to get past the security in the Solar Collection Tower. Instead, fast travel back to the Nellis AFB and head over to the Nellis Array to the northeast. Fix the five arrays and report back to Loyal in the Nellis Hangars. This concludes the 'Sunshine Boogie' quest, netting you fame at the Boomers, plus 300 EXP.
RAQUEL: ANTS MISBEHAVIN'
Raquel can often be found on the little outpost south from the hangar, otherwise try the Nellis Woman's Barracks. Ask what's.. bugging her and she'll explain the situation and hand you the [NELLIS GENERATOR KEY]. Go back to Loyal in the hangar first. If you have 50 Speech or Science he'll give you the [SONIC EMITTER]. Travel to the Nellis Array Generators and go inside the door - follow this quest's marker.
Remember, don't use any flamer or laser weapons to prevent the ants from blowing up. In the first room, waste several ants, then loot the dead Boomer. Look for the [MARKSMAN CARBINE] next to him (which doesn't show up while looting the body). In the room to your left (northwest) is another dead Boomer, who holds a Grenade Launcher. You can find an [ASSAULT CARBINE] next to him, which is the assault rifle version compared to the sniper version that the marksman is.
Head into the north chamber and go down the catwalk stairway, flipping the first of three power switches at the stairs' intersection. The other two switches are on the ground level - east wall straight ahead. Go northeast and loot the iron cabinets for a load of goodies: [AMMO BOX x2], [MISSILE x2],[MINI NUKE x2], [.308 ROUNDS x24 x4], [5MM ROUNDS x100 x4] and [40MM GRENADE x12 x2]. One of the Mini Nukes is lying on the ground. The double door on the north side and the adjacent tunnel only lead back to the Mojave Wasteland, so you can ignore them for now.
Instead, explore the south/southeast part of the ground floor to find [40MM GRENADE x12] and [THUMP-THUMP] next to a skeleton. Thump-Thump is a unique grenade launcher, and quite a decent one at that. Test it elsewhere - this area is a little too risky with various explosives around, along with the ants.
It may be a little difficult to spot, but the large pile of rubbish and sand here (to the south) is the Ant Mound. Place the Sonic Emitter on top of it and activate it to destroy all ants in the building. You've now officially owned this place! Return to Raquel to get your reward: 400 EXP and an increase of fame at the Boomers.
VOLARE
Back at the 'Volare!' quest, return to Pearl who'll send you running back to Loyal.
Jack requires a pressure cooker in order to create the rebreather, or you can tell him how to make one from various ingredients with 45 Science. Jack will now give you the [REBREATHER], which has the Breathe Underwater ability! You can find a pressure cooker in Field's Shack, which is located to the southwest of Nellis Air Force Base, near the "entrance" of where the bombing continually used to take place. Return to Jack when you've got one.
With the rebreather in your posession, travel to the Crashed B-29 airplane to the southwest. Equip your Rebreather (which can be equipped under a hat) and dive into the water, which isn't irradiated. After finding the B-29, attach the ballast under both wings and swim to the northwest shore. Equip Loyal's Detonator and bring the plane back up. Return to Loyal at the Nellis Hangars, and lastly speak with Pearl to end the quest. The Boomers are now loyal to you, giving you the option to have them help at a potential battle at Hoover Dam. You also receive a [BOOMER FLIGHTSUIT] and a [BOOMERS FLIGHTSUIT].
Now that you've won the Boomer's support, go back to Mr. House to tell him so, as part of the quest 'The House Always Wins, III'. You can now continue with part IV of this quest series'. By now, you'll also get the quest notices 'Beware the Wrath of Caesar' and 'Don't Tread on the Bear!', respectively showing how annoyed Caesar and the NCR are at your involvement with Mr. House.
The long journey to Boomer Love
The next few sections involve the quest 'How Little We Know'.
HOW LITTLE WE KNOW
Enter Gomorrah across the street, and speak with the Secretary to learn more about this place. Ask around about Cachino and people will tell you to get out of there face. Asking around several times makes Cachino show up. He's a dick, so don't expect a high-level conversation.
You can get the key to his place by buying it from the Secretary (or you can threaten her if you have 8 STR, or use Barter if you have 55 ). It costs 300 caps. Ride one of the elevators on the northwest part of the hall and go to the suites. Cachino's room is located to the northeast; make sure the guard is walking in the other direction to sneak in unseen.
Go upstairs and explore the bedroom. You can find a {MILSURP REVIEW} next to the closet on the southeast. Check the desk in the east corner of the room to find {CACHINO'S JOURNAL} inside. Alternatively you can attempt to pickpocket Chachino himself for this journal, but I wouldn't recommend doing this. Read the journal in your Pip-Boy's Misc section, then return to Cachino and confront him with what you know. He's often sitting in the back (northwest) of the brimstone section of the casino. Roughly speaking, you now have two options:
1. Give Cachino back the journal (60 Barter nets you 200 caps, otherwise you get 100 caps) and then follow his instructions.
2. Don't give Cachino his journal. Instead, take this thing to his bosses.
Let's try the latter first. Speak with the Omerta Thug in the NE corner of the room and tell him you've got business with his bosses - show him the proof. You'll get the [ZOARA CLUB KEY] from him, so enter through the door. Head upstairs and head into the hall southeast from the pool tables. Find Big Sal (often) sitting on the left, just the guy you wanted to talk to. Otherwise look around for Nero. In any case, show them the journal for either 100 caps or (55 Barter) 200 caps. Follow Big Sal/Nero in their office and watch the event. Now get down to business. Ask him what the big thing is they have going on, and be on your way.
Head through the south halls, going downstairs on the right. In the Gomorrah Lower Lobby, find Troike, one of this quest's main figures. He asks you to retrieve a stolen shipment of weapon parts from a group of Fiends. These can be found southwest of the strip - follow the quest marker. There are three of them, so dispatch them and retrieve the Disassembled Weapon Shipment (which has a value of nearly 5000 caps!). Give it back to Troike, then go look for Clanden who can be found by riding the express elevator to the suites. Find Clanden and ask him what he needs.
To give him the chlorine, head to outer freeside and head over to Mick and Ralph. You can buy the chlorine from Ralph, or even get it for free if you have 60 Speech. Alternatively you can get some from the Ultra-Luxe Casino's. Unlock the door to the storage room stealthly and fetch the chlorine. In either case, return to Clanden to wrap things up.
When you've done so, return to the big boss, Big Sal or Nero, and tell them you've finished your work. You're then rewarded with 400 caps, 300 experience, but your infamy on The Strip also rises.
The Brotherhood of Steel poses a serious threat to Mr. House and his plans. He thus requires you to wipe out the entire BoS.
QUEST REWARD: 100 EXP.
After dealing with the Omertas in one way or another, return to Mr. House. Even if you sided with the Omertas, you'll still be able to continue working with Mr. House. This quest requires you to destroy the Brotherhood of Steel, so it's advisable to first conclude any business you have with the BoS before continuing down this line with the Main Quest.
Check your worldmap and locate the Hidden Valley. Enter the bunker and go downstairs. Soon after entering the chamber with large containers, a squad of three BoS troops tells you to hand over all your equipment and to come along. You can ignore them and go on a killing spree, but it's not an advisable option and arguably less fun. Hand over your weapons.
Head downstairs to meet Paladin Ramos. Agree to see Elder McNamara and speak with him. You're not immediately trusted, so you'll need to do a quest first. Agree to deal with the Ranger and the "Still in the Dark" side quest begins. You're being fitted an Explosive Collar to ensure you're enslaved and won't run off too far away from the bunker. Collect your stuff from the crate to your right before continuing.
STILL IN THE DARK
To deal with the Ranger named Dobson, head southwest and follow your quest marker. During daytime he'll be on patrol; during nighttime he can be found in his bunker. Speak with him and tell him you're not a Powder Ganger. Be sure you don't mention anything about the BoS, or you'll automatically fail this quest and you're tracked down by the BoS afterwards.
You have several options to get Dobson moving from the BoS territory. Let's go over them one by one:
While you're in Dobson's bunker, be sure to grab the [.308 ROUNDS x3] from the cabinet to the southwest. It also contains [PURIFIED WATER x4].
Return to the Brotherhood of Steel and tell Elder McNamura that you've dealt with Dobson the Ranger. You can now either continue with BoS business, or continue with Mr. House's goal of destroying the BoS. This section will lead you to the destruction of the BoS, so make sure you've done all other business here.
DESTROYING THE BOS
Essentially, the only thing you need to do is wipe out the entire BoS bunker. The easiest way to do this is by blowing up the bunker, which in turn requires three keys. Head to Bunker L2 by making a full round circle in the hallway below.
When in possession of all three keycards, head to the VR chamber in the L2 bunker (southern area). Use the terminal on the western wall to get an access code, which you can then use at the red terminal on this same wall to blow up the bunker. Doing this turns all BoS members immediately hostile, so it's good to still have the Stealth Boy active. It can also greatly help to pop a Med-X and, if you have it, and Atomic Cocktail to greatly reduce damage income. Rush out of bunker L2, then out of bunker L1 using your local map for guidance. With the bunker destroyed, return to Mr. House for further instructions, and to conclude this main quest.
Taking out the Brotherhood
President Kimball is doing a speech at Hoover Dam, and Mr. House wants you to protect him; if you're in the position to do so.
Note: This quest will automatically fail if you aren't at the very least "Accepted" by the NCR. If you aren't, you're automatically given the next quest (part VII) and the president dies as well.
Essentially, this quest requires you to do the other Main Quest "You'll Know It When It Happens". Either save the president or let him die and return to Mr. House to proceed with the story.
Protecting the President of the NCR
You still need to boost the Lucky 38's transmission signal to allow for control of the Securitrons at Hoover Dam.
You've been given an Override Chip which you can use to extend the transmission signal of the Lucky 38 Casino. Travel to the El Dorado Substation or somewhere closeby, and enter the garage. There are a few ways in which you can do this:
Inside the garage, locate the terminal and use the Override Chip. Return to Mr. House and inform him of the good news. This also starts part VIII of this quest, which is shortlived - you only need to accept your final mission and it will conclude. Do realize that accepting this mission will inevitably finish the game; there is no turning back from here.
Planting the Power Override Device
This is it; the final battle. You'll need to help Mr. House to gain full control of New Vegas (and the Mojave) again.
QUEST REWARD: 4000 EXP.
Depending on which sidequests you did earlier, the following things can happen:
Head for the Hoover Dam Tower to the northeast, battling any hostiles along the way. Inside, ride the elevator. Search for the control room to the northeast, guarded by heavily armed NCR troops you'll need to dispatch before or after entering (or if you have 75 Speech, convince them to head elsewhere), and access the large terminal here, using the Override Chip. Head to the southeast area of the complex, dealing with NCR and Caesar's troops as you make your way to the switch you manually need to flip. Open the door, check the right of the balcony and flip it. Head to the north/northeast area to exit the tower.
Back outside, proceed over the dam and let the Securitrons handle the Legion Centurions as you eventually traverse southeast, uphill, towards the Legate Camp. Inside, dispatch several Praetorian Guards and head up the steps on the far end of the camp. Here you'll meet who you could call the final boss of the game in this scenario: Legate Lanius. You have a whole lot of options in the dialogue, but ultimately you'll need 100 Speech or Barter to successfully make him retreat.
LEGATE LANIUS
Alternatively, and ultimately if you don't have a very high Speech and/or Barter skill, you'll have to fight Legate Lanius. He's a tough, speedy behemoth with a huge amount of health and plenty of supporting Legion troops.
After finally defeating Legate, head back to the gate and general Lee Oliver of the NCR shows up. You have several options now:
Mr. House then moves towards you as a Securitron and tells you that you've been a fabulous right hand, arguably the best he's ever had. The game now concludes.
Taking the Hoover Dam for Victory!
QUEST REWARD: 100 EXP, Caesar's Legion Fame
QUEST OUTLINE:
1. Get a replacement firing mechanism for the Legion howitzer from the Boomers.
2. Retrieve the firing mechanism from the Boomers' workshop.
3. Install the replacement firing mechanism into the Legion's bunker.
4. Inform Lucius that the howitzer has been repaired
Upon entering The Fort and talking to Caesar you unlock the ability to speak to other members of the Legion. Talk to Lucius and ask if you can lend him a hand to which he asks you to fix the howitzer. Make your way to Nellis Air Force Base where you can acquire the missing piece to fix the howitzer. If you are Accepted or higher with the Boomers then talk to Mother Pearl and request the [HOWITZER FIRING MECHANISM] otherwise head over to the Nellis Workshop and open the gun cabinet and steal it.
Head back to The Fort and find the howitzer on the cliff then repair it. Tell Lucius of your genius for [100 EXPERIENCE POINTS] and Caesar's Legion Fame. If you side with the Legion at the end of the game then they will use this howitzer as a weapon in the final battle.
Two American kids growin' up in the Wasteland
QUEST REWARD: 250 Caps or Turbo Recipe, 150 Caps,goes on?
QUEST OUTLINE:
1. Find Jack and Diane's missing drug runner.
2. Return to Diane and tell her about Anders.
3. Deliver drugs to Don Hostetler at the Crimson Caravan.
4. Return to Diane for your payment.
5. Deliver drugs to Motor Runner.
6. Return to Diane for your payment.
7. Teach Jack new chem recipes.
If you go north of the Red Rock Canyon you're sure to find the Red Rock Drug Lab. In this area you will find some trailers and Great Khans' by the names of Jack and Diane. Diane needs help tracking down her delivery boy Anders, accept her quest and if your Barter skill is at 50 or higher you can convince Diane to sell to the citizens of Mojave and gain some Karma.
Moving Product for the Khans
Fast Travel to the Cottonwood Cove or Sniper's Nest, if you have either, at the southern part of the map. From here follow the quest marker to find Anders on a crucifix. You can either cut him down and he'll head back to Red Rock Canyon or you can leave him up there for the Legion. If you return after you cut down Anders then Diane will offer you [250 BOTTLE CAPS] or the [TURBO RECIPE], either choice nets you Great Khan Fame. Remind Diane of the work she previously promised to continue the quest and receive the [MILDLY SUSPICIOUS PACKAGE].
Now that you are Anders replacement head over to the Hostetler's house located south of the New Vegas Medical Clinic. Check the end table between the sofas for a [SUNSET SARSAPARILLA STAR BOTTLE CAP] and then the kitchen if you need any random assortment of foods or drinks. Mr. Hostetler can be found in his room, simply drop off the package and rendezvous back with Diane for the reward of [150 CAPS]. Ask for more work to be given a task of delivering drugs to Vault 3 nearby.
As you make your way closer to the vault door you will notice more and more Fiends, be wary as they will attack on sight. Upon entering Vault 3 you will questioned as to your intentions, with Speech 64 or higher you can pass a check or else you have to fight your way through. Head through the middle door and to the right to spot a Very Easy door to pick. In this closet area you can find a few [STIMPAKS], leave the closet and enter the dining area across from it. On a table in the southern end you can find a [JET] and [PSYCHO x2]. Pick the Easy door nearby and check the [FIRST AID BOX] for a [RAD-X] and [STIMPAK x5]. In the next room over you can find numerous [PURIFIED WATER] and a few [NUKA-COLA].
Return to vault entrance and go left at the split this time. You'll find a door with an Easy lockpick, pick it and enter. Check the [FIRST AID BOX] on the table to find [PURIFIED WATER] and [STIMPAK x5]. On the shelf opposite this is a [FIXIN' THINGS] magazine. Leave and continue around to a Hard lockpick door and enter this room. The [FIRST AID BOX] on the computer desk has a [RAD-X] and [STIMPAK x4], you can also snag the [TODAY'S PHYSICIAN] sitting on the same desk. Opposite the desk you can find [RADAWAY x3], [FIXER x2], and a [DOCTOR'S BAG]. Visit the bathroom across the hall and open the [FIRST AID BOX] (Very Easy lockpick) to find more [RAD-X], [RADAWAY], [STIMPAK x4], and [DOCTOR'S BAG x2]. Leave this room and continue north to the game room, head upstairs to find an ammunition box containing [ENERGY CELL x30].
Hop down and check the vending machines for [SUNSET SARSAPARILLA x3] and [NUKA-COLA x3]. Head up the other set of stairs to find [MENTATS], [JET], and [MED-X] on the pool table. Drop back down and open a nearby Very Easy lockpick door to find a [NUKA-COLA VICTORY] and [NUKA-COLA QUARTZ] in a carton on the back shelf. In the western teaching classroom you can find a [DOCTOR'S BAG] and three ammunition cases with [MISSILE x4] and a nearby [10MM PISTOL]; there is a [JET] on the projector stand. Leave the game room and head north to reach the Maintenance section.
The door to the right is an Average lockpick door, open it and check the cabinets for [VAULT 3 UTILITY JUMPSUIT x2] which add 5 skill points to Repair and Lockpick. Make your way around to Motor-Runner via the north door. Talk with him and pass a Speech 25 challenge to gain [25 EXPERIENCE POINTS]. Give him the delivery and check the lockers for a [REVERSE PULSE CLEANER] and a [5.56MM ROUNDS x22]. As you leave don't head out, instead continue straight to find an Average lockpick door. The Filing Cabinet inside holds [20 GAUGE ROUND x3] and [9MM ROUND x14]. Grab the [FIXIN' THINGS] on the shelf next to the Tool Cabinets then be on your way back to Diane. You'll receive [300 CAPS] and Great Khans Fame as your reward; to finish this quest you need to teach Jack a few things.
With a Science skill of 50 and Survival skill of 75 you can teach Jack all the stuff he can learn. Each time you teach him a new skill you will earn [50 EXPERIENCE POINTS] and have the option of being rewarded with [50 CAPS] or some random chems. After teaching him three skills you will finish the quest and be rewarded [300 EXPERIENCE POINTS] as well as the [KHAN TRICK] perk.
Sonic Emitter functions like a magnifying glass, pop goes the ant.
QUEST REWARD: 400 EXP, Boomer Fame
QUEST OUTLINE:
1. Restart the 2 array generators, then reset the main power breaker.
2. Kill all ants in the generator room.
(Optional) Loyal may have something to help with the ants.
(Optional) Place Loyal's sonic generator on the ant mount.
(Optional) Activate the sonic emitter.
3. Return to Raquel and let her know the generators are running again.
To get this quest you must have first reached Nellis Air Force Base and started the quest Volare! by speaking with Mother Pearl. Track down Raquel either in the Barracks or outside patrolling and ask her about what's been "bugging" her.
She will fork over the [NELLIS GENERATOR KEY]. Now go visit Loyal to the north in the Hangar. Complete a Speech or Science challenge (you need a skill of 50 or higher) to receive the [SONIC EMITTER] from Loyal. Leave the Hangar and go east acrossed the tarmac to reach the Nellis Array Generators (follow this quest's marker).
Remember, don't use any flamer or laser weapons to prevent the ants from blowing up. In the first room, waste several ants, then loot the dead Boomer. Look for the [MARKSMAN CARBINE] next to him (which doesn't show up while looting the body). In the room to your left (northwest) is another dead Boomer, who holds a Grenade Launcher. You can find an [ASSAULT CARBINE] next to him, which is the assault rifle version compared to the sniper version that the marksman is.
Head into the north chamber and go down the catwalk stairway, flipping the first of three power switches at the stairs' intersection. The other two switches are on the ground level - east wall straight ahead. Go northeast and loot the iron cabinets for a load of goodies: [AMMO BOX x2], [MISSILE x2],[MINI NUKE x2], [.308 ROUNDS x24 x4], [5MM ROUNDS x100 x4] and [40MM GRENADE x12 x2]. One of the Mini Nukes is lying on the ground. The double door on the north side and the adjacent tunnel only lead back to the Mojave Wasteland, so you can ignore them for now.
Instead, explore the south/southeast part of the ground floor to find [40MM GRENADE x12] and [THUMP-THUMP] next to a skeleton. Thump-Thump is a unique grenade launcher, and quite a decent one at that. Test it elsewhere - this area is a little too risky with various explosives around, along with the ants.
Restoring Power to the Base
It may be a little difficult to spot, but the large pile of rubbish and sand here (to the south) is the Ant Mound. Place the Sonic Emitter on top of it and activate it to destroy all ants in the building. You've now officially owned this place! Return to Raquel to get your reward: 400 EXP and an increase of fame at the Boomers.
QUEST REWARD: 100 EXP
QUEST OUTLINE:
1. Rescue the NCR hostages from the Techatticup Mine.
2. Report back to Private Renolds.
Make your way south of Nelson toward Techatticup Mine. Between these two areas you can find Private Renolds who tells you he was ambushed by the Legion. Question if the men are still alive to open up a Barter challenge (45 skill) for [100 CAPS]. Head to the Techatticup Mine nearby along the road. Make your way down the path and turn south when you get the chance along the loop. At the southern tip of the loop is a locked gate (Average). Inside the cubby are some ammunition boxes with [5MM ROUND x71] and [5.56MM ROUND x13]. On the shelf you can find [SUPER STIMPAK x2], [DOCTOR's BAG], and [BOXING TIMES] magazine. If you continue north you will spot another locked gate (Average).
In this cubby are four ammunition boxes holding [5.56MM ROUND x17], [5.56MM ROUND x18], [10MM ROUND x12], and [12 GAUGE ROUND x4]. On the boxes you can find [FRAG GRENADE x4], [FRAG MINE x2], and a [BRASS KNUCKLES]. In the back on the shelves you can grab an [EXPLORER HOOD] and [LEGION RECRUIT ARMOR]. North from here you can find Alexus, the leader of this little gang. You can pickpocket or kill Alexus to obtain the Techatticup Storage Key (based on your reputation with the Legion). Head back around the loop and go north to find the two cages where the NCR members are being held.
Rescuing the NCR Soldiers
Battle is inevitable if you want to complete this quest. Freeing one of the soldiers will cause the Legion to pummel him to death so you need to clear apath. Behind the cage on the left you can loot [DIRTY WATER x3], [LEGION EXPLORER ARMOR], a [MACHETE], [LAD'S LIFE], and [PATRIOT'S COOKBOOK]. Untie the NCR Trooper and set him free so long as you can cleared a path for him. In the other cell you can find [SCRAP METAL x2], a [DOCTOR'S BAG], two ammunition boxes holding [.306 ROUND x6] and [5.56MM ROUND x16], and a [STIMPAK]. Release this NCR Trooper as well and return to Private Renolds to complete the quest and receive [100 EXPERIENCE POINTS].
QUEST REWARD: 100 EXP, NCR Fame
QUEST OUTLINE:
1. Kill the NCR Hostages
2. Return to Milo at the NCR Checkpoint
West of Nelson along the road to I95 you will find an NCR Ranger Checkpoint. Milo will come out and ask who are, a Speech of 25 will suffice for some bonus experience but it doesn't ring a bell. Tell Milo you will help with hostages and check the footlocker for [C-4 PLASTIC EXPLOSIVE x2] and a [DETONATOR]. You can storm in and kill everyone as one option, Dead Sea will drop a Unique Weapon, the [LIBERATOR]. It's highly unlikely that you can storm in and kill everyone not to mention this will tank any reputation you have with the Legion.
Freeing the NCR Troops
You can always simply sneak in and use the C-4 like you were told or optionally with an accurate Sniper Rifle pick off the hostages at range. If you have Boone and a bad reputation with the Legion you might consider clearing the town of Nelson out and rescuing the hostages for bonus reputation with Boone. Regardless of how you do it you will receive [150 EXPERIENCE POINTS] and NCR Fame pending you succeed.
Ignorance is bliss?
QUEST REWARD:
QUEST OUTLINE:
1. Ask around the Ultra-Luxe for information regarding Ted Gunderson's disappearance.
2. Get Ted back to his father if he is still alive.
3. Inquire with Mortimer at the Ultra-Luxe about the investigator.
4. Get into the investigator's room at the Ultra-Luxe
5. Search the Investigator for clues.
6. Meet with the investigator's contact in the Ultra-Luxe steam room at 4pm.
7. Find a way to gain access to the Member Only section of the Gourmand.
(Optional) Find a sponsor to help you join the White Glove Society.
8. Talk to Heck Gunderson.
To begin this quest you must gain access to the Strip (see section [WLK-8]). Head to the southeast corner and enter the Ultra-Luxe Casino. Around the bar located Heck Gunderson and speak with him. After some conversation ask him if you can help locate his son to begin the quest. You can follow either path you want, or both, until the Kitchen scene. At the Kitchen you must choose to ally or expose the White Glove Society for what they are trying to become.
Head to the back of the floor and turn the corner to enter the Gourmand area of the hotel. Talk to Marjorie to get what you can out of her then leave. Head to the receptionist desk and speak with Mortimer. Mention the Society's old ways of cannibalism to spark a Speech 62 challenge to get him to spill some information. If you can't pass the check return to Marjorie and question the Society's penchant for human flesh. Return to Mortimer after that and ask about the craving once more. With the information gained you receive [CATTLE PROD], [ULTRA-LUXE KITCHEN KEY], [ULTRA-LUXE PENTHOUSE KEY], and the [ULTRA-LUXE FREEZER KEY].
Head to the back of the floor and enter the Gourmand area. Speak to Marjorie to get some information on an investigation then leave and talk to Mortimer at the reception desk. Tell him you are just trying to help and you can obtain the [INVESTIGATOR'S ROOM KEY]. Make your way to the Hotel Rooms and use the key to enter the room. The Investigator is dead, loot him for the [MATCHBOOK] and get ready to defend yourself from two White Gloves. Check the back of the matchbook to get the message to meet at the steam room at 4 PM. Head to the Steam Room and wait until approximately 4 PM to meet Chauncey. Explain the situation and press the issue about Mortimer to discover that he is trying to regress the White Glove Society into cannibalism. After you are done talking to him he catches a bullet from an Assassin, arm yourself and wait for the Assassin to enter so you can ambush him with VATS.
There are several ways to enter the kitchen; if your The Strip Fame is high enough you can have Marjorie or Mortimer sponsor you, if your Fame on The Strip isn't Liked or higher than you can switch sides or raise your Fame high enough. If you want to stay on the exposure path then you can always pickpocket Mortimer for the [ULTRA-LUXE KITCHEN KEY] or use lockpicking (50 to open the door) to force your way in.
In the kitchen you have a lot of options regardless of which side you have followed thus far. Head down stairs to be confronted by a White Glove. You can tell him Mortimer sent you (requires 50 Speech if you are exposing) or you can lie about a burst water pipe (Repair 35 ). Don't tell him you're just passing through or you get busted. Head down the hall to the fourth door on the right to meet Phillipe the chef.
Make your way into the freezer with the key Mortimer gives you to find Ted. At this time you can either play along with setting up Heck or return him to his son. If you want to set up Heck then kill Ted and grab [TED'S BLOOD SAMPLES] to be used as a ploy. Enter the Penthouse Suite and spread the blood around then head out to The Strip and tell a Securitron what happened. With this route you must head north from Freeside's North Gate and track down Carlyle St. Clair. With the Black Widow perk you can convince him to get in the dumpster or with various other checks (Speech 45 , Guns 45 , Strength 7 , Medicine 45 , or Unarmed 45 ) make him incapacitated. The Cattle Prod can also be used as a means of wrestling him down. Return to Mortimer with the good news. Wait until after 7 PM to speak with him again to hear of the success. You gain [500 EXPERIENCE POINTS] and White Glove Society Fame.
If you are trying to expose Mortimer then you need to get Phillipe to leave. With Barter, Speech, or Medicine (all 55 ) you can get him to move to the other end of the hall as well as obtain [PHILLIPE'S RECIPES]. Now you can improvise the meal with a Survival skill 75 or with an Intelligence of 6 cook the meal with the recipe. With the meal cooked wait till approximately 7 PM and call the waiter via the intercom near the door. At this time open the freezer and get Ted to follow you to the banquet in the Members Only Area. Here you can expose Mortimer for a cannibalist. Take Ted back to Heck at this point.
If at any time you return to Heck with Ted in hand you are prompted on what happened. Lying that you have no idea who did nets [500 CAPS], [500 EXPERIENCE POINTS], and White Glove Society Fame. If you tell him who it was then you can pass a Speech check (35 ) to convince him not to blockade The Strip, this results in a gain of The Strip Fame. Likewise, you can side with Heck to get the [500 CAPS] but in turn The Strip and White Glove Society Infamy.
Rescuing Ted Gunderson
Is one bird in the hand worth two in the bush?
QUEST REWARD: Van Graff Combat Armor, 1000 Caps, NCR Fame, Freeside Fame
QUEST OUTLINE:
1. Go outside and talk to Simon.
2. Take up position on the other side of the Silver Rush entrance.
3. Guard the Silver Rush entrance.
4. Report back to Gloria.
5. Deliver the package to a man at the designated location.
6. Report back to Gloria that the package has been delivered.
7. Talk to Jean-Baptiste to receive your next assignment.
(Optional) Visit Alice McLafferty, who might know where Rose of Sharon Cassidy is currently located.
8. Find Rose of Sharon Cassidy and get her to follow you.
9. Bring the Cassidy girl to Jean-Baptiste.
10. Report to Gloria Van Graff for your next assignment.
11. Kill the remaining Legion troops.
12. Report to Gloria Van Graff that all of the Legion troops are dead.
Working for the Silver RushHave Cass executed to finish the quest and receive [350 CAPS]. Speak with Gloria for the final mission, an escort. You arrive in a warehouse with some Legion members when Gloria gives you the lowdown, you are setting a trap. To avoid taking any Legion Infamy simply don't attack but be sure to loot the bodies afterwards. Talk to Gloria to receive the [VAN GRAFF COMBAT ARMOR], [1000 CAPS], [600 EXPERIENCE POINTS], NCR Fame, and Freeside Fame.
Bitter Springs Infirmary Blues
QUEST REWARD: 200 EXP, NCR Fame, Stimpak x2, Rad-X x4, RadAway x2, 140 Caps
QUEST OUTLINE:
1. Find Lt. Markland a book on psychological treatment.
2. Bring the psychology textbook back to Lt. Markland
3. Find a book on pediatric medicine for Lt. Markland
4. Bring the pediatric medicine book back to Lt. Markland.
5. Bring Lt. Markland three Doctor's Bags.
You can begin this quest as part of the larger side quest "No, Not Much" by talking to Captain Gilles at Camp Bitter Springs. Speak with Lieutenant Markland and tell him the Captain sent you to help. You need to bring him three Doctor's Bags in order to get the ball rolling. If you don't have three then head to the New Vegas Medical Clinic like he suggests. Seek out Doctor Usanagi and check the inventory for a [DOCTOR'S BAG]. Head over to the Crimson Caravan Company and talk to Blake who has two more [DOCTOR'S BAGS] and two books that you are going to need when you return to Markland, [STRESS AND THE MODERN REFUGEE: A PRIMER] and [TINY, TINY BABIES: ALL YOU NEED TO KNOW ABOUT PEDIATRIC MEDICINE]. With all supplies in hand return to Lieutenant Markland and make the drop off.
Note: If you have Arcade as a follower then you don't need the books from the Crimson Caravan Company, he will aid Markland in learning more about medicine.
You gain NCR Fame but you can also make Markland hand over [STIMPAKS], [RAD-X], [RADAWAY], and upto [140 CAPS] in addition to the [200 EXPERIENCE POINTS] you receive for completing the quest.
Bleed Me Dry
QUEST REWARD: 1650 EXP, 5200 Caps (6400 if Bartered), Hunting Rifle, Hunting Revolver, Hunting Shotgun: Dinner Bell
QUEST OUTLINE:
You can start this quest by talking to Red Lucy in the Thorn on the Westside of New Vegas. Red Lucy is typically standing on a platform near the center of the Thorn, she desperately needs newborn specimens to fight. Tell her you will help and she will give you her first task of a dozen Giant Mantis' Eggs. Take her advice and go to Vault 22 where you will find plenty of Giant Mantis' waiting for you. If you fix the elevator (Repair Skill 50 ) then you can ride down to the Pest Control level, else you have to make your way down through the various other floors.
Once you reach this level hook a left from the elevator and head up the steps to enter the lab. Head through the nearby door to reach the Food Production section. Go straight at the junction and turn the corner dispatching the Giant Mantis'. Loot the [PILE OF GIANT MANTIS EGGS] and be on your way back to Red Lucy. With a Barter Skill of 50 you can convince Red Lucy to pay you [300 CAPS] instead of 200 and you gain [100 EXPERIENCE POINTS]. Ask if you can still help to be sent on a mission for Radscorpion Eggs. Fast Travel to the Goodspring Cemetery and go from there to find Giant Radscorpions lurking about. Run in and take out what you can then snag the [PILE OF RADSCORPION EGGS] and return to Red Lucy. She hands over a [HUNTING RIFLE] and [300 CAPS] but you can convince her to give you [400 CAPS] with Barter Skill 60 ; you receive [150 EXPERIENCE POINTS].
Next up is Fire Gecko eggs which can found in the Bootjack Cavern near Lucky Jim Mine. Once you get here keep your distance and take out the Fire Geckos. At the end of the cave you will find the [PILE OF FIRE GECKO EGGS], grab them and return to the Thorn once more. You receive [200 EXPERIENCE POINTS] for this mission as well as [500 CAPS], Barter (Skill 70 ) to receive [700 CAPS] instead. The mayhem continues as you are told to acquire a few Night Stalker eggs. The easiest way to enter the cave is from Bitter Springs. A Legendary Night Stalker sits near the nest with approximately seven other Night Stalkers. If you don't have the firepower for this one then use a Stealth Boy to reach the [PILE OF NIGHT STALKER EGGS]. Back at the Thorn Red Lucy yields [300 EXPERIENCE POINTS], a [HUNTING REVOLVER], and [700 CAPS]. A Barter Skill of 80 will net you [1000 CAPS] instead.
Once again you are set out to find eggs, this time from the Cazador. Pick a location nearest this one, maybe something like Jacobstown or Ranger Station Foxtrot, and head on over. Nearly a dozen Cazador and Young Cazador swarm the area, be careful and take them out. The Super Mutant lying dead holds a [FATMAN] so be sure to loot it along with the [PILE OF CAZADOR EGGS]. [400 EXPERIENCE POINTS] and either [1000 CAPS] or [1500 CAPS] (Barter Skill 90 ) later Red Lucy gives up the mother of all hunts. Deathclaw eggs are the finale and you can go to one of two locations, the easier path being the pit near the Quarry Junction. Unless you are completely positive you can defeat the Deathclaw simply use a few Stealth Boys and grab the [PILE OF DEATHCLAW EGGS] and high tail it out of there.
Your reward this time is [500 EXPERIENCE POINTS], [2500 CAPS], and a modded out [HUNTING SHOTGUN]. You can talk to Red Lucy to get a personal invitation into her bedroom for some after hours training once all missions are complete.
Booted
Booted is also a reference to getting high, much like Boxcar does.
QUEST REWARD: 100 EXP, Powder Ganger Fame
QUEST OUTLINE:
1. Speak with Boxcar in the Nipton General Store.
2. Travel to the Legion Raid camp nearby.
3. Free the captured Powder Gangers.
To start this quest head to Nipton and enter the General Store at the southern end of town. Speak with Boxcar to find out that he's crippled, give him Med-X to get the location of the remaining Nipton survivors or simply head there without his aid. Leave the General Store and go northeast to reach the Legion Raid Camp. You can't negotiate with the Legion even if you are friendly with them and untying the hostages causing hostility with the Legion. Sneak in and pick off the Recruits and Decanus or rush in guns blazing. Once the firefight is over untie the hostages for [100 EXPERIENCE POINTS] and Powder Ganger Fame.
The "Lucky" 2nd Place Lottery WinnerNote that killing the Legion members results in Caesar's Legion Infamy.
Boulder City Showdown
Not quite the O.K. Corral but it'll do.
QUEST REWARD: 300 EXP, Positive Karma, Great Khan Fame and NCR Infamy OR Great Khan Infamy and NCR Fame
QUEST OUTLINE: 1.
The Main Quest will send you to Boulder City where you will meet up with a Lieutenant Monroe. You can resolve the hostage situation a number of ways to include negotiation, sneaking in and rescuing the hostages, or murder the NCR and free the captors. If you go the negotiation route then head inside and speak with Jessup. Here you can either pass a Speech check (skill 45 ) or pay 500 Caps for the freeing of the hostages. The Speech check results in a NCR and Great Khan Fame while simply cooperating only nets Great Khan Fame.
If you sneak in try going at night so you are less visible. Sneak around the backside of the building and pick the locked door. Quickly free the hostages and make a dash for the entrance using the NCR as supporting fire if needed. If you locate them but can't reach them then you can tell Monroe where they are and go from there. All routes lead to NCR Fame during this path.
A Successful Hostage NegotiationLastly, if you decide to help the Great Khans then kill all the NCR to include Lieutenant Monroe and tell Jessup you cleared a path for them. This results in NCR Infamy, Great Khan Fame, and positive Karma. All quest outcomes result in [300 EXPERIENCE POINTS].
Bye Bye Love
QUEST REWARD: 200 EXP, 200 Caps (400 with Barter)
QUEST OUTLINE:
1. Talk to Joana, on Carlito's behalf, at Gomorrah.
2. Joana has decided to escape Gomorrah. Talk to Carlitos about her decision.
3. Carlitos wants to meet Joana in Freeside, between midnight and dawn. Explain the plan to Joana. (Optional) Carlitos suggests getting backup before attempting the escape. Find the two guns-for-hire that owe him a favor.
4. Joana agreed to Carlitos' plan. Talk to her once you're ready to escort her during the escape.
5. Joana will wait, in disguise, at Gomorrah's lobby. Go there and lead the girls to Freeside.
6. Help Joana, and the girls, in their escape to Freeside.
7. Joana is safely delivered to Carlitos. The Omertas who set up the ambush are gone.
8. Joana is free and reunited with Carlitos. She spoke about rumors of a sinister Omertas' operation.
[video=6636 tite=Sleeping]Start this quest by heading to The Strip and finding Carlitos, in Vault 21 near the Diner, or Joana, in the Courtyard of the Gomorrah. To start with Carlitos you'll need Speech 50 or Strength 7 to get the information out of him, for Joana it will take Medicine 50 or Speech 75 to find out what her deal is. Speaking with Joana first will lead you back to Carlitos who ultimately comes up with a plan to sneak Joana out of the Gomorrah and meet him in Freeside. To convince Joana to leave you need a Speech 40, once she agrees you have the option of getting some backup before getting her out.
The quest starts with a sob-story about true loveIf you chose to get the additional help head to Freeside and enter the Atomic Wrangler where you will find Big Beard and Little Beard. Tell them to be in Freeside waiting for you and return to Joana. Once you are ready let Joana know and she will begin moving the Gomorrah Lobby. Head on down there and wait near the Disguised Hookers and speak with Joana once she arrives to get out of the building. Follow the crew until they dash to Freeside, then continue on down the street where you run into Carlitos. Unfortunately, some Omerta Thugs are also there waiting and you have to kill them if you can't pass the harsh Speech 85, Barter 85 (plus 500 Caps), or Strength 9 challenges. If you recruit additional help they should go down without much of a fight. You receive thanks in addition to [200 EXPERIENCE POINTS] and [200 CAPS] (or [400 CAPS] with a Barter skill 65 or higher).
Can You Find It In Your Heart?
QUEST REWARD: 100 EXP, 100 Caps, Caravan Lunch x2, Service Rifle, Weapon Repair Kit x2
QUEST OUTLINE:
1. Clear out the critters on the road to Invanpah Lake.
2. Return to Ranger Jackson at Mojave Outpost.
At the Mojave Outpost talk with Ranger Jackson. Ask if he could use any help to start the quest. Follow the quest marker to the Ivanpah Lake where you will find Giant Ants sitting near the underpass. Take them out any way you feel comfortable but be sure to start with the Soldiers then the Workers. Return to Ranger Jackson once the deed is done to receive [100 EXPERIENCE POINTS], [100 CAPS], [CARAVAN LUNCH x2], [SERVICE RIFLE], and [WEAPON REPAIR KIT x2].
Classic Inspiration
Leonardo DaVinci would have taken his own pictures.
QUEST REWARD: 500 EXP, 500 Caps
QUEST OUTLINE:
1. Michael Angelo wants pictures of famous signs around New Vegas.
2. Take a picture of the Bison Steve sign.
3. Take a picture of Novac's Dinosaur Thermometer.
4. Take a picture of the Sunset Sarsaparilla Head-quarters Bottle sign.
5. Take a picture of the HELIOS One sign.
6. Take a picture of the McCarran Airfield sign.
7. Return to Michael Angelo for your reward.
You can find Michael Angelo in the back of his shop at the southern end of The Strip. Don't get too hasty with the challenges or you won't get a chance to start the quest, instead simply tell the truth and ask about his background until you can offer to help him with some photographs. You receive the [CODAC R9000] and [CAMERA FILM x24] and are sent to take pictures of the Bison Steve sign in Primm, Novac's Dinosaur Thermometer, the Sunset Sarsaparilla Headquarter Bottle sign, the HELIOS One sign, and the McCarran Airfield sign. You can return to Michael Angelo at any time after taking a picture to collect a small reward for your work. Consult the chart below on your payment and experience per picture snapped and turned in.
___________ ________ ______
| Picture # | Caps | EXP |
|=-=-=-=-=-=|-=-=-=-=|-=-=-=|
| 1 | 100 | 100 |
| 2 | 125 | 125 |
| 3 | 150 | 150 |
| 4 | 175 | 175 |
| 5 | 200 | 200 |
¯¯¯¯¯¯¯¯¯¯¯ ¯¯¯¯¯¯¯¯ ¯¯¯¯¯¯Once all pictures have been taken speak to Michael Angelo one last time to receive the final payment of [500 CAPS] and finish the quest to receive [500 EXPERIENCE POINTS].
Climb Ev'ry Mountain
QUEST REWARD: 100 EXP, NCR Fame
QUEST OUTLINE:
1. Find the source of the attacks on Bitter Spring.
2. Tell Captain Gilles about Oscar Velasco.
You can begin this quest as part of the larger side quest "No, Not Much" by talking to Captain Gilles at Camp Bitter Springs. Follow the quest marker up the mountain until you reach the Great Khan Supply Cave. Once you enter you will meet Oscar Velasco who has been raiding the camp. Tell him that the people at Camp Bitter aren't responsible (Speech 50 ) and to let go of his rage to join the Khans at Red Rock Canyon. Otherwise, tell him to attack Camp McCarran. If your Speech isn't high enough then you are forced to kill Oscar in order to get the [GREAT KHANS SUPPLY CACHE KEY].
Check near the campfire in the ammunition boxes for [.308 ROUND x10]. Inside the cage you will find [12 GAUGE ROUND x3], [SCRAP METAL], and various chems. There is [.308 ROUND x24] also on the shelf and the [GREAT KHAN SUPPLY CACHE] at the top. Grab it and return to Captain Gilles for [100 EXPERIENCE POINTS] and NCR Fame.
Cold, Cold Heart
QUEST REWARD: 150 EXP, Caesar's Legion Fame
QUEST OUTLINE:
1. Spread word of Legion atrocities.
2. You told the NCR about Vulpes attack at Nipton.
This quest starts when you approach the Mayor's Hall in Nipton, resulting in a gain of Caesar's Legion Fame. The task here is simple, make it to the Mojave Outpost in the southwest corner of the map and talk to Sergeant Kilborn. Either tell him of the movements or promote the Legion. Both choices result in [150 EXPERIENCE POINTS] and Caesar's Legion Fame.


 Who Is The Biggest Security Threat? Turns Out, It's You
 The Wolf Among Us: Episode 3 Walkthrough [w/ James!]
 Just Dance: Disney Party 2 (2015) song list
 Earth Defense Force 2017 Wiki .
 Victor Vran (PC) - walkthrough