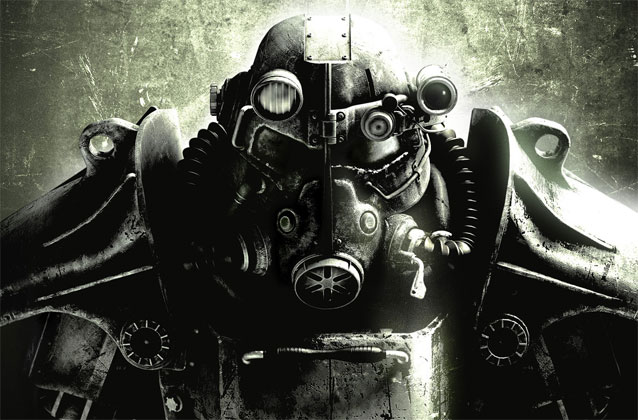
Without evil Russians to fight, the specter of invasion from the Far East looms large in the imaginations of game writers imagining futuristic war scenarios. Fallout did it with the Chinese. Now Kaos Studios and publishers THQ are ready to unleash a horde of North Koreans on the unsuspecting United States, courtesy of their new title Homefront.
Developed by working in close collaboration with a number of military and intelligence experts, in addition to Red Dawn screenwriter John Milius, the game blends the high-octane war-fighting FPS junkies have come to demand with an engrossing plot full of emotion, drama, and patriotic fervor. Join the fight to kick out the forces of Kim-Jung Un, with the help of this step-by-step walkthrough! We also have pages with achievements, trophies, and cheats (useful Homefront information, collected onto one page).
Mission 1 – Why We Fight
After you hear a knock at the door, go an answer it. Following the intense bus ride, follow Connor’s orders and press X to pick up the nearby handgun. Walk to the end of the bus and press X to crouch and climb out.
Follow Connor and Rianna into the nearby building. Once back outside, take cover behind the trash bin to the right and take out the two guards across the way.
Walk over to the guards and pick up the assault rifle. Follow Connor into the next building. Before making the turn into the next room, crouch to take cover behind the fallen bookshelf.
Wait for the attacking guards to top up, then take them out. Pick up any spare ammo, then head through the door and back outside. Take cover next to Connor and shoot the guards by the bus.
Hop over the short brick wall, and make a right into the building. After you make your next right into the room, take cover behind the gray ventilation unit. Take out the guards inside, then shoot the ones outside and to the left.
Stay inside the room and pick up any frag grenades that you see laying around. Stay hidden behind some cover and take out the next two groups of transports that arrive outside. Keep in mind that most of the soldiers will stay hidden behind the two barricades of to the sides.
After the huge explosion, follow Connor and Rianna out and to the left. Press B to crawl and follow Connor in through the hole in the house. Wait for the tank to pass, then when Connor gives you the okay, sprint across the street and up over the fallen gate.
Head straight down the path (past the Do Not Enter sign) and in through the open doorway. Move through the house and back outside. Climb up the treehouse to the left.
When Connor starts shooting, give him covering fire from your elevated position. After you get hit by an RPG, stay low and crawl over to the nearby wall for cover. Peek over and take out the guards to the north on the platform first.
Clear that section as best as you can, but make sure you keep up with Connor and Rianna when they advance (make sure you pick up ammo along the way). Kill the guards in the fuselage, then take cover to the left.
Take out the guard with the machine gun on the second floor window. Clear out the rest of the guards around the house, then move across the area. Climb up the red ladder, kill the guard that comes through the window, then head inside.
Grab the C4 inside the green case to the left. Look out the window to your right and hit LB to throw it at the tank. Press RT to detonate it, then hit the tank with another block of C4 to destroy it.
Hop out the window and follow Connor to the civilian neighborhood. Once the tank shows up and starts shooting civilians, turn around and follow Boone and the gang in the house on the right.
Move to the left of the windows to take fire away from the mom and her baby. Once the tear gas gets thrown in, follow Boone through the door in the garage. Give Rianna and Connor covering fire as they escape, then follow Boone down the path.
Follow Rianna through the door to meet up with Hopper. Press X to pick up the Goliath Targeter in the bag nearby Hopper. Equip yourself with Targeter and look out the window. Wait for the target to lock on one of the tanks, then press RT to fire.
Follow the truck that pulls over to the left. Quickly step outside and lock on with Targeter to destroy it. Walk further outside and destroy the next big tuck to the left using the Targeter.
ACHIEVEMENT: Stay behind the stack of tires and when you see the tank up across the way, use the Targeter again to have the tank destroyed. Lock on to any other vehicles where the “Target” indicator is showing to have them destroyed and complete the mission.
Mission 2 – Freedom
ACHIEVEMENT: After Boone wakes you up, follow him outside. After he tells you to check out your new home, you can walk around and talk to people. Talk at least once to each inhabitant of Oasis to earn the “Welcome To Freedom” Achievement.
Once you meet back up with Boone, pick up your weapon and ammo nearby, then follow him through the trap door. Head through the underground tunnel and up the ladder.
Stay close to Hopper and Boone as you make your way down the street. Once you cross through the house, follow Boone’s lead and sprint to the nearby van without getting it by fire.
Move up with Boone when he advances. Move over to the right and hop over the rail. From there, make a had dash for the Sentry Tower. Move around to the left and use a grenade to shoot the white tank.
Turn right and follow Boone through the next house. When you get the okay, take out the guard on the roof. Take out the rest of the guards in the yard, then head through the house.
Kill the one guard that comes flying around the corner to finish off the last of them. Follow Boone and Connor into the next building to meet up with Rianna.
Once you split up, follow Hopper and Connor down the school’s hallway. Take your pick of a weapon on the wall, then meet back up with the guys outside. Follow them across the playground and through the house.
After Connor gives the countdown, take out the unsuspecting guards. Peek around to the left and kill the lone guard up in the tower. Move around to the left and kill any remaining guards.
You’ll need to flank the the sentry gun, so run over to the right and move past the van. Take out the guard on the second floor window after you make the turn, then follow the guys down the alley up on the left.
Kill the two guards and continue down the alley. Throw a grenade to kill the group of unsuspecting guards to the right. Advance on the left and kill the guards in the house to the right.
Head upstairs and get near the window. Chuck a grenade near near the sentry gun to watch it go boom! Head back downstairs, hop over the rail and follow Connor to the Labor Camp.
After you ditch your rifles, head to the back of the area and up the steps. Walk down the next set of stairs and move past the guys looking to fight Hopper. Walk around to the left and follow the guys into the building.
After you meet up with Arnie, follow him to the depot. It turns out that punk Arnie will rat you out. Once you break free from his hold, the game will slow down. Use your handgun to take out the two guards to the left.
Quickly head up the stairs to the left. Take out the nearby guard and grab his assault rifle. Use the rifle to take out the guards across the way. Head halfway back down the steps and take out the two gunners in opposite windows on the first floor.
Head back up the steps and take out any remaining guards as you make your way across. Head into the house and walk downstairs to join back up with Connor and Hopper.
Turn right into the next room and pick up the beacons on the table. Follow Connor out of the building as you head toward the baseball field.
Once you arrive and Connor loses it, turn right to avoid sentry gun fire. Head around the back of the bleachers to flank the sentry guns. After you walk past the backstop, don’t shoot the first guy you see (that’s Hopper), shoot the lone guard who will take cover behind the white sand bags just up ahead.
Take cover behind the wall to the left of the bags. Peek around and take out the guards. Continue down this path and kill all enemy fighters along the way.
Once you get to the bus, kill the guard inside and continue on to the right. (Be careful! the sentry gun will be able to see you here!)
Stay close to the stacked freighters as you walk alongside of them. Move in-between the crates and quickly throw a grenade under the sentry gun to destroy it. Continue around to the right and kill the oncoming guards.
ACHIEVEMENT: Continue around to the next sentry gun and when you get close enough, throw a grenade to destroy it. Meet back up with the guys. Once the helicopters fly by, press X when prompted to and jump into the pile of bodies.
Mission 3 – Fire Sale
Follow Rianna and head down the hallway of the building. After you head up the stairs and Rianna takes out the guard, head outside.
ACHIEVEMENT: After Hopper unleashes that crazy phosphorus missile, take out all enemies below using your sniper. Kill five enemies while they are on fire to earn the “Mercy” Achievement.
After you get hit by a misfired rocket, follow Rianna through the fiery inferno. Head up the steps to join Connor on top of the tower. After the tower falls and you get back up, use your sniper to take out the EMP soldier on the roof of the supermarket.
Head up the tiny nearby ramp and shoot the attacking guards. Keep an eye out because another EMP soldier will show up on the left side of the supermarket’s roof. After you take him out, look for another on the right again.
When you see the target icon on your screen, switch to the Goliath Targeter and use it to lock onto the humvee that pulls up in front of the store. Kill the remaining guards and regroup in front of the store.
After you get hit, turn to your right and use the Targeter again to lock onto and destroy the helicopter. Follow Goliath and head up the tower to the left. Use your sniper to take out the sniper in the building to the northeast.
When the humvee pulls down the street, use the Targeter again to have it destroyed. After you destroy yet another humvee, head downstairs and join the group at the entrance to the left.
Follow Rianna and crawl under the crawl space. Head inside the building and follow Connor. Use the surrounding area as cover as you take out guards along the way. North Korean guards will be all over the place, so stay low and close to the walls.
Once you get to the part where more troops are being dropped from a helicopter, throw a grenade to blow them up. Pick up and spare ammo and continue to follow Connor.
After you get to the back of the building, follow Connor up the ramp. Kill the lone soldier and head through the next door. Once outside, drop off the roof to the right.
Quickly kill the guards you encounter and sprint for the tanker. Head through the doorway, kill the guard and sprint for the tanker. Don’t worry—the tanker will take off, but you should have enough time to catch it. Once you get close enough, press X to plant the tracking device.
Head for the on-screen locator to meet up with your team. Before you reach them however, turn left and shoot the yellow gas cans to kill the surrounding guards. Continue on toward the rear entrance of the building.
Take out the guards that come bursting through the windows, then toss a grenade to kill the guard in the room to the left. Cut through here and follow Connor around to the right. Use the yellow gas cans to do damage on the nearby guards.
Follow Connor and quickly make your way through the fire-drenched room. Get up to the top of the stairs and wait for Connor to come up and move the lateral file out of the way.
Walk around the roof and get to the position overlooking the KPA. You’ll need to provide covering fire, but as soon as Rianna says so, press X to vault off of the roof.
ACHIEVEMENT: Follow the on-screen locator and sprint for the truck. When you get close enough, press X to hop on. Use the Targeter to lock onto the attacking humvees behind you, then use it to take out the attacking chopper to complete the mission.
Mission 4 – The Wall
After you find that Boone and the rest of the Oasis inhabitants have been murdered, follow Connor. Wait at the gate for Hopper to join you guys, then continue to follow Connor.
After you cross over the gate, take cover behind the boat to avoid the ambush. Chuck a few grenades in the direction of the fighters, then pick the rest of them off.
When you are given your next objective of targeting the Humvee, pull out the Targeter and lock onto it to have it destroyed.
Next, stay close to Goliath and look for the “eliminate” icon on your screen. These will appear above enemy fighters with RPGs. Take them out in order to protect Goliath. They will be located on the roofs of the homes.
After Goliath bulldozes through the blockade, look around for a sniper if you don’t already have one. Use this to take out RPGs, as well as other enemy fighters in the next area.
Once you clear the next area, a tank will come rolling through. Break to the left and follow Goliath through the house. Follow Rianna through the gate, through the backyard of the house.
Switch to the Targeter, turn right and lock onto the tank to have it destroyed. Once this is done, follow Connor to go meet up with Brooks.
After you get the plan from Brooks, head back into the street and begin eliminating KPA forces, clearing a path for Goliath. Stay along the left wall in the pile of rubble for cover as you make your way down the street.
Eliminate the majority of the KPA near the barricade, then when Connor gives you the order, sprint for the “activate” icon to lower the barricade. Take cover to your right, then hurl a grenade at the KPA charging from the northwest.
Move around to the left and kill the KPA coming out of the White Castle. Clear the area, then follow Connor through the White Castle.
Walk to the end of the hallway and wait for Connor before opening the door. Kill the KPA just to the right of you, then shoot the yellow gas cans straight ahead, and finally take out the last KPA to the left.
Switch to your sniper and take out the two nearby snipers (they will have the “eliminate” icon above them). From the building you are currently in, take out the one in the tower straight across from you first, then peek around the right side of the bay door and kill the one on the ledge.
Run through the doorway to your right and proceed straight to the boarded up window in front of you. Look through the crack and take out the two snipers.
Run back out of the room and go activate the switch in the control room to drop the second barricade. Regroup with Rianna and Connor, then follow them upstairs.
As soon as you get upstairs, crouch down and crawl toward the RGP in the corner. Pick it up, aim and fire right at Goliath to create an explosion and break through the wall.
ACHIEVEMENT: Head back downstairs and hop into the humvee. Use the machine gun on anything that moves in order to create a path for Hopper and complete the mission.
Mission 5 – Heartland
After Connor and Rianna kick the crap out of those guys, take cover behind the crates to the right. Take out the first wave of survivalists, then move up and take cover alongside Hopper.
Take out the survivalists to the house in the right. Head inside the house and kill any remaining survivalists before meeting back up with Connor outside. Follow Connor to the next area.
Wait for the two survivalists to finish their conversation, then when Rianna gives you the word, take off across the street. Follow Connor through the field to the right. If ever you get separated from Connor, meet back up with him to get your next set of instructions.
Your next task will be to take out the sniper in the windmill to the northwest. He’ll be hard to see because of the shadows, but you can use LT to zoom in. Aim for the head and make it count.
Follow Connor around to the right. Stay low and hide behind the cover so the survivalists messing with the KPA don’t spot you. Wait until you get the okay from Connor, then follow him to the tractor.
Follow Connor around to the next area. There will be a survivalist close by to the right, but as long as you stay close to Connor he won’t see you. After Rianna takes out the guy on the ground, take out the RPG up on the windmill to the right.
Advance with the group into the garage. Wait for the KPA chopper to pass, then follow Connor to the left.
After you move around the two survivalists sitting at the table, Connor will give you orders to take out the guard in the second floor window. Make sure that as soon as you see him you take him out—he’ll be able to see you where you are.
Follow Connor to the left. After you witness that brutal killing, advance with the group. Take out the guard on the second floor window to the right, then follow Connor through the window.
Turn left through the doorway and use your knife to melee the lone survivalist in the back. Wait for the two survivalists who are arguing over cigarettes to pass, then use your sniper to take out the RPG in the windmill straight ahead.
Follow Connor as you sprint through the field to the right. Head through the river. After you come to that intense scene under the bridge, it’s go time! Take cover behind the nearby cover and kill any survivalists you spot.
Make sure you stick with your team and move when they advance. The survivalists will be well spread out in this area, so keep your head on a swivel. Pay special attention to the West bank where survivalists will be hard to spot because of the glare.
Clear the area, then follow Connor and the rest of the team. When you arrive at the crash site, it’s open season on everyone. Clear the area, then advance to the next one. Keep in mind that there will be survivalists on the roofs of these structures.
Stay to the right side of the area with your team and clear this next area. When you spot the windmill tower and after you get the command from Rianna, quickly switch to your sniper and take out the RPG.
Follow Connor and book it down the road. After you guys break off, head up to the right and into the church. Before you head through the door, take out the guy on the scaffolding to the right of the church.
Get behind the blue truck and take out the guy behind the crates to the left. Next, take out the guy in the entryway to the church and to the one to the right, behind the crates.
ACHIEVEMENT:Head through the church doors and up the stairs. If you make it to the crow’s nest in 240 seconds, you’ll earn the “Stairway To Heaven” Achievement. Quickly move to the right and take cover behind the plywood. Shoot the guy across the way, then move around to the left and kill the guy downstairs.
Another guy will pop through the window in front of you—kill him, then take out the other guy when you turn to the right. One more guy downstairs, then another behind the green crates right in front of you. Note: You shouldn’t worry about the guys downstairs if you want to get the achievement.
Climb the two ladders and turn across the wood planks to the right. Walk up the steps and pick up the sniper to the right.
This next part will be easy: crouch down with your sniper so that you are overlooking the field. Wait for Connor’s orders before each kill, then look for the downward icon on the screen to indicate where your next kill will be. When it turns red and says “eliminate,” take them out. Remember to only shoot on Connor’s command.
After you get hit with an RPG, press X when prompted to. After you jump, hop down to the left and sprint for the rendezvous point at the helicopter. You don’t have to kill all of the survivalists to clear the area, but don’t just go rushing in or you’ll get killed.
ACHIEVEMENT:Get to the helicopter to complete the mission.
Mission 6 – The Overwatch
This first part is pretty self explanatory: blow stuff up! RT fires guns, LT fires rockets. Make sure you use LB to drop down when you come to the tunnel. Press RB to pull back up once you exit.
Once you catch up with the convoy, destroy the escorts (look for the “destroy” icons on the screen.
When you are given the objective to hijack the tankers, move to the left side of them lower the chopper down. Once you get close enough to them (on the left side), press X when prompted to in order to have Hopper jump in.
Repeat this step two more times so that each tanker gets highjacked. Once you obtain all three tankers, your new job will be to protect them. But really, it’s you that has to watch out for incoming missiles.
Shoot the red squares to destroy your targets, and when you see the “Missile Warning” sign, make sure you swerve to get out of their way. After you destroy the one to the left and the one down the middle of the road, there will be one up in the hills to the right.
There will be a couple more at the wind in the road, then a whole bunch one you begin to see the trees and enter California. Missiles are nice, but if you can find the red squares, aim and use your guns to destroy them.
Destroy everything in front of the blockade, then follow Connor’s lead as he cuts through the neighborhood to the left. Keep a close eye on your team and give them covering fire as they cut through the neighborhood.
Once you are about to turn right, look to the building on the right and kill the gunners on the roof of the hotel. Then continue down the road and destroy the blockade up ahead.
Look ahead on the road for any red squares and take them out to clear a way for your team. Once the guys cross back under the main road, destroy the incoming helicopter.
Next, turn right and kill the RPGs on the huge building. Make sure you take out all of the RPGs before you advance. Kill the last group of RGPs to the left on the dock near the train cars.
ACHIEVEMENT: As you move along the bridge, you’ll have to turn around and destroy the oncoming humvess before they reach your team. Destroy them all, then fly under the bridge with your team to complete the mission.
Mission 7 – Golden Gate
As you chopper begins to circle under the Golden Gate, hit the left arrow on your control pad to switch to your grenade launcher and shoot the RPGs on the scaffolds.
After you land, quickly move up and grab some cover, then take out the RPGs on the balcony up ahead. After you take them out, advance and kill the KPA on the ground. They will be well protected and hard to see, so make sure you stay behind some cover as you make your way up.
If you can move quick enough, move up the left side of the area and flank the KPA from the right. Once you clear the area, head through the gate and follow Connor into the next area.
Head up stairs into the building after Connor and kill the KPA at the other end of the room. Move quick through the building; the guy in the tank to the left will be opening fire on you as you make your way across.
Follow Connor into the next building, clear it out and pick up the Rocket Launcher on the left side of the room. Look out the nearby window and blow up the tank using the Rocket Launcher.
Head outside and follow Connor up the ladder. Pick any ammo you need on the crates to the left, then follow Connor around the deck. Kill the small group of KPA around the turn, then head up the makeshift ramp.
Make your way up the winding sets of ramps, then kill the KPA you encounter on the bridge. Head up stairs and kill the next wave of KPA in the first room. After you climb up the next set of stairs, use the surrounding objects as cover as you clear the room.
This looks familiar! Ascend the ramps and kill the KPA repelling from the Golden Gate. Then, another ramp, another room full of KPA to kill and another set of stairs.
Kill the two KPA coming down the last set of stairs, then head up. After the turn, kill the KPA on the catwalk of the bridge. Turn left, and kill the other KPA across the way.
Walk up the ramp that leads to the underside of the bridge and kill the KPA to the left. Head in that direction and kill the attacking KPA. Once you reach the ladder, follow Connor up to the top.
Take out the unsuspecting KPA and move to the right as Connor head up the ramp to the left. Hide behind some cover and take out the rest of the KPA in this area. When the tanks start rolling through, meet back up with Connor and the rest of your team in front of the gate.
After the gate gets blown in, head through and eliminate the RPGs. Head around the far left area of the bridge and look for the arrows on the screen to indicate the RPGs.
Move around the white bus and cross over to the white bus on the other side. Wait for the tanks to come down the middle of the bridge, then advance. Use the cars as cover and continue down the bridge.
After you get blown off the side—not this again! That’s right, you’ll have to kill more KPA and fight your way back to the top of the bridge. Kill the first KPA you see, head across and turn right.
Shoot the KPA up on the catwalk, then head up the ramp. Walk around the scaffolding. When you reach the end, turn right through the break on the rail and carefully walk on the narrow beam.
Shoot the two KPA on the catwalk across the way. Turn left onto the rail, then make a right to get to the other side of the bridge. Sprint across and climb up the ladder. Once you get to the top, throw a grenade under the white tank of the sentry to blow it up.
Take cover behind the cases to the right and take out the nearby KPA. Clear the area, then sprint across to the right and throw a grenade behind the sentry to destroy it.
Walk straight ahead and pick up the Javelin on the crate. Turn around and wait for the chopper to fly back around. Once you’ve locked onto it, fire to take it down. You probably won’t get it on the first try, so lock onto it again and take it down.
After you regroup with Connor, take cover behind one of the cement blocks as the huge gates open. Stay down until Connor says “They’re down! Press on to the platform!”, otherwise you’ll get lit up.
Quickly move through the gates and sprint around to the right. Take out the KPA to the right, then take out the KPA with grenade launchers standing up on the containers.
Push to the front of their blockade, then turn right. Turn right up the platform and shoot anything that moves. Once you get the objective of covering Hopper, take out the RPG in the northwest tower.
Take out the KPA on the ground as they try to retake the platform. In the meantime, another RPG will show up on the northwest tower; take him out once you spot him.
Use grenades and C4 to wipe out the huge wave of ground troops that will keep coming. Once you get the objective to call in a UCAV, turn around and head over near Hopper to use it.
Bombs away! Fire at any highlighted figure and take out the armored vehicles in the distance.
Sprint down the ramp and head into the humvee. Shoot at anything that gets in your way. Once you get to the gate, unload on the humvee to destroy it. Once one of their Goliaths shows up, keep firing at it while you move in reverse.
ACHIEVEMENT: Their Goliath is going to put up a ridiculous amount of resistance—just continue to fire. Once the Goliath crashes into the back of the fuel truck, aim for the truck to cause the whole thing to blow.


 The Forgotten Revolution of Fallout
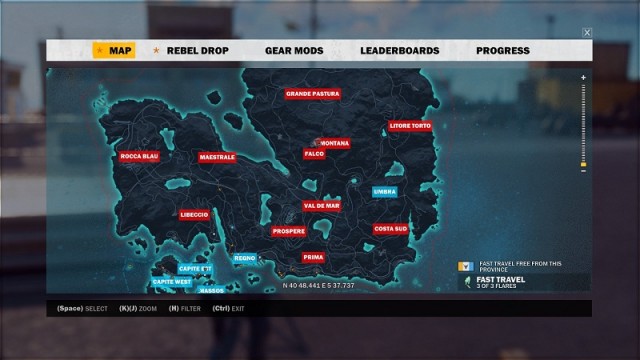 Just Cause 3: How to Find the Last Base of Every Region Location Guide
 Disney Epic Mickey Wallpapers in HD
 Soul Caliber V and the Ezio Factor
 Dbrand PlayStation 4 Skin Review