SWTOR 3.0 Lightning Sorcerer DPS guide by KTap of Harbinger.
Contents
- 1 Intro to Lightning Sorcerer
- 1.1 Ratings
- 1.2 Passives
- 1.3 Offensive Cooldowns
- 1.4 Utilities
- 1.5 Operation/Flashpoint Utility and Defensive Cooldowns
- 1.6 Gearing
- 2 Abilities and Rotation
- 2.1 Main damage abilities for rotation
- 2.2 Ideal Opener
- 2.3 Rotation through first 5 Thundering Blasts
- 2.4 Priority List
- 2.5 Mobile Priority List
- 2.6 AoE Priority (3+ enemies)
- 2.7 Recklessness Priority List (Single Target)
- 2.8 Recklessness Priority List (2+ Targets)
- 2.9 Force Speed Use
- 3 Sample Parse & Video
- 4 About the author
Intro to Lightning Sorcerer
Lightning has been returned to its former glory and is once again a very viable option for any PvE content. The new mobility we have, along with all of the old/new utilities we bring to fights, puts Lightning in the best spot that it’s ever been, in my opinion. Very high burst, good sustained damage, lots of useful things for a group and great looking animations, what’s not to like?
You have a lot of utility to bring to any fight, please use it!
Ratings
- Sustained DPS: 7 (8 on short and/or bursty fights)
- AoE Damage: 10
- Group Utility: 8 (9 with no Sorc healer)
- Burst: 9
- Rotation Difficulty: 5
- RNG dependance: 7 (lots of procs)
- Execute bonus: None
This guide will be updated if they tone down Force Storm. I’m hoping they won’t, but I doubt they want it to be viable for single target dps (there’s also a lot of pvp complaints about it). Will also be updated if I find any errors or I figure out something that I currently don’t know (very probable)!
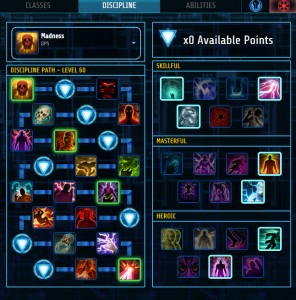
Passives
- Electric Induction – Reduce the force consumed by force abilities by 10%.
- Force attunement – Attuned to the force, your maximum force is increased by 500.
- Transmission – Increases the range of Force Lightning, Shock, Jolt, and Force Slow by 20 meters. Also increases the duration of Whirlwind to 60 seconds.
- Lightning Storm (level 12) – Lightning Strike, Lightning Bolt, Thundering Blast and Force Storm grant Lightning Storm when Activated. Finished cooldown on chain Lightning, reduces the force cost by 50% and makes it an instant cast. Available every 10 seconds.
- Storm Brewing (level 16) – Increases Force Storm crit chance by 15% and critical bonus damage by 30%.
- Lightning Effusion (level 20) – Direct force attack crits grant Lightning Effusion, reducing the force cost of your next two non-channeled force attacks by 75%.
- Subversion (level 24) – Reduces the pushback suffered when activating Chain Lighting. Lighting Strike, Crushing Darkness, Thundering Blast, and Lighting Bolt by 75%. Additionally, you have a 25% chance when taking direct damage to gain Subversion, which causes your next Lighting Strike or Lighting Bolt to activate instantly. This effect cannot occur more than once every 8s and lasts for up to 15s.
- Forked Darkness (level 28) – Crushing Darkness has a 30% chance to tick twice and make its target vulnerable for 45s. Vulnerable targets take 5% more damage from Force attacks. In addition, when you activate Thundering Blast, there is a 30% chance the ability will produce a second blast that strikes the same target for 30% damage.
- Lighting Swarm (level 32) – Increase the maximum range of your Force attacks by 5 meters. Additionally, Chain Lighting immobilizes all affected targets for 0.5s and slows all affected targets by 50% for 6s.
- Convection (level 36) – Force Speed give 2 stacks of Convection which allows Lighting Strike and Lighting Bolt to be activated instantly.
- Forked Lightning (level 40) – Lightning Strike, Chain Lightning, Lightning Flash and Lighting Bolt have a 30% chance to produce a second arc of lightning that strikes the same target for 30% damage. Additionally, Chain Lighting overwhelms its targets for 45 seconds. Overwhelmed target takes an additional 10% damage from area attacks.
- Focal Lighting (level 44) – Damage dealt by Chain Lightning and Lightning Flash has a 100% chance and damage dealt by Lighting Strike and Lighting Bolt have a 50% chance to grant Focal Lighting, which increases alacrity by 1%. Stacks up to 5 times. Lasts 15s.
- Chaos Nexus (level 48) – Forked Lightning is twice as likely to trigger while Polarity Shift is active. Additionally, increases the duration of Polarity Shift by 5s and reduce its cooldown by 15s.
- Reverberating Force (level 52) – Increases critical damage dealt by Chain Lightning, Lightning Flash, Crushing Darkness and Thundering Blast by 30%.
- Conduction (level 56) – Each Forked Lighting and Forked Darkness reduces the active cooldown of Polarity Shift by 1s. In addition, being interrupted grants Unshakeable for 4s. This can only occur once every 15s.
- Charged Reaction (level 59) – Direct damage dealt by your Crushing Darkness and Chain Lightning abilities refreshes the duration of your Affliction on affected targets. In addition, Lightning Bolt increases your Force regeneration by 10% for 10s. Stacks up to 3 times.
Offensive Cooldowns
- Polarity Shift (90 second cooldown) – Grants 20% alacrity and immunity to interrupts for 10 seconds. Use on cooldown assuming you can be attacking for that long (don’t use if there’s only 5 seconds left before some downtime or something).
- Recklessness (90 second cooldown) – Grants 2 charges of Recklessness, which increases the Force critical chance of your direct attacks and heals by 60%. Each time a direct Force ability critically hits you lose 1 charge. Lasts 20 seconds.
- Attack Adrenal (3 minute cooldown) – Increases Power by 750 and reduces all healing done by 20%. Lasts 15 seconds.
- Unlimited Power (5 minute cooldown) – Increases Strength, Presence, Aim, Cunning, Endurance, and Willpower for you and your group members within 40 meters by 10%. Lasts 10 seconds.
Utilities
Skillful – Force Suffusion + Empty Body + Tempest Mastery
- The AoE heal from Force Suffusion is great for getting a quick ~1-3k heal on everyone it hits (I normally use during downtime to help top everyone off or when the healing gets extremely intensive).
- Empty Body is a no brainer for Operations in my opinion, 10% healing received is huge.
- Tempest Mastery currently while Force Storm is so powerful.
Masterful – Suppression + Dark Resilience
- Suppression is great for instances when you know that you’re going to be taking damage. 25% reduction for 6 seconds can save your life.
- Dark Resilience is also great for taking damage, whether it’s unavoidable or you make a mistake. I can currently heal upwards of 17k using this Utility, and while they might not say it aloud, your healers appreciate having to heal the dps less during difficult fights!
Heroic – Corrupted Barrier or Force Speed + Force Mobility
- Corrupted Barrier may not look very impressive on paper, but it’s a very powerful self heal whether used on Static Barrier or Force Barrier. With my health where it is (49.4k), the healing ticks are at 1100 per second, with 4400 healing ticks per second with 4 stacks of Enduring Bastion (the buff after Force Barrier ends). Even if you only use Force Barrier for 1 second to avoid damage, you’re still getting 5 ticks of healing (1 stack, so 1100 per second in my case) after you cancel it. I’d suggest using this if your healers are having a difficult time keeping everyone up during a fight.
- When the healing isn’t as much of an issue (some fights are healing intensive, some are not), I’d go with Force Speed. If nothing else, you’ll have Force Speed and Force Slow available should you need them.
- Force mobility is another no brainer to me. Thundering Blast is our highest priority, so getting as many of these per fight on target is crucial. With all the mechanics we must move out of or into during a fight, being able to cast TB on the move is necessary (it works during Force Speed as well).
- Note – If you do not need Corrupted Barrier or Force Speed for any reason, I’d personally go back and put a point to something else from the Skillful or Masterful options.
- These are definitely at least partially personal preference. The ones I listed are what I personally use for the hardest content (emphasis on damage reduction and healing). Most fights are about staying alive while executing your priority list, not going for the highest dps of all time.
Operation/Flashpoint Utility and Defensive Cooldowns
- Unlimited power – Group/operation wide buff, increasing all main stats by 10% for 10 seconds. I recommend using it on your opener. This is assuming mechanics allow for it, your tanks can hold aggro, and you won’t need it for a burn phase within the next 5 minutes.
- Force Speed – Use when necessary, whether it’s for the speed boost or for the instant Lightning Bolts.
- Cloud Mind – Aggro drop, use when necessary to reduce threat or to reduce damage taken with the Suppression Utility.
- Expunge – Use to get rid of cleansable debuffs that should be cleansed. Can be used on other people in your group if necessary.
- Electrocute – 4 second hard stun, can be useful in Flashpoints and against some trash in operations.
- Force Storm - Can slow or even stun enemies caught in it, useful in Flashpoints and some trash in operations.
- Reanimation – Use to revive necessary dead players in your group. You should be reviving teammates, not the healers (coordinate with other revive capable dps so you’re not all trying to revive someone at the same time). Reanimate wisely – if there’s 2 or more people dead, revive the more necessary teammate (normally tank or healer).
- Extrication – Friendly pull, use when necessary to save somebody from mechanics (they are stuck in a corner, dying in fire/acid, they need to be where you are, etc). Can also be used to lower someone’s threat amount (shouldn’t be necessary).
- Unnatural Preservation – A free, powerful, instant self heal that is off the gcd (global cooldown). There is no reason not to use this is you’re below 80% life and there’s no current downtime in the fight.
- Resurgence – An instant heal and an over time heal in one. This is on the gcd so use sparingly during combat, but if there’s downtime, feel free to use this in combination with Dark Heal to help the healers out.
- Dark Heal – An expensive casted heal. Should only be used during downtime or when absolutely necessary (healers are dead or extremely hard pressed).
- Overload – The knockback is very situational, and mostly useless for ops, but the heal while using Force Suffusion is definitely a nice utility for some fights. Whether it’s during combat or during downtime, this can really help healers who are hard pressed. It’s capable of being an instant 3k+ heal (with crit) on everybody it hits (up to 8 people including you), which is insane for a dps. It is on the gcd as well, so only use when necessary (or during downtime).
- Unbreakable Will – Use when necessary to get rid of movement impairing effects or stuns that can be broken.
- Consumption – Should never be necessary, but if you’re extremely low on force, it can be used to get a quick boost to your force pool.
- Force Barrier – Use when necessary to avoid damage, whether it’s a giant hit at full health, or if you’re going to die if you get hit again. If you’re confident enough to do the fight without needing Force Barrier for protection, it can be used to avoid mechanics and increase dps (example: ignoring a knockback and getting back to dpsing sooner). Can also be used to heal yourself using the Corrupted Barrier utility.
- Static Barrier – Use when necessary. For instance, if you get a giant grenade (or some similar unavoidable damage) on you and it’s about to blow up. Also, if there’s no sorc healer, or they’re otherwise occupied, I try and bubble people who are going to take similar unavoidable damage (only for big hitting things like grenades/bombs/etc, not something that’s going to not hit very hard). You can also bubble your tank(s) if they are dying and there’s no sorc healer in the group. Can also be used to heal yourself using the Corrupted Barrier utility.
We do not have issues with our force pool (under normal circumstances), so don’t be afraid to bubble everybody in your group if there’s sufficient downtime and your force pool permits. This is assuming that there is no sorc healer who uses more powerful Static Barriers.
These utilities can make or break a fight, and it’s up to you to decide what to use and when to use them as the fight dictates. They are all situational. Good luck!
Gearing
Accuracy (assuming you have 1% companion bonus. If you don’t, get it!) – Personally I think that anything above 109.5% Force accuracy is sufficient. I’m sure the theorycrafters will come tell me how wrong I am, but I personally do not like going over the accuracy cap, and so I do not. It’s up to you if you can live with a slight miss chance.
What I would personally recommend based on gear level:
- 186 gear (Dread Master) – 7 Accuracy pieces (~109.57% Accuracy) (add one augment to go over cap)
- 192 gear (Resurrected) – 6 Accuracy pieces + 1 Accuracy augment (~109.61% Accuracy) (add one more augment to go over cap)
- 198 gear (Revanite) – 6 Accuracy pieces (~109.63% Accuracy) (add one augment to go over cap)
Crit – I’ve done a lot of crit testing over the years (with game play, not math), and for me, the results are normally about the same on average (unless using insane amounts of crit, then it’s lower). I try to just stick around 25% now and call it good, but there’s probably some ‘optimal crit’ according to theorycrafters that I don’t know. I’m currently at 239 crit rating (24.68% crit chance) and usually hover between 200-300. This could change in bis 198 gear, but I’m nowhere close to that yet!
Power – Everything that isn’t crit.
Surge – At least 3 pieces of gears worth (306-360 depending on gear level). Can go higher if you feel inclined through augments (you’ll start hitting some diminishing returns though).
Alacrity – At least 1 piece of gears worth (102-120 depending on gear level). Can go higher if you feel inclined through augments.
Augments – Based on recent numbers from theorycrafters, they say Power augments are #1, with main stat just behind them. You will have more crit (~1.67% for me with full Willpower) with mainstat, more bonus damage with power, so choose whichever you prefer. I’m currently using Willpower.
Augments are also a good way to make up any stats that you’re missing from gear, or want to otherwise increase. I was a bit low on surge with my current gear, so I dropped some Surge augments in to compensate.
Relics – Serendipitous Assault and Focused Retribution.
Set bonus – 6 piece Force-Master. It’s very possible that the old 4 piece + new 2 piece would be better, but I don’t have the gear currently to test properly. It will probably get nerfed if people start using it.
Abilities and Rotation
Main damage abilities for rotation

Affliction (AF) – A DoT required to get automatic crits on Thundering Blast. Refreshes with CL and CD, so ideally you only need to cast it once per fight, but there are some instances where it will need to be recast after some downtime or target switching.

Thundering blast (TB) – Our staple attack, and our highest priority, Thundering Blast should be used on cooldown.

Crushing Darkness (CD) – Our second priority (with proc), CD is another must use part of our rotation. The guaranteed damage from it is second only to TB (or attacks using Recklessness).

Lightning Flash (LF) – A new ability with 3.0, and third on our priority list (assuming CL proc is not about to wear off). With the crit damage buff from Reverberating Force, it’s capable of hitting much harder than LB, which is why I use it before Chain Lightning. I want to use as many of these per fight as I can.

Chain Lightning (CL) – Fourth on our priority list, third on priority assuming the proc is about to fall off (it never should be). Gains bonus from Reverberating Force, instant cast with proc, and hits up to 8 targets within 8m making it priority #1 for AoE.

Lightning Bolt (LB) – A new ability given to us to replace Lightning Strike as our main filler during rotation. Available as a cast or an instant cast using Force Speed (or 25% chance on taking damage).

Lightning Strike (LS) – Main filler used until level 57, then it gets replaced by Lightning Bolt.

Force Storm (FS) – A channeled AoE that got massive buffs in 3.0, even becoming viable in single target rotations. I generally use on opener and with Recklessness depending on the situation.

Shock – An instant cast that can be used with the Chain Shock utility and it does more average damage than Lightning Bolt. Probably ideal for dummy parses or short, bursty fights. I prefer the healing utilities for hard content personally, but if surviving isn’t an issue, Shock is definitely viable to add into your rotation.
Ideal Opener
Precast CD > AF > Offensive Cooldowns > TB > LF > Recklessness > CL > Force Storm > TB > Priority list

Note – You want to use Polarity shift before your Attack Adrenal (or any cooldown without a timed debuff on your bar). The 20% Alacrity will reduce the cooldown of your adrenal from 3 minutes to 2 minutes and 30 seconds without any additional Alacrity (The math doesn’t seem to add up, but it is indeed 30 seconds and not 36 seconds). It does not work with Unlimited power because you’re locked out for 5 minutes either way.
Ideally you’d also have a merc using their 10% Alacrity buff before the group uses their cooldowns as well for even more time shaved off of cooldowns.
Rotation through first 5 Thundering Blasts
Crushing Darkness > Affliction > Polarity Shift + Attack Adrenal + Unlimited Power > Thundering Blast > Lightning Flash > Recklessness > Chain Lightning > Force Storm > Thundering Blast > Chain Lightning > Lightning Flash > Lightning Bolt > Crushing Darkness > Lightning Bolt > Lightning Bolt > Thundering Blast > Chain Lightning > Lightning Flash > Lightning Bolt > Lightning Bolt > Lightning Bolt > Lightning Bolt > Thundering Blast > Crushing Darkness > Chain Lightning > Lightning Flash > Lightning Bolt > Lightning Bolt > Lightning Bolt > Thundering Blast > Chain Lightning.

There’s another promising rotation using Force Storm a lot more, up to ~90 hits on a 1 mill dummy, but I’m not going to go over that here as it’s not nearly as viable for mechanic-filled operations and is in all likelihood getting toned down anyways
Priority List
Assuming your CL proc isn’t about to run off, which it never should be.
- Thundering Blast (with Affliction)
- Crushing Darkness (with proc)
- Lightning Flash
- Chain Lightning (with proc)
- Lightning Bolt
Mobile Priority List
- Thundering Blast (with Affliction)
- Lightning Flash
- Chain Lightning (with proc)
- Lightning Bolt (with proc)
- Shock
- Force Slow
- Electrocute
- Overload
AoE Priority (3+ enemies)
- Chain Lightning (with proc)
- Force Storm
- Overload (mobile or low on force)
Recklessness Priority List (Single Target)
- Chain Lightning (with proc)
- Force Storm (if you can get 3+ ticks on target)
- Lightning Flash
- Lightning Bolt
Recklessness Priority List (2+ Targets)
- Force Storm
- Chain Lightning (using this first with 2+ targets will eat both stacks)
- Lightning Flash
- Lightning Bolt
Force Speed Use
- When you need the instant LB for mobile combat (and you’re not going to need Force Speed for the next 15 seconds).
- When a relic proc/raid buff/Polarity Shift/whatever is going to wear off before your next LB cast finishes (and you’re not going to need Force Speed for the next 15 seconds). This is highly situational and requires awareness + keybinds to pull off efficiently.
- Using Force Speed on cooldown under normal circumstances is not a dps increase. The time before next cast is the same as if you hard casted it.
Sample Parse & Video
I tried to get a parse with as close to average crits as possible to show the percentage of totals that you should expect (I’m at 24.68 crit chance atm). Obviously it will vary a bit with crit and all the rng procs throughout our rotation, but you get the idea!

The ability delay for me is horrible on my ship atm (has been mostly bad since 3.0), but the percentages should be close enough. Apm for dummy parses is highly dependant on how many times you use Force Speed. During an actual PvE fight apm varies wildly depending on a multitude of things, so don’t concern yourself with it too much.
I’ve hit well over 4.5k a few times (ability delay permitting) with this rotation and some decent/nice RNG (gear is a mix of 180/186/192 with a 198 offhand armoring), and I’ve also hit 4k with some terrible rng. Don’t be too worried if you’re doing everything correctly and the numbers aren’t there. This spec is still fairly RNG dependant.
Video
Disclaimer: After 4 hours of attempts, this was the best video I could get. The ability delay is still terrible for me on my ship so I may have mistimed one or two things due to that.
About the author
My name is KTap (Currently playing Veijel, formerly Stomach/Handcuff) and I’ve been playing a Lightning Sorc/Telekinetics Sage off and on since RotHC released. I’ve dabbled with other classes and specs, but this spec is by far my favorite in the game and I’m very glad that it’s once again an excellent choice for any group! I’m in the guild Zorz on the Harbinger server.
This guide is a culmination of not just mine, but other people’s ideas as well. I am not all knowing and had plenty of help from other people, whether it was their insights or they inspired me to do something out of the box (too lazy to find and list everyone, sorry).
If you’re looking for pvp advice, I’m probably not the right person to ask. I’m fairly competent at pvp, but there’s definitely more knowledgeable players out there and I’d suggest posting your pvp questions in the swtor pvp forums.
Please feel free to ask any questions, tell me how wrong I am (I wouldn’t be surprised), etc in the comments here or through private message on the swtor forums (I’m KTap there as well).
I hope you enjoy the guide and thanks for reading!


 SWTOR 3.0 Seer Sage Healing Guide by Orderken
 SWTOR 3.0 Operative DPS Guide by Raulos
 SWTOR 3.0 Operative Medicine Healing Guide by Orderken
 SWTOR Festival of Splendor Event Guide