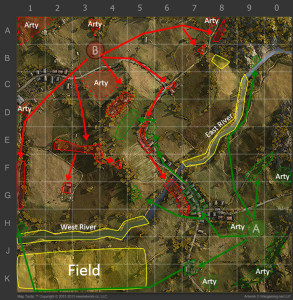
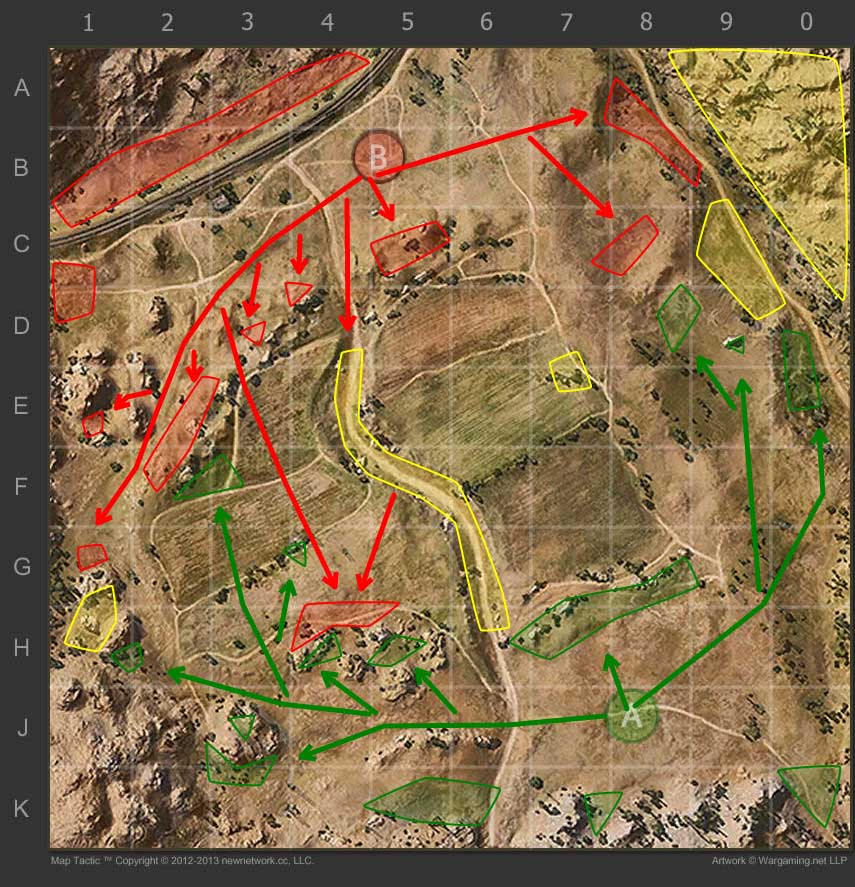
Although Fisherman’s Bay has been out for quite some time now I see that most overlook the widely used defensive locations on the map in public matches. Keep in mind these are not the only viable locations but instead are the most widely used and useful from my perspective for public matches. You’ll see that there is a clear difference between the East and West sides of the map which favor side one(green) or side two(red).

A quick look shows that side one(green) lacks viable hard cover for the Western side of the map. The main cover there is found in J2/K2 near the windmill and venturing further you loose any hard cover and must rely upon slopes or trees/bushes for camo. Side two(red) on the other hand has a decent amount of cover up in the B1/B2 area, D1 rock, and the E3 building that is capable of firing on advancing tanks on the 1 line. Moving over to the Eastern side of the map side one(green) gains the more defensible side of the map with many more locations providing lines of fire than side two. The central part of the map is largely equal with both sides having equal footing.
D9 and F0
Both sides have viable locations on the opposite side of the town for fast tanks(mediums/lights) to rush across at the start of the map and set up before the opposing team does. Anything that travels 45 km/h+ heading towards D9/F0 makes it before the enemy team can react and/or spot them. Having a large force in these areas denies the opposing team defend in the E8/F8 area which is crucial to holding the town. If the opposing team already has a large force set up in E8/F8 then the option of pushing further to around the bend on the outside of the town is viable and will provide cover. Both areas allow your team to support from safe cover and hopefully push forward to support you once the opposing side if weakened. High risk, high reward.
Central Road
While not highlighted on the map above the central road is critical to any team wishing to push to the enemy side of the map. Holding this allows a team to either support the Western of Eastern forces initially and later in the game deny the enemy from crossing the map to either reinforce the weak flank or to assault/defend the flag.
G1 and D1 Rocks
Both locations provide advance spotting for the defenders located behind them on each team. While not large enough to hide several tanks they can hide 1-2 tanks from incoming fire. They also serve as cover for advancing forces so loosing them will hurt your chances of defending against a push.
A8/9 and K8/9 SPG support
Both of these locations are very useful for SPGs to set up in to provide fire into the city. They allow SPGs to fire down the vertical roads and hit most of the corners that opposing forces will pop out behind to fire off shots at your team mates. It still allows the SPG to support the opposite side of the map along with the middle making it a great location to set up in. The only downside is if your team looses the town then you are left defenseless.
 Map Strategy: Steppes - World of Tanks Guru
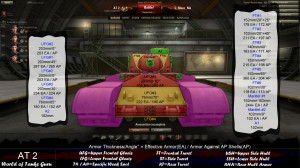
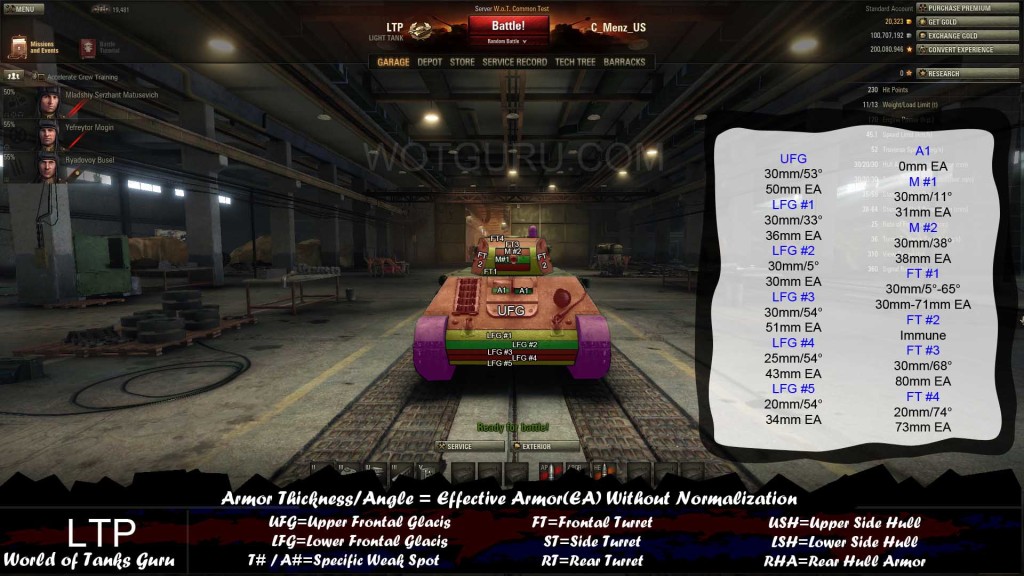 Weak Spot Guide: LTP - World of Tanks Guru
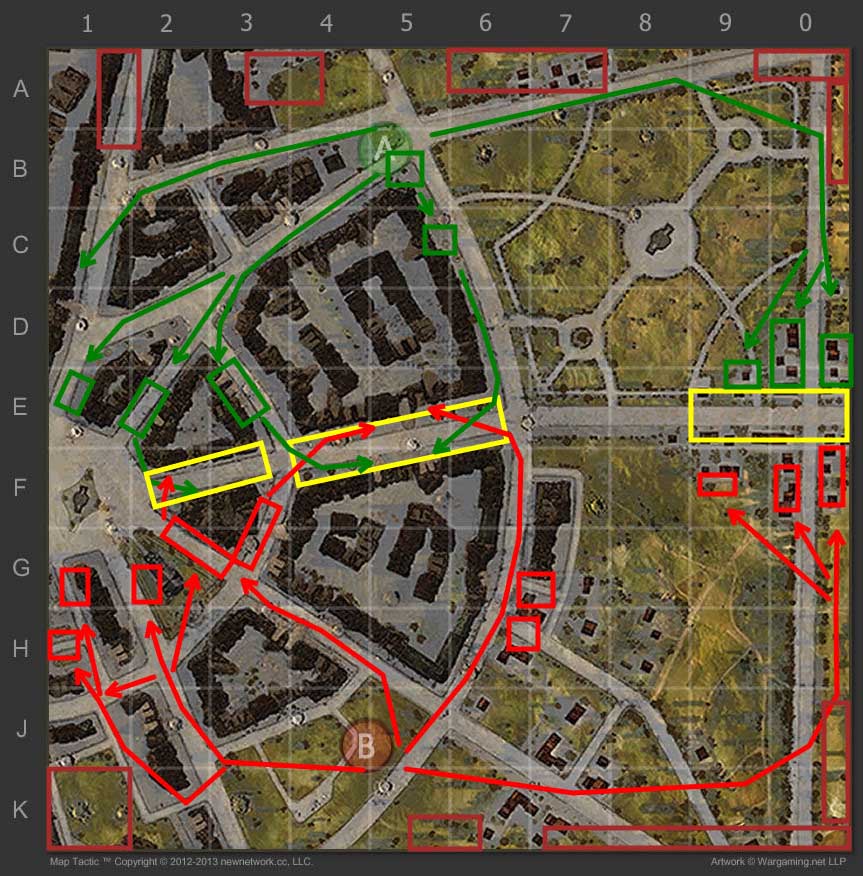 Map Strategy: Ruinberg - World of Tanks
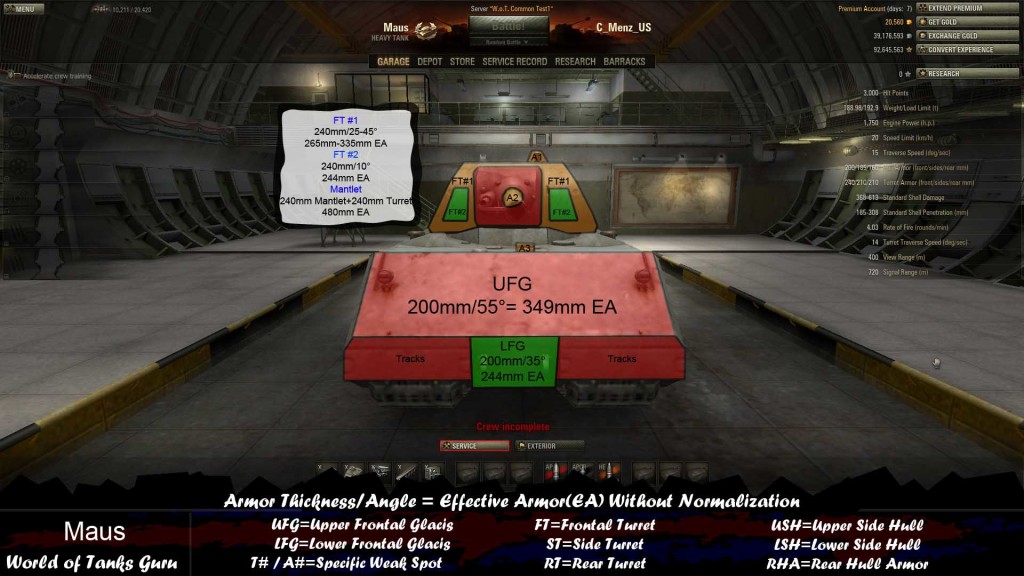 Weak Spots Guide: Maus - World of Tanks Guru
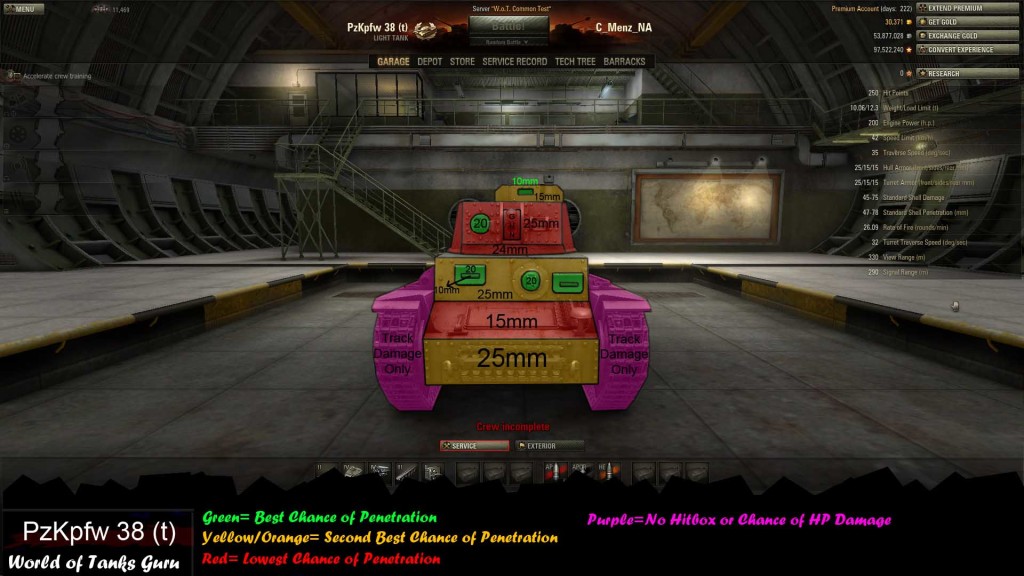 Weak Spot Guide: PzKpfw 38 (t) - World of Tanks