This guide for the World of Warcraft: Warlords of Draenor is an indispensable tool of any player that wants to lead hi character to saving the continent of Draenor from the might of the Iron Horde. The guide has been divided into two main parts: beginner's guide and a detailed description of all the aspects of the game. The former has been, primarily, designed for the newcomers to the game, as well as the ones that return, after some time off. In 10 easy steps, this guide presents the basic aspects of the gameplay, starting with the character creation process, through discussing the interface, the glossary to the presentation of the new element of the game - the garrison. The second part of the guide revolves around several key aspects of the game. It presents the expansion of the garrison, starting with obtaining resources, the suggested way to expand the fortress at the beginning of the game and a detailed description of the available buildings, including the profits that they ensure. It also presents the system of recruitment of followers and of dispatching them on missions. Another element of this guide, which is also important, is the description of all the dungeons available in Warlords of Draenor. The description of each of the dungeons focuses, predominantly, on the battles with individual bosses, their attacks, their weaknesses and the ways to fight them. The next part of this guide presents all of the mounts that this expansion pack introduces, along with a short description of how such a mount can be obtained. The last part of the guide presents the suggested add-ons to the game, thanks to which it becomes less tedious, as regards some of its aspects, including the mod-management client installation process. The second part of this guide is intended for the intermediate players, although, also hardcore veterans of the World of Warcraft may find interesting information there. Warlords of Draenor is the fifth expansion pack for the most famous MMO in the world - World of Warcraft. It introduces thousands of new quests into the game, a continent that has been designed in detail, 8 new instances and several new elements of the gameplay.
World of Warcraft is one of the most popular MMO games in the world. Currently over 10 millions of players are playing it. This guide will show you in ten simple steps the new add-on to this game. Warlords of Draenor adds some important changes to the game. It improves not only game mechanics and adds some new gameplay elements, but presents a new storyline with hundreds of quests as well. Some of those elements will be described in this guide. Due to the nature of this guide some things will be described only in general terms, although clearly enough for everyone to understand and use in the game. This guide should especially benefit the less advanced players whose adventure with World of Warcraft begins with this expansion or who returns to the game after a long absence.
World of Draenor in 10 easy steps guide contains:
Patryk Greniuk ()
A readable representation of all interface elements shown on the screen. Since there is a lot of them and not all of their functions is clear they might be troublesome for inexperienced players.
A short description of changes that comes with the new expansion and their consequences to the game.
In this chapter you will find a description of the new world map. There will be a short plot summary and information about how the map is divided into provinces.
A chapter about character creation. There will be a description off available races, alliances and of the most important choice - the character class with a short characteristics.
A description and presentation of how to boost one selected character to level 90. A presentation of profits coming from boosting a character at level 60 or higher.
A presentation of all professions available in the game. Division for the main and minor professions. A short description of crafting and the best choice for each character class.
This chapter contains a short description of the first map where you start the game and tutorial to obtaining new spells and talents. You will find information on what to do at the beginning so the game will be fun and not frustrating with its inaccessibility.
This chapter focuses on a short presentation of your garrison. What it is, what's its purpose, what can you do in it and what benefits does it give to you.
During the ten years of its existence World of Warcraft created some specific vocabulary that can be hard to understand even for those who are fluent in English language. Here you will find a presentation of the most important terms and abbreviations that will make understanding other players far easier.
A short description of available ways of cooperating with other players, from forming a group to raiding a dungeon.
First contact with World of Warcraft might be a bit troublesome. All of the screen is filled with pointers, icons and buttons. It is even more complicated if that first contact is being done while playing the Warlords of Draenor expansion with a level 90 character. In this chapter you will learn of the basic interface elements - they will be shortly described and you will find some advices how to use them. It won't be a full description, only a brief overview of what is necessary to play. It is a good idea to sacrifice some time at the beginning of the game for learning what options does the game offer.
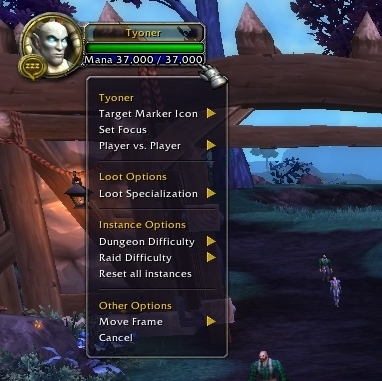
In the upper left part of the screen there is an icon that represents your main character. There is an graphic representation of his head and some information about your nickname, a hit points bar and an additional bar, that in this case show mana points. After moving your cursor on a bar you will see the max amount of life or mana points.
When you click the right mouse button on the character icon a menu appears where you can set some parameters. Most important of them are setting the PvP mode and instances difficulty level.
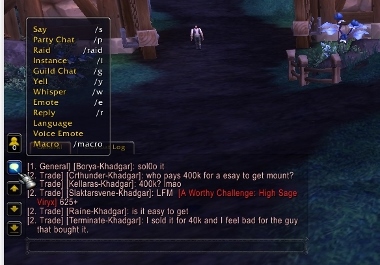
On the left side of the screen you can see a big box. You can see what other players said there and plot dialogues as well. What's worth mentioning, there are a lot of "rooms" in which you can write. The choice of the room should depend on with whom and about what would you like to talk. Luckily, there is a list of chat options available in the game. When you click a chat icon, you will see a box with all available abbreviations and its description. Such abbreviation should be written before the main part of your speech.
A the lower left corner of the screen you will find probably the most important and definitely the most often used part of the interface. It is the action bar, which allows you to use your attacks and spells. The basic version contains a single bar which you will fill very quickly. It is possible to add another one over the previous one.
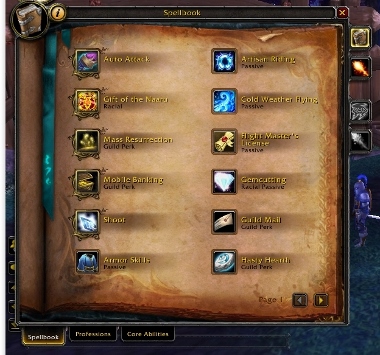
To see what actions is your character capable of, you must go to the Spellbook & Abilities menu. After learning what spells and abilities are available, drag the icon that represents them to the selected place on your action bar.

1. Character Info - In this tab you will find information about your character and his/hers equipment. This is where you will find specific character stats and, in other tabs, your pets stats and reputation in various fractions.
2. Spellbook & Abilities - In this menu you will find your character abilities - spells, professions and specialization-based abilities.
3. Specializations & Talents - This is the place where you can add and remove talents and glyphs. You can choose a talent every fifteen levels and it's an ability that you can use during the combat. Glyphs improves your spells and abilities. You can modify what talents and glyphs you have chosen by using the Tome of the clear mind item, which you can buy at most of the merchants.
4. Achievements - In this tab you can see all available and unlocked achievements that the game has to offer.
5. Quest Log - This icon opens a map connected with all available missions. You can see here where is the place that you must travel to for completing the quest or what you must do.
6. Guild - This window is about the guild in which you currently are. You can see the list of other guild members currently online and other information about the guild.
7. Group Finder - This bookmark helps you in forming a party required for going to the Instances, both dungeons and raids. All you need to do is select your character class, select a dungeon and click the Find Group button. It is very helpful for players that play alone and would like to complete some locations with other players from time to time.
8. Collections - In this window you will find mounts and pets that accompany you. You can browse your collections here and select which mount you want to use now.
9. Dungeon Journal - Here you can find what bosses await for you in which dungeons and abilities do they posses.
10. Shop - This window opens a shop in which you can by for real money various collector items.
11. Game Menu - This icon opens the main setting window, such as exiting the game, logging off and opening the client options menu.

In the lower right part of the screen you will find backpacks icons. To open all of them at once hold SHIFT and press LMB on one of the backpacks. By clicking the icon in the upper left corner of an opened backpack you can set its purpose - what is supposed to be inside of it. You can, for example, set it to contain crafting materials, items for sell or weaponry. In the upper right corner of the backpack there is a broom icon. If you click it, the game will automatically sort all equipment having regard to the functions assigned to each backpack. It makes navigating through the items much easier.
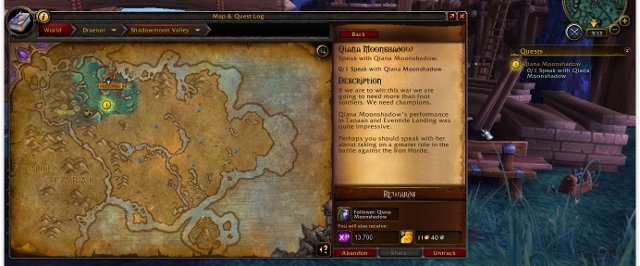
Directly under the minima there is a box with active quests. The maximum amount of quest displayed is around 5-6. Near every quest there is a number which makes finding that quest on the map easier. There is a mission objective as well.
If you click on the quest name, there will be a map displayed that shows the mission objective location or where you should search for it. On the right side of the screen you can read the full mission description and see the rewards for its completion. You can also cancel the quest (by clicking the Abandon button) or remove it from the bar and minimap (by clicking the Untrack button).
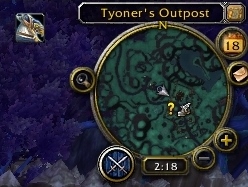
Minimap is one of the more important parts of the UI. There you will find the precise location where you must travel to complete a quest. On the minimap you will find locations of specific enemies to kill for completing mission as well. Minimap can be fully customized to show what you currently need. There is some additional information on the minimap circle as well.
It shows the real time and date, it allows to open your inbox (it is a good idea to look there from time to time, you might get an additional item from Blizzard). Two crossed swords in the lower left corner are connected to your garrison - you can see your allies mission progress there.
Warlords of Draenor not only implemented a new map and hundreds of new tasks, but some new features that impacts the core gameplay mechanic as well. The most important are:
- Max level cap increased to 100.
- A possibility to instantly boost one of your characters to level 90. The type of boost depends on the level of character boosted.
- New gameplay element - The Garrison.
- Integration of the world map and the Quest Log, which makes both of them more clearer.
- There are additional missions shown on the maps. They aren't obligatory and they don't have no plot. All you need to do in them is kill a specific amount of monsters. It's a good idea to complete them, they are awarded with a big amount of experience points.
- Completing quest is easier thanks to the numerous auras surrounding characters/places/items. Enemies to kill are surrounded with red aura and there is a red name over them. Quest items to interact with are surrounded with creamy aura. It is well visible and if you need to find, for example, ten items of some sort you don't need to wander around to find them since they are visible from long distance.
 Numerous auras makes completing quests easier and faster.
- There is a new UI element - the Toybox. All our toy items are transferred there. You no longer need to have them in the backpack. The toybox can be found in your Collection.
- The possibility to add your mounts to favorite. Then you can add the "select random mount" option. It will select a random mount from the favorite group.
- While gathering plants or mining the items obtained will stock in your backpack in the amount of 20 per one slot. It greatly saves the place in your backpack.
- There is a new category in the bank for your crafting items. You can automatically transfer all such items from your bank to your backpack with just one button. And you can create items using the materials stocked in the bank without the need to taking them to your backpack first.
- The level caps for Mining and Herbalism have been removed. You can gather and mine all materials no matter what profession level do you have.
- You can set categories for various items in your backpacks. For example, you can set one backpack for crafting items and other for equipment. After clicking the broom icon the game will automatically sort all items to their corresponsive backpack categories.
Before immersing into the world of Warlords of Draenor you should learn about the game storyline and se the locations you will be traveling through.
The story takes place in the homeland of orcs - the Draenor. This realm has been destroyed in the past, so to see it a time travel is required. You will follow Garrosh Hellscream, who thanks to the help of dragon Kairoz managed to travel to the times when the orcs haven't signed the Blood Curse with the Burning Legion yet. Garrosh united the orcs and creates the Iron Horde, which main purpose is to take revenge on the citizens of Azeroth.
In the expansion you will be able to travel through all of the Draenor continent, which is divided into seven locations and one main city - the Ashran. Each continent part has a specific climate. First, you will see the Shadowmoon Valley. Your garrison is located in the northern east part of that location. Nearby is the main headquarter of Draenei - Karabor. Sadly, the only thing you will find there is a few tasks, so there is no need to go there.
The continent is divided into those locations:
The storyline will guide you through all parts of the continent, but you will explore every location in a very limited manner. Additional tasks will encourage you to explore more of the world.
Ashran is the main city in Warlords of Draenor. Luckily, its size does not terrify. You will find all needed merchants and teachers on a quite limited space. You won't find only class teachers and pet trainers, to met whom you will need to travel to your race capitol. Ashran Island is additionally the place of battles between the Horde and the Alliance, this is where main part of the PvP mode happen.
Your first step in the game will be creating a character. You will use him/her for hundreds of hours, so it's better to do it well so you won't need to create another one because of bad decisions.
First you must select your characters race. There are 13 available in the game. All of them are divided into two groups that represents different sides - the Alliance and the Horde. What is worth mentioning, those alliances cannot contact each other. So, if you play as part of the Horde, you won't be able to play with friends that have chosen the Alliance. Every group has different locations to explore at the beginning of the game, completely different missions and cities. So it's a good idea to create at least two characters from different groups to better know the game and have more fun from it.
Furthermore, every race has different starting location, available only for that race and with unique quests. Some of the later tasks differ between races as well. However, the race choice isn't too important. You should select in based on which do you like most visually.
First of the available fractions is the Alliance. It has the following races available:
In opposition to the Alliance stands the Horde. Here you can play as:
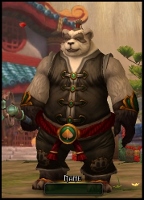
A completely different type of race are the Pandaren. What is characteristic for them, they are available for both sides. When you create a Pandaren character you must simply choose for who will you fight. Pandarens from different fractions can't communicate with each other even when they are in the same city.
Choosing a character class is far more important. At the moment there are eleven classes available. The game style and available abilities and spells depend on the class you have chosen. When choosing, select a class that matches your play style. You might choose between close combat classes, ranged fighting classes, magic fighting classes and healing classes. Every class has its weaknesses and strong sides, none of them is superior to others. They are all well balanced.
Before you choose, you can see a short characteristic of all of them.

Warrior - A typical warrior fights in close combat. He has strong defence, deals a great amount of damage with melee weapons and has the ability of battle rage, that increases his base damage. He can change his stance and adapt to the situation on the battleground.

Paladin - Paladin is a mix of warrior and priest. He can use heavy armor and healing spells, which makes him a perfect protector of other group members and a good tank. You can make him a typical offensive character as well.

Hunter - A long range fighting class. It's a good choice for players that prefer to play alone. He is accompanied by a pet that helps him in combat.

Rogue - Rogue is a class of choice for players that like to play more stealthy and likes to make a surprise attacks. He can hide from the enemies and backstab them and he gains combo points for consecutive attacks.
Mage - This character deals a lot of damage from distance. His weakness is a small amount of hit points limited abilities to heal during the combat. If you level your character wisely, there won't be many enemies who will be able to come close to you anyway.

Priest - Priest is supposed to heal and help other party members during the combat. He has a lot of healing spells and auras and some distance attacks as well. It is possible to focus this character on dealing heavy damage and he won't do it worse than mage or warlock.

Shaman - It's a very versatile character. He can heal other party members, deals both long-distance and close damage. He can create totems that aid him and his allies on the battlefield.

Warlock - Warlock is a dark version of the mage. He is accompanied by a demon, that aids him in combat. His main purpose is dealing long distance damage, but he can cast curses and weakening spells as well.

Druid - This class is multi-talented, thanks to the ability to transform into different animals. Depends on what form you will become, you might take or deal damage. This ability allows druid to fast travel through land, see and air.

Death Knight - A dark version of the warrior. He can wear heavy armor, deal damage in close combat and create runes that strengthens his equipment.

Monk - It's the newest class and its use depends on the player. He can create powerful elixirs that aids combat. He can heal other players or focus on dealing damage.
If you bought Warlords of Draenor as pre-order or collector edition, you can boost one of your characters to level 90. There are two types of boost. You can either boost a character from level 1 to 90 or boost a character that is at level 60 or higher. If you choose the latter option, you will gain some additional profits that will be described at the end of the chapter. Since I didn't have a character on level 60 or higher, I will describe the process of boosting a new character.

First you should create a new character. When you selected one or more characters to boost, click the golden icon in the upper right corner.

Now you must select from the list on the right side of the screen a character that you want to boost. If you don't want to boost any of them, you can create a new one by clicking on the "Create New Character".
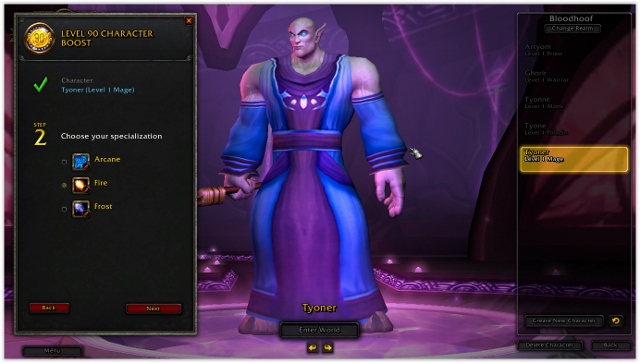
After you select a character, you will be asked to select specialization. Every class has three specializations to choose and the equipment, abilities and spells that you will be given after the boost depends on that. This decision is not final, after completing the starting location you will be able to go to your class trainer and change specialization, but means you will change your equipment and loose some time.
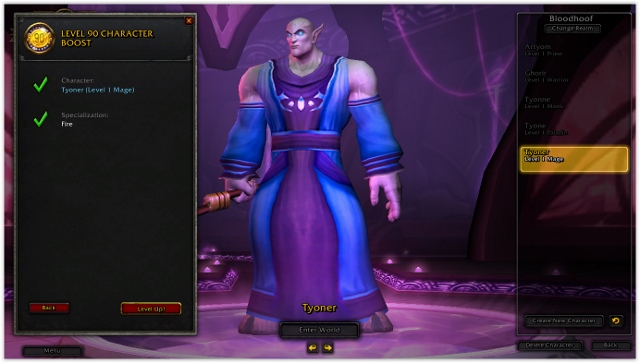
After you select specialization, all left to do is to click the "level up!" button. You will be asked to confirm your decision. This is the last time you can change your mind. After you confirm, you won't be able to change it.
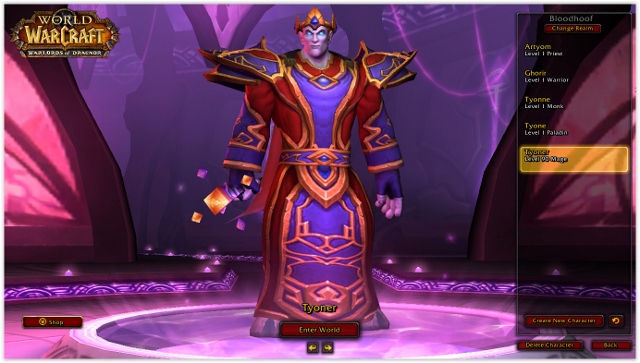
Congratulations! Your character has been boosted to level 90. As you can see, your character has all necessary equipment. He has been taught the basic spells and abilities as well. How to properly adapt him to the game will be explained in the chapter about the first steps in the Warlords of Draenor.
If you already have a character on level 60 or higher you might want to consider boosting that character. In that case you will be awarded with a Veteran bonus. Not only your level will be boosted, but two main professions as well. You won't be able to choose which professions, the boost will include the ones that you have learned on the character selected. Those professions will be boosted to level 600, which means you will save a lot of time needed to level them. Additionally, the First Aid profession will be boosted to level 600 as well.
In World of Warcraft there exist the so-called Professions, which you can learn and use while playing. They give you new options available in the game. If you learn the Skinning profession, you will be able to gain additional items from killed monsters. If you choose Blacksmithing or Tailoring, you will be able to create equipment for yourself or for sell. Every profession influence your game. Race or class of the character doesn't matter when choosing professions. You should think about what professions choose, a good set of them can make the game much easier.
There are two types of professions in the game - main and minor. You can choose only two main professions and as much minor ones as you want. See the description of the professions, it might make the decision easier.

Alchemy - This skill allows you to create various mixtures. Some will regenerate your health and mana, others will improve your stats or temporary upgrade your weapons. This profession is recommended for magical classes, like Mage, Warlock, Druid or Shaman.

Blacksmithing - It allows you to create armor from metal ore. You can create sharpening stones that temporary increase your weapons parameters as well. It's a good profession for fighting melee classes like Warrior, Paladin or Death Knight. You can select Mining as minor profession to have a good source of materials.

Enchanting - This profession allows you to enchant weapons, armor and other items to increase their parameters. To do so, you will require essence, that can be bought or created through the "Disenchant" - destroying useless equipment. A good profession for magic classes.

Engineering - This professions over variety of possibilities. You can create gunfire, a crossbow, hats, explosives, transport vehicles or even companions. It's perfect for Hunter class.

Herbalism - It's an unusual profession, that doesn't allow you to create anything, but to gather herbals that can be found all over the world of World of Warcraft. It's mostly recommended for Alchemists, but every character can profit from it as well. The herbals can be sold in the Auction House, which is a good source of money.

Inscription - This profession allows you to create powerful glyphs, that can improve your spells and abilities. You will be capable of creating unique items of great value as well. This profession is good for every character class.

Jewelcrafting - This profession not only allows you to create powerful rings and necklaces, but some very expensive gems as well. To make the most use of this profession, it is recommended to select Mining as additional profession.

Leatherworking - This ability is similar to Blacksmithing, although it allows to create leather-based items. You will be able to create armors and backpacks. It's a good profession for Hunters and Rogues. It connects with Skinning.
Mining - Mining allows you to gather many kinds of ore and stones, which can be used to create armor and gems. You can simply sell mined ore with great profit as well. This profession should be chosen with Jewelcrafting or Blacksmithing.

Skinning - This profession allows you to skin fallen enemies. Leather might be used to create armor or be sold. This profession works great with Leatherworking.

Tailoring - This ability allows you to create armor from cloth. You will be able to craft backpacks and even a flying carpet as well. This profession is good for magical classes that wear light armor.

Archaeology - This ability allow you to search and dig items from the ground. You can find weapon, armor and even mounts and companions.

Cooking - It allows you to cook meal that regenerates your health after a battle. Some meals can increase your stats for a limited time.

First Aid - It allows you to create bandages and antidotes. The first one allows you to heal during and after a battle. The antidotes removes negative status effects. You should train this ability, it will save you from death numerous times.

Fishing - It allows you to hunt some fish. You can catch not only fish, but boxes with equipment and bottles with numerous scrolls, plans, information as well.

Riding - This skill allows you to travel on mounts. The higher the profession level, the faster you travel.
To learn a profession or some new recipe, you must go to a profession trainer. They can be found in every major city and in your garrison after you upgrade it. If you want to use a profession, you must press the Spellbook & Abilities icon and then select the Professions bookmark. There you will find your two main and all minor professions. You must click the icon that represents selected profession. It will open a window where you will find all recipes known by your character with description what items are needed to create selected item. Now you just need to gather required materials and click the create button.
The selection of the professions depends mostly on what you want to do, nothing stands in the way of playing with a mage that creates armor. But remember, that in such case you won't be able to fully enjoy all the profits that come with item crafting.
If you play with a magic class (Druid, Priest, Mage, Warlock, Shaman), select two professions from Herbalism, Alchemy, Enchanting, Jewelcrafting, Tailoring. If you play as Warrior, Paladin, Death Knight, the best choice would be Blacksmithing and Mining. If you play as Hunter or Rogue, think about choosing Skinning, Leatherworking or Engineering. In all those cases don't forget about leveling your minor profession - First Aid.
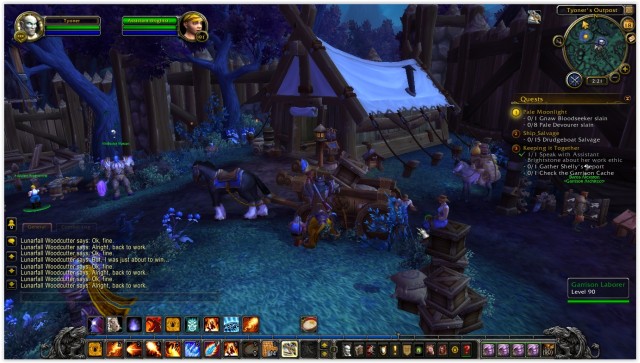
You start the game in the Assault on the dark portal location. This is where you will spend first hours of the game preparing for the tasks that awaits you on the Draenor continent. First tasks will introduce you to the plot and will show you the basic types of quests. This part of the game is heavily directed, so expect many cinematic fragments and animations. In this chapter you will learn not about completing the quests, but on things that you should do to prepare your character for the game.
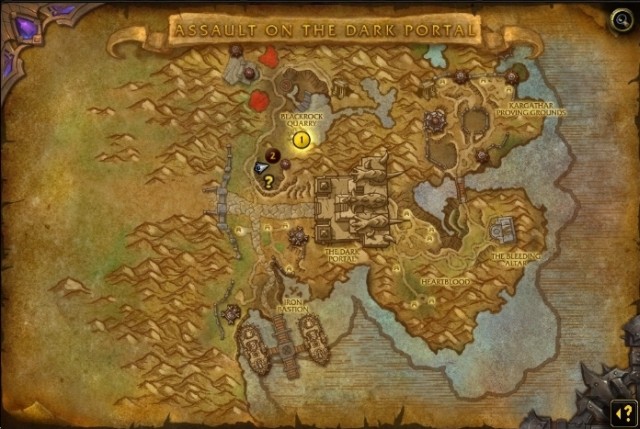 A map of the starting location.
After completing few first quests you will have all the abilities that a character on level 90 should have. Sacrifice some time to learn how to use them. Try to understand how they work, move them to the quick access bar. After a few battles customize the bar so that the most often used spells would be easy to access. Repeat it until the effect is optimal. It would be a good idea to search the web for so called "rotation", a list of best way of using skills for optimal effects. While You should search for rotation for your specific class and specialization.
Next, you should fill your talent tree. You will be allowed to add some talents after completing few early quests. There are three talents available in every line, from which you must select one that best suits your character. It is important than the talents corresponds to the rest of your abilities.
After you deal with quick choice bar, what can take some time, focus on setting your backpacks so that every one of them contains a different type of items. If you play as Hunter or Warlock give some time to your companion, learn his abilities, see if you can summon someone else.
Don't forget to change your equipment after every quest that rewards you with a new wearing item. At this point of the game even a change of single item might greatly improve your character stats. And the last thing: Don't be afraid to experiment! Most of the changes can be easily undone.
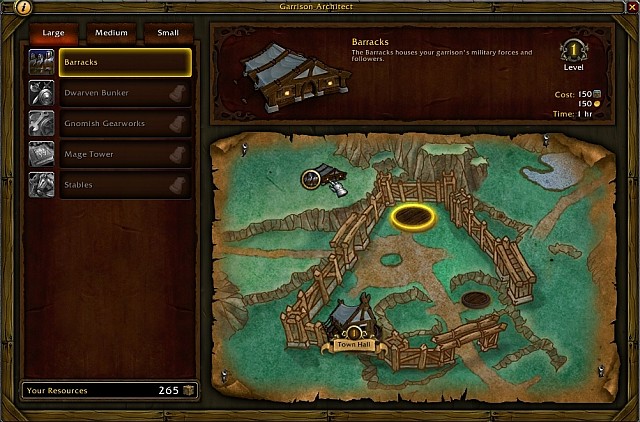
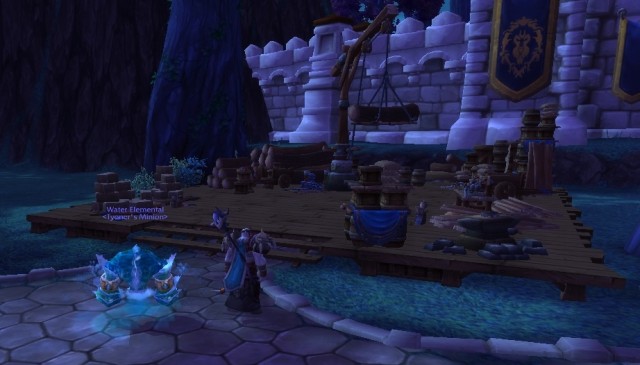
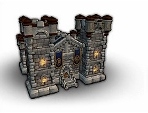
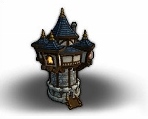
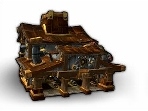
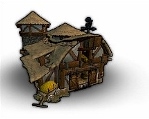
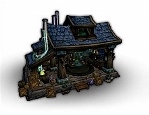
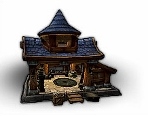
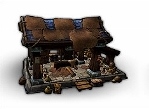
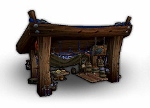
The Garrison is one of the most important gameplay elements added with the Warlords of Draenor expansion. It isn't just a place where you take new quests, it's your main base of operations. You can customize it so it will serve your needs. You can meet various merchants here and, after upgrading specific building, profession trainers as well. Below you will see a presentation of the most important parts of a garrison.
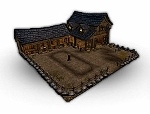
 At the beginning, your town hall is a simple building with one table inside.
A garrison can be customized by building specific buildings. A the beginning you will have only a city hall, but one of the first tasks will help you build barracks for your allies. Every building has three levels. The higher the level, the more profits from the building.
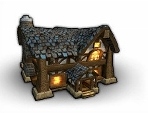
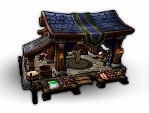
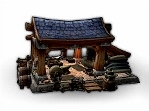
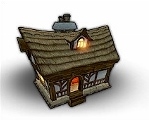
 The way your garrison looks changes as you upgrade it.
Number of fields on which you can build depends on the level of your city hall. All fields are divided into groups based on their size - there are large, medium and small fields. To build and increase level of a building you will need resources. They can be gained by sending your companions to missions, by completing some quests and by regularly visiting a chest located near the city hall.
Every building server a specific purpose, some of them are very useful and makes virtual life far easier. For example, Barracks allow you to call for reinforcements that are very helpful in fight with stronger opponents. Stables allow you to breed your own mounts.
On the small fields you can create buildings for specific professions, like the Forge for Blacksmithing or a Gem Boutique. A building like that gives you access to profession trainers that can teach you new recipes. It gives you a merchant with profession-related items as well. So you won't need to travel to the closest city each time you run out of materials.
Another category is for buildings related to the minor professions. Every garrison has a Mine, Fishing Hut and a Herb Garden. What's most important you won't need the Mining ability to mine from your mine and you won't need Herbalism to gather herbs from your herb garden.
Another new gameplay element are the Followers. They are NPCs that you "gain" during the game. You can do it by completing the main and side quests or you can even craft them yourself. They can be found while exploring as well. There are dozens of them in the game.
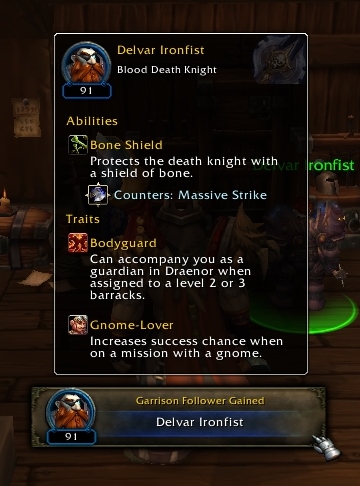
Every follower is unique. He has his own name, character class and special abilities. The latter is especially important due to the tasks you can assign them to. You have a control panel from which you can send followers to different missions. When choosing who to send where you should look at weakness of your enemy. You should choose a follower that is best suited for fighting that enemy. If you make the right choice, there is almost 100% probability he will complete his mission. Your followers can level up by completing missions. The higher their level, the greater the chance their will complete the task you have given them.
Every mission takes a specific amount of time. Usually a one-person mission takes from 30 to 60 minutes. More complicated tasks can take even 10 hours. During that time the followers aren't available in the garrison. To get a mission report you must click on the table in the town hall. If you're currently in other part of the map you should go to the closest outpost, where you will find a table to manage your followers as well.
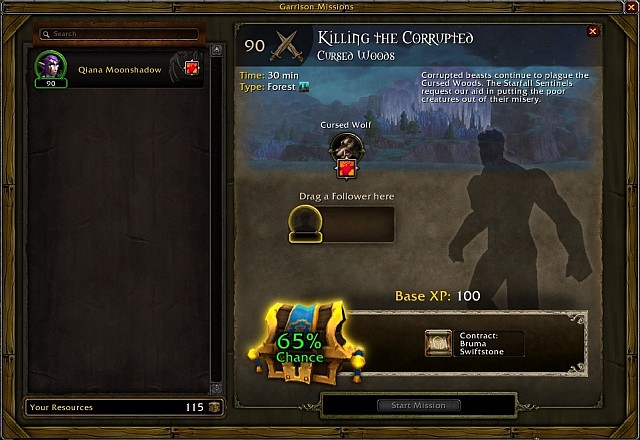
For completing the missions you will gain some materials for the garrison or experience for your followers (at least at the beginning of the game). Sometimes you will be awarded with an equipment item or even with a new follower.
World of Warcraft is over ten years old and during its existence it has accumulated a gigantic community, that over the time created specific terms and abbreviations. To understand announcements and other people a good knowledge of English language might not be enough. Below is a short list of terms that might come in handy.
Buff - A spell that temporary raises your statistics. It can be used on yourself or other players.
Caster - Character classes that casts spells.
Cooldown - Time that you must wait until you can use an ability again.
Debuff - Similar to Buff, except that this time it's the enemy that casts a spell that weakens you.
Drop - Items that fall from a defeated enemy.
Grinding - Killing enemies for a longer period of time in the same location to gain experience, items or gold.
Hate - A parameter that shows how your spell works on your enemy. The higher the hate level, the greater the chance that he will attack you.
Instance - A location which you can enter only accompanied by a group.
Mob - Enemy controlled by a computer.
Newbie - A young, inexperienced player. A positive version of Noob.
Noob - This is a term that describes a player that behaves in bad way, although it can also describe a player that plays very poorly.
Pet - An animal that follows player.
Raid - A very big group that is created on higher levels for instances or battlegrounds.
Respawn - When an enemy shows again after killing him.
Stack - Items that take only one slot in your backpack even if there are more than one of them.
AH - Auction house - A place where you can buy and sell items
AoE - Area of Effect - It describes skills that works in a wider area
AWF - Away from keyboard - A description of person that isn't currently near the computer. It can be written what you are going away from the computer for a while.
BG - Battleground - A place where forces of Horde fights with the Alliance.
DMG - Damage - Damage dealt for a specific amount of time, like 10 seconds Every second enemy gets specific amount of damage.
DPS - Damage per second - Characters that focuses on dealing damage are called that way as well.
EXP, XP - Experience
GJ - Good Job
GM - Game Master - A person hired by Blizzard that enforces good culture and keeps order on the server.
GS - Gear Score - A parameter that describes our equipment level.
GY- Graveyard
HoT - Healing over Time - Healing in a specific amount of time, like 30 seconds.
HP - Health points
HS - Hearthstone - A stone that transfers you to a specific place, usually to same city.
IF - ironforge - The capitol of dwarves
LFG - Looking for group - You write it when you want to find a group to some instance.
LFM - Looking for more - You write it when you need more people to group.
MB - Mana Break - A brake while on a raid or in a dungeon to replenish mana.
NP - No Problem -
NPC - Non-playing Character - A character controlled by computer.
NVM - Nevermind
OOM - Out of Mana
PR - Personal Rating - A parameter that describes character level.
SW - Stormwind - Capitol of humans
TB - Thunder Bluff - Capitol of Taurens
TY, THX - thank you
UC - undercity - Capitol of the Undead
WTB - Want to Buy
WTS - Want to Sell
WTT - Want to trade
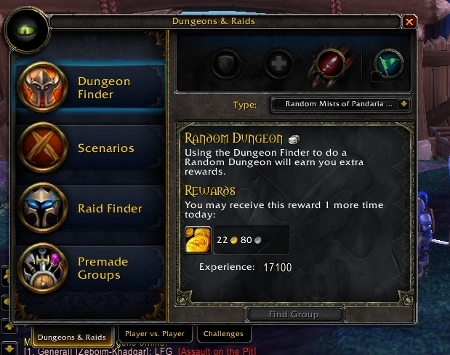
World of Warcraft is mostly an online game and interactions with other players and cooperative missions are the key element of it. For normal playing and completing main quests the best choice is to use the PremadeGroups search engine in the Dungeons&Raids tab. You can select what sort of game are you interested in and the game will automatically find you a companion. It's the best way to find someone for Dungeons as well. Thanks to it you won't have to wander through the game map in search for an entry point to a location. Usually after clicking the Find Group button you will have to wait for a few minutes.
There are 8 new dungeons in the Warlords of Draenor:
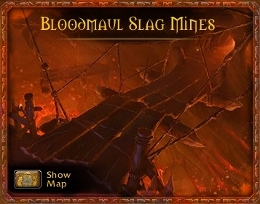
Bloodmaul Slag Mines - This instance is for a five-member group. Suggested character level is 90-92. It teleports you to the very heart of an volcano, where Ogres forces slave citizens of Draenor to work in the mines. There are four bosses and numerous lesser enemies there.

Iron Docks - This instance is for a five-member group. Suggested character level is 90-92. There are four bosses, and your main objective is to stop the Iron Horde from sailing. Be caution of regular explosions.

Auchindoun - This instance is suggested for characters at level 94-97. This time you are teleported to the sacred Draenei mausoleum. You will face four bosses here.
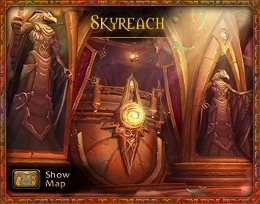
Skyreach - it is the last instance you will reach while leveling your character. This instance is suggested for characters at level 97-99. This time you will face enemies on the top of the Spires of Arak. There are four bosses here. Watch for the rays of light.

Shadowmoon Burial Grounds - A dungeon for characters al level 100. You will fight in the Shadowmoon Valley, which is the traditional burial ground for Shadowmoon clan members. The spirits of ancestors are restless. There are four bosses and numerous lesser enemies waiting there for you.
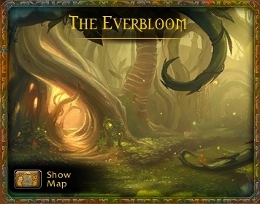
The Everbloom - Another instance for characters at level 100. This time you will be teleported to the jungle of Gorgrond. There are five bosses, each commanding a different force of nature. Watch out for attacks with w wide range of damage. Run from everything that glows and looks suspicious.
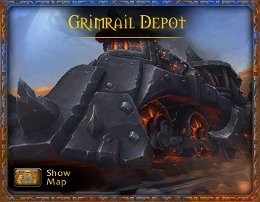
Grimrail Depot - One of the most interesting locations in Warlords of Draenor. Battle is being held in a train that is on the move. You must get to the beginning of the train, defeating three bosses on your way.
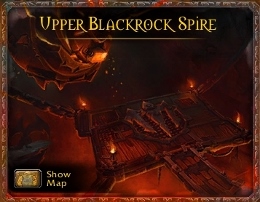
Upper Blackrock Spire - It is the last instance for level 100 characters. This time you will go to Azeroth, to the inside of Blackrock Mountain, where you will face five bosses.
A more precise walkthrough of dungeons and some advices about fighting each bosses will be found in the main part of the Warlords of Draenor guide.
Warlords of Draenor is the most recent expansion pack for the World of Warcraft, one of the most famous MMO RPGs in the world. It introduces many revolutionary elements that alter certain aspects of the game considerably. The most important innovation is the garrisons, which serve as your HQ on the continent and perform a vital role, both when it comes to the storyline and the technical side of the game. This guide has been intended for beginner and intermediate players, who will benefit the most from reading it. As for the veterans of Warcraft, is still recommend that they view, at least, some of the chapters that present some of the aspects of the game in a comprehensive and lucid manner. The contents of the guide revolves around the innovations that the Warlords of Draenor itself introduces. Predominantly, all of the aspects connected with the development and the management of the garrison, have been discussed, as well as ones concerning the process of recruiting new followers and dispatching them on missions. A vast portion of the guide has been devoted to presenting and discussing all new dungeons, along with descriptions of all of the bosses, their attacks and ways to defeat them. It also presents new mounts, including the means of obtaining them. The last part of this guide comprises a list of the most useful add-ons, which considerably facilitate playing the Warlords of Draenor. Due to the vastness of the game world and the multitude of aspects of the game, it turned out to be impossible to present them all. Therefore, I focused on presenting the most important ones, whose knowing is going to be the most useful to you.
This guide for the World of Warcraft: Warlords of Draenor includes:
Patryk Greniuk ()

Brown has been used for the characters that you encounter throughout the game and the bosses.
Blue has been used for abilities. This goes both for the ones used by you and your opponents.
Green has been used for areas and locations within Draenor.
Orange has been used for Achievements.
All of the proper names, which do not fall into any of the above categories, and they require to be mentioned. This means, e.g. professions, attributes of the followers or items.
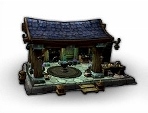
Warlords of Draenor introduces an entirely new element into the game, which is the garrisons. A garrison is a city/fortress the belongs to the player and it is on the player that it depends, in which way it develops and what is built there. You can decide in several key issues, concerning the garrison.
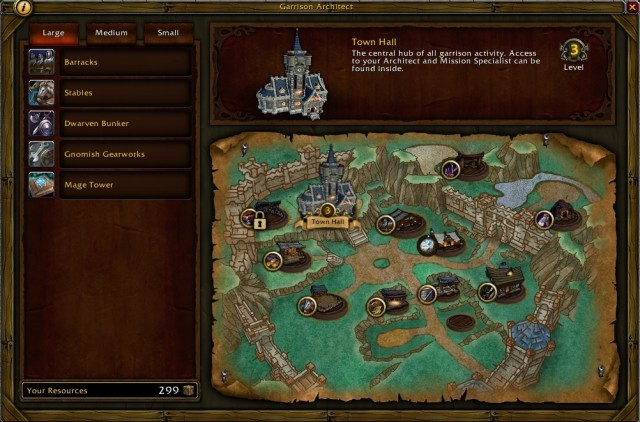
The first thing that should be on your mind is to fill your garrison with buildings. You have a dozen-or-so buildings to choose from. The function of each one is different and profits you in a different way. There are three tiers of development for each building, where each higher tier provides you with additional bonuses. Additionally follower, your buildings and your "plots" have been divided into groups, basing on their size. And so, on a big plot, you can build only the buildings that fall into the category of big ones. Unfortunately, even with the town hall upgraded to the highest tier, the number of available plots is much lower than the number of the available buildings. Therefore, you are forced to choose only the ones that you deem the most useful to you and focus on developing those structures. To make the choosing easier for you, the next part of this chapter provides the descriptions of all the available buildings.
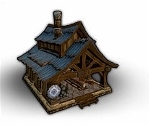
 Each tier of the town hall alters the looks and the arrangement of buildings in your garrison
The next innovation introduced by the expansion is the party system. During your journeys, you encounter many heroes that you can invite into your garrison as a follower. You will have the option to assign them to the individual buildings, which boosts the profits that you receive from them, or dispatch them on missions that provide you with gold and supplies, and your followers wit experience. Also this element of the game has been presented in the next chapter of this guide.
Apart from these two main functions, which your garrison fulfills, there also is a number of minor functions. The garrison is the most important place for you, in all of Draenor. It is here that you receive the majority of your quests and meet the traders of your interest. In the garrison buildings, you can develop your profession, mine ore in the mines or pick herbs. It is here that the commander's table is located, thanks to which you dispatch your followers on missions. It is the place, where you spend long hours, while playing the Warlords of Draenor.
The main functions of the garrison are:
Construction
One of the most important functions of the garrison is erecting buildings. The building space is strictly limited and it depends on the tier that your town hall is at. It should be your priority to upgrade the town hall so, as soon as you reach level 100, your town hall is upgraded to tier 3. The correlation between the building space and the tier of your town hall is as follows:
Tier 1: 1 small field, 1 big field
Tier 2: 2 small fields, 1 medium-sized field, 1 big field and buildings outside of the city limits
Tier 3: 3 small fields, 2 medium-sized fields, 2 big fields and buildings outside of the city limits
 Each building lot in your garrison has a specific size which determines what kind of buildings can be built there.
Before the construction, you need to find out about the size of the building plot, available for development, and pick the building that you want to put up there.
 You build structures by dragging an appropriate icon onto the empty field.
After you pick the building, you need to approach the drawing board. If your town hall is at tier one, it is locate right next to it. In the case of tier two and three, it is in the main hall. By doing that, you access that building management menu, where you start building, by dragging the building onto the available field on the garrison map. Before that, you only need to make sure that you have enough resources and gold for this construction, as well as Blueprints.
To upgrade a building to the higher tier, you need blueprints. You learn all of the tier one blueprints automatic follower, after you upgrade the town hall to tier two.
You obtain tier two blueprints by completing basic quests in locations of Draenor so, you should be able to obtain them without major problems.
Tier three blueprints are the most difficult to obtain. Virtually, almost always, this requires you to obtain an appropriate achievement. Later in this guide, you can find achievement requirements in descriptions of each building, and what it consists in.
With all the requirements met, you can start construction. Usually, this takes one or two hours. After the time elapses, you need to approach the building site and click on the slip of paper floating there. Thanks to this, the construction will be complete and you will be able to enjoy the profits that it brings you.
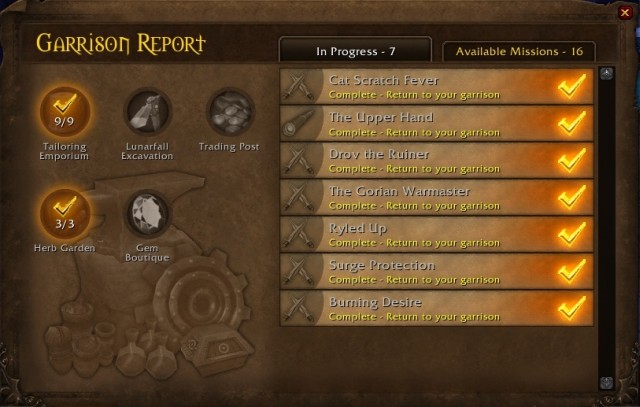
Garrison management requires you to keep many things in mind. Fortunately, you can access the window, where you can follow the basic processes in the garrison, on a regular basis. To access the window, you need to click the icon of the crossed swords, in the bottom-left corner of the minimap.
In the window that pops up, you can review how many missions have already been completed, or how long before they are completed. In the next tab, you can view the number and the type of the available missions that you can dispatch your followers to. Also here, you can find information on the status of production in your buildings, e.g. the mine, the herb garden or a profession-specific building. Unfortunately, you can only view the status of the garrison here. To implement any changes, you need to go to the garrison yourself.
 It is a good idea to exchange reacting substances, for resources, as often as possible. Thanks to this, you will ensure yourself with a supply of items that you need for your profession.
You can order the specific items to be crafted at the majority of buildings. It allows you to exchange the items of low usefulness for the ones that you need for crafting.
To issue a work order you need to go to the NPC in the specific building and pay him the specific number of reacting substances, by pressing the "Start Work Order" button.
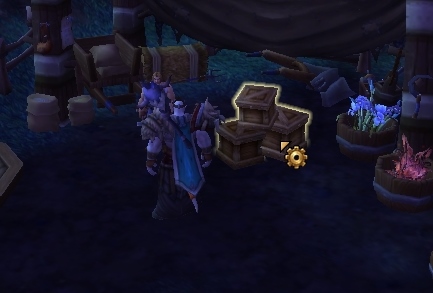
One Work Orders takes 4 hours to be completed. As soon as it is completed, you need to see that NPC again but, this time, you need to click on the highlighted chests next to him. In the window that pops up, you see all of the items crafted by your subordinates.
In a tier one building, you can issue 7 work orders a day. At tier two, you can issue 14 such orders, and 21 at tier three. Each one of them requires 4 hours to be completed. Therefore, after you issue 21 work orders, you can stay out of the garrison, or even out of the game, for the next 3 days. If, to all that, the upgraded Storehouse is added, the number of work orders is increased by another 15 so, this means additional 2 days. The process of crafting can be speeded up by some of the followers that you can assign to a given building. Usufollower, they double the production speed.
First of all, it should be noted that it is the suggested way, in which to put up the individual buildings in your garrison. Everyone can, or even should learn about the functions of the individual buildings and pick the most useful ones, by themselves. The purpose of this section is only to suggest certain actions.
First of all you should focus on upgrading your town hall to tier three, as soon as possible. Therefore, you should save up on your resources, so that you have 2000 resources for upgrading the town hall, after you reach level 100.
Your first small building
The first building that you erect should be related to your profession. If, however, you know already that you will not be performing the profession that often, I recommend that you build the Enchanter's Study. Thanks to this building, you will be able to dump the items that you do not need and sell the resources that you obtain this way. This will provide you with quite an amount of gold and, at the beginning of the game, you will be receiving quite a few items.
Your first big building
There is only one good choice in this case - Barracks. At this stage, there is not much point in building any other building. The barracks provide you with an option to recruit followers and to dispatch them on missions. This will provide you with little gold, but it makes your garrison accept new followers and start resembling an actual city.
Your second small building
The next small building may be another structure related to your profession but, it is a good idea to wait until you reach level 96 and only then, build the Salvage Yard, thanks to which you will be able to obtain better gear.
Your first medium-sized building
Your first medium-sized building should be the Lumber Mill, thanks to which you can chop down trees, which can then be turned into building resources. There is nothing that you would need more, at the beginning, than the resources for the expansion of your fortress.
Further development
After you upgrade the town hall to tier three, you gain additional building lands. Your choice of buildings should reflect, in the first place, your preferences. If you want to focus on your followers, you can build the Inn/tavern and the Dwarven Bunker. If you want to obtain additional mounts, invest in the stables. If you want to focus on the PvP, you should consider building an arena and a workshop.
You may face a situation, in which you want to raze a building down to the ground. Unfortunately, this is not an option but, you can replace the building in question, with another building. Simply, drag another building into the place of the one that you do not need anymore.
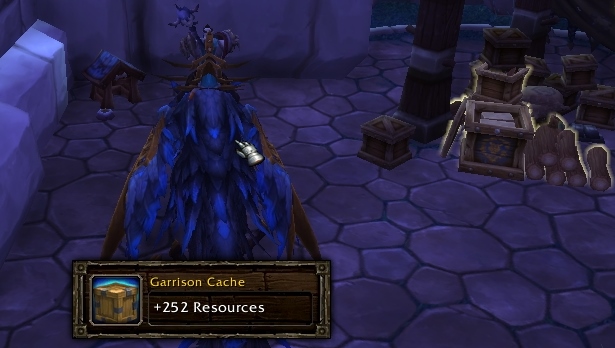 Remember to empty the chests next to the town hall. It is a small, but stable source of income.
During the development of your garrison, you will suffer a constant shortage of supplies. Below, you can see the suggested ways of obtaining them:
The garrison itself generates resources, the only thing that you need to do is collect them. Next to the town hall, there is a chest where you can claim the generated supplies. Your garrison produces 6 resources an hour so, daily it makes 144. Te crate can hold up to 500 resources so, it is important to empty it once per three days, at least.
Dispatch your followers on missions. Some of the missions available for your followers are rewarded with supplies for your garrison. While calculating your income, remember that the act of dispatching your follower on a mission, in itself, costs a small amount of supplies.
Chop down trees. As one of the buildings, you can choose the Lumber Mill. It allows you to chop down trees and exchange it for resources for your garrison. Each 10 units of lumber can be exchanged for 20 units of supplies. At first, you will only be able to perform 7 exchanges at a time. By upgrading your garrison, you can increase this number considerably. After you upgrade the Lumber Mill to tier three, you will be able to issue 21 exchange orders a day. If, in addition to that, you build the Storehouse at tier three, you will be able to perform additional 15 exchanges. Therefore, you will be able to exchange lumber 36 times a day and obtain 720 resources.
 Even in your garrison, there are several inconspicuous bags (they resemble stones) with supplies inside.
Get HandyNotes. HandyNotes is an add-on, which shows you, on the map, all of the secret stashes of items, or supplies. It is surprising, how many of such stashes can be found around Draenor. In your garrison itself, there are several of them. Each chest may hold 10, up to 50 supplies. Without this mod, they are difficult to find, but the app makes it easier and faster to find them.
You can also obtain supplies in all the locations in Draenor. In Gorgronda there are lots of hidden places, where you can obtain supplies. If, in your outpost, you build, e.g. the Lumber Yard, you receive the Mechashredder, which is capable of cutting through bushes with supplies behind. In the Spires of Arak location, after you select the Smuggling Run for your outpost, you can summon a trader with supplies for sale.
Dwarven Bunker / War Mill - This is where your army stashes its gear. It also helps you obtain new gear.
Tier one - It doubles the chance of upgrading the item that you have obtained, to rare or legendary. In other words, after you obtain an item, the chances that its level is higher, than you originally assumed, are better.
Tier two - It allows you to pick armor elements from the orcs that you have defeated. You can exchange these elements for new ones The entire set costs 410 armor elements. In total, you can obtain up to 4 armor sets. Each one is related to one armor thickness and it is exclusive to a specific orc clan in Draenor:
Cloth: Shadowmoon clan
Leather: Thunderlord clan
Mail: Warsong
Plate: Blackrock
Tier three - Provides you with one free Seal of tempered fat, per week. It allows you to raise the level of the items that you obtain during raids.
However, to upgrade the building to tier three, you need to obtain blueprints. You receive them after you obtain the Filling the Ranks achievement, i.e. raise the level of, at least, 20 followers, to 100.
Barracks - This is where all of your followers stay. By erecting this building, you get the option to recruit them and dispatch them on missions. The second most important building in the garrison, with the town hall the most important.
Tier one - Allows you to recruit and dispatch your followers on missions.
Tier two - Allows you to take one follower with you, as a back up in battle. He may be a healer, a tank or an attacker. However, the condition is that the follower has the Bodyguard ability.
Tier three - Increases the limit of followers by 5.
To upgrade the barracks to tier three, you need to progress to level 100 and obtain the Patrolling Draenor achievement, i.e. have your followers complete 50 patrolling missions
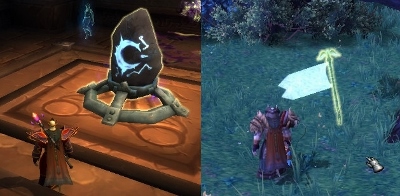
Mage Tower / Spirit Lodge - It allows you to create teleports to the individual parts of Draenor, in your garrison. However, to do that, you are going to need 25 Ogre Waystone, which you obtain from each ogre that you kill in Draenor. Thanks to this, you will gain access to the Ogre Waygate. As soon as you do that, you will find an open portal after you return. You can close the portal shut, by paying 10 stones. Then, you are able to open a portal in a different location.
Tier one - It allows you to collect Waystone from the Ogres, and open your first Ogre Wayportal in the garrison.
Tier two - Allows you to open two portals at any time.
Tier three - Raises the number of possible active portals to three.
To upgrade Mage Tower / Spirit Lodge to tier three, you need the blueprints. You can obtain them by obtaining the Finding Your Waystones achievement, i.e. collect a total of 500 Ogre Waystones.
Stables - It allows you to capture and raise mounts. One of the more interesting buildings and it is a god idea to have one. After you have unlocked all of the available mounts, you can simply raze it to the ground, without losing the mounts.
Tier one - Allows you to capture and train special mounts.
Tier two - Allows you to interact with objects, while still mounted on a mount. You do not need to get off the mount, e.g. to activate something. Active only around Draenor.
Tier three - Raises the speed of mounts by 20%. Just like above, active only around Draenor.
To upgrade the stables to tier three, you need the blueprints. You can buy them, provided your character is at level 100 and you have obtained the Master of Mounts achievement, i.e. trained all of the 6 mounts available in the stables, to the highest level.
Gnomish Gearworks / Goblin Workshop - The engineer in this building is going to supply you with his inventions, every day. You will then be able to use them in the battlefield.
Tier one - Unlocks the engineer that is going to supply you with his inventions every day.
Tier two - Provides you with access to 5 more inventions.
Tier three - Allows you to build a large siege engine.
To be able to buy the tier three blueprints, you need to obtain the Terrific Technology achievement, i.e. to use each invention a specific number of times. In the case of various inventions, it is 5-20 times.
The list of the inventions that you can get from the Workshop (the first four are available at tier one, and there rest of them, at tier two), is as follows:
Barn - allows you to capture creatures in Draenor and "process" them into leather, meat and such.
Tier one - Allows you to capture creatures, such as wolf, clefthoof, elekk and talbuk. Thanks to them, you obtain leather and fur. It is especially useful for the players that engage themselves into leatherworking and Tailoring.
Tier two - It allows you to capture and process boars and riverbeasts. Thanks to the meat that you obtain from them, you can cook the best food in the game.
Tier three - allows you to capture elite creatures that you can then process into Savage blood, used to craft powerful weapons and armor.
To upgrade the barn to tier 3, you need to buy appropriate blueprints that becomes available only after you obtain the Master Trapper achievement, i.e. after you process 125 creatures.
Lunarfall Inn / Frostwolf Tavern - hanks to this building, you can complete tens of new quests and recruit new allies.
Tier one - Each day, in your tavern, there appears one of the heroes of the World of Draenor and offer you a special quest.
Tier two - Each week, you can pick one ally for your garrison, from among three offered to you. It is worth adding that you will be able to pick one feature that your new ally should have.
Tier three - You gain access to highly profitable Treasure Hunter missions.
To be able to upgrade the inn to tier three, you need to unlock the Stay Awhile and Listen achievement, i.e. complete 20 quests tasked to you by the inn guests.
Lumber Mill - Thanks to the mill, you are able to chop down trees and obtain supplies for your garrison faster. After you chop down trees, you obtain Timber, which you can then exchange for supplies. You can order the exchange in the mill. The possible exchange orders to be performed at any given moment is 7, for tier 1.
Tier one - Allows you to chop down small trees.
Tier two - Allows you to chop down medium trees
Tier three - Allows you to chop down big trees.
You can upgrade the lumbering mill to tier 3 only if you buy special plans. They are available only after you obtain the Upgrading the Mill achievement, i.e. after you order 75 exchanges of timber for supplies for your garrison and complete several quests connected with the mill.
Gladiator's Sanctum - This building provides you with several abilities that become useful, while you are exploring the world and during combat. The most important, however, is the option to unlock a series of achievements to obtain and new quests.
Tier one - Speeds up health regeneration in open zones and allows you to collect bones from defeated opponents (this is true for the PvP duels), which are used to obtain one of the achievements.
Tier two - Unlocks Nemesis quests, and decreases damage taken from falls from heights. Also, it allows you to breathe underwater.
Tier three - Provides you with access to tournaments in Highmaul Coliseum and, if your health drops below 35%, it reduces damage taken by a half.
You can upgrade the Sanctum to tier 3 after you obtain The Bone Collector achievement, i.e. after you collect the bones of 4000 defeated opponents.
Trading Post - Thanks to this building, you can conduct trade with the factions of Dreanor. You can buy, e.g. crafting materials and other goods. Unfortunately, for your purchases, you pay with the supplies needed for garrison expansion.
Tier one - Allows you to exchange supplies for meat, plants and other basic items.
Tier two - At the Trading Post, you can access auction house and conduct trade with one additional faction.
Tier three - You receive 20% reputation more. It is effective on all characters on the same account.
To obtain plans for tier 3, you need to obtain the Savage Friends achievement, i.e. obtain high level of reputation with, at least, 3 factions of Draenor.
Alchemy Lab - This building is useful for Alchemy. Thanks to it you can obtain new reacting substances that speed up the process of brewing new potions. If, however, you do not have the profession of Alchemy, you can brew weaker potions at the building.
You obtain reacting substances after you issue an appropriate order at the Alchemy Lab. Issuing an order costs you 5 Frostweed and thanks to this, you obtain 1 Alchemical Catalyst. Also, you stand a chance of obtaining the Sorcerous Fire or Sorcerous Water.
Tier one - allows you to brew potions and issue orders to exchange reacting substances for supplies. At any given moment, you can issue 7 such orders.
Tier two - You can assign an ally to the building, thanks to which you obtain several potions a day. The number of orders that can be issued increases to 14.
Tier three - Raises the number of orders to 21.
To upgrade the Alchemy Lab to tier three, you need to obtain the Working More Orders achievement, i.e. have your buildings complete 250 work orders.
Enchanter's Study - It allows you to generate additional items that you can use, e.g. for Enchanting and allows you to disenchant (put items apart into basic elements), regardless of your professions.
You can order production after you leave 5 Draenic Dust in the building. You then obtain 1 Fractured Temporal Crystal and a chance of obtaining Sorcerous Fire or Sorcerous Air.
Tier one - It allows you to order production and for disenchanting of items. The number of orders is 7.
Tier two - You can assign one of your allies to the building, who provides you with the option to Transmogrify items. The number of orders rises to 14.
Tier three - The number of production orders, at a given moment, rises to 21.
To unlock tier three blueprints, just like in the previous case, you need to obtain the Working More Orders achievement, which requires your buildings to complete a total of 250 work orders.
Engineering Works - This building allows you to obtain new items required for the Engineering profession, and also allows you to build some of the gadgets, without the necessity to own it.
For a work order, you need to pay 2 True Iron Ore and 2 Blackrock Ore. After some time, you will obtain 1 Gearspring Parts. You can also obtain Sorcerous Fire or Sorcerous Air.
Tier one - It allows you to issue a production order, as well as to have people without the engineering profession, create some items, e.g. you will be able to craft a level 630 shotgun. The number of work orders is 7.
Tier two - It increases the number of work orders to 14, and also it allows you to assign an ally to the building. Among others, he will sell you a mailbox, which you can carry around, or the item that allows you to access the bank from any location.
Tier three - It increases the limit of work orders to 21.
To upgrade the building to tier three, you need to meet the same requirements as in the previous cases. You need to obtain the Working More Orders achievement and build the building plans for 1000 gold.

Gem Boutique - It allows you to generate items for Jewelcrafting, and also to use the weaker jewelry, without the necessity to have the profession.
You issue the work order, when you have 5 Blackrock Ore. With the production complete, you obtain 1 Taladite Crystal and a chance of obtaining Sorcerous Earth or Sorcerous Air.
Tier one - It allows you to craft jewelry and issue 7 work orders.
Tier two - The number of work orders rises to 14, and you also receive an option to assign one of the allies to the building. This provides you with the option to complete quests, for which you are rewarded with valuable items.
Tier three - The number of work orders rises to 21.
The upgrading requirements for tier three Gem Boutique are the same as in the case of the previous buildings.
Salvage Yard - It allows you to process items that are completely useless, into ones that you will gladly use. After you complete the mission, you can obtain Crate of Salvage, where you can find something useful.
Tier one - It allows you to salvage from the Crate of Salvage mission.
Tier two - it increases the possibility of receiving Salvage from the mission, and it unlocks the possibility of obtaining items for your allies.
Tier three - You can receive a Big Crate of Salvage, in which you find armor elements that cannot be obtained in any other way.
To upgrade the Salvage Yard to tier three, you need to obtain the Salvaging Pays Off achievement, for which you need to open 100 crates of salvage.
Scribe's Quarters - This building enables you to develop the Inscription profession at a higher rate and also, you will craft new items.
To issue a work order, you need to spend 2 Cerulean Pigment, in return for which you obtain War Paints, as well as a chance for Sorcerous Water or Sorcerous Earth.
Tier one - It allows you to craft items and issue work orders. The limit of work orders is 7.
Tier two - The limit of orders rises to 14. It allows you to assign one of your allies to the building, which allows you to erect a building that teaches you a random recipe, or can be sold at a profit.
Tier three - Increases the limit of simultaneous orders to 21.
Just like in the case of all the buildings connected with professions, you need to obtain the Working More Orders achievement to be able to upgrade this building to tier three.
Storehouse - It allows you to access the bank freely, and also affects the rest of your buildings in a positive way.
Tier one - You can access the bank, where you can deposit the items that you are not using at the moment. Additionally, it increases the number of orders, in each building by 5, For example, instead of 7 orders, you can issue 12.
Tier two - It allows you to access the guild bank.
Tier three - Increases the number of work orders in all buildings, by 15. This provides you with additional item (Void Storage)
To unlock the plans for the storage tier there, you need to obtain the Got My Mind On My Draenor Money achievement, where you need to collect 10,000 gold in Draenor. The counter is shared by all of the characters created on an account.
Tailoring Emporium - Thanks to this building, you raise your Tailoring at a faster rate. If you do not have this profession, you will be able to craft the majority of items anyways. Still, the most interesting feature is that you can craft a flying carpet that you can later use as your mount.
At the building, you can order the production of items for your profession but, you need to pay 5 Sumptuous Fur. After some time, you receive 1 Hexweave Cloth in return, and a chance of obtaining Sorcerous Water or Sorcerous Air.
Tier one - It allows you to craft items and issue production orders. The limit of work orders is 7.
Tier two - At any moment, you can issue up to 14 work orders. You also can assign an ally to the building, thanks to which you can craft items that will be helpful in battle.
Tier three - The limit of work orders rises to 21.
To upgrade the Tailoring Emporium to tier three you need to obtain the Working More Orders achievement.
The Forge - This building is especially useful for characters with the Blacksmithing profession.
You can issue a work order with 5 True Iron Ore. Thanks to this, you will obtain 1 Truesteel Ingot and a chance of obtaining Sorcerous Fire or Sorcerous Earth.
Tier one - It allows you to buy recipes, craft items and issue 7 work orders.
Tier two - Increases the limit of orders to 14. It allows you to assign an ally to the building, which provides you with an additional bonus; e.g. you can activate an ability, thanks to which your gear becomes indestructible for the next 4 hours.
Tier three - Increases the limit of orders to 21.
To upgrade the forge to tier three, you need to meet the same requirements as in the case of the other profession-bound buildings.
The Tannery - This last one of the buildings presented here is connected with Leatherworking.
To issue an order, you need to have 5 Raw Beast Hide, for which you receive 1 Burnished Leather and a chance of obtaining Sorcerous Earth or Sorcerous Water.
Tier one - It provides you with the option to craft items, buy recipes and issue work orders. The limit of the orders is 7.
Tier two - At any moment, you can issue up to 14 orders. You can assign one of your allies to the building, thanks to which you will be able to craft tents that temporarily boost your statistics.
Tier three - The limit of orders is raised to 21.
To upgrade the Tannery to tier three, you need to obtain the Working More Orders achievement, i.e. complete a total of 250 work orders (all around the garrison and not in this particular building).
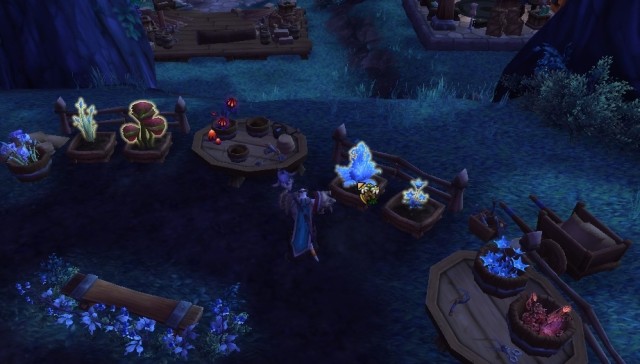 Sometimes, while picking herbs, you can be surprised by more than the amount that you have picked.
Apart from the buildings within the limits of your garrison, you can also find other buildings outside of it, which you can also use and develop. These buildings are connected with all sorts of mining/picking professions, from mining, through herbs picking, through fishing. These activities, however, are not connected with any of the professions that you have selected. For example, without the Mining ability, you cannot mine for ore scattered all around the continent, whereas you can do that thanks to your mine.
Fishing Shack - It provides you with everything that you might need while leveling up your fishing profession. To build it, you need to complete several simple quests first. Also, this building allows you to obtain an unique mount.
Tier one - In the waters in the vicinity of your garrison, you are able to catch small fish. Also, you receive one quest every day.
Tier two - you can fish for medium-sized fish around the garrison.
Tier three - You can fish for big fish around the garrison. Additionally, you get a chance of catching an unique fish that can be used in the form of a bait for mysterious animals, which you can fish for on the coast of the continent.
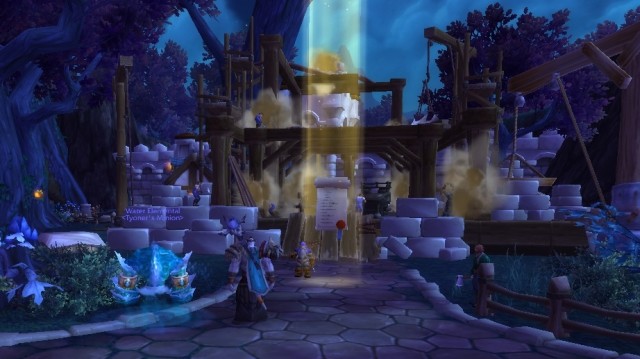
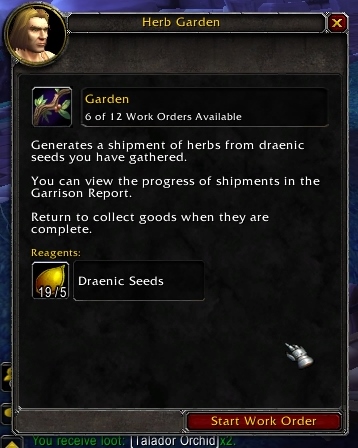
Herb Garden - This building provides you with your daily share of fresh herbs, which you can then use for brewing potions, or sell to traders.
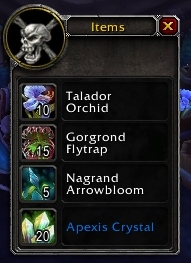
Additionally, in each flower, you can find 1-3 Draenic Seeds. For every 5 seeds, you can issue a work order in the building, thanks to which you obtain more herbs and apexis crystals.
Sometimes, out of the herb that you pick, there jumps a Disturbed Podling. After you kill him, he drops more herbs than you would obtain from a regular harvest.
Tier one - It allows you to pick herbs and exchange the seeds that you obtain, for work orders. The limit of work orders is 7.
Tier two - You can assign one of your allies to the building, thanks to which you can decide which herbs you want to plant. It also increases the number of herbs that you harvest. At any given moment, you can issue 14 work orders.
Tier three - In the garden, there appears a special tree, whose fruit ensures you with temporary boost to statistics. The limit of orders rises to 21.
To upgrade the herb garden to tier three, you need to obtain the Draenic Seed Collector achievement, i.e. to harvest a total of 500 seeds from your plants.
Pet Menagerie - It is a special building for your pets.
Tier one - Your building attracts elite opponents that you can fight, using your pets. Additionally, there will be, up to, five of your pets in the building.
Tier two - Increases your chances of catching new pets, and raises the number of pets in the garrison to 10.
Tier three - It unlocks daily quests that require you to defeat opponents with pets, thanks to which you obtain unique items.
Mine - It ensures your garrison with a constant income of resources. It is especially useful to the players with the Blacksmithing profession.
While mining in the mine, from each rock, you can obtain 1-3 Draenic Stone. Each 5 stones can be exchanged for a work order, which provides you with more ore and apexis crystals.
Tier one - It allows you to mine for stone and for iron ore. At a given moment, you can issue 7 work orders.
Tier two - It allows you to assign one of your allies to the mine, thanks to which mining carts appear in the mine, Additionally, you gain access to one more mining shaft, which increases the amount of ore that you obtain. The limit of work orders increases to 14.
Tier three - It opens additional tunnels in the mine. Additionally, it starts being patrolled by your guards that will eliminate the pesky Gorens. At the same time, you will gain the option to issue 21 exchanges of Draenic Stones to resources.
To upgrade the mine to tier three, you need to obtain the Draenic Stone Collector achievement, i.e. obtain 500 Draenic Stone from the mine.
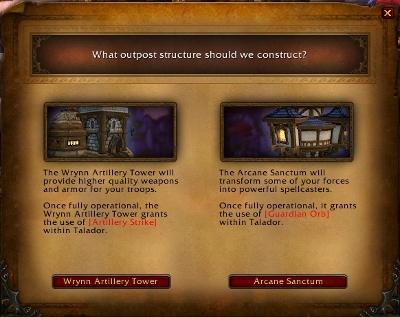
 You can put up an outpost in every major location, which then performs the role of a field base.
You can put up buildings also outside of the garrison. In the majority of lands that you are going to visit, you can set an Outpost. Most often, this is going to require you to complete several quests, which leads you to a small base set up by your followers. The quests are easy and they are difficult to miss.
One of your next tasks is going to be to build a special building in your outpost. You will always be able to pick one out of the two available ones. Each of the buildings provides you with certain profits and often, also an extra follower in your garrison. Before you pick your building, you should first consider the profits that you are going to gain, because your choice should depend not only on your preferences, but also on your playing style.
Once you pick the building, the ability that it ensures will be added to your quick bar. You can only use this ability only in the location, where the building is located. For example, if you currently are in Gorgrond you can use the ability that you have obtained from the building put up there. If, however, you leave Gorgrond and travel, e.g. to Talador, that ability is replaced, in your quick bar, with the one available in this area.
Apart from the abilities, the outposts profit you in different ways also. In there, you can find traders, where you can sell or repair your gear. Often, it is in outposts that you receive new quests. Also, you can find the commander's desk here, where you accept reports from your followers and dispatch them on missions. Therefore, you do not need to return to the garrison each time, to manage the followers.
 Selection of the building that you erect in the outpost is one of the more important decisions
Below, you can find the list of all the locations, where you can put up a building, as well as the buildings that can be built there. It is accompanied with descriptions of the profits that these provide (the names of the structures may be slightly different, depending on your alliance):
Sparring Arena
![It allows you to use [Champions Honor], thanks to which, the champion of the arena fights with you for a minutes - Outposts - The garrison - World of Warcraft: Warlords of Draenor - Game Guide and Walkthrough](https://game.lhg100.com/Article/UploadFiles/201512/2015121717460259.jpg)
It allows you to use [Champion's Honor], thanks to which, the champion of the arena fights with you for a minutes. After the time elapses, you receive a buff to your statistics, for 5 minutes. The potency of the buff depends on how many opponents you manage to kill within that minute.
Lumber Yard
![Thanks to this building, you receive [Summon Mechashredder 5000], thanks to which you summon a huge robot that you can control for a minutes - Outposts - The garrison - World of Warcraft: Warlords of Draenor - Game Guide and Walkthrough](https://game.lhg100.com/Article/UploadFiles/201512/2015121717460235.jpg)
Thanks to this building, you receive [Summon Mechashredder 5000], thanks to which you summon a huge robot that you can control for a minutes. The robot ensures huge firepower, which makes it perfect against bosses (you need to be careful, though, because using the Shredder in some battles, terminates them).
Additionally, thanks to it, you will be able to obtain resources for the garrison, by cutting through creepers. You can use the Mechashredder every 10 minutes, for the duration of one minute.
Arcane Sanctum
![Thanks to this building, you will be able to use the [Guardian Orb] - Outposts - The garrison - World of Warcraft: Warlords of Draenor - Game Guide and Walkthrough](https://game.lhg100.com/Article/UploadFiles/201512/2015121717460372.jpg)
Thanks to this building, you will be able to use the [Guardian Orb]. It summons an orb of energy that deals around 9-14k damage to your opponents. The orb flats around the battlefield for 30 seconds. The reload time is 5 minutes.
Arsenal
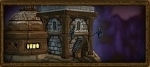
Thanks to the arsenal, you can summon artillery fire, around Talador. You summon it with the [Artillery Strike].
There are up to three charges available, at any moment, which regenerate after, around 3 minutes and 20 seconds. Each charge consists of three fireballs that deal AoE damage. One fireball deals between 25 and 38 thousand damage so, it is easy to calculate that you can deals more than 300k damage with all three strikes. Even though the artillery fire comes from the sky, you can use it both in buildings and underground.
Smuggling Run
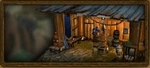
Thanks to this building, you can summon a trader that sells very interesting items.
Brewery
![After you choose this building, you gain access to [Home Away from Home], which allows you to teleport to your outpost - Outposts - The garrison - World of Warcraft: Warlords of Draenor - Game Guide and Walkthrough](https://game.lhg100.com/Article/UploadFiles/201512/2015121717460592.jpg)
After you choose this building, you gain access to [Home Away from Home], which allows you to teleport to your outpost. The ability becomes useful, if you are in the need of a tactical retreat from the battlefield. Still, it is not used too often.
Tankworks
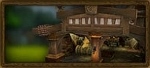
Thanks to this building, you can summon the Telaari Siege Engine or the Wor'var Demolisher, depending on the alliance. It is a huge tank armed with rockets and a flame thrower and deals tremendous damage. You can summon it every ten minutes. It is worth noting that the usage time is unlimited, for as long as you retain your health. It is very useful, if you want to kill, e.g. lots of enemies that are spread apart. Usually, one flame thrower burst is enough to eliminate the enemy. You can collect items from the corpses of the enemies without getting out of the vehicle.
Corral
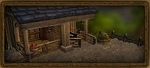
This building ensures you with what most of the players of the World of Warcraft dream about, i.e. the ability to collect items without the necessity to get off the mount. You receive the ability to summon the Telaari Talbuk or the Frostwolf War Wolf mounts, thanks to which you can fight without losing the speed that they ensure. However, it should be noted that they are available in Nagrand only.
The most recent expansion to the World of Warcraft introduces dozens of heroes into the game, who can be recruited. These are AI-controlled characters but, to a limited extend, you can issue orders. Each one has a name, a backstory, race, class, and special abilities. The majority of the followers progress in experience, just like you do, they may be at levels between 90 and 100, i.e. it is the same as in your case. They also gain experience by completing missions and, as soon as they gain enough of it, they progress to the next level. With time, they can also obtain new abilities, which come in handy during missions, and which make them more versatile. After a follower reaches level 100, you can give him gear that bolsters his power even more.
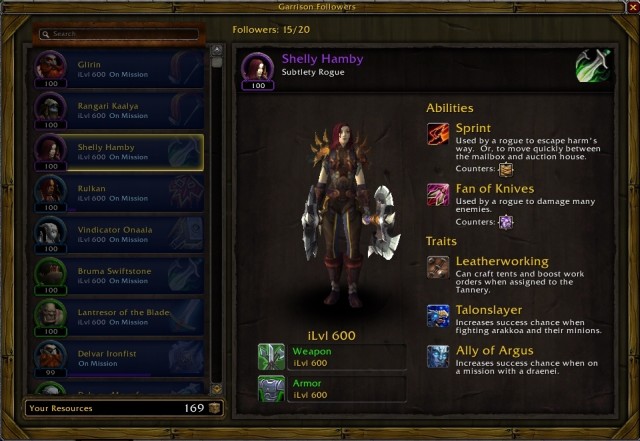 As you can see, it is best to dispatch this follower in the party from Daenea, against Arakkoa. She can also be assigned to one of your buildings.
It is worthwhile to have a closer look at the abilities of your followers. The most important category is "abilities". We will take a closer look at "Traits" later on.
The abilities determine which attacks can be countered by your follower, which is tightly connected with the missions that you dispatch him on. It is a good idea to focus now on what the missions look like. Each mission is to dispatch between one and three followers against one, or several opponents. Each of the opponents has one, or several, special abilities, e.g. Danger zones. What you need to do is dispatch the follower that has the ability to counter such attacks. Usually, one attack can be countered by several different abilities of your followers. In the case of the Danger Zones, the ones in question are e.g. Sprint or Heroic Leap. Fortunately, in the followers selection menu, you learn which of the characters have the required ability. Things get much more difficult later into the game, when you, e.g. want to complete 8 missions, but you do not know how to distribute the followers, to tip the scales over to your side.
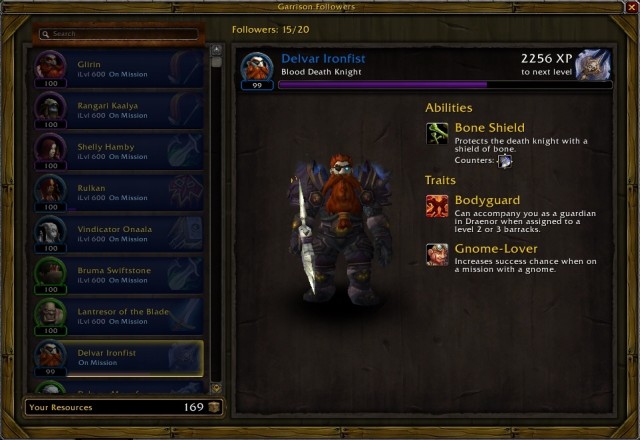 This follower has the Bodyguard ability, thanks to which he can accompany you throughout the game.
The situation is even more complex, if you want to learn about the traits of your followers. To make things easier, I have put them into three categories:
The first one is the divisions into the followers with and without the Bodyguard ability. What does make it so important? It determines if a follower can accompany you, while completing the quests in Draenor, i.e. if they can aid you in combat. To use this ability, you first need to upgrade the Barracks to tier two. The function of the follower, in the party, may vary, depending on his class. He may be a tank, a healer or an assault. In each of the cases, however, he is much needed help.
The second group are the traits connected with professions. Some of your followers may have abilities such as Blacksmithing, Tailoring or any other, directly connected with a profession. Such followers can be assigned to individual buildings, whose main functions are connected with that profession. You receive the option to assign a follower to a building after you upgrade that building to tier two. If, e.g. one of your followers has Mining, you can assign him to the garrison mine, which additionally profits you. You need to remember though that the assigned followers cannot be dispatched on missions.
The third group of traits are the ones connected with profits to mission success. Thanks to some of them, your follower is more proficient at killing a specific type of enemies. Thanks to other traits, you receive a bonus after you dispatch the follower on a jungle mission, whereas there is a completely other trait to determine interracial relations. If you dispatch, on a mission, a dwarf with the Gnome-Lover trait, and a Gnome you receive an increased chance of the mission's success. In truth, however, such traits and factors are so plentiful that they are, probably, impossible to grasp. Additionally, their effect on the chance of success of the mission is so low that waste a dozen-or-so minutes to assemble the entire party.
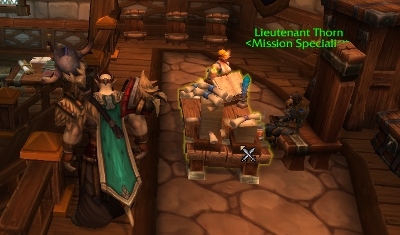 Your main working place is in the town hall and, unfortunately, it is always busy.
The place, where you can receive reports on missions and dispatch followers on new ones is, the commander's desk. It is in your garrison, in the main room of the town hall. You can also access tables at the outposts in the other locations around Draenor. Usually, you can find them in a building.
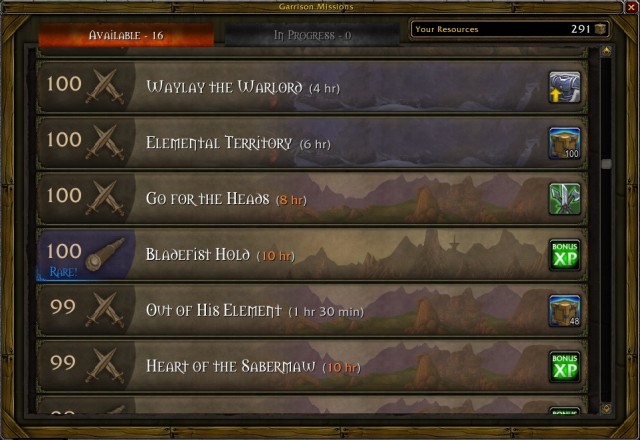 In the first plate, assign followers to the missions marked as Rare! The reward for completing them is usually higher than in the case of a regular mission.
After you right-click on the commander's desk, you access the follower management window. First, reports of the finished battles display. Then, you are presented with the tab showing the available missions. Usually, there are several of them available. For completing each one, you receive certain profits and most often, this means additional experience for your followers, gold and resources, but you can also get missions that allow you to obtain gear for your character.
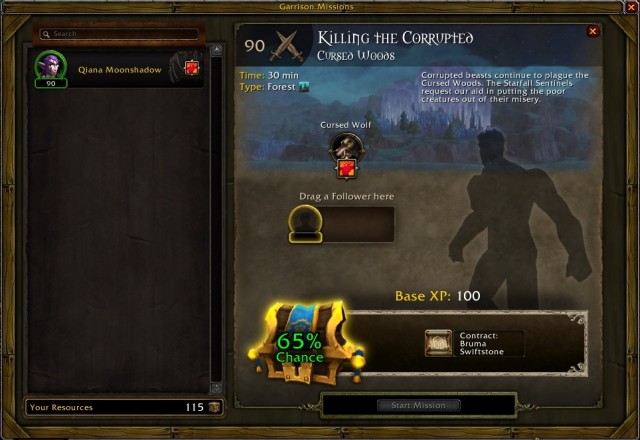 Selecting the follower for a given mission is mainly about comparing icons which, in the case of the above mission was immensely easy.
Clicking one of the missions takes you to the field, where you pick the follower that is capable of completing that mission. The most important thing is to check your opponent's ability. For the mission, you should choose the follower that has the ability to counter such an ability. In the case of some of the missions, you may have to dispatch, e.g. three followers, where each one can counter one of the opponent's abilities. It is a good idea to look up the percentage chance of completing the mission. It is best to dispatch the followers on mission, when the probability of success is 100%. In some cases, however, being able to counter all of the opponent's attacks amounts to, e.g. 70% probability of the mission's success. This means that the experience level of the followers is too low and it is better to consider, whether it is a better idea to dispatch them on some easier mission.
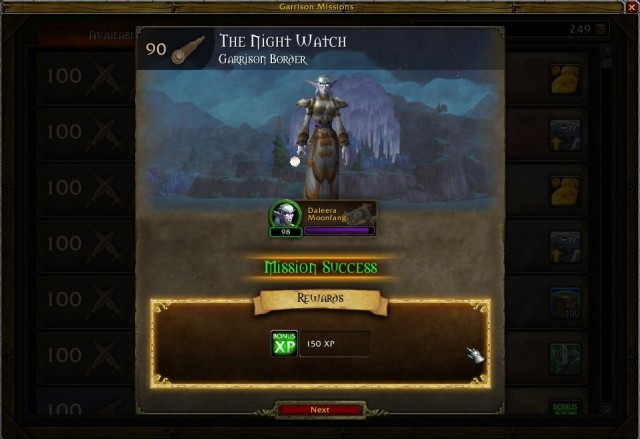
Missions vary in length. The shortest ones take 30 minutes to complete so, it is a good idea to start them right after you start the game, so you can claim your reward towards the end of the session. Some of them, however, are as long as 12 hours. Therefore, it is best to dispatch followers, on such missions, before you exit the game, or in the evening.
There are several ways to recruit new allies and some of them have been presented below:
Complete storyline missions. Lots of followers join you during the min storyline of the game, after you complete several quests for them.
Dispatch your followers on missions. At the beginning of the game, you only have one follower. A quick way to recruit more is to dispatch that follower on several patrol missions. Often, you are rewarded with new followers, for completing them. This way, you can gain several new heroes.
Build a tavern. Building a tier two inn/ tavern allows you to recruit a follower each week. After you enter, one of the NPCs provides you with an option to pick one out of three suggested ones. You should pick the one that you deem the most useful, whether due to the Bodyguard ability, or to his profession.
Explore the game world. While exploring the game world, you can sometimes encounter followers in need. After you complete several quests for them, you can convince them to join you. This way, you can obtain the most interesting followers. One of such is the huge Ogre who, after you help him kill the enemies, will gladly join you and will add to your garrison's strength.
Gain achievements and reputation with factions. Some of the followers are a reward for achievements, whereas the others join you if you have the appropriate reputation with a given faction.
Warlords of Draenor offers eight new dungeons, thanks to which you get to fight dozens of new bosses and explore the majority of the continent, by fighting in mines, stone fortresses or mountain peaks.
The best way to find a dungeon is to use the Dungeon Finder option in the Dungeons & Raids tab. After you use this option, the computer automatically finds the other players for the dungeons, thanks to which you waste no time over finding them.
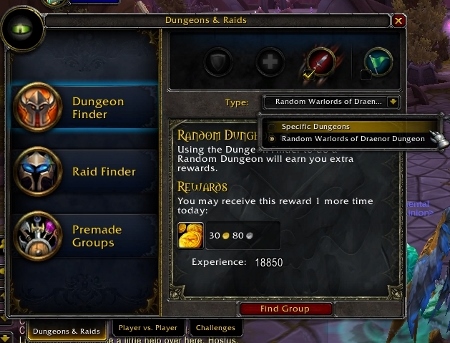 As you can see, using the search engine ensures you with lots of gold and experience, once a day.
In the Dungeons & Raids there are two options of selecting the dungeons that you want to play. By selecting Random Warlords of Draenor Dungeon the search engine finds players for each dungeon available to you. At the beginning of the game, it means a choice between, up to, two options but, after you reach level 100, you can access several, or more, options. The computer suggests those of the dungeons, for which finding the rest of the players is the fastest.
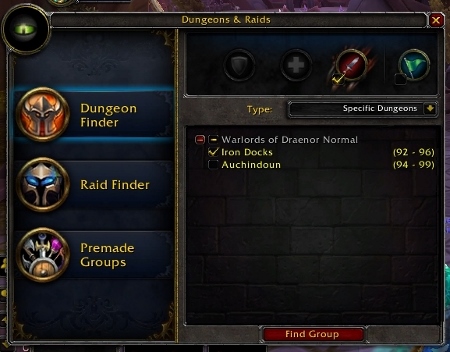
After you select Specific Dungeons, you can pick the individual instances that you want to take part in. You can, e.g. pick all of the dungeons, save one that you are already bored with, because you completed it several times already. In such a case, the game takes you into account for those of the dungeons that you have selected.
At the top of the window, there are 4 icons: shield, sword, cross and banner. The first three determine your function in the party. In the case of the mage, who I played as, the game highlighted the sword icon automatically so, my role in this dungeon was to deal as much damage as possible. The shield represents the tank, i.e. a player that attracts the enemies and takes on the majority of damage. The cross represents the healer, who is supposed to heal the rest of the party members. Some of the classes may pick, e.g. the Shaman function, who is responsible for both dealing damage and healing. All that depends on the level of development of your character. You can pick several options, but you are going to perform only one function, during the instance, anyways. The banner icon means that you already know the dungeon and you can lead the party across it, while giving advice on the individual opponents. This option is irrespective of your function in the battlefield.
As soon as you are ready, click Find Group. You will be queued automatically for the Dungeon. While waiting for your turn, you can come back to completing missions, or deal with something else. This does not matter. Still, you should remember not to offer the other players that you should form a party. This way, you will lose your place in the queue.
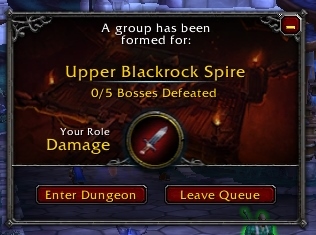
Waiting time depends, to a major extent, mainly on your function in the party. Definitely, characters that deal damage wait the longest, i.e. 20 to 30 minutes. You can find a party much faster if you are a healer or a tank, which usually is several minutes.
After the game finds your new party members, you will be presented with a suggestion of the dungeons and your role in the battlefield. You can click Enter Dungeon, which means your consent. If you click Leave Queue, the wait is all for nothing and you will have to queue up again.
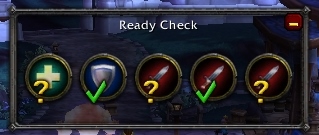
After you click Enter Dungeon, a window presenting the decisions of the rest of the players pops up. If there is a player that does not accept the choice, the entire party is disbanded. You do not need to worry, though, because you remain at the front of the queue anyways so, the waiting time, until you enter the dungeon, should be no longer than several seconds.
If all the party members accept the selection, you automatically get to the beginning of the selected instance.

Bloodmaul Slag Mines is the first dungeon available in the Warlords of Draenor. The recommended character level is 90-92, but you can also complete it at level 94. It is best that you did it as quickly as possible, because the dungeon becomes unavailable to you, after you progress to level 95, and you will be able to complete it only after you progress to level 100. During your journey, you will have to defeat 4 bosses. The items that the opponents may drop are at level 530, at the normal difficulty level, and 630, if you complete the dungeon at the Heroic level.
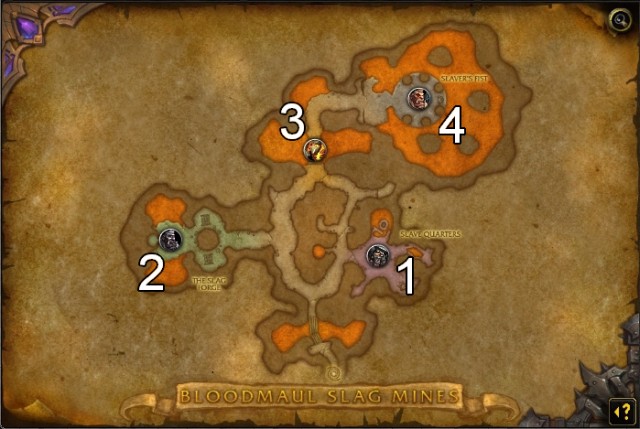
To the north of the Frostfire Ridge, ogres of the Bloodmaul clan opened a mine in the center of the volcanic caves complex. Slaves from all the Draenor are brought to the mine, where they are exploited to the brink of their abilities. The mine provides lots of various ores and precious stones but, the main purpose of the mine is, allegedly, unearthing a powerful artifact inside the volcano.
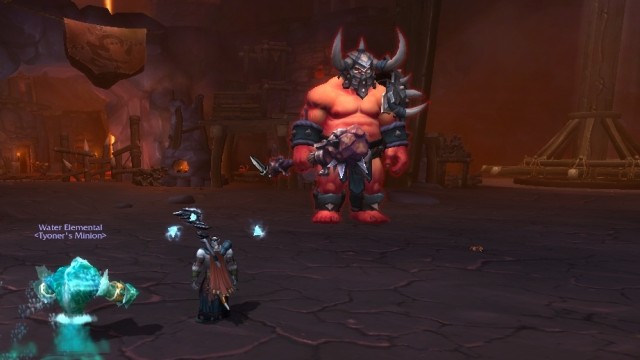
Your first opponent is the Slave Watcher Crushto. He is not too demanding and an opponent, for a good party but, you need to watch out for several things, during the battle. First of all, your tanks should keep the opponent away from the rest of the party. The majority of Crushto's attacks are focused on single targets. During the battle, you should watch out for [Earth Crush], in the random spot of the battlefield, there appears a huge stone spire which, apart from dealing massive AoE damage, immobilizes you for 2 seconds. Fortunately, this attack is signaled beforehand and you simply need to get off the line of attack. Another ability is [Wild Slam]. A shockwave pushes everyone away and deals, around 10k damage. This is often followed by [Crushing Leap], which is aimed at a random part member, who gets crushed and immobilized for 8 seconds.
The greatest responsibility, during this battle, rests on the shoulders of the tank and the healer, the DPS characters should focus on dealing massive damage to Crushto and on casting an AoE spell, occasionally, to kill the summoned miners. The healer should focus on healing the individual party members, especially the tank, and the character that suffered from [Crushing Leap]. If there is something that appears on the ground - steer clear of it as quickly as possible.
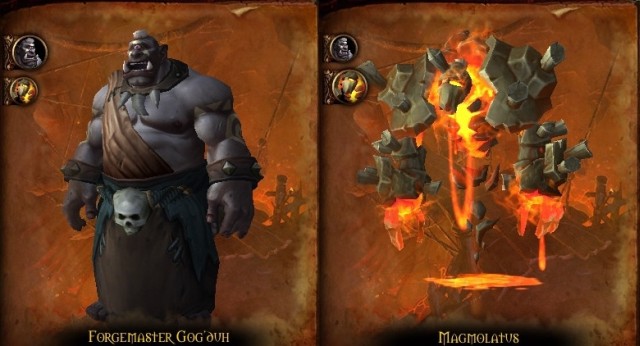
Before you get to your main opponent - Magmolatus, you need to fight your way through dozens of opponents and Gog'duh. Before you enter the forge itself, you will have to eliminate several groups of fire elementals. They are not too demanding opponents, provided that you deal with them in small groups. Players with weak armors should make sure that they do not get too close to the opponents, because they may die quickly.
As soon as you approach the forge itself, it turns out that your main opponent is being held captive by one of the ogres - Forgemaster Gog'duh. You will have to deal with him in the first place. While fighting, he mainly uses AoE spells and summons lots of fire and earth elementals. The attackers should be, predominantly, using AoE spells, the tanks should focus the attention of all the enemies and healer should be using healing spells, over the entire party. After the fight, you should have no problems defeating Gog'duh.
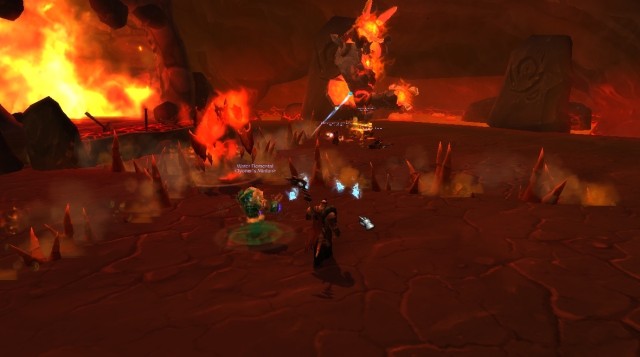 While fighting Magmolatus, watch out for the spikes from under the ground and firebolts.
At this point, your main opponent - Magmolatus breaks free. He summons smaller numbers of elementals, but you should kill them as quickly as possible, to prevent getting distracted by them, while avoiding the opponent's attacks. This battle is definitely more eventful. Magmolatus co occasionally throws [Magma Barrage], which is a huge magma projectile. On the ground, you will notice the circle that marks the area, where the projectile drops. Get away from there, as quickly as possible. His other AoE attack is [Shatter Earth], which takes on the form of a cross of spikes from the ground. Each time, it surfaces elsewhere so, you need to be careful. It does to deal too high damage, provided that you get away from there quickly.
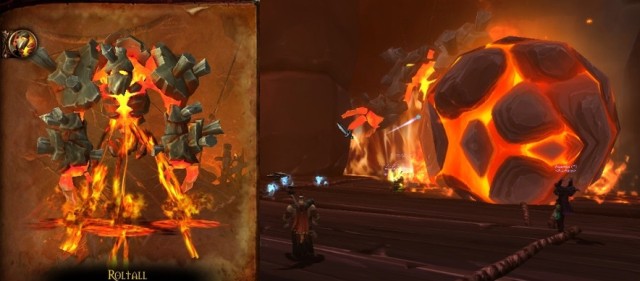 While fighting this boss, watch out for the three, large balls of magma.
After you defeat Magmolatus a bridge guarded by Roltall will open. He will be accompanied by several groups of ogres, who should be no challenge to you.
Roltall himself is very similar to the previous opponent and you can expect similar attacks. The only difference is the [Fiery Boulder]. It summons three large balls of magma that roll your way. If you are not careful enough, you can easily lose as much as 80k of health. If, however, you learn the attack, you can easily avoid the balls. First of all, always there only are three. As soon as you dodge all of them, you can approach Roltall. The trajectory of the balls is predetermined. One of them is always rolling on the left side of the bridge, one in the middle and one on the right. The only random thing is the order in which they appear so, the combination middle-left-right is a possibility. The best solution is to stand as far away from the opponent as possible, in the middle of the bridge's width, thanks to which you will have enough time to avoid the attack. The remaining part of the battle should not be a problem. One more hint: do not fall off the bridge or you will die.
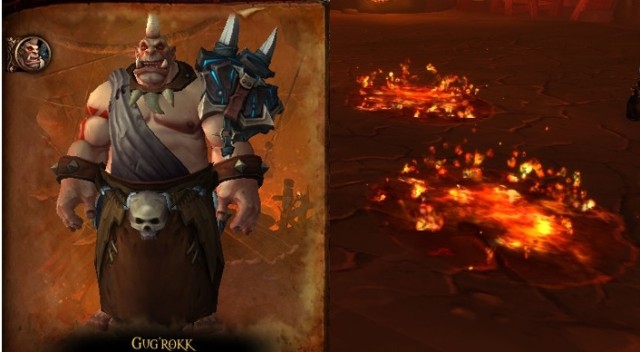 The indispensable element of the battle against Gug'rokk is maneuvering around the pools of magma.
After you cross the bridge and deal with several packs of ogres, you face the boss of the mine - Gug'Rokk. Before fighting him, you should deal with his guards, who form a protective ring. While fighting them, the boss should take no part in the fights, but just in case, it is best to stay away, as far as possible.
Fighting Gug'rokk is similar as in the case of the previous bosses, in many respects, but his attacks are stronger. First of all, you should watch your step, because a large portion of the battlefield is covered with magma and fire. The boss's only attack is [Magma Eruption], which forms a field of magma under each party member and they hold for 2 minutes. You need to step out of the pool, as quickly as possible, because each second costs you 10k health. The Healer should watch out for the [Molten Barrage], which deals around 12k damage to the party members. The final thing that you need to watch out for is the elementals that the boss summons occasionally - Unstable Slags, who head towards the furnace. You need to kill them before they get there, or the party starts taking around 8k damage every three seconds. To sum up, the key to victory is avoiding the pools of magma and fire, and elimination of the elementals before they reach the furnace.
The second dungeon that becomes available is the Iron Docks. It becomes available after you reach level 93. It is recommended that you complete it after you reach level 95, but it remains available up to level 97. Also in this case, you will have to defeat 4 bosses, thanks to which you can obtain gear at level 550 in the case of the normal difficulty level, and 630 in the case of the Heroic level.
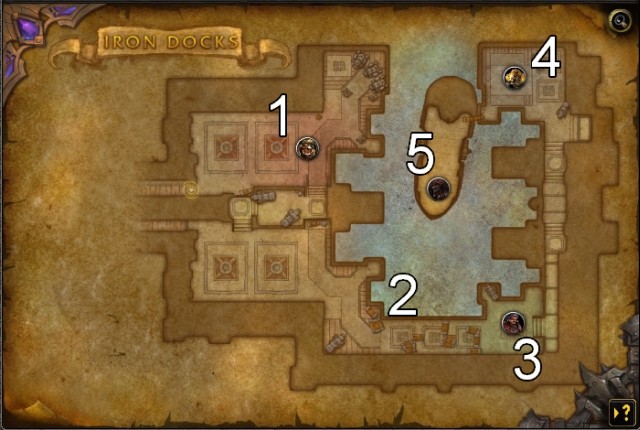
You get to the Northern coast of Gorgrond to the docks, which is central to the might of the Iron Horde. Here, you can find huge warships and artillery created at the Blackrock Foundry and prepared to be transported to the other parts of Draenor. Also, you can find here elite units of infantry that are prepared to join fights at any moment. Your task is to conduct a diversion behind the enemy lines and destroy, at least, a part of the enemy fleet.
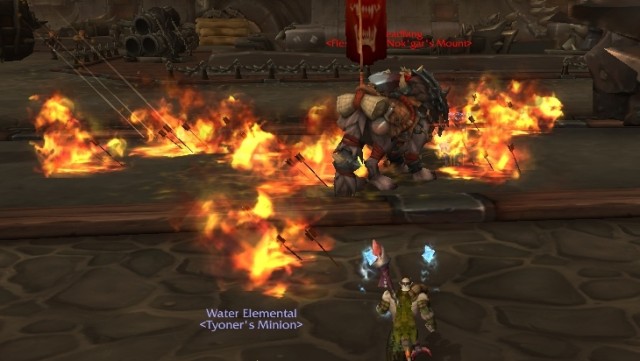 While fighting, you need to avoid the regular and the fire arrows.
After you defeat several bigger enemy units, you will face the first boss, i.e. Nok'gar. The battle itself can be divided into two stages. In the first one, you simply need to attack the opponent mounted on a wolf. The fight is not too complex, the tank should be taking on the damage, while the others are trying to harm the opponent.
Stage two starts after you kill the mount. You will face Nok'gar himself. In this case, you need to be more careful. First of all, he occasionally summons archers, who pepper you with fire arrows. As soon as you notice that he is using the [Burning Arrows], you need to change your positions or you will lose 7,500 health points per second of staying in the spot, where the arrows fell. The second ability that you should watch out for is [Reckless Provocation]. As soon as you notice that the ability is active, you should stop the attacks, because you will receive the "intimidation" effect if you don't, which stops your attacks anyway.
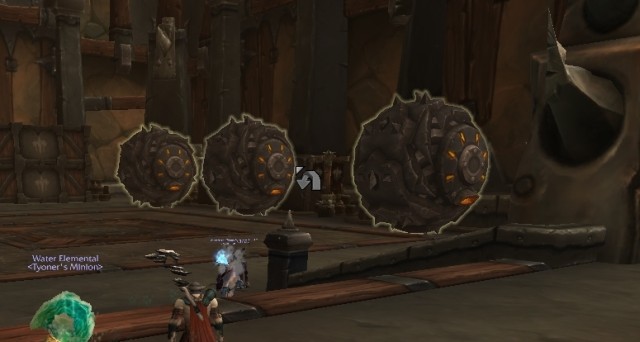 You will eliminate quite a few enemies , if you activate the Iron Stars.
After you defeat the first boss, you are up for a longer journey. After you kill several larger groups of opponents and enter a big open area, you notice three big balls at one of the walls - Iron Stars. You need to approach them and click the icon that symbolizes entering them. After a while, the balls are activated. You will be able to aim and the balls will roll ahead, to crush the opponents in your way. The rest of the way should be covered close to the right wall, so you keep the necessity to fight the enemy forces low.
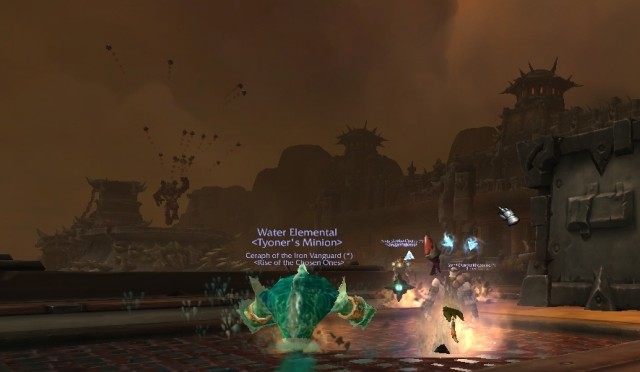 While walking along the quay, avoid the barrage and hide behind the containers.
After you approach the location, where there are containers from the nearby ship, the artillery barrage starts. It is the final boss - Skulloc. The arrangement of the containers allows you to take cover. During the barrage, you need to remain hidden behind one of the containers and, after it stops, dash towards the next cover. The situation takes place several times, before you finally face the next boss.
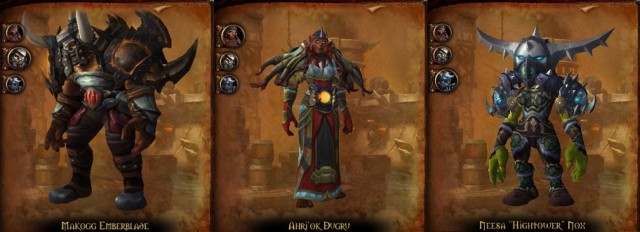 You are up for a fight against three opponents at the same time - the key is to eliminate them one after another.
You will face three opponents, of which none is too dangerous. Still, together they may kill you quickly. Each one has special abilities that you need to watch out for. The most important thing, however, is that you agree on the order, in which you eliminate the individual bosses. The entire party should focus on attacking one opponent only. The recommended order is Ahri'ok Dugru, Makogg Emberglade, Neesa Nox, due to their abilities. Ahri'ok has [Sanguine Sphere] which heals the threesome with 15% of health points. As soon as one of them is affected by the spell, you should not attack, because it is your attacks that heal the bosses. You also need to watch out for Neesa's ability. She spreads traps around a selected character which, after you step on them, immobilize the character. After a while, she throws in a bomb, into the circle of traps. This can damage you with as much as 21k. What you need to do is simply walk out of the circle, carefully, between two individual traps. In general, the fight should be not too much of a challenge, as long as the entire party is focused on one opponent.
After you cover a short distance, you face the next boss, who is not as easy to defeat as the previous ones. Of course, if you know his attacks, the battle is much easier.
The main attack that you should watch out for is [Time to Feed]. Oshir attacks a random party member, jumps onto him and deals massive damage for 20 seconds. There are few that can withstand this high damage and you usually die as a result. Still, there is a way to break the attack. First of all, Oshir breaks the attack, if he receives damage of 5% of his entire health bar. The attack can be landed by the character that is currently being "devoured". If possible, the devoured character should use a distracting spell, e.g. invisibility. The last hope of such a character is the healer who should focus his spells on the devoured one.
Occasionally, Oshir may dash towards one of the cages around the battlefield and unleash a groups of enemies. The most important thing, at this point, is to kill all the enemies, to prevent them from distracting you from Oshir.
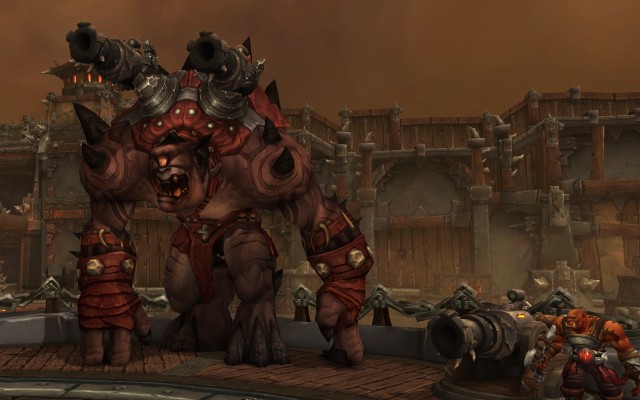 After you learn how to avoid Skulloc's attack, the rest of the battle is a piece of cake.
Your last opponent is Skulloc, who is surrounded by two weaker opponents - Koramar and Zaggosh. In the first place, you should deal with the former - Koramar, to the left of Skulloc. This makes the battle way easier. As for the other guard, you can ignore him and take to the boss.
Skulloc's main attack is [Cannon Barrage], which repels you to the very beginning of the ship and peppers you with projectiles that deal around 5k damage. The most important thing, after you are pushed away, is to take cover behind one of the containers. It is best to take the one on the left but, if you are late, by at least 2 seconds, you die probably. If you are not sure if you have enough time to hide, it is better to hide behind the container on the right and dash between the containers, between the individual attacks by Skulloc. After you reach the opponent, for some time, you will be able to attack him with no repercussions, up until the next [Cannon Barrage]. This attack may be landed several times, up until you deplete Skulloc's entire health. During one of the attempts, Skulloc suddenly disappeared, in the middle of the battle. You then need to backtrack to the beginning of the ship, with the entire party, and wait for him to reappear. Unfortunately, he appears with his health full, then.
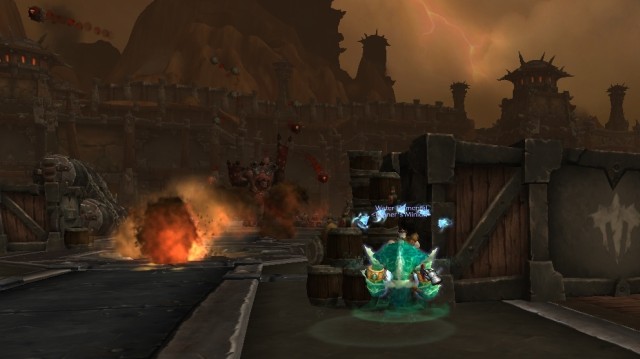 You should dash between covers between Skulloc's attacks.
As soon as you master swift dashing between the covers, killing Skulloc is only a formality.
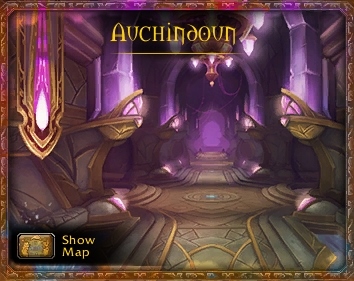
Your next destination is the holy Draenea Sanctuary. This location is meant for characters at levels 95-97. There are 4 challenging opponents to fight, after which you can obtain items at level 570 in the case of the normal difficulty mode, and 630 in the case of the Heroic difficulty level.
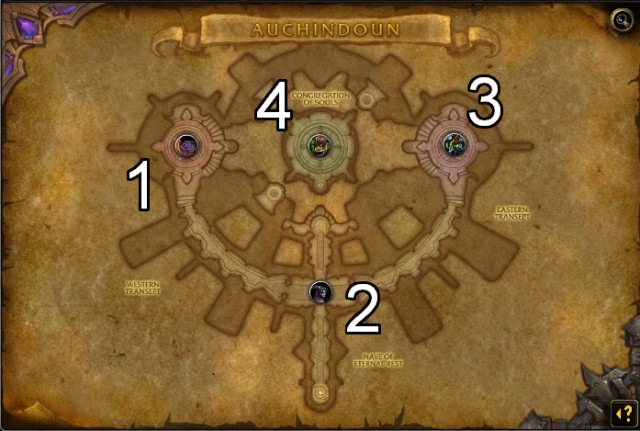
Auchindoun is in the very center of Talador. It is the holy place of all the Draenas, a sanctuary with the souls of all of the ancestors rested. It is these souls that are the reason for the Burning Legion, led by Teron'gor to have appeared.
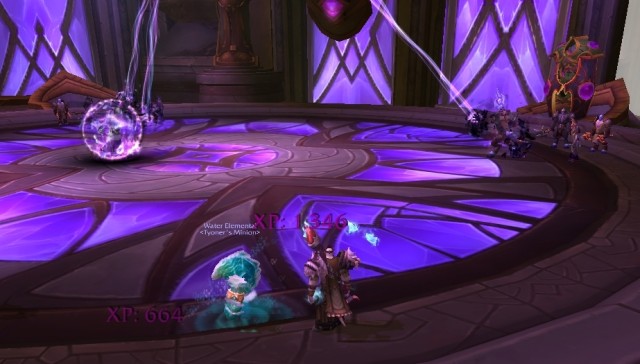 Before the boss battle, you need to defeat three groups of enemies.
After you enter thus dungeon, you should go left, at the intersection. You will reach the place, where you fight your first opponent. After you see the cutscene, you will have to eliminate three groups of enemies. Thanks to this, your main opponent will activate - Kaathar. He is both the most difficult and the easiest opponent in this dungeon. If you do not know how to react to his attacks, you can die within several seconds. If, however, you learn the functioning of the attacks, the battle should be no challenge to you.
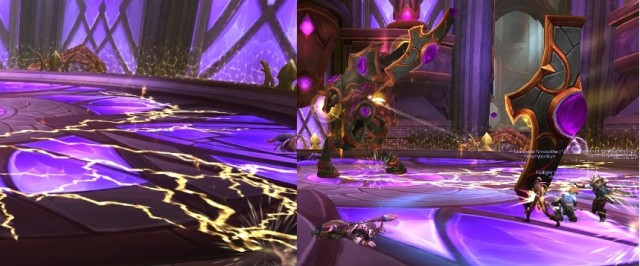 As soon as the shield appears in the battlefield, you should hide behind it.
Kaathar uses three main abilities. The first one is [Hallowed Ground], where the boss launches an orb of light towards you. After a while, the orb explodes and damages you for around 20k health. The best way to avoid taking damage is to walk some 10 meters away. The second ability is the [Sanctified Strike], which forms a series of cracks on the ground, and damages you if you step on them. The obvious defense against this attack is avoiding these cracks. The last, and the most lethal one is [Consecrated Light], where the boss forms several waves of light that deal damage to you. Fortunately, Kaathar throws his shield in your direction sufficiently early. To avoid taking damage, you need to hide behind it. If you fail to do this, you will, most probably, die within 3-4 seconds.
 Fighting Nyami should be much easier than fighting the previous boss.
The way back into the center of the complex is not going to be that easy. Along your path, you will have to deal with several groups of enemies. In the very center of Auchindoun you encounter Soulbinder Nyami. Fighting her does not require any special tactic but, there is a lot of things happening in the battlefield. You can expect lots of creatures summoned by the boss, which it is best to deal with, when they are still few in number. AoE attacks are perfect for this. As for special abilities, you need to watch out for [Arcane Bomb] and [Soul Vessel]. During the former, Nyami forms several orbs of energy that deal lots of damage if you touch them. [Soul Vessel] on the other hand, is an unique AoE attack. The area of its effect is very big but, in this case, the safest spot is in the very center. The entire party needs to gather in the center to avoid taking damage. Then, you scatter again.
After you defeat Nyami and reach the other end of the sanctuary, you will face Azzakel. There are two phases to this battle. The first one is direct fight with Azzakel, where you need to deal as much damage as possible. Your tank needs to be the most careful here, because it is him that [Fel Lash] is used on, and which pushes him away from the opponent. At the same time Azzakel may change targets and use [Curtain of Flame], which causes an explosion of fire and deals to you, and the party members, lots of damage.
After you have dealt enough damage, the battle enters phase 2, where Azzakel summons allies. You should not attack Azzakel himself, at this point, because he is invulnerable. You need to focus on eliminating the summoned opponents, one after another. The most difficult task here is that of the tank, who needs to attract the attention of all the creatures. Your priority in this case is to kill the Pyromaniac, then the Trickster. Felguard can be left for the end. After you have defeated all of the opponents, you fight Azzakel again. The entire cycle may occur several times, up until you kill the boss.

Now, you are going to fight the final opponent. Before that, however, you will see a short cutscene and fight three minibosses. I am not going to describe them here, because they are not too demanding and fighting them should be a mere formality. As soon as you deal with them, you will face Teron'gor.
Also in this case, the battle can be divided into two phases. The first one is inarguably easier, as long as Teron'gor has more than 75% health. He then uses simple spells available for Warlock. The most dangerous one, in this case, is [Rain of Fire], which summons a hail of fireballs that you should avoid.
As soon as his health drops below 75%, Teron'gor absorbs one of the souls of Draenea, which provides him with unique abilities. For each individual battle, they are random. Which ability he has absorbed becomes apparent by what he says to you. It may be: Demonology, Destruction and Affliction. Regardless of which ability he absorbs, he now wields new unique powers. You should especially watch out for AoE attacks and interrupt his attacks as often as possible, by casting, e.g. Counterspell.

Skyreach is the last dungeon meant for the leveling characters. You gain access to this dungeon after you reach level 97. Here, you are going to fight four new bosses, thanks to which you can obtain new hear. At the Normal difficulty level, the item level is 600, whereas at the Heroic level - 630.
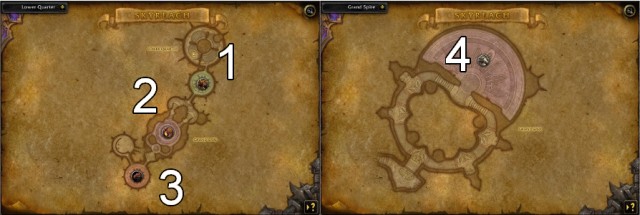
This time, you will be transferred to the Skyreach fortress. It is one of the most interesting dungeons, both when it comes to the feel of it and to the boss battles. Each one is going to require a slightly different tactic of you, as well as watching both yours and your party members' steps.
Your first task is to deal with several larger groups of monsters. You need to be careful here - if you attract too many enemies, you can die right at the very beginning of the dungeon. After you do full circle, you face Ranjit - the firs tactual boss.
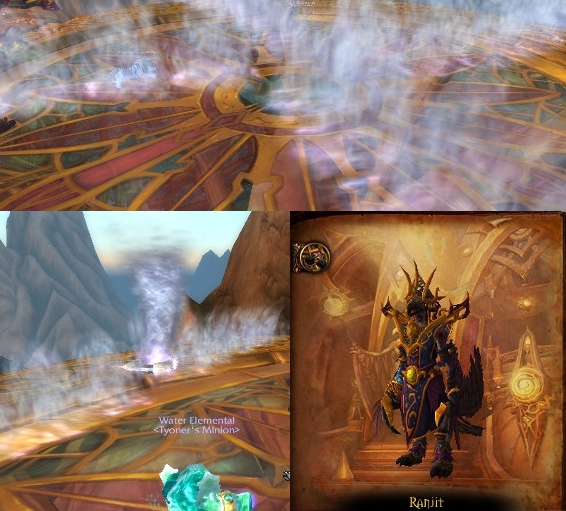 The key to survival is to move between the walls of wind nimbly
Ranjit mainly uses three main abilities that are not too dangerous, as long as you have learned them. The first one is [Piercing Rush]. While performing it, Ranjit picks one of the party members, faces him and prepares a quick attack, whose aim is to pierce the opponent. In such a situation, you need to get off the line of attack or you are severely battered. The remaining two abilities are similar to each other. [Windwall] forms a wall of wind that crosses the battlefield slowly. You need to avoid those, because staying within their reach may deal lots of damage. A much more dangerous ability is [Four Winds]. In the center of the arena, it forms a whirlwind with four walls of air spreading from it. The direction, in which the walls whirl, is random and entering into them ends in taking lots of damage. Fortunately, their whirling speed is low so, you should have no problems moving with them. So, as you can see, defeating the opponent is much dependent on avoiding his attacks - if you see what is going on and react fast enough, Ranjit should be no challenge to you. An the last thing to remember: do not fall off the platform that you fight on. There is nothing worse than an unnecessary death.
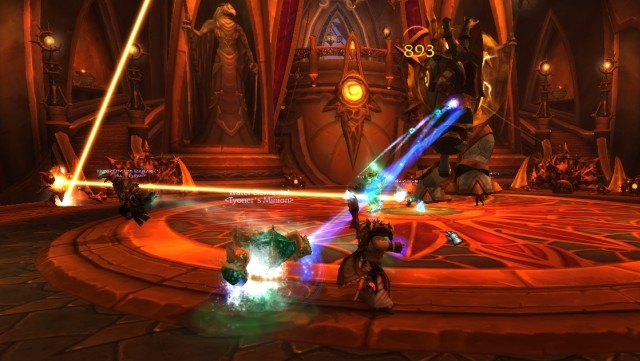 Most of the times, you should avoid the beams from the sky, in this case, it is the key to success.
Your second serious opponent is Araknath. The battle is quite easy and in it is mainly about launching your abilities quickly, to obtain as high damage per second (DPS) as possible. The only abilities of the opponents that you should watch out for, is [Smash] and [Burst]. [Smash] concentrates on your tanks and deals tremendous damage but, it is easy to avoid, if only you notice that Araknath is preparing the attack. As for the other ability, you cannot avoid it, it deals damage to all party members. So, as you can see, this opponent is a test of how well party members do, at what they do in the battlefield. The tank needs to lure the opponent away from the others, the healer needs to watch health of all the party members, and the rest should strive for the highest DPS possible. Occasionally, you may notice a beam of light from the sky, which then touches to Araknath. It is a healing beam (heals around 0.75% per second). To terminate the beam, you simply need to walk into it, to prevent the beam from reaching the opponent.
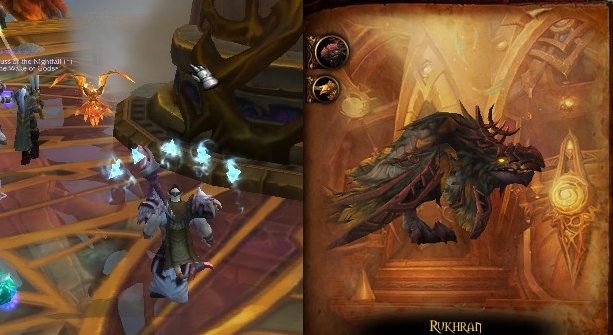 When Solar Flares appear in the battlefield, there are two things that you can do - kill them before they reach you or escape. In the long run, it is better to eliminate them.
The third boss is Rukhan. Before you fight him though, you need to clear the platform that he is on. You need to do this carefully, the individual groups of enemies should be eliminated one-by-one. Rukhan himself is an easy target, he is standing, or rather floating, above one spot and does not move too much. Unfortunately, you will have to attach lots of attention to this battle. During the fight, Rukhan uses [Summon Solar Flare], which summons a phoenix. The bird locks in on one party member and flies up to that character slowly. The most important thing here is to stop it. If the Solar Flare touches to you, the explosion deals around 80-90k damage. It is easy to figure out that it takes two birds only to die. This is why, it is immensely important for the entire party to work together, while killing the birds. Of course, you can escape, but you are then useless to the rest of the party. It is much better to eliminate the bird and return to Rukhan.
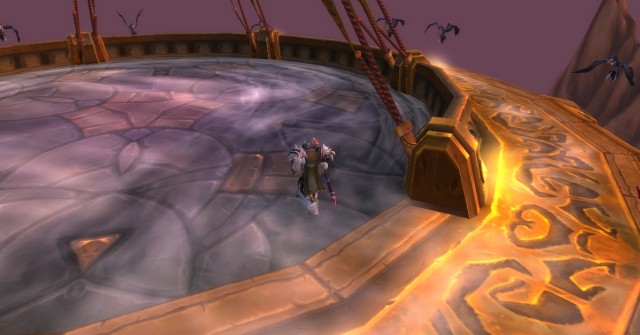 Try to walk at a certain distance away from the walls and do not try to take any shortcuts.
Before you reach your last opponent, you need to cross the "air tunnel". The most important thing is to keep in the middle of the route and on the roundabout in the middle of the route, take no shortcuts and walk around near the edge.
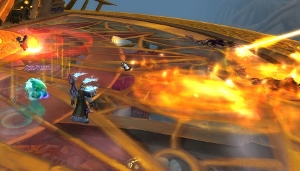
Eventually, your opponent - Viryx - is going to require, of you, attention and quick switching between targets during the battle. His strongest weapon is [Cast Down]. This ability summons to the battlefield the Solar Zealot, who attacks a random party member, lifts him above the ground and flies slowly towards the edge of the arena. At this point, every party member should focus on attacking that opponent. If the Solar Zealot reaches the edge of the platform, he drops the party member into the void, which results in death. Fortunately, a moment before that, you can see which one of the party members is the target of the attack, when a smudge of light appears above his head.
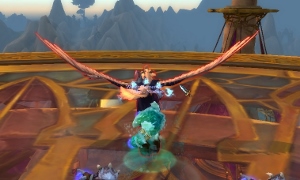
During the battle, Viryx may also summon the Skyreach Shield Construct, which ensures 50% protection against any attack. In such a case, it is better to destroy the Construct first, and focus on the main opponent later. You should also avoid the [Lens flare] that forms area, where you take damage. In this case, however, it is enough not to enter that area at all.
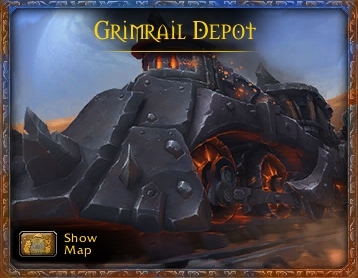
Grimrail Depot is one of the four dungeons available after you reach level 100. To gain access to the instance, you should have gear of the average level of, at least, 595. Here, you fight against three bosses, who drop gear at level 615.
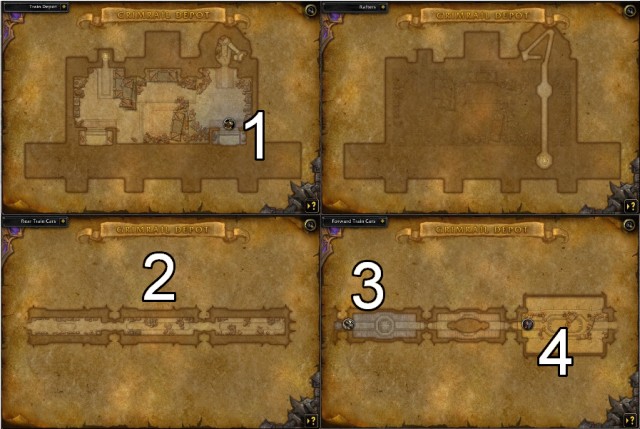
You start the dungeon at the handling station of the Iron Horde's railway, which is the transit knot for the supplies for all the units in the other parts of Draenor. Your task is to sabotage the and destroy the train that is pulling out of the station. It is worth noting here that you will be fighting on the speeding train so, expect beautiful sights.

After you get to the area of the instance, you will have to deal with several groups of guards that are not too strong. As you can probably seem there are Iron Stars to the sides (big, iron spiked balls). You need to make sure that the opponents that you encounter later on - Grimrail technicians - do not activate them. This may cause a commotion and damage to your party.
Before the fight with the first two opponents, you need to remember about one thing. You need to enter the arena as the entire party. If there is someone lagging behind, he will be separated from the rest with a gate and will not participate in the battle. This is not as harmful in the case of characters that deal ranged damage, but in the case of the tank, this may have grave consequences for the entire party.
There are two characters that make up this boss. The huge orc - Borka and a goblin with a rocket launcher. In the first place, you need to focus on the orc that deals direct damage to your tank and often charges in your direction. At the same time, you need to avoid the attacks of the smaller one. Unfortunately, not always is it an option,. Whenever Railmaster Rocketspark uses [X21-01A Missile Barrage], the number of launched rockets makes it difficult to avoid them. If, however, there is at least one considerate Healer on the party, you should suffer no shortage of health.
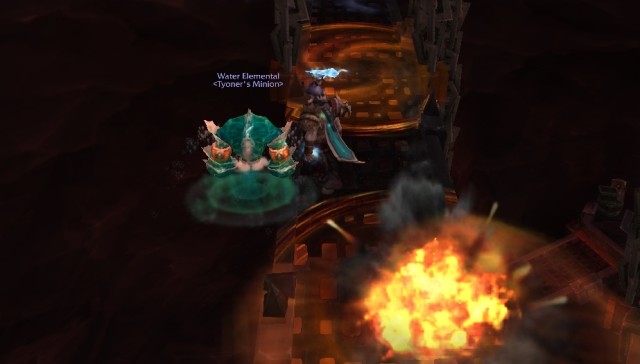 While climbing along the plank, watch out for the rockets.
After you kill Borka and Rocketspark, the grate in one of the walls opens. You need to wary while crossing it. At each level, there is an orc with a grenade launcher. You need to head up the stairs in the way that will allow you to avoid the explosions. After you defeat all of the opponents, you need to keep going ahead. After the entire party gets above the train, a cutscene will start, after which you get onto the train.
 The train is long and full of opponents so, fighting your way to the very front will take you some time.
Ahead of you, there are several railway cars, where you will have to face several opponents. You need to approach them with care and deal with each separately. While walking from one car to the next one, you will notice that the train is in motion and the landscape keeps changing.
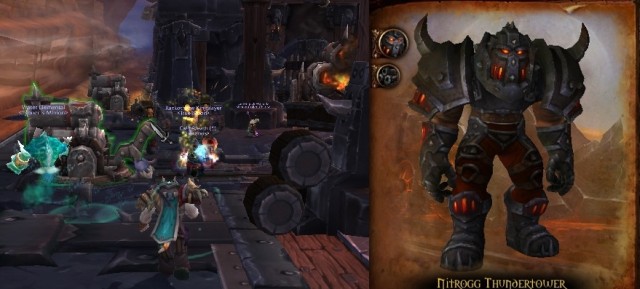 The key to victory is killing the orcs with barrels, lifting them and using the cannons to wound the opponent.
At the beginning of one of the cars, you encounter another opponent - Nitrogg. The first phase of the battle is the same, as in the case of any other opponent but, after you bring some of his health down, he "flies" over to the other end of the car and sits behind the controls of a huge cannon. He fires a salvo, which makes the sides of the car fall off, which forms quite an arena.
The course of the fight is quite specific. You do not attack Nitrogg directly, but with the cannons on the sides of the car. But, to be able to use the cannons, you first need to pick up an ammo barrel. The barrels are carried in by the orcs summoned by Nitrogg. As soon as you kill the orcs, one of the party members needs to lift a barrel, mount the cannon and aim it at Nitrogg and fire. Thanks to this, the opponent loses some of his health and dismounts the cannon for a moment. You can then deal as much damage as possible. You need to repeat this sequence several times, up until the boss's health drops to zero. Of course, all of this is made more difficult by the constant barrage by Nitrogg. If possible, you need to observe the situation and dodge from the projectiles. However, the priority is to deal with the incoming waves of opponents and seize the ammo barrels.
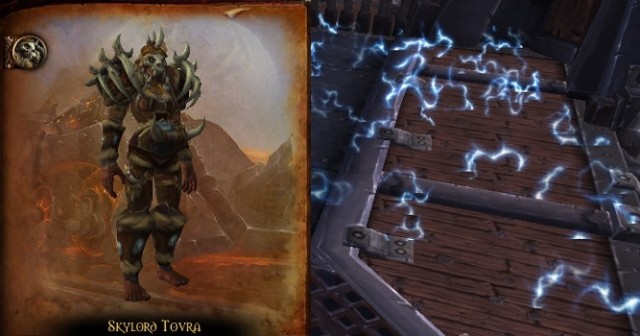 Later into the battle, virtually the entire car is covered with fields of electricity. Still you should be on the lookout for safe spots.
Before the final battle, you need to clear the last car of opponents. There are loads of them here so, the best idea is to use the AoE attacks and a good cooperation of the tank with the healer.
After you kill all of the opponents, Skylord Tovra will fly in, mounted on a two-headed wyvern. In itself, fighting this boss is easier than the previous one. You only need to deal as much damage as possible and avoid stepping on the fields with electrical discharges. It is worth noting here that not only Tovra causes the discharges, but also the wyvern, which keeps circling above your car and breathes blue fire that leaves the fields of energy on the ground. After you kill the opponent, a short cutscene, of the explosion of the train, will start you will get into a new location, where you can claim your reward.
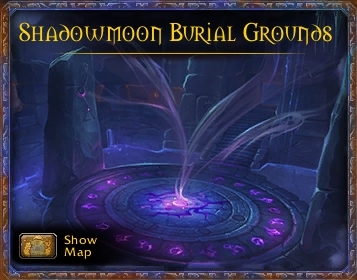
One of the most difficult dungeons, after you reach level 100, is the Shadowmoon Burial Grounds. What is challenging here is, first of all, the fights against the four main bosses. Each one requires knowledge of his attacks, of you, and of the way to react to them.
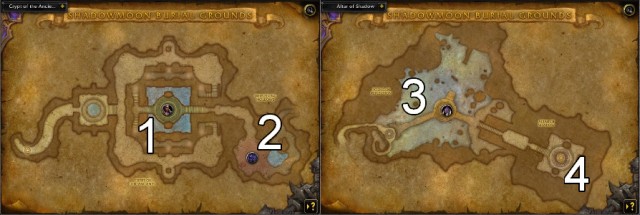
For the duration of this instance, you will be taken over to the underground catacombs of the Shadowmoon clan. It is a dark place full of magic and the ancestral souls. Currently, the catacombs are the site of the rites performed by Ner'zhul and his followers. Your task is to restore peace to this place and free the souls of the ancestors, from black magic.
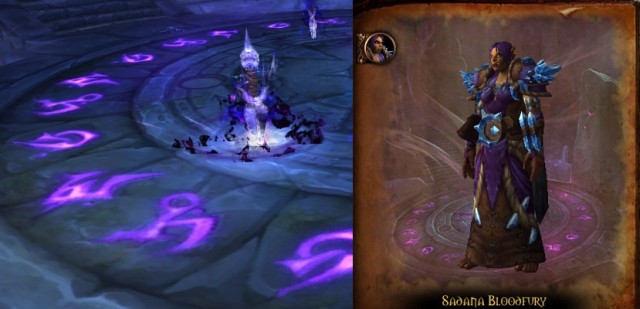 During the fight, you need to mind many things. It is important not to step on the glowing runes and stay away from the daggers.
After you defeat several groups of opponents, you fill enter a huge arena, in the center of which, there is your opponent - Sadana Bloodfury. You need to prepare for the battle, best by learning the types of attacks used by the enemy. Without this knowledge, the battle may be as short as several seconds, to your disadvantage, of course.
From where you stand, the most important ability is [Dark Communion], by which the boss summons the Defiled Spirit, which heads towards Sadana starting from the center of the arena. Your priority should be destroying those spirits. If one reaches its destination, Sadana regains quite a portion of his health and receives a temporary buff to damage, which may prove lethal to your tank.
There are a lot of things going on in the arena. First of all, there are two things to avoid. Firstly, Sadana uses [Daggerfall], which drives a large dagger into the ground. You need to keep clear of it, because it may cost you around 20k health a second, if you stay close to it. For the majority of time, there will be several such daggers in the battlefield so, it may prove difficult to avoid them. Secondly, under no circumstances, can you step on one of the glowing runes, arranged into a circle, on the ground. Such an action may cost you almost 80k health points, may proves lethal in the middle of the battle.
Occasionally, Sadana also attacks with [Dark Eclipse], which deals 100k damage to each of the players. You can protect yourself from that, however. Directly before the attack, the glowing circle of runes is activated. You then need to step on such a rune, thanks to which you receive [Lunar Purity], which decreases the damage you take, by 80%.
Sadana Bloodfury may be a difficult opponent, if you do not know what to avoid. At the same time, he is a sheer challenge to your healer, who constantly needs to control, not only the health of the tank, but of the entire party. Ninety percent of the time, it is him that of success depends on.
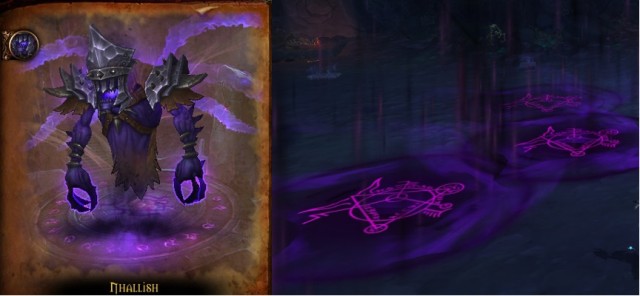 During the battle, avoid the appearing circles of runes.
Your next opponent is Nhallish. Himself, he should not be too much trouble to you. You need to watch out for two things, though. Firstly, avoid the symbols on the ground that deal lots of damage.
Occasionally, Nhallish uses the ability to possess your souls. You are then transferred to a different reality, where each player needs to defeat his own possessed soul. You need to do that within 20 seconds. It would be best if you managed to do that within that time, because you then receive a buff to attack and you heal 40% of your health. Fortunately, even if you fail, this will not have any negative effects.
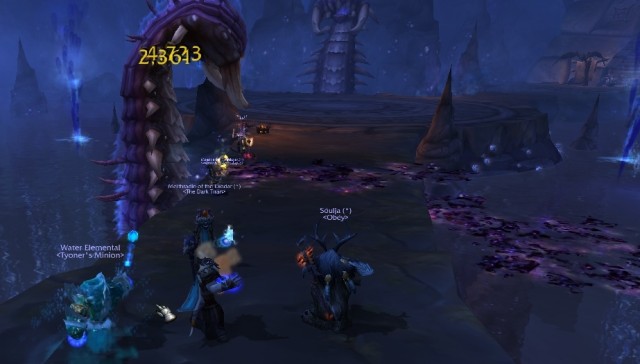 During the battle, you can clearly see where the next attack hits.
Your third opponent is in the arena across the bridge. However, to reach him, you will have to defeat two of his followers surfacing from under the water, first one the right side of the bridge, then on the left. They are not too demanding and the most important thing is to avoid being crushed. The attack is signaled with a black and violet stripe that shows you where the enemy will strike. You simply need to walk away to a safe distance.
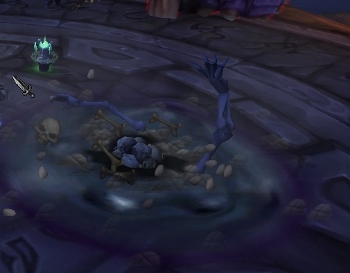
Your main opponent - Bonemaw - uses three main abilities. The simplest and the easiest to avoid is the body slam. It is identical with the attacks of the previous two opponents so, it is easy to avoid it.
The second, most frequent, attack is [Necrotic Pitch], which forms, in random spots, fields of hands that try to grab you. Staying within that fields slows you down considerably and deals 6k of damage a second. For the majority of the battle, you simply need to avoid these fields.
![As soon as you spot Bonemaw starting the attack [Inhale] you need to react. - Shadowmoon Burial Grounds - Dungeons - World of Warcraft: Warlords of Draenor - Game Guide and Walkthrough](https://game.lhg100.com/Article/UploadFiles/201512/2015121717463526.jpg) As soon as you spot Bonemaw starting the attack [Inhale] you need to react.
As soon as you spot Bonemaw starting the attack [Inhale] you need to react.The most dangerous of Bonemaw's attacks is [Inhale]. In this attack, he sucks you in, into his maw, and disposes you through the other end, as a result of which you land in water. While in the water, you need to reach the fountain, as quickly as possible, which takes you back into the battlefield. This attack does not deal too much damage, but it eliminates you from the battle for several tens of seconds.
There are two ways, in which you can avoid being sucked in. The easiest one is escaping to the other end of the arena. Unfortunately, it is possible only in the case of ranged characters and not always will you succeed, because there is quite a distance to cover. The other option is to use the fields formed by the [Necrotic Pitch]. The hands sticking out of the fields will effectively prevent you from being sucked in by Bonemaw. Unfortunately, you need to keep in mind that you will be taking some damage for several seconds.
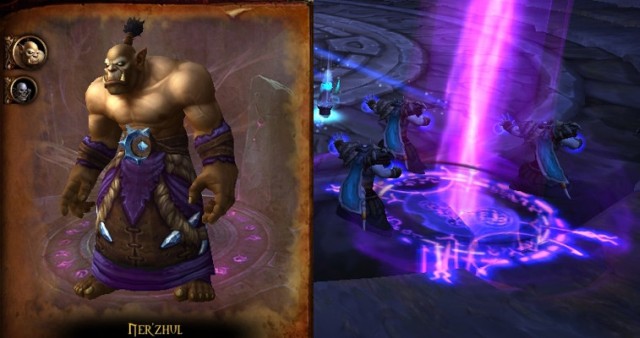
Now, you only need to fight the final battle against Ner'zhul. The battle itself is not too complicated, the opponent uses only three main abilities. Two of them are dangerous, but easy to avoid, whereas the third is lethal and impossible to avoid, if you are late with your reaction.
Ner'zhul's less dangerous attacks are [Omen of Death] and [Malevolence]. The former forms a circle in the battlefield, which deals serious damage if you do not walk away early enough. [Malevolece], on the other hand, is an AoE attack. Ner'zhul discharges dark energy that forms a triangle and, if you are caught within range, you take around 80k of damage. Fortunately, the attack is signaled beforehand and you can escape it.
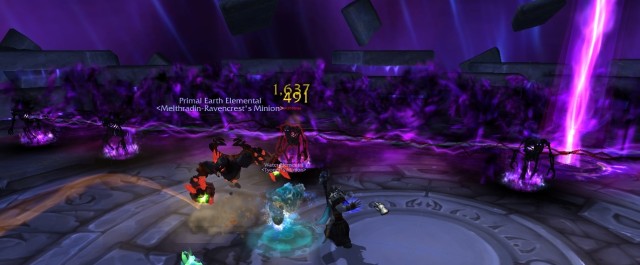 The chain of energy is Ner'zhul 's most dangerous attack.
The most dangerous attack is [Ritual of Bones]. It summons several skeletons to the other end of the arena. The skeletons are bound together with beams of energy. They start closing in on you and stop at the other end of the arena. You cannot touch neither to a skeleton, nor to the beam of energy, because this will result in around 110k damage that you take. Your task is to destroy one of the skeletons, which forms a gap in the energy beam. Destroying a skeleton is an absolute priority, you stand little chance of winning, because each of the players takes over 110k damage. It is best to agree on which skeleton you will be attacking, so that the each party focuses on one skeleton only. In my opinion, it is best to pick the skeleton in the middle and attack it as soon as it appears in the battlefield, without waiting for it to approach you. This forces you to watch your back at all times, to find out when the skeletons appear.

Everbloom is one of the most interesting, and the most difficult dungeons in Warlord of Draenor. It is meant for characters at level 100. You will have to fight five new bosses, four of which are necessary for the instance to be completed.
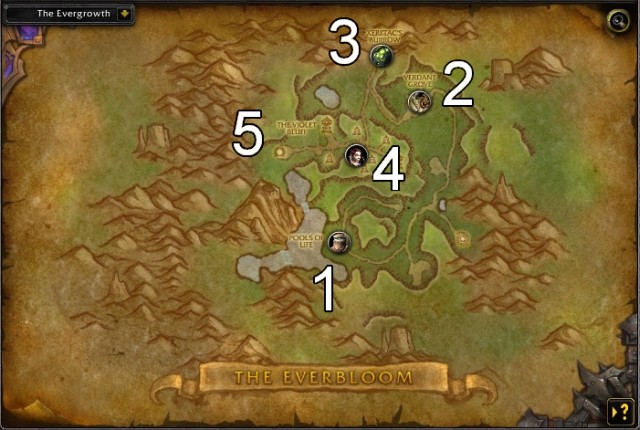
In this instance you travel to Everbloom - forest in the center of Gorgrond. It is one of the longest dungeons, whose completion takes around 30 minutes, although it is going to take you more time, the first time around. There are lots of opponents here, in-between the individual bosses. The majority of them cannot be navigated around and even if you think you managed to do so, you are attacked from behind, by surprise. Therefore, it would be better if you took your time and eliminated them all. The groups of monsters themselves are of considerable sizes so, the best ones to use here are AoE abilities.
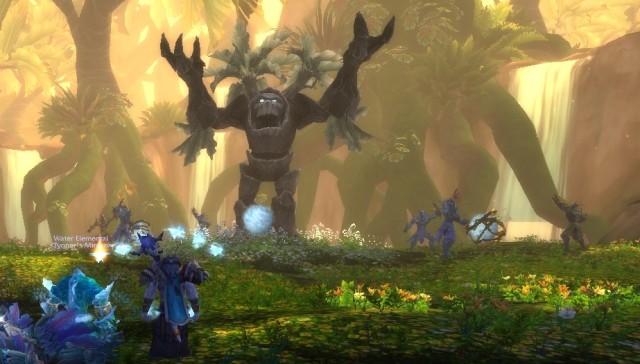 Before the boss battle itself, you need to kill three groups of enemies gathered around the orbs of water.
Your first opponent is the huge elemental. To activate him though, you need to get rid of the water orbs around. As soon as the last one touches to Witherbark, he suddenly comes to life. The first thing that you should watch out for is the creepers that appear from below the ground and deal considerable damage when you stand in them.
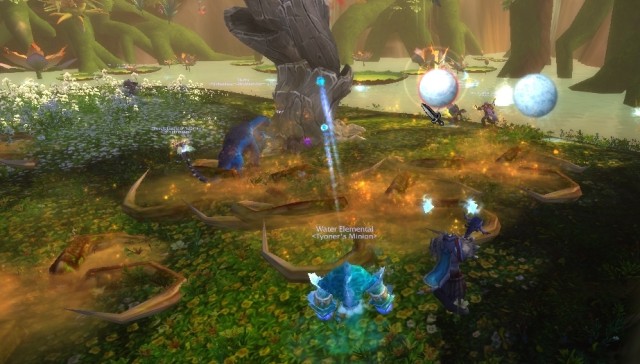 During the battle, avoid the creepers and destroy the water orbs heading towards Witherbark.
After some time, Witherbark starts using a different ability. From the nearby lake, water orbs will emerge and they will head towards the boss. You need to destroy them in the first place, before they reach Witherbark and restore some of his health points. If, one of the orbs comes above one of the creepers on the ground, the vine springs into a plant that attacks you. The battle itself is not too complicated, provided you remember about the above. First of all, you need to destroy the water orbs and then, the possible creations that grew from the creepers. In-between, attack the boss.
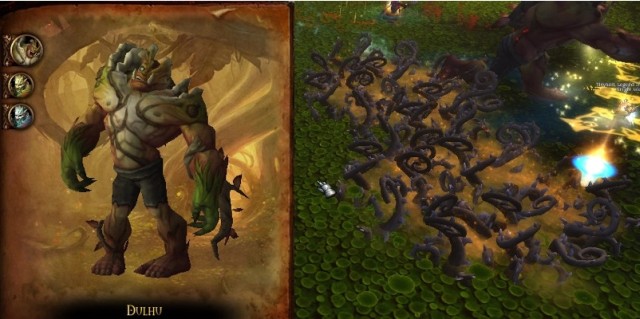
Your next opponents are three bosses - Dulhu and two smaller elementals. Each one uses different abilities. The most important piece of information, though, is that the blue elemental to the left of Dulhu is a healer so, he should be eliminated in the first place. Apart from focusing the entire attack on the boss, you should also interrupt some of his spells. He often uses [Revitalizing Waters], which restores 15% of maximum health to the threesome and this is the ability that you should be interrupting. Ads your next target, you should pick the next elemental and deal with Dulhu at the very end.
The next thing that you should watch out for is [Bramble Patch]. These are the creepers that spring from below the ground. Not only do they deal 15k damage per second, but also slow you down by a half. The battle itself, however, should be much easier after you deal with the blue elemental. If you remember the order in which to kill the enemies and avoid the creepers, the battle should not last too long.
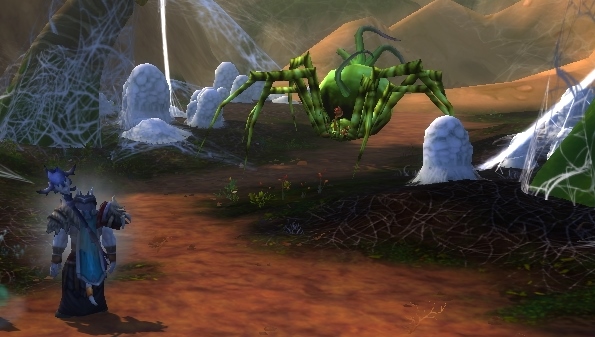 The huge spider is not another boss, but rather a guardian of the gate.
This opponent is not required to complete this instance. Still, it is worthwhile trying to kill him, because he is not too difficult. Before the entrance to the cave, you will notice a huge spider with masks on the abdomen. It is not another boss, but a guardian of the gate. His health level is not too high so, it is only going to take a while to kill him.
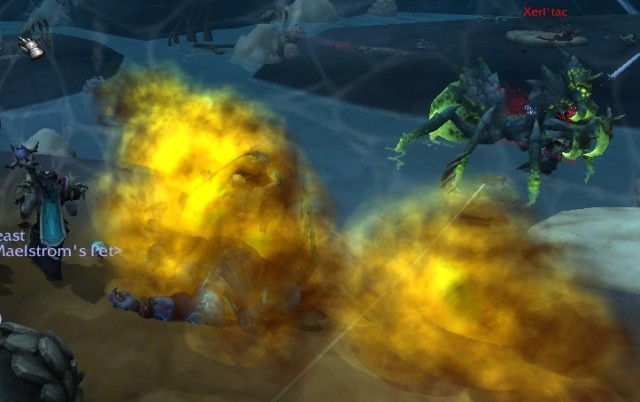 The most important thing during the battle is killing orcs that Xeri'tac preys on.
Your main opponent is Xeri'tac, who is hanging below the ceiling, in the first phase of the battle. Therefore, you are incapable of harming him. He summons waves of opponents that you need to eliminate. More or less, after the third wave, he climbs down to fight you himself. During the battle, he summons orcs to his aid. While setting successive waves of opponents at you, he will be spraying clouds of yellow gas. If a summoned arcs enters the cloud, he gains in strength and deals much more damage so, if possible, try to stay away from them. The opponent himself is not too difficult to defeat but, you need to pay attention to one of his abilities. He quite often uses [Consume], where he devours one of the minions. This restores 25% of his health so, if you ignore this, the battle may be endless. It is a good idea to keep an eye out for the message that Venom-Crazed Pale One is going to be devoured. Such an opponent heads towards Xeri'you're your task is to kill him as quickly as possible, before he is consumed and restores the boss's health.
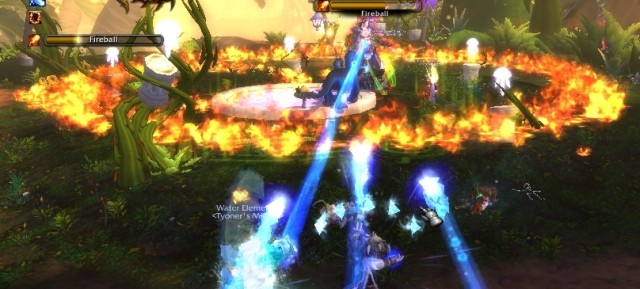 You simply can jump over the flames.
Archmage Sol is the second-last opponent in this instance. In comparison with the others, she is quite easy to defeat. You need to pay way more attention to the mages that you need to kill before the boss battle proper. Under no circumstances, can you allow the situation, where you fight all of them at once. You need to deal with them one-by-one because they are incredibly dangerous, as a group and there is little chance that you will emerge victorious. Fortunately, they do not respawn so, even in the case of death, you will not have to fight them again.
The battle with Sol itself is one of the easiest. You only need to pay attention to two abilities. In the first phase of the battle, she often uses [Firebloom], which forms rings of fire. You simply need to hop over them to avoid taking damage. As soon as you damage her sufficiently, she also starts to cast [Frozen Rain], which resembles a hailstorm. At such a moment, you need to steer clear of her and continue the battle.
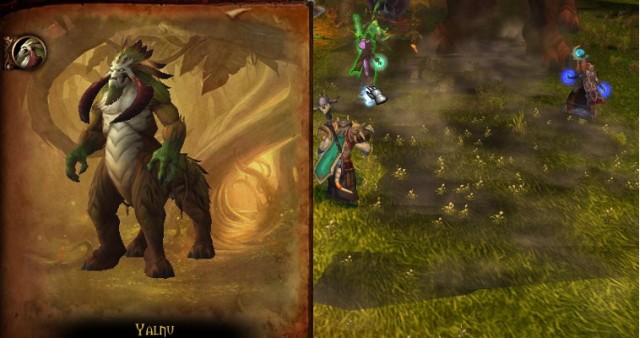
After you kill Sol, you square up against the final boss - Yalnu. He is waiting right next to the huge portal to Stormwind. Unfortunately, you cannot prevent him from entering the portal. You need to follow him. Yalnu is one of the most demanding opponents, of all the dungeons in the Warlords of Draenor. During the battle, he summons plants and elementals that are not too much of a threat, if alone, but they can be difficult to deal with them, when there are 15-20. It is worthwhile learning his attacks and the ways to counteract.
In the battle, you are aided by quite a group of mages that are present on the battlefield at the moment of your arrival. You need to free them from the creepers, after they are entangled, because they may prove to be a decent backup in the battle. One of the most frequent attacks of the boss is [Colossal Blow], which deals damage of 70-80k, within the radius of a dozen-or-so meters. The attack itself is signaled by the dust raisin above the ground, which marks the area where the attack will hit. You should get away from the spot as quickly as possible.
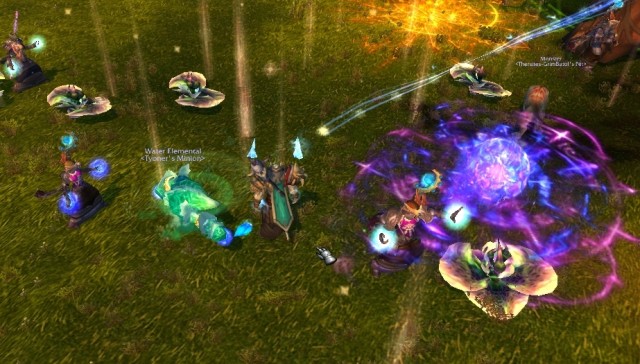 Your priority during this battle should be to tread down the scattered plants.
Still, the most dangerous attack is [Genesis]. Yalnu scatters dozens of flowers around him, which root into the ground. From this moment, you have 15 seconds to destroy them. You simply need to step on them. Each plant that you fail to destroy, turns into an opponent with 450k health, after those 15 seconds. It is a good idea to determine, before the battle, which party member will be responsible for destroying the plants in a given area, so that you do that in the most proficient way. Spells that increase movement speed will also be useful here.
In theory, this seems not too complicated a task, but during the battle, when you are facing a monstrous opponent, dozens of minor mobs and the plants on each side, it is easy to get confused. The key to success is to control the battlefield and prioritize on your tasks. In my opinion, your first priority should be to destroy the plants scattered around, then freeing the mages and finally, attacking Yalnu.
The last of the presented dungeons is the Upper Blackrock Spire. Right next to Everbloom, it is the longest of instances that you visit. In here, you fight six bosses, where one of them is optional.
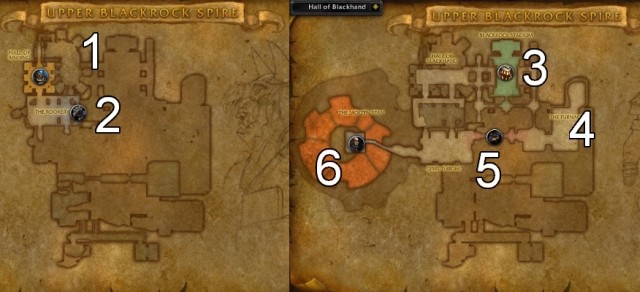
You start in a fortress cut in a rock - Blackrock Mountain. This complex has been built ages ago by the members of the Dark Iron clan. As of now, the fortress is being occupied by the forces of the Iron Horde, who plan to build a weapon of mass destruction within the mountain. Your mission is to prevent that from happening.
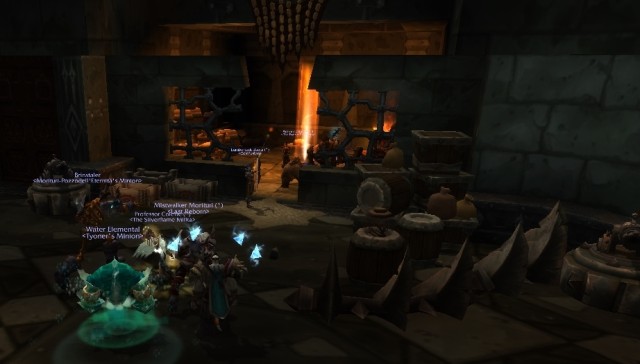 The individual groups of enemies are marked with light beams. As soon as you kill them, the beams disappear.
Your first objective is to eliminate several groups of enemies in the room around the starting chamber. You should not have any problems here. After you defeat the last one, a door will swing open in front of you, behind which, there is your first major opponent - Gor'ashan.
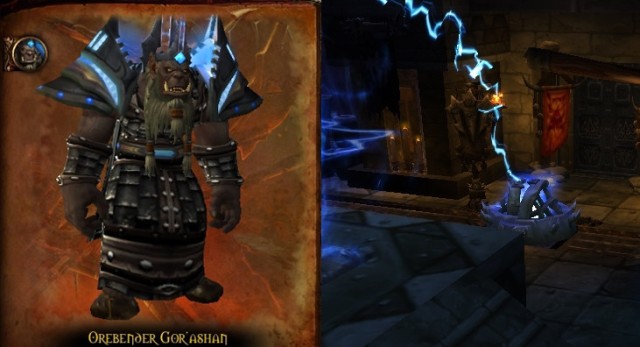 Ehen the cages in the corners of the room are activated, you need to jump down off the platform and deactivate it.
Gor'ashan is one of the easier opponents. You only make sure that you do not take too much damage. The opponent himself is standing in the middle of the arena on a platform, throughout the entire battle. This is the platform that you should be standing on, throughout the majority of the battle, too. This way, you will avoid taking damage from the orb of energy circling around below. You can note, straight away, that at the walls of the room, there are spherical cages. Gor'ashan will occasionally use [Power Conduit], which makes one of the cages transfer energy to Gor'ashan. Each cage makes the opponent take 14% damage less and , after some time, he will be able to use [Thunder Cacophony], which may claim 30k of health points from each party member.
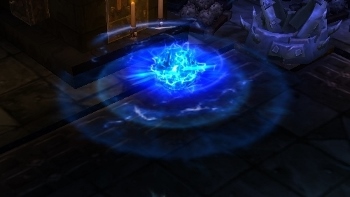
To prevent him from doing that, you need to jump off the platform, dash up to that cage and right-click on it. At the same time, you need to be very careful because there is the [Electric Pulse] circling around the cage which damages you for around 25k health points per second. You need to time your drop from the platform well. This will provide you with enough time to deactivate the cage. You'd better do it one-by-one and return onto the platform each time because, you may take damage from the orb of energy, otherwise.
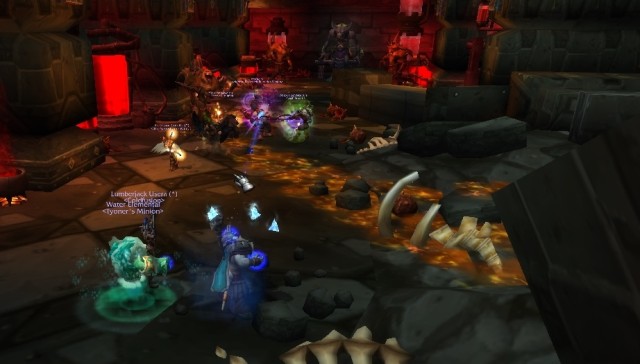 The majority of the AoE attacks are signaled beforehand.
Directly after the battle with Gor'ashan you encounter another opponent - Kyrak. The fight is not too complicated. First, you need to kill two of his guards, who may make fighting the boss more complicated. You need to watch out for [Eruption] that Kyrak uses, and which may deal 60k damage to you, if you are not careful enough.
Kyrak, basically, uses three abilities. The most dangerous one is the [Debilitating Fixation] where Kyrak locks on one of the characters and deals 12,5k damage per second. You can interrupt casting this ability with an appropriate spell. When Kyrak's health level drops below 50%, he starts using the [Rejuvenating Serum], which restores up to 16% of his health points within 12 seconds. Also this ability can be interrupted. The battle itself should not be too long, the most important thing is to kill Kyrak's guards first, and him himself later on.
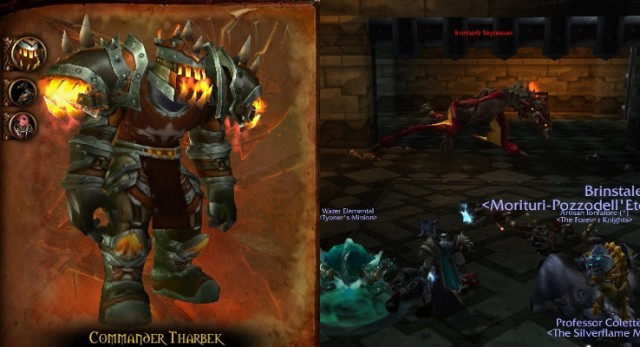
Another boss battle is preceded by three waves of opponents summoned by him. Each time, they appear behind the closed grate in one of the walls. Only after you deal with all of the enemies, you will be allowed to face Tharbek.
Tharbek's attacks are based on AoE, to a large extent. First, you need to avoid the [Incinerating Breath], which deals 25k damage per second, as well as [Noxious Spit], which forms a pool of acid that damages you for 25k health, per each 1,5 seconds of being affected by the pool. It is worth remembering that Tharbek himself deals lots of damage in melee so, your healer should keep an eye on the tank's health.
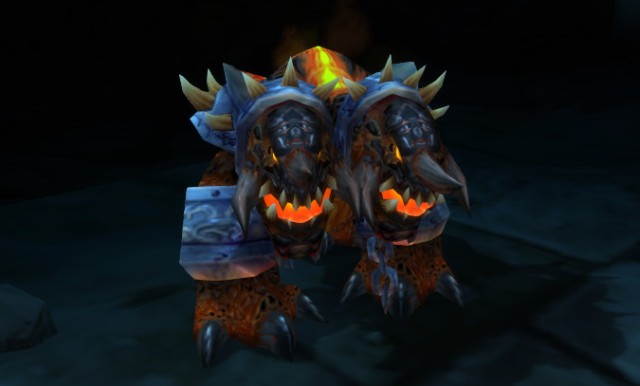
This is an optional opponent. He is staying in one of the side rooms of the fortress. You do not receive any reward for killing him and the boss is a reference to the earlier dungeon, i.e. the Blackrock Spire. During the battle, you need to watch out for the [Fiery Charge], where the boss charges towards a randomly selected party member, as well as the [Terrifying Roar], which makes your character keep escaping for 5 seconds.
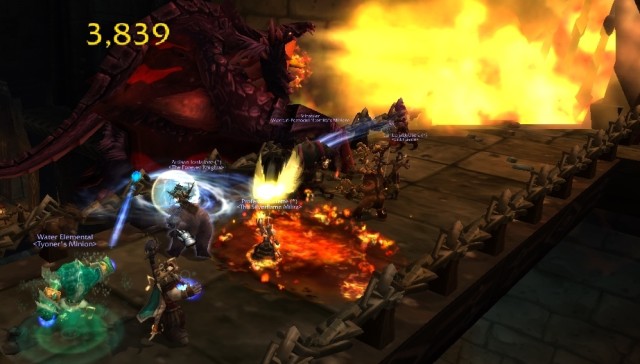 While belching fire, the boss usually draws a semicircle so, you need to escape from this attack.
Before the final battle, you are to cross the bridge guarded by a huge dragon. The majority of the battle boils down to avoiding the AoE attacks and dealing as much damage as possible. The battle itself can be divided into three phases.
In phase one, Ragewing will mainly use the [Engulfing Fire] where he breathes fire. The opponent starts in one spot and describe an arch with the flames. If you are not staying within the flames, it is easy to avoid.
When the opponent's health drops below 70%, he starts flying high above the bridge and using [Fire Storm], which is a series of fireballs that you need to escape from.
During this last phase, Ragewind lands on the bridge and mainly uses the [Magma spit]. It is a fire projectile that, apart from dealing damage, forms a circle of magma that deals damage to those who stand in it.
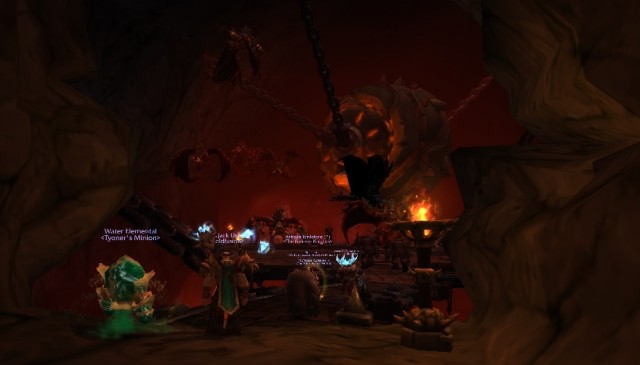 Zaela's fighting arena is one of the best-looking locations, of all the dungeons.
The last battle in this instance is against Warlord Zaela. Also in this case, the battle has been divided into three phases. In the first one, you will be able to attack the boss directly. Still, you need to watch out for the frequent [Black Iron Cyclone], which is cast on a randomly selected party member. If you stay within the range of such a cyclone, you take 45k damage per 1,5 seconds.
When Zaela's health level drops below 60%, he mounts a dragon and circles around, above you, for 40 seconds. Then, his minions enter the battle and you need to deal with them in the first place. Occasionally, Zaela attacks you from above with the [Burning Breath]. In such a case, you need to get away from the burning area.
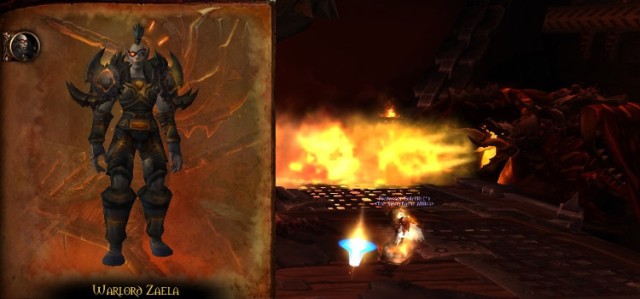 During the battle against Zaela, you need to remember about the wyvern above.
After 40 seconds, Zaela returns to the platform, regardless of whether you have dealt with the rest of the opponents, or not. The type of her attacks does not change, but the wyvern that used to circle around above you, keeps landing the [Burning Breath]. The rest of the battle should not surprise you in any way and if you avoid the flames effectively, the battle ends after several minutes.

Warlords of Draenor introduces dozens of new mounts into the game that you can add to your collection. Unfortunately, in the current version of the game, you cannot use the airborne ones. All of the presented mounts travel over the ground, although their looks may suggest otherwise. The developers of the game justify that in saying that this makes the players explore the game world that is one of the best designed in the history of the game. The option to fly will probably be added with the later release of a patch for the game. There are several dozens of mounts that the expansion adds. You can obtain some of them by obtaining achievements, some of them are available from the traders, where as a large group of these is garrison-related. Below, you can find the list of all the mounts in the Warlords of Draenor alongside a short description of how to obtain them.
Obtaining one of the below mounts is connected with obtaining a specific achievement in the game. Most often, these achievements are difficult to obtain and they are time-consuming. However, they reward you with unique looks of your mount.
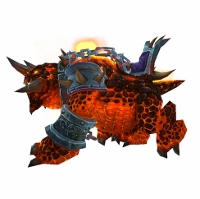
Core hound - Obtaining this mount is connected with obtaining the Boldly, You Sought the Power of Ragnaros achievement. It is about defeating the special version of Ragnaros, which is meant for a level 100 character. It is the final boss of the Molten Core raid. This mount is connected with the celebration of the 10th anniversary of the World of Warcraft series. It is only available until the January 5, 2015.
Felfire hawk - You obtain this mount after you obtain the Mountacular achievement, i.e. after you obtain 230 other mounts for your collection.
Emerald Drake - A new species of the drake can only be obtained after you complete Awake the Drakes achievement. This achievement is about obtaining all of the previous species of this mount.
For your collection, you need:
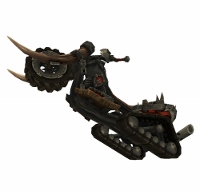
Warlord's Deathwheel - To obtain this bike, you need to obtain the achievement of the same name. It is only available for the characters connected with the Horde. To obtain this "mount" you need to have logged in to the game between the 25th and the 30th of September 2014. This chopper is connected with the promotional campaign of the Warlords of Draenor.
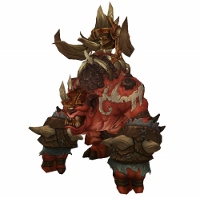
Gorestrider Gronnling - This mount is one of the most difficult ones to obtain. You need to obtain the Glory of the Draenor Raider achievement, i.e. obtain 17 other achievements connected with your participation in raids. Mostly, they are connected with defeating the individual bosses.
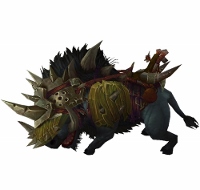
Blacksteel Battleboar - For this mount, you first need to obtain the Guild Glory of the Draenor Raider achievement first. To do that, you need to obtain two Raid-related achievements, while in the group of your clan members. The achievements in question are Imperator's Fall and Warlord Blackhand. Both of them need to be obtained at the Mythic difficulty level.
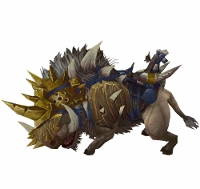
Frostplains Battleboar - You obtain this mount after you obtain a series of achievements connected with completing a series of dungeons, which results in completing Glory of the Draenor Hero. You need to complete all of the dungeons available in the Warlords of Draenor, at the Heroic difficulty level.
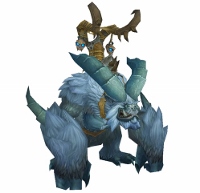
Challenger's War Yeti - To obtain this Yeti, you need to obtain the Challenge Warlord: Silver achievement. It is about completing each of the eight dungeons of the Warlords of Draenor in the challenge mode and obtaining, at least, silver.
Thanks to the garrison, you have access to a new form of obtaining mounts. You can simply train them. By building the stables, you gain access to six groups of quests, which reward you with new mounts. The interesting piece of news is that the majority of them need to be caught beforehand and break in afterwards, by training them. Also, there are mounts related to the other buildings. Below, I have presented the list of the mounts, divided with respect to the buildings thanks to which you can obtain them.
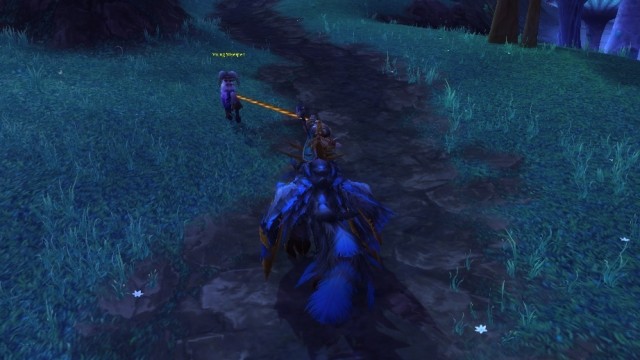 After you catch a mount, you need to follow it for some time, to prevent it from slipping the rope.
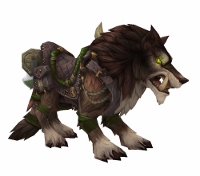
Trained Snarler - You obtain this wolf after you complete seven quests related to training it, in the Wolf Training main quest.
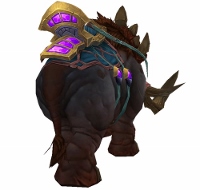
Trained Meadowstomper - In the case of the Meadowstomper you also have to complete seven quests related to the Elekk Training quest.
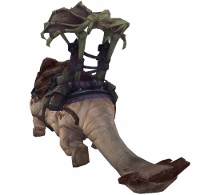
Trained Riverwallow - This mount requires you to spend two additional days on completing quests. In the Riverbeast Training quest, there are 9 tasks to complete..
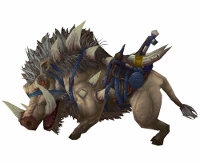
Trained Rocktusk - This mount requires you to complete Boar Training. The quest comprises of 10 tasks, where you need to defeat opponents.
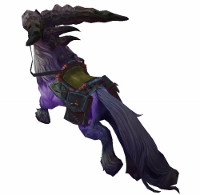
Trained Silverpelt - Silverpelt is one of two most difficult mounts to obtain. To gain it for your collection, you need to complete 12 tasks of the Talbuk Training quest.
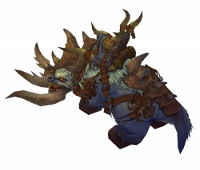
Trained Icehoof - This mount is the second best one available in the stables. To obtain it, you need to complete the Clefthoof Training quest of 12 tasks, where you have to deal with successive waves of opponents.
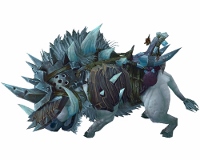
Armored Frostboar - You receive this mount after you complete all six basic mount quests at the stable. After you complete it, in the stable, there appears an items that allows you to find it.
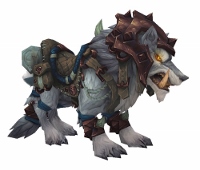
Armored Frostwolf - You receive this mount after you complete all of the six basic mount quests at the stables. After you complete them, at your stables, you should find an item that allows you to find the mount.

Ironside Warwolf - This mount is available for the Horde members. You can either buy it at your garrison, after you upgrade the Trading Post to, at least, second tier. The cost of the mount is 5000 gold + 5000 apexis crystal . You can buy it from Kil'rip at your Trading Post.
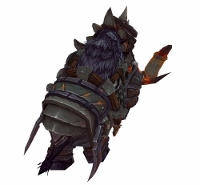
Armored Irontusk - This mount is available for the Covenant members.
You can obtain it after you upgrade the Trading Post to, at least, the second tier. The cost of the mount is 5000 gold + 5000 apexis crystal . You can buy it from Maria at your Trading Post.
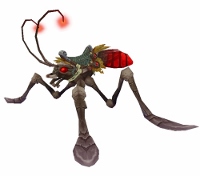
Crimson Water Strider - Obtaining this mount is related to upgrading the Fishing Shack at the garrison. First, you need to upgrade the building to tier 3, which becomes an option after you progress to level 100 and obtain the Draenor Angler achievement.
With the Fishing Shack at the appropriate tier, you will be able to recruit a new follower - Nat Pagle. You can buy special items from him, and the Crimson Water Strider mount, among others. Unfortunately, you will have to pay a special currency for that - Nat's Lucky coin. The cost of this mount is 100 such coins. You can obtain them by completing the replayable quest tasked to you by Nat. You will have to catch a special fish - Lunker. Apart from its unique looks, the mount also offers moving over the surface of water so, you do not lose your speed while crossing water reservoirs.
Obtaining these mounts depends on the successful draw, while opening Invader's Forgotten Treasure. You can obtain this item after you complete the Gold Victory three week quest at level Gold. The quest is about defending your garrison from the attack of the Horde..
Garn Steelmaw
Giant Coldsnout
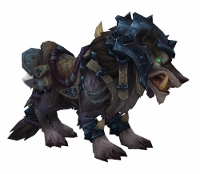
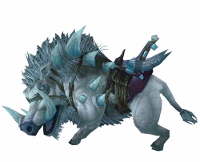
Smoky Direwolf
Shadowhide Pearltusk
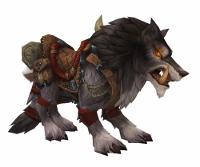
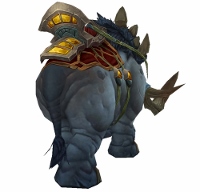
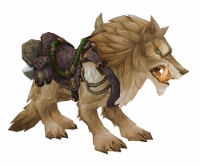
Dustmane Direwolf - To obtain this mount, you need to meet a number of requirements:
- You need to build the Tannery at the garrison.
- Leatherworking must be one of your professions.
- In that building, you can buy Recipe: Riding Harness, thanks to which you learn the recipe for the wolf. The recipe costs 5 Secret of Draenor Leatherworking but, you can obtain only one book per day so, you need 5 days, at least, to obtain the mount.
- To craft the items to summon the mount, you are going to need 100 Burnished Leather and 20 Sorcerous Air.
- To use this mount, your Leatherworking must be at level 700.
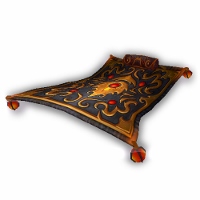
Creeping Carpet - Just like in the case of the wolf, to craft the flying carpet, you need to meet several conditions:
- You Need to build Tailoring Emporium at the garrison.
- You need to have Tailoring, as one of your main professions.
- In the building, you need to buy Recipe: Creeping Carpet, which also costs 5 books, which requires 5 days in the game.
- To craft the Creeping Carpet you need 100 Hexweave Cloth and 20 Sorcerous Air.
- To use the carpet, your Tailoring must be at level 700.
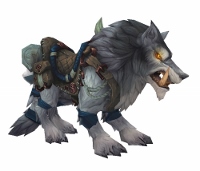
Swift Frostwolf - You can buy this mount at Warspear, the Horde's main city in Draenor, on the Ashran isle. You can buy it from Beska Redtusk, if your reputation level with the Frostwolf Orcs is high enough, and if you pay 5000 gold and 5000 apexis crystals.
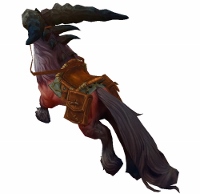
Breezestrider Stallion - Just like above, you buy this mount on Ashran in Warspear, but this time you need to see Dazzerian, and also have an appropriate reputation level with Vol'jin's Spear. The price is the same, i.e. 5000 gold and 5000 apexis crystals.
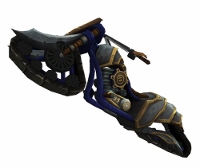
Champion's Treadblade - This track-propelled bike can be obtained by every Covenant member that can pay 100,000 gold. You can buy it from Paulie in Stormwind City, which is the main city of the Covenant. To get there, you need to leave the continent of Draneor.
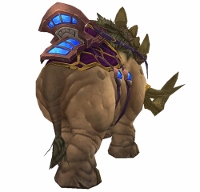
Dusty Rockhide - You can buy this mount on the Ashran isle in the city of Stormshield. To buy it, you need to see Vindicator Nuurem and pay 5,000 gold, and 5,000 apexis crystals. The additional condition is that your reputation with the Council of Exarchs faction is sufficiently high.
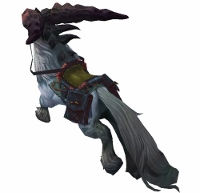
Pale Thorngrazer - Just like in the case of the Rockhide also here, you need to go to Stormshield. This time, however, you need to see Crafticus Mindbender. The condition here is sufficiently high reputation with Wrynn's Vanguard and 5,000 gold, and 5,000 apexis crystals.

Shadowmane Charger - It is the first mount available for both factions. You can buy it after you receive sufficiently high reputation with Arakkoa Outcasts and pay 5,000 gold and 5,000 apexis crystals. Covenant members need to go to Stormshield to Shadow-Sage Brakoss. In the case of the Horde, it is Ravenspeaker Skeega in Warspear.
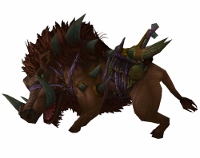
Domesticated Razorback - Another mount available for both factions and you need reputation with the Steamwheedle Preservation Society faction. Just like in the case of all the other mounts, the cost is 5,000 gold and 5,000 apexis crystals. Covenant members need to see Gazrix Gearlock in Stormshield, and the Horde needs to go to Warspear and see Mimi Wizzlebub.
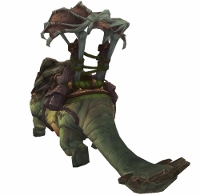
Mosshide Riverwallow - In the case of this mount, you do not need any reputation with any of the factions. You simply need to go to the appropriate person and pay 5,000 gold, and 5,000 apexis crystals. For the covenant, it is Dawn-Seeker Krek in Stormshield, and for the Horde - Dawn-Seeker Alkset in Warspear.
You can obtain each of the below mounts after you kill a rare opponent that appears occasionally, in a given location. Each participant of the killing has 100% chance of drawing an item to summon the mount.

Great Greytusk - To obtain this one, you need to go to Frostfire Ridge and kill Gorok. You are most likely to find him in Collosal's Fall or to the South of Grom'gar.
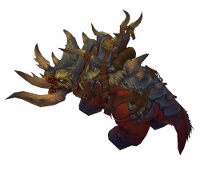
Bloodhoof Bull - To obtain this mount, you need to kill Nakk the Thunderer in Nagrand. You should look for him to the South of The ring of blood.
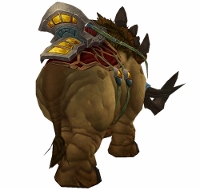
Mottled Meadowstomper - Also this mount can be found in Nagrand. This time, you need to kill Luk'hok that you can find around the Ring of Trial, both South-Eastwards and Northwards, of the location.
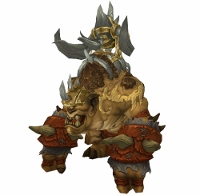
Sunhide Gronnling - This time you need to travel to Gorgrond. You need to find Poundfist, who you are most likely to find around Gronn Canyon in the central part of Gorgrond.
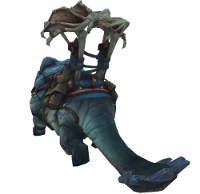
Sapphire Riverbeast - In the case of this mount, you need to go to Talador and kill Silthide. You can find the beast near the big lake Eastwards of Auchindoun.
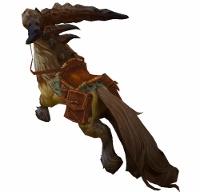
Swift Breezestrider - You should look for the last of the mounts in Shadowmoon Valley. You are going to need to kill Pathrunner. The beast is to be found, most often, near the Embaari Village.
Vicious War Raptor - You receive this mount after you obtain the Primal Combatant achievement. You need to win 100 3x3 duels or 40 Battlegrounds. It can be received by the Horde members, from Deathguard Netharian in Orgrimmar.
Vicious War Ram - this is the Covenant's counterpart of the Raptor. In this case, you will have to obtain the Primal Combatant achievement, i.e. to win 100 3x3 duels, or 40 Battlegrounds. To receive it, you need to go to Stormwind and see Necrolord Sipe.
Grinning Reaver - You can buy this mount for real-life money from the Blizzard store. You can buy it from the website and in the game. It costs 25$.
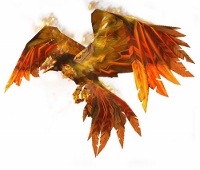
Solar Spirehawk - You can obtain this mount after you kill Rukhmar, in the Southern part of the Spires of Arak, who is one of the Raid bosses.
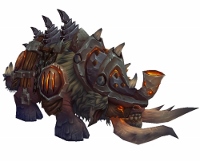
Ironhoof Destroyer - You obtain this mount after you kill Blackhand, at least at the Mythic difficulty level, during the Raid.
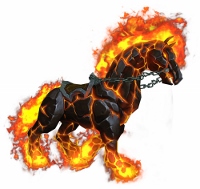
Cindermane Charger - This Mount becomes available after you invite a friend to the game, who starts an account and plays the World of Warcraft.
World of Warcraft is an immensely vast and, in some respects complex. Therefore, this does not come as a surprise that players create mods to streamline and speed up the game.
On the Internet, you can find add-ons that allow you to facilitate the organization of your gear, mark the most important, or most interesting places on the map, or help you fight the opponents. You only need to decide what you care for most and how you want to modify the game.
It should be pointed out that the add-ons are completely legal to use. They have nothing to do with bots and cheats, for which you can be banned from the game temporarily or permanently. By installing add-ons, you facilitate the game slightly and, e.g. eliminate the number of the necessary clicks or eliminate the use of maps on the internet. You are not going to be punished for using them.
There are two main ways to install add-ons. You can download one from the internet, best from the developers' website, and paste it into the appropriate folder. This folder is in the folder of the game and the patch is: World of Warcraft/Interface/Addons.
However, I suggest that you do something else, i.e. use a special program - Curse, which allows you to install and manage add-ons available in the program's database. This facilitates the entire process, especially if you want to install several mods. After you find the add-on, you only need to click "install" and the installation process completes automatically. It is just as easy to update and uninstall mods.
Below, I present the process of installing Curse and several of the most useful add-ons for the efficient management of followers and your inventory or for searching resources for your garrison.

To install Curse you first need to access the main site for the program. The address is www.curse.com. There, in the head menu, access "CLIENT" tab.
This opens a new page. You can learn, here about the profits from using the program for add-ons management. If you want to proceed, you need to click the blue "Download for PC" button.
This starts the download process for the installation software, whose size is several hundred kilobytes. The rest of the program is downloaded during the installation process. The entire process is similar in the case of the majority of programs so, you should have no problems with that.
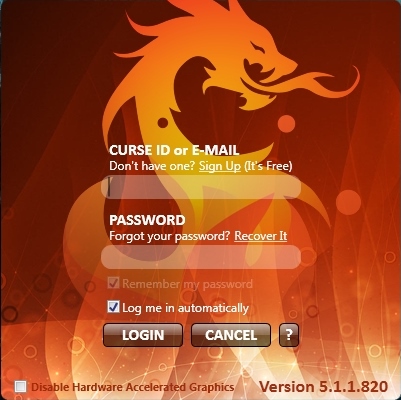
To work properly, the program requires an active member account. If you still do not have one in Curse, click the underlined "Sign Up" inscription above the log-in field. This opens a new window, where you create a quick account.
The process of setting-up your account consists of three short steps. In the first one, you need to provide your basic information, such as your nickname, e-mail address and password. In the second one, you are asked to provide more detailed information. Note that not all the fields are necessary and you can skip some of them.
After you create the account, you log-in to the program automatically. The page suggests a short guide to you. It is a good idea to see it, because you will be able to set-up several basic options and the entire process takes less than a minute.
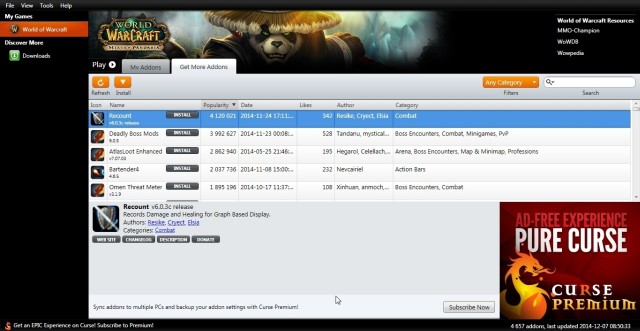
After you start the program, you see two tabs - "My Addons" and "Get More Addons". You are interested in the latter, as of now. Thanks to it, you will be able to install more add-ons.
To find a specific add-on, you need to enter a part of its name into the search engine on the right. If you do not know, specifically, what you are looking for, you can select filtering on the available add-ons, with respect to the number of downloads, release date, likes and category.
After you pick the specific mod, click on it. As soon as you do, you will be able to read the description, by clicking the button, or to access the mod's main page, where you learn about its functioning in detail. If you are interested in installing it, click "Install" next to the mod's name above. The mod will then be automatically added to your game folder. This should be no longer than several seconds.
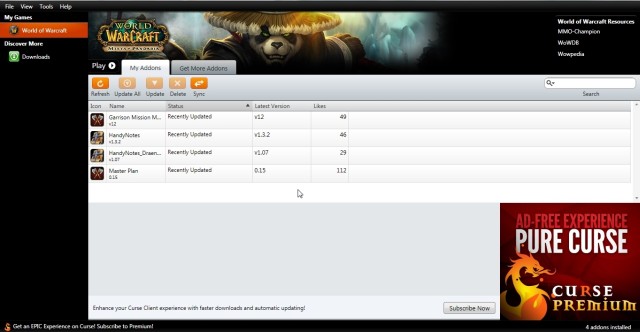
In the first tab - "My Addons", you can view the ones that you have already installed. Here, you can also update and delete the add-ons that you do not need.
After you have implemented all of the changes, you can close the program and start the game. All of the add-ons should be successfully installed.
The first recommended add-on for the Warlords of Draenor is the one that facilitates the management of your garrison. Specifically, these are two separate ones that work together. These are Garrison Mission Manager and Master Plan. The mods can be downloaded in the Curse app.
The first change is the change into the system of receiving reports on the completed missions. You do not need, any more, see the cutscenes for each one of the missions, nor accept the reports manually. This is not a problem at the beginning of the game, but if you are to accept 10 reports, it becomes a time consuming process. Thanks to this add-on, all of the completed missions are displayed in the form of a list, with the percentage chance of its success and the possible reward.

After you click "Complete Missions", you receive all of the reports within several seconds and to learn which ones were successful and which ones were failed.

Then, click "View Rewards" thanks to which you access the window with all of the received rewards displayed. In the majority of the fields, there appear the silhouettes of those of your followers that received experience. You learn about the specific amount of experience after you roll your mouse over the specific follower. Gold rewards and items can be viewed at the very bottom of the list. After you click "Done", you are ready to dispatch your followers on more missions.
The first change that you notice in the missions menu is the icon on the right, which presents the percentage chance of success. It is not the only change, though. On the top, you can change the filter for the missions, where you pick the sorting method for them. By default, these are sorted by the percentage chance of success, but you can also sort them by the rewards of resources for the garrison, or by the amount of experience that your followers receive. Under the name of the mission, you find additional information, e.g. how many followers need to be dispatched, what are the enemy's abilities. The green frame around it, means that you have a followers that can counter that ability. Thanks to this, you get a better view of the overall situation.
If you enter the menu for dispatching your followers on mission, you also note some changes. The main window remains nearly unchanged, but on the right, there appear three more icons. Thanks to this, you can select one of the three suggested make-up of the party that you dispatch on the mission. Each one displays the percentage chance of success, as well as the bonus experience for that make-up. All this facilitates the process of dispatching your followers on missions, and you do not need to decide which make-up is the most profitable. All of that is done for you.
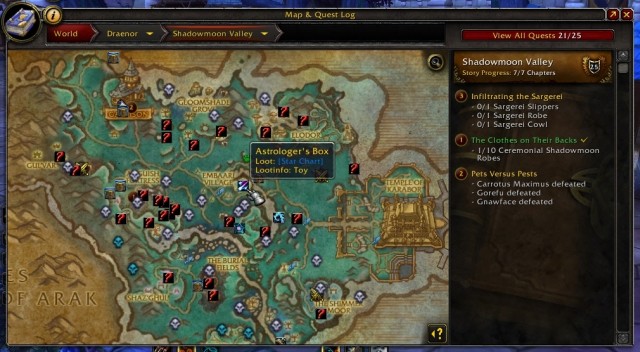
Another recommended mod is HandyNotes. While adding it from the Curse, you need to add the basic version - HandyNotes and the special update for the continent of Draenor - HandyNotes_DraenorTreasures. This add-on adds a number of new markers to your map. Not only will you be able to find the majority of unique opponents and bosses, but also special items. After you zoom in, you also learn where you can find resources for your garrison. The usefulness of this mod becomes apparent after several minutes of using it, after you notice that around your garrison, there are 6-7 spots where you can obtain additional resources. This mod is perfect for the players that visit Draenor just to explore it. Thanks to HandyNote, you will always know where to find something interesting.
The last one of the recommended mods is Bagnon. The only change that it introduces into the game is the way in which your inventories and bank stashes are displayed. You do not need to access all of them one-by-one, anymore. Now, you access one big window, after you click once. Thanks to this, your inventories take up less space on the screen and additionally, the mod adds several interesting functions. Among others, Bagnon lets you know, which items you can use and which one are worthless to you. Also, you have more control over the management of items.
World of Warcraft: Warlords of Draenor is only available for PC. It is a game of relatively low system requirements. It is optimized for online playing, where the fluency is valued above visual effects. Therefore, a fast and stable internet connection is recommended. The graphics of the game are dated, which does not require a strong graphics card. Even on the weaker systems, the game should run smoothly. There may be occasional drops in performance, while exploring dungeons, where there is a multitude of effects connected with spells. For the game, you only need a mouse and a keyboard. To make sure that the playing does not become burdensome, it is important that the key on the keyboard are big enough, which makes for easy navigation. The game is highly flexible, when it comes to adjusting controls to your needs.
The guide has been prepared on Toshiba Satellite laptop of the below specifications:
On the above specifications, the game ran smoothly, without major problems. Occasional drops in framerate occurred only during boss battles in dungeons. It is worth pointing out that the game's requirements for data transfer are low. Even in the situations of temporary problems with the internet connection, playing Warlords of Draenor was possible and this did not cause any lags or chopping.
Yes, it is possible to play World of Warcraft: Warlords of Draenor on laptop computers.


 WildStar Game Guide & Walkthrough
 World Soccer Winning Eleven 9 Game Guide & Walkthrough
 World of Tanks Game Guide & Walkthrough
 Warhammer 40.000: Dawn of War - Soulstorm Game Guide & Walkthrough
 Warhammer 40,000: Dawn of War II Game Guide & Walkthrough