The guide to Lord of the Rings: War in the North contains a detailed and richly illustrated description of how to complete both the main plot playthrough and all side quests. The game is of linear type, which means that players should not miss any quest if they follow the guide. We also suggest reading several game hints, which will surely make it easier to travel across the north of Middle-earth (there are also tips relating to achievements - except for those that can be found in the descriptions of all the chapters).
In the text, all names (NPCs, playable characters, places and items) are made bold. The objectives of main quests are marked in brown. Side quests and activities connected with them are marked in green, circumstances in which you can or you will unlock an achievement - in orange and all secrets - in blue.
Piotr "Ziuziek" Deja
There are three characters you can play in the game. Actually, it doesn't really matter whom you choose, as each of the three heroes - Champion, Loremaster or Ranger - can be trained to become a character excellent both in melee and ranged attacks. However, it is impossible to teach them everything, so you must decide in which direction your character will develop. There are some differences you should be aware of:
If you completed a particular level with one character and, despite having searched it thoroughly, you are surprised that you didn't find all the secrets, then you should know that each character simply has his/her own. There are also secrets connected with side quests for all three characters.
As it has been mentioned above, you need to decide in which direction your character will develop. The first component of development is the statistics - strength, dexterity, stamina and will. If your character is to use melee attacks only, then when you level up choose the strength, if he/she is to attack from a distance - dexterity. Raise stamina and will to increase your health (i.e. your character's life) and power (necessary for all heroes to enable them using special abilities).
Achieving level 20 level should not be a problem, which will result in unlocking two achievements: [ACHIEVEMENT] Defender of the North and [ACHIEVEMENT] Champion of the North.
The play a major role. First of all, without the ability to use them in a fight it would be much more difficult. Read the abilities descriptions and use those that might be useful at a particular time. Yet, that is not all. During the level-up you can distribute 1 point to develop one of three 'schools', and it must be underlined that these abilities greatly influence your character.
That is why, for example, if you play the Dwarf, and you want to be able to fight using two-handed melee weapons, then make sure you boost the ability Heavy Weapons (the tree Sweeping Attack) to a maximum, and also that you invest some statistics points into strength. This is, of course, only an example, but right after the game has started it's really worth thinking about what kind of character you want to play.
What is more, there are some special abilities connected with achievements: [ACHIEVEMENT] Warrior Exemplar, [ACHIEVEMENT] Battle-master and [ACHIEVEMENT] War-hardened. They are about distributing the points in an appropriate way. A piece of advice - look for a special gem (it costs 16,000 silver coins) at one of the merchants. It will allow you to redistribute the points, or, right before the game ends, switch a character and redistribute his/her ability points (assuming you didn't do it earlier).
It is also of no small importance. First of all, you need to remember about repairing damaged items at the blacksmiths'. Secondly, it's best to be influenced by the price (assuming you want a certain item) to decide which of the two, e.g. armors, is better. Your character can wear helmets, spaulders, bracers, armors, leggings, boots and amulets, rings, etc. - in general, you should try to use each slot where you can equip an item.
At this point, two things are worth mentioning. The first are the Elf-stones that increase the statistics (some can boost them really high). They can also be put into some special items. If you slot such a stone into an item for the first time, you'll unlock the [ACHIEVEMENT] Gem-studded.
Another issue are the armor sets. It is hard to find a complete set, because the items in chests and hiding places are generated at random. That is why, don't sell any items which belong to a particular set, and at each merchant's (it doesn't matter if it's an NPC, or a teleport) look through the items and buy those that belong to some set. Naturally, if you already have a set, you don't need to follow this guideline. If you manage to complete and equip a magical armor set, you'll unlock the [ACHIEVEMENT] Well-arrayed.
Lastly, there are some general tips. Destroy all crates and barrels, and search all heaps of items. You will find missiles (arrows or bolts), potions (healing or power regenerating), coins, items that can be sold, etc. Try - before you spend any money - to gather 25 000 gold coins, which will result in unlocking the [ACHIEVEMENT] Dragon-hoard. Additionally, try to return to levels to discover all the secrets. If you discover 25, you will unlock the [ACHIEVEMENT] Seeker.
The game is of linear type, thus in order to complete all side quests you should simply talk to all NPCs about everything, ask about details and always agree to help them. While traveling across the levels all barrels and crates should be destroyed, and secrets discovered. It's worth paying attention to the fact that the following [SIDE QUESTS]:
... are about finding specific items hidden in barrels or crates. Unfortunately, they are generated at random and there's a chance that even after completing, for example, chapter 1 several times you won't find all Westernesse Artifacts necessary to do this quest.
Completing 15 (main or side) quests will result in unlocking the [ACHIEVEMENT] Many deeds, great and small. When you complete the [SIDE QUEST] The Captive you will unlock the [ACHIEVEMENT] Friend of the Woodland Realm, while completing the [SIDE QUEST] Cult of the Lidless Eye will result in unlocking the [ACHIEVEMENT] The Lidless Eye.
Below you can see a list of all side quests as well as chapters where you can begin a particular side quest:
Quest name
Chapter
A Gem No Mine Can Yield
Chapter 5
Athelas
Chapter 2
Cult of the Lidless Eye
Chapter 1
Elf-stones
Chapter 3
Forewarned is Forearmed
Chapter 1
Gorin's Gratitude
Chapter 5
Miruvor
Chapter 3
Otto's Arsenal
Chapter 1
Rowlie Gift
Chapter 1
The Captive
Chapter 5
The Last Sons of Cardolan
Chapter 2
The Poet
Chapter 3
The Seer's Words
Chapter 1
Truesilver
Chapter 3 / 4
Work of Westernesse
Chapter 1
This is the most essential part of the game. While traveling across the regions of the North you will come across a lot of different enemies, but all of them can be divided into several groups:
Aside from characterizing some specific enemies there are some general guidelines, which, if followed, not only make the fight easier but also allow your character to level up faster.
As far as the remaining achievements are concerned, it's rather not possible to complete a playthrough without killing less than 600 enemies (well, you might try if you want to), so you don't need to worry about the [ACHIEVEMENT] Foe-hammer and the [ACHIEVEMENT] Bane of Mordor. Only during the first chapter (and it's best to do it during the second playthrough, in Hero Mode) you should let yourself absorb 25,000 total damage to unlock the [ACHIEVEMENT] Living Shield. You won't be able to unlock this achievement in any other chapter, while the following - [ACHIEVEMENT] Strength of Our Alliance - can't be unlocked if you're playing alone (you must kill one enemy together with two other players).
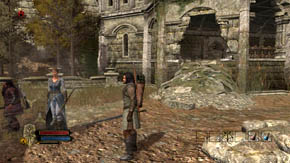
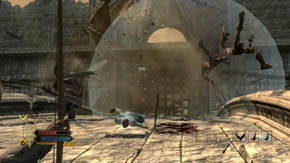
Fornost: Travel to the ruined city of Fornost

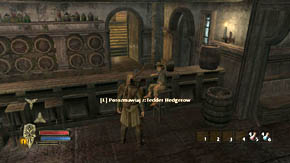
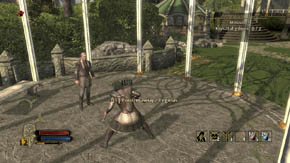
The game begins at the table where Aragorn is sitting. You can talk to him, ask about the details of your mission and also about some other things. Turn around and approach the bar where a hobbit, Tedder Hedgegrow, is sitting. You can easily earn 750 silver coins. Agree to play his game of riddles and give him five correct answers. Use the table below if you don't know any of the answers.
Riddle
Answer
The more of you the less you see.
Darkness.
Each morning I appear at you feet all day. I will follow no matter how fast you run, yet I nearly parish in the mid day sun.
Shadow.
I'm always hungry, I need to be fed. The finger I touch, will soon turn red
Fire.
Always running never walking. Often murmuring never talking. Has a bed but never sleeps. Has a mouth but never eats.
River.
At night come they come without being told. At day they are lost without being stolen.
Stars.
My life can be measured in hours. I serve by being devoured thin, I am quick, fat I am slow, Wind is my foe, What am I?
Candle.
I drive men mad for want of me. I'm easily broken, but never free.
Gold.
The more of these you take, the more you leave behind.
Footsteps.
What is it you must keep, after giving it to someone else.
Your word.
What is it that's so fragile, even saying the name can break it.
Silence.
What is yours but is used more by others?
Your name.
I'm found deep in the earth. When beaten and burned I can become a blood thirsty killer.
Iron.
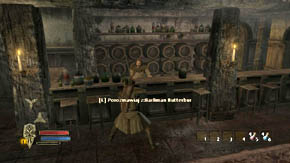
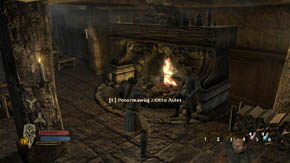
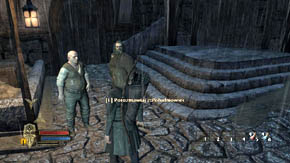
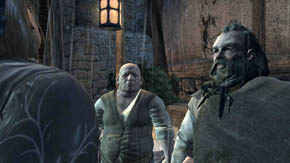
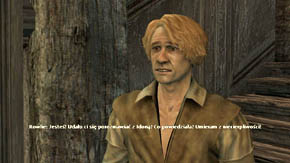
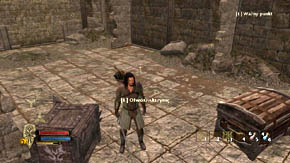
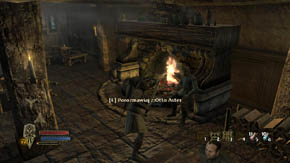
The bartender, Barliman Butterbur, is standing on the left, behind the bar. You can ask him about Bree and if anything interesting has been going on here recently. Turn around and approach the fireplace. There's Otto Aster sitting by it. Talk to him, agree to help and you'll receive a [SIDE QUEST] Forewarned is Forearmed.
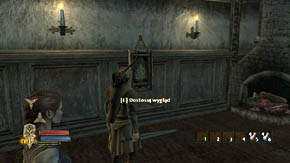
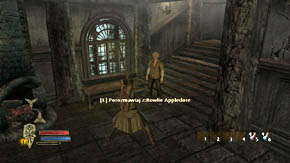
Locate the inn exit but don't use it yet. Instead, run to the right. There's a mirror on the wall, on the left - you can change your character's appearance by using it. A little further, by the stairs to the right, Rowlie Appledore is standing. Have a chat with him and ask about everything. Then agree to help him. You will get a [SIDE QUEST] Rowlie Gift and a Broken Rowlie's locket.
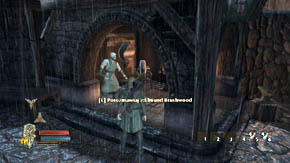
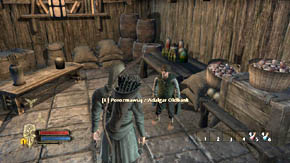
Run outside and turn right. Before you head up the street, check what's on the left and right side. On the left there is a blacksmith, Elmund Brushwood. Blacksmiths can repair damaged items - armors and weapons - and this one can also repair the damaged locket. Pay 1 silver coin and you'll get Rowlie's locket, necessary to complete the [SIDE QUEST] Rowlie Gift. To the right of the street there's a merchant - Adalgar Oldbank. You can ask him about Bree, but above all - buy or sell some items.
Run up the street. Soon you will notice two men on the left, before the merchant's cart. Approach them and talk to the Southerner. Be tough and unyielding, which will end with punching him in the face and getting a few experience points.
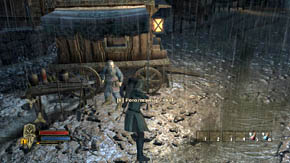
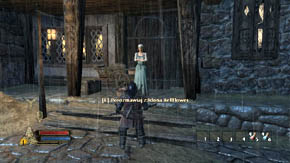
A few steps further, in the street there's a cart that belongs to a dwarven merchant - Grof. Talk to him and convince him that it's worth to bring weapons. This conversation is necessary to complete the [SIDE QUEST] Forewarned is Forearmed. Once you've finished it, run up the street and find Idona Bellflower standing on the right. Give her the locket and the good news ([SIDE QUEST] Rowlie Gift).
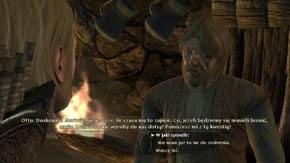
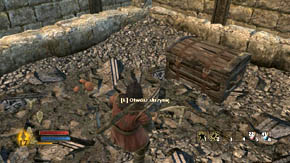
Go back to the pub. Talk to Rowlie and refuse to receive any reward - this way, you will get more experience points. The [SIDE QUEST] Rowlie Gift will be completed. Approach Otto Aster and talk to him about your success as well. You will complete the [SIDE QUEST] Forewarned is Forearmed, and if you agree to sell your weapon to Otto Aster - what you should do now - you'll receive a new [SIDE QUEST] Otto's Arsenal.
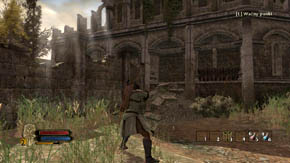
There's nothing more to do in Bree. Run out of the pub and go up the street. Use the glowing portal at the end of the street to move to Fornost.
Warning! On this and the next levels (but only within Chapter 1) you can come across Westernesse Artifacts. These items are hidden in barrels and crates, that's why you should destroy them all. Acquiring the artifact will result in getting a [SIDE QUEST] Work of Westernesse. When you acquire three artifacts you will be able to make an item from them (one of the blacksmiths in Chapter 3 or 5 can do it for you).
Fornost: Find and disrupt enemy forces
Run up the stairs and defeat two goblins. Try to hit them with a powerful blow only when there's a yellow triangle above the enemy - you will get more experience points. In front of the stairs that curve to the left and lead straight into the fortress courtyard, there's a flower on the left. Andriel can pick up flowers and mushrooms to make potions, magic cakes and other things.
Upstairs you'll defeat some goblins. On the right and left there are crates and barrels (there is also a flower on the right) you can destroy. Do it, as inside you will find potions, arrows or bolts (depending on the character you play), coins and other valuable items.
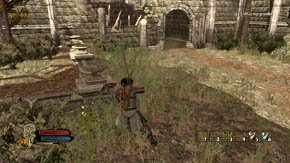
Around the courtyard, under the walls there are even more crates and barrels (there's a flower next to them). Search every corner and then use the glowing portal to pass to further part of the place. In the majority of cases using the glowing portal also means that the game is saved automatically, but it doesn't always happen.
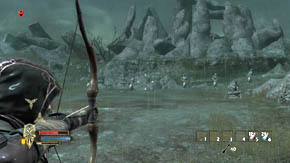
In front of you, in the building, three archers will appear. Practice aiming here. After entering the aiming mode you can zoom even closer by pressing an appropriate button. Remember to always aim at the head when you use a ranged weapon - it will inflict more damage. If you kill an enemy this way, you will receive the bonus in the form of experience points. Three warriors and two archers will appear on the left. Deal with them after getting rid of the first group.
Once in a while new warriors will come running from various directions. Fight with them, keeping in mind that you should use the stronger attacks when a yellow triangle appears above the opponent's head. Soon you'll hear an announcement telling you the gate has been opened. Press the indicated button to look at it. It leads to the further part of the level, but first, finish off four warriors who came through it.
Before you pass to the further part of the level, search this place thoroughly. There's a flower near the square garden on the right. Near the stairs leading to the courtyard, and also on the other side - to the left of the short stairs that lead to the interior of the building - there are crates and barrels. Destroy them, but don't go inside the building yet, go right instead. If you play as Eradan, you will notice some foot tracks on the right.
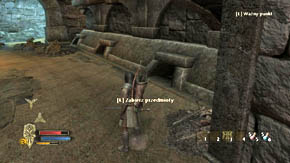
Follow them. You will enter through the hole in the wall to a small room. On the left there is a room with crates and barrels to destroy and also a chest you should open. Take all the items.
Keep following the tracks, destroying crates and barrels on the way. After a while you will notice that the foot tracks turn to the left and lead to a wall. If you approach the wall with Eradan, you will discover a hiding place with items. This is the first [SECRET 1/5 for Eradan] on this level (at this point, it's worth mentioning that each character has his/her own secrets).
Go back to the stairs leading inside the building and go in. Search the room on the right. You will find there a mushroom and a chest you should search. Return to the larger room and destroy all barrels and crates located there. You will find another mushroom among the ones in the right corner. Go out through the hole in the wall on the left.
Reach the fragment of the destroyed wall and crash some barrels and crates. To the right there is an entrance to the other building through the hole in the wall, but for now run behind the wall. You will find a plant, a chest to be searched, crates and barrels there.
Now, go inside using the hole in the wall. On the right there will be a chest you can search and a crate to destroy, while on the left there's a mushroom.

If you play as Farin, you will notice some golden cracks in the wall on the left. Break it (don't attack, just examine it - the dwarf will destroy the wall himself) and you will discover the [SECRET 2/5 for Farin]. There is a golden treasure chest behind the wall.
Leave this place and turn left. Next to the low wall there's a flower, while a bit further there is an open gate leading to the further part of the level. Go there and climb the stairs on the left. You'll come across some crates and a mushroom. Run following the only path. Soon the floor will collapse you will find yourself in the underground tunnels. You will receive a new objective of the quest.
Fornost: Escape the underground tunnels
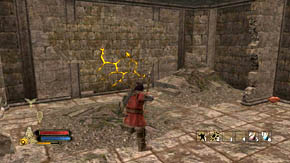
Go out of the hall. There are two secrets for two characters in the second hall. If you play as Andriel, then look at the wall on the right. Press the use key so that the Elf will cast a spell. It will turn out that you can go through the wall - it's the [SECRET 3/5 for Andriel]. Behind the wall there are crates and barrels to be destroyed, a mushroom and a chest.
If you play as Farin, you will notice some cracks in the wall on the left. Break the wall and discover the [SECRET 4/5 for Farin]. You will find a heap of items, crate and barrel.
A small goblin will attack you here. It's a very weak enemy. Defeat him and go down the stairs on the left. Destroy crates and barrels in front of you, and then use the glowing portal between the stairs on the left.
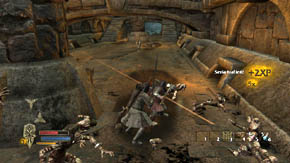
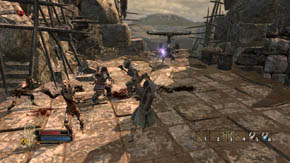
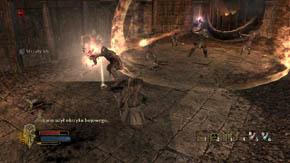
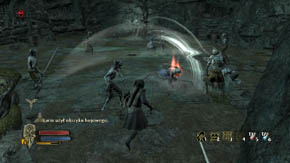
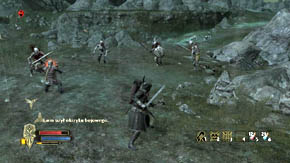
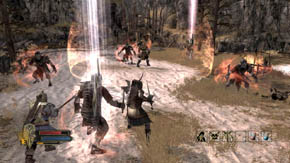
The first difficult fight awaits you here. Small goblins will come out from all directions, which means there will be a lot of them. Such a large number might pose a real threat. It's pointless to use a ranged weapon, as you won't have enough arrows or bolts to kill all enemies. That's why it's best to use melee attacks. It's also a great opportunity to get a lot of experience points by performing special attacks.
Don't forget about the special abilities. Andriel's healing sphere will be especially useful here. She casts it once in a while. If you play as the Elf, then use this special ability as often as possible. We suggest fighting behind one of the pillars - this way, it'll be hard for the archers, who will come running to this place, to aim. There will be five archers together, though they will appear one after another.
If one of yours companions falls in the battle, quickly run up to them and hold the use key. This action will get them back on their feet. You'll also unlock the [ACHIEVEMENT] Where there's life, there's hope if you do it. Remember that you mustn't be hit with any powerful blow while bringing your companions back to life, because the process will be stopped. The same applies to a situation when you fall, so keep your fingers crossed for your companions and hope they manage to get you back on your feet as well.
Kill the goblins till they stop appearing. Then run up to five archers. It's vital that you attack them together with your companions. Kill the enemies and then start searching the place. Begin with the second stairs. Behind the ones on the right there's a heap of items. You will come across such heaps quite often and they are worth searching - you will find potions, arrows, bolts and other useful things.
Run to the first stairs (you used the glowing portal between them), On the way you'll find another heap of items, the next by the pillar (on the right there is a mushroom), while near the stairs on the left - one more. Destroy all barrels and crates on the way and also pick up items left by the enemies.
Run up the second stairs. If you hold the appropriate button, the entrance leading to the further part of the level will be shown. But first, search this place. Begin with examining the area where the abovementioned gate is located. There's a barrel, crate and heap of items on the right.

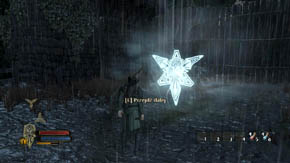
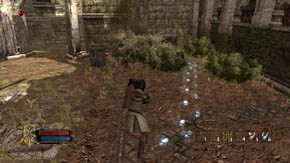
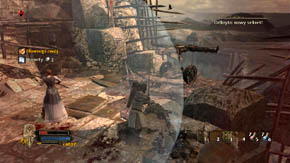
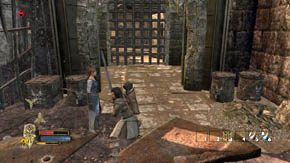
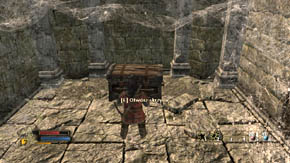
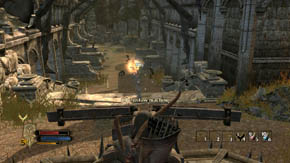
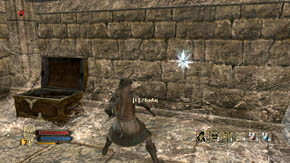
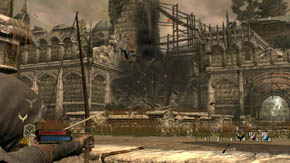
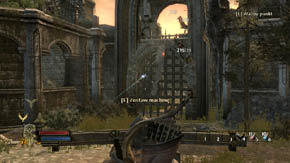
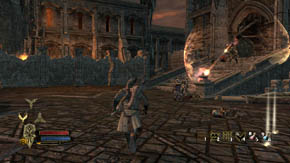
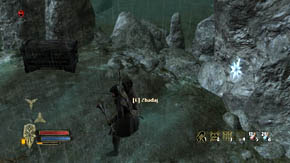
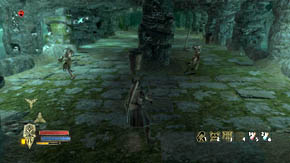
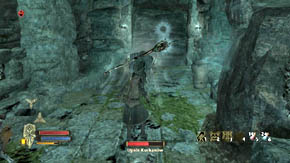
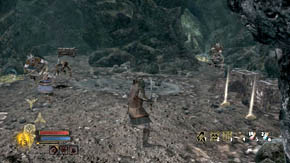
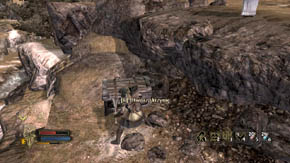
![You're likely to find the Westernesse Artifact in one of the crates or barrels will - acquiring this item begins the [SIDE QUEST] Work of Westernesse - Main Gate - p. 1 - Chapter 1 - The Lord of the Rings: War in the North - Game Guide and Walkthrough](https://game.lhg100.com/Article/UploadFiles/201512/2015121715524082.jpg)
You're likely to find the Westernesse Artifact in one of the crates or barrels will - acquiring this item begins the [SIDE QUEST] Work of Westernesse. Cross the closest bridge. There will be a heap of the items you should search in front of you. Then run left.
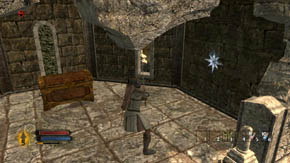
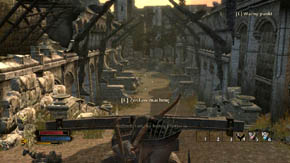
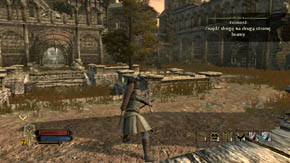
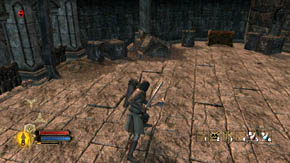
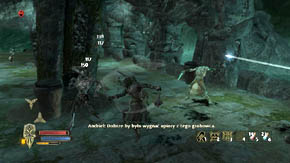
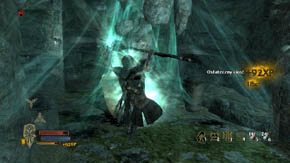
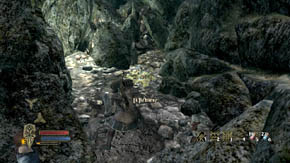
![In one of the walls on the right the [SECRET 5/5 for Eradan] is hidden - Main Gate - p. 1 - Chapter 1 - The Lord of the Rings: War in the North - Game Guide and Walkthrough](https://game.lhg100.com/Article/UploadFiles/201512/2015121715524010.jpg)
In one of the walls on the right the [SECRET 5/5 for Eradan] is hidden. At the end of the path you'll get to a golden treasure chest. If you search five such chests, you will unlock the [ACHIEVEMENT] Expert Treasure-hunter.
There are some mushrooms on the other end of the tunnel. You can collect them if you want to. Go to the tunnel exit. There is a glowing portal in front of you, but before you use it, search a small room on the right. There are two barrels and a chest.
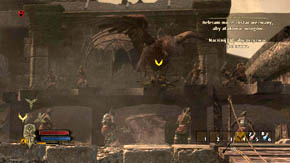
Fornost: Free the captive Eagle
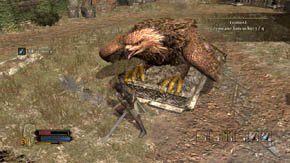
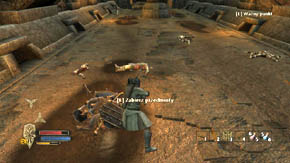
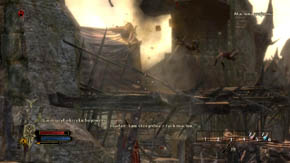
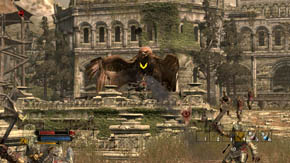
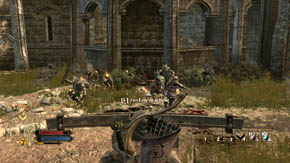
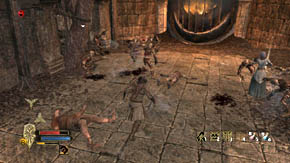
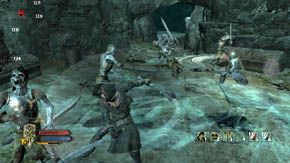
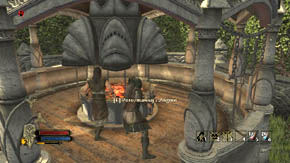
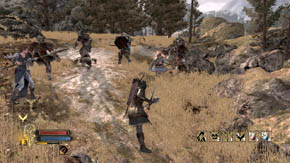
After watching the cutscene it's time to fight. There are several ordinary goblins and warriors in the courtyard. Kill a few and then run up to a captured Eagle who's in the middle of the square. Cut the four chains, starting with the front ones to free the Eagle, and then finish the remaining enemies off.
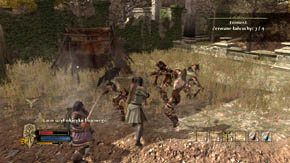
Another fight awaits you here, with a large number of ordinary goblins. The attack will be divided into three waves. First, it will begin by the tent (on the left, when you look at the altar on which the Eagle was imprisoned). The goblins in the second wave will come down the right wall of the building. To make matters worse, single warriors and archers will be attacking you all the time.
The last group of goblins will run out of the left wall of the building. Stop all three enemy waves (the fight will not differ much from what you went through in the tunnels). Then kill the rest of the enemies, namely the warriors and archers. It won't be a difficult task. Fight till you see a cutscene with the Eagle called Beleram whom you freed a moment ago. You will unlock the [ACHIEVEMENT] Friend to the Eagles.
Fornost: Make your way to the battlements
Though you can finish this level at this point, it's better to explore the area first. There is a tent to the left of the place where you began this location, and behind it - a flower. Go there and run into the building through the hole in the wall on the right. Nearby, on the left there's a crate and a mushroom. Further you'll find a lot of crates and barrels by the walls, and also a golden chest to be searched.
Jump out through the window on the right to the courtyard. There's a flower you can collect under the window. Run in the direction of the gate and you'll notice some foot tracks on the right - you'll see them if you play as Eradan. They lead to a flower and a chest you can search.
Now you can head for to the gate. On the left and right in front of the stairs, and also upstairs, there are barrels and crates. You will also come across a teleport that allows you to immediately buy and sell items and also move to a different location (for now you can only teleport to Bree, though it's not necessary). On the left there is a glowing portal that finishes this level.
Fornost: Destroy the War Machines

There are some crates and barrels in front of and behind you. If you didn't find the Westernesse Artifact in the previous level, then now - in one of the barrels or crates - you'll find it for sure ([SIDE QUEST] Work of Westernesse). Keep destroying everything you can on the way till you get to your first enemies.
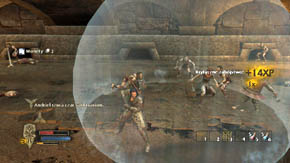
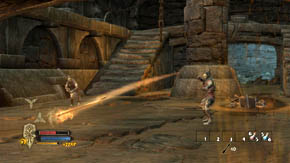
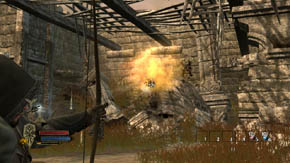
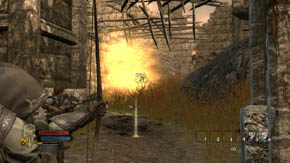
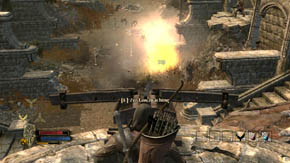
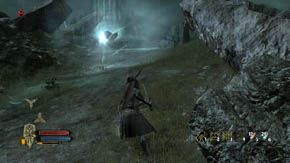
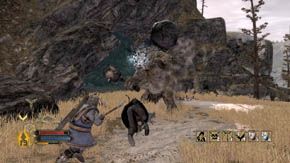
You will meet a goblin sorcerer for the first time. There are also several warriors here and a lot of goblins, however, deal with the archers in front of you first. Locate a red ball - if you shoot at this explosive the enemy archers will be gone.
After that quickly take care of the sorcerer. He throws the dangerous fireballs and their explosions can knock you down and wound seriously. Yet, it's not a tough enemy. Flood him with blows, which will prevent him from casting a spell.
It's necessary to take the items that will fall out of his body. Among them you'll find the Malignant Scroll. Once you pick it up, a [SIDE QUEST] Cult of the Lidless Eye will be started. The scroll is also the [SECRET 1/1 for everyone]. Finish off ordinary goblins and warriors. You will not have any trouble here, though new goblins will be joining the fight.
Destroy all the crates and barrels around, and then move closer to the war machine and begin to quickly press the use/inspect button. You'll push it down this way - the other will remain. Cross the wooden bridge.
There are several warriors and another sorcerer hiding behind the corner. On top of all that the area will be teeming with ordinary goblins. Try to kill the sorcerer using melee or a ranged weapon before you get surrounded, and then deal with the rest of the enemies. Fight until there is nobody else here except the three of your characters.
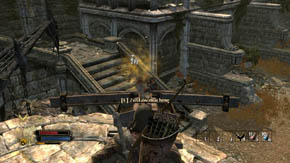
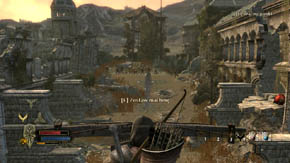
On the left there is a chest and on the right a heap of items (search both). There are a lot of barrels and crates around and opposite - the second war machine you should push down now. You will receive a new objective of the quest. Head for the gate nearby and destroy all crates and barrels. Pass through the gate when it opens and use the glowing portal so that the game will be saved automatically. Destroy a barrel and a crate and then bring the view closer on a group of goblins who are standing on the other side of the bridge, on an elevation.
Fornost: Make your way to the end of the battlements
Approach the wooden bridge, but don't go further. You will receive three Great Feathers, which will make it possible to summon Beleram. Enter the aiming mode, zoom in, place the crosshair on the sorcerer and press a suitable button. Beleram will literally drop from the sky and neutralize the enemy at once. The fight with remaining goblins will be much easier due to that. It's also worth knowing that if you call the great eagle 10 times during the game, you will unlock the [ACHIEVEMENT] Swift-winged Warrior. However, we suggest leaving his help to use when you deal with really burdensome or powerful enemies.
Run on the bridge and begin to fight the warriors. Archers will be shooting at you the whole time but warriors should cover you. Finish off the former once you are able to cross the bridge.
The last enemies are two warriors who will come through the abovementioned gate. You will defeat them without a problem. Then all that's left to do here is searching the place thoroughly. Downstairs and upstairs there are some barrels and crates. Additionally, there's a chest to be searched downstairs. Head for the glowing portal to finish this level after you've taken all the items.
Fornost: Find the sons of Elrond

Run forward and talk to Beleram. You can pick a flower in front of the bridge, while on the other side there's a teleport. The further road leads right, to the long and open corridor. At the beginning of the tunnel, to the right, there will be some mushrooms.
Get to the stairs (by the right turn you'll find a flower on the left, under the wall) and run upstairs. Call Beleram to take care of one of the two archers. Thanks to that he'll also destroy the gate. It leads to the next part of the level, but for now examine the place you're currently in. Begin to fight with the warriors who will come running here.
Keep killing the next enemies while going up the stairs. Another group of warriors will run down from the opposite building. Defeat all enemies and then begin to search this place. Run left, destroy two crates next to the tent and go down the narrow stairs (in front of them you'll find another flower).
Destroy two crates. There's a mushroom just to the right, and further there is a chest you should search. Come back to the fork and follow the left path. If you play as Eradan, you will notice some foot tracks. They lead to a golden treasure chest, mushroom and flower. Return to the place from where the last warriors ran out.
This time go right. Nearby and a little further to the right there are crates and barrels, while between them - a flower. Go past the gate on the left and head for the hedge. There are crates, barrels and a chest and a mushroom by the tent (one crate is behind the tent, you need to run around it from the left side). If you play as Eradan, you will notice foot tracks on the ground.
They lead to hiding place in the hedge, which is the [SECRET 1/4 for Eradan]. Another mushroom is next to the second tent on the right. There's nothing more to do here, so go to the gate Beleram destroyed and run through. On the left there are crates and barrels, while on the right a glowing portal you should use now.
After you've watched the cutscene, immediately run up the stairs. You'll see a goblin operating a big crossbow. Call Beleram to kill the enemy and then go about getting rid of several warriors.

After some time one of yours companions will warn you about the next warriors, who will come running down the stairs further away and surround you. Defend yourself and flee somewhere further or in Andriel's healing sphere if you are wounded. Also remember about healing potions and special abilities.
Finally, deal with the archers. They are literally everywhere, on the wall under which you were fighting, on the second to the left (the further one) and on the wooden towers. Zoom in and shoot at their heads constantly moving a few steps to the left and then to the right so that they won't be able to hit you. If you can't locate them, look at your companions - they won't have any trouble with it.
At the fork you can choose the path forward, to the building or to the left, up. Choose the first road for now. Enter the stairs, there's a flower on the right. Under the building walls and those that surround the courtyard there are a lot of crates and barrels. Try not to miss any and destroy all. Next to the post with a crossbow there's a mushroom.
Run around the whole courtyard destroying all you can. At the other end of the courtyard, on the left, by two crates and a barrel there's a flower. Look at the wall to the right. There a hole through which you can enter inside - do it. There'll be a mushroom in front of you.
If you play as Farin, focus your attention on the wall to the left - you can break it. You will find a chest you should search. It's the [SECRET 2/4 for Farin].
You will get to a golden treasure crate. There is a Mysterious Aged Tome. Taking it will result in receiving a new [SIDE QUEST] The Seer's Words. This is also the [SECRET 3/4 for everyone]. To the right, in the wall, there's a hiding place with items. It's the [SECRET 4/4 for Eradan].
This is all you could do here. Come back to the fork and this time - choose the path leading up, to the stairs. Destroy all crates and barrels on the way. You will reach the glowing portal. Use it and then jump down on a small arena. The game will be saved automatically. Now, get ready to fight with a troll.
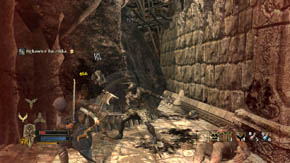
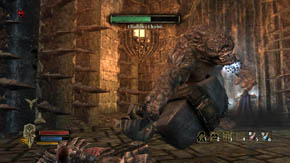
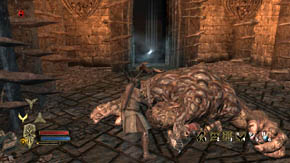
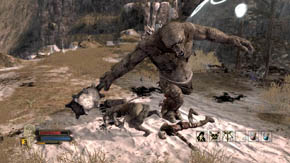
Fornost: Slay the Troll
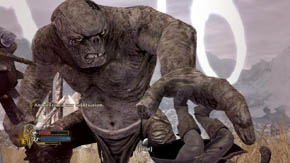
These gigantic beasts are very tough and fight with them is quite long. Once in a while they charge at you or simply hit you with their powerful hammer, and each such an attack will knock you down. Apart from that, a troll doesn't have any special attacks.
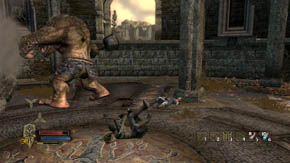
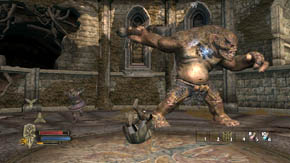
Dodges are the most important thing. The troll doesn't attack often so you will manage to injure him a little before he takes a swing to hit you. It doesn't matter which way you dodge - it's crucial that your hero is in the middle of performing a dodge because in this brief moment he's simply untouchable. When you fight hand-to-hand, it's best to attack him from behind, but be careful - he can swing his arm and hit you (before doing so he'll turn away his head - it's a sign to dodge instantly).
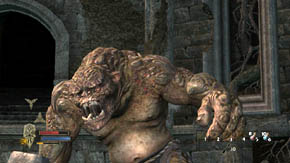
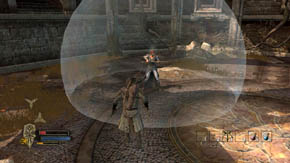
You can also simply him shoot at his head, but do run away if he begins to charge at you. If you've been wounded, hide in Andriel's healing sphere or use a healing potion. Fight till you kill the monster and then press the use/inspect button to finish this level. After the cutscene you will unlock the [ACHIEVEMENT] Elf-friend.
Fornost: Find a route to the citadel
Follow the Elves, destroy a crate on the left, and then walk up a short path on the right. Search a chest there and then come back down to join Elrond's sons. You'll notice a crossbow in the distance. This is a dangerous weapon and the goblin that operates it should be eliminated first.
Call Beleram or simply run zigzagging and avoiding the crossbow shots till you're able to reach its operator. Go past the enemy archers who are in your way - your companions will deal with them easily. After killing the operator start to fight with a large number of warriors (new will be joining the battle every now and then). It won't be hard, especially because the Elves will help you.
After this fight, however, your ways will part. Don't waste time - move to the crossbow as quickly as possible and use it. Begin to flood your enemies who appear in the place you came from with bolts. There will be fast goblins and warriors, and the enemy attack will be divided into three stages.
During the second and third stage, fast goblins will also be going down the walls on the left and right, but you should easily manage to kill these opponents. All the time you must watch out for the archers on a platform to the left - new will appear in the place of the killed ones. Shoot them every now and then, but focus mainly on killing the enemies who use melee weapons - don't let them surround you.
The last thing will be to defeat two goblins and an orc. You should not have any trouble with this task. Before you pass through the gate that's just been opened, examine the area. You'll find a flower next to one of the broken-off walls down, to the left (when you look at the stairs leading to the courtyard with the crossbow). If you play as Andriel and take a look at the stairs leading to the courtyard with the crossbow, and then look to the right - at the wall in front of them - you will notice that you can cast a spell on it. It's the [SECRET 1/5 for Andriel].
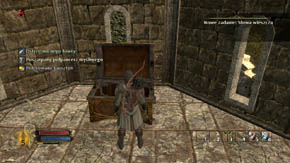
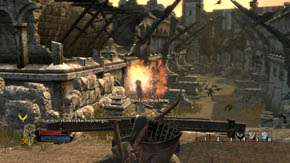
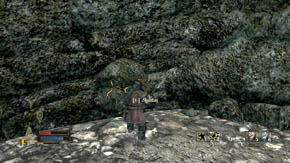
![Behind the false wall you will find (from the left): a crate, mushroom, golden treasure chest, hiding place with items in the wall (this is the [SECRET 2/5 for Eradan], you'll need to change the character after the game is saved to discover this secret), barrel and a heap of items - Inner Wards - p. 1 - Chapter 1 - The Lord of the Rings: War in the North - Game Guide and Walkthrough](https://game.lhg100.com/Article/UploadFiles/201512/2015121715530845.jpg)
Behind the false wall you will find (from the left): a crate, mushroom, golden treasure chest, hiding place with items in the wall (this is the [SECRET 2/5 for Eradan], you'll need to change the character after the game is saved to discover this secret), barrel and a heap of items. Come back to the stairs and use them. To the left (looking at the crossbow) there are crates and barrels, a flower on the left and a mushroom on the right. Take the items that belonged to the killed enemies as well.
Pass through the gate and look to the left (the game will be saved automatically). You will encounter goblin suicide sappers for the first time. These enemies will run to you and explode, which might severely injure you, so it's essential that you eliminate them from a distance. Keeping this in mind, take a few steps forward and then begin to quickly, with a ranged weapon, kill the sappers who will be coming down the destroyed wall.

After that search this place. There are two heaps of items here (one on the left and the other one in front of you), a mushroom by the tree to the right, while in a pillar on the other side you will find a hiding place with items. It's the [SECRET 3/5 for Eradan]. Go to the place from where the sappers came out and then turn right. There's a mushroom near the entrance on the right.
Get ready for eliminating the next wave of goblin sappers who will come from the opposite direction. Shoot until there's no one left. Then detonate two red balls on the left (shoot from a safe distance). The second one (upstairs) will destroy the wall - be prepared to quickly kill the next sappers who are waiting behind the abovementioned wall.
 s
s
Use the glowing portal to move to the next location. This will also save the game automatically. To the right, over the gate, you will a notice crossbow and a goblin sorcerer. It's pointless to shoot at him, because his aura protects him from ranged attacks. You can use Beleram or simply run up to the stairs on the left or right as quickly as you can. Be careful, however, it will be more difficult than at the beginning of the level.
Get upstairs and go past the archers. Quickly finish off the sorcerer - he won't be that dangerous in close combat provided you prevent him from casting spells. Next, deal with the goblin who is operating the crossbow and then use it yourself.
Look around and try to take down enemy archers using the crossbow. Yet, this will only be possible if they went down the wall that's over the gate. If it didn't happen this way, then kill them in a traditional way and then pull the lever (press the use/inspect button quickly), which is near the crossbow. The lever is glowing in orange, so it's easy to locate it.
Use the crossbow right away and prepare to repel the enemy attack. A lot of fast goblins will come out in front of you and, to make matters worse, after a while goblin sappers will start going down the wall fragments to the right and left as well. In the first place you should shoot the latter as when he explodes all enemies who are around him will also be killed.
With a bit of luck the enemies won't even manage to get to you. When there are no new goblins, deal with the archers standing a little closer, to the right. Shoot at the red explosive to get rid of them fast. The gate will stand open but don't go through yet. Search the place first. By the left and right stairs, on the wall, there are heaps of items.

Head for the place where the goblins were coming out. To the right, if you play as Eradan, you will notice foot tracks. They lead to the thickets you can cross. There's a golden chest gold you should search - it's also [SECRET 4/5 for everyone]. There are also two flowers and a barrel here.
Only now should you head toward the gate (destroy two barrels under the wooden construction on the left). When you find yourself on the bridge, the gate will close behind you and soon goblins will begin to come out from all directions. There aren't many so you'll deal with this attack easily.
The next attack also won't cause you any trouble. Stand with your back facing the second gate and look at the wall on the left. Goblin sappers will begin to appear there. Shoot all of them and do the same with the ones who will appear on the wall to the right. However, the situation will get complicated when sappers begin to appear on both walls. You need to be accurate and fast so that your companions won't be more than lightly wounded.
Now it's time for the most difficult stage of this fight. Again you will be attacked by a large group of goblins and new ones will be coming on the bridge all the time. Also, once in a while, a sapper will appear on the bridge - fight keeping your eyes open and kill the sappers from a safe distance. If any approaches you, dodge fast.
Fight until the elven brothers unlock the gate. Run forward then and up the stairs. The game will be saved automatically. Look at the wooden tower on the left. Don't shoot at the archers but the red explosive barrel (it's on the first tower level). The tower will collapse, which will create the way to get to the next part of the level.
Search this place. In the middle of the courtyard there's a crate and a barrel, on the right a flower (by the right stairs), and a little further crates and barrels under the tower on the right. The opposite gate leads to a teleport - outside there's also a heap of items on the left, while inside, also on the left, a mushroom.
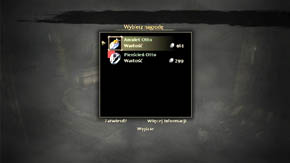
If you have at least ten items such as shields, weapons or bows you can use the teleport to go to Bree. Talk to Otto Aster in the inn and sell him ten items of kinds mentioned above. The prices Otto Aster offers are, to be sure, ridiculous but it's worth doing it anyway because you will complete the [SIDE QUEST] Otto's Arsenal. You will receive some experience points and a package. Open it in your inventory and choose one of the items.

Come back to Fornost, destroy the tower with orcs again and search this place. Then run up the destroyed tower to get to the hole in the wall. If you play as Farin, focus your attention on the wall to the left of the stairs. Break it - it's the [SECRET 5/5 for Farin].
Behind the wall there is a chest you should search, while on the left there's a mushroom. Leave this place and run up the nearby stairs. Before you enter the bridge, search the chest on the left.
On the bridge, which is exactly over the gate, there's a lever that opens the very gate. Shift it, but before you go down, cross the bridge and crash some crates and barrels, and also search another chest. Come back down following the same path that got you here and go through the gate. The game will be saved automatically.

Immediately stand behind the crossbow in the middle of the square and start to defend yourself. You will easily fend off the first attack (a lot of goblins getting down the wall on the left and archers standing upstairs) and the second - identical, only coming from the right.
The third attack - a lot of ordinary goblins and sapper goblins - can be a bit problematic, particularly because there are really lots of enemies and it's possible that some can break through. Finish them off quickly and resume shooting at the enemies. In a moment goblin warriors will also join the fight.
When you hear that enemies are attacking from all directions, it will mean that there are archers and goblins on the left and right. Eventually, the time will come to repel the most difficult attack- ordinary goblins and sappers getting down the opposite wall, warriors and archers on the left wall and on the gate to the right.

After you fend off the attack, the allied Elves will open the next gate. There's a flower by the crossbow, while on the way to the gate there's a crate and barrel. In the passage itself there are some mushrooms. Run up on the bridge and up the stairs, and then, avoiding goblins, turn right (the game will be saved automatically). You have to get to the orc sorcerer as quickly as you can. He'll be shrouded in the healing sphere and throw fireballs at you.
After you've finished him off, take care of the warriors. Your companions should be able to deal with goblins, though the closer you all are, the easier it will be to fight. The gate will stand open and the last enemies will come running at you - bigger orc warriors. Beat them and use the glowing portal to finish this level.
Fornost: Fight your way to the citadel gate

Before you cross the bridge, search this place. In the corner, to the right there's a flower. There are two heaps of items on the left and right, and also some crates and barrels. Get the bow ready and begin to run across the bridge. As soon as a goblin appears behind the crossbow on the other side of the bridge, take him down as quickly as possible.
You will easily defeat several goblins that will come running to you. Cross the bridge and take a look at the wall to the left from a distance. Ordinary goblins and goblin sappers will start going down it. Try to kill the latter with a ranged weapon - all enemies around will be killed when the sappers explode.
When goblins stop coming, quickly aim at the red explosive on the second stairs to the right. In a while two warriors and an orc sorcerer will approach that place. If you manage to shoot the barrel on time, then you will get rid of the enemies right away. If not, deal with them the usual way. Then search the courtyard and destroy crates and barrels.
There's a flower near the stairs on the right. Use them to get into a small hall. There is a heap of items and a mushroom in front of you, while to the left - a mushroom, a chest to be searched and crates and barrels to destroy.
Stand up on a bridge to the right and enter the aiming mode. Then, take out two archers upstairs, in front of you. Cross the bridge and prepare to fight. An orc sorcerer will appear together with two fast goblins, two orc warriors and three archers. Use special abilities. The sooner you get rid of the sorcerer, the better.
It's not the end of the fight, though. In a while the hall will be swarming with fast goblins. Individual goblin sappers will also come here once in a while. Be careful - run away or dodge before the sapper's explosion kills you. At the same time keep fighting with the goblins till there's none left.
Wait for the last enemies - two goblin warriors and an orc warrior who will come through the newly open gate. After getting rid of them and taking the mushrooms (one is by the crossbow, the other near the gate you're using right now), go to the place from where the last enemies came out. Before you use the glowing portal on the left, check what's across from you (a flower on the left, crate, barrel and chest on the right).
Fornost: Defend the sons of Elrond
Your next task is to protect Elladan and Elronhir from orcs and goblins. You can see the Elves' health bar at the top of the screen and if it runs out, you'll lose the battle. In the beginning it won't be hard. The first attack will be performed by three fast goblins across from you (standing with your back facing the gate) and two goblins warriors both on the left and right side.
The second wave means two fast goblins and three orc warriors (they will come up the stairs on the left), while the third - five orc warriors who will come up the stairs to the right. As you fight, it will get more difficult. Keep fighting but once you hear that the elves are under attack come back to them immediately.
The fourth attack will consist of large number of orc warriors and several goblins warriors. Defend yourself the whole time and remember about your special abilities. You should attack the enemies who are occupied with the elves first - it will cause the orcs and goblins to focus their attention on you.
In the fifth wave expect several goblin warriors and a troll. Summon Beleram to wound the troll, which will delay his march, and use special abilities and tips given in the previous fight with a troll. The difficulty here, though, is that the troll will constantly be trying to injure the elves, so you have to draw his attention away from them however you can.
After dealing with the troll the rest of the enemies will retreat. Watch the cutscene and then run down the right stairs - there are crates, barrels and a chest to be searched. Come back upstairs and use the glowing portal to finish this level (there were no secrets here).
Fornost: Find Agandaur within the citadel

You begin in a small hall with a teleport on the left and some barrels, crates and a chest on the right. Search everything and then run up the high stairs.
Choose the right or left road and then use the glowing portal. Prepare for the fight with the boss of this chapter - Tharzog.
Fornost: Defeat Tharzog and his guards

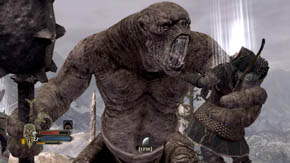
Tharzog is a great orc chieftain whose attacks are very powerful. The fight will be long and difficult, so do your utmost. Remember about special abilities to do as much damage to the boss as you can. Also, don't forget about the healing potions!
Tharzog attacks in a traditional way but he also has two special attacks - a jump with a blow and taking an aerial sword swing. The latter is preceded by a roar, so you'll know when to dodge. The fight with the boss resembles the one with a troll - do as much damage as you can and at the same time keep your eyes open for his blows. If you see he attempts to - dodge quickly.

To be honest, Tharzog's guards are the real problem. It's pointless to fight them as new will appear in the place of the killed ones. That's why, see to it that they are busy fighting with your companions while you fight with Tharzog.
Don't forget about Andriel's healing sphere. You can also fight with Tharzog using a ranged weapon, which is much safer, though a bit more onerous, because not only must you try to aim at the head, but also one of the enemies might get into the line of fire. Also remember about healing your companions if they fall. When your or some other hero gets hit during the process of healing, it will be stopped!
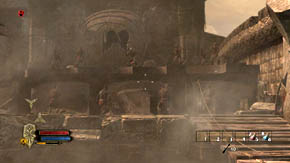
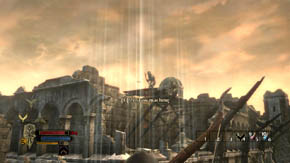
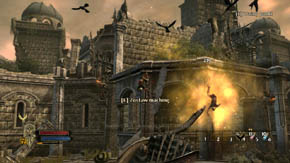
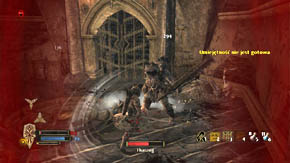
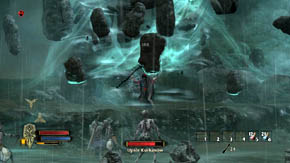
![After the long fight you'll finally kill Tharzog and you'll unlock the [ACHIEVEMENT] Tharzogs Bane for that - Citadel Tower - Chapter 1 - The Lord of the Rings: War in the North - Game Guide and Walkthrough](https://game.lhg100.com/Article/UploadFiles/201512/2015121715534157.jpg)
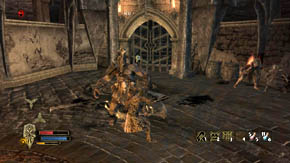
After the long fight you'll finally kill Tharzog and you'll unlock the [ACHIEVEMENT] Tharzog's Bane for that. Getting rid of the guards will not cause any trouble then. Before you use the glowing portal, run around the round hall, breaking all crates and barrels on the way, and also search some heaps of items. Then you'll finish both this level and Chapter 1.
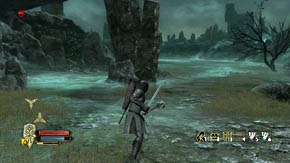
The Barrow-downs: Travel to the Barrow-downs
You'll begin the second chapter near Halbarad. Talk to him about the awaiting task. Two challenge mission will be unlocked after the completion of this chapter (you can get to them on the map) - Lorien Challenge Mission and Osgiliath Challenge Mission. Hador (a blacksmith who can repair your items) and Maradan (a merchant) are standing nearby.
Run into the large tent on the left. You'll meet Silanna and talk to her. Offer her your help and you'll receive a [SIDE QUEST] Athelas. There's nothing else to do in Sarn Ford. Run out of the tent and turn right. Go to the end of the road, use the glowing portal and then move to The Barrow-downs.
The Barrow-downs: Search for the missing Rangers

Run following the only path ahead till you have to go down, to the left, and then right. Don't go forward just yet - turn right. Reaching this place will unlock [SECRET 1/9 for everybody].


To the right, in the rock, there is a hiding place with items. It's the [SECRET 2/9 for Eradan]. Opposite there are two heaps of items to be searched, while on the left - a flower. Come back to the main road and go forward. On the left you'll see a herb, Athelas. Pick it up to be able to do the [SIDE QUEST] Athelas. There is a heap of items in the opposite corner and a flower on the left.
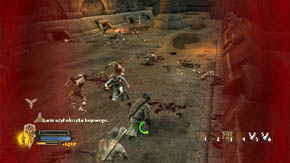
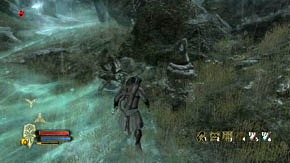
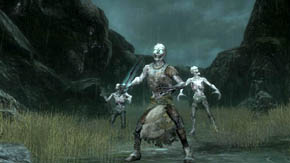
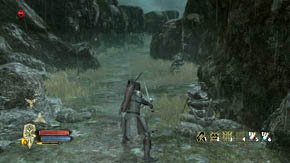
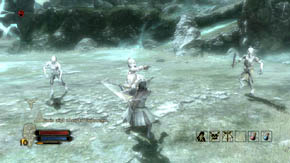
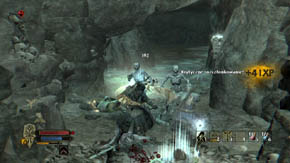
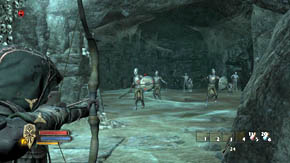
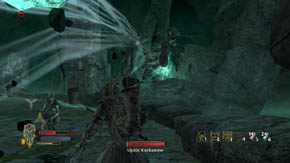
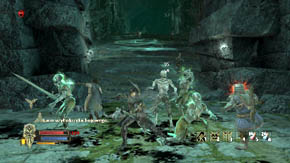
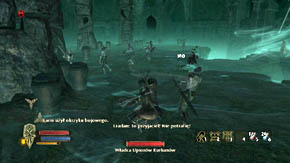
Start running downhill till you notice a valley shrouded in green fog (earlier you'll find a mushroom on the left and a flower on the right). There are a lot of small shrines here which function as crates and barrels - destroy them and pick the items that will fall out. A mushroom can be found by one of the shrines on the right. In a corner on the right you'll come across a heap of items. A little further to the right there's an Athelas. Get to the door - a fight with a large number of zombies awaits you inside. They aren't tough enemies, similar to fast goblins. Some zombies can run quickly on all fours, the other move slowly. You shouldn't have any trouble winning this fight, however, as usual - don't let them surround you.
There are two heaps of items in this place - the first on the left and the second in front of you, under the great pillar you should run around. Behind it you'll find the exit - use it. You will see two trolls hunting zombies in the distance. Don't approach the enemies yet - let them fight among themselves.

This will make it easier for you to finish off both trolls. Dodge frequently (especially when you notice that one of the trolls wants to throw a stone at you), use special abilities or attack from a distance aiming at the head. Search the place after killing the trolls. On the left there is an Athelas.

Examine the right part thoroughly - you'll find a mushroom near the entrance, as well as a lot of shrines that should be destroyed. A little further, on the right, you'll notice some foot tracks, provided you play as Eradan. They lead to a rock in which you will find a hiding place with items. It's the [SECRET 3/9 for Eradan]. There is also a heap of items nearby, a mushroom on the left and on the right - an Athelas.
Head for the door destroying the shrines on this and on the other side. Use the gate for the game to be saved automatically. Then you'll advance to the further part of the level. There is a flower on the right. A little further you will fight a ghost (an enemy similar to goblin warriors) and you'll also defeat two zombies.
Follow the only possible path. Destroy two shrines (on the left there's a flower), a little further another one, and then the last on the right - right after you've entered a vast area. There's a flower on the right. You will be attacked by a really big number of zombies in a moment, so be careful and don't let yourself get surrounded.
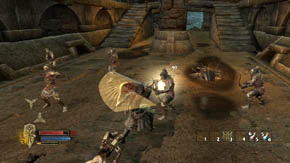
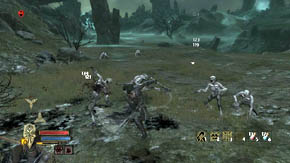
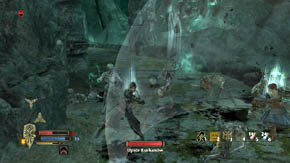
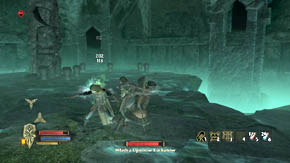
New enemies will be coming all the time - fight till you get rid of all. Yet, the real battle is just about to begin. Run to the left, pass by the blocked entrance to the tomb on the left and high rock nearby. When you arrive at the place, spirits will come flying from both nearby tombs. Then they'll turn into zombies and spirits-warriors.
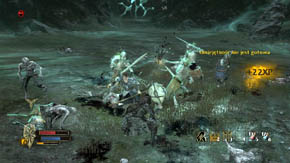
The fight will be quite difficult. First of all, don't let yourself get surrounded - choose individual enemies, finish them off and deal with the next. New zombies and spirits will be joining the fight. Also, remember that dismemberment doesn't work on them, as a spirit-warrior is capable of fighting without an arm or even a head!
At the end kill two archers standing over the entrance to the tomb on the right and then head for the place they've been standing. You will find a chest you should search. Well, you could go to then next part of the level right away, but first we recommend doing the quest [SIDE QUEST] The Last Sons of Cardolan. In order to begin, go inside the tomb (you found the chest above its entrance).
Use the glowing portal. This way, the game will be saved automatically in case you die, which is likely as a difficult fight lies ahead. Run inside the first hall. Together there are four halls here linked by corridors, while the whole forms a circle. Moreover, you'll find a lot of urns here - destroy them because you can find various items inside. If you play as Andriel, approach the wall on the left - you can cast a spell on it. It's the [SECRET 4/9 for Andriel].
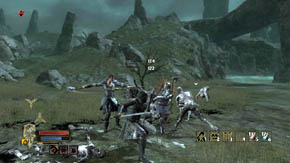
Behind the wall you will find several urns and a chest you can search. Run out of this room and use the corridor on the left. Defeat several zombies who will appear in a small hall. There will be enemies in every hall of this tomb and there's one condition to be met if you want to win - not fighting with all of them simultaneously.
That's why, after destroying the urns in this hall return to the previous one and defeat another group of zombies and spirits-warriors. Come back to the second hall and use the stairs to go down to the third. There is a chest and some urns but before you check what's inside you'll have to get rid of a few zombies and spirits-warriors.
Head for the last hall (you went past it earlier) using the stairs leading up on the right. The enemies should be already waiting here and there will be more of them. You must particularly be careful when the spirits-warriors surround you - dodge a few times to escape. At the same time keep an eye on your companions - they can easily fall, so be ready to help them.
You will clean the first tomb after a long fight. Go outside after searching it and head for the entrance to the second tomb - it's a little to the left. Use the glowing portal (the game will be saved automatically) and search the corridor that leads to a large hall - there are a lot of urns here you can destroy.
Soon in the great hall (there is only one in this tomb) a lot of zombies and spirits-warriors will appear. Try to eliminate enemies as quickly as possible, because more will be joining the fight all the time. If any of your companions falls, draw the enemies' attention away from him/her so that the other one can heal him/her.
Search this hall after getting rid of all enemies. There are a lot of urns and two heaps of items. If you play as Andriel, cast a spell on the wall on the right. It's the [SECRET 5/9 for Andriel] and behind the magic wall you will find a small room with urns, two heaps of items and a chest you can search.
But it's not the end of secrets. If you play as Farin, examine the left wall (looking from the entrance to the hall) . You can break it - it's the [SECRET 6/9 for Farin]. Behind the broken wall there is a small room with a heap of items in the corridor, and further there are two chests and several urns.
Run out of the tomb and go left. There is the small spot to the left of the glowing portal. You'll find a flower, mushroom, shrine and heap of items there. Use the glowing portal to move to the next part of the level.
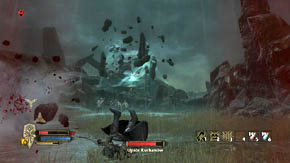
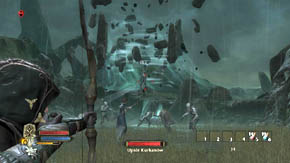
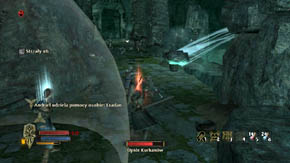
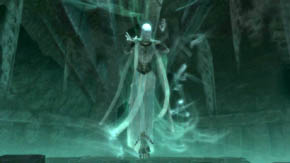
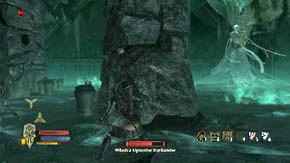
A fight with a boss awaits you, the Barrow-Wight. He will appear in front of you, surrounded with rocks and he'll be throwing them at you once in a while - dodge then. For now you can only injure the boss by using a ranged weapon. Shoot, dodge and let your companions take care of the zombies the boss summons.
After a moment the Barrow-Wight will move on a rock right to your left. The tactics doesn't change. It is worth knowing that if you're standing in Andriel's healing sphere, then the rocks thrown by the boss won't harm you. Near the end, the Barrow-Wight will teleport on the ground. From now on you can use melee attacks but watch out for his blows - they're quite powerful.
Destroy all shrines in this area after eliminating the boss (there's a flower on the right). Run into the tomb destroying all urns on the way (the game will be saved automatically). You'll reach a big hall - do the same here. Don't go right yet, run to a small room facing you instead. There's a chest and a heap of items. Search them and come back to the previous hall.
A lot of zombies and spirits-warriors will emerge from the ground, while near the entrance to the tomb some archers will appear as well. It's a very difficult battle, especially because of the spirits-warriors who can easily surround and kill you. Remember to heal your companions! If they both fall, lure the enemies in front of the tomb and then return to your friends and start getting them on their feet. This way, you'll gain some time before any of the enemies interrupts the healing.
The road further leads to the right and downstairs. On the way destroy urns and prepare for another heavy fight. A big number of spirits-warriors will slowly appear in front of you. Try to weaken them with arrows before they reach you. Then fight in a tight corridor thus making it impossible for them to surround you.
The fight with zombies and archers will be much easier after knocking out most of the spirits-warriors. Even though new will appear it won't be a problem. After the death of the last of the undead you'll complete the [SIDE QUEST] The Last Sons of Cardolan. Search the room - there are several urns here and some mushrooms on the left. If you play as Farin, examine the wall on the left. Destroy it - it's the [SECRET 7/9 for Farin].
Behind the destroyed wall there's a corridor leading to a small room where you'll find a lot of urns and a heap of items. This, however, is not all. Andriel can examine the right wall and cast a spell on it. It's the [SECRET 8/9 for Andriel] but you'll be able to get to it only after switching the character by the game saving point (there's one nearby).
There is another small hall behind the false wall. Inside there are urns, a heap of items and a chest you should search. Now, return to the great hall now and turn left. Run through the corridor to the exit of the tomb (destroy urns on the way), and then turn right. The game will be saved automatically.
Several archers will appear on the right. You will kill all from a distance easily. Stand in the middle of the glade and more enemies will appear - a few spirits-warriors. There aren't many, so you also won't have any trouble with them. On the right there's a shrine and a heap of items, while on the left - mushrooms.

The road further leads to the left, but for now choose the right road. Destroy a shrine on the way and keep searching heaps of items (a mushroom is by the second one) till you reach the top of the hill. There is a flower on the left and a place with items hidden in the stone on the right. It's the [SECRET 9/9 for Eradan]. Come back to the glade using the same path you arrived here.
On the left, before the glowing portal there's a flower. Use the portal and run forward. On the right there is a teleport - it's good to use it and return to Sarn Ford to complete the side quest [SIDE QUEST] Athelas.
When you find yourself in Sarn Ford, run forward and then right by the great statue. You will reach the camp. Enter the tent and talk to Silanna. This way, you will complete the [SIDE QUEST] Athelas and receive a reward (unlock it in your inventory and choose one item). Go back to The Barrow-downs (after leaving the tent go right).
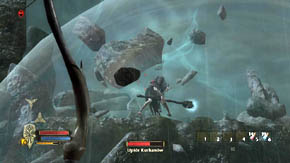
Run forward after reaching The Barrow-downs. The Barrow-Wight will appear in front of you again. The way you should fight him doesn't change. The only difference is that this time he'll be throwing several rocks - not one - at you, which means you need to be careful. Shoot at him till he moves to the right side. Do the same till he appears among the shrines in the middle of this place.
Then, either use a ranged weapon (provided you have ammo, if not - destroy some shrines here), or run up to the Barrow-Wight and use melee attacks. After you've killed him, destroy all the shrines (in the middle and on the borders of this place) and use the opposite glowing portal to finish this level. You will unlock the [ACHIEVEMENT] Tracker.
The Barrow-downs: Search for the missing Rangers
In the hall where you begin there will be no enemies, only a lot of urns and different interesting things. There is a heap of items on the right near the urn. Turn left and go past the pillar - there's a flower on the left, an urn on the right, and opposite a chest to be searched.
Once you've taken all the items from the chest, focus your attention on the abovementioned pillar. Inside it, the [SECRET 1/1 for Eradan] is hidden. Search the hiding place and then go left to the corridor, destroying urns on the way. There's a mushroom in the corridor to the left. Continue going to the lower level.
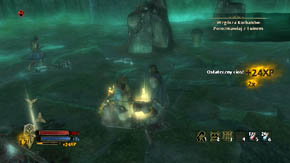
Crash urns in a small room (on the left there's a flower between the coffins) and go to the cave downstairs. The game will be saved automatically. On the right, next to the rock, there is a heap of items. In a moment you will be attacked by a large number of zombies. They will appear literally everywhere, that's why don't let them surround you and pull back if you have to in order not to fight with everybody at the same time.
Next zombies will start coming down from the right, among them a spirit-warrior and an archer. They won't cause you any trouble. Go to the place they've come from. In a small room there are two heaps of items, a lot of urns, two chests to be searched and a mushroom on the left. Don't worry about your companions fighting with new enemies, who will appear in the first hall. Your friends will take care of them easily.
The Barrow-downs: Find a key for the locked gate
To carry out the new objective of the quest head for the opposite corridor that leads to a hall with two chests. On the way you will be fighting with individual zombies, archers and then also with several spirits-warriors. Fortunately, they won't appear simultaneously, so you will get rid of them with ease. On the top of the stairs on the left there is an urn, while on the right - a flower.
Go around the pillar from left or right side, and you'll come across a stone chest. Search it and take everything that's inside, including the Ancient key. Several zombies will appear here (you'll kill them easily). Come back to the last hall, turn left and open the gate.
The Barrow-downs: Continue the search for Luin and Kilaran
Destroy the urn on the left and run following the only path. There is a heap of items downstairs on the right. Destroy all urns on your way until you notice the first enemies in a distance. You will get to a large and long corridor with several pillars. There are many enemies waiting to be killed in this corridor.

There will be zombies, archers and ghost-warriors. But don't worry because they won't attack simultaneously. They will simply appear once in a while. Slowly and systematically move deep into the corridor eliminating enemies until you reach the stairs. Finish off the last ones but don't leave this place yet.
By the second pillar (counting from the entrance to the corridor) there's a flower. To the left and right of the last pillar there are heaps of items. Remember to destroy all urns, and after going down the stairs search the chest that's between them (there are also mushrooms on the right). Start killing the enemies who will be coming out of the other end of the corridor.
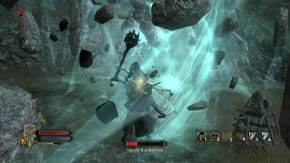
The next fight with the Barrow-Wight is going to be difficult. He will appear to the right, on a pillar, so you will be able to attack him only from a distance. Watch out for the rocks he throws, but most of all, for the great number of enemies who will be constantly appearing in this tight place - zombies, warriors and archers. Use special abilities, healing potions and alternate killing the enemies with attacking the boss.
After some time the boss will move to the further pillar. If you want to reach him you'll need to change your position a little. To do so kill the closest enemies and then shoot at the Barrow-Wight till another undead starts attacking you. As the fight progresses there should be less and less enemies - provided you eliminate them gradually.
Eventually, the boss will teleport to the furthest part of this path, so you'll be able to fight with him hand-to-hand. Kill two archers and then with a series of blows attack the Barrow-Wight. Try to attack him from behind. Dodge when you notice he wants to strike you. Search the place after you've defeated him (there are many urns here) and the corridor with pillars (if you didn't manage to do it during the fight).
In the next small room on the right there are two urns. Further you'll see a teleport and a heap of items. Behind the pillar on the left there's a heap of items, more urns, but above all, the glowing portal you should use. The game will be saved automatically and you will advance to the next part of the level.
Run through the wide corridor destroying urns placed by the left and right wall. You'll reach an altar - Luin is lying on it. He will join your team after a brief conversation. Destroy all urns, and search the heap of items in front of the chasm on the left. A few steps further, behind the pillar there are three urns.
The Barrow-downs: Find Kilaran
Keep running further destroying urns on the way. After a short stroll on the left, in front of the entrance to the next corridor you will find four urns standing next to one another, while further, behind the entrance - an urn, a mushroom and a chest to be searched. Prepare to the fight with a big number of enemies.
Zombies and spirits-warriors will begin going down the wide stairs. New enemies will appear in the place of the killed ones. Don't let yourself get surrounded by spirits-warriors - in fact, it's the only thing you need to watch out for here. Luin will help you in the fight. After you've finished off the enemies deal with the archers on the top of the stairs (there's a flower on the right).
Search this corridor. There are many urns and near the entrance on the right - a flower. A little further to the right, between the statues there's a chest to be searched. Next, use the glowing portal at the end of the corridor to begin the battle with the boss of this chapter - the Barrow-Wight Lord.
The Barrow-downs: Defeat the Barrow-Wight Lord
This boss isn't the difficult type. First of all, remember that as long as Kilaran is protected by the Barrow-Wight Lord you can't wound him - so don't waste time doing it. Start with getting rid of all zombies and spirits-warriors that are here. Only then will Kilaran come running to you. Fight with him until he disappears - he's not a difficult opponent. He makes use of several attacks (jump with a blow, magic wave of destruction) but you outnumber him.

Hide behind one of the pillars at once. The Barrow-Wight Lord will begin to send waves of destruction that can hurt and knock you down. But if you've hid behind the pillar, you'll be safe. When the boss stops attacking this way it means you're going to fight with more zombies and warriors once more. Keep fighting until Kilaran attacks you again. Hit him as hard as you can.
Hide behind the pillar, wait till the waves are over, defeat a lot of zombies (this time, without spirits-warriors) and finish the battle with Kilaran. After eliminating the boss you will unlock the [ACHIEVEMENT] Begone, lord of carrion!. Search the hall thoroughly - on the left and right there are heaps of items (at the ends of the hall). Also, there are a lot of urns. Collect everything you need.
Finally, approach Luin and talk to him. Then pick up all the items the Barrow-Wight Lord left behind. Go to the glowing portal to finish this level and go to Rivendell.
The Ettenmoors: Travel to the Ettenmoors
![After the conversation with Elrond, Gandalf and Aragorn you will unlock the [ACHIEVEMENT] Trusted with the Secret - Rivendell - Chapter 3 - The Lord of the Rings: War in the North - Game Guide and Walkthrough](https://game.lhg100.com/Article/UploadFiles/201512/2015121715542396.jpg)
After the conversation with Elrond, Gandalf and Aragorn you will unlock the [ACHIEVEMENT] Trusted with the Secret. You can have a chat with Gandalf and ask him about the details, but first of all talk to Elrond. You will get more information about the [SIDE QUEST] Cult of the Lidless Eye and - provided you acquired the Mysterious Aged Tome in the first chapter - you'll complete the [SIDE QUEST] The Seer's Words.
You will get two packages from Elrond. Unpack them in your inventory and choose your reward. There's a mirror on the left - you can change your character's appearance by using it. On the top of the stairs, to the left there's Aragorn with whom you can talk. Generally speaking, there are many well-known characters in Rivendell you can talk to. The guide will take you to all of them. Go downstairs and then use the stairs on the left to get to the lower part of Rivendell. Elladan and Elronhir are standing to the left.
Enter under the roof and go past the table to come across another well-known character - the Dwarf Gimli. Further, on the balcony, there's Frodo standing to the right. If you talk to him about the ring, you will unlock the [ACHIEVEMENT] Friend to the Ring-bearer.
Turn right and run up under the roof again. There's another Dwarf there - Gloin. Nearby there's also Elaure to whom you can talk. She functions as a merchant in Rivendell. Look through her items, because some are really worthy of attention.
Further, Bilbo Baggins is sitting on a stone bench. Talk to him and agree to help. You'll need to choose one from four answers, thus making his poem ready - you will receive a [SIDE QUEST] The Poet which you will complete right away if you talk to Arwen. She is standing on the bridge to the left. Agree to help her find some ingredients for the potion and you'll get another [SIDE QUEST] Miruvor.
If you run down the stairs that lead to the bridge, you will meet Legolas on the left, and a little further, on the same side there's a blacksmith, Angmir. You can repair your items, and if you've acquired all three Westernesse Artifacts then the blacksmith will be able to craft a weapon using them. Thus, you'll complete the [SIDE QUEST] Work of Westernesse. Talk to him about the details and ask about the jewels - you'll get a [SIDE QUEST] Elf-stones. Run on the bridge and use the glowing portal at its end to move to The Ettenmoors.
Warning! On this and on the next levels (but only within Chapter 3) in of the crates or barrels you can find Red Beryls, Green Beryls and Golden Beryls. They are necessary to complete the [SIDE QUEST] Elf-stones.
The Ettenmoors: Search the Moors
Run the only possible path down. When you reach two rocks that form a passage, you'll be attacked by orcs. Archers will appear on the rocks, while several orcs will run out from behind them, including an unusually fast warrior using two weapons. Only he can cause you trouble, you'll deal with the rest easily.
Fight until the next enemies appear behind rocks. Go there and continue the slaughter. To the right, the next enemies will come running downhill, among them a heavy-armored orc. As you've probably noticed, orcs are stronger and tougher than goblins. When the fight is over, run up a rock to the right and soon you'll notice some foot tracks - if you play as Eradan.
They lead to a place where you must jump from one rock to the other. Your character will do it automatically. On a small glade you'll notice a goblin - kill him, and then deal with a big number of enemies who will get down the rocks. After the fight search this place - there's a golden treasure chest and two flowers (on the left and right).
Run uphill. The further road leads to the right, but first examine the cave. You'll find the entrance on the left. You will defeat several goblins and two archers inside. There are also a lot of barrels and crates here. Destroy all on the way and take the items.
![In a small spot to the right you will find a mushroom and the first Miriloth Bloom (necessary to complete the [SIDE QUEST] Miruvor), while on the left there's another Miriloth Bloom - The Coldfells - p. 1 - Chapter 3 - The Lord of the Rings: War in the North - Game Guide and Walkthrough](https://game.lhg100.com/Article/UploadFiles/201512/2015121715542982.jpg)
In a small spot to the right you will find a mushroom and the first Miriloth Bloom (necessary to complete the [SIDE QUEST] Miruvor), while on the left there's another Miriloth Bloom. There will also be a chest in front of you, while further, to the left - a heap of items you should search.
If you play as Farin, then now you'll be able to use his knowledge about the precious ores. To the left you will notice a protruding piece of the rock with golden cracks. It's not a secret, but if you examine the rock, then the reward will be several hundred silver coins in the form of nuggets. Sell them at the nearest merchant.
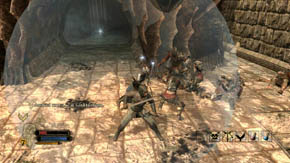
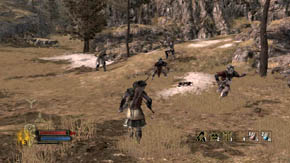
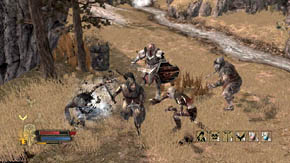
Exit the cave and turn left. When you get to the end, jump down. You will find yourself in an orc camp. A long fight divided into a few stages awaits you. First, you'll fight with an orc leader, two warriors and an archer. The leader has similar blows to Tharzog - when he roars it means that he's about to perform a aerial attack.

When you kill these enemies, new ones will appear - several goblins (new will join during the fight), two ordinary and one fast orc warrior. Here, like before, only the last opponent can be a problem. Defeat all enemies and wait for the next.
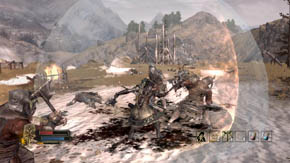
An orc sorcerer accompanied by six warriors will teleport to the camp. While he's not standing in any inaccessible place, you can run up to him immediately and attack with a series of blows. Yet, don't let yourself get surrounded by the enemies, as it can have pitiful results. Also, be prepared to save a companion if she/he falls.
Several goblins will get down the rocks to the left, but it won't be the worst thing - after a while a troll will also appear. To be sure, you already know how to fight with trolls but this one has a new attack - he can grab you and inflict a lot of wounds. If he knocks you down, you have to quickly press the button at the bottom of the screen to free yourself. Do the same if the troll manages to catch your character and he's trying to bite his/her head off.
Apart from that the fight doesn't differ much from what you've already experienced fighting this kind of enemy. Dodge and hit the troll as much as you can or shoot at his head. After dealing with him and watching the cutscene the main objective of the quest will change. Search the camp. On the left and right there are a lot of barrels and chests. There is also a chest near the wooden tower to the right of the exit, and close (on the left) the third Miriloth Bloom ([SIDE QUEST] Miruvor]). Go out through the destroyed gate (the game will be saved automatically).
The Ettenmoors: Find Bargrisar the Stone-Giant
Run the only possible road until you get to a stream. You'll need to defeat two goblins and one ordinary and one heavy-armored orc warrior. You will get rid of them easily just don't go up during the fight because new enemies will join it. On the left there is a barrel and in front of you a flower. Begin to shoot two orcs standing on the left hill.

New enemies will join the fight after a while - several ordinary orc warriors and one heavy-armored. Dealing with this unit shouldn't be a problem, just don't let yourself get surrounded. Don't climb the rock on the right side yet. Go towards the trees in front of you. Among them you'll discover the fourth Miriloth Bloom ([SIDE QUEST] Miruvor]) to the left.

Go further. A troll will run out of the cave on the left. Defeat him and then search the area. Before entering the cave, on the left and right there are some heaps of items. Inside the cave there's another (on the left) and two corners. There's a mushroom in the one to the right and a vein of gold (again - only Farin can mine the nuggets), while in the one to the left there's a chest and a barrel.
Run out of the cave and go forward (you should notice an entrance to another cave in the distance) till you jump down. You will find yourself next to a chest you should search. Then jump down once more, in front of the entrance to the cave.
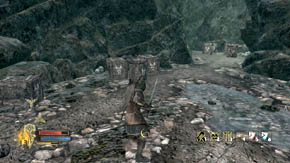
Wait here for a minute till five warriors and an orc leader will come running down the hill. Again, this patrol will not cause you any trouble if you don't let yourself get surrounded. Enter the cave. There are a lot of barrels and crates. Destroy all. You can go following the corridor on the left or right.
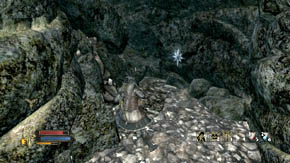
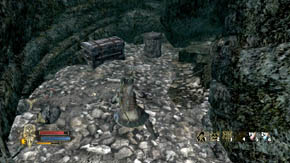
Choose the one on the left, destroy some crates, and search the corners on the left and right side. In this second one, in the rock, you will find a hiding place with items - it's the [SECRET 1/4 for Eradan], while in this first there's a chest, a barrel and a mushroom. Now follow the corridor on the right to get deep into the cave.

You will reach a fork after a while. Go left and you'll get to a dead end. There are crates and barrels, a mushroom, a heap of items and a vein of gold to right. Now follow the other road till you reach the cave exit (on the way there's a vein of gold on the wall on the left, in front of the cave). However, before you use the exit, defeat the enemies who appeared behind you - two warriors and several goblins (new will go down through the hole in the tunnel).

If you play as Farin, then before you exit the cave, look at the left wall (looking at the cave exit). You can break it. It's the [SECRET 2/4 for Farin]. Behind the wall you will find a small room with a mushroom, three barrels and a golden chest you should search.

Destroying the barrel on the way, exit the cave. There's the first deposit of Gilivor Crystals just on the left, while on the right - the fifth and the last Miriloth Bloom. Both items are necessary to complete the [SIDE QUEST] Miruvor]. Apart from that, there's also a barrel and a flower to the right, and you can jump down from here - do it.
There are a lot of crates and barrels around - destroy everything and then run left, down the stream. You will come across some crates and barrels that surround a golden chest. Search it and take all items, including the second Sorcerer's Scroll (you found the first in Chapter 1) necessary to complete the [SIDE QUEST] Cult of the Lidless Eye. It's also the [SECRET 3/4 for everyone].

Now run up the stream and go past the first entrance to the cave. Then get to a place where the path turns to the right (a flower is on the left). You will notice an armored warrior and two ordinary ones in the distance. Attack and kill them. Do the same with two archers who will join the fight.
To the right, near a small stream behind the rock, you will find a flower and the second deposit of Gilivor Crystals. On the left, near the barricade, there's another Miriloth Bloom (in case you missed the previous ones) and a few steps further - in an overturned trunk - Mountain Honey. Thus, you will collect all necessary ingredients to complete the [SIDE QUEST] Miruvor.
Run up the stream. Follow this path all the time till you notice some foot tracks on the ground (if play as Eradan). They lead to a small cave on the right, where you can find two veins of gold (on the left and right), crate, barrel and chest, and also a mushroom opposite the entrance. Additionally, there's a hiding place in the rock on the right. It's the [SECRET 4/4 for Eradan].
Run out of the cave. The further road leads right, but for now you should go straight, past the rock and turn left. This way, you'll get to the other side of the barricade. On he way, you can pick a mushroom on the right and search a heap of items, while by the very barricade you can break some barrels and crates and search a chest.
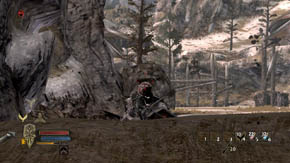
Come back up and run forward. The game will be saved automatically. There is a place here from where you can jump down to the next orc camp - but don't do it yet. Instead, come closer to the edge and start shooting enemies from a distance. It would be best to take out a few archers and a heavy-armored orc.
Only after that can you run down and deal with the orc leader and several warriors. After a while a sorcerer surrounded by another group of warriors will appear. The fight does not differ much from the one in he first orc camp. The key to success is to not let yourself get surrounded and finish off individual enemies.

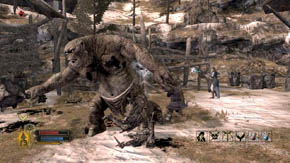
Next fights will be similar to the one in the first orc camp as well. First, a large number of goblins will get down the rocks first, and when the last one is killed the opposite gate will be broken by a troll. Apply the same tactics as before and don't let the troll grab you.
Search the place after finishing the battle. There's a flower on the left, on the right there are a lot of crates and barrels, and under a wooden tower there's a chest you should search. A Miriloth Bloom is just in front of the glowing portal that finishes this level - you can pick it if you haven't collected five up till now.
The Ettenmoors: Find Bargrisar the Stone-Giant
There's a flower on the left. After taking several steps you will notice a scout who will draw the enemies. In the beginning there will be only one archer and one fast orc with two weapons, so you'll manage to kill them with ease.
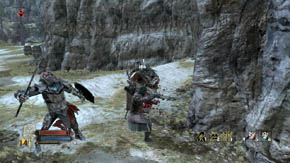
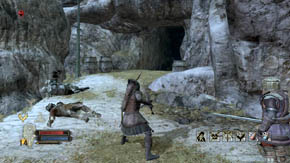
Follow the only possible path to another orc camp. Two ordinary and one fast warrior will charge at you. Defeat them, and head for the cave whose entrance is just to the right. Near the entrance, to the right, there's a vein of gold.
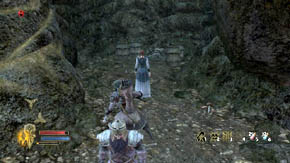
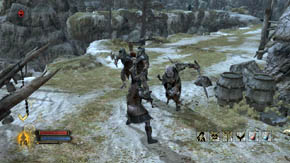
You will find several chests and barrels, and also a heap of items inside. Exit the cave and turn right. You will bump into two ordinary and one fast warrior at once. Kill them as quickly as you can, because more enemies will appear here soon.

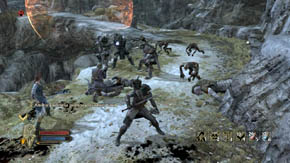
Expect an orc sorcerer accompanied by archers and warriors. After some time a pack of goblins will come running here. If the opponents are in the sorcerer's healing sphere then it's pointless to fight with them with a ranged weapon. Defeat everybody and take the third Sorcerer's Scroll from the body of the orc sorcerer. The scroll is necessary to do the [SIDE QUEST] Cult of the Lidless Eye and it's also the [SECRET 1/7 for everyone].
The last enemy to beat will be the orc leader. He's alone so you shouldn't have any problem with killing him. Next, search the camp thoroughly. There are barrels on both sides. Under the rocks to the right you'll find a flower, and a little further, behind two wooden towers - barrels and a chest you should search.
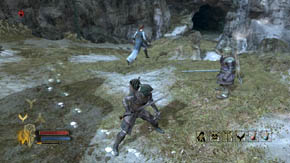
The further road leads through a rocky bridge on the left. Destroy the barrels to the left when you get to the other side and then go right. If you play as Eradan, you will notice some foot tracks - they will take you to a small cave nearby. To the right of the entrance there's a flower (by the stream).
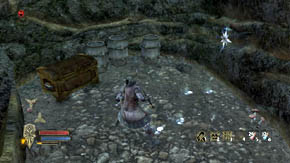
In the cave there are two mushrooms, three barrels, a vein of gold to the right, near the entrance, and a golden treasure chest you should search. Additionally, there are some items hidden in the rock on the right - it's the [SECRET 2/7 for Eradan]. Exit the cave and stick to the rocks on the right to follow the last path leading to the further part of the level (right at the beginning of the path, to the right, there's a flower).
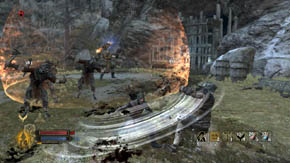
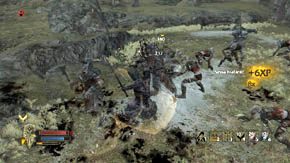
Run the only possible path to an open wooden gate. The game will be saved automatically, and the gate will be closed behind you. Near the exit to the glade, on the left, there's a flower. First of all, however, focus your attention on an orc sorcerer and several warriors who will appear here. Finish off the sorcerer as quickly as possible. After a while a large number of goblins will get out from the trees - defend yourself till the last one is killed.
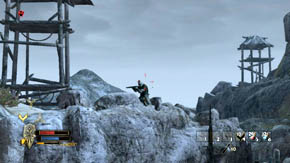
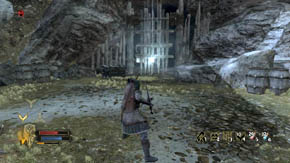
The last thing will be taking out the archer who's on one of the rocks, but it won't be difficult. Opposite the entrance to the glade there is an open gate, and by them four barrels and a chest you should search. Use the glowing portal and the game will be saved automatically.
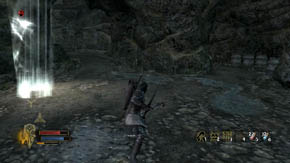
There is a teleport behind the gate, and on the right a small cave with a mushroom and several barrels. Use the teleport to move to Rivendell. Turn around and go back to the bridge to talk to Arwen and complete the [SIDE QUEST] Miruvor. Speak with her a little more, and you'll receive another [SIDE QUEST] Truesilver. Come back to the High Moors (the glowing portal is at the end of the bridge).

Run through the corridor deep into the cave. A heavy-armored orc accompanied by two warriors will bump into you after a while. Defeat them and go further. If you play as Farin, keep looking closely at the right side. You will come across a wall that the dwarf can break. It's the [SECRET 3/7 for Farin].
Inside you'll find five barrels, a vein of gold on the right, a mushroom on the left and a chest you should search. Return to the corridor. In the place, where it turns to the right - a dozen or so steps further - there's a wall to be examined if you play as Andriel. The wall will turn out to be false. It's the [SECRET 4/7 for Andriel].

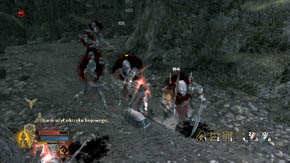
Behind the false wall you will find a small cave. Inside there's a chest to be searched and several barrels to destroy. Go back to the corridor and run further. After a while you will notice an orc who's running away. Soon he will come back, together with some more. Don't let yourself get surrounded (the corridor is tight) and the fight won't be difficult.
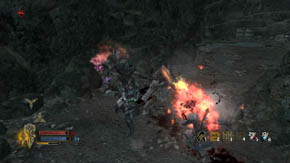
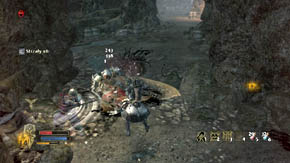
As soon as you finish off the warriors, an orc sorcerer will appear, as well as a few archers and a fast warrior with two weapons. This time the lack of space will be of benefit to you. Eliminate the enemies moving further through the corridor. The next enemy will be a heavy-armored orc - he'll attack you near the entrance to the larger cave.
In the cave where you're now there are a lot of barrels and two heaps of items (on the left and right). Run up to an even bigger cave and finish off two archers. There are more barrels here - destroy all of them and take all the items. Next, go to the corridor. To the right there's a mushroom at the fork and a vein of gold on the wall, while the further road leads left.
After a few turns you'll reach another large cave. Apart from the orcs there's a troll here. However, he won't attack you first - the first to attack will be the warriors (including a heavy-armored orc) and archers. Try to kill as many of these enemies, before the troll realizes that some unwelcome quests entered his cave.

When the troll arrives, first try to get rid of the rest of the enemies, excluding the archers - deal with them only after you've killed the troll. Move the fight back deep into the corridor so that they won't be able to hit you. Afterwards search this place - there are a lot of barrels around and also a heap of items under a rocky pillar.
Open the gate behind the pillar (a mushroom is behind it) and begin to run right, to the exit. Defeat two archers, and then the next enemies who will run into the cave. When you find yourself near the exit, watch out for the fast warrior with two weapons, who's hiding to the left. There's also a chest and some barrels there.
Before you exit the cave, lure the enemies outside one by one. Try not to lure too many a time and remember to destroy the nearby barrels. Finally, leave the cave (there's a flower on the left) and start fighting with new enemies who will appear here, among others, including an orc sorcerer accompanied by archers. Defeat everybody and get ready for the next battle.
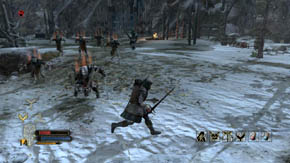
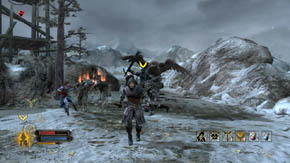
A very difficult fight is ahead, that's why you must call Beleram and remember about using all of your special abilities. If you run higher using the entrance on the left, you will be attacked by five ordinary warriors, one fast and an orc leader. Try to send Beleram down on one of these two enemies (the best option is the orc leader).
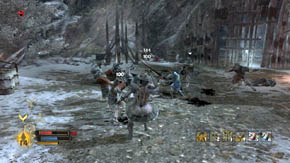
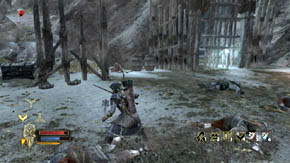
You should somehow deal with the rest, just don't let yourself get surrounded and heal your companions if they fall. Afterwards search this place. Destroy all barrels and search the chest on the left. On the right, near the edge, there's a flower. Next, go to the glowing portal to advance to the further part of the level. The game will be saved automatically.
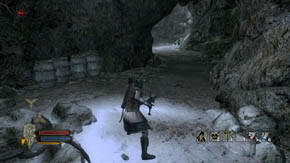
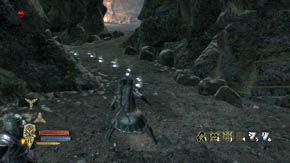
Run through the winding corridor. Destroy four barrels on the way. You will reach the fork eventually. The right road leads to the glowing portal which will finish this level, however, we suggest that you search a big cave to the left first. The foot tracks lead to it - you'll notice them if you play as Eradan.
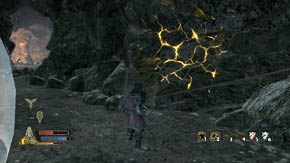
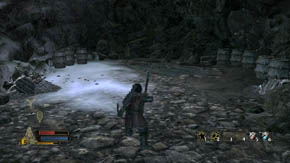
Additionally, if you play as Farin, focus your attention on the wall exactly across from you. You can examine and break it - it's the [SECRET 5/7 for Farin]. Inside you will find two heaps of items on the left and right and also a lot of barrels. This, however, is not the end of secret places.
In this very cave the wall opposite the entrance is false. It's the [SECRET 6/7 for Andriel]. Examine the wall, cast a spell and get to another hidden cave. Start searching it. To the left there's a vein of gold, on the right a mushroom. In front of you there are several barrels and a golden chest you should search. Warning! This secret is impossible to find if you play alone. Come back to the first cave and run outside. Now explore the big one on the right.
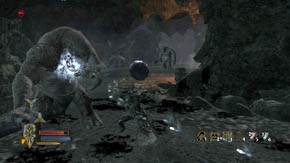
It's not going to be easy, though. When you approach a rocky pillar in the middle of the cave, several goblins and a troll will come running to you. To make matters worse, another troll will join the fight after a while. Quickly finish off the goblins, and pull back to the corridor in order not to fight with two trolls at the same time.
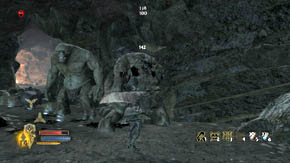
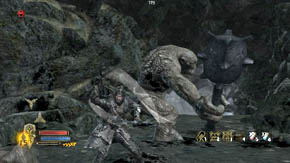
Avoid their blows and don't let either of them knock you down - use healing potions. You can't allow for the situation in which one of your companions has to heal you, because most likely the trolls won't let him/her do it. Besides, if you fight in the corridor, it's possible that the second troll will only be standing and doing nothing.
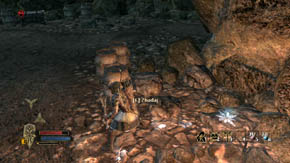
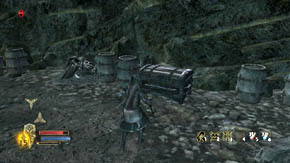
Search the place after the fight. At the other side of the rocky pillar (the tracks lead there) you'll find a hiding place with items - it's the [SECRET 7/7 for Eradan]. Around the pillar and on the left and right side of the cave there are a lot of barrels. Destroy them all and search two heaps of items (also on the left and right).
Go to a small cave, in front of which there will be a heap of items. Inside you'll several barrels and a golden treasure chest, and also a vein of gold on the left. Come back to the fork after taking all the items and choose the other path. Use the glowing portal to finish this level.
The Ettenmoors: Slay Bargrisar
![To the left there is a teleport - you can use it to complete the [SIDE QUEST] Elf stones, if, of course, you managed to find all that were needed - Stone Chasm - Chapter 3 - The Lord of the Rings: War in the North - Game Guide and Walkthrough](https://game.lhg100.com/Article/UploadFiles/201512/2015121715550809.jpg)
To the left there is a teleport - you can use it to complete the [SIDE QUEST] Elf stones, if, of course, you managed to find all that were needed. A little further there are barrels on both sides, while on the right there's also a heap of items and a flower. When you are ready for the fight with the boss of this level, use the glowing portal.
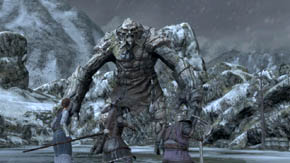
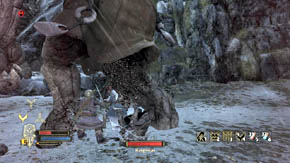
Bargrisar is a very tough enemy, but the battle won't be difficult. It will be time-consuming, though. At the beginning focus on attacking his legs - cut them as much as you can and don't worry that you're doing little damage. Also use powerful attacks whenever you can - it's possible that you're successful in giving him a special blow that will make him go down on his knees.
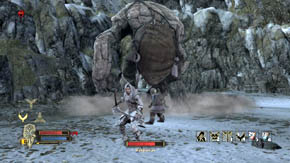
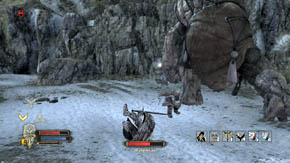
Before this happens, however, you'll need to watch out for his blows. Each of them - whether it's a foot thump or a fist punch on the ground - will knock you down and do considerable damage. That's why it's important to dodge at the right moment. Not right away, as you'll finish the dodge before Bargrisar makes a hit - you should do it a second later when you notice he's about to hit something. Stay behind his back the whole time. If he turns around, simply run between his legs.
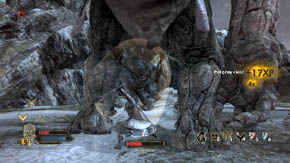
It's pointless to attack the giant from a distance, because his stone skin will prevent him from getting virtually any serious wounds from arrows and bolts. The melee attacks won't do him much damage, either - but in spite of that keep cutting his legs patiently and use powerful attacks. After some time you'll be successful in knocking the giant down.
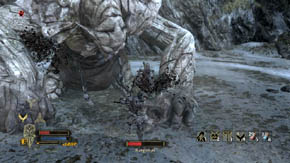
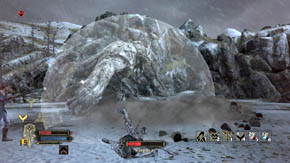
Then focus on his gigantic fists. Hit them as much as you can but don't forget about dodging, as Bargrisar will be hitting the ground once in a while. Use powerful attacks and combinations of blows, which will result in successfully knocking down the giant in such a way that you'll be able to attack him head. It's a very sensitive part of his body, but you can attack it only when he's been knocked down and isn't propped on his hands.
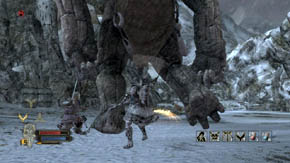
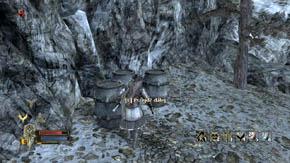
After some time Bargrisar will get up (or he won't if you managed to defeat him). Fight using the same tactics as before. As it was mentioned above - the fight is very long but it's not one of the most difficult ones. Watch the cutscene, explore this place, and then press the use/inspect button to advance to the next chapter and return to Rivendell. For defeating the giant you'll unlock the [ACHIEVEMENT] Giant-slayer.
Mount Gundabad: Travel to Mount Gundabad
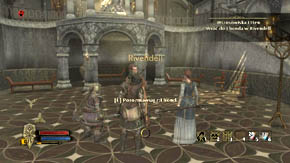
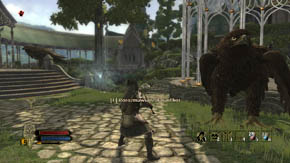
Chapter 4 begins after the conversation with Elrond. After listening to the details of your new quest head for the glowing portal which is between two eagles (to the right, near the garden sheds from Legolas). There's another eagle here. You can also talk to him. When you are ready, go to Mount Gundabad.
Mount Gundabad: Scale the pass and find an entrance to the Stronghold
Go forward. On the right there will be a heap of items you should search, and a little further - the first enemies. These orcs are better equipped than their cousins from the previous chapters, but you shouldn't have any trouble with defeating them. There are several warriors and archers here, as well as a heavy-armored orc. On the right there is another heap of items.
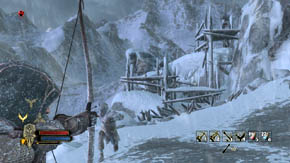
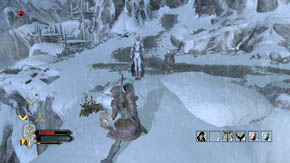
Next, you'll fight with some warriors and a heavy-armored orc. You also have to watch out for the archers standing on wooden constructions. Take a few steps back and look at the edge. There's a flower there, and a little further, in the direction of the wooden constructions, a heap of items.
The second heap is right under the wooden construction, a little to the right, to the left of the passage leading up. Go this way and if you're interested in flowers than there's one to the right (the archer stood here).
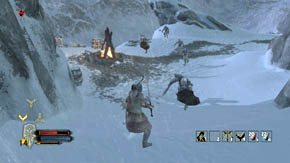
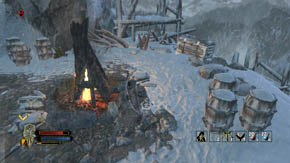
Just on the left there will be a patrol consisting of several warriors (including two heavy-armored) and archers. There are six barrels behind the fire (destroy them and pick everything up), a chest to be searched and a flower. The further road leads right. Go through the glowing portal and the game will be saved automatically.
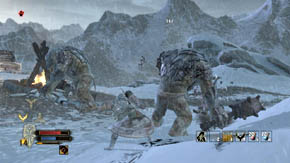
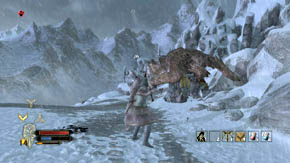
Here, a hard battle with two trolls at the same time awaits you. What's more, ordinary and heavy-armored warriors will be hanging around the trolls. Use all the special abilities you have. You can also call the eagles for help, and even retreat near the wooden constructions if such a need arises.
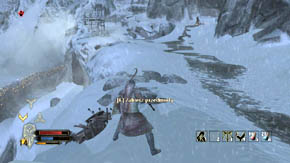
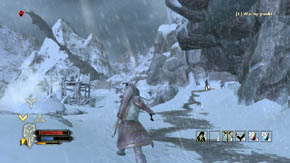
Go to the place from where the trolls came. On the way search a heap of items on the left, and then shoot all the archers on the wooden construction to the left and kill the survivors by the fire (if there are any). Now you can now choose one from two roads. For now follow the one down, to the left. There are a lot of chests near the wooden construction and two heaps of items on the left and right.
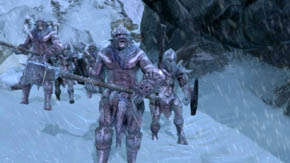
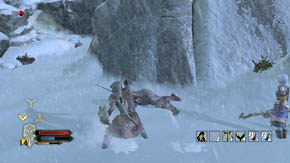
This road leads to the next heaps (four altogether) and a flower (it's on the right), and also an orc patrol (one ordinary and four heavy warriors). After a while an archer will also come running here. Defeat everybody but don't go to the glowing portal yet.
Instead, run to the right to examine the area around the fire. The only thing worth your attention is the entrance to the cave by which there are crates and barrels. Inside the cave you will find some mushrooms and a chest you can search.
 s
s
Additionally, if you play as Farin, then to the right of the fire there will be a vein of gold - examine it. There is a wall the dwarf can break to the left of the fire. It's the [SECRET 1/3 for Farin]. Enter through the destroyed wall to the further part of the cave.
Right on the left there's another vein of gold, opposite - a mushroom, while a little further a vein of gold and a chest. Search the latter, you will find a Mithril Ore inside, necessary in the [SIDE QUEST] Truesilver. It's also the [SECRET 2/3 for everyone]. Exit the cave and run to the right, to the glowing portal. Use it to save the game automatically. Only now can you find the last secret. The [SECRET 3/3 for Eradan] causes a big problem, because after the game has been saved, you need to exit it (assuming you play the dwarf) and change your hero to Eradan. Come back to the cave, go through wall destroyed by the dwarf and find a secret that's in a rock to the right. Continue the game with Eradan till the next time the game can be saved (fortunately, it'll be soon). Then you can change your character back to the dwarf.
Defeat a heavy warrior and an archer and then turn right. On the left and right there are heaps of items, and a little further more orcs - two archers and two heavy warriors. Crash the crates and barrels on the left. There is a flower to the left of the post, while behind it- a chest and a teleport. Use it to move to Rivendell in order to complete the [SIDE QUEST] Truesilver.
Talk to Arwen after returning to Rivendell and tell her that you managed to get some Mithril. She will direct you to the local blacksmith, Angmir. You will complete the [SIDE QUEST] Truesilver, and as a reward you'll get some experience points and Angmir's Sword. Using the teleport between two eagles come back to Mount Gundabad.
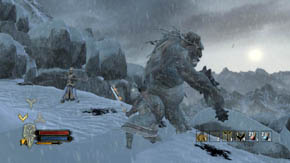
The further path leads through the rocky bridge covered with snow. Go through the glowing portal to save the game. Jump off the low ledge and then approach the blocked passage. After a while a huge mountain troll will unblock it. Watch out for his powerful blows and stone throws. Defeat him, gather all the items, destroy crates and barrels on the left and enter the cave on the right.
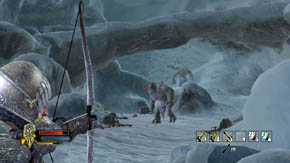
Inside a fight with two mountain trolls awaits you. In spite of appearances, it won't be a very hard battle, but don't let them take you by surprise. Eliminate both enemies using everything you have and you'll unlock the [ACHIEVEMENT] Troll's Bane. Search the corner on the left - there are some mushrooms and a heap of items there.
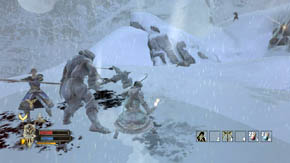
On the right there is an entrance leading up. Search a heap of items by the ice bridge, and then cross it. Right on the right there's a mushroom. Save the game using the glowing portal. Start fighting after watching the cutscene. Several heavy-armored and ordinary warriors wait for you here, and also a lot of archers.
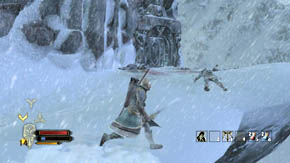
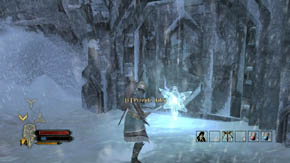
In spite of that, the battle is not one of the most difficult. Use the glowing portal on the right to advance to the next level after eliminating all those enemies.
Mount Gundabad: Find the Dwarves who have infiltrated Gundabad
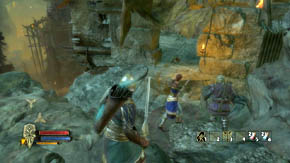
Move forward. Run out of the post and watch the cutscene. The further road leads left, and right by the exit there's a mushroom on the right. After a short walk turn right and then jump several ledges down. There are a few goblins waiting for you there.
After dealing with the goblins, a heavy orc warrior will get here and then another one. Fight in the short corridor, thus the archers standing a little further will not be able to hit you. Also watch out for orcs charging at you - if you don't dodge on time, your character will fall down. After getting rid of two orcs go out of the corridor and quickly kill all the goblins.
The last stage of this battle is neutralizing the archers in windows and downstairs (in the entrance and to the left), and also dealing with the third heavy-armored orc. If you're interested in flowers, then two can be found next to the rocks from which you jumped down recently.
![You will find a chest to the left of the glowing portal, and right next to it, on the left in the wall - [SECRET 1/2 for Eradan] - Mountain's Interior - Chapter 4 - The Lord of the Rings: War in the North - Game Guide and Walkthrough](https://game.lhg100.com/Article/UploadFiles/201512/2015121715553183.jpg)
You will find a chest to the left of the glowing portal, and right next to it, on the left in the wall - [SECRET 1/2 for Eradan]. Approach the glowing portal and use it. After a while two beams will be glowing in yellow - you need to destroy them to go further.
The next fight will be similar to previous one. Two heavy-armored orcs and a pack of goblins will attack you here. Also the archers will shoot at you all the time. Fight with everybody staying in front of the door and don't run up to the archers yet, because on the left, behind the rock, there's another pair of heavy-armored orcs (of course, you can take the archers out from a distance).
The further road leads to the glowing portal on the left, but before you run over there, search a chest on the rock to the right (there's also a flower also there). Next, go to the gate to save the game. Run forward and then turn left.
Mount Gundabad: Destroy the lever that controls the Orc-machinery
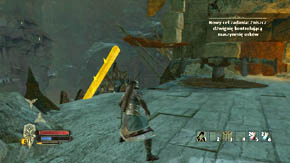
You will come across a troll surrounded by goblins here. New ones will be getting on the bridge all the time, so the faster you deal with the bigger enemy, the better. Watch out for the troll when he charges at you. When you kill him, hear your heroes out. You will receive the following objective of the quest - destroying the lever on the left (it will be glowing in yellow). Do it and you'll get another objective of the quest.
Mount Gundabad: Help the Dwarves defeat the attacking Orcs
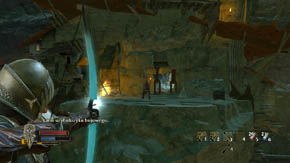
Run into the tower and go past the chains in the middle. Exit it on the other side and take an archer out using a ranged weapon. Afterwards, go back to the tower. The further path leads upstairs. Run up the wooden stairs and go through the hole in the wall. Defeat a goblin and quickly run following the only path. The tower walls should be to your right all the time.
You will come across another hole in the wall. A wooden bridge leads to a chest on the left - search it. Then start climbing the stairs. Go through the hole in the wall and turn left. Then cross two wooden bridges to get to the second tower (between the bridges there's a mushroom).
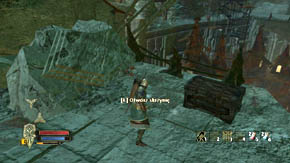
Jump down through the opening in the wall and run out through the door on the left. Defeat the archer, turn left and take care of another pair of archers. Jump down from the wooden platform and kill the last archer, and then a goblin a little further. Enter the tower through the opening on the left. There are two exits from here. First use the one on the left and you'll reach a chest and a mushroom. Inside the chest you'll find the [SECRET 2/2 for everyone] - the fourth Sorcerer's Scroll (necessary in the [SIDE QUEST] Cult of the Lidless Eye).
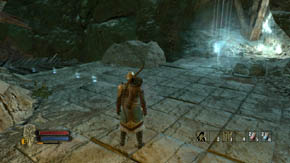
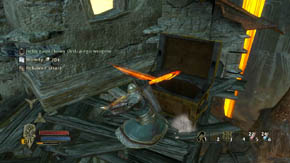
Now use the second exit from the tower. Right nearby there's a flower on the left, a bit further on the left you'll will find a golden treasure chest you should search, while in front of you there is a glowing portal. Use it to move to the next part of the level. You will come across a teleport just behind the portal. Sell all unnecessary items.
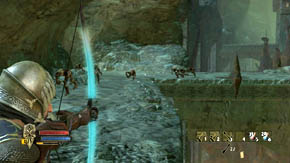
Run the only possible road. There's a flower on the right, while a little further you will have to jump down. The next flower is under the rock you've just jumped down from. After a while you will notice a large group of goblins that will begin to climb the bridge and then run in your direction. You will deal with them with ease.
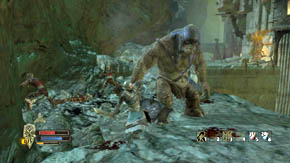
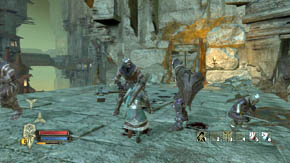
It will be a bit harder after a while, because a troll will join the fight. Another pack of goblins will enter the bridge. The difficulty in fighting with the troll will be that on the passage along the rocks there's little place to dodge. However, stay in this place, and run on the bridge only after you've killed these enemies, as three heavy-armored orcs will run out of the tower. Defeat them, look at the nearby tower that's collapsing, and then enter the one you're facing.
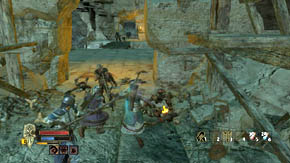
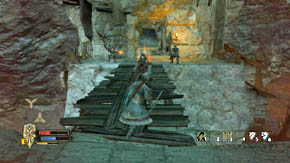
There are some mushrooms on the right. You can pick them, but first of all use the glowing portal to advance to the next part of the level. Don't exit the tower, though. Instead, wait till some goblins come running to you. Kill them all quickly and going past the orc leader run to enemy archers. Get rid of them and then finish off the orc leader.
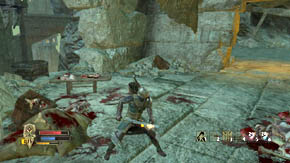
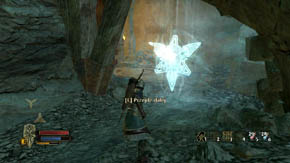
In the next tower (there is a lot of blood and meat here) you will find a chest on the left. Search it and then run on the bridge. On the left and right, next to the ruins, there are mushrooms. Run into the cave and turn right. Then use the glowing portal to finish this level.
Mount Gundabad: Defend Nordri while he activates the ancient weapon
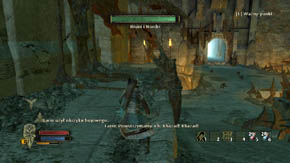
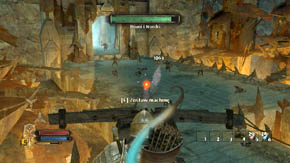
You can't let the Dwarves die. Quickly run on the left or right side of the wall to get to one of two crossbows. Use it - begin to shoot the enemies who are running inside through a large gate on the left. At first, there will only be goblins but soon orc warriors will join the battle...
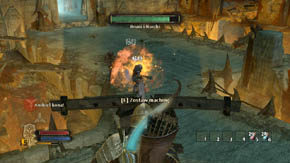

...as well as heavy-armored orcs whom you need to kill with at least two crossbow shots. Keep eliminating the enemies and don't worry either about the Dwarves, or your companions - they should do just fine. After some time this stage of the fight will be over and your heroes will have a chat with the Dwarves.
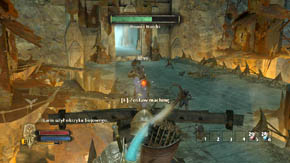
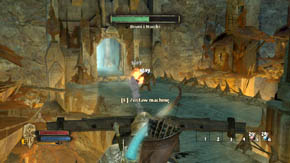
The second stage will be much more difficult because of the trolls who will join the fight. To kill them you need as many as six cross-bow shots - so hurry and be accurate at the same time. It's best to shoot at enemies' heads. After killing the trolls start shooting orcs - heavy-armored and fighting with two weapons. Then kill the third troll.
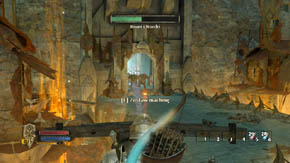
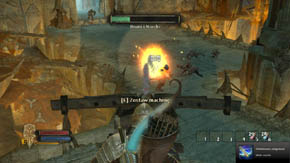
After a while you will notice four trolls coming through the large gate. Try to shoot them as many times as you can before the enemies even start fighting with your allies. The trolls are your main target, so don't waste time on shooting goblins. It's likely that during this level you will unlock the [ACHIEVEMENT] War-machinist (elimination of 150 enemies with war machines in a single playthrough).
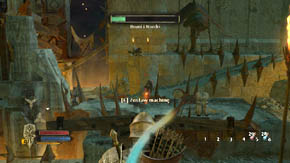
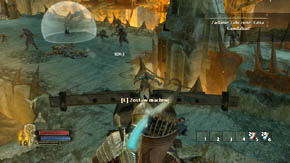
Once in a while, when no enemies are coming through the large gate, look around to find those who forced their way through. Archers are especially dangerous (they position themselves on the stairs on the other side). Before the next trolls' attack you'll have to quickly kill a large number of archers. Then start shooting trolls and orcs. When a message telling you that you've carried out the objective is displayed, the level will end soon. You will also unlock the [ACHIEVEMENT] Mountain-breaker.
Nordinbad: Speak with Gorin
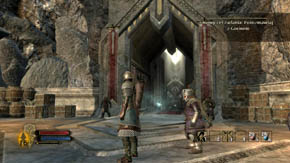
When you arrive at Nordinbad you'll have a conversation with one of the dwarves you helped in the previous chapter - Bruni. You can talk to him once more and ask about everything. You will get a short main quest - having a conversation with the dwarves' leader. You can go down the left stairs and examine the area to find out more about him. Next, use the glowing portal.
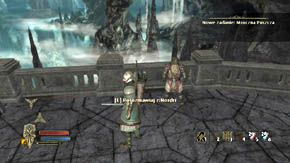
You will teleport to the fortress interior automatically and begin a conversation with Gorin. You will also complete the main quest and receive the next - [SIDE QUEST] Gorin's Gratitude. You can also chat with Nordri who is standing nearby.
Mirkwood: Travel to Mirkwood
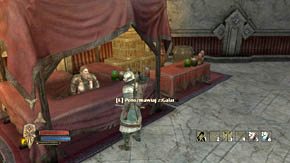
The aforementioned side quest can be completed quickly. Run down the left stairs and approach the stall that Galar is behind. Talk to him and say that the leader sent you and you'll receive Choice of Reward from Galar. Open it in your inventory and choose one of the items. The side quest [SIDE QUEST] Gorin's Gratitude will be completed.
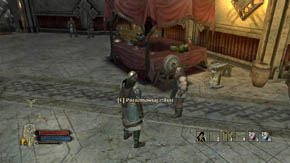
Buri, the blacksmith who can repair your items, is standing opposite the merchant. Use his services, but above all ask him about mithril, and then about the gem. Agree to help him and you'll get a [SIDE QUEST] A Gem No Mine Can Yield. Also, if you acquired all three Westernesse Artifacts but you didn't use Angmir's help in Rivendell to craft an item, you can do it now, at Buri's. The reward will differ slightly, but the [SIDE QUEST] Work of Westernesse will be completed. Run into the corridor. On the right there is a hall where on the left you'll find a mirror that can be used to change appearance.
You can also admire the dwarven craft - in order to do it examine a big column that divides the corridor. There's nothing else to be done in this place. Keep running further through the corridor to go outside. Then, use the glowing portal behind Beleram, the eagle. Teleport to Mirkwood.
Warning! On this and the next levels (but only within Chapter 5) you can come across Black Pearl. These item is hidden in one of the barrels and crates, that's why you should destroy them all. Acquiring the artifact is necessary to complete the [SIDE QUEST] A Gem No Mine Can Yield.
Mirkwood: Defeat Wulfrun
The journey through Mirkwood will begin with a fight with a boss - Wulfrun. It is not a strong enemy, though he can cast several spells that can be troublesome. At the very beginning of the fight don't approach the wall of the fire he created. Attack him from a distance and watch out for magic missiles he will be shooting at you.
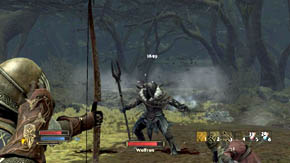
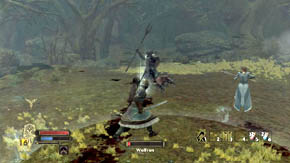
Only when he teleports can you fight hand-to-hand. Of course, you should be making use of the best abilities of the character you're playing. Watch out for Wulfrun. Not only does he teleport from one place to another, but also he's able to perform really effective dodges, and his combinations of blows are quite powerful. Attack him from a distance or hit him in the back. After some time Wulfrun will start teleporting to places inaccessible to you, so attacking with a ranged weapon will be the only option. Remember that you have the advantage over him, which means that you'll defeat him eventually.

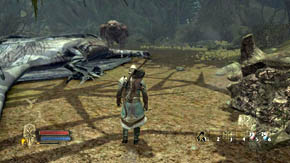
You should definitely search his body. You will find the fifth Sorcerer's Scroll, necessary to complete the side quest [SIDE QUEST] Cult of the Lidless Eye. This is also [SECRET 1/3 for everyone]. Run to Beleram who landed behind the body of the dead beast to receive a new objective of the main quest.
Mirkwood: Travel through Mirkwood to the home of Radagast
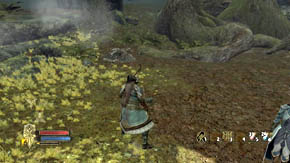
There are two heaps of items to be found in the place where you were fighting with Wulfrum. Search both and then go deep into the forest.
Keep running forward following the only possible path. In a while you'll watch a cutscene featuring a Warg. Go further sticking to the left side of the path. You will come across some tracks leading to the left, deep into the forest.

![There is a [SECRET 2/3 for Eradan] hidden in a large stone - The Shadowed Paths - Chapter 5 - The Lord of the Rings: War in the North - Game Guide and Walkthrough](https://game.lhg100.com/Article/UploadFiles/201512/2015121715555268.jpg)
There is a [SECRET 2/3 for Eradan] hidden in a large stone. Behind it there are three mushrooms and three heaps of items. Search all, then go back on the main path and continue your journey. In a moment you will reach a stream. It means that the further path leads right, through the camp full of orcs. Prepare for an exceptionally difficult battle.
There is a flower near the entrance to the orc camp on the right. Go up the elevation further on the right and wait until the orc archer moves away. Shoot him and then start eliminating the next archers as quickly as you can.
Keep doing this till your series of shots is broken by one of three heavy-armored orcs. It will be difficult to fight him, especially because other archers will be shooting at you as well. To make matters worse, new heavy-armored orcs will appear in the place of the killed ones.
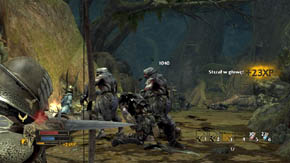
Don't hesitate to use Beleram's help because he will deal with every heavy-armored orc instantly. In a moment some heavy-armored orcs and two archers will destroy the previously blocked passage. Use all your special abilities and don't forget to heal your companions if the fall.
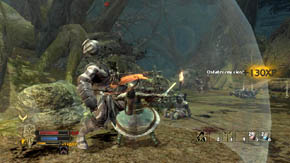
Eventually you'll manage to get rid of the orcs in the camp (don't forget the archers), but don't be surprised if you have to repeat this fight - it's really long and arduous. Search the camp thoroughly. There are some chests and barrels, several in the left, bottom part of the camp (there is a flower behind one of the barrels), and the remaining ones are located near the fire on the elevation on the right (another flower is there).
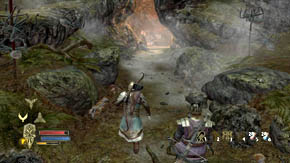
Go to the camp exit. On the way you will come across a flower that's on the right, in front of the barrel and crate. Run out of the camp. On the right there's a flower and a mushroom, while the only path you can go leads to the cave. There are two mushrooms in front of the cave entrance. Turn right once you've entered the cave.
There is a fragment that can be destroyed in this corridor on the left rocky wall. This is [SECRET 3/3 for Farin]. There are a lot of barrels and chests to destroy inside, but first of all two treasure chests that you should search.
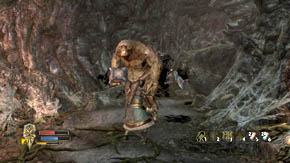
Keep running through the corridor until you reach the glowing portal. Use it. The last battle on this level awaits you after the cutscene. Your enemy is a troll. The fight is a lot easier than the previous one, however, each troll is a challenging enemy.
Search the cave. There is a glowing portal that finishes this level at the end of the cave. But before you use it, search three heaps of items (two on the right and one on the left when you're facing the glowing portal).
Mirkwood: Travel through Mirkwood to the home of Radagast
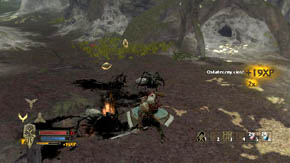
Right on the left there's a heap of items. Search it and go forward. You'll notice some orcs fighting with spiders. The latter will win and then come at you. They aren't tough enemies and they are similar to goblins as far as efficiency is concerned.
Near the entrance to the glade there is a heap of items, while on the right there's a flower. Locate the opposite tree. Some mushrooms are on the left, and on the right and under the tree there are some more heaps of items. There's one more heap behind the tree. On the right you'll see a mushroom.
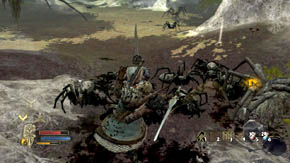
After a while the larger glade will swarm with ordinary spiders but some bigger ones will also appear here. The latter are more dangerous, because they can catch your character in the net shooting from a distance. That is why it's best to attack these enemies from close up. You will need to deal with a swarm of small spiders and three larger ones.
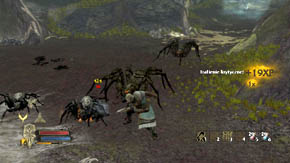
Opposite there is a heap of items and a flower under the tree and the rock, and another one on the right. Follow the right path and some spiders will approach you in a while - two big and a lot of smaller ones. The tighter the place you fight with them, the better, as your opponents will have problems with surrounding you.
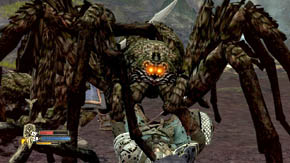
Watch out, however, for the big spiders. Apart from shooting out a net at you they can also catch you with their limbs. To free yourself you must quickly press a button shown at the bottom of the screen. Once you've finished them off, search the next glade. Some mushrooms are to be found to the right of the rock (on the right and left), while a few steps further, under the rock on the right there's a heap of items.
Search the last heap of items on the left side of the glade and then go deep into the forest. You can collect a plant on your way (it's on the left, behind the stone). When you reach the stream (just on the left there is another heap of items) you'll be attacked by orc archers.
Watch the direction from which the arrows are coming to locate your enemies. After that taking them down won't be a problem. There are three on the right and two on the left. Zoom in to make it easier to hit them.
Keep going up the stream. After a while you will notice an armored orc and two orcs fighting with two weapons. Wait till they come running and then deal with them. Do the same with the next two enemies - the heavy-armored orcs.
A little further, near the end of the stream two archers will attack you. You will bring them down easily. By the path leading right there's also a heap of items. Run following the path and you'll reach the glowing portal. Use it. You'll watch a cutscene and receive a new objective of the main quest. Meanwhile the game will be saved automatically.
Mirkwood: Defeat the spider horde
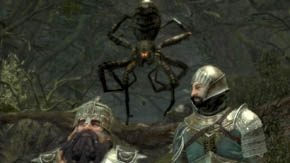
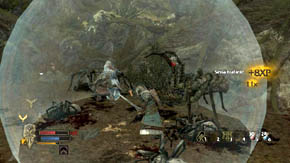
A lot of ordinary spiders and two larger ones will come down from the trees. Defeat them and then get ready to repulse another wave of opponents - once more two spiders with a swarm of smaller ones. After you've killed them the game will be saved automatically.
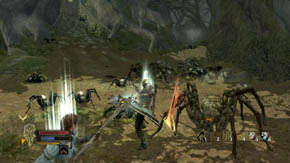
The third and the last group of spiders (a lot of smaller and two bigger ones) is waiting to be repelled. Kill them all and then search three heaps of the items located here. The first is just under the elevation from where your heroes jumped down after the last cutscene.
Mirkwood: Gather Radagast's staff
You'll find the second to the right of the stairs leading to the house of Radagast. The third is on the left, next to the glowing portal that finishes this level. But before you use it pick up Radagast Staff glowing in yellow - it's lying just by the gate. Don't worry about the secrets - there's none on this level.
Mirkwood: Search for the missing wizard Radagast
Run ahead and then right. After a while on the left some orcs will appear - an archer (he's standing on the rock), two ordinary warriors and one heavy-armored. Kill them all. There is a heap of items under the rock where the archer was standing. Go forward in the direction of the glowing portal and you'll notice more enemies.

There will be two heavy-armored warriors, an archer and one ordinary warrior. In a moment another warrior, archer and heavy-armored warrior will join then. The sooner you get rid of the first group of enemies, the easier it'll be to deal with the second.

Keep going further. Several heavy-armored warriors will appear on your way, though not all will join the fight at once. Also, watch out for a few warriors who will appear to the right. It's not going to be easy here, so don't hesitate to use Beleram's help to kill some of the heavy-armored enemies.
Three archers and a heavy-armored warrior will join at the end of the fight. Defeat them all. You will notice some foot tracks (if you play as Eradan) and a heap of items. The traces don't lead to any secret, but they show the path to the place where you can do a side quest, so follow them.
Pass under the great tree. You will find another heap of items on the left nearby, while near the entrance to orc camp is the next one. Be careful, as a difficult fight with a large number of warriors and heavy-armored warriors awaits you here. Apart from that there will be several archers on the elevation in the camp. New enemies will be coming during the fight. You will also receive [SIDE QUEST] The Captive after a while. It's the [SECRET 1/4 for everyone].
Before you enter the camp, focus your attention on a great tree on the left, under which you can pass (there are mushrooms next to it). Do it and you'll reach two plants (one is closer to the left and another further on the right) and the chest that you should search. Return using the same path and turn left to run into the orc camp.
There are a lot of barrels and chests you can destroy in the camp. Search all you can - if you didn't acquire the Black Pearl earlier ([SIDE QUEST] A Gem No Mine Can Yield), then it's likely that you'll find it in a barrel or chest right here.
Run to the end of the camp to free a prisoner. On the left there is a heap of items and on the right a flower. Talk from Glorihirin, and you'll unlock the [ACHIEVEMENT] Friend of the Woodland Realm. After destroying all barrels and chests come back by using the path you already know to the place where you decided to follow the foot tracks (not the ones that were leading to a crate by the orc camp, but those you saw earlier). You must be careful, though, because when you reach the tree, under which you can pass, three heavy-armored warriors and three archers will attack you.
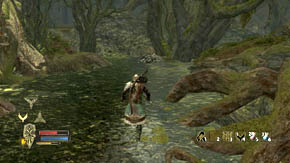
Pass under the tree and turn right. Search a heap of items and run further (on the right there will be a mushroom). You will reach the fork. The path on the left leads to the place you've already been to. The one opposite will take you to a heap of items and a mushroom, while the one on the right leads to the further part of the level.
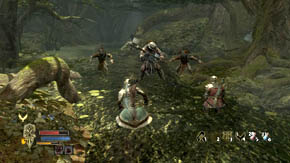
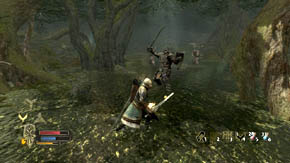
Run following the right path. On the left and right there are corners with orcs. There are a few heavy-armored and ordinary warriors here, and a bit further - one heavy-armored and two archers (there's yet another archer on the left). The enemies won't all start fighting at once, which will make it easier for you to defeat them.
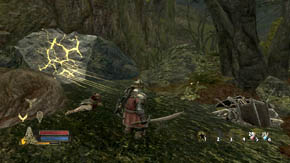
In the corner on the left there are two mushrooms, while the one on the right has a heap of items. You should also observe that the stone wall in the tree on the left can be destroyed - it's the [SECRET 2/4 for Farin]. Inside you will find some mushrooms and a chest that can be searched.

However, it's not all. Under the tree on the left there's [SECRET 3/4 for Eradan]. Yet, there is a problem with switching between the characters. You can use the save point described in the paragraph below and (assuming you play as Farin and you broke the wall under the tree) choose Eradan and return to a hiding place under the tree to find the secret. Finish the level using this character and then switch to Farin.
Run forward. There's a mushroom on the right, and a little further on the left there's a heap of items. Use the glowing portal to pass to the further part of the level - the game will be saved automatically. Follow the only possible path ahead until you reach to a place with cobwebs.
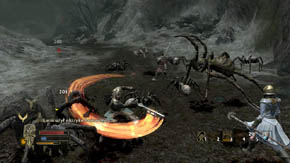
There's a plant on the left but before you collect it, defeat a swarm of small spiders and two bigger ones. You shouldn't have any problems with this battle. Before you go to a larger glade search a heap of items on the right.
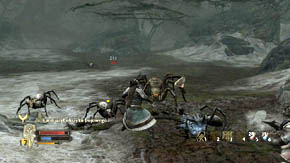
Prepare for a lot more difficult battle with the spiders. New groups of small spiders will be joining the fight all the time, as well as individual larger spiders. Try to fight in the passage between the glades so that your opponents will have a difficulty with surrounding. On the left there is a heap of items.
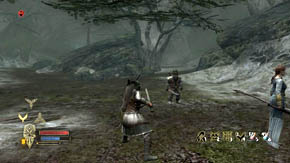

If you look at this glade while standing right in the entrance to it, you'll notice two rocks near to each other. Run between them playing as Eradan and look at the left one's right side. In the rock there's a hiding place with items. It's the [SEKRET 4/4 for Eradan].
Choose the path on the right after you've searched it. You will defeat a small group of spiders (a lot of small and one large), and you will find a heap of items on the left. Run ahead till the end and you will find the next heap and a chest you should search.
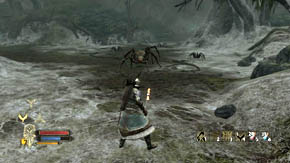
Keep to the right corner of the map on your way back. You will defeat the last group of spiders (a lot of big ones and one smaller) and you will find a passage leading further. It will take you to the glowing portal. Using it will finish this level.
Mirkwood: Search for the missing wizard Radagast
Run through the tunnel to the teleport. It's good to use it now to move to Nordinbad in order to complete a side quest [SIDE QUEST] A Gem No Mine Can Yield.
When you reach the dwarven fortress wait till the gate opens and run inside. Go through the corridor to the familiar dwarven headquarters. Buri is standing on the left - talk to him, give him the gem and you'll complete the [SIDE QUEST] A Gem No Mine Can Yield. You will receive experience points and a reward (you can choose one of three items).

Come back to the exit and use the glowing portal behind the eagle to return to the cave in Mirkwood. Once you're there, run the only possible path to the next glowing portal and use it. Watch the cutscene and get ready for a fight with a boss of this chapter.
Mirkwood: Defeat Saenathra
It's the spider queen, Saenathra. She's not that tough considering she's a boss, so don't expect a lengthy fight. She attacks with her limbs or abdomen, and once in a while she can jump on one of your characters. You should dodge then in order not to get crushed.
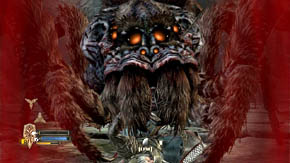
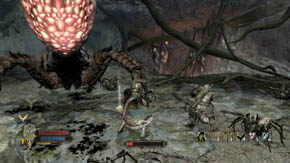
The spider queen is also able to catch your character and - if you don't keep pressing the button shown at the bottom of the screen - devour him/her. Escape and get back to the fight. If Saenathra caught one of your companions, use this opportunity to inflict as much damage to her as you can.
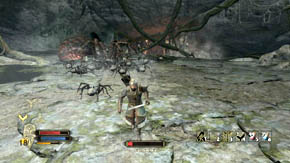
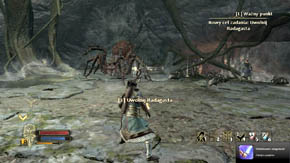
The true problem here is the swarms of small spiders, which Saenathra will be summoning once in a while. Your companions should take care of the queen while you should kill all spiders as quickly as you can and then get back to the fight. Use special abilities. The spider queen is not a difficult boss and you should deal with her the first time you try. You will unlock the [ACHIEVEMENT] Spider-slayer.
Mirkwood: Free Radagast
All you need to do to free the wizard is to press the use/inspect button. Before you do it, however, take all the items from dead spiders and their queen, and also search six heaps of items located on the borders of this place (three on the left, three on the right).
You will receive a new main quest requiring you to head to The Gray Mountains after you've freed the wizard. Before you go there, however, you should definitely talk to Glorihirin to finish the [SIDE QUEST] The Captive and to claim your reward. Choose one of several items after unlocking the package from the elf and then use the glowing portal to move to Urgost's Lair.
The Gray Mountains: Locate Urgost's lair

On the right there is a heap of items, and a little further on the left another one. Run forward and after watching the cutscene deal with two barbarians and a sorcerer. They are not difficult enemies to defeat, though the former have quite dangerous combinations of blows.
There are several chests and barrels near the fire (destroy everything), and a little further on the right a heap of items. Run the only path until you notice a small barbarians' camp in the distance. On the left there is a heap of items. In the camp you'll fight with several warriors and. Try luring out the former...
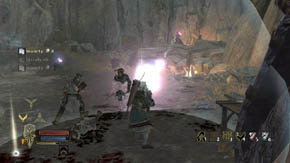
...or shoot out the latter, because sorcerers - though not very tough - can hurl powerful magic missiles. In spite of that the fight will not be difficult.
Afterwards search the camp. On the right there are barrels, while on the left there's a heap of items and a flower. Go a bit higher. The left road leads to the glowing portal, but before you go there, crash some crates and barrels around the fire (there is also a heap of items a little further).
Visit a small cave on the right as well. A mushroom is on the left (near the entrance) and you'll also find a chest, a few barrels and crates. Take all the items and head for the glowing portal. On the right there is another barbarians' camp, but this time you'll also have to fight with orcs - there are several archers on the rocks around and some heavy-armored orcs. Plus some warriors and barbarian sorcerers.
Try to lure enemies who fight hand-to-hand, so that those attacking from a distance won't be able to shoot at you. Use special abilities, and even summon Beleram, because the fight will be quite difficult. After you've defeated the enemies fighting hand-to-hand shoot all the archers and sorcerers.
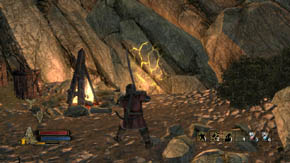
Go to the camp. Before you run up, search a small depot on the left. There's a chest, a heap of items, two flowers (on the left and right) and several chests and barrels to destroy. If you play as Farin you'll notice the wall behind the fire - you can break it. It's the [SECRET 1/5 for Farina].

The broken wall will take you to a small cave, where you will find three veins of gold on walls and a chest with treasure. Go outside and run upstairs. On the right, under the rocks, there is a heap of items. Near the wooden construction a little further there's a barrel.

Defeat two orc archers and a barbarian warrior, search a heap of items on the right, and a bit further on the right kill another warrior. Further you'll fight with a small group the consists of, among others, heavy-armored orcs and archer. When you reach this place the game will be saved automatically.

Before you move forward look left. You will notice a flower on the left, a heap of items on the right and some foot tracks - if you play as Eradan. Follow them and you'll reach a hidden place with a chest and a heap of items near the fire. Don't leave this place yet. Run forward.
![Look at rocks on the left carefully - there's [SECRET 2/5 for Eradan] in one of them - The Grey Mountains - p. 1 - Chapter 6 - The Lord of the Rings: War in the North - Game Guide and Walkthrough](https://game.lhg100.com/Article/UploadFiles/201512/2015121715563779.jpg)
Look at rocks on the left carefully - there's [SECRET 2/5 for Eradan] in one of them. Search the hiding place and then turn left. Before you jump down you can pick up a flower. Next, come back to the place with the foot tracks, only this time - don't follow them. Instead, go forward under the stone bridge.
After a short stroll you'll get to a mushroom on the left and a place from where you will have to jump down. There is a deserted enemy camp downstairs. There are several barrels and a heap of items here. Run up, to the right. On the left, near the collapsed tunnel there is a flower. Opposite the flower you'll see two barrels. Prepare for the next fight (the game will be saved automatically here).
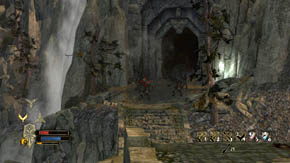
The heavy-armored orc warriors will begin to come running through the bridge. Hide in such a way as to make it impossible for the sorcerers and archers standing on the other side of the bridge to hit you. Defeat the orcs and then shoot all the enemies fighting from a distance. They are very far away, so you will have to enter the bridge to reach them.
Get across the bridge. To the right there's a teleport and a heap of items. You can see the glowing portal in front of you. Use it to pass to the next part of the level. On the left, near the edge there's a flower. Run into to the cave and go through the corridor. Jump down and turn left. Downstairs, on the left there's a reception committee awaiting you - two heavy-armored orcs and two archers.
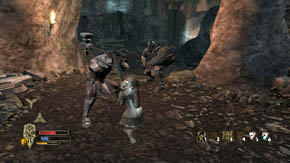
After dealing with these enemies take care of the archers shooting at you, and then run to the left, downstairs. Round the corner two heavy-armored orcs will come out running at you, as well as a barbarian warrior and an orc archer. Near the torch on the left there's a crate and a barrel.
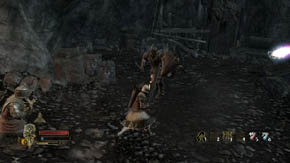
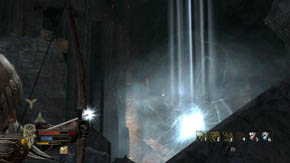
Run downstairs and defeat a heavy-armored orc. Next, get your ranged weapon ready - behind the glowing portal (don't use it yet) there's a barbarian sorcerer standing upstairs. Bring him down from a distance, otherwise he might cast too many spells on you.
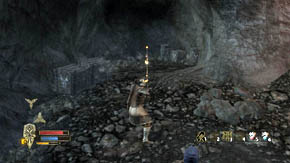
On the right, in a small cave, there are a few barrels and chests. Destroy them and collect all the items. Afterward search the left corridor. There will be more barrels and chests on the way. At the end of the corridor there's a chest you should search. Only now can you use the glowing portal but don't jump down just yet.
The next battle can be quite difficult, if you begin to fight with all enemies simultaneously. That's why, first bring down two archers - one is on the opposite rock, and the other on the rock next to you, on the left. Then jump down and turn right at once. Two heavy-armored orcs will appear there, while to the right - an orc archer and a barbarian sorcerer.

It's essential that you fight here and not run out to the right. Do it only after you've eliminated all enemies (the ones using ranged weapons should be killed the same way - from a distance). If not, two strong barbarians will join the fight - it's better to deal with them when there's no one else left.

Search the place after you've killed the enemies. Opposite the glowing portal you used to get here there are a lot of barrels and chests. Expect to find more in the corner on the left, there's also a mushroom there. On the rock to the left you'll see a vein of gold. To the right, in a small cave there's a chest, a heap of items and more barrels and crates.


Go upstairs. On the left, on the rocky wall, there's a mushroom. You will be attacked by two heavy-armored orcs, an archer and a barbarian warrior in the tight corridor a little further (you can collect the mushroom on the way - it's to the left on the rock but you have to turn to see it). A bit further, on the left there are more archers - kill them from a distance but don't jump down yet.
Before you do it search the cave on the right. There's a chest, a heap of items and a lot of barrels and chests to destroy. Jump down and defeat a heavy-armored orc and a barbarian warrior. Destroy the barrel and begin to climb up through the corridor on the right.

Upstairs on the right there is a corridor leading to the bridge, but before you go outside, search a small cave on the left (three crates and a mushroom). On the other side of the bridge there are a lot of enemies. Expect both strong and ordinary barbarian warriors and heavy-armored orcs, and a little further - orc archers and barbarian sorcerers.
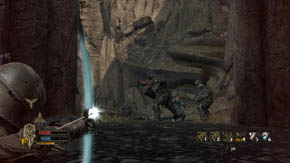
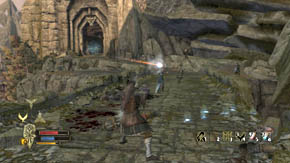
In order not to be shot at pull back to the cave and fight with enemies who use melee weapons. What's more, not all opponents will start fighting at once - use this situation to your advantage and do some serious damage to them from a distance. At the end shoot all the enemies who use ranged weapons.
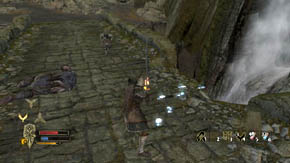
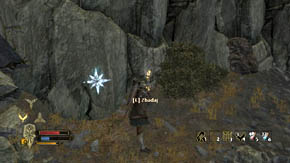
Approach the right edge of the bridge and you'll notice some tracks. Jump down where the tracks end and begin to run along the rocks. You will come across a mushroom after a while, the [SECRET 3/5 for Eradan] hidden in the rocks a little further, and finally a vein of gold.
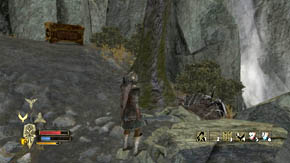
Run till the end. There is a bend to the left, as well as a flower, a heap of items and a golden chest you should search. Continue the journey till you see a place from where you can jump down (there's another flower here and vein of gold on the right a bit earlier). Then return to the bridge and cross it.
There are three paths here. The left leads to a flower hidden behind the bush (it's just by the edge). The right will take you to a heap of items and a flower, while the one in the middle to the next part of the level. Search the body of a sorcerer who was here and you'll find the sixth Sorcerer's Scroll necessary to complete the [SIDE QUEST] Cult of the Lidless Eye. It's also a [SECRET 4/5 for everyone]. Go through the glowing portal and the game will be saved automatically.
Run following the only path. On the right there is a heap of items, and on the other side of the wooden bridge there are some new enemies - a heavy-armored orc and a lot of archers. After defeating the orc shoot all the archers or do it first (two are on the left, two on the right). On the right, near the fire you will find another heap of items and a mushroom.
Look at the place from where you came out and then up - there's an archer and two heavy-armored warriors. This is a great opportunity to get rid of all of them easily using a ranged weapon. Run following the only possible path upstairs (on the rock to the right there's a vein of gold). Two archers from the higher level will shoot at you. Kill them and run to the bridge.
There's a mushroom near the fire. Behind the first bridge, on the right you will find a heap of items, and a few feet away - a vein of gold on the rock on the right. In front of the second bridge there's another mushroom. Pass to the other side and turn right. Kill the opposite archer (to the right of this enemy, on the rock there's a vein of gold) and two on the left, on the other side of the chasm.
Run ahead. On the way, on the right rock you'll come across two veins of gold. At the fork turn left to run up to the place where you saw the enemy archers. You can pick up a mushroom while going there (it's by the destroyed bridge), while by the fire you will find a chest, a heap of items, a teleport and the [SECRET 5/5 for Eradan] hidden in the rocky wall. Come back to the fork and this time run upstairs. You will receive a new objective of the quest.
The Gray Mountains: Defeat the Carn Dum Captain
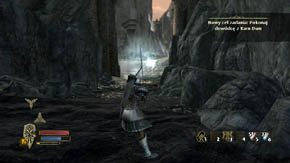
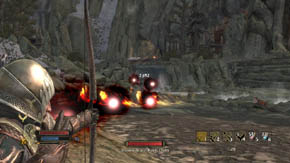
A battle with a boss, the Carn Dum Captain, awaits you. He is similar to Wulfrun who you fought with at the beginning of Chapter 5. The boss will begin the fight by surrounding you with a wall of the fire and striking you with magic missiles. Don't approach him and attack from a distance until he teleports.
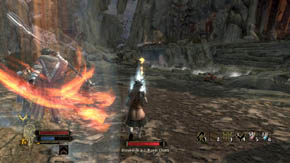
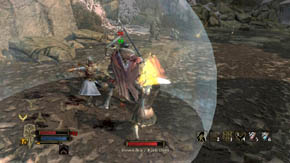
The captain teleports more frequently than Wulfrun, so be careful not to let him, for example, appear behind you. Watch out for the magic missiles. Also, it's pointless to fight him hand-to-hand - attack him this way only when he's busy fighting with one of your allies.
To be honest, the allies who will appear after the Captain has been wounded are the real problem. The first group will consist of a few archers on the rocks to the left and an armored orc who will come down running at you. Deal with them when you notice that the Captain has teleported somewhere far from you (so that you can't run close to him). Still, watch out for the magic missiles!

When the Captain's health is reduced by half he'll summon more allies and the fight will get a lot more difficult. On the higher level there will be additional archers (on the rocks to the left and in front of the gate). On the lower - a heavy-armored orc, an archer, warriors and a barbarian sorcerer. Don't think twice about using Beleram's help - let him take care of the heavy-armored orcs.
Fight with the enemies, but don't let the Captain take you by surprise. Once you've killed most of them focus on the Captain. Remember that when he gets seriously wounded he instantly teleports to a different place, which means you have to act quickly. The same applies to a situation when he moves on a higher level - after a while he'll appear in a different place anyway, so you must aim at him fast.

When the Captain's health is almost finished he'll summon the last group. Get rid of them the same way as the previous ones, and then kill the boss. Remember to search his body - you will find, among other things, the last Sorcerer's Scroll, necessary to complete [SIDE QUEST] Cult of the Lidless Eye. You will also receive a new objective of the quest.
The Gray Mountains: Enter Urgost's lair
Before you do it search the area. There are three heaps of items here. You will find the first to the right of the cave exit, near the rocky wall. The second is on the left, under the wall. The third is in front of you, to the right of the glowing portal. Use the portal to finish this level. This, however, is not the end of your quest. After you've entered Urgost's Lair you'll unlock the [ACHIEVEMENT] In the Dragon's Den. You don't have a choice - you have to agree to the dragon's proposal. However, don't fly to Nordinbad after the conversation and meeting with Beleram!
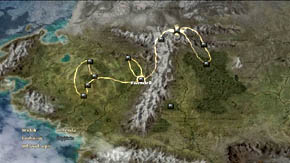
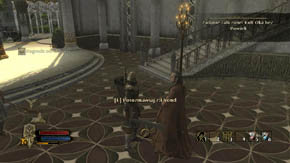
Move to Rivendell instead. Find Elrond and talk to him about the Sorcerers' scrolls. He'll give you a reward (choose it in your inventory), you will complete the [SIDE QUEST] Cult of the Lidless Eye and unlock the [ACHIEVEMENT] The Lidless Eye. Find the glowing portal and use it to move to Nordinbad.
Siege of Nordinbad: Repel the invading forces
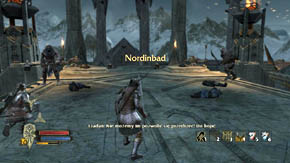
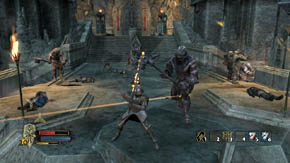
This chapter will be short, but very intensive. You will start fighting with the forces Nordinbad right away. You don't need to worry about the goblins. The archers standing on the walls on the left and right can be a little problematic, while the greatest threat are six heavy-armored orcs.
Run up to the turret on the left as fast as you can (simply run ahead after the level has begun - the turrets are on the left and right) and use it quickly to bring down two archers on the opposite wall. You have to do it before any of the heavy-armored orcs runs close to you. Then do the same with the archers on the right. If you're attacked by one of the heavy-armored orc, then retreat, run around the place to lose your enemies, and go back to the turret.
You can use the turrets to kill heavy-armored orcs, yet you have to be smart to do it. Run downstairs and call all your companions to come to you by using an appropriate button (i.e. they should start defending you). Then your enemies will come running down as well. You, however, should get to one of the turrets as fast as you can and aim it down to a maximum. Even if the missile doesn't hit the orc directly, he'll get wounded anyway.
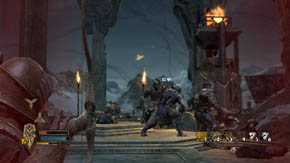
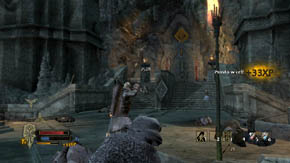
Don't use only the turrets, of course. Use your most dangerous abilities and keep fighting till the heavy-armored orcs fall. Don't forget about your companions - heal them if they need it. Kill all the remaining orc archers and prepare for the next task.
Siege of Nordinbad: Destroy the siege towers
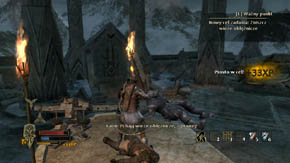
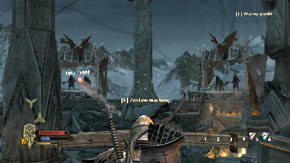
Once you hear about the siege towers run up to the turret on the right as quickly as possible. Use it and look at the walls. In a moment from behind the walls two siege towers will emerge. Enemy forces will be coming out from them all the time (heavy-armored orc warriors and fast barbarian warriors fighting with two weapons). Begin to shoot at the siege towers at once, even before they open.
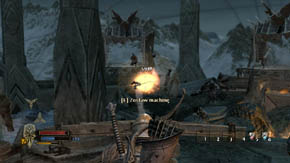
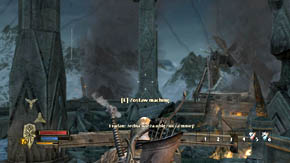
Thanks to this you will manage to wound the enemies inside. The basis of achieving success in this task is speed and accuracy. Aim in advance and don't wait till the projectile hits the aim - keep shooting at another place. You must divide your attention between killing the enemies (otherwise they'll overwhelm you) and destroying the siege towers (it takes two to three shots to tear down one of them).
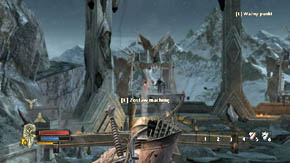
In a moment you will hear an announcement about the towers that will appear on the left. Take the turret and do exactly the same as you did before - a few shots at the enemies and one at a tower till you achieve the desired result. You'll have to get rid of four more towers. The tactics doesn't change in this case. After you've destroyed all siege towers, the game will be saved automatically and you'll receive the next objective of the quest.
Siege of Nordinbad: Protect the Inner Door from Goblin-sappers
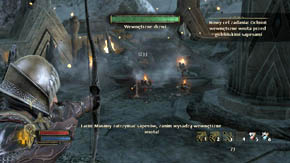
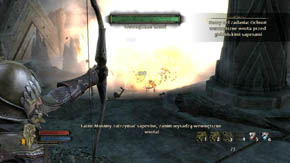
Now the most difficult part of the siege is about to begin. First, shoot all the sappers who will appear downstairs. Then immediately run upstairs, take a position in front of the first stairs leading down and call your companions. You (only you) should get back so as to be standing a few meters away from the main door.
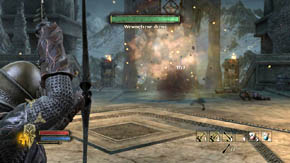
Aim and wait. If you positioned your companions properly, then they should be able to deal with most of the goblin sappers' waves. If any sapper breaks through, eliminate him from a distance. You can also fight hand-to-hand - the explosions won't do you much harm and protecting the door is of utmost importance. You will receive the last but one objective of the quest after dealing with several goblin waves.
Siege of Nordinbad: Protect the Inner Door from Trolls
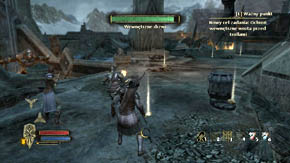
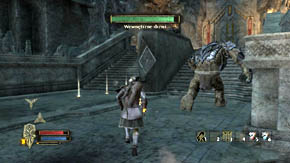
Quickly aim at the door leading to the courtyard - two trolls will appear there. They'll start coming toward the inner door. The trolls are very tough, and the worst thing is that it only takes a few blows for them to destroy the door. Try to do as much damage as you can to one troll - unfortunately, the turrets have been destroyed and you can't use them anymore.
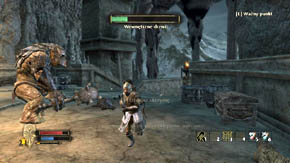
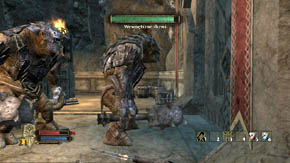
However, don't engage in fighting only one troll if you see the other running towards the inner door. Go there as soon as you can and, using all your special abilities, attack the trolls, or - in other words - occupy them with yourself, which should prevent them from banging on the door. Some orc archers are likely to come running here as well, but don't bother to deal with them.
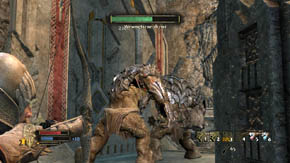
As long as you keep harassing the trolls, their attention will remain focused on you - and that's exactly what this task is about. Attack hand-to-hand or hide behind the columns and shoot at their heads. Once you've killed one troll it'll be easier to fight with the second one. The problem is when you're attacking one while the other is destroying the door. You'll receive the last objective of the quest after dealing with the second troll.
Siege of Nordinbad: Slay the Siege Commander
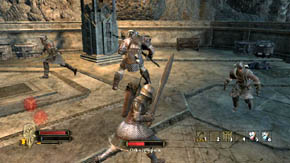
You must kill an Orc Champion, who is the siege commander. He is a tough boss having a company of heavy-armored orcs and orc archers as well as barbarian warriors at his disposal. His blows are very powerful, so you should rather avoid fighting him hand-to-hand or dodge after each successful melee attack.
If your companions fall (this is a very difficult battle), run around the place with two crossbows to leave your enemies behind. This will give you some time to heal your companions, before you get knocked down by a powerful strike while getting your friends back on their feet. After a long fight you'll finally defeat the boss. Then, you'll only have to wipe out the remaining enemies, which won't be very hard.
Nordinbad - Aftermath: Speak with Gorin
Kill off all the heavy-armored orcs and barbarians, and then shoot all the archers who will appear in front of the destroyed gate. After fending off the siege you'll unlock the [ACHIEVEMENT] Siege-breaker and you will complete the main quest.
Run downstairs and thoroughly search all that remained of the barrels and crates that were here before. Collect all the items and run to the internal door. Before you use the glowing portal, destroy all the barrels and chests on the left, on the right and in front of you, and search two chests (on the left and right) as well.
Nordinbad - Beleram: Check on Beleram
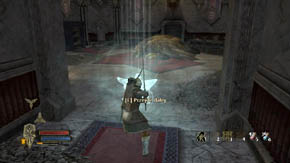
After the conversation with Gorin you'll need to check what happened to Beleram. Repair your items, buy or sell what you need, and then run into the corridor and turn right. Use the glowing portal and after talking to Beleram come back through the corridor, only this time turn right. Use the second glowing portal to move to the Carn Dum fortress.
Carn Dum: Discover a way into the fortress
Run forward and then to the right. You will come across a sewer opening and enter it. It will take you inside the fortress.
Carn Dum: Search for Agandur within the fortress

Keep running ahead, destroy a barrel, and then go right, upstairs. The right road at the fork leads to a crate and a barrel, while the left - to another fork. The opposite gate is locked, the left branch leads to a crate whereas the right to the further part of the sewer system and a barrel.

Run through the corridor. You will see some prisoners who are by no means friendly. Soon you will reach a red sewage - turn left, and then right. Destroy the barrel at the end and go right again. Go at the end of the sewer. When you notice some goblins running away turn left to the parallel corridor.
It will take you to the stairs. Next, you'll get to a large hall full of crates and barrels. Crash them all and focus your attention on the closed door on the left. You should look for a lever that opens the door. Head for the stairs opposite the entrance to the hall and then run through the corridor (there are also a lot of crates and barrels here).
Carn Dum: Pull a lever to open the gate
Run following the only path destroying barrels and crates on the way, and you will get to a lever glowing in yellow. Shift it pressing the use key quickly, and prepare to fight with the freed, mad prisoners. They are not difficult enemies, so killing them will be a mere formality.
Carn Dum: Continue the search for Agandur


Return to the large hall with the door, but don't forget to search the cells as you go. There's one opposite the lever and the next three on the right in the corridor leading to the stairs. You will defeat a strong barbarian warrior downstairs. You can either run up through the open door or...
...go back downstairs for a while. Once you've walked down the stairs, carefully look at the cells on the left - one of them is open. You will find a golden chest, barrels and crates inside. Search everything and come back upstairs.

Pass through the door and begin to fight with the prisoners. The outcome of this battle is a foregone conclusion. On the left, at the end of the corridor, there is a treasure chest. Search it and all the cells (destroy barrels and crates). Then use the glowing portal on the right. Three barbarian warriors fighting with two weapons will attack you. They are more difficult enemies than the prisoners, but even this won't make this battle hard.
Destroy the barrels on the right and run to the left. You will go outside, to a long courtyard full of barrels and crates. Destroy everything on your way and pick up the items. Next, use the glowing portal on the right. The game will be saved automatically. Run to the stairs on the right and get ready for the first more difficult fight.
It won't be that difficult in the beginning, tough. A heavy barbarian warrior will run out to get you and some prisoners will be around (though not all will attack you at once), while over the double door on the right there will be barbarian sorcerers. However, more enemies will be coming while you're dealing with the ones just mentioned. And in greater numbers.
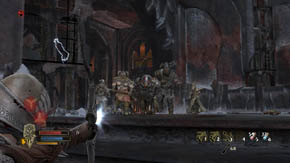
More heavy barbarians warriors, fast warriors wielding two weapons, sorcerers, prisoners and also a troll will be joining the fight. Leave the troll till the end. Choose individual opponents and eliminate them far from the majority of enemies. Still, it's possible for your companions to be overpowered.
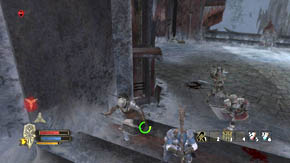
If it does happen, run away as fast as you can to the place from where you went outside, and then turn back. Leaving enemies behind will buy you some time to bring your friends back to fight, before one of the opponents could interrupt this action. Eventually, you'll defeat everybody, including the troll.
Carn Dum: Pull a lever to open the gate

Search the big courtyard - there are a lot of crates and barrels here. Run through any of the gates on the right after that. Both lead to a room with another lever, but right after you've entered a great number of prisoners will come down from the ceiling. Get rid of all of them.
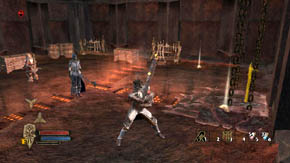
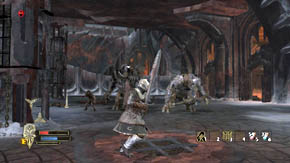
Only now can you destroy the remaining barrels and crates (the ones that weren't destroyed during the fight) and search two chests. Next, pull the lever glowing in yellow to unlock the second gate in the big courtyard. Go out of the room with the lever. A troll will run up through the newly open gate, while another one will climb opposite you.
Carn Dum: Continue the search for Agandur
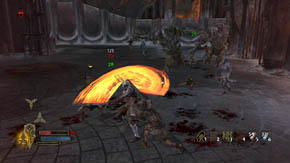
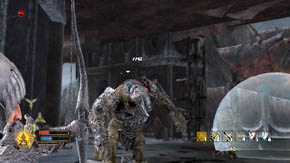
To make matters worse, you will be surrounded by a large number of prisoners and new will continue to appear in the place of the killed ones. In spite of that begin the fight with getting rid of most of them. This way, nobody will disturb you while you'll be dealing with the trolls.
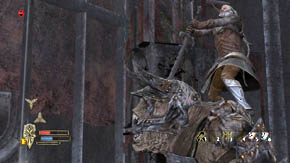

Once you've taken care of the prisoners fighting with the trolls won't be so hard any. Avoid their blows and use special abilities. When they fall run out through the newly open gate and turn right. Run up the stairs and turn right again. The game will be saved automatically.
Barbarian sorcerers will appear in the opposite windows and a warrior will come running to get you as well. Shoot all the sorcerers (we suggest hiding in Andriel's healing sphere), kill the warrior and run to the windows. Before you climb up the stairs on the left, search a small chamber on the right - there are crates, barrels and a chest to be searched.
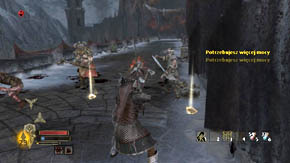
Run up the stairs, use the glowing portal (the game will be saved automatically) and prepare for another battle. Hide under the wall on the right so that the barbarian sorcerers can't hit you. Soon, a heavy barbarian warrior and a fast warrior with two weapons will appear here.
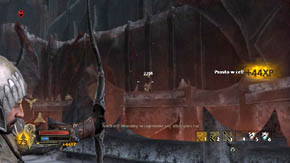
Shoot all the sorcerers in front of the gate on the right and destroy all barrels and crates that you come across on the way. Reach the stairs at the end of the wall. On the right, two heavy barbarian warriors and a sorcerer will appear. You will defeat them with ease. Run up the stairs to the upper part of the wall.
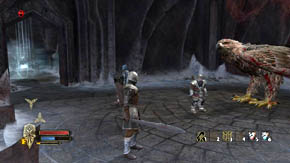
On the left there is a small chamber with crates and barrels. You can search it. Run to the glowing portal and use it. Watch the cutscene and then prepare for the final confrontation with Agandaur. To begin it use the glowing portal on the left in the corridor leading to the fortress interior. Don't worry about the secrets - there's none on this level.
Carn Dum: Defeat Agandur
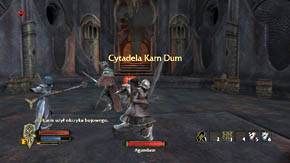
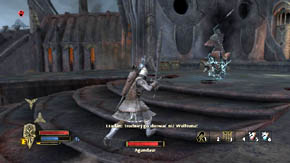
Agandaur can be compared to Wulfrun, with whom you fought at the beginning of Chapter 5, and with the Carn Dum Captain at the end of Chapter 6. However, he won't begin the fight by surrounding you with flames. Expect melee attacks instead. Agandaur is much more quicker than the previous bosses, he teleports more often, his blows are powerful and their combinations deadly.
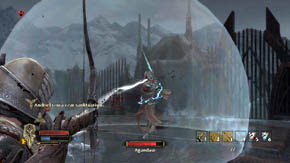
That is why, don't fight him hand-to-hand but strike from behind when he's busy fighting with your companions. Attacking him with a ranged weapon and aiming at the head is even better. Agandaur can also levitate, teleport somewhere far from you and start throwing magic missiles. Wait until this attack is over avoiding the missiles and get back to the fight when Agandaur returns.
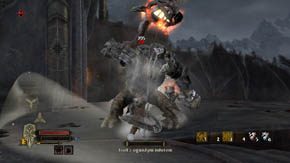
When the health of the boss is reduced by half he'll summon the Fire-hammer Troll. Though he's tougher and stronger than ordinary trolls, fighting him will not be difficult. Defeat him by shooting him in the head or with powerful blows while dodging his, and Agandaur will come back to the fight.
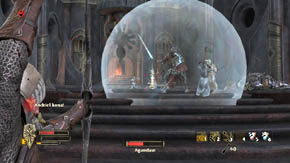
Now, things might get a little complicated, as the boss won't be alone - three fast barbarian warriors with two weapons and a prisoner will appear. Your goal is to eliminate these enemies as quickly as you can (use all special abilities). Otherwise, your companions will literally be flooded with blows and they'll fall.

Resume fighting with the boss after killing the enemies. Watch out for his melee attacks and magic missiles. Don't shoot at him while he's levitating because before you locate him he'll move to another place anyway. When he is close to death, he summons the same group of enemies - wipe them out as fast as you can. Following these guidelines you should eventually manage to deal with Agandaur.
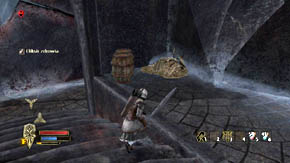

This, however, is not the end of the fight, only the first stage. Still, before you use the glowing portal, which will take you to the second one, you can run around the courtyard, destroy crates and barrels and also search some heaps with items. Do it especially when you're low on missiles (arrows or bolts). Then use the glowing portal.
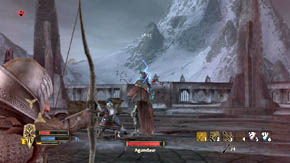
The second stage will require considerable dexterity and accuracy. Each Agandaur's attack - even a magic missile - knocks you down, so dodges and continuous running are inevitable. The boss uses the same attacks during the whole fight - avoid them and keep wounding him. If you use melee attacks, attack him from behind. Using ranged weapons is even better - aim at Agandaur's head.
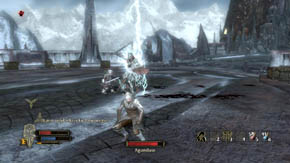
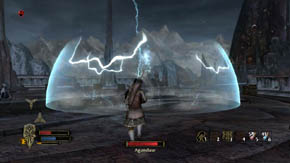
If you notice that Agandaur is on the ground and begins to electrify, run away from him as quickly as you can. In a moment he'll disappear and in the place where he's just been standing a shock wave will be created. It will harm you and knock you down if you don't flee in time.
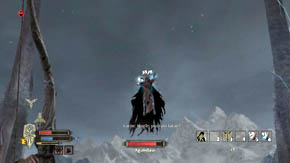
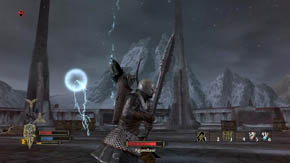
Agandaur will also be using magic missiles. When he vanishes and appears nowhere on the ground it means that you should look for him in the air. You have only a moment to hit him (the head is the best part), because once he recharges the energy he'll throw a series of missiles, then vanish again and appear in a different place.
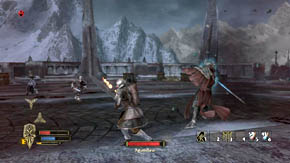
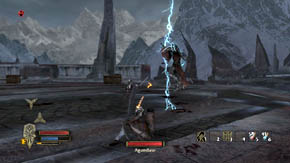
Apart from ordinary attacks Agandaur will float in the air once in a while and then strike from above. If you're the target, then dodge quickly. This kind of attacks will be very frequent when he's on the ground.
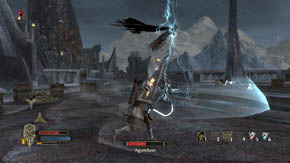
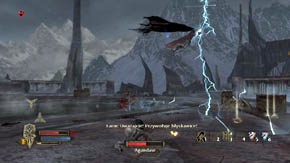
When Agandaur's health is reduced by half, he'll begin to fly over the remains of the bridge where you are fighting and strike everything below him with bolts of lightning. You must be cautious then and move out of the way he'll be flying as fast as possible. Once Agandaur has performed this series of attacks, he won't be using them again.
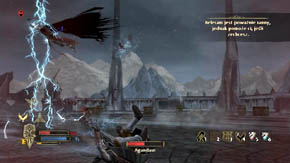
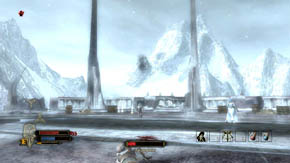
In this very moment you will receive information that Beleram - although wounded - is able to help you. Of course, you can call the eagle, but we suggest otherwise. If you manage to defeat Agandaur without using Beleram's help, you will unlock the [ACHIEVEMENT] Eagle Savior.
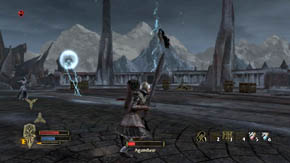
Generally speaking, the fight with Agandaur is not the most difficult one in the game. Everything depends on frequent dodges and successful aiming, as well as using all of the most powerful special abilities. Eventually, you will manage to defeat him and finish the game at the same time, which is connected with unlocking the [ACHIEVEMENT] Hero of the North.
Attention! If you completed a playthrough on at least Normal difficulty (not Easy), you will additionally unlock the [ACHIEVEMENT] Victorious in Battle and the Heroic level of difficulty will be unlocked. If you complete a playthrough on Heroic difficulty, you will unlock the [ACHIEVEMENT] Hero of Legend. Then, the last and the highest, namely Legendary, level of the difficulty will be accessible. Completing a playthrough on Legendary means unlocking the [ACHIEVEMENT] Against All Odds, but it won't be easy.
Good luck!


 The Elder Scrolls V: Skyrim - Dragonborn Game Guide & Walkthrough
 The Amazing Spider-Man 2 Game Guide & Walkthrough
 The Next Big Thing Game Guide & Walkthrough
 The Movies Game Guide & Walkthrough
 The Chronicles of Riddick: Assault on Dark Athena Game Guide & Walkthrough