
Welcome in the guide for the adepts of the dark side, which have Playstation3 or Xbox 360. In the Star Wars: The Force Unleashed, you are one of the Siths - the secret apprentice of the lord Vader - Starkiller. This guide will familiarize you with best boss strategies and reveal all game secrets (especially locations of the hidden holocrons). Have a nice lecture!
Przemek "g40st" Zamecki
The Training room is a good place to learn how to use the Force and combos. To access this mode, press during the game button SELECT (Playstation 3) or Back (360) and choose option (Training Room).
Before every bigger fight, make sure that you assigned all points for upgrades. To do this, go to menu and choose the option "Force Upgrades"
During the game, you can obtain several types of the crystals. These crystals can be used in your lightsaber. Some of them only changing the color of the lightsaber, but others can increase damages or even generate damage from lightning. If you find the crystal, go to menu and check whether you can use it.
Holocrons, which you found before your dead, will be treated as yours and you don't have to collect them again.
The best strategy for AT-ST is keeping the safe distance and attacking by throwing the objects with the Force Grip.
The mechanical enemies (such as Purge Trooper, Droids) are most vulnerable on lightning.
If you will deplete the blue bar of the Force, withdrawn on several seconds from the fight and wait for the regeneration.
During the fight with some types of enemies, you can use "Quick Time Events". If such action will be available, you will see on the screen the buttons. To execute Quick Time Event, you will have to push the buttons in adequate order and time.
Force Lightning: Shocking enemies with powerful lightnings. Very effective against mechanical enemies, enemies with jetpacks, enemies grabbed with Force Grip and against felucian shamans.
Activation - PS3: Triangle. Xbox 360: Y
Force Push: Pushing and often falling enemies. To generate strong push, press the button and hold it.
Activation - PS3: Circle. Xbox 360: B
Force Grip: Grabbing the enemies or items and gives the possibility to throw it. The one of the most often used powers, so it's worth of the investment. In the later phase, you will be able to grab even few enemies in the same time.
Activation - PS3: R2. Xbox 360: RT
Force Repulse: This force is creating around you the force bubble. After a while the force bubble is changing in a shockwave, which is wounding nearest enemies. This force is especially effective against: opponents, which are using the Force, stormtroopers, felucians protected by shamans and bosses.
Activation - PS3: L2+Wheel. Xbox 360: LT+B
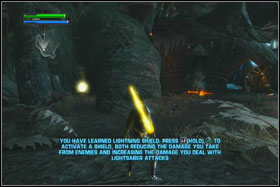
Force Lightning Shield: Reduces effectiveness of the enemy attacks.
Activation - PS3: L2+Triangle. Xbox 360: LT+Y
Force Lightsaber Throw: With this force you can throw your lightsaber in targeted enemy. This force isn't especially strong alone but if you mix her with Force Grip (PS3: R2+Square. Xbox 360: RT+X), you will be able to defeat the strongest enemy.
Activation - PS3: L2+Square. Xbox 360: LT+X
Fortitude: Increases amount of the health.
Force Focus: Increases amount of the Force.
Force Affinity: Increases regeneration rate of the Force.
Vitality: Increases amount of the points, which regenerate health bar after hitting the enemy.
Resilience: Reduces effectiveness of the enemy attacks.
Battle Meditation: Reduces amount of time necessary to power up the Starkiller's force.
Saber Mastery: Increases effectiveness of the lightsaber attacks.
Defense Mastery: Increases the chance on the deflection of the shot with lightsaber.
Combo Mastery: Reduces amount of the points of Force used during combos.
HOLOCRON
Unblocks apprentice's robe with hood
MANDALORE
You are able to play as Rahm Coda
WOOKIEE
Unblocks the robe of the Starkiller's father
LIGHTSABER
Unblocks use powerful lightsaber
MARAJADE
Yours attacks are more powerful
KATARN
Reloads all of your forces to maximum
DANTOOINE
Unblocks ceremonial robe of Jedi.
Find and eliminate General Coda
Destroy five TIE Fighters
Earn 200000 Force Points
Find 15 holocrons

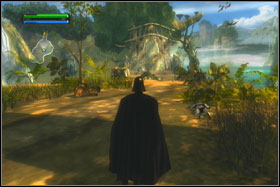
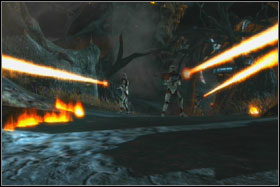
A long time ago in a galaxy far, far away... You are starting as Lord Vader on the planet of Kashyyyk, which is populated mainly by hairy wookies. Head straight.
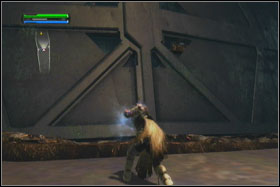
Use the Force Push (O) on the blockade. To do this, hold the button for few seconds. You will have to fight with defenders of the planet, but Darth Vader should be able to kill them without any problems.
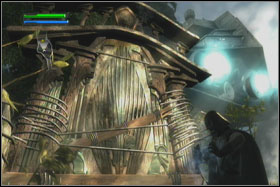
After a while, you will reach the large elevator. Hop inside and use her to get on the top level.
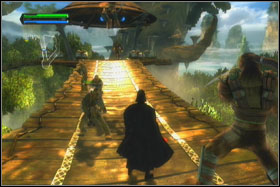
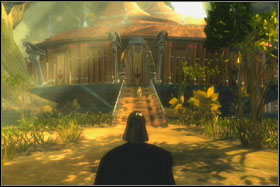
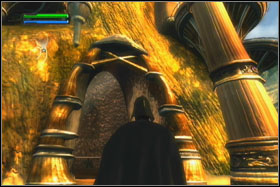
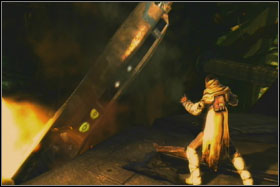
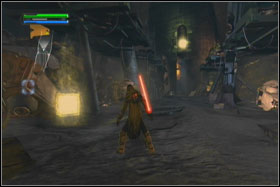
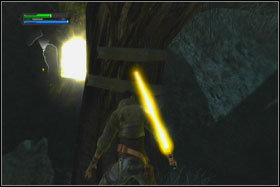
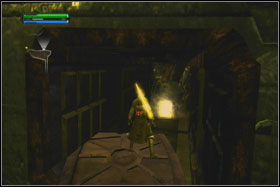
Next you will have to go past few footbridges. All of the time you will be attacked by Wookies. Eliminate them systematic until you reach the hut, where (according to the information) is hiding the Jedi.

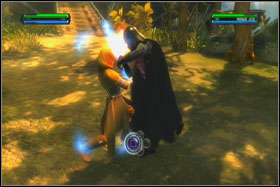
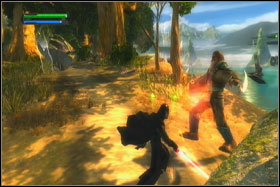
The one who is hiding in the hut is very powerful. He can be hard to defeat. Remember about blocking. Use mainly Force Repulse (L2+O). When the Jedi will fall on the ground, quickly run to him and hit with lightsaber.

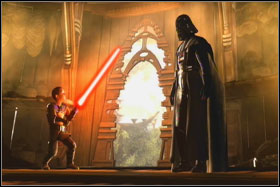
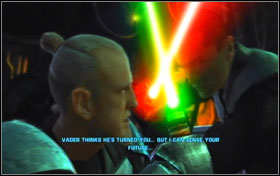
This fight can end only in one way. The Jedi will die and his son who's also using the Force will become the secret apprentice of Lord Vader.
Find and eliminate General Coda
Destroy five TIE Fighters
Earn 200000 Force Points
Find 15 holocrons
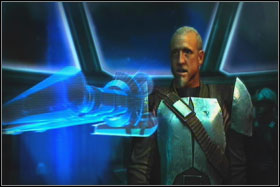
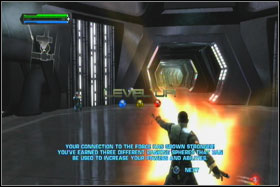
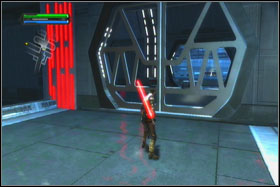
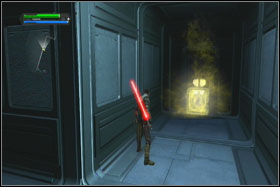
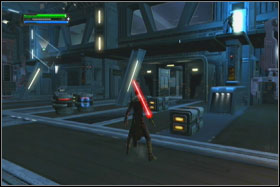
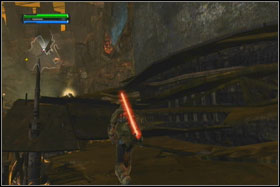
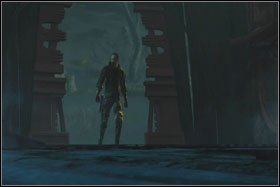
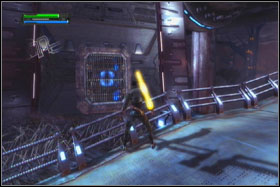
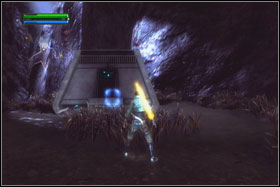
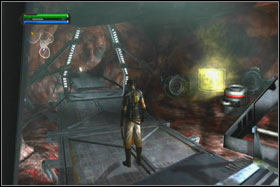
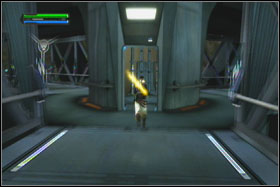
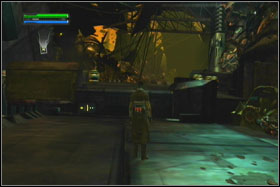
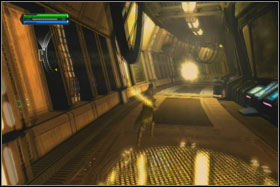
Watch cutscene and run straight, through the corridor.
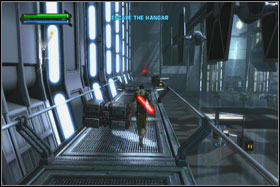
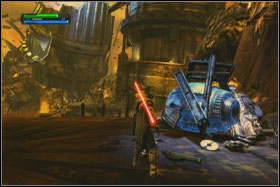
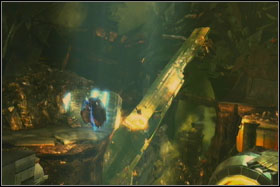
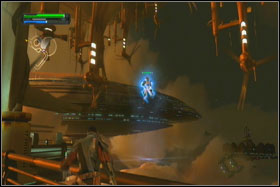
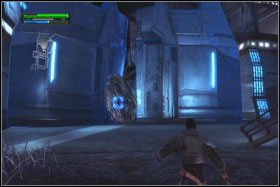
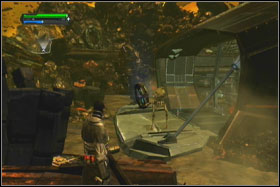
When you will reach the first lock, which is blocking way, use the Force Push (Circle - O). Enter inside the hangar, where the Coda's rebels and stormtroopers are fighting. At the end of the ramp, which you used to run inside the hangar, you will find Unlimited Energy. Take it. Thanks to this, you will obtain several seconds without decreasing of the blue bar. Go down and eliminate all enemies. Fight mainly with Force Grip (R2).
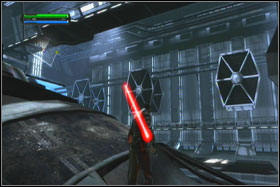
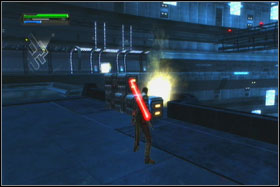
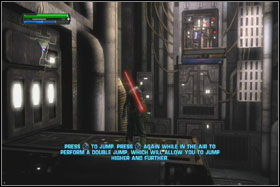
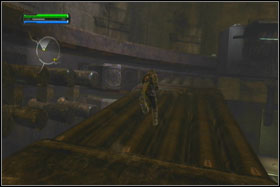
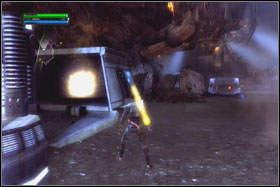
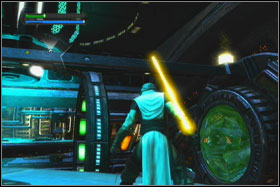
After extermination of enemies, you should focus yourself on first of the secondary objectives. Under the roof are hanging Empire's machines. Destroy five of them with Force Grip (R2). On the other side of the entrance, which you used to go inside hangar, you will find low placed ramp. Jump on a hull of the destroyed shuttle and jump (X+X) to the holocron worth 10 000 points.

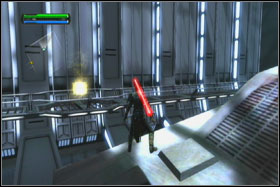
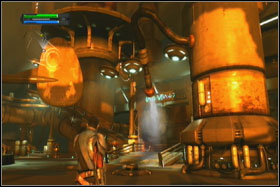
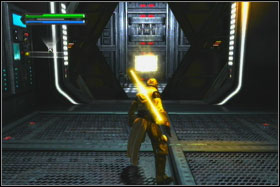
When you jump on a tail of the destroyed shuttle, you will be able to jump on a higher ramp. At the end of this ramp, you will find the holocron (Yellow Light Saber Crystal). When you do this, back to do ramp, which is heading to interior of the complex. Use Force Grip (R2) and right analog stick to move out the two bars.
You should gain new experience level. After every level up, Starkiller will receive one of the available Force's spheres. When you go past another lock, you should find two another locks. Behind one them, you can find holocron worth 10 000.
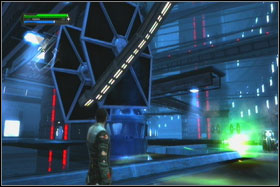
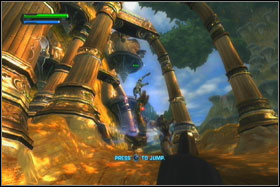
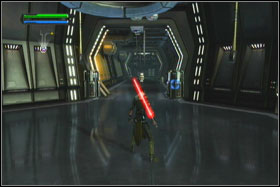
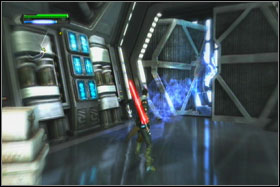
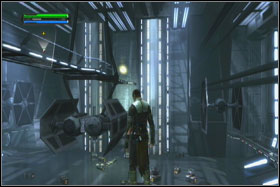
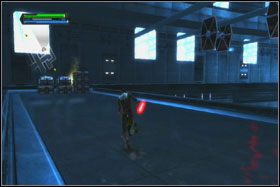
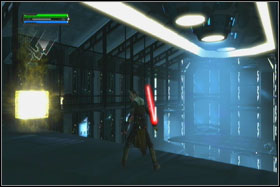
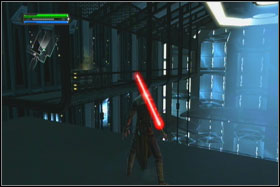
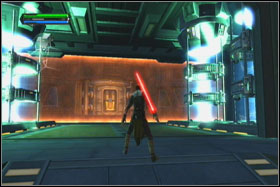
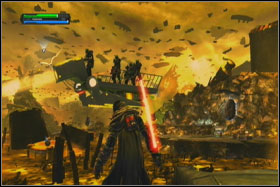
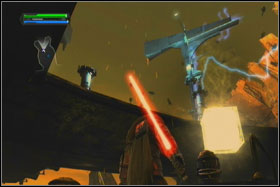
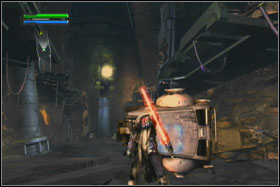
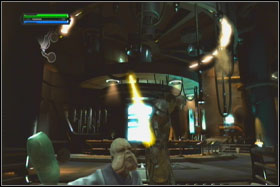
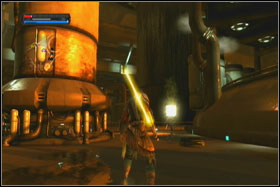
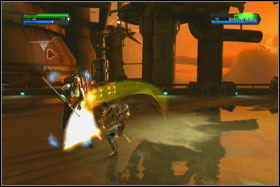
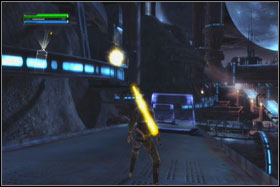
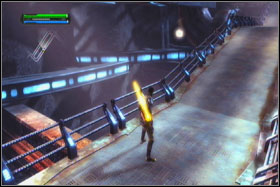
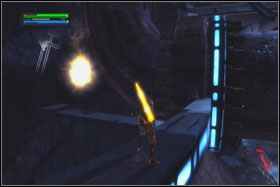
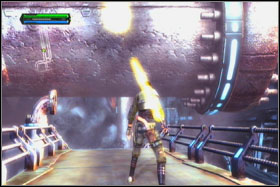
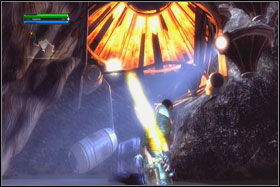
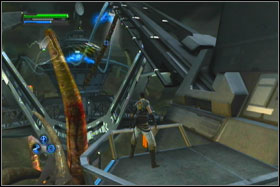
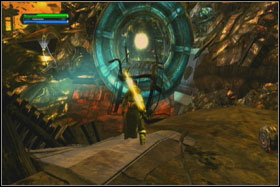
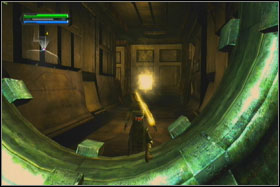
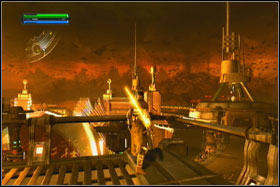
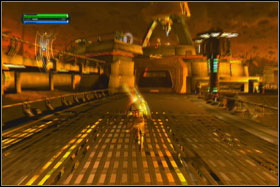
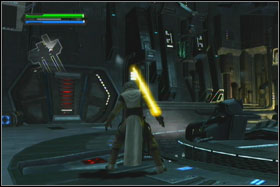
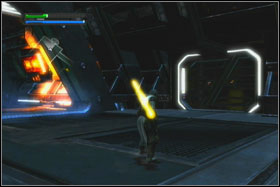
When you will pass few another locks, you will reach the huge corridor in which unceasingly flying the TIE Fighters. To keep them away for a while, you can use the Force (R2) and bend the pillars, which are located at the sides of the ramp. Next run forward. Jump over small abyss on the left side. You will see again the fighting soldiers. Kill them all.
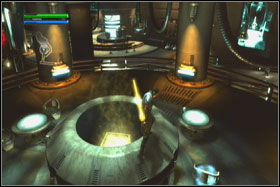
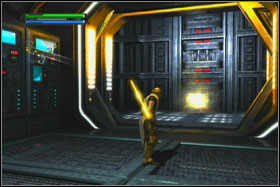
In the middle of the corridor you will find elevator shaft. Before you decide to ride up, eliminate all enemies from the control room and go on another side of the room. You will find the few crates. Behind them is located holocron (Force Talent Sphere).

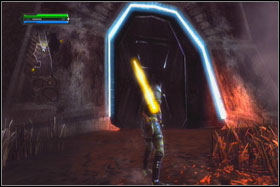
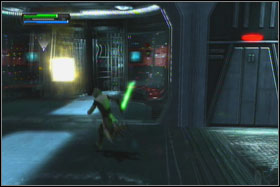
After riding on the higher level, go on the rear of the control room. On the left side, behind the stock of the chests, you will find holocron (Force Combo Sphere). Go back. Breach the door with Force (O), go straight and eliminate all of enemies.
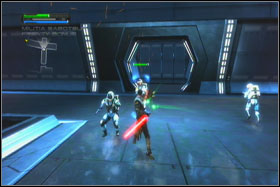
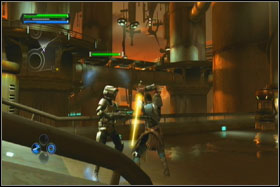
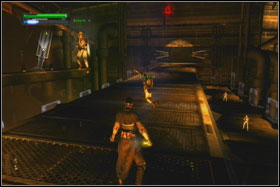
After jumping on the second side of the ramp, you will meet Coda's soldiers. They will be armed with energy sticks. In one of the niche on the right side, you will find holocron.
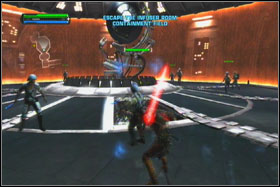
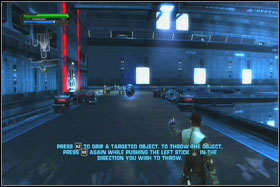
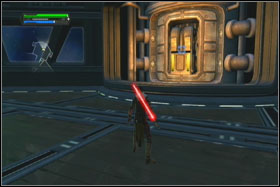
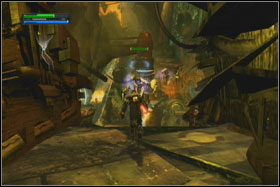
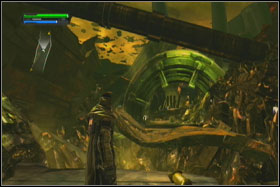
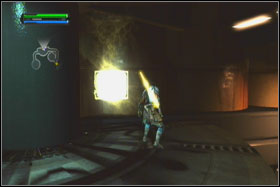
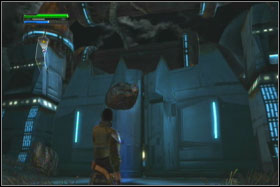
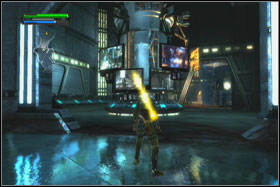
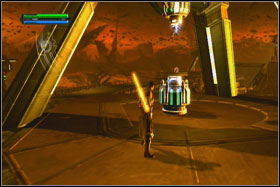
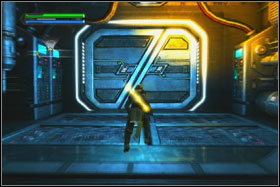
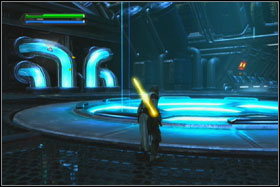
You will quickly orientate that Coda set a trap for you. The room will become closed with the energy barrier. You will have to kill all enemies. You can throw them in barrier. If you do this, they will die immediately. When the enemies will be dead, you will have to localize the generator, which is located behind the barrier. Remove him from his slot with Force Grip (R2).
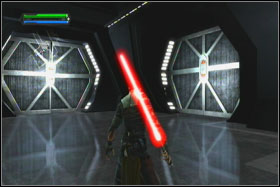
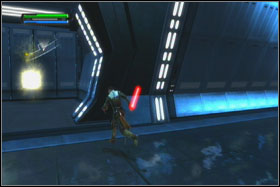
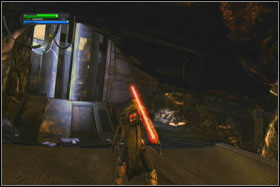
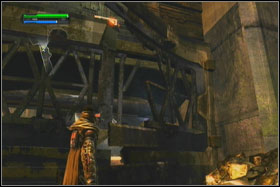
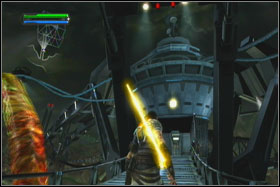
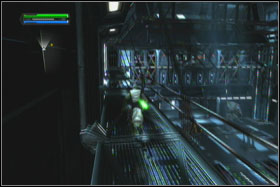
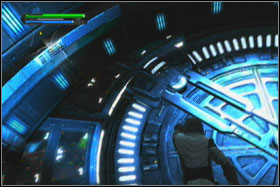
You will reach the broken elevator. Grab the piece of metal on the left and pull him out. Next jump on him, and pull out another one, which is located slightly higher. Kill the stormtrooper and go forward.
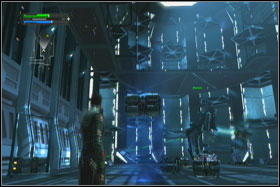
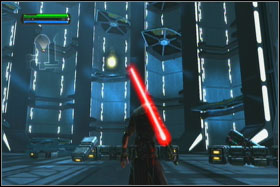
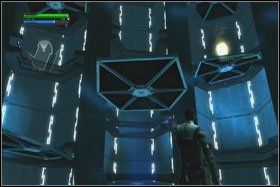
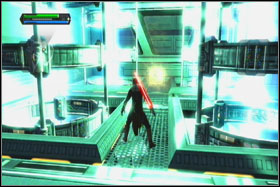
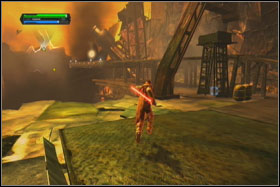
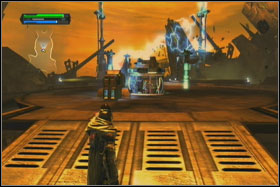
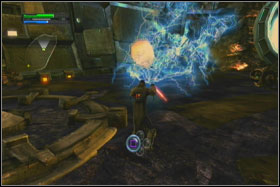
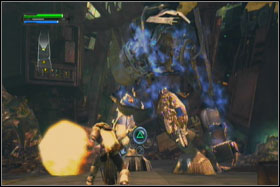
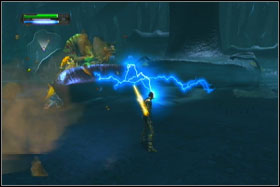
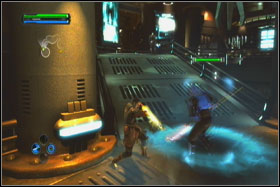
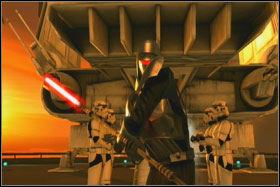
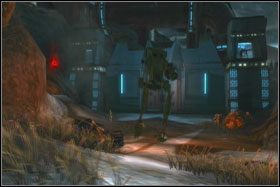
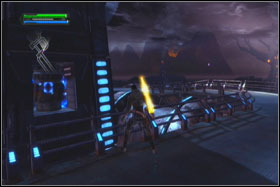
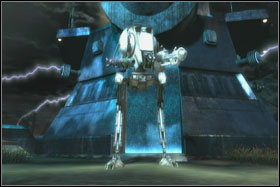
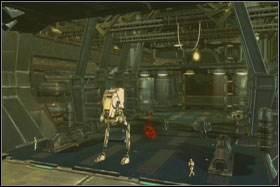
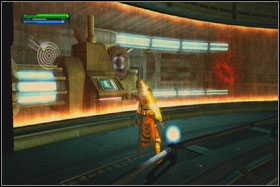
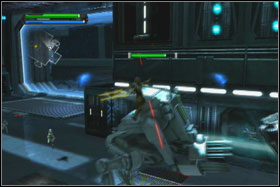
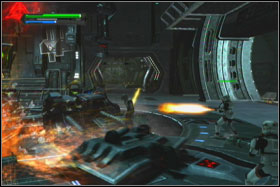
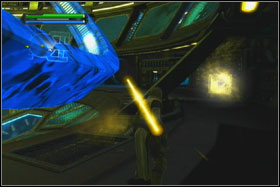
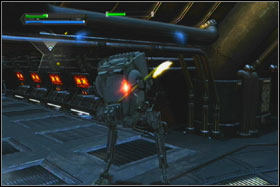
You will find yourself in the room with side panels, which contains the TIE Fighters. Before you will go forward, destroy the AT-ST. You should use Force Lightning.

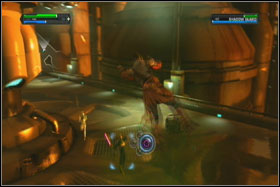
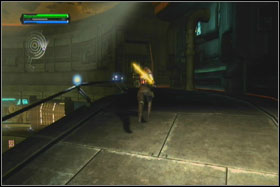
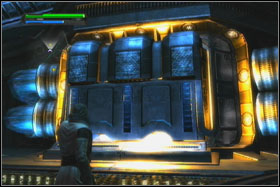
Look at the panels, which contains Tie's. They are moving up. Jump on the panel and ride on him on the next level. You will find there Rebels with two turrets. First eliminate turret's crew and next the stormtroopers. When you will kill all of them, jump again on the moving panel and ride up on another level. You will find there two holocrons. The first one is located on a roof of the control room.
To get this holocron, you should use one of the two ramps, which are located near to the wall. The second holocron is located in a crate on the same level. Take two holocrons and jump down on the middle level.
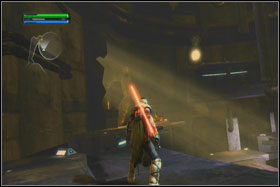
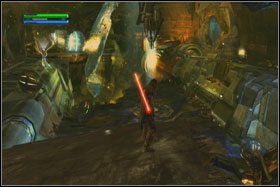
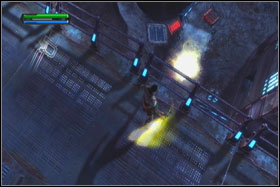
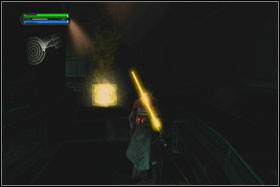
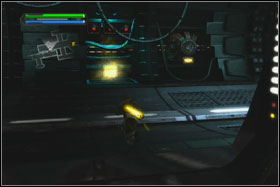
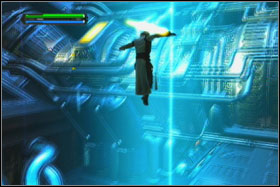
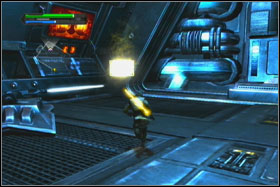
When you will kill all enemies, you will find that the transport line is damaged. You will have to figure how to obtain two holocrons, which are located in this room. Of course you will need to use the Force. Grab one of lying panels and careful slip him in free place, just under the holocron, which is visible from the bottom. Next jump on the lowest (bended) panel and after two jumps you should be able to take shining cube.
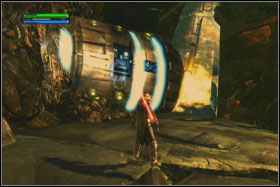
After this action, jump on the higher panel, and turn around. Next, jump on two another panels. When you do this, you should be able to see second holocron (Rubat Power Crystal). He is located on the end of the ramp. Jump another time (X) and after a while press (L1). This action should guaranty you safe landing. After landing you will have only jump the holes in the ramp and you will be able to grab the holocron, which contains force crystal to lightsaber.
After few another fights in the corridor, you will reach the elevator. Use her to get on the higher level. After a while you will be reach the assembly line room.

In the assembly line room is located another holocron. Go to the center of the room. Look on the left down side. You should be able to see the "L" shape niche, where is hidden the holocron.
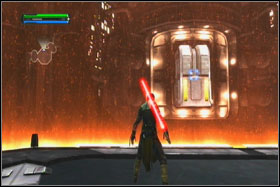
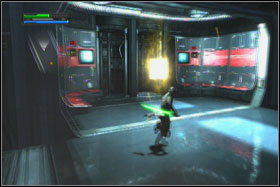
The energy barrier blocks the pass to the next room. To shut her down, you have to slip out the generator from his slot. Before this can be done, you will need to defeat few enemies. The easiest way to kill them will be throwing them in the barrier. Just before the barrier you will find two niches. In the right one is hidden the holocron.
Next to barrier is located another holocron. The authors located him exactly in the middle between four generators on the left side. In next room of the assembly line, in the niche on the right side you will find penultimate cube.
The last holocron is located behind the hull of Tie Fighter, on the right side, at the end of assembly room. When you collect all holocrons, prepare yourself for the fight with General Coda. Go trough a door and use an elevator to get on the highest level of the station.
Find and kill Kazdan Paratus
Destroy 10 skiffs
Earn 250000 Force Points
Find 15 holocrons
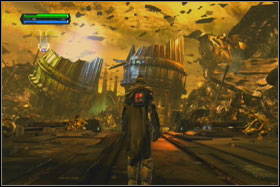
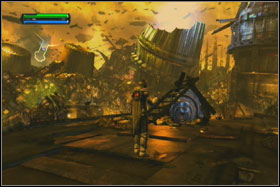
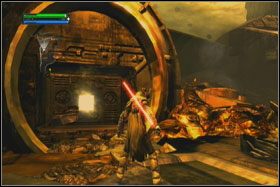
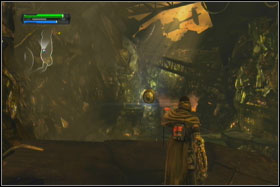
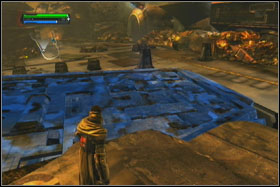
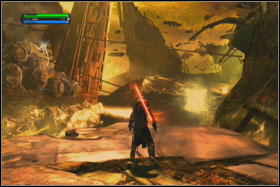
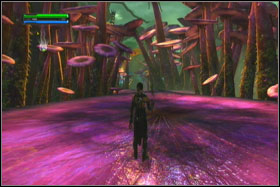
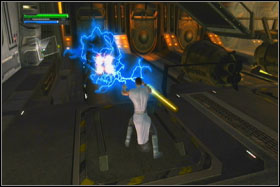
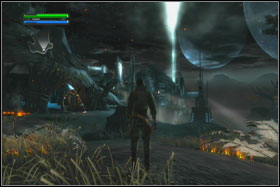
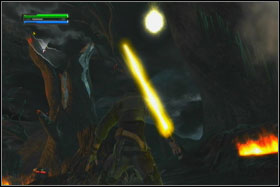
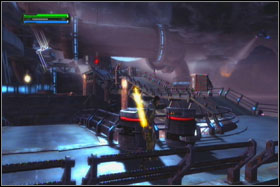
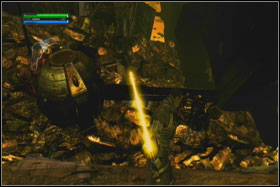
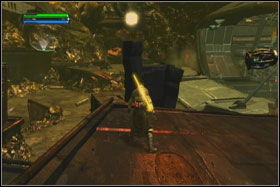
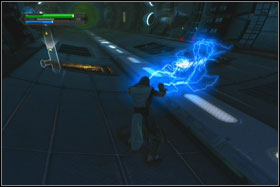
It's time for the most beautiful level in the game. Raxus Prime. On the beginning of the mission you will receive info that Starkiller learnt the Force Lightning. To use it, press the triangle. Go several steps straight. You will reach the engine. Use the lightning on him. After a while, the engine will explode, making a hole in the wall, on another side of the lava lake. Jump down and go left.
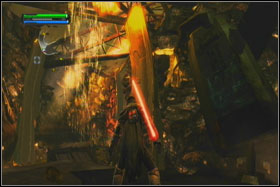
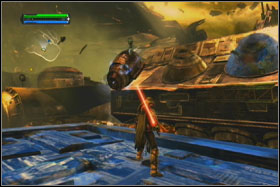
You will reach the lake full of lava. Above the lava are levitating round platforms. Before jumping on one of this platform, look forward. You should be able to see holocron. Use the Force to lift on the platform, jump on her and take the holocron. Next go forward, but have the eye on the scavengers and their skiffs. This is perfect moment to fulfill the secondary objective (destroying 10 skiffs). Target the front side of the skiff (engine) and use the Lightning. If you will use the Force in adequate moment, you will destroy not only skiff, but also scavengers, which are standing on him. Several steps forward (under pile of junk), you will find second engine. Target him and press triangle.
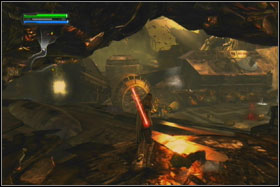
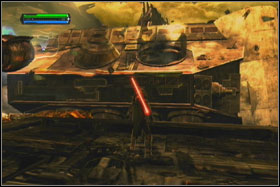
When you turn right, you will see that the next platform is quite away and you won't be able to jump there without problem. You will have to lift on the platform, which is hidden under the lava. When you do this, quickly jump on her, and immediately on the next platform.

When you find yourself on the center of the lava lake, lift on the last platform. Jump on her and after a while on the next one (watch out on the iron sticks!). Next, kill the enemies from the skiffs and destroy the last engine with the Lightning. The explosion will create a hole in the wall. Go trough her.
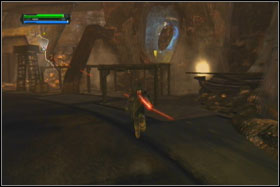
Inside you will find the scavengers and first Jawas. Then aren't strong enemy, but you should have the eye on their grenades. Go around the reactor and start climbing.
When you will reach next level, look on the right. Slightly above the entrance you can find second holocron (Force Power Sphere). To get him, go straight, evade the entrance and run up on the long pipes, which are creating something like footbridge. When you will reach the top, turn left and go to the end.
Take a small run up and jump on the pipes above you (X+X). You will find yourself one level above the holocron. Jump down on the platform, kill the Jawas and take the cube. Now you can leave the area.
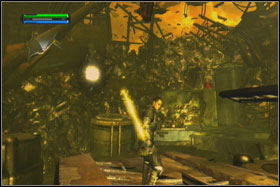
One moment later, you will reach the blocked pass. Use Force Push and go forward. You will arrive to narrow gorge, which is full of the junk. Grab the metal boxes and use them to kill Jawas and other enemies.
The exit from the gorge is blocked by lava. Fortunately just next to the footbridge, you will find three big metal panels. Curve all of them with Force Grip (R2) in such way to create something like roof above the pass. After a short march, you will find a place where crashed the large spaceship. Before jumping there, take the holocron, which is placed on the left side.
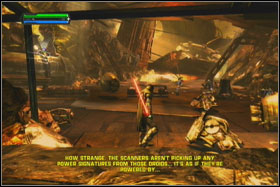
At the crash site you will first time meet the junk droids, which are working thanks to the Force. Kill them with Force Lightning. If you still haven't destroy 10 skiffs, you will be have chance to do this now. They will be still arriving with new scavengers. When you will be have a moment of calm, look on the crushed stone and use Force Push to destroy him and take the holocron (Red Light Saber Crystal).
Lift up (R1) the big shining platform and jump on her. Grab with the Force one of the flying piece of junk and throw him in damaged dome in front of you.
Now you can enter to the spaceship. Make double jump (X+X) and in adequate moment, press (L1). On the other side (in open area) you will be have to eliminate large group of the droids.
Just before end of the cliff, you will find the holocron. When you take him, back yourself. Find the crushed hatch. Use Force Push and again enter inside the spaceship.
In the corridor, you will have to fight with few Jawas. Just before the place where you can jump on the higher level is hidden holocron. Use the Force Push, take him and go straight.
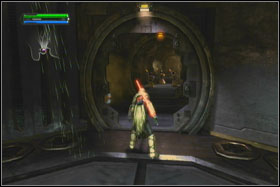
When you reach the closed gate, curve one of her parts and go trough. You will find yourself on the big open area, full of the scavengers.
In this area you can find two holocrons. First of them is located in one of the corners (Force Combo Sphere). Second (Gold Lightsaber Crystal) can be found on the platform, which is rising above the abyss, on the left side of the entrance.
Your main objective in this area will be shutting down the generator of the shield, which is blocking the pass. Find the elevator and ride down. When you will leave short corridor you will be have to beat another group of the scavengers.
In this part of level, you can also find two holocrons. First (Force Talent Sphere) is located on the right of the elevator's exit (just after entrance to the open area). Second (Compressed Yellow Light Saber Crystal) is located next to destroyed skiff, under power generator.
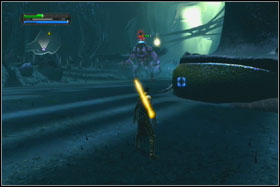
To deactivate the shield, use the Force and move from the left to the right the generator, which is standing on the platform. After that, return to the previous area with elevator. When you do this, you will able to reach corridor, which was blocked by energy shield. Go straight. After a short while you should meet the levitating probes, which will be sucking the force from the Starkiller.
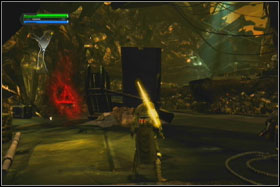
The probes are very dangerous, so try to destroy them in the first order. When you destroy two probes, jump down on the lower level. Destroy another droids and jump on the junk, on the left of the entrance.
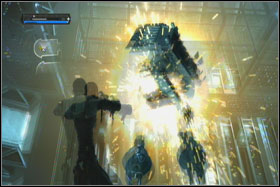
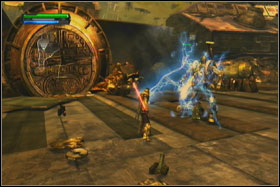
Destroy another droids. When you reach the large engine blocking the pass, use on him Force Lightning. When you will back yourself, the system will active the Titan built from the junk and Force. You shouldn't have any problems with beating him. Use mainly the Lightning and sometime the lightsaber. Try to keep safe distance. When the Titan lost certain amount of the energy, you will be able to use Quick Time Events.

After defeating the Titan, jump on the pile of junk on right and take the holocron. Next, go forward. When you will reach previously activated engine, target piece of metal that is heating by the engine and hold for the few seconds (R2).
Go trough the footbridge. Destroy druids and look on the right side. You should be able to see the metal plate, which is curved up. Grab her with Force and curve in such way to create platform. When you jump over the curved plate, you will see metal pillars. Use on them Force Push.
By curving another plates, you can reach the holocron (Sith Robe), which contain additional robe. When you obtain the cube, back on the ground.
After a while you will reach another gate, which is guarded by second Titan. Beat him with exactly the same strategy, as the first one.
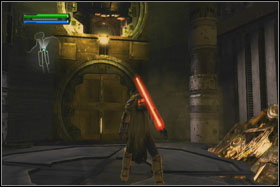
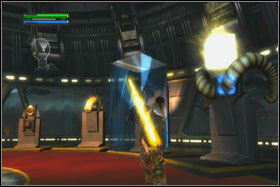
After defeating the Titan, hold for the few second button (O) and jostle the gate. You will arrive to atrium of the Jedi Temple. You can find there three last holocrons. The first is near of the entrance.
To obtain two another crystals, grab with the Force hull of the AT-ST and place him in such way to be able jump with his help on one of the side ramps. Take the holocrons and go defeat Kazdan Paratus.
Find and kill Shaak Ti
Kill four rancors
Earn 375000 Force Points
Find 15 holocrons
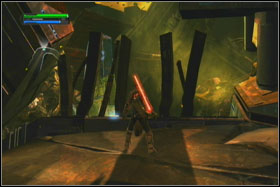
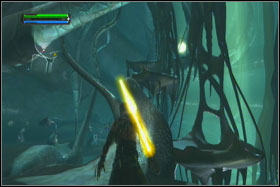
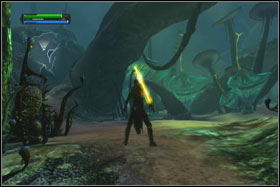
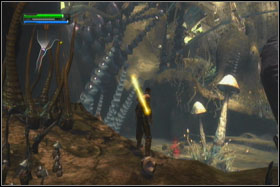
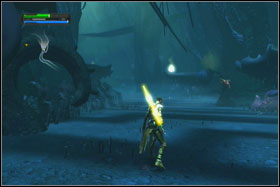
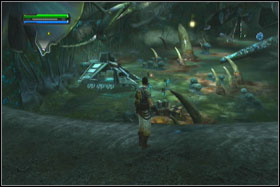
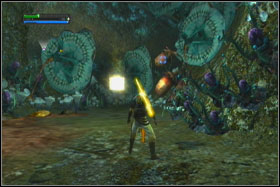
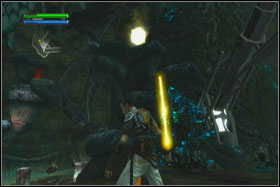
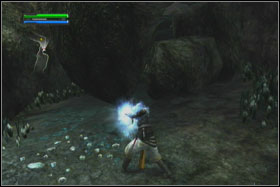
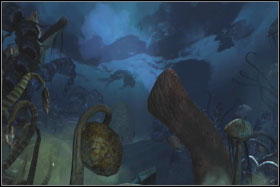
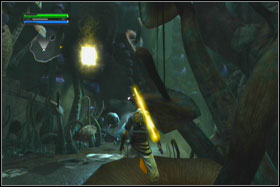
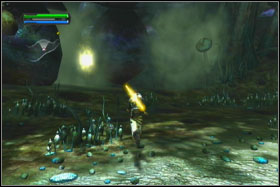
Felucia - the planet of mushrooms. Go straight. After few seconds you should see the opening on the right. You will find there holocron. Take him.
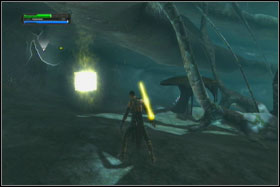
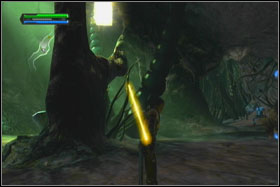
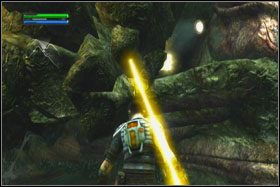
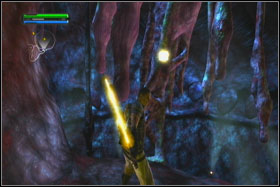
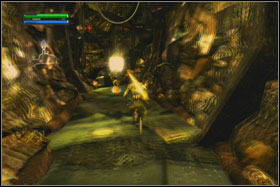
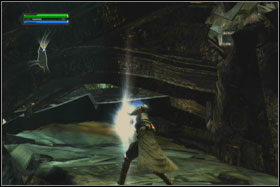
After first fights will Felucians, you will arrive to the huge vertical cave. If you will stand in entrance and look on top ledge, you will see one of the holocrons. Another is bellow you, so first jump one level down and after that start to climb.
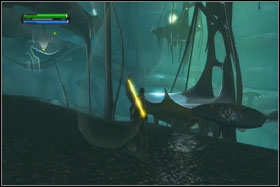
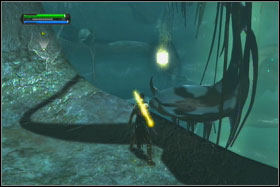
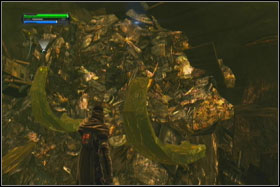
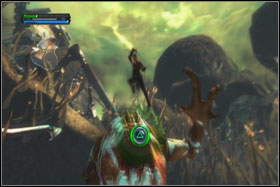
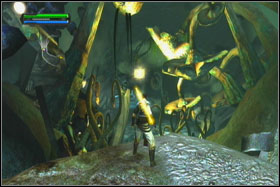
Third cube is hanging on one of the huge leafs.
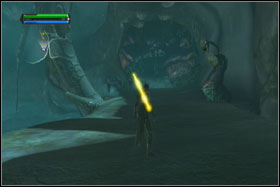
The fourth (Unstable Red Light Saber Crystal) is located just ahead of the exit from the cave. To see him, you must turn left just before leaving the area. You will be able to take this cube by jumping on leafs.
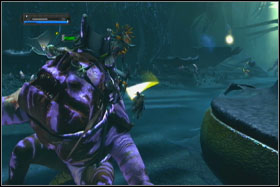
When you leave the cave, you will enter on the open area. Before you go left, examine the right side. You will find there holocron.
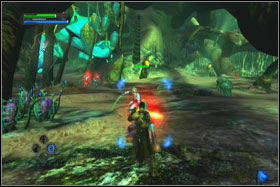
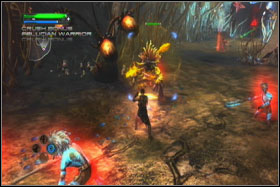
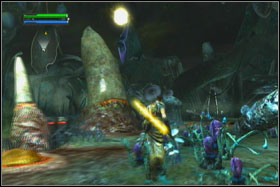
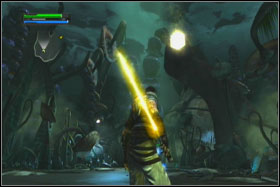
Move straight. After a while natives protected by shamans will attack you. To kill these enemies, you have to find the shaman (usually he is somewhere behind natives) or use Force Grip (R2). Remember that protected natives are immune on attacks with lightsaber. To find another holocron (Compressed Gold Light Saber Crystal), keep yourself the left side of the open area. After finding the holocron turn back and enter to the tunnel on the right. When you will find yourself near the exit, you will see a cone, which is sticking out of the ground. Pull him out and take the cube.
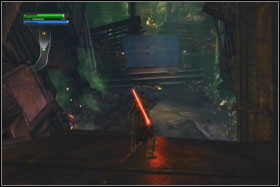
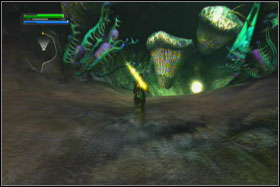
In the tunnel you will find another enemies and holocron (Force Combo Sphere), which is hidden behind one of the pillars. Before entering to the next arena, prepare yourself to fight with first Rancor.

After short cutscene, run left and take holocron.
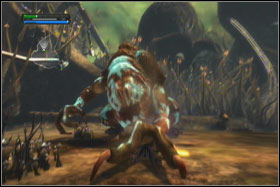
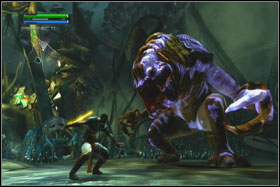
To beat the Rancor you should use the same tactic as in the case of the Titans. Many jumps, few slashes and Force Lightning. Don't waste your time for throwing items. This creature is quite fast and you will not have enough time to precise targeting. When the Rancor will become weak, you will have possibility to finish him by the Quick Time Events.
After defeating the Rancor you will unfortunately again have to fight with opponents supported by shamans and two leaders. Threat them with Force Grip. Next holocron is located in the tunnel.
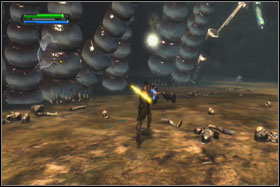
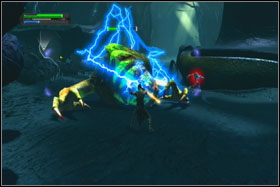
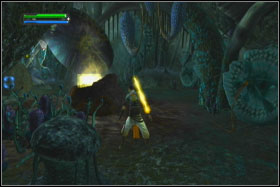
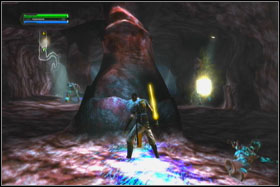
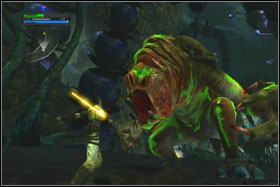
The tunnel is leading to the big cave, which is full of enemies. You will find there Felucians, three Rancors and four holocrons. The first two are located near the entrance to the cave, on the shelf, on the right side. The monsters can be eliminated by traditional way or with the help of surroundings (recommended). Look on two big pillars, which are supporting the ceiling. The pillars are wrapped around with tentacles. If the Rancor will see you, run in the direction of the pillars.
Try to running around pillars in anti clock-wise direction. In adequate moment, target the tentacle and treat her with Force Lightning. She will straighten, ramming all of the chasing you enemies. She is so strong, that is capable to fall even Rancors. When the Rancor will fall on the ground, quickly attack him. When the creature will get up, you must repeat whole operation.
When the Rancors will be defeated, look at the ledge on the left side. You will find there third holocron (Force Talent Sphere). The fourth is hidden behind second pillar, close to the exit from the cave. When you obtain all cubes, go to next objective - kill Shaak Ti.
Escape from the ISS Empirical
Destroy all rescue capsules
Earn 150000 Force Points
Find 5 holocrons
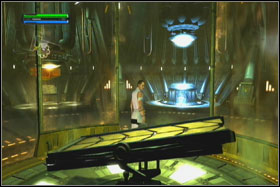
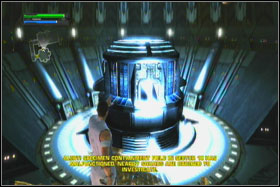
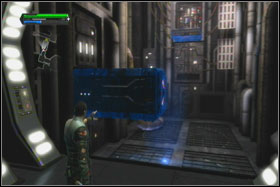
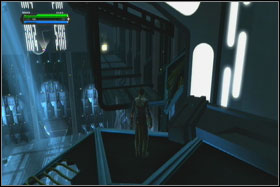
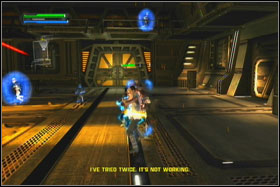
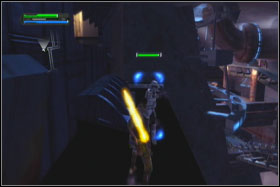
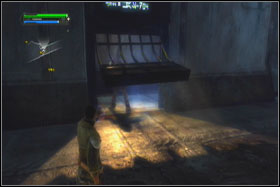
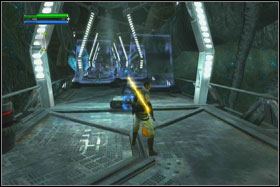
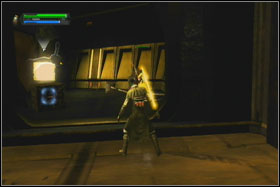
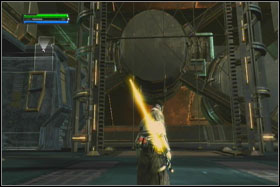
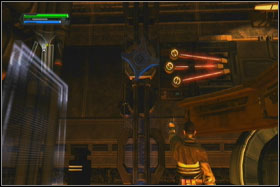
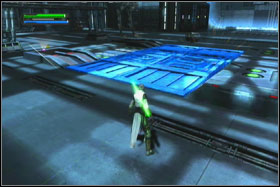
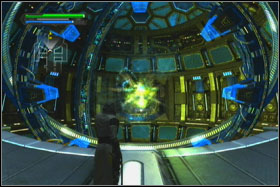
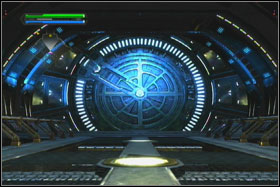
You are beginning this level in something like glass showcase. Don't break her immediately, because the room is filled with poison gas. Move the camera and try to localize the generator with blue glow. Stand in front of him and then broke the glass. Grab the generator with Force and pull him up. The poison should be immediately filtered.
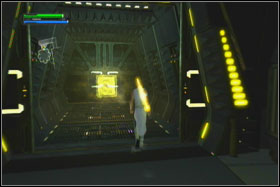
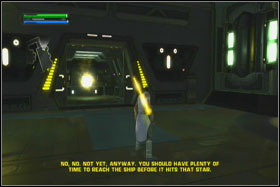
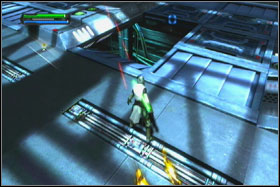
From lab you can exit by only one lock. Just behind the hatch, you will see first of the five holocrons (Blue Light Saber Crystal) from this level. After short fight you will reach the bigger laboratory.
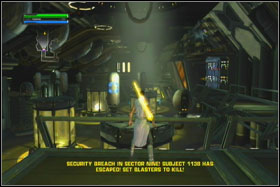
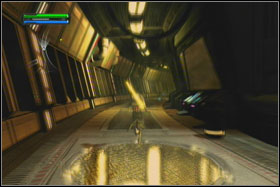
In this area you will have to fight with new type of stormtroopers, which are armed with weapon able to paralyze for a few seconds. After killing the enemies, take the second holocron (Force Combo Sphere) from one of the showcases.
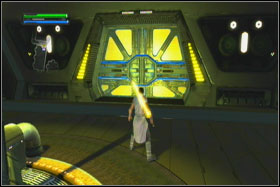
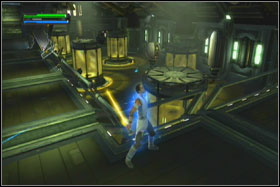
Third cube (Force Talent Sphere) is located in the lock, exactly under the entrance to this area. When you obtain three holocrons, use on the yellow lock Force Push, by holding for a while the button (O).
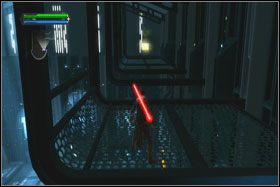
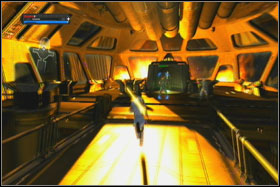
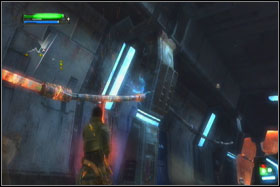
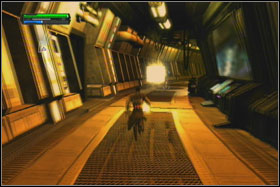
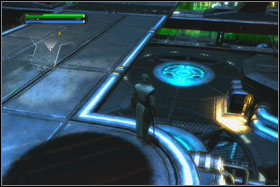
The next bigger room will be this with rescue capsules. Kill all stormtroopers. Pay the special attention on the Shadow Troopers, which are capable to disappear.

To destroy capsules, burn them with Force Lightning. In the first of the right, you can find third holocron (Force Power Sphere).

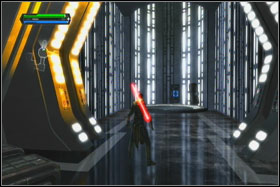
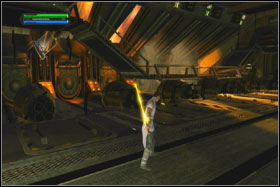
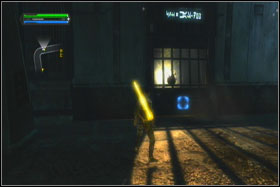
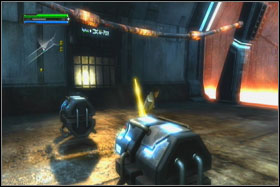
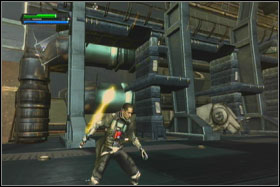
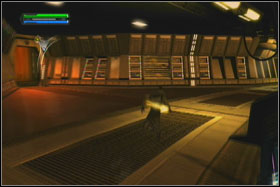
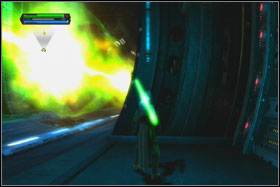
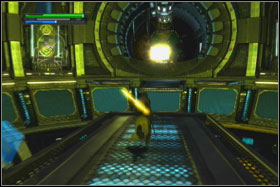
Go to the next section of the ship. Look behind the containers on the end of the corridor. You will find there fourth cube (Lorrdian Power Crystal). Take him and use Force Push to crush the door which leading to the room with four generators. Unfortunately passing trough this room won't be easy. You will have to defeat big Purge Trooper with two stormtroopers.
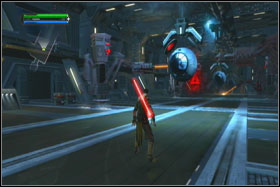
Kill the stormtroopers while maneuvering between generators and simultaneously hit the Purge Trooper with Lightning. Try to fight with him on the medium distance. When you will be close to him, he easily grab you. If you will be too far, he will attack you with the rockets. The safest strategy is forcing him to keeping the small red energetic shield. After fight, use the Force to open the soldered door.
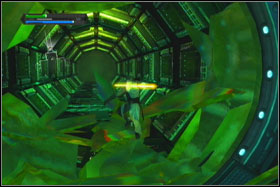
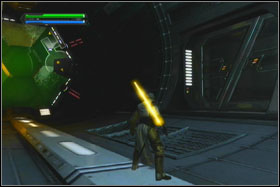
You will find yourself on the bridge. The way to the officers will be blocked by energetic barrier. First kill all stormtroopers on the platform. After that, jump down on the lower level. You have to be careful there. The shield's generators are guarded by two Purge Troopers.
After killing the enemies (use the Force Grip), pull up both generators. The shield will disappear and you will be able attack the officers and finish the mission.
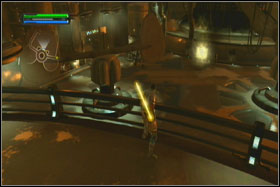
Escape with General Coda from Cloud City
Freeze 10 imperial soldiers in carbonit
Earn 200000 Force Points
Find 5 holocrons
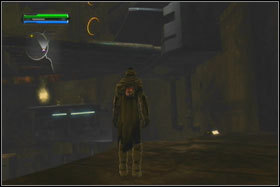
The mission begins in cantina. You have to escort blind General Coda to landing platform. At first you will be have to fight with some senate guards. Kill them with Force Repulse (L2+O). When they will fall on ground, finish them with lightsaber.
First holocron (Ruusan Power Crystal) is located on roof of the bar, which you will pass. The second (Unstable Gold Light Saber Crystal) is just in front of exit from cantina, inside the ventilation shaft.
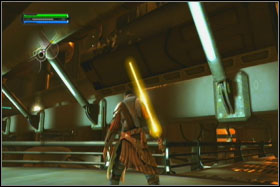
When you left the cantina, look on the containers with carbonit, which are located on the sides of the ramp. Grab them and throw in enemies to fulfill secondary objective - freeze 10 enemies with carbonit. You can also tear out the pipe. This action will create a fountain of the cold steam.
Third holocron is located on the first platform after leaving the cantine. The cube can be found on the right of the footbridge. You will meet there Jump stormtroopers. The easiest way to kill them is Force Grip (L2), Force Lightning and Force Push.
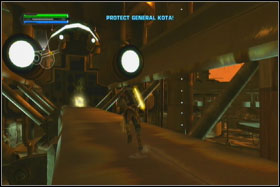
You should also watch out on the snipers (Scout Troopers). Kill them always in the first order. The fourth holocron (Force Combo Sphere) is hanging above the platform under which you are passing now. To get the cube you should climb on the ramp located above this place and jump on her with combination (X+X+L1). So it will double jump + Force Dash.
Fifth cube is located on the concrete ramp (from time to time, you can see there the transporter). Jump on this ramp and take the last holocron (Unstable Yellow Light Saber Crystal).
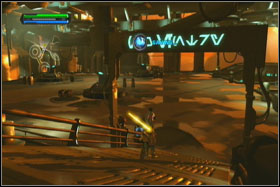
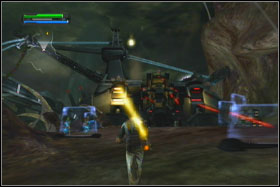
The one of the attraction of the last platform are two Juggernaughts. These some kind of mechs are piloted by Jugnaughts and equipped with ray emitters, capable to catch and throwing objects. You should use the similar tactic as they. Throw in them objects and hide behind the covers.

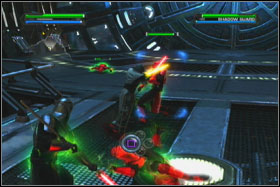
After defeating the Juggernaughts, on the platform will land the shuttle. From him will get out several enemies, among them the Shadow Guard with Light Lance.
During the fight, remember about blocking and using Force Repulse (L2+O). If you will use this strategy, you should be able to defeat him in time shorter than one minute. Before you start fight with Shadow Guard, eliminate the stormtroopers. They can be annoying.
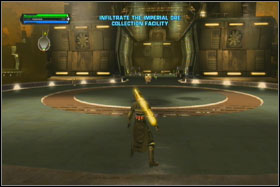
Infiltrate the imperial base on Kashyyyk
Destroy Skyhook and kill Ozzik Sturn
Destroy the imperial relay tower
Earn 360000 Force Points
Find 15 holocrons
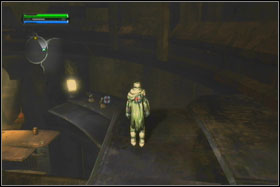
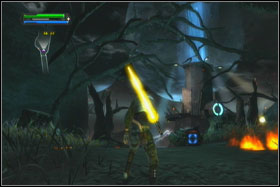
You will be have a second opportunity to make a trip on the wookie's planet. At this time, the planet is occupied by Imperial Forces. First, move the camera slightly left. You should be able to see the first holocron (Compressed Blue Light Saber Crystal). Take him and go straight to the hut.
You will find yourself in a place, where Starkiller meet first time Darth Vader. After short cutscene, turn left while standing in the place. You should be able to see second holocron (Kento's Robe).
Next you will have to defeat the stormtroopers armed with fire throwers. They aren't hard to beat. Just jump between them. Use the Force Repulse (L2+O) and finish fallen opponents. When you kill them, look on the right. Under one of the branches, you should be able to find third holocron.
Next you will be have to destroy AT-ST. Keep safe distance and throw in him large stones, which are located around you. After the fight, use the stones to open the gate (throw stones in the central point of the gate). Make sure that you have all of the holocrons and go inside.
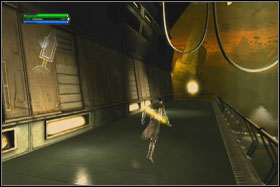
Go straight. After a while you will find the shields, which can be used to protection. Use them during the fight with stormtroopers. On the left side (slightly above the ramp, just next to entrance) you will find fourth holocron. Run straight, take him, next jump (X+X+L1) on the ledge, kill sniper who's standing there and jump down (back on the ramp).
The ramp is divided into two parts. The right is leading to the cannon. The left is leading to internal part of the complex. You should firstly choose the left part of the ramp. Keep looking on the right side of the ramp. In certain moment you will notice the small window with bars. Hit her once with Lightning and once more in device inside. If you will do this, you will fulfill first half of the objective "Destroy the imperial relay tower". Return to the ramp's intersection.
At this time, go right. Jump on the left pillar, which is located on the left of the ramp. Next jump on the panels, which are running along the rocky wall. After a while you will find the fifth holocron. When you will take him, return on the ramp.
When you will pass the thick pipe, look behind yourself. You should be able to see the sixth holocron. Destroy the cannon, which is located next to the cube. After that do the same with second of the relays.
Go to the left of the second relay. You will find there another holocron (Force Combo Sphere). Take him and jump down. You will find yourself ahead the entrance to second part of the base. Use again the rocks to open the gate.

Kill stormtroopers, which are guarding this place and enter inside. You will be have to defeat there the red guard, but if you will use Force Repulse (L2+O) and your lightsaber this will be quite easy.

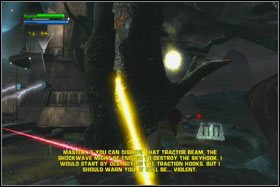
Take the holocron from the trophy room and approach to the shining door. This will trigger a cutscene in which Starkiller meets Princess Leia. Leia is asking Starkiller to destroy Skyhook - device, which (as she suppose) will be used to transport wookie's on the orbit. This device is commanded by captain Ozzik Sturn.

You are about to explore the prison sector of the complex. In first hut, which you will see when you will leave the rocky tunnel is located holocron (Force Power Sphere). Before you will be able to take him, you will have to eliminate the sniper.
Release also all spotted wookies. They are closed in metal containers. When you will free them, they will attack Imperials. Just ahead of the prison gate (on her right side) is standing container. Inside of him, you will find hidden holocron.
Few meters from this place, in the hut behind the gate you will find another one. Take him and jump on the middle pale which is supporting the construction and take another cube. When you do this, enter inside the prison.
The prison corridor is full of the prisoners. To free them, bend the bars with Force. To shut down energy shields, which are blocking the pass, target the plug of the supply cable and tear her out.
In one of the cells, which is guarded by the droids interrogating prisoners, you can find another holocron (Force Talent Sphere). Next cube is located just ahead exit from this section.
It's time for the Leia's objective. Look on the trunk. At his right side, you will find holocron (Purple Light Saber Crystal). Take him and approach to Skyhook. This device is guarded by ordinary stormtroopers, laser cannon, snipers and Purge Troopers. First, kill the stormtroopers. After that, eliminate the laser cannon and snipers. During a fight with stormtroopers, try to eliminate Purge's with Force Lightning.
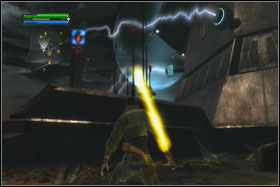
After cleaning an area from enemies, it will be time for destroying Skyhook. To do this, you have to slip off with Force six energetic spigots, which are located around the construction. Between spigots you will find the holocron. Take him. When you will slip off second spigot on the scene will inbound AT-ST piloted by Ozzik Sturn.

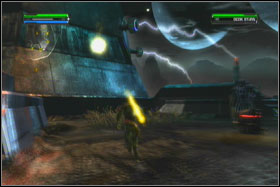
The fight with AT-ST is quite easy. It will be enough if you will be throwing in him rocks and containers. Remember to keep safe distance. Ozzik is rather slow, so even if he will target you, you will be able to evade his attack.
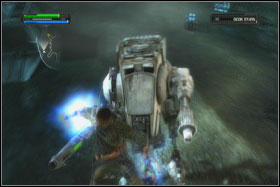
You can also fight in short distance. This is more dangerous option. As always you should use the combination: jump, few slashes and Force Lightning.
Find and rescue senator Bail Organa
Release three tentacles of the Sarlacc
Earn 425000 Force Points
Find 15 holocrons
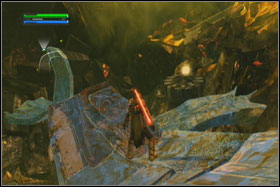
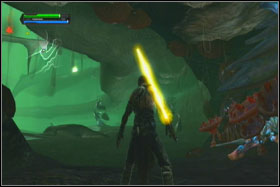
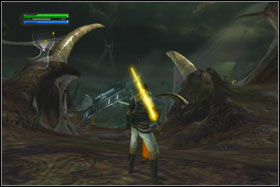
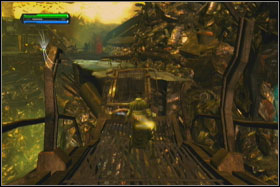
Bellow you are fighting the Felucians and Imperials. Eliminate escort of the gunboat and run right. On the end of large tunnel you will find the holocron (Green Light Saber Crystal).
Second holocron (Force Talent Sphere) is hanging under the big Sarlacc's tooth. To get there, jump on the "gum" of the tooth and again make a double jump (X+X).
Third holocron is located in a small niche, on the right of the bridge with energetic shields. To get there, tear out with Force Sarlacc's tooth.

Just behind the bridge (before jumping on the lower level), turn right. You should be able to see holocron (Compressed Purple Light Saber Crystal). To take him, you should use the mushrooms located on the wall. When you get the cube, jump on the lower level and prepare yourself to the fight with AT-ST. The imperial machine will be dropped when the tunnel will collapse. This will happen when you will decide to enter the next section.
After collapsing the tunnel, jump on the shelf, on the left side. Run straight. After a while you will see the holocron, which is located on the end of the tunnel. To get there, use the combination (X+X+L1). To find next holocron just continue running straight.
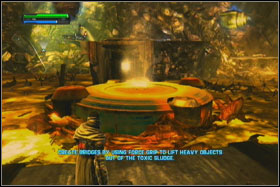
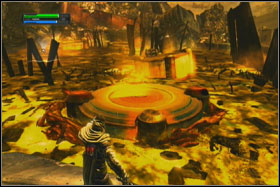
Now back to the place where the tunnel collapse and unblock pass with Force (O). Go straight. After a while you will find yourself near the mouth hole of the Sarlacc. Here you have to shut down three power generators, release the tentacles of the Sarlacc and of course find another holocrons.
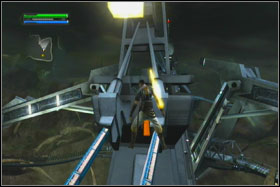
Turn right, kill the stormtroopers and jump on the first of huge cranes. One of the holocrons is located high above the cables. You have to stand exactly in the middle of the cables and make double jump (X+X) while moving the analog stick slightly in left or right side. If you do this, Starkiller will land on one of the cables. Now make another jump and take holocron (Vexxtal Power Crystal).
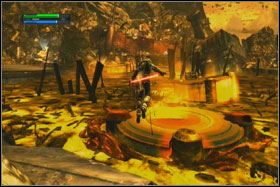
Now use Force Lightning on the generator and close to edge of the top device's platform. You will see the tentacle of the Sarlacc, which is hanging on the chain. Target the chain and throw your lightsaber (L2+square).

No go to rear part of the machine and look down. You should be able to see another cube. Repeat these action on the two another platforms. You can reach them by ramps, which are outgoing from the elevator leading to the Sarlacc stomach.
Last of the holocrons from this area can be found during return from one of the remaining machines in direction of the complex's center. He is hanging above the small room, just ahead the elevator. When you will obtain 9 cubes, ride down to Sarlacc's stomach.

Take the holocron and run straight. In the alimentary canal, you will be have to defeat many annoying enemies. When you reach the tentacles, just cut them with your lightsaber.
To avoid chewing by Sarlacc, find small devices located near of the each holes and treat them with Force Lightning. When the hole will close, you will be have few second for safe passing. Before jumping into the lung, jump to the holocron (X+X+L1+O), which is hanging in the middle of the big room. It will be possible only, if you bought ability Dashing Blast.
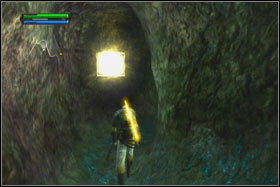
Sarlacc need to breathe, so in the lung is very windy. To go straight, use the breaks in breaths and try to hide behind the protruding edgings. Don't forget about the holocron, which is located on the right side. When you will reach end of the corridor, you will be blown away trough the nose hole.
Look up. Nearly above you is hanging holocron (Force Combo Sphere). To take him, you will have to use the big mushroom, which is located on right of the holocron.
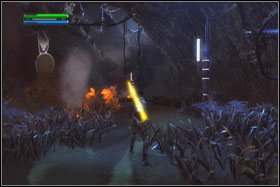
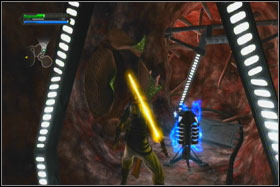
Kill the shaman and his men. When you do this, eliminate the Rancor. You can use exploding fruits of some strange plant or traditional method - lightsaber and Force Lightning. Next holocron (Unstable Blue Lightsaber Crystal) is hanging quite high, just ahead entrance to the next location. Evade him, climb on the next rocky shelves, turn in holocron's direction and just then jump to grab him (X+X+L1).
When you do this, you be just step before the fight with boss of this level - apprentice Shaak Ti-Maris Brood. Eliminate enemies and Rancor. Take the holocron, which is located on the left side and jump into the cave with Bull Rancor.
Destroy the shipyard, which is located on the orbit
Shut down the turret with tractor beam
Earn 500000 Force Points
Find 15 holocrons
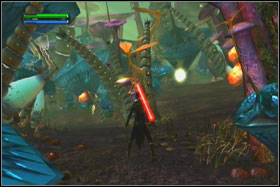
You are again on the junkyard. Jump on the lowest level and kill first opponents. Next jump on one of the shelves. On the other side you should be able to see one of the spaceship parts, which is similar to sphere. Jump to this place (X+X+L1) and enter to the room on the right side.
Jump on the lowest level. You will find there the holocron (Sigil Power Crystal) guarded by one of the Jawas. Take him and return on the top level.
After a while you will reach something like small barricade. On the left of this place you can find corridor, which is leading to the holocron.
Return to the barricade and continue moving straight. You will reach the obstacle from metal bars. Treat her with Force Push. Move forward. You will reach the collapsed bridge. Jump on other side (X+X+L1) and keep running.
On the end of the footbridge (inside the ship) you will find next holocron. Don't forget to take him.
Jump on other side of the destroyed ramp and continue running straight forward. You will reach the open area. There you will have to beat some Purge Troopers. When they will dead, take the holocron, which is located on the right side, above the round platform. The next one can be found in the niche, from where ran out the horde of Rodians.
In the area will inbound gunship, which will drop the container with AT-ST. Destroy the machine and begin jumping on the footbridges, which are leading to the exit, located on the considerable height. When you find yourself on the level of the levitating holocron, jump to grab him (X+X+L1). After that, return on footbridge and continue moving forward.
Take another cube. After a while you will again reach the open area. First kill the snipers. Next eliminate the Purge Troopers. Keep going in the direction, where on the big height is hanging the holocron. Jump on the platform, which is located near to him. In certain moment, the big hatch will open and from inside the hall will go out AT-ST, Purge Troopers and some stormtroopers.
You should find yourself in the place with flying containers. Grab them with Force and throw in AT-STs and other enemies. When you kill them, approach the edge opposite to the holocron and jump in his direction (X+X+L1).

Enter inside the fabric hall. Eliminate the sniper and take the holocron, which is located on footbridge placed across the hall (Force Talent Sphere).

Find the elevator platform, which is located in the distant part of the hall and step on her. You will reach landing platform, where Starkiller will steal gunship.
You are now on the landing platform, which is located near to the ore mine. Kill the enemies and ride up on the higher level. Run to right edge of the ramp and take the holocron. After that, return to lock, which is placed in the middle of the area and enter inside the complex.
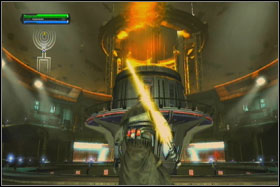
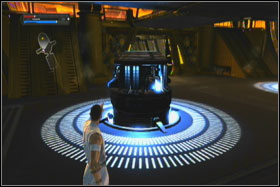
You will find yourself in the round room, which is blocked by the force shields. First jump on the central round platform. Use there Force Lightning on the five switches. Thanks to this, you will able to complete the secondary objective. To shut down the barriers, target every of the devices which are located above the barriers and slip them off with the Force.
On a top level of the round room (along the ramp), you can find the entrance to the next area. Open the door with the Force and take the holocron (Unstable Purple Lightsaber Crystal).
Next room is blocked by the gate with two locks. First kill the stormtroopers. After that, jump down on the one of the side ramps. At the end of the each ramp, use the Force (R2) and move the blockade up. On the left side of the room, you should be able to see thirteenth holocron (Force Combo Sphere).
The pass is leading to the long corridor, which is running around the central core of the mine. Start running in the left. Eliminate all stormtroopers and take the holocron.
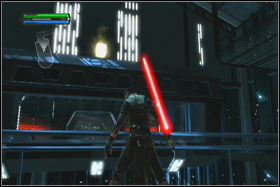
After a while, you should be able to see the exit, which is located on the left side. Ignore it and run forward. Thanks to this, you will be able to get the last holocron from this level. Now return to the exit and prepare yourself to the fight with Proxy, which is capable to change in enemies, which you killed earlier. Use the same tactic as in the previous fight with these opponents. The last enemy will be Darth Maul. Fight with him by combining Force Repulse (L2+O) and Force Grip (R2).

When the Darth Maul will be defeated, exit the room by using Force Push on the metal bulkhead. Your new objective will be activation of four nods, what will give you the possibility to pull down the Star Destroyer from orbit.
Kill all stormtroopers and use Force Lightning on every nod. Repeat this action on every post, located around the mine core.
Rescue captured Rebel leaders
Earn 500000 Force Points
Find 15 holocrons
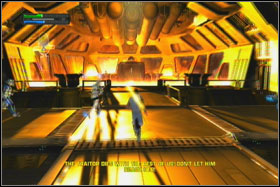
The first part of the mission is probably the most difficult moment of the whole game. You will have to fight with many stormtroopers armed with different types of the weapon. First it will be AT-CT, next AT-ST. The best method for survive is destroying the cannons E-Web, which are located in the both corners of the hall. Next find small elevator platform and ride with her on the ramp running around the room. On her shorter end, you will find the holocron (Katak Power Crystal).
Eliminate the snipers and Jump stormtroopers and run on the other side. In the similar niche you will find second holocron. Jump back to the main part of the hall.
Now you can try to destroy rest of the Imperial Forces. It will be very difficult, so if you want to evade the fight, use the Force to bend floor plates and go to the lower level. But if you will decide to fight, eliminate first Purge Troopers, and after that mechs. Use most of often Force Lightning. When the enemies will be dead, jump down through the hole in the floor.
The Empire is testing gigantic stream cannon. Every several seconds in the tube, where you are is running the dangerous ray. Fortunately. Before launching, the officer is counting from 5 to launch. This should guaranty you enough time to hide somewhere. Keep moving forward, destroying by the way green lens, which are blocking pass.
You have to watch out on the turrets, which are hidden in the floor. Threat them with Force Lightning. If you will keep yourself the right side, you will come to the holocron hidden behind the bulkhead.
In the side rooms of the tube, you will have to fight with stormtroopers (standard and armed with flamethrowers). The exit from this part of the level is located on the right side. You will have to pull up the blockade from the bulkhead. Before you leave the area, take the holocron (Unstable Green Light Saber Crystal) from the top of the laser. Next holocron is placed in the same place but on the opposite side.
Behind two another bulkheads you find additional holocrons.
When you will back to the tube, you will see the holocron on the opposite side. On the right side of this place you will see three moving huge rings. Ignore them for a while and back to the bulkhead from where you took the cube and enter inside. Go one level down and after defeating the enemies enter inside the room with rings. Around this room is running narrow shelf. Behind one of the metal bracket you will find next holocron (Force Power Sphere). Take him and back to the top.
When the ray will be shut down, stand in forward of rings and use Force Grip to grab first of them. Place him in vertical position (you should be able to hear click) and grab another. Level him with previous and take another. When all rings will be removed, the footbridges will draw out and you will able to go forward. The game with the rings will be repeated two times. While moving to the next room, you should gain tenth holocron.
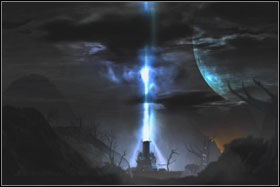
When you go out from the tube, you will reach the big room, where all rays meet and unite in one big stream of energy, which is capable to destroy whole planet. Before jumping down, explore footbridge on left of the exit. You should find another holocron.
Jump down and destroy two AT-ST. Next use the Force Grip and push big generator in his place.
This action will activate two elevators. Stand on one of this elevators and ride to the top.
Kill all Jumpstormtroopers on the top level. This will make further exploration quite easy. You should be able to see the holocron under you, which is looking as unavailable (Black Lightsaber Crystal). You can easily get him. Just jump on the metal bracket near to him. Next cube is located one level down, behind the closed bulkhead.
Another one is placed on lower level and is guarded by several stormtroopers and two Purge Troopers. When you will gather fourteen holocrons, ride up with the elevator on the level, which is located slightly above the platform, which is leading to the Palpatine's chambers. From there you can jump on this platform.
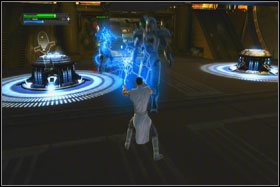
When you do this, round bulkhead will open, and you will be have to fight with some imperial guards and one Shadow Trooper. Use several times the Force Repulse and finish wounded enemies. This should be enough.
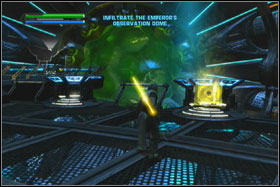
Take the last holocron (Force Combo Sphere) and approach to round bulkhead. Grab the lock with Force and move him from the left to right side. You will have to fight with Vader and the Imperator. ATTENTION! After defeating Vader you will be able to choose between light or dark side of the Force. If you will choose the light side, you will be have to defeat the Imperator, what will be very hard.
Name
Points
Description
Apprentice
75
Complete game on the Apprentice difficulty. Do not change the difficulty after the game has started.
Sith Warrior
100
Complete game on the Sith Warrior difficulty. Do not change the difficulty after the game has started.
Sith Lord
100
Complete game on the Sith Lord difficulty. Do not change the difficulty after the game has started.
Sith Master
100
Complete game on the Sith Master difficulty. Do not change the difficulty after the game has started.
Pushed
5
Defeat 100 enemies with Force Push
Gripped
5
Defeat 100 enemies with Force Grip
Shocked
5
Defeat 100 enemies with Force Lightning
Repulsed
5
Defeat 100 enemies with Force Repulse
Impaled
5
Defeat 100 enemies with Saber Throw
Stormed
5
Defeat 100 enemies with Lightning Shield
Grappled
15
Defeat 100 enemies with a grapple move (PS3: Triangle + Circle. Xbox 360: Y+B)
Launched
20
Defeat 100 enemies with Aerial Ambush combo
PROXY Won't Be Happy
15
Destroy 35 droids
Rebel Leader
15
Defeat 500 Imperials
Bossk
15
Defeat 200 Wookies on Kashyyyk Prologue
Bully
15
Defeat 25 Ugnaughts or Jawas
Skilled
5
Earn 250,000 Force Points on a single level
Expert
10
Earn 500,000 Force Points on a single level
Legend
25
Earn 600,000 Force Points on a single level
Frenzy
5
Get a Frenzy x4 bonus
Sith Frenzy
10
Get a Frenzy x8 bonus
Sith Lord Frenzy
15
Get a Frenzy x12 bonus
Holocron Collector
75
Earn all holocrons in the game
Corellian Star
10
Complete all bonus objectives on one level
Force Push Mastery
20
Defeat 500 enemies with Force Push
Force Grip Mastery
20
Defeat 500 enemies with Force Grip
Force Lightning Mastery
20
Defeat 500 enemies with Force Lightning
Force Repulse Mastery
20
Defeat 500 enemies with Repulse
Lightsaber Throw Mastery
20
Defeat 500 enemies with Saber Throw
Lightning Shield Mastery
20
Defeat 500 enemies with Lightning Shield
The Bigger They Are
15
Defeat 6 Rancors
The Harder They Fall
15
Defeat 10 AT-STs or AT-KTs
Cannon Fodder
15
Defeat 150 Stormtroopers
Sith Trials
20
Complete all Training Room challenges
Sith Training
20
Complete all Training Room lessons
Name
Points
Description
Invasion
10
Complete Level - Prologue
Insurrection
10
Complete Level - TIE Factory
Junkyard
10
Complete Level - Raxus Prime
Jedi Hunt
10
Complete Level - Felucia
Empirical
10
Complete Level - Empirical
Vapor Room
10
Complete Level - Cloud City
Skyhook
10
Complete Level - Kashyyyk
Infestation
10
Complete Level - Felucia
Destroyer
10
Complete Level - Raxus Prime
Redemption
20
Complete Game - Light Side
Revenge
20
Complete Game - Dark Side
Worst Day-Shift Manager Ever
10
Kill 12 Stormtroopers as Vader during the Prologue


 S.T.A.L.K.E.R.: Clear Sky Game Guide & Walkthrough
 Star Wars: Empire at War Game Guide & Walkthrough
 Spellforce 2: Shadow Wars Game Guide & Walkthrough
 StarCraft II: Wings of Liberty Game Guide & Walkthrough
 Sid Meiers Railroads! Game Guide & Walkthrough