Welcome to the unofficial guide to "Race Driver GRID" PC video game. This guide consists mostly of a very detailed description of the main mode of the game, called GRID World. It's a large career mode where you purchase vehicles, manage your team and participate in various events. I've described all the trophies, as well as pointed out a few hints on how to advance properly. The second chapter of the guide contains a full list of available cars. This will allow you to make a faster decision on whether you should buy them or look for something else. Have fun playing the game!
Stranger
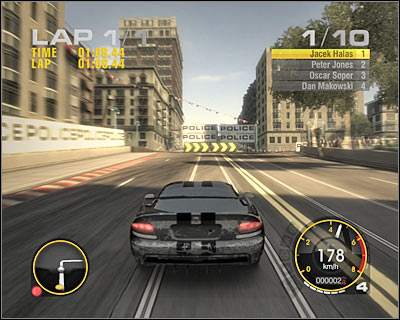
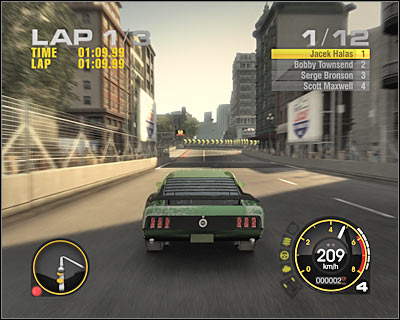
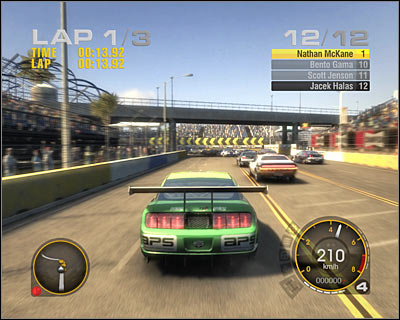
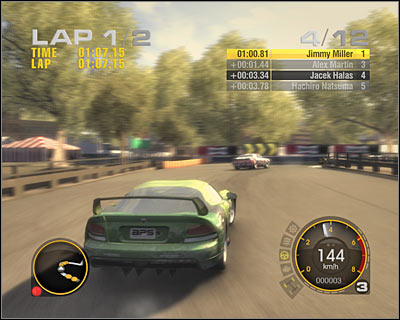
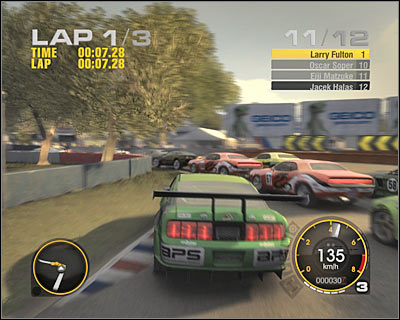
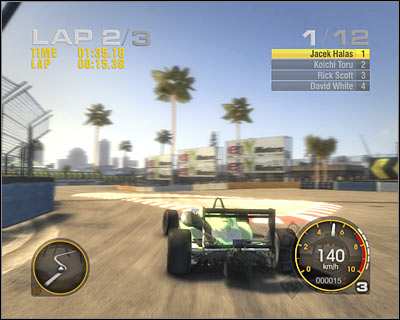
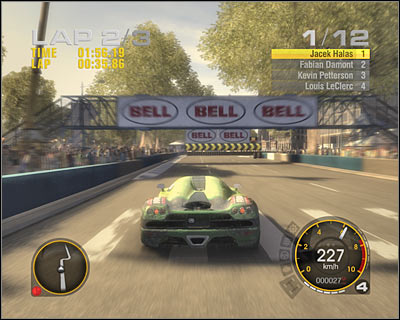
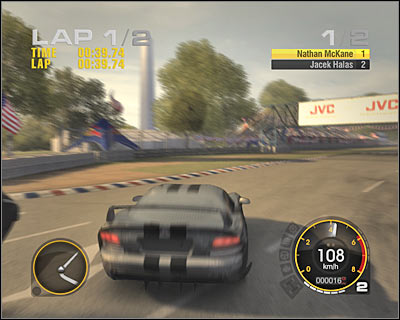
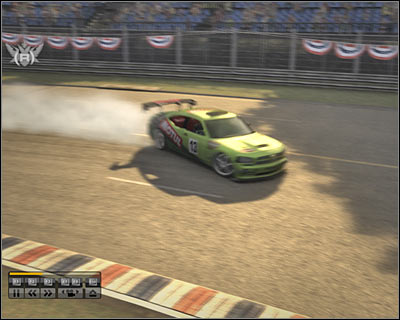
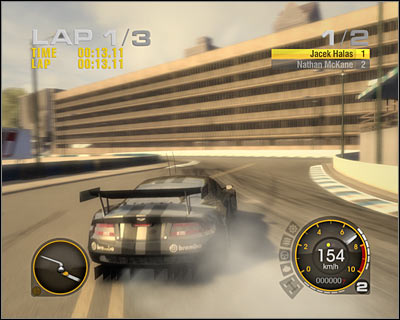
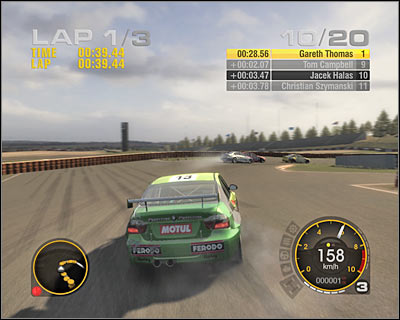
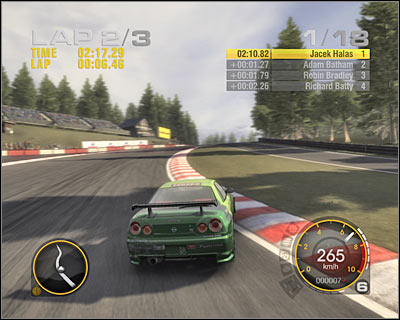
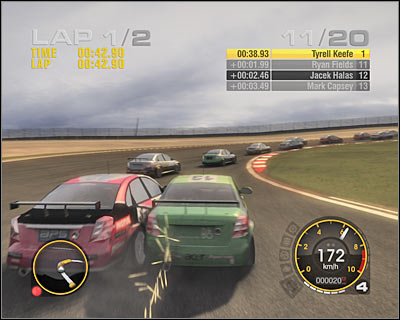
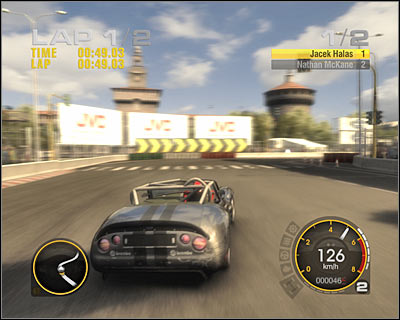
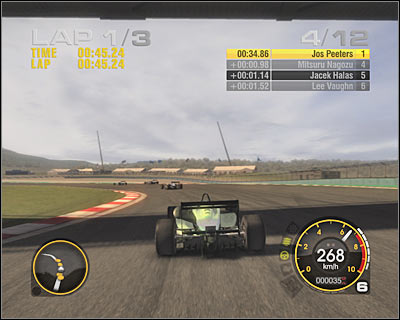
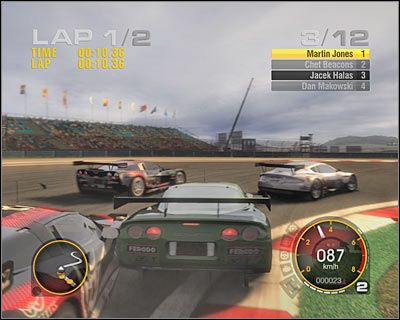
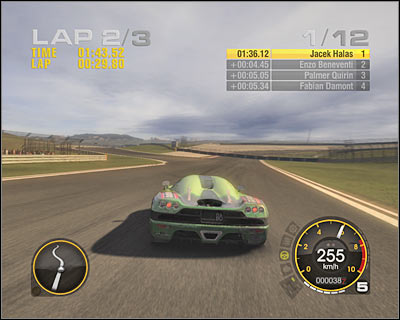
Before you'll be allowed to participate in the main events, you will have to pass a short tutorial section of the career mode. Thankfully, there's nothing you should be worried about. You can't lose. Instead, you'll learn some things on how to handle the car. Your first race in GRID World will start automatically, so don't worry that you can't participate in other events. Your objective will be to complete one lap of the San Francisco Grand Prix circuit. You won't have to win this race and you won't even have to finish on the podium. Your only task will be to get to the finish line without wrecking your car. Thankfully, you will have to complete only one lap, so it won't take too long. Nevertheless, I would advise you to familiarize yourself with this track, especially since a lot of events are going to take place here. Slow down once you've reached the section with a few jumps (screen). You shouldn't be driving too fast, because it's very easy to make a mistake and crash. Thankfully, this track was available in the demo version of the game, so you may already know it. You should also notice that Dodge Viper is a very difficult car to drive, so don't worry if you spin a few times. Good luck! :)
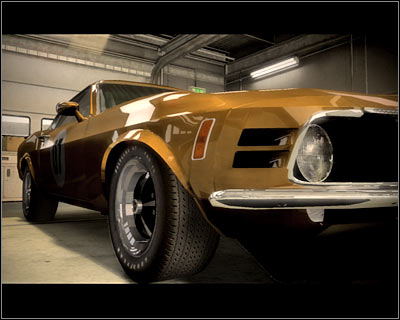
Once you've reached the finish line in the first race, you are going to be rewarded with three racing licences (one license per class). As you've probably noticed, you'll have to earn 80000 respect points in order to unlock better licences in each class, so it's going to take some time. You can't participate in racing events, because you don't own any cars. Instead, you will have to focus your attention on Driver Offers challenges. Check the next section of the guide for more details on these races. Your objective here will be to earn at least 60000 euros. This should become possible once you've finished 4-5 events. Once this is done, you are going to be rewarded with your first car (Ford Mustang Boss 302) and you'll also unlock several other features.
Advancing in the career mode
The career mode is built on a mechanism which simulates completing full racing seasons. It'll be up to you to decide where you want to race. You'll be dealing with two types of sporting events. Tournaments will reward you with a large number of respect points, however it's going to be difficult to raise a lot of money here, however this won't be a problem later during the course of the game. If you don't have enough money to buy new cars, consider participating in Driver Offers challenges. Here you'll usually be given a task to win a single race and you'll be rewarded with a lot of cash. The downside is that you won't earn too many respect points from these challenges, so you should ignore them once you can afford new vehicles. At the end of each season (which is about 8-10 races long), you'll be given a chance to participate in Le Mans 24 Hours race. Check the final section of this chapter for a more detailed description of this event. After that, you'll be presented with the statistics window. Here' you'll find out exactly how much money and respect you've earned. Thankfully, you won't receive any penalties for not being good enough, so may as well ignore these summary windows.
There are many different strategies to finish the career mode. By choosing racing events from the same class you won't have to worry about the difficulty level spiking up. The downside is that you won't earn a lot of money. I would recommend that you choose one class and focus only on finishing it. Doing this will allow you to earn more money quickly and you'll also receive better sponsorship offers. Check the following subsection of the guide for a more detailed description on how to handle with that problem.
You can choose from many types of races, but I think that you should be more focused on cars. I would strongly recommend purchasing one good car in each group in order to use it to win all races. The second chapter of the guide will point out the best cars, so you should head over there right now if you're having some problems finding good vehicles on your own. Additionally, it's important to buy ONLY new cars. Don't buy used models, because there's always a possibility that there may be something wrong with them and they're only slightly cheaper.
 Winning all career mode races is going to take you A LOT of time, but it's doable. Good luck!
Sponsorship offers
Once you've won a few racing events, you will be given a chance to choose between sponsorship offers for your team. There are two types of sponsors you'll be dealing with. You can only have one major sponsor, but such a company must pay you twice the amount of money it offered you in the first place. Additionally, you can have up to seven minor sponsors and they'll pay you exactly the amount they were offering.
The key factor here are the requirements of each sponsor. Early during the course of the game you'll be dealing mostly with companies which are interested only to see your cars reach the finish line. Sadly, the requirements are going to get bigger over time. I would recommend choosing a company which offers more than 100.000 euro for your main sponsor. Additionally, such a brand should only be interested in you finishing in the top two or the top three. As for other sponsorship offers, focus on choosing companies which are interested in podium finishes. Avoid firms with a first place or a no damage requirement. Thankfully, their offers aren't attractive enough for you to reconsider.
The amount of money offered by the sponsors is based on the class you're racing in. This is why it's very important to advance to the highest level of the race tree as soon as possible, so you can stop worry about raising enough money to purchase new vehicles. You should also try winning all race classes in the 24 Hours Le Mans race. Start with the lowest class (GT2) and finish in the highest class (LMP1).
Managing your team
Acquiring a fourth license will also unlock a new feature of the game - you'll be allowed to manage your team from now on. This means you can hire a second driver, so you can compete in the constructor championships and you can both earn money from the sponsors. Sadly, most of the AI drivers aren't too skilled. Hiring the professionals, on the other hand, is equal to a lot of expenses. You would have to give them a few million euros as a starting bonus and you'd also have to share a lot of your winnings with them.
The key elements of a good driver are his skill, aggressiveness and consistency, so he won't have any problems scoring a lot of podium finishes. Only then you can think about gaining other bonuses, as well as receiving a lot of many from your sponsors. You should take your time to analyze a racing speciality of your potential teammate. Be careful, though. If he's very good in winning races where you can't manage, you may have some problems acquiring these cups. Take this under consideration before you decide to hire him.
Important! You can find a detailed description of all career trophies here. Sadly, the races are changing each time you decide to participate in an event. I've focused on explaining the first combination. If you don't want any problems using my guide, try winning them in your first approach. Thankfully, you'll also be allowed to activate some helpful features. Don't forget to restart your race whenever something goes wrong. You can also click on "Quit to Garage" button without losing your entire progress. Going back to the Grid World mode will allow you to return to the last race anytime. It's also wise to do this when you must win a race, but you've been forced to start from the back of the grid. Finally, you should consider disabling an autosave feature. Saving the progress on your own is only going to take you a few seconds, so it won't a problem.
Make sure you're using the Race Day menu to familiarize yourself with each track and vehicle. Decide on a difficulty level which suits your needs and skill. Most races can be won without any major difficulties on Serious and Savage levels. Only a handful of events may force you to lower the difficulty bar to Normal. This usually occurs when you have to control an unstable car or when you have to go through a very narrow track. Remember that you don't have to win all races in each class, however only then you'll be allowed to participate in bonus head to head challenges.
Classic Muscle - Lucas Oil Bay Bridge Trophy
Number of races: 2
Tracks: San Francisco - Sprint Circuit; San Francisco - Short Circuit
Best car: You start the career mode with a Ford Mustang Boss 302, so you should use this car in this event. It's a simple event, even if you're playing on the highest difficulty level. Also, most of the AI drivers are using the exact same vehicle, so they won't have an advantage over you.
Hints: Both races are extremely simple, so you shouldn't have any problems winning here. You can even treat this event like it's an expanded tutorial session. Use this time to familiarize yourself with some new variations of the San Francisco track.
You should begin the first race with a good start. It's an important issue, especially if you've been forced to start this event from the back of the grid. Go through the first set of corners without crashing into anything and you should end up being third or fourth. Now you will have to go through several tight corners. Cut through the corners, but don't hit the tires. This is your chance to take the lead. Watch out for a VERY tight turn which is located in the middle section. Start slowing down early, because all muscle-cars are equipped with poor brakes. Also, prevent your vehicle from burning too much rubber. It may look nice, but it'll cost you a lot of time.
The second race seems to be even easier than the first one. Just as before, you will have to focus on having a perfect start. Cut through the corners aggressively, however avoid bigger crashes. The corners are smooth here, so you won't have to worry about hitting the barriers. Slow down once you've reached several tight corners (screen). The final section of the track is extremely simple and it'll allow you to take the lead (maybe even on the first lap).
Stock Car - Michigan Demolition Derby
Number of races: 2
Tracks: Detroit - Demolition Stadium Short; Detroit - Demolition Stadium Long
Best car: Sadly, you won't be allowed to choose a car for this event. All the participants are using Jupiter Eagleray MK5 vehicles. Make sure you've bought a new car, because you may have some problems with the older models and the difference in price is very small.
Hints: You will have to change your driving style radically during the course of this event. The key to your success is to keep sliding while taking longer turns. This will allow you to maintain higher speeds and you won't crash into any of the surrounding walls. Watch for two jumps, because it's very easy to lose control over your car there. These jumps have to be very accurate. Sadly, you won't be able to avoid all collisions. As for your opponents, try overtaking them by going as close to the barrier as possible (screen).
The second race may seem to be a little harder, however your competitors tend to make a lot of mistakes here. A lot of crashes will take place on the track and obviously you must avoid being a part of them. There are many opportunities for you to get in front of the competition. The first corner is one of many examples (screen). Once you've taken the lead, avoid heavier crashes with other cars. Also, don't cut through the last corner, because you would find some tires there.
Pro Tuned - Cobra Pro Tuned Tour
Number of races: 2
Tracks: Long Beach - Street Circuit; San Francisco - Sprint Circuit
Best car: Ford Mustang GT-R Concept is by far the best vehicle you could choose for this race. You will also be given an opportunity to purchase Dodge Viper which is more expensive, however this vehicle is difficult to drive. If you don't have enough money for a Mustang, consider buying Chevrolet Camaro Concept or Nissan 350Z.
Hints: I've already mentioned that you should consider practicing some of the races in Race Day mode. I'd strongly recommend that you familiarize yourself with the Long Beach circuit outside of the career mode. Thankfully, all the cars in this cup are very easy to drive, so you won't have to spend too much time learning when to brake and how to turn.
The first race of this tournament is going to be much harder, so don't worry if you'll only score a podium finish, instead of being the first one to cross the finish line. You'll probably lose one place after the start, but you'll be able to retake that spot once you've reached the first corner (screen). I would recommend staying on the left and attacking other cars aggressively. If you're lucky, you won't crash and burn. Instead, you'll advance at least 3-4 places.
Don't worry if you slightly damage your car, because only heavier crashes will result in some major problems with the handling or the performance. There are some simple corners in front of you. Consider cutting through most of them in order to decrease the gap to the leaders of the race. Watch out for a long right turn (screen). You can't get too close to the left wall, because you may hit some of the tires. The second part of the lap will require you to go through several fast sections. After that, you will have to pass through a few sharp turns, but it's nothing you shouldn't be able to deal with.
The second race takes place on a well-known track. You've been here while trying to win the Classic Muscle cup. The only thing you have to remember about is the unexpected right turn. Winning here should be a fairly easy task.
Touring Cars - Quickshift DC Challenge
Number of races: 2
Tracks: Washington - Park Circuit; Washington - Sprint Circuit B
Best car: Sadly, even though this is a Touring Car challenge, you won't be allowed to choose a vehicle. Chevrolet Lacetti is the only available car here.
Hints: Both races in this cup are extremely easy to win, so you should consider choosing this tournament as soon as possible. The most noticable thing is that all cars are moving slowly, so you'll have a lot of time to take corners properly. Also, both tracks are easy to remember. Taking the lead in the first race should become possible even when you're still on your first lap. Your best chance of taking the lead are the two tight corners (screen). Other vehicles stay on the correct line here, but you should consider cutting through these corners. Don't worry, because you won't lose control over your car. Instead, watch out for faster turns, because that's where you'll have to maintain a correct racing line.
The second race of this tournament is a little more difficult. The first long turn seems to be the most tricky one (screen). You can't allow the car to move too much to the left, because that would result in a huge crush. Try overtaking the competition near the tight turns by braking at the last seconds. Stay off the grass and gravel traps, because that's where you can lose the control over your vehicle.
Pro Muscle - Dodge Motor City Cup
Number of races: 2
Tracks: Detroit - Sprint Circuit B; Detroit - Sprint Circuit
Best car: You will be allowed to choose between two vehicles by Dodge. I assume that you don't have any of them in your garage. Nevertheless, you should consider buying a Viper, because it's faster than Dodge Challenger Concept and you'll be able to use it in some other races later during the course of the game.
Hint: I'd strongly recommend that you exit the career and spend a lot of time practicing how to drive a Viper. It's a very important issue, because it's a highly unstable car. You will have to be extremely careful while going through slower corners. Use the gas pedal carefully, so you'll avoid sliding the car and crashing into barriers.
Both races in this tournament are quite challenging, mostly because you don't know these tracks. The first race requires to you start perfectly, so you won't lose any places. Go through the first chicane carefully and avoid hitting other cars, because there's a high probability of losing control over your own vehicle. Focus on getting closer to the leaders of the race. There are some tight corners near the tunnel (screen) and that's where you should take the lead. Other cars tend to slow down here, so you won't have any problems getting close enough to perform an overtaking maneuver.

The final section of the track is also quite difficult. You will have to go through several tight turns here (screen). Avoid sliding the car at all costs, because you'll hit something or you'll lose a lot of time. The final right turn is quite easy, however maintain proper speed. Hold your lead on the second lap and you should be able to score a win.
The second race of the tournament is going to be very similar to the first one. The only difference is that you'll be going the other way. Just as before, watch out for the slowest corners. You will have to be very precise there. The second part of the lap is going to be easier, however you must stay calm while going through faster corners and chicanes. Avoid making too much mistakes and you'll win this one as well.
Club GT - Direzza Club Trophy
Number of races: 2
Tracks: San Francisco - Sprint Circuit; San Francisco - Sprint Circuit B
Best car: Once again, you won't be given a chance to choose a car on your own. All the competitors are using TVR Tuscan Challenge vehicles to win this event.
Hints: The structure of this tournament is going to be very similar to the previous cup. You'll be racing on the same track, but you'll going in two different directions. The first race seems to be an easier one, because you'll have a lot of areas to perform overtaking maneuvers. You should find yourself close to the leaders after the first lap. Avoid cutting through the corners too much, because the TVR has a low suspension and you could easily lose control over it. This becomes especially important once you've reached a tight turn (screen). Slow down here and maintain a perfect racing line.
The second race of this tournament requires a very smooth start, so you won't get overtaken by the rest of the competition and you'll have some chances at gaining a few places. Just as before, watch out for the very sharp turn. Thankfully, going through the rest of the corners is going to be easier from this angle. The only exception is one of the last remaining chicanes (screen). Remember that you aren't allowed to cut through the corners too aggressively. Nevertheless, winning here shouldn't be a problem, especially since other cars are fairly slow on this track.
Classic Muscle - Head 2 Head
Important! Participating in this duel is possible only when you've won all six tournaments from this group!
Hints: It's a very special kind of race. Your objective will be to win a duel, so it means you'll be going against only one driver. Thankfully, this race is going to be VERY easy to win. I would recommend that you finish it as soon as it becomes available, because you can earn a lot of money here. The duel will take place in Long Beach, so a lot will depend on how you've taken the first corner (screen). This is where you should overtake your opponent and if you're skilled enough, you won't give him a chance to win back his initial lead. Watch out for some of the faster turns, because the vehicle you're driving likes to slide a lot. Nevertheless, you should be able to wind this race with a safe advantage of your opponent.
Pro Muscle - Ebay Motors Muscle Cup
Number of races: 3
Tracks: San Francisco - Short Circuit B; Washington - Sprint Circuit; Long Beach - Sprint Circuit
Best car: I assume you have at least one vehicle from this group at your disposal, probably a Viper. I wouldn't recommend using this car, though. Ford Mustang GT-R Concept is a much better choice - it handles very well and you won't even notice its lower maximum speed.
Hints: You've been to the first track many times before, so you should know which corners are the most difficult ones. Like always, you must be extremely careful while cutting through some tight turns, because it's easy to make a mistake there. Thankfully, your Mustang is fully capable of performing such aggressive measures and you won't have to worry about losing control over this vehicle.
You've also been to the second track, but you might not remember it very well. Nevertheless, you shouldn't have any problems winning this race, especially since your car is very easy to drive. Try winning a few places after you've started (screen). It's a little risky, but you should be able to avoid any heavier crashes. Now you must focus on closing the gap to the leaders of the race. Watch out for faster corners, because you won't be allowed to make any mistakes there. Otherwise you'll end up outside the track. Cut through the corners whenever it becomes possible and secure your lead at the end by moving flawlessly towards the finish line.
The third track of the tournament is an easy one. Ignore the fact that you must complete eight full laps, because a single lap can be done in about 30 seconds. The only real challenge here are two tight turns. The first turn is located near the start and you'll reach the second one in about 10-15 seconds. You should notice that you'll be allowed to cut through this corner (screen). Winning the race should be a formality, as long as you stay away from the barriers and tire walls.
GT1 - Ferodo S7 Speed Series
Number of races: 3
Tracks: Long Beach - Street Circuit; Detroit - Grand Prix Circuit; Washington - Grand Prix Circuit
Best car: There's a Saleen in the title, so you shouldn't be surprised by the fact that it's the only available car. It's quite expensive to purchase, however you'll be able to use it many times later on during the course of the game. As a result, you should consider buying it as soon as you've gathered enough money.
Hints: The first track of the championship was visited by your team many times before, so you should remember how it all goes. Just as before, you should consider cutting through the first corner in order to gain a few places. Wait for other opportunities to overtake AI drivers. Watch out only while going through faster corners, however Saleen is an easy car to drive, so you don't have to worry about any unexpected slides.
The second track is the most difficult one, mostly because you didn't have a chance to familiarize yourself with it and you won't be allowed to make any mistakes. Be careful after the start, because the road is very narrow. Avoid tire walls at all costs. The middle section of the track consists mostly of a few tight turns. Thankfully, the final section is much easier. There are some slow corners here, but you may use them to overtake the rest of the cars. Watch out only for two chicanes. The second chicane allows you to go at full speed, however you can't get too close to the barriers.
The final third track is also quite difficult, mostly because it was made to accomodate slower cars. As a result, you'll have less time to perform correct actions. Be careful after the start, because you'll have to go through the first set of corners at full speed. Don't try cutting through them too much, because it's possible to hit a barrier here. Watch out for longer turns (screen) and use tight turns to get ahead of the rest of the competition. The final section of the lap requires you to go through several corners at a nearly maximum speed in order to secure the overall win.
Open Wheel - Simpson F3 Shield
Number of races: 3
Tracks: Long Beach - Street Circuit; Long Beach - Classic Circuit; Long Beach - Classic Circuit B
Best car: This is a Formula 3 tournament, so you won't be allowed to choose a vehicle. All drivers are using Dallara Formula 3 cars.
Hints: All three races are taking place in Long Beach, so it would seem that they're going to be very similar. Sadly, that's not the case. Each race will require you to change your approach. You'll also have to spend a lot of time learning how to drive a Formula 3 car. As you've probably noticed, you'll be dealing with an increased grip, so you'll have to take some of the tight corners at higher speeds. On the other hand, your car will become unstable while going through very slow turns. You must also take this under consideration. Use these turns in the first race to get ahead of the competition. Additionally, avoid cutting through the corners, because it may result in losing control over your vehicle.
The second track of the championship is going to be quite simple to memorize. Just as before, use tight corners to find yourself ahead of other cars. Watch out while going through tunnel sections. It's often wise to use your brakes there. You can also consider cutting through one of the corners (screen) in order to gain a second or two. The final section of the lap requires you to be more precise, however you should still be able to hold off your first place.
Sadly, the final third race is even more difficult. Going through the same corners in the opposite direction is going to get troublesome, especially if you'll start from the back of the grid. Watch out for the first corner, because it's very easy to bump into someone and it could damage your vehicle. You will also have to be extremely careful near the tunnels, because it's very narrow there and you'll have to turn the car even when you're still inside the tunnel. The middle section consists of a large number of fast corners, however there's a tight turn at the end of this sequence. Pass through it carefully in order to avoid the tires. Watch out near the finish and maintain a perfect racing line.
Drift Battle - Ecko Unltd US Drift Battle
Number of races: 3
Tracks: Long Beach - Classic Circuit B; Washington - Sprint Circuit B; Long Beach - Classic Circuit
Best car: I guess you may be surprised a little bit by the fact that you'll be allowed to choose between many different vehicles. If you think you're an experienced driver, consider purchasing one of more expensive cars. Mazda RX-7 FD3S should do the trick, however it's difficult to drive. I think that you should consider buying Toyota Corolla GT-S which is the cheapest car in the lot. It's not the fastest, but it handles great and you'll be able to pull off some cool maneuvers with it.
Hints: All three races are going to be quite challenging, mostly because you'll be racing on closed circuits which weren't built to host these types of events. It'll make your drifting more difficult, because each contact with the barriers will purge your current account. The event you're about to participate in is a combination of drift and a standard race. This means you'll have to stay somewhere in the lead, because otherwise you'll earn less points for successful drifting. I would recommend that you aim for a third or a fourth spot. Don't try overtaking the race leader at all costs. Instead, focus on performing good drifts. You should also take your time once the race has started, because it always gets crowded near the first corner and you won't be able to slide the car properly if other vehicles are blocking your path.
The first race will allow you to perform a good slide once you've reached the first corner (screen). You should be able to earn a lot of points here, as long as you stay away from the right wall. Remember to get as close to metal poles as possible, because then you'll be rewarded with large bonuses. Maintaining a high multiplier is equally important, so you can't take too long between the drifts. Watch out inside the tunnels, because it's very easy to hit something there. Later on you'll come across more open areas, however you should try maintaining a perfect line, especially if you want to get closer to the poles. Additionally, you could lose control over your vehicle as a result of straying off the main track.
The second race in the series seems to be even harder. Don't focus on the first corner, because it's very tricky and you'd have to restart the race many times to achieve something here. Instead, approach the left turn properly (screen). Try scoring points mostly for long drifts. There are a lot of mild corners here, so it shouldn't be a problem. You should also pay attention to other drivers. Prevent too many of them from overtaking you, because you won't be able to score many points from the back of the grid. Avoid hitting tire walls. Thankfully, you won't have to worry about the grass, because leaving the track for a second or two doesn't necessarily mean that the race is over. You will have to finish three laps, so don't use up all the flashbacks right away.
The third race takes place in the same location you've visited earlier, however the biggest difference is that you're moving the other way. As you've probably noticed, you will have to learn all the corners from the beginning. Focus mostly on longer bends and tight turns. Just as before, you'll also have to be extremely careful inside both tunnels (screen). You can earn a lot of points here, but you also may lose them if you push too much. The final corner is easier to get past from this side, so you won't have to worry about it.
Prestige - US Supercar Challenge
Number of races: 3
Tracks: San Francisco - Sprint Circuit; Long Beach - Street Circuit; Detroit - Sprint Circuit
Best car: Zonda R seems like a much better choice. Not only does this car accelerate faster than the Koenigsegg but it's also easier to drive. Koenigsegg is only better at achieving large speeds, however it's very easy to spin the car by mistake.
Hints: Theoretically it might seem that these races should be fairly easy, however both cars in this class are very fast and it'll make your run a lot harder. You won't be allowed to cut through the corners and you'll have to maintain high speeds while going through some mild curves. The first race will require you to be very precise, especially in the middle of the track. Maintain a perfect racing line in order to avoid any crashes. Watch out for the right turn. Also, slow down near the last chicane (screen), because both cars are wide and you would have some problems fitting in. Slowing down a little is always better than crashing and damaging your car.

The second race seems to be the easiest one of all three. As you probably remember, it's important to find yourself on the inside while taking the first turn. This should allow you to advance a few places. Next up, focus on going through the slowest section without any crashes. Once this is done, speed up and start chasing after the current leader. You should be able to win this race, as long as you're fast enough in the second section of the track.
The third race is quite simple, however you must take under consideration that you're driving a fast car which is also unstable at lower speeds. Watch out for the first section of the track. Thankfully, other players will also slow down here, so you'll have plenty of opportunities to overtake them. Watch out for the chicanes, especially the one that's been displayed on the screen. Use tight turns to your advantage, however slow down once you've arrived at the final two chicanes.
GT1 - Goodyear Continental GT
Number of races: 3
Tracks: Washington - Park Circuit B; Detroit - Grand Prix Circuit; San Francisco - Short Circuit
Car: There are many different vehicles for you to choose from and some of them even cost two million euros. I suspect that you still own a Saleen S7R and that's the car you should consider using in this event. It's fast enough to stay close to other vehicles and you won't have any major problems controlling it. Cutting through the corners will also be possible in this car.
Hints: The first race of the tournament can be won without any major problems. Use the fact that there are two slow corners on the track. Cutting through them will allow you to get closer to the current leaders. The same goes with other tight turns, like the ones on the screen (screen). Other drivers will be slowing down here and that's your chance to overtake them. The final section of the lap will require you to go through a mild curve at a very high speed. You must prevent the vehicle from getting too close to the left wall, especially since there are also some tires over there. Other than that, you will probably secure your lead long before this race has ended.
The second race is going to be very similar to one of the challenges from the previous tournament. Thankfully, Saleen is much easier to drive than Zonda or Koenigsegg. Use this to your advantage and maintain higher speeds while going through some difficult corners. You will have to turn right at some point of the race. This new section of the lap will lead you to a tight turn. Go through this corner at a very low speed. Secure your lead by finishing second part of the lap without any major crashes.
The third race is going to be the easiest one of all three. Like I've already said, cutting through corners in a Saleen is not a problem. You won't have to go through any tight turns. Instead, you'll be dealing with a fast chicane (screen). It's very easy to crash into barriers here, so I'd strongly recommend slowing down the vehicle a little. Otherwise you would probably have to use up one of available flashbacks, especially if this is your first run on this track.
Pro Muscle - Head 2 Head
Important! Participating in this duel is possible only when you've won all six tournaments from this group!
Hints: Sadly, winning this race is going to be more difficult than it was in the first race. The main problem is that you'll have to use a Dodge Viper and this car is very difficult to drive. Additionally, you'll be dealing with a narrow track, so you won't be allowed to make any mistakes. Winning here is possible only if you've practiced driving a Viper a lot and if you're familiar with the entire track.
Obviously the first part of the race is going to be crucial to your success. The start must be perfect, so you can't afford any wheelspin. Your opponent will probably take an early lead and your job will be to stay behind him as close as possible (screen). You will have to go through several fast corners. Prevent the car from sliding and avoid hitting the tires. Don't push too hard or you may end up restarting this event.
You will start encountering difficult corners very soon and they're your only chance of taking the lead. I would recommend that you wait for one of few tight turns to make a move (screen). Make sure that you're cutting through the corners, so you'll be very close to your opponent before overtaking him. Once this is done, calm down and focus only on securing the lead. This means you can't make any mistakes and you will have to maintain higher speeds while going through mild curves. Thankfully, you should know the track by now, so you'll have less problems defending your first place.
GT1 - Motul CCGT Series
Number of races: 4
Tracks: Long Beach - Street Circuit B; San Francisco - Grand Prix Circuit; Detroit - Grand Prix Circuit; Washington - Grand Prix Circuit
Best car: As you've probably noticed, you will have to purchase a Koenigsegg CCGT in order to be able to participate in this event. You don't have this car in your garage, so you'll have to spend some of your earned money on it. The vehicle costs more than 2 million.
Hints: This new Koenigsegg is very similar to the other model which you've probably driven before. Sadly, this means you'll have some major problems staying on the track. CCGT is very difficult to drive and it's also wide, so it's not going to be easy to get through some of the sharper turns. It would be a good idea to practice these races before deciding to enter the event.
The first race of this tournament is going to be quite challenging, mostly because you'll be visiting a narrow track. This becomes an issue especially when you try to overtake someone. As a result, you will have to make sure that your start is perfect, so you won't any places here. It's going to get easier once you've reached a long straight section of the track, however you can't make any sudden moves or you'll lose control over your vehicle. Be careful - you'll be dealing with sharp turns later on during the course of the lap. The final section of the track seems to be the most difficult one, because you'll be dealing with some very narrow corners here. You will also have to slow down once you've reached one of final chicanes (screen). Otherwise you would have ended up crashing into a tire wall. Avoid this at all costs. There are four laps here, so you'll have a lot of opportunities to take the lead or at least to get closer to the podium.
The action of the second race takes places on the streets of San Francisco. You probably know this track from the demo version of the game and you've also been here at the start of your career. Don't forget that you're driving a very fast car, so you can't make any major mistakes. Be careful near the hill area (screen), especially when trying to land the car after each successful jump. Avoid using the side movement keys or you may end up sliding towards the barrier. It would be good idea to slow down here, especially if you've taken an early lead or if you're close enough to the leader. The final section of the track consists of long straight roads, however you must slow down near a fast chicane.
The third race of this championship seems to be the easiest one. Make sure that you've started properly and you'll gain a few places right away. Try overtaking your opponents near tight corners, because that's where they'll slow down, allowing you to make a move. Watch out for some of the mild curves and when going through fast chicanes.
The action of the fourth race takes place on the track you've visited before (during the head to head challenge). Watch out near the start, because there are a lot of difficult corners out here. Avoid crashing into other vehicles, because nothing good will come out of it. Use some of the sharper turns to get closer to other cars (screen) and prevent the vehicle from sliding too much while going through faster curves. Once you've taken the lead, focus only on defending your first place, instead of pulling off good lap times.
Drift GP - Rotora Capitol Drift
Number of races: 3
Track: Washington - Sprint Circuit
Best car: You won't have to race against other drivers directly, so ignore some of the fastest cars of this group. I would recommend that you test all available vehicles in the Race Day mode, so you'll know which one is easiest for you to handle. Toyota models are excellent, however you can also consider using a Dodge or a Nissan.
Hints: Thankfully, this is an easier drifting event than the previous US drift race. The biggest difference is that you'll be the only car on the track, so you won't have to pay attention to other players. You can focus only on pulling off good drifts in order to acquire as many points as possible. Also, you won't have to be in a lot of hurry, however you'll earn the largest number of points for drifting at higher speeds. There are three races for you to win - a quarterfinal, a semi-final and the final race. Each time you'll have to earn more points than your current opponent. Sadly, you won't find out exactly how many it's going to be right away. If you're playing on Serious difficulty, you'll probably have to earn at least a few hundred thousand points. Obviously the third race is going to be the most difficult one, because you'll be going against the champion. Nevertheless, winning all three trials should be fairly easy.
As you've probably noticed, this is an easy track, mostly because it's very wide and you won't have to worry about hitting the barriers all the time. You will be allowed to slide on the grass, however it's going to be more difficult to steer the car in such conditions. Watch out only for sharper turns, mostly because you will come across tire walls out there. You should have any major problems increasing your multiplier and that'll be the key to your success. Also, don't forget to find yourself near metal poles in order to receive other bonuses.
Prototype - Tag Prototype Series
Number of races: 4
Tracks: Long Beach - Street Circuit; Detroit - Grand Prix Circuit; Washington - Grand Prix Circuit; Long Beach - Classic Circuit
Best car: You aren't given a choice here, because all the drivers are using prototype vehicles. You'll be sitting behind the wheel of a Ford Doran JE4. This is a very expensive car (it costs more than 4 million), however you should have enough money to buy it.
Hints: Thankfully, the car you're about to use in all four races of this tournament is very easy to drive. You should also notice that the tires offer a lot of grip, so you won't have to worry about sliding or slowing down before sharper corners. You will only have to be careful while driving slower, because it's easy to create a dangerous wheelspin situation. Once you've familiarized yourself with the vehicle, you should know how to avoid these problems. Winning all four races should be easy, even if you're playing on a higher difficulty level.
The action of the first race takes place in Long Beach. Just as before, you should focus primarily on having a good start which should be followed by an overtaking maneuver near the first corner. Doing this will allow you to advance a few places. Be careful while going through some of the nearby corners (screen). I wouldn't recommend cutting through them too aggressively, because there's a chance of losing control over your vehicle. The second part of the lap is much easier. Use the fact that your vehicle is easy to handle. Maintain higher speeds and avoid making major mistakes.
The second race is in Detroit and you shouldn't have ANY problems winning it. This is the most common version of this track, so I'm sure that you know the corners by now. Just as before, you should consider acting aggressively after the start, especially since your car won't slide too much. Be careful when you're going through the slowest section of the track. The second part of the lap is much faster and it should allow you to increase your lead over the guy in the second place.
The action of the third race takes place in Washington, so you shouldn't be surprised by the fact that winning here isn't going to be a simple thing. It's very important to fight your way from the back of the grid, so you might want to consider restarting the event a couple of times to get a better spot. Focus mostly on maintaining a good pace throughout the entire race. You can't allow other drivers to extend their lead. Be on a look out for sharper turns to overtake them. Also, avoid making major mistakes, because you would have to use a flashback or restart the race.
The fourth race of the series is quite relaxing, however obviously you won't be allowed to make any major mistakes. The first part of the lap requires you to go through several tight corners. This should allow you to get closer to the leader of the race. Don't forget to turn left in order to cut through one of the slower corners (screen). Slow down once you're close to the tunnels, because it's easy to hit a barrier there.
GT1 - Head 2 Head
Important! Participating in this duel is possible only when you've won all three tournaments from this group!
Hints: Before you decide to participate in this head to head challenge, you should consider making some preparations. Take your time to familiarize yourself with an Aston Martin DBR9, because this is the vehicle you will have to use during this race. DBR9 is an unusual car, because it is very responsive. It's a good thing when you're travelling at higher speeds, but it can become a problem while going through sharp turns and there are many of those in Detroit.
You should be able to take the lead early during the course of this event. Consider attacking your opponent near the second chicane (screen). Don't worry if you lose the lead later on, because you'll always have a chance to win it back. Go through the tunnel carefully, as well as through other slow corners. Use the minimap to locate the second car and block your opponent whenever it's possible.
The middle sector is by far the easiest one. You will only have to go through several tight corners. Other than that, you will be dealing with mild curves and long straight sections. You should stay in the lead here, as long as you don't make any mistakes. Be careful near the end of the lap. You'll encounter a well-known slow section here (screen). Prevent the vehicle from sliding or crashing into the barriers. I would recommend staying on an ideal racing line, because your opponent will have a hard time taking the lead away from you. The last corner is quite simple, so it should secure your win in this race.
Classic Muscle - Bilstein Festival Milano
Number of races: 2
Tracks: Milan - Castello Circuit; Milan - Castello Circuit B
Best car: You can choose between two muscle-cars. Ford Mustang Boss 302 will allow you to reach higher speeds, however Cuda seems like a better choice. This car is better at taking corners which will allow you to catch up to other vehicles much faster.
Hints: Both races take place on the exact same track, however you'll be going in two different directions. The first race seems to be a little easier. Maintain high speed once you've started and while you're going through a long curve. You can't get too close to the barriers here, because it's very easy to crash by mistake. Choose the roundabout section for a place to make a move. The second part of the lap will also present you with a lot of opportunities to take the lead in the race. You've probably noticed that you can cut through some of these corners. Speed up once you're close to the finish, especially since other drivers will do the same thing.
The second race will also require you to through a large curve which is located near the finish line. As long as you maintain higher speeds, you should be safe here and you won't have to worry about other drivers extending their lead. Try overtaking them near some of the sharper turns, especially since you'll be allowed to cut through most of these corners (screen). Watch out near the finish and go through the roundabout without smashing into any barriers.
Touring Cars - BMW Challenge
Number of races: 2
Tracks: Nurburgring - Sprint Circuit; Nurburgring - Grand Prix Circuit B
Best car: You won't be allowed to choose a vehicle for this race, but it's not a problem, because BMW 320SI is the best car in this class.
Hints: Both races are quite easy to win, however you should spend some extra time in the Race Day mode to familiarize yourself with both versions of the Nurburgring track. Prevent other cars from taking an early lead by having a perfect start. Approach the first turn from the inside and cut through the grass in order to overtake a couple of vehicles. Now you will have to deal with a few fast corners (screen). The key to success here is to approach them at a correct speed, so this is why it's very important to know the track.
The second part of the lap starts with a long straight section of the road. You will have to maintain a very high speed here for obvious reasons. Be careful, though. You will come across a tight chicane very soon (screen). You must use the brakes early or you'll crash into the tire wall. Also, I wouldn't recommend cutting through this corner, because there's a possibility of losing control over your car. You should be able to take the lead on the second lap. Once this is done, defend yourselves against attacks from other drivers until you've reached the finish line.

The second track is very similar to the first one, especially in the beginning. My opinion is that this race is easier to win. There are a lot of sharp corners on the track, so you'll have some opportunities to overtake other vehicles (screen). Be careful once you're close enough to the chicane. If you don't make any major mistakes, you should be able to take the lead even faster than in the previous race.
Open Wheel - BMC Formula 1000
Number of races: 2
Tracks: Donington Park - National Circuit; Nurburgring - Sprint Circuit
Best car: All the competitors are using Formula 1000 vehicles - JRC FJ1000. Thankfully, they're much cheaper than Formula 3 cars, because one vehicle costs about 37000 euro. As a result, you should consider winning this cup as soon as possible.
Hints: Formula 1000 races are easier than Formula 3 events which you've probably came across in the past (one of these events is in the USA). The main difference is that you'll be dealing with slower vehicles and it won't be such a problem to maintain a good racing line while taking some difficult corners.
The first track of the championship has appeared in the career mode before, as well as in many other racing games. As a result, you should know this track very well, however this doesn't mean you can take it easy. There's a very difficult corner near the start line. Use the brakes wisely and avoid leaving the asphalt road. Now you will have to deal with a large number of fast corners. It's an excellent opportunity to overtake other vehicles. Watch out for two tight corners which are located in the middle section of the track (screen). You can't make a mistake here, because there are gravel traps all over the place.
You should end up heading towards the finish line. Maintain maximum speed in this area (which is about 225km/h). The final chicane is a very difficult one (screen). You will have to go through it without making even a smallest mistake. Cross the finish line and maintain your lead on the following laps. It shouldn't be a problem, especially since computer drives aren't too aggressive here.
The second circuit of the championship has appeared in your schedule many times before, however you will have to take under consideration that your car is capable of going through corners at a higher speed. Don't try cutting through the corners, because there's a high probability of losing control over your vehicle.
Pro Tuned - Dunlop Spa Challenge
Number of races: 1
Track: Spa Francorchamps - Sportscar Circuit
Best car: You won't be allowed to choose a vehicle for this race. All the contestants are using Nissan Skyline GT-R Z-Tune vehicles, so you'll have to purchase one before proceeding with the race.
Hints: This is a very unusual tournament, because you will have to complete only one race and it's not even long. I guess you might suspect that you'll have to familiarize yourself with this track in order to secure your win. You will also have to remember that your vehicle can be tricky to drive. Skyline tends to slide a lot and it has some poor brakes. As a result, you will have to be extra careful while going through some of the slower sections of Spa.
The first part of the lap is very easy and you shouldn't encounter any problems here. Your objective will be to climb a small hill at a maximum speed (screen). You won't have to use the brakes and you may even move a little to the left, because there's some asphalt there as well. Keep pushing until you've reached a new set of corners. The key to success here is to maintain an ideal racing line. Use sharper turns to get ahead of the competition.
The middle section of the track will require you to deal with some faster corners. You must know exactly how fast you can go here, so it's very important to practice finishing this race before proceeding with this career event. Prevent other cars from increasing the lead. Make sure to maintain higher speeds when such an opportunity presents itself. Skyline isn't too fast, so it's crucial that you start accelerating whenever it's possible. Slow down once you've reached the final chicane (screen). You can't be going too fast here or you'll end up crashing into a tire wall. The last corner is a tight turn which leads directly to the finish line. You've got two options here - you can slow down to a minimum speed or you can go wider, because you won't end up on the grass.
Club GT - Firestone TVR Showdown
Number of races: 2
Tracks: Donington Park - National Circuit; Donington Park - Grand Prix Circuit
Best car: You will have to use a TVR during this event. It's a TVR Tuscan Challenge. I'm sure that you own one of these vehicles by now. If not, purchase it right away, because you're going to need it to win several other events.
Hints: Both races take place in Donington Park. The first race should be familiar to you, because you've already been here during a Formula 1000 event. Sadly, TVR is much harder to drive, especially at taking corners. You will have to be very careful in order to prevent the car from sliding. I think that you'll get a hang of it after a few races. Knowing the track is equally important. I would recommend accelerating in the middle section, because that's where you can overtake other cars. Watch out for sharper turns, especially for the one pointed out on the screen. The final section of the lap is a difficult chicane. You can't afford to make any mistakes here, so consider slowing down if you can't go through this section faster.
The second race will start the same way as the first one did. As a result, you should consider overtaking as many vehicles as possible. You'll see the differences once you're near the finish line. You will have to cross a new chicane by going left. It's going to be followed by two very sharp turns. The first turn is easy to spot, however the second one is very tricky. You will have to start turning the car before you've even seen it (screen). Use the minimap if this one of your first runs. You can't wait for the last second, because you would end up outside the track.
Touring Cars - Goodridge Trophy
Number of races: 2
Tracks: Istanbul Park - Grand Prix Circuit; Istanbul Park - Intermediate Circuit
Best car: Once again, you won't be allowed to choose a vehicle on your own. All the competitors are using a Chevrolet Lacetti from the Touring Cars category. You should consider purchasing this car, because you might need it in other tournaments. Also, it's very cheap.
Hints: Both races of the tournament take place in Istanbul Park, however you'll be dealing with different variations of this track. I guess you won't have any problems achieving two wins here, however understanding the track is an important matter, mostly because you'll have to go through some of the corners at an exact speed. If you'll drive slowly, you won't have the chance to catch up to other cars and if you'll drive too fast, you'll end up in a gravel trap.
I would strongly recommend having a perfect start, so you won't end up being overtaken by other vehicles. You should be able to reach the first corner very soon. Despite what you might think, it's not too sharp, so you don't have to slow down your car too much. Prevent other vehicles from moving away from you. Focus on some of the upcoming turns by going through them at a maximum possible speed. This should allow you to close the gap to the leader of the race. The second part of the lap consists of a large number of sharper corners (screen). You should consider performing a few overtaking maneuvers here. Cutting through some of the corners will also become a possibility.
You will come across four mild curves. DON'T use the brakes, because it's possible to get through them at a maximum speed. All you have to do is to stick to the inside and you won't end up somewhere outside the track. The final section of the lap will require you to deal with several sharp turns. The first one will force you to turn left. Also, there are three hairpins near the finish line (screen). This is your final opportunity to take the leadership away from your competitors. Be careful not too cut through these corners too much, because you'll hit a tire wall or you'll lose control over your vehicle.
The second track has a very similar start to the first one, so you should use this as an opportunity to overtake other vehicles. Maintain a close distance to them and wait for the right moment to perform an overtaking maneuver. You will have to turn left somewhere in the middle of the track (screen). Thankfully, it's a simple maneuver, so you won't have to slow down. Focus on maintaining an ideal racing line and you should take the lead even faster than in the previous race.
Club GT - Head 2 Head
Important! Participating in this duel is possible only when you've won all six tournaments from this group!
Hints: Sadly, it's going to be a difficult head to head challenge, mostly because you'll be forced to use a TVR Tuscan Challenge. As you probably remember, this vehicle is very difficult to drive, especially here where it's very narrow. Also, you will have to be racing in Milan and this is probably your first visit to this variation of the track. You will have to restart this event at least a few times to familiarize yourself with the layout of the track and the capabilities of your vehicle.
I would strongly recommend that you begin racing by having a perfect start. Prevent the wheels from spinning too much and focus on maintaining a small distance to your opponent, because he'll probably take the lead right away. You should be able to reach a small roundabout very soon. Slow down slightly, so you won't hit your opponent, but you can't let him extend his lead. I would recommend overtaking him near the cathedral (screen), especially since there's a sharp turn here. You should be successful, as long as you play this out aggressively.
I guess you won't be surprised if I tell you that you should focus primarily on defending your first place against the attacks of your competitor. Enter a small tunnel. Use the brakes, because the next left turn is very tricky. You'll hit a tire wall here if you drive too fast. Some of the upcoming chicanes are corners are equally difficult. Watch out for a tight right turn (screen). You can't cut through it (tire wall) and you can't go too wide (barrier).
You should be able to reach a new corner very soon. Cut through the corner aggressively, because there aren't any penalties for such an action. The next left turn is very tricky. You MUST maintain a perfect racing line here. Don't cut through it or you'll lose control over your vehicle (there's a large bump here). The final part of the lap will require you to achieve maximum speed and hold it. Block your competitor if he gets too close. Avoiding the barriers at all costs is also very important here.
Endurance - Le Mans Series (GT2)
Number of races 3
Tracks: Spa Francorchamps - Grand Prix Circuit; Istanbul Park - Grand Prix Circuit; Nurburgring - Grand Prix Circuit
Best car: You will be allowed to choose between two GT2 class vehicles. Spyker C8 Spyder is a little faster, however it's very difficult to drive and it has poor brakes. As a result, you should consider purchasing an Esperante which is a much better choice. You'll notice the difference between these cars very soon, because the first track will require you to brake a lot.
Hints: I'm sure that you're familiar with all three tracks of this tournament, however you will have to take under account the fact that both cars from this group are very difficult to drive. Panoz and Spyker tend to slide a lot and they're very unstable at higher speeds. I would recommend that you practice driving a Panoz in the Race Day mode, so you won't be surprised by how bad it really is once you've entered this event. You should also know that vehicles from all four classes will participate in this tournament. Obviously you will have to win in the GT2 class. This means you will have to finish at least eleventh (if none of the faster vehicles suffers from a crash). You could try overtaking cars from the GT1 class, however it's not necessary. Focus only on winning your group.
The first race should allow you to take an early lead, however only if you went through the first chicane at a maximum speed. Watch out while going through tight corners and chicanes, because it's very easy to spin a car. Don't try cutting through these corners. There's a possibility of losing control over your vehicle, so you shouldn't risk losing your lead. Instead, drive a little slower and block your opponents. The middle section of the track is by far the most difficult one. You will come across two fast corners here (screen). Maintain a perfect racing line and prevent other vehicles from taking the lead away from you. Once this is done, focus on moving as fast as possible. Brake hard once you've reached the chicane. Thankfully, the finish line is located ahead of the hairpin, so you won't have to worry about it as well.
The Istanbul Park track seems to be the easiest one of all three, however this doesn't mean you shouldn't be careful. Some of the faster corners of the track will require you to slide a little. Doing this will prevent other drivers from extending their lead. Thankfully, you'll have a lot of opportunities to overtake them. Watch out near the end, especially while going through three hairpins. It's very easy to spin a car out there and you can't allow that to happen.
The third race seems to be a little harder than the second one, however you should also be able to pull off a win here as well. Just as before, the key to success is to go through some of the corners at a higher speed (screen). You will have to prevent the car from sliding too much at the same time. The final part of the lap will require you to go through a well-known chicane. Maintain a perfect racing line here, so you won't have to worry about losing control over your car.
Open Wheel - Mintex European F3
Number of races: 3
Tracks: Istanbul Park - Grand Prix Circuit; Donington Park - Grand Prix Circuit; Spa Francorchamps - Grand Prix Circuit
Best car: All the competitors are using Formula 3 cars (Dallara Formula 3), so you won't be allowed to choose a vehicle on your own. Sadly, acquiring a Formula 3 car means spending more than 300000 in cash.
Hints: You've probably dealt with a Formula 3 race event before (while trying to complete the US branch of the career tree). If not, you should picture them as a much faster version of Formula 1000 races. You'll still be dealing with a massively increased grip, however you will have to be extremely careful at lower speeds, especially while going through tight corners and hairpins. Spinning a Formula 3 in such conditions is a very easy thing to do. Like I've already said, these cars are much faster, so you'll also have less time to react to what's happening on the track. Consider spending some time in the Race Day mode before proceeding with this tournament.
I'm sure that you're familiar with all three tracks of the tournament, however you will have to change your driving style a lot in order to prevail. The first race should begin with a perfect start. This will allow you to overtake a few vehicles near the first corner. Now you will have to focus on going through some of the faster corners of the track. Don't make any mistakes. Try overtaking other vehicles near sharper corners, however avoid hitting them at all costs. Not only you would have damaged your car, but you would also end up outside the track. You may have some problems with four mild curves (screen). It's possible to go through them at a maximum speed, however you would have to be extremely precise and you wouldn't be allowed to hesitate. The final part of the lap consists of a large number of sharp corners, so this is your final chance to overtake other drivers.
The second race is by far the easiest one, mostly because other driver tend to slow down a lot. This occurs for the first time after the start, once you've reached the first set of corners. Use this opportunity to get ahead of the competition. Be careful while going through slower corners and stay on the track.
The third race is going to be more difficult, however winning here is possible as well. Slow down before the first turn, because you can't afford damaging your vehicle. Head over to the hill and go through the chicane at a full speed. You can also consider moving to the left here in order to overtake other vehicles. The middle section of the track has to be done faster than usual. You can't use the brakes too often. Watch out for the first fast corner (screen). You can approach it at a nearly full speed. Also, don't forget about a tight chicane which can be found near the finish line. Maintain a perfect racing line there in order to avoid unnecessary spins.
GT1 - Aston vs Corvette Challenge
Number of races: 3
Tracks: Donington Park - National Circuit B; Nurburgring - Grand Prix Circuit B; Istanbul Park - Grand Prix Circuit B
Best car: The title of this event says it all. You will be forced to choose between two brands. Aston Martin has only one model in the game - DBR9. As for Chevrolet, you will be allowed to choose between two GT1 class vehicles - C5-R and C6-R. I would recommend choosing an Aston Martin, however only if you're comfortable with this car. If you can't drive it properly, you should buy a Chevy Corvette C5-R instead. Ignore the C6-R model, because it's not as good as its predecessor, especially when it comes to performance.
Hints: The most important thing about this tournament is that you'll have to be moving in a different direction on all three tracks. Sadly, this means you'll have to spend some time learning how to take the corners, especially since AI drivers are going to be very fast here. Also, you won't be allowed to make any mistakes.
The first race is going to begin a with a very difficult chicane. You will have to avoid straying off the main track, because your car will immediately lose grip on the grass. You should be aggressive here on the first lap, however focus on precision on the following three laps. Once you've dealt with the first section of the track, you'll come across a new difficult corner (screen). Slow down here slightly, so you'll avoid any problems. Focus on overtaking other cars, because the next section is simple. Watch out near the finish line, because the last corner is tricky.
Action of the second race is going to take place on Nurburgring circuit. Like I've already said, you'll be going in an opposite direction. Try overtaking at least a few cars near the start line. After that, wait for other opportunities to present themselves. You'll have plenty of chances to advance, as long as you don't make any mistakes. Be careful near the finish line, because there are some difficult corners out there (screen). You shouldn't be in a lot of hurry. Instead, focus on maintaining a good racing line. Thankfully, other drivers will also slow down here, so you don't have to worry about them getting too close.
The final third race in the tournament is Istanbul Park. I would recommend that you focus on having a very good start, so you won't have any problems overtaking a few cars near the hairpins (screen). You should be able to advance a lot of places here. Be careful once you're on a straight road. There are some very fast corners here and you must prevent the car from sliding, because losing control here is equal to losing an entire race. You will have to deal with four mild curves. Slow down only a bit, so you won't end up outside the track. The final part of the lap will require you to deal with a large number of tight corners, but this is good news - you'll have more opportunities to take the lead away from AI controlled players. Watch out only for the final turn and you should be able to secure your win.
Touring Cars - Euro Touring Car Series
Number of races: 3
Tracks: Nurburgring - Grand Prix Circuit; Jarama - Grand Prix Circuit; Istanbul Park - Intermediate Circuit
Best car: You will finally be allowed to choose between two vehicles of the Touring Cars category. Chevrolet Lacetti is a better choice for less experienced players. I would strongly recommend choosing a BMW 320SI which is much faster than the Chevy. You'll also be able to drive it aggressively, as long as you don't mind sliding here and there. :-)
Hints: The first track is the main version of the Nurburgring circuit. You've been here a few times, so you should know it by now. Try overtaking as many vehicles in the first sector as possible. It shouldn't be a problem, since there are a lot of tight corners out here. Now you must focus on driving flawlessly. Don't forget to control the back of your vehicle, so you won't spin and lose your advantage over the rest of the grid. The final part of the lap is a well-known chicane. Brake early and maintain a perfect racing line while going through the chicane.
As for the second track in the series, you probably know it from the demo version of the game and you've been using the exact same car, so it should be extremely easy to win. First of all, you will be allowed to cut through most of the corners and hairpins, because there are special sections for these types of actions. Watch out near the second hairpin (screen). The final section of the track consists of two difficult corners. Stay on the inside, so you won't end up dangerously close to a gravel trap.
Istanbul track should also be familiar to you, so I'll only focus on some of the more important things. Just as in previous races, you should have a great start followed by an aggressive first corner (screen). Try winning a few places here. As for the rest of the track, don't forget to turn left at some point of the race. Also, you won't be allowed to slow down too much. The final section are the three hairpins. Use them to get closer to the leader of the race.

Endurance - Le Mans Series (GT1)
Number of races: 3
Tracks: Istanbul Park - Grand Prix Circuit; Spa Francorchamps - Grand Prix Circuit; Donington Park - Grand Prix Circuit
Best car: You will be allowed to choose between several vehicles of the GT1 category. I would recommend choosing a Saleen S7R. You've probably used this car before, so you should know how fast it is and how easy to handle. You won't have to worry about taking corners in this car and you'll be allowed to focus more on overtaking other vehicles.
Hints: All three races of this tournament are fairly simple. Just as before, you will be dealing with vehicles from all four classes, so don't worry that you won't be allowed to get to the first place. Your objective will be to finish at least eighth. You will be allowed to chase faster vehicles, but only in Spa you'll be capable of overtaking them. I wouldn't recommend doing that, because that could affect your style of driving. It's better to stick with the GT1 class, because you won't receive any rewards for finishing the race ahead of vehicles from a higher class.
The first race is Istanbul Park and it's definitely the easiest one. You should focus on having a good start, so you'll take the lead in your class right away. The only difficult section are the four mild curves in the middle of the track (screen). Sadly, you will have to slow down here, because otherwise you'll end up outside the track. You would find some asphalt there, but you'd still lose a few seconds and probably a few places in your class.
The Spa circuit won't surprise you with anything new. Just as before, focus on having a great start. You must also take the first hairpin properly, so you'll end up ahead of your main rivals. Once this is done, focus only on not making any major mistakes. You should also remember to drive faster in the middle section, so you won't give other drivers a chance of closing the gap.
The third race will also allow you to take an early lead. Avoid hitting other vehicles at all costs, because there's a lot of grass around you and you wouldn't be able to return to the track as fast as you would have imagined. I would also recommend slowing down before the first tight corner in the middle section (screen). I can tell from my own experience that it's very easy to make a mistake there by going too fast.
Prestige - Omex Supercar Series
Number of races: 3
Tracks: Istanbul Park - Intermediate Circuit; Nurburgring - Sprint Circuit; Donington Park - National Circuit B
Best car: This time you'll be allowed to choose between two cars. As you probably remember, Zonda R is much easier to drive, however Koenigsegg can go a lot faster. If you're skilled enough, consider choosing Koenigsegg. Otherwise take Zonda for a spin.
Hints: You've been to the first track many times in the past, so I guess I should only focus on the differences from having a new car. Try attacking other drivers from the inside once you've reached the first corner. Don't risk too much, because you won't be able to win the race in a damaged vehicle. Choose sharper corners and hairpins for places to overtake your rivals. Don't forget that you will have to turn left in order to explore a new section of the track (screen). It would be wise to slow down here, because there's a possibility of ending up on the grass. Watch out for the three hairpins near the finish, however I'm sure that you know how to approach these corners safely by now.
The second track is one of the shorter versions of Nurburgring. Start off by cutting through the first corner, however prevent the car from sliding. You should consider going through some of the faster corners in a controllable slide (screen), so you won't allow your competitors to increase their lead. A second hairpin is also a great place to perform overtaking maneuvers, however prevent the car from leaving the track. Watch out for the chicane at the end!
The third track seems to be the easiest all three, even despite the fact that you'll be moving in a different direction. Cut through the first corner aggressively, but only on the first lap. You will have to be careful here later on during the course of the race, when you have a lot to lose. Watch out for some difficult corners in the middle of the track. Thankfully, you'll be able to drive faster later on. Slam on the brakes only near the final left corner.
Touring Cars - Head 2 Head
Important! Participating in this duel is possible only when you've won all six tournaments from this group!
Hints: Thankfully, this duel is going to be very easy, so you shouldn't have any problems finishing it ahead of the second car. You will be using a BMW 320SI which is easy to handle on this track. The most important thing you'll have to worry about is to maintain higher speeds throughout the entire track. Also, you won't be allowed to make any mistakes, because you'll lose your lead instantly.
I guess you won't be surprised to see your opponent take the lead. Brake at the last second and attack him from the inside near the first hairpin (screen). If you're unsuccessful, try repeating this maneuver with two other hairpins. Once you've taken the lead, switch your attention to what the other player is doing and block him whenever he tries to attack you. You must be driving flawlessly at the same time, so it's important that you're familiar with the surroundings.
You should be extremely careful near two tight corners. Maintain a perfect racing line here, so you won't end up spinning the car. The same goes with four mild curves in the middle of the track. You must prevent your vehicle from sliding too much. The final section of the track consists of a few sharp turns (screen). Cut through most of them without losing too much speed. Observe your rival and prevent him from taking the lead. It's not a major issue, because even if he does, you'll still be able to win it back. Watch out near the finish line - you can't make any mistakes there.
Prototype - Virgin Mobile Endurance Classic
Number of races: 1
Track: Le Mans - Circuit de la Sarthe 1968
Best car: You will be allowed to choose between two prototypes. Nissan R390 goes a lot faster, but it has poor acceleration and grip values, so it's not a good choice. I'd strongly recommend purchasing a Mazda (787B model), because it's going to be much easier to win the event with this car.
Hints: This is going to be a very unusual event, mostly because of the track. You'll be given an opportunity to race on one of many variations of the famous Le Mans circuit. I'm sure that you know this track from the 24 Hours Le Mans race, however this time you'll be presented with a much shorter route. Nevertheless, reaching the finish line is going to take you A LOT of time, so you shouldn't use all the available flashbacks right away.
Despite the fact that it's going to be a long race, you should focus on having a good start. You'll have to reach a top of a small hill (screen). After that, you'll go through a very difficult chicane. I wouldn't recommend straying off the perfect line, because there are gravel traps all over the place. Carefully go through several other corners. You could consider overtaking a few cars here, however it's important not to end up outside the track.
Now you will have to deal with a very long straight section of the road which is even longer than in the 24-hour race. It's very important to maintain maximum speed throughout this entire sector, because a smallest mistake would mean trouble. You will also have to avoid other vehicles, if there are any around you (screen). Mazda's maximum speed is about 415 km/h and that's how fact you must be going. There's a mild curve near the end. Stay on the asphalt road and avoid using the orange sections, because you would start losing speed.
You should be able to reach an EXTREMELY difficult corner very soon (screen). You will have to use the brakes early, so you won't end up outside the track. Also, you won't be allowed to cut through this corner, because there's a tire wall here. Don't worry if you go through the corner slowly, because it's always better than using a flashback or trying to get back on the track. The final part of the race will require you to go through some fast chicanes. Avoid tire walls there as well.
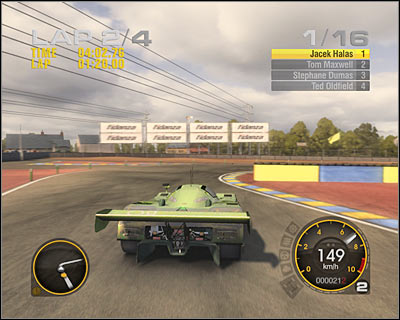
Endurance - Le Mans Series (LMP2)
Number of races: 4
Tracks: Donington Park - Grand Prix Circuit; Nurburgring - Grand Prix Circuit; Spa Francorchamps - Grand Prix Circuit; Jarama - Grand Prix Circuit
Best car: You will have to choose between two LMP2 class vehicle. Lola B05/40 is a much better car. Despite it's similar in price to Courage C65, it accelerates faster, so it'll be easier to catch up to other vehicles.
Hints: All four races of this tournament are quite challenging, mostly because both LMP2 class vehicles aren't too easy to handle. Lola becomes unstable while going through some slower corners and it gets even worse with tight hairpins. You will have to be extremely careful in order to prevent any unwanted slides from happening. You're starting in the LMP2 class, so you'll have to end this race in fourth. Ignore the top three, especially since you won't even able to pursue these vehicles. Focus only on winning in your class.
The first race of the series is Donington Park. It's one of the most difficult circuits, mostly because you will have to adjust your driving style to what the car is capable of doing. This becomes frustrating in the early stages of the race, because you will have to go through the first corner (screen) without any spins. Controlling the car in fast corners of this track is also challenging. The final part of the lap is the most difficult one. You will have to go through a chicane, as well as two hairpins (screen). Watch out for the second hairpin, because you won't see it until it's too late. Use the minimap, so you'll know when to start turning. Control the situation on two other laps. If you don't make any mistakes, you should be able to hold off to your fourth place (first in the class).
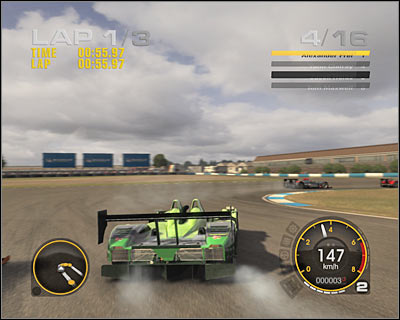
The second track of the series is Nurburgring. Thankfully, it's going to get a lot easier here. Use the fact that there's a very tight turn at the start of the race. Overtake as many vehicles here as possible, however watch out not to hit your teammate. Be careful while approaching faster corners. The car tends to stray off from the ideal racing line. One of the most difficult corners (screen) will require you to turn right without you actually seeing where you're heading. Practice going through this corner, so it won't jeopardize your race near the end. The final part of the lap consists of a chicane and the final turn, but you should know about it by now.
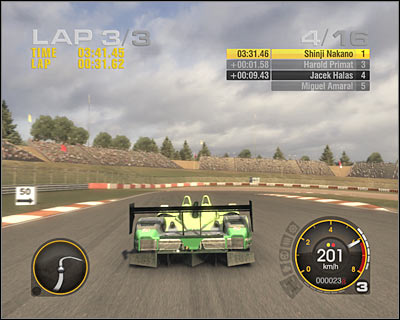
The third race in the tournament is on the Spa circuit. You will have to show everyone here that you've got nerves made of steel. Many of the corners will require you to go at a nearly maximum speed, without slowing down. You should be able to take the lead after the first hairpin. Head on towards the hill (screen). If you don't want to risk too much, consider moving to the left, however you must watch out for the barrier. The middle section of the track requires you to keep pushing. Prevent the car from sliding and block your opponents whenever they try to overtake you.
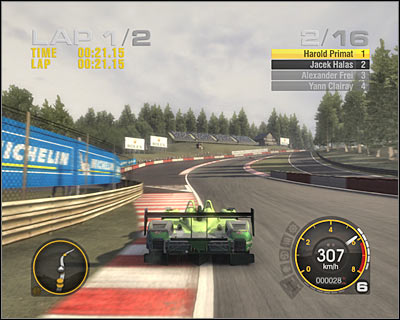
The final fourth race is on the Jarama circuit. Ignore the fact that you may know this track very well. You will have to make a lot of adjustments, including the grip and the performance of your vehicle. Brake earlier before the first hairpin. You can't be moving too fast or you'll end up near a gravel trap. You will be able to go through other corners faster, however you must watch out whenever you come across a sharper turn. The same goes with the second hairpin. Be careful there as well. As for the final two corners (screen), cut through them at a slightly lower speed.
Endurance - Le Mans Series (LMP1)
Number of races: 4
Tracks: Donington Park - Grand Prix Circuit; Nurburgring - Grand Prix Circuit; Spa Francorchamps - Grand Prix Circuit; Jarama - Grand Prix Circuit
Best car: I guess you might be a little surprised by the fact that there are four vehicles in the LMP1 class. That's a lot, especially compared to only two cars in the LMP2 group. Sadly, only one of them is good and that is an Audi R10 TDI. I know it's a very expensive car, however you'll also be able to use it to win the 24 Hours Le Mans race at the end of the season.
Hints: The good news is that you'll once again revisit some of the most famous European circuits. The bad news is that you'll have to take control over an extremely powerful vehicle. Thankfully, Audi is quite easy to drive and it'll spin only when you've made a serious mistake. You'll be able to use this car to win all four events with a fair advantage over other drivers.
Donington Park is your first race. You must pull off a good start, so you'll overtake at least one of your opponents. Cut through the first corner and focus your attention on faster corners ahead (screen). You should be able to take the lead somewhere in this area. Watch out for the final sector of the track. There's a chicane there, as well as two hairpins.
The second race (Nurburgring) seems to be the easiest one to win. Just as before, you will have to start without any problems. Use the first hairpin to your advantage. This is the area where you should take the lead. Now you must only focus on not making any mistakes and the first place should be yours.
The third race is in Spa and it shouldn't pose as a great challenge. Start off by cutting through the first hairpin. If you're lucky, you should be able to take the lead here. Otherwise wait for a right moment to make a move. Watch out near the first hill. Slide the car slightly here or move to the left (screen), but you have to watch out not to hit the tire wall.
The fourth and final race is going to take place on the Jarama circuit. It'll be easy. Watch out only for two hairpins, because your vehicle may slide there a little bit. Prevent it from leaving the track. Other than that, it'll be of no challenge to you.
Open Wheel - Head 2 Head
Important! Participating in this duel is possible only when you've won all three tournaments from this group!
Hints: Sadly, this is going to be an EXTREMELY difficult head to head challenge, mostly because you'll have to use a Formula 3 car. Your opponent will do his best to hold the lead and you won't be allowed to make any mistakes. Otherwise you won't have the time to catch up to your opponent.
The duel is going to take on a Nurburgring circuit. I guess I should tell you that you'll be moving in an opposite direction, so make sure that you've familiarized yourself with this track. Start off as fast as possible, without the unnecessary wheelspin. Try getting closer to your rival and follow him through the first turn. You won't be allowed to slow down too much, so you must remember to choose a perfect racing line. If you're lucky, you'll take the lead here. Otherwise try overtaking your opponent near the first chicane (screen). Blocking him may not seem as a fair move, but it can provide you with an early lead. Also, make sure to avoid hitting your rival, because nothing good will come out of it.
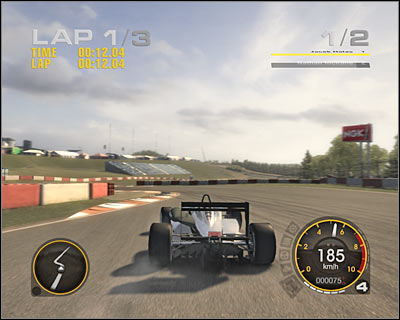
Don't make any mistakes once you've gone past the chicane or your rival will retake the lead. You will come across two new corners. DON'T slow down here, because your car is good enough to maintain maximum speed. Observe your opponent and block him when he tries to attack you. You should be able to reach a new chicane. Slow down once you're about to turn right (screen), because you may end up outside the track.
The final part of the lap will begin with two challenging corners (screen). You can't cut through them and you have to block your opponent at the same time. Maintain higher speeds whenever it's possible, because your rival will do the same thing. You should be able to reach the main straight without any other problems. Focus on defending your achievement on the remaining two laps. Remember to use the minimap to monitor what your opponent is doing. You can't allow him to take the lead, because it's going to be very difficult to win back the first place.
Pro Touge - Champion Touge Shield
Number of races: 3
Track: Mount Haruna - Foothills
Best car: If you're playing on Savage or Extreme difficulty level, you should consider choosing a car with a good acceleration. You will have to deal with some limited grip, but you've got no other choice. Nissan Skyline or Dodge Viper should do the trick. If you're playing on the Serious difficulty (or even a lower setting), consider choosing something which is easier to drive. I would recommend using a Ford Mustang GT-R Concept.
Hints: I'm sure that this is a new type of a event for you, so you should really consider waiting for the game to display a short tutorial movie. The structure of this mode is very similar to some of the drift events, because you'll have to win three trials - a quarterfinal, a semi-final and the final. Each time you'll be going twice. The first run starts at the top of the hill and your task is to reach the bottom. The second race takes place in a different direction, so you must reach the top of the hill. The most important thing here is that you MUST avoid hitting your opponent, because you're receive some major penalties for that. This becomes an issue during the second run of each trial, because you're starting as a second person on the grid.
Thankfully, the route is very short, so you won't have any problems memorizing where to brake and where to move at full speed. Reaching the finish line in both events is going to take you less than one minute. The first run will require you to have a great start, so you won't allow your opponent to take the lead. You can also block him if you want to, however it shouldn't be necessary. Watch out for some very tricky corners. I wouldn't recommend cutting through any of them, because you may end up hitting the barrier instead. Look at the screen - it's the most difficult corner of the track. You will have to slow down here, so you'll stay on the track. The final section of the run is also quite challenging. Observe your opponent here and block him whenever he tries to take the lead away from you.
The second race of each run is going to be much harder to win, because you'll start it from the second place. As a result, you will have to focus all of your efforts on overtaking your rival. It's not necessary, however you would have to finish this run within a smaller time margin than he did in the first race. You shouldn't count on that, so try thinking like overtaking him is the only way to win. I would recommend choosing one of the sharper corners (screen) for an overtaking maneuver. Attack your rival from the inside and avoid hitting his car.
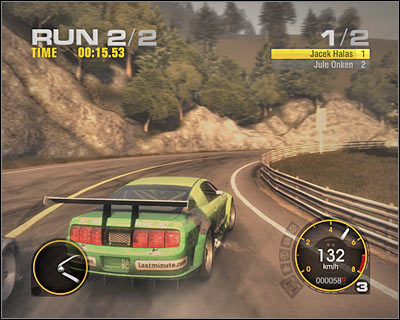
Drift GP - Avo Turboworld Drift GP
Number of races: 3
Tracks: Okutama - Drift Circuit
Best car: You will be allowed to choose only between those vehicles which were manufactured in Japan. I would recommend choosing one of two available Toyota models. Soarer is slightly faster than Corolla and that's an important thing, because speed is one of many factors taken under account while performing in front of the audience.
Hints: I guess you won't be surprised by the fact that you'll have to win three trials and all of them will take place on the exact same track. Your only objective will be to gather as many drift points as possible. At the end of each round you must have more points than your rival. It shouldn't be difficult to win here, even if you're playing on a higher difficulty level. You will only have to remember about two things - increasing the multiplier by drifting without any interruptions and getting as close to the metal poles as possible in order to receive additional bonuses. Thankfully, the track is very wide and it won't you a lot of time to reach the finish line. This event is a good practice, especially since you'll be dealing with much harder drift events in the near future.
Freestyle Drift - HKS Freestyle Drift
Tracks: Yokohama - Freestyle Arena D; Yokohama - Freestyle Arena C; Yokohama - Freestyle Arena A
Best car: You won't have to race anyone and you will have a whole area at your disposal, so it doesn't really matter which vehicle you'll decide to choose.
Best car: This is going to be a very unusual tournament and it appears only once in the career mode, so you won't have to worry about repeating it. Your job stays the same - you must perform huge drifts in order to gather more points than your opponents. The main difference is that you'll be given a large arena and it'll be up to you to explore it. You won't have to stick to a designated track. Obviously this means you'll have to spend a lot of time to familiarize yourself with all three arenas. It's not necessary, but it's often wise to know what to expect. I wouldn't recommend straying off the central zone of each map, because there's a possibility of encountering narrow segments and you could easily crash there. Don't forget to link your drifts, so you'll have better chances at scoring more points than your main rival in each round. The final arena (Freestyle Arena A) is by far the trickiest one, because you won't encounter too many open roads here, so you'll have to be more precise. Scoring a few hundred thousand points in each event should secure your win in the overall standings.
Pro Tuned - Jun Street Series
Number of races: 2
Tracks: Yokohama - Docks Route B1; Yokohama - Docks Route C2
Best car: Nissan has the best models in the Pro Tuned category. As a result, you should consider buying one of these vehicles. Skyline GT-R seems to be a better car on paper, however 350Z is much easier to drive and this is the car you should use during this event, especially since it'll be more about precision, rather than raw performance.
Hints: This tournament is an excellent example of what you can except of Japan. You will have to be ready to race on very narrow tracks, filled with a large number of obstacles. Some of these objects can be destroyed, but most of them will stop your car. The only solution to this problem is to stick to the middle of the road, even when you're approaching corners. You will also have to stray off the asphalt road a few times. Some of these shortcuts are very unusual, so observe your map in order to find out where to go. Obviously getting to know the tracks in the Race Day mode is a good idea, however you should be able to win this event without any major preparations.
The first race is going to begin with a series of mild curves. Sadly, this means you won't be allowed to overtake your rivals right away. Instead, you'll have to chase them. Don't even think about cutting through the corners, because there's a possibility of hitting the metal barriers. You should be able to reach a hairpin very soon. Try sliding through these corners, instead of slowing down. Be careful, because you'll have to leave the asphalt road and turn right (screen). Don't hit the trailers and avoid other large objects as well.
You should be able to reach a slower section of the track very soon. This is where you'll have to be very precise. Don't hit the metal gate, because that would be equal to destroying your car. The final sector consists of a very difficult left hairpin (screen). You will have to start turning early, so you don't end up on the outside. There are two laps to go. You should focus on securing your lead. If you're not first, try getting closer to the leaders, but don't risk too much, because you'll still be able to win the second race of the tournament.
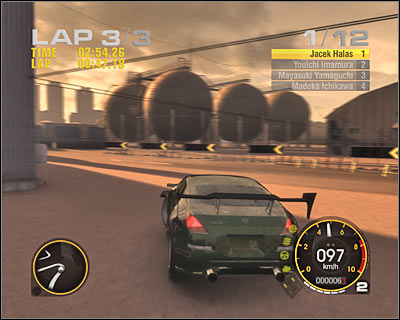
The second track of the championship seems to be a more challenging one, however you should be familiar with the car by now, so it's going to get easier to chase other vehicles. Once you've started, you'll have to deal with a large number of sharp corners. I'd strongly recommend that you drive aggressively here in order to overtake as many cars as possible. Watch out for a very difficult hairpin. The second part of the lap is going to surprise you with a left turn (screen) to the garage. It's very tricky there and you have to turn right in order to maintain a perfect racing line. Don't hit any obstacles near the finish line and you'll finish a clean lap.
Pro Touge - Viper Vs Skyline Challenge
Number of races: 3
Track: Mount Haruna - Foothills
Best car: The title of this tournament suggests that you'll be allowed to choose between two vehicles. Nissan Skyline GT-R Z-Tune is a much better choice, because it's easier to handle than Dodge Viper SRT-10.
Hints: I'm certain that it's going to be very easy for you to win in all of these events, mostly because computer players won't be as fast as you would expect them to be. Additionally, Skyline is perfect in these conditions. Controlling the vehicle through tight bends is going to be very easy. Your only concern is going to be the second run in each race, because you'll be starting there from second place. Don't forget that you aren't allowed to hit your competitor, because you would be punished with a few seconds added to your overall time. Try overtaking your opponent as soon as you've started the second run (screen). It shouldn't be a problem, especially if you've started without the wheels spinning. Doing this will allow you to catch up to him quickly. Once you've taken the lead, focus on defending your first place, but don't crash into any barriers at the same time.
Pro Tuned - Nissan Cup
Number of races: 2
Tracks: Okutama - Sprint Circuit; Okutama - Sprint Circuit B
Best car: Once again, you will be dealing with cars made by Nissan. You will have to choose between Skyline GT-R and 350Z. I would recommend taking the 350Z for a quick spin, however you can also choose a Skyline, as long as you're comfortable with how this vehicle handles on the road.
Hints: You've been to this track before, but probably only once (during a drift event). As you've noticed, both tracks in this tournament are very wide, however you won't be allowed to perform any risky maneuvers, because it's easy to end up outside the track.
The first race of the tournament is slightly easier than the second one, because you won't encounter too many difficult corners. You will have to go through a very long curve once you've started. Don't even think about slowing down here. Instead, try sliding a little bit. Overtake at least a few cars, but avoid hitting them. Watch out for the first tight bend (screen). Stay on the inside, because otherwise you would have ended up being caught in the gravel trap.
You should be able to reach a new set of corners very soon. You will have to maintain a correct racing line here, so you won't slow down too much and you won't end up outside the main track. The final sector of the lap will require you to turn left (screen). Stay on the asphalt road and you should be fine. You've got three more laps to go. Try closing the gap to the leaders and watch out while going through some of the trickier corners.
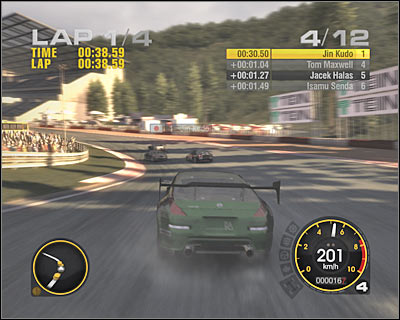
The second race takes place on a slightly more difficult track. You'll revisit the same place, but this time you'll be going in an opposite direction. As a result, it's going to be harder to go through some of the corners. You will also have to slow down more often. The most difficult corner of the race is the second one (screen). Start moving right even before your see it, because otherwise you'll end up going straight and you'll be overtaken by all other drivers.
Midnight Touge - Head 2 Head
Important! Participating in this duel is possible only when you've won all six tournaments from this group!
Hints: This duel is going to familiarize you with new types of events, called Midnight Touge. The whole idea for a race is very similar to Pro Touge, so you'll have a canyon road and your task will be to get ahead of the second car. The only difference is that the race is going to take place at night. You will only have to win one run, however reaching the finish line in this head to head challenge is going to take you more than three minutes.
As you've probably suspected, even if you manage to pull off a perfect start, your opponent will take an early lead. It's up to you to take that lead away from him. As a result, you will have to go through the first set of corners flawlessly and eventually you'll end up going side by side (screen). Block him, however avoid crashing into his car. Thankfully, you won't have to worry about him fighting back, because it's a very narrow track.
I guess it won't come as a surprise to you that the track is going to be quite challenging. There are a lot of hairpins, as well as tricky fast corners. I suspect that you may have some problems using the brakes in few areas (screen). Push the brake button early, so you won't end up hitting the wall. Leaving the asphalt road will also give your rival an opportunity to take the lead, so you can't allow that to happen.
The final sector of the track will force you to deal with a large number of very sharp turns. You've got three choices here - you can try drifting, you can try maintaining an ideal racing line by going from one side of the road to another or you can try slowing down immensely each time you approach a new hairpin. Either way, you should stay in the lead. Watch out for a few fast corners (screen). Block your opponent here if you see him on your minimap. The final section is identical to the one from Pro Touge, so you should be able to pull off a safe win.
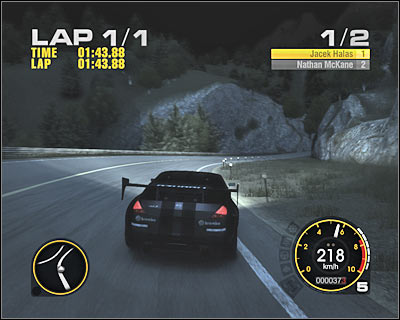
Downhill Drift - Downhill Drift Festival
Number of races: 4
Track: Mount Haruna - Drift Run
Best car: All available vehicles may come in handy during this drift even. I would recommend choosing a car which is easier to drive, because the track is going to be difficult and there won't be any room for error. Toyota Soarer seems like a good choice, however you can also consider taking a smaller Corolla.
Hints: This drift event is very similar to other races from the group. The only difference is that you'll be starting the race at top of the hill. Sadly, this means you'll have to deal with a very tricky route. You will also have to change your driving style, because you won't be allowed to pull off more dangerous stunts. The key to success will be to stay in the middle of the track. The only time you'll want to head on to the inside is when you want to get closer to the metal poles. You will have to complete four trials and each time you will have to gather more points in order to succeed. Practicing the track in the Race Day mode is a good idea, however it's optional. You should be able to learn it during the course of the tournament.
The track you're about to conquer is a very tricky one, especially near the finish. Don't forget that you must keep increasing your multiplier by linking drifts. Only then you'll be able to score a lot of points and you'll defeat your current rival. Like I've already said, you shouldn't forget about the metal poles, because you'll be rewarded for driving close to them. Watch out near the finish line. There are a lot of hairpins out there, so you will have to adjust your driving style. Approach each hairpin from the outside and cut through it aggressively, so you'll find yourself next to the metal pole. You can't slow down too much, because you won't receive any points for a successful drift. Don't forget about the possibility of using flashbacks. They may come in handy whenever you've lost a lot of points as a result of a mistake.
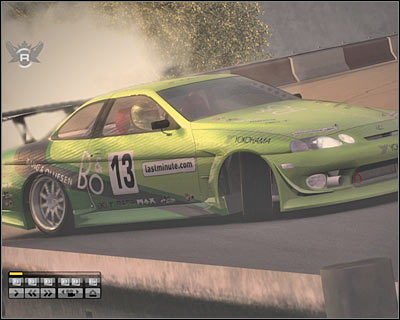
Pro Tuned - Falken Super Street
Number of races: 3
Tracks: Shibuya - Street Circuit B; Shibuya - Street Circuit; Shibuya - Short Street Circuit
Best car: Nissan Skyline GT-R Z-Tune and Nissan 350Z are one of the best vehicles to choose from. The other two (Honda NSX and Toyota Supra) are much worse when it comes to handling, so you might as well ignore them.
Hints: All three races of this tournament take place in Shibuya, however you will have to deal with three variations of the circuit. It's very easy to pull off a win in each race. The only thing you'll have to remember about is to avoid hitting walls. Having an agile car is important here, because you will be dealing with a lot of chicanes and tight corners.
The first race is going to begin with a long right hairpin. You won't have to slow down too much, however avoid hitting the outer barrier for obvious reasons. The most difficult section of the track is the roundabout area (screen). I would recommend slowing down only slightly, so you won't have to slide the car and you'll stay on the proper racing line. The final part of the lap consists of a sharp left turn. You should also know that the track is very narrow there, but it shouldn't be a major problem.
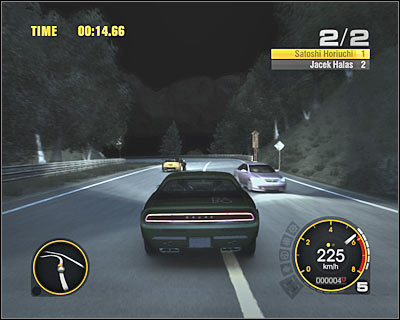
The second race is even easier than the first one. As a result, you should be able to take the lead on the first or second lap. There are many slow sections on the track and that's where other drivers can be overtaken. Try getting through the middle section of the track by moving the car only slightly and staying close to the inside of each corner. You should be able to master this maneuver after a few laps. Doing this will also allow you to extend your lead over your rivals. Watch out for a tight left hairpin (screen). Don't try cutting through this corner, because it's very easy to crash into the barrier.
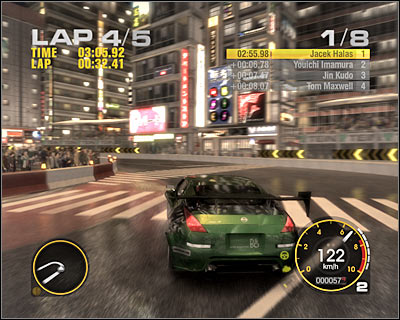
The final third race consists of eight laps, however it's not a major problem, because it's very short. Finishing a single lap of this race should take you about 30 seconds, so it's going to be easy to memorize all difficult corners. Once again, you will be dealing with a chicane at the roundabout (screen). Don't forget that it's better to slow down, so you won't have to struggle here.
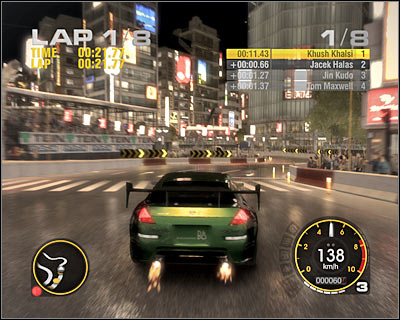
Pro Tuned - Toda Racing Challenge
Number of races: 3
Tracks: Okutama - Sprint Circuit; Okutama - Sprint Circuit B; Okutama - Grand Circuit
Best car: All the drivers in this tournament are using the same vehicle - Honda NSX-R. You'll probably have to purchase one.
Hints: You've dealt with some of these races in the past, so you should know what to expect. Sadly, you will have to take control over a Honda which is very unstable at high speeds. As a result, achieving two wins isn't going to be a simple thing. This becomes an issue during the second race. USE THE BRAKES before approaching the second corner (screen). Try going through some of other corners at full speed. Focus only on chasing the leaders of the race, because the track isn't too long and you've only got six laps to succeed.
The third track is going to be completely new to you. As you've probably suspected, you'll be dealing with a longest version of this track, so you'll only have to complete two laps. Finishing each lap takes about two minutes. You should be able to reach a junction very soon. Try maintaining a higher speed while going through this section and watch out near some of the faster corners. Prevent the car from sliding too much towards the rock wall. You should be able to reach a long bridge very soon. Be careful - there's a chicane at the end of it (screen). Slow down here in order to avoid potential problems.
You will have to be extremely careful, because it's very narrow here and there are a lot of sharp turns ahead. Also, you'll be surround by walls from both sides, so you won't be allowed to stray off the main track. Nevertheless, try moving as fast as possible, because AI drivers may catch up to you and they'll even try performing overtaking maneuvers. You should be getting closer to a very sharp turn (screen). Brake early and accelerate the second once you've gone past it. You won't be allowed to slow down here, because you'll lose your lead. The final sector of the lap is very similar to the first race, so you should be able to gain a few places here.
Midnight Touge - NOS Midnight Touge
Number of races: 3
Tracks: Mount Haruna - Akina Run
Best car: It's extremely important that you choose a car with an excellent acceleration for this event. I would recommend choosing a Nissan Skyline GT-R Z-Tune. You could also consider choosing a Dodge Viper, however as you probably remember, this car is very difficult to drive. You can't rely only on good performance.
Hints: You will have to deal with one extra problem during the course of this event. You've probably noticed it in the tutorial movie. Civilian vehicles will appear on the track from time to time and it'll be up to you to avoid them at all costs. Thankfully, you won't have to worry about encountering some heavy traffic, because this isn't "Burnout" nor "Test Drive Unlimited". You will come across only a few cars and some of the races won't suffer from it at all. Either way, you will have to focus on staying on the left lane, because the traffic in Japan is inverted.
You should notice that both you and your opponent start the race close to each other, so you can't count on being able to take a comfortable lead. It's very important to have a perfect start. If your rival takes the lead, focus all of your efforts on overtaking him somewhere nearby. Thankfully, you will be allowed to cut through some of the upcoming corners by going through the grass. Be careful, though. At least one civilian vehicle may appear on the track (screen). Thankfully, you'll have plenty of time to avoid crashing into this car.
The track is very difficult, because it consists of a large number of sharp turns. You'll also be dealing with tricky chicanes, like the one on the screen. Each time you must use the brakes early, so you won't end up hitting the barrier or leaving the track. Avoid hitting the walls, because you would crash or lose some speed. The final section of the track will force you to deal with a challenging hairpin. During next events of the tournament you'll be dealing with stronger opponents, so it becomes clear that you won't be able to win unless you know the track.
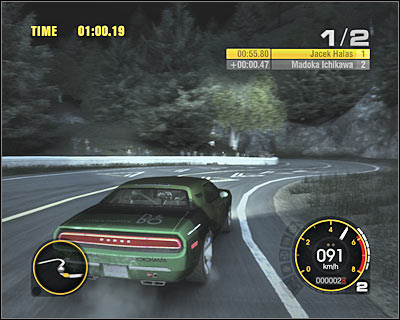
GT2 - Valvoline Trophy
Number of races: 3
Tracks: Okutama - Sprint Circuit B; Shibuya - Street Circuit; Okutama - Sprint Circuit
Best car: Sadly, you won't be given a chance to choose your own car. All the contestants are using a Spyker C8 Spyder. I used the term 'sadly', because it's one of the most difficult vehicles to handle and you wouldn't even think about choosing it in normal racing conditions.
Hints: Winning this tournament is going to be very difficult. You'll have some major problems with two races - the first one and the final third one. Winning them is next to impossible if you haven't practiced driving a Spyker. Obviously knowing the track is equally important, however you've raced here many times before.
Let's start by saying a things about the first race in this tournament. The whole idea of winning it is to go through the entire track without slowing down. Also, you'll only use the brakes once or twice. It may seem unreal at first, however you'll come to the same conclusion once you've started the race a few times (and lost). You will be allowed to slow down only twice. The first area is near the start. You can't take the first corner at full speed (screen), because you'll lose control over your car or you'll end up on the grass. This becomes frustrating on the opening lap, because there are other vehicles ahead of you. I would recommend restarting the event a few times in order to receive a better spot on the grid (somewhere in the middle of the pack). Either way, you will have to be very careful here. Touching other cars isn't officially forbidden, but nothing good would come out of it. You would probably spin the car around and that's more than enough to jeopardize your chances of scoring a good place at the finish.
Don't forget about the second right corner, because you won't notice it at first glance and you also have to pass through it at maximum speed. The second area where you can slow down has been displayed on the screen. It's one of the tougher chicanes. Don't use the brakes, though. Releasing the gas pedal for a second or two is more than enough. Doing this will allow you to stay on the track. Watch out near the finish line. There's a mild curve there and it needs to be passed through at full speed. As for other contestants, try overtaking them somewhere in the middle section of the track, once you've gone past the second corner. Sadly, this means you'll be able to advance only 1-2 places per lap, so it's important not to start the race from the back of the grid, because you wouldn't have enough time to finish on the podium.
I guess you may be surprised a little by the fact that the second race is extremely simple to win. Other contestants will suffer from the lack of grip here. Thanks to that, you won't have any problems overtaking them. You should be able to take the lead on the first lap. The only thing you have to worry about are some of the hairpins. Your car may have some problems slowing down, so you'll have to brake early.
The third race is going to be only a little easier than the first one, mostly because you won't have so many problems staying on the track. The bad news is that you'll have even more problems overtaking other vehicles, because you can pass through almost an entire lap without slowing down. Your only chance is the first sharp corner (screen), but you'll only gain a few places there. Obviously you will have to be driving flawlessly, so you won't give other players the opportunity to win back their places.
Drift Battle - Remus Drift Battle
Number of races: 3
Tracks: Yokohama - Docks Route A1; Okutama - Drift Circuit; Yokohama - Docks Route A2
Best car: This is also going to be a challenging tournament, so you should consider choosing a vehicle which will allow you to pull off some insane stunts. If you don't mind experimenting a little bit, consider purchasing a Mazda RX-7 FD3S. Otherwise you should choose a Toyota Soarer or a Nissan Silvia.
Hints: This is going to be the worst possible version of drift, because not only you'll have to gather points but you'll also have to watch out for other cars. Each track will force you to change your tactics a little bit, even though they may all look the same.
The first race takes place in Yokohama. Sadly, the circuit consists of a large number of sharp turns. Additionally, you're going to be surrounded by walls and large obstacles. You will have to make a decision whether you plan on staying near the leader at all costs or maybe you like to remain somewhere in the middle of the pack, pulling off excellent drifts. You can win this event the same way you've been winning before - by increasing your multiplier and moving close to metal poles. It's often wise to slow down on this track, even if it means gathering less points. It's always better than crashing and losing all of them. Thankfully, there are some faster corners as well, so you'll be able to increase your speed there and you won't have to worry about your surroundings so much.
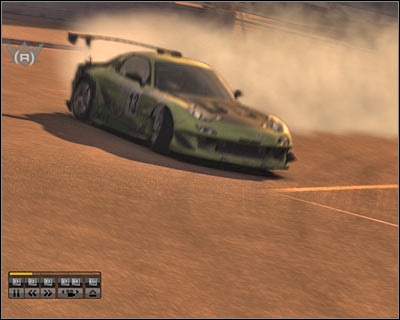
The second run (screen) is by far the easiest one of all three. If you weren't capable of taking the lead before, now's your chance. The most important thing about this circuit is that it's very wide. As a result, you won't have problems gathering a lot of points, even if you're less experienced in winning these types of events. You should also be able to stay somewhere in front, maybe even as a leader of the race.
The third run in the tournament is very similar to the first one. Sadly, this means you'll have to deal with a large number of sharp corners. This becomes frustrating near the start and at the end of each lap. You should be able to gather a lot of points in the middle of the track, because it's much easier out there to avoid hitting cars and obstacles. Don't try taking the lead at all costs, however you shouldn't be the last one in the pack as well. Try staying somewhere in the middle and you will gather enough points to win the race.
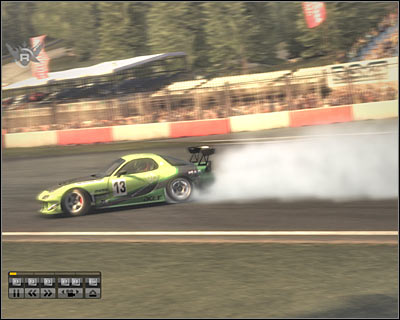
Drift Battle - Head 2 Head
Important! Participating in this duel is possible only when you've won all six tournaments from this group!
Hints: I guess you won't be surprised to hear that this duel is going to be more difficult than some of the "standard" drift events. Your opponent is very skilled, so you'll have to gather A LOT of points to beat him. Ignore the fact that his account won't show any points for a longer period of time, because that's when he'll be increasing his multiplier. Nevertheless, he shouldn't be able to pull off more than one clean lap, so it's not a disastrous situation.
The key to success here is to achieve a highest possible multiplier, because only then you're be capable of keeping up with your opponent. Don't try getting closer to the metal poles, because it can be dangerous here. Remember that only one crash can delete all your achievements. You won't have to lead this race, however you should be presented with a few opportunities to overtake your rival, mostly when he makes some kind of a mistake. React quickly to such actions, because you'll be allowed to gather more points when you're in the lead. If you didn't make any mistakes and pulled off nice multipliers, you should be able to win this head to head challenge on your first run.
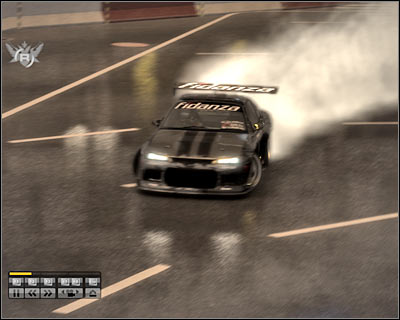
Drift GP - Driftbox Championship
Number of races: 4
Track: Yokohama - Docks Route A1
Best car: You won't have to spend a lot of time trying to decide which vehicle is going to be the best one to win this race. I wouldn't recommend choosing cars which are difficult to drive, because you would have to struggle to win all four races. Something with more grip is exactly what you should be looking for.
Hints: You've had many opportunities to familiarize yourself with this track. You should remember where to look out for obstacles and where to pull off insane drifts. You'll be starting alone, so it's going to get a lot easier to gather points and to increase your multiplier. You should be able to win all events by collecting at least 500000 points. You don't have to be extremely precise, however you won't be allowed to make too many mistakes, because each error will delete your points or nullify your multiplier. Just as before, watch out for some of the sharper turns, as well as large obstacles. Each time (there are four rounds of the tournament) you will have to complete two laps, so make sure you haven't used up all available flashbacks right away.
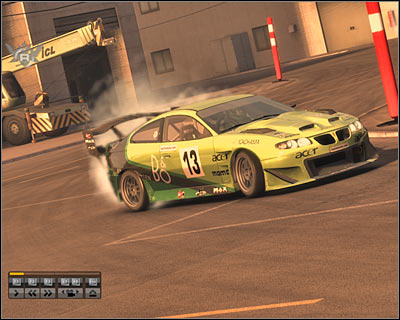
GT1 - Volk GT Series
Number of races: 4
Tracks: Shibuya - Street Circuit; Okutama - Sprint Circuit; Shibuya - Street Circuit B; Shibuya - Short Street Circuit
Best car: This is a GT1 class event, so you'll have a lot of cars at your disposal. I would recommend choosing a Saleen S7R which seems to be the easiest to drive. If you don't like it, consider choosing a Koenigsegg CCGT.
Hints: Saleen will knock out the rest of the competition in Shibuya, mostly because it's very easy to handle considering how powerful it is. You shouldn't have any problems overtaking other drivers, especially since there are a lot of sharp corners. AI drivers have problems there. You don't have to avoid crashing into other vehicles, however prevent your car from being heavily damaged. The most difficult sections of all three Shibuya tracks are the hairpins (screen). You will have to use the brakes early or you'll end up hitting the wall. I'm sure that you know this issue from the Spyker event. Winning on all these tracks (first, third and fourth in the championship) is going to be easy, so you don't have to worry about not being first in Okutama.
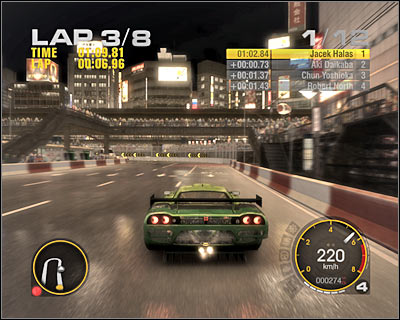
The second race of the tournament is going to be the toughest one of all four, mostly because you will have to focus your attention on staying on the track and travelling at high speeds. Thankfully, it's going to be easier than before, when you were driving a Spyker. This time you will have to use the brakes a few times. The first mild curve (screen) should allow you to overtake a few vehicles on each lap. Watch out for shaper corners in the middle of the track. Accelerate once you've gone past them, however be careful near the finish line.
Prototype - Vertex Prototype Championship
Number of races: 4
Tracks: Okutama - Grand Circuit; Okutama - Grand Circuit B; Okutama - Sprint Circuit; Okutama - Sprint Circuit B
Best car: You will have to choose between two vehicles of the Prototype category. Mazda 787B is a much better choice than Nissan R390 GT-1.
Hints: As you've probably suspected, winning this tournament isn't going to be a simple thing to do. Both vehicles from the Prototype class are difficult to handle, especially at high speeds. Also, you will have to avoid crashing into other cars, because not only you'll damage your vehicle but you'll also end up outside the track. Try winning at least two out of four races. As for the remaining two, you will have to end them being somewhere near the podium. This should allow you to win the championship and to collect a golden trophy.
You've already been to the Grand Circuit in Okutama before, so you won't be surprised by how difficult it is to win here. Watch out for some of the fast corners in the first sector of the lap. You will also have to be careful on the bridge and after you've left it. I would recommend slowing down a lot in order to prevent the car from hitting some of the nearby walls. Watch out for a very tight left turn (screen). Use the brakes early and accelerate once you've gone past this segment safely. You will have to careful here, however you won't be allowed to drive too slow, because other drivers will catch up to you. The final section of the lap consists mostly of mild curves. Maintain higher speeds but avoid straying off the main track. You should focus your attention here on catching up to the leaders of the race.
The second race of the championship will require you to explore the exact same track, however you will be moving in an opposite direction. From my experience I can tell you that it should be a little easier to win here, however knowing the track is going to be crucial to your success. Watch out once you've started, because it's easy to crash the car here. Don't worry - you'll have plenty of opportunities to overtake other players. Be careful once you've left the tunnel (screen). This seems to be the most difficult section of the track. You will have to maintain an ideal racing line, as well as go through a very tight corner. The second part of the lap is easier. Avoid hitting the barriers and watch out for some faster corners and chicanes.
As for two of the remaining tracks, you've been here many times before. Sadly, this doesn't mean that winning here is going to be an easy achievement. You'll probably encounter more problems while going in an opposite direction. You must be very careful in order to avoid crashing into other cars, because nothing good would come out of it. Use the first corner to overtake a few vehicles, as well as the middle section. Watch out for some sharp turns, though (screen). The final corner will require you to achieve maximum speed. You can't slow down or you're going to get overtaken by other vehicles.
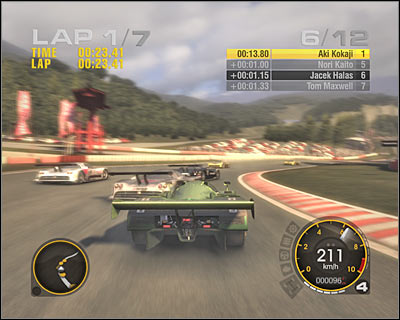
Prototype - Head 2 Head
Important! Participating in this duel is possible only when you've won all three tournaments from this group!
Hints: You shouldn't have any major problems winning this head to head challenge. Once again, you're going to have to participate in a Touge event, so this means you'll be racing in the canyons. The biggest difficulty is that you have to use a prototype vehicle during this event. Thankfully, your opponent will slow down in many areas. As a result, you shouldn't complain about not being able to overtake him.
You should act similar to some of the previous Touge races of the career mode. This means you must have a perfect start, because your opponent will take the lead anyway. You won't have to worry about encountering any civilian vehicles, so focus only on taking the lead away from your rival. This can occur while going through some of the first corners of the race (screen). If you're unsuccessful, try waiting for both of you to get to sharper hairpins.
Sadly, your Mazda wasn't made to participate in these types of events, so you'll be struggling to get through some of the sharper corners. If you feel like you're slowing down too much, consider drifting with a little help of the handbrake (screen). Otherwise you would lose a lot of time and you would also give your rival a chance to close the gap to your car. You will also have to watch out for fast chicanes and mild curves, because it's easy to make mistakes in these areas. Reaching the finish line should take you about two minutes.
Important! These tournaments will be unlocked once you've gathered one million respect points. You will also be given a global licence which grants full access to other events.
Open Wheel - Philips World Championship
Number of races: 5
Tracks: Detroit - Grand Prix Circuit; Okutama - Sprint Circuit; Milan - Circuito di Milano; Washington - Grand Prix Circuit; Istanbul Park - Grand Prix Circuit
Best car: All the contestants are using Formula 3 vehicles, so you won't be allowed to choose a car on your own.
Hints: This is one of the most difficult tournaments in this group, at least in my personal opinion. If you've participated in F3 challenges before, you should how difficult it is to handle these cars on the track. Additionally, other drivers will push to their limits, so it won't be easy to outrun them, let alone reach the podium. It's doubtful that you'll win all five events. I would recommend finishing first on three tracks and reaching the podium or the fourth spot in the remaining two events.
Detroit is one of the easier tracks of the tournament, mostly because you won't have to worry about finding yourself outside the track. If you'll make a mistake, you'll probably bounce off a wall, however watch out for tire walls - they can stop you permanently. The first corner is very tricky. I would recommend slowing down, because there is a possibility of going too wide (screen). There are some tires there, as well as a small gravel trap. You will have avoid those at all costs if you plan on achieving good results. Go through the slowest section of the track carefully. The middle sector should allow you to overtake a few cars. Watch out for a tight hairpin, as well as other tight corners. The final section of the lap consists of two chicanes. Avoid hitting the barriers here, especially if this is your final lap.
The second stage of this tournament is by far the most difficult one, so you should be more than satisfied if you've finished in third or fourth here. The most important thing for you to know about is that you'll have to go through an entire lap at full speed, including the first section. That's where you've tried to overtake other cars before, so know you'll have to find yourself a new spot. I would recommend choosing one of the middle chicanes (screen). Be careful not to hit other cars, because you'll end up restarting the race or using a flashback. Also, I wouldn't recommend cutting through the corners, because there's a possibility of losing control over your vehicle.
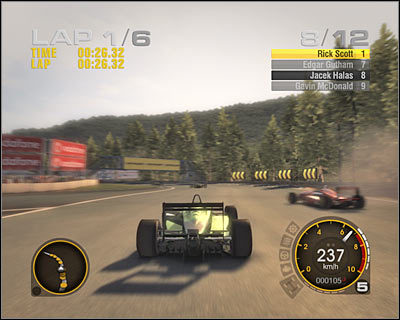
The third track of this championship event is a street circuit. This is also one of the toughest races in the series, so you shouldn't try winning it at all costs. Finishing the race in the top three is a good achievement. Approach the first roundabout carefully (screen). You can't be going too fast and you can't cut through this corner, because you're going to crash or you'll lose control over your vehicle. Be careful when going through slower corners. Don't forget to chase the leaders of the race. There are only three laps, so you won't have a lot of time to catch up to them.
Action of the fourth race takes place in Washington. This is one of the easier circuits, however you should know that other drivers are very fast on this track and they will force you to travel at ridiculously high speeds. Don't crash your car at the start of the race. Choose sharper turns and hairpins for places to overtake other drivers. Watch out for some of the fastest corners, like the one on the screen (screen). You'll have to maintain an ideal racing line in these areas, so you won't crash and you won't allow other drivers to extend their lead.
The final race is in Istanbul Park. Thankfully, it's definitely the easiest one, as long as you know where you're going. Other drivers are kind of slow throughout the entire first section of the lap, so you'll have a lot of opportunities to overtake them. Watch out once you're close enough to four mild curves (screen). You can't slow down here and you have to cut through these corners in order to prevail. Thankfully, you'll regain some of the lost time near the finish line, however watch out for the hairpins.
Touring Cars - Bridgestone Challenge
Number of races: 5
Tracks: Detroit - Grand Prix Circuit; Washington - Grand Prix Circuit; Nurburgring - Grand Prix Circuit; Istanbul Park - Grand Prix Circuit; Milan - Circuito di Milano
Best car: BMW 320SI is a perfect car for these conditions. You won't have any problems driving it and it's probably already in your garage.
Hints: This is by far the easiest tournament of the global race group. Winning all five races is extremely simple, even if you're a less experienced player. The most important thing is that all vehicles of the Touring Cars category are slow and easy to drive. You should also be familiar with all five tracks, so you'll know where to achieve maximum speed and when to brake.
The first race is in Detroit, so don't forget to avoid cutting through some of the corners, because you may hit a tire wall. Be careful while going through the hairpin which can be found in the middle section of the track. Both vehicles from this class brake poorly, so you'll have to take that under account. Other than that, you should be able to reach the finish line with a comfortable lead over the second car.
Next up, you'll have to move to Washington. This race is slightly more challenging, mostly because you'll have to precise while going through some of the corners. You won't be allowed to approach them a very high speed, because you'll only spin the car around. Also, avoid leaving the asphalt road, because you'll lose a few seconds at best. Focus on having a good start here (screen) and then start overtaking other vehicles. I wouldn't recommend playing too aggressively, because you may lose a lot more than you could ever gain.
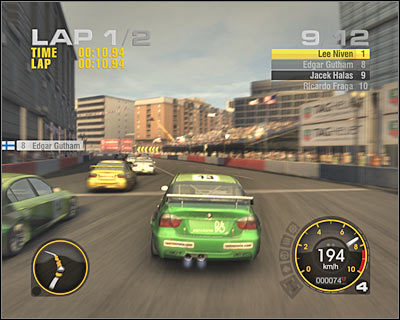
The third track of the championship is Nurburgring and it's one of the easier ones. You shouldn't have any major problems taking an early lead. Watch out only while going through some of the faster corners. Also, don't forget to use the brakes and maintain a perfect racing line once you've reached the final chicane. Istanbul is going to get even easier. You will only have to be careful near the finish line, because it'll be easy to spin the car there.
Milan is going to get more difficult, mostly because you won't be allowed to make any mistakes on this track. Additionally, it won't be easy to catch up to the leaders of the race, so you'll have to be driving flawlessly. Try cutting through some of the corners (screen), however prevent the car from sliding too much.
Drift GP - Advan Drift International
Number of races: 4
Track: Shibuya - Hachiko Drift Circuit B
Best car: Just as before, it doesn't really matter which vehicle of the Drift category you'll decide to choose for this event. I would recommend having a car with a lower Grip value, so you won't have any problems performing massive drifts. If you're a less experienced driver, choose a Toyota or a Nissan.
Hints: You will have to win four runs in order to achieve victory in this tournament. Thankfully, you'll be the only car on the track, so you'll be capable of performing cool drifts without having to worry about other drivers. As you've probably noticed, this is a narrow track, so you won't be allowed to move too much to the outside once you've started drifting. You will also have to be careful near some of the sharper corners, especially when you plan on getting closer to the cones. Each run will require you to gather at least half a million points. It shouldn't be too difficult, especially if you've increased your multiplier a few times.
GT1 - Brembo World GT
Number of races: 5
Tracks: Washington - Grand Prix Circuit; Shibuya - Street Circuit B; Istanbul Park - Intermediate Circuit B; Jarama - Grand Prix Circuit; Long Beach - Street Circuit
Best car: This is a GT1 class event, so you should be familiar with the fact that you'll be presented with a lot of interesting vehicles. Saleen S7R and Aston Martin DBR9 are some of the best cars in the pack. Saleen is easier to drive and Aston is faster. The choice is yours. :-)
Hints: The first track of this tournament is located in Washington. It won't be easy to win here, since you'll be struggling in the first section of the lap. Nevertheless, you should focus on having a perfect start. Choose sharper corners for places to perform overtaking maneuvers. Don't forget that you'll be allowed to cut through some of the corners (screen) without having to worry about losing control over your car. Avoid ramming into other vehicles, because these crashes may send you somewhere outside the track.
The second race is in Shibuya and you shouldn't be surprised to hear that it's going to be the easiest one. Use the fact that your rivals are slow here and attack them from the inside whenever you're close enough to them. Watch out near the roundabout, because it's easy to crash there.
Istanbul Park is an easy track, however you'll be going in an opposite direction, so it'll make your life more difficult. Watch out for the hairpins which can be found near the start. The most difficult section is the sharp right turn (screen) which is located in the middle of the track. You'll be travelling at a high speed there and you won't notice it if you don't know that it's there. Look on the minimap and brake once you're close enough to it. Some of the other corners are also quite challenging, however you should be able to reach the finish line without any major problems.
Jarama circuit is one of the easiest events of the tournament. There's nothing you should be worried about while racing here. Try cutting through most of the corners and maintain optimal speed while going through both hairpins. You're probably familiar with the layout of the track, so you'll know where to brake and where to accelerate.
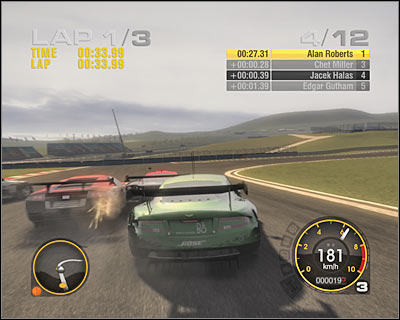
It's been some time since you've last raced in Long Beach, so you should take it easy, especially since there are a lot of difficult corners here. Choose these bends for places to overtake other players (screen). I wouldn't recommend cutting through smaller chicanes. You should also stay away from the barriers, because you may hit a tire wall instead.
Prototype - Castrol Prototype Series
Number of races: 5
Tracks: Long Beach - Classic Circuit; Washington - Grand Prix Circuit; Nurburgring - Grand Prix Circuit; Milan - Circuito di Milano; Spa Francorchamps - Grand Prix Circuit
Best car: Since you're capable of choosing LMP1 class vehicles as well, there's only one vehicle you should be interested in. Obviously I'm talking about an Audi R10 TDI. You've probably used this car many times before, mostly during Le Mans 24 Hours events. If by any chance you don't like the car, consider choosing a Ford Doran JE4 instead. It's slower than the Audi, however it's easier to control.
Hints: This is going to be a quite challenging tournament. The biggest difficulty is that you'll have to take control over an extremely powerful car. Some of the tracks are going to be narrow, so you'll have some problems navigating through the corners. Also, don't forget that all the vehicles from the LMP1 class tend to become unstable at lower speeds. Prevent them from sliding or you're going to crash. Winning in all five events is possible, however you won't have to fight so hard to be the first one in each event. Try winning at least three times. As for the remaining two races, podium finish is going to be more than enough to succeed in the overall standings.
The first race of the tournament is going to be one of the most difficult ones, especially since you will have to deal with a large number of tight bends. Also, you won't be allowed to crash into other vehicles, because you can't win a race in a damaged car. Thankfully, you will have a few opportunities to overtake other vehicles (screen). Watch out for a few narrow sections, including the tunnels.
Washington also has a challenging circuit. It's important that you don't make any mistakes here, especially after the race has started. Watch out while going through some of the fasters corners, because you may lose control over your vehicle for a split second. There are some hairpins and tight corners on the track and that's when you'll have to perform overtaking maneuvers.
The third race in the calendar is on the Nurburgring circuit. It shouldn't be a problem to win here, especially since AI drivers are moving slowly. Use the first hairpin to overtake as many vehicles as possible, however don't try cutting through this corner too aggressively or you'll lose control over your car. The second area where you have to be careful is the final chicane.
Action of the fourth race of the tournament takes place in Milan. This seems to be the most difficult event of these series, mostly because you'll be dealing with a very narrow track. You won't be allowed to make any mistakes. Watch out near the finish line, because you'll be travelling at very high speeds. You won't be allowed to slow down, so you'll have to adjust your driving line constantly (screen), especially since exceeding a top speed of 340-360km/h isn't something out of the ordinary here. As for slower section, watch out for the area near the roundabout and prevent your car from hitting the barriers or the tire walls.
Spa circuit is the final event of this championship. It's not going to be too difficult, however knowing the track and the capabilities of your vehicles are key points to success. Cut through the first corner and start accelerating. Be careful in the middle of the track - you won't be allowed to slow down there. The final section will require you to travel at a full speed. Thankfully, even if you'll end up outside the track, you'll still remain on the asphalt, so you won't have to worry about anything else.
Pro Tuned - Kenwood Global Series
Number of races: 5
Tracks: San Francisco - Grand Prix Circuit; Washington - Park Circuit; Jarama - Grand Prix Circuit; Shibuya - Street Circuit; Okutama - Sprint Circuit B
Best car: You will have to make an important decision when it comes to choosing a car for this event. You can choose a car which is easier to drive or you can choose a vehicle which will allow you to overtake your rivals much faster. The easiest vehicle to handle is a Ford Mustang GT-R Concept. If you're all about the performance, consider using a Nissan Skyline GT-R Z-Tune instead, however take under consideration that it's going to be harder to cut through some of the corners in this vehicle and you'll have to prevent it from sliding too much.
Hints: This is one of the easier tournaments of the global group, mostly because all the vehicles are easy to drive, so you won't have to focus all your attention on trying to maintain a good racing line. Only a few vehicles (for instance - a Viper) are trickier to handle, however you should have learned to avoid them by now. As for the tracks, you will in fact be racing around the world and you should know that only a few events are going to be more difficult. In most cases, you'll be able to win as long as you don't make any major mistakes.
The first track of the tournament is the San Francisco GP circuit. You've raced here many times before, so you won't be surprised by any new elements. Nevertheless, you should stay focused throughout the entire race, especially while performing small jumps (screen). Other drivers will push hard here, so you won't be allowed to slow down.
The Washington circuit will require you to plan each move very carefully, especially in the open section. Thankfully, you'll be dealing with a shorter version of the circuit. Don't forget to turn left at some point of the race, instead of moving forward as usual.
You've probably never been to the Jarama circuit in a muscle-bar before, however it's not a problem, because you won't have to change your driving style. This means you'll only have to watch out for two hairpins, because it's easy to make a mistake there. As for other corners, try cutting through some of them to gain time over your opponents.
The fourth track of the tournament is also going to be an easy one. Use the fact that AI controlled players tend to slow down a lot. Watch out while going through some of the faster corners, however it's nothing you should be worried about, as long as you keep drifting a little.
The final track of the tournament is one of the shorter variations of Okutama circuit. As you've probably suspected, you will have to be very careful here. Thankfully, due to lower performance of these vehicles it's going to be much easier to stay on the track. As for your rivals, try overtaking them somewhere in the middle of the track (screen). Avoid hitting them at the same time. There's a high probability of losing control over your vehicle and you would lose too much time trying to get back on the road.
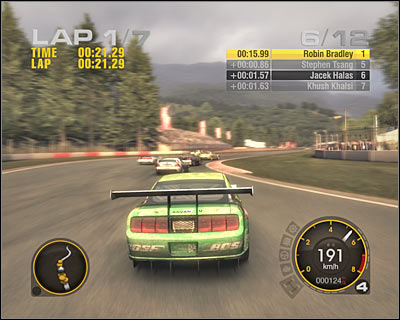
Prestige - Head 2 Head
Important! Participating in this duel is possible only when you've won all three tournaments from this group!
Hints: This is going to be the final duel in the career mode. As a result, you shouldn't be surprised to see that the game will make your run as hard as impossible. First of all, you will have to play on the highest Extreme difficulty level. You won't be allowed to lower the difficulty level on your own. This means your opponent is going to be more skilled at what he's doing and you won't be allowed to use flashbacks. You will be given only one flashback for this race, so you'll have to preserve it, instead of using it to correct smaller mistakes.
The final duel is going to take place in Le Mans, however you'll be dealing with a shorter version of this circuit. Nevertheless, your objective will be to complete three full laps which is going to take you about eight minutes. Also, you'll be forced to sit behind the well of a Koenigsegg. As you probably remember, it's a very unstable car, so you will have to be extra careful, especially while going through slower turns. Prevent the vehicle from sliding, because it's only a step away from spinning it and you losing the entire event. You won't be allowed to leave the asphalt road or even cut through the corners. Your only chance of winning this event is to drive flawlessly and to defend yourself against attacks of your rival.
Let's sit down and see exactly what this track has to offer, shall we? Once you've started, you'll probably notice that your rival has taken the lead. It's crucial to your success that you take the first place away from him once you've reached the first chicane (screen). You could try cutting through the gravel trap, however you would probably lose control over your vehicle. The same goes with two other laps when you'll have to be even more careful here.
You will have to deal with a few simple corners. Once this is done, you'll end up on the main straight section of the track (screen). It's very important that you maintain a maximum speed of your vehicle (364 km/h) throughout this entire part of the lap. You won't be allowed to make any sudden turns and you can't find yourself on the red section of the track, because your rival would immediately catch up to you and took the lead. You'll finally reach a very tight corner. Use the brakes early, so you won't end up dangerously close to the gravel trap.
Start accelerating once again, however this time you'll reach a new set of corners earlier than before. Cut through the first mild curve at full speed, however use the brakes before approaching the second one (screen). Try staying on the main track, so you won't have to worry about your car making any sudden moves. The final third corner is quite easy to pass through, as long as you maintain an ideal racing line.
The final part of the circuit will require you to deal with five mild corners (screen). I would recommend using the brakes only twice - before the first and fourth corner. As for the remaining three, you should be able to pass through them without any problems. There are also two chicanes in front of the finish line. Be careful here, because you can't hit any of the tire walls.

As for the remaining two laps, it's crucial that you don't make any mistakes. If you maintain good pace throughout the entire race, you won't have to worry about your opponent attacking you constantly. I would recommend that you spare your flashback for the last lap, because that's where you'll probably make some kind of a mistake. Good luck! :)
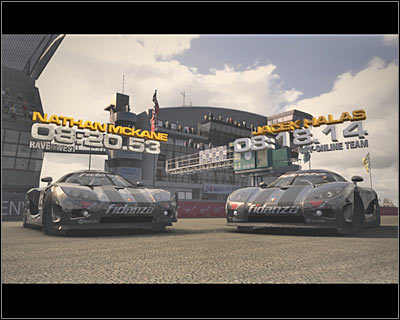
24-hour race in Le Mans appears on your list at the end of each season and you'll probably finish 16-17 of those, depending on how many times you'll repeat some of the tournaments and how many Driver Offer challenges you've decided to participate in. I wouldn't recommend skipping this event, even when you don't have enough money to buy a vehicle. If you're short on cash, consider choosing one of the challenges by joining other teams only for this one event. It's important that you're always using the fastest car in your class during the event, so you won't have to worry about other players attacking you throughout the course of an entire race. This becomes very frustrating and may result in you making a lot of mistakes. Remember that it's a long race, because you'll have to be focused for 12 whole minutes.
Here are some of the most difficult sections of this track:
1) Obviously you should focus on having a good start. It doesn't really matter which class you're riding in. Approach the hill and go through the first chicane safely (screen). Depending on your car, you'll have to stick to the ideal racing line or you can try cutting through the corner. You'll have to figure out on your own whether you'll be allowed to play more aggressively or not.
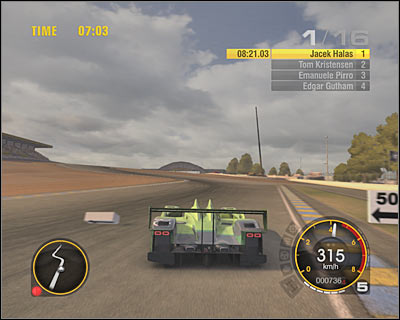
2) Some of the upcoming corners may be tricky, especially the left one (screen). You won't be allowed to leave the track, because there's a high probability of spinning the car or being caught by a gravel trap. A mild curve leads to the first straight section of the road. You can try cutting through the grass or you can maintain a perfect racing line. You should be able to familiarize yourself with these corners after a few laps. Only the first one can be painful.
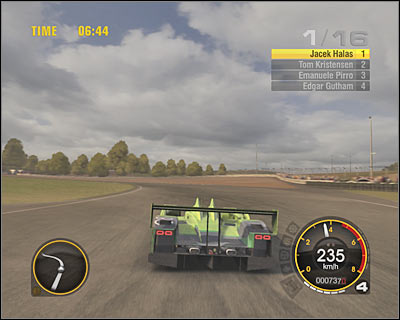
3) Reaching a new set of corners is going to take you a lot of time. Depending on the performance of your vehicle, it can take up to you 15-20 seconds. Use the brakes the second you've noticed a tire wall in the background. I wouldn't recommend cutting through this chicane too aggressively (screen), especially if this one of your first runs. Nevertheless, try exiting the chicane as fast as possible, so you won't have to wait too long for your car to achieve maximum speed.
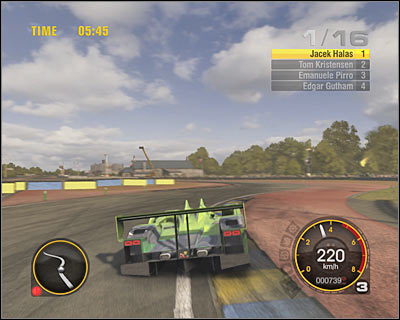
4) This time it's going to take you less time to reach a new set of corners. You'll have to deal with a very tricky chicane (screen). Use the brakes early. You could try moving a little to your left, however you would have to avoid ending up on the grass or near a gravel trap. If this is your first run, maintain a perfect racing line through these bends.
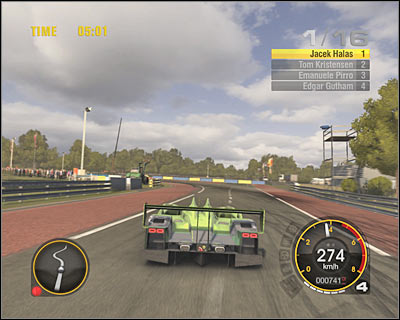
5) Once again, you will have to accelerate. Use the brakes near a mild corner which is going to be followed by a very difficult corner (screen). It's EXTREMELY important that you don't brake too late, because you would have ended up in a gravel trap. Also, you won't be allowed to cut through this corner, because there's a tire wall here.
6) I guess you won't be surprised to hear that once again you'll have to start accelerating. You should be able to reach a mild corner very soon. Go through it at maximum speed, however use the brakes once you're close enough to a much tighter turn (screen). I wouldn't recommend cutting through it, because you could lose control over your vehicle. The third corner will require you to turn right. Consider cutting through the grass, however it can be dangerous. It all depends on what type of a vehicle you're using for this race.
7) It's going to take you about 10-15 seconds to get to a new difficult area of the lap. Your objective will be to go through five mild curves. I suspect that it's going to be some time until you've mastered them. It's very important to slow down the car before approaching the first corner. Accelerate near the second one (screen) and remain at a similar speed near the third corner. Brake before approaching the fourth corner and then accelerate once more to go past the last one.
8) The final part of the lap will require you to go through two tight chicanes, built out of tire walls (screen). You won't be allowed to hit these obstacles for obvious reasons. I would recommend slowing down here, especially if your car has difficulties going through tight corners.
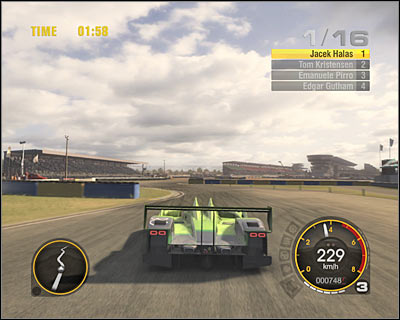
I've mentioned many times before that you should consider buying only one car in each group, obviously the one that suits your needs the most. This becomes an important matter especially in the early stages of the career mode, when you don't have enough money to purchase all available vehicles. This chapter of my guide contains a full list of available cars. I've also pointed out which ones are interesting.
Here are some of the best cars from each class. Buying them isn't equal to winning all events without encountering any problems, however they'll make your life a lot easier. I've displayed only those classes which have more than one car in stock.
Pro Muscle category - Ford Mustang GT-R Concept
Prototype category - Ford Doran JE4
Touring Cars category - BMW 320SI
Drift category - Toyota Soarer
GT2 category - Panoz Esperante
GT1 category - Saleen S7R
LMP2 category - Lola B05/40
LMP1 category - Audi R10 TDI
Prestige category - Pagani Zonda R
Pro Tuned category - Nissan Skyline GT-R Z-Tune
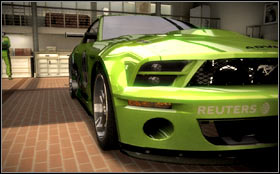
Ford Mustang GT-R Concept (C class)
V Max 3,5/5 Acceleration 3/5
Grip 3,5/5 Brakes 3/5
One of the best vehicles in this category. Mustang is very easy to handle, so you shouldn't have any problems winning races in it.
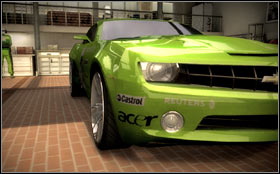
Chevrolet Camaro Concept (D class)
V Max 3/5 Acceleration 3,5/5
Grip 3/5 Brakes 3/5
This is a much worse car than Ford Mustang GT- Concept. The only advantage of having it is being able to accelerate faster. Sadly, Camaro has a lower top speed value and it's more difficult o handle on the track.
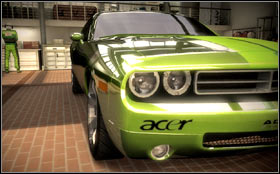
Dodge Challenger Concept (D class)
V Max 3/5 Acceleration 3/5
Grip 3/5 Brakes 3/5
This is also a bad choice. This Dodge model is slower than you would expect it to be. The good news is that you won't have any problems driving it, but it's not enough to consider buying one.
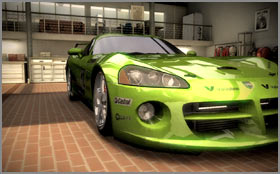
Ford Mustang Boss 302 (E class)
V Max 3/5 Acceleration 3/5
Grid 2,5/5 Brakes 2,5/5
You won't have to purchase this vehicle on your own, because your first goal in the career mode is to gather enough money to buy it. I would recommend ignoring it later on during the course of the game. It should be used only to win one or two tournaments.
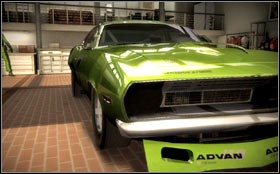
Plymouth AAR Cuda (E class)
V Max 2,5/5 Acceleration 3/5
Grip 3/5 Brakes 2,5/5
This is by far one of the coolest looking muscle-cars, however you shouldn't buy it, not unless you've got enough money to cover such expenses. Mustang Boss 302 is a better choice for some of the introductionary tournaments. Cuda is slower and it's also quite expensive.
Dodge Viper SRT-10 (C class)
V Max 3,5/5 Acceleration 3,5/5
Grip 3/5 Brakes 3/5
Viper seems to be the best car of the category, however it's extremely difficult to drive, so you won't be able to pull off amazing lap-times. I would recommend purchasing a Mustang (GT-R Concept) instead.
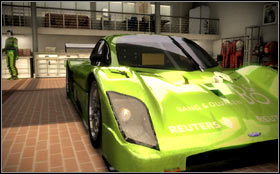
Ford Doran JE4 (A class)
V Max 4/5 Acceleration 4/5
Grip 3,5/5 Brakes 3,5/5
This is a very interesting car. Doran is one of the best vehicles in the entire game. Not only you'll be quick, but you also won't have to worry about staying on the track. Use this car to win some of the most difficult events.
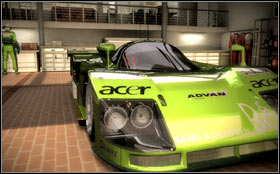
Mazda 787B (A class)
V Max 4/5 Acceleration 4/5
Grip 4/5 Brakes 3,5/5
Mazda often appears in pair with the Nissan, so you can't really compare it Ford. Nevertheless, this is a very interesting car. It's fast and easy to handle.
Nissan R390 GT-1 (A class)
V Max 4,5/5 Acceleration 3,5/5
Grip 3/5 Brakes 3,5/5
Nissan is better than Mazda only when it comes to top speed. The rest is awful - it has a poor acceleration value and it's difficult to drive. You shouldn't consider buying this car, especially since it's very expensive.
Jupiter Eagleray MK5 (E class)
V Max 1/5 Acceleration 1,5/5
Grip 2/5 Brakes 0,5/5
Ignore the fact that Jupiter is a very slow car, because you'll only have to use it once during the course of the career mode. It's needed to win a Demolition Derby cup. You may sell it afterwards.
Chevrolet Lacetti (E class)
V Max 2,5/5 Acceleration 3/5
Grip 3/5 Brakes 3/5
Lacetti is a much easier car to drive than the BMW, so you should consider buying this vehicle if you're a less experienced player. Sadly, it's also very slow.
BMW 320SI (E class)
V Max 2,5/5 Acceleration 3,5/5
Grip 3/5 Brakes 2,5/5
BMW 320SI will satisfy more experienced drivers. This is a much faster car than the Lacetti. The only disadvantage of using it that it slides a lot. Nevertheless, you should be able to win all events from this category with the BMW.
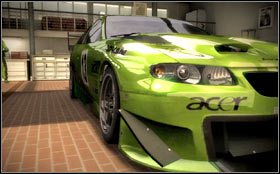
Pontiac GTO (E class)
V Max 3/5 Acceleration 3/5
Grip 2,5/5 Brakes 3,5/5
Pontiac GTO is a very interesting car. I would recommend taking it for a spin, so you'll find out whether you feel the same way about it.
Dodge Charger SRT-8 Drift (D class)
V Max 3/5 Acceleration 3/5
Grip 2,5/5 Brakes 3,5/5
Dodge Charger is one of the worst cars in the Drift category. It's very "clumsy" and it's not fast enough to be able to compete with other vehicles. I would recommend choosing a car made in Japan instead.
Mazda RX-7 FD3S (D class)
V Max 3,5/5 Acceleration 4/5
Grip 2/5 Brakes 3/5
Mazda RX-7 will satisfy only the most experienced players, because it's extremely difficult to control. If you aren't skilled at drift events, you'll spend more time fighting with the car rather than pulling off good drifts.
Toyota Soarer (E class)
V Max 3/5 Acceleration 3/5
Grip 4/5 Brakes 3,5/5
Toyota Soarer, on the other hand, is one of the best vehicles in its class. The biggest advantage of using it is that it's very easy to drive. It should allow you to win all events without any problems, except for some of the Drift Battle challenges, because that's where a faster car is needed.
Subaru Impreza (D class)
V Max 3/5 Acceleration 3,5/5
Grip 3/5 Brakes 2,5/5
Honestly this is one of the worst cars in this category. Subaru isn't fast and it doesn't provide you with as much grip as you would probably wanted to. It's better to decide on buying something else.
Toyota Corolla GT-S (AE86) (E class)
V Max 2,5/5 Acceleration 3/5
Grip 4/5 Brakes 4,5/5
This is one of the slowest vehicles in this category, so you should consider buying it only if you're a less experienced player. You'll be rewarded with an excellent handling capabilities. Nevertheless, Soarer is a better choice, however Corolla is much cheaper.
Nissan Silvia (D class)
V Max 3/5 Acceleration 1,5/5
Grip 3,5/5 Brakes 3,5/5
Interesting car, however it's also quite slow. Easy at drifting, so you should at least give it a chance by testing it on one of the available circuits.
Panoz Esperante (C class)
V Max 3/5 Acceleration 3/5
Grip 2,5/5 Brakes 3,5/5
Panoz Esperante is one of the slowest vehicles, so you shouldn't use it to win other races. Choose this car only if you have to win a GT2 tournament in order to advance in the career mode. Thankfully, it's a cheap car (for its class), so you won't have to spend too much money on it.
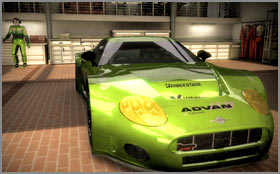
Spyker C8 Spyder (C class)
V Max 3,5/5 Acceleration 3/5
Grip 2,5/5 Brakes 2/5
Spyker is slightly faster than Panoz, however it handles HORRIBLY. This becomes an issue especially if you have to visit a track filled with a lot of difficult corners. Use this car only if you don't have any other alternatives.
Chevrolet Corvette C6-R (B class)
V Max 3,5/5 Acceleration 3/5
Grip 3/5 Brakes 3,5/5
C6-R seems to be worse than its predecessor - C5-R. This vehicle is more difficult to drive and has a lower top speed value.
Chevrolet Corvette C5-R (B class)
V Max 4/5 Acceleration 3/5
Grip 3,5/5 Brakes 3/5
This is a much better car than C6-R, mostly because it's easier to control on the road. It's also one of the best vehicles of the GT1 segment.
Saleen S7R (B class)
V Max 3,5/5 Acceleration 3/5
Grip 3,5/5 Brakes 3/5
Saleen S7R is by far the best car in the GT1 class. It may not be as fast some of the other vehicles (including Chevy C5-R), however it's extremely easy to control. I'm sure that you'll win a lot of events thanks to this car.
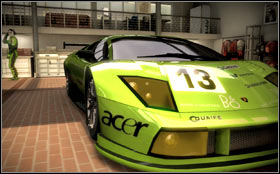
Lamborghini Murcielago RGT (B class)
V Max 3,5/5 Acceleration 4/5
Grip 3/5 Brakes 3,5/5
This is one of the worst cars in this class. Murcielago is extremely fast, but it's the only advantage of having this car. There are many other problems, including the steering. RGT is unstable at lower speeds, so you shouldn't buy it unless you're a professional player who knows how to control it.
Aston Martin DBR9 (B class)
V Max 3,5/5 Acceleration 3,5/5
Grip 3/5 Brakes 2,5/5
You can achieve a lot with an Aston Martin DBR9, as long as you don't mind how it handles on the road. It's very manoeuvrable while taking sharp turns and that may a problem to you. If not, consider buying it instead of Saleen.
Koenigsegg CCGT (B class)
V Max 4/5 Acceleration 4/5
Grip 3,5/5 Brakes 3,5/5
This is an extremely fast car, but all this power has its price. Koenigsegg is very difficult to handle, so you should consider using it only if you aren't allowed to choose other vehicles from this group.
Dallara Formula 3 (C class)
V Max 3/5 Acceleration 3,5/5
Grip 4/5 Brakes 4/5
Dallara Formula 3 is the only Formula 3 vehicle featured in the game. You'll participate in a few tournaments, so sooner or later you're going to have to buy one.
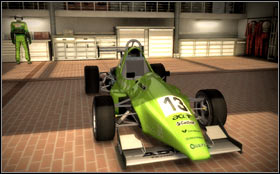
JRC FJ1000 (E class)
V Max 2/5 Acceleration 3,5/5
Grip 3,5/5 Brakes 3,5/5
This is also where you aren't allowed to choose a car. All the competitors are using JRC FJ1000 vehicles. They're much slower than Formula 3 cars (and cheaper).
TVR Tuscan Challenge (E class)
V Max 3/5 Acceleration 3,5/5
Grip 3/5 Brakes 3,5/5
Tuscan is one of the most difficult vehicles to handle in the entire game. You will have to be very careful in order to prevent this car from spinning and crashing. Thankfully, you will be using it only in a few events.
Courage C65 (A class)
V Max 3,5/5 Acceleration 3,5/5
Grip 4/5 Brakes 4,5/5
This car was added to satisfy less experienced drivers. Courage is easy to handle and it has excellent braking system. Sadly, it's not as fast as you'd want it to be.

Lola B05/40 (A class)
V Max 3,5/5 Acceleration 4/5
Grip 4/5 Brakes 4,5/5
Lola is a more interesting car than Courage C65, mostly because it accelerates better. As a result, you won't have any problems overtaking other drivers, especially in the Le Mans race.
Audi R10 TDI (A class)
V Max 5/5 Acceleration 4,5/5
Grip 4,5/5 Brakes 5/5
This is by far the best vehicle in the game. R10 not only is extremely fast, but it also handles very well. Sadly, it's a very expensive car. Nevertheless, consider purchasing it as soon as possible, because you'll be allowed to use it in the Le Mans race.
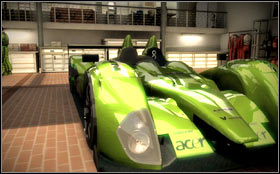
Courage LC70 (A class)
V Max 5/5 Acceleration 4,5/5
Grip 4/5 Brakes 3,5/5
LC70 is a slightly worse car than the R10. You can out on similar performance, however this vehicle is more difficult to drive and it also has some problems with the brakes. I would recommend ignoring it, especially since it's also quite expensive.
Creation CA06/H-JUDD (A class)
V Max 4,5/5 Acceleration 4/5
Grip 4/5 Brakes 4/5
Creation is very similar to Courage LC70. It seems to be a little better, however there's still a large gap separating this vehicle from the Audi, especially when it comes to performance.
Lola B06/10 (A class)
V Max 4/5 Acceleration 4/5
Grip 4/5 Brakes 3,5/5
Poor choice. It seems that Lola B06/10 should be placed in the LMP2 class instead. It doesn't stand a chance compared to other vehicle of this group.
Koenigsegg CCXR (A class)
V Max 4,5/5 Acceleration 3/5
Grip 3,5/5 Brakes 3/5
This is a slightly faster model than the CCGT from the GT1 category, however it's even more difficult to handle. You will have to go through almost each corner sliding a little and even a smallest mistake will send you off the main road.
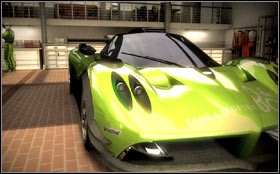
Pagani Zonda R (A class)
V Max 4/5 Acceleration 4/5
Grip 3/5 Brakes 3,5/5
This is a much better car than the Koenigsegg. If you look at the value bars, you may think that Zonda should be worse, but in reality it's much better, especially when it comes to handling. You won't have to worry about losing control over this vehicle.

Nissan Skyline GT-R Z-Tune (C class)
V Max 3/5 Acceleration 3,5/5
Grip 3,5/5 Brakes 3/5
This is one of the best vehicles in this class. Skyline is fast, however it can surprise its owner from time to time with an unexpected maneuver. Nevertheless, you should at least test drive it.
Nissan 350Z (D class)
V Max 3/5 Acceleration 3,5/5
Grip 3/5 Brakes 3/5
350Z is very similar in handling and performance to Skyline GT-R Z-Tune. This car a little slower than its "big brother", however it's also easier to drive.
Honda NSX-R (C class)
V Max 3,5/5 Acceleration 3/5
Grip 3/5 Brakes 2,5/5
I wouldn't recommend purchasing this vehicle, because it's difficult to drive, it accelerates slowly than the Skyline and it has poor braking capabilities.
Toyota Supra (D class)
V Max 3,5/5 Acceleration 3/5
Grip 3/5 Brakes 3/5
Toyota Supra is only slightly better than the Honda. It has even worse acceleration value, so you won't be able to use it on some of the open tracks.

 Rise of Nations: Rise of Legends Game Guide & WalkthroughRed Dead Redemption Game Guide & WalkthroughResident Evil 6 Game Guide & Walkthrough
 Risen Game Guide & Walkthrough
 Resistance 3 Game Guide & Walkthrough