
This guide to the Nightmares from the deep: The Siren's Call includes a detailed walkthrough for all of the chapter of the game, as well as solutions to all puzzles, and whereabouts of all collectibles (Collectibles and Puzzles).
This guide has been color-coded in the following manner:
- orange: characters
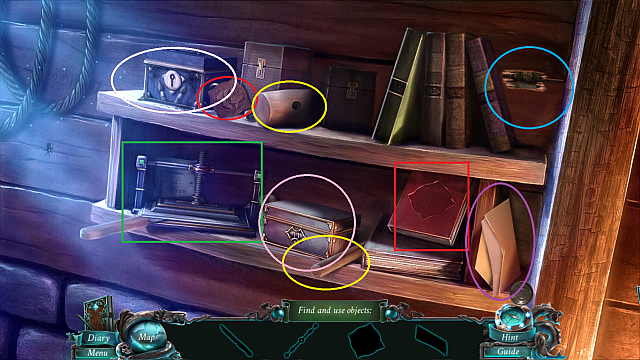
- green: items
- bold: locations
- Bold + Italics: references to the Puzzles subchapter
- Italics: references to the Hidden Objects subchapter
- [digit]: reference to a specific screenshot
The HOP acronym, which often appears in the text, stands for Hidden Object Puzzle. Because this type of puzzle that consists in finding hidden objects, are random, the ways to solve them have not been included in the text. Ones that are not random, have been included in the Hidden Objects subchapter.
()
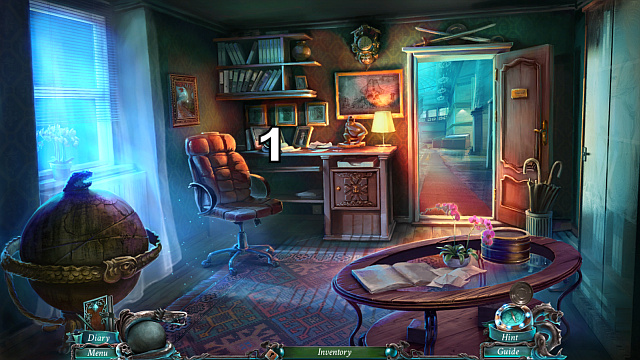
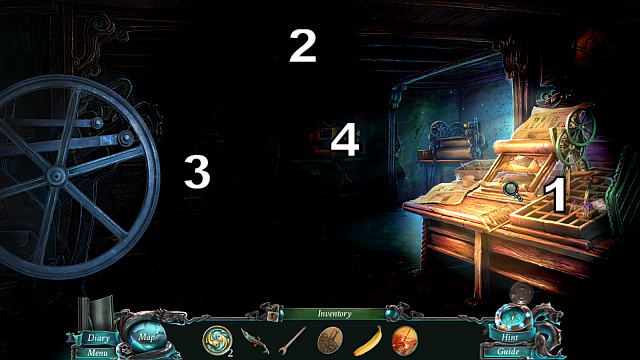
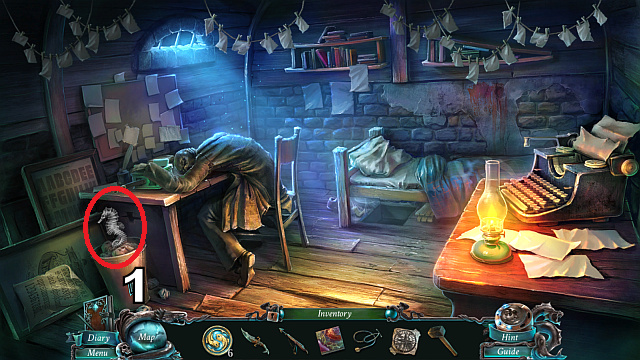
The game starts in your office. Click on the intercom [1], and listen to your guest. Then, let him in.
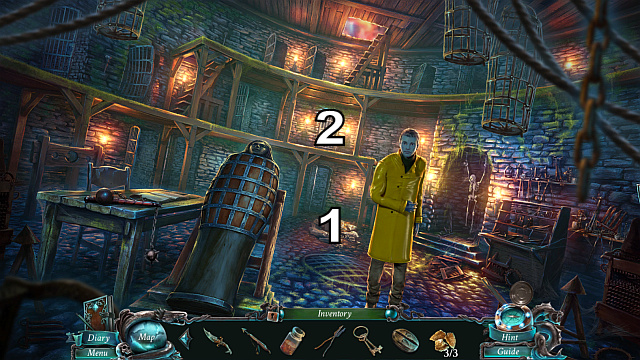
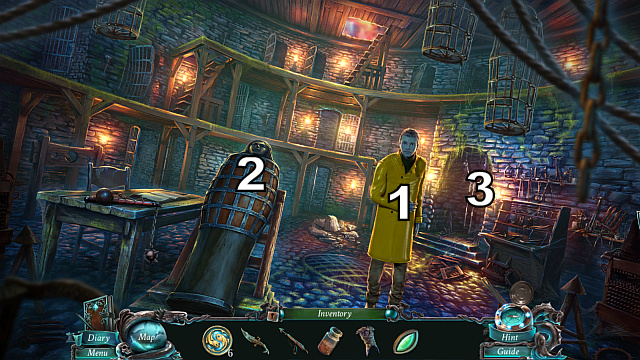
Walk over to the corridor and talk to the man in the yellow coat. [1] Then, approach the cabinet and collect the keys from there. [2]
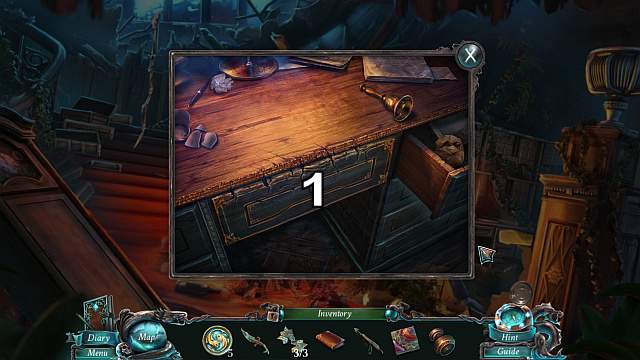
![Return to the office and use the keys to open the drawer [1] - Chapter 1: An Unexpected Guest - Walkthrough - Nightmares from the Deep: The Sirens Call - Game Guide and Walkthrough](https://game.lhg100.com/Article/UploadFiles/201512/2015121618374503.jpg)
Return to the office and use the keys to open the drawer [1]. Collect scissors and return to your guest.
![Use the scissors to cut the package open [1] - Chapter 1: An Unexpected Guest - Walkthrough - Nightmares from the Deep: The Sirens Call - Game Guide and Walkthrough](https://game.lhg100.com/Article/UploadFiles/201512/2015121618374603.jpg)
Use the scissors to cut the package open [1].
![Approach the cabinet from, which you collected the keys, again[1] and fish for the artifact behind the smashed glass[2], which you need to put inside the packet - Chapter 1: An Unexpected Guest - Walkthrough - Nightmares from the Deep: The Sirens Call - Game Guide and Walkthrough](https://game.lhg100.com/Article/UploadFiles/201512/2015121618374660.jpg)
Approach the cabinet from, which you collected the keys, again[1] and fish for the artifact behind the smashed glass[2], which you need to put inside the packet.
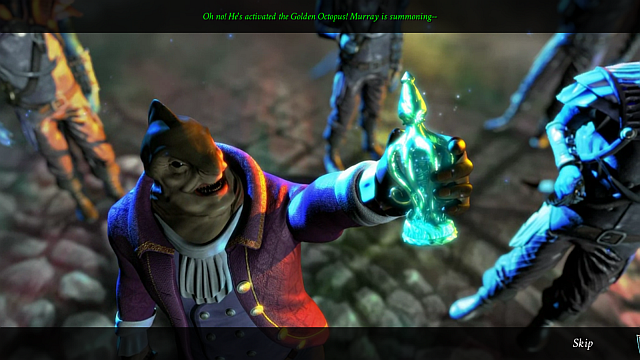
It is time for a puzzle now (Chapter 1: A puzzle). After you solve the puzzle, open the packet and collect a statuette of an octopus from there.
Objective completed: Late package
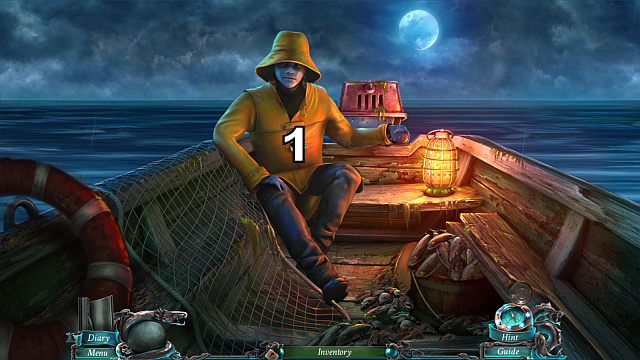
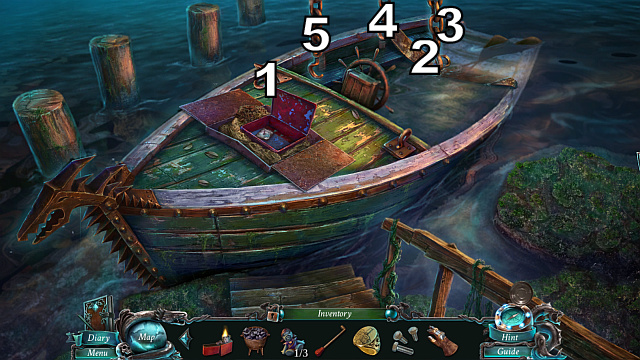
After a short cutscene, you will wake up in a boat. Talk to the fisherman [1].
![After you land on the shore, collect the oar [1] from the boat to the right and follow your companion [2] - Chapter 1: An Unexpected Guest - Walkthrough - Nightmares from the Deep: The Sirens Call - Game Guide and Walkthrough](https://game.lhg100.com/Article/UploadFiles/201512/2015121618374749.jpg)
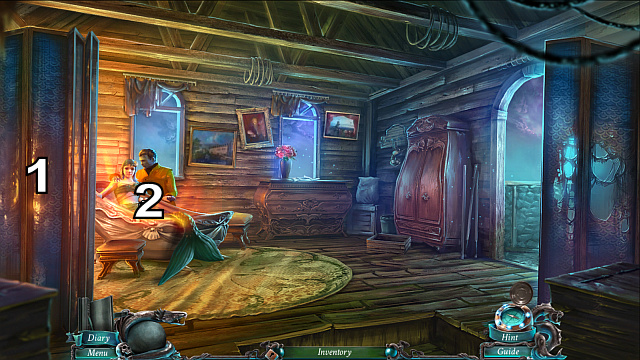
After you land on the shore, collect the oar [1] from the boat to the right and follow your companion [2]. In the corridor, help him barricade the door (by double-clicking LMB on the wardrobe to move it).
![Use the oar to support the other wardrobe [1] - Chapter 1: An Unexpected Guest - Walkthrough - Nightmares from the Deep: The Sirens Call - Game Guide and Walkthrough](https://game.lhg100.com/Article/UploadFiles/201512/2015121618374785.jpg)
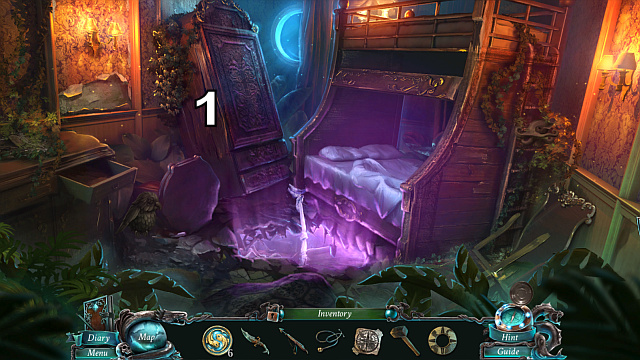
Use the oar to support the other wardrobe [1]. Follow your companion upstairs, to the bedroom [2].
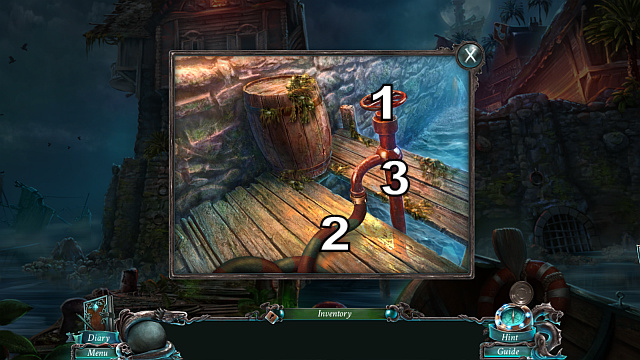
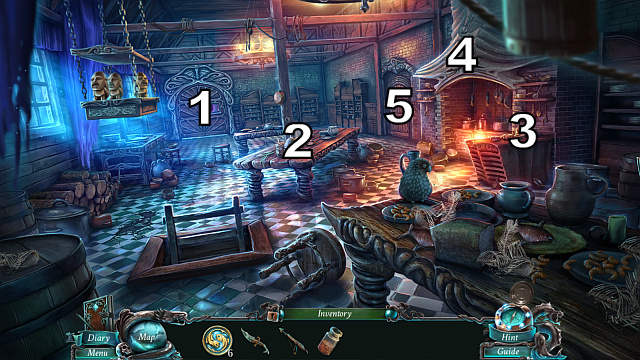
During your attempt to break into the bedroom, a fire will start, which you need to put out. To do that, collect a lid from the coat to the right, and the hose from the closet to left, using the oar. Return to the harbor and use the lid [1] and the hose [2] on the water pump [3]. Open the tap and return to the house.
![Use the hose to extinguish the fire [1] - Chapter 1: An Unexpected Guest - Walkthrough - Nightmares from the Deep: The Sirens Call - Game Guide and Walkthrough](https://game.lhg100.com/Article/UploadFiles/201512/2015121618374823.jpg)
Use the hose to extinguish the fire [1].
Objective completed: Defend the house
Climb up the stairs to the bedroom. Draw back the curtains [1] and talk to Calliope[2]. Take the Golden Fish from her.
Objective completed: Meet Calliope
 Release the Kraken!
After the conversation, go out to the balcony and watch a short cutscene.
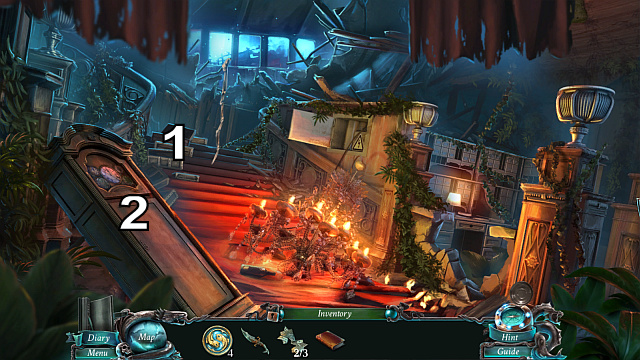
![Your companion is in a bad shape after the octopus's attack [1] and you should help him - Chapter 2: Boats Away - Walkthrough - Nightmares from the Deep: The Sirens Call - Game Guide and Walkthrough](https://game.lhg100.com/Article/UploadFiles/201512/2015121618374940.jpg)
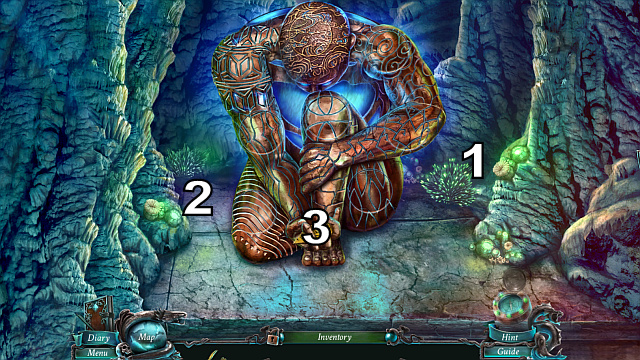
Your companion is in a bad shape after the octopus's attack [1] and you should help him. That is why, you should approach the heap to the left [2]. Solve the puzzle (Chapter 2: Bedroom).
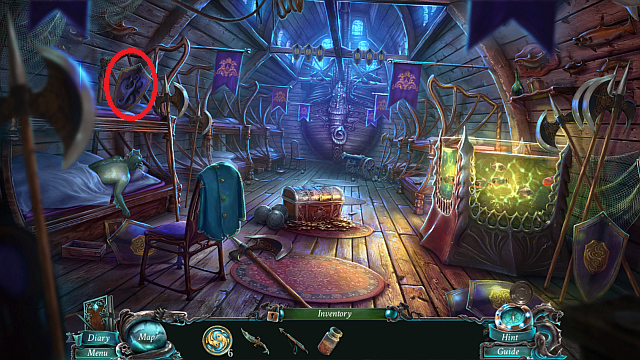
![Use the salts that you have found, on the fisherman and take the map from him [1] (thanks to it, you will be able to fast-travel between locations that you have already visited) - Chapter 2: Boats Away - Walkthrough - Nightmares from the Deep: The Sirens Call - Game Guide and Walkthrough](https://game.lhg100.com/Article/UploadFiles/201512/2015121618374931.jpg)
Use the salts that you have found, on the fisherman and take the map from him [1] (thanks to it, you will be able to fast-travel between locations that you have already visited).
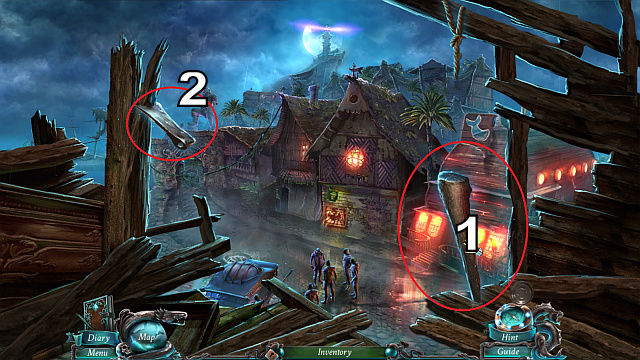
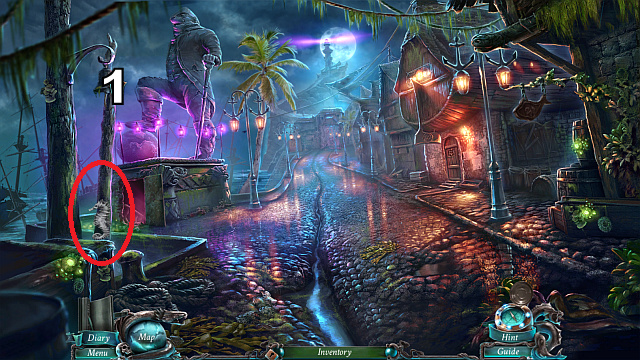
Approach the window to the right. Use the projecting wooden stump [1] on the axe's blade [2], to obtain a hatchet.
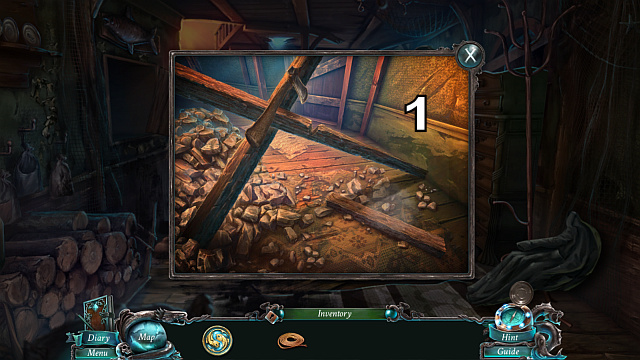
Go down the stairs and to the heap of rubble in front of you. Sweep the rubble away and,. Using the hatchet, chop down the wooden beams [1].
![Talk to the mermaid [1] - Chapter 2: Boats Away - Walkthrough - Nightmares from the Deep: The Sirens Call - Game Guide and Walkthrough](https://game.lhg100.com/Article/UploadFiles/201512/2015121618375044.jpg)
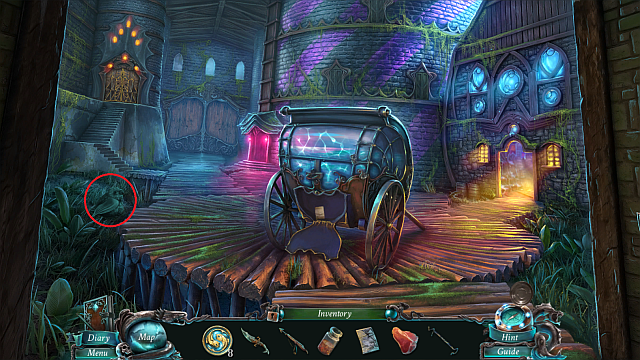
Talk to the mermaid [1]. Use ropes to tie the cart to the wooden planks [2].

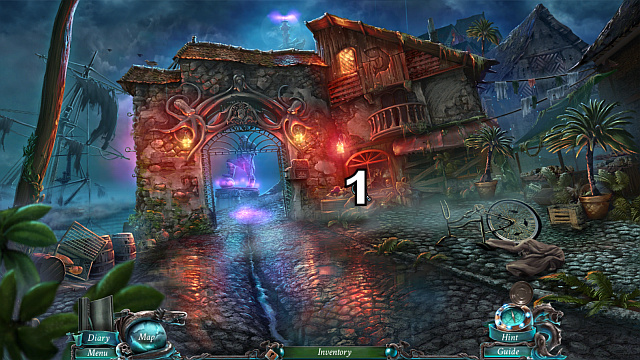
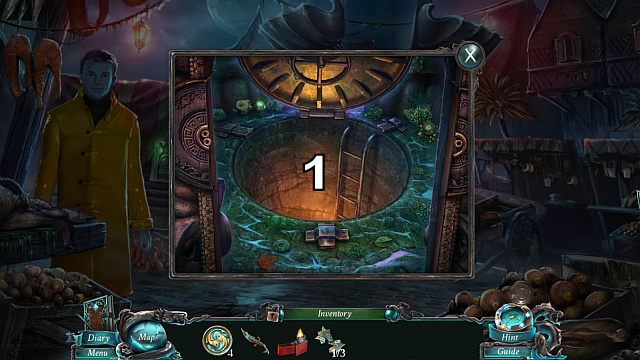
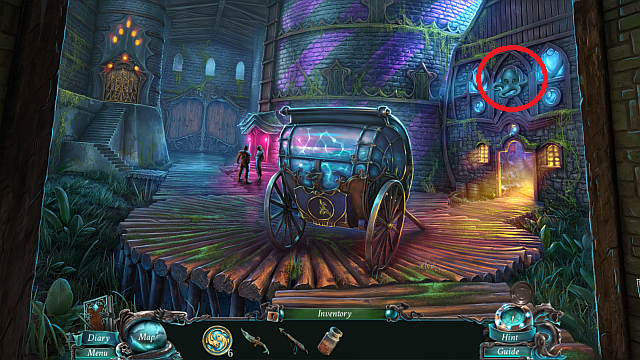
Unfortunately, this will do no good and the horses, along with the trapped mermaid, will ride away. Leaving the opened exit behind [1]. You will find here Golden Octopi [2]. Approach the window [3].
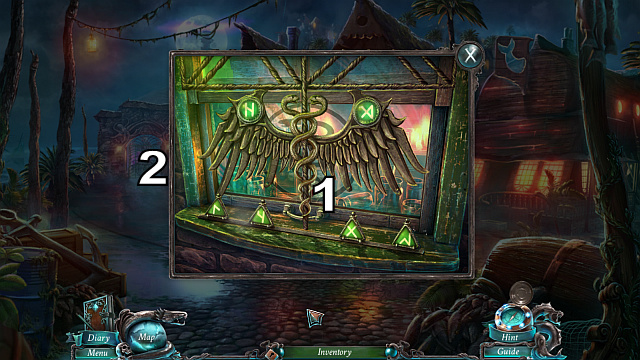
Put together the symbols below n such a way, as to create the symbol shown above (just like on the screenshot). Collect the bondages [1]. Set out for Archway[2].
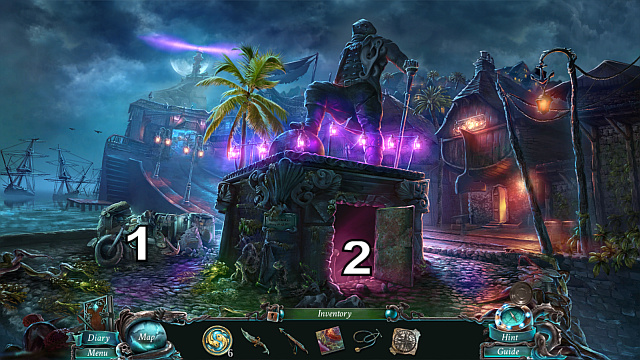
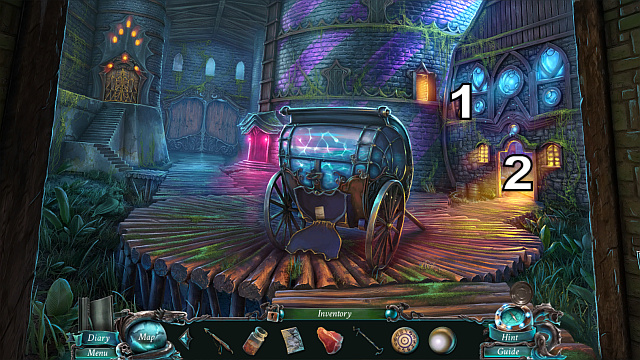
![Remove the blanket from the bike and collect the pedal, and the chain [1] - Chapter 2: Boats Away - Walkthrough - Nightmares from the Deep: The Sirens Call - Game Guide and Walkthrough](https://game.lhg100.com/Article/UploadFiles/201512/2015121618375179.jpg)
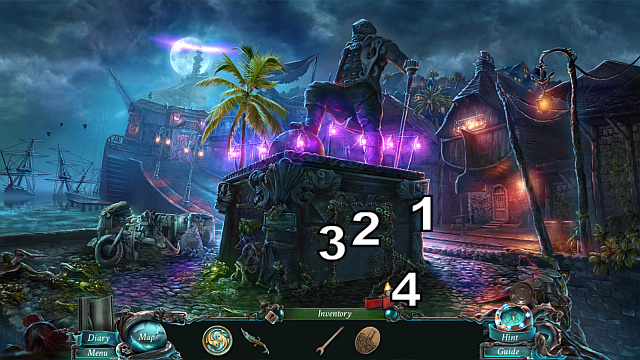
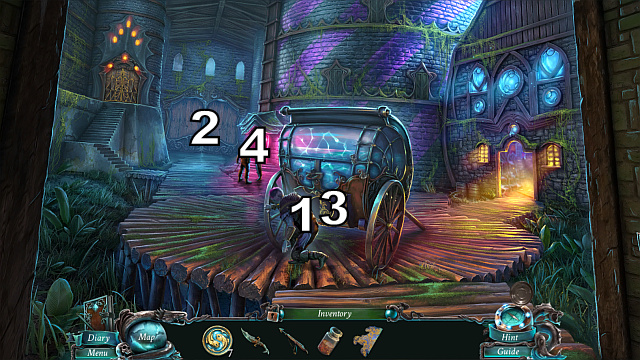
Remove the blanket from the bike and collect the pedal, and the chain [1]. Approach the gate [2] and watch a short cutscene.
Collect a rod from the gate [3]. Examine the mechanism to the right [4]. Collect the Golden Octopi[5].
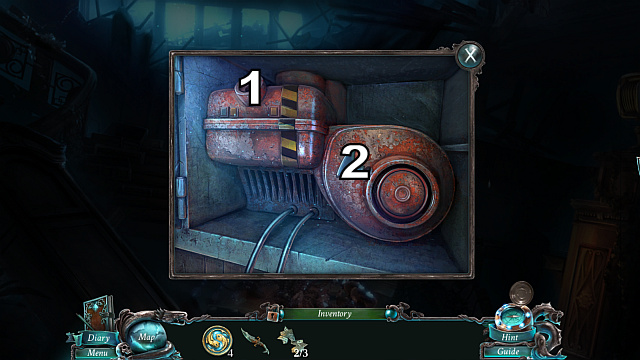
![Into the abovementioned mechanism [1] put the pedal [2] and the chain [3] - Chapter 2: Boats Away - Walkthrough - Nightmares from the Deep: The Sirens Call - Game Guide and Walkthrough](https://game.lhg100.com/Article/UploadFiles/201512/2015121618375170.jpg)
Into the abovementioned mechanism [1] put the pedal [2] and the chain [3]. Then, use the pedal and collect the oilcan [4].
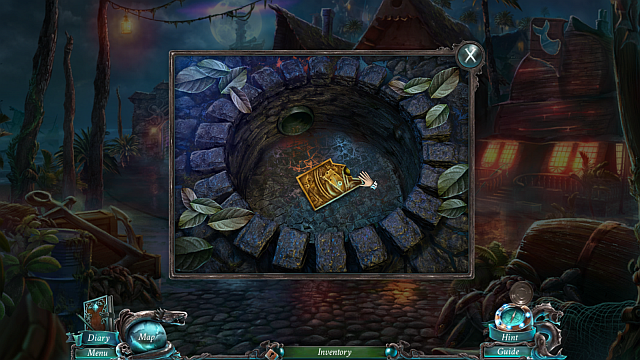
Return to the Square. Note the well [1], remove the leaves from its bottom and use the rod from the gate to pry Collect the mechanism plate. Return to the Bedroom and use the bondage to dress the fisherman's wounds.
Objective completed: Help the wounded fisherman
Collect the dagger and return to the Square. Approach the tavern [2].
![Examine the fishing rod [1] and use the dagger to collect another mechanism plate[2] - Chapter 2: Boats Away - Walkthrough - Nightmares from the Deep: The Sirens Call - Game Guide and Walkthrough](https://game.lhg100.com/Article/UploadFiles/201512/2015121618375389.jpg)
Examine the fishing rod [1] and use the dagger to collect another mechanism plate[2].
Return to the gate (Chapter 2: The Gate).
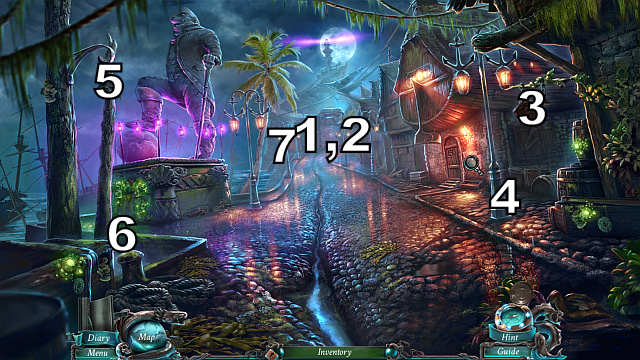
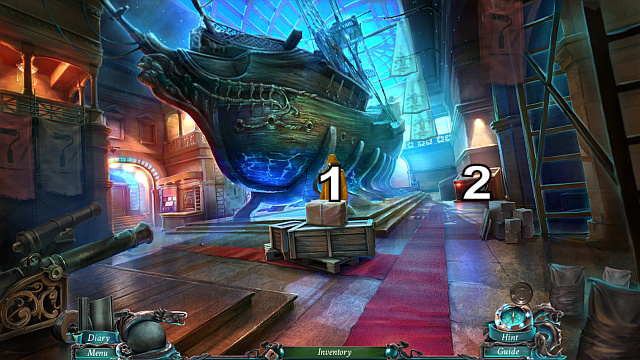
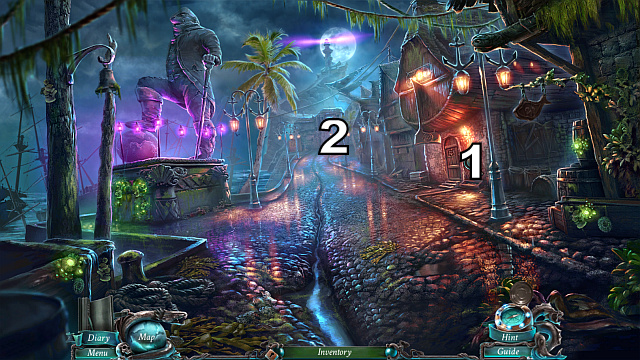
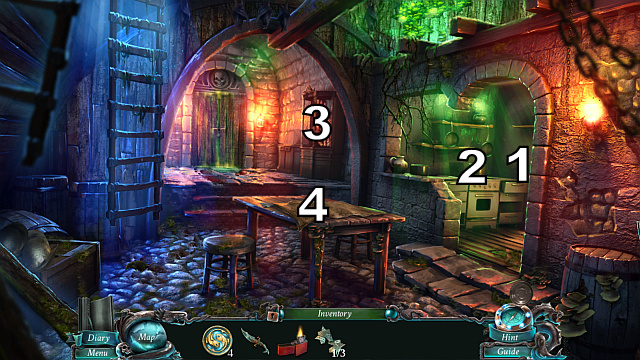
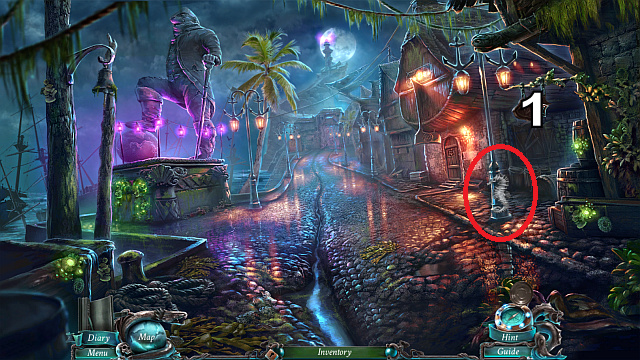
After you wk through the gate, walk towards the Promenade. You will find sea horses hidden here. Interact with the shop sign [3] and the bell [5], and the sea horses will appear in [5] and [6]. Approach the gate. Examine both the gate and the carriage [1],[2]. Turn left and go to the Dilapidated harbor[7].
![Remove the blanket from the boat [1], open the door [2], collect the sea horse's and the circle half - Chapter 2: Boats Away - Walkthrough - Nightmares from the Deep: The Sirens Call - Game Guide and Walkthrough](https://game.lhg100.com/Article/UploadFiles/201512/2015121618375376.jpg)
Remove the blanket from the boat [1], open the door [2], collect the sea horse's and the circle half.
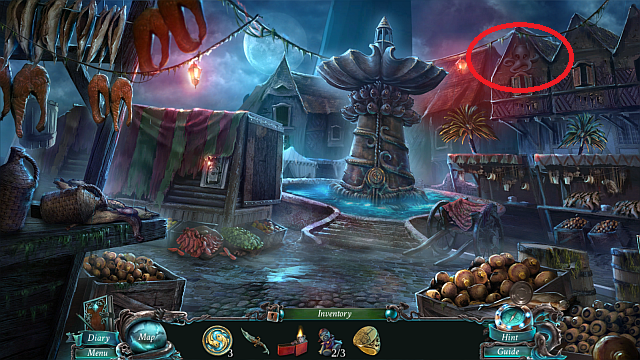
Return to Archway. Approach the stall [1].
![Find all of the objects listed below [1] or play mahjong instead [2] - Chapter 2: Boats Away - Walkthrough - Nightmares from the Deep: The Sirens Call - Game Guide and Walkthrough](https://game.lhg100.com/Article/UploadFiles/201512/2015121618375423.jpg)
Find all of the objects listed below [1] or play mahjong instead [2]. Use the brush [3] to dust the shelf [4]. If you find it problematic to locate any of the objects, press the hint button.
Return to the Promenade. Examine the door [1], Collect the coin from there and approach the gate [2].
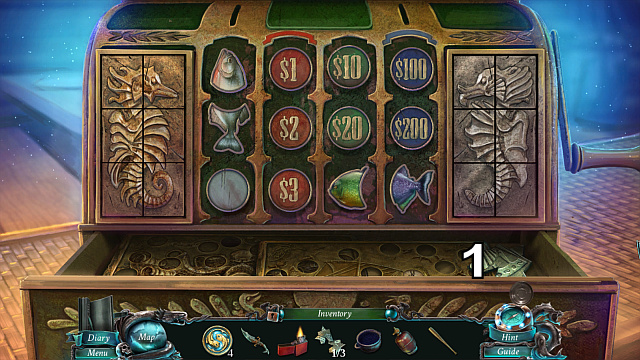
![Put the coin inside the slot-machine [1], fill the lighter with the fuel that you have just obtained and collect it - Chapter 2: Boats Away - Walkthrough - Nightmares from the Deep: The Sirens Call - Game Guide and Walkthrough](https://game.lhg100.com/Article/UploadFiles/201512/2015121618375514.jpg)
Put the coin inside the slot-machine [1], fill the lighter with the fuel that you have just obtained and collect it. Examine the tool box[2]. Read the note and collect the spanner from it.
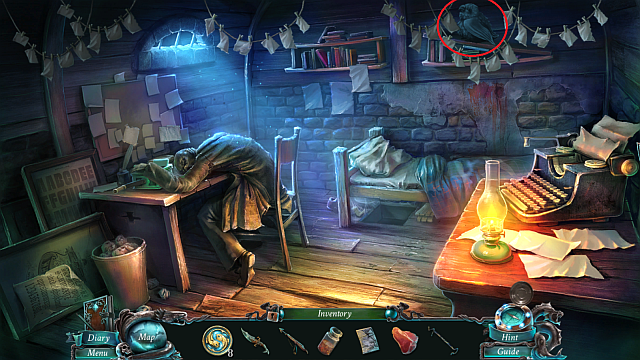
![Return to the bedroom[1] - Chapter 2: Boats Away - Walkthrough - Nightmares from the Deep: The Sirens Call - Game Guide and Walkthrough](https://game.lhg100.com/Article/UploadFiles/201512/2015121618375564.jpg)
Return to the bedroom[1]. Read the note from the spot where the fisherman used to lie and collect the Rebel Symbol[2].
Use the circle half, to open the box [3], to collect the gunpowder.
Return to the Promenade. Approach the monument [1]. Use the dagger, to clean the plate[2]. Then, pour the gunpowder into the crack [3]and set it on fire [4]. Do not forget to collect the Golden Octopi [5].
Solve puzzle (Chapter 2: Puzzle).
Objective completed: Reveal the hidden chamber
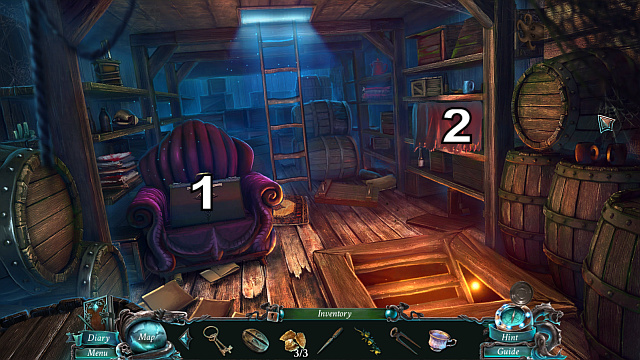
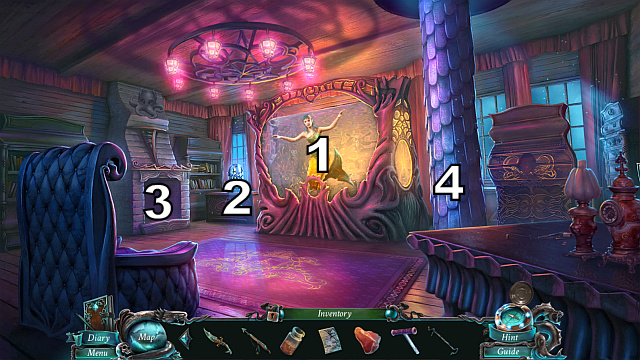
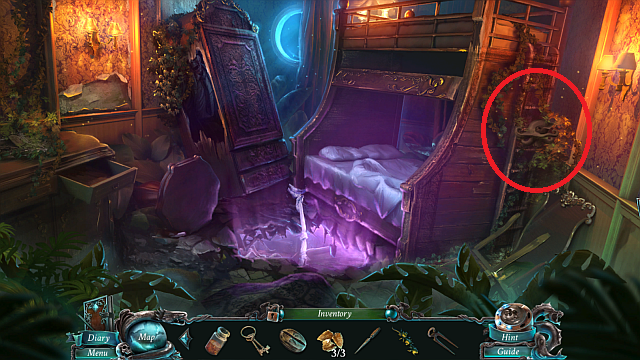
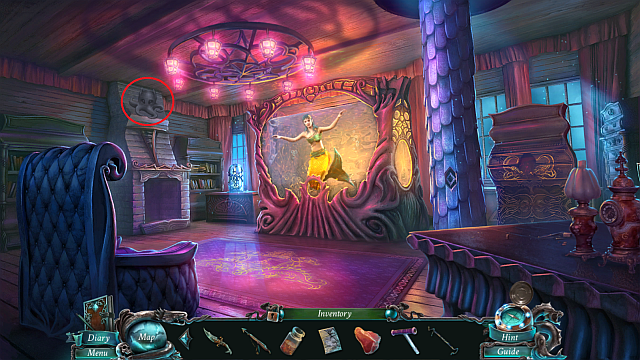
![Enter the chamber and examine the throne [1] to collect a bottle of rum from it - Chapter 2: Boats Away - Walkthrough - Nightmares from the Deep: The Sirens Call - Game Guide and Walkthrough](https://game.lhg100.com/Article/UploadFiles/201512/2015121618375645.jpg)
Enter the chamber and examine the throne [1] to collect a bottle of rum from it. Now, remove the blanket [2] and talk to the goblin.
Return to the Square And go to the tavern. Open the door [1]. Give the rum to the sailor.
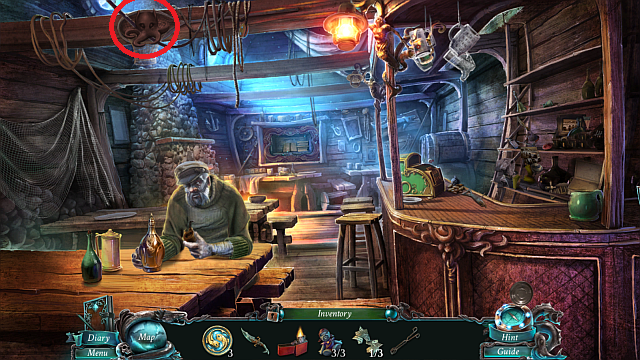
![Enter the tavern [1] - Chapter 2: Boats Away - Walkthrough - Nightmares from the Deep: The Sirens Call - Game Guide and Walkthrough](https://game.lhg100.com/Article/UploadFiles/201512/2015121618375612.jpg)
Enter the tavern [1]. Talk to the mariner [2] and take the picture from him. Move the hanging beer glasses [3] and collect the Golden Fish. Also, collect the Golden Octopi[4]. Approach the counter [5]. Locate the items (Chapter 2: Hidden 1). For finding all of them you will be rewarded with a banana. Approach the window. Solve the puzzle (Chapter 2: The Tavern). After you open the locker, collect the newspaper key.
Objective Completed: Access the tavern
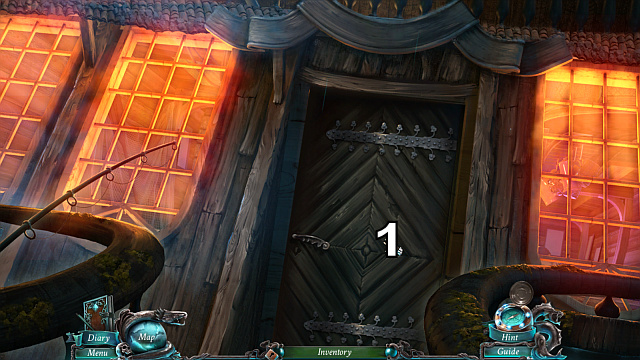
![Go to the Promenade and use the key to open the door [1] - Chapter 2: Boats Away - Walkthrough - Nightmares from the Deep: The Sirens Call - Game Guide and Walkthrough](https://game.lhg100.com/Article/UploadFiles/201512/2015121618375702.jpg)
Go to the Promenade and use the key to open the door [1].
Enter the Newspaper Office and use the lighter. Approach the shelf[1]. Just like earlier, find the hidden items, or play mahjong. Screw in the light bulb [2]. Approach the fireplace[3]: collect the coal and the Toy soldier. Approach the board [4](Chapter 2: The board).
Enter the Hideout.
Objective completed: Find the hideout
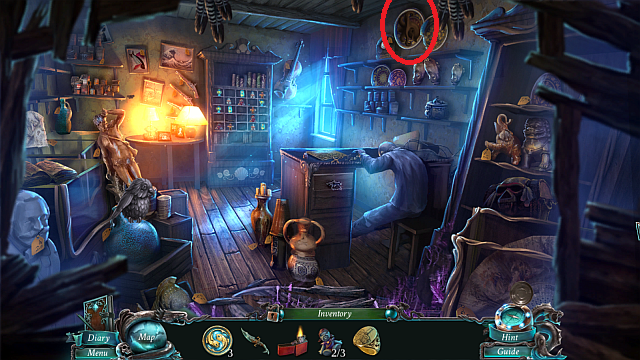
![Use the lighter to light the lamp [1] - Chapter 2: Boats Away - Walkthrough - Nightmares from the Deep: The Sirens Call - Game Guide and Walkthrough](https://game.lhg100.com/Article/UploadFiles/201512/2015121618375759.jpg)
Use the lighter to light the lamp [1]. From under the bed [2] collect the crane lever and the Wind-up key. Approach the body [3]. Use the abovementioned key to open the box. Collect the signet ring and the Golden fish. Approach the shelf [4]. Perform all of the described actions (Chapter 2: The Hideout)
![Return to the secret chamber and give the banana to the monkey [1] - Chapter 2: Boats Away - Walkthrough - Nightmares from the Deep: The Sirens Call - Game Guide and Walkthrough](https://game.lhg100.com/Article/UploadFiles/201512/2015121618375860.jpg)
Return to the secret chamber and give the banana to the monkey [1]. Collect the fireproof glove[2].
Go now to the Dilapidated harbor. Use the bolts [1] and tighten them with the wrench. Straighten the iron [2], and use each of the chains [3], [4] and [5].
Return to the gate. Approach the board [1]. Click on the fishes from the smallest to the biggest one.
![Put the crane lever in socket [1], the coal in [2] - Chapter 2: Boats Away - Walkthrough - Nightmares from the Deep: The Sirens Call - Game Guide and Walkthrough](https://game.lhg100.com/Article/UploadFiles/201512/2015121618375968.jpg)
Put the crane lever in socket [1], the coal in [2]. Use the fireproof glove to open the stove [3], and the shovel [4] to shove iron inside. Then, use the left [5] and the right [6] levers.
Objective completed: Breach the gate
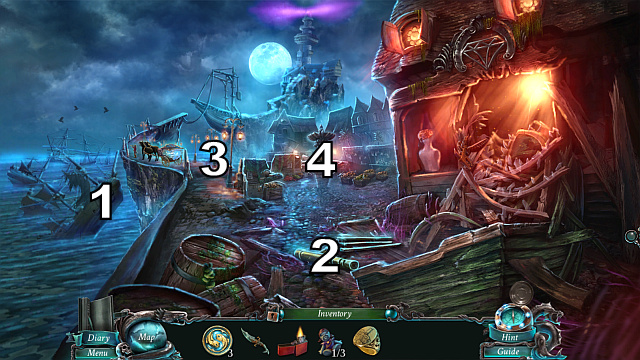
Go out into the street. Collect the Golden Octopi[1]. Use the telescope [2].
Examine the cliff [3]. Lend the fisherman a hand and collect the third toy soldier. Approach the fountain [4].
![Collect the Golden Octopi[1] - Chapter 3: Beneath the town - Walkthrough - Nightmares from the Deep: The Sirens Call - Game Guide and Walkthrough](https://game.lhg100.com/Article/UploadFiles/201512/2015121618375906.jpg)
Collect the Golden Octopi[1]. Examine the cart [2] and collect the thick cloth. Return to the street and use the cloth on the heap to the right, then, enter the Pawn Shop.
![Collect another Golden Octopi[1] - Chapter 3: Beneath the town - Walkthrough - Nightmares from the Deep: The Sirens Call - Game Guide and Walkthrough](https://game.lhg100.com/Article/UploadFiles/201512/2015121618375948.jpg)
Collect another Golden Octopi[1]. Examine the table [2] and collect 1 of 3 printing matrix pieces from behind the picture Approach the bookshelf [3] and collect tongs. Approach the desk [4] and open the drawer with the signet ring. Then collect the steel wheel.
![Return to Fountain and talk to the fisherman [1] - Chapter 3: Beneath the town - Walkthrough - Nightmares from the Deep: The Sirens Call - Game Guide and Walkthrough](https://game.lhg100.com/Article/UploadFiles/201512/2015121618380071.jpg)
Return to Fountain and talk to the fisherman [1].
Put the wheel in the switch [2], to activate a Hidden Object Puzzle.
Find all of the marked objects (Chapter 3: Hidden 1). You will receive the third toy soldier. Return to the Fountain. Examine the cart. Use the dagger to move the fishes open the chest and collect the Golden Fish.
![Approach the fountain and move the trash away [1] - Chapter 3: Beneath the town - Walkthrough - Nightmares from the Deep: The Sirens Call - Game Guide and Walkthrough](https://game.lhg100.com/Article/UploadFiles/201512/2015121618380070.jpg)
Approach the fountain and move the trash away [1]. Move the trash away with tongs collect the fountain key[2], which you need to use on the fountain.
Approach the fountain (Chapter 3: Fishes)
Return to the Pawn shop. Approach the shelf for toys and put the 3 toy soldiers on it Organize the toys in the way presented in Chapter 3: Toys. Approach the opened door and find the blowtorch. (Chapter 3: Pawn shop).
Return to fountain. Approach the fountain and use the blowtorch to open the manhole. Then, go down to the underground.
Objective completed: Open an alternate route to the lighthouse
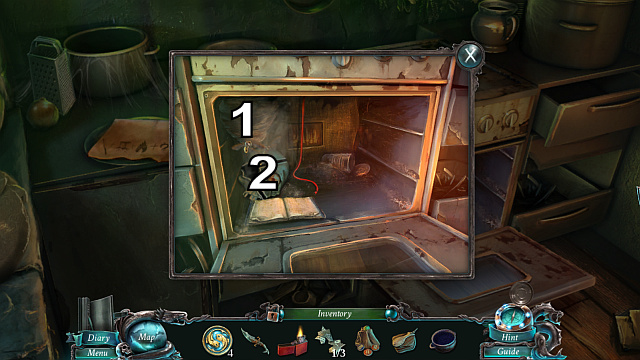
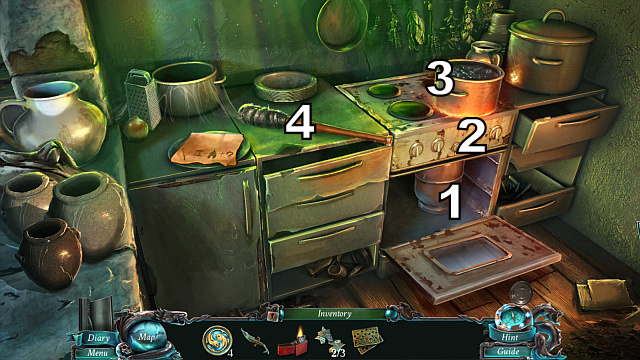
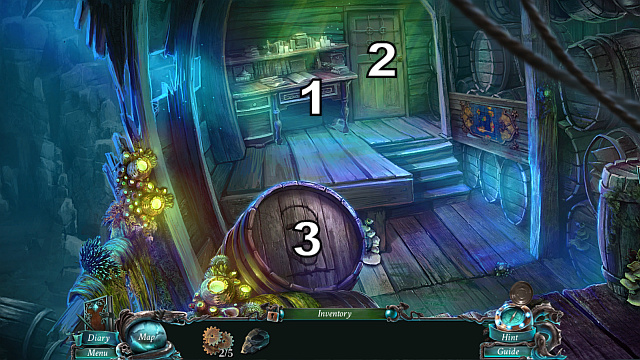
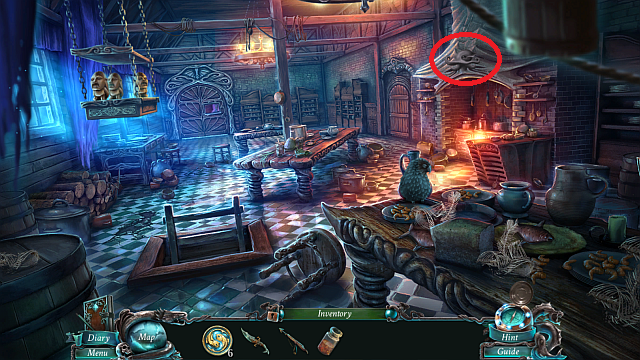
Walk over to the kitchen to the right [1] and examine the pot [2]. Collect the cash register buttons from there. Then, approach the shelf [3] and collect blunderbuss lock.
Approach the table [4]. Collect the lighthouse map from there.
![Then, put the blunderbuss lock on the table and assemble a weapon [1] - Chapter 3: Beneath the town - Walkthrough - Nightmares from the Deep: The Sirens Call - Game Guide and Walkthrough](https://game.lhg100.com/Article/UploadFiles/201512/2015121618380149.jpg)
Then, put the blunderbuss lock on the table and assemble a weapon [1]. Click on the items in the following order [2], [3], [4], [5], [6], [7] and then [8]. Take the gun with you . Approach the door and use the gun to shoot the padlock.
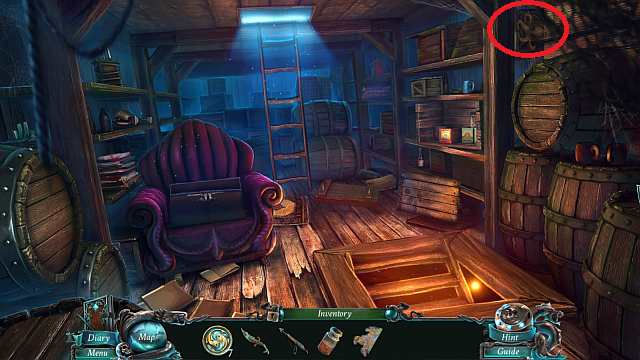
![Collect the Golden Octopi[1] - Chapter 4: The Labyrinth - Walkthrough - Nightmares from the Deep: The Sirens Call - Game Guide and Walkthrough](https://game.lhg100.com/Article/UploadFiles/201512/2015121618380106.jpg)
Collect the Golden Octopi[1]. Examine the pot [2], use the blade and collect pot of hard tar. Approach the boat [3] and find all of the items (Chapter 4: Hidden 1), as a reward, you will receive bellows.
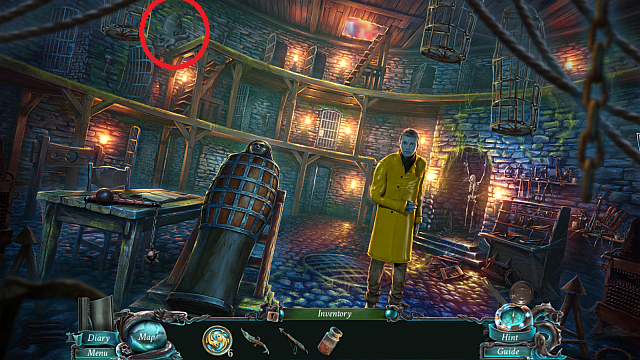
Return to the Underground, to the kitchen. Use the bellows on the hornet nest [1]. Collect the skull [2] and return to the catacombs.
Approach the door in front of you and place the skull in it, which will activate a puzzle (Chapter 4: Skulls)
Enter the labyrinth. Move the planks aside and collect the gas cylinder [1].
![Return to the tavern and approach the counter [1], to activate a Hidden Object Puzzle - Chapter 4: The Labyrinth - Walkthrough - Nightmares from the Deep: The Sirens Call - Game Guide and Walkthrough](https://game.lhg100.com/Article/UploadFiles/201512/2015121618380294.jpg)
Return to the tavern and approach the counter [1], to activate a Hidden Object Puzzle. Once again, find all the items or lay mahjong. You will receive a baseball bat. Approach the machine [2].
Use the cash register buttons. Arrange them in the way shown above [1] collect the second printing matrix piece and decoder plates.
Return to Archway an approach the stall. Find the items (Chapter 4: Hidden 2), thanks to which you will receive a comb.
![Then, go to the Street and use the comb on the dummy [1] - Chapter 4: The Labyrinth - Walkthrough - Nightmares from the Deep: The Sirens Call - Game Guide and Walkthrough](https://game.lhg100.com/Article/UploadFiles/201512/2015121618380315.jpg)
Then, go to the Streetand use the comb on the dummy [1].Collect the hair bristle.
Return to the Underground. Examine the stove and use the gas tank on it [1], then torn the stove on [2] and put the pot of hard tar on it [3]. After that, use the baseball bat on the pot and the hair bristle on the bat. This way you will get a torch [4].

Go now to the Pawn shop. Examine the desk with the corpse at it. Use the decoder plates on the map [1] . Then, put the little pictures into pairs. Collect the slip of paper strange code.
![Return to the labyrinth and use the slip of paper, with the code on it, in front of the entrance[1] - Chapter 4: The Labyrinth - Walkthrough - Nightmares from the Deep: The Sirens Call - Game Guide and Walkthrough](https://game.lhg100.com/Article/UploadFiles/201512/2015121618380484.jpg)
Return to the labyrinth and use the slip of paper, with the code on it, in front of the entrance[1]. Then, move around with adherence to the symbols appearing at the turns. The correct order is: ahead, right, ahead, left, right, ahead.
Objective completed: Make your way through the labyrinth
 Go to the light.
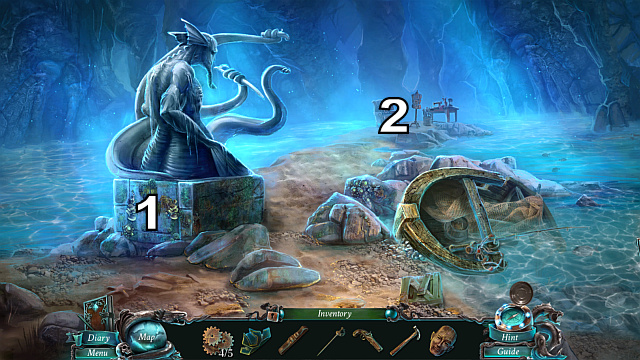
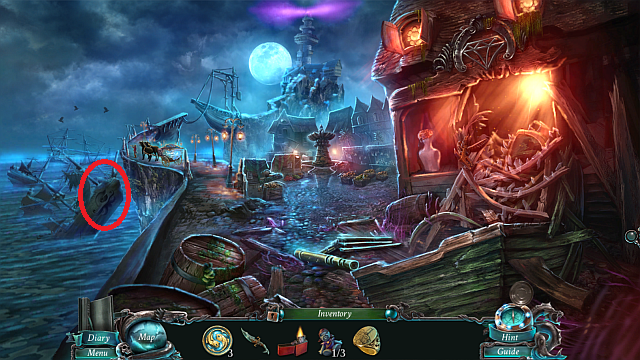
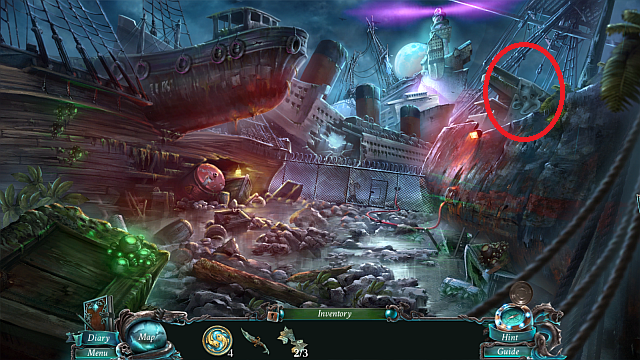
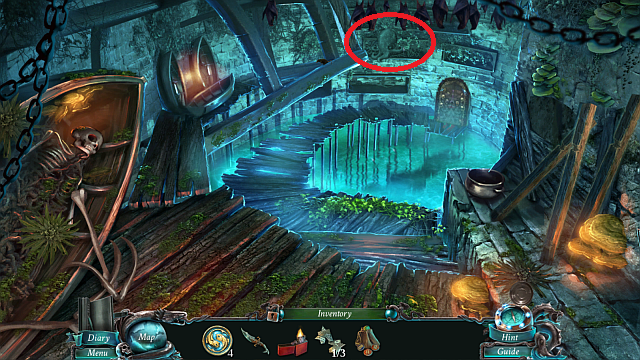
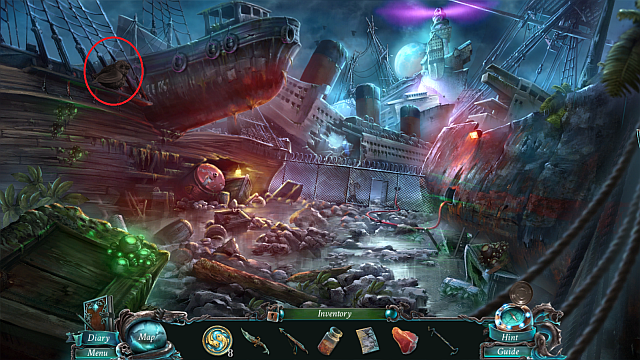
![In [1] there is a Golden Octopi, collect it - Chapter 5: The Shipwreck cemetery - Walkthrough - Nightmares from the Deep: The Sirens Call - Game Guide and Walkthrough](https://game.lhg100.com/Article/UploadFiles/201512/2015121618380480.jpg)
In [1] there is a Golden Octopi, collect it. Approach the gate [2], pull on the handle, collect the hook and use it to obtain the screwdriver. Approach the crate [3] and unscrew the screws with the screwdriver. You will activate a puzzle (Chapter 5: The Cemetery).

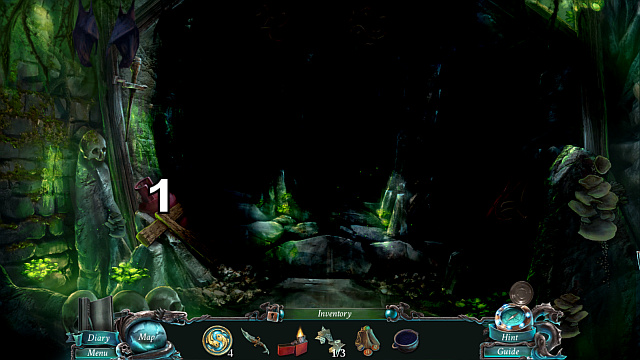
Approach the gate again. Open it and walk over to the Foyer. Talk to the ghost [1]. Examine the chandelier [2] and collect the corkscrew and the tube. Also, collect the starter cord[3], and, from the box [4] an empty fuel can. Return to the Cemetery entrance.
![Approach the fuel can [1] and use the corkscrew to open it - Chapter 5: The Shipwreck cemetery - Walkthrough - Nightmares from the Deep: The Sirens Call - Game Guide and Walkthrough](https://game.lhg100.com/Article/UploadFiles/201512/2015121618380581.jpg)
Approach the fuel can [1] and use the corkscrew to open it. Use the tube[2], to fill the canister[3]. Collect the full canister.
Go to Foyer and approach the fuse box . Pour the fuel in [1], and use the starter cord[2]. Pull on it for 3 times to turn the lights on.
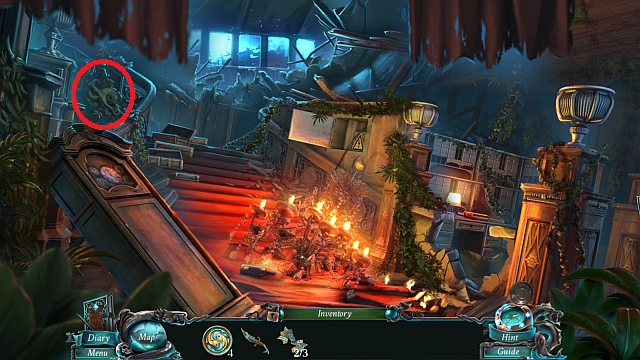
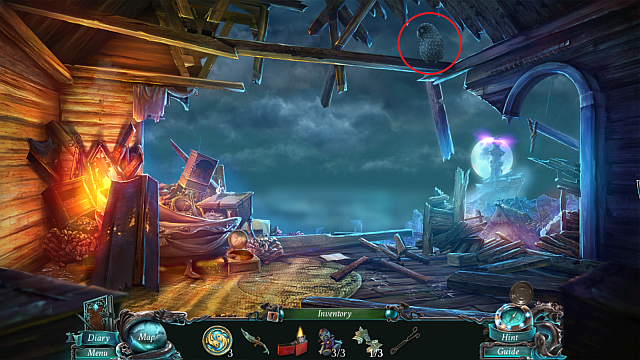
![Now, since it is somewhat brighter here, you can collect the Golden Octopi[1] - Chapter 5: The Shipwreck cemetery - Walkthrough - Nightmares from the Deep: The Sirens Call - Game Guide and Walkthrough](https://game.lhg100.com/Article/UploadFiles/201512/2015121618380503.jpg)
Now, since it is somewhat brighter here, you can collect the Golden Octopi[1]. Approach the table and collect the red book[2]. Activate the HOP in [3](Chapter 5: Hidden 1). You will receive an improvised rope.
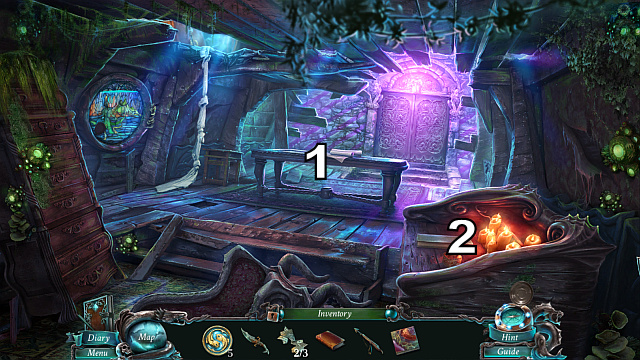
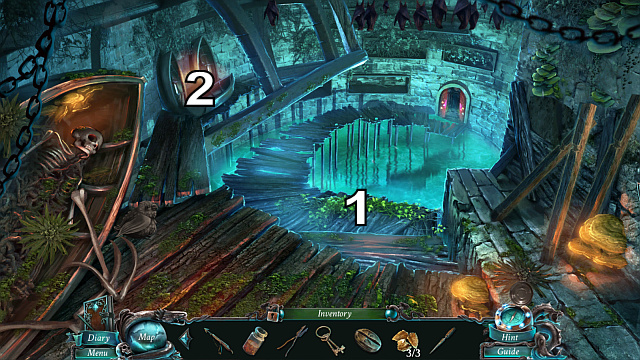
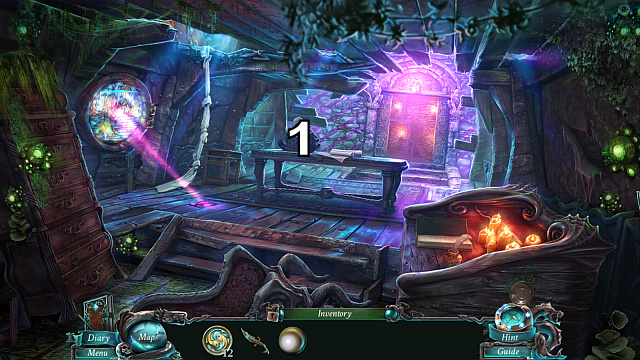
![Use the rope in [1], thanks to which you will be able to walk over to the Bridge, which you should do without hesitation - Chapter 5: The Shipwreck cemetery - Walkthrough - Nightmares from the Deep: The Sirens Call - Game Guide and Walkthrough](https://game.lhg100.com/Article/UploadFiles/201512/2015121618380606.jpg)
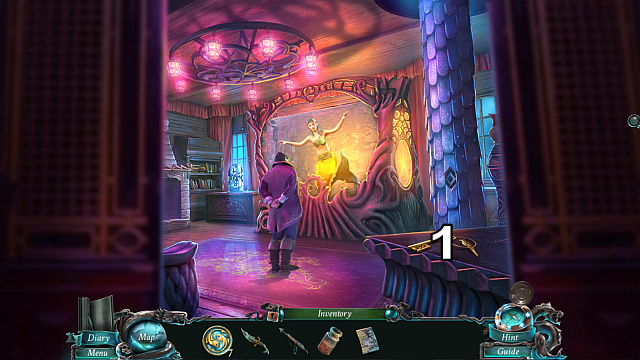
Use the rope in [1], thanks to which you will be able to walk over to the Bridge, which you should do without hesitation.
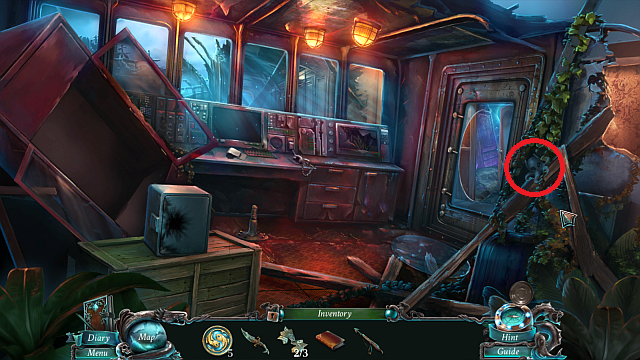
![Talk to the ghost [1] - Chapter 5: The Shipwreck cemetery - Walkthrough - Nightmares from the Deep: The Sirens Call - Game Guide and Walkthrough](https://game.lhg100.com/Article/UploadFiles/201512/2015121618380639.jpg)
Talk to the ghost [1]. Collect the cable from the floor [2]. Examine the cabinet [3] and collect another rope from there, and the harpoon. Approach the console [4] and collect the 3rd cable.
Open the door, put the cables in the panel, which will activate a puzzle (Chapter 5: Bridge).
Objective completed: Warn the ship about the kraken.
From the opened drawer, collect the Golden Fish and the diamond.
![Use it to scratch the glass in the door [1] - Chapter 5: The Shipwreck cemetery - Walkthrough - Nightmares from the Deep: The Sirens Call - Game Guide and Walkthrough](https://game.lhg100.com/Article/UploadFiles/201512/2015121618380613.jpg)
Use it to scratch the glass in the door [1]. Enter the Passenger cabin.
![Talk to the ghost again [1] - Chapter 5: The Shipwreck cemetery - Walkthrough - Nightmares from the Deep: The Sirens Call - Game Guide and Walkthrough](https://game.lhg100.com/Article/UploadFiles/201512/2015121618380769.jpg)
Talk to the ghost again [1]. Collect the sheet rope from the bed [2]. Move the carpet away [3] and use the rope on the hole. Climb down to the captain's cabin.
Objective completed: Pass the shipwreck cemetery
Approach the table [1] and collect the stone picture. Examine the desk [2] and collect the last printing matrix piece from the book, and a knob.
Return to the Foyer. Approach the desk that you collected the red book from and insert the knob into the space in the drawer [1]. Open the drawer and take a look into the book.
Return to the Passenger cabin and approach the suitcase above the bed.
Break the code (Chapter 5: Suitcase).
Objective completed: : Break the code to the luggage hatch
Approach the suitcase again and activate the HOP. You will receive printing ink.
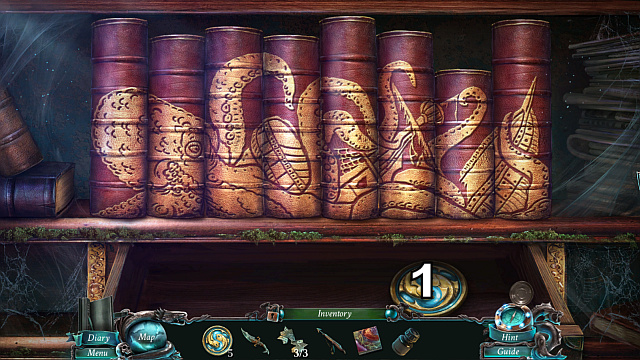
Go to the Underground and put the red book on the shelf. Then, arrange the books in the order presented above.
Objective completed: Return the missing book
Collect the Golden Fish from the opened drawer [1].
![Return to Fountain, and approach the stall [1] to finish the HOP - Chapter 5: The Shipwreck cemetery - Walkthrough - Nightmares from the Deep: The Sirens Call - Game Guide and Walkthrough](https://game.lhg100.com/Article/UploadFiles/201512/2015121618380846.jpg)
Return to Fountain, and approach the stall [1] to finish the HOP. You will receive a stethoscope.
Go to Hideout. Approach the board above the corpse.
Sweep the slips of paper away and place the printing matrix pieces on the board. Then, arrange the whole puzzle into one whole. (Chapter 5: Hideout) and collect the matrix.
![Return to the Newspaper office and approach the desk [1] - Chapter 5: The Shipwreck cemetery - Walkthrough - Nightmares from the Deep: The Sirens Call - Game Guide and Walkthrough](https://game.lhg100.com/Article/UploadFiles/201512/2015121618380845.jpg)
Return to the Newspaper office and approach the desk [1]. There is another HOP for you to solve here which, when finished, will grant you an insulating tape. Approach the printing press [2].
![Use the matrix on it [1], then the printing ink[2] as well as the insulating tape[3] - Chapter 5: The Shipwreck cemetery - Walkthrough - Nightmares from the Deep: The Sirens Call - Game Guide and Walkthrough](https://game.lhg100.com/Article/UploadFiles/201512/2015121618380826.jpg)
Use the matrix on it [1], then the printing ink[2] as well as the insulating tape[3]. Spin the wheel [4] and collect the rings' potter[5].
Objective completed: Complete the evidence
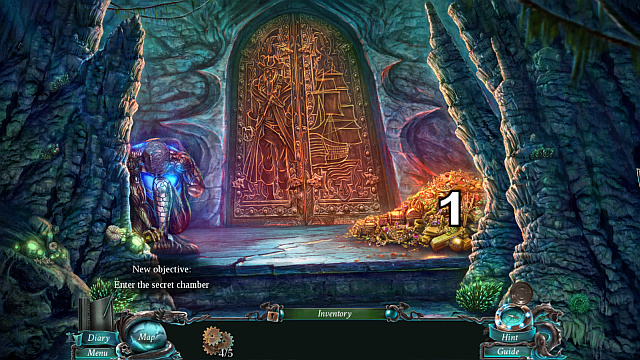
Return to the monument. Approach the heap of trash [1] and solve the HOP. You will receive a sledgehammer. Enter the Secret chamber[2].
![Move the statuette [1] - Chapter 5: The Shipwreck cemetery - Walkthrough - Nightmares from the Deep: The Sirens Call - Game Guide and Walkthrough](https://game.lhg100.com/Article/UploadFiles/201512/2015121618380975.jpg)
Move the statuette [1].
Put the stone picture into that place to activate a puzzle (Chapter 5: The Chamber). Red the book and collect the stone ring.
Return to the Passenger cabin. Use the sledgehammer on the boards [1] for three times, and collect the safe dial from the corpse's hand
![Go to the bridge and activate the stethoscope and the safe dial on the safe [1] - Chapter 5: The Shipwreck cemetery - Walkthrough - Nightmares from the Deep: The Sirens Call - Game Guide and Walkthrough](https://game.lhg100.com/Article/UploadFiles/201512/2015121618381012.jpg)
Go to the bridge and activate the stethoscope and the safe dial on the safe [1]. Using the dial, [2] keep trying different combinations until you discover the correct one (to make things easier: 648507). Collect the sticky resin.
Go to the captain's cabin and talk to the Fisherman [1], then approach the door [2].
Use the stone ring and the rings' pattern (Chapter 5: Captain's cabin).
Objective completed: Rescue the siren
![Collect the Golden Octopi[1] - Chapter 6: The Lighthouse - Walkthrough - Nightmares from the Deep: The Sirens Call - Game Guide and Walkthrough](https://game.lhg100.com/Article/UploadFiles/201512/2015121618381016.jpg)
Collect the Golden Octopi[1]. Talk to the fisherman[2].
Approach the skeleton [3]. After you finish the HOP you will receive a chain. Climb up the stairs to the Storeroom [4].
![Remove the blanket [1] and use the chain on the statuette - Chapter 6: The Lighthouse - Walkthrough - Nightmares from the Deep: The Sirens Call - Game Guide and Walkthrough](https://game.lhg100.com/Article/UploadFiles/201512/2015121618381152.jpg)
Remove the blanket [1] and use the chain on the statuette. Remove now the second blanket [2] and collect the old chain from under the armchair. Examine the exit [3] and use the chain on it, then combine it with the statuette [4]. Move the statuette by double-clicking on it.
Enter the Kitchen. Approach the door and talk to the guard [1].
Approach the table [2] and collect the keys. Use the dagger on the can [3] and collect the coffee symbol. Collect the octopus [4] and approach the door [5].
Find all of the items (Chapter 6: Hidden 1), and you will receive garden shears.
Return to the Prison. Move away the stones in [1] and collect 3/3 golden flakes. Use the keys on the cell [2] and collect the ice pick from there.
Return to Catacombs. Use shears on the vines [1]. You will obtain a flower stalk. Approach [2]. Complete the HOP, to obtain pliers.
Go to the Passenger cabin. Approach the bed and find the items (Chapter 6: Hidden 2).
Return then to the Storeroom. Use the keys to open the suitcase [1] and collect hydrogen peroxide from there. Remove the curtain from the chest [2] and open it with pliers. Then, pry the can with the dagger, put the coffee symbol inside. Collect the coffee beans and the coffee grinder.
Go to the kitchen and approach the table located in the middle. Place hydrogen peroxide, flower stalks and golden flakes on it. It is now time to brew some elixirs (Chapter 6: Kitchen). Collect the sleeping powder now.
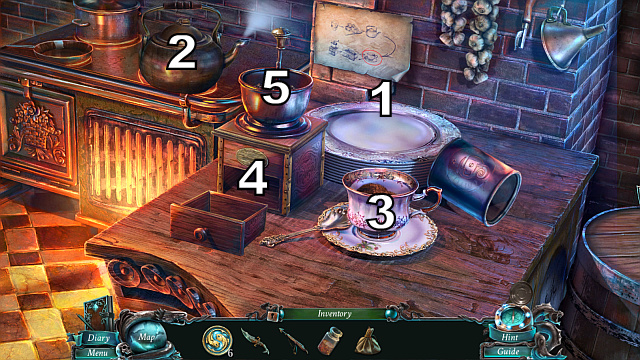
Approach now the table next to the oven. Use the ice pick on the ice [1]. Open the kettle [2] and pour the ice inside. Put the china cup on the saucer [3]. Put the grinder in [4] and the coffee beans in [5]. Grind the coffee, pour it into the cup and pour the water from the kettle onto it. Add some sleeping powder and collect the spiked coffee.
![Approach the door opposite [1] and give the coffee to the guard - Chapter 6: The Lighthouse - Walkthrough - Nightmares from the Deep: The Sirens Call - Game Guide and Walkthrough](https://game.lhg100.com/Article/UploadFiles/201512/2015121618381361.jpg)
Approach the door opposite [1] and give the coffee to the guard. Pull on the handle and walk into the Yard.
Objective completed: Take care of a guardian.
![Collect the Golden Octopi[1] - Chapter 7: Find Calliope - Walkthrough - Nightmares from the Deep: The Sirens Call - Game Guide and Walkthrough](https://game.lhg100.com/Article/UploadFiles/201512/2015121618381333.jpg)
Collect the Golden Octopi[1]. Walk over to the Quarters[2].
![Collect the uniform [1] - Chapter 7: Find Calliope - Walkthrough - Nightmares from the Deep: The Sirens Call - Game Guide and Walkthrough](https://game.lhg100.com/Article/UploadFiles/201512/2015121618381378.jpg)
Collect the uniform [1]. Use the blade on the sea horse [2], to obtain the green eye. Also, collect the octopus[3].
Return to Prison. Give the uniform to the fisherman[1].
Objective completed: Provide fisherman with a uniform.
Put the green eye into the sarcophagus [2] and collect the Golden Fish from there. Approach the skeleton [3] and complete the HOP. You will receive gold insignia.
Return to the Yard. Talk to the fisherman [1] and watch him act. Then, after a short cutscene, talk to him again. Walk over to the Embankment[2] and collect the chest panel. Use the gold insignia w [3] (Chapter 7: The Carriage).
Search through the locker and collect the elevator emblem. Then, approach the door [4] and use the emblem to open the elevator and enter it.
Objective completed: Get to the siren!
Collect the [1](treasure key).
Return to the Yard, approach the door over the stairs to the left, and open it with the key that you have just obtained. Enter the Treasury (Chapter 7: The Treasury). Collect the Brass idol.
![After the cutscene, talk to the fisherman [1], and block the door out [2] - Chapter 7: Find Calliope - Walkthrough - Nightmares from the Deep: The Sirens Call - Game Guide and Walkthrough](https://game.lhg100.com/Article/UploadFiles/201512/2015121618381597.jpg)
After the cutscene, talk to the fisherman [1], and block the door out [2].
![Return to the kitchen and activate the HOP in [1] - Chapter 7: Find Calliope - Walkthrough - Nightmares from the Deep: The Sirens Call - Game Guide and Walkthrough](https://game.lhg100.com/Article/UploadFiles/201512/2015121618381596.jpg)
Return to the kitchen and activate the HOP in [1]. You will receive meat. Put the Brass idol next to the other ones [2] and collect the Golden Fish.
Return to the Apartment. Talk to Calliope[1].
Objective completed: Find a way to stop the kraken
Approach the table [2] and collect the lever from it. Collect the fire poker from the fireplace[3]. Approach [4] and use the (lever), then, pull it. Go up the stairs to the Gong.
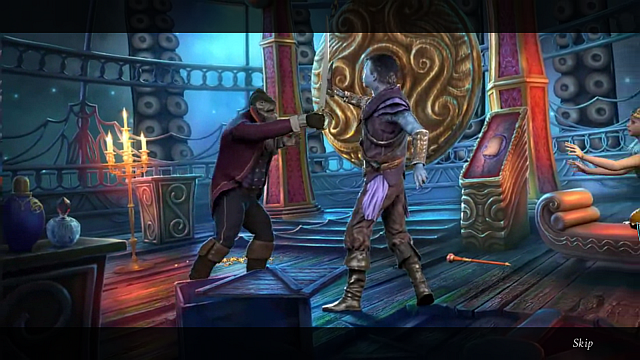
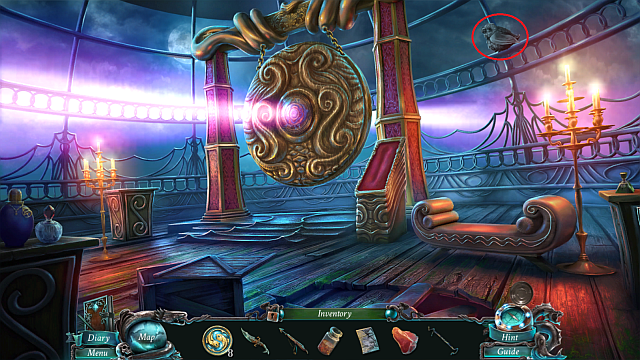
![Approach the pulpit [1] and take the wooden seal - Chapter 8: Get Kraken! - Walkthrough - Nightmares from the Deep: The Sirens Call - Game Guide and Walkthrough](https://game.lhg100.com/Article/UploadFiles/201512/2015121618381617.jpg)
Approach the pulpit [1] and take the wooden seal. Then, walk over to [2], , read the note and collect the clock face.
![Go down to the apartment and put the wooden seal in [1] - Chapter 8: Get Kraken! - Walkthrough - Nightmares from the Deep: The Sirens Call - Game Guide and Walkthrough](https://game.lhg100.com/Article/UploadFiles/201512/2015121618381637.jpg)
Go down to the apartment and put the wooden seal in [1]. You will activate a HOP. After you complete it, you will receive gong pieces.
Enter again and activate the gong pieces on the gong itself (Chapter 8: Gong).
Collect the chest seal.
Objective completed: Open the gong
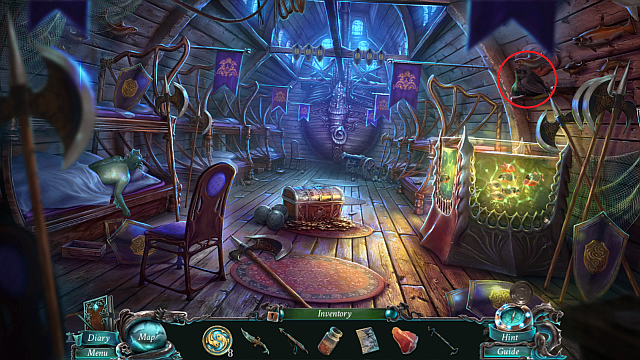
Return to the Yard. Discharge the harpoon at the place specified by the fisherman[1]. Collect the Golden Fish. Enter the Quarters[2].
![Put the meat in the aquarium [1] and use the fire poker to fish for another Golden Fish - Chapter 8: Get Kraken! - Walkthrough - Nightmares from the Deep: The Sirens Call - Game Guide and Walkthrough](https://game.lhg100.com/Article/UploadFiles/201512/2015121618381722.jpg)
Put the meat in the aquarium [1] and use the fire poker to fish for another Golden Fish. Approach the chest [2] and put the chest panel in it. Read the note and read the sticky resin in the chest. Collect the stained-glass disk.
Return to the Captain's cabin and approach the window.
In the empty space, put the stained-glass disk (Chapter 8: Captain's cabin).
Objective completed: Patch the stained glass window
Use the blade to pry the boards and, in the spot marked by the beam of light, collect the Golden Fish.
Return to the Foyer. Activate the HOP in [1] and collect the clock hands. Then, approach the clock [2].
Fix the clock (Chapter 8: The Clock). Collect the last, 12th, Gold Fish.
Objective completed: Fix the clocks
Return to the Captain's cabin. Approach the table [1] and put in the chest all of the Golden fish tokens, while watching an interesting story in parts.
Objective completed: Twelve fish tokens
Then, use the chest seal pearl and open the chest to collect the conch from.
![Return to the Yard and go to the Apartment[1] - Chapter 8: Get Kraken! - Walkthrough - Nightmares from the Deep: The Sirens Call - Game Guide and Walkthrough](https://game.lhg100.com/Article/UploadFiles/201512/2015121618381810.jpg)
Return to the Yard and go to the Apartment[1].
![Talk to the fisherman [1] - Chapter 8: Get Kraken! - Walkthrough - Nightmares from the Deep: The Sirens Call - Game Guide and Walkthrough](https://game.lhg100.com/Article/UploadFiles/201512/2015121618381834.jpg)
Talk to the fisherman [1]. Go upstairs [2].
![Untie Calliope[1] with the knife and hand her the conch - Chapter 8: Get Kraken! - Walkthrough - Nightmares from the Deep: The Sirens Call - Game Guide and Walkthrough](https://game.lhg100.com/Article/UploadFiles/201512/2015121618381880.jpg)
Untie Calliope[1] with the knife and hand her the conch. Take pleasure in watching the last cutscene in the game. Congratulations!
Objective completed: Restore Calliope's power
 Will the good prevail again?
This chapter is available if you have the Collector's Edition and you have finished the basic eight chapters.
![Talk to the fisherman[1] - The Book of Davy Jones (bonus adventure) - Walkthrough - Nightmares from the Deep: The Sirens Call - Game Guide and Walkthrough](https://game.lhg100.com/Article/UploadFiles/201512/2015121618381956.jpg)
Talk to the fisherman[1]. Go to the Embankment[2].
![Talk to the captain [1], and to the Praetorian, that appeared in [2] - The Book of Davy Jones (bonus adventure) - Walkthrough - Nightmares from the Deep: The Sirens Call - Game Guide and Walkthrough](https://game.lhg100.com/Article/UploadFiles/201512/2015121618382019.jpg)
Talk to the captain [1], and to the Praetorian, that appeared in [2]. From him, take the scroll emblem and return to the Yard.
![Again, talk to the fisherman [1] and use the key that you receive to open the door [2] - The Book of Davy Jones (bonus adventure) - Walkthrough - Nightmares from the Deep: The Sirens Call - Game Guide and Walkthrough](https://game.lhg100.com/Article/UploadFiles/201512/2015121618382093.jpg)
Again, talk to the fisherman [1] and use the key that you receive to open the door [2]. Walk over to the Quarters.
![Approach the sea horse on the wall [1] - The Book of Davy Jones (bonus adventure) - Walkthrough - Nightmares from the Deep: The Sirens Call - Game Guide and Walkthrough](https://game.lhg100.com/Article/UploadFiles/201512/2015121618382048.jpg)
Approach the sea horse on the wall [1]. Give its tail a twist for three times and put the scroll emblem in the place that reveals. Walk into the corridor that reveals.
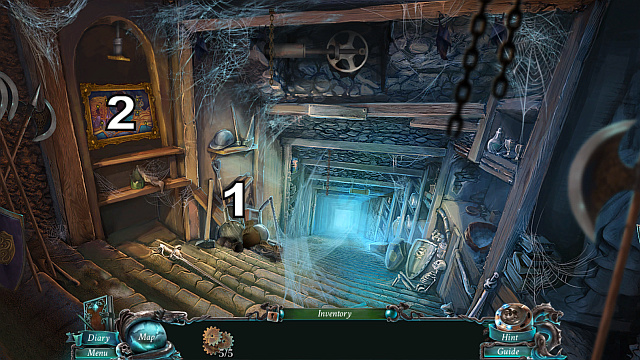
![Collect the boathook[1] and use it to sweep cobwebs away in [2] and [3] - The Book of Davy Jones (bonus adventure) - Walkthrough - Nightmares from the Deep: The Sirens Call - Game Guide and Walkthrough](https://game.lhg100.com/Article/UploadFiles/201512/2015121618382054.jpg)
Collect the boathook[1] and use it to sweep cobwebs away in [2] and [3]. Approach the shelf [4], collect the map and 2/2 flint stones. Then, examine the shelf [3] and read the note. Use the flint stones to light the candle. Walk over to the Cave[5].
![Collect 3/3 dynamite casing[1],[2],[3] and the bowl of glue[2] - The Book of Davy Jones (bonus adventure) - Walkthrough - Nightmares from the Deep: The Sirens Call - Game Guide and Walkthrough](https://game.lhg100.com/Article/UploadFiles/201512/2015121618382119.jpg)
Collect 3/3 dynamite casing[1],[2],[3] and the bowl of glue[2]. Return to the corridor.
![Approach [1] and complete the HOP for which you will receive scissors - The Book of Davy Jones (bonus adventure) - Walkthrough - Nightmares from the Deep: The Sirens Call - Game Guide and Walkthrough](https://game.lhg100.com/Article/UploadFiles/201512/2015121618382115.jpg)
Approach [1] and complete the HOP for which you will receive scissors. Then, approach the shelf [2] (bonus chapter: dynamite).
Collect the dynamite sticks and walk over to the Cave.
![Put the dynamite under the rocks [1] and put fire on the wick using the candle - The Book of Davy Jones (bonus adventure) - Walkthrough - Nightmares from the Deep: The Sirens Call - Game Guide and Walkthrough](https://game.lhg100.com/Article/UploadFiles/201512/2015121618382173.jpg)
Put the dynamite under the rocks [1] and put fire on the wick using the candle. Move the rocks away and walk over into the Bay[2].
![Find the hidden objects [1] - The Book of Davy Jones (bonus adventure) - Walkthrough - Nightmares from the Deep: The Sirens Call - Game Guide and Walkthrough](https://game.lhg100.com/Article/UploadFiles/201512/2015121618382250.jpg)
Find the hidden objects [1]. The lever that you obtain in this way, needs to be put into the mechanism[2]. Then, use it. Approach the islet that surfaces [3]. Sweep the seaweed away and collect the crowbar.
![Return to the cave and use the crowbar on the chest [1] - The Book of Davy Jones (bonus adventure) - Walkthrough - Nightmares from the Deep: The Sirens Call - Game Guide and Walkthrough](https://game.lhg100.com/Article/UploadFiles/201512/2015121618382248.jpg)
Return to the cave and use the crowbar on the chest [1]. Read the note and collect the stained-glass quill and 1/5 golden gear. Go to the Bay again.
![Put the feather into [1] - The Book of Davy Jones (bonus adventure) - Walkthrough - Nightmares from the Deep: The Sirens Call - Game Guide and Walkthrough](https://game.lhg100.com/Article/UploadFiles/201512/2015121618382224.jpg)
Put the feather into [1]. Then, go into the Shipwrecked hull[2].
![Pick up the cannon ball [1], and use the boathook to release the cannon[2], which will fall onto the ground - The Book of Davy Jones (bonus adventure) - Walkthrough - Nightmares from the Deep: The Sirens Call - Game Guide and Walkthrough](https://game.lhg100.com/Article/UploadFiles/201512/2015121618382341.jpg)
Pick up the cannon ball [1], and use the boathook to release the cannon[2], which will fall onto the ground. Approach it and load it with the cannonball, and set the wick on fire. After the cannon is discharged, sweep the planks away and go on the deck (Barrels)[3]. Collect the pickaxe blade from a barrel, return and approach the pond [4] (Bonus Chapter: Lilies)
Collect 2/5 golden gear and return to the cave.
![Use the pickaxe on the rocks [1] and collect lump of coal - The Book of Davy Jones (bonus adventure) - Walkthrough - Nightmares from the Deep: The Sirens Call - Game Guide and Walkthrough](https://game.lhg100.com/Article/UploadFiles/201512/2015121618382362.jpg)
Use the pickaxe on the rocks [1] and collect lump of coal. Return to Barrels.
![Approach the desk [1] and read the note, then use the coal on the book - The Book of Davy Jones (bonus adventure) - Walkthrough - Nightmares from the Deep: The Sirens Call - Game Guide and Walkthrough](https://game.lhg100.com/Article/UploadFiles/201512/2015121618382370.jpg)
Approach the desk [1] and read the note, then use the coal on the book. Read the code (739), and put it on the door [2].
Find all of the items (Chapter Bonus: Hidden 1) and approach the wall with the plates that you have obtained [3] (Bonus Chapter: Plate).
From the box, collect the stained-glass hat.
![Return to Bay and put the glass hat in [1] - The Book of Davy Jones (bonus adventure) - Walkthrough - Nightmares from the Deep: The Sirens Call - Game Guide and Walkthrough](https://game.lhg100.com/Article/UploadFiles/201512/2015121618382420.jpg)
Return to Bay and put the glass hat in [1]. Through the passage that appears, make it to the beach [2].
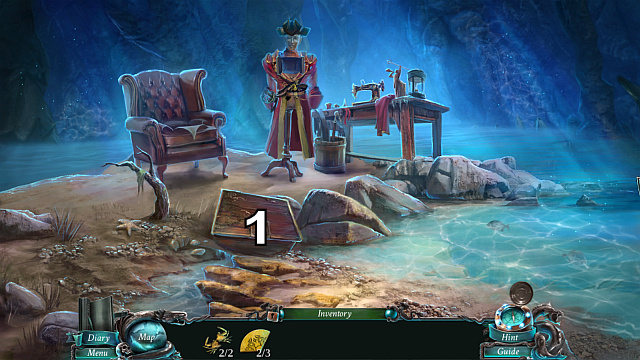
![Approach the wrecked boat [1], move the nets away and grease the spinning wheel, and roll it up - The Book of Davy Jones (bonus adventure) - Walkthrough - Nightmares from the Deep: The Sirens Call - Game Guide and Walkthrough](https://game.lhg100.com/Article/UploadFiles/201512/2015121618382428.jpg)
Approach the wrecked boat [1], move the nets away and grease the spinning wheel, and roll it up. Collect the marine seal and 3/5 golden gear. Examine the pedestal [2] and collect the chisel from it. Go to Armoire[3].
![Collect the pirate hat[1] - The Book of Davy Jones (bonus adventure) - Walkthrough - Nightmares from the Deep: The Sirens Call - Game Guide and Walkthrough](https://game.lhg100.com/Article/UploadFiles/201512/2015121618382513.jpg)
Collect the pirate hat[1]. Approach the chest [2] and collect the thread cutter from the sand . Then, read the note [3] and rip the pillow open. Collect the belt.
![Return to the Bay and complete the HOP in [1] - The Book of Davy Jones (bonus adventure) - Walkthrough - Nightmares from the Deep: The Sirens Call - Game Guide and Walkthrough](https://game.lhg100.com/Article/UploadFiles/201512/2015121618382526.jpg)
Return to the Bay and complete the HOP in [1]. You will receive a rapier.
Walk over to the Barrels. Approach the desk [1] and put the marine seal in it. Keep spinning the dials in such a way, as to make an octopus appear. Collect the flintlock pistol from the locker that opens. Approach the door [2] and complete the HOP, for which you will receive a hammer. Then, go to the barrel [3] and use both the hammer and the chisel on it. Collect the mannequin head and 4/5 golden gear.
Return to the Beach. Use the hammer on the pedestal for three times [1]. Collect the coat and go ahead [2].
![Approach the mannequin [1] and dress it (mannequin head => pirate hat => coat => belt => flintlock pistol => rapier) - The Book of Davy Jones (bonus adventure) - Walkthrough - Nightmares from the Deep: The Sirens Call - Game Guide and Walkthrough](https://game.lhg100.com/Article/UploadFiles/201512/2015121618382666.jpg)
Approach the mannequin [1] and dress it (mannequin head => pirate hat => coat => belt => flintlock pistol => rapier). This will open a locker that you should collect the stained-glass island from.
![Return to the bay and put the glass island in [1] - The Book of Davy Jones (bonus adventure) - Walkthrough - Nightmares from the Deep: The Sirens Call - Game Guide and Walkthrough](https://game.lhg100.com/Article/UploadFiles/201512/2015121618382632.jpg)
Return to the bay and put the glass island in [1]. Go to the Entrance[2].
Objective completed: Fix the pillar
Activate a HOP in [1]. You will receive the last golden gear.
Return to the Corridor. Approach [1] and find all the items (Bonus Chapter: Hidden 2). You will receive stone pieces. Then, approach the painting [2] and put the golden gears in it.
Arrange the gears correctly (Bonus Chapter: Gears).
Return outside of the entrance and approach the golem (Bonus Chapter: Golem).
Enter Expositions. Approach the table [1] read the note and collect 2/2 crab halves.
Objective completed: Enter the secret chamber
Objective completed: Find all translations
Exit to the entrance and approach the treasure. Find the items (Bonus Chapter: Hidden 3). You will receive a small island model.
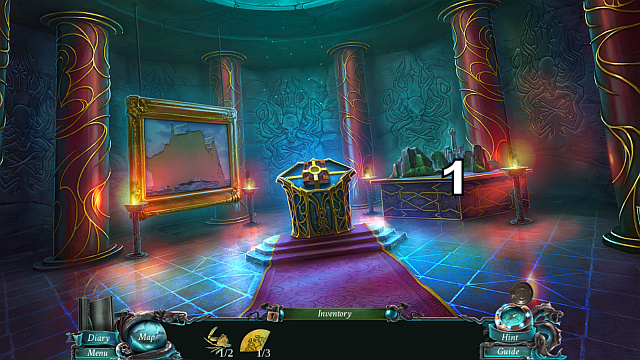
![Enter the Expositions again and put the island model in [1] - The Book of Davy Jones (bonus adventure) - Walkthrough - Nightmares from the Deep: The Sirens Call - Game Guide and Walkthrough](https://game.lhg100.com/Article/UploadFiles/201512/2015121618382813.jpg)
Enter the Expositions again and put the island model in [1]. Collect 2/3 seal parts.
Return to Armoire. Arrange the crab halves in the chest [1]and collect the painting strips.
Return to the Expositions for the last time and approach the painting. Use the painting strips on it to put the entire painting together. (Bonus Chapter: The Ship) and collect 3/3 seal parts. Use them on the book and collect the The Book of Davy Jones. Return to the Yard.
![Talk to the fisherman [1] and walk over to the Embankment[2] - The Book of Davy Jones (bonus adventure) - Walkthrough - Nightmares from the Deep: The Sirens Call - Game Guide and Walkthrough](https://game.lhg100.com/Article/UploadFiles/201512/2015121618382981.jpg)
Talk to the fisherman [1] and walk over to the Embankment[2].
![Give the book to the Praetorian [1] and talk to the captain [2] - The Book of Davy Jones (bonus adventure) - Walkthrough - Nightmares from the Deep: The Sirens Call - Game Guide and Walkthrough](https://game.lhg100.com/Article/UploadFiles/201512/2015121618382943.jpg)
Give the book to the Praetorian [1] and talk to the captain [2].
Objective completed: Recover the Book of Davy Jones
Objective completed: Leave the island
 This is the end of adventures... for now.
Congratulations! This is the end of your adventure with Nightmares from the Deep: The Siren's Call.
Location: Square
Location: Archway
Location: Promenade
Location: Gate
Location: Street
Location: Tavern
Location: Pawn shop
Location: Fountain
Location: Passenger cabin
Location: Cemetery entrance
Location: Foyer
Location: Bridge
Location: Catacombs
Location: Prison
Location: Storeroom
Location: Kitchen
Location: Yard
Location: Quarters
Location: Apartment
Location: Bedroom
Location: Square
Location: Archway

Location: Secret Chamber
Location: Gate
Location: Promenade
Location: Fountain
Location: Hideout
Location: Pawn shop
Location: Cemetery entrance
Location: Underground
Location: Passenger cabin
Location: Storeroom
Location: Kitchen
Location: Yard
Location: Quarters
Location: Gong
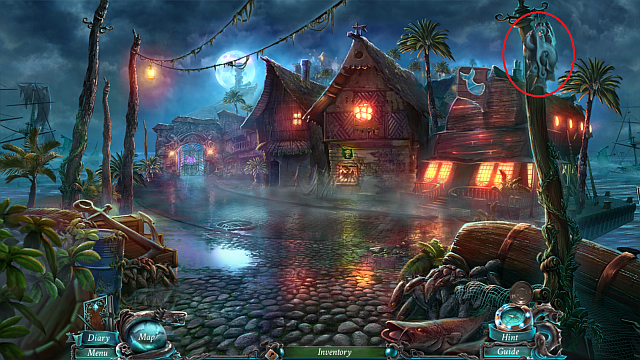
Location: Promenade
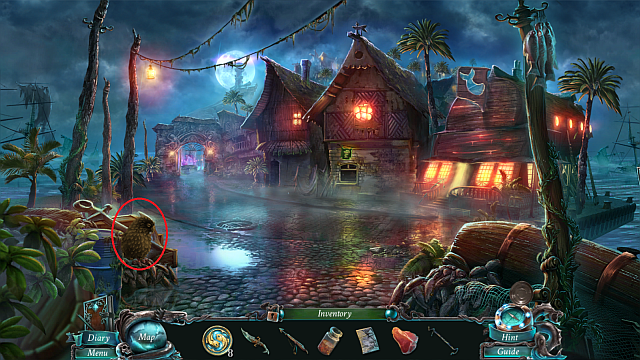
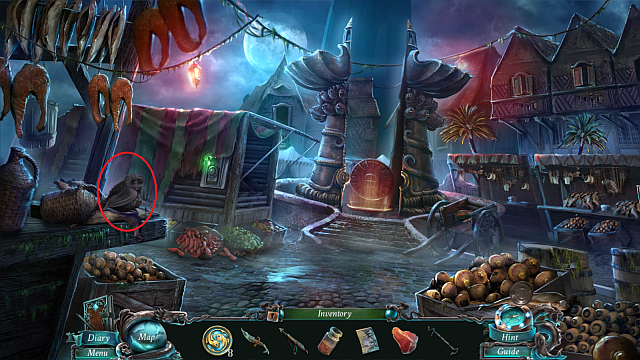
Interact with the shop sign [1]
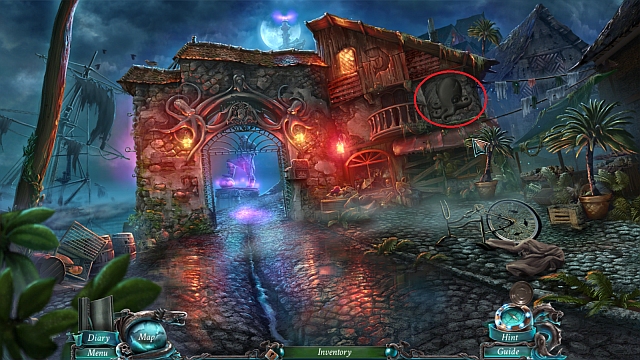
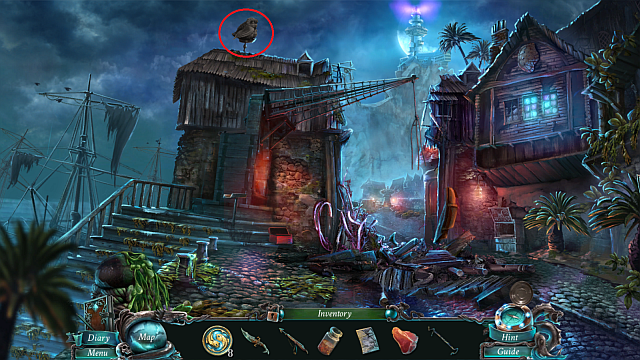
Location: Promenade
Pull the bell [1]
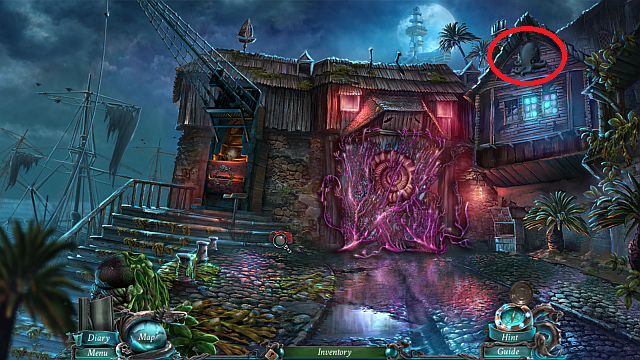
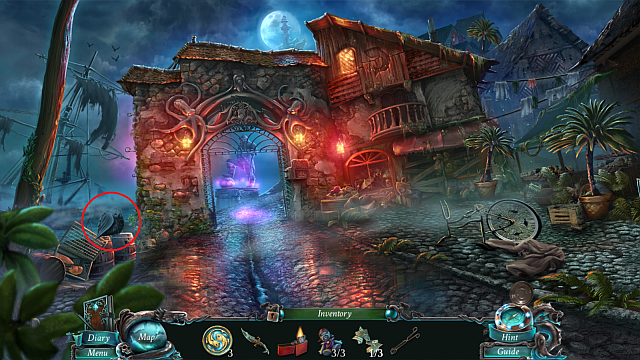
Location: Dilapidated harbor
It is hard to miss - you will collect it while completing a
Location: Newspaper Office
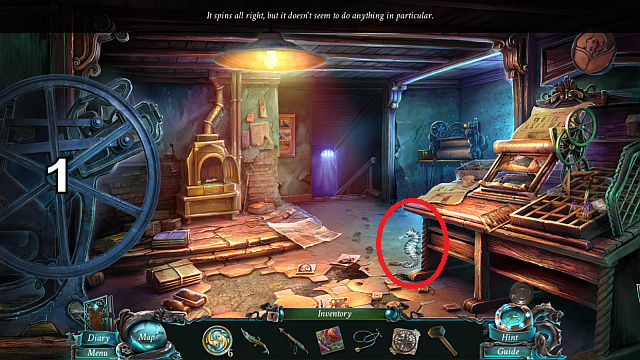
Spin the wheel [1]
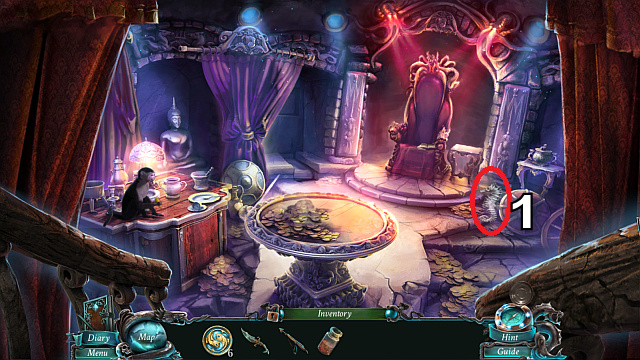
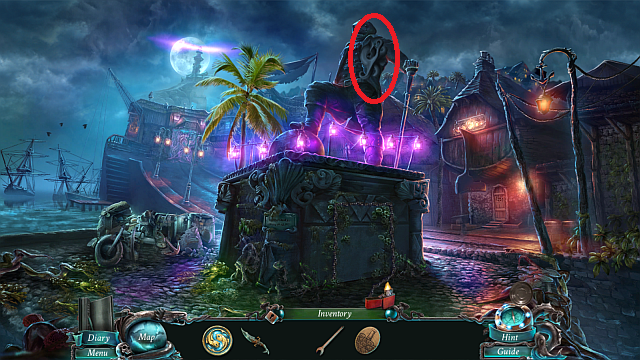
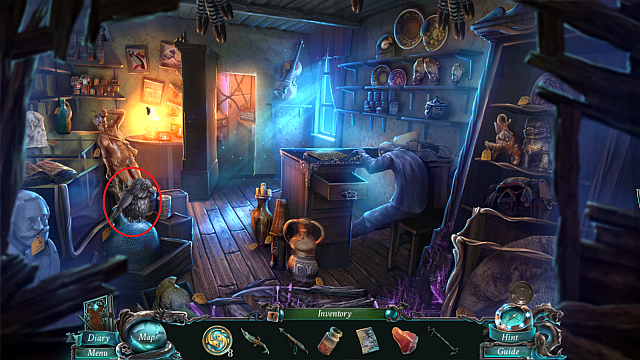
Location: Secret chamber
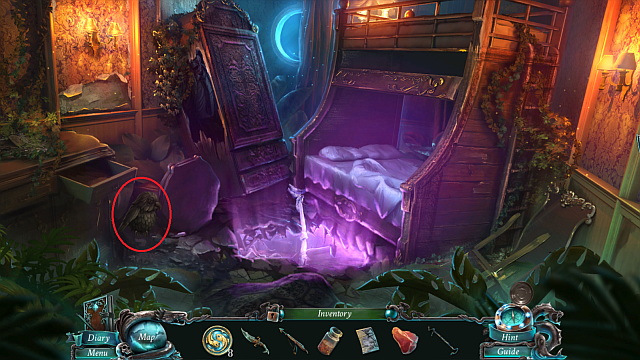
Move the shield [1]
Location: Hideout
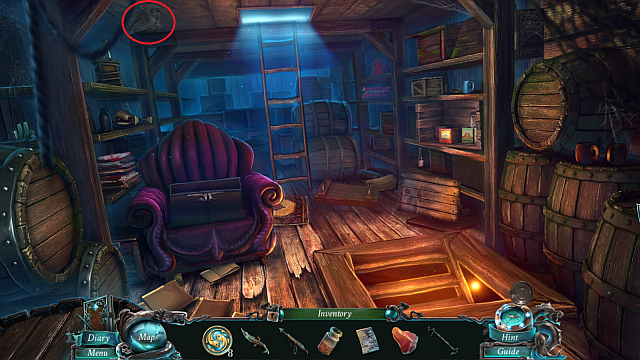
Click on the trashcan [1]

Location: Foyer
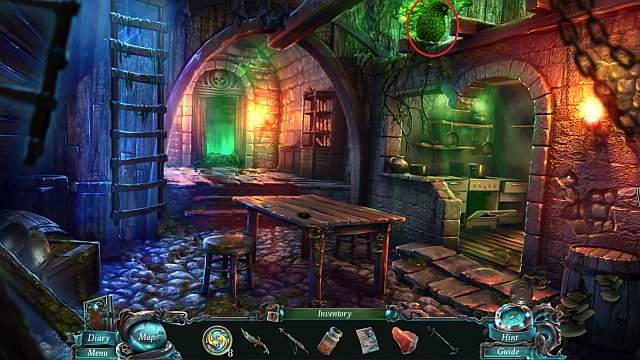
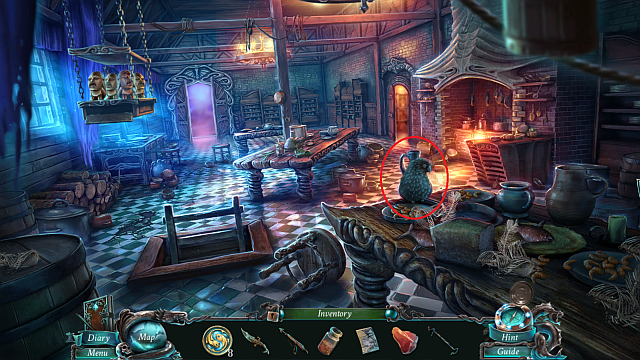
Click on the cup [1]
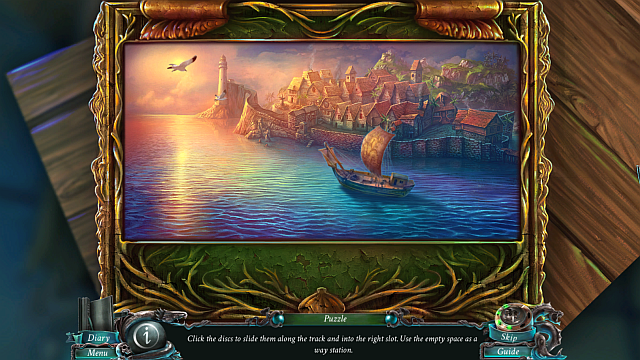
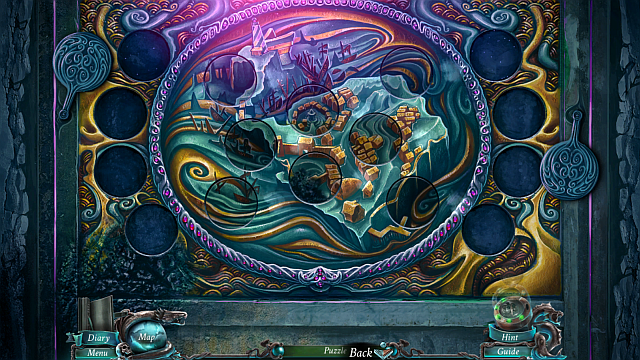
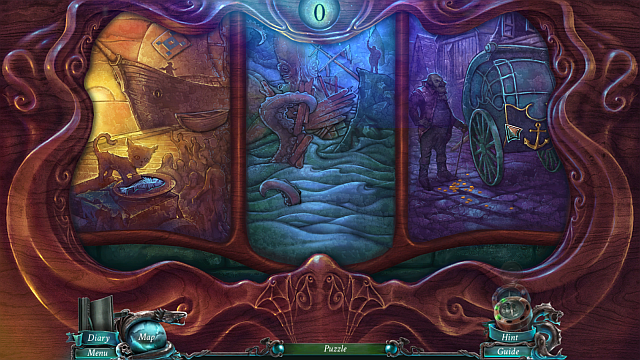
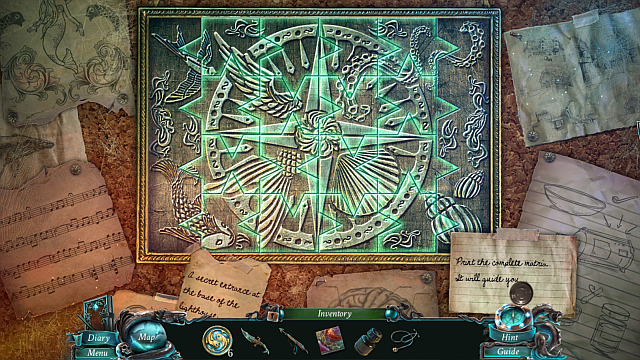
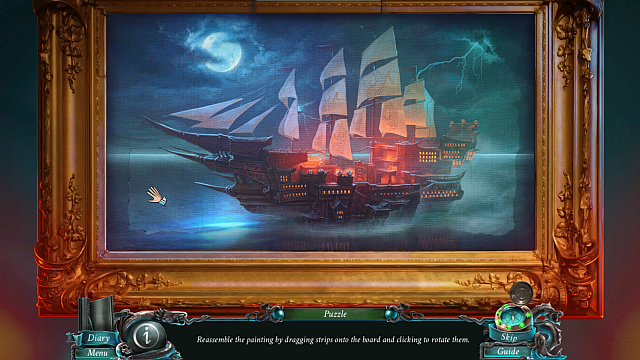
In the first puzzle, restore the image as shown above.
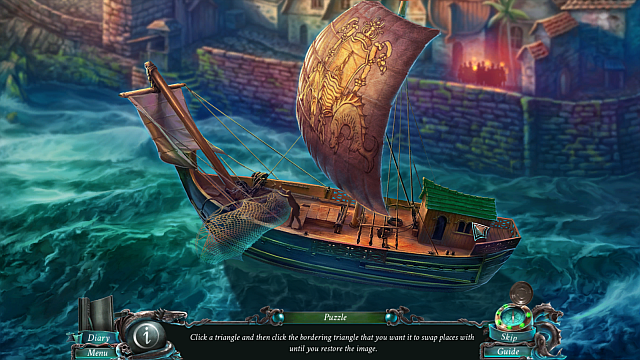
In the next one, restore the image of a ship.

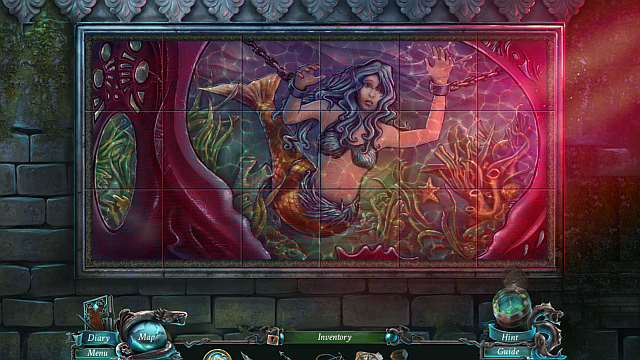
The third and the last one, at the same time, is about sliding triangles until you put together an image of a mermaid.
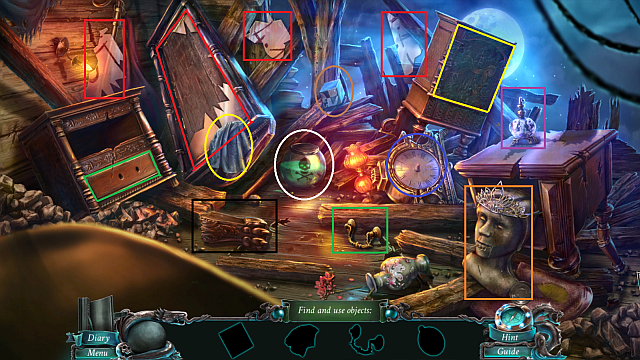
Perform the following actions;
- Put all of the glass pieces into the drawer (red)
- take the drawer handle and put it in the drawer (green)
- open the drawer and collect the pump, put it in the perfume vial (violet);
Use the perfume
- take the piece of clothing and dust the cupboard (yellow), then open it
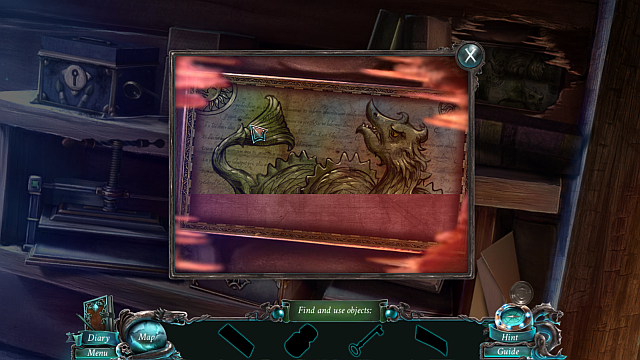
![- collect the chessboard piece and put it into the cupboard[1] - Chapter 2 - Puzzles - Nightmares from the Deep: The Sirens Call - Game Guide and Walkthrough](https://game.lhg100.com/Article/UploadFiles/201512/2015121618385640.jpg)
- collect the chessboard piece and put it into the cupboard[1]
- collect tongs and use it to fish the medal out of the bowl with acid(white)
- move the wooden fragment (black), put the medal inside and collect the jewel
- put the jewel in the tiara and collect the clock hands (orange)
- set the clock for 4:15 and collect the caduceus
![- put the caduceus in the first-aid kit [1] and collect the smelling salts from it - Chapter 2 - Puzzles - Nightmares from the Deep: The Sirens Call - Game Guide and Walkthrough](https://game.lhg100.com/Article/UploadFiles/201512/2015121618385636.jpg)
- put the caduceus in the first-aid kit [1] and collect the smelling salts from it.
![Press the button [1] use the mechanism [2] and the gear [3] - Chapter 2 - Puzzles - Nightmares from the Deep: The Sirens Call - Game Guide and Walkthrough](https://game.lhg100.com/Article/UploadFiles/201512/2015121618385794.jpg)
Press the button [1] use the mechanism [2] and the gear [3]. Complete the puzzle in the way shown above [4].
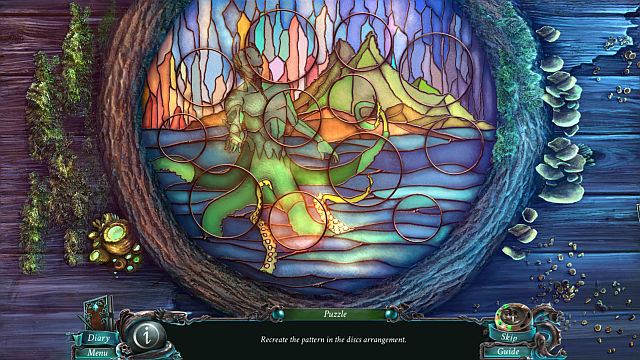
Fit the circles to complete the picture.
Fit objects into their outlines in the way shown above.
![Use the photo to activate the puzzle [1] - Chapter 2 - Puzzles - Nightmares from the Deep: The Sirens Call - Game Guide and Walkthrough](https://game.lhg100.com/Article/UploadFiles/201512/2015121618385883.jpg)
Use the photo to activate the puzzle [1]. Complete the picture in the way shown above. In [2] put the Rebel symbol. It will open a passage.
Do the following:
- take the book symbol and put it in the book (red). Collect the handle
- place the handle on the press and collect the knife (green)
- use the knife on the hammer handle and combine the handle with the rest (yellow); collect the hammer.
- use hammer on planks (blue)
- solve the puzzle in the way shown above, collect the fonts and the paint book key)
- use the key on the drawer (white) and collect the printing ink from it
- take a slip of paper from the envelope (violet)
- use the fonts, ink and the piece of paper on the printing press (green), read the code 247
- set the code in the little box (pink) and collect the bolts
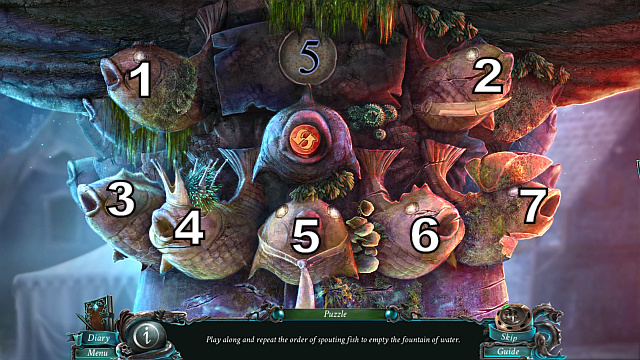
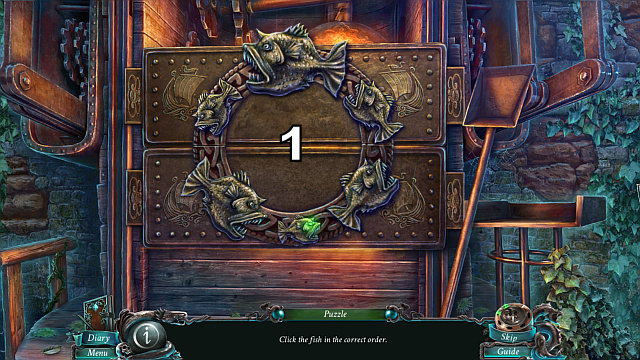
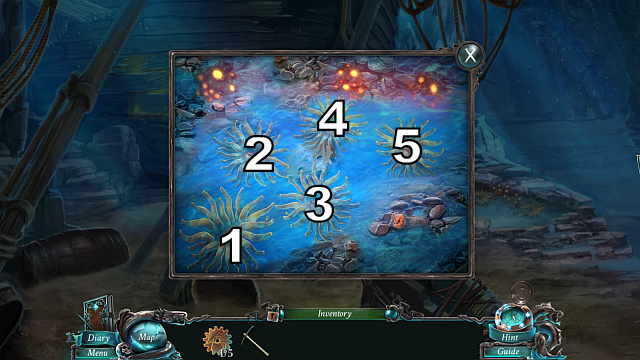
You will activate a game in which you need to repeat the order of the fishes that spit water. The correct order is as follows:
- no 3, no 2,
- no 1, no 5, no 2,
- no 7, no 2, no 1, no 3,
- no 4, no 1, no 6, no 2, no 5,
- no 1, no 4, no 5, no 6, no 2.
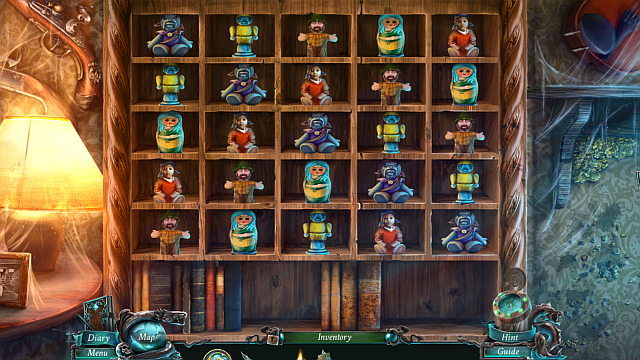
You will activate a puzzle where you need to put the toys in such an order, as to have only one type of a toy in each row and in each screen (see above).
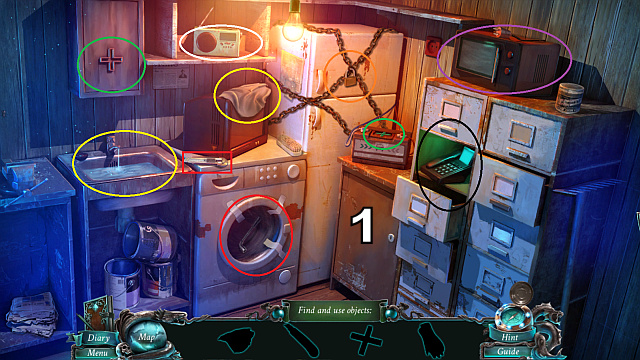
Take the cutter, use it on the tape, open the door and collect the wrench (red). Take the green cross and fit it into the cupboard's door (green). Collect the syringe and the glove. Collect the towel (yellow), close the tap and use the towel to fish the extension cable out of the sink. Use the key on the battery (where the cross used to be) and fill the syringe with acid. Use the syringe on the padlock on the fridge door (orange) and take the block of ice from inside, using the glove. Use the cable on the microwave oven (violet), put the block of ice inside and close the door. Collect the crank from inside and use it on the radio (white) Read the number 974. Dial the number on the phone (black), to receive a key. Use the key on the cupboard [1] and collect the blowtorch.
Match the jewels in accordance with colors (see the screenshot).
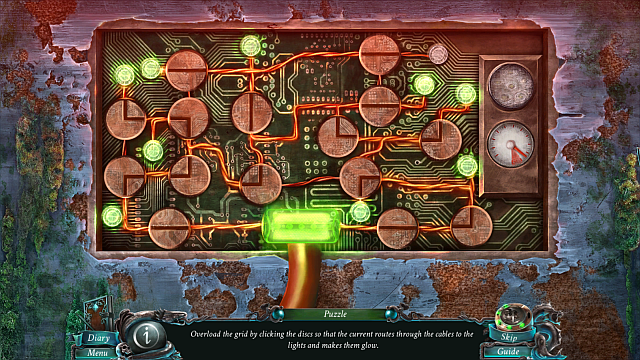
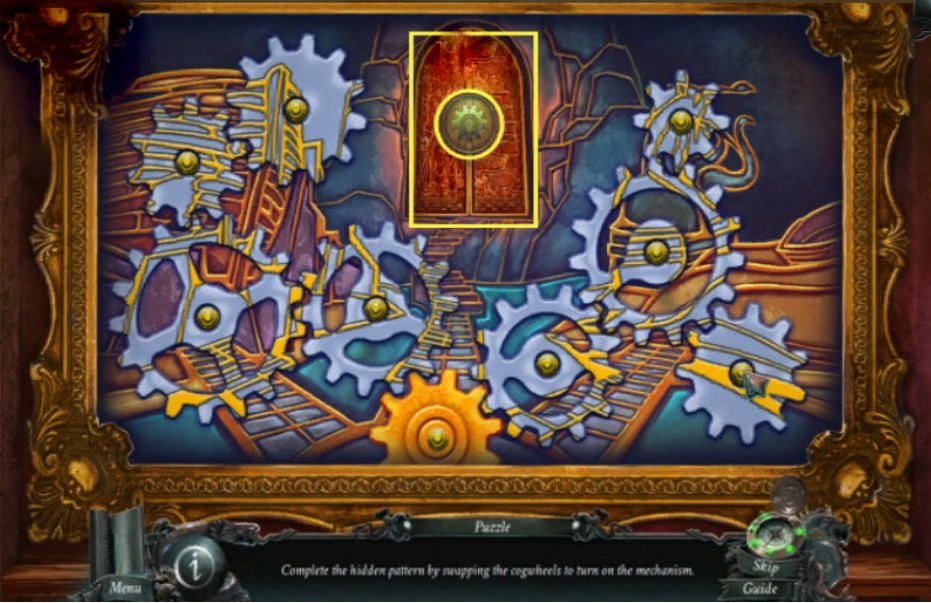
Arrange all the parts in a way that closes the circuit (see the screenshot).

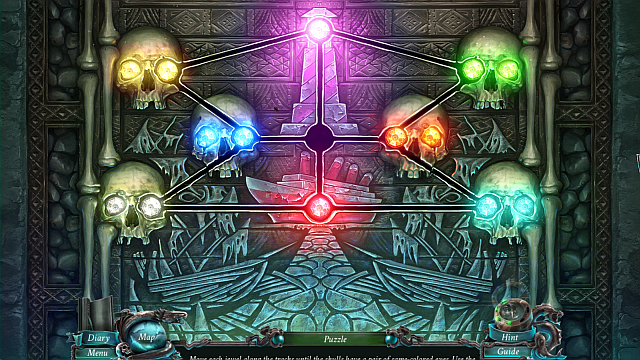
You need to choose the cables in such a way, as to make the drawing below match the one above.
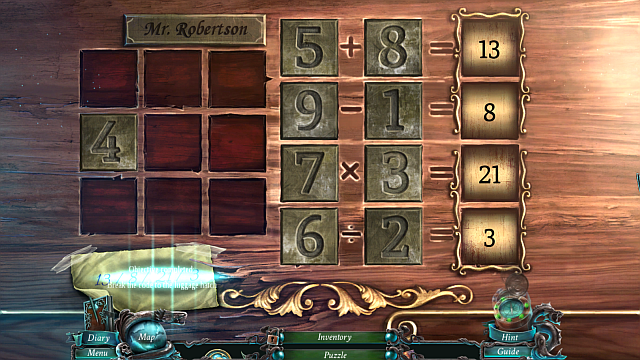
Arrange the numbers to fill the equations (see the screenshot)
Arrange the individual elements into one whole.
Arrange puzzle into the above picture.
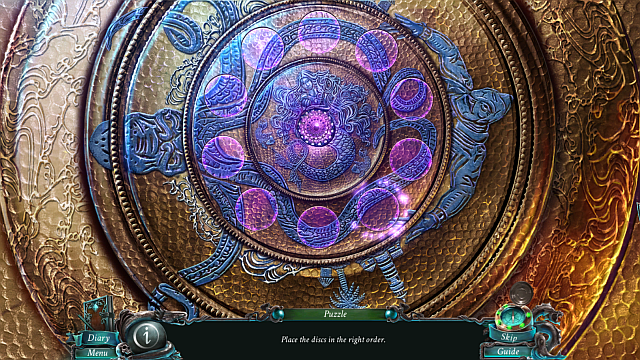
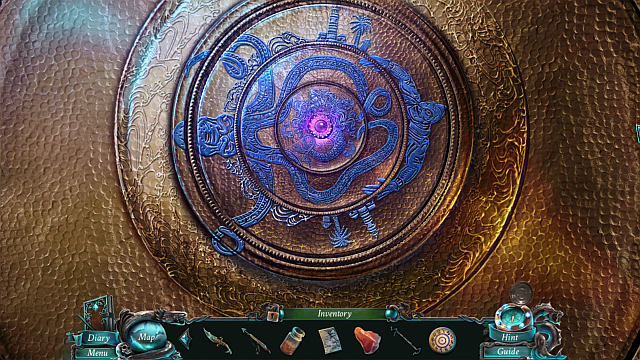
![Make the pattern in [1] match the one in [2] (it is best to start with the external rings) - Chapter 4/5 - Puzzles - Nightmares from the Deep: The Sirens Call - Game Guide and Walkthrough](https://game.lhg100.com/Article/UploadFiles/201512/2015121618390527.jpg)
Make the pattern in [1] match the one in [2] (it is best to start with the external rings). Then, arrange the side pictures as above.
![Put the lump of coal [1] and golden flakes[2] on the burner[3] - Chapter 6 - Puzzles - Nightmares from the Deep: The Sirens Call - Game Guide and Walkthrough](https://game.lhg100.com/Article/UploadFiles/201512/2015121618390539.jpg)
Put the lump of coal [1] and golden flakes[2] on the burner[3]. Light the burner and put it [4] (using the tongs[5]) into [6]. Then, pour the contents of the bottle [7] into [6], and use the spoon [8] to pour the golden flakes from the burner into [6].
![Use the tongs [1] to remove the coal lump from the burner and put it on the plate [2] mix ingredients [3] and pour into the test tube [4] - Chapter 6 - Puzzles - Nightmares from the Deep: The Sirens Call - Game Guide and Walkthrough](https://game.lhg100.com/Article/UploadFiles/201512/2015121618390558.jpg)
Use the tongs [1] to remove the coal lump from the burner and put it on the plate [2] mix ingredients [3] and pour into the test tube [4]. Then, put it over the burner [5]. After the mixture does hot, pour it through the sieve [6] onto the slip of paper.
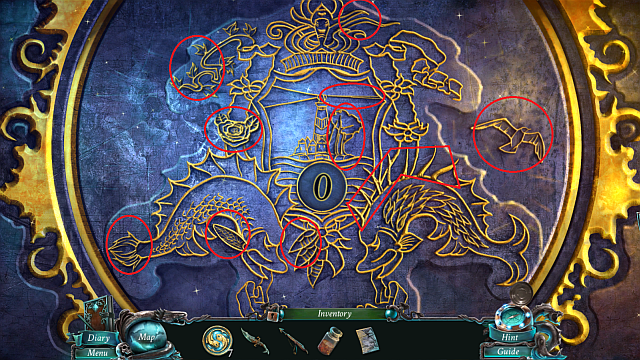
Find the shiny object that change after you click them (see the screenshot).
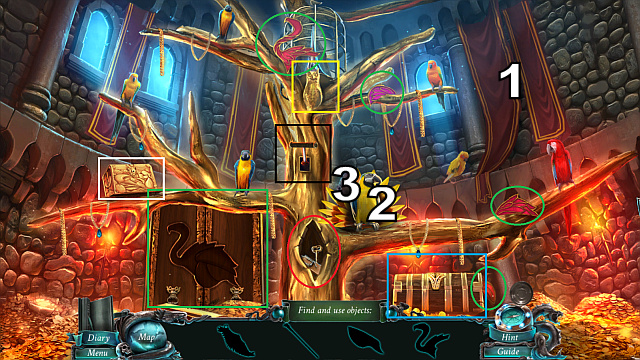
Put together the 4 flamingo parts to open the door (green). Take the cane and wing. Use the cane on the mouse trap, to get the key (red). Use the key to open the chest (blue) and take another wing. Complete the owl statuette with the wings (yellow), collect the trophy from the cage. Pull the lever (black). Put the trophy into the place that reveals on the wall [1] and collect lockpicks, then use them to open the chest (white). Take the cracker and give it to the parrot [2]. Collect the feather and put it behind the bird [3].
First, complete a mermaid in the smallest part.
Then, match the external rings.
Spin the wheels to complete the picture (the screenshot).
![Use the clock face and the clock hands in [1] - Chapter 8 - Puzzles - Nightmares from the Deep: The Sirens Call - Game Guide and Walkthrough](https://game.lhg100.com/Article/UploadFiles/201512/2015121618390939.jpg)
Use the clock face and the clock hands in [1]. On the face of the biggest clock, set the given time (10:16:37). To do that, move the hands of the smaller clocks.
![Put the bowl of glue in [1] and use the scissors to cut through ropes [2] - Bonus Chapter - Puzzles - Nightmares from the Deep: The Sirens Call - Game Guide and Walkthrough](https://game.lhg100.com/Article/UploadFiles/201512/2015121618390975.jpg)
Put the bowl of glue in [1] and use the scissors to cut through ropes [2]. Put dynamite in [3]. Use the lids to secure it [4]. Remove wicks from the bowl of glue and put them in the dynamite sticks.
Use the end part of the pickaxe with wooden handle and collect the pickaxe. Then, mark the lilies and press them in the order that they go on:
- no 5,
- no 4, no 3, no 2,
- no 1, no 2, no 3, no 4, no 5.
![Complete a path between [1] and [2] with them - Bonus Chapter - Puzzles - Nightmares from the Deep: The Sirens Call - Game Guide and Walkthrough](https://game.lhg100.com/Article/UploadFiles/201512/2015121618391033.jpg)
Complete a path between [1] and [2] with them.
Arrange the gears to complete the picture (the screenshot).
Read the note and collect 1/2 crab halves.
Collect both parts [1], [2] and secure them to the golem, then, arrange the wheels to make them match with the rest of the picture (screenshot). From the golem's hand, collect the [3] seal part.
Complete the above picture with the puzzle.
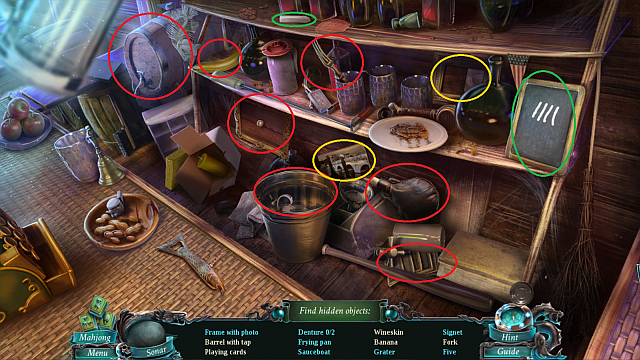
Just like before, find all of the items (red) from the list or play mahjong. Use the photo (yellow) and fit it into the frame. Do the same with the piece of chalk and draw the fifth line with it (green).
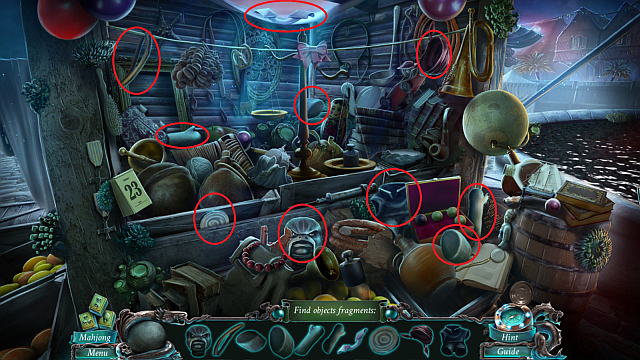
Find all of the marked items.
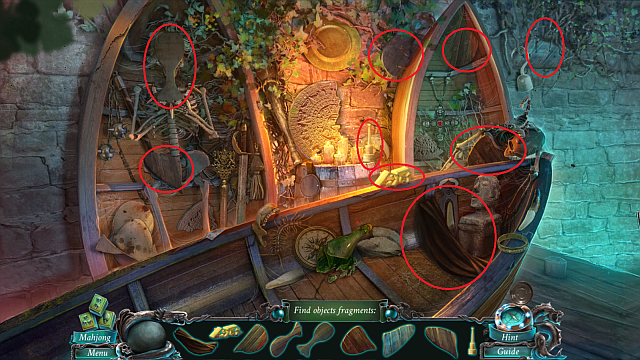
Find all of the marked items.
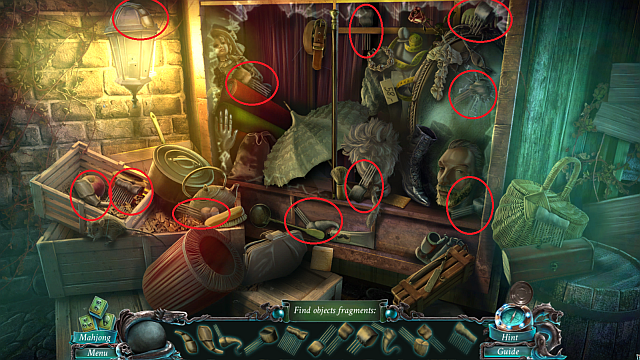
Find all of the marked items.
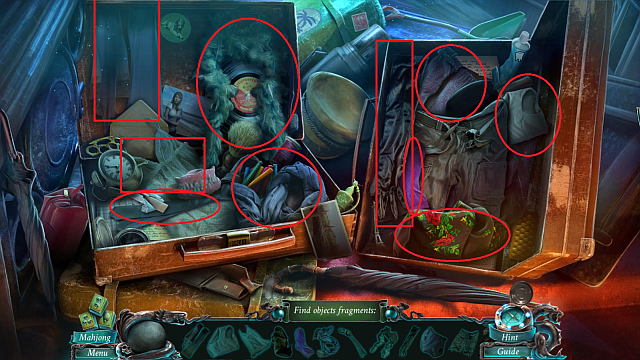
Open the suitcase and find all of the items (see the picture).
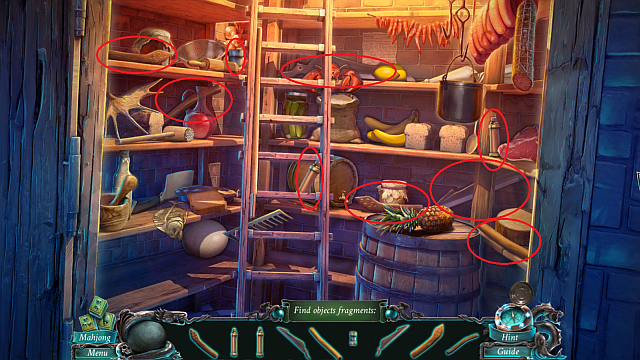
Find all of the marked items.

Find all of the marked items.
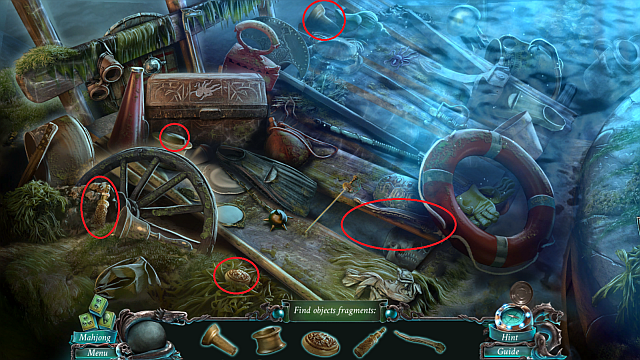
Find all of the marked items.
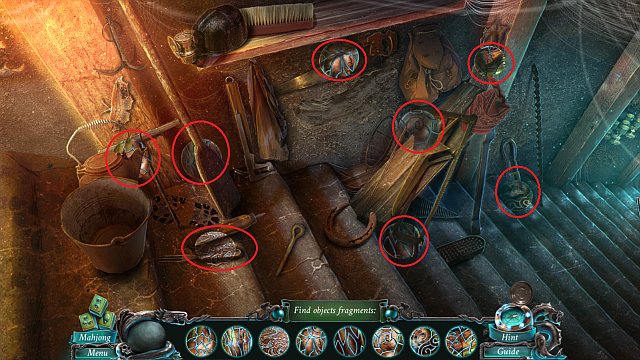
Find all of the marked items.
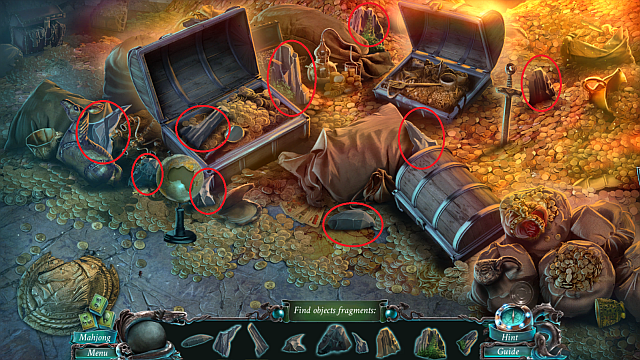
Find all of the marked items.


 Naruto Shippuden: Ultimate Ninja Storm Revolution Game Guide & WalkthroughNeed for Speed Rivals Game Guide & Walkthrough
 Need for Speed: Most Wanted (2012) Game Guide & Walkthrough
 Neverwinter Nights 2 Game Guide & WalkthroughNeed for Speed Carbon Game Guide & Walkthrough