
This unofficial Metal Gear Solid V: The Phantom Pain guide will comprehensively present the extraordinarily complex and fascinating game made by Hideo Kojima. The entire guide has over a dozen of smaller and bigger chapters which describe things like the game mechanics, quests description or finding the hidden surprises. The first few chapters contain the tips about the game's basics. Following chapters are focused on exploring the game's world, the stealth mode, eliminating the enemies during a direct confrontation or using the help of your assistants. This part will be concluded with the F.A.Q. chapter with information like how to make a quick fortune or which scientific projects are worth your time. The most complex part of this guide is focused on the main plot walkthrough and it describes how to complete every quest in 100%. There is also a description of all 157 Side Ops you may unlock during the game. The following chapters will describe the collectibles and secrets (Cassette Tapes, Blueprints, Memento Photos and others), the proper management of the Mother Base and how to unlock the achievements. You should also notice that this guide has a lot of screenshots which will show you the most important areas or items. You will also find few maps which will help you to navigate in the gigantic area you are going to explore.
Metal Gear Solid: The Phantom Pain is the very last game made by Kojima Productions studio which is managed by Hideo Kojima. During this game you will play the Big Boss character, mostly in Afghanistan and Africa in 1984.
In this guide we have used the following color designation:
Jacek "Stranger" Halas ()

The following, unofficial Metal Gear Solid V: The Phantom Pain game guide is intended to help understand the basics of gameplay, as well as with the completion of the first major chapter of the main plot. In the early pages of this guides, there are numerous chapters containing various tips & tricks, which should be especially helpful to those who are beginning their journey with the Metal Gear Solid franchise. These tips are associated with topics such as the exploration of the game world, carrying out tasks while remaining hidden, eliminating enemies through direct confrontation, relying on the assistance of your teammates, or the completion of received missions. A relatively similar chapter is the one with the frequently asked questions (FAQ). It contains answers to numerous topics, such as rapid acquisition of money, as well as how to spend that money reasonably, "fultoning" (sending people, as well as objects away via a balloon), or how to acquire the highest ranks in missions. The most space in the guide is devoted to walkthroughs to all the fifty missions from main camapaign. These are missions 1-31 from the first chapter - main story missions and 32-50 from the second chapter (new missions and modified old ones). Each mission was dissected into parts, which will allow you to easily access the descriptions of all tasks within each mission, tips & tricks concerning the proper preparation, or detailed description of each step required for their completion. The whole guide is complemented by numerous screenshots and maps from within the missions itself, making the task of getting to key locations, as well as finding the routes to move around the map a lot easier. Metal Gear Solid V: The Phantom Pain is a third-person action game, coming from the Kojima Productions studio, in which the player has the possibility to explore vast maps and complete various tasks scattered around them. The title promotes stealthy style of gameplay, as well as neutralizing enemies without killing them, although those who are willing to use brute force should find something for themselves too.
In this guide we have used the following color designation:
Jacek "Stranger" Halas ()

Walk / Run (press and hold)

Look around / Change the camera (press) / Zoom (press and hold)

Change position between: standing, crouching, lying on the ground

Reload / Lift or drop the body (hold)

Quickly lie down

Unique interaction (depends on unique item or object)

Equip a main weapon

Equip an additional item

Equip a supporting weapon

Equip a secondary weapon

Use the radio / Connection menu (hold)

Aim

Use the first person perspective while zooming / Use the binoculars (hold)

Fire from weapon / Melee attack

Pause (left part of the touchscreen) / iDroid menu (right part of the touchscreen)

Options menu

Move

Look around / Change your position when you try to hide while riding a horse (press) / Zoom (press and hold)

Begin or finish hiding while on a horse

Reload

Move faster

Jump on a horse org et off it

Equip a main weapon

Equip an additional item

Equip a supporting weapon

Equip a secondary weapon

Use the radio / Connection menu (hold)

Aim

Use the first person perspective while zooming / Use the binoculars (hold)

Fire from weapon

Pause (left part of the touchscreen) / iDroid menu (right part of the touchscreen)

Options menu

Drive a vehicle

Look around / Change the camera (press) / Zoom (press and hold)

Hide in a vehicle

Move a vehicle (hold)

Turn on a radio

Enter or leave a vehicle

Equip a main weapon

Turn on or off the night vision goggles

Turn on or of the vehicle lights

Equip a secondary weapon

Use a weapon mounted on a vehicle

Brake / Reverse gear

Use the first person perspective while zooming / Use the binoculars (hold)

Gas

Pause (left part of the touchscreen) / iDroid menu (right part of the touchscreen)

Options menu

Walk / Run (press and hold)

Look around / Change the camera (press) / Zoom (press and hold)

Change position between: standing, crouching, lying on the ground

Reload / Lift or drop the body (hold)

Quickly lie down

Unique interaction (depends on unique item or object)

Equip a main weapon

Equip an additional item

Equip a supporting weapon

Equip a secondary weapon

Use the radio / Connection menu (hold)

Aim

Use the first person perspective while zooming / Use the binoculars (hold)

Fire from weapon / Melee attack

iDroid menu

Options menu

Move

Look around / Change your position when you try to hide while riding a horse (press) / Zoom (press and hold)

Begin or finish hiding while on a horse

Reload

Move faster

Jump on a horse org et off it

Equip a main weapon

Equip an additional item
Equip a supporting weapon

Equip a secondary weapon

Use the radio / Connection menu (hold)

Aim

Use the first person perspective while zooming / Use the binoculars (hold)

Fire from weapon

iDroid menu

Options menu

Drive a vehicle

Look around / Change the camera (press) / Zoom (press and hold)

Hide in a vehicle

Move a vehicle (hold)

Turn on a radio

Enter or leave a vehicle

Equip a main weapon

Turn on or off the night vision goggles

Turn on or of the vehicle lights

Equip a secondary weapon

Use a weapon mounted on a vehicle

Brake / Reverse gear

Use the first person perspective while zooming / Use the binoculars (hold)

Gas

iDroid menu

Pause

Character movement / driving vehicles

Run

Walk

Change position between: standing, crouching, lying on the ground

Contextual action

Quickly lie down to assume prone position

Change zoom

Reload weapon / Pick up item

Prepare weapon (aiming)

Use weapon / Melee attack / Place marker while using the binoculars

Use binoculars (hold the button)

Use radio

Turn on / turn off lights (while in a vehicle)
iDroid

iDroid help

Quick main weapon swap from the inventory

Quick secondary weapon swap from the inventory

Quick support weapon swap from the inventory

Quick additional item swap from the inventory

Move the cursor

Turn on / turn off flashlight

Install / uninstall silencer
We have listed below few tips addressed to people who have just begun or are going to begin the adventure with MGS V: The Phantom Rain. Some of these tips are developed in further chapters of this guide.
1. If you have an opportunity to do so you should play Metal Gear Solid V: Ground Zeroes since it is game which we could call a prologue to Metal Gear Solid V: The Phantom Pain. It will help you to understand the somewhat complex plot of the series and will also help you to understand the game's mechanics better since The Phantom Pain right after the opening mission will throw you on one of the main areas and you will have not much time to practice. In Ground Zeroes you should at least try to complete the main quest however the side quests may also be useful since you will be able to use your progress to your advantage during The Phantom Pain. You will receive new skins, new staff for your Mother Base and so on (you may read about it in a separate chapter).
2. Metal Gear Solid V does not force you to use a specific playstyle during the game however you will benefit the most from every quest (with rewards such as the highest ranks, a lot of cash, new allies and so on) if you will act undetected and you will avoid killing random enemies. You shall try to eliminate your enemies by stunning them or by putting them to sleep. Remember that once you will do that to someone he or she may wake up later on and become an obstacle again.
3. Don't worry if you will not be able to do something during the mission as you would like to, for example if you will fail in achieving a high rank or you will not complete one of the side tasks. Metal Gear Solid V allows you to repeat already completed missions what you may start doing once you get to the Mother Base. Repeating missions will also allow you to use some options (such as "fultoning" the enemies) which were unavailable earlier on.
4. While completing the missions you shall also remember about the side activities you may take care of. Don't Focus your entire on the main plot but try to also look out for a way to save some additional hostages or gathering extra resources or diamonds which are going to be useful when you will develop your Mother Base.
5. A lot of equipment parts and other important tools are going to unlock by itself during the progression of the main plot. Some of them are received automatically although you have to put some effort into getting other ones (for example you have to find the D-Dog or a Russian translator by yourself). These important situations are also marked in our guide so you will be able to not skip any of them.
6. The game's world of Metal Gear Solid V will interestingly react to your actions in a global scale. If you will constantly repeat some schemes of actions it may result in increasing enemies' defenses. For example if you will try to complete every mission during the night you will be able to notice that new enemy bases will be much better patrolled during this time - they will use some additional headlights, more patrols and so on. Try to modify your tactics and compromise them with your orders so you will be able to keep being undetected.
7. If you don't mind spoilers you may prefer to read a mission introduction from our guide before you will start to play any mission. It will help you to learn what dangerous situation you may avoid and what items you shall take with you. It will allow you to avoid additional obstacles such as choppers or tanks which you could destroy with explosives instead of just running around them in shadows.
8. Metal Gear Solid V does not allow you to save the game where you want. Your progress will be saved automatically from time to time and it will be announced by a yellow icon in upper right corner of the screen. It happens mostly when you get closer to a new post, village or mission target. Keep track of it and don't quit the game prematurely if you haven't reach any checkpoint in some time. Remember about it also when you try to unlock any secret. You may lose your progress if you will quit the game, fail a mission or die without reaching a new save point.
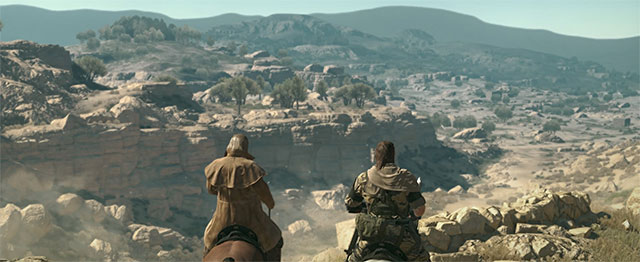
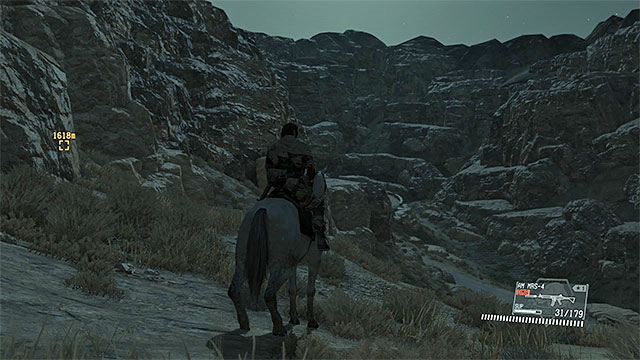
 Riding a horse is a great way to traverse long distances
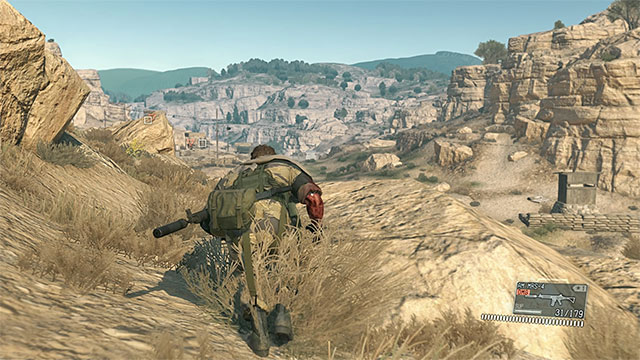
Metal Gear Solid V divides significantly from the previous games of the series since it allows you to explore huge areas without any great limitations. Obviously it results in some pros and cons. You will have a lot of freedom and you will be able to choose the best path towards a target or an evacuation area. From the other hand sometimes you will have to pass a huge distance (even a mile) to just get to an area you want. In this case you may decide either to walk or to use one of the facilitations listed below.
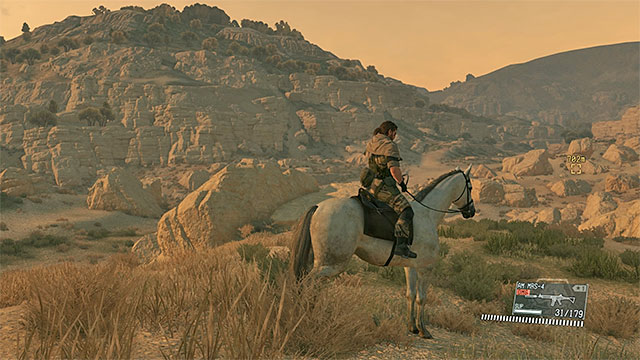
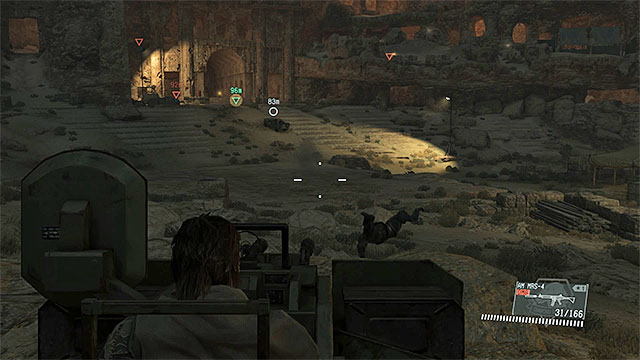
The best way to speed up your game will be riding a D-Horse. This horse may gallop fast and works great in more inaccessible areas such as hills and mountains. If you will see an enemy patrol while riding a horse you may also slant in a saddle to hide yourself behind a horse's torso. A horse will be a little less useful once you will start using a D-Dog as your buddy. If you are on foot you may more often use some vehicles to travel. Jeeps are definitely the best of them since they are much faster than trucks or armored vehicles, however vehicles also have their disadvantages. First of all you may find them mostly in big bases you have to sneak into and they are quite bad once they leave the main roads. However you may hide yourself inside them quite easily and this way avoid being detected by enemy patrols.
You may also use the fast travel option which requires you to personally unlock the fast travel locations however you are going to reach them in later parts of the game. Still you may use the helicopter transportation and land in some areas (especially at the beginning of a mission) as well as set up the evacuation area although if you will set up any of this places nearby enemy bases you may become spotted and in result your enemies may hallow or even try to shoot your helicopter down. The game will always tell you a chance of this to happen when you will try to choose a landing or an evacuation area.
 While climbing and walking through the ledges avoid falling from great heights
While travelling you shall always keep your distance from villages, posts and other places filled with enemy forces. Often you may ignore this places and find on map some less crowded path. In further part of this chapter you will find some tips about exploring the world.
The world of Metal Gear Solid V is not just a flat area. It has a lot of places on which Big Boss may climb. Climbing will sometimes allow you to avoid walls or to get on a top of a roof. You may also sometimes try to use a long mountain path to avoid an enemy post or to get to a high observatory point. You need to remember about two things. First of all Big Boss may climb only in the specific areas such as ledges or constructions where you will see the climb icon. The second thing is that you may die or be dangerously damaged if you will fall from a high area. Try to avoid walking near the edges and jump on the other ledges only when you will see a proper icon when you are near them.
The time is a very important part of Metal Gear Solid V since it has a great influence on missions. It flows in a similar way to time known from GTA series what means that one day take couple of dozens of real time minutes. The in-game time you may check by watching the map. In lower right corner will be shown in the "TIME" section.
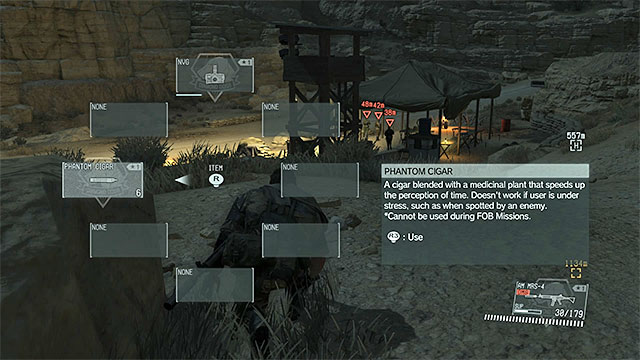
You can select the needed day time during the briefing before the mission (excluding the first main mission) - you can select morning, evening or leave the current hour. Additionally, you can use the Phantom Cigar to quickly change the time of day. It can be found in Big Boss's inventory since the first mission in Afghanistan (the picture above). Remember that you can use it limited number of times. Additionally, when you lit the cigar, you mustn't be under enemy fire - you must find a safe place to do it.
 If you will find a generator you may sabotage it
Every period has its advantages and disadvantages however basically acting during knight is a little bit easier. During the night you will have much better vision and you will be able to easily detect your targets. However it works in both sides and you may be seen by enemies from a significant distance. You will have to put a lot of effort into looking for covers and use more time to plan your moves and to crouch or lie.
Working during the night will allow you to move while undetected much easier since your enemies will see you mostly only in a distance of thirty or less feet. Even if you will be noticed by them you may easier hide yourself since they need some time to pull out a flashlight and get to your position. Some people also go sleep during the night and in result you may much easier avoid them or stun them. Remember, that you will have much worse view during a night and you will have to avoid all the sources of light when you are going to infiltrate enemy territory. You may destroy lamps or headlights with your guns however it may alarm your enemies. The best way to deal with the sources of light is to find and sabotage the energy generators. It will give you some time to act safer however after a couple of minutes someone will go there to reactivate them. This way you may also take down few guards without being detected.
Remember - During the early morning and late evening enemy changes its guars what makes this periods pretty unique. You may use it to get to some areas where you will see much less enemies however after every change the guards are "refreshed" which means that you are going to be forced to mark them with your binoculars once again (what is explained in details on the next page).
Remember - Some areas or enemies are unavailable through most of the day but are available during a specific time. Information about these situations you will find in later chapters of this guide focused on the walkthrough.
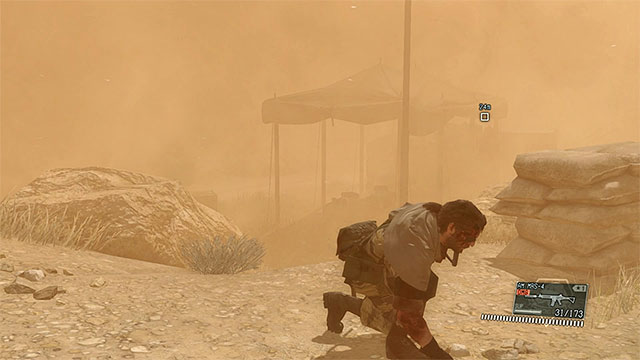 Sandstorms don't last for long so you have to act quick
During the game you will also encounter the weather changes which are going to influence your possibilities. The most important are the sandstorms which drastically reduce your field of view however you don't have to wait for it to pass but instead you may just as well use it to your advantage since the enemies which you have tagged by the binoculars are still visible. If you have made a decent reconnaissance you may use this time to easily eliminate the guards or to avoid them.
Remember - Don't try to "fulton" (sending off people or items with a balloon) during the dangerous weather. It will significantly reduce the chance percentage of them coming into the Mother Base.
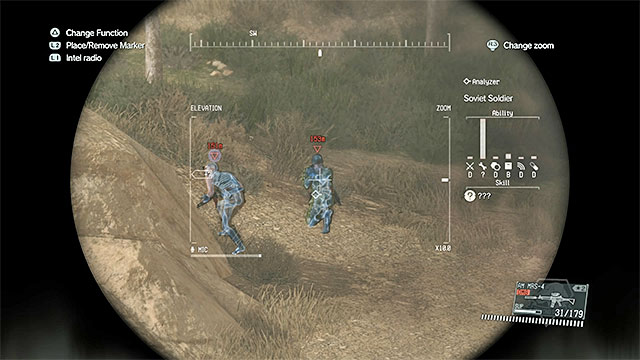
 Before using the binoculars, find a good viewpoint
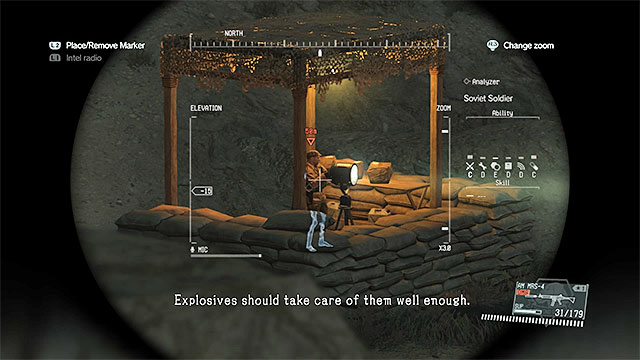
Reconnaissance is an important part of Metal Gear Solid V and you should do it whenever you're not rushed by the current mission objectives (like reaching a specific point of the map in time limit or escaping from enemy forces). Skipping this step might have very grave consequences, usually in the form of sudden confrontation with enemy forces, during which an unprepared hero will be at a disadvantage.
Start a reconnaissance whenever you're getting close to a unique location on the map, no matter if it's a small outpost near the road or a larger location (like a village, barracks or military base). Before you do something, make sure you're not too close to the location which you intend to explore (at least 150-200 meters from it). Look around for some higher ground (it might be even a guard tower) from which you will have a good view of the whole location. At the same time, make sure that large buildings won't hide too big a part of the location - in that case you will have to visit more than one viewpoint to examine the whole location (for example, you will have to check the location from the North and from the East).
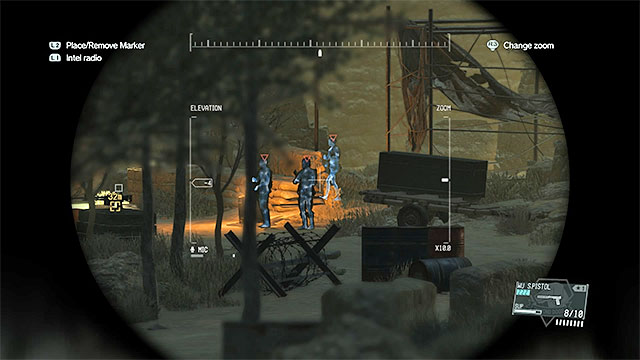 During the reconnaissance, try to learn as much as possible about the territory which you will soon infiltrate
After you reach a viewpoint, select the binoculars from the inventory, set it to medium or maximum zoom (it depends on how far away from the examined location you are) and start the proper reconnaissance. During the examination, look mostly for enemy soldiers and for currently active military vehicles (armored vehicles, tanks etc). Allow for the found enemy forces to be automatically marked by the game, this will let you track enemy movement. It's a very important matter that makes the game much easier. Marked enemies will remain visible all the time, you can see them even through walls. Thanks to that, you don't need to leap from each corner and wall to check their current position.
In addition to soldiers and their vehicles, during the reconnaissance you should also keep attention to:
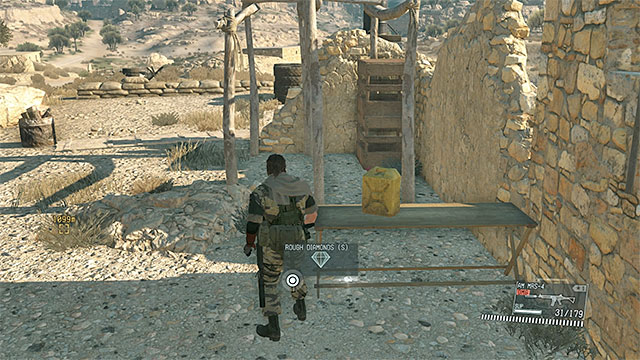 A thorough exploration of the surroundings will allow you to obtain rare resources or valuable diamonds
Main story missions are not the only attraction offered by Metal Gear Solid V. In addition to matters related to Mother Base, you can spend your time in some other ways. Most important additional activities available in MGS V on which you should focus are:
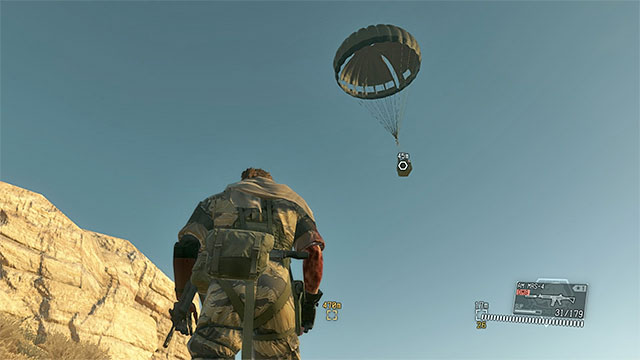 The supplies will reach the place you selected in slightly more than dozen of seconds
Calling supply drops becomes available since you visit the Mother Base for the first time, after completing the second main mission (Diamond Dogs). It's a very useful option thanks to which you won't have to worry that suddenly you will no longer be able to use a weapon with suppressor or that destroying the tank found in enemy base will be impossible. In order to call a supply drop you must activate the iDroid device. Go to the Missions tab and then select the first option from the list - the Supply Drop. The drop that you should use most frequently is Ammo/Fulton. It allows you to replenish the weapon ammunition and the supply of Fultons. The best thing is, it regenerates the suppressors in your silenced weapons (by default, the suppressors are available in your assault rifle and in the tranquilizer gun). Use two other supply drop options only if you have selected the wrong equipment before the mission and because of that now you have trouble with dealing with the enemy. Calling those drops is much more expensive.
After selecting the supply drop type, you must choose a landing zone. It should be close to you and far from the enemy. Now all that is left is to wait until the chest with the equipment reaches the ground (make sure not to position yourself directly underneath it!).
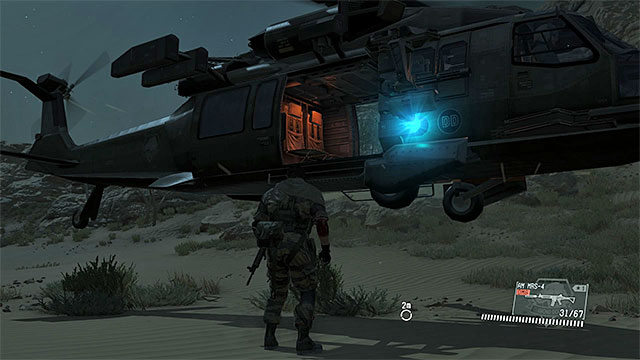 Select the landing zones for the helicopter that are away from enemy buildings
Majority of missions (including side ops) end with exfiltration - the moment when you must leave the operation zone and go back to the Mother Base. Exfiltration can be done in two ways:
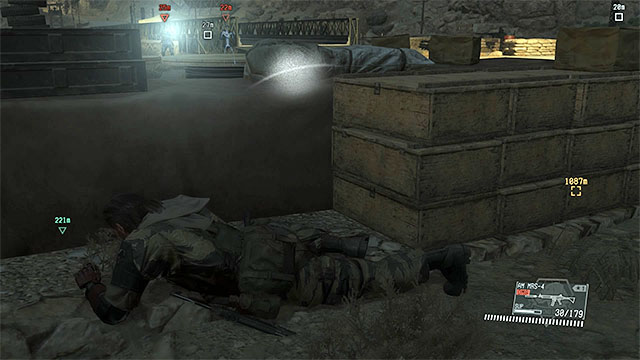
 Move mostly in crouching position or by crawling
Sneaking up in Metal Gear Solid V isn't very complicated, but the game doesn't do anything to make it easier. Enemies aren't blind or deaf. What's more, they can cooperate and adapt to the current situation (for example, to the time of day). One of the most important things to remember is that enemies have significant field of view. It becomes clear when traveling during the day, when you can be easily detected from even few dozens of meters. A partial solution to that problem is acting mostly at night (more about day/night can be found in the previous chapter of the guide). It's not always possible, and it makes it only slightly harder for enemies to detect Big Boss; moreover, the enemies can help themselves with spotlights while searching the area.
The best and at the same time the easiest way to reduce the risk of detection is moving mostly in crouching position and using available cover. Big Boss automatically "sticks" to all potential covers, you don't need to press any additional buttons. Crawling is a bit more extreme solution that you should use mostly when you're on open terrain and you can't or don't want to use alternative route. It is not recommended to use crawling during the whole game, it will greatly reduce your movement speed.
 In order to avoid unnecessary confrontations, try to pick the routes that are less used by enemies.
Many potentially dangerous situations related to sneaking can be partially or completely avoided. The reconnaissance described in the previous chapter of the guide is very important, it allows you to identify enemies and track their movement. In addition to that, it is wise to constantly look around for alternative routes to the target. For example, if a guard post separates you from the current mission objective, you don't have to get through it, you can walk around it as well.
Important - Don't overdo avoiding enemy camps, by doing so you might miss the opportunity to complete a side missions or obtain valuable secrets. Decide to avoid enemy territory only when you think that the risk is larger than the potential profits.
 The guard might walk towards the place where he saw or heard someone suspicious
Enemies in Metal Gear Solid V have four main behavior states - the state of full calmness, curiosity, increased vigilance and full alarm. The guard might switch to the state of curiosity when he noticed a suspicious person, but couldn't identify it as you or when he heard something suspicious. If you manage to hide fast enough, the alarm won't be raised. However, the guard might decide to check the territory where he noticed something. In that case you can act in one of three ways - quickly move away from the place where the enemy is going, wait for him and neutralize him (a risky method, but might prove to be effective) or distract his attention. An empty clip dropped to another place is the best way for the latter, especially since you can decide precisely where it will land (you can, for example, point the enemy in a completely different direction).
 Alarm in the base usually means large trouble
Increased vigilance usually means more trouble, especially since the nervous guard very often informs his colleagues about what's worrying him and they gang together for the "hunt". This state usually activates when you make some larger mistake, for example when you shoot from a weapon without a suppressor or when you allow a body of a knocked-out or killed guard to be found. Similarly to the state of curiosity, you can quickly get away from the zone that the enemies will want to search. You can also hide someplace, for example in the bushes, and wait. After some time, the situation calms itself and the guards will go back to their routine patrols.
A state of full alert starts when you are detected by an enemy and you didn't manage to eliminate him quickly enough. That person will then start an alarm and the attack on you will start. Most of all, you should know how the alert raising mechanism works. By default, only the most immediate vicinity of the specific opponent is being alarmed. If that specific opponent has been in the open area, far away from any developments, there is a chance that only several of the enemies will respond to the alarm. If that enemy has been inside the base, most probably all of the opponents stationed there respond to the alarm. There is one more obstacle, regarding the alarms. The personnel of a given base may contact the other bases and smaller outposts, which may result in the heightened alertness of the larger portion of the map. You can remedy this by sabotaging communications devices in bases, beforehand, e.g. by blowing up antennas on rooftops, or by cutting off power supply.
The best response to the alarm is escape, especially that the opponents that you eliminate may soon be replaced by new ones. Apart from that, longer fights may deteriorate your ranking at the end of the mission and lead to lowering Heroism Score.
 Reflex mode is the last resort before the alarm is raised
One of the new additions in Metal Gear Solid V is Reflex Mode, which is an addition really handy in sneaking. It automatically slows time whenever you are detected by a guard. It gives you few seconds to shoot that person. If you succeed, then the alarm won't be raised.
Reflex Mode has two large cons. First, using it is limited, don't count that you can move through the game world as you want and ignore any reconnaissance. Second, using Reflex mode will strip you of the bonus score after completing the mission and thus it might make it harder for you to obtain the highest S rank. If you don't want to use this option at all, you can deactivate it in the main menu.
 After sneaking up on the enemy from behind, you can choke him or stab him with a knife
You have learned many things about how to avoid unwanted confrontations with the enemy from the previous chapter of the guide. Sadly, many times confrontation is required or suggested, for example when the hostage that you're looking for is inside the building surrounded by guards and exfiltrating him might be very difficult while the guards are still active.
The safest way to eliminate enemies is using a weapon with a suppressor. If possible, try to use a weapon with tranquilizer ammunition since the beginning of the game. Thanks to that you will leave enemies unconscious instead of killing them and you will receive a better score at the end of the mission. Use the rifle only if you have no other choice, for example when the guard is on an open territory and is close to detecting you.
Important - As you progress in the game, you can unlock many new weapons. The selection of weapon research should depend on the game style you have selected.
Important - The suppressors in the weapons gradually wear off. Because of that, try to make each shot count. Additionally, aim at the heads, thanks to that a single hit should stun or kill the enemy. You can replenish suppressors with the supply drops (they have been described in the previous chapter) or by thoroughly exploring the game world (search mostly the insides of the buildings).
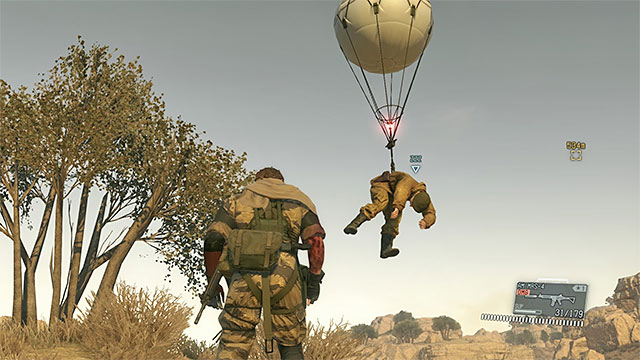
 "Fultoning" the enemies is recommended
You can also silently eliminate opponents using melee combat. The best way for that is to silently sneak up on an enemy from behind. Just make sure not to move too fast and avoid pushing any items on your way. It is best to choke the captured enemy until he loses consciousness, but you can kill him with a knife as well.
Stunning enemies in MGS V has one grand disadvantage. They don't remain unconscious till the end of the mission, sooner or later they will regain consciousness. A previously stunned guard might start thorough check of the territory where he was attacked or even alarm his allies. This problem can be reduced by hitting enemies perfectly in the head with a tranquilizer gun. Thanks to that they will remain inactive for longer. The best way to take care of them is to "fulton" them (send them away with a balloon) when they lose consciousness. This action has two main advantages. First, you won't have to worry that they will make your further actions harder. Second, you might obtain a new worker in your base (assuming that the enemy sent with a Fulton won't die on his road to the Mother Base).
 Do not destroy spotlights, because this will anger the enemies even more
While sneaking, in Metal Gear Solid V, you also need to keep in mind other potential threats, apart from the ones described in the rest of this guide. Also, it is a good idea to be aware of them, before starting the game.
Paradoxically, many of the threats become active after dark, because this is when enemies try to make up for their limited range of vision. While exploring the map, during the night, you should watch out, predominantly, for watchtowers and other spots (e.g. roadside fortifications), with spotlights lighting the area, in them. Avoid walking into the lighted area, because this grants the enemies with vision comparable to that of broad daylight. The easiest way to handle this is to walk around these spots, at a safe distance, and leave them alone or get the operators from behind. Destroying spotlights is not a good idea, because this will only alarm the nearby enemies and encourage them to search the area more thoroughly.
Playing too many missions during the night makes the enemies start using night vision goggles. You need to keep this in mind, while performing the reconnaissance. If you only notice that one of the soldiers is using night vision goggles, act in the same way as you would during the day, because they will be able to spot you from long distance.
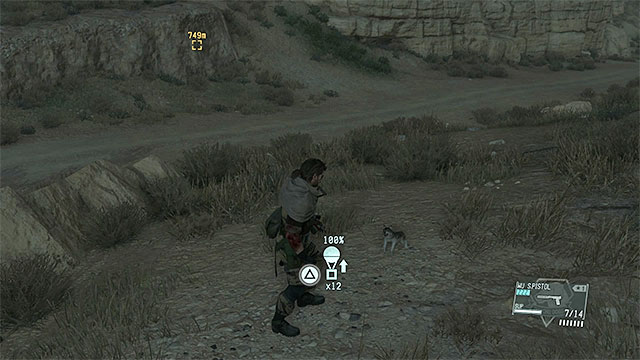
 In the case of animals, the safest method is to put them to sleep and fulton then to your zoo.
A completely different type of threat, connected with sneaking, is posed by wildlife. You do not need to worry about the smaller animals, but if you run into a pack of wolves, or a big bear, you should stay especially vigilant. Bigger animals may try to attack the Big Boss and not only wound him, but also make unnecessary noise. If the circumstances allow that, use, e.g. the pistol to put the animals to sleep and, at the same time, fulton them to the Mother Base, where they enrich your zoo.
 Use covers and lie on the ground to become a harder target
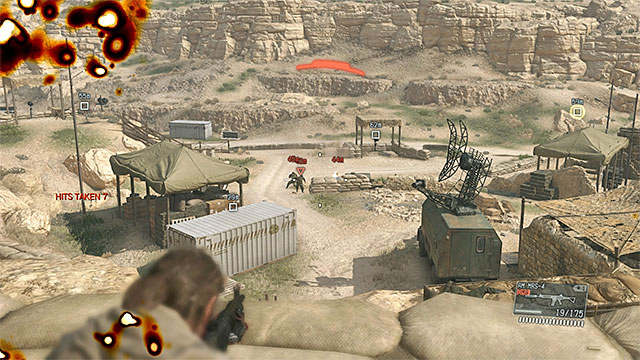
Metal Gear Solid V awards remaining undetected, but in some circumstances it is recommended or even required to participate in direct confrontations with enemy forces. In some cases it happens due to the game storyline. However, mostly it happens when you weren't cautious enough and you've alarmed the enemies.
Once the battle starts, you can of course try to escape (preferably on a horse or inside a vehicle), but you can also choose to remain on the battle zone. During the battle, most of all try to regularly use cover (Big Boss automatically sticks to them) or, if it's not possible, lie on the ground and try to attack enemies from higher grounds. Assault rifle works best in eliminating regular soldiers. You should aim at enemy heads. Grenades can be helpful as well as long as you precisely aim where to throw them. A well aimed explosion can hurt or eliminate few enemies at once.
Enemies are eager to use grenades as well. When you notice that someone is preparing to throw a grenade, shoot at him and try to disrupt him. If it's too late for that, then quickly move someplace else. Otherwise Big Boss will be knocked to the ground or he will die. In addition to grenades throw, you should also look out for actions like trying to surround you. Additionally, you should aim to finish all confrontations as quickly as possible. Otherwise, the enemies might call for reinforcements.
In some situations, melee attacks might be helpful in eliminating opponents. You should decide to use CQC when a single opponent has gotten close to you. Don't try to fight opponents with your fists when there are more than one enemy nearby. You can perform few hits in close combat or a throw. In both cases the attacked guard should be knocked down to the ground and stunned - it means you can additionally use Fulton on him.
 You can use enemy defense systems for your needs
You can also use some heavy equipment for eliminating opponents, like, for example, a grenade launcher. You should also look around for military equipment that can be found in the battle zone. You can, for example, find an armored vehicle and take control of its weaponry. It is also a very good idea to find fortified stationary cannons. Many of them allow you to attack enemies with heavy fire. Of course, when using them you can't move around and enemies might try to use that. Some of them also have a limited range.
Important - Confrontations with enemy vehicles and flying machines have been thoroughly described on one of the further pages of this chapter of the guide.
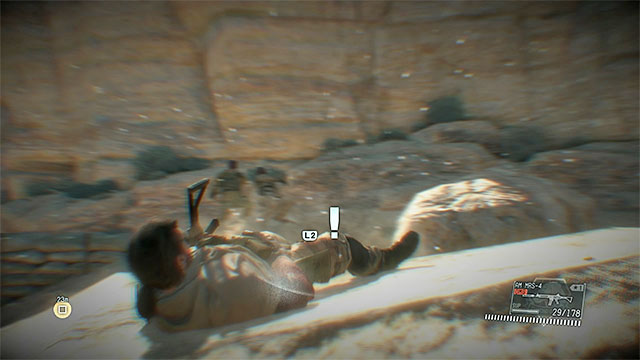
 Whenever you receive major wounds, retreat someplace safe
The risk of being wounded is a natural part of each direct confrontation with enemy forces. Healing mechanism in Metal Gear Solid V is rather simplified. All "regular" wounds will be automatically healed as long as you provide a few calm moments for Big Boss to regain full strength. So, whenever it is needed, try to find a safe hideout. Sometimes, the main character might receive some serious wounds. In that case the only way to heal him is holding the action button. You shouldn't ignore such wounds, because of them Big Boss might not be able to run or jump on a horse. It might make it much harder to win a battle or escape from a dangerous territory.
Important - the character you control can receive injuries or die in many different ways. Most of all, avoid falling from high altitude, touching the mines placed in some locations, standing near objects that might explode (like barrels) and move on open terrain in locations patrolled by enemy machines.
If you fail in healing the main character and he will die, you can return to the last checkpoint or restart the whole mission. You should select the first option, thanks to that you won't lose too much of your progress (the game creates new checkpoints regularly). Repeating the whole mission is useful only if you're attempting to obtain the highest score and rank.
Unique opponents in Metal Gear Solid V can be divided into several categories and below, you can find descriptions of the four most important ones. Enemy vehicles have not been listed and they have been presented on the next page of this chapter.
 Try to stay near a cover and determine the position of the sniper quickly
Snipers in MGS V are as annoying as in nearly any other action game. Usually, their range of vision and firing is long and it is difficult to spot them quickly, due to their positions, or outfits. You can secure yourself against potential sniper attacks thanks to reliable reconnaissance. If you fail to spot the sniper quickly, try to lie down or hide behind the nearest cover, after which you should plan on your next actions. The easiest way to eliminate snipers is with a scoped sniper rifle, or by getting them from the side or from behind (if they still have not spotted you). The most extreme means is summoning air raid onto the sniper's positions, but you should do this only if there is one occupying an area that is more difficult to access and this makes it difficult to complete the mission.
 You can often tell the high-ranked officer by the beret (usually green or red)
You keep encountering enemy commanders and single officers, virtually, from the beginning of the game. In themselves, they are not a serious threat to you, but they can summon reinforcements much faster. If possible, it is a good idea to restrain them and fulton them on the balloon to the Mother Base, because the possibility of obtaining a valuable personnel member is high then. Still, keep in mind that they are usually difficult to get to (e.g. deployed in the center of a big base) and they often are guarded.
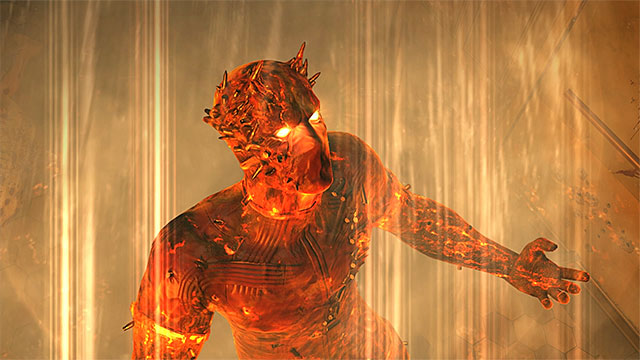 Man on Fire is the fits boss that you encounter
Bosses are unique opponents that appear, nearly exclusively, in main missions. You rarely encounter them, but nearly each one of such encounters is a big challenge, because they have unique skills and a separate (extended) health bar. Walkthroughs for all the boss battles have been provided in the walkthrough for the game, because each of such encounters is a unique experience.
 Stay away from "zombies", because being spotted means lots of trouble
The Skulls also are unique opponents. At first glance, they resemble sluggish zombies, but this only seems that way. Starting with the moment, at which they spot you, they become very agile and pose threat greater than any other standard opponent that you encounter throughout the game. If possible, (and if the mission allows that) stay away from them, thanks to which they do not spot you and do not attack. If, in spite of your attempts, you have been detected, there are two ways to handle this -fight or flight. Fighting them is a good idea only if you need to stay in this very area and you come well armed. The best weapons to use against zombies are rocket and grenade launchers. Escaping is the best solution if you do not need to stay there. However, keep in mind that escaping on foot is doomed to fail, because zombies move very fast. As a result, you need to use a vehicle or (which is a better idea) the horse.
Note - During your encounters with the Skulls, the entire area is veiled in fog, which means that you cannot request air support nor the pick-up chopper. This is an additional incentive to make you avoid such places, instead of trying to fight them.
Initially, in Metal Gear Solid V, apart from minor exceptions, you do not encounter any enemy vehicles. This changes drastically, beginning with main mission eight, where ground and air vehicles become commonplace and often destroying them is included in primary objectives of missions. Below, you can view a list of the most common enemy vehicles, along with hints on how to deal with them.
 Armored vehicles are quite easy to destroy
Armored vehicles are, the most frequent enemy military vehicles (jeeps and trucks do not have additional weaponry). They appear in two variations - with standard machine guns mounted on them and rocket launchers, which they use to wreak havoc. As for the enemy APCs, you can use the weakest types of grenade launchers, rocket launchers or explosives (such as C4, mines, etc.) to destroy them. Still, you need to keep in mind that a single attack is not always effective and you may have to strike the vehicle again.
Note - While infiltrating enemy bases, it is a good idea to search for unmanned armored vehicles, thanks to which you can steal them and make completing the current mission objectives easier.
 Fire at the enemy tanks from safe positions
Tanks are definitely more rare than the APCs, where they pose much more threat, or obvious reasons. A single tank attack can kill you instantly, or severely wound you. If only this is not required, do not engage them. To destroy tanks, use only the strongest rocket launchers and mines. If a single attack fails, repeat it quickly and, in the meantime, try to avoid fire from the tank.
Note - You can fulton all of the ground vehicles (requires the CARGO 2 upgrade). This is a perfect method of eliminating them from the battlefield. You always need to be very careful here, and make sure that you are not spotted by the crew too early.
 Many choppers engage you only after they spot you
The enemy combat vehicles are also quite a handicap - they can fly above the entire map and search it, thanks to the spotlights mounted onto them and lay fire on you, as soon as they spot you, which is capable of draining your health points quickly. While fighting against choppers, it is always a good thing to have a cover at hand and to hide behind it, before you strike again. For destroying choppers, always use the best rocket launchers, at best the ones with targeting system, thanks to which you will not be wasting rockets on trying to hit the chopper.
Note - If you manage to damage the enemy chopper, its pilot will most probably, try to escape the battlefield. You can either let it do that, or send another rocket towards it - the other variant is the recommended one, if you want to score better towards the end of the mission, or if destroying the chopper is one of the objectives.
Note - If there is a big base around, check it for an AA cannon. Using it can be a good alternative to the standard equipment of your character.
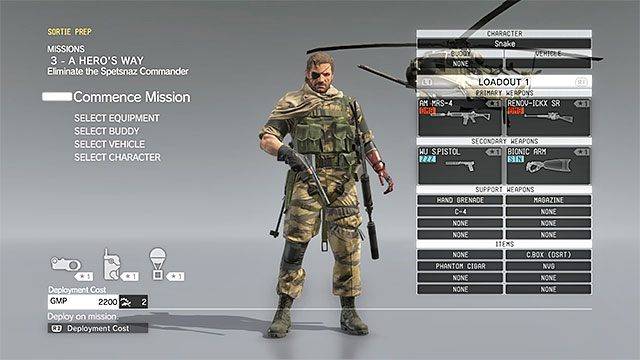 Mission preparations screen
All missions that take place after completing the second main mission (Diamond Dogs) offer the chance to prepare for the mission. You shouldn't skip this step, otherwise you might choose the wrong equipment and make the mission much harder than necessary. Most important things you should think about are:
Mission objectives in Metal Gear Solid V are divided into three main categories. Despite appearances, at first it is hard to distinguish them. Those categories are:
Important! In many cases completing all mission objectives during the first playthrough is impossible or very hard. For example, you might not have specific equipment or various objectives exclude each other. Remember about not completed objectives when repeating a mission (more about it on the next page of the guide).
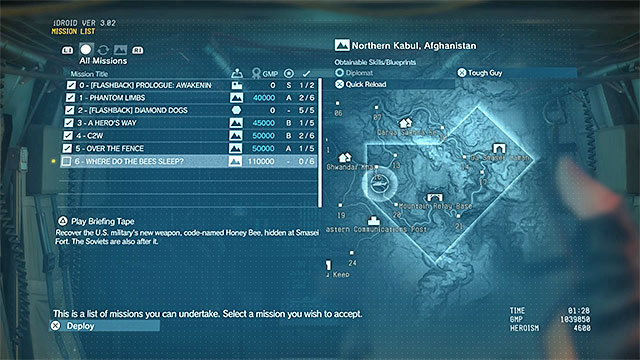 After opening the mission list you can check the obtained ranks and completed objectives
Each completed mission in Metal Gear Solid V can be repeated. This option becomes available after visiting the Mother Base for the first time (during mission 2 - Diamond Dogs). From that moment, while using the helicopter, you can select from the mission list not only new missions, but the ones already completed as well.
Repeating the missions allows you to test other paths to mission objectives or complete some requirements in different ways. The main motivation to mission repeating should be obtaining higher rank. When completing a mission for the first time, it might be difficult to obtain S rank due to the lack of proper equipment or simply not knowing the territory and mission targets. In addition, mission repeating is a good way for earning GMP and for taking care of excluding mission objectives and hidden targets, about which you didn't know when completing the mission for the first time.
Warning - If you are going to repeat a mission you will see that every quest you have already completed is still considered done. You don't have to complete them again although you may do it if you want to achieve a higher rank.
 An example of a summary window after completing a mission
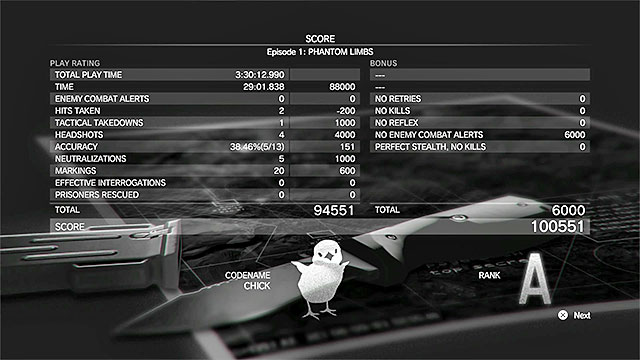
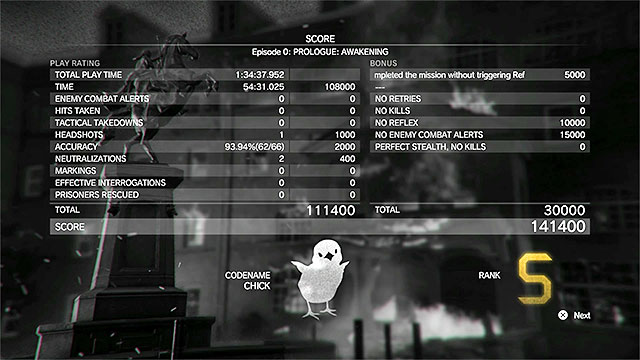
Missions in Metal Gear Solid V always ends with a summary, you should take some time to check it. At first the game shows some general statistics and informs you about the number of obtained points. How much points you accumulated determines the received rank (F is the worst, S is the best). More details about obtaining the best ranks can be found in the next chapter of this guide, on the How to obtain the highest S ranks in missions? page.
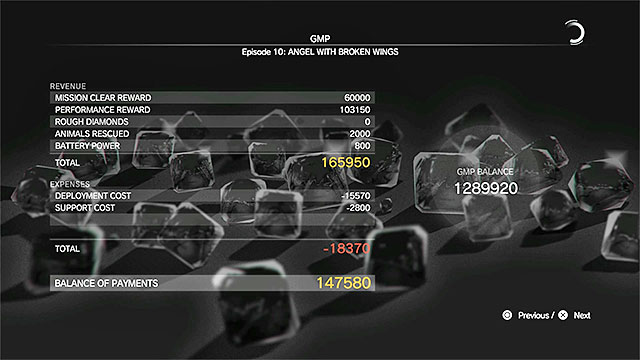
Another important part of the summary is the screen that shows you the balance of profits and expenses. From here you can learn how much GMP you managed to collect and on what have you spent money. The How to gain money and on what to spend it page will help you in developing well and avoiding bankruptcy.
Other parts of the summary are less important. However, it doesn't mean that they are completely useless. From them you will learn about your heroism score, what additional rewards (like new cassettes) have been unlocked for completing the mission and what new workers have joined your research team.
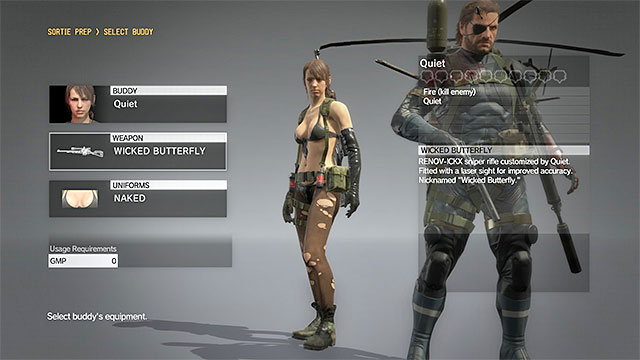 You may choose your buddy (and his or her equipment) at the beginning of every mission
Buddies are an important part of the Metal Gear Solid V: The Phantom Pain. They may assist Big Boss during his missions in many ways, like exploring an area or eliminating the enemies. During the game you may find four buddies which are D-Horse, D-Dog, Quiet and D-Walker. It is worth mentioning that only D-Horse is available from the beginning of the campaign. The rest of the buddies you have to unlock by yourself.
You can take with you on a mission only one of your buddies. You may select the one you want in the preparation menu screen and you may also choose his or her equipment as well as a camouflage or a weapon. You should choose the buddy that will be the most useful during a specific mission. For example if you are going to travel a lot you should choose D-Horse. In our walkthrough you will find information which buddy do we recommend for a mission. On the following pages you may also find some details about their potential.
 You can give orders to your buddy from the expandable menu
Your buddies have different utility during the fight as well as during the other activities of the mission. Big Boss may use either D-Dog or D-Walker to move faster and safer, however D-Dog and Quiet are going to automatically follow you. You may give orders to every one of your buddies from the special menu. This way you may either order them to keep close to you, to go to a specific point or to attack a specific enemy. At the beginning of the game you are not going to have many orders to choose from however later on you are going to unlock more options.
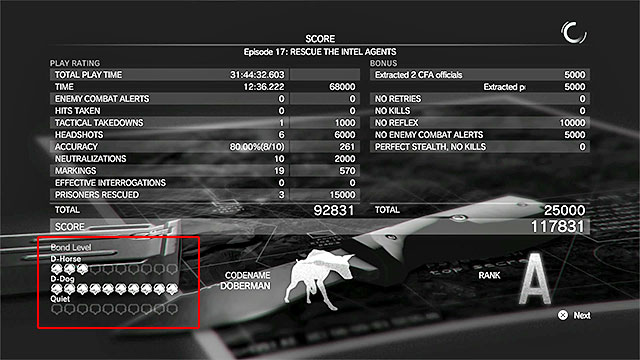 The current level of your relationship is shown, for example, on a mission summary screen
Your character may develop his Bond Level related to every Buddy beside the D-Walker. You may accomplish that by taking them for missions and using their special abilities (which are described on the following pages). It is important to take care of it since it allows you to unlock their new abilities as well as new types of equipment. After every mission you will see all the Bond Levels on the score screen however you will also be able to check them while selecting a buddy for a next mission.
 D-Horse
D-Horse is available from the very beginning of the Metal Gear Solid V or to be specific: from the Phantom Limbs mission.
The main purpose of having a D-Horse is to allow you to move through the world faster. It is important especially if you have to follow the enemy convoy or get to the distant area in a short time. Moving faster will also allow you to complete some missions in a shorter time what may be important if you want to receive the S rank. Travelling on D-Horse allows you also to duck while sitting in saddle what may help you to avoid the enemy patrols. D-Horse is not very durable however it is not weak enough to die after the first bullet. Later on you may develop the various types of horse armors which will also provide it some extra protection.
Developing your relation with D-Horse is fairly easy since riding him is pretty much all you need to do. After getting to the half of the Bond bar you are going to unlock the new order which will force D-Horse to take a poop in a place where he stands. It is a surprisingly effective way of stopping the enemy vehicles, much more efficient than, for example, putting a basic cardboard box on the middle of the road.
 D-Dog
D-Dog While playing look out for a puppy
To unlock D-Dog you have to make a few steps and the first one of them is to find a dog during the game. The best moment to do so is during the fourth main mission called C2W. Right after beginning of this mission look around the landing zone, where you shall be able to find a puppy. If you don't you may restart the mission or just try to look for him in while exploring the area. In the last case just look around and maybe you will also listen some barks. After finding a puppy get close to him and fulton him to the Mother Base.
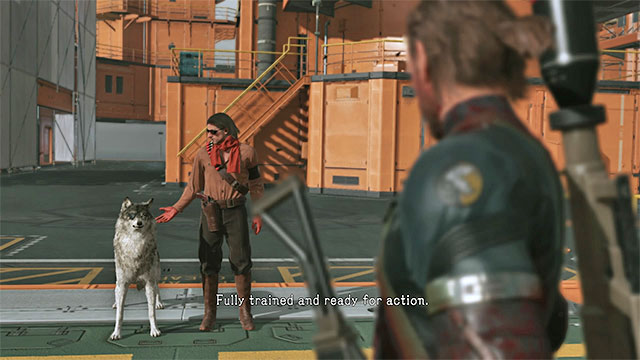 A grown up D-Dog will be a great ally
Soon after fultoning the puppy away you are going to be invited by Ocelot to Mother Base and you are going to see a short cutscene. After that point you should focus on new missions. When getting close to the 9th or 10th mission you should receive another invitation. When you will get to Mother Base you will see D-Dog as a mature and trained dog which will be able to join you during the following missions.
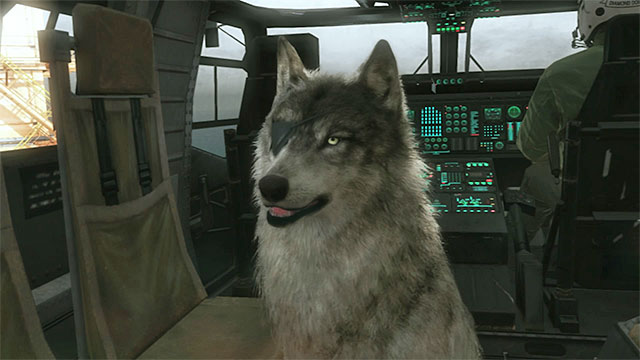
During most missions D-Dog is probably the most useful buddy you can take. His biggest advantage is the ability to detect the living creatures and important objects from large distance. It will help you to stay undetected if you try to sneak your way through an obstacle and you would like to save some time which you normally would have to spend on reconnaissance (or it is impossible to make it properly because of the shape of the surrounding area). It will also help you find the friendly or important characters such as the imprisoned allies. D-Dog will also locate objects like mines, medical plants or new animals which you may send to your zoo.
Developing your relation with D-Horse is possible by taking him on missions with you and giving him orders as well as by unlocking his new "equipment". At first D-Dog may obey some basic orders such as the barking which will draw your enemies' attention. Later on he will also be able to stun your enemies and do some other useful tricks, between which probably the most interesting one will be available after giving him a camouflage and a knife which will allow him to takedown your enemies. D-Dog is very efficient while if stays undetected and during one on one combat.
 Quiet
Quiet Defeat Quiet during the one on one combat
After getting to the eleventh mission of the game (the Cloaked of Silence) you will have your first chance to meet Quiet. Your mission will be defeating her in a duel which will happen in Aabe Shifap Ruins in Afghanistan. You may read about the details of this duel in our walkthrough however we would like to remind you that you may win also by taking down her entire health bar by with, for example, a sniper rifle or a rocket launcher or by taking down her entire endurance bar with, for example, a stunning weapon or by sending against her some supply drops.
 Capture Quiet alive
After defeating Quiet you have to get close to her. DON'T KILL HER or you will be unable to recruit her. Better wait for Big Boss to hide his gun and lift her from the ground. Take Quiet to the helicopter which will take you to the ruins where you will be able to watch a long cutscene showing your return to Mother Base and putting Quiet in the prison.
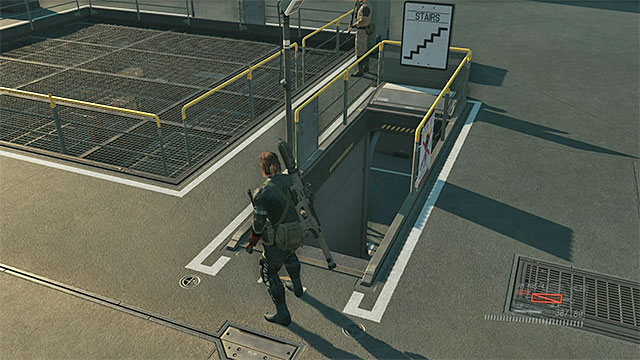

Now you should focus on completing other missions. After the 14th mission (Lingua Franca) you will unlock a Side-Op titled 111 - Visit Quiet. Get to the Mother Base and head to the Medical Platform. Look for the stairs shown on the screenshots above. Go downstairs and listen to new conversations and watch new cutscenes as well. From now on Quiet will be your new buddy.
Quiet will be most useful as the sniper supporting you in the battle. She may eliminate your enemies from a distance and help you if you will be detected. She is not the best choice if you want to stay undetected since she needs some new, silenced weapons to really be useful in these situations. Quiet may also help you with the reconnaissance since she may mark your enemies on the map sometimes even better than D-Dog however she can't get wherever she wants. Because of that she can't detect the enemies who are hidden in the buildings.
Developing the relations with Quiet may begin even before she will join your team. When she will be taken to the prison you may visit her from time to time to bond with her. Beside that you may just use the basic way which is to give her orders and to use her special abilities during the missions. Fun fact is that you may actually bond with her by looking at her during your travels in the helicopter. The most important option which she will unlock through your bond is an access to the group of inventions which will allow you to provide her new weapons which will make her very useful.
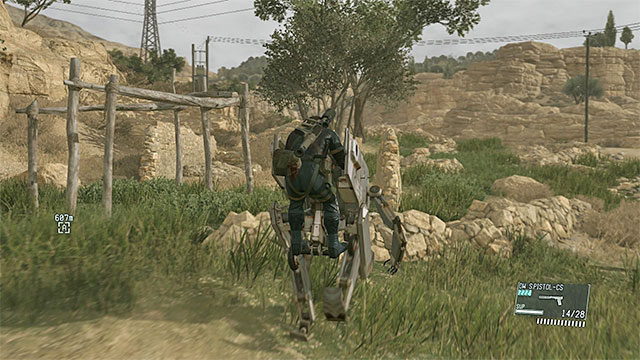 D-Walker
An access to D-Walker will be unlocked after quite a long time however it does not require you to do anything special. All you need to do is to complete the 13th main mission of the Metal Gear Solid V which is called Pitch Dark and is the first mission from Africa.
D-Walker is not the most useful buddy since he has very limited variety of actions. He is an alternative way of transportation (kind of like a D-Horse) and is a very strong source of damage. At the beginning this machine is fairly week since it has just a weak handgun so you shouldn't even consider taking it with you if you haven't invented in an additional rocket launcher or a Gatling gun. Remember that most missions may be completed without even being detected so taking D-Walker with you should be an option only if you are sure that you will be forced to fight with a lot of enemies, like during the battle with the Skulls or the battle with tanks.
 Obtaining the S rank in a mission might require completing it few times in order to learn how to do it well
S rank is the highest rank that can be obtained for completing a mission in Metal Gear Solid V. It's a form of distinction for acting very well during it. Obtaining the S ranks is also required for receiving the Elite trophy/achievement. To achieve the S rank you need to collect at least 130.000 points during a mission. We have listed below the most important factors which will result in increasing your score.
D-Dog is one of the best buddies available in Metal Gear Solid V. More information about all the buddies can be found in a separate chapter of this guide. Below you will find a short manual on how to find and take the dog in, so that he could start helping you as early in the game as possible.
After visiting the Mother Base for the first time, select the fourth main mission from the list - C2W (you can do that before starting the third mission). Immediately after starting that mission check the area near the landing zone. In the place shown on the picture above you should find a puppy.
Warning - A dog may also appear in other places and you may find him even before the fourth main mission. While you are exploring the world keep listening and if you will hear any bark just look around if you want to find its source.
 Use the balloon to send the puppy to the Mother Base
You must use the Fulton to send the puppy to the Mother Base. After completing the mission Ocelot should ask the hero if he wants to return to the Mother Base. A short cutscene with the puppy will occur there. Now you must wait for the dog to become larger and be "promoted" to the status of a buddy.
Important -if the puppy is nowhere to be found near the landing zone, then try to start the mission from the beginning or select a different time of day when repeating it.
Russian language translator is one of the most important optional characters that you should persuade (with force) to cooperate with you early in the game. The reason for that is since the moment you unlock the translator, Big Boss will be able to interrogate all the soldiers during missions in Afghanistan. Interrogations (they are possible after sneaking up on enemies and capturing them) will allow you to obtain many valuable information, for example informing you about the whereabouts of important mission objective, ammunition stock or precious diamonds.
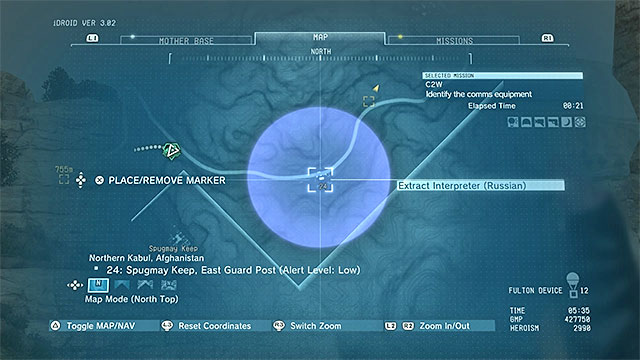
You can meet the translator early in the campaign, during the fourth main mission called C2W. You must reach the territory shown on the picture above (guard post 24), which is located East from the landing zone where you started the mission.
Warning - Beginning the fourth mission is not obligatory. You may also wait for the Side-Op number 1 called Extract Interpreter Russian to unlock which is completely focused on the translator. It is a better way to choose if you want to find a translator but you don't want to push forward the main story.

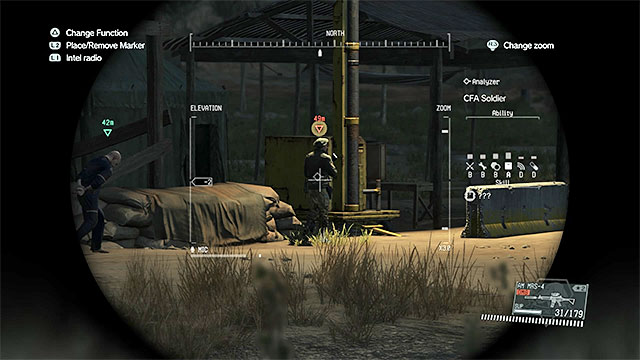
The translator won't want to cooperate with you, you will have to use force and make him unconscious. He has been shown in the above screenshot (you recognize him by the green beret). If you want to do it the fast way, deal with the interpreter's guards (you can also kill or knock down other soldiers) and make him unconscious (it is recommended that you use tranquilizer ammo pistol). If you do not want to be spotted, wait for the interpreter to enter the building, eliminate the guards silently and knock him down afterwards. Regardless of what you did, approach the unconscious interpreter and fulton him, i.e. extract him with the balloon to the Mother Base (make sure that the action is successful - he cannot be inside the building!). Once the mission ends, he will join your personnel (you can use his services when replaying the previous missions).
In the further part of the game (starting with the 13th main mission titled Pitch Dark) the Metal Gear Solid V action is moved to Africa. It is a problem since you are going to be forced to "learn" a local language to interrogate imprisoned enemies. You can learn the Afrikaans language in two ways which are described below.
 A translator from the 14th main mission of the game
The first option is to capture a translator during the 14th mission of the game titled Lingua Franca. You can knock him down and fulton away at the beginning of the mission or later on, when he will be focused on getting to other hostages. You may recognize him because of his green beret.
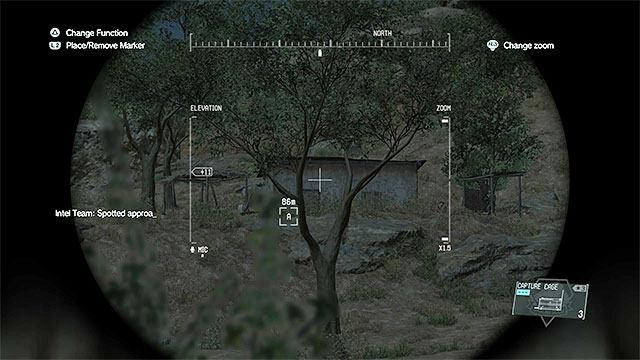
The second way is related to the Side-Op focused on capturing a translator which will be unlocked as the number 3: Extract Interpreter (Afrikaans). This mission will begin close to the Blampeve Plantation in Africa. After getting there begin a reconnaissance. The translator is close to the hut show on the screenshot above. Knock him down and fulton him to Mother Base.
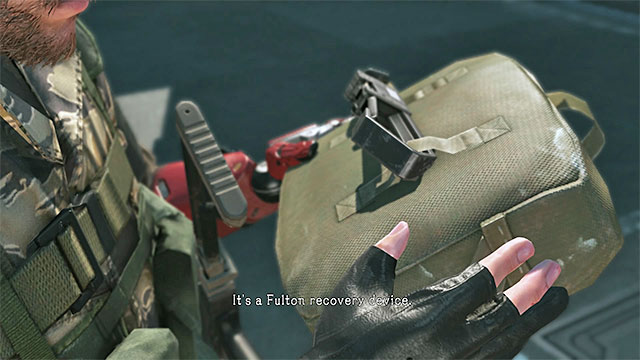 You will receive the Fulton recovery device during your first visit to Mother Base
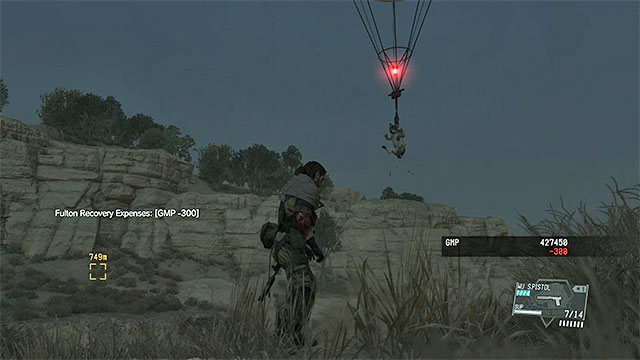
The so called "fultoning" is one of the most useful options in Metal Gear Solid V (it has been introduced in MGS Peace Walker) thanks to which you can greatly improve your Mother Base, obtain new equipment and get enemies off the map. Fultoning means using a device with an installed balloon thanks to which you can send other characters and military equipment back to your base. For the first time it is done during the second main mission (Diamond Dogs), the way how it works is well explained by Ocelot then.
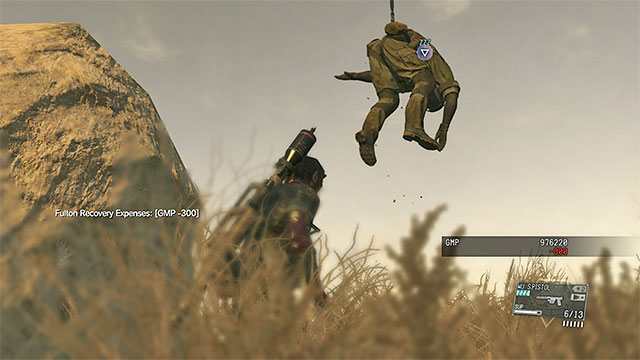
 Press the "fultoning" button and wait for the balloon with the cargo to leave the mission territory
After walking towards the body of a stunned character (it can be enemy or an ally, for example a prisoner you're saving) or after finding military equipment, you must hold the button responsible for activating the Fulton recovery device. You have a limited number of Fultons available, but you can regenerate the supplies in the same way like, for example, suppressors, by calling a supply drop. In addition to that, each fultoning costs some GMP. Luckily, it doesn't cost much.
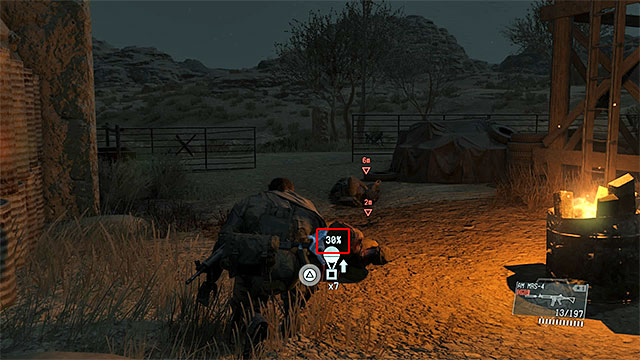
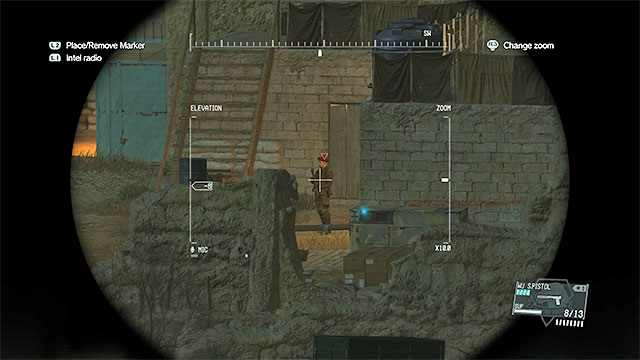
Fultoning is also limited by the game in some other ways, you should know about them to avoid wasting the balloons. Most of all, before using the Fulton you should check the percentage chance of success - an example has been shown on the picture above. Use the Fulton only if the value is 100% or close to it. Fultoning can fail when:
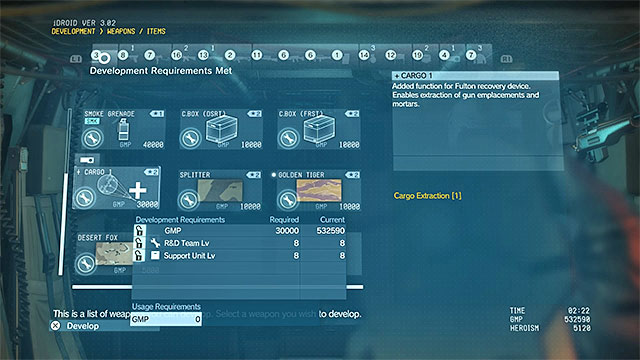
The abovementioned restriction for heavier equipment can be remedied by R&D at the Mother Base. You can purchase two upgrades - CARGO 1 (the above screenshot) and CARGO 2. CARGO 1 can be unlocked quite early into the game (you only need to make sufficient progress with your R&D and Support). It provides you with the option to extract mortars and machine-gun stations that you find. CARGO 2 becomes available, at the earliest, after you have completed the tenth mission of the main storyline, because one of its requirements is the transportation specialist on your crew, and you find him in that mission. Thanks to this upgrade, you will be able to extract vehicles, AA stations and big gear containers.
Note - The heavier the item that you want to extract, the more GMP you need to spend (e.g. 5000 GMP to extract a mortar). If only you can afford this, it is always better to "steal" something, because you can sell the item anyway, if you are not going to use it.
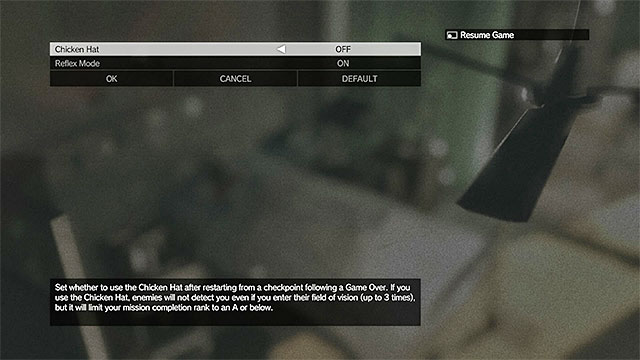 The Chicken Hat can be activated in the main menu of the game
Metal Gear Solid V doesn't offer any option to change difficulty level. However, if you have some trouble with remaining undetected, you can use a "legal trick" which will make it easier. In the main menu, go to options and search the tab on which you can activate the Chicken Hat. Once activated, you can start the game. The Chicken Hat will become active when you will die during a mission and return to a checkpoint. Thanks to wearing it, enemies will have much more trouble with finding you, even if you're in their range of sight.
Important! Using the hat is limited - you can use it only three times to deceive enemies. Additionally, using the hat blocks the ability to receive S rank in missions (the highest possible rank to obtain with the hat is A).
GMP (Gross Military Product) is the currency in Metal Gear Solid V that you spend, among others, on research, expanding the Mother Base or requesting reinforcements during missions (to learn more, see the next page of this guide). Below, you find the most important methods of earning money, i.e. ones that ensure the greatest income.
 You receive a high payment for each mission that you complete
Unarguably, the best method of earning lots of GMP is completing main missions. For completing each mission, nearly always, you receive several thousands GMP and this can add to your overall budget considerably. The amount of rewards for individual missions is not predetermined, because the game calculates your overall performance in the mission. Try to complete all of the objectives and also try to avoid detection and killing other people. Apart from that, you can receive a high bonus, if you ranked S in that mission.
 Diamonds are usually worth 10000 GMP a piece, although you can also find rare specimens
Collecting Rough Diamonds is another good method of earning money. Whenever possible, try to explore all of the locations that you visit during missions, thanks to which you will find, at least, several, while on mission (you can also search for them during free exploration of the game world). A single diamond is usually worth 10000 GMP, but there also are more valuable ones (these are hidden better), whose value reaches 100000 GMP.
Note - IF you have any problems finding diamonds, you can interrogate soldiers that you encounter. Some of them tell you where the diamonds have been hidden, which ads appropriate markers to your map. You only need to get there afterwards.
 Side missions grant you an income of several tens of thousands of GMP and many of them are replayable
Side-Ops in MGS V are a good and stable source of income. This is so, because there are more than 150 of them in the game and you can earn, as much as, several thousand GMP from each. An additional incentive is the fact that side missions are usually very short (e.g. finding a blueprint or saving a single prisoner), thanks to which they are not too time-consuming.
Note - Some of the side missions can be replayed. You can do this if you need to quick fix of cash and you do not want, for some reasons, to start new missions suggested by the game.
 Dispatching your men on missions is risky, but it is also profitable
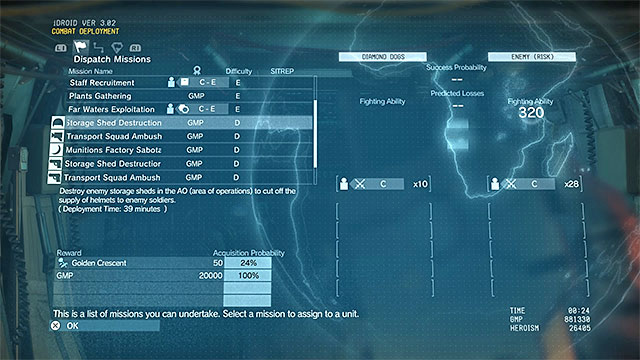
Later into the main campaign in MGS V, you also receive an option to dispatch your men on missions. Rewards for these vary, but you often earn more money for them. Therefore, try to have some of your men in the field, at all times, especially since the game does not make you follow their progress. If a mission is successful or fails, depends on the percentage coefficient for completing that mission. To learn more about this element of the game, see the other guide, in the chapter devoted to management of the Mother Base.
In Metal Gear Solid V, there are many ways to earn money and they have been described on the previous page of this guide. There are just as many ways to spend it. Some of your purchases have a tremendous effect on the game, whereas the others may be meaningful only in certain situations (e.g. when you are missing a piece of equipment which would allow you to complete a specific mission).
Note - Do not get carried away and be stingy with money. Always try to have spare several thousand GMP. In our other guide for MGS V, you can find a number of hints on how to manage your budget.
 New inventions quickly become more and more expensive
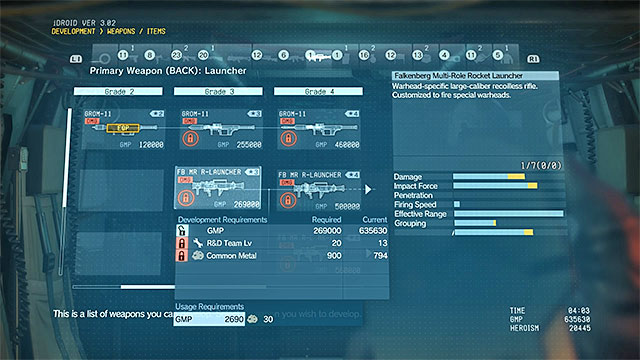
You should spend the lion's share of the money you have on research. This way, you can gain access, e.g. to new unique weapons additional gear or upgrades for your men. Try to invest, in the first place, into those of the inventions that will prove the most useful (e.g. a sniper rifle, a rocket launcher, enemy scanner or a new version of the fultoning device, fit for transporting large cargo). Leave the less important ones for later and do not try to invent everything at all costs, because you will not afford it, at first.
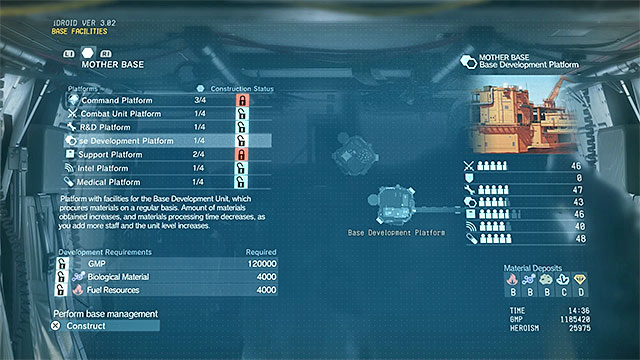 Build new platforms in the Mother Base
Another important category of investments is new platforms for the Mother Base and development of the existing ones. In this case, you need to keep in mind the steep costs, which often exceed a hundred thousand GMP per one plan. Fortunately, the game will halt your impulse to build more, because expanding the base often requires you to have, e.g. lots of resources. Just like in the case of the abovementioned inventions, try not to spend all of the money that you have, on expanding the base and leave a sizeable reserve.
 Fultoning people and requesting backup is never free
You also spend minor amounts of GMP during missions. You spend it mainly on:
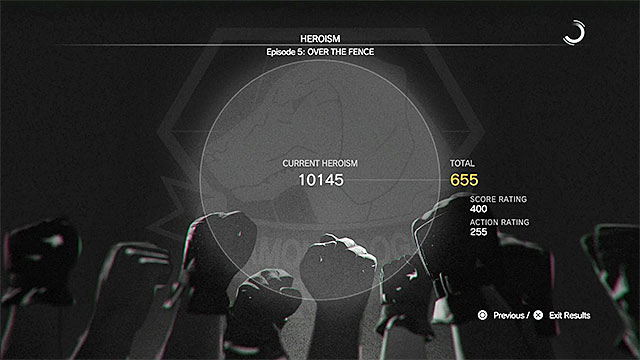 You may read about your Heroism Score progress after every completed mission
The Heroism Score is the MGS way of showing your reputation. Basically it increases during the heroic actions and gets lower if you will hurt some innocent peopled. The higher is your Heroism Score the more often will new people recruit to your Mother Ship. You may check your Score after every mission on the score screen as well as in the bottom right corner of your iDroid.
You may increase your Heroism Score mostly through the:
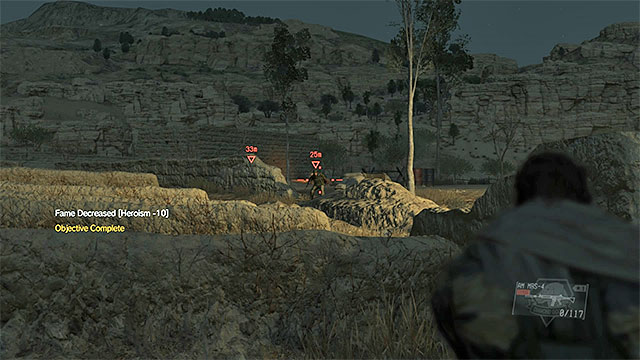
Your Score will decrease if because of you an innocent person will die, for example if you will not rescue a hostage which is sentenced to death. You also need to avoid failing the side tasks, for example by destroying an important cargo which you supposed to secure and fulton away.
Metal Gear Solid V: The Phantom Pain allows you to upload your experience from Metal Gear Solid V: Ground Zeroes, which is the game that can be treated as a prologue. Later in the text, you can find instructions on how to do that. But, before you start that, there are several things to know:
Note! The below description of the procedure is for PlayStation 4 only, but the actions you take are identical for PCs and Microsoft consoles.
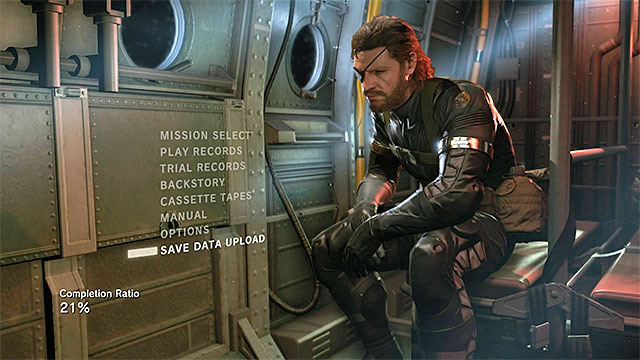
Start by launching MGS V: Ground Zeroes. In the main menu, access Save Data Upload (the above screenshot) and confirm (Yes) that you want to upload your progress. The process will be successful only if the game managed to establish a connection with Konami servers. If the connection fails, wait for several minutes/hours try again .
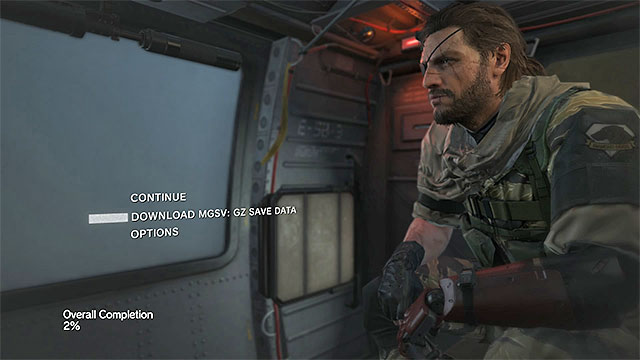
You can now close MGS V: Ground Zeroes and start MGS V: The Phantom Pain. Here, access Download MGSV: GZ Save Data (the above screenshot).
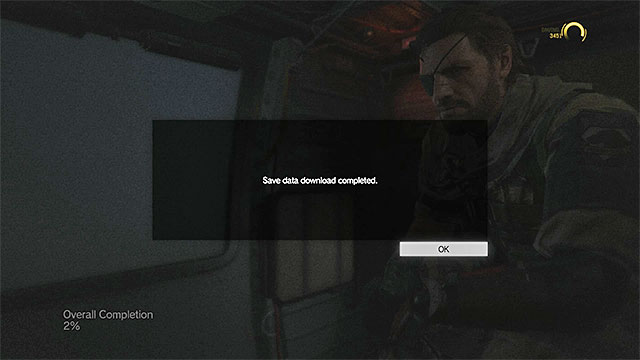 Successful download message
Confirm that you want to download the data (Yes) and wait for the game to display the message on successful download.
Note - Data transfer to MGS V: The Phantom Pain will succeed only if the game establishes a connection with Konami servers. If the connection fails, wait for several minutes/hours and try again.
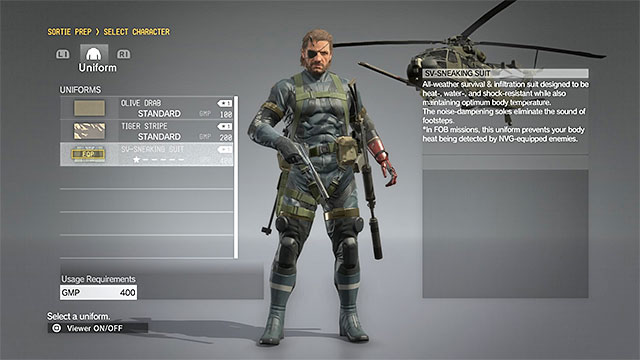 The Sneaking Suit is one of the rewards that you get for transferring your progress
The below list presents rewards that you can receive, for uploading your progress from MGS V: Ground Zeroes to MGS V: The Phantom Pain. Among others, these are new visual elements and new recruits in the Mother Base, which the game calls "special volunteers".
To receive this reward, you need to complete the main mission in Ground Zeroes. After you do this and upload your progress, you also need to develop it at the Mother Base. The earliest that you can do this is after you complete the fifth main mission, i.e. the one where you rescue the engineer (he also offers you other upgrades for the Bionic Arm).
Gray Fox skin from Metal Gear Solid 1
To unlock the skin, you need to complete a side mission: Deja Vu at the high difficulty level. Additionally, after the upload, you need to complete all the main missions in The Phantom Pain. After you select this skin, you can move around the game world faster.
Solid Snake skin from Metal Gear Solid 1
To unlock the skin, you need to complete a side mission: Deja Vu. The change is only graphic and it does not provide you with any extra capabilities.
There are a dozen-or-so volunteers that you can unlock for the crew of the Mother Base and it can even include Hideo Kojima himself. To gain access to volunteers, you need to rescue prisoners and abduct important targets in successive missions of Ground Zeroes (e.g. main objective officers). They are as follows:
Note! Not all of the volunteers join you at the Mother Base immediately. They will be unlocked with your progress, starting with main mission three (you gain access to the last group after you complete the twelfth side mission).
This is one of the most interesting rewards that you obtain. There aren't any requirements, when it comes to upload, because you only need to have any progress saved in Ground Zeroes. In The Phantom Pain, you additionally need to develop this outfit at the Mother Base (40000 GMP, 4 R&D tier 4). This outfit provides you with increased resistance to elements and, above all, muffles out your movements.
Metal Gear Solid V: The Phantom Pain is supported by five different video game platforms: personal computers, old generation consoles (PlayStation 3, Xbox 360) and new generation consoles (PlayStation 4, Xbox One). The PC version has an average requirements although it does require one to have a decent quad-core processor, at least 4 GB RAM and at least GeForce GTX 650 video card (with at least 2 GB memory). However this game is very well optimalized and you may easily enjoy yourself without buying the hardware recommended by the developer.
To create this guide we have been using the PlayStation 4 console and it has made a great job. The game works perfect beside of how many details and actions are presented even in very complex areas such as the villages or during the intense battles. It is worth to mention that MGSV loads very fast, especially when a player just wants to load a last checkpoint (game does not allow you to make your own save points however it saves its progress fairly often).
It may take you, as long as, an hour to complete the prologue of Metal Gear Solid V. This is so, mainly because there are quite a few cutscenes to watch. The prologue itself, is not that easy, anyway. The protagonist may die in several locations here and this results from the fact that, at the beginning, he is unarmed. Therefore, try and follow Ishmael and follow his instructions.
Note! The main task, i.e. The one connected with escaping the hospital, does not appear on the missions list.
 Sneak past while sticking to the left wall and do not let yourself be seen by the helicopter crew
Still before the attack on the hospital, you will see several cutscenes. Follow the doctor's instructions and move your head. Then, you need to pick your new name, birth date (it is a good idea to pick a date close to the current date in the calendar, thanks to which you will unlock an easter egg), and pick your new face (face editor).
After you cut to the character, follow Ishmael. At first, you will crawl, but after some time you will start to crouch. Remember to follow all of the man's instructions and lie back down after he tells you to. After you get into a new corridor, start crouching again. Here, you need to get into the spotlights of the enemy helicopter. As quickly as possible, follow Ishmael and stick to the left wall (right under the windows), thanks to which you should not be spotted. After you walk away from the dangerous corridor, start running.
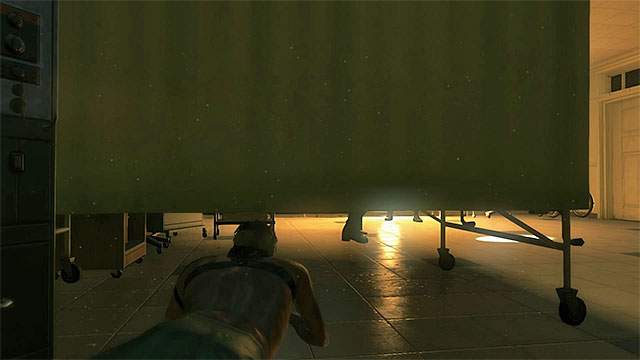 Wait for the enemy to end his search and crawl over to the area that he has been examining
Follow Ishmael down to the lower levels, where you will have to backtrack, after a while, and reach the spot, where there are a dozen-or -so neutral people. After you walk into a new room, you will have to start avoiding the people armed with firearms, who start searching this place. Crawl over to the middle bed on the left. Wait for one of the enemies to search the neighboring area, behind the curtain. As soon as he leaves that area, crawl over there to avoid detection. You can now wait the search out.
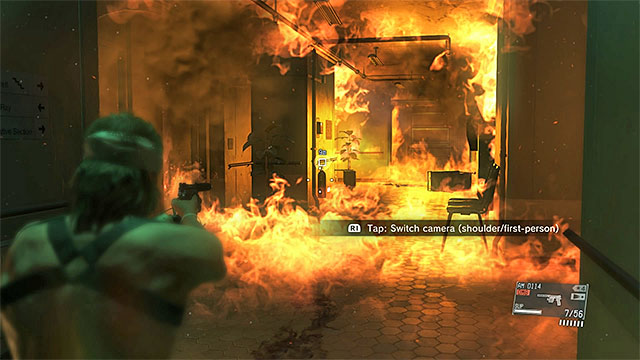 You need to hit the extinguisher
Follow Ishmael out of this room. After you get into a new corridor, lie down and do not move. See the another cutscene and hold down the appropriate button to heal. Keep on your way. Soon Ishmael gives you a pistol (AM D114). First of all, fire it at the fire extinguisher in the blazing room. Walk up a little bit closer and after you get into the corner, stand behind the curtain. You can wait for Ishmael to handle the two opponents, or shoot them yourself (this will not prevent you from ranking S at the end of the mission). If you decide on the latter, try to target the heads of the enemies, thanks to which you will only need single shots to get things done.

After that, you can leave immediately, or pick an SMG (Sz.-336 SMG CS) from one of the corpses. Soon, you will walk into the main hall, where there are quite a few enemy soldiers. It is best to walk around them silently. To do this, go right and in the spot shown in the above screenshot, drop down to a lower level.
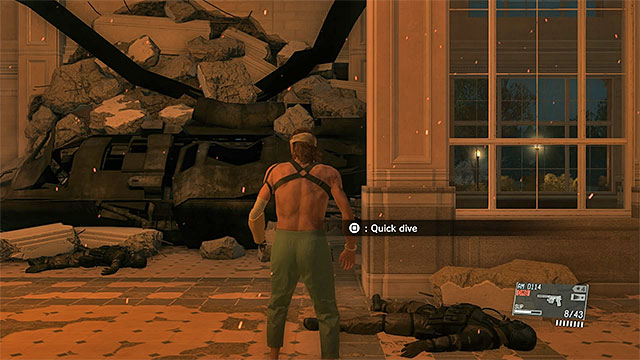 Reach the hospital exit
Very carefully, follow the right side of the hall - it is a good idea to crouch here, or crawl. On a regular basis, make sure which way the enemy soldiers are facing, thanks to which noone will spot you. As soon as possible, try to reach the hospital main exit . This will trigger another cutscene.
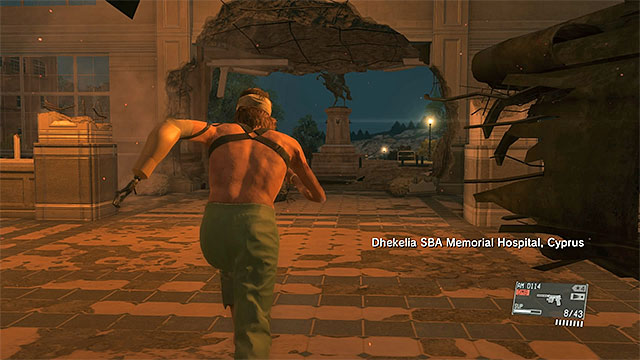 As soon as possible, leave the building
Do not approach the Man on Fire, neither fight him, nor waste time on covering from him. As soon as you cut back to your character, start running towards the destroyed hospital exit. Here, press the button for dropping down onto the ground. After you get outside of the building and land onto the ground, you do not need to fire at the approaching Man on Fire, because this is no way to stop him. You can, just as well, wait for another cutscene to start.
 Start shooting at the Man on Fire, as soon as he comes sufficiently close
Now, you need to escape on horseback from the Man on Fire. During this sequence, do not waste your ammo for the shotgun (S1000), because you only have a limited amount of that and, apart from that, you can worsen your accuracy rating. Do that only when the Man on Fire comes discernibly closer, and when he is preparing to launch his ranged attack (this is required for the second optional objective of the mission). It will take several tens of seconds to lose the Man on Fire, which ends the prologue.
The first one of the Metal Gear Solid V's missions is relatively long and you can spend, as long as, over an hour on completing it. Although completing the main objective is not that time-consuming, time spend with the mission may be extended, due to the side missions and a more in-depth exploration of the area. While completing this mission for the first time, ignore the side mission of extracting the barracks commander and the truck driver. It is a good idea to leave that until you have unlocked the option to fulton them (i.e. to extract men and equipment using balloons).
The game will not allow you to prepare for this mission during your first attempt however you may do during your next try. You don't need to take with yourself any specific equipment however you may make use of some nice camouflage or some silencing items to reduce the noises you make while moving. You will also be unable to choose a specific time since the mission will begin during the late afternoon.
The above map presents the mission area available during the first mission of Metal Gear Solid V - Phantom Limbs. The most important location is the Da Ghwandai Khar village (point 5 on the map), because this is where Kazuhira Miller is being kept. You can either go there immediately, or obtain the documents from the Da Wialo Kallai village (point 3 on the map) first. As for the optional locations, all of the outposts (every point 2), can be walked around or secured. You should go to the Wakh Sind Barracks (point 4 on the map) only while replaying the mission, i.e. when you will have the option to "fulton" other people.
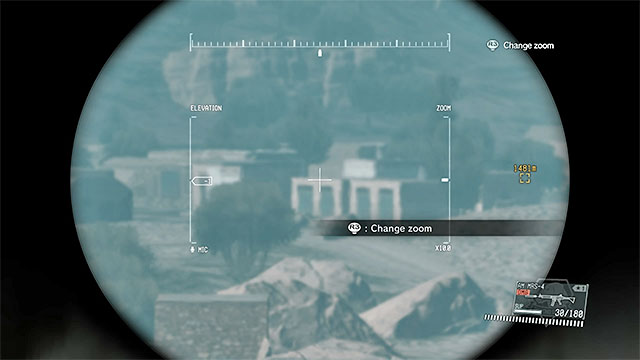 Use binoculars to locate the village
It is only optional to determine Kazuhira Miller's whereabouts, but you should not ignore it, because it is a part of the tutorial and, apart from that, you complete one of the secondary objectives, this way. You start the mission in Spugmay Keep, in the Southern part of the map. Follow the instructions and pick Ocelot the binoculars and use it to locate the Da Wialo Kallai village in the distance. At the same time, practice zooming in and out, gaining additional information on the object within sight and marking of points of interest (the only purpose of that is to navigate the environment better).
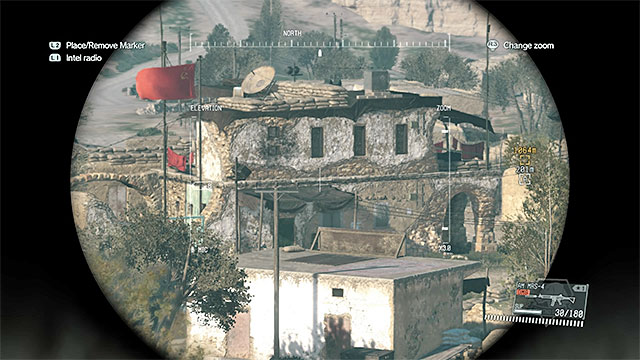
After Ocelot leaves the area, head to the village. On your path there, you run into one of the outposts (number 23) - you can either walk around such locations or try to secure them. In the case of the latter, check the outpost, from a safe distance, to learn about the positions of the enemy soldiers and attack afterwards. In the outposts, you can find ammo, diamonds or resources.
The best direction, from which to approach the Da Wialo Kallai village is the South or the West. Make it over to a higher vantage point and start your reconnaissance. Apart from finding positions of enemy soldiers and marking them, try to find the central building shown in the above screenshot, which you need to reach.
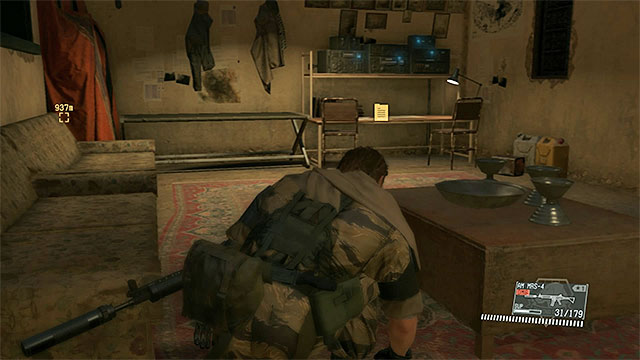 The documents
After you have examined the area, you can step into action. While heading towards the building with the documents, you run into two, or three, enemies and you need to be especially careful with the guard right next to the destination. It is a good idea to eliminate the enemies with the pistol, but you need to get sufficiently close, first. After you reach the building, climb up the stairs and enter the small room, which should be empty now. The documents are on the desk and you need to interact with them, which starts a short cutscene.
Note - If you find it difficult to stay in the shadows, while exploring the village, wait until dusk and then locate the generator in the village, to sabotage it. This will win you enough time to reach the file in complete darkness.
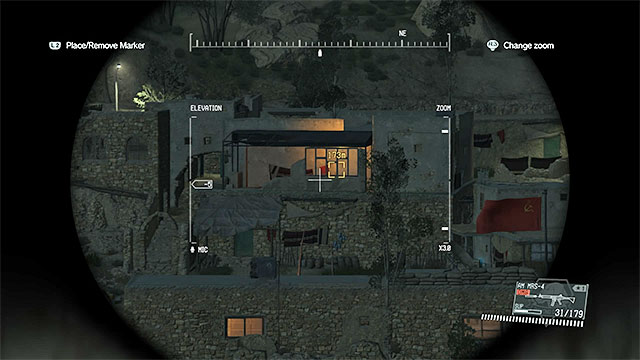
Regardless of whether you found the file or not, you need to get to the Da Ghwandai Khar village in the Eastern part of the map. Along your path, you should watch out for, at least, one more outpost. Just like in the case of the previous village, start by climbing to a high vantage point (a good one is to the West of your destination). Use the binoculars to mark all of the soldiers that you can see. Apart from that, locate the building shown in the above screenshot - this is where Kazuhira is being kept.
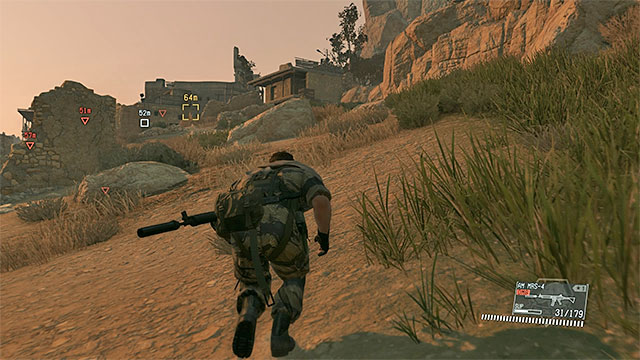 Cross the most poorly guarded part of the village
I recommend that you approach the building from the South-East, because this part of the village is relatively poorly guarded. Stick to the rocks and crouch (if necessary, you can also crawl). Depending on how good was your reconnaissance, you can either head straight towards the buildings, or hide behind corners of the nearby cottages to check out on the immediate area.
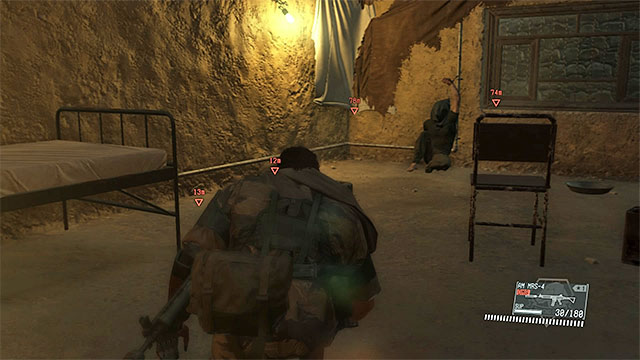 The room with Kazuhira
Before you reach your destination, try to secure the entire Northern part of the village, which will make it easier for you, later into the mission. Hide the stunned opponents behind buildings, in the way that prevents them from being discovered prematurely. You can enter the building you are looking for, either in the traditional way, or by climbing onto the rooftop of one of the nearby cottages, from where you jump onto the rooftop of that particular one. Be vigilant here, because there may be someone in the main room and, apart from that, you can be spotted through the window. Kazuhira is being kept in the smaller room - approach him to start a cutscene.
 Carefully, carry the man out of the village and head towards the nearest landing spot.
You need to make it out of the village. Since your character is carrying Kazuhira. You can your use pistol only and, it is because of the limited movements that it was so important to secure the area beforehand. Leave the village the same way you came, so reach the Northern part of the village and head South-Eastwards. Head towards the designated landing spot. The attempt to extract the man will fail and Skulls appear.

Skulls are zombie of a type. However, do not let them trick you, because moving slowly is only their default mode of movement and they have quite a wide range of vision. If you let them spot you, they will become more vigorous and you will stand no chance against them, in a direct confrontation (in such a case, you will have to escape on horseback).
It is much better to leave the dangerous zone and remain undetected, especially that this will reward you with completion of one of the secondary objectives. Focus on the two zombies heading towards the bridge (the above screenshot). Wait for a bit longer - the zombies should either stay on the bridge or take the path to the side. Depending on what they did, take the safe route and walk away from the area, with Kazuhira on your back.
Note - If the zombies separated, use, e.g. an empty ammo clip to encourage them to go in the same direction.
Warning - If you don't want to be slowed while avoiding the zombies you may put Kazuhira on a horse and move forward alone. After bypassing the Skulls squad you may call your horse who will appear with the hurt ally as well.
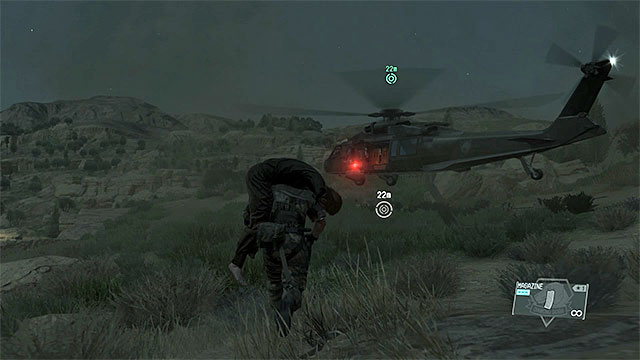 The second landing spot
To end the mission, you need to go to the second designated landing spot, close to the Da Wialo Kallai village. Along your path, watch out for the enemy outposts. Put Kazuhira on the board of the chopper. If you want to end this mission at this point, you simply need to get into the chopper yourself and wait for it to fly away (alternatively, you can complete secondary objectives, if you have missed them).

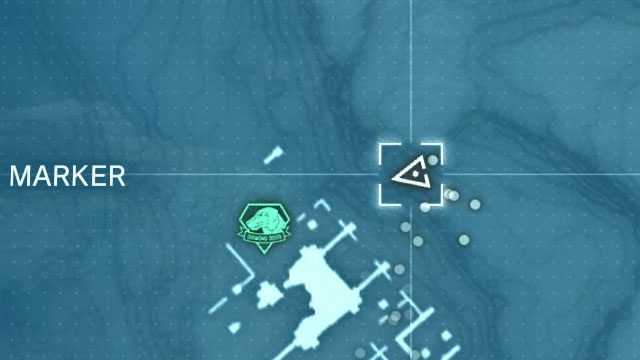
One of the side objectives in the Phantom Limbs mission is to find the rough diamond in Spugmay Keep ruins, which is the starting location for this mission. This means that you can take interest in that objective right after you start the mission, even the first time around. Climb the high elevation close to the ruins. You need to reach the rocky ledge shown in the above screenshot, where there is the Rough Diamond among others.
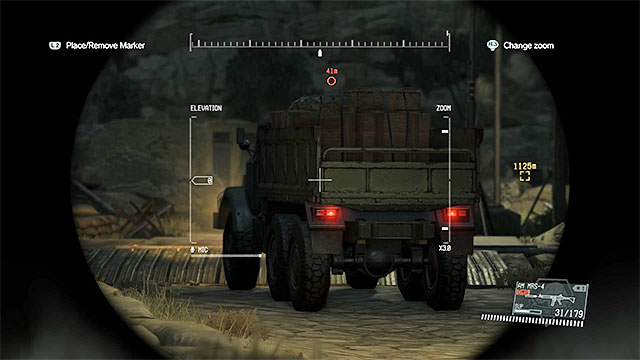 The truck
You should try to extract the driver while the second time around. This is recommended because you will then come equipped with the fultoning device, i.e. one that allows you to extract people with balloons. You gain access to this gadget after you have completed the second main mission of the game (Diamond Dogs).
There is no one specific point on the map, where to find the truck, because it is travelling from village to village and smaller outposts. Therefore, you can complete this objective, somewhat, incidentally, or stop in one spot, in wait for the truck to arrive.
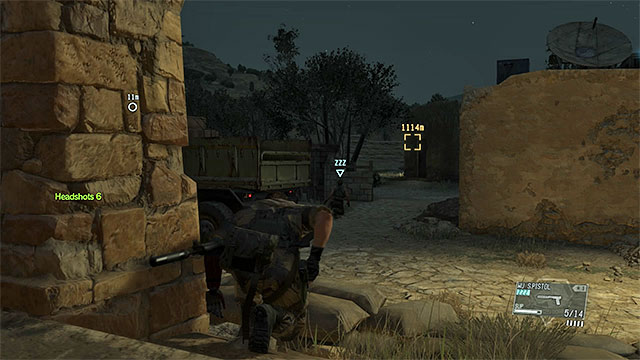 Attack the driver as soon as he gets out of the cab and fulton him
Of course, you can stop the truck yourself, e.g. by firing at the tires. However, if you want to take a more sneaky approach, it is better to wait for the truck to arrive at a location and for the driver to come out. Depending on whether you have previously secured the area or not, your options are to either focus on the driver himself, or to eliminate the enemy forces first. In both cases, it is recommended that you use the pistol with sleeping ammo, thanks to which you will not have to take the risk of getting him from behind.
After you knock the driver unconscious, you simply need to approach the body and fulton him, i.e. send him away to the Mother Base (if you are playing the mission for the first time, you need to get him onboard the chopper, with Kazuhira)
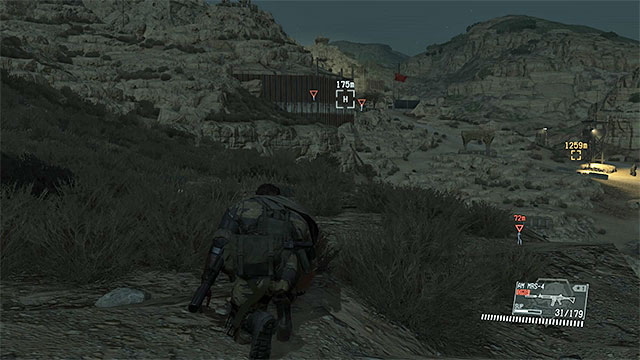
You should also extract the commander only after you have already obtained the fultoning device, i.e. while replaying the first mission. He is in Wakh Sind Barracks in the Northern part of the map. Along your path to the barracks, watch out for the small outposts that you can simply walk around.
The commander is in the upper part of the barracks and the area is not easy to access, because you need to take the path that is being patrolled, and where there are not too many covers to hide behind. Fortunately, there is an alternative way to get there. You can climb over rocks to the West of barracks (the above screenshot), thanks to which you will get around all of the guards.
 You can tell the commander by the red beret
Approach the upper part of the barracks from the South-West and perform an additional reconnaissance here, because there are several more enemies here. Of course, you can start knocking them out, one after another, but an even better approach is to try to get around all of them on the North. Approach the four low buildings - the commander is inside one of them and you can tell him by the red beret. If you will hurry you may get close enough to the officer's building and to neutralize him on the spot. If you will get here late he is probably going to leave the building and begin a patrol. In this case you may try to attack him in other place or wait for him to return to his hut. You should use your binoculars to keep track of his position.
Regardless of which you decide on, approach the unconscious commander and fulton him to the Mother Base to get this problem off your head.
The second main mission of the Metal Gear Solid V is completely focused on introducing you to managing the Mother Ship. You are not going to find any enemies and there is basically no way of failing this mission. Instead you are going to learn about things like organizing research in your lab or how to recruit new people. You will also receive an access to the "fultoning" and you will be able to complete two side quests focused on neutralizing tactics. These training sessions are not obligatory however they don't take too long and you shouldn't try to avoid them.
Warning! During this mission you are not going to achieve any ranks however the game will count some of your scores such as the time required to complete the mission.
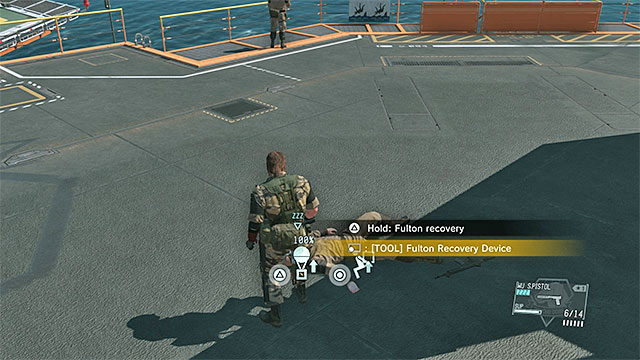 Fulton out the stunned ally (the balloon with a cargo icon)
Get close to Ocelot who will give you a Fulton Recovery Device which is designed for sending away people, animals and the military equipment to the Mother Ship with a balloon. The game will allow you to test its functions. Stun a volunteer either by shooting him with a soporific ammunition, knocking him down or getting close from behind and choking him. Stand next to him and use the fulton button.
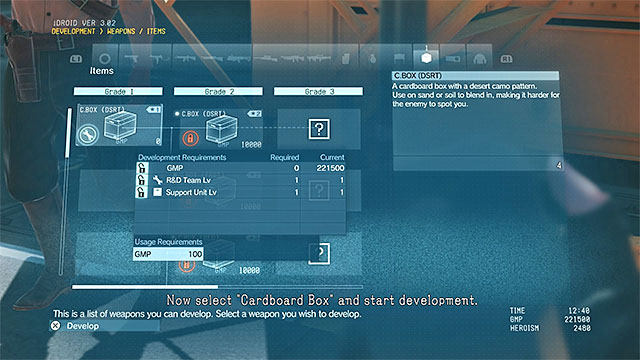 You may unlock the cardboard box when your research squad will level up
Choose your iDroid and select the Mother Base section and then the Staff Management section. Listen to Ocelot's comment and return to main menu. Choose the Development section and go to Weapons / Items. You will learn that you don't have enough resources so you may turn off the iDroid. Stun and fulton away few other volunteers.
When you will rise up the research squad's level you may return to Weapons / Items menu and select the C. BOX DRST. Confirm the order and wait for the research to finish. Choose on your map an area to drop the supplies and wait for the cargo to drop on the platform. Now you can finish the mission or start the optional activities.
 Train how to stun and how to grapple
To begin additional training you need to speak to Ocelot. You are going to have two parts of training. At first you have to practice stunning your enemies. Try to stun the volunteers and fulton them away.
The next part of this training will allow you to practice throwing your enemies and making a series of quick punches. Fulton the knocked out people away.
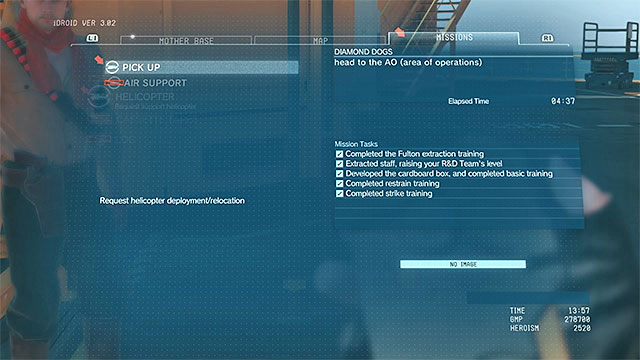 Summoning the helicopter
The last thing you need to do is to leave the Mother Base. Turn on the iDroid and select the Missions menu. Choose the Helicopter menu and then order it to Pick you Up. Select the only airstrip available and wait for the helicopter to come.
During your flight you may notice that a new iDroid menu has been unlocked. From this menu you may run your Mother Ship from a distance and select a new mission. You may already see that the game has unlocked three new main missions. 3rd mission - Hero's Way, 4th mission - C2W and the 5th mission - Over the Fence. You may find it's description on the next pages of this guide. You may complete them in any order you like. From this moment on you may also choose to replay some missions you have already completed if you want to, for example, complete some skipped side quest or achieve a better rank.
The third Metal Gear Solid V main mission is definitely shorter than the first one and is located in a much smaller area. The obligatory part is to find and kill or kidnap the Spetsnaz commander. You need to remember that you have to choose if you want to kill him or kidnap him and if you would like to do both of these things you have to complete this mission twice. Beside the main mission you may also complete two easy side missions. One of them is focused on finding a rare plant, and the other one - on finding some raw materials.
This mission is much easier during the night so you may decide to wait for the 6 PM to begin it. If you want to kill the commander you should take a sniper rifle which is unable for you at the beginning of the game however it is easy to construct it in the Mother Base. You may for example begin with RENOV-ICKX SR sniper rifle (40000 GMP, fourth level of R&D).
The map shown above represents the area you are going to explore during the third Metal Gear Solid V main mission called A Hero's Way. The only bigger location in this area is the Da Shago Kallai village (marked as "3") where you may find the commander which you have to kill or kidnap for this mission. In the village you may also find the materials (marked as "5") for the side mission. You should also walk to the area marked as "4" where you can find the Haoma plan for another side mission.
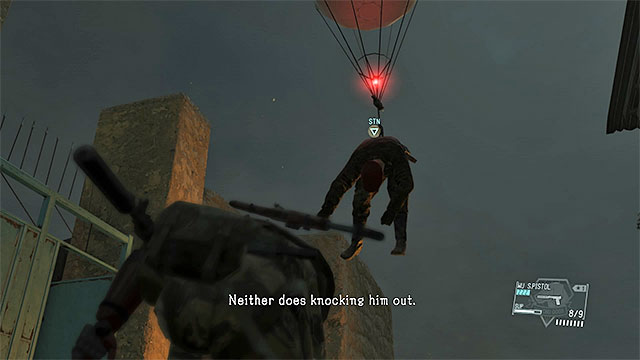 The rocks east of the village are the perfect spot to look around
Selecting a landing area for a helicopter is not very significant. Both of them are safe and far away from the village. Go to the Da Shago Kallai village however don't rush yourself but make a careful reconnaissance instead. Try to reach the rocks northeast of the village where you may see the entire place from a distance and without any serious obstacle you may spot the guards and other important objects.

The Spetsnaz commander you are looking for wears a red beret (you may also see him on the screenshot above). At first he will participate in a briefing on the field and later on he will go to the building in the middle of the village. From now on you may get to him by infiltrating the village and getting to the building's entrance of to the spot from which you may see him by the northeast window.
Now you have to decide how do you want to act later on:
Warning! Murdering a Spetsnaz commander is just one of the possible ways to complete this mission. If you prefer to kidnap him instead you should see the description of Kidnap a Spetsnaz commander.
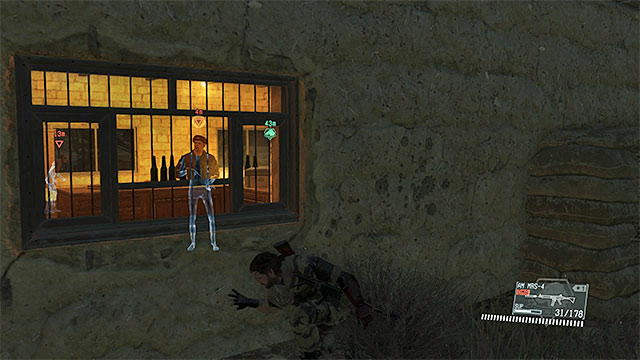 Sneak to the window through which you may see the commander
You may eliminate the Spetsnaz commander in few ways. If you don't have a sniper rifle you have to get to the Da Shago Kallai village however you need to watch out for guards spectating the area from the roofs and from the watchtowers (they may also use some headlights during the night). Some soldiers will also patrol the areas nearby the center of the village. You can neutralize and hide the bodies of some of them. Try to stay away from any group of enemies.
The best way to kill the commander is by using the silenced gun and shoot him from a window when he will not look directly at you. However you may also throw something at him to make him leave the building and give yourself a chance to shoot him in the head from a cover or a bush.
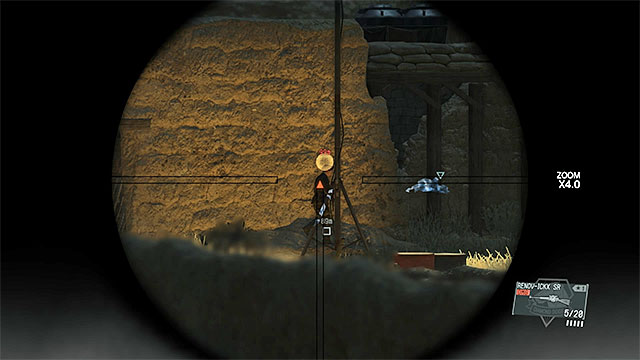 Try to hit him from over a hundred meters (330 feet)
If you have a sniper rifle you may just take the commander almost down right on the beginning of the mission. If you will not catch him in time keep walking around the village and get to the northwest part of the area. Find a window from which you may see the commander. You may also make him leave the building and try to lure him somewhere where he will be isolated. When he will be on an open field you may easily take him down.
Warning - While firing from a sniper rifle try to be at least 100 meters from your target (you may easily tell the distance thanks to your binoculars). It will help you complete one of the side quests.
Warning - To finish this mission you need to call a helicopter and get to the evacuation area.
Warning! Kidnapping a Spetsnaz commander is just one of the possible ways to complete this mission. If you prefer to kill him instead you should see the description of Murder a Spetsnaz commander.
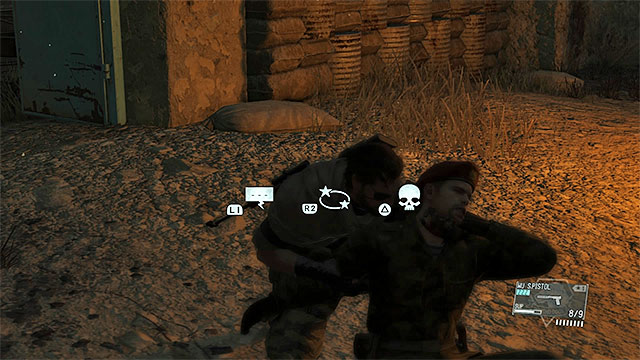 You may knock out the commander during a fist fight or with, for example, a pistol silencer
Kidnapping the Spetsnaz commander is more difficult than sniping him down. You may decide to try doing this during the second try when you will know this location much better. Head to the center of the Da Shago Kallai village however you need to watch out for guards spectating the area from the roofs and from the watchtowers (they may also use some headlights during the night). Some soldiers will also patrol the areas nearby the center of the village. You can neutralize and hide the bodies of some of them. Try to stay away from any group of enemies.
As I mentioned before the commander spends his time mostly on the ground floor of the building in the center of the village. Entering the area surrounded by a wall is a dangerous idea since the neighborhood has a lot of additional enemies. Instead you may try to lure the commander out by, for example, throwing an empty magazine from your weapon close to the building's window. After succeeding use a silence pistol or choke the commander from behind.
The best thing to do is to fulton away the knocked out commanderWhen you will stun the Spetsnaz commander you still need to get him out of here. The easiest way is to use a balloon to fulton him to base however you can't do this while you are in any building. You may also take him to a place where you want to call a helicopter.
Warning - If you have problems walking through the village you may decide to find and sabotage a generator which will temporarily turn off every source of light in the village.
Warning - To finish this mission you need to call a helicopter and get to the evacuation area.
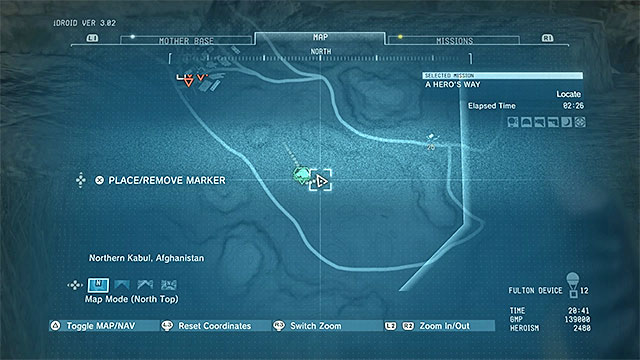
Finding a rare haoma plant is the easiest at the beginning of the mission however you may also take care of it in the end. Explore the desert southeast of the Da Shago Kallai village. You will find the plant in the place marked on the screenshot above.
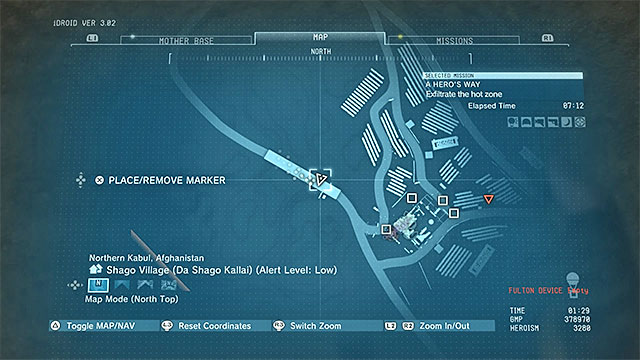
Finding the common metal will be the easiest right before the end of the mission. Get to the bridge in the western part of the Da Shago Kallai village. This area will be surrounded by at least two enemies which you may either neutralize or ignore. You will find the Common Metal box under the bridge, in the place shown on the screenshot above.
The fourth mission of Metal Gear Solid V is a bit longer than the previous one. This is the result of a greater variety of the side missions that you are assigned here. One of them even requires you to a quite distant village. Just like in the case of the previous mission,. The two primary objectives exclude each other. You can sabotage communications equipment by destroying the antennas or by destroying the transmitter on one of the buildings. Therefore, to complete all of the objectives, you will have to replay the mission at least once.
The best time of the day to start this mission is after dark, so pick 18:00 as the starting moment. Make sure that you have taken along C4 explosives, if you want to destroy the transmitter, or frag grenades if you want to blow up the antennas (fortunately, the grenades are also at the enemy base).
The above map presents the operation area in the fourth main mission of Metal Gear Solid V - C2W. The most important location of this mission is the Eastern Communications Post (point 4 on the map), which is the enemy base with the transmission device that you need to destroy. In the base, there also is a container with resources and to the South of it - diamonds (point 6 on the map). If you want to complete all of the objectives, you also need to stop by in Da Wialo Kallai village (point 5 on the map) to rescue hostages (the hidden objective).
 You can find the puppy close to the place where you have started the mission
Your destination is the Eastern Communications Post to the North-East of the landing site. Before you go there, you may want to take a look at two other things. If, during your explorations, you have not yet found a puppy (D-Dog), he should now be around the landing site. Approach the dog and fulton him (send to the Mother Base on the balloon), thanks to which you will soon get a new Buddy.
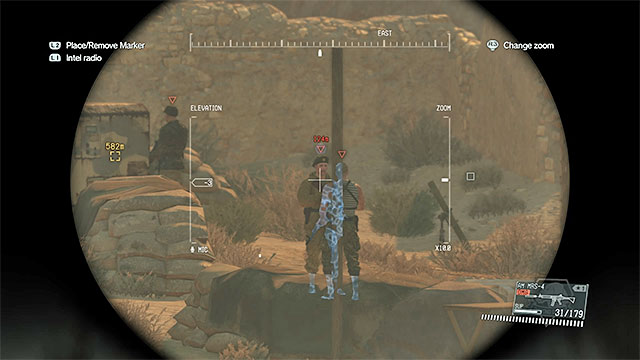
The other important issue is the option to recruit a Russian interpreter. IF you still have not done the side mission (Side-Op) connected with him, you can find him in outpost 24 that you pass by on your way to the enemy base. Identify him with the binoculars - he has been shown in the above screenshot - and you can recognize him by the green beret. You can deal with the guards of the interpreter straight away, or wait for him to enter the building. Either way, try to restrain him (he does not want to cooperate) and fulton him, thanks to which you will be able to interrogate opponents, starting with the next mission.
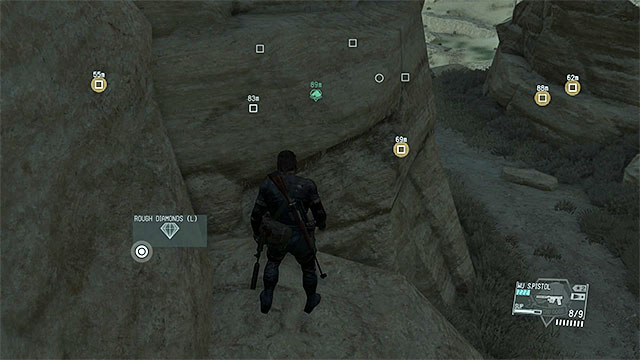
The easiest way to get to the base is along the road, but you need to watch out for the truck traveling around the map and for, at least, one enemy patrol. I recommend that you reach the destination from the south, along the narrow path between rocks. Watch out for wolves here, that it would be better to put to sleep and fulton. Examine this place, because on the rocks marked in the above screenshot (you first need to climb onto them), you find a Rough Diamond. Collecting it completes one of the hidden objectives of the mission. Apart from that, thanks to following the path among rocks, you get to an excellent viewpoint.
In the Eastern Communications Post, there are four objects that you need to take interest in and they have been shown on the above map. A's mark the three antennas. It is a good idea to locate them using the binoculars, thanks to which you complete one of the secondary objectives. The T marks the transmitter and it is located inside one of the buildings.
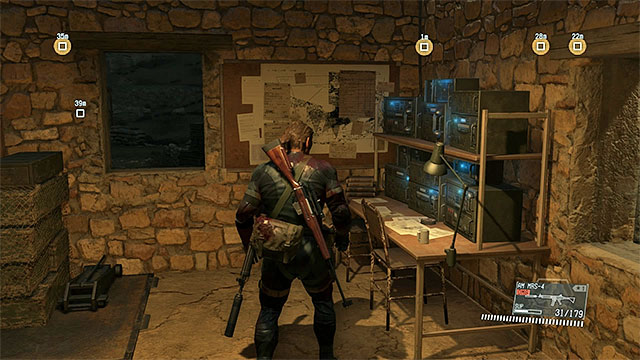 Plant a C4 on the transmitter
There are two ways in which to complete this mission and they exclude each other. You can destroy three antennas or one transmitter - each of the plans is connected with a different objective.
In my opinion, it is better to destroy the transmitter. Thanks to this, you end the mission faster (also, this is important for your S ranking) and there is a lower risk of alarming the enemy. Carefully drop down to a lower level and use the sleeping ammo pistol on, at least, one guard. Sneak into the building with the transmitter from behind and place the C4 there. After that, get as far away from the transmitter, as possible (you can get to the edges of the base) and then detonate (hold down the targeting button and press the context actions button).
Note - if you do not have the C4 explosive in the inventory, you can e.g. fire a suppressed weapon at the transmitter.
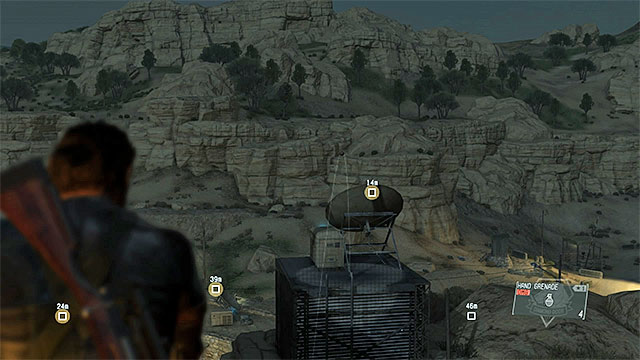 Throw grenades towards the antennas
If you decided on the plan to destroy the three antennas, you need to keep in mind that this, sooner or later, will alarm the opponents around. The most convenient way is use the grenade launcher, while on the upper viewpoint. If you do not have it, the best idea is to throw grenades onto the rooftops with the antennas, because getting to them to plant C4 explosives would be too troublesome. Before you start the action, it would be best to secure as much of the camp as possible, beforehand (elimination of the guards here).
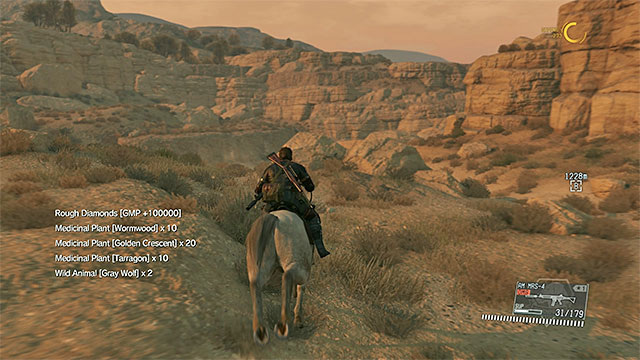 You can request the helicopter r get outside of the mission area
You will be able to leave the mission area after you have destroyed either the transmitter or the three antennas in the Eastern Communications Post. Also, you can request the helicopter, but this is not required for this mission. If you want to save up some cash, or it is too far to the landing spot, it is best to use the horse, thanks to which escaping the base does not take too much time.
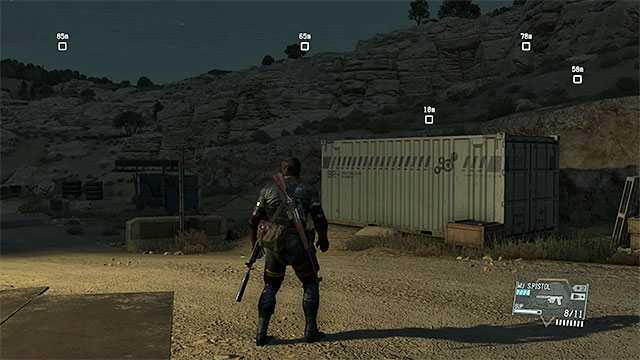 The container with materials
The container with materials is in the Eastern Communications Post, i.e. where you complete the main objective of the mission. You find it on the roadside. It is impossible to fulton the container when you are playing this mission for the first time. For this, you need the CARGO 2 upgrade that allows you to fulton containers and other heavy equipment. The earliest you can unlock that is after the tenth main mission, because one of the requirements is the transportation specialist on the crew, and you find him in that mission. After you obtain CARGO 2, replay this mission and fulton the container.
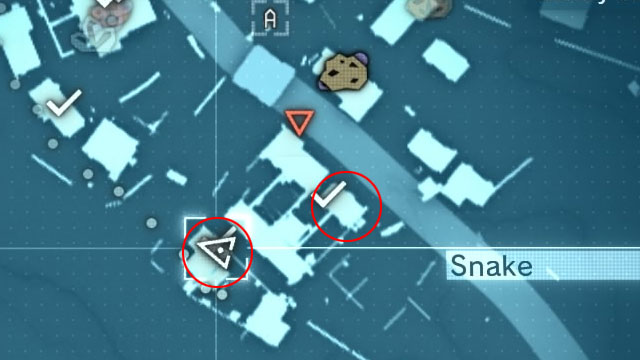
There are two hostages from Da Wialo Kallai village that you need to rescue. You should take interest in that at the beginning of the mission, because it ends automatically after you sabotage the main base and step outside of the mission area.
After you reach the village, you can find the hostages on your own (marked in the above screenshot) or interrogate several guards, thanks to which you learn about the whereabouts of the prisoners. After you find a given prisoner, you need to pick him up, carry outside of the building and fulton him (send to the Mother Base using the balloon). Do not attempt that with the hostage still indoors!
The fifth mission of Metal Gear Solid V takes place in the enemy barracks, from which you need to extract the imprisoned engineer. There are several ways in which you can infiltrate the barracks and the description provide in this walkthrough makes it easier to avoid detection. Just like in the previous missions, apart from the main objective, you can take up several side assignments - rescuing another prisoner, finding a blueprint and stealing the military vehicle.
It is a good idea to start this mission at night or in the evening, right before the guard change takes place, thanks to which the barracks will not be as heavily guarded. You do not need to take any specific weapons for this mission. Just try to equip the Big Boss with the outfit that provides it with the camouflage possible.
The above map presents the operation area in the fifth main mission of Metal Gear Solid V - Over the Fence. This mission takes place in Wakh Sind Barracks, where the engineer is being kept (point 4 on the map). There are several paths that you can take to get there. They have been described in the walkthrough. While in the barracks, also find the escaped prisoner (point 3 on the map), who you need to fulton, as well as a blueprint connected with the hidden objective (point 5 on the map).
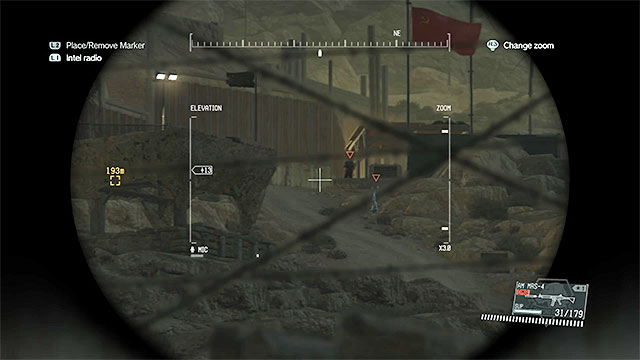 The main path is being guarded by the enemy forces
You can pick either of the two available landing spots and it is better to pick the Western one. You will then start Southwards of the Wakh Sind Barracks. Go straight ahead Northwards and approach the lower part of the enemy base. Avoid the single opponent that is guarding the Western road, and the guards to the East of here (it is night, some of them will be using headlights).
The engineer that you are looking for is being kept in the upper part of the barracks and you can get there in two different ways. There is the main road leading up to the upper area, but it is quite heavily guarded. You would have to eliminate, at least, several opponents, if you decided to go that way, and you would also watch out for new patrols that could reach there in the meantime.

A much better way to reach the upper base is to climb the rocks to the right (i.e. to the West) of the main entrance. Search for the spots on the wall, over which your character can start climbing. An example of such a spot has been shown in the above screenshot. After you climb to the top, keep climbing over the small ledges, until you get near the top and close to your destination.
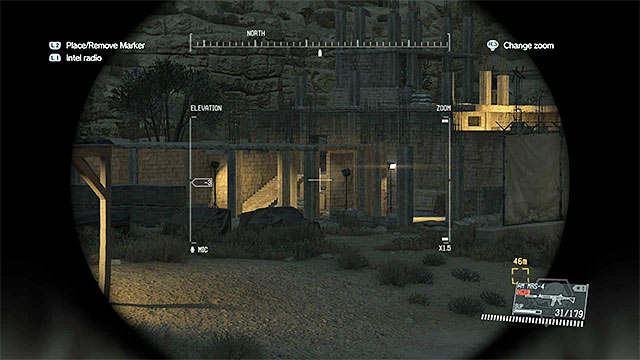
The engineer has been imprisoned at the ground floor of the unfinished building shown in the above screenshot, in the upper part of the Wakh Sind Barracks. You need to keep vigilant here, because the surroundings of the building, as well as its individual floors, are being patrolled by 2-3 enemies. Do not let yourself be surprised, especially if one of them gets to the rooftop of the building. It is a good idea to eliminate quietly all of the opponents here, thanks to which they will not interrupt your rescue mission, later on.
Note - If you want the game to mark the building that you are looking for, grab a soldier and interrogate him.
 The room with the engineer
To get to the basement with the engineer, you need to climb down the stairs and you find them in two different locations (it does not really matter which ones you take). After you get to the basement, start sneaking, in case here still are some enemies here (if so, use covers and try to knock them down from behind). The Engineer is in a locked room - approach the red door and hold down the action button to open it.
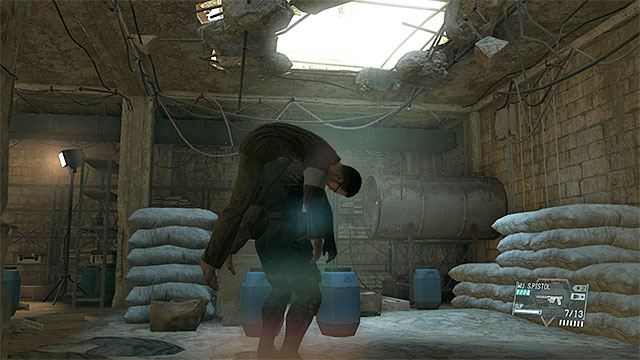
Approach the engineer and pick him up. I recommend against carrying him outside. Instead, walk over to one of the neighboring rooms in the basement and find the hole shown in the above screenshot. Put the engineer down under the hole and fulton him, i.e. send him to the Mother Base using the balloon. This will complete the side objective of the mission.
If you want to end this mission now, you can leave the barracks, best use the way that you came. Just like in the previous main mission, you can either request a chopper pickup or leave the mission area, which completes it automatically.
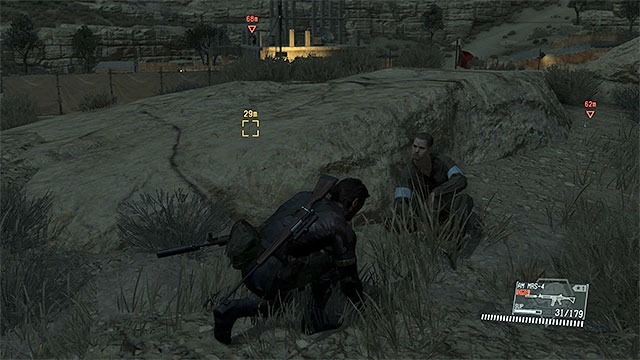
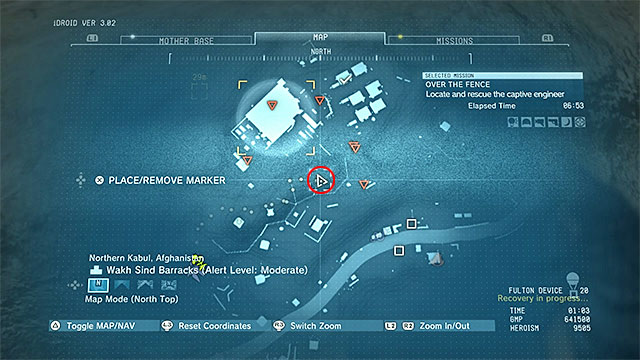
You can try to rescue the prisoner after you have reached the upper part of the Wakh Sind Barracks, still before you have found the engineer, or after you have fultoned him. Examine the ledges near the top viewpoint (it may be occupied by a single guard). The prisoner has been shown in the above screenshots. After you reach him, you only need to fulton him away, which completes his secondary objective.
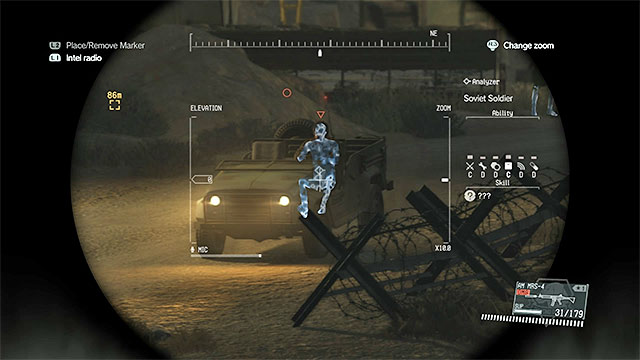 Wait for the car to park nearby and the driver walks away.
The car that you are looking for is the off-road and it travels between the barracks and the outposts in this area. At the beginning of the mission, the vehicle should appear near the path to the main barracks entrance (use binoculars to identify it easily), but if you miss the moment, you can wait for it to reappear here, or check out a different point on the map. You need to sneak up to the vehicle and fulton it, i.e. send it to the Mother Base using the balloon.
Note - It is impossible to fulton the vehicle when you are playing this mission for the first time. For this, you need the CARGO 2 upgrade that allows you to fulton containers and other heavy equipment. The earliest you can unlock that is after the tenth main mission, because one of the requirements is the transportation specialist on the crew, and you find him in this mission. After you obtain CARGO 2, replay this mission and fulton the vehicle.
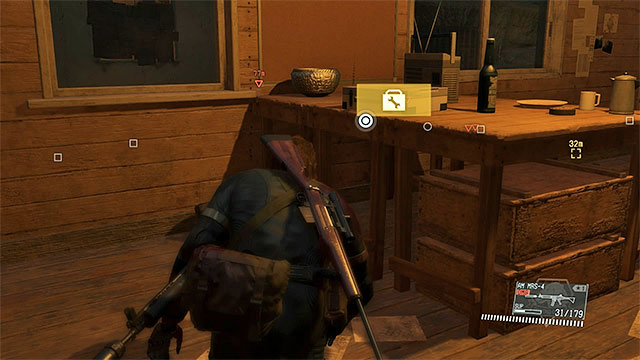
![What you need to find is blueprint [UN-ARC] and it is in the upper part of the Wakh Sind Barracks - Remaining Over the Fence secondary mission objectives - Mission 5 - Over the Fence - Metal Gear Solid V: The Phantom Pain - Game Guide and Walkthrough](https://game.lhg100.com/Article/UploadFiles/201512/2015121617532604.jpg)
What you need to find is blueprint [UN-ARC] and it is in the upper part of the Wakh Sind Barracks. You need to check out the four small buildings close the where the engineer used to be kept. Watch out, because the area is being patrolled by several groups of enemies and there can also be single ones in the buildings. You need to enter the building shown in the above screenshots, because this is where the blueprint is.
The sixth mission in Meal Gear Solid V is definitely shorter than the previous ones, but completing it may cause you more trouble. When heading to the place where the Honey Bee weapon is hidden, you will have to go past a very well-guarded mountain base and also avoid being spotted by enemy chopper. At the end of the mission, Big Boss will have to fight a group of Skulls. There are several side quests to complete in this mission (for example exfiltrating two snipers in the mountain base) and you can finish them all during the first try.
The time of the day that you select for this mission should be 6 PM, as always, which will make it easier to stay undetected. As for the equipment, it is crucial in this mission. You should have FAKEL-46 and GROM-11. Both of these weapons have to be crafted in Mother Base, but the requirements aren't very high (you just need to have to develop the appropriate research groups and gather some materials). Your second main weapon is not that important. It can be for example any of the sniper rifles (it will be useful when rescuing the prisoner, but only if you don't mind killing the enemies).
The map that you see above shows the whole area available during the sixth mission entitled Where Do The Bees Sleep?. It is quite large. You start in the western part (no. 1 on the map) and you need to reach Da Smasei Lama (no. 5). On the way, you will go past Mountain Relay Base (no. 3), where you have two optional objectives to complete. The Honey Bee weapon is located in the caves, close to the main base (no. 6 on the map).
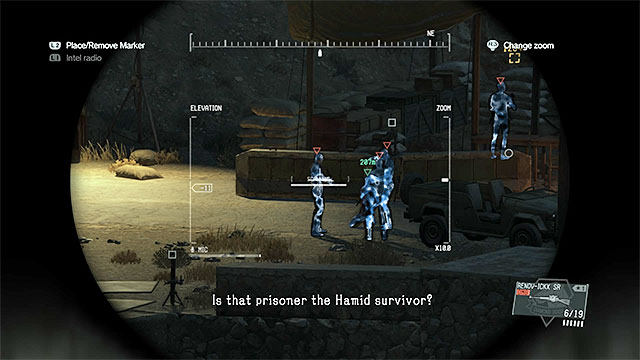 You will find the enemies with the hostage in the eastern part of Mountain Relay Base.
After landing, start heading east to reach Dam Smasei Laman. However, before you get there, you will need to go past a few enemy outposts. The most important one is Mountain Relay Base. Use the binoculars to spot a group of soldiers interrogating a prisoner in the eastern part of the base. Rescuing the prisoner is one of the optional objectives in this mission. It is worth doing, as the prisoner can tell you the exact location of Honey Bee.
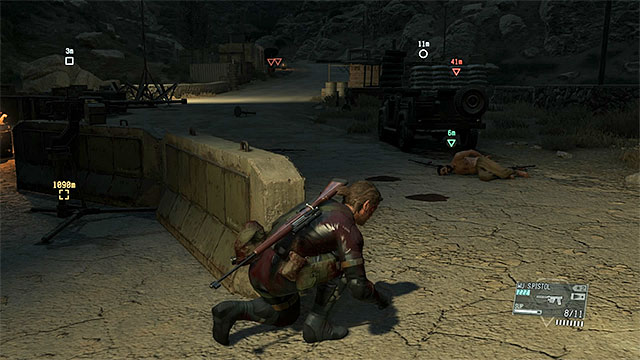 After eliminating the enemies, approach the prisoner.
Don't try to reach the eastern part of the bridge by taking the main road, because you would encounter a lot of enemies that can spot you. Instead, jump down the rock shelves so that you end up under the bridge. Go east and find a spot where you can climb. Try to approach the enemies interrogating the prisoner and distract them (for example by throwing an empty magazine). You can then try to knock all of them out (it is good to use a gun that will put them to sleep). When there's nobody guarding the prisoner, approach him and watch the cut-scene). Fulton the prisoner.
Note - if you don't hurry up when rescuing the prisoner, he will be taken to the main base. In this case, you can follow him and try to rescue him from the new place. However, you also have to be quick, because the prisoner will be killed after the interrogation.
Note - If you don't mind killing the enemies, you can find a spot in the west and shoot them down using a for example a sniper rifle, or destroy their vehicle. Watch out for the two enemy snipers and don't get spotted.
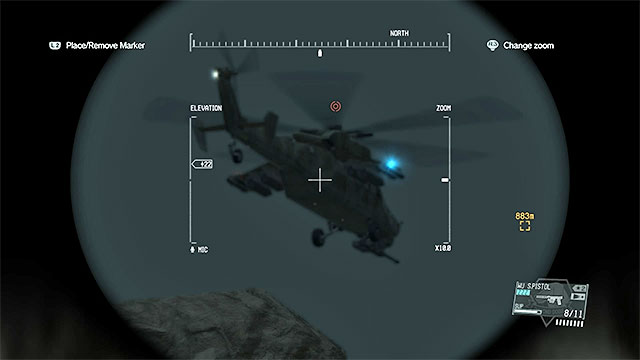 Watch out for the gunship.
No matter how you acted (whether you rescued the hostage, weren't quick enough or simply ignored him), you have to head east. Don't hurry and try to keep away from the road. You will encounter at least one patrol on the main road. You also have to go past two more outposts.
Later, you will notice an enemy gunship flying over the area. You can try to shoot it down (we discussed it when describing optional objectives). However, if you aim to obtain the highest rank, it is better to just avoid contact. Check the position of the gunship and don't let the searchlight spot Big Boss (you can hide behind the rocks or lay on the ground if you need to).
 It's a good idea to choose the northern path that leads to the main base.
There are two passages between rocks that lead to Da Smasei Laman. The southern path is guarded by at least two enemies, but you can easily go past them by climbing the rocks (watch out not to fall down and jump onto another shelf in the right spot!). However, a better idea is to choose the northern path. It is not guarded by soldiers, but remember about the gunship. Moreover, if you choose this path, you will end up in a good vantage point that will allow you to look around the area.
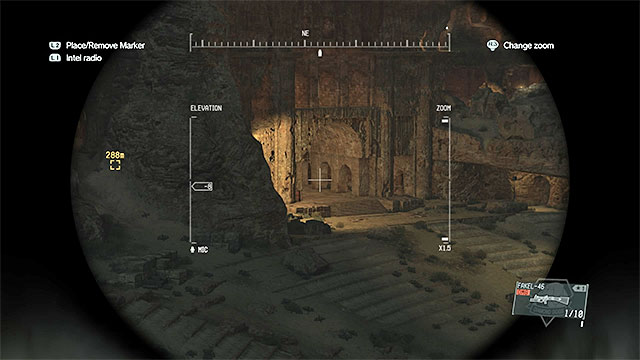 Head towards the entrance to the ruins.
After reaching Da Smasei Laman, spend some time to learn the area. Use the binoculars to mark all the enemies that you can see (there should be at least one on the watchtower) and take a look at the ruins on your left, towards which you will need to go. It is best to stick to the rocks on the left, as this part of the base should be less guarded.
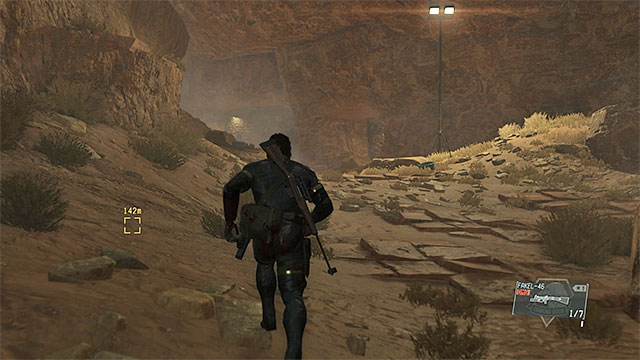
Head towards the entrance to the ruins, but remember that after you go in, you will start encountering single enemies that weren't visible to you earlier. Slowly search the halls and use your pistol to put the opponents to sleep (try to hide their bodies so that others don't notice them).
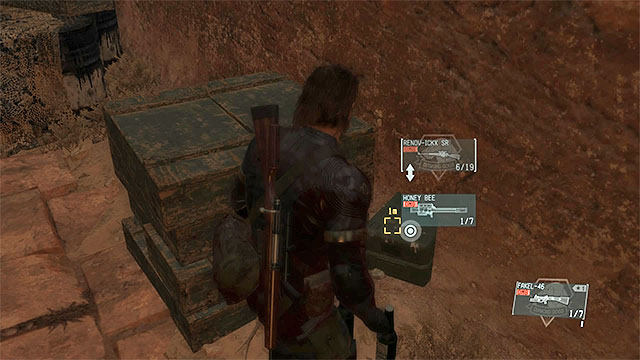
After entering the caves, you still need to watch out for more enemies. Try to neutralize the soldiers as you go. Because of the lack of good covers around, you will need to lay on the ground. After reaching a large cavern, go to the smaller chambers connected to it. Honey Bee is lying on the ground in one of them. Its location is shown on the screen above.
 Get out of the cave with Honey Bee.
After taking Honey Bee (it will replace the second main weapon in your equipment), go back the same way towards the exit. If you haven't got rid of the enemies in the caves, you need to avoid them again so that they don't sound the alarm. When you get close to the exit, you will watch a cut-scene and a group of Skulls will appear in Da Smasei Laman. Now, you decide how to react.
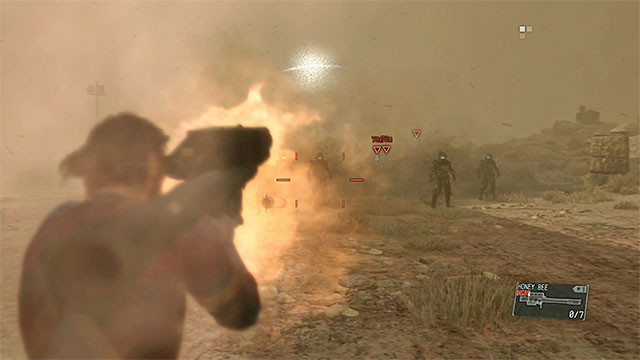 You can use Honey Bee to eliminate the zombies.
You can act in two ways. The first possibility is to eliminate the Skulls, which will allow you to complete one of the optional objectives in the mission. You can use Honey Bee to kill them - try to aim directly at the enemies and look for an occasion when there are several of them close together.
However, it is not a very good idea to use Honey Bee, because losing the whole ammo will prevent you from completing another optional objective. Alternatively, use a grenade launcher or a rocket launcher, which you should've taken with you for this mission. In the last resort, use an assault rifle and grenades. No matter what you choose to do, keep your distance from the Skulls and try to stay on the move.
 Escaping on horseback is the best way.
The second way that you can choose is to escape the enemy base without fighting. If you want to save ammo for Honey Bee and obtain an S Rank in this mission, this is the thing to do. When you regain control over Big Boss after the cut-scene, summon your horse and start escaping. Gallop towards the southern exit from the base and ignore the fact the Skulls will try to chase you. After leaving the base, head North and you should lose the pursuit after a while.
In both cases, you need to leave the area at the end of the mission. A helicopter will be summoned automatically, so reach the landing site and finish the mission.
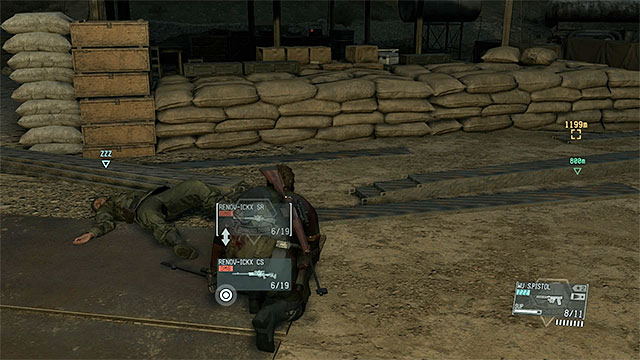 One of the snipers.
The snipers that you seek are in Mountain Relay base. Extracting them is an optional objective in this mission and it is best to do this when going to the caves. After reaching the base, use the binoculars and try to identify the snipers based on the weapons that they carry. They should be located on the road or right next to it, one to the left and one to the right of the bridge.
The easiest way to get close to them is to go under the bridge and then use the stairs or climb up the rocks. Each one of them can be dragged away from the rest, or you can neutralize all the enemies in the area. You should of course Fulton both the snipers.
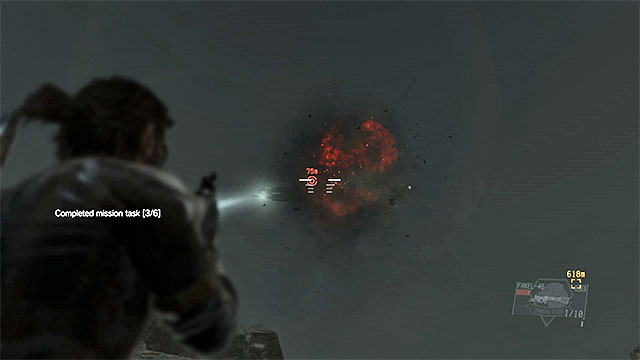
The enemy gunship is patrolling the eastern part of the map, namely the area near Da Smasei Laman and outposts number 14 and 17. To shoot it down, you will need an appropriate weapon. You can unlock it by research in Mother Base. It can be for example grenade launcher FAKEL-46 or rocket launcher GROM-11.
If you have the rocket launcher, you can attack the gunship as soon as it appears in your range of view. If you use the grenade launcher, wait until it stops in one place and quickly get as close to it as you can (avoid the searchlight). Shoot a burst at the machine. 3 hits from the grenade launcher or 1-2 from the rocket launcher should be enough.
Note - when the gunship is damage, its pilot may decide to try to escape. Don't allow it, because when the machine leaves the mission area, you won't be able to complete this objective. In such case, it is good to load the last checkpoint and try one more time (shoot one missile after another, without any additional breaks).
The seventh mission in Metal Gear Solid V is mainly connected to three enemy commanders, woe plan to meet in one of the nearby villages. Big Boss's task is to eliminate all the officers or exfiltrate them to Mother Base when they are unconscious (it is a hidden objective in this mission and of course it is more difficult to complete). You will also earn extra points if you manage to eavesdrop on the commanders during their meeting and rescue the prisoners from nearby town (both of these objectives are hidden ones).
This mission, just like most of the previous ones, should be played at night. It is especially important if you plan to extract all three commanders and/or eavesdrop If you plan to kill the officers, make sure that you take the best sniper rifle that you have. This will allow you to do it without taking any unnecessary risk connected to getting close to the enemies. However, if you want to exfiltrate them, take any of the Cardboard Boxes on the mission. It will allow you to stop the vehicles travelling between the bases.
The map above shows you the area of the seventh mission in Metal Gear Solid V entitle Red Brass. It is a very large territory, consisting mainly of the places where you can find the officers. This means Da Wialo Kallai (no. 3 on the map), Wakh Sind Barracks (no. 4) and Da Shago Kallai (no. 5). To rescue the prisoners (optional objective), you will need to go to Da Ghwandai Khar (no. 6).
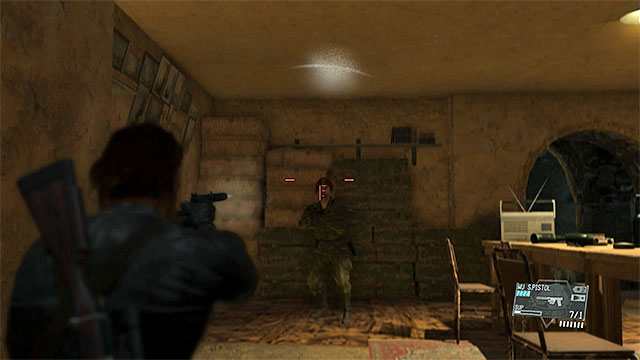 You will find the first officer in one of the buildings in Wialo village.
Before you decide how you want to complete the mission, spend some time on learning the position and the travelling routes of all the three commanders. The easiest one to find is the officer in Da Wialo Kallai, because he stays in one location throughout the entire mission. At the beginning, hew will be in one of the smaller huts, waiting on his friends to arrive. After the meeting, he will go to the main building in the village and you will find him in one of the rooms on the ground floor.
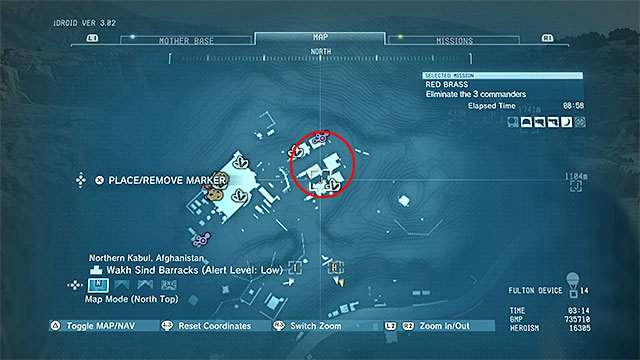
The main location of the second commander is Wakh Sind Barracks, but right after the mission starts, he will go to Da Wialo Kallai to meet the rest of the officers. When the meeting is over, he will go back to the barracks and you will find him in one of the buildings marked on the screen above. The best way to reach them is to climb the nearby rocks.
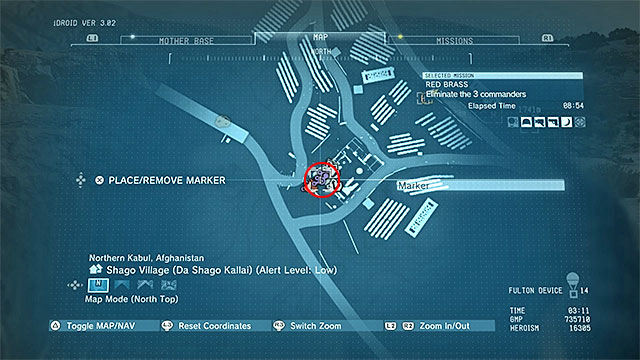
The third commander is in Da Shago Kallai, but as soon as the mission starts, he will get into the vehicle and head to Da Wialo Kallai. After the meeting, he will return to Shago village. From this moment, you will find him on the first floor of the main building in the base. The place is marked on the screen above.
Now you have to decide what you want to do next:
Note! Killing the commanders is one of two ways of completing this mission. If you prefer to complete the hidden objective, go to the chapter entitled Exfiltrating enemy commanders.
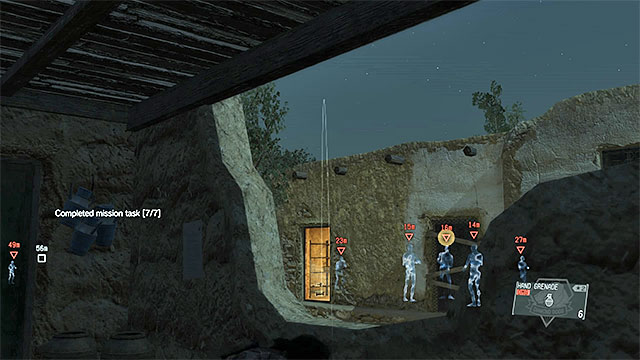 Attacking the officers during the meeting will allow you to complete the mission faster.
You can eliminate the commanders using many different ways. The most obvious variant would be to reach their locations, use the binoculars (the officers all have red berets and then kill them from safe distance using a sniper rifle, or get closer to the target and use any other weapon (for example a pistol or an assault rifle with a silencer).
However, you can make the task easier. If you want to eliminate the enemies quickly, you can sneak to Da Wialo Kallai and hide near the building when the meeting will take place. This is the suggested way of completing this mission if you want to get the S rank. You can then throw a grenade inside and or scare them out and kill them as they run outside.
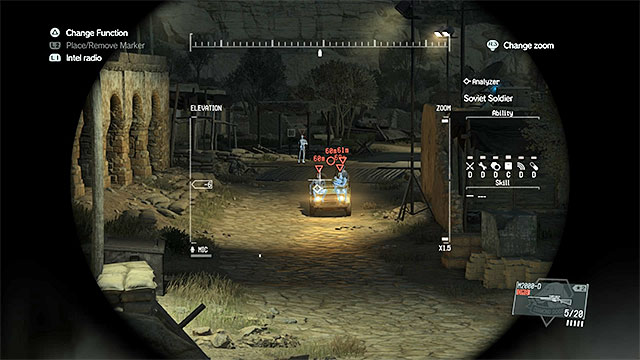 You can plant C4 or a landmine on the vehicle's route.
In the case of the officers from Wakh Sind Barracks and Da Shago Kallai, another interesting idea is to ambush them while they travel, either from their default location to Da Wialo Kallai or when they are returning. Here, you can also make use of the sniper rifle, but it's even better to use a grenade launcher, a rocket launcher or some explosives. You can use C4 or landmines. Place it on the vehicle route (it is makred on the map) and wait until it arrives.
After killig all the commanders, you can summon the helicopter or leave the mission area by yourself (preferably on horseback).
Note! Exfiltrating the officers to Mother Base is one of two ways of completing this mission. If you plan to kill them, go to the chapter entitled Killing enemy commanders.
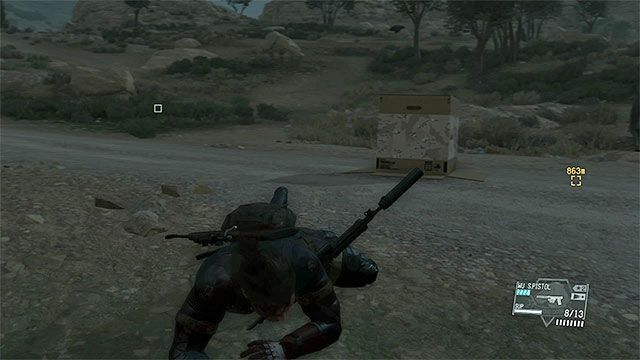
The methods of exfiltrating the commanders are quite similar to the ones described in the previous chapter. You can ambush them while they travel, before or after the meeting, or attack them when they are in their bases (the default locations of the officers are shown in the chapter entitled Locating the three commanders).
As for ambushing the officers while they travel, you can use this method against the commander from Wakh Sind Barracks and the one from Da Shago Kallai. You just need to place a Cardboard Box, or any other obstacle, on the route of the vehicle (shown on the screen above) and wait until it arrives. When the jeep stops and the passengers go out, you can knock out all the soldiers (use a pistol with a silencer) or quickly kill the escort and knock out only the commander.
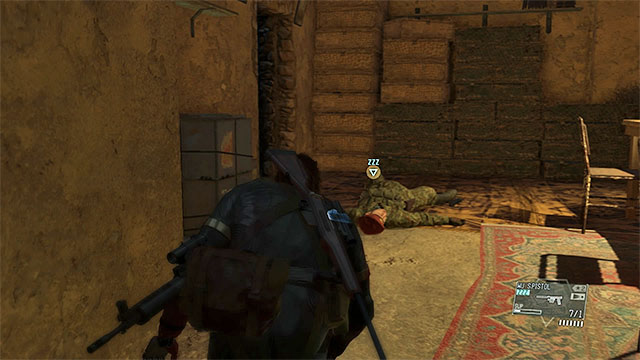 It is good to use a pistol to put the officers to sleep.
If you prefer to attack the enemies in their bases, you should be more careful not to be noticed by the soldiers and raise the alarm. If it happens, the mission is not over, but you have to bare in mind that reinforcements may arrive or the commander may change his location. Each officer that you knock out should be fultoned as quickly as possible. If you attacked an enemy inside a building or under some roof, don't forget to drag them to a place from which you will be able to send him to Mother Base.
After knocking out and fultoning all the commanders, you can summon a helicopter or leave the mission area by yourself (preferably on horseback).
 Knock out the whole crew of the jeep.
This objective is directly connected to the exfiltration of enemy commanders, which is described earlier in the guide. However, the description of this task that you can find on the objectives list is not precise enough, so we need more details. You need to exfiltrate four soldiers in total. Only two soldiers assist each commander, so you need to stop two vehicles to complete the task.
You should start the mission by choosing the landing site in Da Wialo Kallai. Head to the road between the village and Wakh Sind Barracks and block it quickly, for example by placing a Cardboard Box in the middle of it. Wait until the vehicle arrives. Use your pistol on the commander and the two bodyguards, starting from the soldier that should stay in the jeep. Shoot without any longer pauses and aim at the enemies' heads. Stay in the bushes or behind the rocks all the time so that you don't get spotted.
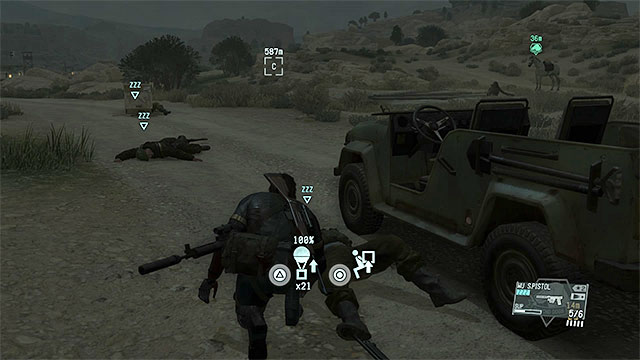 It is best to stop the second vehicle when it's going back to Shago village.
After knocking out and fultoning the first commander and his escort, head to the road between Da Wialo Kallai and Da Shago Kallai. Most probably, you won't be able to catch the vehicle as it is going to Wialo village, but you just need to wait a little longer and prepare an identical ambush. Place any obstacle on the road, hide in the bushes and knock out the crew when the jeep stops. When you fulton enough people, the objective should be completed.
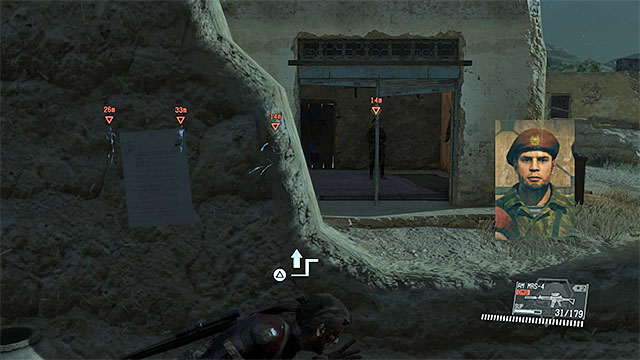
You should start completing this objective right after the mission starts. This way, you won't be late for the meeting. Select the landing site south of Da Wialo Kallai and head to the village as soon as you get to the mission area. When you're close to your destination, start crouching, but try not to eliminate the nearby soldiers, because you may raise the alarm. If you have to knock out or kill a soldier, hide his body.
The destination is shown on the pictures above. You have to get inside the building that is next to the one in which the first commander is (he is waiting for his colleagues to arrive). Stand near the broken wall and make sure that you won't be noticed. You should be about 15-20 meters away from the building in which the meeting takes place. Now you just need to wait for the two other officers to arrive. You don't need to do anything more. Just stand there and wait until the meeting ends.
Note - the objective will be completed right before the commanders walk away. You can use this fact to kill them (for example by throwing a grenade inside) or knock them out (it will be more difficult because of the guards).
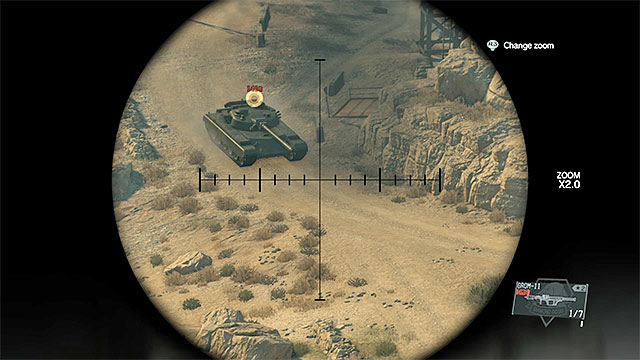
This is the least complicated optional objective in the mission. Head to Da Ghwandai Khar. You can try to find the prisoners by yourself (their location is shown on the screen above) or interrogate a few of the soldiers. You have to pick up each prisoner from the ground, carry him out of the building (remember to clear the area first so that nobody sees you!) and fulton them.
In the eight mission in Metal Gear Solid V, you will face enemy war machines for the first time. In this case, it will be two tanks (one of the mandatory objectives in this mission is to destroy them). You can of course use a rocket launcher to eliminate the tanks, but the game provides a few alternative solutions, like for example using the gear that you find during the mission. As always, there are a few optional objectives, for example rescuing a prisoner and extracting an enemy colonel.
It is not necessary to complete this mission at night. Choosing daytime may actually make it easier for you to aim at the vehicles in the convoy (if you plan to destroy them). As for the equipment, try to unlock GROM-11 rocket launcher, or a better one (if you have the materials and proper personnel). Taking it on the mission is not required, but will make it much easier for you to complete it. Also, check if you have any pieces of equipment that you could use to stop the convoy (for example landmines).
The map above shows the area available to you during the eight mission in Metal Gear Solid V, entitled Occupation Forces. Its most important part starts after you reach Qarya Sakhra Ee (number 3 on the map) and collect the deployment plans. After you do that, a convoy will appear (no. 4), heading to Da Smasei Laman (no. 6). You can use the armored vehicle near one of the outpost (no. 5) to stop the convoy.
 Stay close to the rocks and avoid confronting the enemies too often.
It is best to select the point to the east of Qarya Sakhra Ee as your landing site. This will make it easier for you to reach the village without being noticed. After getting close, use the binoculars and mark the enemies guarding the main path and patrolling the wooden balconies of nearby buildings. Start slowly moving towards the buildings in the higher part of the village. This will allow you to go past several guards, but sooner or later, you will have to eliminate a few of them. Try to use a pistol with a silencer and then Fulton the enemies, or at least hide their bodies.
 The location of the deployment plans.
The deployment plans that you look for are located in one of the buildings in the higher part of the village, namely in the one with a large flag on it. Be careful, because there is at least one soldier guarding the building. Enter the hut and examine the documents lying on the desk. It will make an enemy convoy appear north of your location. The convoy is heading to Da Smasei Laman.
Note - the convoy may also appear on the map after you rescue the prisoner in the village (you can read more about it in the chapter with the description of the optional objectives in this mission) and then try to get away from this location, or if you spend too much time on the map.
Find a safe, covered spot and prepare your rocket launcher.The convoy consists of two tanks and a truck, in which the colonel is travelling. All the three vehicles can be destroyed in many different ways. If you have a rocket launcher, stand in a covered placed so that you can attack the weaker elements of the enemy tanks' armor. You have to bare in mind that if you have a weaker type of rocket launcher, one missile may not be enough. In this case, you have to quickly reload the weapon and use it again. If the situation gets dangerous, you will have to hide behind for example some rocks to avoid enemy shots.
Instead of the rocket launcher, you can use for example C4. However, remember that tanks are very durable and one attack may only damage them. This doesn't apply to the truck, which doesn't have any extra armor.
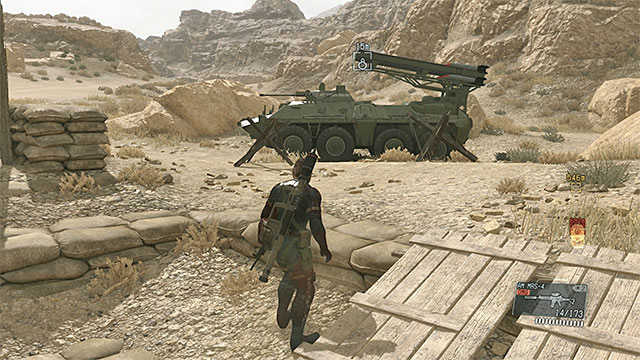 The location of the armored vehicle.
Another way of destroying the tanks is to use the armored vehicle located on the map. This is the best idea if you want to obtain an S rank. You will find the machine to the east of the village, not very far. You can eliminate the enemies guarding the area before you take the vehicle, ignore them, or run them over when you already control the machine.
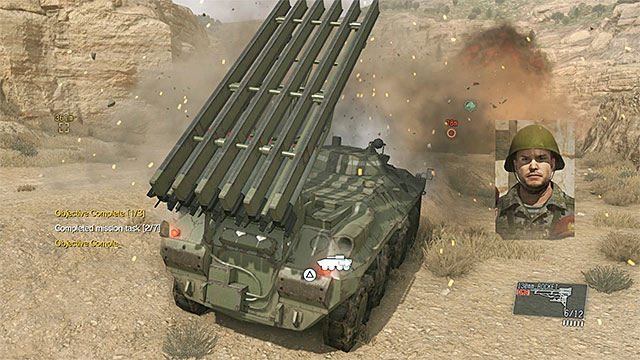 Use the rockets when the convoy gets into your rang of attack.
After you gain control over the vehicle, find a spot on some high ground so that you can see the convoy well. Switch to first person camera and make sure that you select rockets as your active weapon. Wait until the tank in the front of the convoy gets close enough and shoot the rockets. Don't worry if the tanks attack you, as the vehicle is quite durable and it won't be destroyed right away.
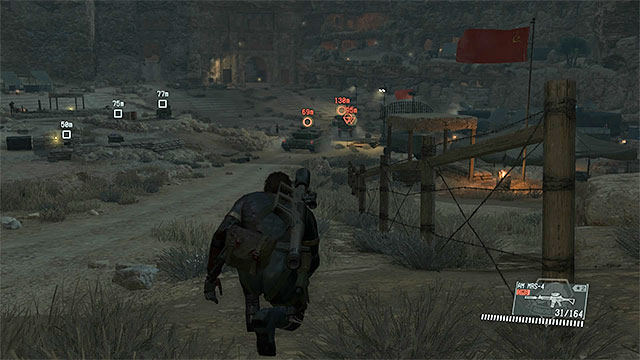 The destination of the convoy is Da Smasei Laman.
If you've managed to destroy the convoy before it got to Da Smasei Laman (the location that you visited in mission 6), you will also complete an optional objective. Otherwise, mission will continue, because the game gives you one more chance to eliminate the tanks and the colonel in the fort. When in Da Smasei Laman, watch out for the guards. Try to avoid them or eliminate them silently. You can use a rocket launcher to destroy the tanks, or make use of the fact that the machines are not moving now and plant a few C4 packages. As for the colonel, he should be in the unguarded, north-western part of the fort, where it will be easy for you to kill him.
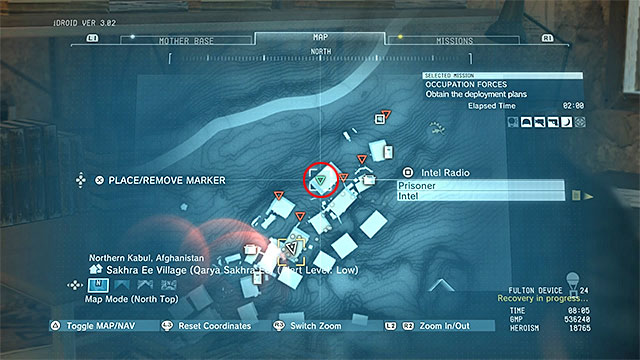
The prisoner that you look for is held at Qarya Sakhra Ee. This is the same location where you find the deployment plans. You can reach the prisoner faster than the plans, because he is in one of the huts in the lower part of the village. You shouldn't have much trouble finding him (look at the picture above). If you need to, you can interrogate one of the guards to learn the specifics. Pick up the prisoner, carry him out of the building and Fulton him.
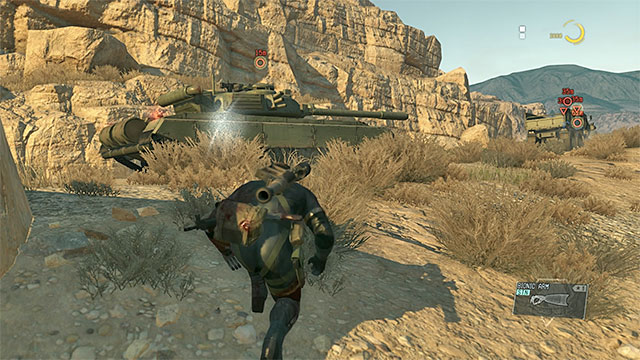 You can approach the tanks when the convoy stops.
You can extract the colonel after the convoy stop. However, it is not so easy, because a Cardboard Box will not stop it for long enough and you would have to use some better obstacles. The best way is to simply wait until it reaches Da Smasei Laman and sneak up to the colonel from behind when he moves away from the tanks.
As for extracting the tanks, you can't complete this quest when doing the mission for the first time, because you need to have CARGO 2 upgrade that allows you to transport heavy objects. This upgrade is available only after completing mission 10 (main campaign), because one of the requirements to buy it is to have a Transportation Specialist, who you will find in this mission. When you have the upgrade, play mission 8 one more time. You can stop the tanks using some large obstacle or wait until they reach the fort and Fulton them.
The ninth mission in Metal Gear Solid V is a mission consisting in a major part of eliminating enemy machines. To complete it, you only need to destroy one armored vehicle, but if you want to achieve the best score, there are as many as eleven machines to eliminate, including a new gunship. For the first time, you will need to race against time, but the time limit is connected only to APC machines. The mission has a few optional objectives, but because of their characteristic, it is best to deal with them when completing the mission the second time.
Note - when completing mission 9, the game won't automatically create checkpoints (for example after reaching an enemy camp). You have to complete the whole mission in one trial. Keep it in mind and don't take any unnecessary risk, for example when you're fighting multiple enemies, tanks or a gunship.
If you start this mission to eliminate enemy machines, you can choose any time of the day and you should select D-Horse as your companion. This will allow you to reach the vehicles faster and none of them will escape you. If you plan to complete optional objectives connected to ambushing the patrol and rescuing six prisoners, it is good to do it at night and select D-Dog as companion (provided it's already unlocked). D-Dog will help you located the prisoners and enemy soldiers.
As for the equipment, take the best rocket launcher that you can on the mission (check if you can invent new models in Mother Base). Moreover, you will use some Cardboard Boxes for stopping regular vehicles and some landmines to destroy APCs and tanks.
The map above shows the area available to you in the ninth mission in Metal Gear Solid V entitled Backup, Back Down. As you can see, the map is quite complicated, because a lot of things happen as you go through the mission. If you plan to focus on eliminating enemy machines, you should look at numbers 3-8 (APCs) and 9-10 (tanks and gunship that appear at the end of the mission). Also, notice number 11, which shows you the location of the jeep with the prisoner and the truck with CGM 25. When completing the mission the second time, you should focus on the optional objectives - extracting enemy patrol (number 12 on the map) and rescuing the prisoners (numbers 13-17 and number 11 - the prisoner in the jeep).
Before we go to a more detailed description, you should read some information about the unusual features of this mission.
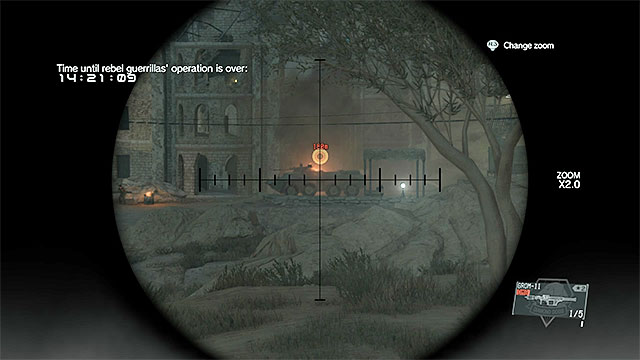 Attack the armored vehicle parked near the square.
Select the landing site located in the south-western part of the map as your starting point (the one located the closest to Lamar Khaate Palace). After landing, approach the palace and use the rocket launcher to destroy the APC parked nearby. Depending on what rocket launcher you use, you can eliminate a vehicle with one missile, or you may need two or three.
Note - Try to destroy this APC every time you repeat the mission. It doesn't take a lot of time and will prevent any complications, like for example all the APCs leaving the map when you are busy doing other things.
Note - Theoretically, you can focus on other things, but it is good to eliminate all seven APCs to earn more points.
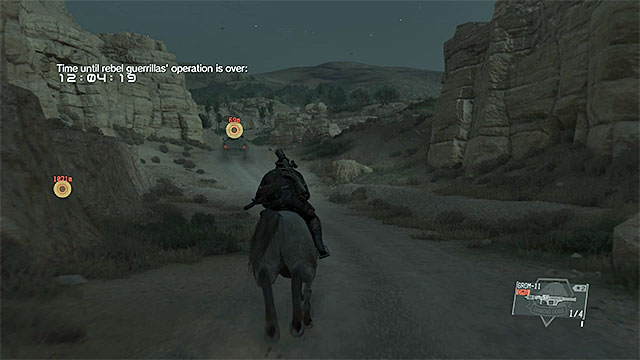 Chase the APC that's heading north.
Quickly get on your horse and head to the second APC marked on your map, which is going north. You can't let it leave to mission area. You can try to overtake the vehicle and block its way with for example a Cardboard Box, or jump off the horse and use your rocket launcher (stand near some covers, because you may be attacked).
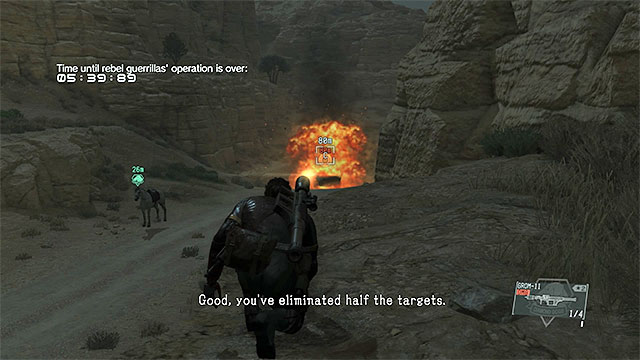 The northern road is a good place for preparing ambushes.
The next APC will appear on the map during the mission. You will see them in the southern part and they will be heading north, with one exception - the APC from Yakho Oboo Supply Outpost, which will start going from there after a few minutes. The best way to deal with all the five machines is to ambush them on the road in the northern part of the map that leads beyond the mission area. If you have a good rocket launcher, you should have enough ammo to finish the task. Otherwise, you will need to call for support (you won't complete one of the optional objectives) or stop the truck carrying a CGM 25 launcher (more on that in the chapter about optional objectives).
After 15 minutes, or after eliminating all seven APC, you will have the option of exfiltrating using a helicopter. You can either do that and finish the mission, or stay in the mission area and deal with the three tanks and a gunship that will appear. This task is described on the next page of the guide.
Note - Three tanks and one gunship will appear on the map after 15 minutes from the beginning of the mission, or after you eliminate all 7 APCs. Eliminating the new machines is not mandatory, nevertheless, we will devote a whole page in the guide to this topic.
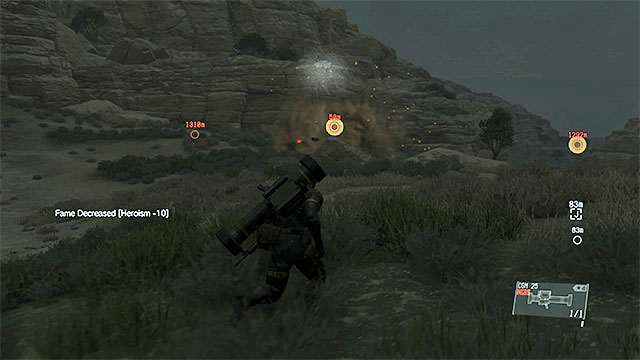 The CGM 25 launcher will do well against tanks.
The tanks will appear simultaneously in three parts of the map - near the northern, eastern and southern edge. The machines will start patrolling the nearby area, so you can approach them in a place of your choice. If you are completing the mission for the first time, the only way is to destroy all the tanks. You can use your rocket launcher or the one from the truck - CGM 25 (you will find more details on the page with other optional objectives). However, if you already have the CARGO 2 upgrade, you can block the tanks' way (for example with a jeep), approach them carefully and Fulton them.
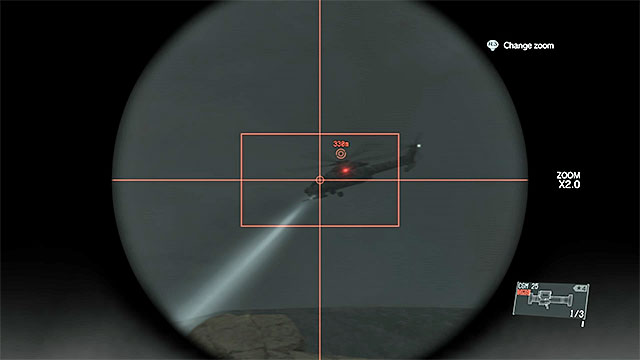 The gunship is flying over the entire map.
Besides the tanks, a gunship will also appear on the map. You have to shoot it down and it is not very easy to do, because you need to have a good rocket launcher (preferably one that will automatically lock the target and destroy the gunship with just one missile). Don't use weaker launchers or grenade launchers, because if you damage the gunship, the pilot will start escaping the mission area and it will be difficult for you to stop him.
Note - Rescuing the six prisoners is an optional objective, but because of the complexity of this task, we decided to devote a whole page to it. It is best to deal with this task when completing the mission the second time, because you should then focus only on this objective (but don't forget about destroying one APC!). The order of rescuing the prisoners described above will allow you to be sure that you will be on time and no one will get killed.
Note - You can make the task easier for you by taking D-Dog to the mission. The prisoners will be automatically marked on your map (D-Dog just needs to get close enough to them) and you won't have to slowly explore the area or use the binoculars often.
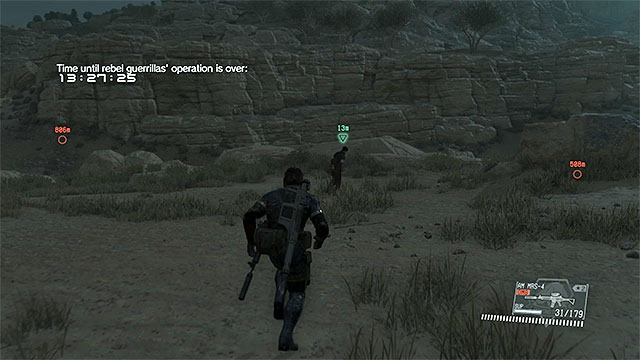 Check the area around the southern landing site.
Select the landing site in the south-western part of the map as your starting point (the one near Lamar Khaate Palace) and when you're on the ground, look around. You should find the first prisoner right here, or after walking a dozen or so steps to the north.
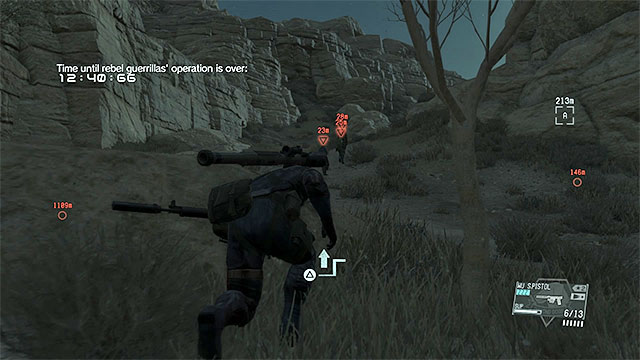
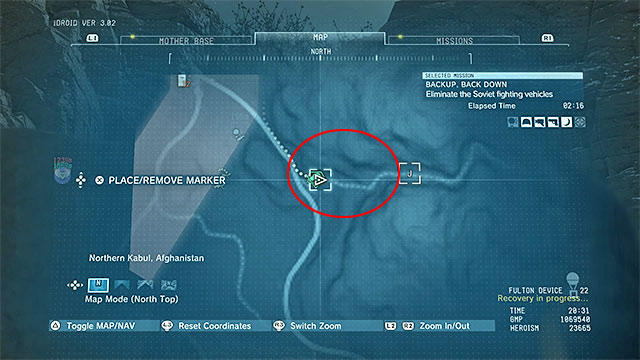
Now you have to be quick, because the life of the second prisoner is in danger. Find the mountain path going from Lamar Khaate Palace that should be to the north-east from your position. It leads to outpost number 15. After a while, you should meet an enemy patrol consisting of four soldiers - their location is shown on the pictures above. There is a hidden objective connected to the patrol and to complete it, you need to catch them alive. Use a pistol to put them to sleep and try to aim at the heads. Hide in the grass to stay unnoticed. When all the enemies are unconscious, Fulton them to Mother Base.
Stay on the mountain path and head east. Soon, you will reach the location of the second prisoner. He will be lying on the ground (the picture above). Fulton him as well.
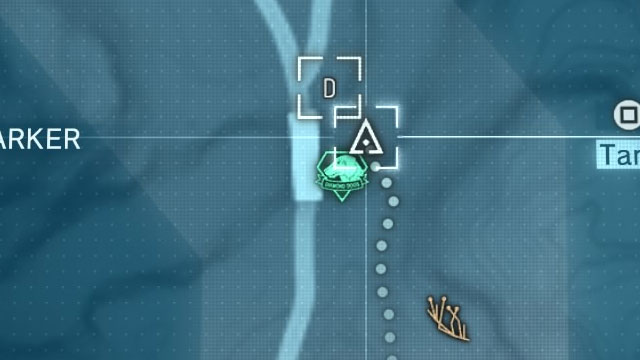
Now you should take an interest in the bridge over the river, which is located north of outpost number 12, not far from it. Go under the bridge and look around. You should find the prisoner in the place shown in the screen above. He can be either under the bridge or a bit to the west of it (depending on how fast you get there).
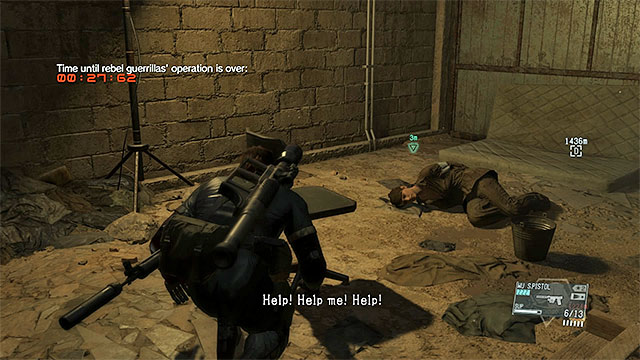 Reach the basement of the barracks.
The fourth prisoner is held in Wakh Sind Barracks, which you already know from previous missions. You have to reach the basement of the building in the upper part of the barracks. The prisoner is in the same room where the engineer was and he is guarded by 2-3 enemies (you should knock them out). Open the door, pick up the prisoner and exfiltrate him the same way as you did with the engineer - placing him under the hole in the roof and Fultoning him.
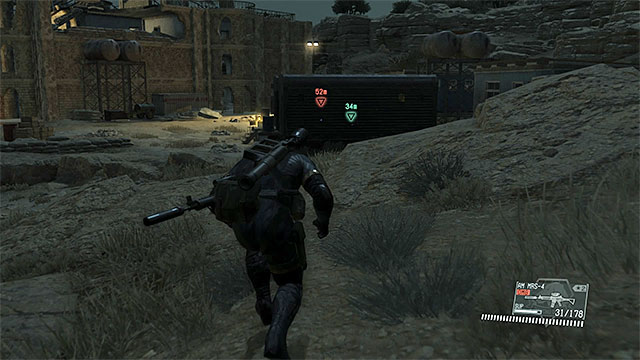 The cage with the prisoner.
The fifth prisoner is located in a cage near Lamar Khaate Palace. You don't have to eliminate all the soldiers in the palace, but just knock out or kill the ones near the cage. You should do so, because Big Boss will need a few seconds for opening the door and carrying the prisoner out to Fulton him.
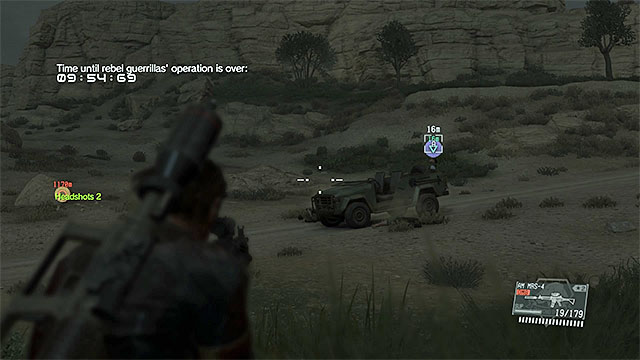 Block the vehicle's way, neutralize its crew and rescue the prisoner.
You shouldn't leave the sixth prisoner for the end, but rescue him as soon as you have the chance. You mustn't be late. Wait until you're informed about a jeep with the prisoner that appeared on the map. It will start from north of Yakho Oboo Supply Outpost. First it will go a bit to the south and then turn east. Stand in any place on the jeep's route and place some obstacle (for example a Cardboard Box). Wait until the vehicle stops and use any weapon to knock out or kill the crew. You can now pull the prisoner out of the vehicle and Fulton him, or Fulton the whole jeep (only if you have CARGO 2 upgrade).
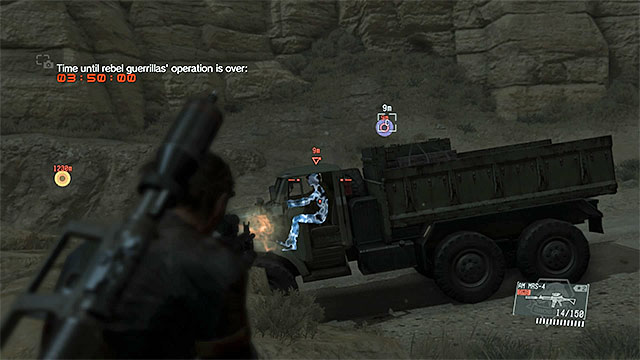 Place some obstacle to stop the truck.
One of the hidden objectives is connected with securing the cargo. It is good to complete it when playing the mission for the first time, because you can obtain a perfect weapon for destroying APCs and tanks. Wait until you're informed about a truck with valuable cargo. It will start from north of Yakho Oboo Supply Outpost and will be heading south. Stand in any place on the truck's route and block the way (you can even use a simple Cardboard Box).
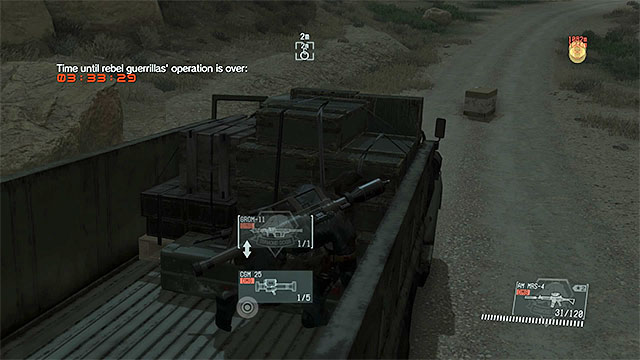 You can Fulton the truck or take the rocket launcher.
When the truck stops, knock out or kill the driver that should get out of the vehicle. If you have CARGO 2 upgrade, you can Fulton the whole truck. However, a better idea is to get on top of it and collecting the CGM 25 rocket launcher. This weapon is perfect for destroying enemy vehicles - you just need to wait until it locks the target and shoot a burst of missiles.
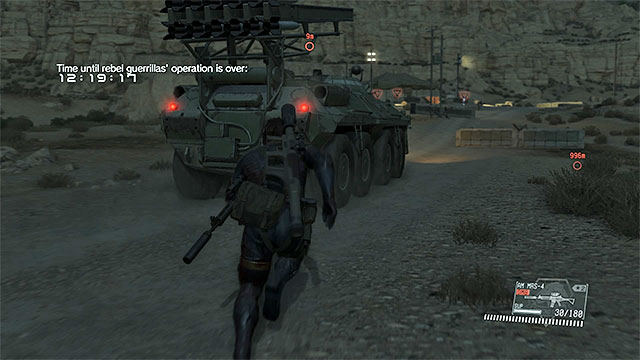 Approach the enemy machines to send them to Mother Base.
There are two hidden objectives connected to extracting enemy machines. The first one is to Fulton any APC (out of seven that you can find on the map) and the second one is to extract all three tanks that appear on the map later in the mission. In both cases, you will need CARGO 2 upgrade. It is available only after completing mission 10, because one of the requirements is to have a Transportation Specialist, who you will find in that mission. Before you Fulton a given machine, you should stop it. In the case of APCs, a simple Cardboard Box will do. However, to stop a tank, you will need a bigger obstacle, like for example a jeep. Be very careful every time you want to extract a machine and don't let yourself be seen.
The tenth mission of Metal Gear Solid V is much shorter than the previous ones and, with favorable conditions, you can complete it in as little as several minutes. Its theme is rescuing the wounded prisoner Malak and there are several ways in which you can do this, e.g. by attacking the convoy that he is on, or by busting him out of prison. Apart from that, there are five other prisoners that you can rescue and, in spite of their status as a secondary objective, they are quite important, because there is the transportation specialist who will enable you to develop CARGO 2 (the fultoning device).
It would be better if you played this mission after dark, i.e. pick 18:00 as the starting time. This will make it considerably easier to rescue Malak, regardless of whether you are going to attack the convoy or get him out of the enemy base. Apart from that, this will make it easier to rescue the other five prisoners. While playing this mission for the first time, pick the D-Horse as your buddy, thanks to which you will get to the convoy, or to the Northern base faster. While replaying it, it is a better idea to use the D-Dog that will easily find the prisoners for extraction.
As for equipment, make sure that you are wearing the suit that provides you with the best camouflage, because you can be easily spotted, while sneaking between enemy bases and while out in the open. Also, you can take a rocket launcher along, if you are going to attack the convoy with Malak, and you do not yet have the CARGO 2 upgrade.
The above map presents the area of the tenth main mission of Metal Gear Solid V - Angel With Broken Wings. All in all, there only are two important locations on the map - Lamar Khaate Palace where you find Malak at the beginning of the mission (point 3 on the map) and Yakho Oboo Supply Outpost, where he is transferred later into the mission (point 5 on the map). It is worthwhile to make a longer stop in the palace and rescue the prisoners there, before they are shot (point 4 on the map).
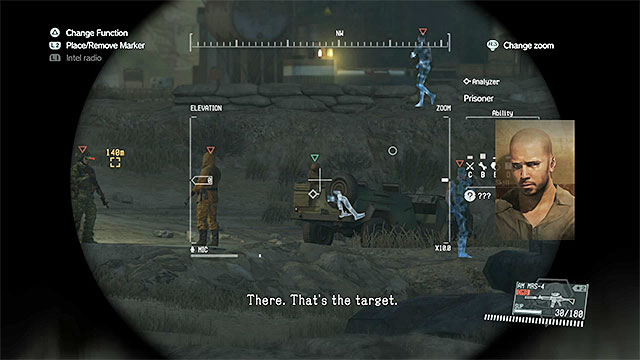 The jeep with Malak
After the mission starts, go North-West to Lamar Khaate Palace. Approach your destination and use binoculars to find the jeep parked by the yard. Malak is there. The vehicle will soon move Northwards (towards Yakho Oboo Supply Outpost) and you need to decide how you want to go about rescuing him.
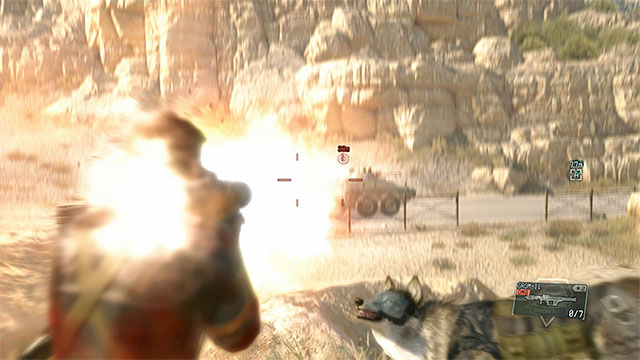 Start by destroying the armored vehicle and eliminate the soldiers in the jeep
The best way to proceed is to attack the jeep when it is under way to the Northern base. Here, you need to keep in mind that there are two more handicaps. First of all, the jeep is being escorted by an APC. Secondly, the road to the North is being patrolled by several groups of the enemy soldiers, so you need to eliminate them first, or pick an unguarded spot for your attack.
Just like in the previous cases, it is best to use the cardboard box to stop the jeep, by placing it in the middle of the road. If it is the first time you are playing this mission, you need to start by destroying the APC, preferably with the rocket launcher. Then, deal with the soldiers from the jeep in any way you want - you can either restrain them or kill them.
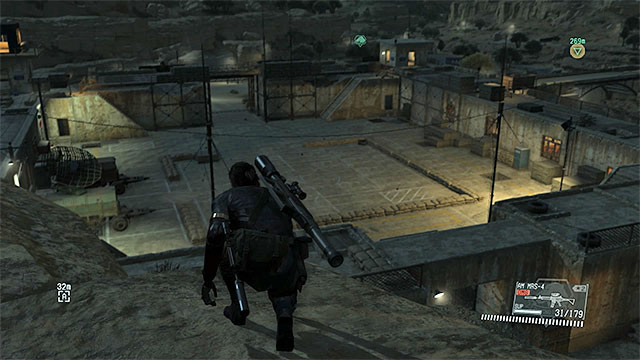 You can drop down onto the upper walls
If you failed to surprise the convoy on the way to Yakho Oboo Supply Outpost you will have to rescue Malak from there. This proves to be quite difficult, because the base is well guarded. Apart from that, there are several enemies patrolling the walls and watchtowers, so they can spot you from afar.
The safest way is to approach the base from the North or from the West. Still, this includes a longer walk or climbing near the river (the interactive wall). There are many ways to enter the base, e.g. dropping off the ledge onto the upper wall. After you do that, it is a good idea to eliminate 2-3 enemies patrolling the walls, but this is not too difficult.
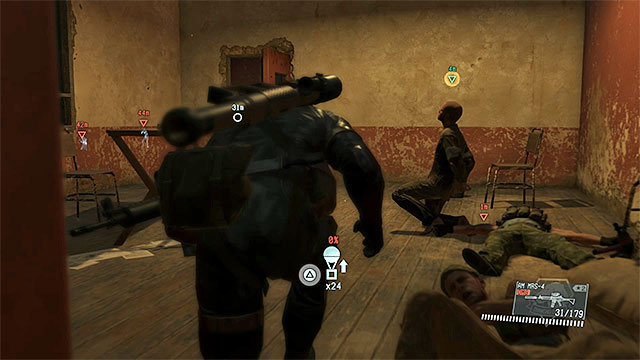 The room with Malak inside
Malak is being held at the bottom level in the Western part of the base. After you have cleared the upper walls, you should secure the main yard, which is being patrolled by two or three more guards. It is a good idea to use throwables to lure the enemies into seclusion. Malak should be guarded by two soldiers, so enter the building carefully and try to attack them by surprise, to prevent the alarm from being raised. Pick Malak up only after you are sure that you will not be spotted.
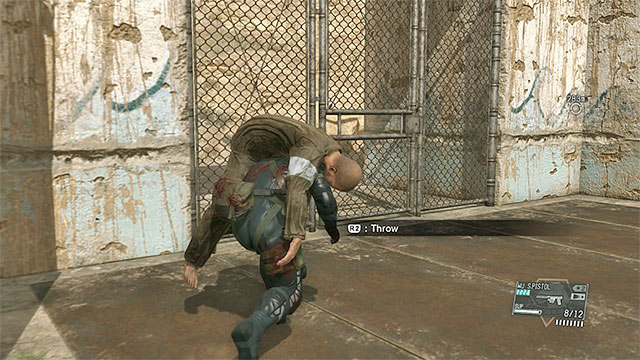
The last step is to extract Malak and, due to the wounds he has taken, you cannot fulton him. If you have rescued him from the convoy, you can steal the jeep and drive it outside of the map, or request pick-up.
If you have rescued him only after he has been transported to the base, you first need to leave. You can carry Malak out of the base through the Northern gate shown in the screenshot, but you need to know that it may be guarded. If you have eliminated all of the enemies in the base, the faster method is to get into the jeep and drive away. Just like above, you can end the mission by driving out of the map, or by requesting pick-up.
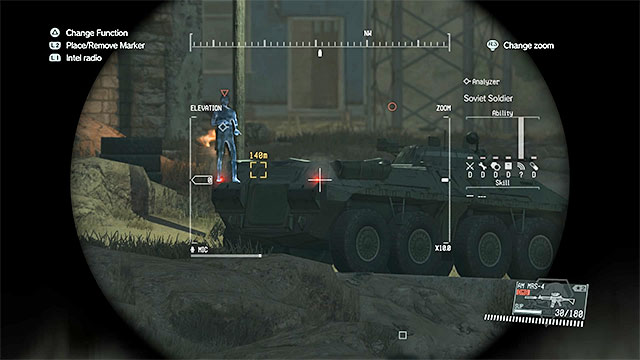 At any point, approach the vehicle
The APC that you need to steal is being parked, by default, outside of the Lamar Khaate Palace and after some time, it follows the jeep with Malak inside. The convoy heads towards Yakho Oboo Supply Outpost and it would be best if you stopped it at some point, e.g. with the cardboard box placed on the road.
After the convoy stops, approach the APC and fulton it. This is not an option when you are playing the mission for the first time, because you need the CARGO 2 upgrade for the fulton device. Fortunately, you only need to rescue the below prisoners, because there is a Transportation Specialist among them.
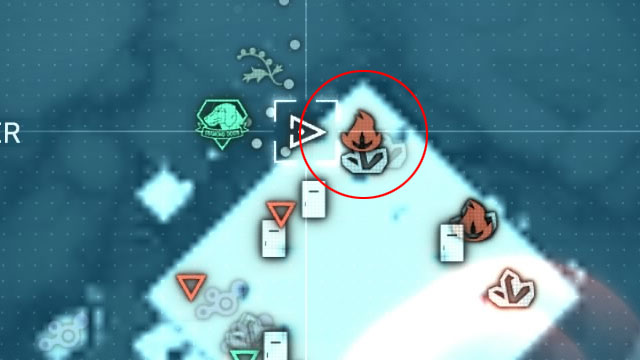 Stun or kill the enemies in the palace, as well as those who are about to enter
You should rescue the three prisoners from Lamar Khaate Palace while replaying the mission. You need to hurry and go to them at the very beginning of the mission, or they will be killed. Approach the palace carefully and walk around all the enemies on the road and by the fortifications, e.g. on the left. Enter the ruins and make it to the upper levels. Stay here a bit longer and neutralize all of the enemies in the ruins, as ell as the ones that are about to enter the building (you can use the dog to help you find them). Thanks to this, you will be free to locate the enemies and extract them, without worrying that someone might die suddenly.
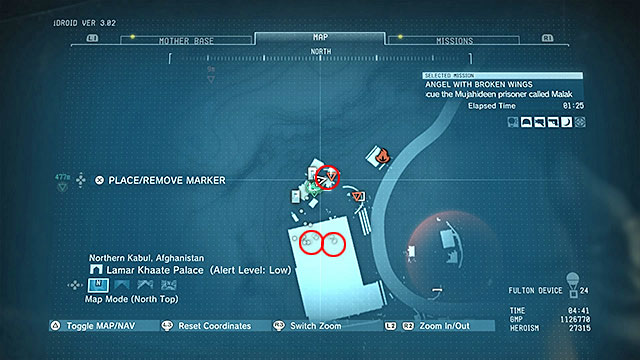
Locations of prisoners have been marked on the above map. Two of the prisoners are at different levels of the ruins. Carry each one of them to the top level of the palace and fulton them. The third one is being kept in a cage and before you come close, make sure that you have secured the area around it. Big Boss is going to need several seconds to pick the lock. After you open the cage, carry the prisoner outdoors and extract him to the Mother Base.
You can rescue the prisoners in Yakho Oboo Supply Outpost while replaying the tenth mission, or while rescuing Malak. They are being kept in the ground-floor room marked in the above screenshot, in the Northern part of the base.
 The door to the building with the prisoners
There are two different ways to reach the prisoners - you can walk into the building, or drop down into it, through the hole in the ceiling. If you want to reach the door, you could crawl through narrow tunnels, thanks to which you get around many opponents on the upper walls and in the main yard. If you prefer to drop in through the ceiling, you need to eliminate, at least, one opponent in the room. Open the red door and start the rescuing operation. You do not need to carry the prisoners outside of the building, because you can carry them to the room with the hole in the ceiling, place them under the hole and extract them.
It is best to complete this objective while replaying the mission. Ignore the palace and head towards Yakho Oboo Supply Outpost. Try to approach the location from the North, i.e. from the high ledges. At the same time, avoid being spotted and raising the alarm. Drop down to the upper walls of the base and deal with all of the patrolmen. Wait for the jeep with Malak to arrive. Stand in the position that allows you to see the Western room in the base shown in the above screenshot, through the window.
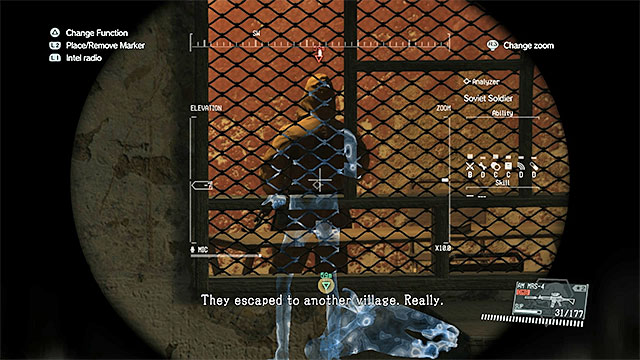 The conversation is short
Equip binoculars with microphone to eavesdrop on the conversation remotely.
Note - If you do not want to use binoculars, you can also use the narrow tunnels under the base, or hide inside the neighboring room. However, the risk of being spotted is higher then, especially that apart from the driver, there also are several more opponents.
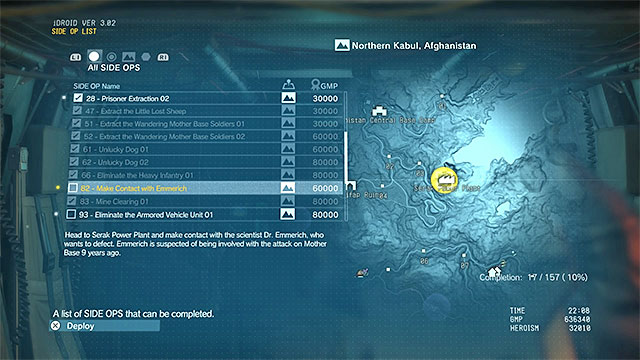 Pick the side mission 82 from the list
The eleventh mission of Metal Gear Solid V does not appear on the list of available missions automatically. Still, it is not too difficult to unlock it. You can try to unlock this one, as soon as there appears mission 82 - Make Contact with Emmerich on the list of available missions. Select this one.
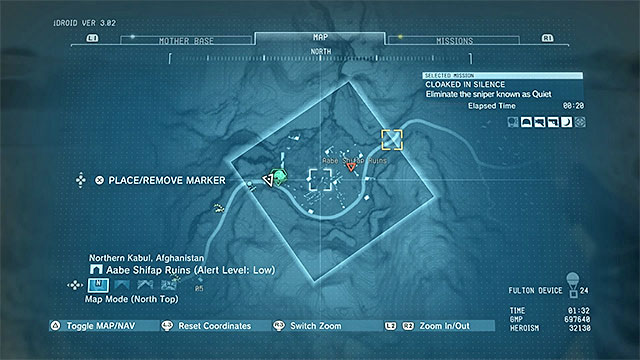
Since side mission 82 takes place in the unexplored part of the map, pick your landing zone to the far West of Serak Power Plant. After you have been deployed, go East. You will be interrupted as soon as you reach Aabe Shifap Ruins marked in the above screenshot. Here, you will be attacked by Quiet and the eleventh main mission will unlock automatically. Your objective here, will be to eliminate the female sniper.
The main objective of the eleventh mission in Metal Gear Solid V is to defeat Quiet, i.e. a member of the Cyber organization, who is armed with a sniper rifle. There are two different ways to succeed - by depriving Quiet of her entire health bar in read, or by draining her endurance bar in blue. After you succeed, the game will present you with an important choice to make - whether you want to kill Quiet or to arrest her.
PRIMARY (1/2): Eliminated Quiet - You can defeat Quiet by depriving her of either the entire health bar or the endurance bar. In the case of the former, you do not need to worry that you prematurely kill her, because both variants end in the same cutscene.
PRIMARY (2/2): Determined what to do with Quiet - Regardless of the way in which you defeated Quiet, towards the end you need to decide whether you want to kill her or to take her hostage. The better variant is, of course, the latter one, because you gain a new Buddy this way.
SECONDARY (1/2): Neutralized Quiet without hitting her with lethal weapons - You do not need to resign of using weapons completely, but only the non-lethal ones are permissible, thanks to which you will be able to restrain the target )e.g. sleeping ammo pistol). Also, you need to make sure that you do not use grenades, or other explosives.
SECONDARY (2/2): Neutralized Quiet with non-firearm attacks - The easiest way to do this is to set a supply drop onto Quiet. Alternatively, you can also surprise her in melee.
You do not need to decide for the night, in the case of this mission, because even then Quiet will have no problems spotting you. Apart from that, it will be easier for you to find her during the day, after she moves to a different spot.
If possible, take the D-Dog along, who will help you locate the sniper. As for your equipment, if you are going to deprive Quiet of her health bar, get the best sniper rifle available. If you want to deprive her of her endurance bar, your choice of weaponry plays no major role.
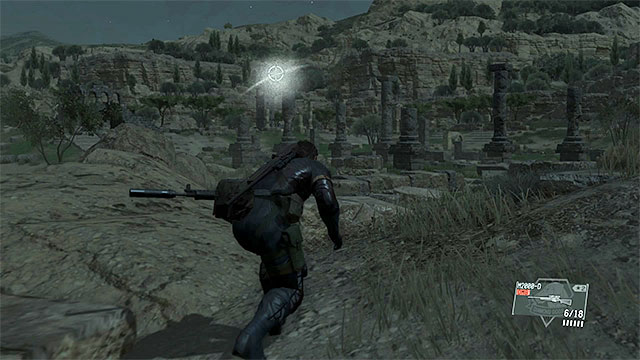
Before you read the walkthrough proper, for the fight with Quiet you need to learn several things about her capabilities. At a distance, she behaves just like the rest of the snipers that you encounter, so after she picks a good vantage point (at first, this is one of the bigger stone objects around), she starts monitoring the area.
After you get within the sight of Quiet, you will be signalled by the white spots on the screen. If, additionally, the crosshair icon appears (e.g. like in the above screenshot). This means that you have walked within her range of fire. In such a situation, you immediately need to leave the area and tale cover (a single shot should not kill you, but this will severely wound you, and your ranking at the end of the mission will drop). During the mission, try to avoid this kind on dangerous moments. First of all, avoid walking into open spaces. Instead, dash between covers and try crawling (you can quickly drop onto the ground, if only you know that Quiet will soon fire again).
 Quiet escapes after you either attack or approach her
Do not count on Quiet's staying put in one spot, for the whole battle, or her changing her position only slightly. Her abilities allow her to change positions very quickly and to jump off high cliffs. She will make use of her abilities each time you attack her, or approach her and she spots you (she is more sensitive to the sounds of the surroundings than the regular opponents).
Note - At the moment at which she leaves her position, Quiet may leave a frag grenade behind. If you spot her trying to leave you such an apple, get away from the site, as quickly as possible.
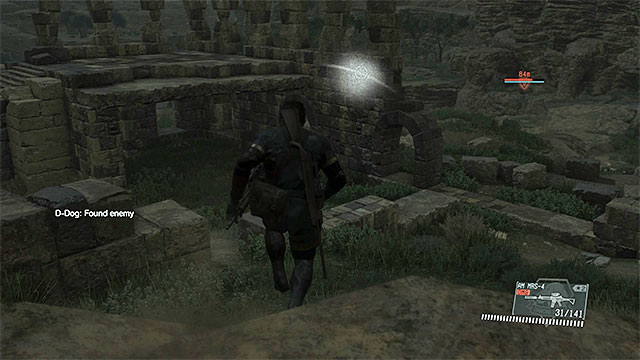 D-Dog will help you locate the sniper again
After Quiet escapes from a given spot, she additionally initiates her camo, which means that you will have to locate her again. Therefore, try to pick the direction in which she escaped, while activating camo. Of course, take your time and do not haste to get to her next position, because you can be targeted again and shot.
You can be helped, while finding out where Quiet hides, by the D-Dog, which is capable of sniffing her out, within the range of several dozens of meters. This will allow you to get prepared properly, before the next confrontation, or to pick an alternative route, thanks to which you will get to a spot appropriate for a sneak attack.
There are two ways, in which you can win with Quiet - by depriving her of her entire, red, health bar (do not worry, because it is impossible to kill her prematurely this way), or by depleting her whole, blue, endurance bar. There are not any long-term effects to the decision that you make, because either way, after you have sufficiently weakened Quiet, you will be able to sneak up on her and decide her fate (this has been discussed on the next pages of this walkthrough).
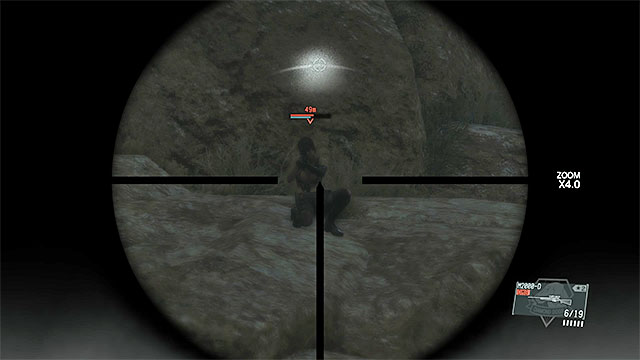 Do not aim for too long, or you get hit
If you want to win the battle by depleting Quiet's endurance bar, your best weapon is the sniper rifle. In the situation, in which Quiet learns your position, stay behind your cover and lean out only to take the shot. Then, walk away quickly, or else her attack ends in a success. If, on the other hand, she does not know your position, you can risk a more precise shot at the head, of course.
 You can throw Quiet explosives
There are many other ways to deplete Quiet's health bar. For example, you can use the rocket launcher or the grenade launcher. If you managed to get close to her current cover, you can surprise her with a grenade and hope that it does not go off before she escapes. Using standard weapons, e.g. a machine gun, is not recommended, because you don't deal too much damage to her, this way, because she escapes into another spot.
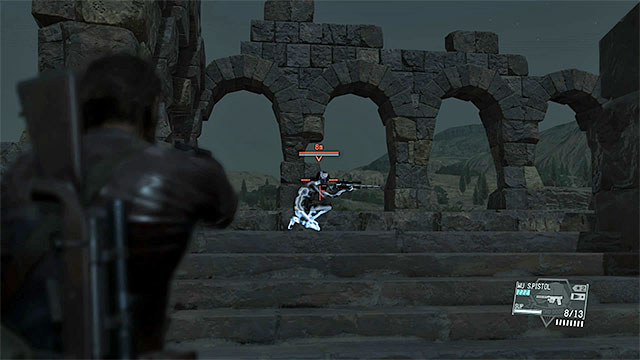 Sneak up on Quiet and either use an incapacitating weapon or a melee attack
If you want to win the battle by depleting her endurance bar, you can use weapons with incapacitating and sleeping ammo. While playing this mission for the first time, you, unfortunately, your only option will probably be a pistol and sleeping ammo. Due to this, you will have to sneak up on Quiet and, additionally, your attacks will only deal a little bit of damage to her. While replaying this mission, later into the campaign, it is a good idea to use some better weapon, e.g. a sniper rifle with sleeping ammo.
The best way to deprive Quiet of her endurance bar is to...deploy supply drops onto her. If only you have enough cash, pick Supply Drop via the iDroid and set Quiet's current cover as the destination. An example screen of Supply Drop request has been presented in the above screenshot - the selected deployment spot coincides with Quiet's current cover.
 Cargo should drop onto Quiet and weaken her
After you have requested a supply drop, stay behind your cover and do not lean out. Also, do not come close to Quiet, or else you will drive her away. If you have been following the plan, the cargo should drop onto her and deprive her of more than a half of her health bar. To defeat Quiet this way, therefore, you require two supply drops, at least, but she should not get resistant to this, after the first successful drop.
Note - An additional upside of cargo drops is that this why, you complete two secondary objectives of this mission (in the meantime, do not attack her with any weapons).
 You can shoot Quiet
Quiet's fate needs to e decided by you, regardless of whether you have deprived her of her entire health bar or the endurance bar. After you defeat her, Quiet should appear in a different spot on the map. Get there and approach her. If you want to shoot Quiet, you need to press the attack button,, at the moment at which your character aims at her. This is not a good idea because you will lose, this way, your opportunity to get a new buddy.
 A much better option is to take Quiet along
If you want to capture Quiet alive, do no do anything and just wait until your character picks her up from the ground. Then, you need to wait for the helicopter to appear in the ruins and carry her over into the vehicle. In this case, the mission ends in several cutscenes, where you do not need to perform any additional actions. After you reach the Mother Base, Quiet will be arrested.
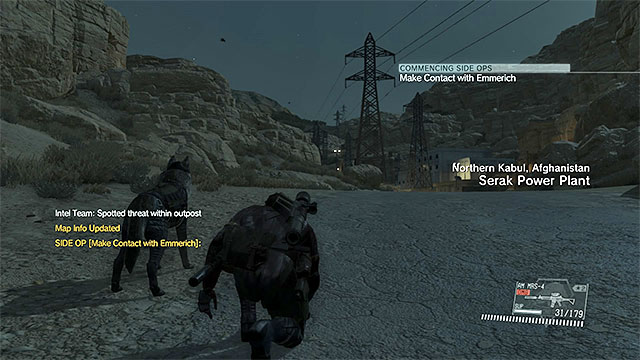 You need to reach the power plant
The twelfth mission of Metal Gear Solid V first needs to be unlocked, because it does not become available automatically from the map of the main missions. Again, take interest in the same Side-Op, as in the case of your preparations for the eleventh mission, i.e. Make Contact with Emmerich. As your starting point, pick, e.g. the landing zone in Aabe Shifap Ruins (this is where you fought Quiet) and head Eastwards, while passing by several enemy outposts. Your destination point is Serak Power Plant.
 Sneak up to and knock down single guards
You need to reach the red door in the Eastern part of the power plant and it is best to do this without raising the alarm. I recommend, therefore, that you move glued to the rock on your left (additionally, the best time of the day is the night) and either walk around, or knock down only those of the enemies that visibly stand in your path. Along your path, climb over several fences, which should be no problem to you. Interacting with the door in the power plant ends side mission 82 and starts the twelfth main mission (Hellbound) automatically.
The twelfth mission of Metal Gear Solid V is relatively demanding. At first, you need to avoid being spotted by regular soldiers (the ones in the power plant and in the HQ), and by the enemy chopper hovering over the mission area. After you make your way into the hangar, where doctor Emmerich is, you need to get him out. This is made more difficult by the necessity to avoid the Metal Gear, i.e. the giant and perfectly armed giant mech. Just like usually, apart from completing primary objectives, it is also a good idea to remember about secondary objectives. You complete all of them in the enemy HQ.
PRIMARY (1/2): Made contact with Dr. Emmerich - The scientist is being kept inside one of the hangars in Afghanistan Central Base Camp. It is being guarded by a big group of soldiers (e.g. ones with walkers), therefore you need to plan carefully on how to reach Emmerich safely.
PRIMARY (2/2): Extracted Dr. Emmerich - This objective is much more difficult than it might seem, at first. Apart from leaving the enemy HQ with Emmerich safely, you also need to watch out for the giant Metal Gear Sahelanthropus, which appears around during your first extraction attempt.
SECONDARY (1/4): Extracted 3 Walker Gears from Afghanistan Central Base Camp) - the walkers are mainly patrolling the western part of the base. You can put to sleep, or kill, the operators and fulton all of the Walker Gears. To complete this objective, you need the CARGO 2 upgrade (fultoning of heavy equipment).
SECONDARY (2/4): Extracted Dr. Emmerich without him taking damage - You can complete this objective while playing the mission for the first time, but you need to be extremely careful, both while escorting him out of the base and towards the end of the mission, which is when Sahelanthropus appears.
SECONDARY (3/4): Secured the Glamour Model Vertical poster at Afghanistan Central Base Camp - The poster is in the building to the South-East of the hangar where Dr. Emmerich is being kept.
SECONDARY (4/4): Secured the blueprint at Afghanistan Central Base Camp) -
Blueprints are inside one of the hangars in the central part of the base and you can walk into the hangar only if you have not raised the alarm (the flashing blue light above the door, instead of the red one).
Since you need to reach the starting point on your own, it is impossible to define the starting time, but try to make it night. Thanks to thin, you will gain a lot, especially while exploring the HQ, because many of the enemies will be able to spot you during the day, at a long distance.
As for the buddy that you should take with you, your choice does not play that big a role - taking the horse will allow you to travel around he map faster, and the dog will help you find guards in the power plant and in the HQ. You do not need any powerful weapons either (e.g. the rocket launcher) because it would be best, if you could entirely avoid detection and avoid destroying the enemy equipment. This also holds for the ending of the mission, when avoiding Sahelanthropus is the only plan that makes sense.
The above map presents the mission area available during the twelfth main mission in Metal Gear Solid V - Hellbound. You start the mission right next to Serak Power Plant (point 2 on the map), which you need to get out of. Then, head to Afghanistan Central Base Camp (point 4 on the map), where you spend the majority of your time saving Dr. Emmerich (point 5 on the map) and completing secondary objectives. Towards the end of the mission, Metal Gear Sahelanthropus (point 6 on the map) appears on the map. You can escape from it towards the landing one marked by the game (point 7 on the map) or request pick-up by the chopper, from a different spot on the map.
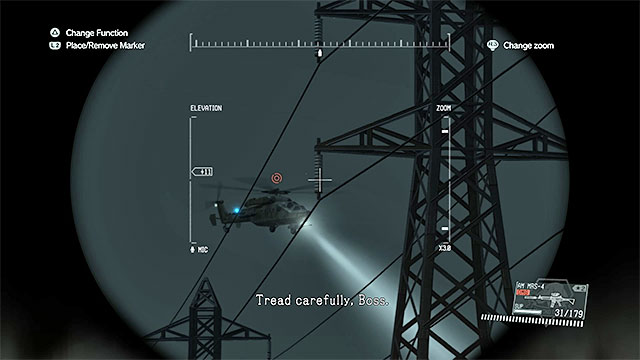 Avoid the chopper at any cost
You start the mission close to the hangar, where you saw the Metal Gear during the cutscene. First of all, return to the red door into Serak Power Plant. You need to sneak across the plant and it is recommended that you take the same route as previously, i.e. right next to the rocks on the right. There should be not much trouble avoiding the enemy soldiers, but you need to watch out for the gunship with a spotlight patrolling this area. Take cover or drop onto the ground as soon as the enemy vehicle starts checking the area around you.
Note - You can shoot down the chopper. This would make exploration of the HQ easier, because the chopper will reach that area along with your character. Do this only if you have taken along a good rocket launcher with automated targeting system and is capable of destroying it, or dealing severe damage, in one hit.
 Along your path, watch out for single patrols
After you leave the power plant, you need to head North-West towards Afghanistan Central Base Camp. Along your path, walk around all of the enemy outposts. Apart from that, do not move too fast and try to stay away from the main road, because it is being patrolled by, at least, several enemy groups, several soldiers each. It is best not to take the risk and save up on your supplies, instead of taking on the opponents in your way. After you get close to the enemy HQ, leave the main road and climb the hill on the right, which provides you with a good overview of the camp.
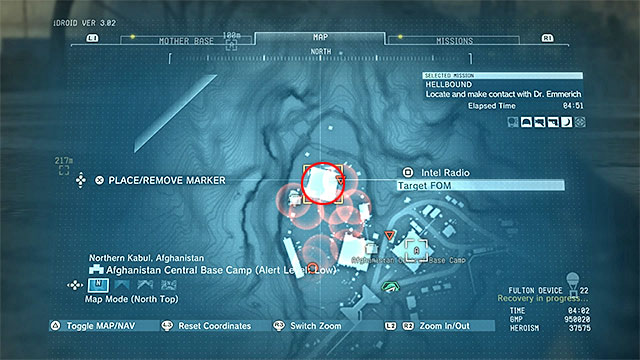
Afghanistan Central Base Camp is a sprawling location and, additionally, there are not too many hills there, or big obstacles that would make the exploration easy and less risky. First, try to remain on the hill and perform the best reconnaissance possible - you should especially pay attention to at least one guard on the rooftop of the large building on the left.
After you have marked all of the enemies, head slowly into the base. You need to avoid moving in the open areas, especially if you are exploring the camp during the day. Your destination has been marked in the above screenshot, the hangar is in the North-Western corner of the HQ.
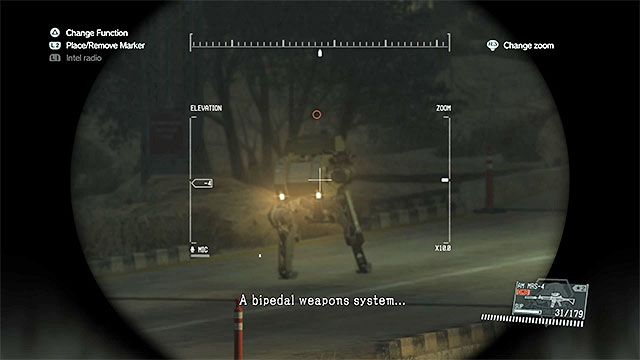 Watch out for the enemy chopper, enemies on heights and walkers
On your route to the hangar, try to eliminate all of the single enemies that you encounter and enemies in higher vantage points. Steer clear of the larger enemy groups and soldiers patrolling the base in walkers (there is a hidden mission objective connected with them - see details on one of the following pages of this walkthrough). Apart from that, keep an eye out for the chopper, which might have reached here in the meantime. Just as in the case of the power plant, you cannot have Big Boss get into the light of the spotlight.
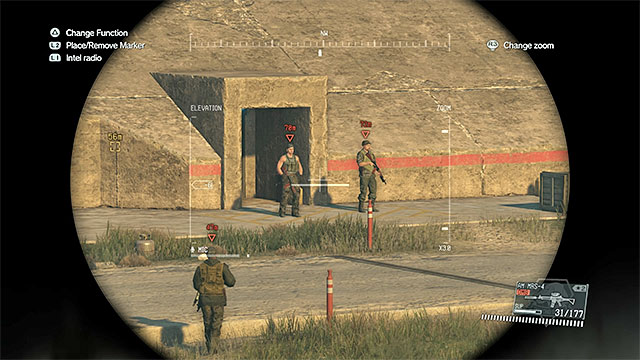 Hangar entrance
It is best to reach the hangar by walking through a smaller building to the South-East of the hangar itself. Use binoculars to find the hangar entrance - it is going to be illuminated in blue. By default, the entrance is being guarded by, at least, two soldiers. You can eliminate them quickly with a surprise attack, or lure them away with, e.g. a throwable. After you gain access to the hangar, enter and meet with Doctor Emmerich.
Note - It is a good idea to secure as much of the base as possible, because in a moment you will have to escort the scientist out. It is especially recommended, if you want to remain undetected, while extracting Emmerich.
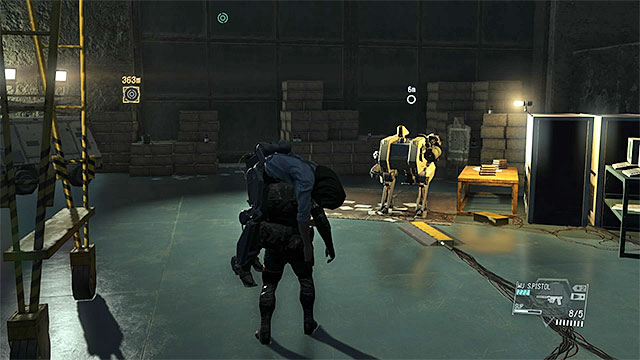 The walker that you can use to escape
Right after the meeting with Doctor Emmerich you receive information that chopper for extraction has been requested - it has landed to the South-West of Afghanistan Central Base Camp. If you have already eliminated the majority of enemies in the camp. Or if you want to end the mission quickly, it is a good idea to use the Walker Gear in the hangar. Man it and use it to pick up the scientist. Leave the hangar. If, along your path, you encounter any enemies, you can fire the machine's Gatling gun at them, which will, of course, have a negative effect on your ranking after the mission ends.
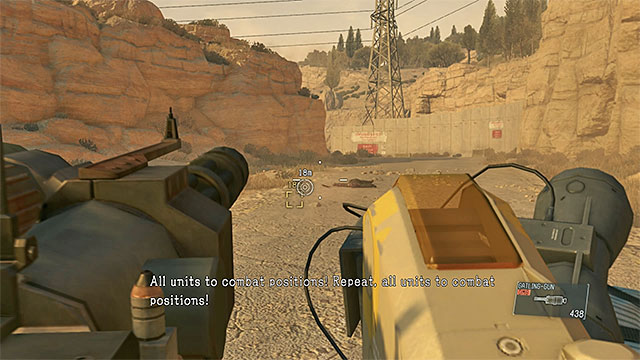 Approach the helicopter landing zone and see the cutscene
If there still are many opponents in the base, ignore the walker and carry Dr. Emmerich on your own shoulders. This will decrease the risk of any encounter of the enemies and make it easier to prevent Emmerich from taking any damage (this is required to complete the mission's secondary objectives).
Regardless of which variant you have chosen, the evacuation will fail, because Metal Gear Sahelanthropus appears where the helicopter should have been.
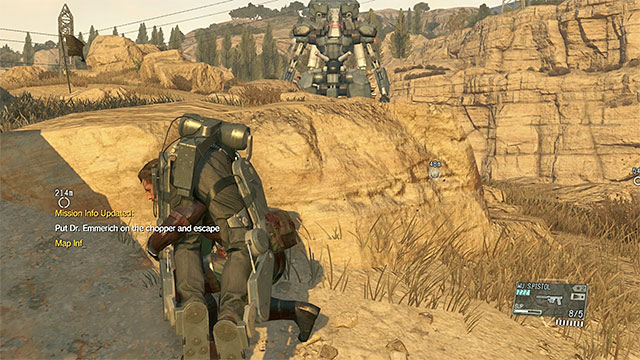 Hide behind rocks, on a small hill
RIGHT AFTER you regain control of your character run, with Dr. Emmerich, over onto the hill to your left. Here, hide quickly behind the rocks to avoid enemy fire from Sahelanthropus, i.e. The giant Metal Gear. Do not attempt fighting it and instead, focus on reaching the new landing zone (to the South of here) and on preventing dr. Emmerich from taking damage.
 Carry Emmerich over to the new landing zone and wait for the drones to stop monitoring the area.
As soon as Sahelanthropus ends its initial fire, start running towards the landing zone, while trying to keep close to the rocks. After you approach your destination, hide behind the rocks, because most probably, Metal Gear will dispatch several drones your way. Stay behind the cover for as long as the drones keep scanning the area around you. Only when it gets safe, run towards the chopper and put Emmerich inside.
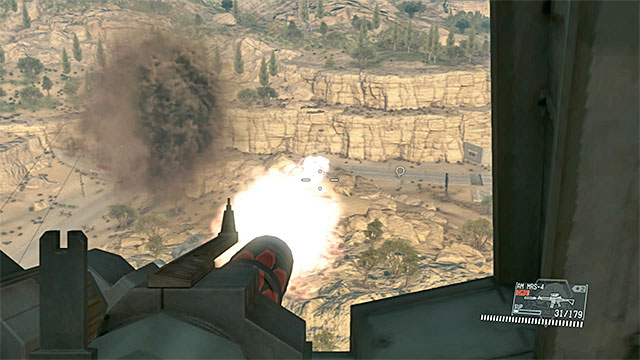 Shoot at the drones and, after that, at Metal Gear itself
As soon as you board the chopper, man the minigun onboard the helicopter. Lay down fire on the white drones. Towards the end of this scene, time slows down, at which point you can lay your fire down on Sahelanthropus.
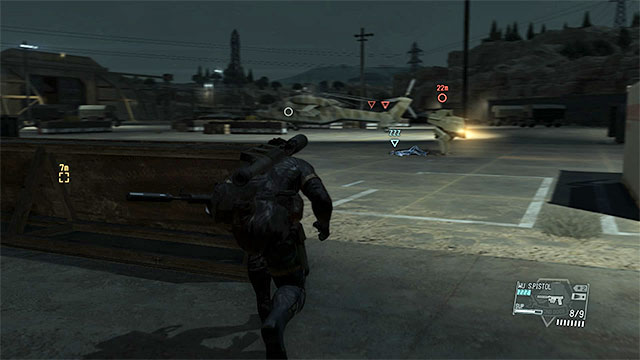 It is a good idea to use a silenced weapon against walker operators
The aim of this objective is to extract, to the Mother Base, three Walker Gears, used for patrolling Afghanistan Central Base Camp. Get to a good viewpoint to locate Walker Gears (they should be patrolling either the central or the Western part of the camp) and approach one from behind. It is best to put the operator to sleep (you simply need to use the pistol with the right type of ammo), but you can just as well shoot him. Regardless of what you do, do not let such an opponent spot you (Walker Gears use the powerful gatling guns). The same goes for the rest of the enemies in the base.
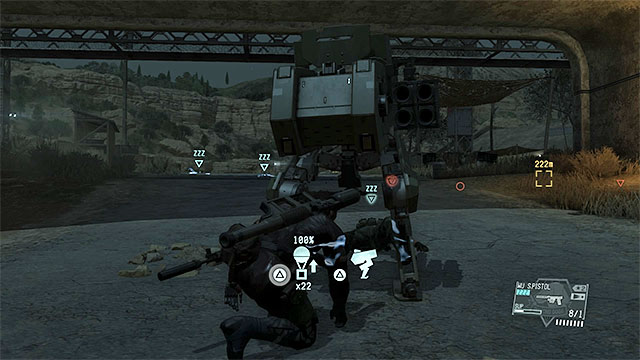 Approach the unmanned Walker to fulton it (requires the CARGO 2 upgrade)
After you eliminate the operator of a given Walker Gear, you can approach it and fulton it to Mother Base. However, remember about two restrictions here. First of all, you need to have the CARGO 2 upgrade, for the fultoning device (thanks to which you can send heavy equipment back to your base). Secondly, fultoning a single machine is 10000 GMP, so you need, at least 30000 GMP available. Repeat the above steps for the rest of the walkers.
You can try to obtain the poster during your exploration of Afghanistan Central Base Camp, while trying to locate Dr. Emmerich. The Poster is on one of the walls of the building to the South-East of the hangar with Emmerich inside. The spot has been marked in the above screenshot.
The blueprint (BAMBETOV SV) is inside one of the hangars in the center of Afghanistan Central Base Camp - the location has been marked in the above screenshot. You should try to obtain this item the first time you are in the base, because the hangar door will be locked if the alarm is raised (the lighting above the door will turn red from blue). After you enter the hangar, examine the metal shelves. The blueprint is on one of them.
The thirteenth mission of Metal Gear Solid V is the first one that takes place in Africa. Therefore, you should not hurry too much here, due to the unfamiliarity of the area. The key part of the mission takes place in the Northern oilfield, where you need to sabotage two installations. Of course, you will be prevented by your enemies and, additionally, towards the end of the mission they will also call for reinforcements (you can either fight them or leave the map). On your way to the oilfield, you can make a stop in two villages, where you can complete secondary objectives.
PRIMARY (1/2): Shut down the oil transfer pump - The mechanism that controls the pump is located inside one of the buildings on Mfinda Oilfield. After you have located it, you simply need to interact with the terminal to disable the pump.
PRIMARY (2/2): Destroyed the oily water separator tank - The tank is on Mfinda Oilfield. Since it is red in color, and it is sizeable, you will have no problems locating it. You can blow up the tank by attaching a C4 explosive to it, or by firing at it the rocket launcher, or the grenade launcher, at a distance.
SECONDARY (1/4): Extracted 4 child soldiers being trained at Bwala ya Masa) - This objective is challenging. You need to restrain four marked opponents, before they leave the map. Additionally, the kids cannot be fultoned, therefore you need to deliver them to a helicopter landing zone (you can use the jeep in the village, for that).
SECONDARY (2/4): Exfiltrated the hot zone before Mfinda Oilfield was sealed off - Reinforcements appear soon after you destroy the tank in the oilfield (the second primary objective). Before you do that, destroy the radar in the base, thanks to which you make the landing zone in the village available. Also, you can request pick-up beforehand and leave the area of mission right after the detonation.
SECONDARY (3/4): Extracted the lappet-faced vulture that wandered into the burned-down village - This village can be found within a short distance to the South-West of Mfinda Oilfield. Sneak up to the vulture, use sleeping ammo and fulton it.
SECONDARY (4/4): Extracted 4 Walker Gears sealing off Mfinda Oilfield - Walkers appear on the site soon after you have destroyed thee water tank on Mfinda Oilfield. Two of them reach the Southern entrance to the base, and two more to the Eastern one. Deal with the operators of the walkers in any way you want and fulton the machines (requires the CARGO 2 upgrade).
This time around, you will be unable to pick neither the landing zone, nor the starting time of the day. Still, if you do not like the time, you can use the Phantom Cigar to pass time. You can take along any buddy that you want, but the D-Dog will prove most helpful, while securing the oilfield.
Before you head out on the mission, it is a good idea to get the best sleeping ammo weapon available, thanks to which eliminating the juvenile fighters in the village will not be too difficult. Additionally, make sure that you have C4 explosives on you, which you are going to use to destroy the tank and the radar on the oilfield (instead of the C4 explosive, you can also use, e.g. The grenade launcher).
The above map presents the mission area available during the thirteenth main mission in Metal Gear Solid V - Pitch Dark. You start the mission in the Southern part of the map (point 1) and you need to reach the base in Mfinda Oilfield in its Northern part (point 5), in order to sabotage the installations there. Along your path to the oilfield, it is a good idea to make stops in villages (points 2 and 4 on the map), because you will be able to complete hidden mission objectives, thanks to this (extraction of the juvenile fighters and fultoning the rare species of vulture).
 If you decided to cross the village, watch out for the large numbers of enemies.
You start this mission on the Northern end of the map and you need to reach its Northern part, because this is where Mfinda Oilfield is. There are two main paths to your destination. The Western part takes you across, e.g. Bwala ya Masa village, where you can complete the secondary objective connected with extraction of the juvenile fighters (see details on one of the next pages of this walkthrough). The Eastern part does not offer attractions of this kind, but there are two enemy outposts that you need to walk around. (11 and 01).
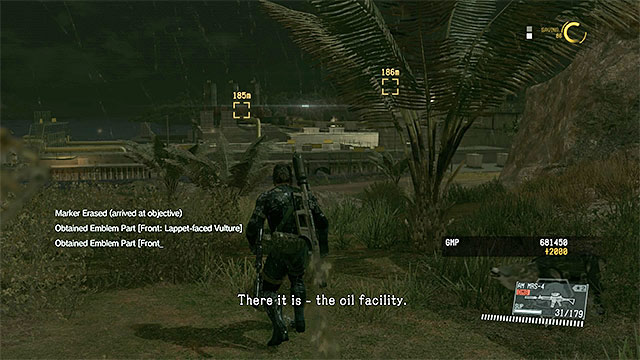 Your destination
Both of the above paths take you near the oilfield. Before you enter the facility, make sure that you have taken your position on one a hill and perform at least preliminary reconnaissance (the game will automatically mark two main targets of your mission, on the map). It is a good idea to get into the mission area by climbing onto one of the balconies, or climbing over the wall. Do not approach main entrances that are more heavily guarded (the Southern and the Eastern ones).
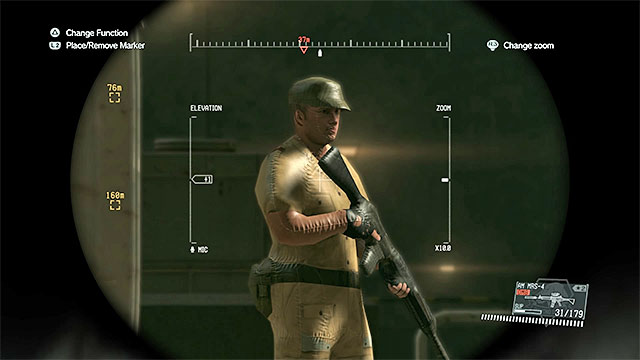 An example dummy
On the Mfinda Oilfield there are a dozen-or-so opponents. It would be a good idea to eliminate the one-by-one, which will make extraction easier, after you sabotage the installation at the enemy base. This is not required, but if you do not want to kill the enemies, you need to move slower and take time to check the most immediate area more carefully. You can be substantially helped by D-Dog, while finding enemies.
It should be noted that at the base on the oilfield, there are traps, of a kind. These are dummies that are to pose as real enemies. In the course of your exploration, they are marked on the map as real enemies. Before you approach one of the enemies to knock him out, or to shoot him, try to make sure that it is a real enemy or just a decoy (as often as possible, use binoculars, zoomed-in to the maximum).
 The window in the control terminal room
Inside the enemy base, you need to perform two acts of sabotage and there is a different mission objective for each one of them. The first primary objective is to disable the pump and to do this, you need to reach the room on one of the higher floors of the central building in the oilfield. If you have already secured the majority of the base, you can take the metal balconies to get to the place. If, on the other hand, the enemy forces still remain active and operating in this area, you need to take a look around for the window at the back of the building. Jump to reach it and climb across into the marked room. In both cases, you need to interact with the control panel.
 You can destroy the tank using either the C4 explosive, or at a distance (e.g. with the rocket launcher)
The other primary objective assumes much more aggressive approach, because you need to destroy the big red tank inside the base. It is best to leave this objective for the end, because blowing up the tank not only alarms soldiers within the base, but also results in reinforcements being called in (to learn more, see the next page). There are many ways to destroy the tank, but I recommend that you pick one of the two following. You can reach the tank and attach a C4 explosive to it. Which you can then detonate from safety, or use the rocket or the grenade launcher from a long distance.
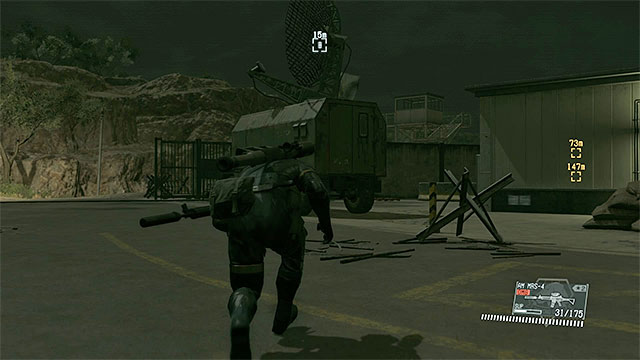
Destroying the tank in Mfinda Oilfield results in a short cutscene from which you learn that the enemy forces have been alarmed. The faster you leave the area of operation the better for you, because reinforcements are heading into the base. Additionally, If you leave fast enough, you will also complete one of the hidden mission objectives.
The best way o end the mission quickly is to call in pick up by helicopter directly into the enemy base. By default, this is impossible to do, but you simply need to destroy the radar shown in the above screenshot, next to the Southern entrance into the oilfield (use e.g. the rocket launcher or grenades). If you want to do things fast, you can request the helicopter still before you destroy the tank, so you can leave right after the explosion.
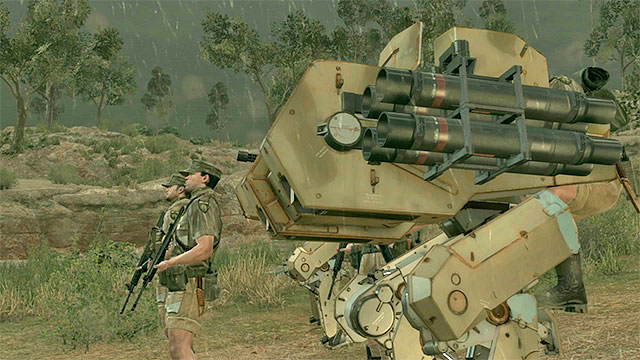 After a while, enemies in walkers, among others, will reach the base
It may be tad difficult to perform extraction from the base if there still are many opponents inside because, mind you, the helicopter would attract their attention immediately. In such a situation, you can pick a different landing zone, after you bring up the map window. On your way to the landing site, however, you will have to expect many enemies, including walker operators. (there is a hidden mission objective connected with them; see the next page for details) and a tank. Depending on which you prefer, you can sneak past them (try to stay away from the main roads), or use the rocket launcher to eliminate the enemy vehicles.
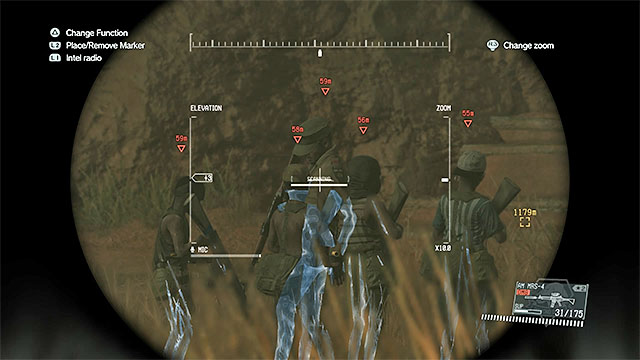
Unarguably, this is the most demanding secondary objective of this mission. It requires flawless operation and it is best to complete it on your replay of the mission. Start by reaching Bwala ya Masa village. Explore its central part, where you should notice the juvenile fighters shown in the above screenshot, being trained by at least two rebels.
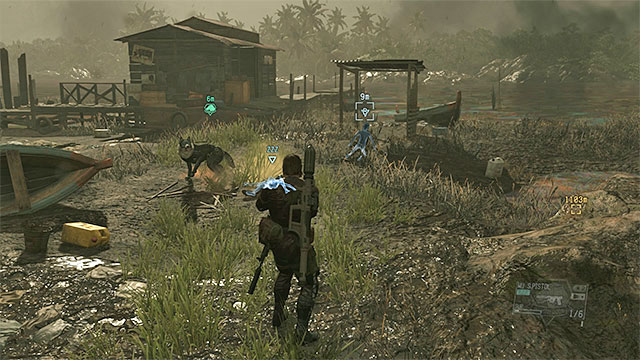 Use sleeping ammo weapons on the kids
Use any suppressed weapon you eliminate the grown-ups quickly. The kids should start escaping and you need to prevent them from doing that, before they leave the map. Depending on what you have in your inventory, you can start restraining the juveniles at a distance (e.g. the sniper rifle with sleeping ammo) and shoot at them. After you finish, make sure that you have all four of them on the ground. Mark this spot to make it easier for you to return here in the future.
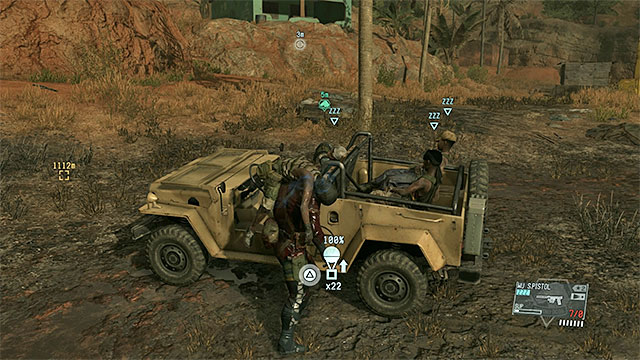 You can use the jeep in the village for extraction of the juvenile fighters
Unfortunately, it is impossible to use the fultoning device on kids. Therefore, take a look around on the nearby hill, where you should find a jeep. Deal with the enemies here, steal the vehicle and drive back to the children. At the same time, request the helicopter pick-up from where you started this mission.
Now, there are two things you can do. If you have the CARGO 2 upgrade, load the kids into the jeep (which is its maximum capacity), fulton the car and deliver the last kid to the landing zone. IF you still do not have the upgrade, drive all the kids to the landing zone. Since you need to do this twice, clear the village of the enemies beforehand.
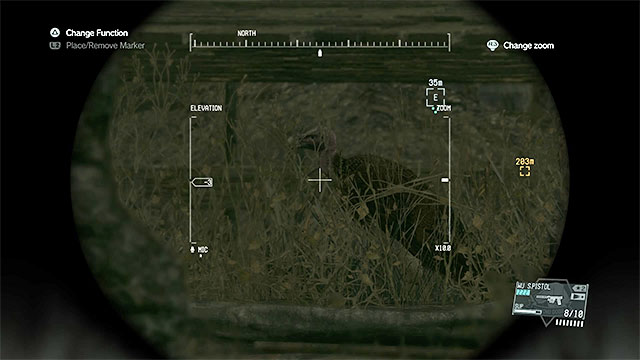
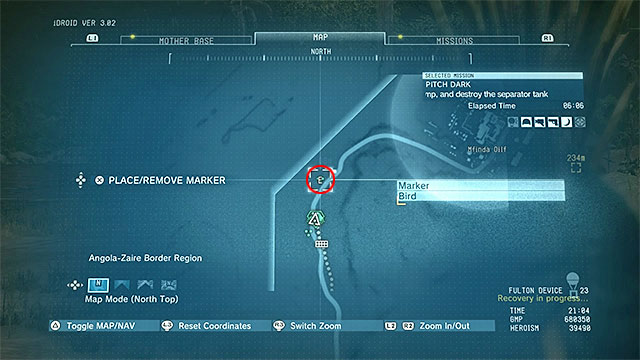
You can find the rare vulture species on your first playing of the mission and this is not too trouble some. Pick the Western road towards Mfinda Oilfield. Soon before you reach your destination, you walk into the burnt-down village. Use binoculars (or the help of the D-Dog) to locate the vulture shown in the above screenshots. Crawl and sneak up to the bird. Then, use any weapon with sleeping ammo. Finally, fulton the vulture to the Mother Base.
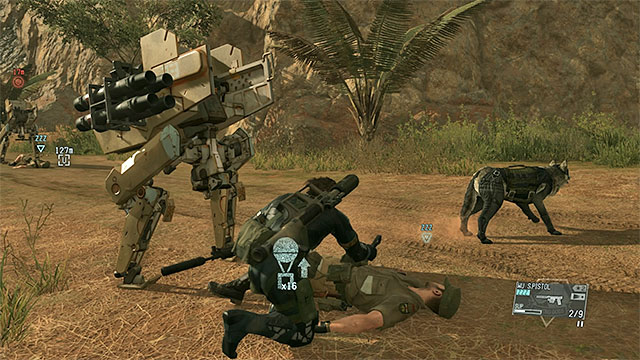 Walkers around the Southern entrance
enemies using walkers appear only as late as towards the end of the mission, i.e. right after you have destroyed the tank in Mfinda Oilfield. Right after you destroy the tank, reach the road to the South of the base and wait for two, out of four, walkers to arrive. Sneak up to them from behind and use any weapon to incapacitate or kill the operators. After you do that, fulton both of the walkers, where it is only possible if you have the CARGO 2 upgrade (and the money to cover the expenses connected with fultoning).
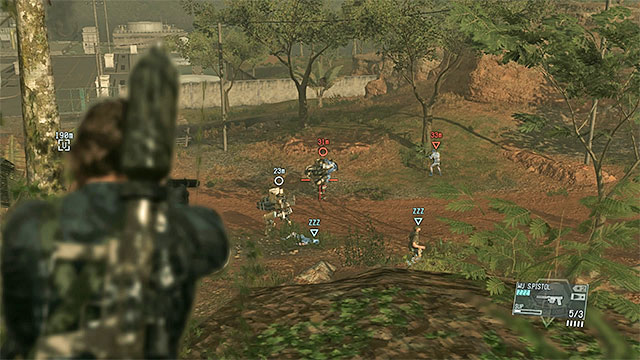 There are regular soldiers accompanying the walkers on the Eastern road
To find the other two walkers, head towards the road to the East of the oilfield (the one towards outpost 01). The walkers here are accompanied by regular soldiers, whose attention you can distract or neutralize, since you are here. Regardless of which you do, do not use heavy weapons to prevent destroying the walkers.
The fourteenth mission of Metal Gear Solid V takes place in a relatively small area, where you still need to complete quite a few objectives. This mission can be completed in two different ways - by finding and rescuing the Viscount on your own (the most preferable method, if you want to rank S), or by following the interpreter while trying to remain hidden. Apart from completing the main objectives, you can also, e.g. rescue the POWs and fulton large containers with valuable resources.
Note - Regardless of the method that you adopt, try to restrain and fulton the Afrikaans interpreter (you can replay the mission especially for the purposes of this objective). Thanks to this, you will be able to interrogate enemies during missions in Africa.
PRIMARY (1/2): Identified the Viscount - You cannot skip this objective because, you identify the Viscount right before you rescue him (primary objective).
PRIMARY (2/2): Extracted the Viscount - You can find and rescue the Viscount (by fultoning him or by escorting him to the chopper) still before he is taken to one of the cottages in the village, which is the best method of completing the mission quickly. If you fail to find him at the beginning of the mission, you can still rescue him from the cottage, before he is interrogated by the interpreter, or after the conversation.
SECONDARY (1/5): Identified the Afrikaans interpreter - You can tell the interpreter by the green beret that he is wearing. You can either identify him right at the beginning of the mission (if you are going to follow him), when he is traveling around the map, or after he reaches the cottage, with the Viscount in.
SECONDARY (2/5): Pinpointed the locations of the 4 prisoners from an intel file - The document is on the desk in the central cottage of Kiziba Camp. You can collect it at any moment into the mission (even after a POW has died, or has been fultoned).
SECONDARY (3/5): Extracted 3 prisoners being held at Kiziba Camp) - the first POW appears on the map at the beginning of the mission, net to the interpreter (he is escorted to the camp, if you do not rescue him immediately), the second one is in the main camp, and the third one is in the roadside shelter. You need to rescue all three before they are shot (this happens short after the interpreter interrogates them).
SECONDARY (4/5): Extracted a materials container at Kiziba Camp) - In total, you need to fulton four big containers: two of them are near the cages in the camp and two other around the building, where the Viscount is being held. To do this, of course, you need the CARGO 2 upgrade.
SECONDARY (5/5): Listened to all 4 prisoners' interrogations - from the very beginning of the mission, you need to follow the interpreter and listen to the interrogations, from a safe distance. You must not be spotted in the meantime, nor raise the alarm, or the interpreter stops doing his beat.
Preferably, you should play this mission at night. It is especially recommended if you are going to follow the interpreter and eavesdrop on the interrogations, because you must not be spotted then.
It is a good idea to take D-Dog along, who is going to prove helpful at locating opponents, while sneaking (this eliminates the necessity of keeping your eye out, and frequent using of the binoculars). You can take D-Horse if you want to complete the mission as quickly as possible, i.e. reach the first staying place of the Viscount. As for the gear, it is a good idea to select a suppressed sniper rifle, thanks to which you can eliminate the more inconvenient opponents. However, this is not required for successful completion of the mission. At the same time, make sure that you have on an outfit that provides you with the best camo.
The above map presents the area of operation for the fourteenth main mission of Metal Gear Solid V - Lingua Franca. Depending on your mode of action, you can either start by following the interpreter (point 3 on the map) or immediately head for the Viscount (point 7 or 8 on the map). An important part of the area of operation is the enemy camp (point 5 on the map), where you can complete a number of secondary objectives (rescuing the POWs, fultoning containers, finding intel data).
The primary objective of this mission is to identify the Viscount and to extract him to the Mother Base. The game will suggest that you need to follow the Afrikaans interpreter here, but this is not necessary.
The game will suggest here that for this, you need to follow the Afrikaans interpreter, but this is not necessary. You need to follow the interpreter only if you want to unlock the secondary objective connected with eavesdropping on all of the conversations - see the next page for details.


At the beginning of the mission, you can find the Viscount outdoors, to the North-East of Kiziba Camp - the locations has been shown in the above screenshots. He is being guarded by a single soldier, whom you can either stun or kill. After you do this, you only need to fulton the Viscount to the Mother Base, or deliver him to the chopper's landing zone, which will grant you easy S rank for this mission.
Note! The Viscount may not appear on the map during the day. In such a situation, you can use the Phantom Cigar to pass time until nightfall.
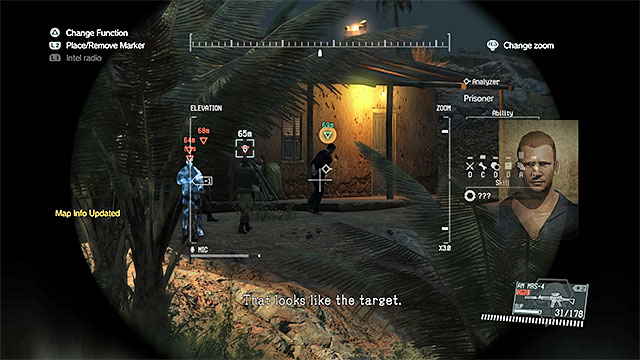
If you do not make it quickly to the first location of the Viscount, he will be escorted to the buildings to the North of Kiziba Camp, by the guard. The location has been marked on the screenshots above. This makes things a little bit more complicated, because this will require you to eliminate several more guards, in that area, before you get to the Viscount.
Note - Towards the end of the mission, the Viscount meets the Afrikaans interpreter whom you had the option to follow (the secondary objective of this mission; see the next page). In such a situation, you can eavesdrop on the interrogation. After it ends, try to free the Viscount quickly, or else he may be shot.
The mission objective, described below, is to eavesdrop on the interrogations of the four prisoners, which will be participated by the Afrikaans interpreter. This is a secondary objective, but due to the level of its complexity, a separate page has been devoted to it. You should take interest in this objective while replaying the mission. Apart from that, you need to keep in mind several things:
 The interpreter is wearing a green beret
Pick the landing site as your starting point. Right after you land, head North, towards the landmark marked by the game. After you get close to the destination, use binoculars to identify the interpreter (he is wearing a green beret). Also, you need to eavesdrop on the short conversation he has with one of the POWs.
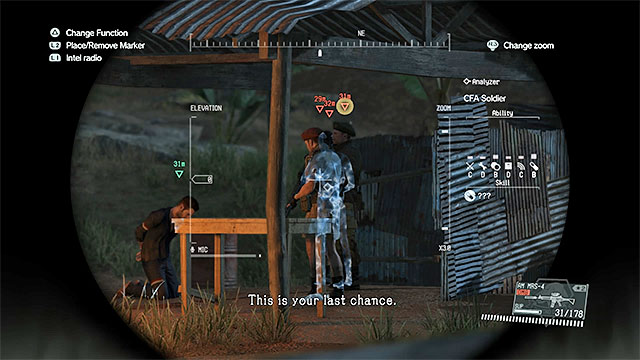
Follow him and ignore the fact that the prisoner, and one of the guards, go right. While following the interpreter, avoid being spotted by the soldier in the watchtower and by all of the other ones in your way. It is best to move along to the left of the road that the interpreter is traveling on, while keeping your distance. Wait for the moment at which the interpreter walks off the road and reaches one of the shelters. Stand in the spot, where you can see the prisoner shown in the above screenshot and listen to the conversation, using binoculars.
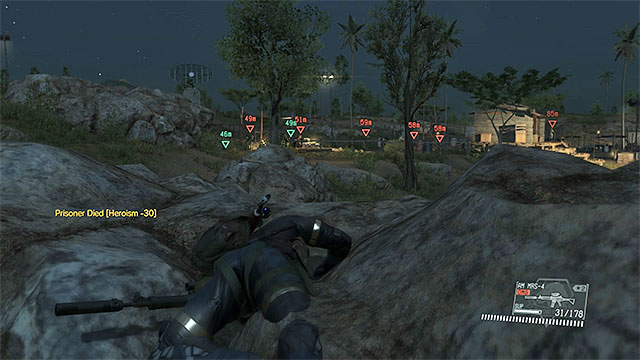
Right after the interrogation ends, you need to act quickly, because the interpreter will soon get on the jeep and head towards Kiziba Camp. As soon as possible, go there. Approach the camp from the West and walk around it from the South. Start crawling, because there are many guards in the camp. It is best to reach the rocks shown in the above screenshot, i.e. to the South-East of the cages with prisoners (one of them was here by from the beginning, and the other one is the POW that you have seen before). Wait for the interpreter to come along and, just like before, use binoculars to eavesdrop on the interrogation.
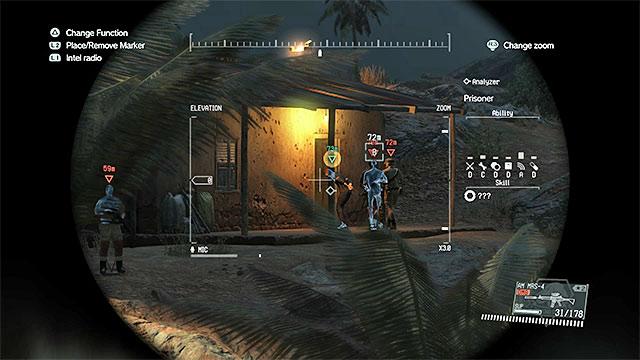
After the interrogation ends, the interpreter makes a brief stop at one of the nearby cottages and goes North afterwards. Use to your advantage the fact that you do not need to hurry and crawl slowly to the North, while avoiding all of the guards in the camp. Your last destination is the cottage shown in the above screenshot, where the Viscount ends up. If you have the upgraded binocular, you can take your position on the nearby hill and eavesdrop on the interrogation through the wall. Otherwise, you need to take the risk and approach the cottage to listen to the conversation through the window. Your objective should update after the interrogation of the Viscount.
Note - Try to restrain the Afrikaans interpreter to wards the end of the mission and fulton him to the Mother Base. Thanks to this, you will unlock the option to interrogate enemies, while playing missions in Africa.
The intel data is in the cottage in the center of Kiziba Camp and the exact location has been shown in the above screenshot. You can collect the data at any point into the mission, even after the prisoners have either been rescued or shot. You can access the cottage through the entrance, or by crawling under it and entering through the hole in the floor.
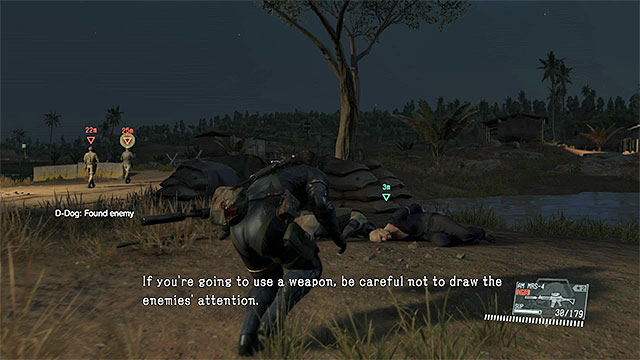 You can rescue the first prisoner at the beginning of the mission
In theory, you can rescue the prisoners at any point into the mission, because they will be killed right after the Afrikaans interpreter is done interrogating them. Restart the mission, pick the Southern landing site and reach the location, where you spot the interpreter for the first time (to learn the details, see the previous page). Wait for the opponents to scatter and take interest in the POW that is being escorted towards the camp, by one of the guards. Eliminate the guard and fulton the prisoner.
 The shelter and the second prisoner
The second POW to rescue should be the one in the shelter to the North of the main camp. He is the one that the interpreter is currently heading for, to interrogate him. If you do not want to take the risk, you can wait until the interrogation is over and get into action afterwards. However, this is going to make it more difficult to rescue the last POW.
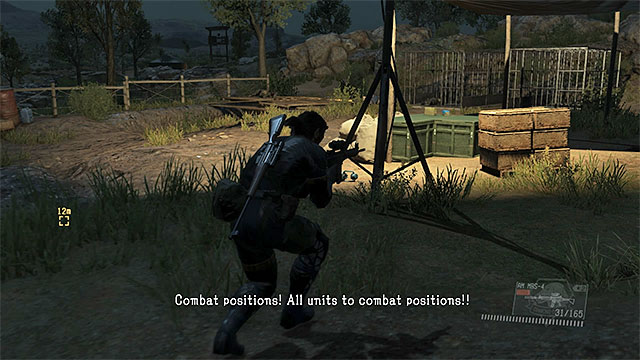 The last POW is in the camp
You can find the last prisoner in Kiziba Camp. You need to approach its Southern part, because this is where prisoners are being kept. Keep all precautions here, because there are, at least, 2-3 guards around (either eliminate or distract them). Also, more can get here.
Note - If you want to rescue the last POW only after he is interrogated by the interpreter, you need to hurry to prevent him from being shot.
 Containers in the main camp
In total, you need to fulton four shipping containers with supplies, to complete this objective. Before you locate them, make sure that you have the CARGO 2 upgrade, and you have, at least, 40000 GMP spare.
Two of the containers are in the central part of Kiziba Camp (the one with prison cages and intel data).
 Containers near buildings to the North
Two more are near the Northern developments, i.e. right next to the building, where the Viscount would have been escorted.
The fifteenth mission of Metal Gear Solid V is one of the shorter, and less complex, ones. Your character needs to explore the village, where there are four Walker Gears and either destroy or fulton them. It is recommended that you operate in shadow here, because the alarmed soldiers start using the Walkers, which makes the mission more difficult. There are three secondary objectives here - rescuing two POWs, locating a rare plant and fultoning the military truck.
PRIMARY (1/1): Eliminated the Walker Gears - Although this is possible, you do not need to destroy the Walkers (for this, it is best to use a good rocket launcher). It is a much better idea to extract them, thanks to which you complete the second secondary objective.
SECONDARY (1/4): Extracted 2 prisoner being held at Ditadi Abandoned Village - You can either find the POWs on your own, or find out about their locations by interrogating enemies. It is best to fulton them back to the Mother Base.
SECONDARY (2/4): Extracted all Walker Gears - This objective is connected with the primary objective. After you find the four Walkers, you need to fulton them and it is best to do this after you have eliminated nearby enemy soldiers. You can fulton the Walkers only if you have the CARGO 2 upgrade.
SECONDARY (3/4): Picked a digitalis (lutea) at Ditadi Abandoned Village - You find the plant in the upper part of the village, close to the rocks that you can climb. You can use the help of your Intel Team, thanks to which it will be marked on the map.
SECONDARY (4/4): Extracted a truck at Ditadi Abandoned Village) - The military truck is parked near the main crossroads in the village. To fulton it, you need to have the CARGO 2 upgrade.
It is best to take on the mission after dark, thanks to which it is going to be much easier to near the Walkers and steal them. As your buddy, you should take along the D-Dog, who sniffs out all of the enemies and is going to make it easier to either avoid or eliminate them.
What gear you take along does not really matter, if you want to fulton all of the Walker Gears. If you cannot do this (because you do not have the CARGO 2 upgrade) take a good rocket launcher and/or explosives along.
The above map presents the area of operation for the fifteenth main mission of Metal Gear Solid V - Footprints of Phantoms. The most important part of the map is Ditadi Abandoned Village (point 3 on the map), because this is where the Walkers are. Apart from that, in the same part of the map, there are the POWs that you need to rescue, as well as the rare plant. At the roadside (point 4 on the map) there also is the truck that can be fultoned (a secondary objective).
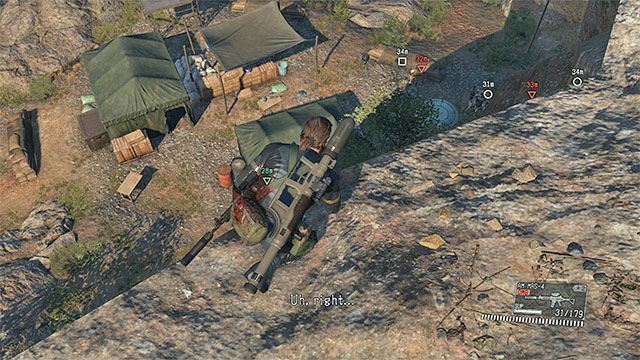 You can find (and destroy) the enemy Walkers after you reach the nearby viewpoint
After the mission starts, go East, i.e. towards Ditadi Abandoned Village. Your destination is the camp in the upper part of the village, but do not take the main path, because the area is heavily guarded and the enemies have the advantage of height. Walk around the village from the North or the South, thanks to which you get a perfect view of the entire camp and you will locate all four Walker Gears without any problems.
Walkers can either be destroyed or fultoned. The latter is a better idea, but you need the CARGO 2 for that, which allows you to extract heavy cargo.
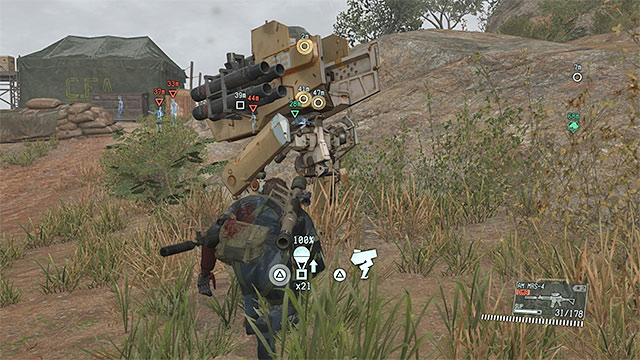 Fulton Walker Gears only after you have secured the camp
If you want to destroy the walkers, start firing the rocket launcher at them. Do not let the enemy soldiers get on the Walker Gears, because they are well-armed (one of them is even armed with homing missiles).
If you want to steal the machines, enter the camp carefully and neutralize the enemies here. Do not fulton the Walker Gears too early, because this would alarm the enemies and they would man the rest of the machines (in such a situation, you would also have to eliminate the operators of the Walkers).
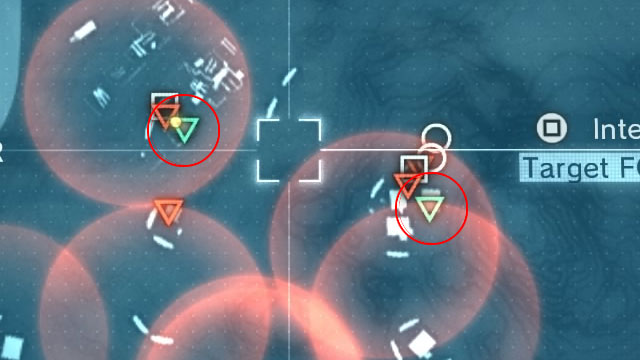
You have already completed some objectives concerned with extraction of prisoners, therefore you should already be familiar with the general pattern. As for their locations, you can figure them out on your own (they have been marked in the above screenshot) or learn the locations by interrogating the enemy soldiers. In the latter case, you need to know Afrikaans, for the interrogation to be successful (you had the option to extract the interpreter in the previous mission).
After you have located a given prisoner, carry him out to the open and fulton him (you can also request pick-up and carry them over to the chopper at the end of the mission).
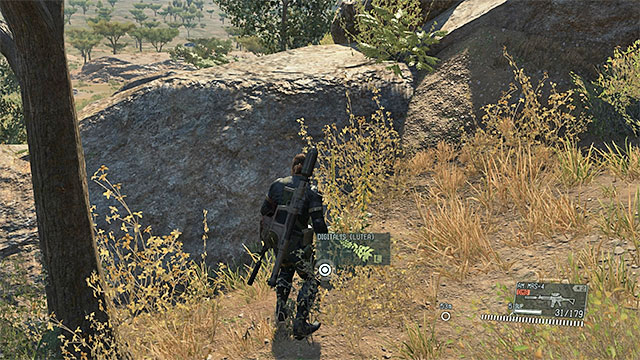
The digitalis (lutea) plant is near the rocks to the East of Ditadi Abandoned Village. The exact location has been shown in the above screenshots. Also, you can use the help of your Intel Team to locate the plant, thanks to which the icon for the plant appears on your map.
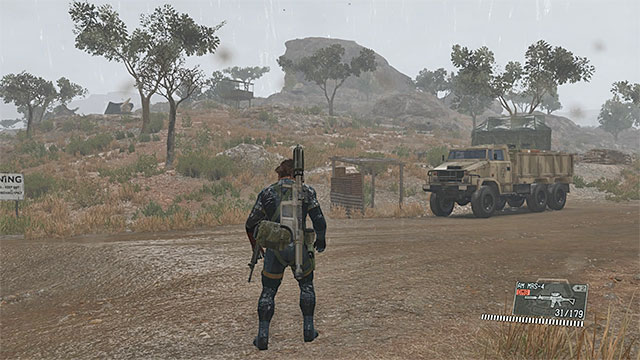 The truck's location
Unarguably, this is the easiest objective to complete. The truck is parked near the main crossroads in Ditadi Abandoned Village. You should fulton it at the end of the mission, because this may alarm the nearby guards. Of course, to fulton it, you require the CARGO 2 upgrade (for extraction of heavy equipment).
The sixteenth mission of Metal Gear Solid V may prove quite demanding, because you need to steal a truck with valuable cargo, which is going to be made more difficult by the Skulls troops around. What is even more, the mission will count as failed if the truck is destroyed. Therefore, you need to tone down your aggressive approach, and you need to make sure that it is not pounded accidentally. Also, you will spend some time with side missions. You can kidnap members of the elite troops, extract the truck driver and face the Skulls in open fight.
PRIMARY (1/2): Identified transport truck - By default, the truck is parked in the North-Western part of Nova Braga Airport, but after the convoy arrives, it will head to Kiziba Camp. You complete this objective automatically after you get near the truck, or after you locate it with binoculars.
PRIMARY (2/2): Extracted transport truck - The easiest way to do this is to sneak up when the truck is parked on the airport and by fultoning it, but you need the CARGO 2 upgrade. Otherwise, you need to steal it and drive it out of the map. This is going to be more difficult, which is due to the Skulls and the APCs in the convoy.
SECONDARY (1/6): Identified escort unit - armored vehicle - The convoy starts its route next to outpost 18 and stops at Nova Braga Airport, from where it heads towards Kiziba Camp. You can identify the APCs at any point into the mission, preferably at a distance, using binoculars.
SECONDARY (2/6): Eliminated the Skulls - The Skulls appear on the map out of a sudden, after you approach main target 1. You need to pack a very good rocket launcher to stand any chance at defeating the "zombies".
SECONDARY (3/6): Extracted the transport truck driver - It is best to stun the driver when he is still at the airport. You need to fulton him before you are attacked by the Skulls.
SECONDARY (4/6): Pinpointed escort unit's estimated route from an intel file - The document is in the tent of outpost 14. It is best to do this right at the beginning of the mission, because the convoy will not be waiting around for you.
SECONDARY (5/6): Listened to all conversations between transport truck driver and outpost/guard post soldiers - You need to listen to the first conversation still at the airport. Next ones will be taking place in every bigger location that the convoy passes by. Each time, use binoculars to eavesdrop on the conversations at a safe distance.
SECONDARY (6/6): Extracted 3 Zero Risk Security soldiers - The soldiers travel in a jeep. At the beginning of the mission, you find them Eastwards of Nova Braga Airport. Then, they move to the fork to the North of the airport and join the convoy. Attack them, restrain them and fulton them at the beginning of the mission, or deploy an obstacle in the way of the convoy, which stops the jeep.
Just like usually, starting the mission after dark can make things much easier. What is meant here is sneaking up into the airport and about following the convoy (e.g. in order to eavesdrop on the conversations). As your buddy for this mission, pick the D-Horse, thanks to which you will be able to cover distances easily and keep up with the convoy (if necessary).
While replaying the mission to complete its secondary objectives, you can decide to pick the D-Walker as your buddy. If only you have ensured its proper arming, defeating the Skulls will be much easier. If you still do not have good upgrades for the walker, take the best rocket launcher along, which you will then be able to use against the zombies.
The above map presents the area of operation for the sixteenth main mission of Metal Gear Solid V - Traitors' Caravan. Right after it starts, you can head out for outpost 18 (point 4 on the map) where the convoy's route starts, and visit successive locations as it goes on. If you want to finish this mission as quickly as possible, go to Nova Braga Airport (point 5 on the map), where the truck is parked. While replaying the mission, take interest in the spots, where you complete secondary mission objectives - outpost 14 with intel data (point 3 on the map) and the area around the airport, where you can encounter Zero Risk Security soldiers (points 7 and 8 on the map).
The game will hint you that to find the truck, you will have to obtain intel data first, which tells you about the convoy's route, after which you should locate it and start following. However, these are secondary objectives, which you can ignore and still complete the mission (they have been described on one of the following pages of this walkthrough). Instead, you can head immediately towards where the truck is parked.
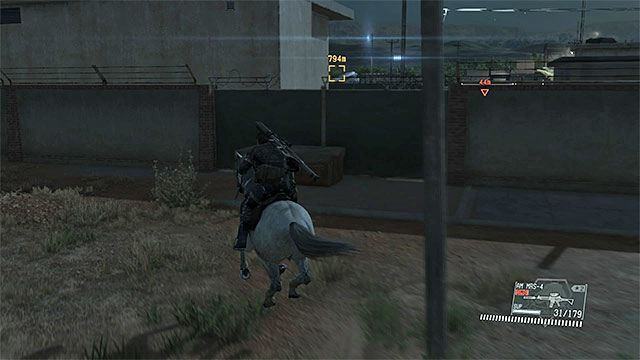 You can infiltrate the airport by, e.g. opening the side gate or by climbing over the wall
Your destination is Nova Braga Airport. It is best to approach it from the North or from the West. It is necessary that you dismount the horse after you arrive in the area, because there is sniper occupying the flight control tower, who may spot you from a very long distance. Try to reach, as quickly as possible, the walls surrounding the airport, thanks to which you can hide away from the sniper.
To get into the airport, check its walls to the West. You an open the gate or climb onto the crate and over the wall. There is a downside to the latter, which is that you cannot then escape the airport along the same route, if it is necessary.
The truck is parked in the North-Western corner of the airport - the exact location has been provided in the above screenshot. Before you come close to the truck, decide in what way you want to complete the mission (see details on the next page).
Note - If, in the marked spot, you didn't find the truck, this means that you are late and the truck, most probably, joined the convoy of two APCs and is heading along the main road to Kiziba Camp, north of here. In such a situation, you can catch up with the convoy, or head for the camp immediately and wait for the truck to arrive in its destination.
Before you take your decision on which way to extract the truck (which is required to end this mission), you need to know the BIG handicap to the completion. After you approach the truck, at the distance of around 20 meters, a cutscene starts. Around the truck, there appear the Skulls, i.e. very strong and very agile zombies that you have already dealt with in previous missions. After the Skulls appear, it is best to finish the truck extraction process, although you can also start fighting the enemies. (this is a secondary objective of the mission, which has been described on the next page of this walkthrough).
 It is best to fulton the truck as quickly as possible
It is best to extract the truck while it is still parked at Nova Braga Airport. If you have the CARGO 2 upgrade, you simply need to run up to it and, while ignoring the Skulls, attach the balloon. After you succeed, leave the airport (preferably, across the gate mentioned on the previous page). Hop onto the horse and start escaping from the Skulls. The mission ends at the point of leaving the area of operation and you should easily get the S rank.
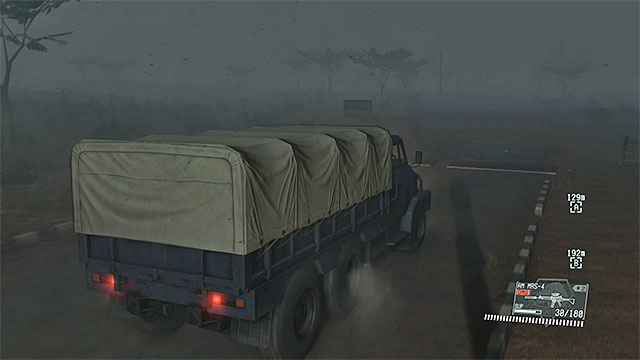 Escape from the mission area on the truck involves the risk of damaging it
If you do not have the CARGO 2 upgrade, the only way to complete the mission is to drive the truck outside of the map. Of course, you can steal the truck when it is still at the airport. In such a situation, try to neutralize the enemies around beforehand and do everything still before the convoy arrives. Right after you get into the truck, leave the airport as quickly as possible and continue driving. Remain on the main road to prevent slowing down too much and prevent the Skulls from landing successful attacks. The mission ends in a success if you leave the mission area before the truck is destroyed.
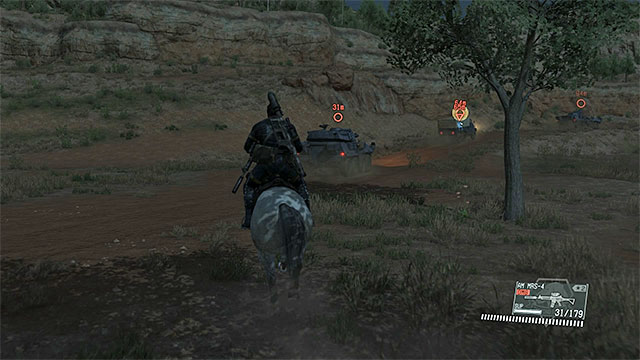 You can stop the convoy along its route
If you did not reach the airport on time, the truck joins the convoy and heads towards Kiziba Camp. It is not a good idea to attack the convoy along its route, because you would have to destroy quickly two APCs (e.g. using the rocket launcher) and stop the escaping truck itself (by neutralizing the driver). Instead, it is better to wait for the convoy to reach its destination and only then, sneak up to the truck and fulton it, or get into the cab.
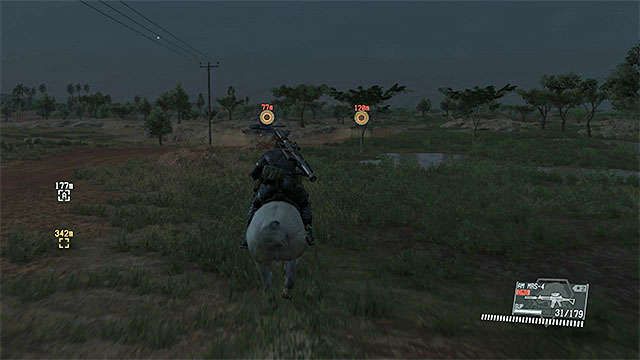 The APCs
This one is difficult to miss, unless you have focused only on stealing the truck and you did it in the initial phase of the mission. Otherwise, sooner or later, you get across the convoy - it starts its route at outpost 18, arrives in Nova Braga Airport and finally, it travels to Kiziba Camp. Regardless of where you ran into the convoy, use binoculars to locate APCs.
Note - Obtaining intel data (one of the side objectives, described on the next page) makes the route for the convoy appear on your map. This should make it easier to find it.
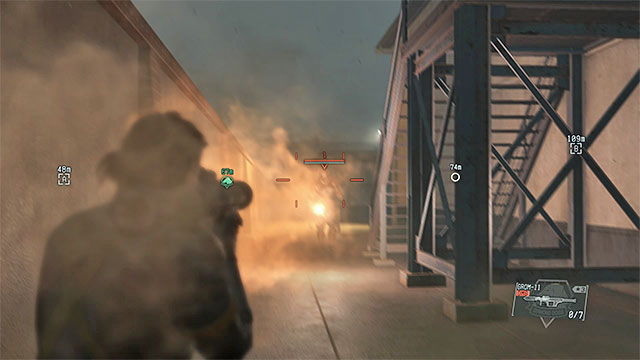 Attack zombies using the best rocket launcher you have
You should complete this objective on your replay of the mission. It is necessary that you take along the best rocket launcher you currently have and find out if your R&D team can come up with something better. The Skulls appear on the map automatically, after you come close to the truck that is your main target (initially, it is parked at Nova Braga Airport). After the zombies join the fight, attack them with the rocket launcher. At the same time, try to remain in constant movement to avoid their powerful attacks (especially short-ranged ones). While fighting the Skulls, make sure that you do not destroy the truck, because you fail the mission this way.
Note - If you gave already invested enough into upgrading the D-Walker, you can take it along for this mission as your buddy. Using the D-Walker should make it much easier to defeat the Skulls.
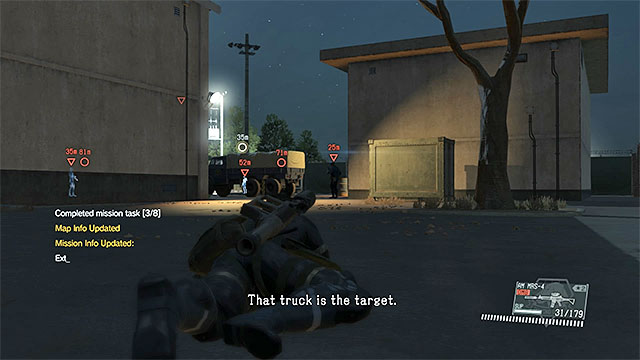 You can identify and fulton the driver while he is still at the airport
Extracting the driver is more difficult than it may seem. He can die easily and what makes things more complicated is the arrival of the Skulls after you come close to the truck. It is best to restrain the driver while he is still at the airport. You need to do this at a longer distance, so use a good pistol, or the sniper rifle with sleeping ammo. With the driver is down, get to him as quickly as possible and fulton him. Do not worry if zombies arrived in the meantime, because you should be able to send the driver away, before he dies, and before weather conditions render this action impossible.
Right after you start the mission (over again), head towards outpost 14, located within close proximity of the landing zone. After you get there, you can eliminate several enemies here, or sneak up to the tent immediately. Inside the tent marked in the above screenshot, you find the Intel File.
Note - Thanks to your obtaining the file, the convoy's route will be marked on your map. The game, however, does not supply you with the information on the convoy's current location. Since the convoy starts travelling right after the mission starts, you can assume that it has already managed to reach near Nova Braga Airport and this is why you should head there.
This one is the most time-consuming of all the objectives of this mission. Just like in the case of the previous mission, where you had to follow the interpreter, you need to make sure that you won't be spotted and reach locations of successive conversations in time.
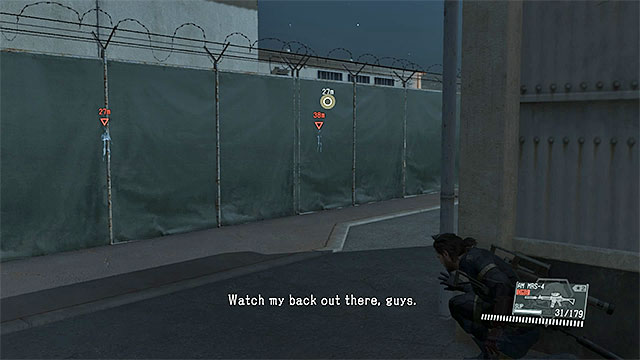 The first conversation takes place at the airport
right after the mission begins, head towards Nova Braga Airport. Make it over to the airport (e.g. by opening the gate in the Western wall) and approach the truck's location. Use binoculars here to listen to the conversation, between the driver and one of the guards, from a safe distance.
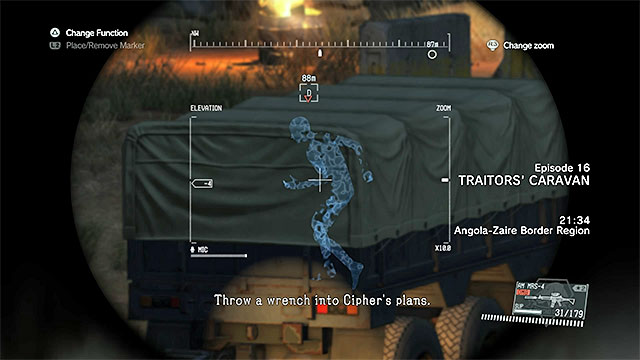 The convoys makes stops in all of the major locations along its route
After the conversation ends, leave the airport, because the driver will soon get into the truck and leave, along with the APCs. Follow the convoy Northwards (preferably on horseback) and watch out for the jeep, with Zero Risk Security soldiers, along your path (they join the convoy). The trucks stops along its route in every major outpost. In such a situation, you need to take your position at a safe distance (preferably on a hill) and use binoculars to listen to another conversation. After you listen to all of the conversations the driver has, you complete this mission objective.
You should try to extract the soldiers while replaying this mission. Right after it starts, check out the area to the East of Nova Braga Airport. Find three Zero Risk Security soldiers right next to the jeep - their locations have been marked in the above screenshot.
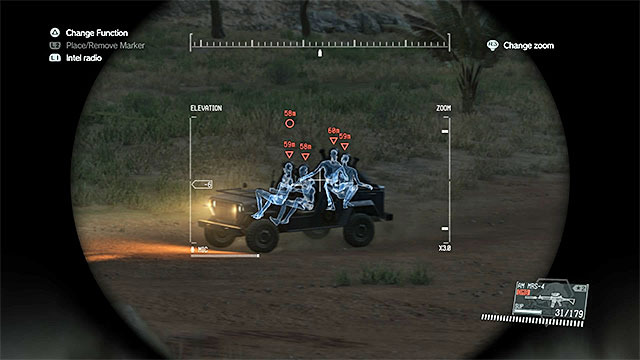 The Jeep with the soldiers stops by the crossroads and joins the convoy
If you are too late to reach the soldiers, they move towards the fork Northwards of the airport. After that, they join the convoy - this happens after the convoy passes by the intersection.
Regardless of when you find the soldiers, the best mode of action is to deploy a obstacle on the road. Then, you can use a weapon with sleeping ammo to put them to sleep. Since the opponents should be wearing helmets, aim at their chests and fire several shots per each soldier (it is a good idea to shoot while hidden in the grass or at a long distance)/ after you incapacitate the soldiers, you only need to fulton them to Mother Base.
The seventeenth mission of Metal Gear Solid V is not too long and it does not take place in a sprawling area, but it is easy to fail it,. Both of the abducted intel agents need to be located and rescued before they are executed. Start with the one hiding in the woods and then, reach the one imprisoned in the main camp. After you have completed primary objectives,, you can try completing secondary ones. They consist in, among others, extracting the truck driver and two officials, as well as rescuing another prisoner.
PRIMARY (1/2): Extracted Intel Team member escaping through the forest North of the camp - He should be the first one that you rescue, because she may die first (after she is found by the enemy soldiers).
PRIMARY (2/2): Extracted Intel Team member being held at Kiziba Camp) - try to rescue this one after you have rescued the one in the woods. You need to locate the prisoner before the CFA officials reach him and kill him. He is being held in the Southern par of the camp, at the bottom of a large hole by the cages. You need either pick him up with the helicopter, or drive him out of the map, because he cannot be fultoned.
SECONDARY (1/4): Extracted 2 CFA officials - The officials arrive after some time at Kiziba Camp and they go where the second prisoner is being held (primary objective 2) to interrogate him. You can either stun them after they get out of the jeep, or a moment later.
SECONDARY (2/4): Extracted prisoner being held at Kiziba Camp) - he is being held in one of the cottages in the Northern part of the village, which can be guarded by a single guard. After you have eliminated the opponent, take the POW outside of the building and fulton him.
SECONDARY (3/4): Extracted 4 search team reinforcements - These are the opponents that are to appear in the woods and join the search for the missing member of the Intel team (primary objective 1). You need to alarm the first group of enemies in the woods, for reinforcements for extraction to appear.
SECONDARY (4/4): Extracted the transport truck driver - You can interrogate one of the enemies to learn about the route of the truck, but this is optional. It is best to abduct the driver after he reaches the center of Kiziba Camp, because he makes a longer stop here.
You should play this mission at night, because this will make it easier for you to avoid detection, while searching for the missing allies and during your actions to rescue them. As your buddy, pick the D-Dog for this mission, thanks to which you will be able to locate both the POWs and the enemy soldiers.
You do not need to take any additional equipment for this mission, although a good weapon with sleeping ammo may make it easier to extract enemies, while completing secondary objectives.
The above map presents the area of operation for the seventeenth main mission of Metal Gear Solid V - Rescue the Intel Agents. You can start this mission in two different spots (points 1 on the map), but it is better to pick the Northern landing zone. Right after you are deployed, find the first ally (point 3 on the map). After you rescue her, go to Kiziba Camp to locate the other member of the Intel Team (point 4 on the map). Only after you have rescued both of them, take interest in the remaining objectives - locate the third POW (point 6 on the map), as well as abduct several enemies from the main part of the camp (point 5 on the map).
As your starting point, it is best to pick the Northern landing zone, thanks to which along your path to the first team member, you will not need to walk around the buildings in the village, which may be guarded.
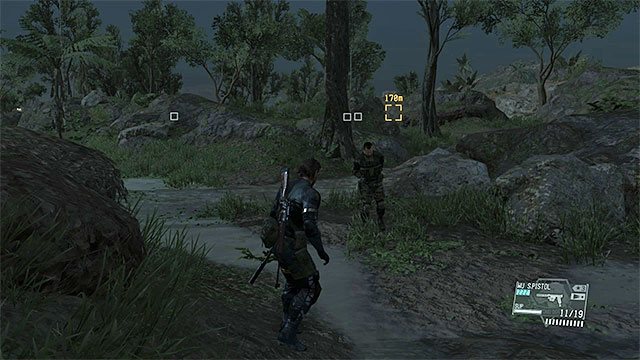
After the deployment, head South and towards the zone in the woods marked by the game. Take your time, because the entire area is now being patrolled by several opponents and there are more coming. You can try to walk around them, or eliminate them to decrease the risk of raising the alarm.
The first member of the Intel Team is hiding in the spot show in the above screenshots and you can use the dog to locate him (alternatively, you could also interrogate one of the enemies to narrow down the search area, but this will, unnecessarily, take you more time). Right after you reach that member, fulton her.
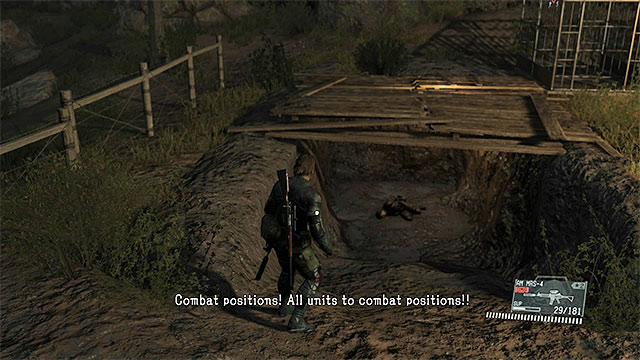

You need to go to rescue the second member of the Intel Team right after you rescue the previous one. His life is in danger and if you do not get there quickly, he will be shot within several minutes.
Go towards Kiziba Camp. Your destination has been shown in the above screenshots - it is a big hole in the ground in the Southern part of the camp, close to the cages. Before you come any closer, try to eliminate, at least, several f the guards around, because they may spot you in the act.
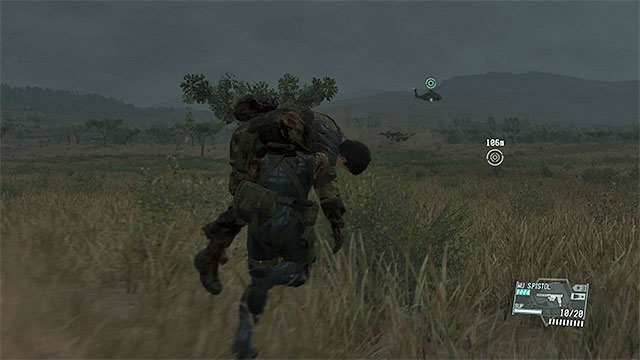 It is a good idea to send the other team member back to the base in the helicopter
Unfortunately, it is much more difficult to rescue the other ally, because you cannot fulton him, due to the wounds he has taken. If you want to complete the mission as quickly as possible (and earn the S rank), take him out of the base and immediately request the chopper (pick the landing zone that does not require you to cross areas full of enemy soldiers). If you want to complete secondary objectives also, after you carry the POW out, leave him in a
Unfortunately, extraction of the other ally is much more difficult, because due to his wounds, you cannot fulton him . If you want to end this mission as quickly as possible, (and be awarded the S rank), you need to carry him outside of the base and immediately request a helicopter pickup (pick the landing zone that will not require you to cross areas full of enemies). If you want to complete the rest of the mission objectives, after you carry the man outside of the base, pt him down in a spot not frequented by the enemies. In such a situation, to extract him, towards the end of the mission, you can use the jeep, instead of the helicopter.
 The officials
The CFA officials appear in Kiziba Camp after several minutes. The reason for which they come is the interrogation that they want to conduct on the other member of the Intel Team and you need to prevent them from doing that, because you fail if your ally dies. First, complete the missions described on the previous pages and, after you rescue both of the allies, return to the camp and wait for mission objectives to appear. The officials arrive in the village in the car. You can either attack them right after they get out of the car, or wait for them to approach the area with cages and the big hole in the ground, where the imprisoned ally used to be kept. Fulton both of them to Mother Base.
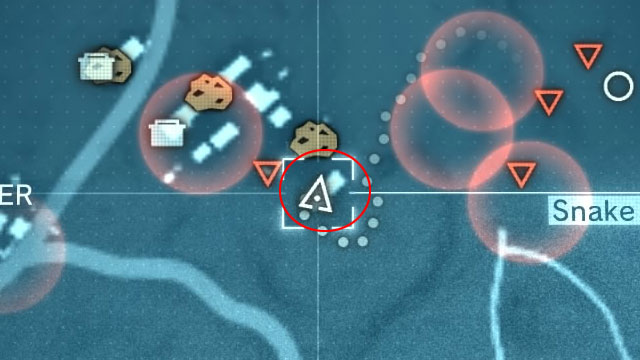
You should try to find the third prisoner only after you have rescued your allies. He is being kept in one of the buildings Northwards of Kiziba Camp and the location has been marked in the above screenshot. Take your time and do not hurry to enter the building, because there still may be a single opponent, whom you would first have to lure outside. Pick up the POW, carry him outside and fulton him into safety.
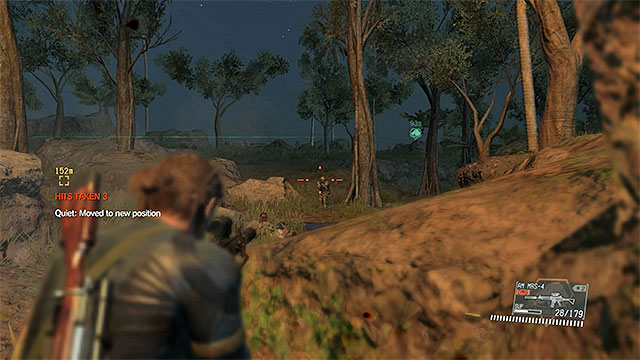 Move into action as soon as reinforcements arrive in the woods
It may bye a bit problematic to complete this objective. Complete it on your replay of the mission. Start by saving the first ally (the one in the woods) and focus on eliminating the enemies here. You cannot eliminate them all, because they need to enter the alarmed state, after which they call in reinforcements. You can do this, e.g. by throwing a grenade, or shooting one to the chest. From then on, focus on restraining and fultoning everyone that appears in the woods. Of course, you need to keep some precautions here, but do not linger for too long, to avoid endangering the life of the other ally (the one in the camp).
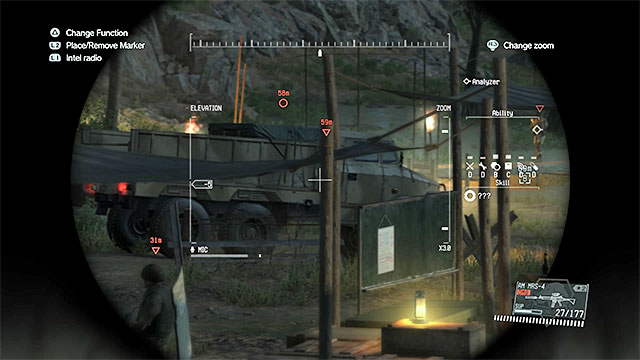 Restrain the truck driver after he appears in the camp
You should extract the driver only after you have rescued the two members of the Intel Team. Remain in Kiziba Camp and wait for the truck to arrive. You can attack the driver, and restrain him, only after he gets out, or walks away from the truck.
Note - If you do not want to risk open confrontation in the village, you can interrogate one of the enemies, thanks to which you learn the truck's route (it will be marked on the map). This will allow you to plan a simple ambush, where you place, e.g. the cardboard box in the middle of the road, which makes the driver stop the truck.
The eighteenth mission in Metal Gear Solid V can cause you a lot of trouble. Eliminating the soldier at the beginning of the mission is quite easy, but things get difficult when you reach the mine. You have to sneak up to the place where the children are, rescue them and take them to the exfiltration point without them getting hurt. Your obstacles will be enemy soldiers, a gunship and snipers (the latter should be dealt with earlier). Good news is that most of the optional objectives can be completed while doing the mandatory ones. There is only one exception - extracting 3 armored vehicles.
It is advisable to play this mission at night. It will make it easier for you to get to the mine and reach the exfiltration point with the children. Besides, it will be easier to sneak up to snipers that are connected to one of the optional objectives. You should choose D-Dog as your companion, which will allow you to locate the snipers faster and also it will be easier for you to move around the mine, as there are a lot of soldiers.
You should also take the best rocket launcher that you currently have, because you will use it to destroy the enemy gunship. You can take some good obstacles that can be used to stop armored vehicles.
The above map represents the mission area available to you during Blood Runs Deep. After beginning the mission, you should go to Bampeve Plantation (number 3 on the map) and eliminate the soldier. Only after doing this, head to Kungenga Mine (no. 6), in which the children are held. You have to escort the using the southern road (no. 7) to the exfiltration point (number 8 on the map). When completing the mission, it would be good to deal with the optional objective connected with the snipers (numbers 4 and 5 on the map). Eliminating the sniper group in the south will make the exfiltration easier.
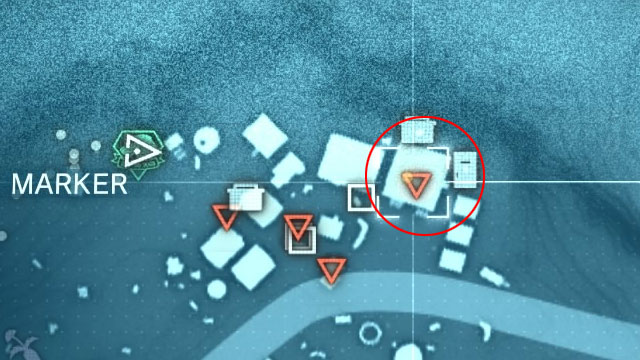
After starting the mission, head to Bampeve Plantation. It is good to use stealth mode here, because if you sound the alarm, it will make the whole mission more difficult for you. Moreover, watch out for the gunship flying over the map (you will read more about it on the next page). The former Mbele soldier that you seek should be located in the north-eastern part of the village. You can find him inside one of the buildings or outdoors, in the place marked on the screen above. You will know the target by his black beret.
 The best way is to sneak up to the target and Fulton him.
If you want to finish the mission quickly, you can kill the soldier. The best weapon to use would be a silenced rifle with a telescope. However, a better idea is to Fulton the enemy while he's still alive. This way you will complete one of the optional objectives. Start crawling towards the buildings where the soldier is. It is best to attack him when he is inside a building or when he stops behind one. Before you Fulton him, make sure that there are no enemies nearby, because they may see the balloon (you can also neutralize them or wait until they walk away from the place from which you want to Fulton the soldier).
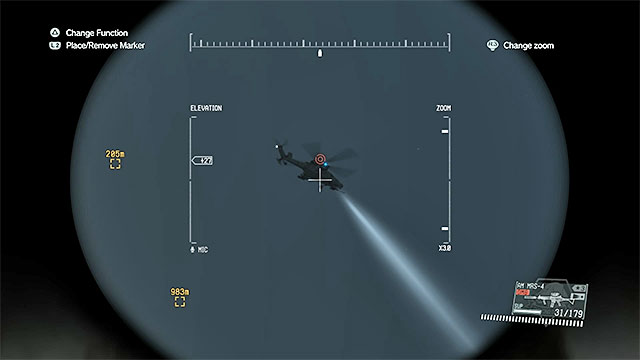 Shooting down the gunship will make the mission easier.
The second main objective in the mission must be completed in the Kungenga Mine. Before you get to it (it is located to the east from the plantation), you should consider doing two more things. The first task is connected to the gunship flying over the map. You can complete an optional objective by destroying it and also make the mission much easier. The gunship often flashes its searchlight near Big Boss and if you don't lay on the ground quickly enough, you may be spotted. Moreover, the presence of the gunship can make the evacuation of the children more difficult, because it may attack your friendly helicopter at the exfiltration point. Attack the gunship when you are away from bigger locations on the map to avoid getting soldiers involved into the fight and sounding an alarm. Use the best rocket launcher that you have to shoot down the machine. The best choice would be a weapon that can lock the target and destroy it with one missile.
Note - if you don't want to take the risk or you don't have a good rocket launcher with you, just remember about the gunship and don't run around in the open. Also, don't get noticed when you will be escorting the children.
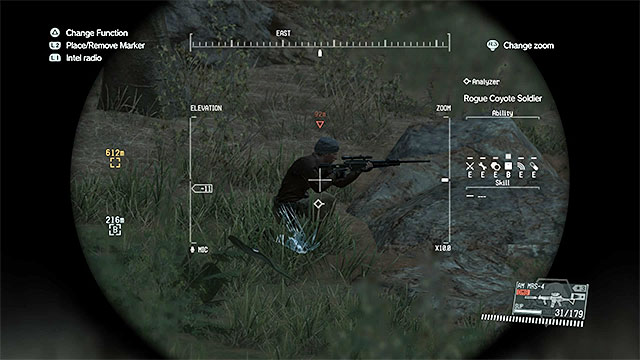 One of the snipers located near guard place number 13
Another important thing is the presence of enemy snipers on the map. This topic will be discussed in detailed on one of the further pages, because there is an optional objective connected to the snipers (exfiltrating all five of them). There are two snipers located near guard place number 13 (south of the mine) that can interrupt you while you complete the mandatory objectives. It would be good to deal with them now (don't let them see you to soon!).
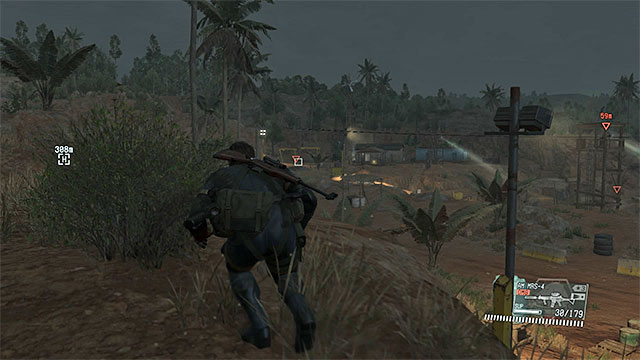 You should enter the area of the mine from the south.
You can reach the mine from a lot of sides, but choosing the western road (the main road) is not a very good idea, as it is very well guarded. It is best to reach your destination from the north. This part of the camp shouldn't be patrolled by anyone. What's more, you can easily go past the fence by jumping down from one of the higher rock shelves.
 It is good to eliminate the enemies as you go.
After entering the territory of Kungenga Mine, start slowly moving south. In this location, there are a lot of enemies and you may be noticed, especially during the day (the same for the gunship, if you haven't destroyed it). Try to neutralize the opponents that can get in your way and stay away from the watchtowers (at night, there are searchlights patrolling the area).
Your current destination is the entrance to the cave located in the south-eastern part of the map. The entrance is shown on the picture above. There are at least two guards nearby and a single soldier on the watchtower. You can knock out the enemies or distract them by throwing an object or ordering D-Dog to bark. There is also a locked gate that you have to open and Big Boss will need some time to do it. When you're inside the mine, reach another gate. You will watch a cut-scene about meeting the children prisoners.
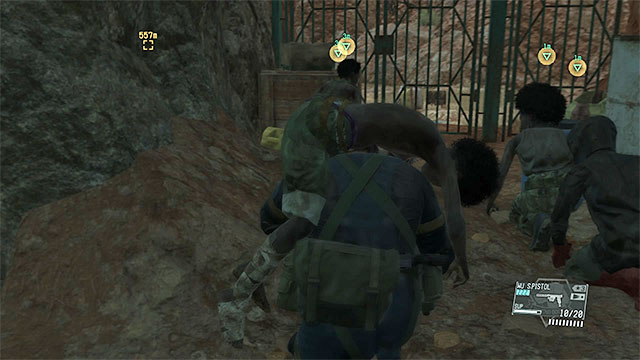 One of the children needs to be carried, the rest of them will head south by themselves.
Start from picking up the kid that cannot walk on their own. Go back to the place where there are two corridors in the cave and choose the path that you haven't been to yet. You will reach the area south from Kungenga Mine. Your last task is to escort the children to the evacuation point located south-west from here.
 Stop the kids before you secure a part of the map.
To reach the exlfitration point, you need to follow the path shown by the game. It leads south first and then it turns south-west. Of course, you won't make it to your destination without encountering some trouble. There are a few camps on your way and at least two guards in each one of them.
Every time you approach an enemy camp with soldiers (use D-Dog to learn their location), you should do two things - put down the wounded kid and order the rest of the children to wait (select Wait in the drop down menu). Only then start clearing the area. Try to stay unnoticed, because you may lose the chance to complete one of the optional objectives (avoiding raising the alarm). After you secure a given area, you can pick up the wounded kid and order the res to start running (select Go).
 Reach the landing site and help the children get on board.
Start heading towards the evacuation point. If you got rid of the snipers near guard place number 13 earlier, the task will be easier now. Otherwise, stick to the rocks on the right. When the gunship lands, place the wounded kid inside. Start picking up other children and place them on board. At the end, join them in the helicopter.
Note - if you haven't shot down the enemy gunship, wait until it moves to another part of the map before you start evacuating the children. Its crew may see you and open fire, making you fail the mission (destroying your helicopter or killing the children).
You should deal with snipers near Kungenga Mine when completing the mission for the first time, because two of them can make it more difficult for you to rescue the children from the mine. There is also an optional objective connected to the snipers. You need to extract all five of them alive to complete it.
Two snipers are located south from the mine, near guard place number 13. Their exact location is marked on the screen above.
There are three snipers located south-east from the mine, near guard place number 2. They are marked on the screen above.
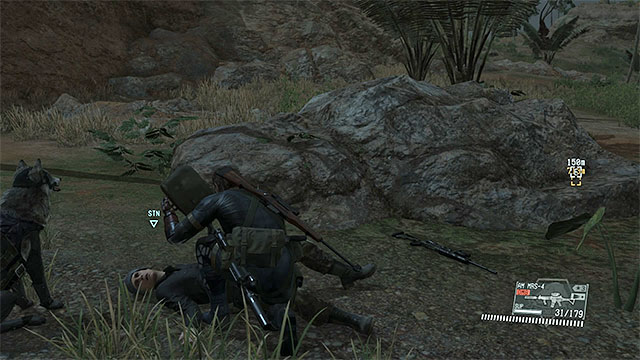 Approach the snipers from behind or from the side and use for example a pistol to put them to sleep.
The snipers from each group are located close to one another so they range of view may collide. You have to be very careful not to be noticed. After approaching a given group of snipers, use D-Dog or the binoculars to located them and then start crawling (preferably in some high grass). Approach any of the snipers (from behind or from the side) and put him to sleep without standing up. When you do that, start heading towards another sniper. Fulton the snipers when all of them are knocked out.
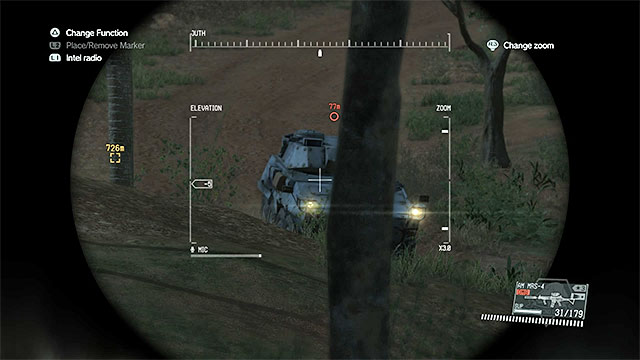 One of the APCs.
You can deal with this task when completing the mission for the first time, but you of course need to have CARGO 2 (transporting heavy objects) to complete this hidden objective.
Enemy armored vehicles are not located in one specific point on the map, because all three APCs constantly travel around it. If you have proper equipment, you can place some big obstacle on the road, wait until an enemy vehicle stops before it and Fulton it. Optionally, you can wait until the soldier parks the vehicle in one of the guard places. An advantage of this method is that you don't have to rely on obstacles, but a disadvantage is that you can be seen by enemy soldiers.
The nineteenth mission in Metal Gear Solid V is not a very complex one. The main objective here is to locate the Major and you can do it on your own, or by following one of his subordinates and trying to stay unnoticed. After identifying the Major, you can kill him or exfiltrate him (the same for the subordinate). Two optional objectives consist in eavesdropping on the Major's conversation with his subordinate and rescuing a prisoner from nearby village (a very easy task).
Just like in every mission of this kind, the best time to complete it is at night. This will make it easier for you to stay unnoticed. If you plan to follow the subordinate through the whole map, you can choose D-Horse as your companion. If you want to head straight to the Major's location, you can take Quiet with you so that she can help you get rid of the guards if you are noticed.
Before starting the mission, make sure that you have the best weapon with non-lethal ammunition, especially if you plan to extract the Major and his subordinate.
The map above shows the area available during the nineteenth mission in Metal Gear Solid V entitled On the Trail. Select any landing (they are close to each other). You can play the mission on two different ways. You either start following the Major's subordinate (number 3 on the map), who will visit the bigger guard post (number 4 on the map), or head straight to where the Major is (no. 5) and try to knock him out or kill him.
Identifying the subordinate of the Major and following this character are not mandatory tasks. You can complete them, according to the game's suggestion, but if you want to finish the mission as quickly as possible, you can focus only on locating the Major. It is described on the next page of the guide.
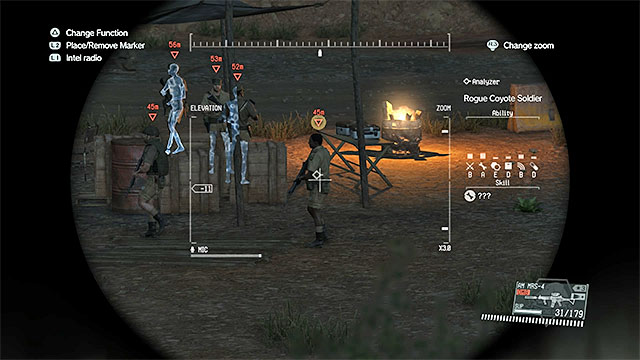 The Major's subordinate.
After landing, head to guard post number 15. Find a spot on one of the nearby hills and use the binoculars to look around the area. Focus on the territory around the parked jeep. A group of enemies will soon appear near the vehicle. One of the soldiers is the subordinate (you will now him by the fact that he is not wearing anything on his head).
Note - If you don't see any vehicle after reaching guard post number 15, it can mean that you are late and the subordinate has already went to the meeting. In that case, you can try to chase him (he will visit guard posts number 19 and 16) or head straight to the meeting point.
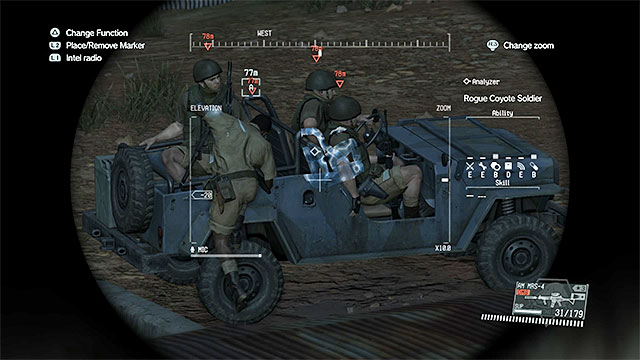 The person that you follow will switch vehicles in guard post number 16.
The Major's subordinate will soon enter a jeep and head south-east with his escort. You should use D-Horse for chasing him. Remember to stay in safe distance from the vehicle and go past all the guard posts through which it will travel. The subordinate will stop at guard post number 16. He will change vehicles and continue travelling, heading north-east. Continue following the jeep until the vehicle stops near the meeting place.
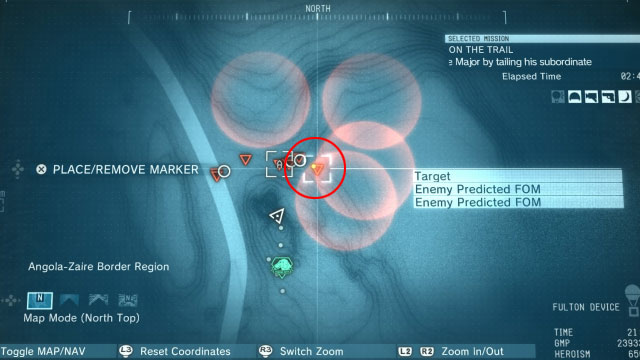
The meeting place is located in the eastern part of the map (south-east from guard post number 13) and is marked on the screen above. You can head this direction right after the mission starts (the best variant if you want to get the S rank) or reach this place by following the jeep.
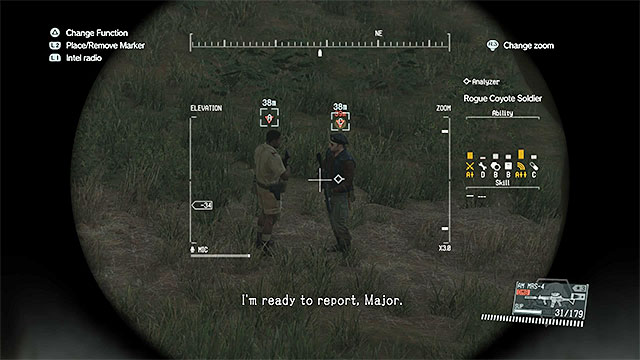 It is good to listen to the conversation.
Don't approach the meeting place from the main road, because this are is well guarded. The best way is to reach the destination from the south and find a spot on the hill nearby. Start from looking around and mark all the enemies. If you've followed the subordinate, you should wait until he meets the Major. Use the binoculars to listen to the conversation, which will allow you to complete a hidden objective.
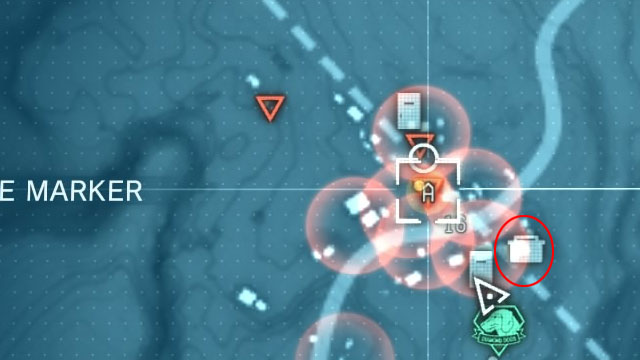 You can kill the Major.
If you want to finish the mission fast, then after identifying the Major (he is wearing a black beret), you can use any rifle (preferably with a silencer) to shoot him from a safe distance.
Note - don't let yourself be detected too soon, because the Major will run away (return to his jeep). The mission will fail if you allow the Major to leave the map.
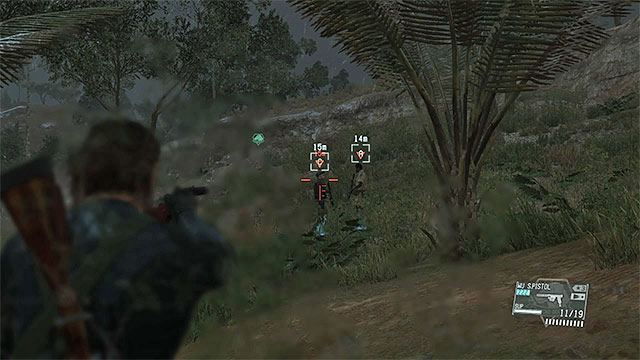 Knock out the Major and his subordinate after you deal with the guards.
A much better idea is to knock the Major and his subordinate out, which will allow you to complete two optional objectives. Such action requires appropriate preparations. It is good to complete this task during the second time you play the mission, because then you won't have to listen to the conversation.
Try to reach the meeting place earlier and neutralize the guards silently. Hide their bodies and when the subordinate arrives, deal with the soldiers that arrived in the jeep. Use any weapon with non-lethal ammunition to shoot both the characters (try to aim at the head). Now you just need to Fulton the enemies.
Note - no matter how you choose to act, you can leave the mission area on your own (for example by taking the jeep on riding on horseback) or summon a helicopter.
One of the hidden objectives in this mission is connected to locating a prisoner. You can find this character in the south-eastern part of guard post number 16, which is shown in the picture above. You will visit this guard post when following the Major's subordinate and you can use this chance to rescue the prisoner. Make sure that you are not detected by the subordinate or by the soldiers standing around the building (it is good to neutralize at least a few of them). After securing the area, carry the prisoner outside, get away from the guard post and Fulton him.
The twentieth mission in Metal Gear Solid V has a very easy beginning, but later, you will have to sneak between enemy guards. What's more, it ends with a confrontation with Man on Fire, which cannot be avoided. You can easily lose this battle, because of the opponent's strong fire attacks. When heading to the place where you meet Man on Fire, you can deal with a few optional tasks, like for example follow the truck driver (almost through the whole map), gathering intel or capture a new animal for the zoo.
It is not vital in this mission to play at night, but if you choose to do so, it will be easier for you to go past the guards in the eastern part of the map (when heading to the Industrial Zone). Also, you will have no trouble listening to the conversation near guard post number 17. You can select Quiet or D-Dog as your companion.
It is very important to choose your equipment thinking of the battle with Man on Fire. Take a rocket launcher or C4 with you, which will help you stop the attacks of this powerful opponent.
The map above shows the area available to you during the twentieth mission in Metal Gear Solid V entitled Voices. You start near the western edge of the map (number 1) and you have to reach Ngumba Industrial Zone, located in the eastern part of it (number 10). At the beginning of the task, you can go through an enemy camp (number 3) or choose the unguarded path (number 5). The end of the mission is more linear, because you have to go past a guard post (number 7) and use the tunnel (number 9). If you plan to complete the optional objective connected with listening to the driver, it is good to sneak up to his truck (number 4) and ride through a major part of the map on the back of the vehicle.
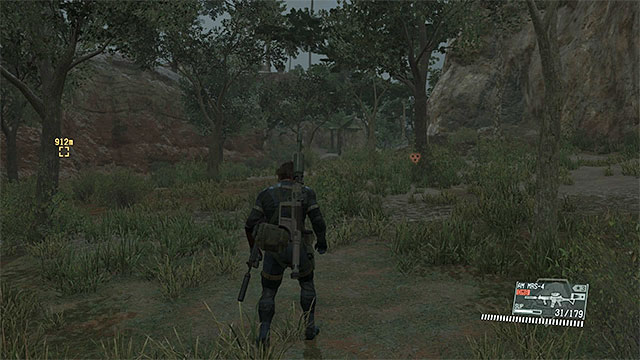 The unguarded path leading to guard post number 20.
At the beginning of the mission, you will have to spend some time going east, because that's where Ngumba Industrial Zone is located. First, you need to reach the central part of the map and you can do it in two ways. Going through Munoko ya Nioka Station is quite risky, because you may be detected by enemies. A much better idea is to head north-east and find a mountain path, which is not guarded by anyone.
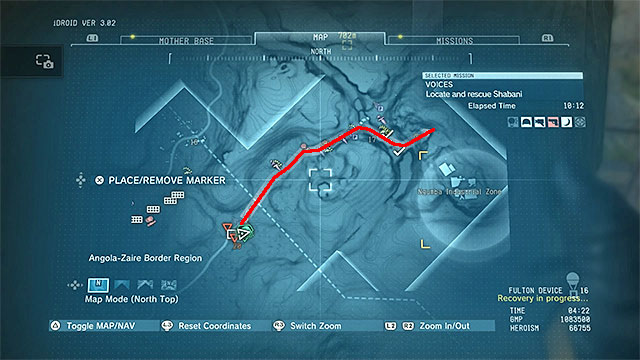
When you reach guard post number 20, you have to turn north-west. The next part of the journey is much more linear and has been shown on the picture above (you can "discover" it by collecting intel from guard post number 20; you will find more details in the optional objectives walkthrough).
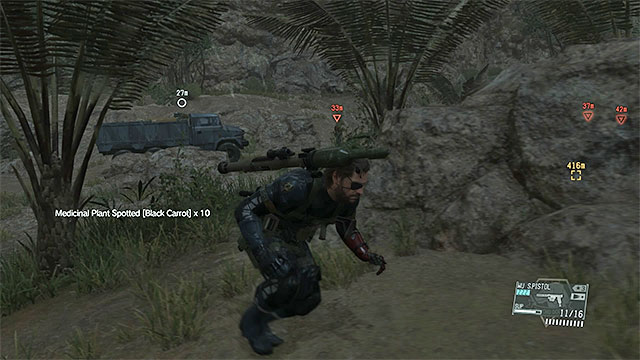 Go past the enemies from the small guard post.
Shortly after you walk away from guard post number 20, you will reach a smaller camp. You don't have to attack the enemies here at all, because you can go past the fence by going through the hill on the right. Head further east, going past guard post number 17. When travelling along the river, lay on the ground and start crawling as soon as you get close to new enemies (you can also neutralize them).
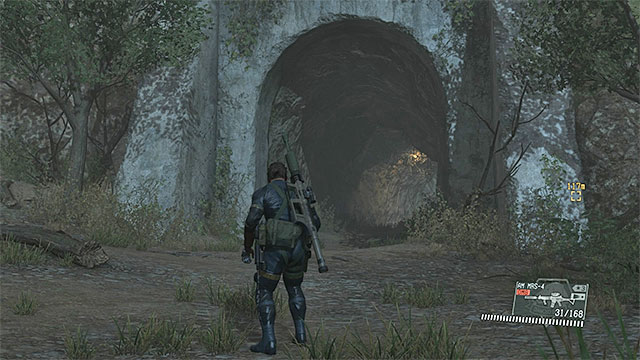 The tunnel leading to the Industrial Zone.
At the end, choose the north-eastern path leading to a large hill. There are 2-3 enemies here, but you can sneak behind their backs and use the thick plants to stay hidden. You need to reach a big tunnel leading directly to the Industrial Zone.
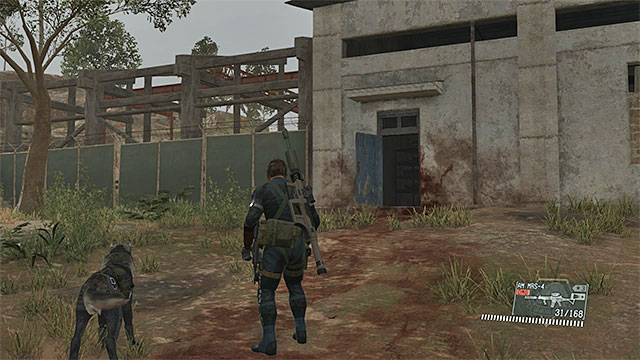 The entrance to the main building in the Industrial Zone.
After reaching Ngumba Industrial Zone, head to the main building and choose the door near which you can see some blood stains. Walk through the rooms. You will reach a place where Shabani is lying on a bed.
When the cut-scene ends and Man on Fire appears, start running towards the exit. Don't stop not to get hurt by the fire. When you're outside, you have to decide how you want to act - you can try to stop the attacks of Man on Fire (you can't defeat him completely), which will allow you to complete an optional objective, or you can endure the confrontation waiting for an opportunity to evacuate.
Important note - when playing this part of the mission, try to stay on the move all the time, because the boss can set fragments of the environment on fire from distance and throw fireballs at the hero. Of course, stay away from all the objects that are already on fire.
The best method for quickly stopping Man on Fire is to use the large fuel tank shown in the picture above. It is located right next to the water. If you can, plant a C4 on it.
 Quickly destroy the fuel tank.
Now, stand in the water and wait until Man on Fire gets close to the fuel tank. Quickly detonate C4 or use a rocket launcher to destroy it.
If you did this the right way, Man on Fire should land in the water (the screen above) and the floating boy won't be able to help him. It will end the confrontation.
 You can destroy the water towers when the boss appears next to one of them.
If you want to just endure the battle, besides staying on the move, you can also stop the attacks for some time by destroying the water towers located in the Industrial Zone. Wait until the boss gets close to one of them and destroy it quickly. You can do that by shooting the red barrel located right next to the tower, using a rocket launcher.
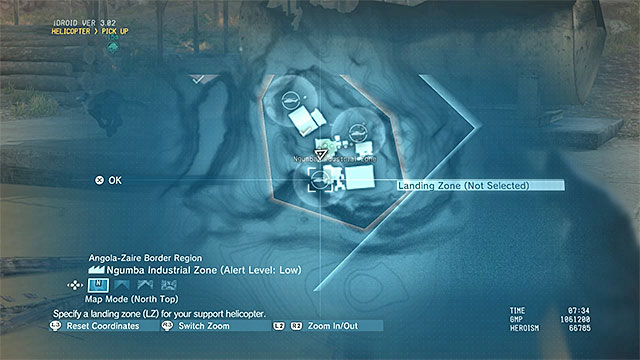 Summon the helicopter to one of the landing sites in the Industrial Zone.
You won't be able to avoid confrontation with Man on Fire completely. If you try to go back to the tunnel, it will collapse. There are only two options - stopping the boss (the method described above) or enduring the confrontation until the weather changes and it starts to rain. No matter how you choose to act, use iDroid to summon a helicopter to one of the three landing sites in the Industrial Zone.
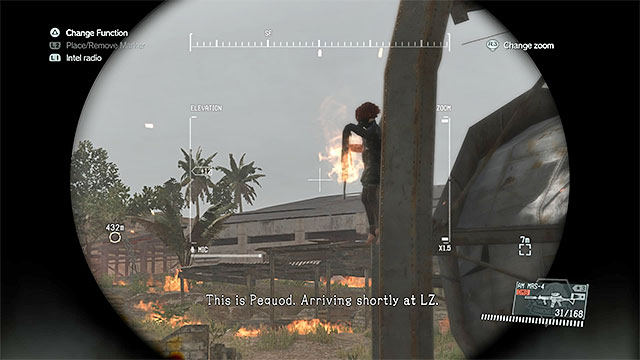 The Floating boy.
Floating boy accompanies Man on Fire when he attacks the hero in Ngumba Industrial Zone. You can't attack the boy using regular weapon, because he will teleport to some other place. You have to use a trick. Hide in a sage place and quickly summon a support air drop to a place where one of the water towers is. Move close to the tower and try to provoke Man on Fire to approach it as well. Floating boy should appear near the wounded boss and stay there for at least a few seconds. If you've summoned the drop earlier, the cargo will hit the boy and you will complete this objective.
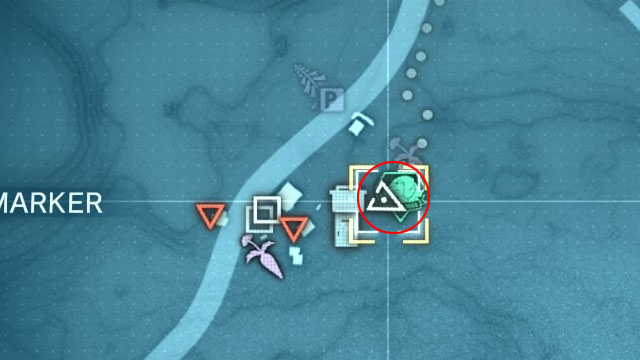
You can deal with collecting Intel File after reaching the central part of the map, namely to guard post number 20. Sneak up to the tent shown in the pictures above and interact with the documents lying on the desk
Note - taking the documents will cause that a suggested route to the Industrial Zone will be marked on your map. It can help you reach this important location.
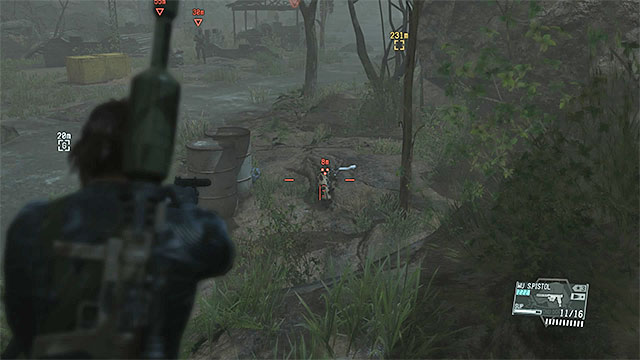

You can deal with finding the African wild dog later, namely after reaching guard post number 17 in the northern part of the map (when travelling to the Industrial Zone). Start heading south-east, along the river and you will find the animal soon (use the binoculars). The dog is shown in the pictures above. Sneak up to the dog, use any weapon to put it to sleep and Fulton it to Mother Base.
 The truck is parked near the place where you start the mission.
The optional objective connected to listening to the conversation of the truck driver is the most time-consuming one and you have to remember about this task from the beginning of the mission. It is good to start from sneaking up to the truck. By default, it is parked near Munoko ya Nioka Station, but you would have to sneak through an enemy camp to reach it there. If you don't want to do this, go to guard post number 20 (central part of the map) and wait until the truck arrives.
 Follow the driver all the time.
As your task is to follow the driver, a good idea is to get on the back of the truck and lay down. Alternatively, you can move in a safe distance behind the truck. Fortunately, the driver is heading the same direction that you would, if you were going to Ngumba Industrial Zone. After leaving guard post number 20, the driver will head south-east. Soon, he will leave the truck and start walking.
When following the driver, you cannot be seen, so stay away from all the enemies or lay on the ground and crawl past them. The driver's destination is a small hut near the tunnel leading to the Industrial Zone. Hide in the bushes and listen to a short conversation (you can use the binoculars). The objective should be completed shortly after the conversation starts.
The twenty first mission of Metal Gear Solid V will allow you to revisit an airport which you have already visit in one of the previous main missions. Your main task is to interrupt the meeting of an arms dealer and a CFA official. The game basically requires you to kill the official however you may also complete this mission by, for example, extraction of these both characters after listening to their conversation. The side tasks are not the easiest to complete since they are focused on stealing the containers from the air sheds which may be possible only after receiving the upgraded fulton device. The other side task is to shoot down the helicopter to receive a rare recipe.
Trying to complete this mission during a night will be much easier than during a day since it will help you get to the arms dealer and listen to your targets' conversations as well as to extract them. Selecting a buddy is not essential here. D-Horse will help you get to the airport faster, D-Dog will detect your enemies and Quiet may eliminate them if you don't want to stay undetected.
You will benefit from taking a good rocket launcher which you may use to destroy a helicopter to either kill the official or to complete an optional task focused on taking a blueprint.
The map presented above shows the area you are going to explore during the 21st main Metal Gear Solid V mission named The War Economy. Head to Nova Braga Airport right after beginning of the mission and choose the northwest gate (number 3 on the map) to get inside. After that go to the main building (number 4) and decide if you want to kill the main targets or do you prefer to knock them down and fulton them away. You shall visit the hangar (number 6) only when you try to repeat this mission and you have the Wormhole upgrade.
Right at the beginning of the mission head toward Nova Braga Airport. Better avoid entering it from the east side since this area is very well secured and will take a lot of your time. Instead try to pass the northern part and look for the northwest gate which is presented on the screenshot above. When the enemies from the other side will walk away you may enter.
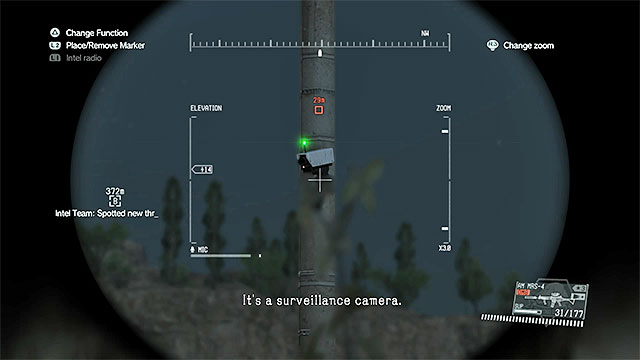 Stay away from the cameras and don't destroy them
During the mission you need to remember about few obstacles. The entire area is protected by the patrols of enemy infantry and Walker Gears. In various part of the airport you may find cameras which you have to avoid and you can't destroy them since it will also be alarming for the enemies. In few points are hidden mines and every explosion may also raise the enemy awareness.

Your destination is the building from the screenshot above. Inside this building you will find the arms dealer and the CFA official will also get there (although you shall try to get here before his arrival). Get to this building from north since it will secure you from being detected by two snipers from the roof. If the helicopter haven't arrived and you have some spare time you may neutralize these snipers and an "ordinary" guard who also patrols the roof.
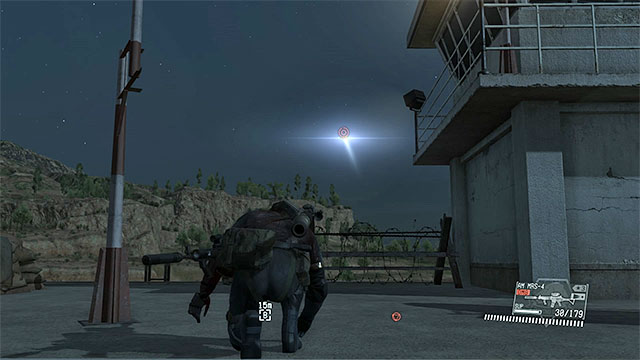 The helicopter with the official will come from the north
You main target to eliminate is the CFA official although he will not be present in Nova Braga Airport at the beginning of the mission but instead he will arrive after a couple of minutes. He is going to land in a helicopter in the northern part of the map and will land on the top of the main building (the one with two snipers).
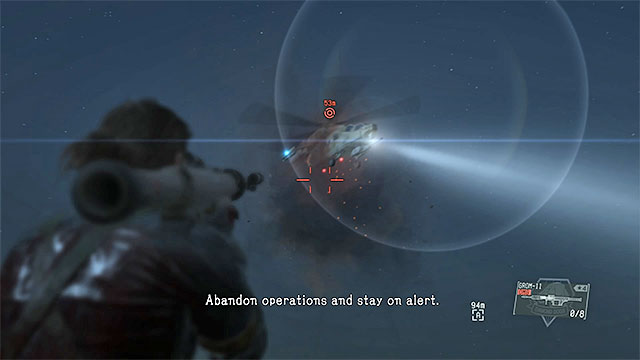 You may shot down the helicopter
The fastest way to complete the mission is to shot down the helicopter before it will land on the roof however you have to stay hidden since if you will be detected by the crew of the helicopter it may turn back what will result in failing the mission. Try to use the best rocket launcher you can to be sure that you may destroy the machine with just a one good shot.
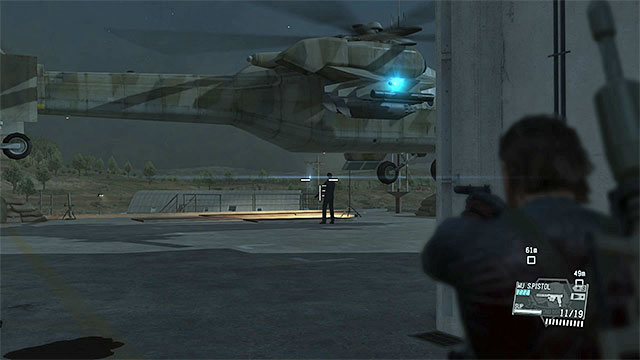 You may knock down the official when he will leave the helicopter
If you don't want to kill the official or if you don't have a good rocket launcher you need to wait undetected for the landing on the roof of the building. Attack your target from surprise when he will leave the machine. Using a sleep ammunition will allow you to fulton him away.
If you got there too late he may be also found inside the building or during his patrols assisted by the arms dealer. It will require a different tactic. You may, for example, ambush both gentlemen from a close distance or fire at official from the top of the building when he will begin his patrol. Either way in the end you will have to leave the airport (most preferably with the gate in the west wall) and leave the entire area or call your helicopter.
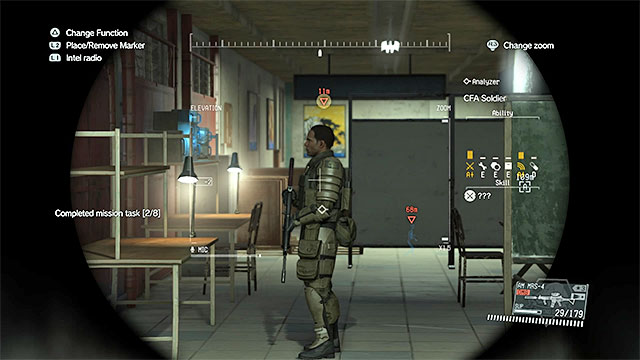 The original location of the arms dealer is on the first floor of the main building in the airport
The arms dealer is on the first floor of the main building in the Nova Braga Airport however before getting near him better take care of the people from the roof which will help you to fulton the dealer away. The dealer wears a heavy armor which may partially protect him from getting stunned from a distance. Much more reliable way will be to get to him from behind and knocking him down in melee fight. Take the unconscious dealer outside and fulton him away.
If you were unable to get to him in time you may try to get him during his patrol with the CFA official (what is quite risky) or just wait for him to return to the main building.
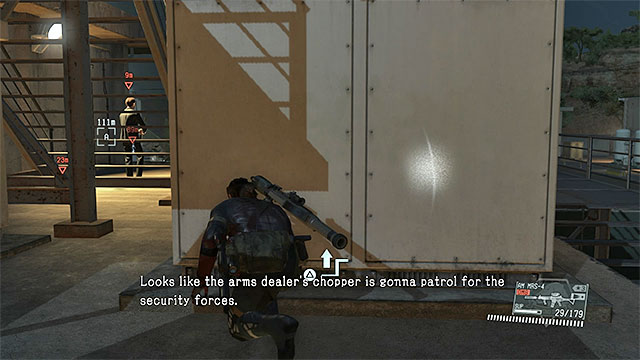 Wait for the meeting of your two targets
We advise you to try to complete this optional task while completing the mission for the second time since it will be better if you will already know the main scenario of the quest. Get to the main building of Nova Braga Airport and take care of the enemies from the roof. Wait for the helicopter with the CFA official and avoid being detected by anyone. Wait for him to meet with the arms dealer inside the building. You may listen here to their first conversation.
Both of them will go outside. If you will follow them for a close distance you may get easily spotted by the enemy soldiers. Try to stay on the roof of the building and stay on the point where one of the snipers has been standing. Use your binoculars to watch and listen the conversations from a safe distance. The screenshot above represents their path which you may also learn from interrogating one of the basic enemies.
 Destroy the helicopter and remember where it will fall
The blueprints are on the helicopter which will take the CFA official to Nova Braga Airport and the only way to secure leads to destroying this machine. The only weapon you really may use is a good rocket launcher, most preferably a launcher strong enough to shot this machine with one missile and will not allow the pilot to fly escape from the mission area.
After hitting the helicopter with a rocket use your binoculars to follow the falling machine. Later on try to mark the place it has landed on your map.
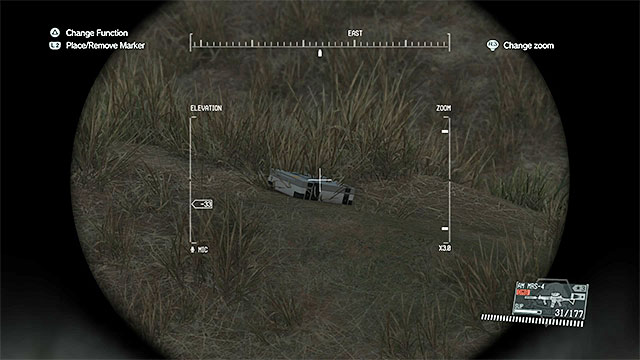
It is important mostly because you are not going to find any wreckage of the helicopter but instead you will need to look for a chest (presented on the screenshot above) with the MACHT 37 blueprint.
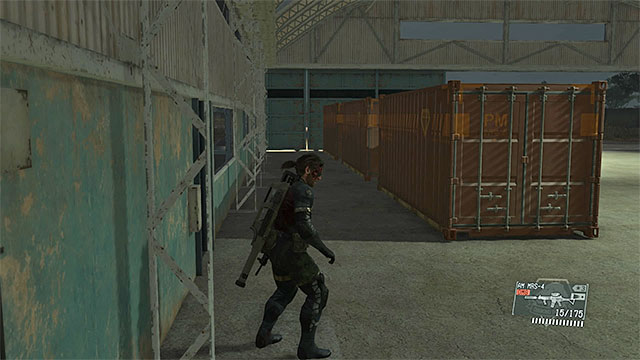 Containers in the hangar
Basically you may complete this task in every moment of the mission however you are not going be able to accomplish that while playing this mission for the first time since you need a Wormhole upgrade (to fulton them away when they are under a roof) and your CARGO 2 upgrade will just not be enough. The containers are in the hangar which is in the very south of Nova Braga Airport. The Wormhole upgrade may be created in the Mother Base after the Side-Op number 50 called Capture the Legendary Jackal which is going to be unlocked after the 31st main mission - Sahelanthropus.
The twenty second mission of Metal Gear Solid V is quite unusual since it is less a challenging mission and more a Mother Base defense tutorial as well as the FOB (Forward Operating Base) creating tutorial. You will listen about the attack on Mother Base during the 21st mission however it does not mean you are going to defend it right away. Remember that this mission has no rank system so you may complete it however you prefer.
There is no difference between completing this mission during a night or during a day. You don't have to keep being undetected since you are not going to be ranked after this mission. You are not going to take any buddy with you so you need to take some heave weapons with you such as a rifle, a grenade launcher or a rocket launcher.
There are two ways to begin this mission. You will receive the information about attack during the 21st main mission (The War Economy) and you are going to face a decision presented on the screenshot above. If you want will press the "OK" button and react immediately you will interrupt the 21st mission. If you will ignore this option ("Cancel") you will be informed that the Strike Team has succeeded to secure your Mother Base however they were unable to safe any hostages. It doesn't mean that you will not be able to complete the 22nd mission on your own. You just need to select it the same way as you choose any other mission in the adequate menu.
Remember - Later on you will receive these kind of messages when you will be attacked by other players. You may read more about it in our second guide to the MGS V.
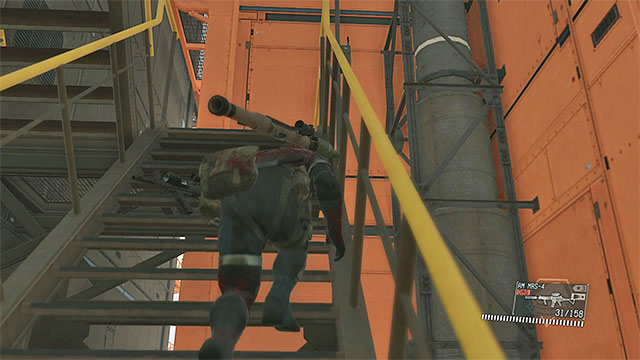 Get to the stairs and go to the upper part of the R&D platform
When Big Boss will leave the helicopter you need to head to the R&D Platform marked by the game itself. You may either kill or fulton away the enemies you are going to face on your path however if you will fight in an open field it is easy to draw enemy attention and die. Even if the alarm will activate no reinforcements will appear. After getting to the platform use the stairs to get to the top of it.
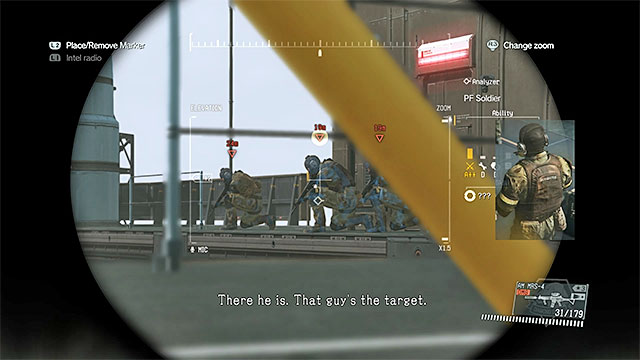
You don't have to hurry, or actually - if you want, you may wait for enemies to regroup and calm down. After getting to the end of the stairs use your binoculars to identify the enemy commander. Mission 22 will end right after killing this person so you don't have to clear the entire area. You may use a good rifle as well as a grenade or a rocket launcher. The rest of the enemy forces will submit.
Warning - If you want to use any explosives pay attention to hit precisely the enemy commander or you may accidentally kill his hostages. It will not fail the mission although you will lose even a couple of hundreds heroic points.
 Establish the first FOB
In the end of this mission you will see a tutorial which will tell you about Security Team which specializes in defending the Mother Base from future attacks as well as the option of creating the first FOB (Forward Operating Base). Use from your iDroid the Base Facilities menu, then FOB1 and Purchase Waters. First transaction is free although after that you are going to have to spend the Motherboard Coins. You may read more about that in our second Metal Gear Solid V guide in the chapter focused on Mother Base.
The 23rd mission of Metal Gear Solid V has place in a very small area and will probably not take a lot of your time. The main task is to extract the teenager warrior named White Mamba.
Warning - A very important limitation is that you are not allowed to kill anyone if you want to avoid failing the mission. To avoid temptation (or accidents) don't take any lethal weapons or explosives with you.
It will be easier to complete this mission during a night since it will help you avoid the children what is quite important since you are not allowed to kill anyone. The best buddy for this mission will be D-Dog since he may mark the enemy warriors although if you may equip Quiet with sleep ammunition she may also be useful.
Try to take with you only the weapons which may contain sleep ammo.
The map presented above shows the area which you are going to explore during the 23rd mission of Metal Gear Solid V which was named The White Mamba. The map is not very complex since after appearing in number 1 you need to get to Bwala ya Masa village and enter the ship wreck where White Mamba is (number 2). Before you will end this mission you may also safe the hostage (number 3) and collect the rough diamonds which are nearby the post (number 4).
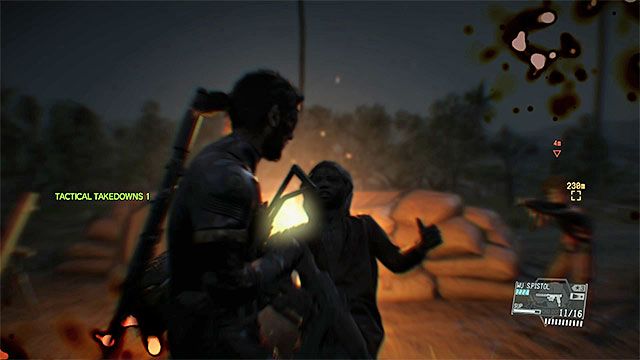 You may neutralize the children for example during a melee fight
Head to the Bwala ya Masa village. Remember that during this entire mission you are not allowed to kill anyone although you may still neutralize them. If you have to use the sleep ammunition or face the teenage warriors in melee combat. If you prefer the close range fighting try to focus on series of punches and on throwing them around since you are not able to catch them the same way you can catch the adults.
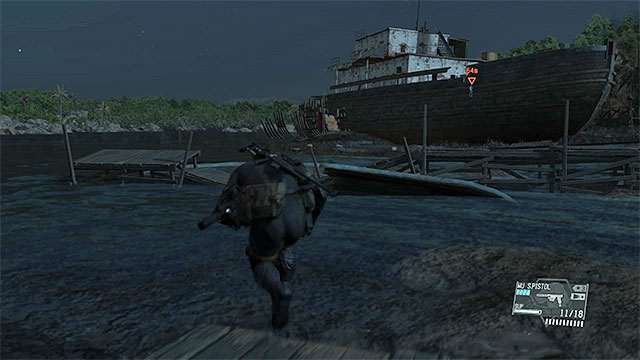
Your goal, White Mamba himself, is on the ship wreck in the west part of the village. The best path there leads from the south (you have to walk around the village from the east first) still you need to keep crouching or crawling, most preferably while staying close to the water. If you have taken D-Dog with you use him to mark and avoid other warriors.
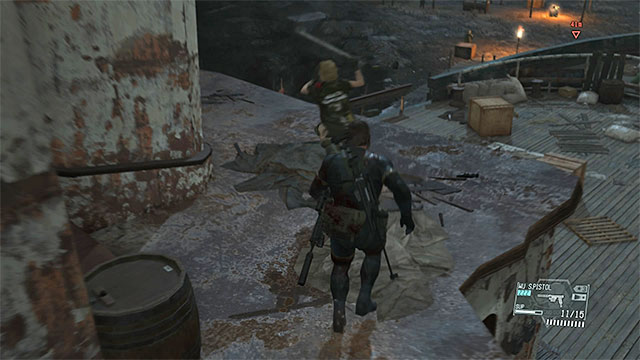 In an open combat you need to hit White Mamba a couple of times
White Mamba is on the top floor of the ship wreck in the Bwala ya Masa village. To get there you need to neutralize a couple of enemies in the surrounding area. If you will take the main stairs you will watch a short cut-scene which will show your conversation with White Mamba what will be result in battle. During this confrontation keep fighting him with your fists to finally knock him down.
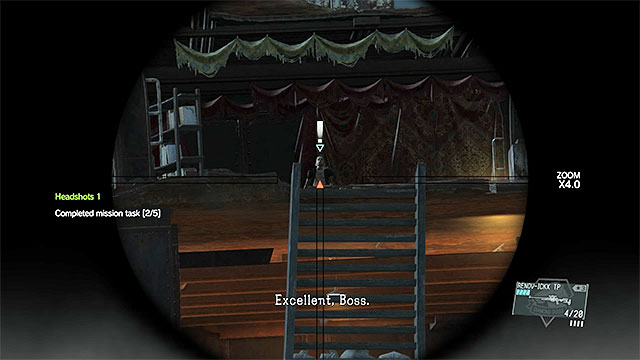
The option described above is not the best one since it may result in raising the alarm in the entire village and at the same time other children will open fire at you. You shall try to attack White Mamba undetected instead or even use a sniper rifle which may use the sleep ammunition (like the RENOV-ICKX TP). In this case you just need to stay in a place from which you may see White Mamba (like the one shown on the screenshot above) and fire at him. You may also climb on a box which is behind him and fire at his back with a sleep ammo from a pistol . Both these ways will allow you to complete an optional task.
 Get White Mamba to the helicopter
After defeating White Mamba you need to extract him. Take him to a helicopter - other children will not attack it but run away from it instead. Bringing Mamba here will instantly end the mission.
You may save the prisoner only before you will extract White Mamba from Bwala ya Masa village. He is in one of the buildings in the north of the village. This place is marked on the screenshot above. You may use D-Dog to make your search even easier. Make sure that there are no teenagers wandering nearby.
You may look for the Rough Diamonds at the very beginning of the mission. Go to the 06 Post which is close to your initial location. Avoid or stun the warriors which are close to the two green tents. In one of them (shown on the screenshot above) you will find the diamonds.
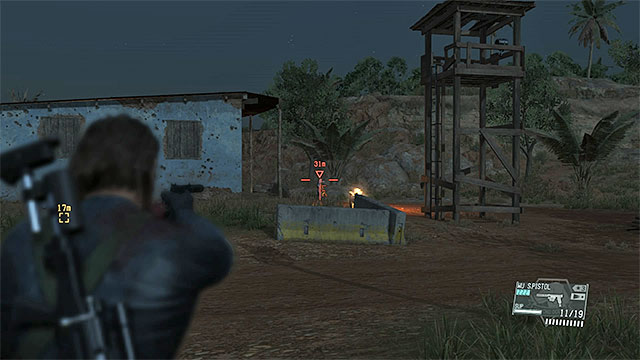 Try to knock the children down with suitable weapons
You may prefer to complete this task while eventually replaying this mission since if you won't have the fulton upgrade which will allow you to extract the underage people. If you really want to complete this task right away you need to stun every person (preferably with the sleep ammunition) and carry them to your helicopter landing's spot. Using a car may make the entire process slightly faster.
Remember - You don't have to fulton away only the children from the main village. You may find the possible targets across the entire map.
The mission area of the twenty fourth mission of Metal Gear Solid V is not too vast, but you need to move around very efficiently. This is especially important at the beginning of the mission, when it is of paramount importance that you reach the engineers quickly. When it comes to exploration of the map in order to complete secondary objectives, you should postpone it until you have liberated the engineers. The list of secondary objectives is long and it includes capturing wildlife animals, finding containers with materials and extraction of the enemy vehicles.
The best idea is to play this mission after dark, because you will then have no greater problems rescuing both of the engineers while staying hidden. Apart from that, this should make it easier to complete secondary mission objectives connected with Munoko ya Nioka Station. As your buddy, pick the D-Dog, who will make it easier to locate POWs, as well as the goats and the eagle (secondary mission objectives).
If this is an option, take along a sniper rifle with sleeping ammo, thanks to which it will be easier for you to capture the animals alive. If you do not have such weaponry, take a rocket launcher, in case things at the Munoko ya Nioka Station go awry, because a combat helicopter would then arrive at the station.
The above map presents the area of operation for the twenty fourth main mission in Metal Gear Solid V - Close Contact. It is best to start this mission in the Northern part of the map, because this will make it easier to reach outpost 20 (point 3 on the map). After you rescue the engineers, find the goats (point 5) and take interest in the remaining areas on them, and especially in outpost 16 (point 6 - materials containers), as well as Munoko ya Nioka Station (point 4 - where you find the plant and the eagle).
 Walk along the valley
As your starting point, pick the Northern landing zone. Right after you have landed, as quickly as possible, head out for outpost 20 (i.e. to the South-East). Because reaching the point quickly will make it easier, for you, to rescue the engineers. Along your path, you come across outpost 16, which you'd better walk around on the left. Then, walk through the valley and head towards outpost 20, along a straight line.

Slow down a bit, after you come close to your destination, because the area around outpost 20 is being patrolled by, at least, two soldiers. Use binoculars to do reconnaissance/ The engineers are being kept in the green tent shown in the above screenshot and you can use the help of D-Dog to locate them.
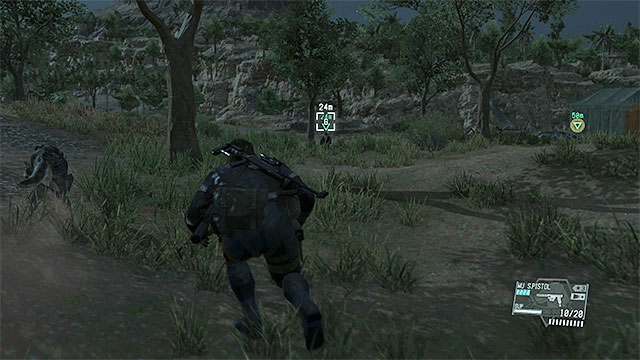 Reach the escaped man and fulton him
Start approaching the tent across the Northern part of the camp. You should not encounter any patrols there, but you will be better off if you crouch and keep your distance of the enemies that you have identified. In the first place, you should rescue the male engineer. Soon, he should dash out of the tent and start running away. Wait for him to get within the distance of, at least, several tens of meters of the tent, approach him and fulton him (try not to alarm the enemies with this action).
Note - you cannot be too late to extract the engineer, because soon the guards will be alarmed and will head out to find him. If they find the engineer, they kill him and you will fail the mission.
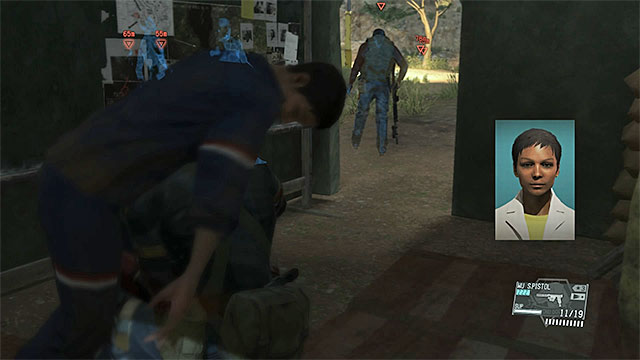 You can sneak up to the tent with the female
Try rescuing the female engineer after you have rescued the first POW. If you want to, you can risk sneaking up to the tent from behind and then extract her. However, you need to do this quickly. If you want to, you can additionally distract the nearby guards by, e.g. throwing an ammo clip, which will make them walk away from the tent.
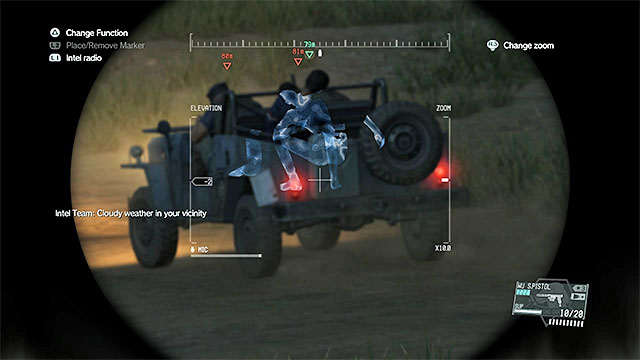 Either stop the jeep along its route or follow it to the station
If you fail to rescue the woman in time, she will be taken out of the tent and put in the jeep that arrives in the camp in the meantime. After a while, the vehicle will drive South-West towards Munoko ya Nioka Station. Of course, you can try and stop it along its path, but you would then have to take it over, quickly, and deploy an obstacle on the road (laying down fire on the jeep's crew is risky and may alarm the enemies).
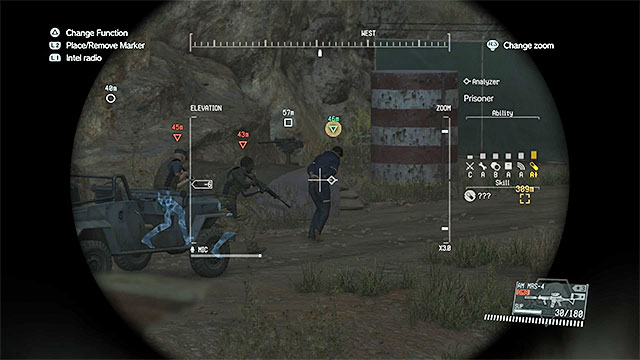 The woman will be taken to the enemy base
The worst case scenario is that you failed to rescue the woman when she was still in the tent and you failed to halt the jeep after she was taken away. The vehicle stops after it reaches the station and the woman will be taken inside. This means that you will have to infiltrate also this base. Do not try to do this from the South. Because the only gate that leads inside is well-lighted. Instead, return to the passage in the valley, walk around the entire map and reach the base from the North. It is much easier, here, to sneak past the enemies.
Regardless of how you reached the woman, you need to carry her over into safety and fulton her, request pick-up for her or carry her out of the map (preferably in a vehicle).
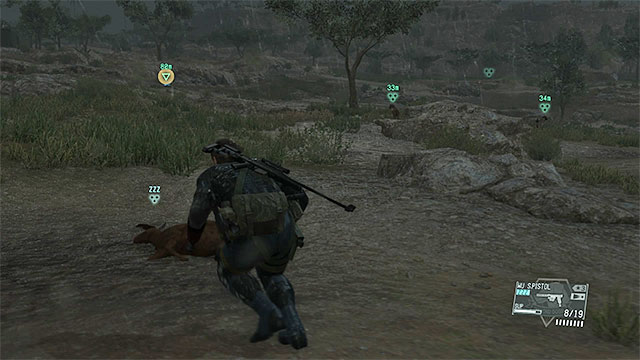 You find the goats close to outpost 20
Find the goats after you have rescued the engineers. However, it is best to start searching for them still before you have extracted the woman, or else it will be easier, for you, to step accidentally outside the narrowed mission area (e.g. when you scare one of the goats and it runs away), which ends the mission prematurely. Go East and South-East of outpost 20 to find the goats (D-Dog will help you). Each time you find a goat, put it to sleep using sleeping ammo weapon and fulton it.
 The first jeep to fulton is the one that the enemies plan on using to transport the female engineer
It is a good idea to remember about this secondary objective throughout the entire mission and steal the jeeps as soon as the opportunity arises. The first one is being used, by the enemies, throughout the entire mission. This is the one that the enemies reach outpost 20 on, at the beginning of the mission, in order to take the female engineer. As soon as they do that, they head out to Munoko ya Nioka Station. You can steal this jeep in any way you want, i.e. sneak up to it, when it is parked in outpost 20 (quite risky), halt it along its route to the station, or reach it after it is being parked near the station (watch out for the guard lighting the area with a spotlight).
 The other jeep should be parked in the Northern part of outpost 20
The other jeep should be parked in the Northern part of outpost 20, which makes stealing it much easier. If it is not there, this may mean that it is currently being used. In such a situation, you need to check out the main locations of the map. Due to the small area of operation, locating it should not be too time-consuming.
Note - to extract the vehicles, you of course need to have the CARGO 2 upgrade, thanks to which you can fulton machines.
Materials containers are in outpost 16, i.e. the one near the Northern landing zone. You find them in pairs in different locations of the enemy base and their locations have been marked in the above screenshot. You should take interest in this objective only if you have the CARGO 2 upgrade.
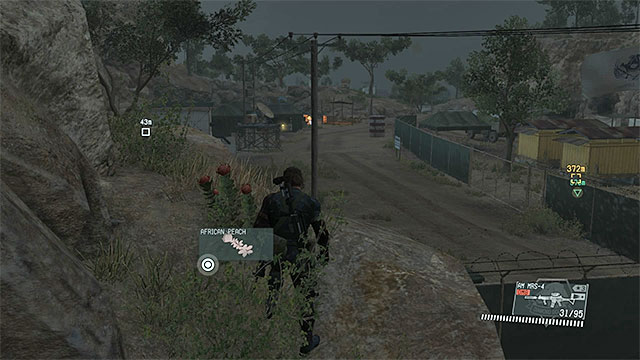
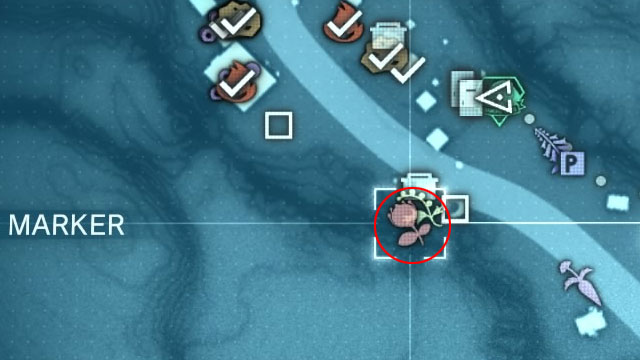
To find African peach, you need to go to Munoko ya Nioka Station. Approach the station from the North and check out the rocky ledges on your left. The plant is in the spot shown in the above screenshots. Before you reach it, consider neutralizing, at least, several enemies in this area, thanks to which you remain undetected.
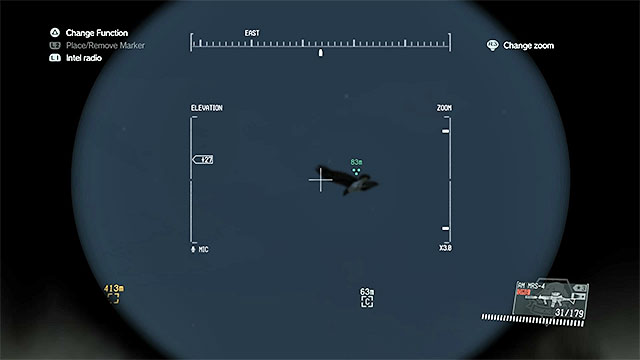
To find the rare eagle, go to Munoko ya Nioka Station. Sneak across the base and reach its center. Above the base, there are several eagles circling and one of them has been shown in the above screenshot.
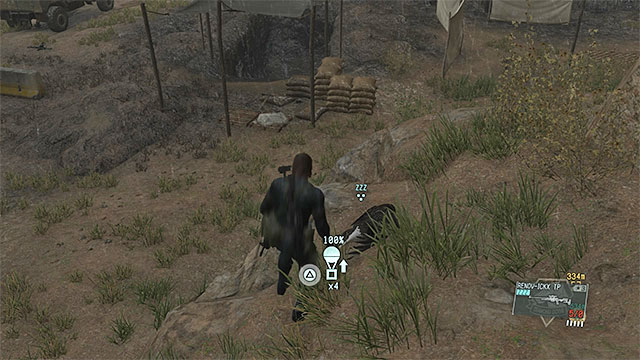 Find the eagle on the ground and fulton it
You need to use a good weapon with sleeping ammo, to bring down one of the eagles. Preferably, this should be the sniper rifle, thanks to which firing from a long distance will not be a problem. Wait to take the shot, up until the moment at which the eagle is flying right above the base, because you then need to reach it after it drops down (this cannot be an inaccessible ledge). Fulton the eagle to complete this objective.
The twenty fifth mission of Metal Gear Solid V takes place on a very small area and the good news is that completing it may take you, as little as several minutes, if the conditions are right. The main objective is to capture the leader of child soldiers and the militants' XO. When it comes to secondary objectives, you can locate and rescue the escaped convict, as well as get to the hill with rare plants.
Note - An incredibly important handicap in this mission is that you cannot kill anyone,, or you automatically fail it. It is best not to take any conventional weapons with you, nor explosives.
Consider playing this mission at night. This is especially recommended since you cannot take too aggressive an approach here and therefore, you should strive for avoiding unnecessary confrontations. At night, it is going to be much easier to extract both of your targets. As your buddy, pick D-Dog, or Quiet if you have a sniper rifle and sleeping ammo.
It has been already mentioned that you cannot kill anyone in this mission, therefore ignore all of the conventional weapons. Try to fill all of the available slots with weapons with sleeping ammo.
The above map presents the area of operation for the twenty fifth main mission in Metal Gear Solid V - Aim True, Ye Vengeful. The only major location on the map is the village, where you need to find the captive XO and capture the commander (point 2). Then, you can load them onto the jeep (point 3), or deliver them to the pick-up point (point 6). While playing this mission, you can also rescue an additional POW (point 4) and find rare plants on one of the hills (point 5).
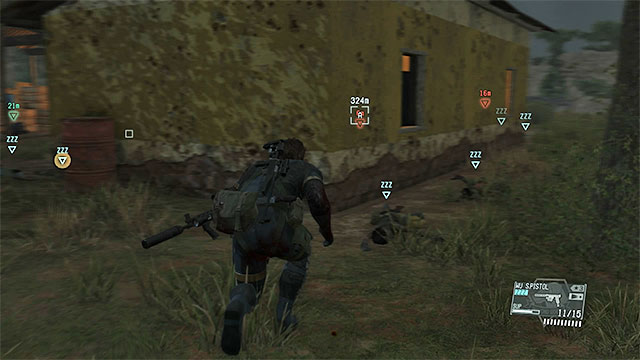 You can either knock down or walk around the child soldiers in the village
Head towards the village. Before you approach it, try to perform a good reconnaissance (you can use the help of D-Dog and Quiet), because it is a good idea to avoid being spotted, throughout this mission. Head towards the main buildings. It is best to walk around the child soldiers that you encounter, or walk around them. In the case of the former, remember that the children need to survive, so use sleeping ammo weapons (if necessary, you can also rely on melee, but then you risk that you alarm others).
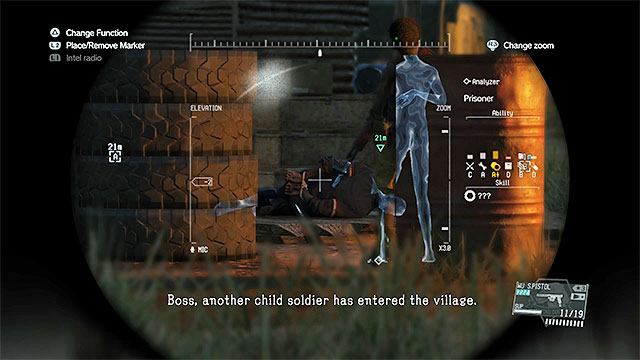
The first one of the characters that you need to extract is the captive XO. He is being held in the shelter in the central part of the village and he has been shown in the above screenshot. It should be noted that, around the POW, there also are several children and you will have to keep this in mind, because you will soon try to rescue the prisoner.
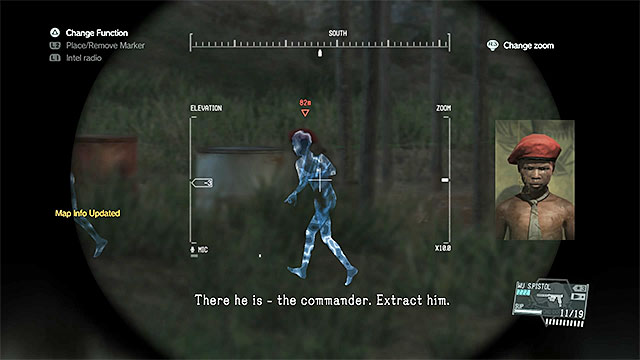 You can tell the commander of the child soldiers by the red beret
The other target to find is the child soldiers' commander. He is not staying in one specific point of the map, but you can usually find him near the abovementioned XO. You can tell the commander by the red beret and usually, he is accompanied by, at least, one guard.
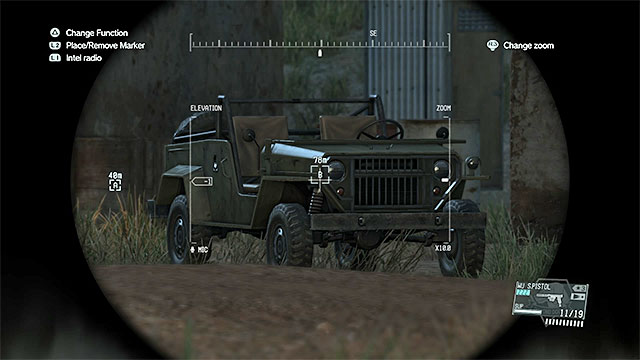
Start by neutralizing the commander. You can approach him and fire the sleeping pistol, several times, or attack him at a distance (here, you can use the help of Quiet, if only she has an appropriate rifle). After that, sneak up to the captive XO. Make sure that there are no child soldiers around and, if necessary, knock down some of them. Only then, pick up the POW.
The best way to complete this mission quickly is to load the commander and the POW onto the jeep in the village, because you will complete one of the secondary objectives, this way (extracting both targets on the car). The vehicle has been shown in the above screenshot.
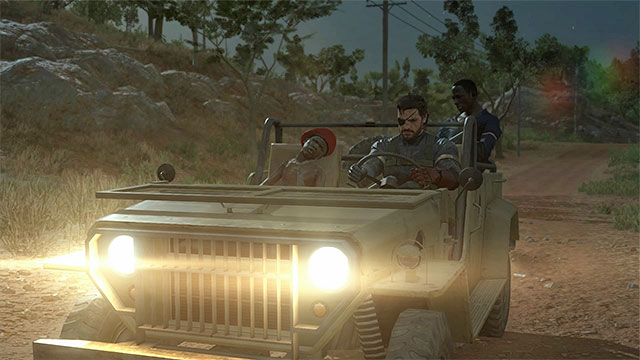 Drive the jeep out of the map
After you put both targets into the jeep, do not attempt to fulton it, because the probability of the prisoner's falling out is high. Instead, get behind the wheel and head North. You need to drive the jeep outside of the mission area, thanks to which you complete it.
Note - If, for any reason, you cannot use the jeep, it would be best to request the helicopter pick-up and deliver both of the targets to the extraction area in the Southern part of the map.
Note - After you complete this mission, you learn about a strange illness spreading around the Mother Base. You do not need to perform any actions. Simply learn the preliminary procedures of dispatching personnel to the quarantine zone.
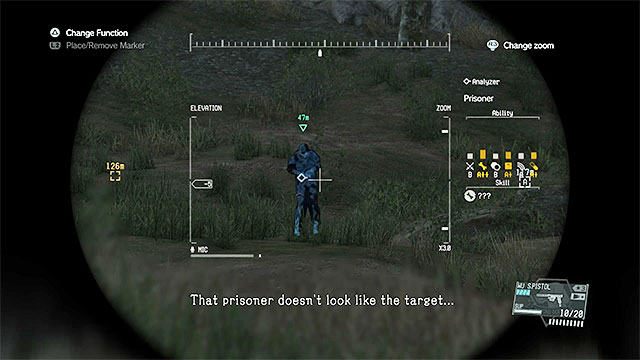
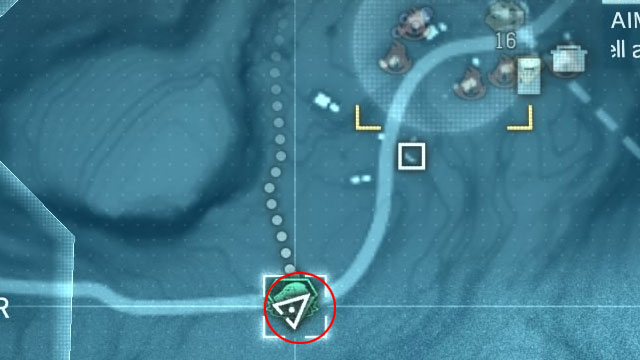
It is best to try and find the escaped prisoner right after you start the mission, or else he may e found by child soldiers and shot. Check out the road Southwards of the village. The initial location of the POW has been shown in the above screenshots but later on, he may go off the road and hide in bushes. It is recommended that you have D-Dog with you, who determines the POWS location from afar.
You should try to complete this hidden mission objective while replaying it, i.e. after you have upgraded the fultoning device, thanks to which you can fulton children also (by default, you cannot do this). Still, if you want to complete this mission the first time around, you need to incapacitate children, one-by-one (it is a good idea to use the sleeping pistol) and carry them over to the Southern landing zone (you can do this faster using the jeep in the village).
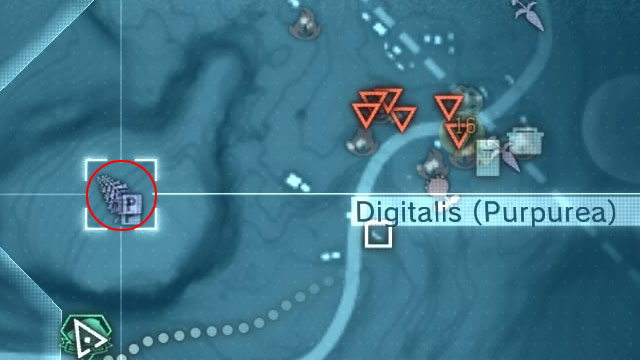
The plant you are looking for is digitalis (purpurea) and it grows on a high hill Westwards of the village. The spot has been marked in the above screenshot.
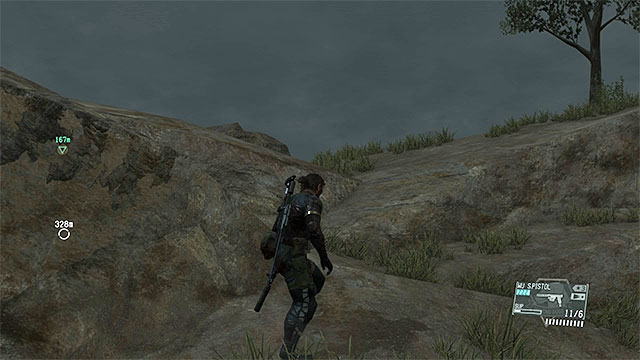 Climb over the rocks
It may be a bit difficult to climb over the rocks - to do this, you need to reach the North-Eastern slope of the hill. Climb onto successive ledges. After you locate the plant, you need to locate all three specimens, because only after you do this, will you complete this mission objective.
The twenty-sixth mission in Metal Gear Solid V consists in locating and neutralizing a trafficker. You can kill this person, but it is better to Fulton him alive with his whole escort to complete optional objectives. It is good to find the trafficker quickly, because when he reaches the northern guard post, approaching him may be more difficult. The optional objectives are not very sophisticated - you need to find a rare type of jackal and rescue several hostages.
Completing this mission at night will allow you to deal with the most important tasks. These are: collecting the intel file and ambushing the trafficker when he is on his way to the camp. You should take D-Horse with you if you want to be sure that you manage to catch the trafficker. When completing the mission the second time, choose D-Dog, which will help you to locate the prisoners and the jackal.
Before starting the mission, check if you have a good silenced weapon with non-lethal ammunition. Having such a gun will make it easier for you to extract the trafficker and his escort.
The map above shows the mission area available to you during the twenty-sixth mission in Metal Gear Solid V entitled Hunting Down. It is best to start this mission near the south-eastern landing site, not far from Ditadi Abandoned Village. You can stop in the village and collect the intel file (number 3 on the map), or head to place from which the trafficker starts travelling right away (number 4). Try to exfiltrate the trafficker before he gets to Kiziba Camp (number 5), because otherwise you won't be able to complete the optional objectives connected with it.
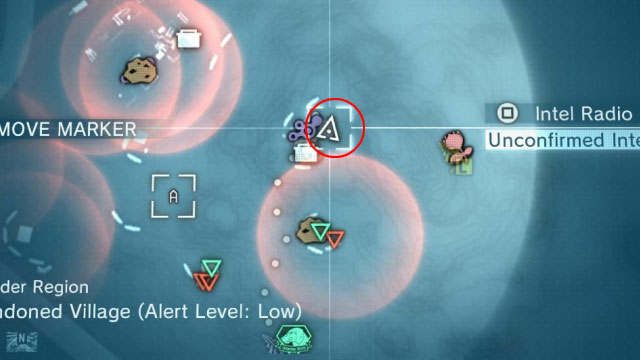
Select the south-eastern landing site as your starting point. After reaching the ground, you can do two different things. The game will suggest you to pinpoint the trafficker's route based on the intel file. It is not necessary to have them, but it's an optional objective in the mission. It is good to complete it, as the trafficker is going on foot and you don't have to hurry.
Head to Ditadi Abandoned Village and start sneaking. You have to reach a tent located on the hill, where you can see the antenna. This place is shown on the picture above. It will be necessary to neutralize two or three enemies here.
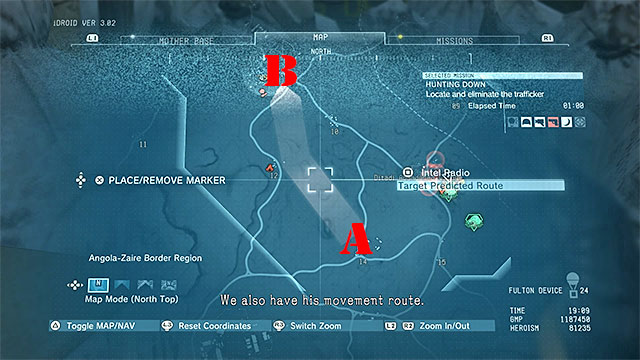
After securing the area around the tent, you can look for the Intel File (picture number 1). After you take them, the trafficker's route will be marked on your map. It is shown on picture number 2. The A point on the picture is the starting point, the B point is the trafficker's destination.
 Identify the trafficker and his escort from a safe distance.
No matter whether you took the intel file or not, you have to head towards the part of the savannah where the trafficker is (it is best to ride on horseback). First, search the starting point (the area to the north of guard post number 14). You can use the binoculars. If you haven't found anyone, move a little to the north-west, towards Kiziba Camp. You need to locate the trafficker and his escort consisting of five soldiers. Make sure that you identify the target from safe distance so that you are not detected.
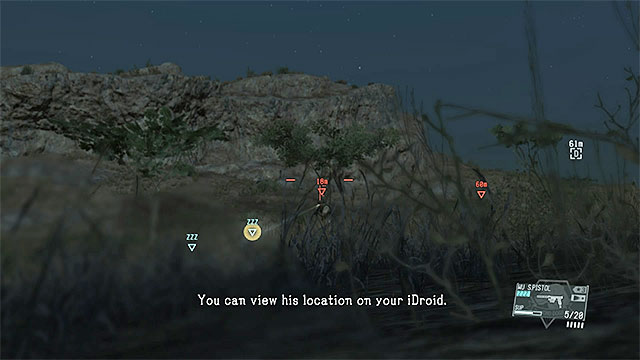 Attack the enemies from behind a cover.
If you want to complete the mission as fast as possible, you can shoot the trafficker or throw a grenade and run away from the attack place. However, a better idea is to knock out the trafficker and the five soldiers, which will allow you to complete an optional objective. Hide in the grass and start shooting at them with non-lethal ammunition. Try to aim at the heads and don't let the enemies see you. When you're done, just Fulton all the opponents to Mother Base.
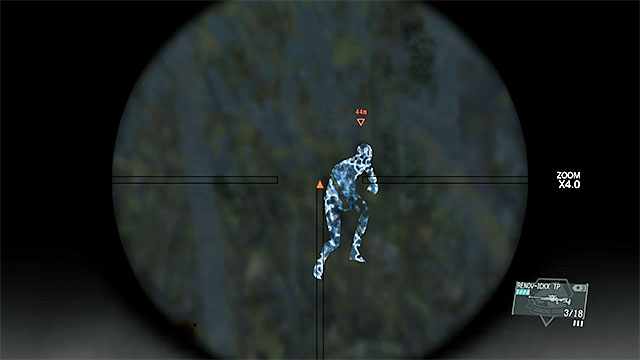 Catch the trafficker if he starts running away.
When you're detected, the trafficker will most probably start escaping. If this happens, you should focus on catching his as quickly as you can (get on your horse if he ran too far already). Remember that you will complete another optional objective if you neutralize the trafficker before he gets Kiziba Camp.
Note - if the trafficker managed to reach his destination despite you chasing him, sneak up to the camp to knock him out and extract him. You can also kill him with a shot from distance.
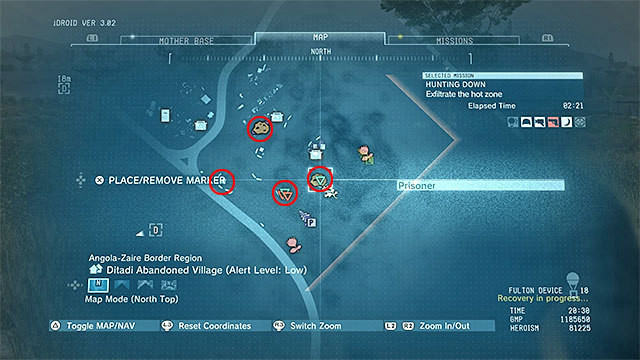
It is good to deal with this task after eliminating the trafficker. Return to Ditadi Abandoned Village, the same one where you found the intel file. The prisoners are in the tents in different parts of the village. You can find them by yourself, use D-Dog to help you or interrogate the guards. You can also use the picture above. Before you rescue a prisoner, check if there are no enemies nearby to make sure that you won't be detected when carrying him out of the tent and Fultoning him.
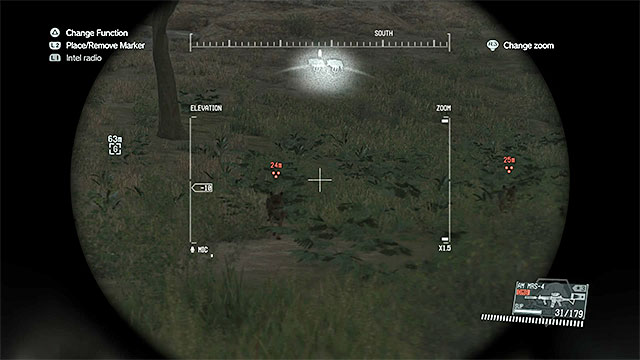
You should deal with this task only after completing the main objective. Look for the animal in the central part of the map, namely, to the south from Kiziba Camp and to the east from guard post number 12 (it is the same place area where the trafficker was travelling). After locating a group of jackals (pictures above), put one of the animals to sleep and Fulton it to Mother Base.
The twenty-seventh mission in Metal Gear Solid V is one of the shortest in the game. Completing all the objectives will take you only a few minutes. It is good to play this mission fast and stick to the plan (more details in the walkthrough), which will allow you to reach the Intel Team Member before he starts escaping in the truck and make the exfiltration more difficult.
It is not necessary to play this mission at night, but if you choose to do so, you will lower the risk of being detected when trying to exfiltrate the ally. It is good to choose D-Dog as your companion, which will help you to locate the main target. You don't have to take any unique equipment with you, because there will be only a few enemies to neutralize at the most.
The map above shows the area available to you during the twenty-seventh mission in Metal Gear Solid V entitled Root Cause. After starting the mission, you should head towards the truck parked at guard post number 07 (number 3 on the map), because the main target will try to use it to escaping. You can use the truck (with the rescued Intel Team Member) to leave the mission area, or you can take one of the jeeps parked nearby (number 4).
It is good to complete this mission exactly as described below, especially considering the fact that it is rather linear. Sticking to the method described in this guide will allow you to complete all three optional objectives and obtain the S rank.
Right after you land, start running towards guard post number 07 located to the north-east from here. Don't try to sneak through the guard post, but instead quickly circle if from the east and then from the north. Your destination is the truck shown on the pictures above, parked in the northern part of the camp. The Intel Team Member, who you have to rescue, is heading its way.
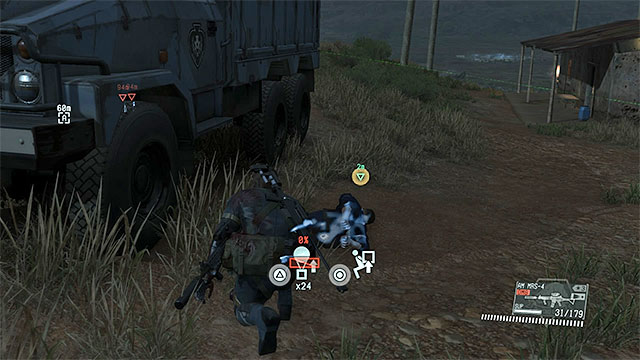 Try to locate and Fulton the ally before he gets into the truck.
The best way to quickly complete this mission is to prevent the Intel Team Member from stealing the truck. If you've managed to do that, go to the description of the best way to extract the character.
If you failed, the target will start escaping using the truck and there are two things that can make the mission much more difficult now. Firstly, the action can alarm your enemies and make them chase the truck. Secondly, your ally will eventually have an accident and will be wounded. If you don't want to start the mission again, try to catch the truck and stop it (shoot at the wheels or block the road) before the accident.
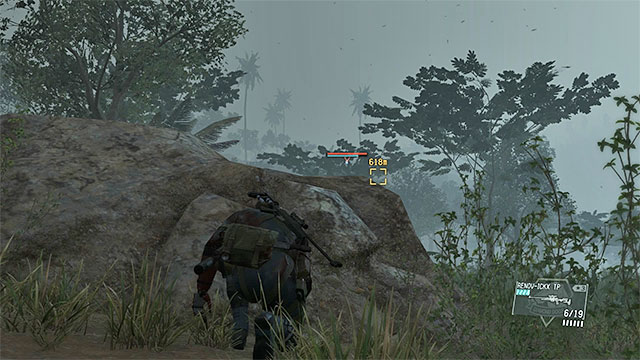 You can steel one of the jeeps.
At the end of the mission, you have to extract the Intel Team Member. Don't summon a helicopter, but leave the mission area using a truck or a jeep instead. You can steal a jeep from guard post number 07 and place your friend inside. Make sure that there are no enemies around before you enter the vehicle.
If you've don everything as described above, you will complete all three objectives (rescuing the ally, preventing the accident and leaving the mission area by land).
The twenty-eighth mission in Metal Gear Solid V consists in finding Code Talker and exfiltrating him. In the first part of the mission, a Skulls squad will try to interrupt you. In the second part, you will have to sneak up to a large mansion. The situation gets complicated at the end, when reinforcements arrive. Good news is that all the optional objectives can be completed when you go to places connected to main objectives.
Playing this mission at night can make it more difficult for you to deal with Skulls. However, it makes the whole next part of the mission easier, because you won't have to worry so much about being detected. You should select Quiet as your companion, who will help you fighting Skulls.
It is good to take the best sniper rifle that you have. Choose regular ammunition if you want to kill the Skulls, or non-lethal ammo if you want to knock them out.
The map above shows the area available to you when playing the twenty-eighth mission in Metal Gear Solid V, entitled Code Talker. When heading to the mansion where Code Talker is (number 5 on the map), you will encounter Skulls female snipers (number 3). No matter of how you choose to end the confrontation, use the narrow paths leading to the mansion (number 4). At the end of the mission, choose one of the evacuation zones (numbers 7 and 8) and consider reaching the APC (number 6) to Fulton it.
Hide behind the rocks and other large covers.After starting the mission, head north-east. Shortly after you enter the foggy area, you will have to fight with a new Skulls squad. This time, it will be four female snipers. You can do two things - either fight the Skulls or leave this territory as fast as you can. The second variant is only good if you don't have a sniper rifle with you or if you want to complete the mission faster.
Using covers is a very important thing. You can use them to plan your next move, to avoid enemy fire or run from one cover to another if you don't want to fight at all and you just want to leave the area quickly.
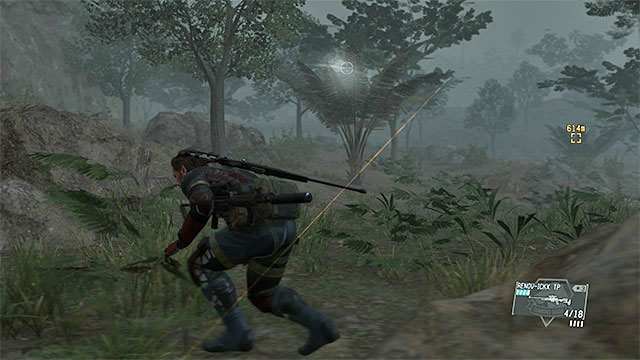 You can spot the snipers by the lasers; use the binoculars as well.
The battle with Skulls snipers is very similar to the fight with Quiet, as they have similar skills. The enemy will stay covered and wait until you come out. You will know that you're in danger when an aim icon shows on your screen. Skulls use sniper rifles with laser aims and you can use this fact to learn their positions. Use the binoculars and follow the laser to spot an enemy. Don't waste your time marking the targets, because the mark will disappear after they use camouflage.
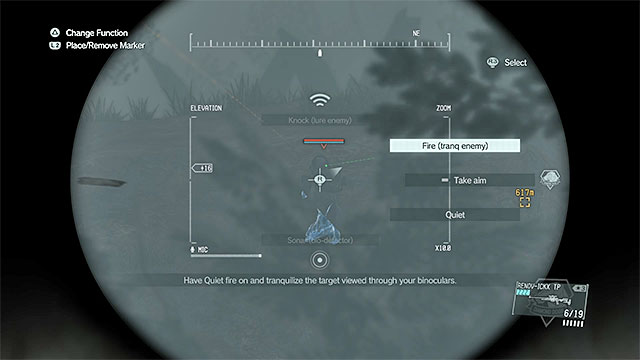 Search for a chance to shoot and use Quiet's support.
The battle with Skulls can be won in two ways. If you want to kill them, you have to bring their hp bar to zero and if you want to knock them out, focus on their stamina bar. In both cases, you should use a sniper rifle (with regular or non-lethal ammo). Every time you hit a sniper, she will move to another position, but she won't regenerate.
If you've selected Quiet as your companion, have her attack the enemies that are difficult for you to reach. However, don't put Quiet to too much risk, because she may take too much damage and be exfiltrated from the mission area.
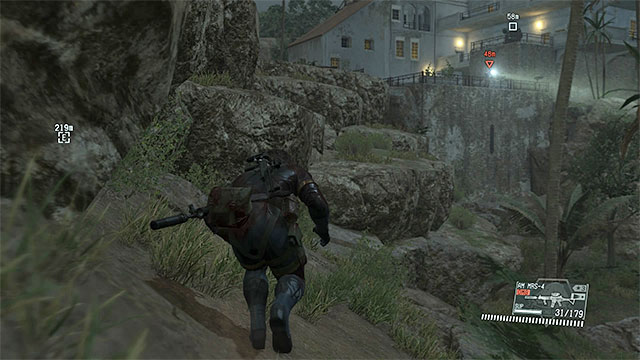 Climb the rocks to the left of the mansion.
No matter how you've chosen to deal with the Skulls situation, you have to go north-east, towards a large mansion located near the east edge of the map. After getting close to it, stick to the paths on the left. You will have to do a little climbing and go past a guard with a searchlight. You can stop for a while after reaching the mansion and do a quick recon to mark the enemies.
Your current task is to get inside the mansion. Don't use the front door, but go the back instead by circling it from the left. There should be 2-3 guards here, but you can sneak up to them (hide behind the walls or crawl) and eliminate them (remember to Fulton them if you knock them out). Locate the back door shown in the picture above.
 The way to the basement.
After entering the mansion, ignore the stairs on the right and go left. Follow the path marked by the candles. It will lead you to the basement. You can proceed through the rooms, because you won't encounter any enemies. In the last room, you will find Code Talker.
 Deal with the guards standing near the exit.
Start carrying Code Talker back to the exit. Don't hurry with leaving the building, because in the meantime, enemy reinforcements have arrived at the back of the mansion. You can use a throwable item to make them go inside and quickly neutralize them, or stand near the exit door and wait for a good moment to ambush them. Don't try to go to the main entrance, because there are enemies there as well.
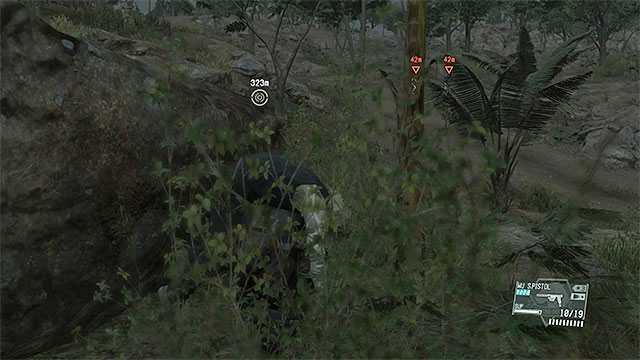 Watch out for enemy patrols on the way.
After securing the back of the mansion, pick up Code Talker once again and choose the exfiltration point. The first one is located near the place where you encountered Skulls. It is not a very good idea to go there, because an enemy gunship may start flying over this area (moreover, if you haven't got rid of the snipers, they will still be there).
It is better to head to the northern landing site. When you go there, try to stay close to the rocks on the left, because the area on the right will be guarded by several two-person patrols. When you meet a patrol, tell Code Talker to lay on the ground and hide in the bushes until the soldiers go past you. If the enemies notice you, quickly use a silenced weapon and Fulton them so that other patrols don't find their bodies.
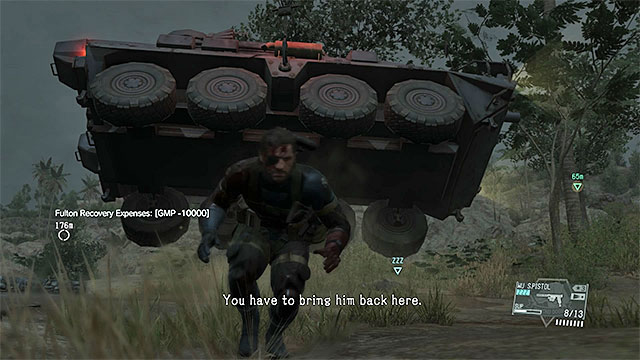 It is best to Fulton the APC.
When close to the northern evacuation point, you will see an APC parked near a bridge. Tell Code Talker to lay on the ground and start crawling towards the vehicle. Neutralize the soldier standing nearby. Approach the APC and Fulton it, completing the optional objective. Note - if you don't have CARGO 2 upgrade and you can't Fulton this machine, go past it from the right or destroy it (for example using C4). If you chose the second option, bare in mind that soldiers will soon arrive.
Now you can reach the landing site. Fortunately, there won't be any new enemies on the other side of the bridge.
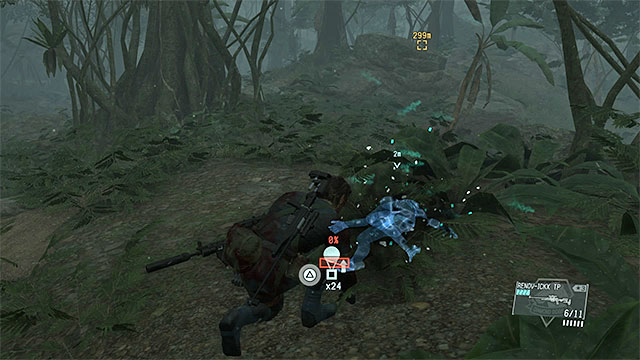 Locate the knock out snipers in the woods and Fulton them.
You can't deal with this task when completing the mission the first time. You can Fulton Skulls only after completing the twenty-ninth mission.
When playing the mission the second time, focus on bringing the Skulls stamina bar to zero. The easiest way to do it is to use a sniper rifle with non-lethal ammunition and give Quiet similar weapon. Don't worry about the snipers getting away from the place when they were attacked, because they will stop in the woods. Use the map to located all the Skulls and Fulton them to Mother Base.
The twenty-ninth mission of the Metal Gear Solid V game is entirely devoted to defeating the new Skulls unit, after the emergency landing with the helicopter. Completing the task can prove to be quite problematic, as the enemies from the Skulls unit are tough, they have a number of additional abilities at their disposal, as well as the control over the personnel of the airport. The good news is that you won't have to keep an eye on the health of the Code Talker, as he won't be harmed in any way, allowing you to focus on the mission to defeat the Skulls.
Choosing the time of the day won't change anything during this mission. As for the companion that will help you fight the Skulls unit, you should definitely take Quiet, as her sniping abilities will make this encounter a lot easier. You should always remember to equip her with the best sniper rifle available at the time.
Big Boss should also bring a sniper rifle for this mission. Take a rocket launcher only if your research team has not yet developed any decent sniper rifle.
 You should mark at least 2 or 3 members of the Skulls unit.
As soon as the mission starts, take out your binoculars and use it to mark at least 2 or 3 members of the Skulls unit, scattered around you (try to do so before they vanish). The biggest merit of this method is the fact, that you will be able to track their movements, even if they change their position after camouflaging themselves. Ignore the infected personnel of the airport, which will be supporting the Skulls unit during this mission and try to prevent them from getting close to Big Boss, or otherwise you will lose the opportunity to complete one of the secondary missions (keep your distance from them and use sprint to get away if they get too close).
Before you take on the Skulls, you should find a proper place to attack them from. My recommendation is to get to the building marked on the first screenshot above, located in the area of the Nova Braga Airport, which can be found by going South from your starting location. Search for the ladder leading to the roof (the second screenshot) and use it to get there.
 Abuse the fact that enemies will try to (without any success) reach the roof of the building.
The main advantage of the selection of that specific building, is the fact that enemies won't be able to get to its roof. This also applies to the members of the Skulls unit, who won't be able to teleport on the roof, and in the worst case will just stand by near the ladder. You can, obviously, use that fact to your advantage - you can lean out a little bit to send a quick series of shots, or just simply throw them a couple of grenades.
Remember - if you run out of ammo, you can call in the supply drop and select the roof of the building you are standing on as the drop zone. This way you will avoid any unnecessary risk of getting injured or grabbed by the personnel of the airport, as you won't have to leave the roof at all.
 Focus on eliminating the members of the Skulls unit one by one, and start from getting rid of their armor.
As it was already mentioned, you must focus solely on the elimination of the four members of the Skulls unit. To accomplish this, it's best to use the sniper rifle, and your companion (preferably Quiet) should use the same weapon as well. You can either let Quiet decide her next target, or pick them for her (the latter can only be accomplished if you've developed your relationship with her to a certain extent and you are able to issue advanced commands for her).
The biggest difficulty of this encounter is the fact, that every member of the Skulls unit has an additional armor, which can be distinguished by a pinkish energy bar (instead of a red one). It means, that you will have to first get rid of the protection, and only then you will be able to injure the enemy. Their armors can regenerate over time, which is why you should fight them one by one, so that you won't waste any ammo, and you will be able to achieve victory earlier. If you've done everything according to my suggestions and you've marked your enemies at the beginning of the mission, you will be able to easily track movements of each one of them, preventing them from regenerating their armor.
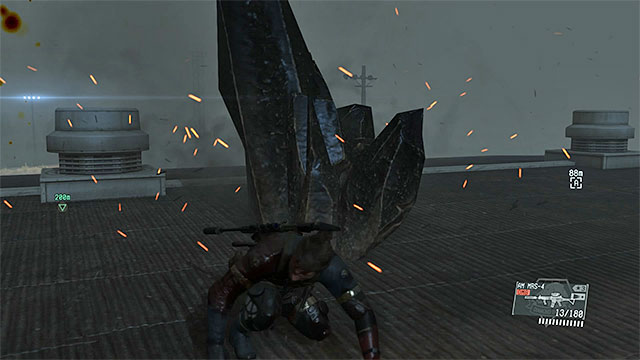 Watch out for their attacks.
During the encounter with the Skulls unit, you must, obviously, reckon with the fact that they will constantly shoot at the main character. You must be extra careful about their additional attacks, in which they are able to produce a stone, spire-like objects. They can then toss them in your direction, but they are relatively easy to avoid, as you only have to jump to the side. The bigger problem is a sudden materialization of the said spire-like object right next to the main character (it can happen even if you are stationed on the roof of the building). When it happens, you must get away from it as quickly as possible, as it will explode after a couple of seconds, seriously injuring, or even killing Big Boss in the process.
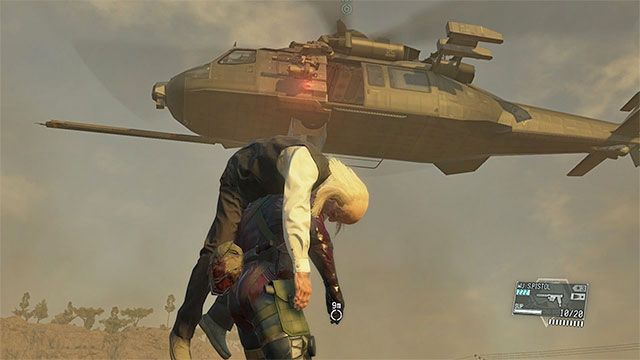 Take Code Talker to the helicopter.
You must continue the encounter until all four members of the Skulls unit are down. It will automatically end the fight (you don't have to worry about the infected personnel of the airport anymore). Get back to the helicopter wreckage, pick up Code Talker lying on the ground and take him to the new chopper, that just arrived in the area.
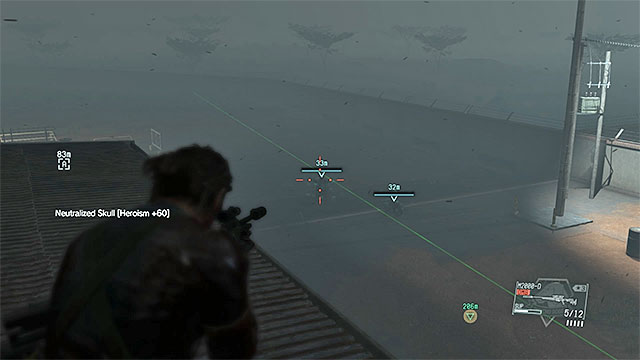 Get to the incapacitated Skulls and fulton them.
You can't accomplish this secondary objective during the first playthrough, as the main character is unable to extract Skulls during this mission. As this ability is unlocked just as you finish the twenty-ninth mission, you can just repeat it as soon as you complete it for the first time.
Members of the Skulls unit can be attacked with any equipment, even the one that allows you to drain their health bars (such as the sniper rifle, rocket launcher, grenades, etc.). After you've defeated a member of the Skulls unit, he will drop on the ground and lose consciousness. You can then go to the enemy (if the area is secure, that is) and fulton him.
The thirtieth mission of the Metal Gear Solid V is one of the most challenging in the game. The main task is to get to the other side of the base, where the Skull Face is located. There will be numerous obstacles on your way, such as significant enemy forces, especially given the fact, that besides normal soldiers, you will have to face enemy snipers, walker gears, as well as a helicopter flying over the base. Secondary tasks are almost entirely associated with fultoning enemy equipment. The only exception is the task to retrieve the cassette tape located in the base.
Completing this mission during nighttime is highly recommended, as it focuses heavily on stealth, which will be severely hampered if the enemies have access to a wider field of view. As for your companion, you should choose D-Dog, which will be able to mark your enemies in advance, decreasing the likelihood of making a big mistake. Additionally, he will be able to detect landmines located near the starting location.
There should be a decent sniper rifle at Big Boss' disposal during this mission. It can be used to quietly eliminate enemy snipers, as well as the operators of Walker Gears. Despite the fact, that there will be a helicopter patrolling the area, refrain from taking and using a rocket launcher to shoot it down, as it will alarm the whole base.
The two map visible on the above screenshot represent the area available to you when playing the thirtieth mission in the Metal Gear Solid V, entitled Skull Face. The first map shows the area from a wider perspective - you start off in the South-Western corner (point 1 on the map) and you have to get to the helicopter landing pad in the North-Eastern section of the OKB Zero base (point 3 on the map).
The second map offers a more detailed overview of the enemy base. During your march to the North-Easter section, you have to go through subsequent gates (points 6, 10 and 14 on the map) or use the alternative approach, focusing on getting there through the base walls (points 7, 11 and 15 on the map). During your journey you must watch out for enemy snipers (points 5, 8 and 16 on the map), as well as for the mine field (point 4 on the map). Don't forget about the secondary mission objectives, such as fultoning enemy tanks (points 9, 13 and 17), as well as the acquisition of the cassette tape (point 18 on the map).
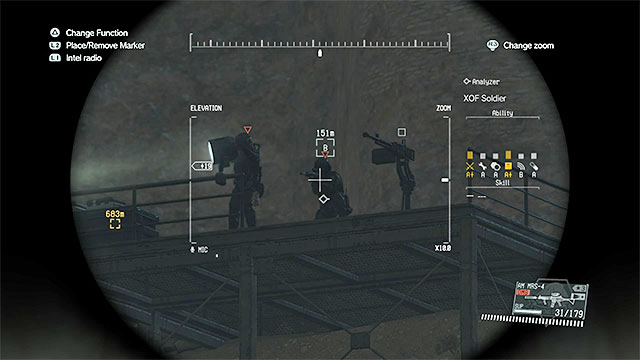 The first sniper is located on the balcony, next to a searchlight.
As soon as you land, head towards the OKB Zero base. Don't slow down after reaching the guard post 01, as there are no enemies here. When you get closer to the base, you should stop running and start moving in a prone position, as well as be sure to make good use of the terrain to hide (tall grass, rocks, etc.). You should be extra careful about the first sniper, located on a metal balcony, next to a searchlight. He can locate Big Boss from a vast distance, even during the night time.
 Avoid mines.
Don't attack the sniper, as it will alert the nearby enemies. Instead, start moving in a prone position towards the base. It's best to remain to the left of the main route. Unfortunately for you, the nearby area is filled with land mines, so you have to make sure to avoid them all. D-Dog will help you locate them. You should move at least several meters away from them, so that the risk of detonating any (and alerting the enemy to your position) is reduced to the minimum.
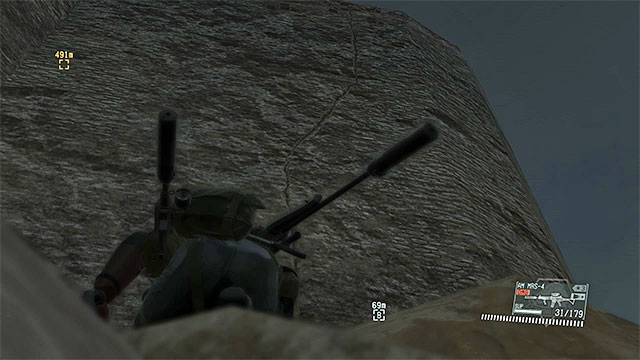
You can get to the base by using two different methods. Going through the main gate isn't the best idea, as the area there is well lit, and there's at least one Walker Gear patrolling the area. The best idea is to locate the wall, that can be climbed, which can be found to the left of the gate (as shown on the above screenshot). Using this method will allow you to get to the base without getting spotted.
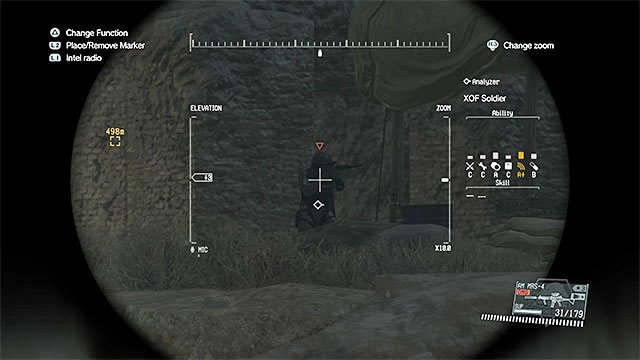 The second sniper.
The first thing that should be done after getting to the OKB Zero base is to locate the second enemy wielding a sniper rifle. That foe can be found right next to the wall on the right side. If you have access to your own sniper rifle, use it to eliminate the enemy as soon as you have the opportunity. If, for some reason, that's not possible, you will have to sneak by the enemy very carefully, avoiding sections of the map that are better lit, reducing the danger of being spotted.
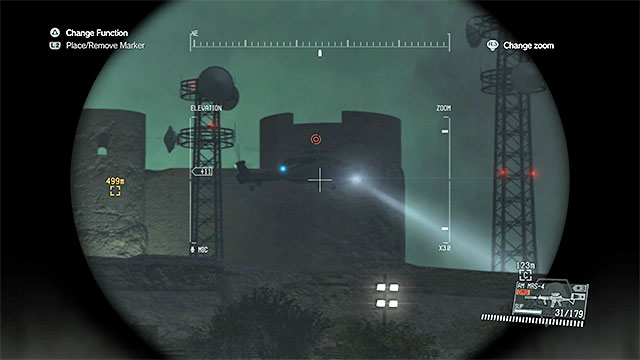 Avoid the enemy helicopter throughout the whole mission.
During your march through the enemy base, you should remember about a couple of things other than the enemy sniper. There will be a helicopter flying around the base all the time, and you have to do whatever it takes to remain hidden from the machine crew. If they manage to locate you and aim their searchlight over your position, quickly lie on the ground, use the sneak mode and don't move until the helicopter flies away. Additionally, watch out for the two-man patrol squads, which, obviously, are quite a challenge to eliminate, the new Walker Gears patrolling around the main route, as well as the enemies that are using searchlights to illuminate the area. Searchlight can be easily avoided - you must simply wait for the soldier to direct it in another direction.
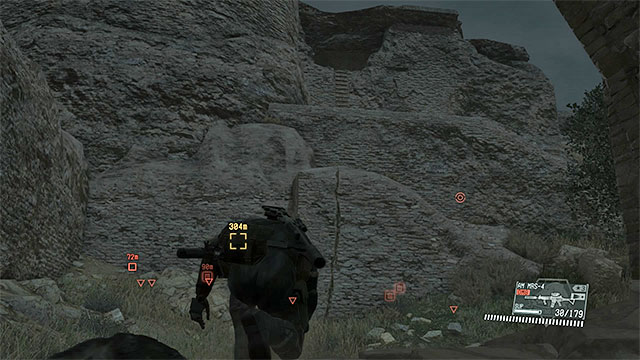 Another wall that can be climbed..
Just like the last time, there are two routes leading to the second section of the enemy base. Going through the gate is an extremely bad choice, as there's a high chance of being detected by enemy Walker Gears, as well as the helicopter patrolling the sky. Check the area to the left of the gate, and you should be able to locate the wall that can be climbed, which will get you to the further section of the base without the risk of being detected.
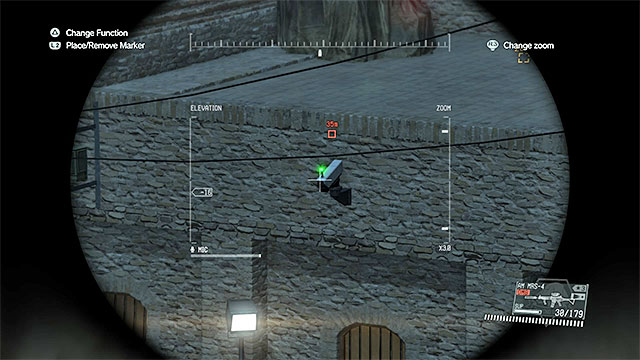 There's a novelty in the section of the enemy base - surveillance cameras.
The second section of the enemy base is an area you should be more careful while moving in - it's a lot smaller, which means that the enemies are more densely deployed. Use D-Dog to perform reconnaissance and pay attention to the enemies located on the upper walls, as they are able to detect Big Boss from a greater distance. The main novelty of this part of the base are surveillance cameras. You must avoid getting in their vision at all costs, as well as refrain from destroying them, as every attempt of doing so will alert enemies, who will go check why they suddenly have no vision.
 A ladder, leading to the upper walls of the base.
This section of the map yet again gives you to the choice of whether to get through the main gate, or to look for an alternative approach. Just like before, the latter solution is the better one. Focus on the walls on the left from the gate and locate a ladder, which will allow you to get to the top of the said walls. Don't rush, as there's a high chance of enemies patrolling the nearby area. Distract them, or simply wait for them to move away before climbing the ladder all the way to the top. After getting to the upper walls, use the passageway leading to the third and final section of the enemy base.
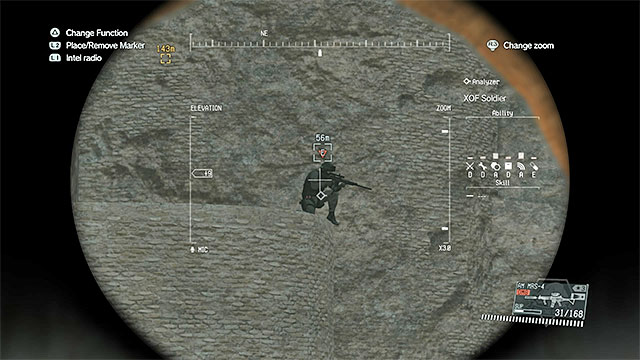 The last sniper.
You are very close to your mission destination, but you shouldn't rush, as there's another (fortunately the last one) sniper nearby. The soldier can be found on one of the vantage points, located to the left of the gate. You can either take him out from a distance, as well as sneak up on him from the flank. After you've dealt with him, check the area below you and make sure that there are no Walker Gears there, as well as if the enemy helicopter isn't nearby. When both of those conditions are met, you should head towards the main entrance of the base.
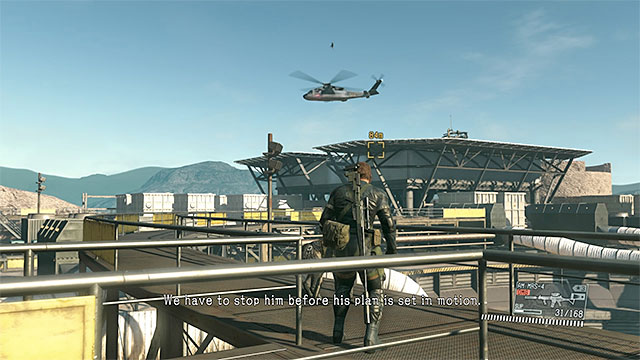 Your destination - helicopter landing pad.
The final part of the mission is trivial, because there are no enemies in the area anymore. After getting to the mains section of the enemy base, ignore the elevator shaft and use the nearby stairs, which will get you to the upper floor. From here you have to head towards the helicopter landing pad, where the Skull Face awaits. After getting there, a partially interactive scene will begin, during which you must make sure that Big Boss follows Skull Face and gets into the jeep.
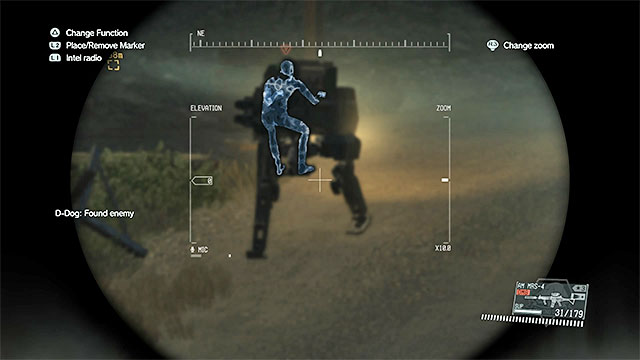 Get rid of the operators of Walker gears by any means necessary.
You can extract Walker Gears during your first playthrough of this mission, provided that you have access (completed) the CARGO 2 upgrade, which is required to do so (as well as the money needed to extract those machines). Three out of four Walker Gears are used by enemies to patrol the OKB Zero base. Before you even attempt to steal enemy machines, you should first make sure to get rid of all the enemies in the area, and then eliminate the person controlling the walker gear itself (by using a scoped rifle to kill the operator, or by sneaking behind the machine and throwing him out of it).
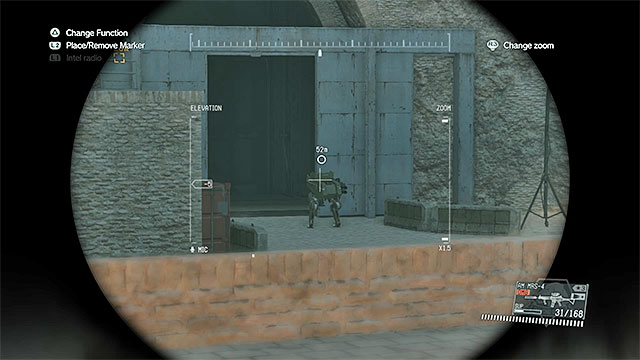 The last Walker Gear.
The last Walker Gear, this time unmanned, should be standing near the main entrance to the enemy base, behind the third gate.
Note - if you eliminated the operator of a Walker Gear in a place, in which fultoning is impossible, simply get inside and move it to the area in which you can perform the extraction.
 Don't rush to the helicopter landing pad, but instead choose the stairs located on the left side.
You can search for the cassette tape at the very end of the mission. After getting to the main section of the OKB Zero base, use the stairs and get closer to the helicopter landing pad, where Skull Face can be found. Don't go there, however, and locate the staircase on the left side, which lead to another platform located below you.
Get to the place with an inactive cargo elevator. You are now at the location of the radio, with the Cassette Tape (Cassette Tape - Heavens Divide) hidden inside - this place is marked on the above screenshot.
You can complete the task of extracting seven red containers with resources during your first playthrough of the mission (remember, that the CARGO 2 upgrade, as well as an access to 70,000 GMP is required to do so!). They are hidden in two separate parts of the OKB Zero base. Four of them can be found after going through the second gate, to the right from the main route (which can be seen on the above screenshot).
The remaining three containers can be found after getting to the final section of the base, right after you get through the third gate. Their locations can be checked on the above screenshot.
Tanks, similar to containers, as well as Walker Gears, can be found and fultoned during your first playthrough of the mission. The whole process is made easier because of the fact, that those tanks are unmanned, meaning that you won't have to worry about being detected by the crew. The first tank can be found to the right of the main route, just after getting through the first gate and entering the OKB Zero base (the above screenshot)
The second can be found soon after going through the second gate. It's located near the place with the third gate (the above screenshot).
The third and final tank is parked in the last section of the base, which you will arrive at after going through the third gate. There are red containers near it, and its located has been marked on the above screenshot.
Thirty-first mission of the Metal Gear Solid V is the last one completed during the first chapter of the campaign. According to the title of the mission, your main task during this mission is to defeat a huge combat mech called Sahelanthropus. The encounter itself will last for a couple of minutes and you should prepare for it beforehand (details can be found below), as the hull of the mech can take quite a lot of damage, and the enemy will have access to numerous powerful attacks.
The mission can be played during any time of the day. If you've invested a lot of funds into your own Walker Gear, you can take it with you on this mission. Mount a rocket launcher, or a gatling gun on the D-Walker. If you haven't invested in your Walker Gear and you feel that it won't help you that much, you should take Quiet with you, while equipping her with the best available weapon.
The primary weapon of Big Boss should be a powerful assault rifle, and, especially, a rocket launcher. If you have access to a number of rocket launchers, you should take the one with the highest damage potential (precision of the weapon is the least of your concerns during this mission).
Note - Before you start the 31st mission, make sure that you have access to at least 100,000 GMP on your account, as you will have to call in the supply drop during the encounter numerous times, and those drops aren't free.
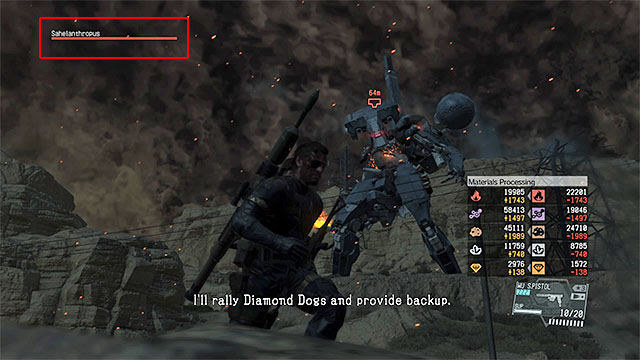 Sahelanthropus' health bar can be found in the upper left corner of the screen.
Mission 31 of the Metal Gear Solid V game is entirely devoted to the encounter with the Sahelanthropus. The huge mech must be defeat in direct combat. You have to, practically, do this on your own, without any backup, as the helicopter with your allies on the deck will appear on the battlefield only from time to time, helping you only a little bit.
The Sahelanthropus' health bar can be seen in the upper left corner of the screen, and your main task is to, obviously, deplete it. Don't worry that the process will take a long time, as the enemy is heavily armored, and achieving success over the mech will take several minutes at the very least. A thing worth noting is the fact, that during the whole encounter there won't be any checkpoints, so if you die during it, you will have to start over from the very beginning of the fight. It's a good idea to remember about that fact and to not take unnecessary risks, and regenerate Big Boss' health in a safe place each time you sustain serious injuries (more on that topic can be found in the further part of this section).
The following pages will describe main attacks of the Sahelanthropus, as well as the suggested tactics which should be most effective against the enemy.
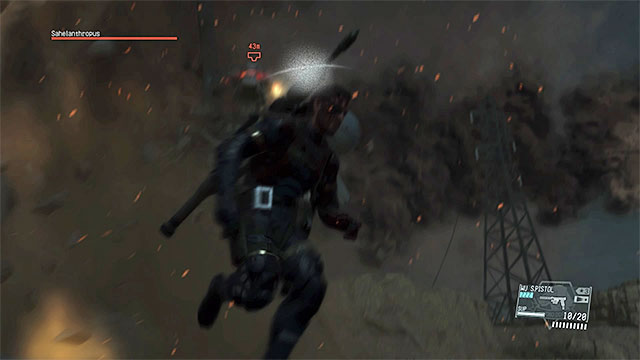 Sahelanthropus' machine guns won't do much damage to you.
Sahelanthropus has access to a wide range of different attacks. Knowing and understanding its main attacks and behaviors will make the whole encounter a lot easier. The least dangerous and the weakest attack of the enemy is done with the machineguns. You can avoid it in order to not get hit simply by running around the map, or by hiding behind rocks, but even if you do get hit you won't lose a lot of health at once.
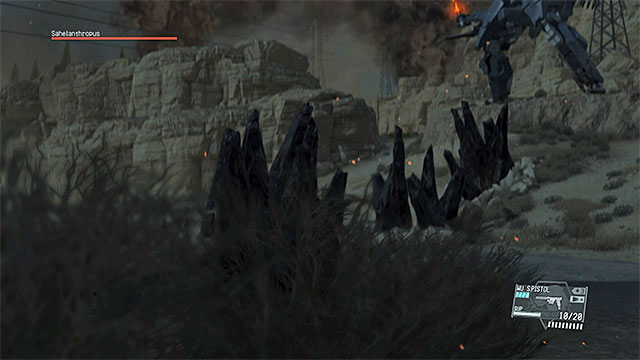
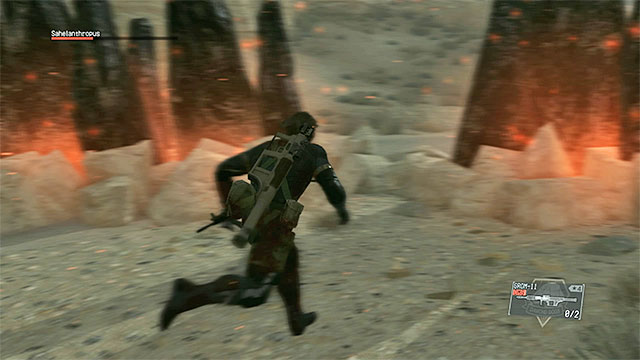
A lot more dangerous from the typically used attacks of the boss is the one, which is associated with the sword-like weapon. From time to time, Sahelanthropus will strike the ground with its sword, and after a short while numerous stone needle-like objects will emerge from the ground (screenshot 1). Additionally, the attack has a second version, in which the main character is suddenly surrounded by the same needle-like objects, which traps him inside (screenshot 2). In both cases the best defense against them is to simply outrun them by using sprint, which should reduce the likelihood of getting injured, or trapped inside the needle circle. However, if you still get trapped by the objects, you can quickly destroy a number of them with the help of grenades, or a rocket launcher, but it must be as quickly as possible, before the needle-like objects explode.
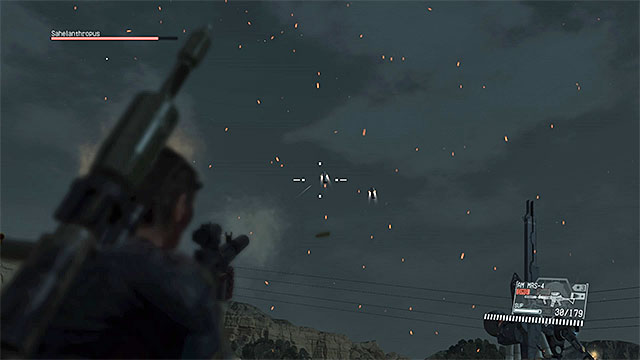 You can either destroy rockers and drones, or simply hide from them.
Another group of attacks of the Sahelanthropus is associated with the mech firing a barrage of homing rockets, as well as white drones. In both cases you can react in two different ways - you can either use your assault rifle to destroy the rockets / drones, or hide behind the nearest rocks, hoping that it will be enough of a cover to protect the main character from the enemy fire. Simply running away won't be much of a help this time.
 Avoid getting the main character on fire at all costs.
One of the rarest attacks of the Sahelanthropus is the one done with the flame thrower. The boss can decide to use this maneuver if you stay for a longer period of time near its vicinity, and this attack means trouble, as the main character can be simply set on fire. If it happened, quickly drop to the ground, which should reduce the effects of the attack a little bit.
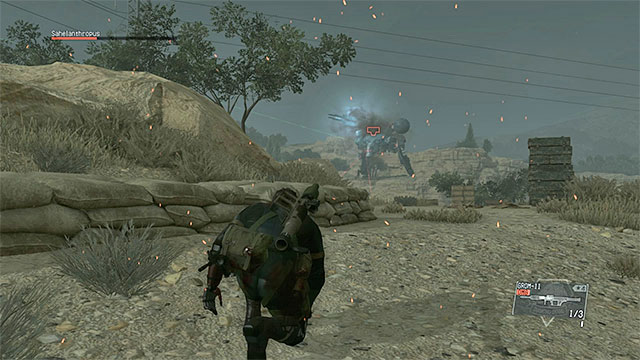 Laser attacks of the mech are extremely dangerous.
Another rare weapon that Sahelanthropus uses is the laser, and it is mainly because those attacks are characterized by extremely high amount of damage dealt. If you notice the enemy preparing for this attack, you should cease your attacks and focus on keeping Big Boss alive. Move away from places marked by smaller lasers, because those places will soon be attacked. Run around the map and refrain from hiding behind covers, as they will be easily destroyed by the lasers.
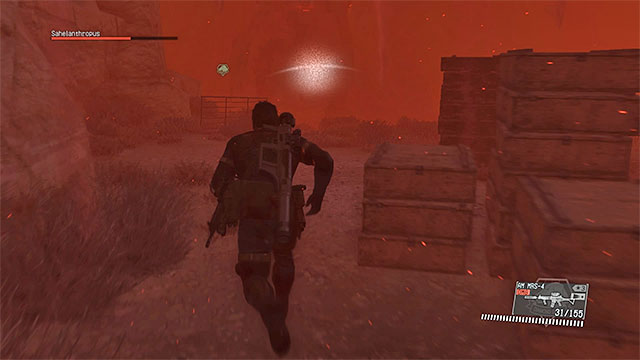 You can use goggles, or wait until the fog clears.
The last ability of the Sahelanthropus isn't an offensive one, but can severely hinder your ability to continue the encounter. The mech is able to fill the nearby area with a red fog, which significantly reduces your visibility. If you have night-vision goggles at your disposal, and you don't want to pause the battle, you can equip them. Otherwise you should just use that time to regain your health, or to get to a supply drop. The fog should clear after several seconds.
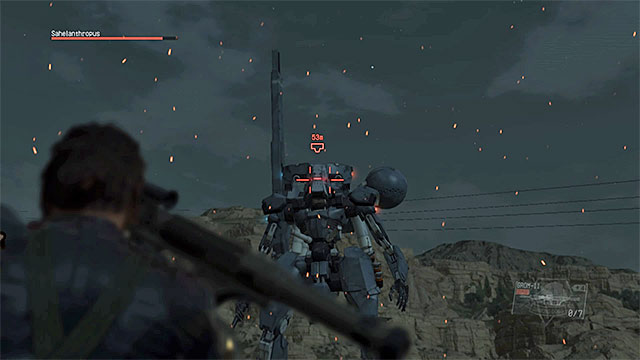 Focus on destroying the Sahelanthropus' head.
During the first phase of the encounter with the Sahelanthropus, you should be mainly using your rocket launcher. Swap your weapon for the assault rifle only when you've noticed that the enemy sent a barrage of rockets, or its drones towards you, which should be taken down as quickly as possible.
From the very beginning of the encounter, you should just focus on firing rockets at the boss' head. The reason for this is quite simple - destroying its head is associated with the secondary objective of this mission, and it (destroying the head) can be done even before the encounter ends. After the head is destroyed, you can aim at whatever part of its body you feel like, with the only exception when the boss is preparing to use its sword. When that happens, aim for the weak spot located on the enemy's chest, which is exposed for a short time when it raises its sword. Use every single occasion to send rockets at that location, but don't use more than 1 or 2 at a time, as shortly after the enemy raises its sword, numerous stone, needle-like objects will appear near your character, and you should focus on avoiding contact with them.
 Hide behind rocks whenever you have a need to regain health.
During the encounter with the Sahelanthropus, it's crucial to keep a safe distance from the enemy, so just keep in motion and react as soon as you notice that the boss is trying to get closer to your position. Another important aspect which should be monitored constantly is the health of your own character - as it was mentioned earlier, during this encounter you won't have access to any checkpoints. When the character is severely injured, gain some extra distance to the boss and look for a place to hide, such as behind rocks. Wait for the energy to regenerate completely and only then you are to resume the battle.
Note - Select only the tallest and biggest rocks, and don't stay there for too long, as some of the boss' attacks (such as the needle-like objects) can reach you even if you are well hidden.
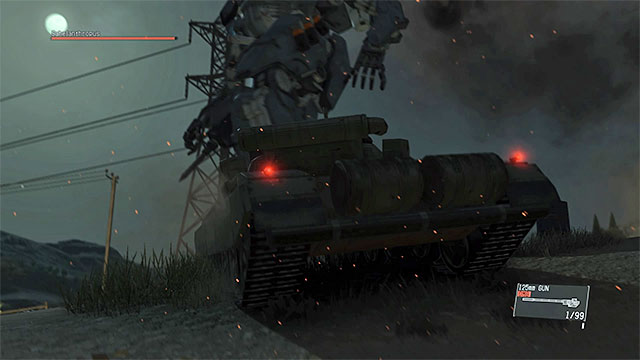 There's a number of military machines scattered around the area.
To attack Sahelanthropus, you shouldn't focus only on your rocket launcher, but on military machines scattered around the area - tanks and armored vehicles. This method has its merits, as well as flaws. The biggest advantage is that military machines have good firepower. The bad thing is that they are extremely slow, which not only endangers you when the enemy attacks, but makes firing at the boss quite problematic. Additionally, you can get trapped inside, unable to jump out of the vehicle quickly enough before it explodes from the enemy's attacks.
If you were able to take D-Walker with you on the mission, you should certainly use it. Walker Gear has a lot better mobility in comparison to normal vehicles, and it makes it a lot more effective against the enemy, allowing you to continue your barrages without worrying that the character will be trapped inside.
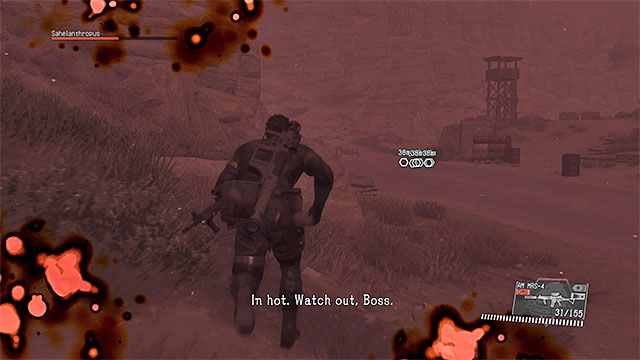 You can order supply drops personally, or wait for your allies to do it.
Given the fact, that the Sahelanthropus is extremely durable, you won't be able to defeat it on with your starting gear. Fortunately for you, this mission allows you to call in the supply drops. By default, a supply drop is performed each time you completely empty one of your main weapons' ammo reserves (if you, for instance, use all of your rockets for your launcher). If you want to, you can order it in advance, but if you want to do it, you must first find a remotely secure place, so that you can use your iDroid device.
Note - Supply drops will appear on the map only if you have access to the appropriate amount of money (GMP) to pay them. It's because of this that I advised that before you even think about going on this mission, you should accumulate at least 100,000 GMP (it should be a sufficient amount for this mission).
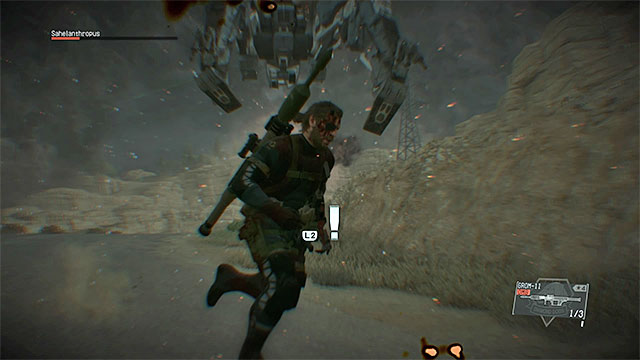 When the boss performs the jump, the time will slow down.
You will advance to the second phase of the Sahelanthropus encounter when the boss is left with about 1/4 of its total health. The enemy, aside from using the previously described attacks, will start performing huge leaps (jumps). If the boss performs such a jump when the main character is in close vicinity, a slow motion effect will become active, giving you enough time to react to the attack (it will happen even if you turned off the Reflex Mode in the options).
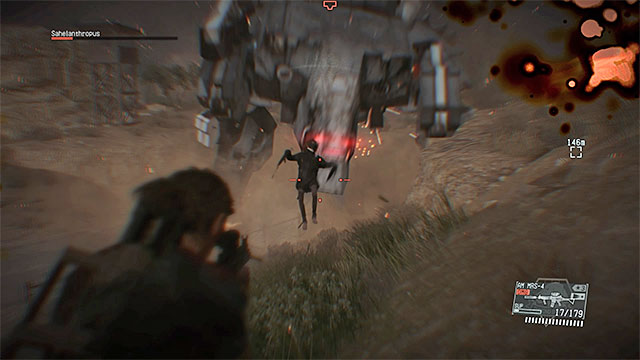
When the slow-motion happens, don't attack Sahelanthropus immediately. Instead, wait for the Floating Boy to appear next to the boss, with which you should certainly be familiar already from your previous encounters. Attack the boy with your assault rifle, or with the rocket launcher.
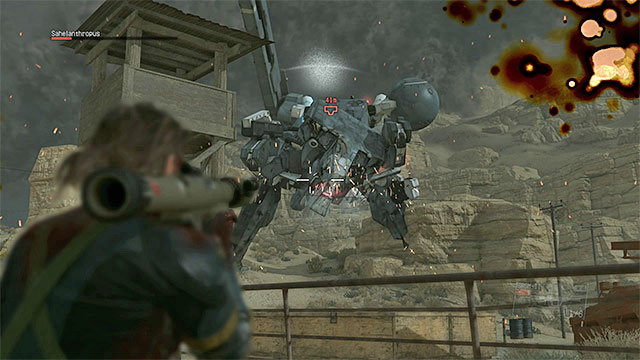 Attack the stunned Sahelanthropus.
If you manager to hit the Floating Boy before he teleports into another place, you will complete the secondary objective, which will also "stun" Sahelanthropus for a few seconds. Use the fact that the boss is vulnerable and send 2 or 3 rockets towards it.
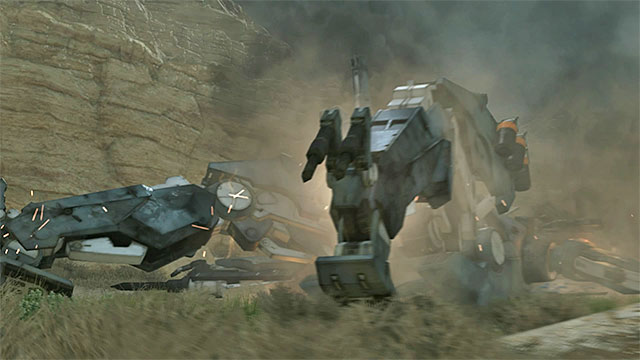 Defeating the boss ends the mission.
Complete all the activities described in this chapter until the Sahelanthropus is left with its energy bar empty. Defeating it will end the mission, and you will complete the first chapter of the campaign.
The thirty-second mission in Metal Gear Solid V is the one in which the second, extra chapter of the main campaign begins. Aside from optional objectives, the mission consists in locating and rescuing a CIA agent and you can do it either while he is still hiding on the desert, or after he's been transported to the ruins of the palace (the task is more difficult then). There are also optional objectives to complete - you can exfiltrate the search team members, rescue two other prisoners, extract a jeep driver and stop the attempt to murder the CIA agent.
The best time to play this mission is at night. When completing the mission for the first time (if you want to obtain the S rank) take D-Horse with you, which will allow you to reach the CIA agent long before the search team arrives. When completing the mission for the second time however, you can choose D-Dog, because it will be easier for you to locate the prisoners and members of the search team.
If you can, take a sniper rifle with you, with non-lethal ammunition. This will allow you to neutralize the soldiers in Walker Gears and the murderer with no trouble. Moreover, you should equip yourself in stealth suit, because it is easier for the enemy to detect you on the desert than on mountainous territory.
The map above shows the area available to you when playing the thirty-second main mission in Metal Gear Solid V, entitled To Know Too Much. Right after you start the mission, you should head to the place shown by the game (number 3 on the map). It is the location of the CIA agent. If you fail to rescue the target in time, he will be transported to Lamar Khaate Palace (number 4) and it will be more difficult for you to free him from there. There are several optional objectives to complete in the palace. Moreover, you can visit Da Shago Kallai (number 5 on the map), where you will find one of the other prisoners (do it before you exfiltrate the CIA agent, because later the mission area will get smaller!).
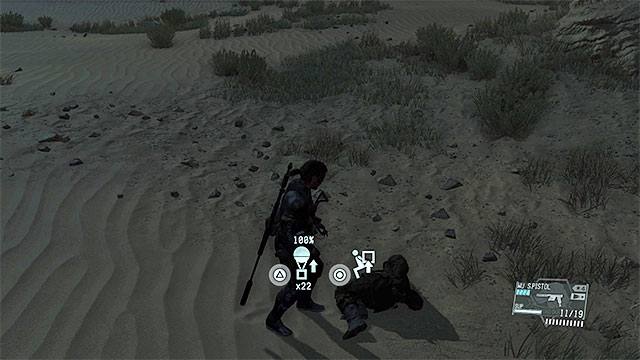
As soon as you land, head to the place shown on the map (it is best to do it on horseback). It is located several hundred meters to the north-west from the starting point. You should hurry, because rescuing the CIA agent at the beginning will allow you to complete the mission quickly and without any trouble. The agent is hiding on the desert and his location is shown in the picture above. When you find him, Fulton him as quickly as you can. You will complete the main objective and also one of the optional ones (rescuing the agent before the enemy finds him). You can summon a helicopter now or leave the mission area to complete it.
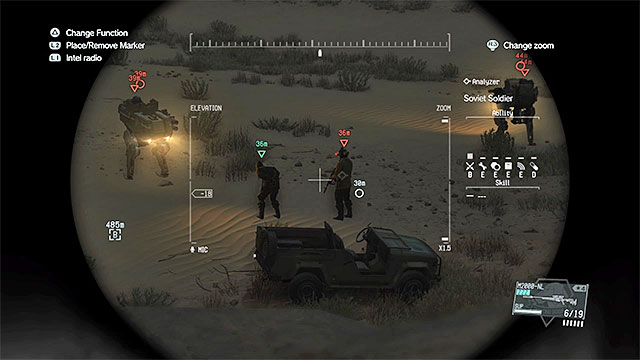 A jeep will come for the agent and he will be transported to Lamar Khaate Palace.
If you fail to rescue to CIA agent on time, things will get complicated. The area around the agent is searched by four enemies with Walker Gears. After about a minute, they will find him. The enemies will circle him and call for transport to Lamar Khaate Palace. Then, a jeep will arrive and the prisoner will be put inside. If you don't want to wait, you can quickly neutralize the soldiers with Walker Gears (use a sniper rifle and aim for their heads or sneak up to them from behind and throw them off the machines), but it is quite risky. You can also try to stop the jeep, but bare in mind that all the Walker Gears will escort him.
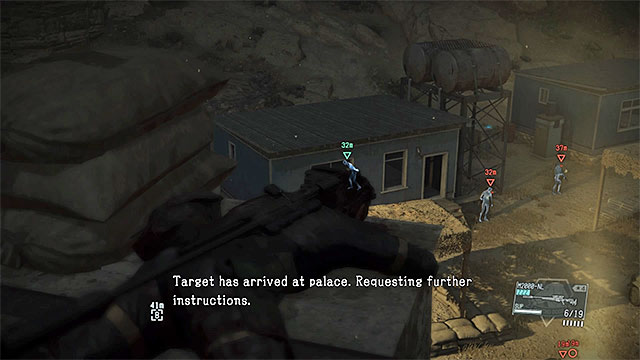
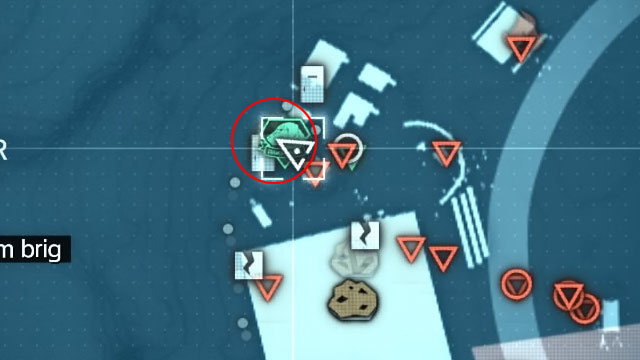
The CIA agent will be transported to Lamar Khaate Palace and put in a building shown in the pictures above. It is your last chance to rescue this character, because after another minute or so, one of Soviet soldiers will try to murder the agent (there is a hidden objective connected to this event, described on the next page). The death of the CIA agent means failing the mission. You can eliminate the enemies around the building (unfortunately, at least one of them has heavy armor), or distract them by sabotaging the generator or throwing items. Lastly, you need to carry the agent out of the building and send him to Mother Base.
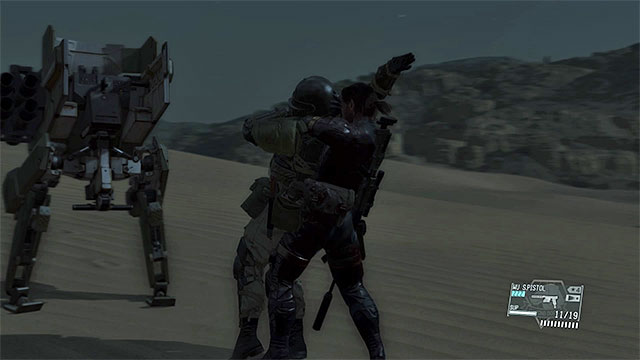 You can sneak to the Walker Gears from behind and throw the operators off.
By default, the search team is located on the desert. It consists of four soldiers with Walker Gears trying to find the CIA agent. You can neutralize the enemies before they find him, using a sniper rifle with non-lethal ammunition and aiming for the heads (a better option), or by sneaking up to them from behind and throwing the operators off the machines. Try not to alarm the opponents, because during the fight, people who you've already knocked out and are waiting to be Fultoned may be killed.
Note - if the soldiers find the CIA agent, they will escort him to Lamar Khaate Palace. You can try to extract them when this happens, but it will be much more difficult of course.
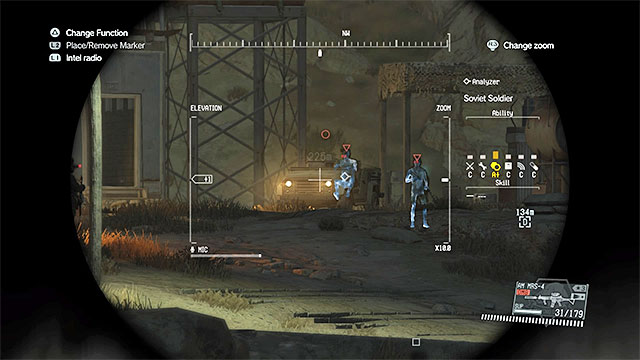 The jeep parked near the palace.
You can complete this objective when playing the mission for the first time or when repeating it. By default, the jeep is parked near Lamar Khaate Palace. Reaching its driver there is more difficult, but not impossible.
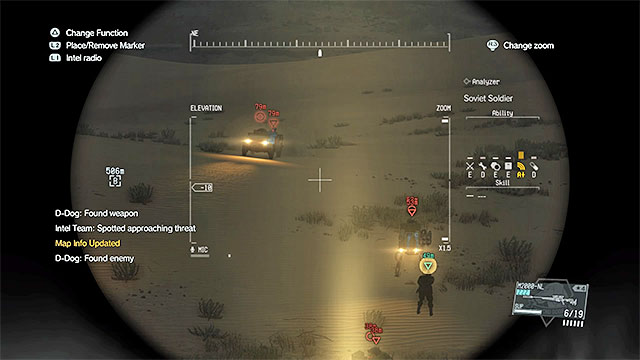 The jeep when heading for the CIA agent.
After the CIA agent is found, the jeep will head to his location. It is the best moment to stop the vehicle and extract the driver (place any kind obstacle on its way).
Note - if you failed to stop the jeep before it reached the agent, you still have a chance to complete this objective. When the agent is in the jeep, the driver will head back to the palace and he will stay there.
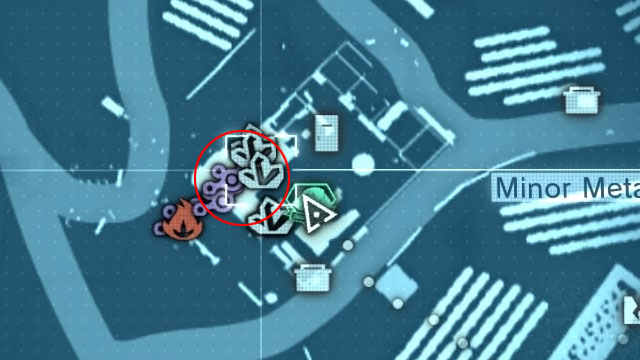
The best time to rescue the two prisoners is when repeating the mission. Head to the location of the first prisoner right after the mission starts (ignore the CIA agent). You have to reach Da Shago Kallai. Start sneaking towards the central part of the village. The prisoner is held on the ground floor of the main building, shown in the picture above. Clear the area from enemy forces and then carry the prisoner out to Fulton him.
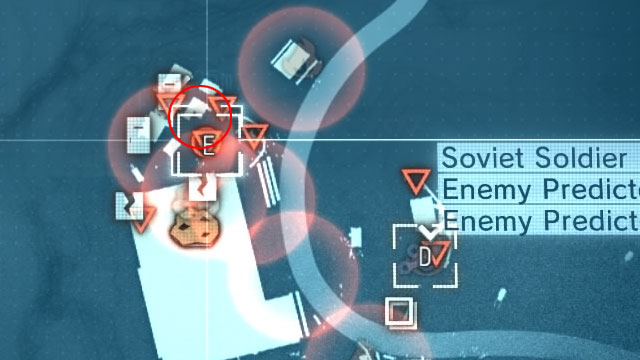
The second prisoner is held in Lamar Khaate Palace, which is the same location to which the CIA agent will be transported. His location is shown in the picture above. It is one of the large cages near the ruins. There are a lot of enemies around and you have to eliminate most of them first.
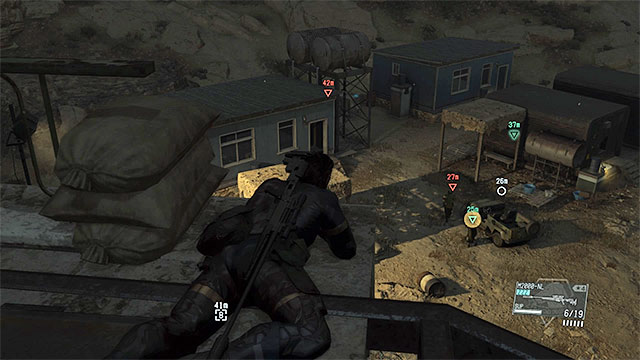 Observe the area from the ruins and act in the right moment.
You should deal with this task when completing the mission for the second time. Allow the soldiers to find the CIA agent and transport him to Lamar Khaate Palace. Reach this location and go to one of the higher levels of the ruins. You should have a view on the building with the agent. Wait until one of the soldiers starts heading to the building to murder him. Use a weapon with non-lethal ammunition or any other method to knock him out. This action will most probably alarm other enemies, so be ready to eliminate them quickly (you can kill them).
The thirty-third mission in Metal Gear Solid V is the first repeated mission in the game. The objectives are identical as in mission number four and you can read all the descriptions in the walkthrough to this mission. The difference is that now you have to complete C2W mission without any help from Diamond Dogs. The most important changes are:
You can't prepare for this mission in any way (you can't select equipment, companion or even time).
The objectives are the same as in C2W mission. Below, you will find a list of tips considering the most important modifications, which of course increase the level of difficulty.
![You can take the gun from one of the enemies - Mission 33 - [Subsistence] C2W - Metal Gear Solid V: The Phantom Pain - Game Guide and Walkthrough](https://game.lhg100.com/Article/UploadFiles/201512/2015121617541894.jpg) You can take the gun from one of the enemies
You can take the gun from one of the enemiesThe most important thing to do after landing is to obtain a gun. You can sneak up to guard post number 24 when you head to Eastern Communications Post, knock out the guards (you can distract them using your bionic arm) and take the gun from one of them. If you don't want to waste time on these enemies now, ignore them and ambush one of the opponents in the main location of the mission.
![The best way is to destroy the transmitter. - Mission 33 - [Subsistence] C2W - Metal Gear Solid V: The Phantom Pain - Game Guide and Walkthrough](https://game.lhg100.com/Article/UploadFiles/201512/2015121617541887.jpg) The best way is to destroy the transmitter.
The best way is to destroy the transmitter.If you want to complete the mission and achieve the S rank, the best way to do that is to destroy the transmitter located in Eastern Communications Post. This will allow you to save time that you would spend detonating the antennas. To destroy the transmitter, you can use the gun that you've obtained or for example grenades that you find.
Completing optional objectives shouldn't be a problem for you, especially considering the fact that you should already have CARGO 2 upgrade. Try to act undetected and leave the mission area as soon as you sabotaging the transmitter and the antennas.
The thirty-third mission in Metal Gear Solid V is another repeated mission. The objectives are identical as in the ninth mission in the game. You will find their description in the walkthrough to this mission. The changes in Extreme version are not so big. First of all, you have to bare in mind that enemy machines will have stronger armor and will deal more damage. Moreover, you can't use Reflex Mode and Chicken Hat.
If you plan to play this mission to eliminate enemy machines, you can select any time of the day. Choose D-Horse or D-Walker. D-Horse will allow you to quickly move from one point to another and D-Walker will make it easier for you to eliminate vehicles (if you want to do that of course and if you have strong weapons for D-Walker). When completing the mission the second time, take D-Dog with you. It will make it easier for you to find all the prisoners.
It is necessary that you take the best rocket launcher that you can with you (before you start the mission, check if you can produce a better launcher in Mother Base). Besides that, you should have some landmines or large obstacles to stop the vehicles.
The main objectives are the same as in the original version of the mission. Below, you will find a list of tips considering the modifications that affect the level of difficulty.
![You can find a spot near Yakho Oboo Supply Outpost. - Mission 34 - [Extreme] Backup, Back Down - Metal Gear Solid V: The Phantom Pain - Game Guide and Walkthrough](https://game.lhg100.com/Article/UploadFiles/201512/2015121617541827.jpg) You can find a spot near Yakho Oboo Supply Outpost.
You can find a spot near Yakho Oboo Supply Outpost.You should complete the most important objectives in the mission, connected with eliminating enemy vehicles, staying near Yakho Oboo Supply Outpost. All the machines appear next to the base and also the jeep and the truck will go past the outpost.
![Try to Fulton all the armored vehicles and tanks. - Mission 34 - [Extreme] Backup, Back Down - Metal Gear Solid V: The Phantom Pain - Game Guide and Walkthrough](https://game.lhg100.com/Article/UploadFiles/201512/2015121617541819.jpg) Try to Fulton all the armored vehicles and tanks.
Try to Fulton all the armored vehicles and tanks.Fulton the machines using CARGO 2 upgrade, which you should already have. The most important thing is of course placing obstacles to stop the vehicles. At this stage of the game, you should have good landmines. They will be enough, if you use them properly. If a vehicle goes past an obstacle, use rocket launcher on it. You have to remember that enemy machines in this mission have stronger armor, so even if you have a good rocket launcher, you may need 2 or 3 missiles to destroy a vehicle (the same for the gunship flying over the mission area - don't let it escape).
Mission 35 does not become available automatically after you complete mission 32 (a new one) and 33-34 (replayable) ones. You first need to complete two side missions (Side-Ops), i.e. missions 143 (Extract the AI Pod) and 144 (Secure the Remains of the Man on Fire). Walkthroughs for these have been involved in the other walkthrough for MGS V.
The thirty fifth mission in Metal Gear Solid V makes you return to the valley that you have already been in, in mission thirty. The main objective in this mission is to locate two containers with valuable cargo, in the jungle, and fultoning them. Fortunately, you can take your time, at first, and you can focus on side missions instead. They are connected with obtaining intelligence data, abducting an enemy commander and finding rough diamonds.
It is better to play the entire mission at night, which limits the vision of the opponents. This is not too important, while you are exploring the jungle, but it is much more difficult to reach the mansion in broad daylight. As your buddy, I recommend that you take D-Dog along, who helps you locate enemies deployed by the containers and ones in the mansion.
To complete this mission, you need CARGO 2 upgrade, for the fultoning device (transportation of heavy cargo with balloon). It is necessary to purchase it (research tab in iDroid), if you still do not have it, or you will have to order it right after you arrive in the mission area (fortunately, it is quickly supplied). Choice of the rest of the equipment plays no major role, but it is a good idea to have camouflage outfit (it is especially useful around the mansion).
The above map presents mission area available for the thirty fifth main mission in Metal Gear Solid V - Cursed Legacy. It is a good idea to start this mission by the Southern landing pad, because it is within a short distance of the containers that you need to extract (points 3 on the map). Before you extract the containers, you can visit the camp (point 4), the large mansion (point 5) and the vicinity of outpost 08, where you find diamonds (point 6).
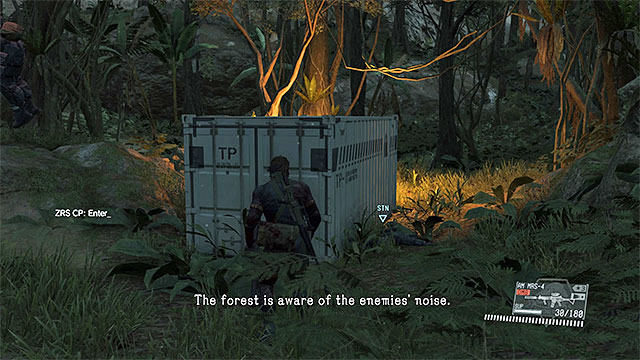
Pick the Southern pad in Lufwa Valley as your starting point, because it is much closer to the containers that you need to fulton. You can get to the containers in any order that you want. The first one is in the Northern part of the jungle and it has been shown in the above screenshots.
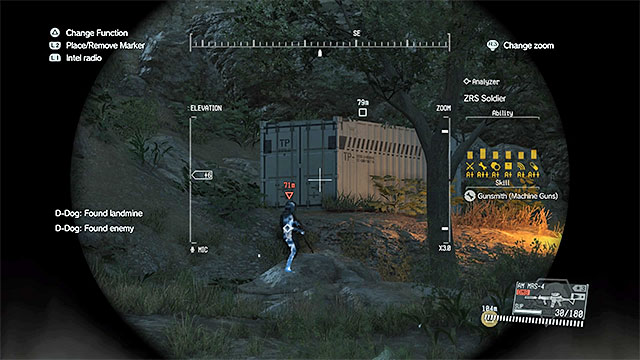
The other container is in the Eastern part of the jungle and it has been shown in the above screenshots.
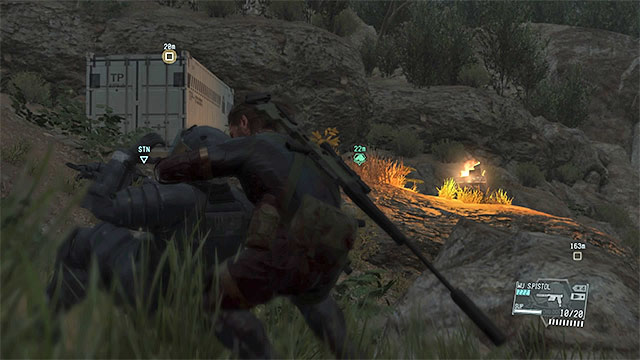 Eliminate the enemies around the containers
DO NOT HURRY to extract the containers, after you find them. Instead, after you determine their whereabouts, secure the adjacent areas. Around each container, there are 3-4 enemies. You should eliminate them, because one of the secondary objectives requires you to extract the containers with no witnesses and you complete it only if there is nobody around, at the moment of attaching balloons. You can either kill or restrain the opponents and you need to keep in mind that some of them are heavily armored (which may make it more difficult, if you are using standard firearms).
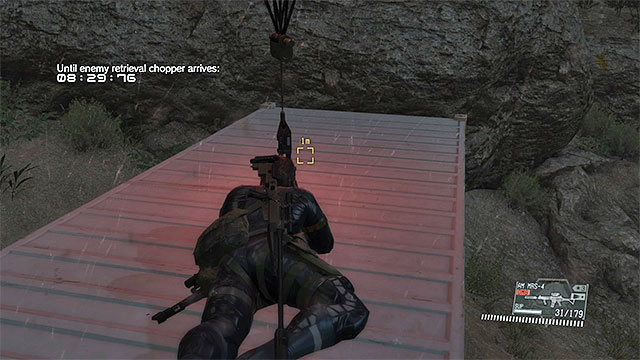 Quickly, lie down onto the roof of the second container
Before you decide to fulton the containers, make sure that you have completed all of the side objectives (if you want to complete them, that is). Pick any of the containers and attach balloon. From now on, you have 9 minutes to fulton the other one, before enemy choppers arrive and the mission ends in a failure. Fortunately, if you have cleared the jungle of the enemy forces, reaching the other container will only take you several tens of seconds.
The other container can be fultoned in a traditional way, or you can try to complete a secondary objective, while here. If so, you will have to climb onto the container, stand in its central point, activate the fultoning device and immediately lie down onto the container. Lying down directly under the balloon should prevent you from dropping to the ground. Otherwise, you will have to load the last checkpoint (they are not made while you are in the jungle, unfortunately) and try again.
You can complete this one, while playing the mission for the first time, but you need to do that before you fulton the containers to the Mother Base. There are two documents that you need to find. The first one is in the camp in the North-Eastern part of the jungle. It is a big tent whose location has been shown in the above screenshot.
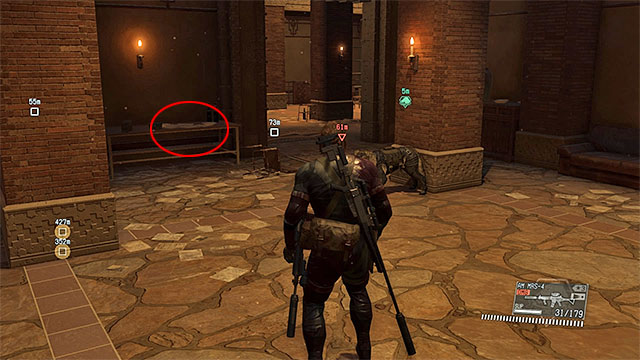
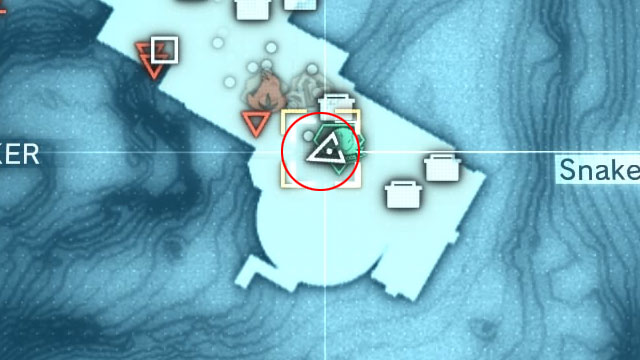
To find the other document, you need to go to the mansion in the Eastern part of the map. It is being guarded by a dozen-or-so opponents and if you do not want to be spotted, you need to keep appropriate precautions (sneaking, taking the opponents' whereabouts with binoculars, or using D-Dog). It is best to enter the mansion through its back door and it is being guarded by two opponents, at least, and you will have to deal with them first. The data is in a room on the second floor of the mansion and it has been shown in the above screenshot.
Obtaining the data allows you to identify the commander, although it is also possible that you will have eliminated him already, while exploring the estate area.
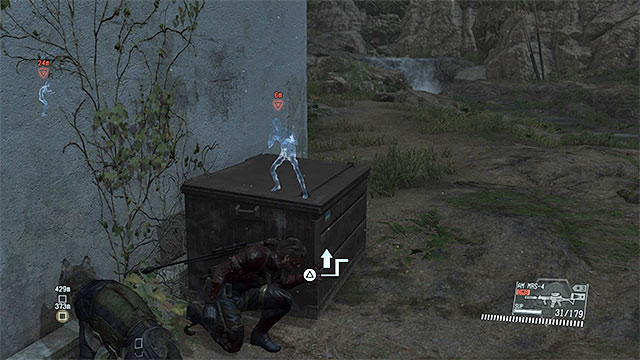 You can either find the commander on your own, or using intel data
Abducting the leader is directly connected with the secondary objective mentioned above. You can find him thanks to the data that you have obtained, or on your own. The commander is wandering all around the estate, so you should not kill anybody, while exploring the estate, or you will fail this objective. You complete the mission after you fulton the commander (if you ran into him inside the mansion, you should first carry him out).
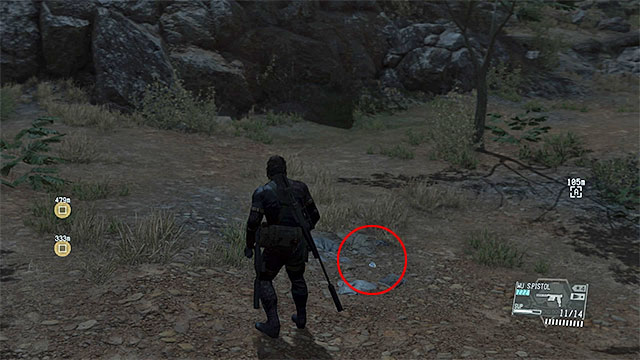
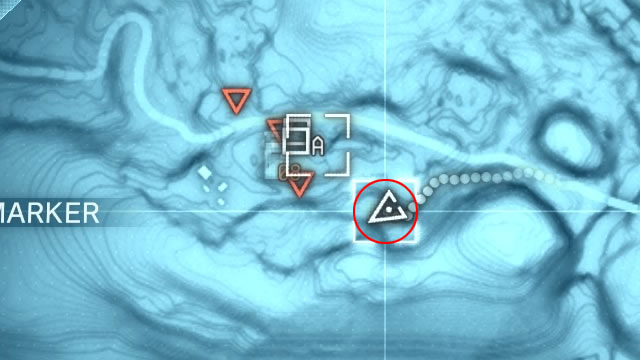
It is best to complete this objective when you are replaying this mission. This is so, because the diamonds are hidden close to outpost 8 and you will not have to cross the entire map to get them, if you pick the Northern landing site. Precisely, explore the area to the South-West of outpost 8. Reach the part of the map shown in the above screenshot, where there are ravens flying. Here, locate the Rough Diamond which is worth 100000 GMP.
Thirty sixth mission in Metal Gear Solid V is one of the replayable ones. Its assumptions are identical with those of the fifteenth one and all the details on the objective and the area of operations have been included there. The most important difference is that you cannot be spotted by the enemies, or you will automatically fail. However, this handicap does not hold for your buddies. Two additional handicaps here are that you cannot use Reflex Mode, not the Chicken Hat.
It is way better if you play the mission at night, thanks to which fields of vision, of the enemies (especially of the ones standing on the hill) are discernibly limited. The best buddy for this one is the D-Dog, who can mark all of the nearby enemies and attack them without risking failure of the mission.
Put on the suit that guarantees better camouflaging (e.g. the upgraded Sneaking Suit). As for the weapons you choose, this does not matter, because you should either avoid all of the enemies, or grab and restrain them silently (in reality, all of the enemies are wearing headgear).
Key premises of mission Footprints of Phantoms remain unchanged. Below, you can view a number of modifications that, for obvious reasons, affect its difficulty level.
![Sneak up to the camp from behind - Mission 36 - [Total Stealth] Footprints of Phantoms - Metal Gear Solid V: The Phantom Pain - Game Guide and Walkthrough](https://game.lhg100.com/Article/UploadFiles/201512/2015121617542097.jpg) Sneak up to the camp from behind
Sneak up to the camp from behindWhen it comes to the hill that the Walker Gears are on, just like previously, you should walk around on the left and reach main targets of the mission from behind. If you followed the earlier suggestion, and taken D-Dog along, use him for elimination of all the enemies. As for the less accessible ones, you can eliminate them with the dog, because even if he is spotted and pounded by the enemy, you will continue the mission. However, do not allow yourself too much freedom, or the enemies start using Walker gears.
![It is recommended that you fulton all of the Walker Gears - Mission 36 - [Total Stealth] Footprints of Phantoms - Metal Gear Solid V: The Phantom Pain - Game Guide and Walkthrough](https://game.lhg100.com/Article/UploadFiles/201512/2015121617542022.jpg) It is recommended that you fulton all of the Walker Gears
It is recommended that you fulton all of the Walker GearsTtry to clear the entire hill and only then, take interest in walkers. Since you do not want to alarm the enemy, it would be better to fulton all of the walkers. This will not alarm the enemies, assuming that there was nobody around, in the act.
The thirty seventh mission in Metal Gear Solid V is a replayable one. Its premises are identical with those of the sixteenth one and you can find all the details on targets and the area of operation there. The most important difference in this mission is that you need to deal with more heavily armored vehicles in the convoy and tougher members of the Skulls. Apart from that you cannot use the Reflex Mode and the Chicken Hat.
When it comes to the main objective, you can play this mission at any moment during the day, especially that you should already know the route of the convoy and the location of the truck in the airport. As your buddy, pick D-Horse, if you are going to escape from the Skulls after you fulton the truck and also make sure if you have already developed an armor to increase the horse's resistance. If you are going to face the Skulls in a direct fight, pick the D-Walker instead (yet, good weapons need to be already developed for it).
It is necessary that you wear a battle suit, e.g. the upgraded Battle Dress. Apart from that, take a rocket launcher along. It is a good thing to have it with you, even if you are going to escape the area of operation right after you complete the main objective, because you can use the launcher to slow your pursuers down.
Key premises of mission Traitors' Caravan remain unchanged. Below, you can view a number of hints concerning its key modifications that, for obvious reasons, affect its difficulty level.
![It is best to fulton the truck from the airport - Mission 37 - [Extreme] Traitors Caravan - Metal Gear Solid V: The Phantom Pain - Game Guide and Walkthrough](https://game.lhg100.com/Article/UploadFiles/201512/2015121617542080.jpg) It is best to fulton the truck from the airport
It is best to fulton the truck from the airportHead towards Nova Braga Airport and infiltrate it in the same way as you did before, i.e. through the Western gate. After the Skulls arrive, run up to the truck, as fast as possible, and fulton it. Do not wait for the convoy to arrive and head Northwards with the truck, because armored vehicles in the convoy would be an additional (unnecessary) challenge, due to the fact that they have better armoring now.
![Escape on the horse with armor on, which should not be halted by the Skulls. - Mission 37 - [Extreme] Traitors Caravan - Metal Gear Solid V: The Phantom Pain - Game Guide and Walkthrough](https://game.lhg100.com/Article/UploadFiles/201512/2015121617542174.jpg) Escape on the horse with armor on, which should not be halted by the Skulls.
Escape on the horse with armor on, which should not be halted by the Skulls.Skulls members are tougher than previously, which is why you should engage them in fight only if you have already developed much better types of rockets launcher and battle suit. Otherwise, leave the airport as quickly as possible, jump onto the horse and start escaping.
Note - if the horse is not wearing its armor, it can be easily defeated by the Skulls. In a situation in which you fall off the horse, you should consider laying down fire on the Skulls, with your rocket launcher, only to win for yourself more time to leave the mission area.
The thirty eighth mission in Metal Gear Solid V takes place in a very small area. Completing the primary objective does not take too much time, because you only need to find the film canister in the ruins occupied by the enemy. It may be a little bit more time consuming to complete side missions. They assume obtaining the film before the reinforcements arrive, rescuing the POW and fultoning the rare vulture species.
Starting the mission after nightfall does not change the way in which it plays out, but it may make it a bit less difficult to reach the film. Also, there is no one "good" choice, when it comes to buddies. D-Dog can help you locate enemies in the ruins and eliminate some of them. Quiet can use her sniper rifle to help you clear the keep at a distance, whereas thanks to D-Horse, you can quickly reach roads that the jeeps with reinforcements are traveling along, thanks to which you stop them faster.
Try to take along a sniper rifle with sleeping ammo. Not necessarily will you need it to eliminate enemies in the ruins (at least several of them are using heavy armors), but it will make it easier to shoot down the vulture for extraction.
The above map presents mission area available for the thirty eighth main mission in Metal Gear Solid V - Extraordinary. It is best to start the mission near the Eastern landing area, because from here, you will reach Spugmay Keep faster (point 3 on the map), where you find the film container. It is a good idea to hurry, and do that before reinforcements arrive (points 4 and 5), or halt them before they reach their destination. While replaying this mission, it is good idea to stop in by outpost 24 (point 6) and rescue the prisoner.
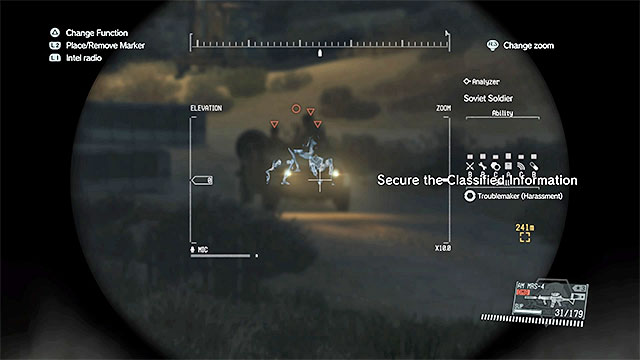 There is a sniper near the ruins
As your starting point, pick the East-most landing zone, thanks to which you reach the ruins faster. Approach the keep from the North and use binoculars, or wait for the dog to mark locations of the opponents. You should attach much care to the sniper on the hill, who should be reached in the first place. Eliminate him without alarming the rest, if possible.
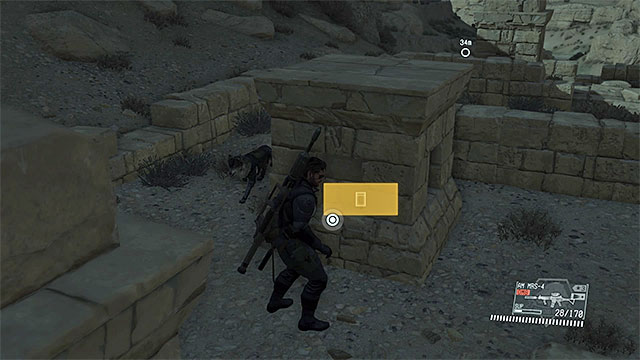
You need to find the Film canister on your own and this is not too easy, due to its size. It has been hidden in the Southern part of the ruins (shown in the above screenshot), between two stone blocks. Near the film, there are, at least, 1-2 enemies and it would be best to deal with them first. After you obtain the film, you can call for pick-up, or walk outside of the mission area, to finish.
You can complete this objective when playing the mission for the first time. It does not require too extensive a walkthrough, because you only need to kill, or restrain, all of the enemies in Spugmay Keep. Try to do this before jeeps with reinforcements arrive in the ruins, because they will make the task more difficult.
One of the jeeps heading for the ruinsIt is not easy to complete this objective, because reinforcements arrive in Spugmay Keep seconds after the mission starts. Of course, you can head towards the ruins immediately and try to secure it very quickly, but this is risky and, additionally, it requires good gear (e.g. the rocket launcher, to eliminate the enemies).
If you are not geared up enough, or you do not want to take the unnecessary risk, you can adopt a different tactic and stop the two jeeps with reinforcements when they are still on their way. The first one appears in the Northern end of the map, close to outpost 23. The other one appears a bit later, in the South-Western part. The easiest way to destroy them is use the rocket launcher or explosives, but you can also do this the oldschool way, place an obstacle on the road and have them stop. Regardless of what you do, use the D-Horse and right after you stop the first jeep, head towards the area where the other one appears.
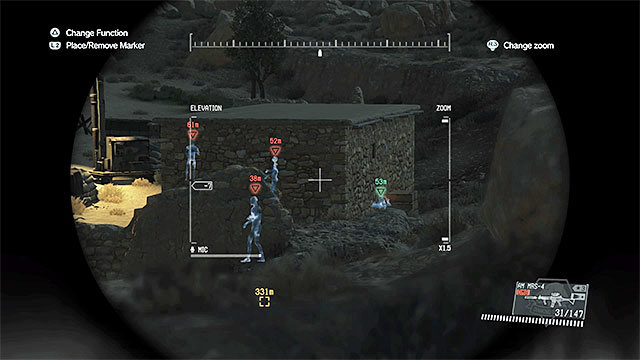
It is best to rescue the prisoner only when you are replaying the mission, because after you find the film, the area of operation gets limited and you will no longer be able to reach him then. You need to head towards outpost 24, i.e. the one in the Eastern end of the map. The prisoner is inside the building shown in the above screenshot and before you carry him out and fulton him, deal with all of the enemies around.
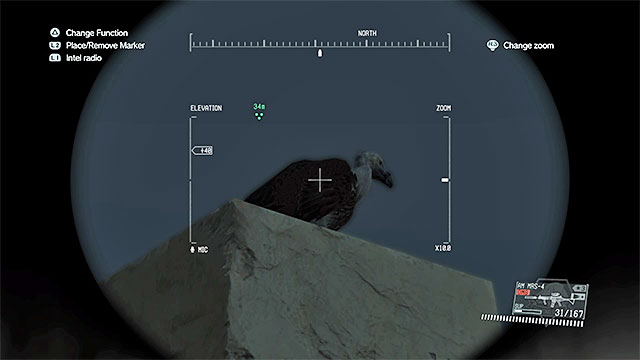
It is best to extract the vulture after you have found the film container and after you have secured Spugmay Keep. Remain in the ruins and note the birds circling around in the sky. Use binoculars or scope of any rifle and locate the rare vulture - it has been shown in the above screenshot.
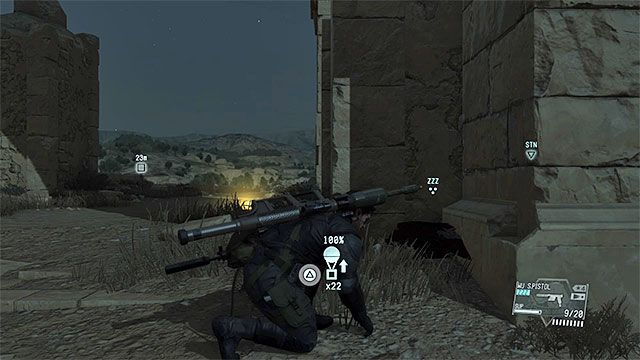 Find the unconscious vulture and fulton it
To get the vulture down, it is best to use the sniper rifle with sleeping ammo. If you do not have it with you, wait for the vulture to land on one of the pillars, or on a lower ledge, and use a pistol. Regardless of what you did, you need to make sure that the vulture drops into the area where you can access it, attach the balloon and send it away.
The thirty ninth mission in Metal Gear Solid V is a replayable one. Its premises are identical with those of the fifth main mission and you can find all the details on targets and the area of operation there. The key difference in this mission is that you cannot be spotted by the enemies, or the mission will end in a failure. This does not go, however, for your buddies. What makes this mission even more difficult is that you cannot use the reflex Mode nor the Chicken Hat.
If you have been playing mission five several times, you should remember the route to the place where the engineer is being kept and you can easily rescue him during the day also. As for secondary objectives, it is best to complete them at night, because you risk more there and you encounter more enemies. It is a good idea to take the D-Dog along, who will reveal positions of the enemies guarding the engineer and will make it easier to eliminate or avoid them.
Armoring does not play a major role here, because you will either have to avoid the enemies or kill them silently. Still, make sure that you wear your best stealth suit (e.g. Sneaking Suit).
The key requirements of Over the Fence remain unchanged. Below, there are a number of hints on the most important modifications, which for obvious reasons, result in the increased difficulty level.
![Just like before, climb the rocks Westwards of the barracks - Mission 39 - [Total Stealth] Over the Fence - Metal Gear Solid V: The Phantom Pain - Game Guide and Walkthrough](https://game.lhg100.com/Article/UploadFiles/201512/2015121617542246.jpg) Just like before, climb the rocks Westwards of the barracks
Just like before, climb the rocks Westwards of the barracksTo get to the engineer in Wakh Sind Barracks, it is best to climb onto the rocks to the South-West first, thanks to which you can avoid unnecessary confrontations. Around the engineer's staying place, there are 2-3 enemies, but after D-Dog sniffs them out, you will have no problems avoiding them. At the same time, it should be reminded that inconvenient enemies can be eliminated with the dog and, even if the enemies spot him, you will not fail the mission.
Completing side objectives may be a bit more tricky. First of all, create a checkpoint after you free the engineer, thanks to which you will not have to, practically, repeat the mission from the very beginning. Sneak even if your enemies are standing well away and avoid attacking them, if there are other guards around.
The fortieth mission in Metal Gear Solid V is a replayable one. Its requirements are nearly identical with the ones of the fifteenth one, i.e. the duel with Quiet. The walkthrough for it has been provided there. Unfortunately, this time around, defeating Quiet is FAR MORE difficult, because your character, due to his poor armoring, can be killed in one sniper rifle shot and additionally, the tactic of dropping supply crates on her head does not help. This is not it, because you cannot use the Reflex Mode nor the Chicken Hat, here.
The next page includes details o defeating Quiet, subject to the Extreme rules.
If you just want to win the duel and you do not care if you obtain the highest S-rank, you can utilize the below tactic. It will allows you to win within 1-2 minutes, without the risk of engaging Quiet in a direct way.
![Use binoculars, stay behind the wall and mark Quiets position - How to win with Quiet in the Extreme mode? - Mission 40 - [Extreme] Cloaked in Silence - Metal Gear Solid V: The Phantom Pain - Game Guide and Walkthrough](https://game.lhg100.com/Article/UploadFiles/201512/2015121617542252.jpg) Use binoculars, stay behind the wall and mark Quiet's position
Use binoculars, stay behind the wall and mark Quiet's positionAfter the duel starts, do not lean out from behind the wall where you should be hiding by default (remember that only one hit may end in your death!). Instead, equip binoculars and locate Quiet. Mark her position.
![This tactic includes using sleeping gas against Quiet - How to win with Quiet in the Extreme mode? - Mission 40 - [Extreme] Cloaked in Silence - Metal Gear Solid V: The Phantom Pain - Game Guide and Walkthrough](https://game.lhg100.com/Article/UploadFiles/201512/2015121617542210.jpg)
This tactic includes using sleeping gas against Quiet. For that, access iDroid and open the Missions tab. Select Fire Support and then, Sleeping Gas. As the spot to raid, select Quiet's current position (the above screenshot).
Note - A single raid is 30000 GMP. Still before you start the mission, make sure that you have enough cash and can afford, at least, two raids.
![wait for sleeping bombs to be dropped onto the mission area - How to win with Quiet in the Extreme mode? - Mission 40 - [Extreme] Cloaked in Silence - Metal Gear Solid V: The Phantom Pain - Game Guide and Walkthrough](https://game.lhg100.com/Article/UploadFiles/201512/2015121617542288.jpg) wait for sleeping bombs to be dropped onto the mission area
wait for sleeping bombs to be dropped onto the mission areaDo not move, to prevent Quiet from changing positions, and wait for the raid to start. Her blue bar, as a result of successive raids, will start going down. Unfortunately, probably you will not defeat her with one raid only, because sooner or later, Quiet escapes into another spot of the ruins.
![Carefully, move to a different spot and locate Quiet - How to win with Quiet in the Extreme mode? - Mission 40 - [Extreme] Cloaked in Silence - Metal Gear Solid V: The Phantom Pain - Game Guide and Walkthrough](https://game.lhg100.com/Article/UploadFiles/201512/2015121617542295.jpg) Carefully, move to a different spot and locate Quiet
Carefully, move to a different spot and locate QuietNow, it's the most difficult part. You need to move into a different spot and locate Quiet again. Sprint from one cover to another and make short stops behind each one. You cannot let Quiet take a shot towards you, because it is highly possible that you will get shot and die.
After you determine her approximate location, use binoculars to locate and mark her again (here, you can be helped by the D-Dog). Just like before, call for an air raid with sleeping bombs and remain behind cover for the whole time. This time, the raid should deprive Quiet of the entire bar and the battle will end (towards the end, you can decide again whether you want to spare or kill Quiet - pick the former).
Ranking S requires you to fight with Quiet an entire battle. You should try for the rating only after you have progressed very far into the game and you obtain the best gear available.
![Before you start the battle with Quiet, it would be a good idea to get prepared properly/ Take along the best sniper rifle you have - How to win with Quiet in the Extreme mode? - Mission 40 - [Extreme] Cloaked in Silence - Metal Gear Solid V: The Phantom Pain - Game Guide and Walkthrough](https://game.lhg100.com/Article/UploadFiles/201512/2015121617542390.jpg)
Before you start the battle with Quiet, it would be a good idea to get prepared properly/ Take along the best sniper rifle you have. It would be best to take a model with conventional ammo, thanks to which you can deplete Quiet's health. Apart from that, you can make preparations that will ensure you with surviving Quiet's attacks. From the briefing menu, select the Characters tab and find someone with the Tough Guy ability (the above screenshot). This type of characters have increased resistance to damage. This is not all, because such beefcake needs be geared with the best combat armor (Battle Suit) and a headgear. If you ensure all of these, this should guarantee that the character will survive after a shot and only takes severe damage.
![Take a sot right after Quiet fails - How to win with Quiet in the Extreme mode? - Mission 40 - [Extreme] Cloaked in Silence - Metal Gear Solid V: The Phantom Pain - Game Guide and Walkthrough](https://game.lhg100.com/Article/UploadFiles/201512/2015121617542395.jpg) Take a sot right after Quiet fails
Take a sot right after Quiet failsRight after the battle starts, you need to learn dealing damage to Quiet, over again. Always start by leaning out from behind the cover, for a fraction of second, which should provoke Quiet to taking a shot. At the moment, at which she is busy reloading her rifle, lean out and take your shot. Of course, you cannot lose time on accurate aiming, therefore always face the right direction and take a shot always when you see any of her body parts in your sights (not just the head).
Note - In extreme situations, Quiet cannot may not know your location. Then, you can, of course, take your time and take a better aim.
![Cross open areas as quickly as possible - How to win with Quiet in the Extreme mode? - Mission 40 - [Extreme] Cloaked in Silence - Metal Gear Solid V: The Phantom Pain - Game Guide and Walkthrough](https://game.lhg100.com/Article/UploadFiles/201512/2015121617542392.jpg) Cross open areas as quickly as possible
Cross open areas as quickly as possibleQuiet, each time she takes damage, moves to a different spot. Moving around the map is yet another factor that you need to master. Dash over short distances and always choose your next cover beforehand. Additionally, you can end each dash with a lounge to the ground, which minimizes the risk of Quiet's attack. To locate Quiet again, use binoculars and D-Dog (unfortunately, the dog can locate her at a distance no longer than several dozens of meters). After you find Quiet, find a nice little spot to take another shot. Repeat this pattern until you deprive Quiet of her entire health and do not take too much risk, especially if you are playing as a character that can die after a single shot.
Note - In the Extreme battle with Quiet, the option to drop supply drops onto her does not work. Therefore, do not waste your cash, because Quiet manages to escape before the crates drop onto her.
The forty first mission in Metal Gear Solid V is about destroying the enemy vehicles in a military convoy - armored vehicles, tanks and a combat helicopter with the commander on board. Of course, you can choose whether you want to steal the vehicles or destroy them (the only exception here is the helicopter that cannot be fultoned). As for secondary objectives, in the mission you can also abduct the commander and obtain rare blueprints on-board the chopper.
It is a very good idea to play the mission after dusk. Thanks to this, it will be easier to get near the enemy vehicles and extract them. Also, this way, it is easier to clear the airport of the enemy units (especially snipers)/ As your buddy, you can take the D-Dog, who helps you locate enemies at the airport (primary objectives are automatically followed), or Quiet, who can eliminate more demanding targets.
If you are going to destroy enemy vehicles, it is necessary to wear combat suit. Regardless of your intended tactic, take a rocket launcher also, because it is compulsory to destroy, at least, one enemy vehicle (the gunship). Make sure that you have taken the best available rocket launcher, because the gunship can withstand 3-4 direct shots from a lower-class launcher.
The above map presents mission area available for the forty first main mission in Metal Gear Solid V - Proxy War Without End. It is a good idea to start this mission in the center of the map, thanks to which you can head towards outpost 14 (point 6) or to Nova Braga Airport (point 9) to complete primary objectives. What is meant here is the enemy vehicles that you need to eliminate. Some of them appear on the map at the very beginning of the mission (points 5), whereas some other appear later on (points 7 and 8). At the airport, take interest in the Western building (point 10), where you can restrain the commander (after he gets here) and find a diamond.
Two, out of three primary objectives of the mission are about eliminating enemy vehicles. This means the enemy APCs and two tanks. Three of them are on the map from the very beginning of the mission - the first tank in the Northern part of the map and another tank, as well as the first APC to the South. These vehicles remain visible on the map for the whole time and their route is displayed. Do not worry if the second APC does not appear straight away. It should arrive as soon as you have fultoned, or destroyed, one of the remaining vehicles. It then appears at the Eastern end of the map.
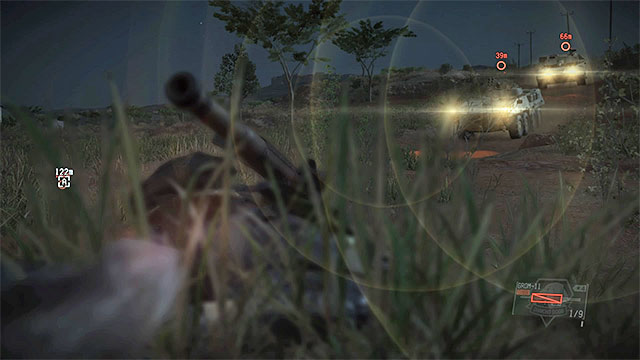 You can halt enemy APCs and tanks heading towards the airport
Start the mission at the landing zone in the central part of the map. All of the APCs and tanks are heading towards Nova Braga Airport. If you want to complete the mission quickly (e.g. order to earn S rank), you can eliminate them while they are still on their way. A good spot to set the ambush is the vicinity of outpost 14, because all of the vehicles pass by that point. Here, you can use the rocket launcher or deploy larger obstacles on the road, in hope that APCs and tanks stop there. This should win you enough time to sneak up to each one of the vehicles and fulton it.
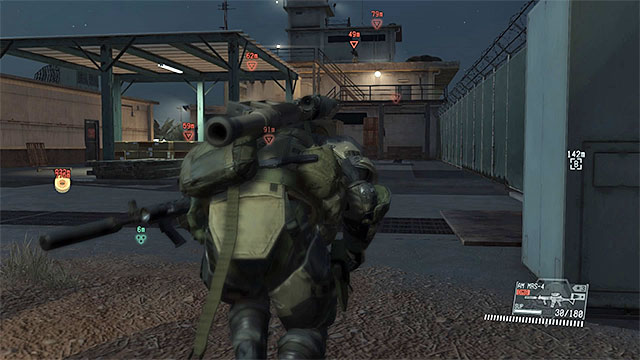 Try to neutralize all of the snipers in the airport main building
If you do not want to take unnecessary risk, and you want to complete some of the secondary objectives, ignore outpost 14 after you land and head immediately towards Nova Braga Airport. Haste is recommended here, because it would be good to secure the majority of the airport, before enemy vehicles arrive. Walk into the airport from the North or from the West (you would have to walk around it, then) because the main building is being occupied by several snipers, among others, who check the area to the East and to the South of their positions. Try to sneak past to the main building, reach the upper levels and eliminate all of the snipers quietly.
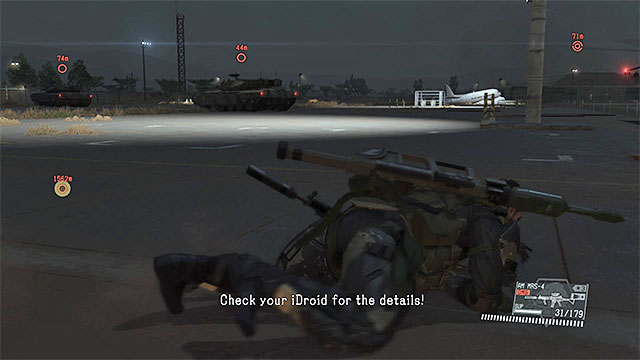 The destination of all the APCs and tanks is the airport's main is the main apron area
APCs and tanks will be reaching the airport one after another and they will stop on the apron. If you have followed the earlier suggestion and eliminated all of the snipers, you only need to eliminate several regular soldiers more and you will be able to reach the vehicles unhindered, in order to fulton them (of course, you can also destroy them - for that, use the rocket launcher from a long distance and stay behind a cover).
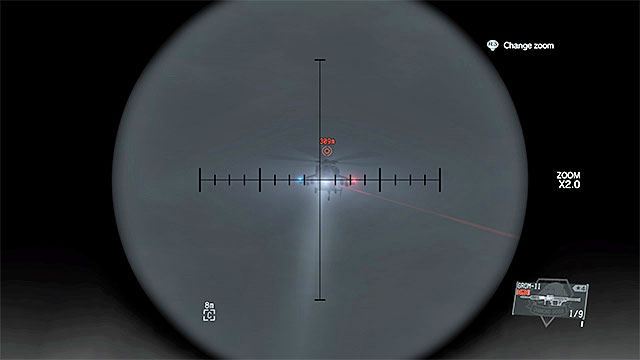 The gunship is flying towards the airport
The gunship appears in the Northern part of the map only after several dozens of seconds, of the starting moment of the mission. Just like APCs and tanks, it is headed towards Nova Braga Airport. If you want to complete the mission quickly, you can lay fire down on the gunship as soon as you spot it. Keep in mind, however, that it is much better armored than helicopters in previous missions. Therefore, you may need two, or three accurate shots. To destroy the helicopter, you could use a launcher with homing missiles, or else you need to compensate for the speed, while aiming, or wait for the gunship to hover over one spot.
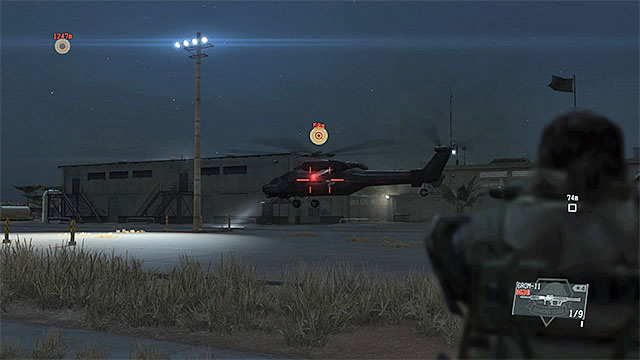 Attacking the gunship at the airport is a very good idea
If you want to complete secondary objectives, it is best to allow the chopper to reach the airport safely and to unload the commander of the military column. Note that the chopper remains at the airport, which makes it a very easy target. Still, you should destroy it only after you fulton, or destroy, APCs and tanks.
The earliest you can end the mission is after you destroy, or fulton, two tanks and two APCs, and destroy the chopper. Also, you can remain here for longer and take interest in secondary objectives described on the next page.
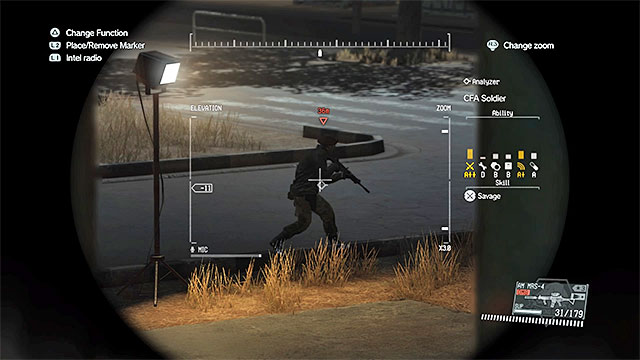 You recognize the commander by the red beret
The military column commander is initially traveling on the gunship that appears on the map several dozens of seconds after the mission starts. You can complete this objective while playing the mission for the first time, but for obvious reasons, you cannot shoot it down too early. Instead, you need to wait until it reaches Nova Braga Airport an the commander gets out. If you have missed that moment, or if a fight ensued and there is chaos at the airport, it is good to know that you can tell the commander by the red beret.
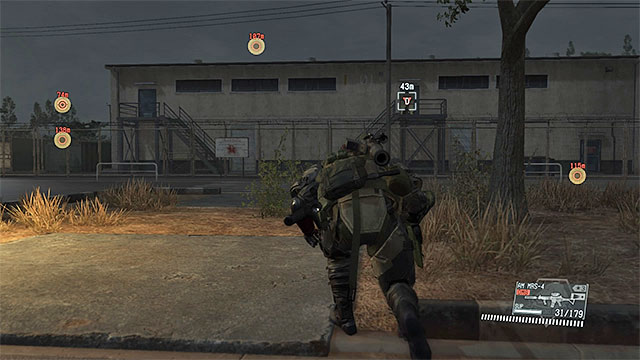
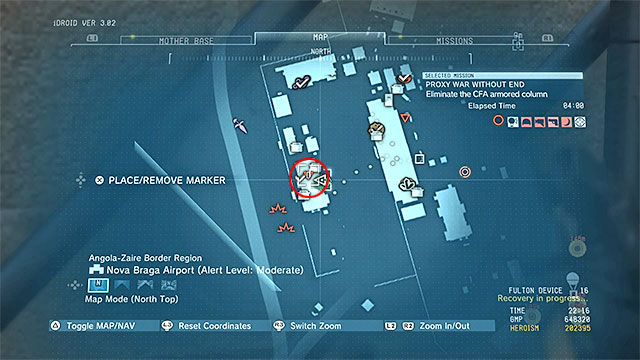
After he reaches the airport, the commander moves to a poorly-guarded building, in its Western part. This place has been shown in the above screenshots and this is here that he is best to be taken down by surprise (if you restrained the commander inside the building, carry him out).
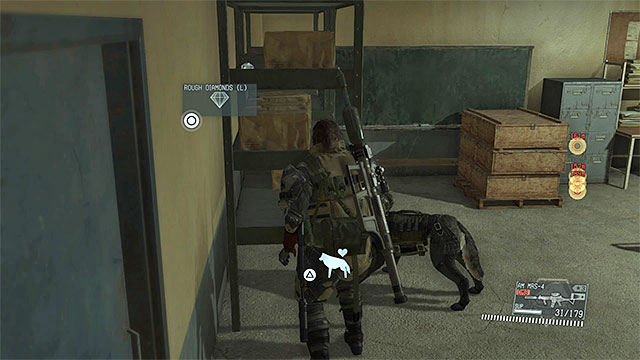
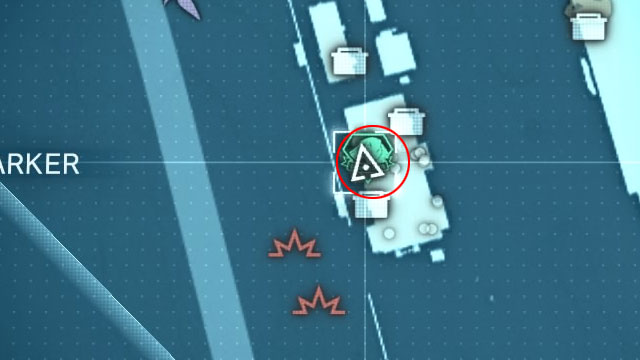
The Rough Diamond is in the same building of the Nova Braga Airport that the column commander goes into, after he arrives at the airport. Both of these secondary objectives can be completed, therefore, at the same time. The exact location of the diamond has been shown in the above screenshots and it is worth as much as 100000 GMP.
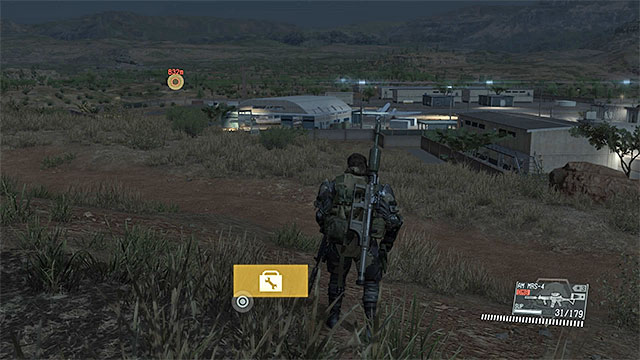 Find the blueprint in the spot where the gunship crashed
The only way to obtain the blueprint is shooting the gunship down, but this is not too much of a handicap, because destroying the enemy machine is one of the primary objectives of the mission. The only thing that you need to ensure is that you watch the gunship drop to the ground after you shoot it, e.g. using binoculars and determine its exact whereabouts (place your marker there). This is very important, because the gunship leaves no remains and, as a result, locating the blueprint (FLAMETHROWER) would to require you to search the area thoroughly.
Forty-second mission of Metal Gear Solid V is one of the repetitive ones. Its objectives are the same as in mission 29 and you can find them in its walkthrough. The changes concern Skulls unit that you fight. They are tougher and deal more damage than before. Defeating them is therefore harder and it requires better equipment. Moreover, you must not use the Reflex Mode and the Chicken Hat.
If you wish to complete the mission decisively (using the strategy described in mission 29 walkthrough), take Quiet with you. However, if you want to engage in combat, choose D-Walker. Choose this option only if you have been upgrading the walker, it needs some decent armor and weapons.
The protagonist might equip either the sniper rifle or the rocket launcher. Aside from that, give Boss the best armor available to decrease the chance of being instantly killed by Skulls. Before you begin the mission, make sure you have 100-150 thousand GMP for supply drops.
Main objectives of Metallic Archaea mission are the same. Below, however, you will find tips about its modifications that affect the overall difficulty.
![Attack Skulls from the roof, unreachable for them. - Mission 42 - [Extreme] Metallic Archaea - Metal Gear Solid V: The Phantom Pain - Game Guide and Walkthrough](https://game.lhg100.com/Article/UploadFiles/201512/2015121617542514.jpg) Attack Skulls from the roof, unreachable for them.
Attack Skulls from the roof, unreachable for them.The fight against Skulls should be similar to the one in mission 29, so mark a few of them with your binocular as soon as you start, then move to the roof of the southern building. After you reach the roof, start attacking Skulls with a sniper rifle or a rocket launcher. Remember that you are not invincible and aside from dodging their attacks, you need to evade their stone needles. Jump back as soon as you see a needle, because it will explode in a moment. Skipping this part might result in Big Boss's quick death. Just like before, call for supply drops from time to time to always have enough ammo.
![You can fulton the defeated enemies or not take the risk and stay on the roof - Mission 42 - [Extreme] Metallic Archaea - Metal Gear Solid V: The Phantom Pain - Game Guide and Walkthrough](https://game.lhg100.com/Article/UploadFiles/201512/2015121617542562.jpg) You can fulton the defeated enemies or not take the risk and stay on the roof
You can fulton the defeated enemies or not take the risk and stay on the roofIf you have upgraded the D-Walker, you can engage in more open combat instead. In that case, you have to keep moving all the time, because even the best armor won't protect you from Skulls' main attacks.
Regardless of the selected strategy, remember that the enemies are very tough, so the key is to attack them one by one. Skulls can be fultoned, but it's incredibly risky, because you would have to do it right after you defeat an enemy. If you wish to use this strategy, do it only if you want to achieve all possible goals.
Mission 43 does not become available after finishing mission 41 (Proxy War Without End). Luckily, unlocking it is fairly easy. Focus on completing side-ops - in my case, I had to complete three of them. When you finish a sufficient number of side-ops, you will be called to the Mother Base to listen about an outbreak of a new epidemic. The new mission will appear on the list after a cutscene.
Forty-third mission of Metal Gear Solid V takes place in its entirety on the quarantine platform in the Mother Base. Your task is to stop the outbreak of the new pandemic. The mission is not really original, so finishing it won't take much time or cause too much trouble.
Note: This mission will not give you any ranks, but it does count some stats (e.g. Time required for completing it).
The game will not let you prepare. Big Boss's equipment consists only of his current rifle and handgun. You'll only need the former to complete the mission.
 Door leading to a room with the scientist
When you reach the Quarantine Platform in the Mother Base, go to the isolated area and wait until you are transferred inside. Start a very linear walk, during which you will see the infected and meet the survivors (it's optional). Use the next staircase to reach the higher floors. Your destination is a laboratory where a scientist responsible for transmission resides. You need to open the door to the room first.
 Put your goggles on and start
When you regain control over the protagonist, start with shooting several infected. Open your inventory and equip the thermal goggles (TDG). They won't help you identify the infected, because you will have to shoot everyone on your way (don't worry about your heroism points, you cannot avoid it).
 Exit from the quarantine zone
Descend towards the lowest floors while scouring all of the rooms where the infected may be hiding. After you secure the area, go towards the place marked on your map to exit the quarantine zone and finish the mission.
Forty-fourth Metal Gear Solid V mission is one of the repetitive ones. Its objectives are the same as in mission 13 and you can find them in its walkthrough. The most important change is that Big Boss must not be detected, because you will automatically fail. Two main difficulties are that you must not use the Reflex Mode and the Chicken Hat.
Completing this mission in the night is highly recommended. It is helpful especially while traversing the oil field, where you can be detected easily during the day. I recommend selecting D-Dog as a buddy, since he can mark the enemies and help Big Boss eliminate them without raising the alarm.
When it comes to equipment, choosing a rocket launcher is a good idea, because you won't have to take a risk reaching the tank that is one of the main objectives.
The most important objectives of Pitch Dark remain the same. Below, however, you will find tips about its modifications that affect the overall difficulty.
![Perform a reconnaissance and take your time while infiltrating the oil field. - Mission 44 - [Total Stealth] Pitch Dark - Metal Gear Solid V: The Phantom Pain - Game Guide and Walkthrough](https://game.lhg100.com/Article/UploadFiles/201512/2015121617542563.jpg) Perform a reconnaissance and take your time while infiltrating the oil field.
Perform a reconnaissance and take your time while infiltrating the oil field.Reconnaissance plays an important role in Pitch Dark. You should perform it after you reach the town (if you want to achieve the optional objectives) and when you reach the oil field. Try to localize and mark all of the enemies. During the infiltration, you should rely on D-Dog and use him to attack enemies without taking a risk (the mission will not result in a failure if D-Dog gets detected and shot).
![Destroy the red tank from a distance - Mission 44 - [Total Stealth] Pitch Dark - Metal Gear Solid V: The Phantom Pain - Game Guide and Walkthrough](https://game.lhg100.com/Article/UploadFiles/201512/2015121617542580.jpg) Destroy the red tank from a distance
Destroy the red tank from a distanceUse D-Dog, your skills and weapons to make your way towards the room where the pump can be turned off. Don't forget that Big Boss needs a moment to open the door to the building and that he can escape through a window after the work is done.
Approaching the red tank with C4 to blow it up is not exactly a good idea, because you'd have to eliminate 2-3 more enemies and you could get detected. There is a much easier option - leave the oil field, go south and use the rocket launcher to destroy the tank. Remember to stand where the enemies won't notice the rocket being fired. When you achieve both objectives, quickly go south not to encounter Walker Gears heading towards the oil field (unless you wish to start the optional objective right now).
The forty-fifth mission of Metal Gear Solid V does not become available automatically. Unlocking it is quite tricky and the procedure has been described below. There are two important pieces of information to it:

Unlocking mission 45 requires having access to side-op 150 (Secure Quiet). It happens because mission 45 begins right after you complete side-op 150 (you won't even be able to get prepared).
The first requirement is having Quiet available as a buddy. Just to remind you, to recruit Quiet, you have to abduct her at the end of mission 11 (Cloaked in Silence) and wait until you unlock side op 111 (Visit Quiet) and visit her on the medical platform of the Mother Base.
Another important issue is your bond with Quiet. It has to be maxed out. You can do it by taking her to missions and cooperating with her. Current bond level can be seen after each mission and during preparation before one. The bar marked above has to be full.
Note - Bond bar does not remain full. The level can decrease if you, for example, made Quiet take heavy damage during a mission. It can be quickly repaired, though.
 The emblem must not contain the butterfly
Another requirement is that Diamond Dogs emblem must not contain the Butterfly. If you haven't modified the emblem, you won't have to do anything. If you have, check the emblem. To do it, open iDroid, select Mother Base, then Customize and Emblem.
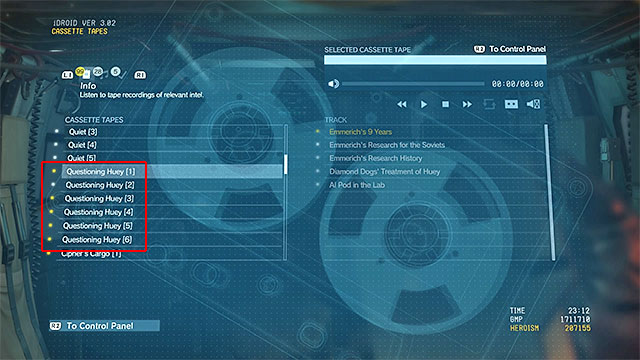
The next requirement is that you have listened to all of Questioning Huey recordings. They are related to the scientist, Emmerich, more precisely to doubts about his good intentions. The tapes can be played with the iDroid. After you turn it on, select Missions, then Cassette Tapes. Tape categories are shown in the screenshot above. They are located in:
 Watch the cutscene showing Emmerich being kicked out of the Mother Base
The last requirement is that you have to see Emmerich being expelled from the Mother Base. After you meet all the requirements, complete main and side missions until Miller tells you to come to the Mother Base.
When the cutscene is over, you will find out that Quiet has gone missing. Side Op 150 should now appear on the side-op list.
Note - Before you start searching for Quiet, prepare yourself, because mission 45 will start right after side op 150. Equip Big Boss with the best armor available and a rocket launcher (preferably one with homing missiles). You can find out more about it in the Mission Walkthrough (mission 45).
 The sniper is located in the southern part of the village
After starting side op 150, head towards outpost 4 in Africa. The area is occupied by hostile forces. Be careful about the sniper, hiding in the southern part of the town. Find him with your binoculars or with D-Dog, then approach him from the side or from behind and eliminate him quietly.


You might find the objectives hard to understand, because your map will not show Quiet's location at all. You have to reach the building shown above. It is located near the tower (neutralize the nearby enemies first). When you enter the building, you will listen to Millers comments and you'll have to walk up to a table with documents that you must take a look at. Doing so will start mission 45 - A Quiet Exit. Its walkthrough has been described on the next page of this guide.
Prize: 140000 GMP
The forty-fifth mission of Metal Gear Solid V is the last one featuring Quiet. During this operation, you have to join Quiet to defend yourselves from a mechanized Soviet unit near the palace ruins. It requires playing carefully, because enemy attacks can leave the protagonist with close to no health. Equipment is crucial here, so you should get prepared early on.
In theory, you cannot prepare for this mission, because it starts right after completing side op 150 (Secure Quiet). You can, however, select your equipment before side op 150. Equip Boss with the best armor. He will also need a rocket launcher (preferably with homing missiles, because the mission includes a chopper that's really hard to shoot down). If you have any anti-tank/EMP mines, take them as well.
Note - in mission 45, Quiet is a predetermined buddy. You'll fight alongside her even if you selected another buddy.
Note - You might want to call for supply drops during the fights. Before you start the mission, make sure you have at least a couple hundred thousand GMP to pay for them.
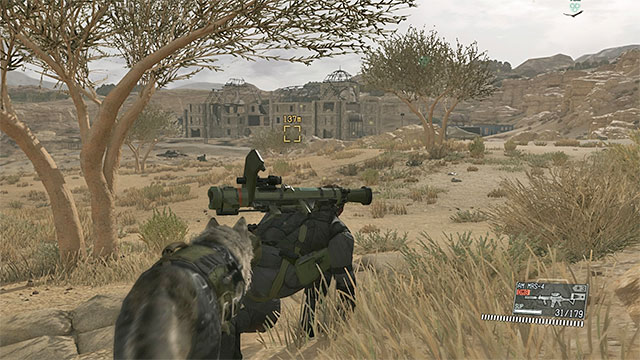 You need to reach Lamar Khaate Palace
The first part of this mission is very linear and you won't have to look at the map too often. You'll start in the northern part of the map and you'll have to go south to the Lamar Khaate Palace. You'll pass outpost 12, but it should not be occupied by enemies. When you reach the palace ruins, a long cutscene will start, showing you meeting Quiet. You will find out that you'll have to defend yourselves from the attacks of a mechanized unit containing infantry, APCs, tanks and a chopper (later).
Throw out the GROM-11 that Quiet gave Big Boss, because you probably already have a better one. The plan is simple - defend yourselves near the Lamar Khaate Palace from enemy infantry and fifteen vehicles - seven tanks, seven APCs and a helicopter. Eliminating them all is the second objective in the mission, so escaping the battlefield is out of the question. Tanks and armored vehicles will reach the palace throughout the whole mission, while the chopper will appear near the end.
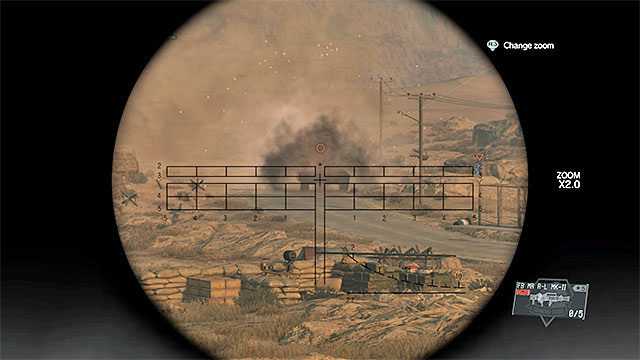 Try to destroy tanks and APCs when they are still far from the palace.
While playing this mission for the first time, you should try to complete it by destroying all of the enemy vehicles. Use the rocket launcher you've taken to the mission to eliminate tanks and APCs. Try to attack vehicles that are closer to the palace or are able to shoot at the ruins first. Depending on the type of a rocket launcher, APCs will take 1-2 hits, while tanks will need to be shot 2-4 times to be destroyed.
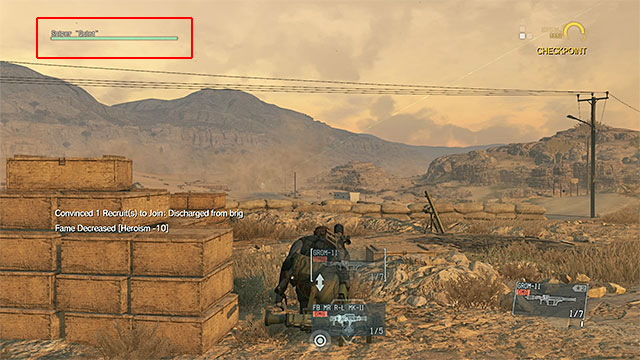
When you reload the rocket launcher, try to keep moving or stay behind a cover (for example, the cages used to hold prisoners). Otherwise, Big Boss might be hit (especially by tanks) and be close to dying. You don't have to worry about the infantry, because Quiet will get rid of all the regular soldiers. It's a good idea to order her to cover you with her sniper rifle.
Note - The screenshot shows Quiet's health bar (marked red above). You don't have to worry about it during most of the mission. Just take care of the vehicles so they don't stick around for too long. Start worrying about Quiet's health near the end of the mission.
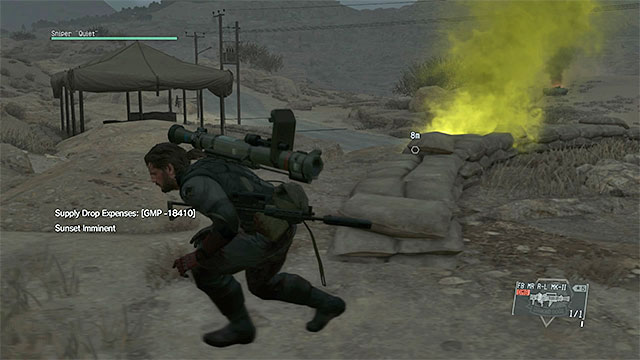 Order the supply drops
Refilling the supplies plays a major part in this mission. Don't wait for Quiet to order a supply drop, because she often does it too late. Order them yourself in advance - when you have half of the available rockets, or even right after you collect items from the last drop. Designate the palace for drops so you don't have to enter any open space.
 During a minor break, place the mines or order a supply drop
After you eliminate half of the tanks and APCs, you'll reach a checkpoint and Miller will suggest to prepare for more attacks. You can place mines on both main roads leading to the palace. Just remember not to be far from the palace for too long, because you might not make it back in time.
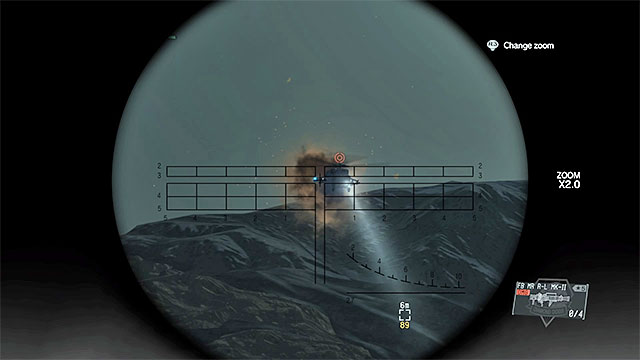 You could use homing missiles to destroy the helicopter
In the final phase, a chopper will appear, coming towards the palace. You must react to it as quickly as possible, because it poses the most threat. If you have a launcher with homing missiles, attack the chopper as soon as possible. If not, wait until it gets closer and hovers. A single shot will not destroy it, so you MUST hide behind the palace or other large cover to avoid its barrage. Shoot a few more times to destroy the helicopter or make the pilot escape (it does not have any negative outcomes).
At the very end, the enemies will commence the last attack. It means that you have to act more aggressively, because the vehicles will approach the palace faster. If you're going to keep Quiet's health bar full, you cannot be slow and careful now. Destroy the vehicles as soon as possible, not letting them shoot the female sniper (keep ignoring the infantry). A cutscene will end the battle.
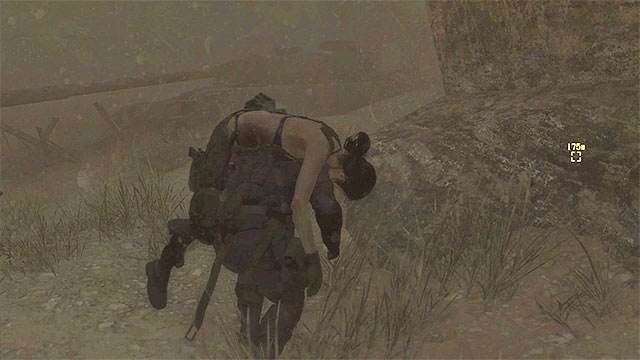 Stay close to rocks on the right
When you regain control over Big Boss, you'll have to carry Quiet to a safe place without being able to use weapons. A sandstorm makes the whole process easier, but there are reinforcements coming towards the Lamar Khaate Palace. Walk south until you reach the rocks, then turn southeast. Stay close to the rocks and keep crouching. You can rely on the recon team and stop whenever there is a warning on the map (red circles). Head towards the southern marker where the game will play a cutscene.
After seeing the summary and new cutscenes, there will be a short epilogue. Don't exit the area of the mission, start following the footprints instead. They will lead Big Boss to the tree shown above with a cassette tape left by Quiet. Picking it up will result in achieving one of the secondary goals.
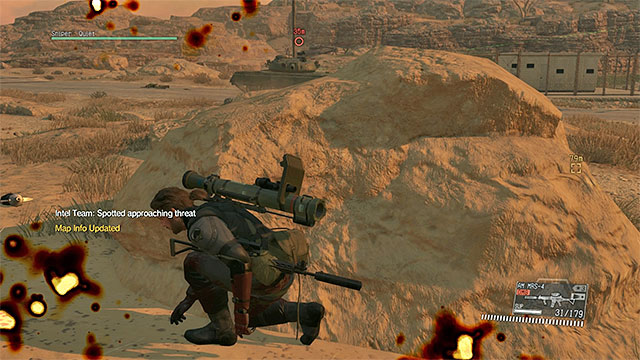 Sneak up to APCs only when they are occupied with fighting Quiet
It's an incredibly difficult objective - you must extract fourteen (!!!) vehicles that attack Lamar Khaate Palace. Try to complete it while replaying the mission, because you need the best possible equipment.
All of the vehicles enter combat mode when they reach the battlefield, which is a major difficulty. You won't be able to sneak up to all of them. There are two solutions. The first one means that you count on Quiet and wait until tanks and APCs engage in fighting her. The downside is that Quiet might start losing health points.
Another solution is just placing mines on the roads that the vehicles use. It guarantees better results, but you need to take care of two things. First, you need to know the order in which vehicles appear and place the charges underneath them. Second, you must use mines that do not destroy the vehicles (e.g. EMP).
Forty sixth mission of Metal Gear Solid V is in fact its true ending. Enabling it isn't quite easy, as you will have to meet up with several requirements which are listed later in the text.
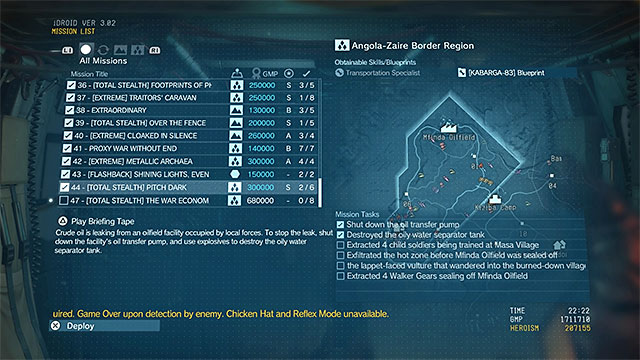 Finish some of the previous missions.
The very first thing you will have to do is completing the most important side tasks. Finish all of the missions form the first act (1-31). As for the second act you only have to finish completely new missions, this is: 32 (To Know Too Much), 35 (Cursed Legacy), 38 (Extraordinary), 41 (Proxy War Without End) and 43 (Shining Lights, Even in Death). You don't have to take care of the main mission 45 (A Quiet Exit) as it is unlocked separately and finishing it is not necessary to unlock task nr 46.
Apart from the main missions, take care of all of the Important Side-Ops marked with yellow colour. Specifically mission 143 (Extract the AI-Pod) and missions 145-149 (Search for the Escaped Children 01-05).
 Listen to the tapes.
Another thing you are required to do is listening to all of the major tapes. Tapes can be played with the iDroid. After activating it, go to the Missions tab and then Cassette Tapes. Play all the yellow tapes. In fact you don't have to be listening to them from start to the end. You only have to make the dots by the titles disappear.

Listening to these tapes comes with a complicated task you will have to deal with. You will have to exile scientist Emmerich from the Mother Base. In order to do so however, you will have to acquire the tapes from Questioning Huey, specifically numbers 1-6 (categories are marked on the picture nr 1), these are the tapes that question the intention of the scientist. The tapes can be found by finishing the following missions:
After you finish listening all of the tapes, go and complete some missions. After finishing couple of them, you will be called by Miler to the Mother Base. The cutscene will start (picture 2).
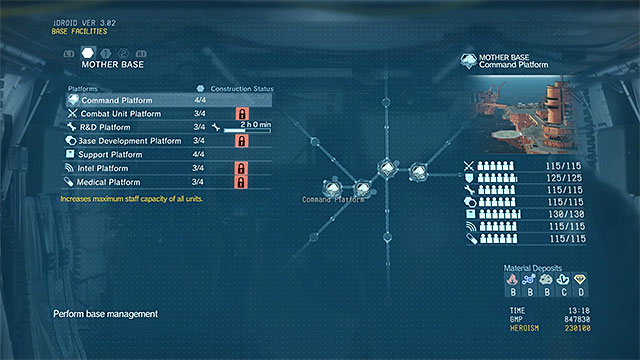
If the mission 46 is not unlocked despite completing all of the mentioned steps it means that you will have to upgrade the Mother Base platforms more. In order to upgrade them, use the iDroid and select Base Facilities tab. Example of the upgrade screen is depicted in the picture above albeit your base doesn't have to be upgraded that much. You will need to acquire 2-3 level of the platforms.
Important Note! - You will have to have a lot of cash in order to upgrade your base. If you don't have enough money, earn it by completing more missions and dispatch your subordinates. A single upgrade may also take up to several hours, which is also an important thing to remember.
Important Note 2! - Along with the mission 46 the following missions 48-50 should unlock automatically. They're very similar to the previous tasks and you don't need to complete them just yet.
Mission 46 is treated as the true ending of MGSV. It's quite peculiar as you will be told to repeat the prologue (0-Awakening). You are basically do the same things as on the first time and any changes appear only in some of the cutscenes. Mission 46 however, ends earlier than the Awakening. You won't be escaping on the horse from Man on Fire.
Important Note! Don't forget to watch additional cutscene which plays after mission summary.
Important Note! On the task list the main task does not appear. This would be escaping the hospital.
You can't prepare to this mission. You will begin the same you did in mission 0. Later on you will be given a pistol.
Mission 46 is basically the 0 mission with the only difference being the fact that it ends earlier than the Awakening. You won't be escaping on the horse from Man on Fire. Below, you will find the description for both of the optional tasks which are also new in mission 46.
 Attack the soldiers in hall instead of avoiding them.
You can deal with this task after getting to the main hall which is also the last location of the hospital. In prologue you were advised to avoid the enemies by sneaking through the right side. Now however, you better kill them right away. Position yourself by the staircase and, after shooting for the first time, proceed with eliminating soldiers who will try to get to the upper floor. Some of them will probably stay on the lower floor, in this case equip yourself with a better gun and carefully approach the remaining opponents.
 Stay in the hall and use the covers.
This optional mission can be completed after the one described above. Man on Fire will appear in the hospital hall the moment you will be leaving the building. When he does, don't leave the hospital just yet. Instead, start attacking him. It is vital to use the bigger covers such as the pillars as you won't be wearing any armour. Only when you will hit the target 20 times, leave the building.
Mission 47 is one of the repeated missions. Its goals are identical as the ones from mission 21. All of the details can be found in the description of it. The biggest change is the fact that the Big Boss cannot be spotted by the enemies. If he is, you fail the mission. This however doesn't apply to his sidekicks. Two more changes involve forbidding the usage of Reflex Mode and Chicken Hat.
It is the best to do this mission during the night-time. It will be easier for you to hide whilst on the airport. Make D-Dog your sidekick as he is able to tag and attack enemies without raising the alarm and, thus failing the mission.
If completing the main objective is all you want to do, you can bring a sniper rifle with yourself. In any other case, take a rocket launcher which will be vital for shooting down the chopper with a VIP and a plan inside of it. Make sure that your rocket launcher is powerful so it can neutralize the chopper in one hit. Whether you want to shoot down the chopper or not, equip yourself with a best version of the Sneaking Suit.
The main objectives of Orders The War Economy stay intact. All of the minor changes are listed below.
![Break into the airport by opening one of the gates. - Mission 47 - [Total Stealth] The War Economy - Metal Gear Solid V: The Phantom Pain - Game Guide and Walkthrough](https://game.lhg100.com/Article/UploadFiles/201512/2015121617542972.jpg) Break into the airport by opening one of the gates.
Break into the airport by opening one of the gates.Infiltrate Nova Braga Airport the same way as you did the first time you were doing this mission. Get to the gate in the northern-western area of the airport and wait until there are no enemies around, as soon as this happens, open it. Head to the main building.
![You can easily end this mission by eliminating the gun-seller. - Mission 47 - [Total Stealth] The War Economy - Metal Gear Solid V: The Phantom Pain - Game Guide and Walkthrough](https://game.lhg100.com/Article/UploadFiles/201512/2015121617543006.jpg) You can easily end this mission by eliminating the gun-seller.
You can easily end this mission by eliminating the gun-seller.If you want to end this mission with an S rank, sneak into the room ion the first floor immediately and kill the gun seller. Even though it isn't your main target per se, it will unable your main enemy to hold a meeting. Then you will be left with leaving the area.
However, if you want to complete more objectives, you will have to carefully get rid of each enemy before the chopper arrives. Here again, if you want to shoot down the chopper, you will have to be equipped with a powerful rocket launcher.
Mission 48 Mission 47 is one of the repeated missions. Its goals are identical as the ones from mission 28. All of the details can be found in the description of it. Changes involve having women as the Skulls. They are tougher and deal more damage. It will be also harder for you to take down the chopper and armoured vehicle. Two more changes involve forbidding the usage of Reflex Mode and Chicken Hat.
You can approach this mission during daytime in order to make finding the snipers less problematic. You can also start this mission at night if you want to sneak into the manor unnoticed more easily. You won't be able to use Quiet in this mission. Take D-Dog instead. He won't be very helpful with finding the Skull girls, but he will make the infiltration easier.
Take the best possible sniper rifle. Equip yourself with the best possible armour and helmet as well. The Skull girls' attacks won't be as powerful as the Quiet's attacks from mission 40, but here you may find yourself on the brink of death nonetheless.
The major Orders Code Talker stay unchanged. Here you will fins some tips concerning its changes which make this mission a bit harder.
![Climb the walls in order to avoid the Skull snipers. - Mission 48 - [Extreme] Code Talker - Metal Gear Solid V: The Phantom Pain - Game Guide and Walkthrough](https://game.lhg100.com/Article/UploadFiles/201512/2015121617543053.jpg) Climb the walls in order to avoid the Skull snipers.
Climb the walls in order to avoid the Skull snipers.The biggest obstacle in this mission would be the fact that you can't use Quiet (she left Diamond Dogs after mission 45). Women snipers have stronger weapons and armours in this mission. However if you want to challenge yourself you will need to get yourself a better weapon and some patience. Don't leave your hiding spot before doing reconnaissance with your binoculars and hide as soon as you see the laser pointer or an icon indicating being spotted.
The snipers can be bypassed, but it will make for a harder mission later on (details below). If you want to do it anyway, keep going by the riverside and climb the wall to its left. If you do this part correctly, you will make it through the whole jungle without being spotted once.
![Snipers will appear in the end, if not finished earlier on. - Mission 48 - [Extreme] Code Talker - Metal Gear Solid V: The Phantom Pain - Game Guide and Walkthrough](https://game.lhg100.com/Article/UploadFiles/201512/2015121617543029.jpg) Snipers will appear in the end, if not finished earlier on.
Snipers will appear in the end, if not finished earlier on.As mentioned, snipers will reappear eventually. As soon as you locate Code Talker. Then you will need to deal with each of the Puppets before leaving the manor. You will also need to watch out for the snipers on the way to the landing spot.
In the case of having the snipers already eliminated, the only threat is an armoured chopper. Don't engage this chopper at all as and fulton the APC vehicle without destroying it.
The forty-ninth mission in Metal Gear Solid V is one of the repeated missions. The objectives are identical as in the eight missions of the main story. You will find descriptions of the objectives in the walkthrough to this mission. The difference is that now you have to complete Occupation Forces mission without any help from Diamond Dogs. The most important changes are:
You can't prepare for this mission in any way (you can't select equipment, companion or even time).
The objectives are the same as in Occupation Forces mission. Below, you will find a list of tips considering the most important modifications, which of course increase the level of difficulty.
![The best place to start the mission is to the east of Qarya Sakhra Ee - Mission 49 - [Subsistence] Occupation Forces - Metal Gear Solid V: The Phantom Pain - Game Guide and Walkthrough](https://game.lhg100.com/Article/UploadFiles/201512/2015121617543016.jpg)
The best place to start the mission is to the east of Qarya Sakhra Ee. Head to guard post number 10 right away. There are four guards here, but you can easily eliminate them one by one and grab a gun from one of them. The main reason for which you are visiting this guard post is the APC with 130mm Rocket, which you can steal. When the convoy arrives, you can use the APC to destroy all the enemy machines (the truck and two tanks), which is the main objective of the mission.
![Some of the enemies have Killer Bee launchers. - Mission 49 - [Subsistence] Occupation Forces - Metal Gear Solid V: The Phantom Pain - Game Guide and Walkthrough](https://game.lhg100.com/Article/UploadFiles/201512/2015121617543003.jpg) Some of the enemies have Killer Bee launchers.
Some of the enemies have Killer Bee launchers.If the armored vehicle has been destroyed earlier, you still have an option of completing the mission and it shouldn't be that difficult. You can search for a substitute for the APCs rockets. Reach one of the mortars in the village, wait until the convoy arrives and start shooting. Make sure that you first destroy the tank in the front, because it may attack you. Another option is to eliminate the soldiers in the village. At least one of them is carrying a Killer Bee launcher, which you can "borrow".
The most risky variant is to Fulton all the machines from the convoy. You can for example use the APC to block the road, hide in the bushes and wait until the convoy arrives. Start from Fultoning the tank in the back and then proceed to the truck. Lastly, deal with the second tank
The last, fiftieth mission in Metal Gear Solid V is one of the repeated missions. The objectives are identical as in mission 31, which is the last in the first chapter. The description of the battle (types of Sahelanthropus's attacks, tactics of the boss, etc.) can be found in the walkthrough to this mission.
Defeating Sahelanthropus in Extreme mode is of course much more difficult. All his attacks are stronger and Metal Gear is very durable, which requires you to use better equipment. What's more, you can't use Reflex Mode (except for the finishing phase, when The Floating Boy appears) and Chicken Hat.
On the next page, you will find some tips on how to defeat Sahelanthropus in the Extreme version of the mission.
![Before you start the fiftieth mission in Metal Gear Solid V, you have to prepare for it well so that you dont die after 1 or 2 attacks and the battle wont take too long - How to win with Sahelanthropus in the Extreme mode? - Mission 50 - [Extreme] Sahelanthropus - Metal Gear Solid V: The Phantom Pain - Game Guide and Walkthrough](https://game.lhg100.com/Article/UploadFiles/201512/2015121617543005.jpg)
Before you start the fiftieth mission in Metal Gear Solid V, you have to prepare for it well so that you don't die after 1 or 2 attacks and the battle won't take too long. The first thing is your equipment. Taking the best rocket launcher that you have is an absolute priority. When browsing launchers, choose the one that deals the most Damage (the parameter is marked on the picture above). It doesn't neccessarily have to be a model with auto-aim, because you probably won't miss a huge target like Metal Gear.
![Another important aspect is switching Big Boss to one of the Diamond Dogs - How to win with Sahelanthropus in the Extreme mode? - Mission 50 - [Extreme] Sahelanthropus - Metal Gear Solid V: The Phantom Pain - Game Guide and Walkthrough](https://game.lhg100.com/Article/UploadFiles/201512/2015121617543118.jpg)
Another important aspect is switching Big Boss to one of the Diamond Dogs. To do that, select the Characters tab in the preparation menu and find someone with the Tough Guy ability (for example the character in the picture above). These characters have increased endurance. That's not all, because it is also good to equip such hero in the best Battle Suit available and a headgear (if possible).
![D-Walker will be only slightly helpful when fighting the boss. - How to win with Sahelanthropus in the Extreme mode? - Mission 50 - [Extreme] Sahelanthropus - Metal Gear Solid V: The Phantom Pain - Game Guide and Walkthrough](https://game.lhg100.com/Article/UploadFiles/201512/2015121617543128.jpg) D-Walker will be only slightly helpful when fighting the boss.
D-Walker will be only slightly helpful when fighting the boss.The choice of your companion during mission number 50 is not that important, because just like in the first version of the mission, you mainly have to count on yourself (and on support from the helicopter). Choosing D-Walker will save you some credits and you can use all the rockets at the beginning of the battle (make sure that they are your main weapon). However, it will not deal a lot of damage to Metal Gear.
![Avoid contact with stone spires. - How to win with Sahelanthropus in the Extreme mode? - Mission 50 - [Extreme] Sahelanthropus - Metal Gear Solid V: The Phantom Pain - Game Guide and Walkthrough](https://game.lhg100.com/Article/UploadFiles/201512/2015121617543193.jpg) Avoid contact with stone spires.
Avoid contact with stone spires.You can play the battle the same way as before. Focus on launching rockets towards the target and at first, aim at his head. This will allow you to complete an optional objective. Also, try to aim at the torso each time Sahelanthropus draws his swords, because this part of the armor is weaker then. Don't forget about calling for supply drops when you use all your rockets.
As it was mentioned earlier, Metal Gear deals much more damage on Extreme mode. You have to be especially careful when he uses stone spires. They can easily reach your hero and deal serious damage after they explode. Staying on the move is the best strategy. Moreover, you can use your rocket launcher when surrounded by spires, which will get you out of the trap. As for the rest of Sahelanthropus's attacks, hide behind the rocks when he tries to use his laser and when he launches missiles or drones (a lot of drones can quickly bring your hp bar to the end).
![It is quite easy to obtain the S rank in the final mission. - How to win with Sahelanthropus in the Extreme mode? - Mission 50 - [Extreme] Sahelanthropus - Metal Gear Solid V: The Phantom Pain - Game Guide and Walkthrough](https://game.lhg100.com/Article/UploadFiles/201512/2015121617543183.jpg) It is quite easy to obtain the S rank in the final mission.
It is quite easy to obtain the S rank in the final mission.During the last stage of the fight with Sahelanthropus, use the strategy described in the walkthrough to mission number 31. Keep shooting at The Floating Boy when the time slows down. As you can remember, doing this will make Metal Gear defenceless for a while and you can launch 1-2 rockets at him.
Winning the battle with Sahelanthropus is not as difficult as for example the second fight with Quiet. If you take proper equipment and use it well, you should win in about 10-15 minutes. You should also obtain the S rank.

This unofficial game guide for Metal Gear Solid V: The Phantom Pain describes all the additional (apart from the main story) activities and attractions offered by the game. The main part of the guide is a walkthrough to all 157 Side-Ops available in the game. Every mission is described in detail. You will find here information about how to unlock them, where do they take place, how to complete, what equipment to take and what is the reward. The next part of the guide is a chapter devoted to managing the Mother Base. It describes the most important aspects of this element of the game and gives you hints on how to properly run the base. Another large part of the game guide is a list of collectibles. You can read about finding diamonds, cassette tapes, blueprints, posters, memento photos and new animals for your zoo. You will find detailed info about their locations, along with maps or screenshots from the game. The last chapter is devoted to Achievements and Trophies, in which every achievement is described. You will learn what are the requirements and how to fulfill them. Metal Gear Solid V: The Phantom Pain is an action game by Hideo Kojima and his studio - Kojima Productions. It is a very complex production and besides playing the main story, we can complete a whole bunch of other quests. A lot of them is important for your overall progress in the game. You can, for example, hire new Specialists for your Mother Base or simply get some money.
This guide has been color-coded in the following manner:
Jacek "Stranger" Halas & Kuba "Zaan" Zgierski ()
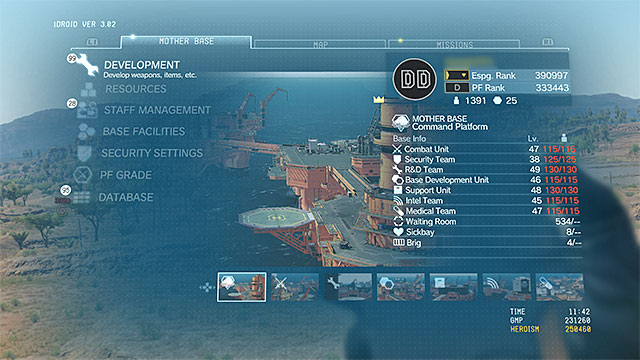 Select Mother Base tab in your IDroid.
The Mother Base is the headquarters of the Diamond Dogs and it's an integral part of Metal Gear Solid V. During the game, you have to remember about constantly developing your base and managing the resources. This will give you access to new devices and support during your missions. You don't need to go back to the base every time you want to make a change. You can do it any time you want, by choosing Mother Base tab in your Idroid. Then, you can give orders or check how are things in the base from distance. However, you have to visit Mother Base when:
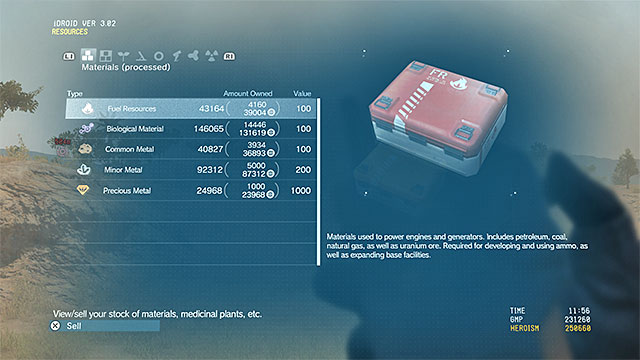
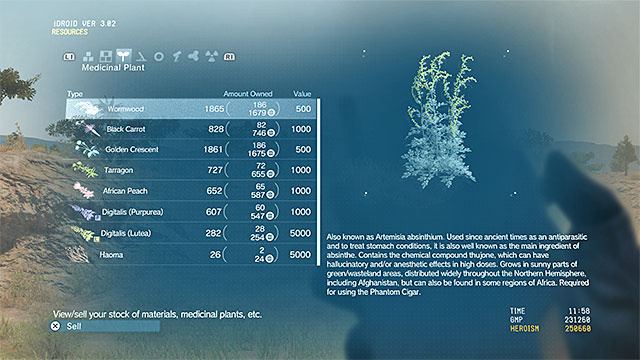 Resources are for example materials or plants.
Another very important element of Mother Base are things that you can use to make the game easier. You have to make sure that you obtain more and more. These are:
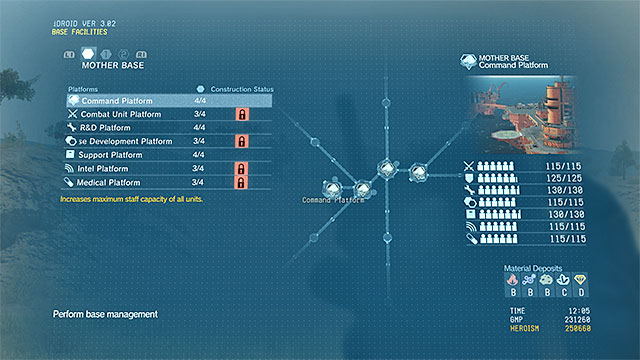 Gradually develop the platforms.
There are seven platforms in Mother Base, all with different uses. The game unlocks the platforms automatically as you progress through the campaign. However, to further develop them, you have to pay. You can develop each platform up to level 4. The platforms are:
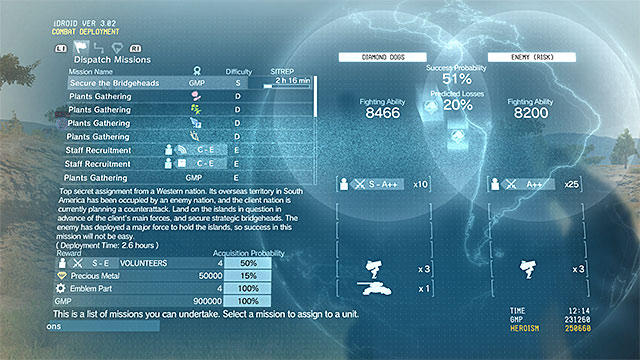 Make sure that some of your allies are on a mission all the time.
Later in the game, you unlock Dispatch Missions. There are quite unusual, because you don't play them by yourself. Instead, you send your allies to complete them. Doing this is a very good way to increase your funds, gather resources or new recruits. Dispatch Missions divide into unique (marked with a yellow dot and located at the top of the list) and the ones that can be repeated many times. Unique missions are more difficult and take more time (sometimes even a few hours), but offer better rewards. Moreover, for completing all the unique tasks, you obtained the Deployment achievement/trophy. No matter what type of the mission, don't send people to complete if the success probability is below 90-95%.
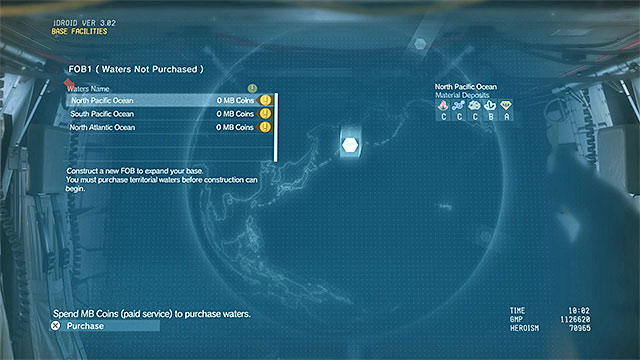 Only the first Forward Operating Base doesn't cost you anything.
After you complete mission 22 (defending the Mother Base), you can build your first F.O.B (Forward Operating Base). The task of this facility is to support Mother Base development so that you can build new platforms and invent new devices faster. The first F.O.B is free, but for the next ones you have to pay with Motherbase Coins. MBC can be bought for real money (microtransactions), or obtained in the game. They are obtained mainly for logging to the game everyday, but it's not a lot, so you have to be prepared for gathering points for a long period before you buy new F.O.Bs.
A very important information connected to Forward Operating Bases is that they are a part of the multiplayer mode. You can attack other player's bases to steal resources or personnel. Of course, other players can attack you too. In both cases, you can go to F.O.B and lead an attack or defend your base (if you ignore an enemy attack, you will lose some of your resources). Before an attack from other player occurs, you can build additional defensive systems in F.O.B and decide how many people should guard the base.
Below, you will find a list of tips connected to Mother Base, especially to the matter of managing it properly and also some aspects that are not fully explained in the game, but are very important.
In Metal Gear Solid V, there are a total of 157 Side-Ops to complete. Not all of them are available from the very beginning of the game. After you complete several initial missions, you gain access to the first 2-3 side missions. More and more optional assignments become available as a result of your progress into the main storyline, or thanks to the side missions available at a given moment.
The majority of side missions only have a single primary objective. They may require you to, e.g. free a prisoner, capture an enemy officer or find blueprints for a rare item. In theory, you can play side missions while playing the main ones, but it is more convenient to complete them in-between the individual main missions (free roaming around the map).
Note - You can replay the selected side missions. However, you should do this only if you want to obtain more cash e.g. for your research (each side mission that you complete is usually rewarded with something between tens of thousands to hundreds of thousands of GMP).
Mission objectives: Restrain and extract the Russian interpreter.
Availability: This mission becomes available automatically, as one of the initial ones (probably after you complete the third main mission).
Location: Outpost 24 near Spugmay Keep and Eastern Communications Post.
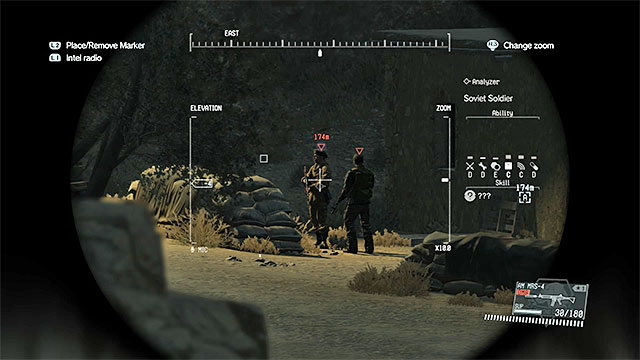
Walkthrough: Approach the outpost with the interpreter from any side and use the binoculars to identify him. He has been shown in the above screenshot and you can tell him by the green beret that he is wearing.
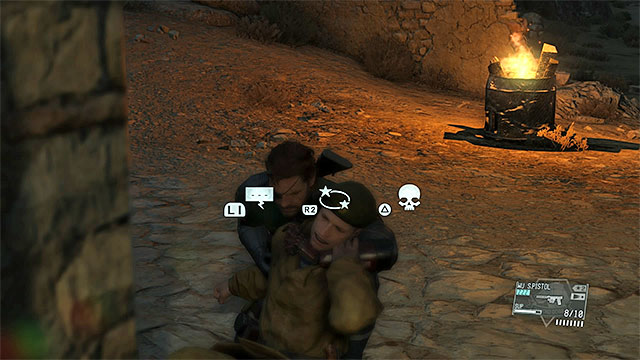 Restrain the interpreter and fulton him
If you want to do this the quick way, immediately deal with the interpreter's guards (you can either stun or kill the rest of the soldiers) and render him unconscious in any way you want (it is recommended that you use the sleeping ammo pistol). If you want to avoid being spotted, wait for the interpreter to enter the building, eliminate the guards silently and knock down the interpreter himself. Regardless of what you did, approach the unconscious interpreter and fulton him, i.e. extract him to the Mother Base using the balloon (make sure that this is successful - the body cannot be indoors!).
Rewards: 30000 GMP, new crew member (Russian interpreter)
Mission objectives: Restrain and extract the Pashto interpreter.
Availability: This mission becomes available automatically thanks to your progress into the game and to completing the rest of the side missions.
Location: Outpost 20 to the West of the Mountain Relay Base.
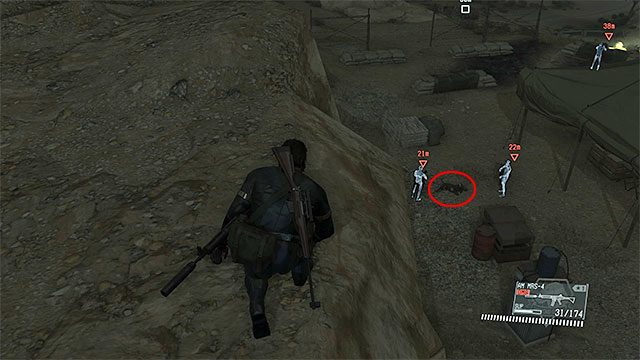
Walkthrough: It is best to approach the outpost with the interpreter from the North-East. Stop by the viewpoint overlooking the outpost and mark all of the enemies with binoculars. The interpreter is being held in the place shown in the above screenshot - guarded by two men.
 The most convenient way is to fulton the interpreter to the base
You can either shoot or use, e.g. the sleeping ammo pistol on the two guards. Try not to alarm the rest of the camp, or you will have to fight more opponents. After you have secured the area, climb down carefully and approach the interpreter. It is best to fulton him from here, i.e. extract the interpreter back to the Mother Base, using the balloon.
Rewards: 30000 GMP, new crew member (Pashto interpreter)
Mission objectives: You have to stun and extract an Afrikaans interpreter.
Availability: This mission should automatically unlock with your progress in the main storyline (you have to unlock the African map) and by completing other secondary missions.
Location: Near the Bampeve Plantation in Africa.
Note - The Afrikaans interpreter can also be recruited with a different method, or to be more specific, during the completion of the fourteenth mission of the main storyline (Lingua Franca) you can capture and fulton the soldier who is interrogating other captives.

Description: After landing you should search the area to the West of the Bampeve Plantation. You should be able to locate the hut shown on the above screenshot, inside of which there's the interpreter. Start off by eliminating the soldiers scattered around the hut, and then you should make some noise, to flush out the translator. Stun and fulton him.
Rewards: 80000 GMP, a new member of the crew (an Afrikaans interpreter)
Mission objectives: You have to stun and extract a Kikongo interpreter.
Availability: This mission should automatically unlock with your progress in the main storyline (you have to unlock the African map) and by completing other secondary missions.
Location: Near the 16th outpost in Africa.
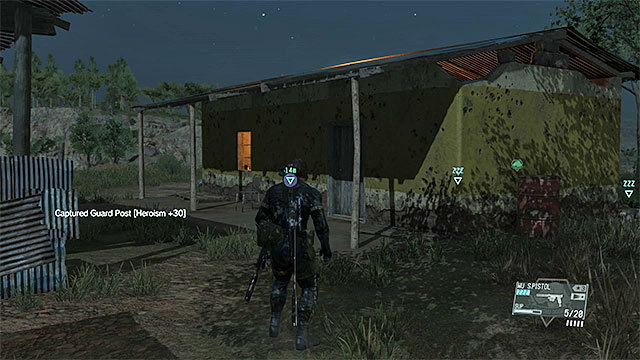
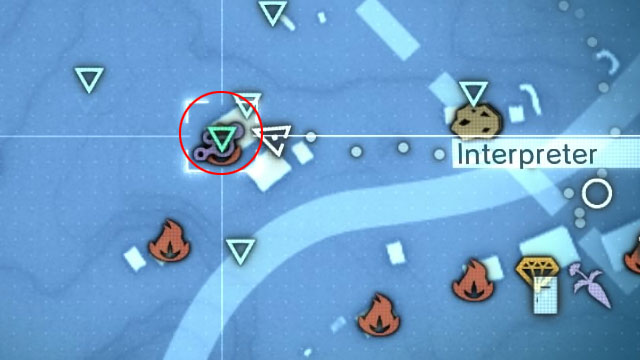
Description: After arriving at the 16th outpost, you should immediately get into the stealth mode, so that you won't have to get involved into unnecessary fights. The Kikongo interpreter is kept hostage in the building shown on the above screenshots. Make sure that there are no enemies near the buildings, get inside, pick up the interpreter and carry him outside. After getting far enough from the outpost, fulton the interpreter.
Rewards: 90000 GMP, a new member of the crew (Kikongo interpreter).
Mission objectives: You need to find and collect the Blueprint.
Availability: This mission becomes available automatically thanks to your progress into the game and completing the rest of the side missions.
Location: Da Wialo Kallai village.
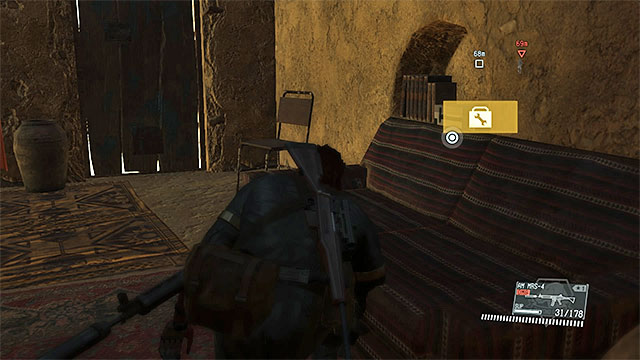
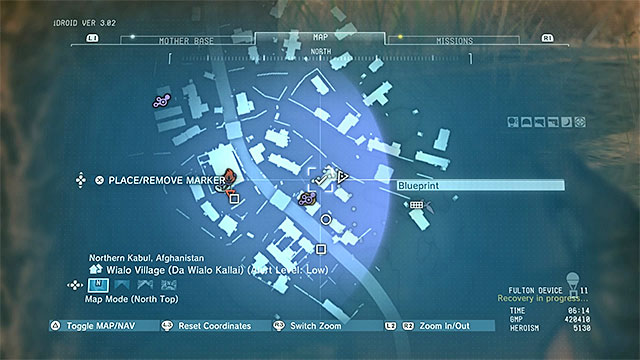
Walkthrough: To obtain the rare Blueprint, you do not need to secure the entire village but you only have reach the cottage shown in the above screenshots. It is in the Eastern part of the Da Wialo Kallai village. It should be noted that you can make things easier for yourself by capturing one of the enemies and interrogating him about the whereabouts of the blueprints.
Rewards: 30000 GMP, new blueprint (RIOT SMG)
Mission objectives: You must find and secure the blueprint.
Availability: This mission should automatically unlock with your progress in the main storyline and by completing other secondary missions.
Location: Serak Power Plant
 The area of the mission.
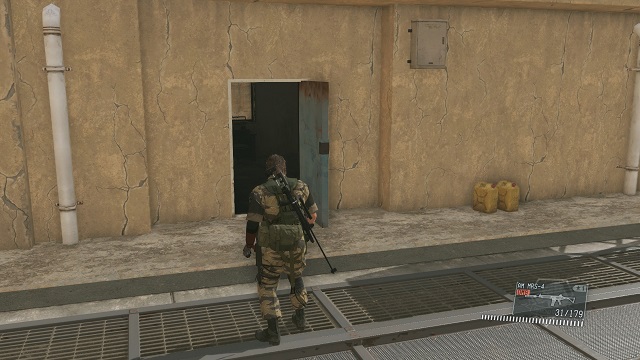 The building with the blueprint inside.
Description: Get to the designation (Serak Power Plant) and find the longitudinal building, located to the North of the power plant. When the character breaks through the lock on the door, you will be able to get inside and pick up the Blueprint from the table.
Rewards: 60000 GMP, new blueprint (STUN ARM)
Mission objectives: You must find and secure the blueprint.
Availability: This mission should automatically unlock with your progress in the main storyline and by completing other secondary missions.
Location: Qarya Sakhra Ee village in Afghanistan.

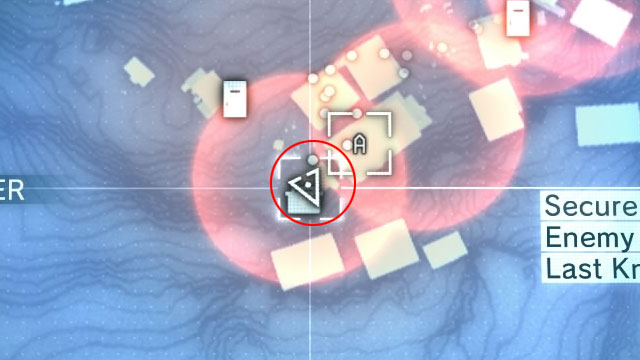
Description: The Qarya Sakhra Ee village can be reached, for instance, from the East or North. During the exploration you may have some problems with the enemies, as they have a height advantage over you and they are stationed on numerous vantage points. The blueprint you are looking for can be found in the small hut, shown on the screen above, which is located in the South-Western section of the village.
Rewards: 90000 GMP, new blueprint (IR-Sensor)
Mission objectives: You must find and secure the blueprint.
Availability: This mission should automatically unlock with your progress in the main storyline (you have to unlock the African map) and by completing other secondary missions.
Location: Near the 11th outpost in Africa.
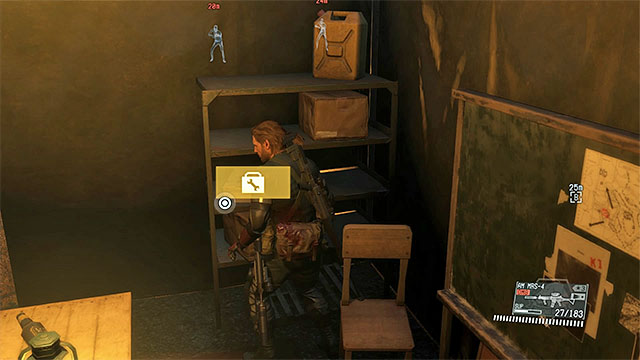
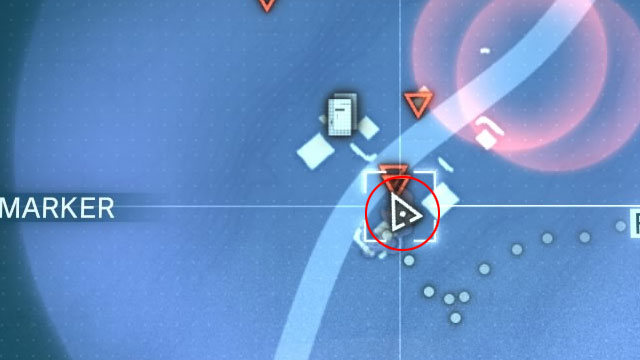
Description: during your march to the 11th outpost, you must be careful, as there are numerous enemies patrolling the area, as well as a soldier equipped with a sniper rifle (the latter can be ignored, as long as you move around the area quietly). More enemies can be found in the outpost itself. The blueprint you are looking for can be found in one of the tents, and the exact location is shown on the above screenshot.
Rewards: 90000 GMP, new blueprint (ANTITHEFT DEVICE)
Mission objectives: You must find and secure the blueprint.
Availability: This mission should automatically unlock with your progress in the main storyline (you have to unlock the African map) and by completing other secondary missions.
Location: Nova Braga Airport in Africa.
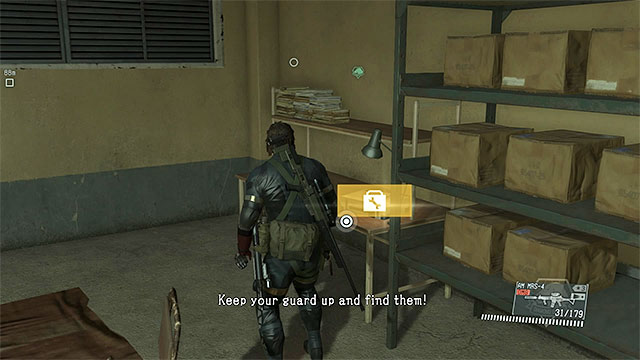
Description: The Blueprint can be found in the South-Western section of the Nova Braga Airport. To get to the airport, it's best to approach it from the West and either cross through the gate, or simply jump through the wall. During the exploration you should be cautious, as there are numerous snipers stationed around the area, such as the roof of the main building. You have to reach the Northern building, shown on the above screenshot, as the collectible you are looking for is located there.
Rewards: 100000 GMP, new blueprint (GUN-CAM DEFENDER)
Mission objectives: You must find and secure the blueprint.
Availability: This mission should automatically unlock with your progress in the main storyline and by completing other secondary missions.
Location: Afghanistan Central Base Camp in Afghanistan.

Description: The best way to reach the Afghanistan Central Base Camp is to come from the South-East. During your journey through the base, try not to be seen by the enemies, as when that happens, getting to the collectible will be a lot harder (mortar bombardment, snipers, helicopter, etc.). The blueprint can be found in a small building, located in the Northern section of the base. It can be seen on the above screenshots.
Rewards: 100000 GMP, new blueprint (UA-Drone)
Mission objectives: Restrain and fulton a well-trained enemy soldier.
Availability: This mission becomes available automatically as one of the initial ones (probably after you complete the third main mission).
Location: The area southwards of Yakho Oboo Supply Outpost and Westwards of outpost 8.
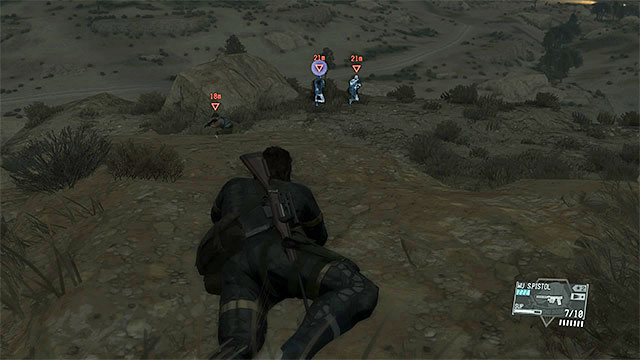
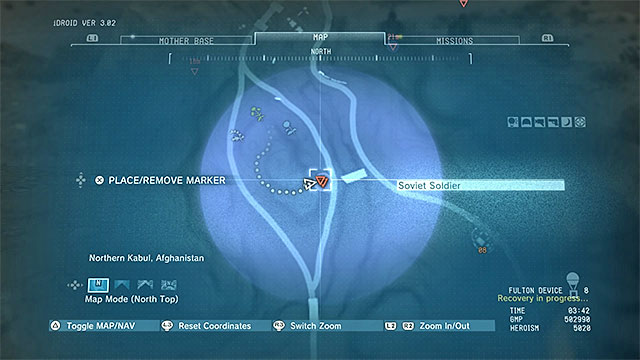
Walkthrough: It may be a bit tricky to find the well-trained soldier, because he is occupying the rocks in the center of the area marked by the game, along with other soldiers. The location has been shown in the above screenshots. Try to sneak up to the enemies from behind (i.e. from the West) by climbing. Use binoculars to identify the target. You can shoot the other soldiers and target at the well-trained soldier to coerce him to give up (which is a better idea), or quickfire sleeping ammo at all three of them (hide behind the bushes between the individual shots). Regardless of which you did, you need to render the target unconscious, stand by his body and fulton him (send to the Mother Base using the balloon).
Rewards: 30000 GMP, new crew member
Mission objective: Restrain and extract a well-trained enemy soldier.
Availability: This mission should automatically unlock with your progress in the main storyline and by completing other secondary missions.
Location: Wialo Village (Da Wialo Kallai)
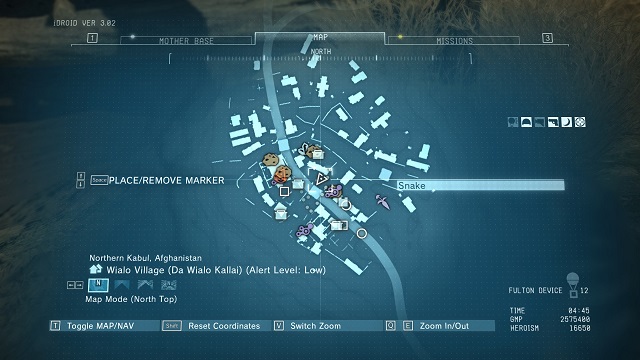 Mission area.
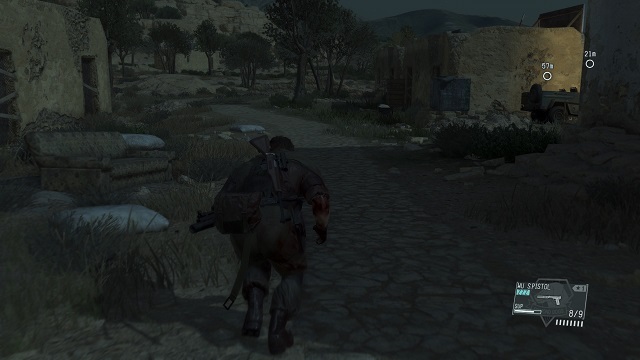 The soldier is somewhere in the village.
Description: In this mission, you need to locate and extract a well-trained soldier (he is different from the rest of Russians in that he is wearing a balaclava). Since he remains in constant movement, you may find him in many different spots in the village. Around, there quite a few enemy soldiers, so you first need to identify your target at a distance and sneak up to him safely, afterwards. Then, you put him to sleep and fulton him to the base.
Rewards: 30000 GMP, new crew member.
Mission objective: Restrain and extract a well-trained enemy soldier.
Availability: This mission should automatically unlock with your progress in the main storyline and by completing other secondary missions.
Location: Smasei Fort (Da Smasei Laman)
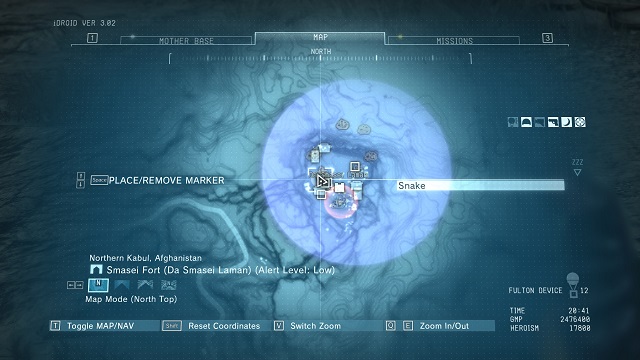 Mission area.
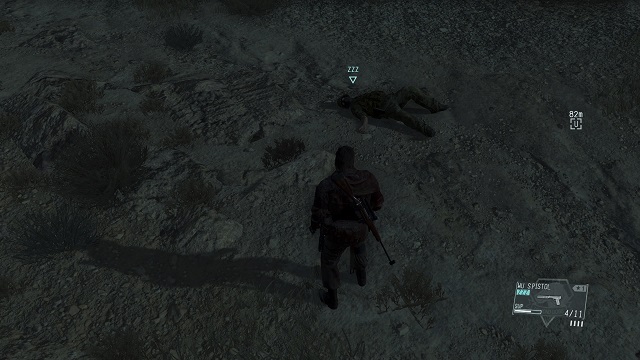 The well-trained soldier.
Description: In this mission, you are to locate and extract a well-trained soldier. Since he remains in constant movement, you may find him in many different spots in the village. Around, there quite a few enemy soldiers, so you first need to identify your target at a distance and sneak up to him safely, afterwards. Then, you put him to sleep and fulton him to the base. The difficult part is that he does stand out from the rest of Russians in the village.
Rewards: 60000 GMP, new crew member.
Mission objectives: You have to stun and extract a highly-skilled soldier.
Availability: This mission should automatically unlock with your progress in the main storyline and by completing other secondary missions.
Location: Da Ghwandai Khar village in Afghanistan.
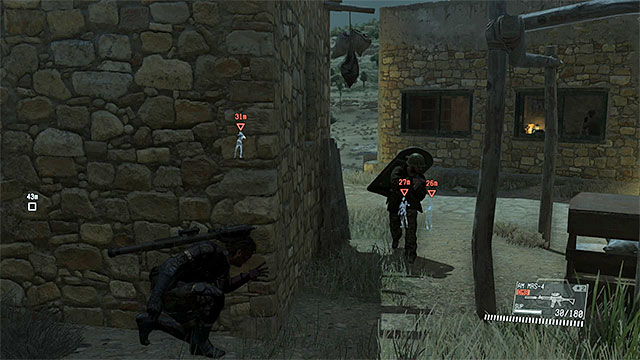 Find the highly-skilled soldier and capture him alive.
Description: You must travel to the previously explored village in order to find the highly-skilled soldier. You can locate him either by using your binoculars, or by interrogating other guards - your target will be inside one of buildings, or outdoors, patrolling the area. After identifying your target, you must knock him out and fulton to your Mother Base. Making sure that no enemy sees you during the process will make the objective a lot easier, especially if you have to get the target outside a building first.
Rewards: 60000 GMP, new crew member.
Mission objectives: You have to stun and extract a highly-skilled soldier.
Availability: This mission should automatically unlock with your progress in the main storyline and by completing other secondary missions.
Location: near the 4th outpost (to the East from the Aabe Shifap Ruins) in Afghanistan.
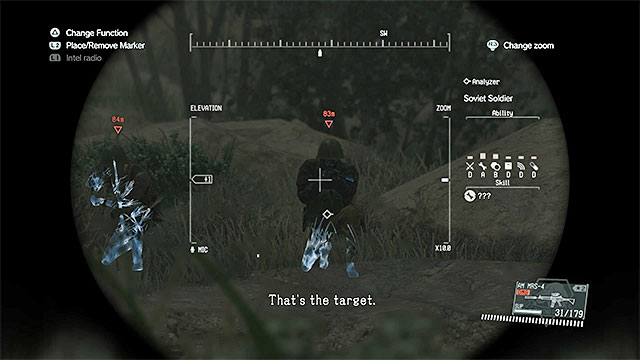
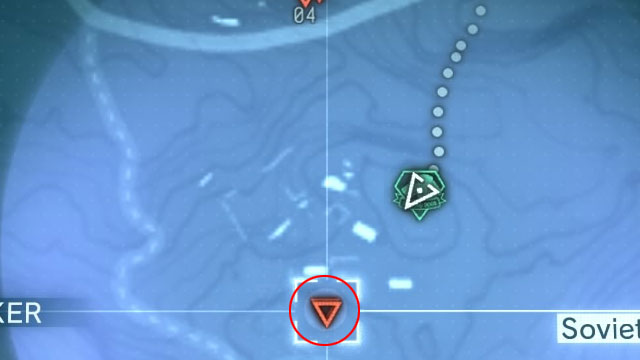
Description: Don't head straight towards the 4th outpost. The highly-skilled soldier you are looking for is a sniper and he can be found to the South of the said outpost - his location can be seen on the above screenshot. Use your binoculars to identify the enemy and then flank him, or get to him from behind. He can be accompanied by other enemies, so make sure to knock them out as well.
Rewards: 60000 GMP, new crew member.
Mission objectives: You have to stun and extract a highly-skilled soldier.
Availability: This mission should automatically unlock with your progress in the main storyline and by completing other secondary missions.
Location: near the 20th outpost (to the West from the Mountain Relay Base) in Afghanistan.
 Clear the hills from all the snipers and only then get to the outpost.
Description: The 20th outpost is monitored by snipers scattered around on numerous hills and those should be taken out in the first place. You can either sneak up on them and eliminate them quietly, or use your sniper rifle to get them from afar (the latter can be made easier with the help of Quiet). You should only focus on getting to and capturing the highly-skilled soldier after the hills are clear from the enemy snipers.
Rewards: 80000 GMP, new crew member.
Mission objectives: You have to stun and extract a highly-skilled soldier.
Availability: This mission should automatically unlock with your progress in the main storyline (you have to unlock the African map) and by completing other secondary missions.
Location: Area to the North from the 23rd outpost, in Africa.
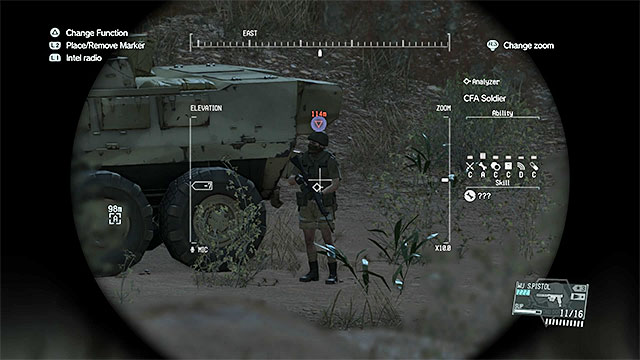
Description: After getting to the designation, immediately get into stealthy position. Locate the enemies standing near an armored vehicle. The highly-skilled soldier is one of those enemies, and he can be seen on the above screenshot.
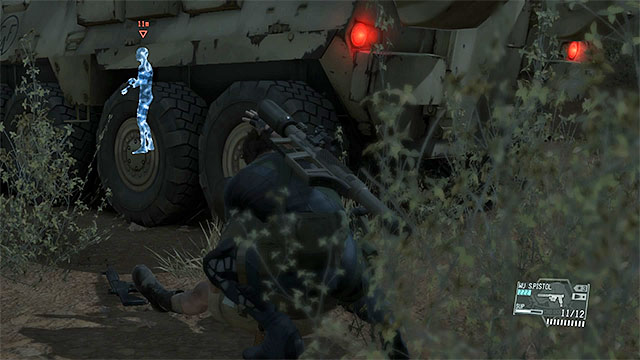 Sneak up on the highly-skilled soldier.
You don't have to eliminate enemies stationed in the area, or attack the armored vehicle. The best approach is to simply wait for some of the enemies to go on a patrol mission and then start moving in a prone position towards your target. Sneak up on him from behind, knock him down and start carrying. You should only decide to fulton the enemy when you are sufficiently far away from the enemy soldiers, as well as the armored vehicle.
Rewards: 80000 GMP, new crew member.
Mission objectives: Knock out and exfiltrate a Highly-Skilled Soldier.
Availability: this mission unlocks automatically as you progress through the game (you have to unlock the map of Africa) and complete side ops.
Location: Mfinda Oilfield in Africa.

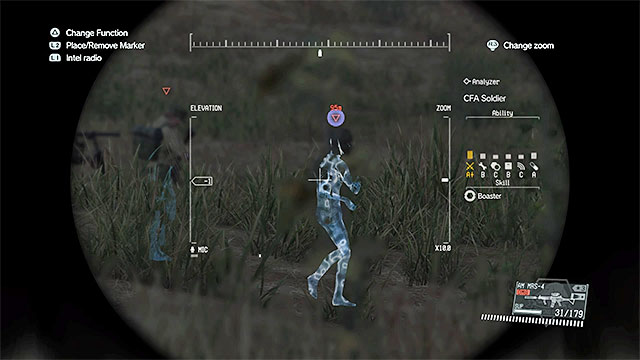
Description: You have to infiltrate Mfinda Oilfield and you can do it by reaching it from the east or from the south. When going through the Oilfield, watch out for the snipers located on the rooftops. It is best to circle them completely. The Highly-Skilled Soldier that you look for is located in the north-western part of the Oilfield, close to the red tank that you've destroyed in the thirteenth mission (Pitch Dark). Its location is shown on the pictures above. You can neutralize the soldier from distance or after you get close to him. Use the metal balconies, as they are less guarded.
Reward: 90000 GMP, new member of the base personnel
Mission objectives: You have to knock out and exfiltrate a Highly-Skilled Soldier.
Availability: this mission unlocks automatically as you progress through the game (you have to unlock the map of Africa) and complete side ops.
Localization: Near guard post number 10 in Africa.
Deal with the soldier's escort and then with the soldier himself.Description: You will find the Highly Skilled Soldier at guard post number 10. He constantly moves around the guard post. Moreover, he is accompanied by two bodyguards. There is also a sniper located on a nearby hill and it is good to deal with him earlier. Get rid of the soldier's escort and then proceed to exfiltrating the main target. Watch out not to kill the soldier during the fight.
Rewards: 90000 GMP, new member of the base personnel
Mission objectives: Knock out and exfiltrate a Highly-Skilled Soldier.
Availability: this mission unlocks automatically as you progress through the game (you have to unlock the map of Africa) and complete side ops.
Location: near guard post number 05 in Africa.
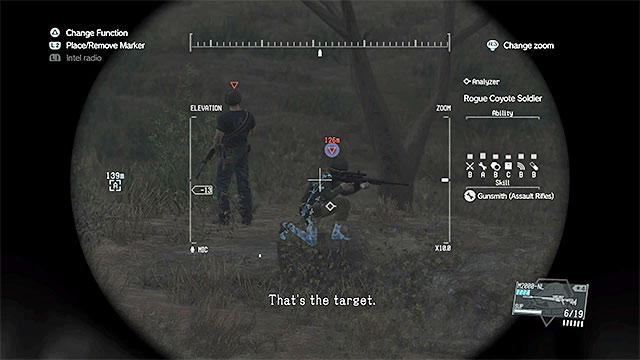
Description: Search the area to the east of guard post number 5. The Highly-Skilled Soldier is a sniper (shown in the pictures above). Sneak up to the hill on which you can see him. First, eliminate the other sniper and then knock out your main target. Try to complete the mission without being detected (sneak up from the side where there are currently no enemies and watch out for snipers and the tank parked nearby).
Rewards: 100000 GMP, new member of the base personnel
Mission objectives: Knock out and exfiltrate a Highly-Skilled Soldier.
Availability: this mission unlocks automatically as you progress through the game (you have to unlock the map of Africa) and complete side ops.
Location: Munoko ya Nioka Station in Africa.
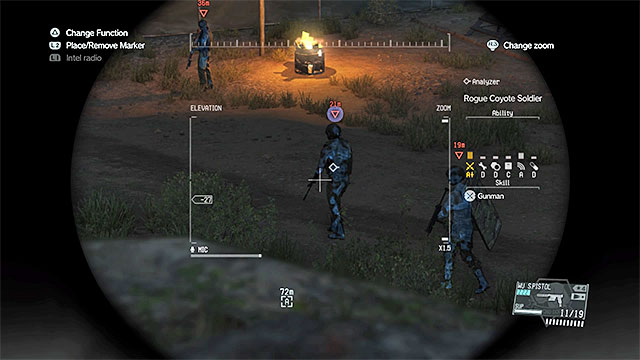
Description: It is best to reach Munoko ya Nioka Station from the northern side, because this is the part where the Highly-Skilled Soldier should be. The target is shown on the picture above. At least one person is escorting the soldier. You can clear out a given part of the base and attack the target, or wait until the soldier goes to a place where there are not many enemies. In both cases, you should sneak to the opponents from behind, then knock out the bodyguard and lastly deal with the main target.
Rewards: 100000 GMP, new member of the base personnel
Mission objectives: Knock out and exfiltrate a Highly-Skilled Soldier.
Availability: this mission unlocks automatically as you progress through the game (you have to unlock the map of Africa) and complete side ops.
Location: the area to the east of guard post number 13 in Africa.
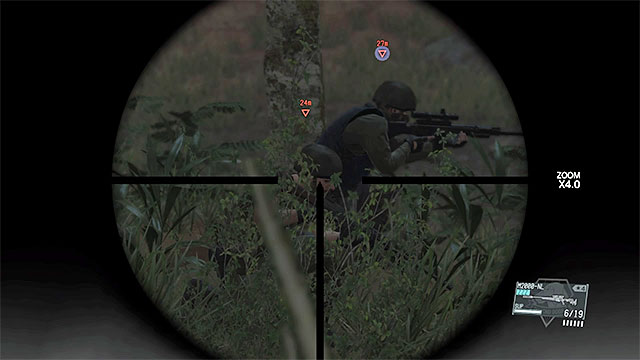
Description: Carefully start searching the area to the east of guard post number 13. Your target is a sniper shown on the picture above. There is another sniper with him. Start crawling towards the enemies. You should crawl in the area that is currently out of their range of view (watch out for the regular soldiers patrolling the area!). After reaching your destination, you can use a gun with non-lethal ammunition or quickly deal with the enemies in melee combat.
Rewards: 100000 GMP, new member of the base personnel
Mission objectives: You have to stun and extract a highly-skilled soldier.
Availability: This mission should automatically unlock with your progress in the main storyline and by completing other secondary missions.
Location: Area near the 25th outpost, and the Spugmay Keep in Afghanistan.
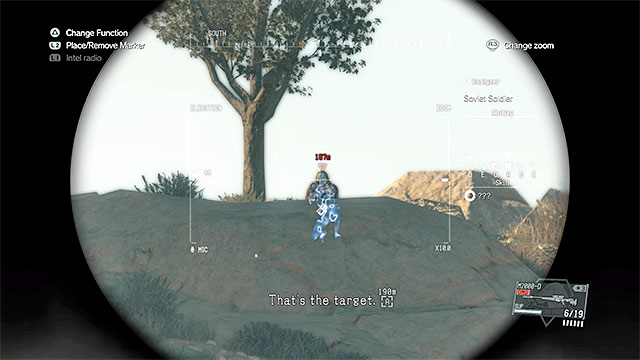
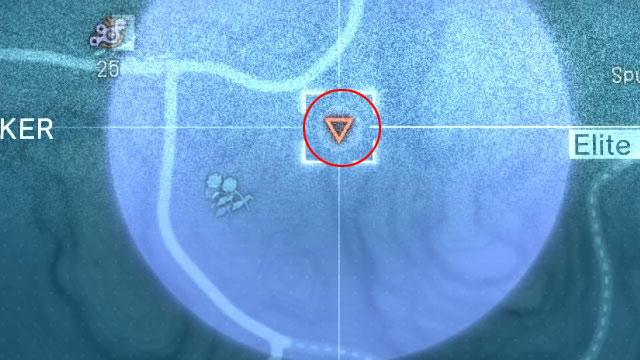
Description: The highly-trained soldier you are looking for is a sniper and he is stationed between the 25th outpost and the Spugmay Keep. The hill occupied by the sniper is marked on the above screenshot. Start crawling towards the enemy (while watching out for two soldiers patrolling the nearby road), or get to the enemy from behind. When you get to the enemy, knock him down and fulton to your base.
Rewards: 120000 GMP, new crew member.
Mission objectives: Knock out and exfiltrate a Highly-Skilled Soldier.
Availability: this mission unlocks automatically as you progress through the game (you have to unlock the map of Africa) and complete side ops.
Location: Afghanistan Central Base Camp
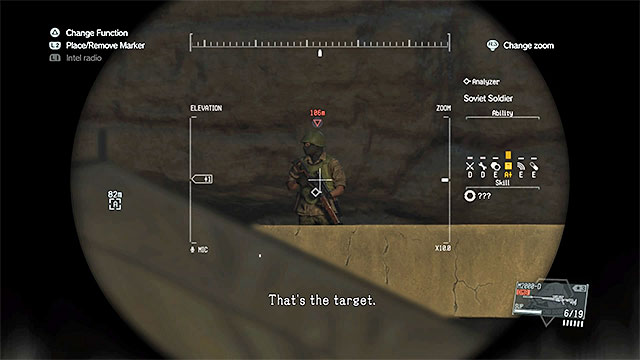

Description: The Highly-Skilled Soldier is a sniper located in Afghanistan Central Base Camp. His exact location is shown in the picture above - it is the roof of the building next to the rifle range.
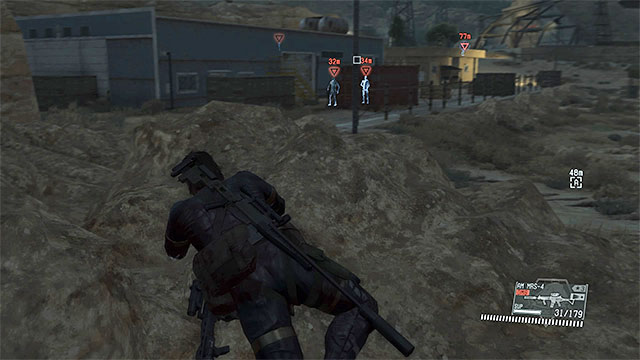 Go past the rifle range to reach the building with the sniper.
When heading towards the sniper's location, make sure that you are not seen by him, because besides raising an alarm, he can easily kill the hero. Choosing the main path is not a very good idea. It is better to circle the rifle range from the left and approach the building with your target safely. You can neutralize the two guards or wait until they go away. Find a locked gate, open it and reach the stairs leading to the roof. Lastly, sneak up to the sniper, knock him out and Fulton him.
Rewards: 120000 GMP, new member of the base personnel
Mission objectives: Knock out and exfiltrate a Highly-Skilled Soldier.
Availability: this mission unlocks automatically as you progress through the game (you have to unlock the map of Africa) and complete side ops.
Location: Lufwa Valley in Africa.
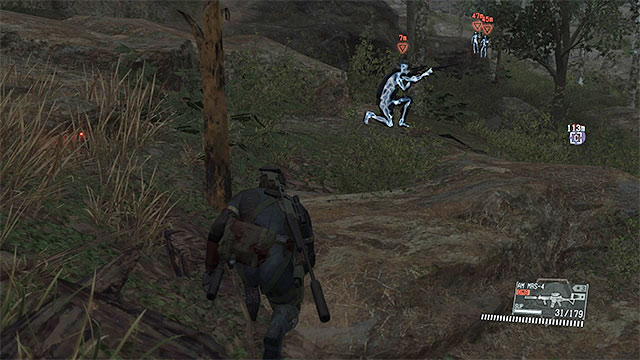
Description: Your destination is a large mansion in Lufwa Valley, which you've visited when completing the thirtieth main mission (Code Talker). You can approach the mansion from the south-west or from the north-west. In both cases, you should watch out for the enemies that you can meet on the way (for example near the wooden bridge to the south of the mansion). Moreover, there is a sniper located on a hill to the west of the house (shown on the picture above). Eliminating him is your priority.
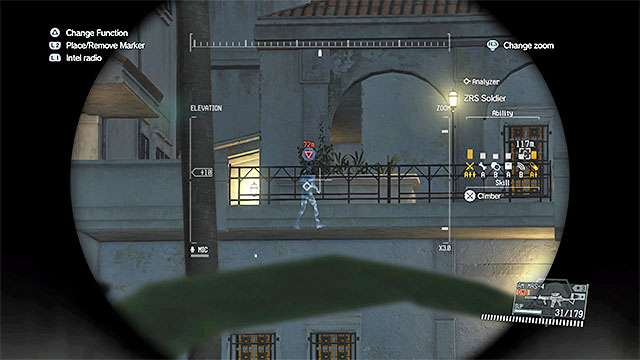
Highly-Skilled Soldier is busy patrolling the balconies above. You can see him on the picture above. Carefully approach the mansion and use any of the stairs (or the ladder) to get to higher levels. Find a good place to prepare an ambush and wait until your target appears. Knock him out and Fulton him quickly. After that, leave the area before somebody detects you.
Rewards: 140000 GMP, a new member of the base personnel
Mission objectives: Knock out and exfiltrate a Highly-Skilled Soldier.
Availability: this mission unlocks automatically as you progress through the game and complete side ops.
Location: OKB Zero in Afghanistan.
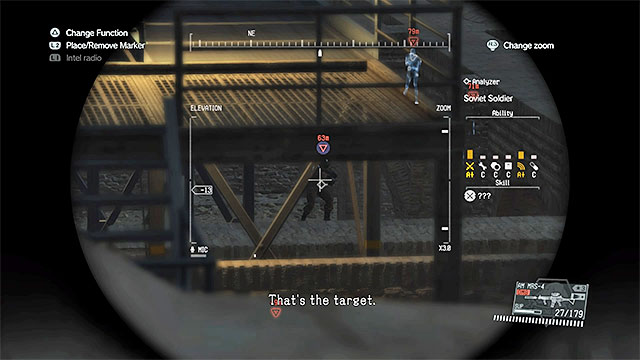
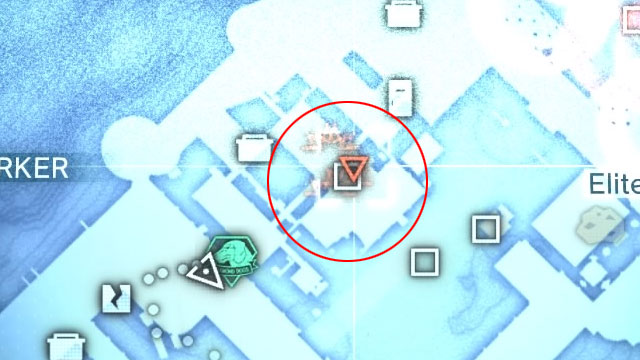
Description: Highly-Skilled Soldier in this mission is located in OKB Zero. Infiltrating the base is very complicated, so you should read the walkthrough to mission 30 (Skull Face). All the details, like for example avoiding snipers and going past the main gates are described there. You have to reach the area behind the second main gate. The default location of your target is shown on the picture above. Unfortunately, he has a large escort. You can start eliminating the soldiers (start from the ones patrolling the balconies and the wall) or wait until your target sets out to patrol the territory and attack him when he is only with one other soldier. No matter which option you choose, remember not to kill your target.
Rewards: 180000 GMP, new member of the base personnel
Mission objectives: Find and extract the prisoner.
Availability: This mission becomes available automatically thanks to your progress into the game and to completing the rest of the side missions.
Location: Eastern Communications Post.
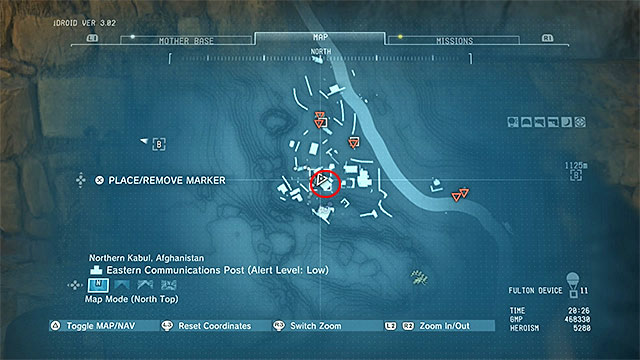
Walkthrough: Reach the Eastern Communications Post. You do not need to secure all of it, although this would make things easier. The prisoner is in the building shown in the above screenshot, in the South-Western part of the base.
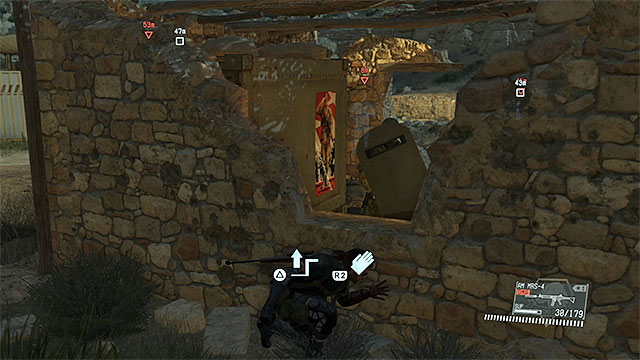 Eliminate the two guards before you extract the prisoner
The prisoner is being guarded by, at least, two soldiers. Start by sneaking up from behind to the opponent by the crumbled wall, grapple him and knock him down. Jump into the building and deal with the other guard by the entrance. You can now lift the prisoner and carry him out of the building. Place him down on the ground and request fultoning (extraction by the balloon to the Mother Base).
Rewards: 30000 GMP, new crew member
Mission objectives: Find and extract the prisoner.
Availability: This mission becomes available automatically thanks to your progress into the game and completing the rest of the side missions.
Location: Da Shago Kallai village.
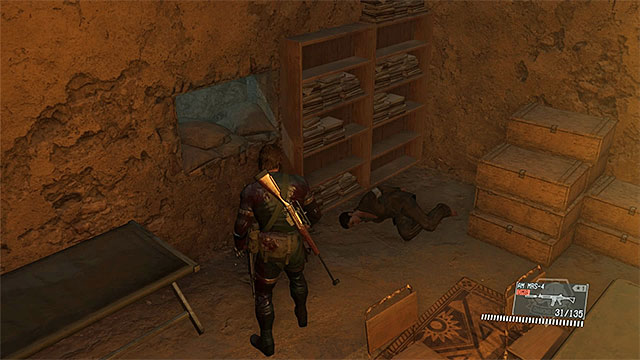
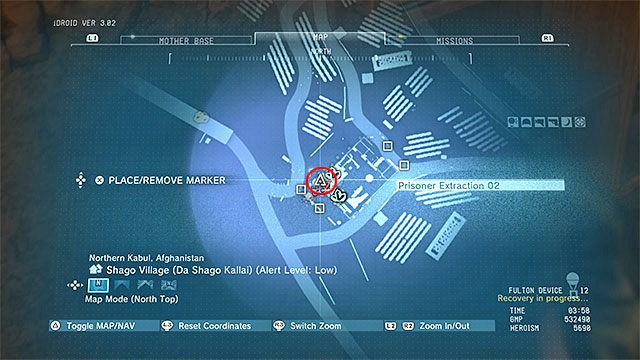
Walkthrough: Go to Da Shago Kallai village. The prisoner is being kept in its center and, as a result of getting there, you need to neutralize, or sneak past, several soldiers. The prisoner is in the place shown in the above screenshots - it is the room at the upper floor of the main building. Pick the prisoner up, carry him outside and make sure that you are under the sky. Only then, fulton him (extract him using the balloon to the Mother Base).
Rewards: 30000 GMP, new crew member
Mission objectives: You have to find and extract a prisoner.
Availability: This mission should automatically unlock with your progress in the main storyline and by completing other secondary missions.
Location: Afghanistan Central Base Camp.

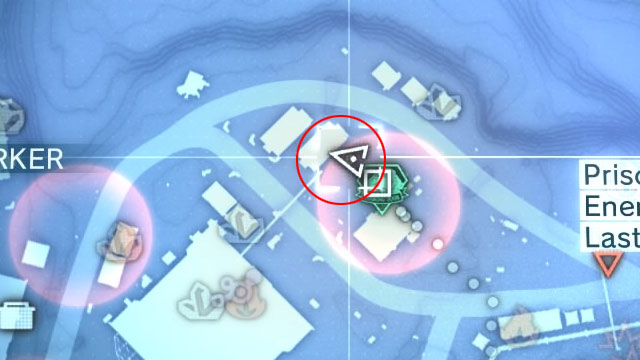
Description: try to get to the Afghanistan Central Base Camp without alarming the enemies, because when that happens, you will have a hard time completing your objective. Your target is kept hostage in a tent which can be seen on the above screenshot, located in the Western section of the camp (you can use D-Dog to find him). Clear the area around the said tent, carry the captive outside and fulton him to your base.
Rewards: 60000 GMP, new crew member.
Mission objectives: You have to find and extract a prisoner.
Availability: This mission should automatically unlock with your progress in the main storyline and by completing other secondary missions.
Location: Mountain Relay Base in Afghanistan.
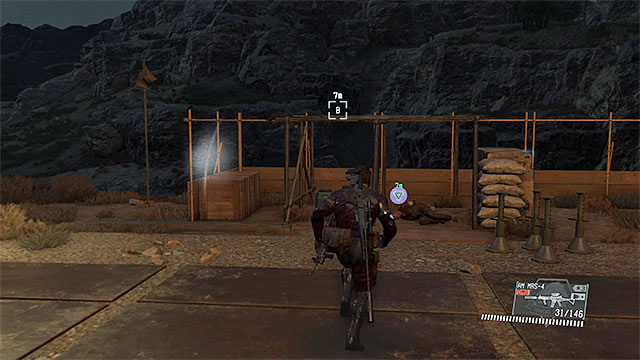 The prisoner can be found on the Western side of the bridge.
Description: the best way to get into the Mountain Relay Base is to go from the Western side, as the prisoner is kept to the West of the large bridge. You should eliminate all the enemies you happen to stumble upon, and be extra careful while doing so, as some of them carry sniper rifles. Locate the prisoner (D-Dog can help you with that as usual), carry him to a place where you can fulton him and send him to the Mother Base.
Rewards: 60000 GMP, new crew member.
Mission objectives: You have to find and extract a prisoner.
Availability: This mission should automatically unlock with your progress in the main storyline and by completing other secondary missions.
Location: Near the 14th outpost in Afghanistan.
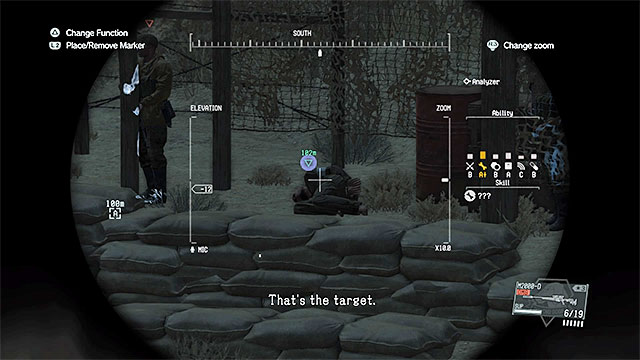 Eliminate the guards and fulton the prisoner.
Description: You should have no trouble locating the prisoner from this mission, because he is kept in the area of the 14th outpost. The prisoner is protected by two guards by default, but more of them are patrolling the nearby area. Take care of the guards (you can fulton them as well) and then rescue the prisoner.
Rewards: 80000 GMP, new member of the crew.
Mission objectives: You have to find and extract a prisoner.
Availability: This mission should automatically unlock with your progress in the main storyline (you have to unlock the African map) and by completing other secondary missions.
Location: Near the 12th outpost in Afghanistan, to the West of the Ditadi Abandoned Village.
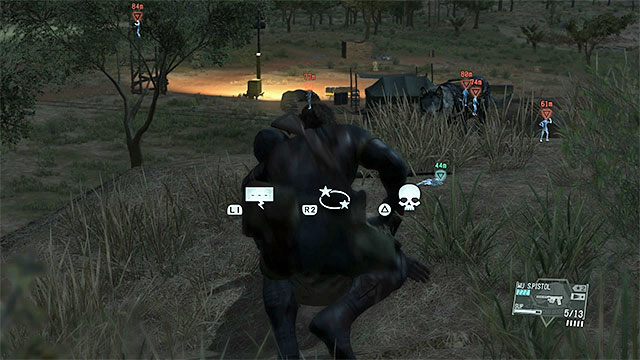
Description: Don't rush while approaching the 12h outpost, as there's a sniper located on the hill (he is shown on the above screenshot). Try to locate that foe with your binoculars, and then eliminate the soldier quietly. Search for the prisoner (D-Dog will help you, as always) and sneak to the place he is held captive at. Carry the hostage out of the building to a safe spot and then fulton him. If you haven't done anything else, enemies from the outpost won't even notice that the prisoner has escaped.
Rewards: 80000 GMP, new member of the crew.
Mission objectives: You have to find and extract a prisoner.
Availability: This mission should automatically unlock with your progress in the main storyline and by completing other secondary missions.
Location: Spugmay Keep in Afghanistan.
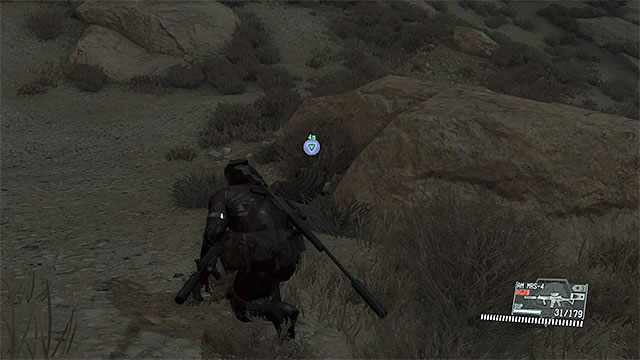
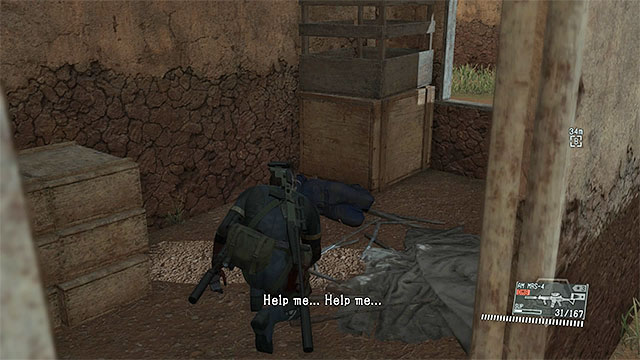
Description: The prisoner you are looking for can be found a little to the East of the Spugmay Keep - his location was shown on the above screenshot. The keep is occupied by quite a large amount of enemies, but you can easily sneak by them by hiding behind terrain obstacles and crawling through the area, if it's necessary. You can fulton the prisoner as soon as you reach him.
Rewards: 80000 GMP, new member of the crew.
Mission objectives: You have to find and extract a prisoner.
Availability: This mission should automatically unlock with your progress in the main storyline (you have to unlock the African map) and by completing other secondary missions.
Location: Bampeve Plantation in Africa.
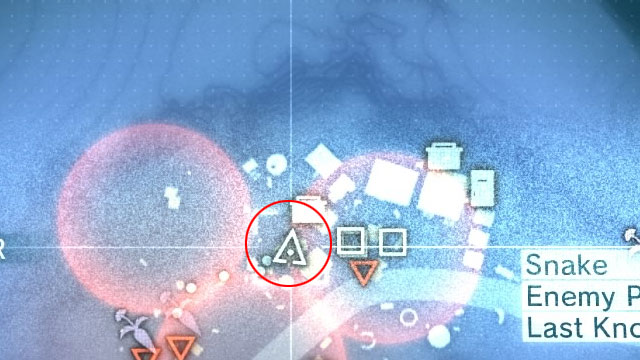
Description: The prisoner you must rescue here is held captive in the Bampeve Plantation, or to be more specific, in a small building in the middle of the village, which can be seen on the above screenshots (you can also "ask" D-Dog to locate the prisoner for you). While traveling to the prisoner, you may have to eliminate a number of enemies. Additionally, remember to move away from the camp before you decide to fulton the prisoner back to the Mother Base.
Rewards: 90000 GMP, new member of the crew.
Mission objectives: You have to find and extract a prisoner.
Availability: This mission should automatically unlock with your progress in the main storyline and by completing other secondary missions.
Location: Aabe Shifap Ruins in Afghanistan.
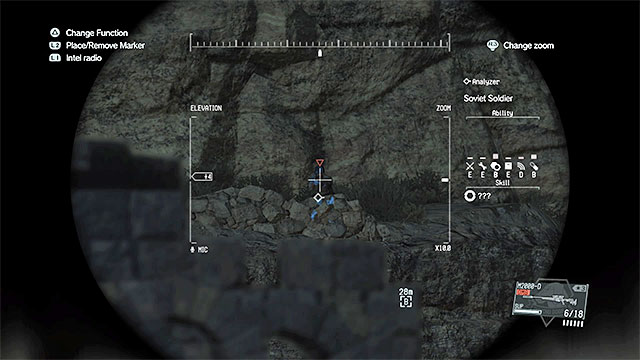 Eliminate snipers participating in the ambush.
Description: Saving the prisoner from the Aabe Shifap Ruins is a lot more difficult than you might have thought. The man you are looking for is lying on the ground in the central section of the ruins, but you shouldn't go there - it's an ambush prepared by the enemy. Use your binoculars, as well as the information you get from D-Dog to locate four snipers, scattered around the area. You can eliminate them either with the help of a sniper rifle, or by going to each one of the personally.
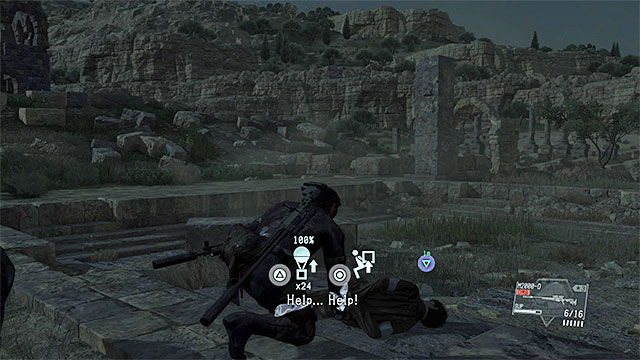 Go to the prisoner only after you've secured the area.
Approach the prisoner only when you've cleared the area of the enemy snipers. Regular soldiers can be either ignored, or you can eliminate them if you want to.
Rewards: 90000 GMP, new member of the crew.
Mission objectives: Locate and extract the prisoner.
Availability: this mission unlocks automatically as you progress through the game and complete side ops.
Location: Lamar Khaate Palace in Afghanistan.
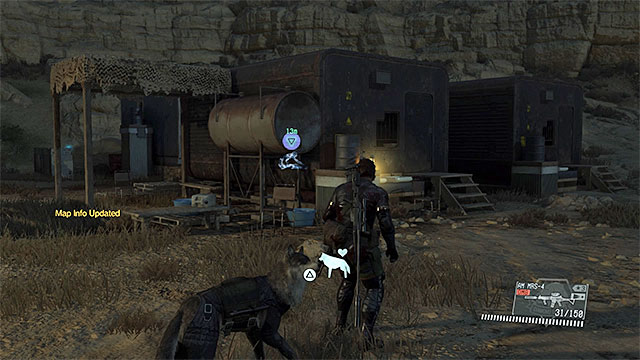
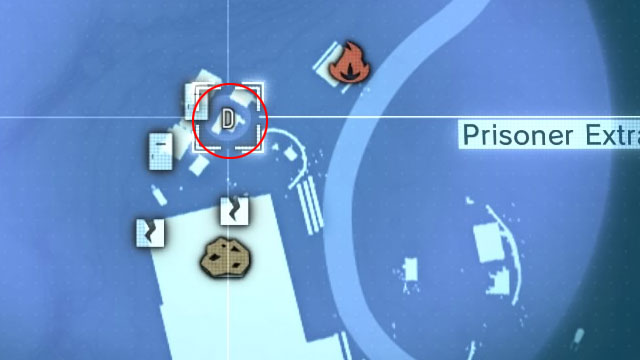
Description: The best way is to approach Lamar Khaate Palace from south-east. Then, you should circle it from the west side which will get you closer to the prisoner. The target is held in a cage shown in the pictures above, to the north of the palace. The area is guarded by several enemies which you should eliminate first (watch out for the soldiers on the higher levels of the palace). After you secure the area, open the cage, carry the prisoner out and Fulton him.
Rewards: 90000 GMO, new member of the base personnel
Mission objectives: Locate and extract the prisoner.
Availability: this mission unlocks automatically as you progress through the game (you have to unlock the map of Africa) and complete side ops.
Location: Area to the south-west from guard post number 11 and to the south-east from Bwala ya Masa in Africa.
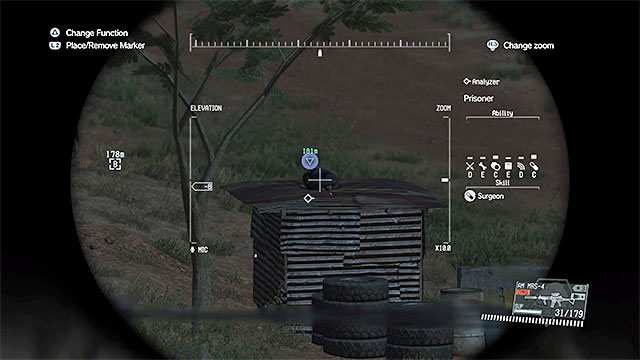
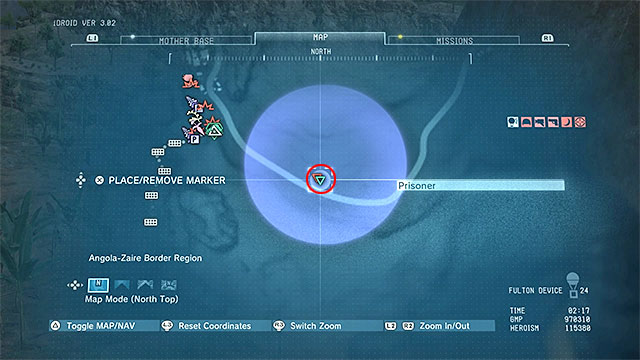
Description: Start searching the road to the south-east from Bwala ya Masa. You have to locate the prisoner who is hiding on the roof of the shed shown in the picture above. The area is patrolled by the enemies, so make sure that you are not detected. Climb to the roof and Fulton the prisoner.
Rewards: 100000 GMP, new member of the base personnel
Mission objectives: Locate and extract the prisoner.
Availability: this mission unlocks automatically as you progress through the game (you have to unlock the map of Africa) and complete side ops.
Location: Area around guard post number 17 in Africa.
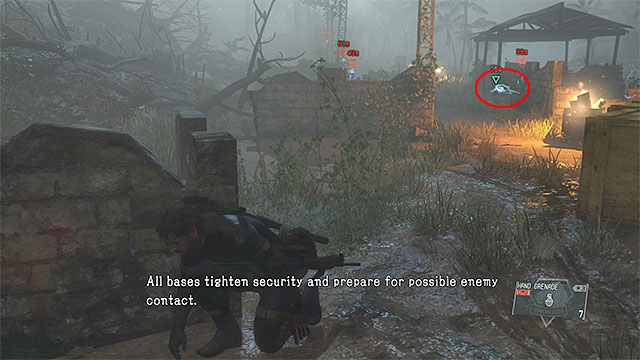
Description: You can approach guard post number 17 from any side that you want. Reach one of the vantage points and use the binoculars to search the nearby village. The prisoner is held near the river, in the place shown in the picture above. You can eliminate the enemies standing nearby or distract them. You need to have some time to rescue the prisoner, because you first have to carry him out of the shed and then Fulton him.
Rewards: 100000 GMP, new member of the base personnel
Mission objectives: Locate and extract the prisoner.
Availability: this mission unlocks automatically as you progress through the game (you have to unlock the map of Africa) and complete side ops.
Location: area around guard post number 3 in Africa.
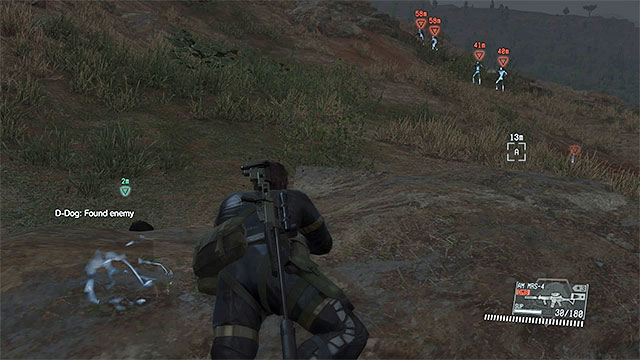
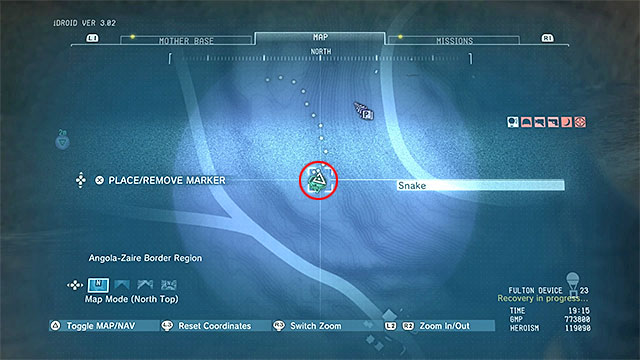
Description: start searching the area to the south-west from guard post number 3. The prisoner is hiding under the rocks (the exact location is shown in the picture above). The area is patrolled by enemies, so you should stay away from their sight. D-Dog can help you locate the prisoner.
Rewards: 100000 GMP, new member of the base personnel
Mission objectives: Locate and extract the prisoner.
Availability: this mission unlocks automatically as you progress through the game (you have to unlock the map of Africa) and complete side ops.
Location: Area to the south of Kungenga Mine in Africa.
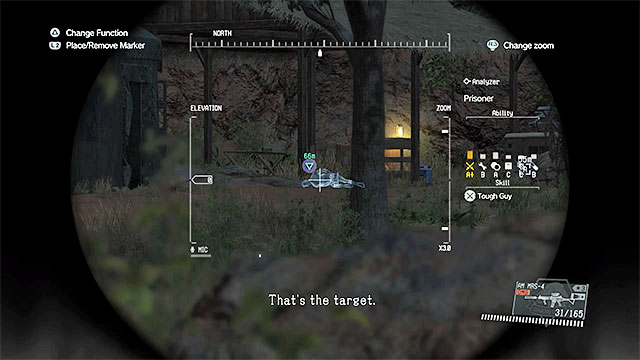
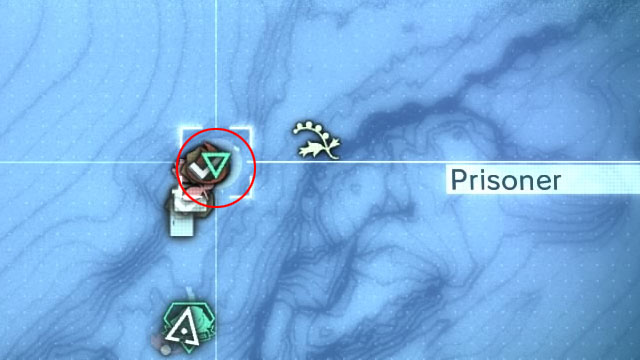
Description: You need to search the area to the south of Kungenga Mine. It is best to reach it from south-west, because then you won't have to go through the large base. On your way to this location, eliminate or go past the guards. The prisoner is held in the place shown in the picture above. Clear the area from enemy soldiers, carry the target to a place from which you can Fulton him and send him to Mother Base.
Rewards: 100000 GMP, new member of the base personnel
Mission objectives: Locate and extract the prisoner.
Availability: this mission unlocks automatically as you progress through the game (you have to unlock the map of Africa) and complete side ops.
Location: Nova Braga Airport in Africa.
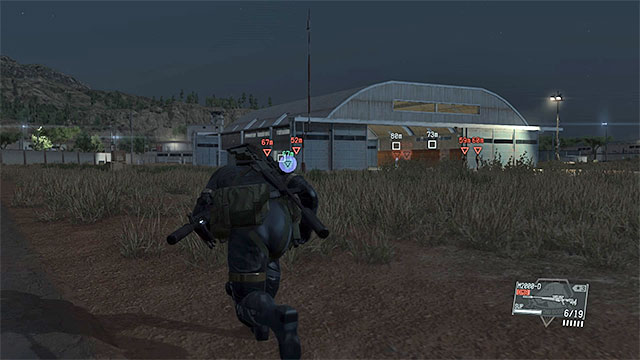
Description: You have to search the area to the south of Nova Braga Airport, namely the hangar shown in the picture above.
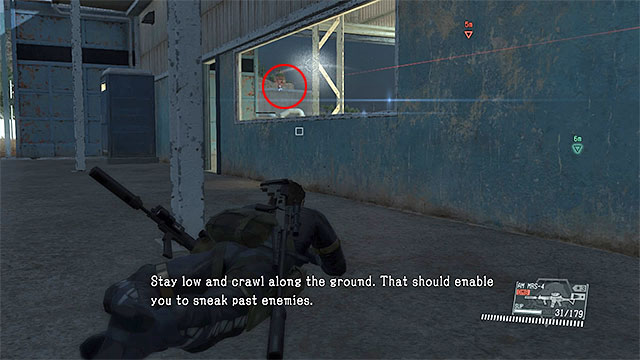
The prisoner is held in the hangar, but don't hurry trying to rescue him, because the area is guarded by a sniper (shown in the picture above). Eliminate him in any way that you want and try to get to the hangar only after you do it. There are only two enemies guarding the prisoner, but there are more of the around the building. Get rid only of the enemies that can interrupt you as you carry the prisoner out and Fulton him.
Rewards: 100000 GMP, new member of the base personnel
Mission objectives: Locate and extract the prisoner.
Availability: this mission unlocks automatically as you progress through the game (you have to unlock the map of Africa) and complete side ops.
Location: Munoko ya Nioka Station in Africa.

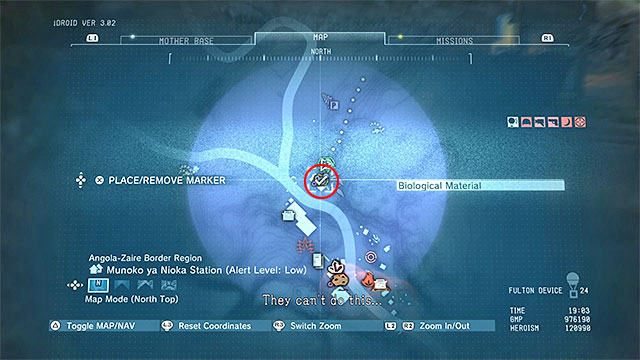
Description: It is best to approach Munoko ya Nioka Station from the north-east, because this is the part where the prisoner is. He is held in the building shown in the pictures above. There should be 2-3 enemies near the entrance to the building, but you can ambush the from behind and eliminate them silently. Carry the prisoner out of the building and Fulton him when you are in a safe place.
Note - Don't let yourself be spotted by the enemy gunship, because it may start shooting at you and thus more soldiers will come.
Rewards: 100000 GMP, new member of the base personnel
Mission objectives: Locate and extract the prisoner.
Availability: this mission unlocks automatically as you progress through the game (you have to unlock the map of Africa) and complete side ops.
Location: Area to the south-east from guard post number 2 in Africa.

Description: Head south-east from guard post number 2. There is a short passage with one guard nearby that leads to the mission objective. Try eliminate the enemy silently. After that, search the area on your right. There are two snipers (shown in the picture above) here, which you should get rid of now. Fortunately, they are facing the other way.
After eliminating the snipers, head towards the shed shown in the pictures above. You will find the prisoner there. Try to eliminate the enemies around without raising an alarm. However, even if you're detected, you no longer have to worry about the snipers. Carry the prisoner out of the shed and Fulton him.
Rewards: 100000 GMP, a new member of the base personnel
Mission objectives: Locate and extract the prisoner.
Availability: this mission unlocks automatically as you progress through the game and complete side ops.
Location: Qyarya Sakhra Ee village in Afghanistan.
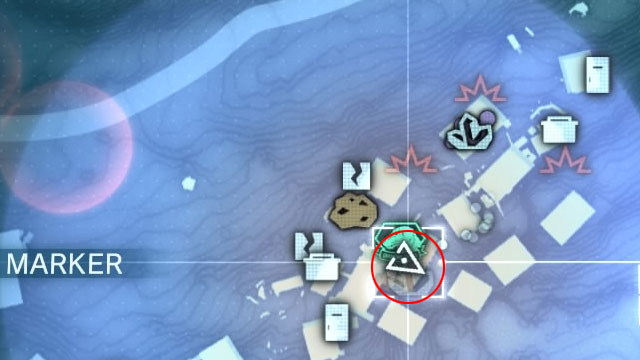
Description: You have to reach Qarya Sakhra Ee, either from the north or from the east. Head to the higher buildings in the village and watch out for landmines and enemies on the balconies (they have a wide range of view). Your destination is one of the bigger buildings in the village, inside which you will find the prisoner lying on the floor. This place is shown in the pictures above. After locating the prisoner (you can use D-Dog to help you), carry him out and Fulton him.
Rewards: 120000 GMP, new member of the base personnel.
Mission objectives: Locate and extract the prisoner.
Availability: this mission unlocks automatically as you progress through the game and complete side ops.
Location: OKB Zero in Afghanistan.
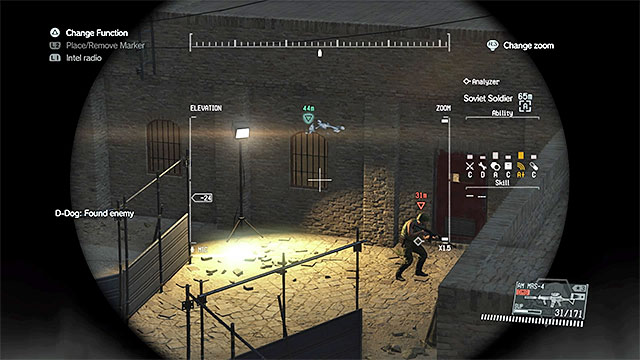
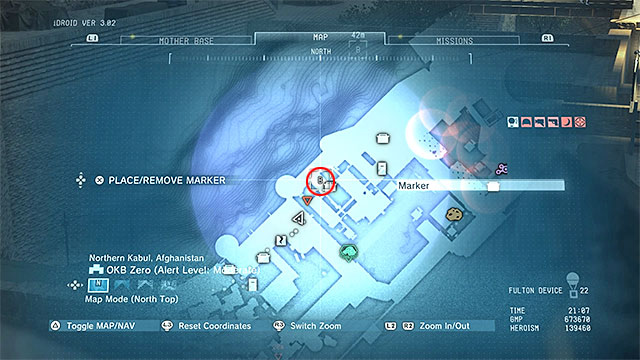
Description: In this mission, the prisoner is held in OKB Zero base. Infiltrating it is complicated, so you should first read the walkthrough for mission 30 (Skull Face), where all the details, like for example how to avoid snipers and go past the gates, are explained. You have to reach the area behind the second main gate. The prisoner is located inside the building with red door (you need to open it), shown in the pictures above. Rescue the prisoner only after you've secured the area (there is at least one sniper here) so that no one interrupts you or ambushes you. After Fultoning the prisoner, leave the base.
Rewards: 180000 GMP, new member of the base personnel
Mission objectives: Find and extract the POW.
Availability: This mission should become available automatically with your progress into the game (you need to unlock the map of Africa) and after you have completed the remaining side missions.
Location: Munoko ya Nioka Station in Africa.
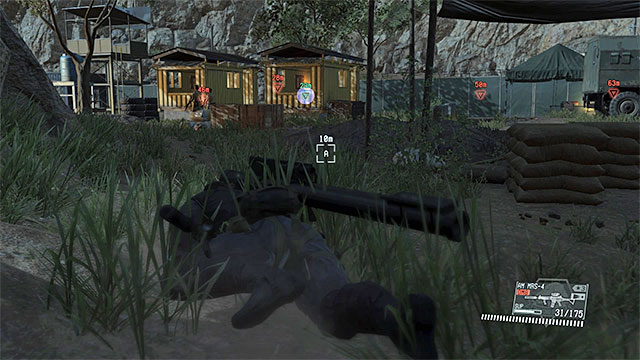
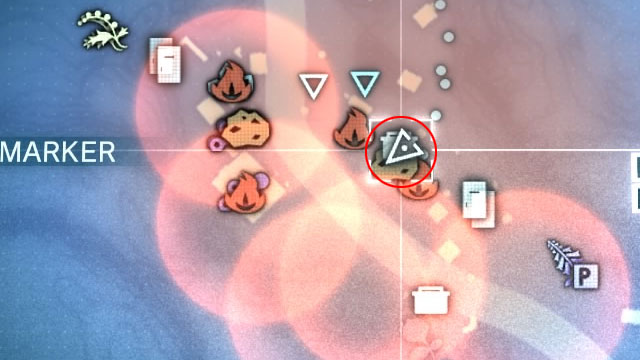
Description: Approach Munoko ya Nioka Station from the North or South-West. Still along your path, you note a helicopter hovering above the area/ It is a good idea to take it down, as soon as it strays away from the base. Thanks to this, even if you are detected, you will not get under the fire from the chopper. Later into the mission (it is very-well armed). You need to make it into the center of the base and you can do that by either remaining in shadows and avoiding direct confrontation, or by eliminating the opponents in your way, by surprise. The POW is being kept in the cottage shown in the above screenshots. However, take your time and do not hurry getting there, because the area is being watched, e.g. by a sniper and it would be best to deal with him in the first place. (for this, you can use the help of either D-Dog or Quiet). Carry the POW outside of the cottage and fulton him to complete the mission.
Rewards: 200000 GMP, new staff member
Mission objectives: Find and extract the lost sheep.
Availability: This mission becomes available automatically thanks to your progress into the game and completing the rest of the side missions.
Location: Da Wialo Kallai village.
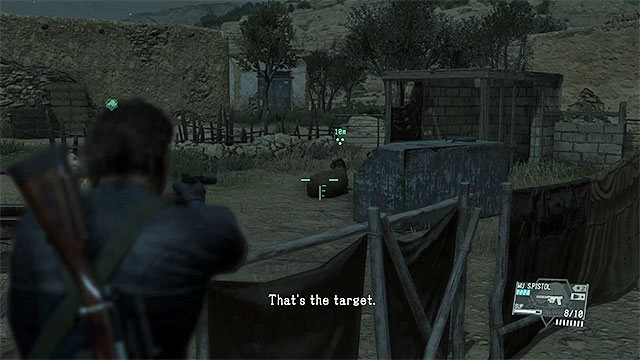
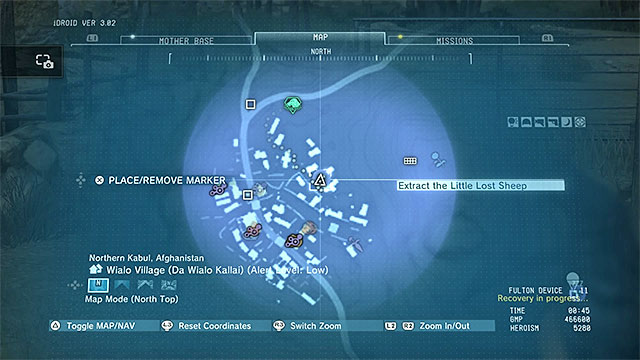
Walkthrough: Reach Da Wialo Kallai village. The sheep is in the enclosure in the North-Eastern part of the village shown in the above screenshots. Around, there should be, at least, two guards and it would be a good idea to take them out silently (either shoot them or put them to sleep). Use the pistol to put the animal to sleep and fulton it to the Mother Base.
Rewards: 30000 GMP, new animal in the zoo.
Mission objectives: You have to find and extract a rare species of bear.
Availability: This mission should automatically unlock with your progress in the main storyline and by completing other secondary missions.
Location: Mountainous area, to the South-West from the Serak Power Plant, and to the North from the 6th outpost.
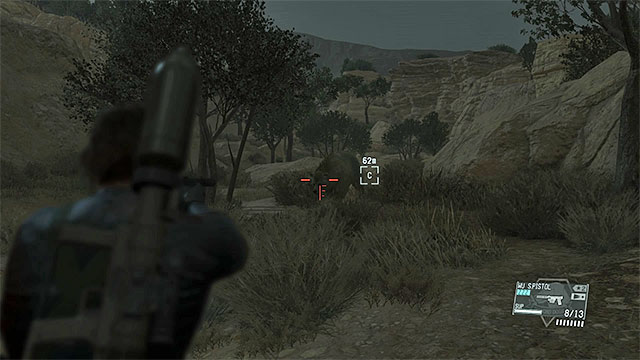
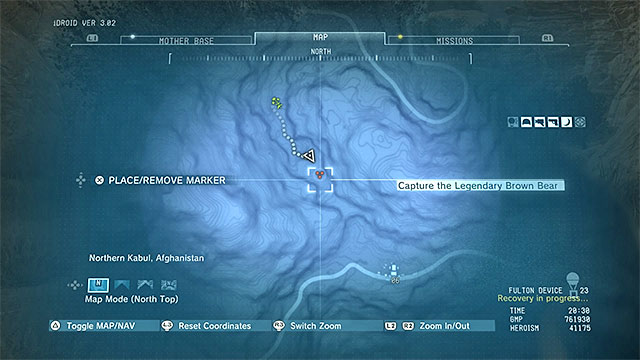
Description: Travel to the designation and get to its central part. D-Dog can help you find the legendary bear, and its probable location can be seen on the above screenshots. The bear won't be knocked out by a single shot - the best way to put him to sleep is to use a sniper rifle with anesthetic ammo. If you only have access to a pistol and you lack a sniper rifle with the proper ammunition, stand as far as you can from the bear, shoot it and be prepared to move back immediately. After the animal was knocked down, fulton it to Mother Base.
Rewards: 80000 GMP, new animal in the zoo.
Mission objectives: You have to find and extract a rare species of ibis (a bird).
Availability: This mission should automatically unlock with your progress in the main storyline and by completing other secondary missions.
Location: Near Lufwa Valley in Africa.
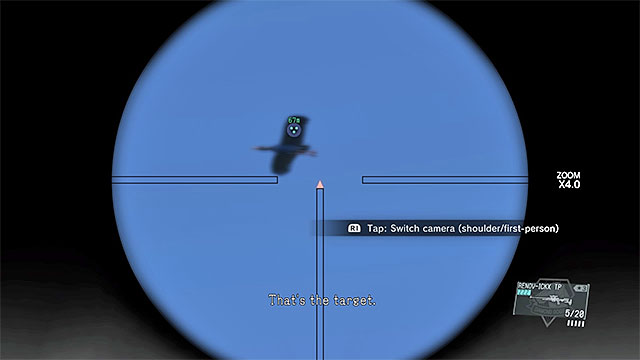
Description: Start exploring the central part of the designated location, or to be more specific the Lufwa Valley, neighboring a large property, inside of which you've found Code Talker during one of your previous missions. You must find an ibis, a species of a bird. Those are flying above the valley, and one of them can be seen on the above screenshot. It's best to hit the animal while it's in the air, but to do so you need to have a decent sniper rifle.
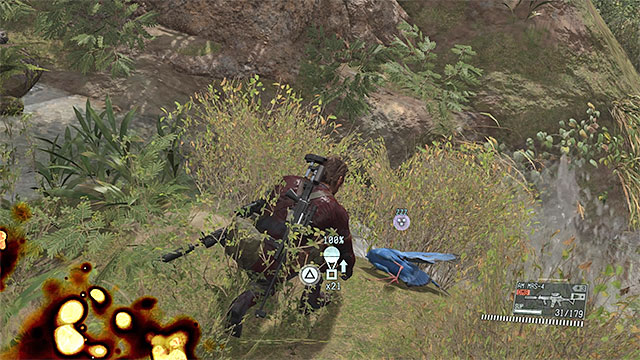 Find the place where the bird landed.
Wait for the ibis to fly over an easily-accessible area and take the shot - after you hit the animal, you will have to get to the place it landed and fulton it to the base.
Note - if you are patient, you can wait for one of the ibises to land on a branch, or a ledge and just sneak up on it and use a regular pistol to knock it down.
Rewards: 100000 GMP, new animal in the zoo.
Mission objectives: You have to find and extract a rare species of jackal.
Availability: you must complete the first chapter of the campaign (main mission 31).
Location: Near the 22nd outpost in Africa.
Note - completing this mission is required in order to unlock a research called Wormhole. It's a valuable upgrade to your fultoning device, as it allows you to create wormholes and send your targets to Mother Base even if they are inside of a building.
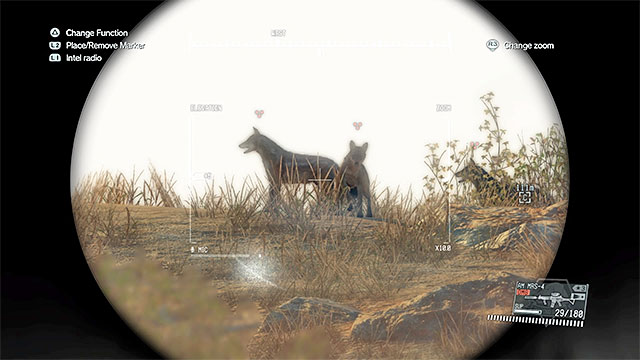
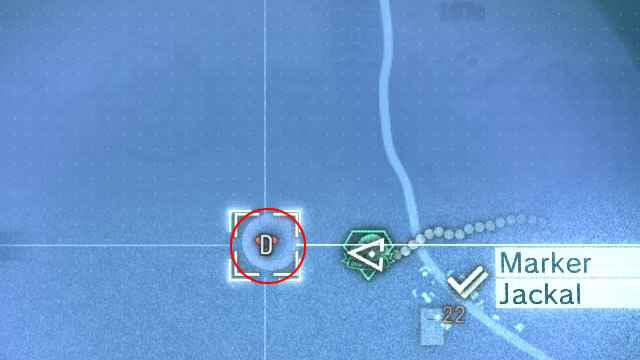
Description: After arriving near the 25th outpost, start searching for the rare species of the jackal. You can either use your binoculars, or use D-Dog to help you. The probable hiding place of five jackals can be seen on the above screenshot. Use a weapon with anesthetic ammo (preferably a sniper rifle) to stun ALL OF THEM and then fulton them to the base.
Rewards: 100000 GMP, new animal in the zoo, new research project (Wormhole).
Mission objective: You need to locate the wandering soldier and fulton him back to Mother Base.
Availability: This mission should be unlocked automatically with your progress into the main campaign.
Location: Area between SE Guard Post (16) and West Guard Post (20)
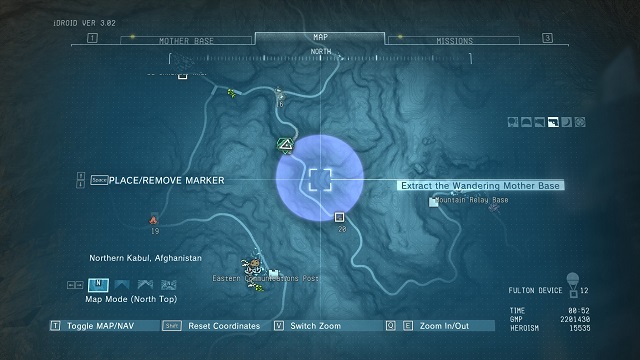 Mission area.
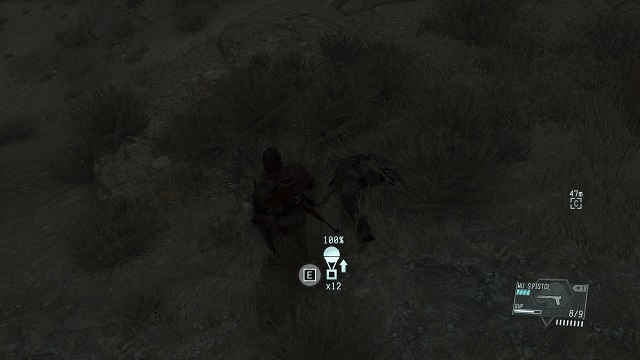 The missing soldier.
Description: Reach the area marked on the map and find the wandering soldier. Most probably, he is hiding on the hill to the East of the road. He is not aggressive, but he escapes after he sees you. You need to put him to sleep with a gun shot and fulton him back to the base. Since there are two outposts and a patrol on a truck, it is a good idea to remain silent here.
Rewards: 30000 GMP and 1/10 Memento Photo (unique collectibles specific to this type of missions).
Mission objectives: You have to find and extract a wandering Mother Base soldier.
Availability: This mission should automatically unlock with your progress in the main storyline and by completing other secondary missions.
Location: Area to the South-West of the Da Shago Kallai in Afghanistan.
 Approach the enemy while preventing him from spotting you.
Description: After reaching the designated area near the Da Shogo Kallai village, head towards the hill located in its central section, as it's the location of the wandering soldier (finding him can be made easier with the help of D-Dog). He will start running away from you as soon as he notices the main character, so try to sneak up on him and shoot him with a pistol with anesthetic ammo (you can use a sniper rifle as well, as long as you have access to the said ammo). Afterwards fulton the soldier to your base.
Rewards: 60000 GMP and 2/10 Memento Photo (special secrets associated with this chain of quests).
Mission objectives: You have to find and extract a wandering Mother Base soldier.
Availability: This mission should automatically unlock with your progress in the main storyline (you have to unlock the African map) and by completing other secondary missions.
Location: Near Bwala ya Masa village in Africa.
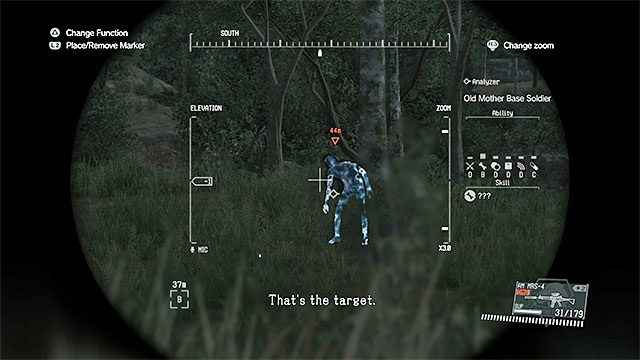 The soldier can be found to the East of the village.
Description: start searching the area to the East of the Bwala ya Masa village. You should stumble upon the wandering soldier here, and D-Dog can help you with the task of locating him. You can't allow the soldier to see you, as he will start running away. Sneak up on him and use any weapon with anesthetic ammo (preferably a sniper rifle, but it's not required). Afterwards fulton the soldier to the Mother Base.
Rewards: 80000 GMP and 3/10 Memento Photo (special secrets associated with this chain of quests).
Mission objectives: You have to find and extract a wandering Mother Base soldier.
Availability: This mission should automatically unlock with your progress in the main storyline (you have to unlock the African map) and by completing other secondary missions.
Location: Area west of the Nova Braga Airport.
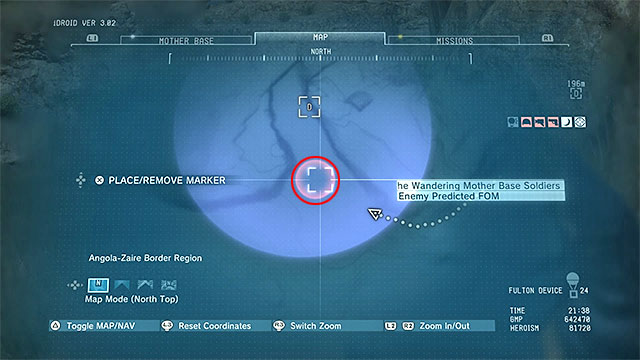
Description: start your march near the Nova Braga Airport and head West. D-Dog can help you locate the wandering soldier - his place of residence is marked on the above screenshot. Sneak up on the enemy and use any weapon with anesthetic ammo (a sniper rifle is recommended, because of the lack of any terrain obstructions). After the enemy has been neutralized, approach him and fulton him to the Mother Base.
Rewards: 90000 GMP and 4/10 Memento Photo (special secrets associated with this chain of quests).
Mission objectives: You have to find and extract a wandering Mother Base soldier.
Availability: This mission should automatically unlock with your progress in the main storyline (you have to unlock the African map) and by completing other secondary missions.
Location: Area to the South of the Kungenga Mine in Africa.

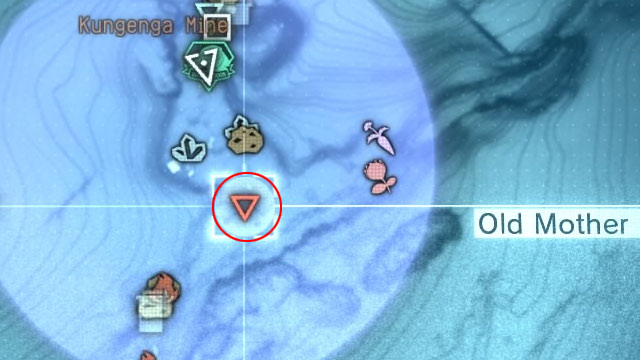
Description: start exploring the area to the South of the Kungenga Mine. If you want to approach the soldier from the North, you have to go through an enemy encampment, so it's easier to use the South-Western route. Your target is the wandering soldier shown on the above screenshots, and, as always, D-Dog can help you find him. The best way to knock him down is to use a sniper rifle with the anesthetic ammo, so you won't have to risk flushing the soldier out of the area while trying to get to him with a pistol. When the was knocked down, approach him and fulton him to the Mother Base.
Rewards: 100000 GMP and 5/10 Memento Photo (special secrets associated with this chain of quests).
Mission objectives: You have to find and extract a wandering Mother Base soldier.
Availability: This mission should automatically unlock with your progress in the main storyline (you have to unlock the African map) and by completing other secondary missions.
Location: Area to the East of the 20th outpost in Africa.
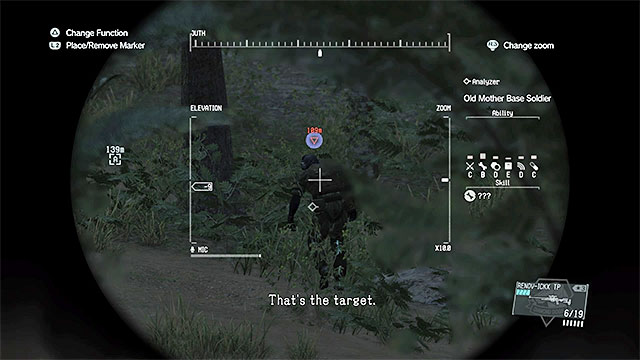
Description: Start exploring the area to the East of the 20th outpost. You must locate the wandering soldier, with a shield on his back, which can be seen on the above screenshots. Remember that the soldier will run away from you if you flush him out, so it's best to use a sniper rifle with the anesthetic ammo to knock him down (aim for the head). Afterwards, approach the unconscious target and fulton him to the base.
Rewards: 120000 GMP and 6/10 Memento Photo (special secrets associated with this chain of quests).
Mission objectives: You have to find and extract a wandering Mother Base soldier.
Availability: This mission should automatically unlock with your progress in the main storyline and by completing other secondary missions.
Location: Area to the South of Yakho Oboo Supply Outpost in Afghanistan.
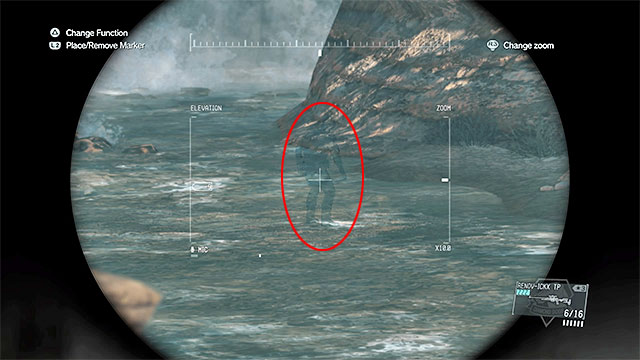
Description: Start exploring the area to the South of the Yakho Oboo Supply Outpost. Unfortunately, the wandering soldier you are looking for won't be in a single, fixed location, but he travels around the area. In my case he was standing in the water, near the waterfall. Another thing that makes finding him difficult is the fact that he is using a camouflage system (the above screenshot), which means that he can't be marked with your binoculars. The best approach is to take a position on top of one of the vantage points in the area and start searching the area carefully. After locating the enemy, knock him down, preferably with a sniper rifle with the anesthetic ammo so that you won't flush him out - when that happens, he will move to another area and you will have to look for him from the very beginning.
Rewards: 140000 GMP and 7 / 10 Memento Photo (special secrets associated with this chain of quests).
Mission objectives: Find and extract the wandering Mother Base soldier.
Availability: This mission should become available automatically with your progress into the game (you need to unlock the map of Africa) and after you have completed the remaining side missions.
Location: Lufwa Valley in Africa.
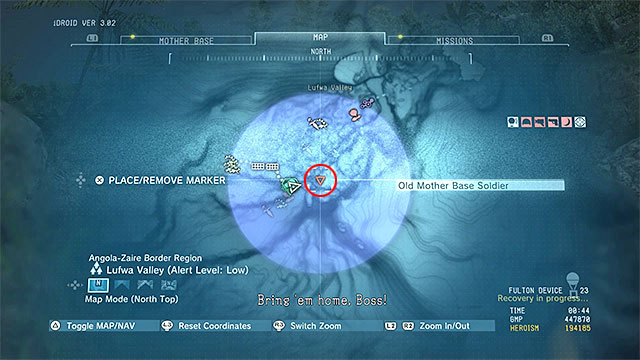
Description: It is best to approach Lufwa Valley from the South-West. Start exploring the jungle, carefully, best while accompanied by D-Dog, who will help you locate the missing soldier. His approximate locate location has been marked in the above screenshot. Since it is impossible for you to smoke the mission target out, you need to use the sniper rifle with bang ammunition, to stun him in one accurate shot. After you do that, send he ally away to the Mother Base.
Rewards: 180000 GMP and 8/10 Memento Photo (special collectibles connected with that type of missions).
Mission objectives: Find and extract the wandering Mother Base soldier.
Availability: This mission should become available automatically with your progress into the game and after you have completed the remaining side missions.
Location: Near outpost 10 in Afghanistan.
Description: Explore the area to the South-West of outpost 10. You need to sneak up onto the hill here, because this is where the missing soldier is (the above screenshot). Locate him, using binoculars or D-Dog and plan your attack on that soldier. Since there is a risk that the soldier might try to escape, after he sees you, it is best to use sleeping ammo sniper rifle. Fulton the man after you have taken the shot.
Rewards: 200000 GMP and 9/10 Memento Photo (special collectibles connected with that type of missions).
Mission objectives: Find and the wandering Mother Base soldier.
Availability: This mission should become available automatically with your progress into the game and after you have completed the remaining side missions.
Location: Aabe Shifap Ruins in Afghanistan.
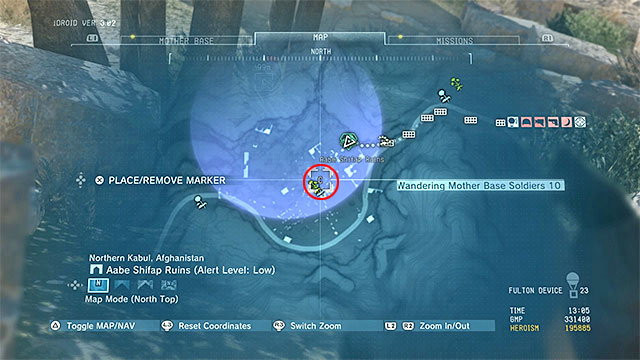
Description: You can approach Aabe Shifap Ruins from any direction you want. After you get there, start sneaking and explore the ruins. Your target should be staying near the area marked in the above screenshot and you can additionally use D-Dog's help, finding him. Just like in the case of the previous missions of this type, it is best to use your sleeping bullets sniper rifle to incapacitate the soldier, thanks to which you do not alarm him and he does not escape. After the soldier is neutralized, approach him and attach the balloon to him.
Rewards: 300000 GMP and 10/10 Memento Photo (special collectibles connected with that type of missions).
Mission objective: You need to locate and extract the POW.
Availability: This mission should be unlocked automatically with your progress into the main campaign.
Location: Yakho Oboo Supply Outpost
 Mission area.
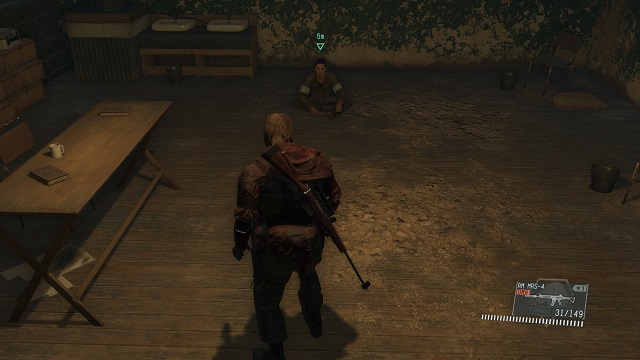 The hostage.
Description: You need to reach the marked military base and make it over into the locked room in the Northern part of the fort. As soon as your character opens the door, you will walk into the room with the POW inside. Take him with you and fulton him through the hole in the ceiling, in the corridor right next to you.
Rewards: 60000 GMP
Mission objectives: You have to find and extract hostages.
Availability: This mission should automatically unlock with your progress in the main storyline and by completing other secondary missions.
Location: Da Smasei Laman base in Afghanistan.
Description: After reaching the Da Smasei Laman starting sneaking, as alarming the enemies will make completion of this mission a lot harder. Focus on the large area in front of the ruins, because the hostages you are looking for are right there. The captives can be found in a small building, shown on the above screenshot (with a small antenna on the roof) and they are protected by several enemy soldiers, which should be eliminated quietly. You have to carry each one of the hostages outside of the building and fulton them to base.
Rewards: 80000 GMP
Mission objectives: You have to find and extract hostages.
Availability: This mission should automatically unlock with your progress in the main storyline (you have to unlock the African map) and by completing other secondary missions.
Location: Nova Braga Airport in Africa.
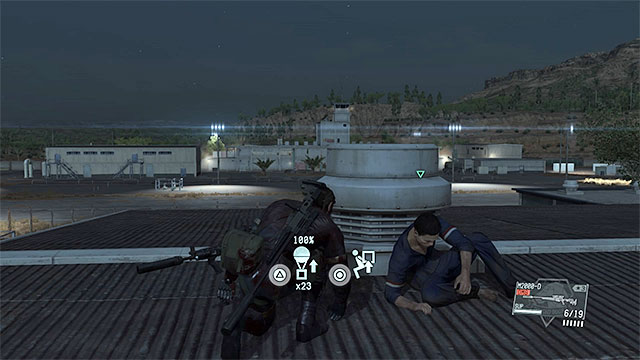
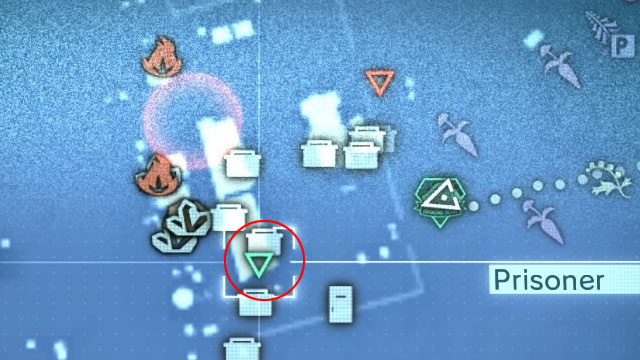
Description: You have to infiltrate the Nova Braga Airport. You can reach it from any side you want, but you must be very careful about the snipers stationed on the roofs of several buildings (to get past them, you can either crawl or hide behind covers). You must find two hostages here. The first captive can be found on the roof of the building shown on the above screenshot, which is located in the Eastern section of the airport (D-Dog will help you again). Secure the area and climb up the ladder to get to the roof.

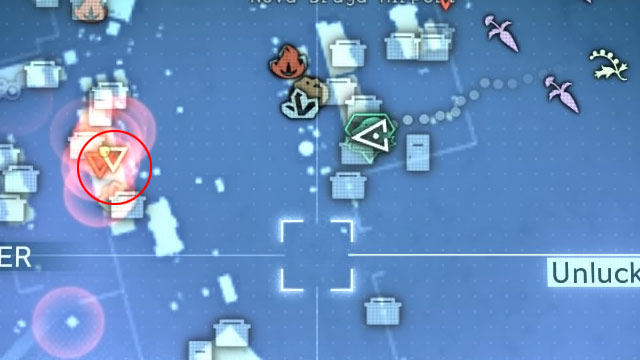
The second hostage is located on the roof of the tallest building of the airport, and one of the snipers is stationed right next to him. The place can be seen on the above screenshots. The main building is best approached from the Northern side, as it will allow you to prevent the snipers from noticing you. Both of the prisoners have to be fultoned to the Mother Base.
Rewards: 100000 GMP
Mission objectives: Locate and exfiltrate the hostages.
Availability: this mission unlocks automatically as you progress through the game (you have to unlock the map of Africa) and complete side ops.
Location: Lufwa Valley in Africa.
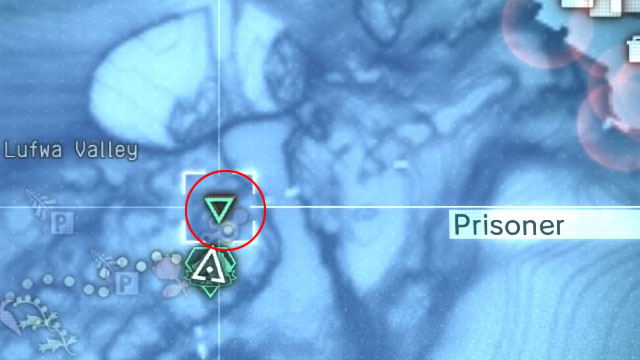
Description: In this mission, you are to rescue two hostages in the area around Lufwa Valley. The first person is held in a small camp located to the west from the large mansion. This place is marked on the screen above. Bare in mind that there are at least 2-3 enemies near the hostage (you can knock them out, kill them or distract them).

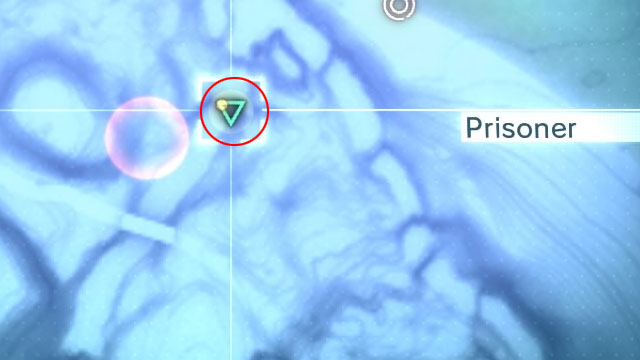
You can find the second hostage to the north-west from the mansion. The prisoner escaped from the enemy and is hiding near the waterfall shown in the picture. When heading to this location (use D-Dog if you have troubles locating the hostage), avoid enemy patrols that are searching for him.
Rewards: 180000 GMP
Mission objectives: Locate and exfiltrate the hostages.
Availability: this mission unlocks automatically as you progress through the game (you have to unlock the map of Africa) and complete side ops.
Location: OKB Zero in Afghanistan.
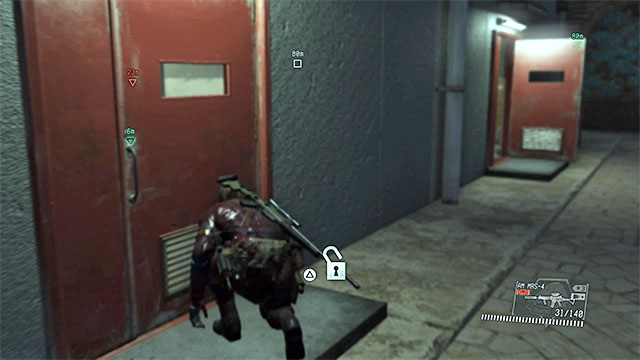
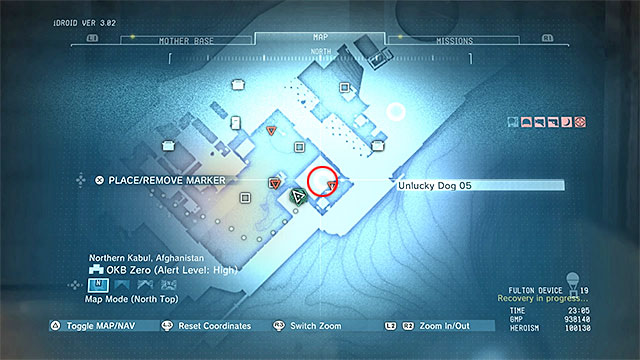
Description: In this mission, the hostages are held in OKB Zero base. Infiltrating it is a very complex task, so you should read the walkthrough for mission 30 (Skull Face) where all the details, like for example avoiding snipers and going past the main gates are described. You can find the first hostage after going past the second gate. Go inside the building on your right, shown on the picture above, through the red door (the hero will need a few seconds to open them).
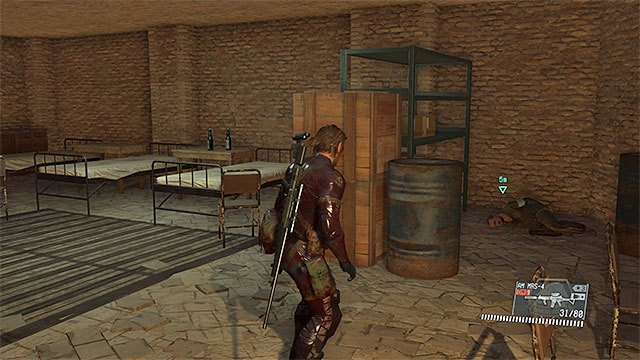
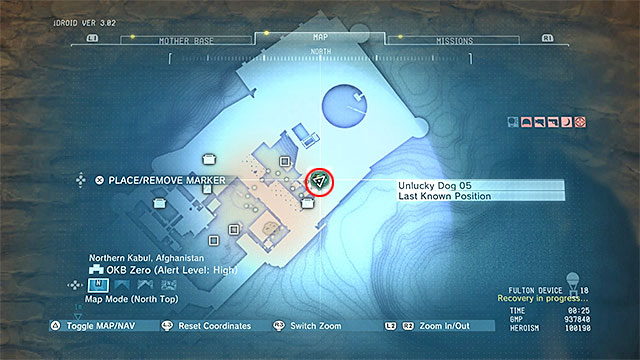
You will find the second prisoner after going past the third gate. Search the area to the right of the entrance to the main part of the gate. The prisoner is in one of the rooms in the barracks (shown in the picture above). Of course, you have to carry both the hostages out before you Fulton them.
Rewards: 200000 GMP
Mission objectives: You have to find and eliminate the heavy infantry.
Availability: This mission should automatically unlock with your progress in the main storyline and by completing other secondary missions.
Location: Near the 12th outpost in Afghanistan.
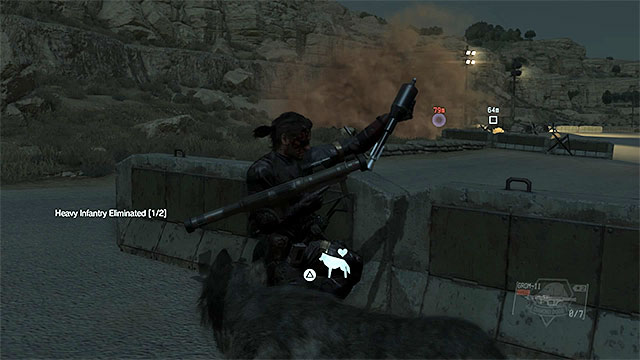 You can kill the enemies, or knock them out and fulton.
Description: Get near the 12th outpost and use your binoculars to identify two soldiers, who are a part of the heavy infantry. Depending on your preferences, you can either kill them (using a grenade launcher, or a rocket launcher is recommended, as they are heavily armored) or knock them down and fulton them to the base (it's worth to sneak up on them from behind).
Rewards: 80000 GMP
Mission objectives: You have to find and eliminate the heavy infantry.
Availability: This mission should automatically unlock with your progress in the main storyline and by completing other secondary missions.
Location: Near the 8th outpost in Afghanistan.
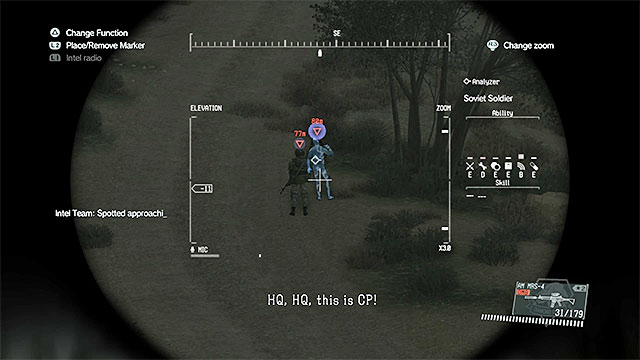 Examine the road near the 8th outpost.
Description: The two enemies you are looking for cannot be found inside of the 8th outpost. Instead, they will be patrolling the nearby road (it's not covered with asphalt) and D-Dog will be able to easily track them. The best way to deal with them is to put them to sleep with a weapon equipped with an aesthetic ammo and then fulton them, but you can also simply kill them. If you've chosen the latter approach, use a grenade launcher, or a rocket launcher, as they are heavily armored.
Rewards: 80000 GMP
Mission objectives: You have to find and eliminate the heavy infantry.
Availability: This mission should automatically unlock with your progress in the main storyline and by completing other secondary missions.
Location: Near the 4th outpost in Afghanistan.
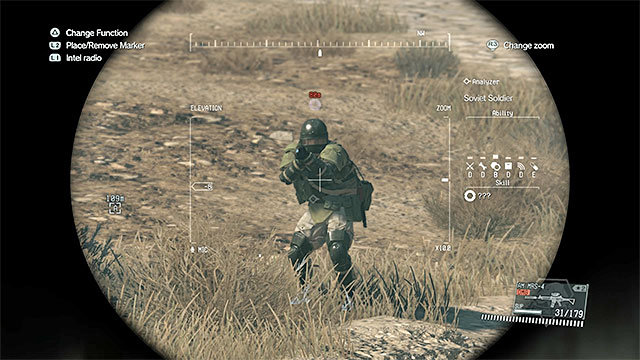 One of the targets of this mission.
Description: The three enemies you are looking for are, by default, scattered around the 4th outpost. If you want to fulton them, you have to sneak up on them one by one, while trying to stay undetected all the time. A lot quicker (and easier) approach is to simply kill them - use a grenade launcher, or a rocket launcher if you decide to do so, as they are heavily armored.
Rewards: 90000 GMP
Mission objectives: You have to find and eliminate the heavy infantry.
Availability: This mission should automatically unlock with your progress in the main storyline and by completing other secondary missions.
Location: Near the 7th outpost in Afghanistan.
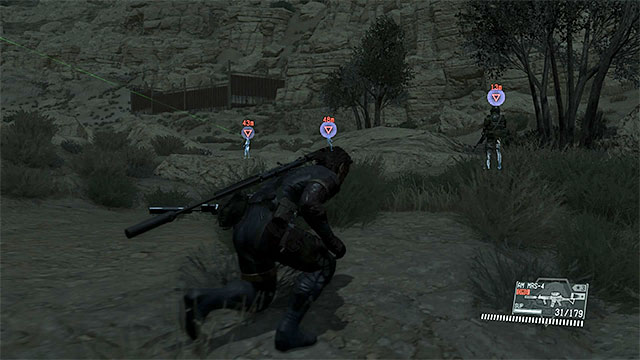 Your destination - you can easily sneak up on the enemies from behind.
Description: There are three heavy soldiers in this mission, and they are stationed a little to the East of the 7th outpost. They should be placed far away from each other and should be stationary, which makes extracting them a breeze. However, capturing them alive is not required in order to complete the mission - you can kill them as well. If you choose the lethal approach, don't forget to use a decent grenade launcher, or a rocket launcher.
Rewards: 90000 GMP
Mission objectives: You have to find and eliminate the heavy infantry.
Availability: This mission should automatically unlock with your progress in the main storyline and by completing other secondary missions.
Location: Near the 15th outpost in Afghanistan.
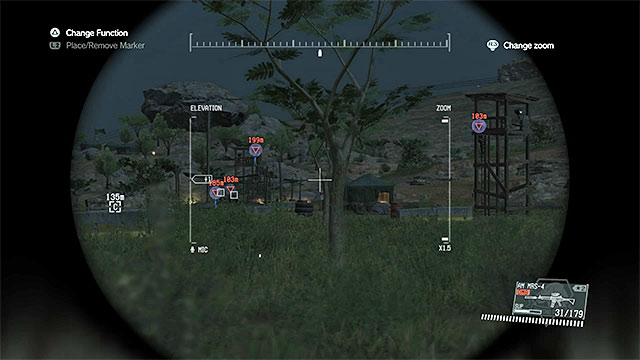 Locate and neutralize the four enemies.
Description: There are four soldiers from the heavy infantry stationed near the 15th outpost. Two of them are patrolling the area, while the other pair is stationed on the observation towers. You can either stun and fulton them, or simply kill them. If you decide for the lethal approach, use a grenade launcher, or a rocket launcher - if you want to kill those stationed on the towers, the easiest way to do so is to simply destroy the constructions they stand on.
Rewards: 90000 GMP
Mission objectives: Locate and eliminate the heavy infantry.
Availability: this mission unlocks automatically as you progress through the game (you have to unlock the map of Africa) and complete side ops.
Location: area around guard post number 22 in Africa.
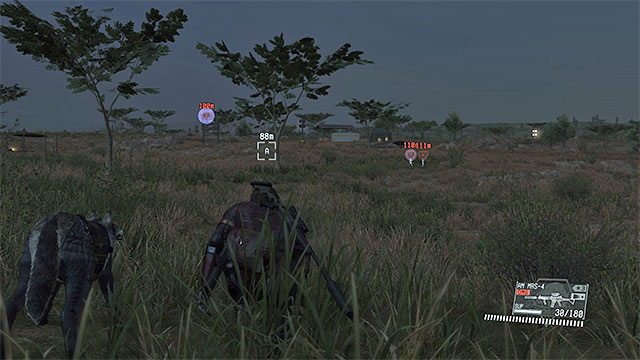 There are four enemies at the guard post.
Description: The heavy infantry soldiers can be found at guard post number 22. You have to neutralize four opponents. Thanks to the fact that they are located in different parts of the camp, eliminating them should be much easier. It is good to act quietly and knock out the enemies one by one, but you can also use more aggressive methods. In the second case, chose a grenade launcher or rocket launcher and destroy the watchtower before one of the enemies gets off.
Rewards: 100000 GMP
Mission objectives: Locate and eliminate the heavy infantry.
Availability: this mission unlocks automatically as you progress through the game (you have to unlock the map of Africa) and complete side ops.
Location: Area around guard post number 20 in Afghanistan.
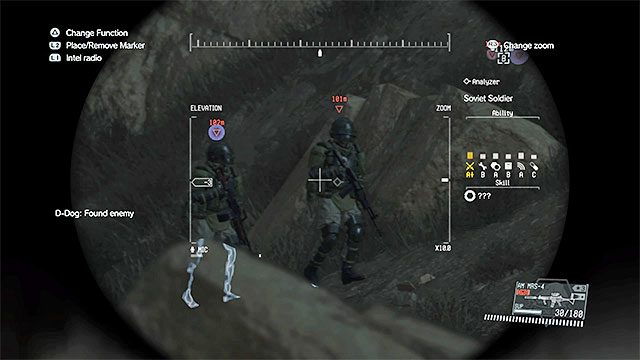 One of two patrols.
Description: You have to search the mountain path to the north from guard post number 20. There are two patrols, each consisting of two soldiers, to eliminate here. The best method of completing the task is simply to kill the enemies. Use a grenade launcher or a rocket launcher. Try to perform the attack far away from the guard post so that you don't alarm other soldiers.
Rewards: 100000 GMP
Mission objectives: Locate and eliminate the heavy infantry.
Availability: this mission unlocks automatically as you progress through the game and complete side ops.
Location: Area around guard post number 14 in Afghanistan.
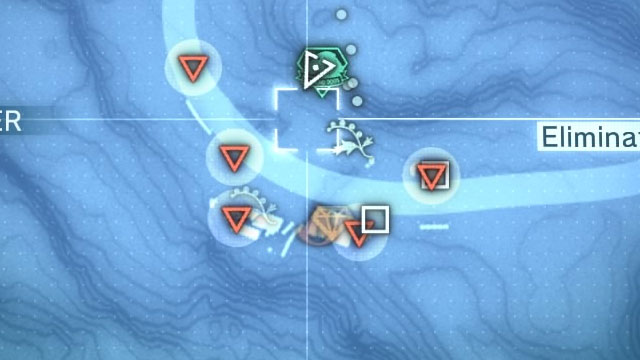
Description: Head to guard post number 14, because this is the one occupied by the heavy infantry soldiers. There are five enemies here and their default location is marked on the picture above. You can take advantage of the fact that the enemies are far away from each other and face different sides. Sneak up to them and knock them out. If you prefer to kill them, Head to one of the nearby hills and shoot them for example using a rocket launcher (remember that they have heavy armor).
Rewards: 100000 GMP
Mission objectives: Locate and eliminate the heavy infantry.
Availability: this mission unlocks automatically as you progress through the game (you have to unlock the map of Africa) and complete side ops.
Location: Area around guard post number 11 in Africa.
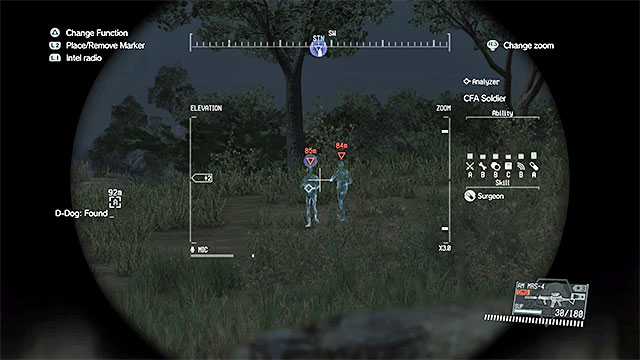 One of three patrols.
Description: Search the area to the west from guard post number 11. There are six heavy infantry soldiers in total to eliminate here. The enemies are patrolling the area in pairs. You can try to ambush them (D-Dog or Quiet can help you do that if you've equipped them properly), or engage in more open confrontation. In the second case, make sure that you are not attacked by all three groups at once and use the best explosives and rocket launcher that you can.
Rewards: 120000 GMP
Mission objectives: Locate and eliminate the heavy infantry.
Availability: this mission unlocks automatically as you progress through the game (you have to unlock the map of Africa) and complete side ops.
Location: Area around guard post number 3 in Africa.
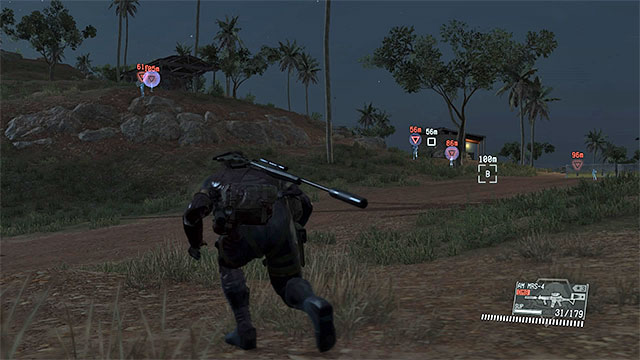 Eliminate the enemies located in the village.
Description: Head to guard post number 3. There are six heavy infantry soldiers here. You can attack them one by one (the best way is to knock them out and Fulton to Mother Base). Start from the enemies on the hill, because they can see the most. Proceed to enemies located lower.
Rewards: 120000 GMP
Mission objectives: Locate and eliminate the heavy infantry.
Availability: this mission unlocks automatically as you progress through the game (you have to unlock the map of Africa) and complete side ops.
Location: Area to the north-east from guard post number 17 in Africa.
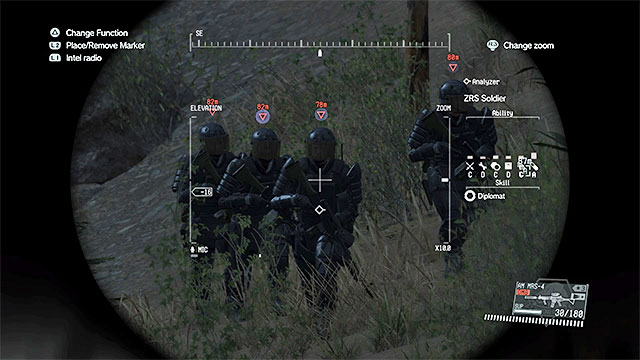 The main group consists of four soldiers.
Description: You can reach the mission area from guard post number 17 (head north-east) or from Lufwa Valley (head south-west). There are six enemies to eliminate. Two of them are very easy to deal with. A more difficult one is the group consisting of four soldiers. The best method is to attack the using a rocket launcher or throw a few grenades when they are close to each other. If you prefer to Fulton them, sneak up to them from behind and knock them out one by one.
Rewards: 120000 GMP
Mission objectives: Locate and eliminate the heavy infantry.
Availability: this mission unlocks automatically as you progress through the game (you have to unlock the map of Africa) and complete side ops.
Location: Area around guard post number 20 in Africa.
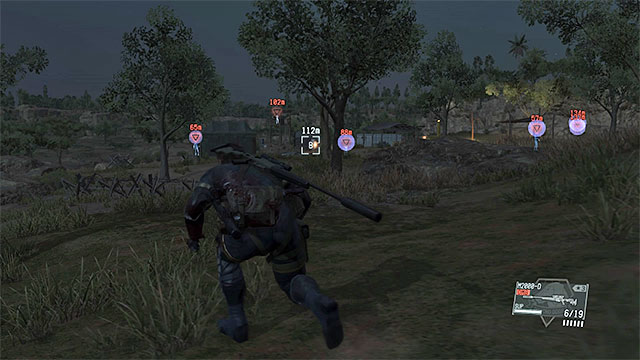 Approach the enemies and neutralize them quietly.
Description: Reach guard post number 20. There are seven heavy infantry soldiers here. There are far away from each other and face different sides, which makes the mission easier for you. You can start knocking them out and Fultoning them one by one. If you want to kill them, use a rocket launcher or a grenade launcher and try to destroy the watchtower before one of the enemies gets off.
Rewards: 120000 GMP
Mission objectives: Locate and eliminate the heavy infantry.
Availability: this mission unlocks automatically as you progress through the game (you have to unlock the map of Africa) and complete side ops.
Location: Area around guard post number 14 in Africa.
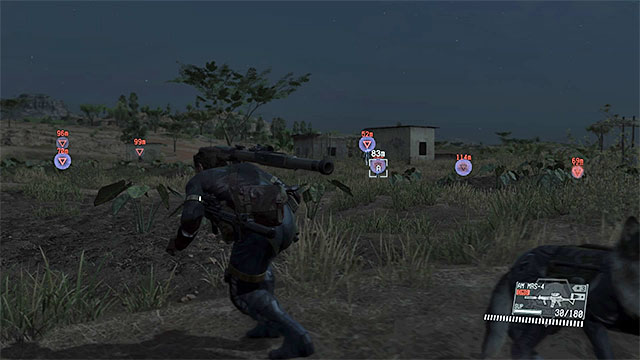 Secure the whole guard post.
Description: Reach guard post number 14, because that's where the heavy infantry soldiers are. There are eight of them. The ones that stand in one place are easy to eliminate, because you can sneak up to them from behind and neutralize them. It's more difficult to deal with the soldiers that keep patrolling the area, as they travel in pairs. If you're spotted, use the grenade launcher, rocket launcher or explosives to make sure that you pierce through the heavy armor.
Rewards: 140000 GMP
Mission objectives: Find and eliminate heavy infantry.
Availability: This mission should become available automatically with your progress into the game (you need to unlock the map of Africa) and after you have completed the remaining side missions.
Location: Near outpost 05 in Africa.
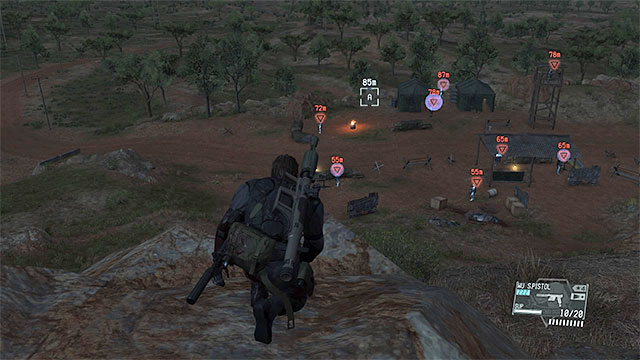 Reach the vantage point and eliminate all enemies
Description: Opponents in this mission are occupying outpost 5. Around, there are several hills and it is a good idea to get to one first, to perform good reconnaissance. You can restrain and fulton successive heavy infantry soldiers (get them from behind, eliminate in melee, but only when there are no other enemies around) or simply kill them. In the case of the latter, it is best to use the rocket launcher and at the very beginning of the mission, destroy the watchtower with one of the enemy soldiers in it.
Rewards: 180000 GMP
Mission objectives: Find and eliminate heavy infantry.
Availability: This mission should become available automatically with your progress into the game and after you have completed the remaining side missions.
Location: Vicinity of outpost 17 in Afghanistan.
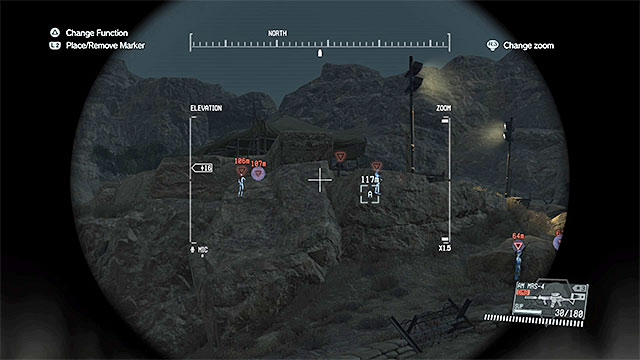 You need to secure the entire outpost 17
Description: Heavy infantry soldiers that you need to eliminate are in outpost 17 and in total, there are 8 of them. It is best to figure out their current locations using the help from D-Dog, but you can just as well, us e binoculars. It is not that easy to restrain opponents, because many of them stand close to each other and you would have to lure single soldiers away. Therefore, it is best to kill them all and you can use the rocket launcher for that, a grenade launcher or grenades.
Rewards: 200000 GMP
Objectives: Find and eliminate the heavy infantry.
Availability: This side op should be unlocked by making progress in the game (after unlocking Africa map) and completing previous side ops.
Location: Near Outpost 01 in Africa
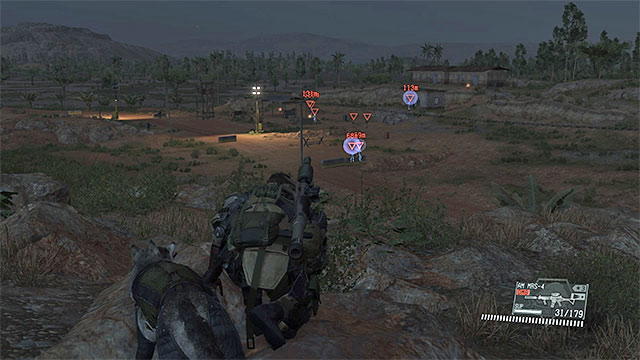 Perform a quick reconnaissance before approaching the outpost.
Description: Hostile soldiers from the heavy infantry unit are occupying outpost 01 - there are eight ones to eliminate. If you wish, you can sneak up to each one, stun and fulton them, but some of them are standing close to each other and you'd have to separate them first. If you don't mind using brute force, eliminate the soldiers with a rocket launcher, because their armor gives them quite a resistance.
Prize: 200000 GMP
Note! This mission is mandatory. You have to complete it to gain access to the twelfth mission of the main storyline (Hellhound).
Mission objectives: You have to make contact with Doctor Emmerich.
Availability: This mission should automatically unlock when you complete the ninth mission of the main storyline and construct the medical platform on the Mother Base.
Location: Serak Power Plant in Afghanistan.
 Your destination.
There are no landing pads near the Serak Power Plant, so you have quite a long journey ahead of you. Select any landing zone to the West of the destination point. During your march you will have to go through the Aabe Shifap Ruins, where you fight with Quiet, during the eleventh mission of the main storyline (Cloaked in Silence). After eliminating Quiet get back to the ruins and go East, while passing a number of enemy outposts along the way. A wide, asphalt road goes directly to the power plant, so it's really hard to miss it.
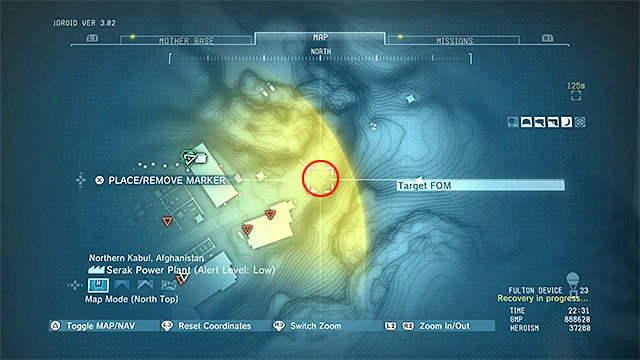
To complete the described mission, you must get to the red doors, located in the Eastern section of the power plant - those are marked on the above screenshot.
 Sneak and either knock out or eliminate enemies you stumble upon during your march.
This objective is a lot easier to complete if the enemies are oblivious of your presence. It's recommended to move along the rocks on the left side (preferably during the nighttime), and to avoid or eliminate only those enemies, that are directly obstructing your path. During your march you have to jump through a number of fences, which should pose no challenge. Open the red doors to complete the mission.
Rewards: 60000 GMP
Mission objectives: You have to clear the minefield.
Availability: This mission should automatically unlock with your progress in the main storyline
Location: Area to the South-West of the Spugmay Keep in Afghanistan, to the South of the 25th outpost.
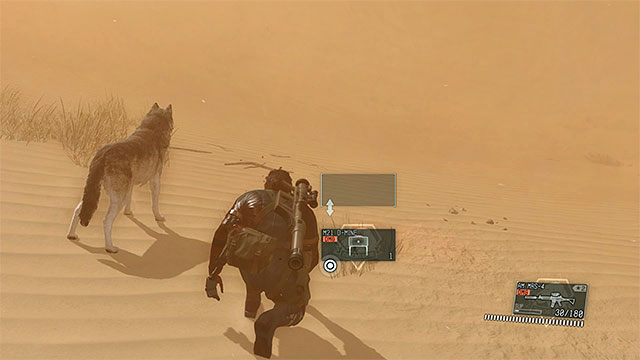 You can either pick up, or destroy the mines.
Description: Go towards the marked minefield. After reaching the area, you can start locating the mines with the help of D-Dog, or by using the night-vision goggles. Each mine you find you can either destroy, or pick up. The latter is quite risky, as you have to approach a mine carefully, so that it won't explode and press the appropriate button to disarm it. There are seven mines to get rid of.
Rewards: 80000 GMP
Mission objectives: Clear the minefield.
Availability: this mission unlocks automatically as you progress through the game and complete side ops.
Location: Area to the west from guard post number 15 in Afghanistan.
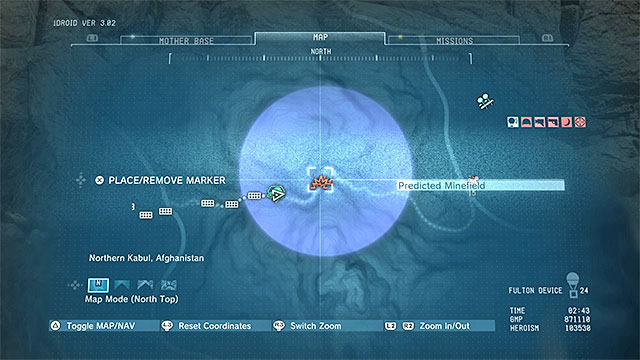
Description: The minefield is located in the place shown in the picture above. It is a mountain path that you can find to the west from guard post number 15. You can reach this place from the west or from the east side. D-Dog can be very helpful when searching for mines, but you can also rely on nightvision goggles. There are seven mines to neutralize - you can disarm them or detonate from distance, using arrows.
Rewards: 80000 GMP
Mission objectives: Clear the minefield.
Availability: this mission unlocks automatically as you progress through the game (you have to unlock the map of Africa) and complete side ops.
Location: Area to the west from Mfinda Oilfield.
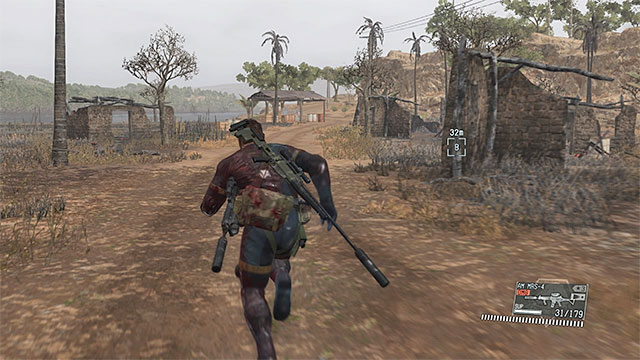 Search the destroyed village.
Description: You can find the minefield in the burned village located to the west from Mfinda Oilfield. After reaching this place, you cans start searching for the mines by yourself or use D-Dog. Just like in other missions of this type, you can disarm or detonate every mine. There are eight mines to neutralize.
Rewards: 90000 GMP
Mission objectives: Clear the minefield.
Availability: this mission unlocks automatically as you progress through the game (you have to unlock the map of Africa) and complete side ops.
Location: Area around guard post number 14 in Afghanistan.
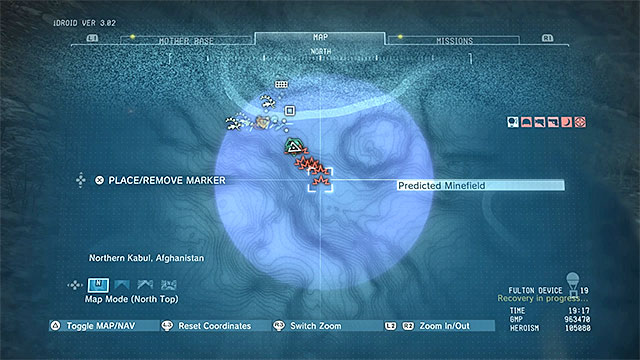
Description: The minefield is located not far to the south-east from guard post number 14. It is shown in the picture above. You can search for the mines by yourself or use D-Dog. You can of course either disarm or destroy them, but if you plan to detonate the mines, watch out not to be attacked by the enemies from the guard post. There are eight mines to neutralize here.
Rewards: 90000 GMP
Mission objectives: Clear the minefield.
Availability: this mission unlocks automatically as you progress through the game (you have to unlock the map of Africa) and complete side ops.
Location: Area to the south from guard post number 16 and to the north-west from guard post number 20 in Africa.
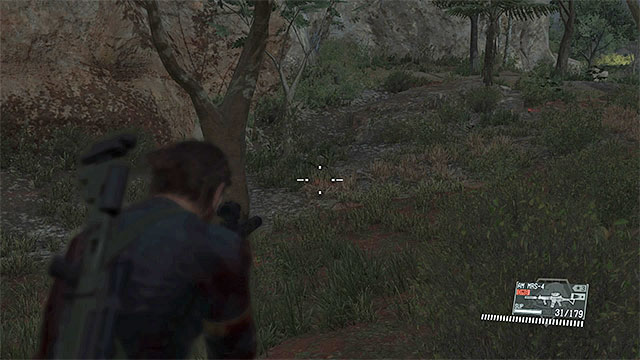 You have to neutralize nine mines.
Description: The minefield is located between guard posts number 16 and 20. It is small valley that you've already been to when completing some of the main mission. You can search for the mines (nine in total) by yourself or take D-Dog with you. You can try to disarm the mines or detonate them from distance.
Rewards: 100000 GMP
Mission objectives: Clear the minefield.
Availability: this mission unlocks automatically as you progress through the game (you have to unlock the map of Africa) and complete side ops.
Location: Area around guard post number 22 in Africa.
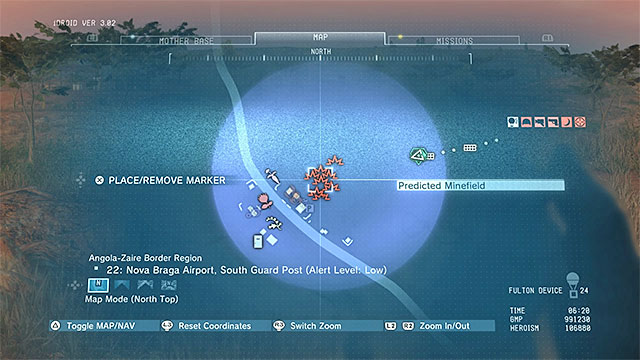
Description: You will find the minefield not far to the north-east from guard post number 22. It is shown on the picture above. Before you start neutralizing the mines, consider securing guard post 22, especially if you plan to the detonate the mines which can alarm the enemies. There are nine mines to find.
Rewards: 100000 GMP
Mission objectives: Clear the minefield.
Availability: This mission should become available automatically with your progress into the game and after you have completed the remaining side missions.
Location: Vicinity of outpost 07 in Afghanistan.
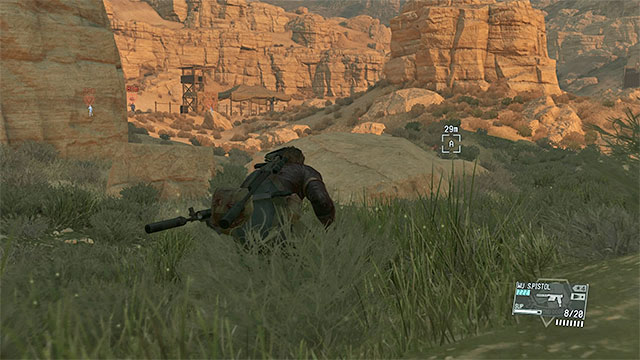 The minefield is next to one of the outposts
Description: The minefield is within short distance of outpost 7. Before you search for mines, it is a good idea to secure the outpost, because enemies would be alarmed, if one exploded accidentally. You can find the mines either o your own or using the D-Dog, after which you disarm them or explode them (rifle fire). There are, as many as, eleven mines to be neutralized.
Rewards: 140000 GMP
Mission objectives: Clear the minefield.
Availability: This mission should become available automatically with your progress into the game (you need to unlock the map of Africa) and after you have completed the remaining side missions.
Location: Vicinity of outpost 03 in Africa.
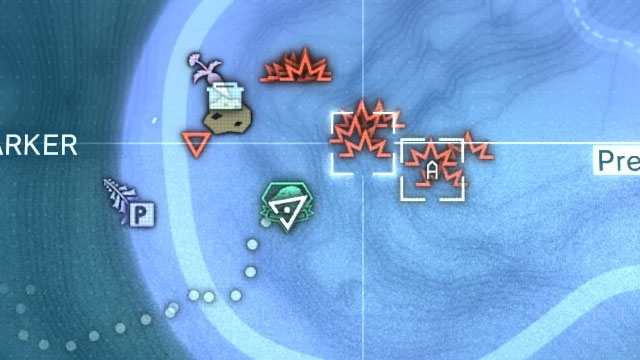 The minefield neighbors an outpost and it would be better to seize it first
Description: The minefield is right next to outpost 3. Since the mines could alarm enemies, after they explode, it is best to capture it first. This is not going to be too difficult, because the outpost is being guarded by regular soldiers> As for the mines themselves there are eleven of them, to be neutralized (either disarm them or destroy them). You can find them using D-Dog's help.
Rewards: 140000 GMP
Orders: Clean the minefield.
Availability: Task will unlock automatically along with the in-game progress (completing side-ops)
Location: Area to the east from the station nr 09 in Afghanistan.
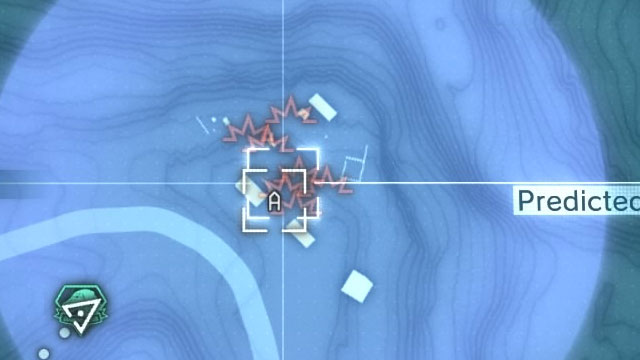
Description: The minefield in question is located not so far to the east from the post nr 9 and it is an unguarded village shown in the picture above. You won't even have to eliminate the enemies as they won't be able to reach the area of an explosion on time. However, you should beware a bear which may be walking around. It is best to kill him, as the process of fultoning it would take you to much time and ammunition.
Rewards: 180000 GMP
Orders: Clear the minefield
Availability: Unlocked automatically through the game progress: By unlocking Africa and finishing the task on its map.
Location: Lufwa Valley in Africa.
Description: As you reach Lufwa Valley try to secure the nearest camp in the jungle as there is a minefield nearby (depicted above). Only after dealing with the nearby enemies you should take care of the mines (by either destroying or defusing them). There are twelve mines in total.
Rewards: 200000 GMP
Mission objectives: You have to find and eliminate the armored vehicle and its crew.
Availability: This mission should automatically unlock with your progress in the main storyline and by completing other secondary missions.
Location: Area to the West of 5th outpost and to the North of the Yakho Oboo Supply Outpost in Afghanistan.
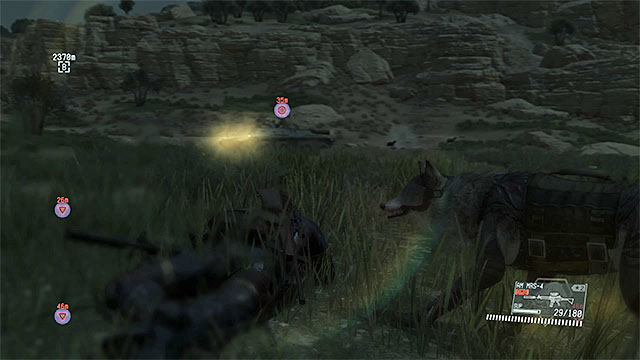 Sneak up on the armored vehicle and its crew.
Description: This mission takes place near the road leading North from the Yakho Oboo Supply Outpost. There are five targets to eliminate - four soldiers, and a single armored vehicle (APC). If you want to eliminate them all, use a rocket launcher and start off by blowing up the enemy vehicle. Otherwise, sneak up on enemies and knock them down with an aesthetic ammo and fulton the enemy APC (the CARGO 2 upgrade is required to do so).
Rewards: 80000 GMP
Mission objectives: You have to find and eliminate the armored vehicle and its crew.
Availability: This mission should automatically unlock with your progress in the main storyline and by completing other secondary missions.
Location: Area to the South of 25th outpost and to the South-West of the Spugmay Keep in Afghanistan.
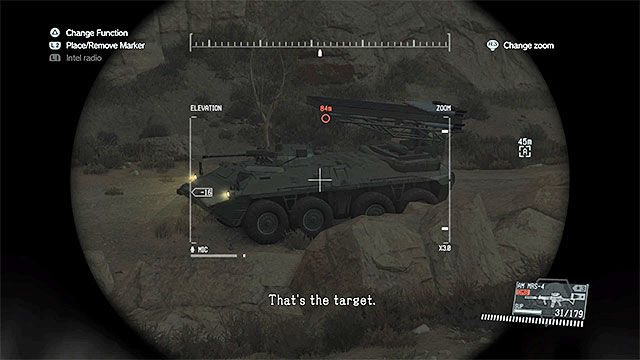 The main target is the enemy APC, but there are 6 soldiers to get rid of as well.
Description: Go to the area to the South-West of the Spugmay Keep. There are seven targets to eliminate here - a single APC and six soldiers. The best approach is to find a good vantage point on one of the hills and eliminate the enemies one by one, to either kill them or knock them unconscious (Quiet can help you with that). As far as the APC goes, you can either destroy it (with a rocket launcher), or fulton it (you will need the CARGO 2 upgrade for the latter).
Rewards: 90000 GMP
Mission objectives: Locate and eliminate enemy armored vehicles and their escort.
Availability: this mission unlocks automatically as you progress through the game and complete side ops.
Location: Area around guard post number 1 in Afghanistan
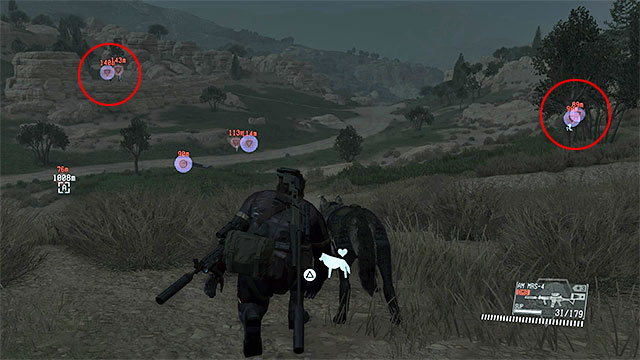
Description: Search the area to the south-west from guard post number 1. There are eight targets to eliminate. First, sneak up to the snipers marked on the picture above who are located on nearby hills (you can also eliminate them from distance). After neutralizing the snipers, reach the two APCs parked by the road. You can Fulton them or (if you don't have CARGO 2 upgrade), plant C4 on them. After eliminating the vehicles, you will just have to deal with regular soldiers.
Rewards: 140000 GMP
Mission objectives: Locate and eliminate enemy armored vehicles and their escort.
Availability: this mission unlocks automatically as you progress through the game and complete side ops.
Location: Area to the north-east from guard post number 11 in Africa.
 Start eliminating APCs and regular soldiers only after neutralizing the sniper.
Description: Search the area to the north-east from guard post number 11. Be careful, because there is a sniper among your enemies. Try to locate this opponent using binoculars and get rid of him quietly. Only after you do that, sneak up to the APC and Fulton it or plant C4 on it. At the end, eliminate the four soldiers. You can attack them from distance, use an explosive or sneak up to them from behind and knock them out one by one (the most risky method).
Rewards: 90000 GMP
Mission objectives: Locate and eliminate enemy armored vehicles and their escort.
Availability: this mission unlocks automatically as you progress through the game (you have to unlock the map of Africa) and complete side ops.
Location: Area to the west of Ditadi Abandoned Village in Africa.
 One of the snipers - deal with them before you head towards APCs.
Description: Explore the area to the west of Ditadi Abandoned Village. There are two APCs parked in this area, but don't hurry with getting to them, because several snipers are located on nearby hills. Get rid of them first (the binoculars and D-Dog will make it easier for you to find them) and when they're gone, Fulton or destroy the armored vehicles. Lastly, deal with the regular soldiers which shouldn't be a problem for you. There are eight targets in total to neutralize.
Rewards: 180000 GMP
Mission objectives: Locate and eliminate enemy armored vehicles and their escort.
Availability: this mission unlocks automatically as you progress through the game (you have to unlock the map of Africa) and complete side ops.
Location: Area to the east of Munoko ya Nioka Station in Africa.
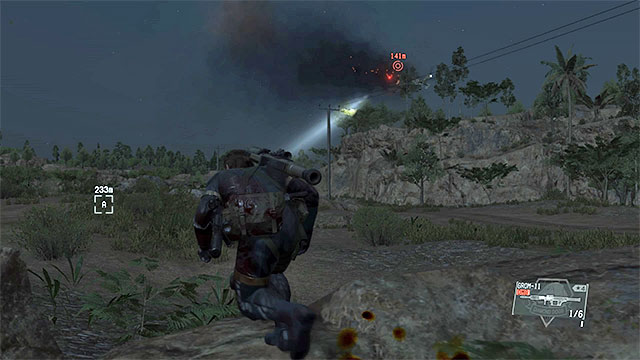 The gunship is flying over the mission area. You can shoot it down right away or deal with it later.
Description: You complete this mission in the area to the east of Munoko ya Nioka Station and it is best to approach it from north-east. When heading there, you should notice one of the nine targets in the mission, which is an enemy gunship. You can attack it now or leave it for the end. If you choose the second variant, watch out not to be detected by the gunship and other enemies.
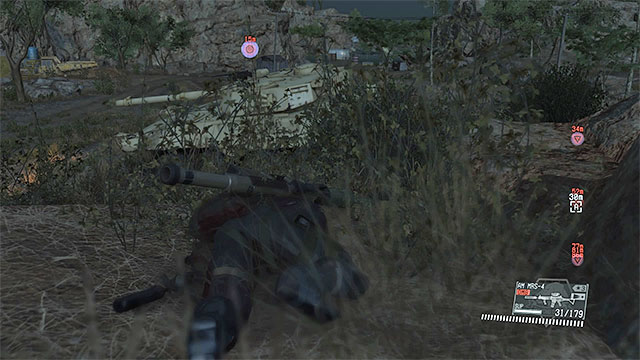 If you have CARGO 2 upgrade, sneak up to enemy machines to Fulton them.
As for the rest of the targets, it is good to start from locating and eliminating the snipers (D-Dog can help you). When the danger has been eliminated, sneak up to each of the machines and Fulton it or plant C4 on it. Lastly, start eliminating regular soldiers. If you haven't destroyed the gunship yet, do it after you deal with all the other enemies. Make sure that you shoot the gunship down quickly and don't let the pilot escape, because then you will have to repeat the mission.
Rewards: 100000 GMP
Mission objectives: Find and eliminate the enemy armored vehicles and their guards.
Availability: This mission should become available automatically with your progress into the game (you need to unlock the map of Africa) and after you have completed the remaining side missions.
Location: Area South of Nova Braga Airport in Africa.
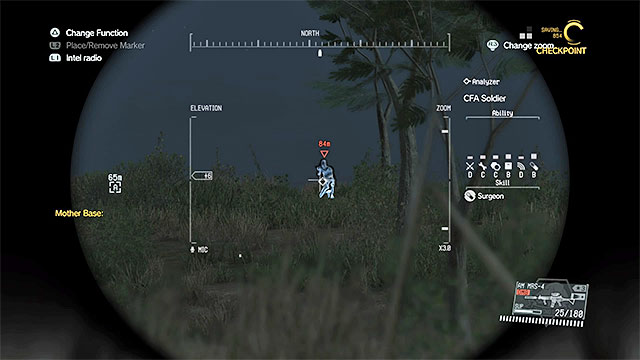 Reach snipers an eliminate them silently
Description: Reach the area Southwards of Nova Braga Airport. You should sneak here, because you note a patrolling gunship, along your path (it is best to leave destroying it for later). Stop within a safe distance of the enemy and either use binoculars, or the D-Dog to determine opponent' locations. First of all, head towards the snipers that you have identified - try to get them from behind and neutralize them silently.
 Finally, shoot down the gunship
After you deal with the snipers, you can take it on the regulars and the enemy vehicles. It would be best if you fultoned them, but if you do not have the CARGO 2 upgrade, plant C4 explosives on them. Deal with the gunship at the very end of the mission (before that, avoid its spotlight). Try to destroy it in one shot and do not let the pilot escape on the damaged chopper.
Rewards: 100000 GMP
Mission objectives: Find and eliminate the enemy APC and the guards.
Availability: This mission should become available automatically with your progress into the game and after you have completed the remaining side missions.
Location: Area Southwards of Da Ghwandai Khar village in Afghanistan.
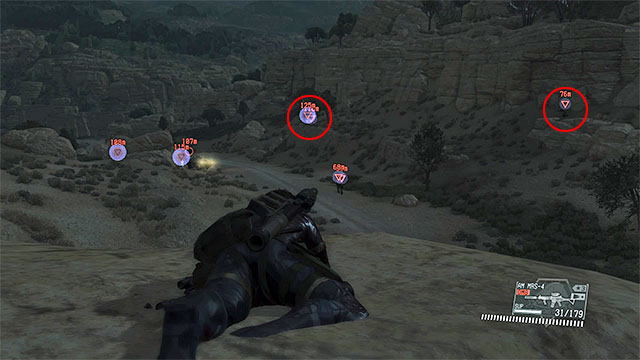
Description: The area of the mission is Southwards of Da Ghwandai Khar village. It is best to reach that location from the South/ Take a vantage point and perform reconnaissance. Your priority are the snipers on the hills to the right of the road - the above screenshot. You can eliminate them with ranged attacks, or sneak up on them from behind or from the side. After you deal with the snipers, fulton or destroy the APC and deal with the regular soldiers. In total, there are eight targets to eliminate here.
Rewards: 200000 GMP
Mission objectives: Find and eliminate the enemy armored vehicles and their guards.
Availability: This mission should become available automatically with your progress into the game (you need to unlock the map of Africa) and after you have completed the remaining side missions.
Location: Eastwards of outpost 02 in Africa.
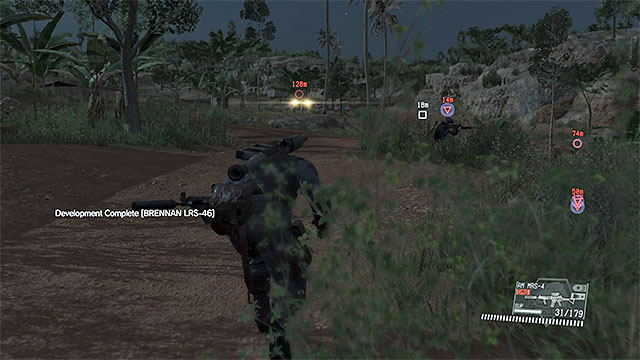 Deal with snipers first
Description: This mission takes place in a small village Eastwards of outpost 2 and you can get there, e.g. from the West. After you approach the area, use binoculars or rely on D-Dog. Your priority here are the snipers that you need to eliminate, while staying out of their sight (get them from behind or from the side). After you eliminate them, try to sneak up to the two armored vehicles and either fulton them or plant C4 explosives on them. Finally, deal with the standard soldiers, who won't be posing any threat anymore.
Rewards: 200000 GMP
Objectives: Find and eliminate enemy armored vehicles and their escort.
Availability: This side op should be unlocked by making progress in the game (after unlocking Africa map) and completing previous side ops.
Location: Nova Braga Airport in Africa.
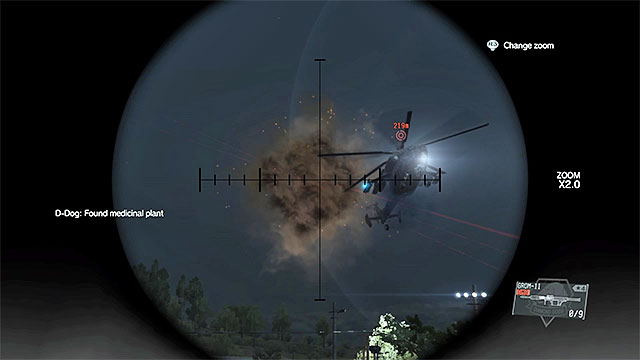 Try to shoot the chopper down before you get close to the airport
Description: The enemy's main forces are located at the Nova Braga Airport, but you should notice the helicopter flying around before you approach the airport. Wait until the vehicle is over 200 meters away from the airport, then shoot it down (it's one of the objectives). Performing this will facilitate crossing the airport, because you will no longer have to fear being detected by the chopper.
Note - the chopper is rather tough, so use a good rocket launcher so you won't have to shoot twice.
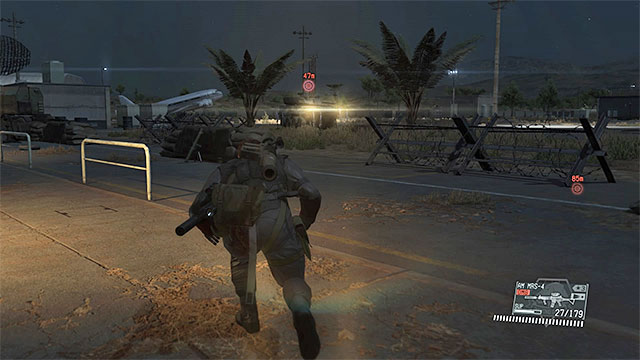 Fulton the armored vehicles to the Mother Base
When you enter the airport, head towards the main building because there are enemies on several floors and they have a good view. Save the APCs for last (you can find them using D-Dog or performing reconnaissance). Sneak up to each one to fulton them. If you raised the alarm, stand farther away from the vehicles near a cover before you use a rocket launcher to destroy them.
Prize: 200000 GMP
Orders: You have to find and eliminate armoured vehicles.
Availability: Task will unlock automatically along with the in-game progress (completing side-ops)
Location: Aabe Shifap Ruins in Afghanistan.
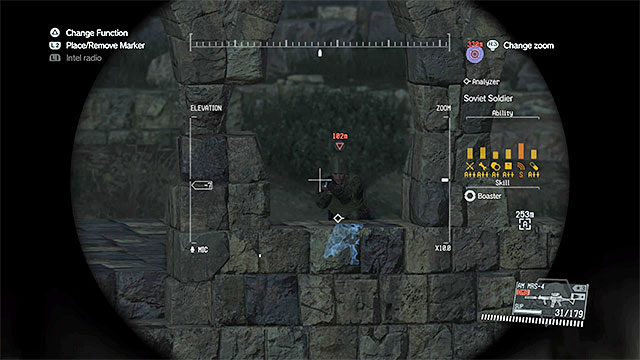 Some snipers are well hidden. Keep your eyes wide open.
Description: The unit positioned itself in Aabe Shifap Ruins. On your way there, notice the flying chopper. Don't attack it yet as it could alarm remaining enemies. Start crawling as soon as you get closer to the ruins to avoid being shot by the snipers. Locate them by using the binoculars or D-Dog and sneak up on each of them. As soon as you get rid of them, approach the nearby APC vehicles and fulton them. Finally you can start shooting up the chopper with a good rocket launcher. Take advantages of the cover system when the chopper attacks you back.
Rewards: 300000 GMP
Mission objectives: Locate and eliminate enemy armored vehicles and their escort.
Availability: this mission unlocks automatically as you progress through the game (you have to unlock the map of Africa) and complete side ops.
Location: Mfinda Oilfield in Africa.
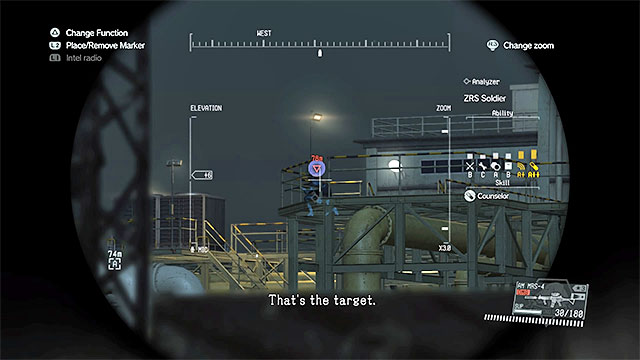
Description: It is best to reach Mfinda Oilfield from the east. After reaching your destination, silently eliminate the guard watching the entrance and avoid the gunship flying over the area. The biggest problem in this mission are enemy snipers. They are located on the metal balconies in the central part of the oilfield (you can see one of the on the picture above). You can send D-Dog towards them and order it to kill or knock them out. You can also reach them by yourself and deal with the enemies. If you chose the second option, remember to crawl and use the buildings, containers and other large objects for cover.
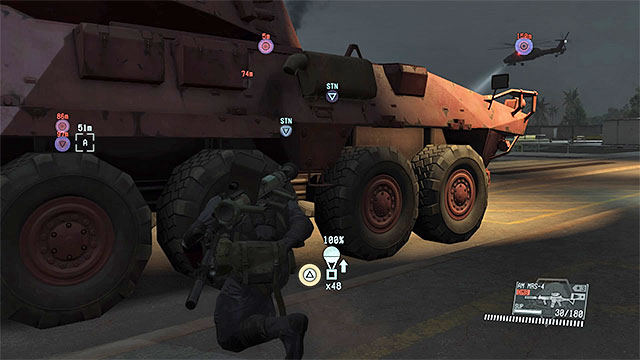 Fulton the APCs first and then take care about the gunship.
After you deal with all the snipers, you can start looking for armored vehicles parked at the airport. You will encounter the strongest type of APCs, therefore it is advisable you sneak up to them and Fulton the machines. You should avoid the gunship almost throughout the whole mission. Start attacking it only when it is the last objective. Hide behind the buildings when reloading your launcher, because you will only destroy the gunship after 2-3 hits, so the crew may decide to use their rockets on you.
Rewards: 300000 GMP
Mission objectives: Locate and eliminate enemy armored vehicles and their escort.
Availability: this mission unlocks automatically as you progress through the game (you have to unlock the map of Africa) and complete side ops.
Location: Area around Ditadi Abandoned Village in Africa.
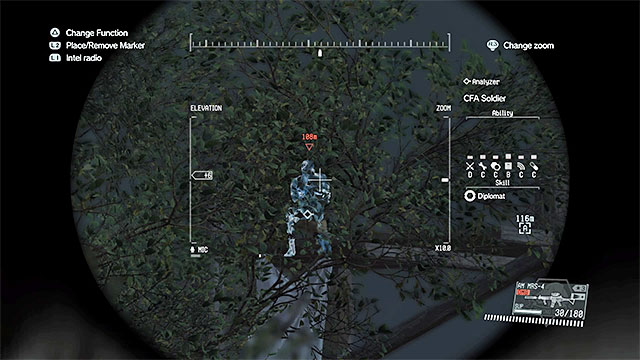 Get rid of the snipers quickly.
Description: It is best to approach Ditadi Abandoned Village from the north-west. You don't have to eliminate all the enemies in the village, but only those connected to the mission. D-Dog will help you identify your targets. Start from dealing with the snipers. If you have a good rifle, you can eliminate the soldier on the watchtower from distance, or you can first deal with all the other soldiers and then climb the tower and defeat him in melee fight. In the last part of the mission, sneak up to the APCs to Fulton them and attack the gunship. The machine is very durable, so use the best rocket launcher that you can and hide behind the buildings or rocks when reloading. Also, before you attack the gunship, you should go away from the village.
Rewards: 300000 GMP
Orders: Find and eliminate enemy armoured vehicles and their guards.
Availability: Task will unlock automatically along with the in-game progress (completing side-ops)
Location: Area to the east from Lamar Khaate Palace in Afghanistan.
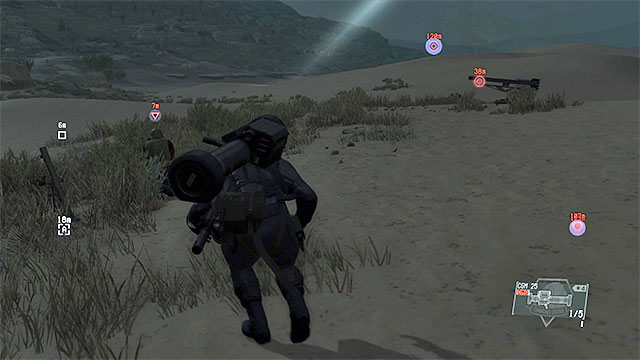 Approach the snipers from behind.
Description: Your target is an area to the east from the Lamar Khaate Palace and once again, don't attack the chopper right away. And again, beware of the snipers as the desert is not the best place to be hiding. Locate the snipers by using D-Dog or crawl to each one of them in order to eliminate them in melee combat. Other targets should be taken care of after dealing with the snipers. You will be left with regular soldiers, two APC vehicles (fultoning them would be reasonable) and the already mentioned chopper. Use the best rocket launcher possible or you will find it extremely hard to flee if it won't destroy it in one shot.
Rewards: 300000 GMP
Mission objectives: You have to stun and extract a legendary gunsmith.
Availability: This mission should automatically unlock with your progress in the main storyline (you have to unlock the African map) and by completing other secondary missions.
Location: Bwala ya Masa village in Africa.
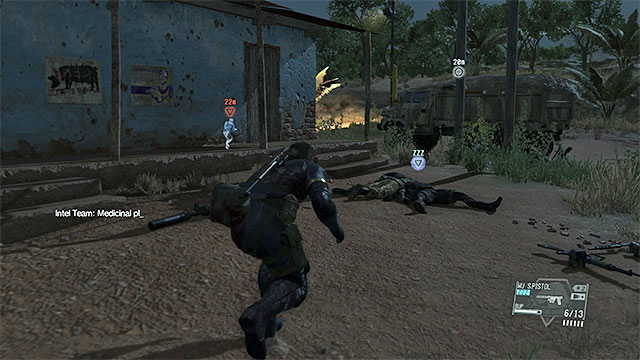 Eliminate the soldiers guarding the gunsmith and then fulton him.
Description: Get to a good vantage point, from where you will have a good view on the Bwala ya Masa village and start your reconnaissance. The gunsmith you are looking for is one of the enemies in the village and you will be easily able to find him thanks to the soldiers guarding him. The guards can be eliminated in any way you want (with a sniper rifle, for instance), but the gunsmith must be taken alive. After you've knocked him down, make sure that there are no enemies nearby and extract him to the Mother Base.
Rewards: 80000 GMP, new member of the crew.
Mission objectives: You have to extract a legendary gunsmith.
Availability: This mission should automatically unlock (after some time) after completing the 107th side mission, after you've learned about the existence of another, better gunsmith.
Location: Afghanistan Central Base Camp
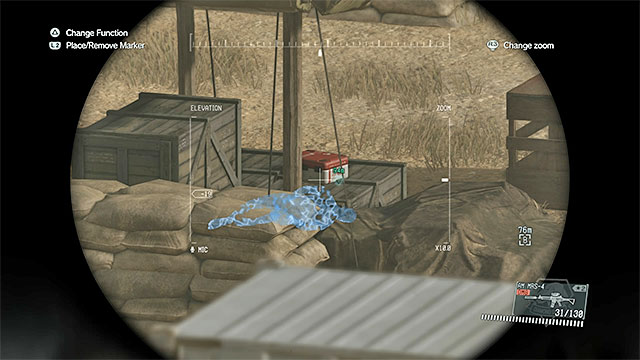
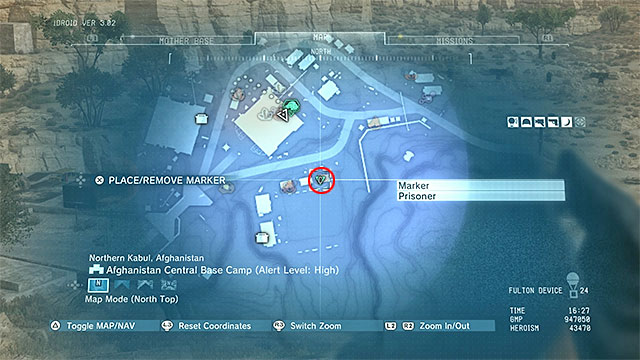
Description: In contrast to the gunsmith from the 107th side ops mission, who was one of the enemies, this time you will have to rescue a prisoner from the Afghanistan Central Base Camp. The place in which the hostage is kept is shown on the above screenshots (D-Dog will help you as well). Try not to alarm the enemies from the base during your rescue mission, as you will have a harder time completing the objective, and the life of the hostage will be at risk.
Rewards: 80000 GMP, new member of the crew.
Mission objectives: You have extract a legendary gunsmith.
Availability: This mission should automatically unlock (after some time) after completing the 108th side mission, after you've learned about the existence of another, better gunsmith.
Location: Yakho Oboo Supply Outpost in Afghanistan.
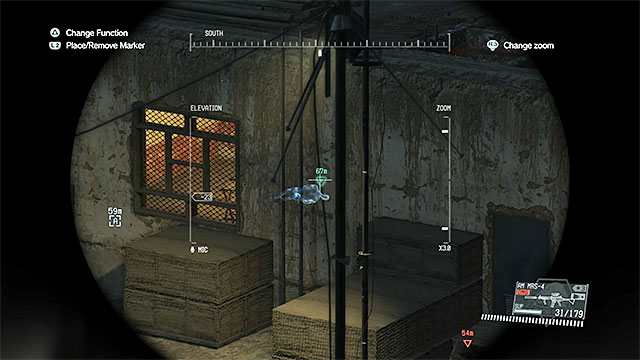
Description: Another gunsmith is held in the Yakho Oboo Supply Outpost, which should be approached from the North-West. Use your binoculars, as well as D-Dog to locate the hostage - he's located in one of the buildings in the Western section of the base, as shown on the above screenshots. Go there and try to remain undetected. After arriving at the gunsmith's position, pick him up and go to the neighboring room. Place him directly below the hole in the roof and fulton him to the Mother Base.
Rewards: 80000 GMP, new member of the crew.
Mission objectives: You have to extract containers with materials.
Availability: This mission should automatically unlock with your progress in the main storyline (you have to unlock the African map) and by completing other secondary missions.
Location: Bampeve Plantation in Africa.
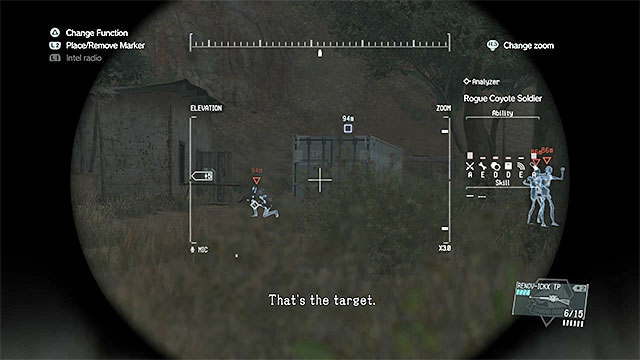 The container is protected by a group of enemies.
Description: Examine the Bampeve Plantation, thanks to which you should be able to locate the container with the materials. It's guarded by a group of enemies, which can either by killed, or stunned and fultonned. To extract the container you will need the CARGO 2 upgrade, and the operation itself costs 10,000 GMP.
Rewards: 80000 GMP
Note! This mission was marked in your iDroid as a high-priority mission (Important Side-Ops). It's not required to complete the first chapter of the main storyline (main missions 1-31), but if you complete it, Quiet will become a full-fledged companion.
Mission objectives: You have to visit Quiet in the Mother Base.
Availability: This mission should automatically unlock when you complete the fourteenth mission of the main storyline (Lingua Franca), but only when captured Quiet alive (during Cloaked in Silence).
Location: Medical Platform in Mother Base.

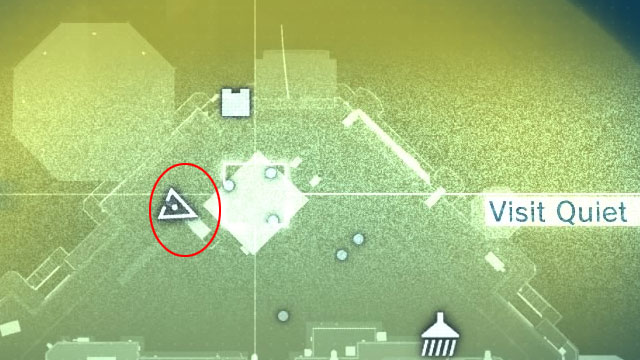
After getting back to the Mother Base, go to the Medical Platform. Search for the stairs, as shown on the above screenshots, which lead to the cell on the lower deck. Approach the cell with Quiet inside and listen to the conversation with Ocelot. Afterwards, when you try to leave the Mother Base, a cutscene will initiate and Quiet will be "promoted" to a full-fledged companion (Buddy). It means, that you will be able to take her along on missions from now on.
Rewards: 30000 GMP, Quiet becoming a full-fledged companion.
Objectives: Find and rescue the Intel agent.
Availability: This side op should be unlocked by making progress in the game and completing previous side ops.
Location: Da Ghwandai Khar village in Afghanistan.
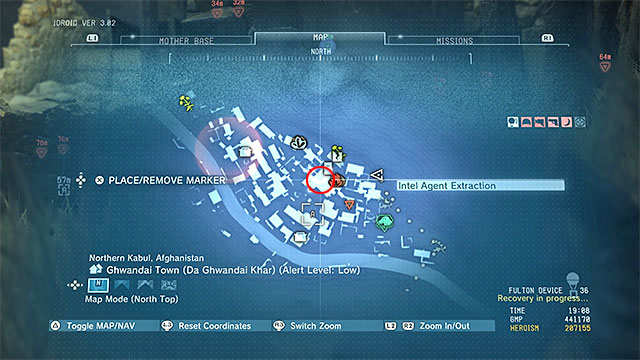
Description: Reach the Da Ghwandai Khar town from any side and start infiltrating it. You can eliminate the enemies or avoid them. The hostage is kept in the same place where you found Miller in the first main mission - a building shown in the screenshot above. There are two enemies in the building, you can kill them with quick shots or, for example, cooperating with D-Dog. Approach the hostage, rescue him and get him out of the village. Call for the helicopter and put him inside to finish this side op.
Prize: 100000 GMP
Note! This mission was marked in your iDroid as a high-priority mission (Important Side-Ops). It's not mandatory, but if you complete it, you will be able to research the Children upgrade for the fultoning device, allowing you to extract kids as well.
Mission objectives: Defeat Eli in direct combat one more time.
Availability: This mission should automatically unlock when you complete the twenty-sixth mission of the main storyline (Hunting Down).
Location: R&D Platform in Mother Base.
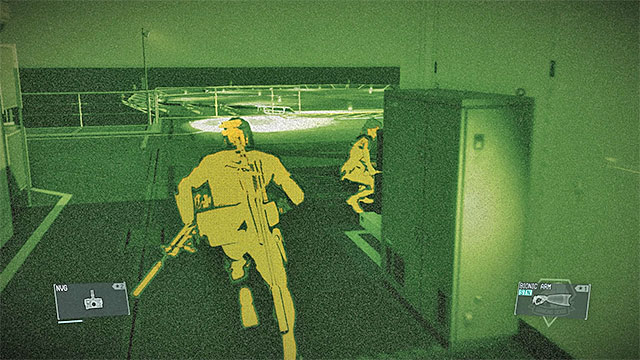
Return to the Mother Base and head towards the R&D Platform. Eli can be found in the upper level, and as soon as you approach him, he will start running away. You can find Eli on your own, or by using night-vision goggles, so that the target will be easier to spot (the above screenshot).
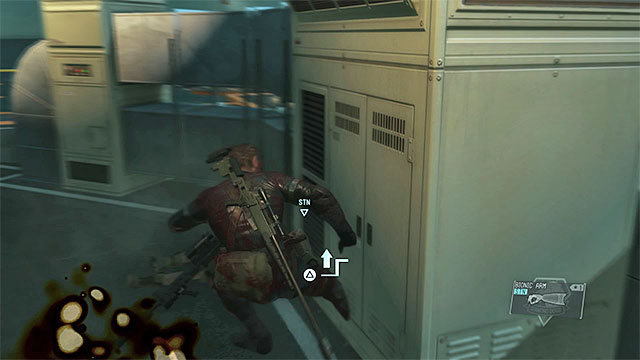 Make use of throws and melee attacks.
In order to defeat Eli, you will have to hit him a few time in melee combat, or perform a number of throws on him. Make use of sprint as well, as it will allow you to get to him easier when you locate him.
Rewards: 120000 GMP, the ability to complete the Children upgrade for the fultoning device.
Mission objectives: You have to find and eliminate the enemy tank unit.
Availability: This mission should automatically unlock with your progress in the main storyline.
Location: Area to the South of the Da Ghwandai Khar village, in Afghanistan.
 Quickly locate and eliminate the enemy sniper.
Description: The group of enemies is scattered around in open field, to the South of the Da Ghwandai Khar village. There are five soldiers, as well as a tank here. You should sneak up on the enemies, as one of them is wielding a sniper rifle. Try to locate him as quickly as possible and get rid of the threat (it's advised to use a silenced sniper rifle to do so). The other enemies should be either knocked unconscious, or killed. If you were noticed, immediately focus on the enemy tank, as the crew inside will be able to kill Big Boss easily. Otherwise, you should consider sneaking up on the enemy tank and fultoning it to the Mother Base (CARGO 2 upgrade is required to do so).
Rewards: 80000 GMP
Mission objectives: Locate and eliminate enemy tank unit.
Availability: this mission unlocks automatically as you progress through the game and complete side ops.
Location: Area to the east of Lamar Khaate Palace in Afghanistan.
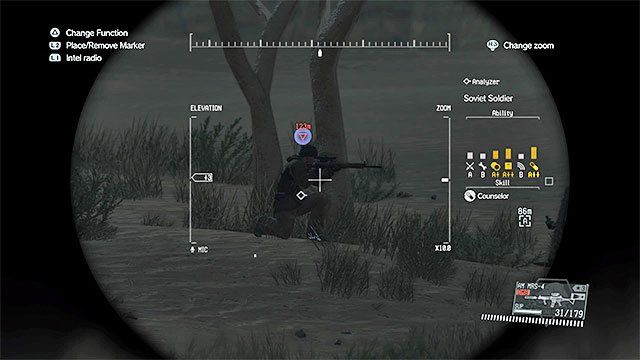 Reach the sniper first.
Description: You complete this mission to the east of Lamar Khaate Palace. It is more difficult, because you are on a desert and there are no places to hide besides dunes. The best way is to rely on crawling to decrease the chance of being detected. First, locate the sniper, who should be near one of the trees. Get rid of him and then start dealing with other targets (there are eight of them in total). The best way to get rid of the tank is to sneak up to it and Fulton it. If you don't have a proper upgrade, you can destroy the tank, but make sure that you stand in a safe place.
Note - if you are detected, bare in mind that the enemies can use mortars.
Rewards: 100000 GMP
Mission objectives: Locate and eliminate enemy tank unit.
Availability: this mission unlocks automatically as you progress through the game (you have to unlock the map of Africa) and complete side ops.
Location: Aabe Shifab Ruins in Africa.
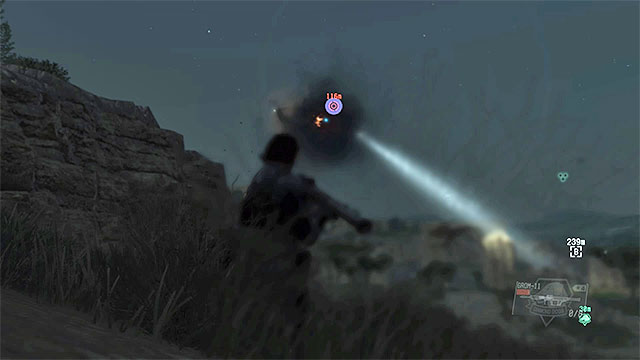 Shoot the gunship down.
Description: You complete this mission in Aabe Shifab Ruins, but you will probably see a gunship flying over the area on your way. It is one of the targets in the mission. If you want to, you can attack it right away. Do it far away from the ruins not to alarm other enemies. Also, try to eliminate the gunship with a single hit so that the pilot has no chance to escape.
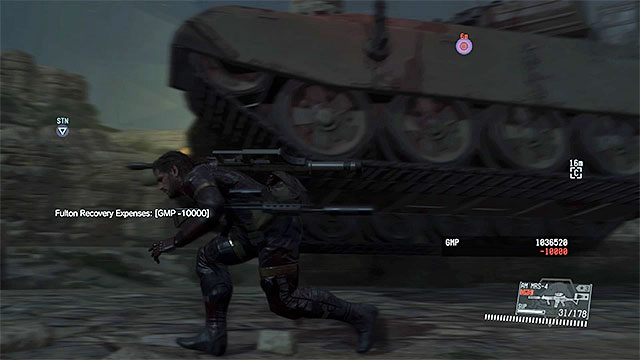 Fulton the tank if you can.
There are five other targets in the ruins. You can start from dealing with the soldiers or focus on the tank first. The best option is to Fulton it. No matter how you choose to act, try not to raise the alarm, because the tank can very quickly kill Big Boss and enemies can also use mortars.
Rewards: 90000 GMP
Mission objectives: You have to find and eliminate the enemy tank unit.
Availability: This mission should automatically unlock with your progress in the main storyline and by completing other secondary missions.
Location: Area of the 15th outpost in Africa.
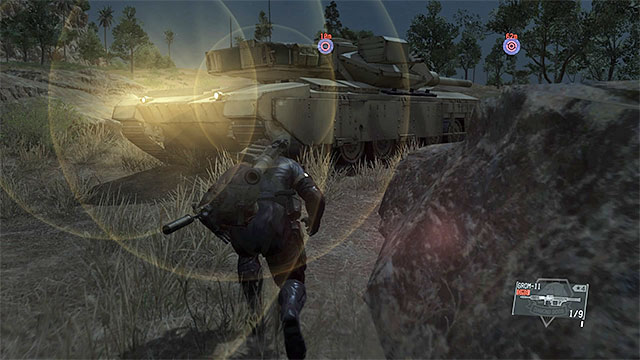 The tank can be either fultonned, or destroyed.
Description: It's one of the more difficult side ops missions in the game. There are nine targets to eliminate here. First things first, focus on eliminating the seven soldiers located in the designated area (a few of them use sniper rifles and they are stationed on top of the nearby hill). Try to, at all costs, eliminate them while staying hidden, otherwise you will make the whole encounter a lot more difficult. After you've dealt with the soldiers (or at least with most of them), approach the enemy tank from behind and fulton it (if you don't have the CARGO 2 upgrade completed, attach C4 to the tank and detonate them from a safe distance).
 Finally take care of the helicopter.
Afterwards, there's only one target remaining - a helicopter flying over the area. Try to use the best rocket launcher to take out the vehicle, so that the enemy pilot has no chance to get away from the battlefield.
Note - if the helicopter or the tank notices you, stop sneaking and take an aggressive approach and attack them, as both of those machines can easily kill Big Boss in a matter of seconds.
Rewards: 140000 GMP
Mission objectives: Locate and eliminate enemy tank unit.
Availability: this mission unlocks automatically as you progress through the game (you have to unlock the map of Africa) and complete side ops.
Location: Nova Braga Airport in Africa.
 It is best to destroy the gunship before you enter the airport territory.
Description: It is best to reach Nova Braga Airport from south-west. When heading towards it, you should notice a gunship flying over the area. It is good to shoot it down now. Deal with it far away from the airport (at least 200 meters), to ensure that you don't alarm other enemies.
 There are two snipers on the roof of the main building.
When you are on the airport territory, head straight to the main building that you already know from a lot of missions. On the roof, there are two snipers and the best way to get rid of them is to sneak up to them and kill or knock them out. After dealing with the snipers, take care of the tanks travelling around the airport. If you have CARGO 2 upgrade, the best option is to Fulton it. At the end, get rid of all the regular soldiers. Don't hurry and neutralize them one by one.
Rewards: 180000 GMP
Mission objectives: Find and eliminate the enemy tank unit.
Availability: This mission should become available automatically with your progress into the game (you need to unlock the map of Africa) and after you have completed the remaining side missions.
Location: The Area Eastwards of outpost 02 in Africa.
 Use buildings and natural formations in the form of a cover
Description: You complete this mission Eastwards of outpost 2. After you get there, try to identify the two enemy tanks, in the first place. Ignore them, as for now. Instead, focus on eliminating regulars in the nearby village (there are six of them in there). Avoid engaging larger groups and assault only single soldiers, who can be killed or fultoned afterwards.
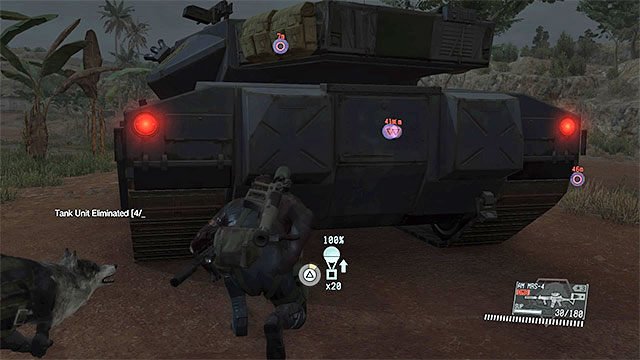 The easiest thing to do with tanks is fultoning them, but you can just as well destroy them
Eliminate the two tanks towards the very end of the mission, when there only are 1-2 enemy soldiers remaining. Of course, the best thing to do here is fulton the tanks, using CARGO 2 upgrade, but if you do not have that, or if you have already alarmed the enemies to your presence, you can use, e.g. the rocket launcher (it is necessary that you use covers, in the case of the latter, or you will get killed quickly).
Rewards: 90000 GMP
Mission objectives: Find and eliminate the enemy tank unit.
Availability: This mission should become available automatically with your progress into the game (you need to unlock the map of Africa) and after you have completed the remaining side missions.
Location: Area Eastwards of outpost 01 in Africa.
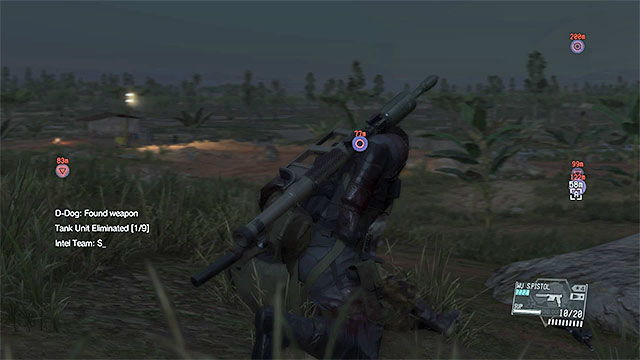 Snipers are quite well-hidden
Description: The mission takes place to the South-East of outpost 1. Do not hurry to get there, because there are several snipers around and they are quite well-hidden (you can use the help of D-Dog to locate them). While sneaking up to successive snipers, you should especially watch out for the helicopter hovering over the entire area.
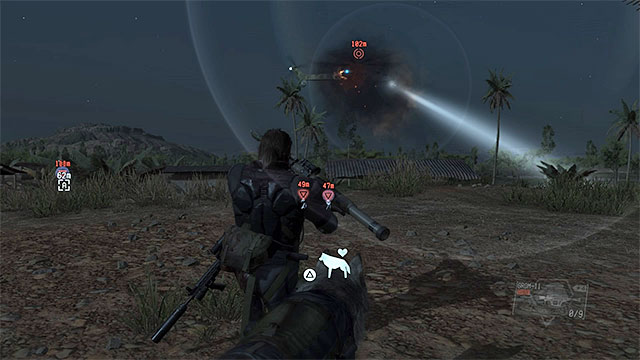 The chopper should be the last target that you eliminate
After you successfully deal with snipers, sneak towards the two tanks parked here. It would be best to fulton them away, buy it you do not have the CARGO 2 upgrade, you can plant several C$ explosives on the tanks. The final target that you take on should be the helicopter. If possible, take it down in one shot (use a good rocket launcher), to make sure that the pilot does not escape the mission area.
Rewards: 120000 GMP
Mission objectives: Find and eliminate the enemy tank unit.
Availability: This mission should become available automatically with your progress into the game (you need to unlock the map of Africa) and after you have completed the remaining side missions.
Location: Area Eastwards of Munoko ya Nioka Station in Africa.
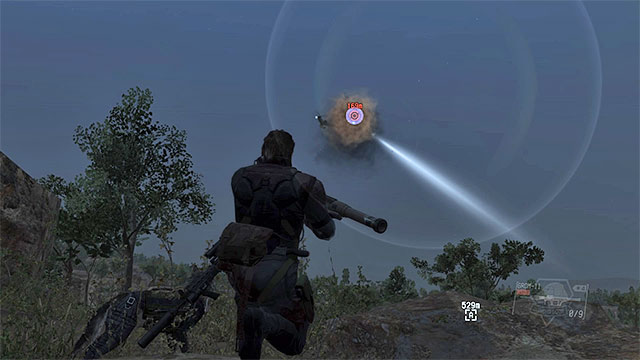 You can shoot down the gunship still before you reach the unit
Description: This mission takes place Eastwards of Munoko ya Nioka Station and you encounter the first one of the nine targets, most probably, when you are still on your way towards your destination. It would be best to shoot the enemy gunship down. Just make sure that you are not too close to your destination, nor to outpost 20.
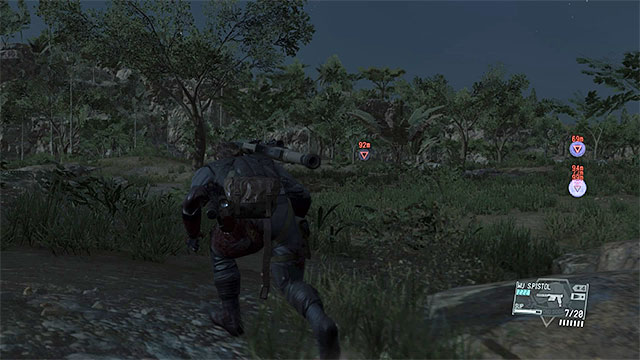 Walk around the area on the Northern side, e.g. on the left, thanks to which you reach snipers safely .
The greatest threat from the main group are the enemy snipers, especially that they will be. Most probably, facing North, i.e. watching the direction which you come. You can now start crawling, or try to walk around the area on the left side, thanks to which you get them from the side. Paradoxically, it is easier to eliminate the enemy tank, because you can simply sneak up to it and either destroy it with C4 explosives, or fulton it.
Rewards: 200000 GMP
Mission objectives: Find and eliminate the enemy tank unit.
Availability: This mission should become available automatically with your progress into the game and after you have completed the remaining side missions.
Location: Area Northwards of Yakho Oboo Supply Outpost in Afghanistan.
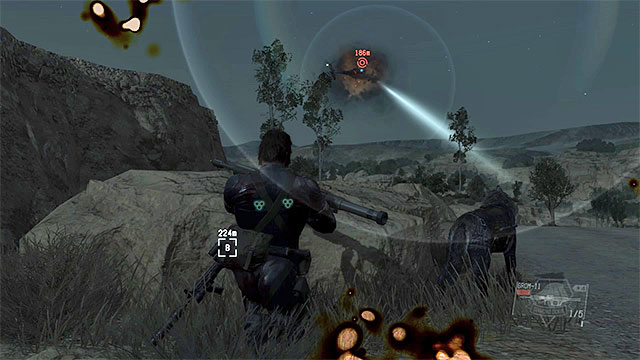 destroy the gunship along your path to the mission area
Description: This mission takes place Northwards of Yakho Oboo Supply Outpost and it is best to approach this area from the South. Along your path, wait for the moment, at which an enemy gunship appears above the canyon. The chopper is one of mission objectives and it would be best to take it down immediately. However, make sure that you do not do that within short distance of the remaining enemy forces, or you will alarm them.
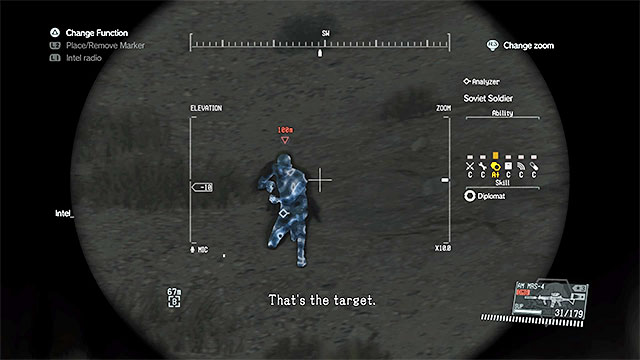 Locate snipers before you start the mission proper
It is best to sneak up to the actual mission area, because there are, among others, several snipers around (locate them using either binoculars or D-Dog). You can eliminate them with long distance shots (it is necessary that you use a silenced weapon!) or get to each one of them, get him from behind and eliminate silently. Finally, deal with regular soldiers and the tank that you can also fulton (CARGO 2 required), or destroy (use the rocket launcher or C4 explosives).
Rewards: 200000 GMP
Objectives: Find and eliminate the hostile tank unit.
Availability: This side op should be unlocked by making progress in the game (after unlocking Africa map) and completing previous side ops.
Location: West from the Ditadi Abandoned Village in Africa.
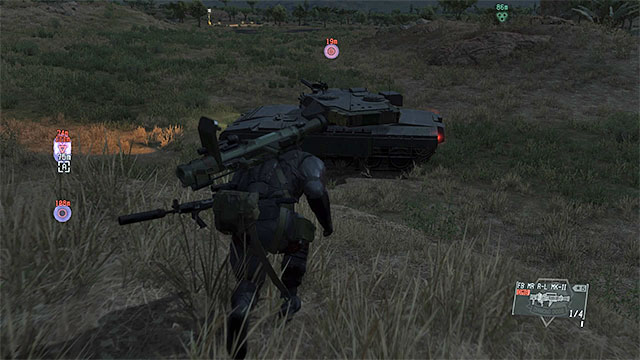 Approach the tanks after you get rid of the snipers.
Description: Start with infiltrating the part of the map west from the Ditadi Abandoned Village. The area is being patrolled by a chopper, but don't eliminate it until the final part of the mission. Firstly, locate the sniper - D-Dog will help you with that. Remember to approach them from the side they are not looking at. After you deal with them, fulton the tanks located nearby. Finally, get rid of the chopper and several regular enemies walking in a group (probably four people). Use a rocket launcher. There are nine targets to eliminate.
Prize: 200000 GMP
Mission objectives: Locate and eliminate enemy tank unit.
Availability: this mission unlocks automatically as you progress through the game and complete side ops.
Location: Area to the south from guard post number 25 and to the south-west from Spugmay Keep in Afghanistan.
 As usual, the snipers should be eliminated first.
Description: You complete this mission to the south-west from Spugmay Keep. When travelling, you will notice a gunship flying over the map. If it's far enough from the mission area, you can destroy it now. Otherwise, leave it for now so that other enemies are not alarmed. As for the rest of the enemies, you should watch our for snipers hiding near the rocks above the main road. You can locate them more easily using with the help of D-Dog. Try to Fulton the tank parked nearby, because it has very strong armor and would endure a lot of rockets.
Rewards: 300000 GMP
Mission objectives: Locate and eliminate enemy tank unit.
Availability: this mission unlocks automatically as you progress through the game and complete side ops.
Location: Area around guard post number 6 in Africa.
 Fulton the tank after you eliminate the snipers and leave the gunship for the end of the mission.
Description: The tank unit can be found to the north-east from guard post number 6. Start sneaking when approaching the mission area so that the gunship doesn't detect you (don't attack it for now). When you're there, use the binoculars to identify your targets or wait until D-Dog does it for you. Try to crawl to the snipers first and eliminate them silently. Next, deal with the tank. The machine has very strong armor and would be a big threat for you, so the best option is to Fulton it. Then, you can proceed to regular soldiers from the unit or attack the gunship. No matter when you want to start fighting with it, make sure that you use a very good rocket launcher, There are not many places to hide in this area so it is very important that you destroy the gunship quickly.
Rewards: 300000 GMP
Mission objectives: Locate and eliminate enemy tank unit.
Availability: this mission unlocks automatically as you progress through the game (you have to unlock the map of Africa) and complete side ops.
Location: Area to the south of Nova Braga Airport in Africa.
 There are two tanks to neutralize here - the best idea is to Fulton them to Mother Base.
Description: The tank unit can be found near Nova Braga Airport. The best way to reach its location is to approach it from the south. The three snipers located nearby won't be able to see you. Sneak up to them one by one and watch out not to be detected by other enemies. After neutralizing the snipers, deal with the two tanks. These are the best tanks in the game, so don't try to attack them, but Fulton them instead. Lastly, get rid of the soldiers and the gunship. You should use a very good rocket launcher for destroying the gunship (auto-aim will be very helpful), because you won't find a lot of covers here.
Rewards: 300000 GMP
Mission objectives: Locate and eliminate enemy tank unit.
Availability: this mission unlocks automatically as you progress through the game and complete side ops.
Location: Area to the south-west from guard post 1 in Afghanistan.
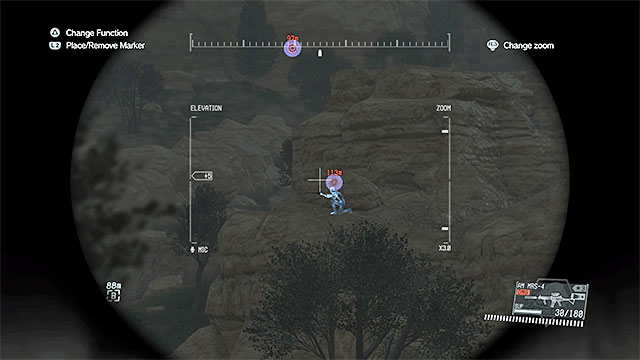 Snipers are watching the road to guard post 1.
Description: You complete this mission to the south-west from guard post 1. You can approach this area from any side, but don't take the main road and don't run. There are three snipers in the area. Use D-Dogs' skills to locate them and eliminate them one by one in the best possible order. After you deal with the snipers, you can sneak up to the tanks. The best idea is to Fulton them. At the end, get rid of regular soldiers and the gunship (avoid the spotlight until you attack the gunship).
Rewards: 300000 GMP
Mission objectives: Find and eliminate the Puppets.
Availability: You need to complete main mission 32 (To Know Too Much).
Location: Oboo Supply Outpost in Afghanistan.
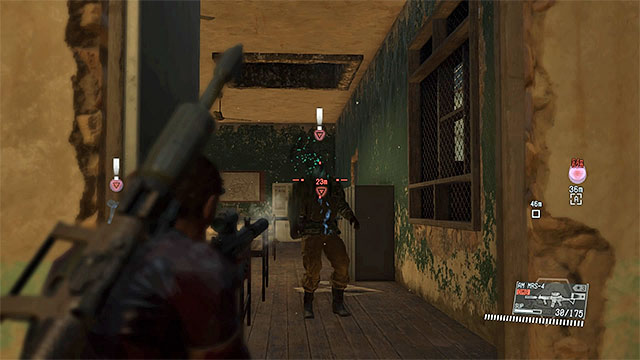 You can kill the appearing enemies
Description: This is a very easy mission, because after you reach Yakho Oboo Supply Outpost, you only find seven Puppets and these are the only enemies here. Puppets are the people that have been victimized by the Skulls' manipulation and they now behave like zombies, of a kind. These opponents move slowly and they cannot request reinforcements. Still, they can lunge on you, if you come closer. The easiest way to complete mission objectives is to kill them - use any rifle and aim at the heads.
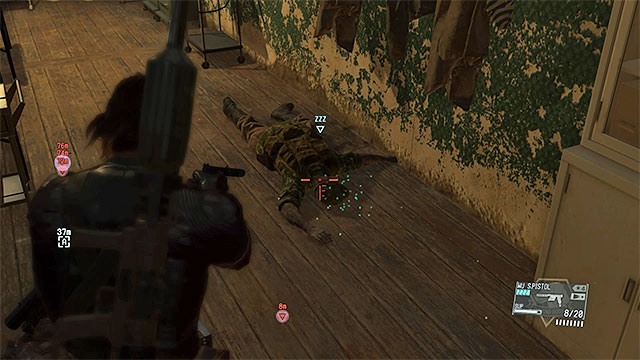 If you want to extract Puppets, you need to use sleeping ammo.
If you want to extract Puppets, you need to use sleeping ammo. You cannot grab them in melee and, if you perform a throw, you do not stun the opponent and he gets up after a while. Regardless of how you want to play this out, clear the entire outpost of Puppets.
Rewards: 140000 GMP
Objectives: Find and eliminate a group of Puppets.
Availability: This mission should become available automatically with your progress into the game (you need to unlock the map of Africa) and after you have completed the remaining side missions.
Location: Nova Braga Airport in Africa.
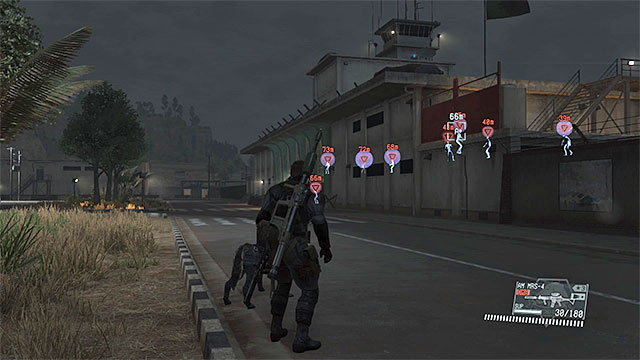 You need to clear the airport main building
Description: You do not need to sneak to get to Nova Braga Airport, because there are no enemies here, apart from the titular Puppets, i.e. enemies zombified by the Skulls. All of the Puppets are staying in the main airport building in the center of the airport. The easiest way to complete the mission is to kill all of the enemies, using, e.g. an assault rifle. If you want to extract Puppets, you need to use sleeping ammo. Additionally, in the majority of the cases, it will be necessary to carry them out of the building (unless you have the Wormhole upgrade).
Rewards: 140000 GMP
Objectives: Find and eliminate a group of Puppets.
Availability: This mission should become available automatically with your progress into the game and after you have completed the remaining side missions.
Location: Da Shago Kallai village in Afghanistan.
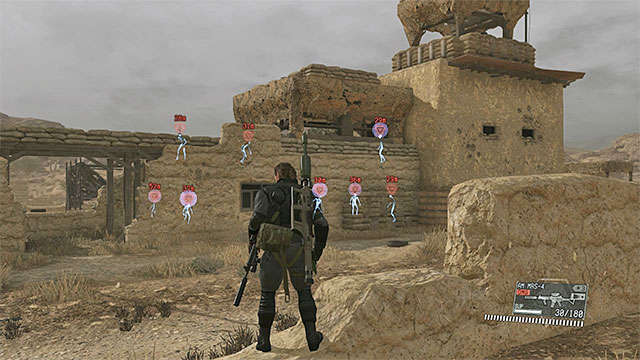 Clear the center of the village of Puppets
Description: The objective of this mission is to eliminate all of the Puppets in Da Shago Kallai village. The enemies here are not too much of a trouble and you can easily eliminate them with standard-issue assault rifle. Puppets can also be extracted, but you would have to use sleeping ammo, in such a case, instead of melee attacks. Puppets are staying in the central part of the village and there are eight of them.
Rewards: 140000 GMP
Objectives: Find and eliminate a group of Puppets.
Availability: This side op should be unlocked by making progress in the game (after unlocking Africa map) and completing previous side ops.
Location: Near outpost 17 in Africa
 Search the hills near outpost 17
Description: Reach outpost 17 and start searching the area to the east. You can find Puppets yourself or, for example, rely on D-Dog. The easiest way to eliminate the soldiers controlled by Skulls is with an assault rifle, since they do not pose much threat. If you plan on fultoning them anyway, use tranquilizing ammo (do not use melee).
Prize: 140000 GMP
Orders: Find and eliminate a group of Puppets.
Availability: Task will unlock automatically along with the in-game progress (completing side-ops)
Location: Lamar Khaate Palace in Afghanistan.
 Puppets dwell in the main ruins.
Description: You can get to Lamar Khaate Palace without sneaking up. Puppets are located on various floors of the ruins and D-Dog may help you with finding them. Equip yourself with a decent assault rifle or a shotgun. Aim for the head of those under the Skulls control. You will have to get rid of eight Puppets in total.
Rewards: 140000 GMP
Orders: Find and eliminate a group the Puppets.
Availability: Task will unlock automatically along with the in-game progress (completing side-ops)
Location: Serak Power Plant in Afghanistan.
 Puppets can be found in the building
Description: The Puppets can be found on south near one of the buildings by Serak Power Plant. If you want to eliminate them quickly, throw couple of grenades inside or simply shoot them with a rocket launcher. Assault rifle will also do nicely. There are eight enemies to eliminate in total. D-Dog will help you eliminate them.
Rewards: 180000 GMP
Orders: Locate and eliminate the Puppets.
Availability: Task will unlock automatically along with the in-game progress (completing side-ops)
Location: Da Ghwandai Khar in Afghanistan.
Search the village in order to locate seven enemies.Description: You can approach Da Ghwandai Khar village as you can come from any side. There is no threat of being shot or spotted. In the village there are seven Puppets in total - some of them will be inside. Use D-Dog or locate them on your own and eliminate them as you see fit (you can also fulton them, but you will have to put them to sleep first).
Rewards: 180000 GMP
Orders: Locate and eliminate the Puppets.
Availability: Task will unlock automatically along with the in-game progress (completing side-ops and unlocking Africa)
Location: Lufwa Valley in Africa.
 Secure the manor in Lufwa Valley
Description: On your way to Lufwa Valley you won't have to worry about the soldiers as there shouldn't be anyone around except for the Puppets. They will be under control of the Skulls and can be found in the nearby manor (one in which you would find Code Talker) Use D-Dog to locate the enemies or search the building on your own. It is the best to kill all of them as using the fulton system would require to take all of the bodies outside (unless you are equipped with Wormhole).
Rewards: 180000 GMP
Mission objectives: Locate and eliminate a group of Wandering Puppets.
Availability: this mission unlocks automatically as you progress through the game and complete side ops.
Location: Da Wialo Kallai in Afghanistan.
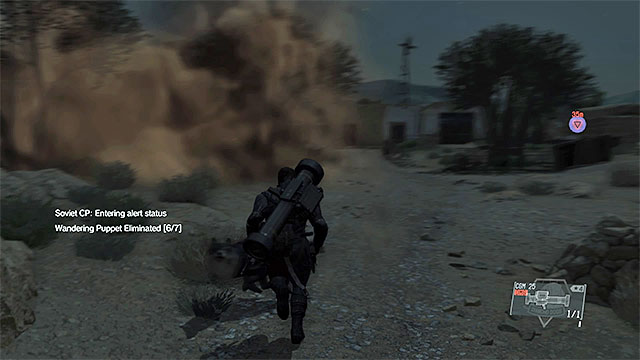 Puppets with heavy armor should be killed with a rocket launcher.
Description: All the Puppets are located in Da Wialo Kallai. You can use D-Dog to help you find them. Eliminating enemies with medium armor is not difficult - you just need to shoot a few times in the head (first you have to destroy the headgear). Puppets with heavy armor should be attacked with a rocket launcher. Remember about keeping a safe distance.
Rewards: 200000 GMP
Mission objectives: Locate and eliminate a group of Wandering Puppets.
Availability: this mission unlocks automatically as you progress through the game and complete side ops.
Location: Area around guard post number 4 in Afghanistan.
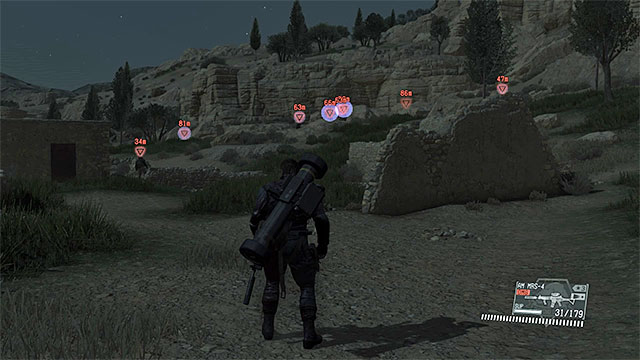 You have to secure the large ruins.
Description: You shouldn't have much trouble locating the eight Puppets. You have to search the ruins next to guard post number 4. The problem is that some of the Puppets have heavy armor and are very resistant to rifles or pistols. Take a rocket launcher with you or use grenades (one grenade may not be enough).
Rewards: 200000 GMP
Mission objectives: Locate and eliminate a group of Wandering Puppets.
Availability: this mission unlocks automatically as you progress through the game and complete side ops.
Location: Da Smasei Laman in Afghanistan.
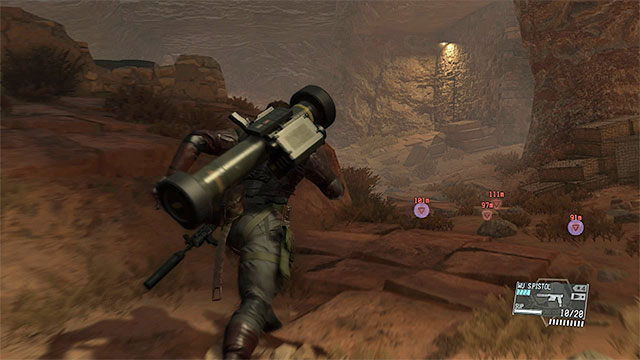

Description: The Puppets are located in Da Smasei Laman, but finding them may cause you some trouble. You won't find them in the main area of the ruins, but in the caves in the north-eastern part of it (you've been there during the sixth mission in the game). The entrance to the cave is shown on the first picture. The second picture shows its location on the map. When you locate the Puppets, you will be able to eliminate some of them using a rifle or a pistol. However, some of them are wearing heavy armor and you will need a rocket launcher or grenades.
Rewards: 200000 GMP
Mission objectives: Locate and eliminate a group of Wandering Puppets.
Availability: this mission unlocks automatically as you progress through the game and complete side ops.
Location: Qarya Sakhra Ee in Afghanistan.
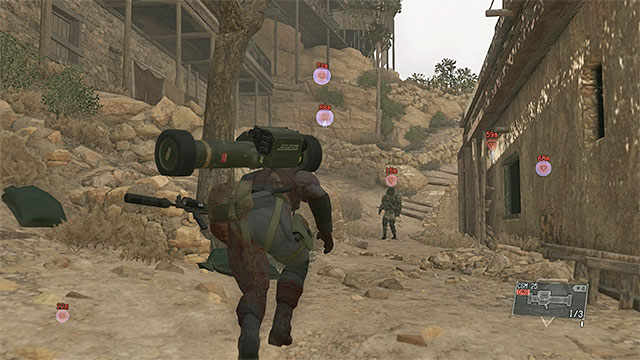 Search the whole village and eliminate eight Puppets.
Description: Head to Qarya Sakhra Ee to search for the Puppets. You can approach this location from any side, as there is no risk of being attacked from distance. The location has many levels, so locating all the Puppets on your own would be difficult. Take D-Dog with you. Try to use a rocket launcher to eliminate the enemies, because most of them are wearing heavy armor. You have to neutralize eight Puppets.
Rewards: 200000 GMP
Mission objectives: Locate and eliminate a group of Wandering Puppets.
Availability: this mission unlocks automatically as you progress through the game and complete side ops.
Location: Area to the east of guard post number 2 in Africa.
 Locating the Puppets is not very difficult.
Description: The Puppets can be found near guard post number 2 and there are eight of them. You can use the binoculars and identify them by yourself or approach the mission area and wait until D-Dog does it for you. Try to take a rocket launcher with you or at least a lot of grenades, because this is the only way to eliminate the Puppets with heavy armor.
Rewards: 200000 GMP
Mission objectives: Locate and eliminate a group of Wandering Puppets.
Availability: this mission unlocks automatically as you progress through the game (you have to unlock the map of Africa) and complete side ops.
Location: Bampeve Plantation in Africa.
 Secure the whole plantation.
Description: The objective of this mission is to eliminate eight Puppets that can be found on Bampeve Plantation. You will find them outdoors, but also inside small cages. D-Dog can help you identify all the targets. A lot of Puppets are wearing heavy armor, so using a regular rifle is not a very good idea. You should use a rocket launcher and throw grenades inside the buildings (you won't have to lure them outside).
Rewards: 200000 GMP
Mission objectives: Locate and eliminate a group of Wandering Puppets.
Availability: this mission unlocks automatically as you progress through the game (you have to unlock the map of Africa) and complete side ops.
Location: Bwala ya Masa in Africa.
 Do a quick reckon from the hill near the village.
Description: All the Puppets connected to this mission are located in Bwala ya Masa. There is a large hill right near the village, from which you can do a reckon with the binoculars. If you're in a hurry, you can enter the village with D-Dog and let it mark the targets. A lot of Puppets are wearing heavy armor so take a rocket launcher or a grenade launcher. Moreover, you can take some grenades and eliminate the enemies inside the buildings without waiting for them to come outside.
Rewards: 200000 GMP
Note! This mission has been marked as an Important Side-Op, in iDroid. You need to complete it, because this is required for main mission 35 to be unlocked.
Mission objectives: Extract AI Pod.
Availability: Complete main mission 32 (To Know Too Much) and one side mission (either main or side).
Location: Afghanistan Central Base Camp.
Description: It is best to approach Afghanistan Central Base Camp from the East. After you infiltrate it, start sneaking and avoid any encounters. Your destination is he big building in the center of the base which has been shown in the above screenshot.
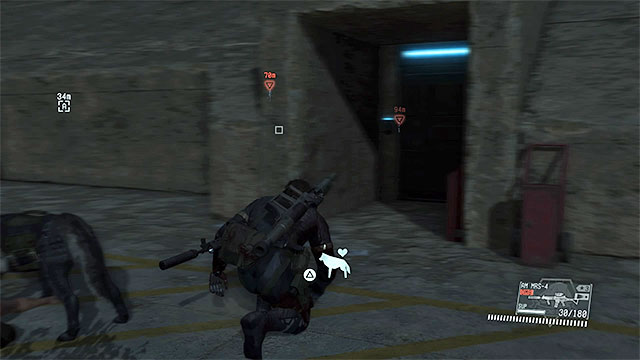 It is possible to enter the building only if the alarm hasn't been raised
At the building entrance, there are one, or two guards and you can either lure them away or eliminate them, silently. If, by that point, you have been sneaking and the alarm hasn't been raised, blue light should be on, above the entrance, at which point you can enter. If you alarmed the enemies, you need to load the last checkpoint and wait for things to calm down.
 Use the computer
After you enter the big building, you only need to approach the computer terminal marked by the game. Interact with it to launch the AI Pod and complete the mission.
Rewards: 140000 GMP
Note! This mission has been marked as an Important Side-Op, in iDroid. You need to complete it, because this is required for main mission 35 to be unlocked.
Mission objectives: Secure the remains of the Man on Fire.
Availability: Complete side mission 143 (Extract the AI Pod).
Location: Yakho Oboo Supply Outpost in Afghanistan.
Get to the hill to learn about the area and eliminate several opponentsDescription: The best direction from which to approach Yakho Oboo Supply Outpost is North-West, i.e. from the side of the neighboring hill. This way, you get an excellent overview of the area and will allow you to plan on your next steps. Eliminate all of the opponents facing the main yard of the outpost - start with the ones on walls and then, the ones in the yard itself. Try to operate in shadows, although inadvertent raising of the alarm does not result in failing the mission.
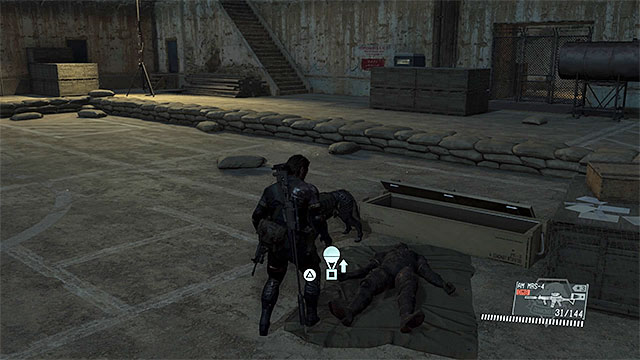
Your priority is to secure the main yard, because it is here that you find remains of the Man on Fire - this has been shown in the above screenshots. An attempt to fulton the remains initiates a cutscene and ends this mission in success.
Rewards: 140000 GMP
Note! This mission has been marked as an Important Side-Op, in iDroid. You need to complete this one and four other escaped children missions (146- 149), because this is required for main mission 41 to be unlocked (Proxy War Without End). You need to complete it, because this is required for main mission 41 to be unlocked (Proxy War Without End).
Mission objectives: Find the escaped kid and extract them.
Availability: Complete main mission 35 (Cursed Legacy) as well as side mission 113 (Eli's Challenge).
Location: Mfinda Oilfield in Africa.
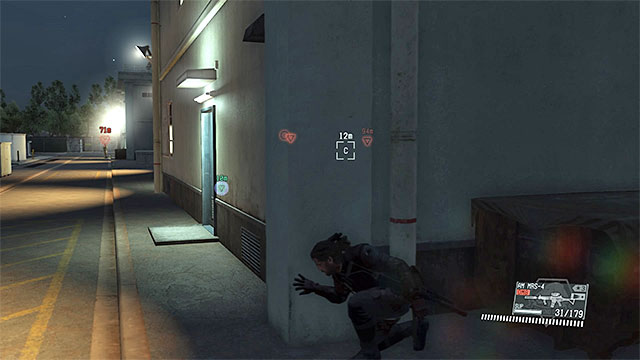
Description: The best direction to approach Mfinda Oilfield from is the East. Try to sneak here, avoid being spotted both by the regular guards and the chopper hovering over the base. Your destination is the building shown in the above screenshots. At the entrance to the building, there should be, at least, one guard, but you can lure him away into a seclusion and deal with him there. Carry the child out of the building and fulton them back into the Mother Base (you can also perform the fultoning inside the building, if only you already have the Wormhole upgrade - time-space tunnel).
Rewards: 140000 GMP
Note! This mission has been marked as an Important Side-Op, in iDroid. You need to complete this one and four other escaped children missions (145, 147- 149), because this is required for main mission 41 to be unlocked (Proxy War Without End). You need to complete it, because this is required for main mission 41 to be unlocked (Proxy War Without End).
Mission objectives: Find the escaped kid and extract them.
Availability: Complete main mission 35 (Cursed Legacy) and side mission 113 (Eli's Challenge).
Location: Lufwa Valley in Africa.
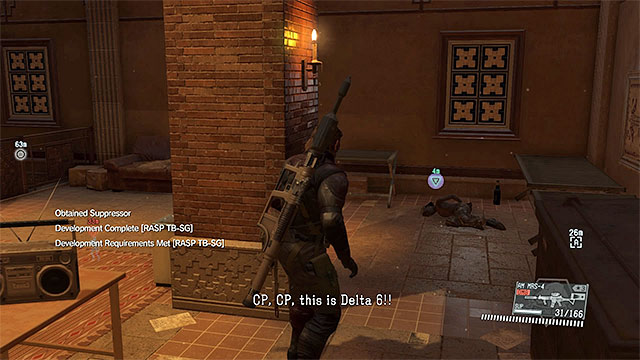
Description: Your destination is the large estate in the North-Eastern part of Lufwa Valley. The best direction to approach from is North-West and sneak up to the backdoor. After you enter the mansion, keep sneaking (D-Dog will help you find and eliminate enemies). The child that you are looking for is being kept in the room shown in the above screenshots (the second floor). After you have secured the area, carry the kid out and fulton them (you can also perform the fultoning inside the building, if only you already have the Wormhole upgrade - time-space tunnel).
Rewards: 140000 GMP
Note! This mission has been marked as an Important Side-Op, in iDroid. You need to complete this one and four other escaped children missions (145, 146, 148, 149) , because this is required for main mission 41 to be unlocked (Proxy War Without End).
Mission objectives: Find the escaped kid and extract them.
Availability: Complete main mission 35 (Cursed Legacy) and side mission 146 (Search for the Escaped Children 02).
Location: Aabe Shifap Ruins in Afghanistan.
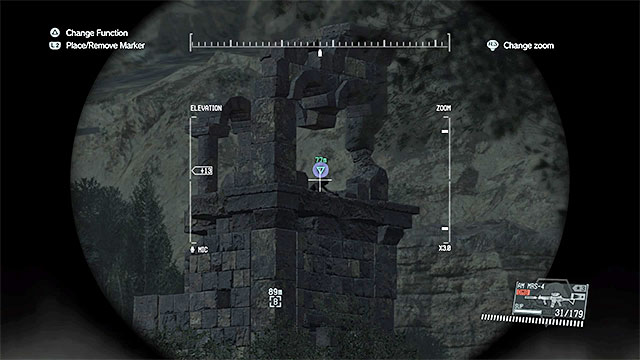
Description: After you get to Aabe Shifap Ruins you do not need to sneak, because you encounter no enemies here (with the exception of a bear that you can avoid). The kid is at the very top of the tower in the Eastern parts of the ruins, shown in the screenshot) (you can use D-Dog's help here). Locate the interactive wall to climb on and reach the very top. Then fulton the kid.
Rewards: 140000 GMP
Note! This mission has been marked as an Important Side-Op, in iDroid. You need to complete this one and four other escaped children missions (145- 147, 149), because this is required for main mission 41 to be unlocked (Proxy War Without End). You need to complete it, because this is required for main mission 41 to be unlocked (Proxy War Without End).
Mission objectives: Find the escaped kid and extract them.
Availability: Complete main mission 35 (Cursed Legacy) and side mission 146 (Search for the Escaped Children 02).
Location: Lamar Khaate Palace in Afghanistan.
Description: The best direction to approach Lamar Khaate Palace from is South-East (watch out for the nearby minefield!). Make it over to the back of the palace and locate the stairs to higher levels of the ruined building. The kid is at the upper level, i.e. in the spot shown in the above screenshots. Along your path to the kid, watch out for the spoiled fragments of the floor, through which it is easy to fall to a lower level. Fulton the kid to end the mission.
Rewards: 140000 GMP
Note! This mission has been marked as an Important Side-Op, in iDroid. You need to complete this one and four other escaped children missions (145- 148), because this is required for main mission 41 to be unlocked (Proxy War Without End). You need to complete it, because this is required for main mission 41 to be unlocked (Proxy War Without End).
Mission objectives: Find the escaped kid and extract them.
Availability: Complete main mission 35 (Cursed Legacy) and side mission 146 (Search for the Escaped Children 02).
Location: Fort Da Smasei Laman in Afghanistan.
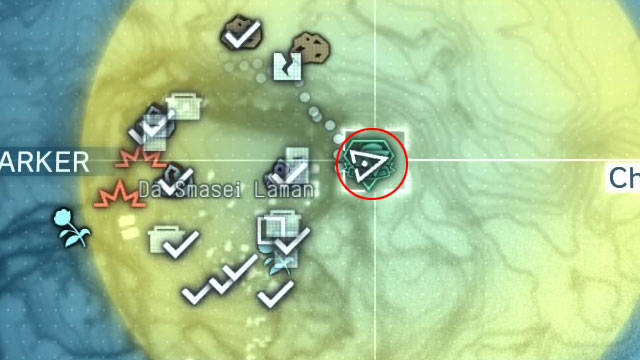
Description: You can approach Da Smasei Laman from any side, because there are no standard opponents there. Instead, you will have to deal with Puppets from Skulls, i.e. the opponents that resemble sluggish and thick zombies. It is best to kill the zombies, with assault rifle or grenades. The kid is at the upper level of the ruins in the North-Eastern part - this spot has been shown in the above screenshots. After you approach the kid, stop using explosives and other, more aggressive ways of fighting to avoid killing them. Pick up the kid, carry them out of the ruins and fulton them to the base (you can also do this straight away, if only you have unlocked the Wormhole upgrade - time-space tunnel).
Rewards: 140000 GMP
Note: This mission is marked in the iDroid as a high priority task (Important Side-Ops). You have to complete it to unlock the main mission 45 (A Quiet Exit).
Objectives: Find Quiet.
Location: Near Outpost 04 in Africa.
Unlocking Side Op 150 is not an easy task. You have to meet various requirements, most of them related to Quiet. The first, most obvious one - have Quiet as an ally. Just to remind you, to recruit Quiet, you have to abduct her at the end of mission 11 (Cloaked in Silence) and wait until you unlock side op 111 (Visit Quiet) and visit her on the medical platform of the Mother Base.
Another important issue is your bond with Quiet. It has to be maxed out. You can do it by taking her to missions and cooperating with her. Current bond level can be seen after each mission and during preparation before one. The bar marked above has to be full.
Note - Bond bar does not remain full. The level can decrease if you, for example, made Quiet take heavy damage during a mission. It can be quickly repaired, though.
 The emblem must not contain a butterfly
Another requirement is that Diamond Dogs emblem must not contain the Butterfly. If you haven't modified the emblem, you won't have to do anything. If you have, check the emblem. To do it, open iDroid, select Mother Base, then Customize and Emblem.

The next requirement is that you have listened to all of Questioning Huey recordings. They are related to the scientist, Emmerich, more precisely to doubts about his good intentions. The tapes can be played with the iDroid. After you turn it on, select Missions, then Cassette Tapes. Tape categories are shown in the screenshot above. They are located in:
 Watch the cutscene showing Emmerich being kicked out of the Mother Base
The last requirement is that you have to see Emmerich being expelled from the Mother Base. After you meet all the requirements, complete main and side missions until Miller tells you to come to the Mother Base.
When the cutscene is over, you will find out that Quiet has gone missing. Side Op 150 should now appear on the side-op list.
Note - Before you start searching for Quiet, prepare yourself, because mission 45 will start right after side op 150. Equip Big Boss with the best armor available and a rocket launcher (preferably one with homing missiles). You can find out more about it in the Mission Walkthrough (mission 45).
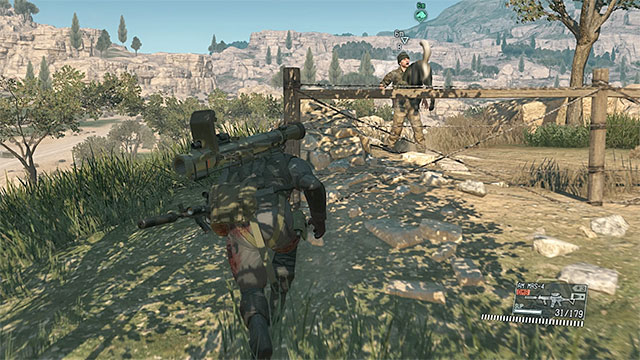 The sniper is located in the southern part of the village
After starting side op 150, head towards outpost 4 in Africa. The area is occupied by hostile forces. Be careful about the sniper, hiding in the southern part of the town. Find him with your binoculars or with D-Dog, then approach him from the side or from behind and eliminate him quietly.
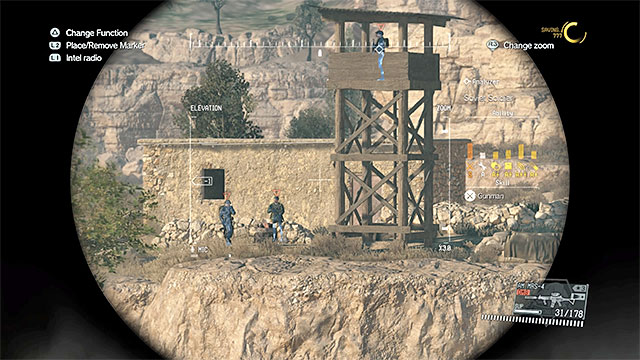

You might find the objectives hard to understand, because your map will not show Quiet's location at all. You have to reach the building shown above. It is located near the tower (neutralize the nearby enemies first). When you enter the building, you will listen to Millers comments and you'll have to walk up to a table with documents that you must take a look at. Doing so will start mission 45 - A Quiet Exit.
Prize: 140000 GMP
Mission objectives: Eliminate all the targets before the time runs out.
Availability: You can complete this mission after unlocking the Command Platform in the Mother Base. It happens automatically as you progress through the game.
Location: Command Platform in Mother Base.
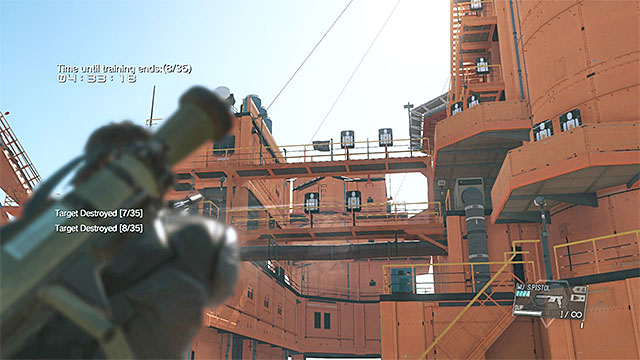 Find the targets and hit them.
Description: To complete this mission, destroy all the targets on the Command Platform before the time runs out. Use a gun or melee attacks (if possible) to destroy the targets.
Rewards: 30000 GMP
 Area of the side op
Objectives: Shoot 35 targets in 5 minutes.
Availability: Becomes available after building the R&D Platform in the Mother Base.
Location: R&D Platform in the Mother Base
Description: Reach the spot shown on the platform and begin the side op. You have to hit 35 targets in 5 minutes with a specific gun. After you start, shoot the target in front of you, turn around and shoot another. Now start eliminating the rest according to the guide.
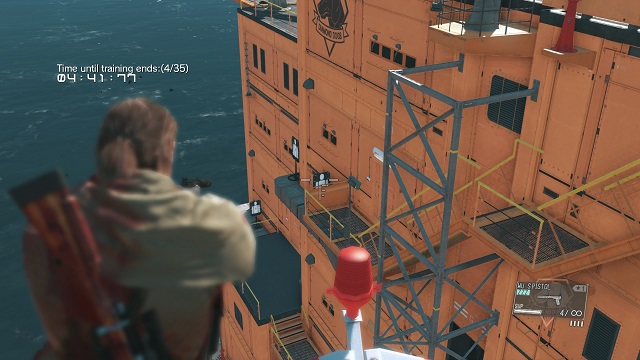 Area by the landing pad
Enter the landing pad and shoot six targets on and near the stairs. Stand on the left edge of the platform to shoot two targets on the ground (be careful, it's easy to fall off the edge here).
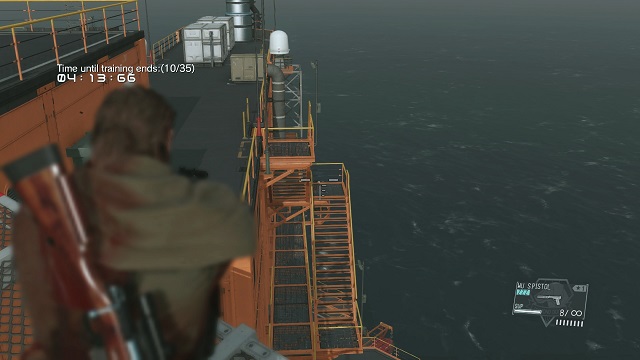 Edge of the landing pad
Cross the landing pad and take down one target placed behind the stairs in front of you.
 Stairs on the left
Exit the landing pad and go to the stairs on your left. When you stand at the bottom of them, you'll be able to hit two targets seen on the scaffolding of the landing pad.
 Behind the railing
Go back to where you started and jump over the railing. There are two targets on the lower platform. When you approach the railing on the right, you'll be able to shoot one more.
 Stairs on the left
Turn around and use the stairs to your left, the ones near the route back to the start (not to be confused with the stairs you've just used). You'll see two targets in front of you and one when you look down.
 More stairs
Go back upstairs and turn left to take another set of stairs. When you're on the lower floor, you'll see two targets behind the railing.
 Inside of the building
Go forward until you reach a niche in the wall. When you look inside, you'll see two targets in front of you.
 A tough one
Go back to the stairs, taking down one target from the lower floor on your way. Aim at it while standing near the railing.
 Stairs near the landing pad
Go back to the landing pad and use the stairs right next to it (in the beginning you shot a target behind them while standing on the right edge of the landing pad). Go down a few floors and shoot three targets - two of them are in front of you, the remaining one is on the ground.
 Ventilation shaft
Go back up (two floors) and go along the corridor. Jump over the railing to reach the ventilation shaft. Follow it, shooting four targets on your way.
 Inside of the structure
Descend from the vents and go right. Turn left towards the inside of the structure. There are two targets by the wall.
 Around the complex
Jump all the way down and run around the platform to take down two remaining targets.
Prize: 30000 GMP
Mission objectives: Eliminate all the targets before the time runs out.
Availability: You can complete this mission after unlocking the Support Unit Platform in the Mother Base. It happens automatically as you progress through the game.
Location: Support Unit Platform in Mother Base.
Description: To complete this mission, destroy all the targets on the Support Unit Platform before the time runs out. Use a gun or melee attacks (if possible) to destroy the targets.
Rewards: 30000 GMP
Mission objectives: Eliminate all the targets before the time runs out.
Availability: You can complete this mission after unlocking the Base Development Platform in the Mother Base. It happens automatically as you progress through the game.
Location: Base Development Platform in Mother Base.
Description: To complete this mission, destroy all the targets on the Base Development Platform before the time runs out. Use a gun or melee attacks (if possible) to destroy the targets.
Rewards: 30000 GMP
Mission objectives: Eliminate all the targets before the time runs out.
Availability: You can complete this mission after unlocking the Intel Team Platform in the Mother Base. It happens automatically as you progress through the game.
Location: Intel Team Platform in Mother Base.
Description: To complete this mission, destroy all the targets on the Intel Team Platform before the time runs out. Use a gun or melee attacks (if possible) to destroy the targets.
Rewards: 30000 GMP
Objectives: Shoot 35 targets in 5 minutes
Availability: available after building the Medical Platform in the Mother Base.
Location: Medical Platform in the Mother Base
 The targets
Description: Reach the spot shown on the platform and start the side op. You have to hit 35 targets in 5 minutes with a specific gun. After you begin, start shooting the targets around you.
Prize: 30000 GMP
Mission objectives: Eliminate all the targets before the time runs out.
Availability: You can complete this mission after unlocking the Combat Unit Platform in the Mother Base. It happens automatically as you progress through the game.
Location: Combat Unit Platform in Mother Base.
Description: To complete this mission, destroy all the targets on the Combat Unit Platform before the time runs out. Use a gun or melee attacks (if possible) to destroy the targets.
Rewards: 30000 GMP
 A diamond
Rough Diamonds are objects that allow you to obtain a lot of GMP, which is a special currency in Metal Gear Solid V. A single diamond, depending on how large it is, can be worth 10000 or 100000 GMP. It is quite a lot, so you can largely increase the pace of Mother Base development or unlock the best inventions faster.
On the next pages of this game guide, you will find examples of locations where you can find diamonds in early stages of the game. Try to visit these places as soon as you can and collect the diamonds. This will make it easier for you to progress through the campaign. Later in the game, you can go back to these places (the diamonds appear again after some time) or find some other locations to collect the diamonds (for example in Africa).
Note - if you don't know where to look for diamonds or you have troubles locating one particular diamond, you can interrogate one of the enemies. There is a high chance that he will tell you the location of the diamond and it will be marked on your map.
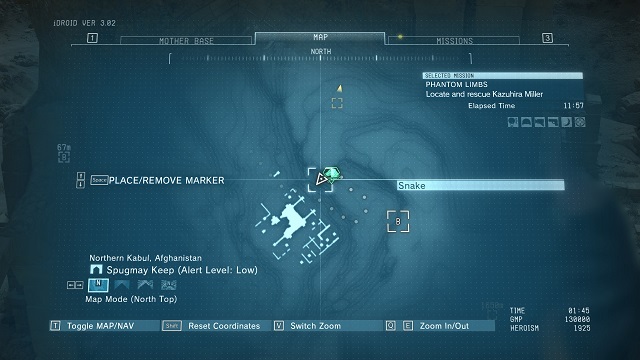 The location of the diamond
Diamond is on the edge which is located right above the ruins (from this point we Begin our first mission).
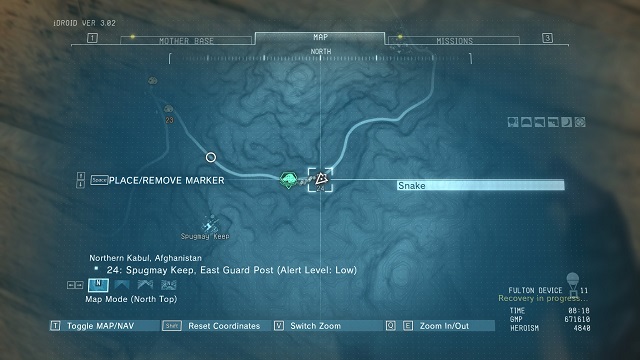 The location of the diamond
Diamond is on the floor in the building in the center of the guard post.
 The location of the diamond
Follow the path located north of the guard post. Diamond is in the grass, next to few trees.
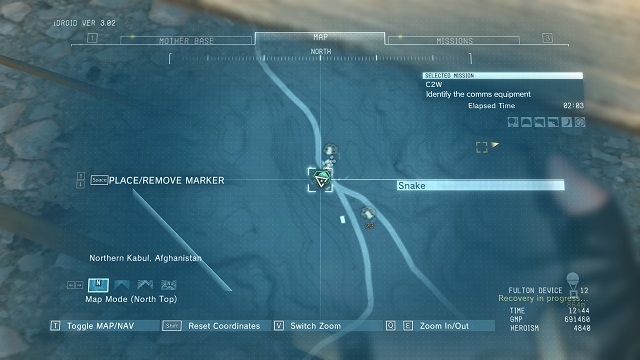 The location of the diamond
Diamond is near the table located next to the wall of the building in the center of the guard post.
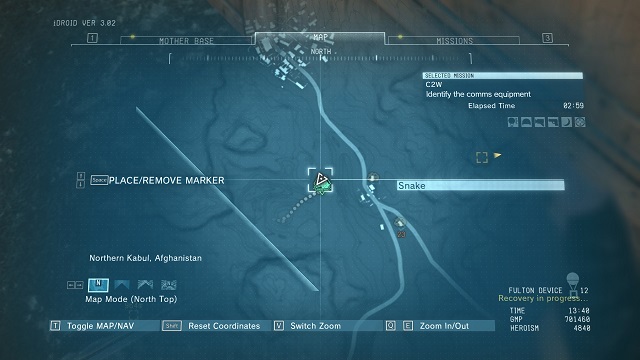 The location of the diamond
The diamond is in one of the two abandoned houses west of the guard post.
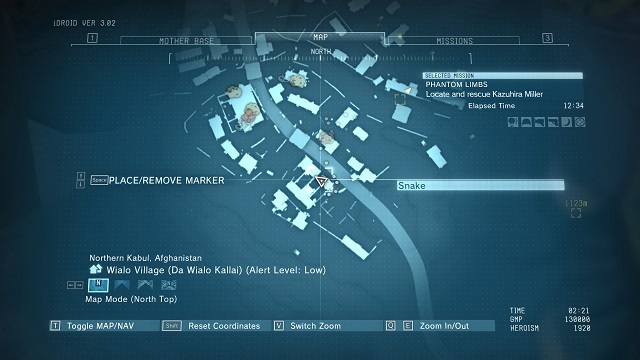 The location of the diamond
The diamond is in the small building south in the southern edge of the village, next to the machine gun and headlights post. It lies on the floor among the begs.
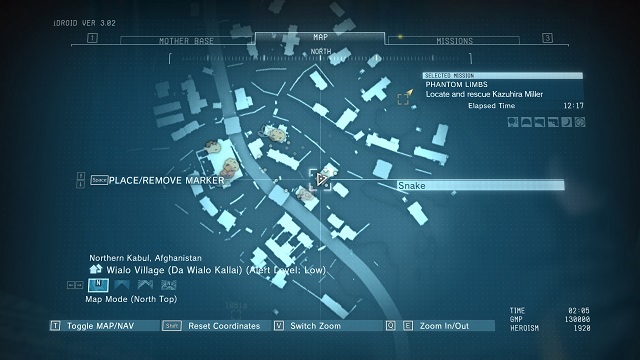 The location of the diamond
The diamond is on the floor nearby the door of the rectangular building.
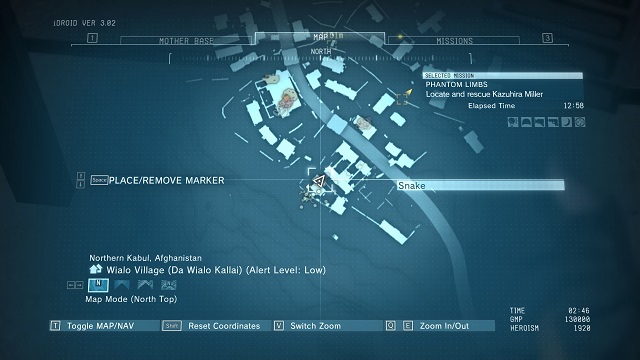 The location of the diamond
The diamond is on a cupboard in the small building which makes a small internal plaza with another house and a wall.
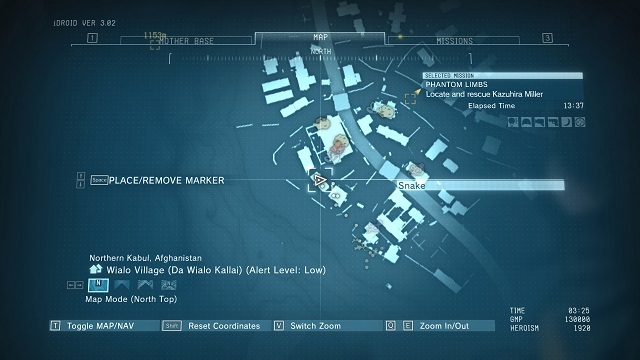 The location of the diamond
The diamond is on the floor among few bags in the longitudinal building which is between two other houses.
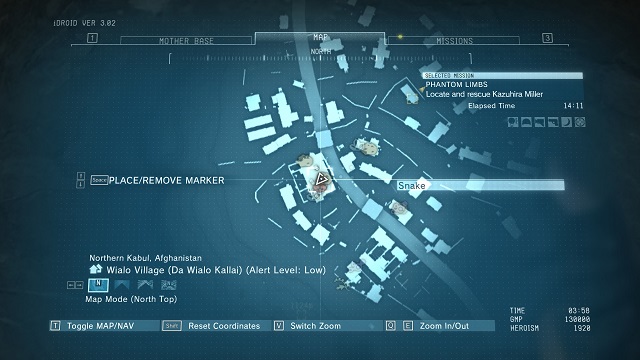 The location of the diamond
The diamond is in the corner of the vestibule which leads to the main room of the central building.
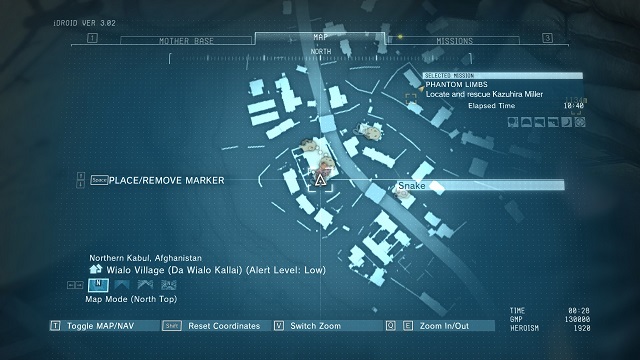 The location of the diamond
The diamond is next to the antenna on the roof of the village's main building.
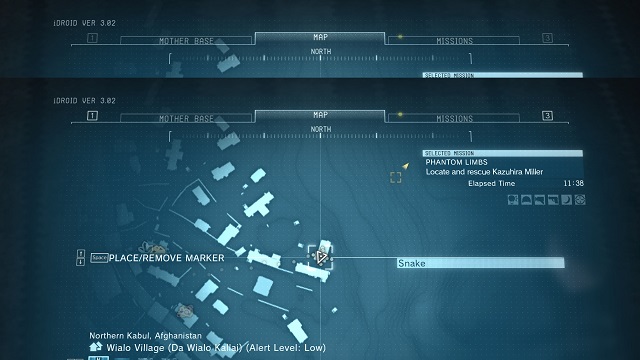 The location of the diamond
The diamond is in the water under the bridge which you may find close to the northern exit of the village.
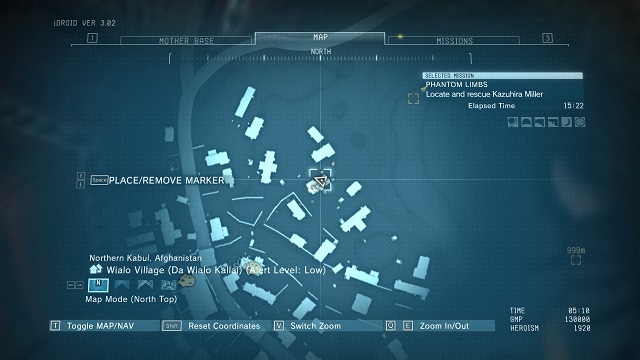 The location of the diamond
The diamond is behind the sofa which stands in the main room of the building.
The location of the diamondThe diamond is on the floor in the small building located in the south east part of the village.
 The location of the diamond
The diamond is behind a huge rock located on the hill close to the guard post.
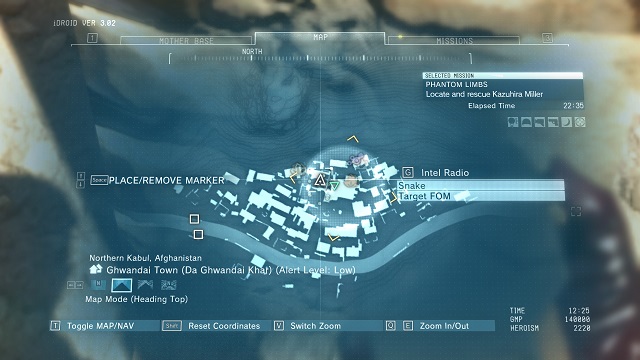 The location of the diamond
The diamond is on the floor under one of the stone arches, close to the main building.
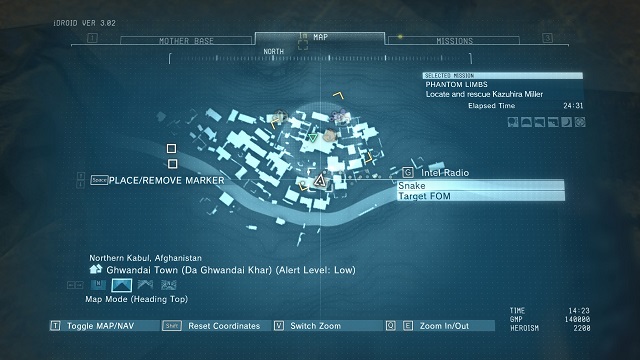 The location of the diamond
The diamond is under the bed in the longitudinal building.
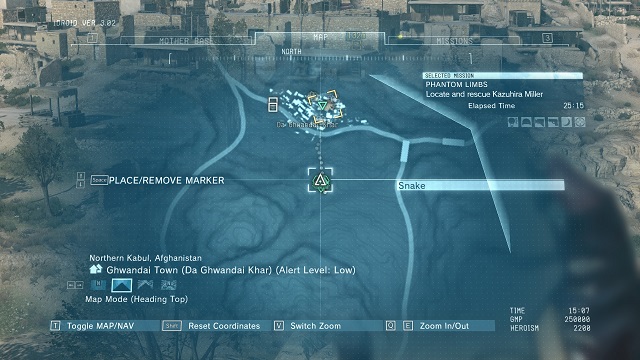 The location of the diamond
The diamond is on the rock on the hill nearby the town.
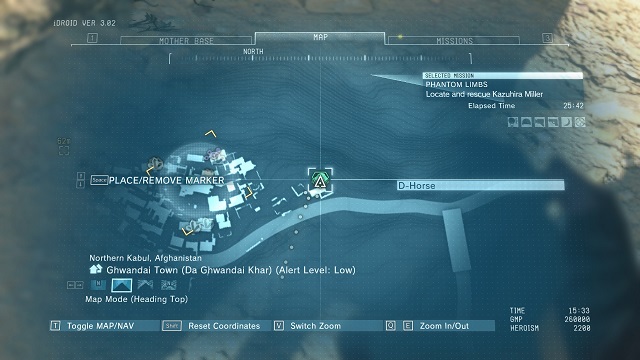 The location of the diamond
The diamond is on the ground nearby the wall of the small building located close to the road east of the town.
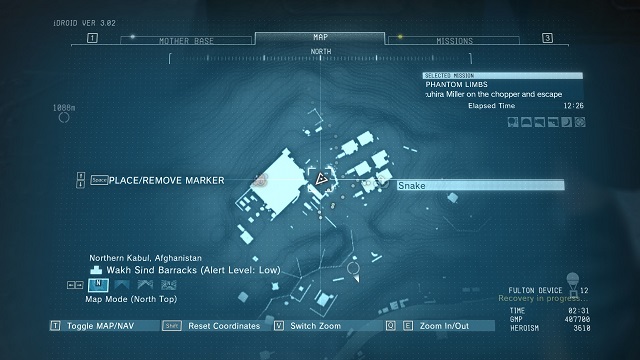 The location of the diamond
The diamond is on the table close to the main building in the center of the base.
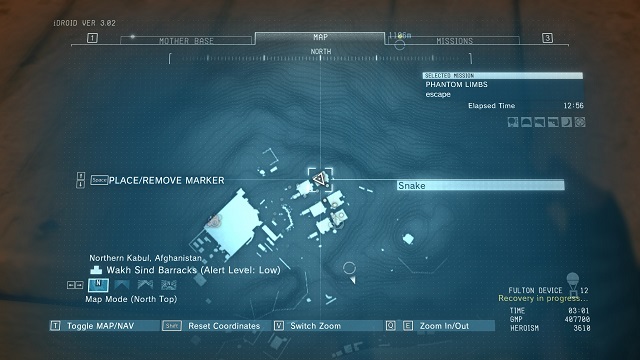 The location of the diamond
The diamond is on the table in one of the barracks.
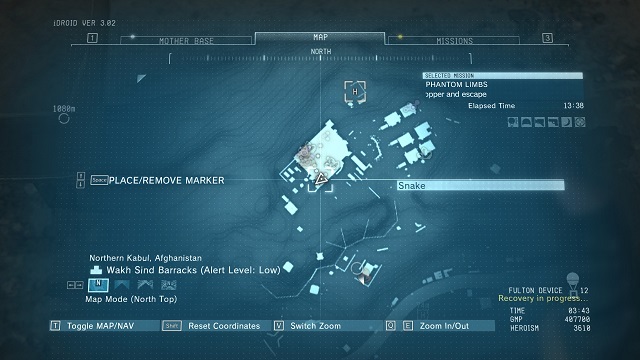 The location of the diamond
The diamond is on the floor, close to the black cupboard in the basement of the multi-storey building, nearby the stairs.
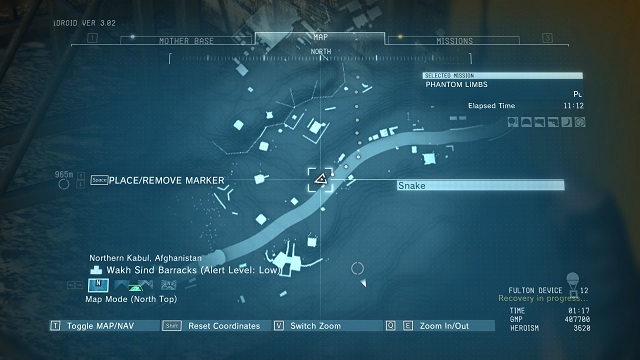 The location of the diamond
The diamond is on the ground among the barrels, heavy equipment and machines which are close to the main entrance to the military base.
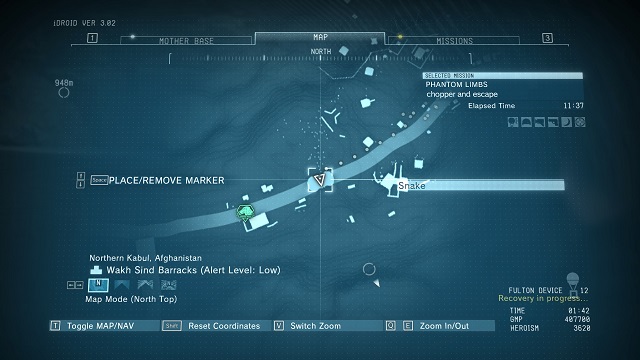 The location of the diamond
The diamond is in the tunnel located under the bridge leading to the military base.
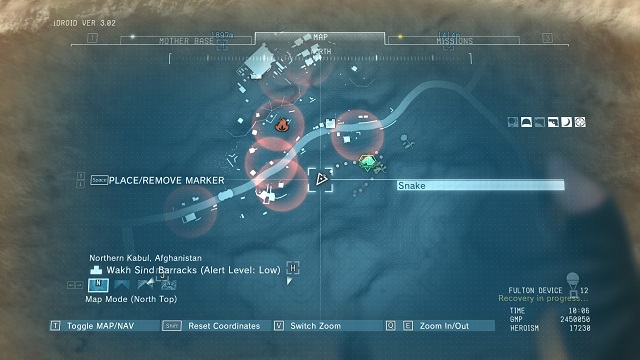 The diamond's location.
This diamond is among rocks at the foot of the elevation, over which the main road runs.
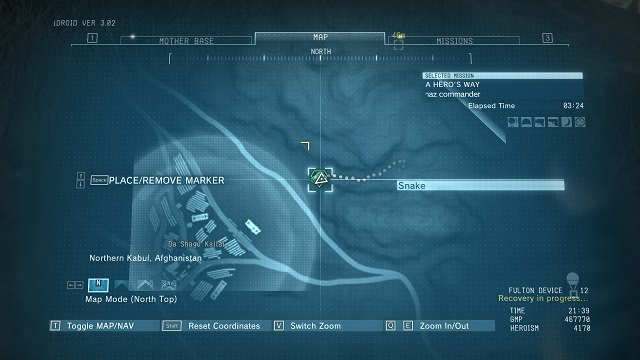 The location of the diamond
The diamond is nearby the ledge on the hill from which you may spectate the military base.
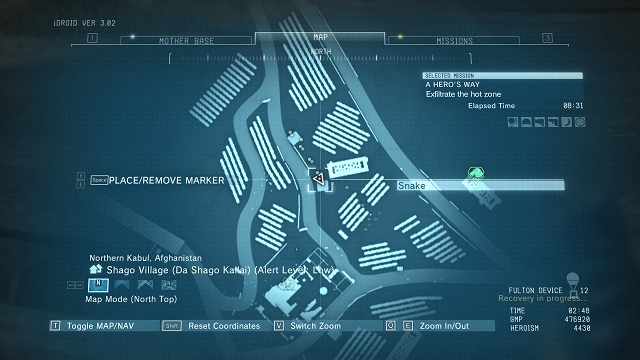 The location of the diamond
The diamond is under the wooden bridge which is above the vale.
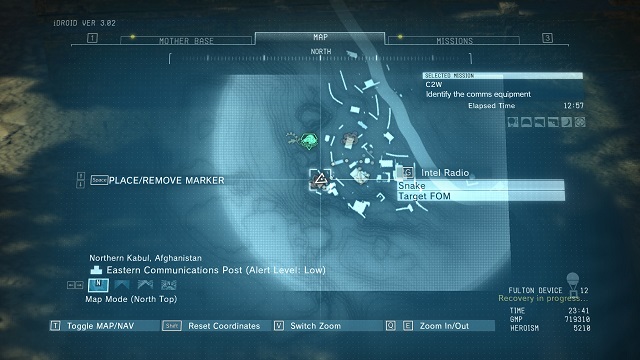 The location of the diamond
The diamond is on the stack of wooden boxes which you may find on the hill..
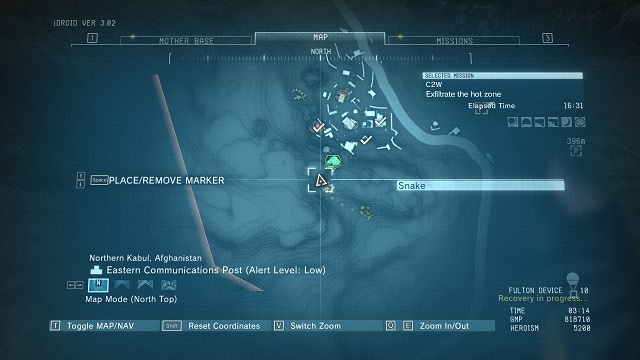 The location of the diamond
The diamond is on the top of the steep rock which is on the hill from which you may spectate the base. To get there you have to find a path in the southern part of the hill and get to the end of this path, where you will also find two aggressive wolfs.
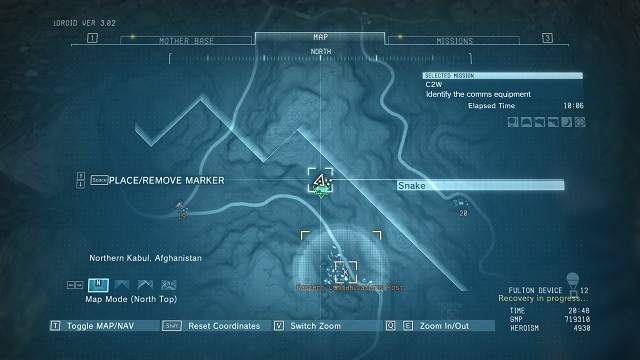 The location of the diamond
The diamond is on the field to which you may get by leaving the path which leads to the base.
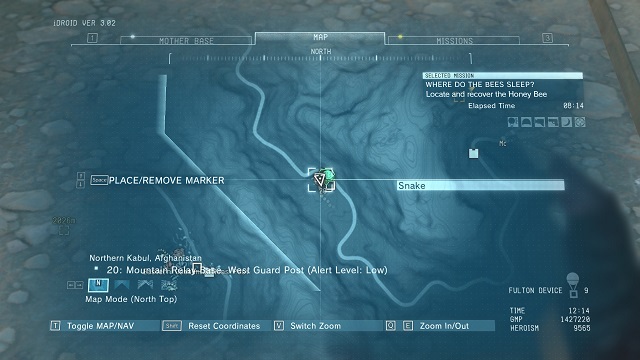 The location of the diamond
The diamond is on the ground in the center of the guard post.
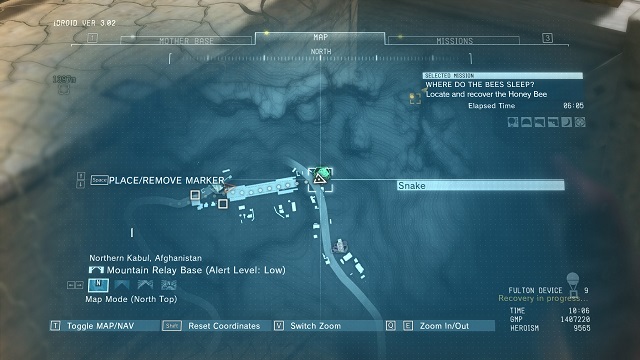 The location of the diamond
The diamond is on the ground among the boxes nearby the entrance to the bridge.
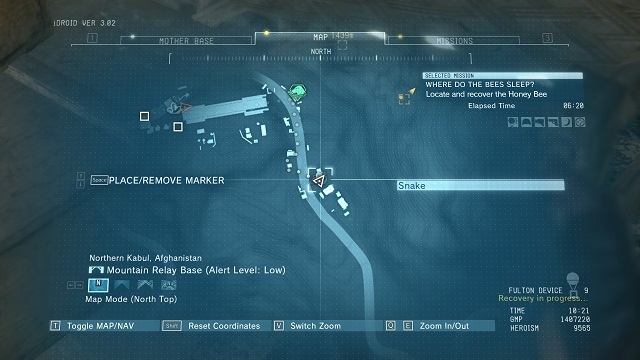 The location of the diamond
The diamond is under the bed in the building being nearby the road leading to the 21st post.
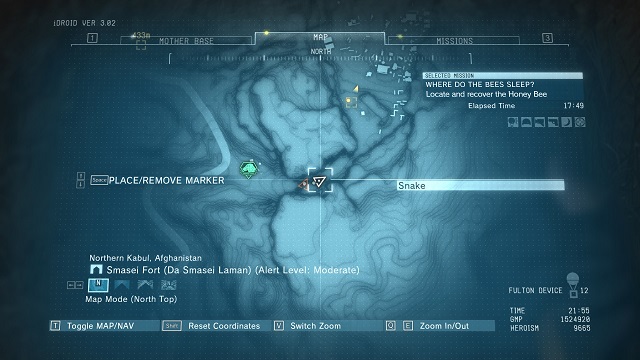 The location of the diamond
The diamond is on the ledge in the narrow mountain pass. To get there you need to climb on the rock which will allow you to get on a first ledge from which you may jump on the one you are looking for.
 The location of the diamond
The diamond is on the floor in the building with the satellite on its roof. To get inside you need to open a lock with a lock pick (which is an automatic action).
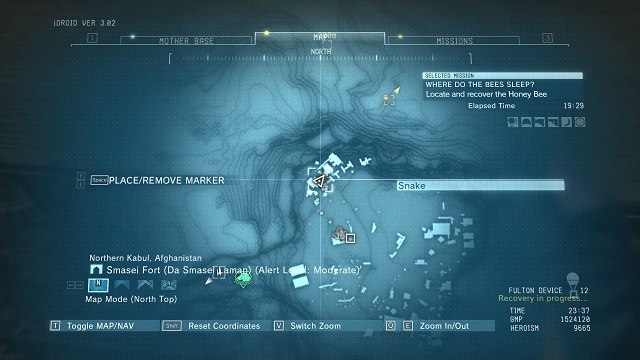 The location of the diamonds
Two diamonds are under the table in the building with the satellite on its roof (there is a lot of boxes nearby).
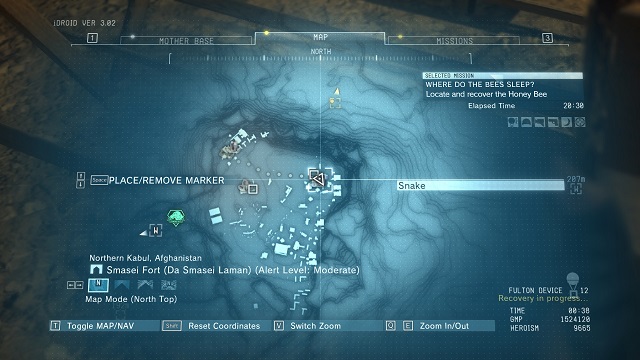 The location of the diamond
The diamond is under the desk in the northern part of the village, right next to the cassette player with a recording.
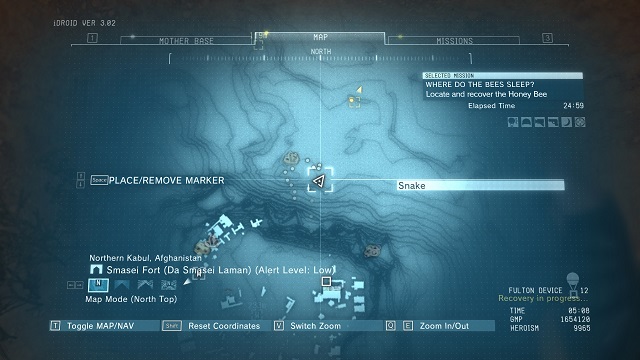 The location of the diamond
The diamond is on the hill to which you may get after climbing on the box which is right in the entrance to the main path of the caves.
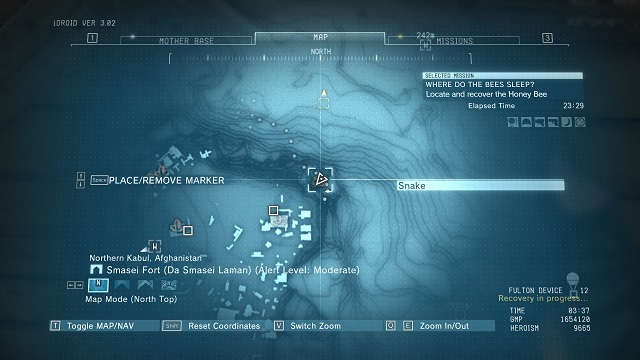 The location of the diamond
The diamond is behind the container and the boxes which are on the ledge. You may get there after entering the caves and then turning right.
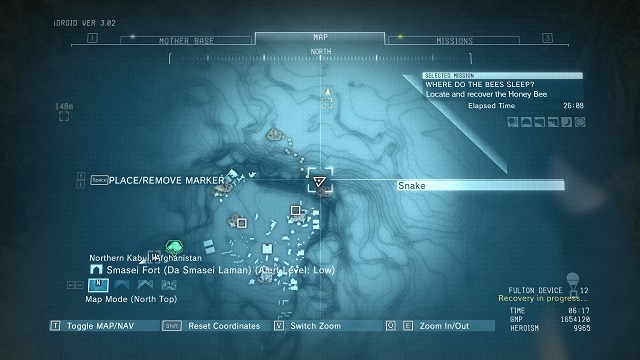 The location of the diamond
The diamond is in the hole which you can get to either by climbing or just by walking into it. It is just nearby the area where you have found the previous diamond (close to the boxes and the container).
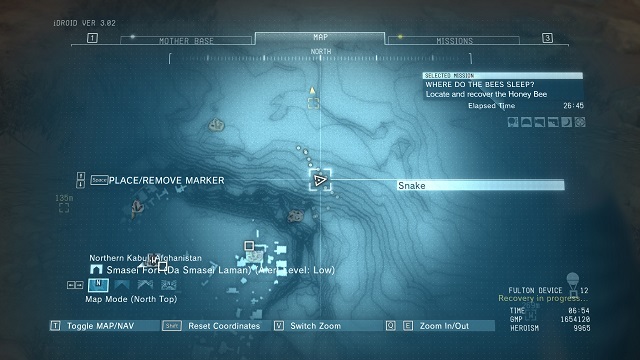 The location of the diamonds
Three diamonds are on the open area to which you may get by passing the previously mentioned hole and heading deeper into the caves.
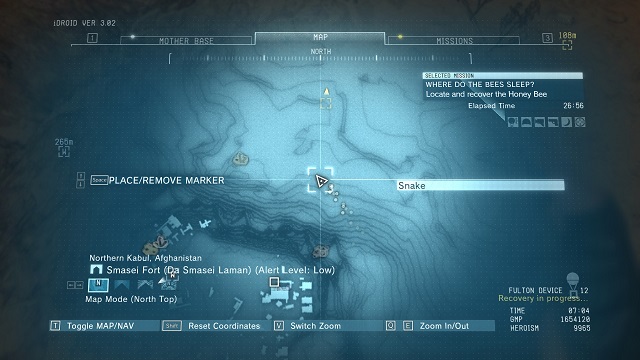 The location of the diamond
The diamond is on the ground behind one of the ruined walls. You may get here by turning left once you get to the open area mentioned before.
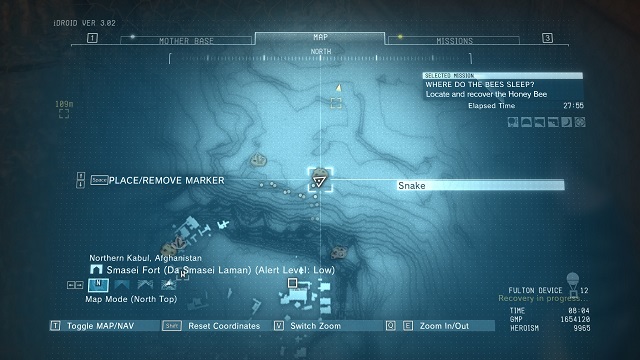 The location of the diamond
The diamond is in the corner to which you may get from the tunnel which is in the ruins mentioned below.
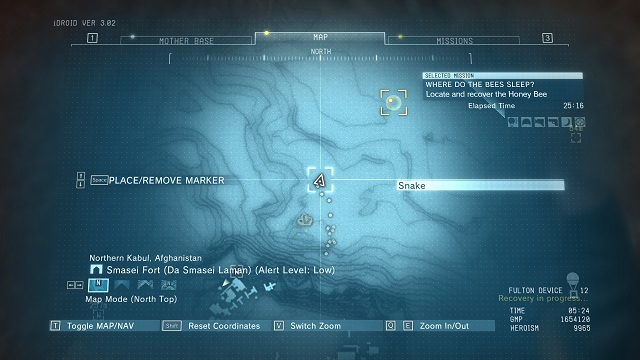 The location of the diamond
The diamond is on the hill nearby the buried entrance in the wall. To get here you need to use the alternative entrance to the caves and go straight ahead. To get to the entrance to the caves turn left while standing in front of the ruins,.
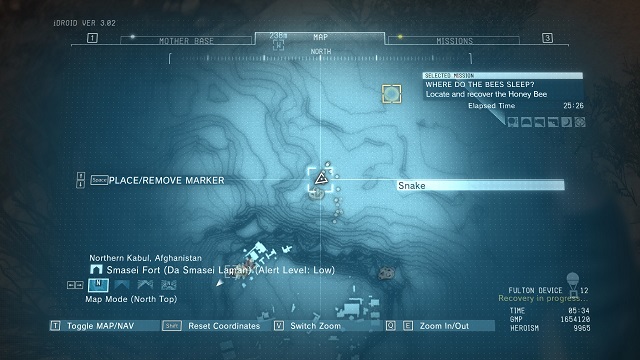 The location of the diamond
The diamond is in the corner of the room located on the hill next to the buried entrance where you have found the previous one.
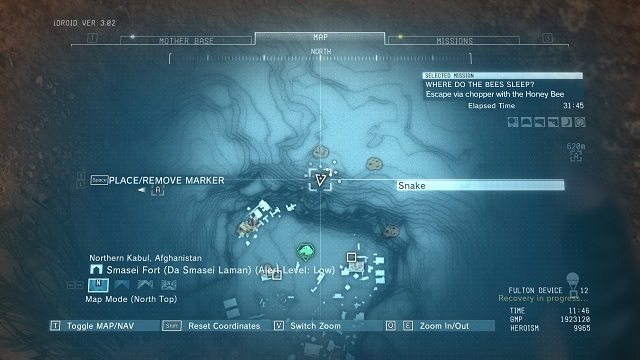 The location of the diamond
The diamond is on the ledge on which you may get by using the alternate entrance to the caves (mentioned in the previous two points).
 The diamond's location.
The diamond is on the floor by the cupboards, right next to the palace entrance on the side of the camp and the road Northwards.
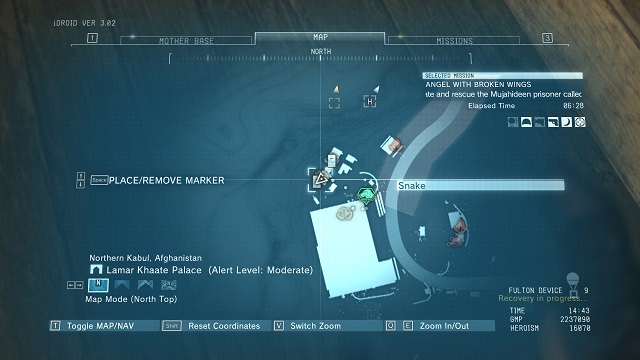 Diamond's location.
The diamond is on the floor in the corner of the building in the camp right next to the palace.
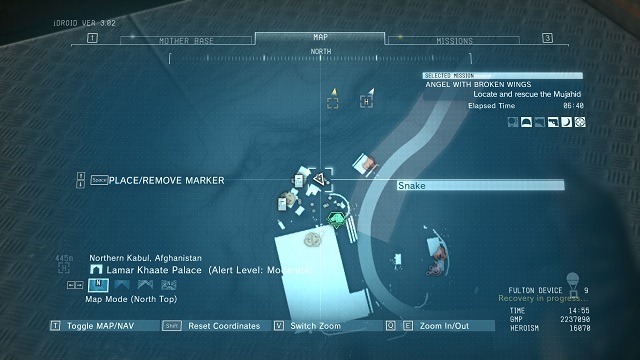 Diamond's location.
The diamond is on the floor of the building adapted as a prison cell, in the camp right net to the palace.
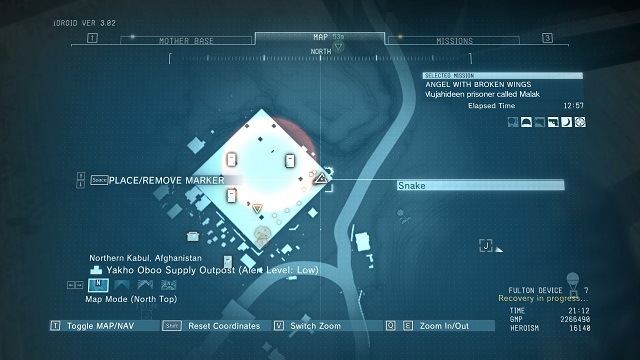 Diamond's location.
The diamond is atop the watchtower (in the corner of the space), on the Eastern side of the wall.
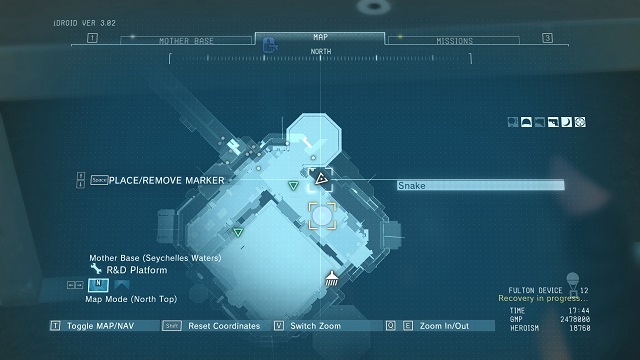 Location of the diamond
The diamond is under a locker on the left side of the platform, on level 0 (turn left immediately after getting off the bridge.
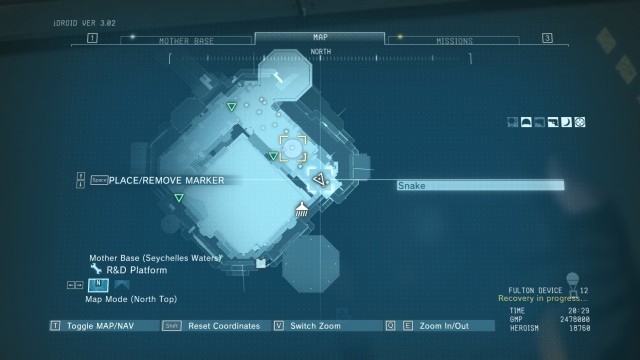 Location of the diamond.
The diamond is on the highest level of the platform near the two cranes.
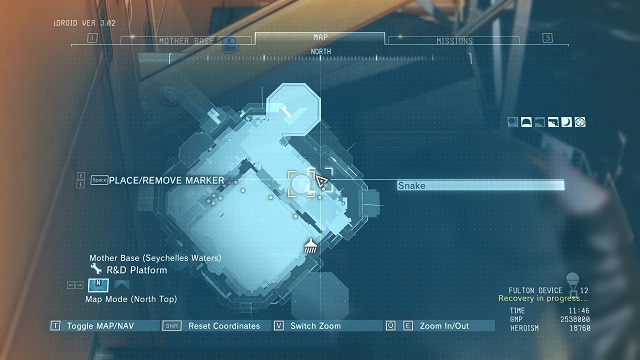 Location of the diamond.
The diamond is inside the vents running along the wall. To get inside, reach the top of the platform, then descend through a pipe right next to you.
 Location of the diamond.
The diamond is located on a small canopy below the pipe and the ventilation system - they were mentioned in the description of the previous one.
 Location of the diamond.
The diamond is placed on a pipe, inside a corridor above the 1st floor. You have to climb other pipes or use the stairs to reach it.
 Location of the diamond.
The diamond is located on a pipe, on the third floor.
 Location of the diamond.
The diamond is on a footbridge near the pipe on the third level (near the top of the structure).
 Location of the diamond.
The diamond is on the ground, near the portable elevator in the central depression of the platform (at the top of the structure).
 Location of the diamond.
The diamond is on the ground next to a cylindrical tank on top of the structure (the right corner, looking from the bridge).
 Location of the diamond.
The diamond is on the bridge, near the stairs between a platform in the corner and the central depression.
 Location of the diamond.
The diamond is on the ground by the wall of the white building on one of the higher floors of the platform (near the stairs).
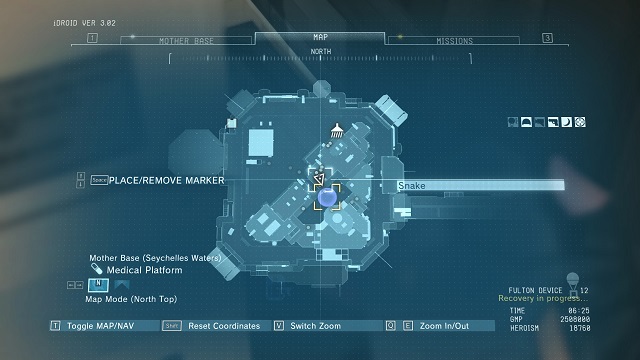 Location of the diamond.
The diamond is on the ground between the railing and a white device on the platform where you found the previous one.
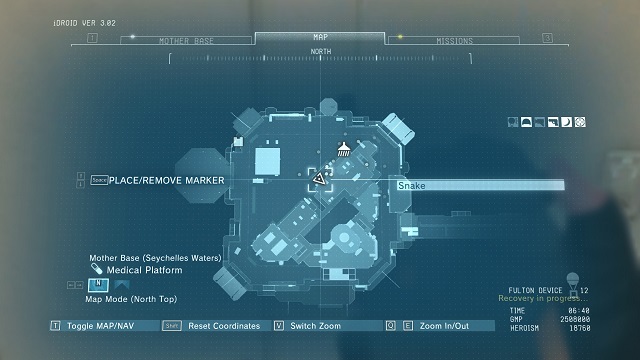 Location of the diamond.
The diamond is on the ground by the ventilation pipe going through the platform (a balcony of some sort) hanging on the wall of the building. To reach it, jump down from a higher level.
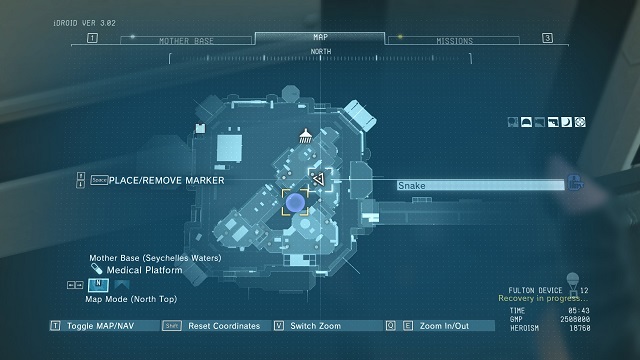 Location of the diamond.
The diamond is on the ground near a gas cylinder, in a narrow corridor on the higher floor of the platform.
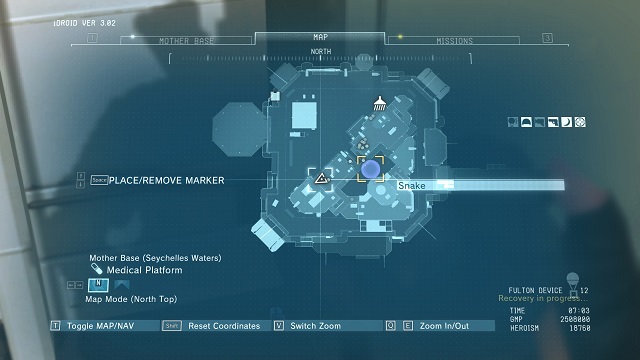 Location of the diamond.
The diamond is on the ground between the railing and the locker on a platform near the landing pad.
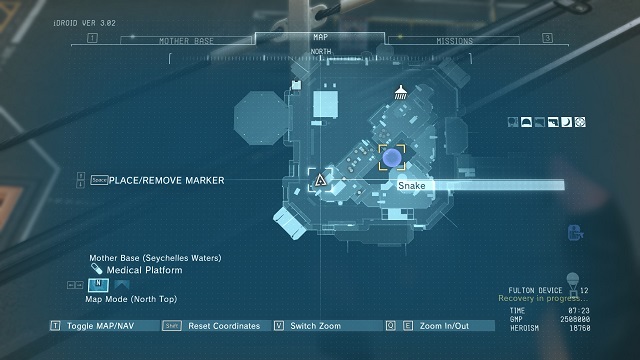 Location of the diamond.
The diamond is on the ground next to a container on the last platform of the structure (near the landing pad).
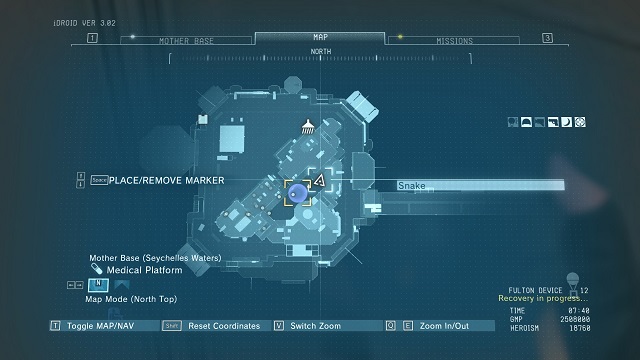 Location of the diamond.
The diamond is on the ground in a niche with a door unavailable for us. The described place can be found on the central area surrounded by all platforms and buildings in this location.
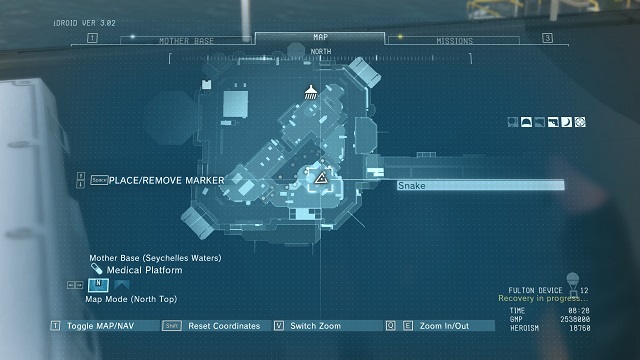 Location of the diamond.
The diamond is on the ground between a giant white sphere (a special container) and a vent - both of these are located on the highest platform here.
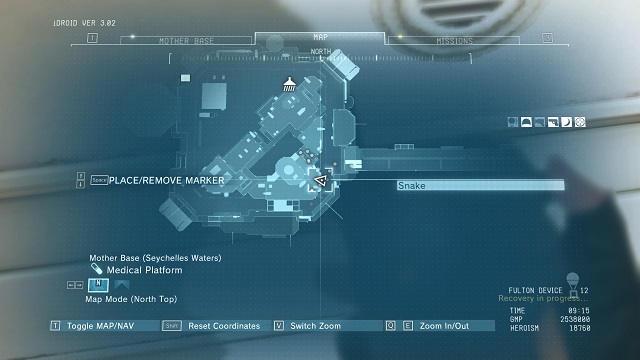 Location of the diamond.
The diamond is inside a pipe going down through the platform mentioned in the previous description.
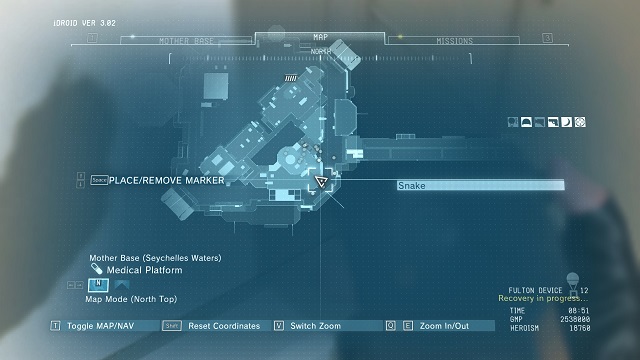 Location of the diamond.
The diamond is on the ventilation shafts placed along the wall of the platform on the left of the end of the main bridge. To reach them, you can jump down from the aforementioned pipe or use the stairs.
Cassette Tapes are collectibles that you can gather when completing missions. On the tapes, you will find music, monologues of the heroes from the game or recordings of interrogations. All the cassette tapes can be played on your IDroid.
Below, you will find tables with all the regular, as well as special cassette tapes that can be found when exploring the game world. You will not find here the cassette tapes that are obtained automatically, for example by progressing in the main campaign.
Note - when it comes to tapes with songs, follow the music to find them.
NAME
HOW TO OBTAIN
204863
Search guard post number 13 in Africa.
A Phantom Pain
Search Wakh Sind Barracks in Afghanistan.
All the Sun Touches
Search Munoko ya Nioka Station in Africa.
Behind the Drapery
Search Da Wialo Kallai in Afghanistan.
Dancing with Tears In My Eyes
Search Ditadi Abandoned Village in Africa.
Dormant Stream
Search guard post number 14 in Afghanistan.
Friday I'm in Love
Search Lufwa Valley in Africa.
Gloria
Search Nova Braga Airport in Africa.
Heavens Divide
Complete one of the optional objectives in mission 30 (Skull Face). The tape is in OKB Zero base.
How 'bout Them Zombies Ey?
Search Bwala ya Masa in Africa.
Kids in America
Search Da Shago Kallai in Afghanistan.
Love Deterrence
Search Da Ghwandai Khar in Afghanistan.
Love Will Tear Us Apart
Search Central Base Camp.
Maneater
Search Lamar Khaate Palace in Afghanistan.
MGS Peace Walker Main Theme
Search the quarantine zone in mission 43.
Midnight Mirage
Search Bampeve Plantation in Africa.
Nitrogen
Search Serak Power Plant in Afghanistan.
Only Time Will Tell
Search Eastern Communications Post in Afghanistan.
Planet Scape
Search guard post number 13 in Afghanistan.
Quiet Life
Search Mfinda Oilfield in Africa.
Quiet's Theme
Locate the tape left by Quiet at the end of mission 45.
Rebel Yell
Search Mountain Relay Base in Afghanistan.
Ride a White Horse
Search guard post number 12 in Afghanistan.
She Blinded Me with Science
Search guard post number 18 in Afghanistan
Snake Eater
Search guard post number 21 in Africa.
Take on Me
Search Yakho Oboo Outpost in Afghanistan.
Take the D.W.
Search Da Smasei Laman in Afghanistan.
The Final Countdown
Search Qarya Sakhra Ee in Afghanistan.
The Tangerine
Search guard post number 24 in Afghanistan.
Too Shy
Search Kiziba Camp in Africa.
True
Search Kungenga Mine in Africa.
You Spin Me Round (Like a Record)
Search guard post number 08 in Africa.
Unique tapes are ones that affect the game world directly. After activating such tape you can distract the enemies or improve your aim. Every tape from this category can be used only once, but after you use it, you can go back to the place where you found it and collect it again.
NAME
HOW TO OBTAIN
EFFECTS
Afghanistan Music
Search Wakh Sind Barracks in Afghanistan.
Puts nearby enemies to sleep. It only works in Afghanistan and only if the alarm was not raised.
Afghanistan Soviet Soldier
Search Qarya Sakhra Ee.
The alarm stops when enemies stop seeing the hero. Works only in Afghanistan.
Bear
After catching a bear, you have to go to the appropriate cage in Animal Conservation Platform.
Bears run from the hero with a slight delay (makes is easier to catch new species).
Bird
After catching a bird, you have to go to the appropriate cage in Animal Conservation Platform.
Birds flee from the hero with a slight delay (makes it easier to catch new species).
Central Africa Music
Search Bampeve Plantation in Africa.
Puts nearby enemies to sleep. Works only in Africa and only if the alarm was not raised.
Central Africa PF Soldier
Search Nova Braga Airport in Africa.
The alarm stops when enemies stop seeing the hero. Works only in Africa.
Goat
After catching a goat, you have to go to the appropriate cage in Animal Conservation Platform.
Goats flee from the hero with a slight delay (makes it easier to catch new species).
Horse
After catching a horse, you have to go to the appropriate cage in Animal Conservation Platform.
Horses flee from the hero with a slight delay (makes it easier to catch new species).
Paz's Humming
Meet with Paz in Medical Platform in Mother Base.
Allies from the Extract the Wandering Mother Base Soldiers missions don't run away from the hero which makes it easier to Fulton them.
Quiet's Humming
Raise the Bond level with Quiet to 60 and play any mission with her.
Improves your aim in first person view.
Soldier with Stomachache
Search Da Wialo Kallai in Afghanistan (the tape is inside a toilet).
The enemies stop searching for the hero when you hide in a toilet.
Wolf
After catching a wolf, you have to go to the appropriate cage in Animal Conservation Platform.
Wolves flee from the hero with a slight delay (makes it easier to catch new species).
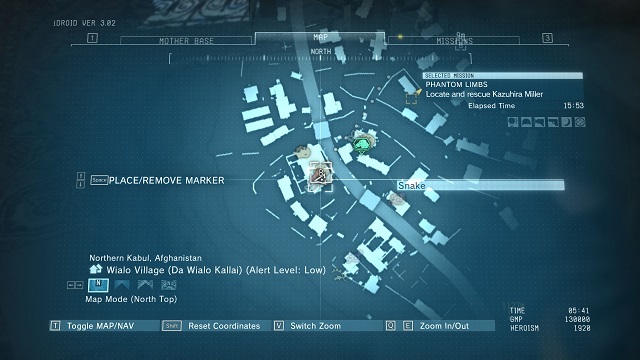 The location of the tape #1
The Behind the Drapery tape is in the cassette player which is on the desk in the main room of the central building in the village.
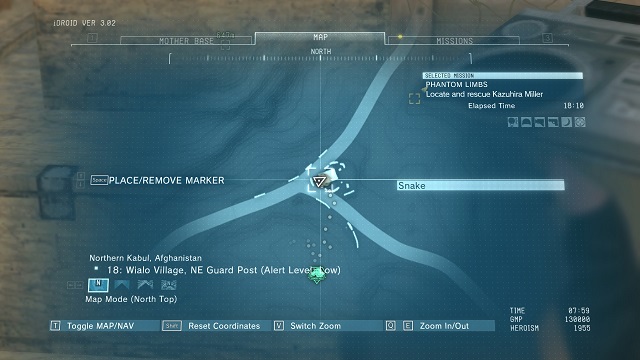 The location of the tape #2
The She Blinded me with Science tape is in the cassette player which is on the table in the guard post.
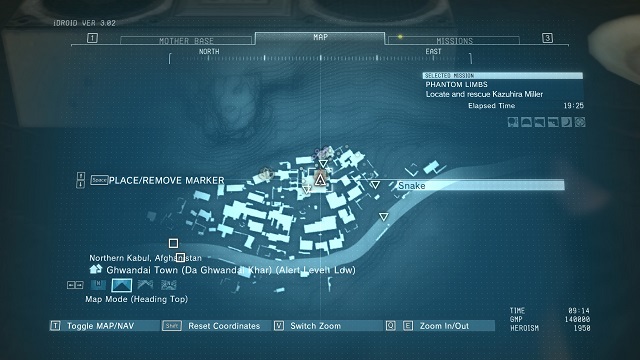 The location of the tape #3
The Koi no Yokushiryoku (Love Deterrence) tape is in the cassette player which is on the table in the main room of the center building in the town. You can also find here Kazuhira Miller.
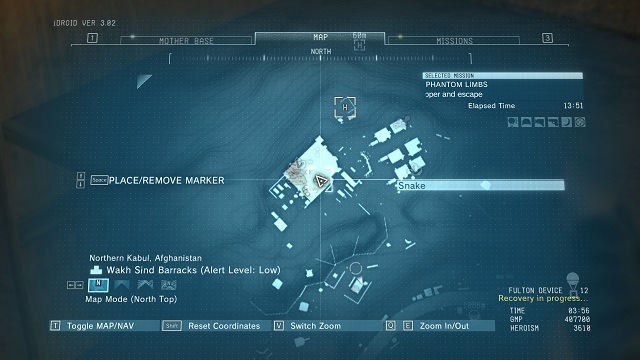 The location of the tape #4
The Afghan Lullaby tape is in the cassette player which is on the table in one of the rooms in the basement of the multi-storey building.
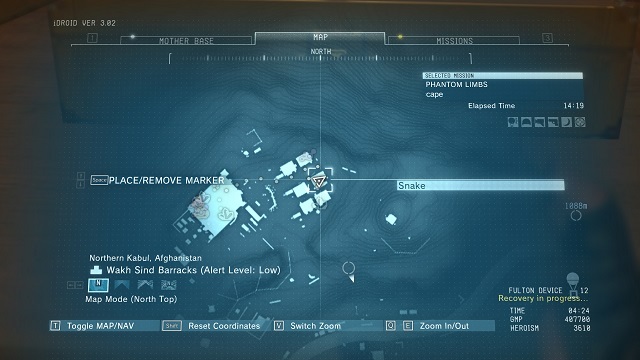 The location of the tape #5
A Phantom Pain tape is in the cassette player which is on the table in one of the barracks.
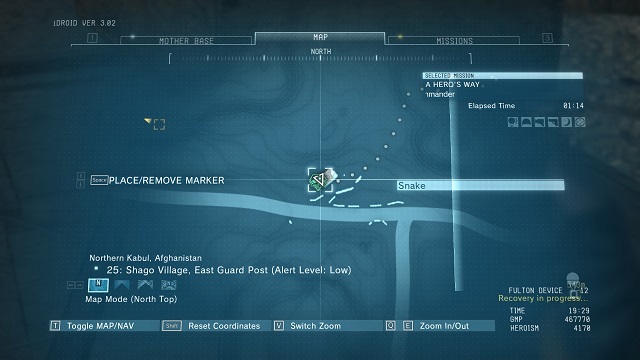 The location of the tape #6
The Tangerine tape is in the cassette player which is on the table in the center of the guard post.
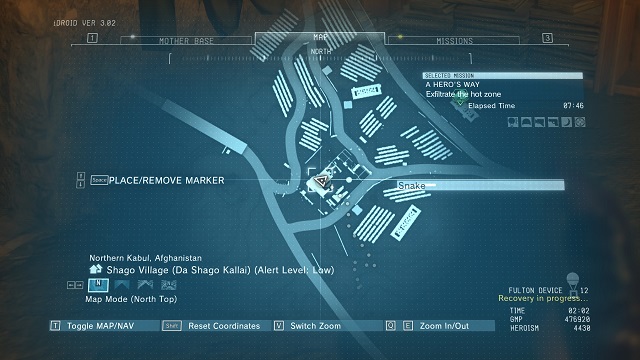 The location of the tape #7
The Kids in America tape is in the cassette player which is on the table in the main building of the military base.
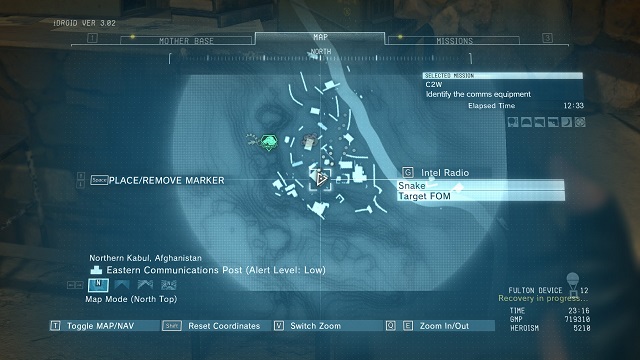 The location of the tape #8
The Only Time We Tell tape is in the cassette player which is on the table in the center building of the military base.
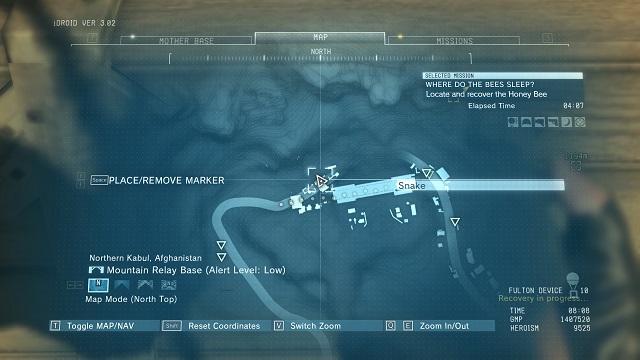 The location of the tape #9
The Rebel Yell tape is in the cassette player which is on the table next to the entrance to the bridge after getting to the base from south.
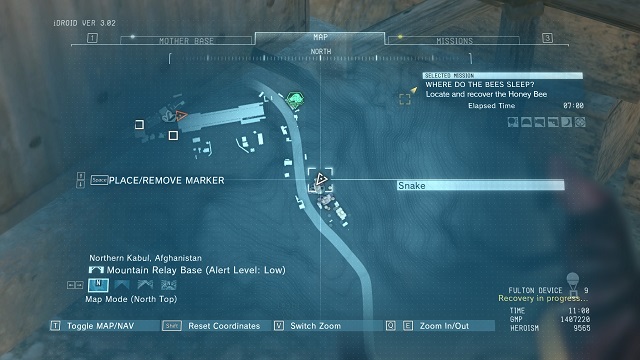 The location of the tape #10
The Recorded in the Toilet tape is next to the toilet nearby the wall of one of the buildings.
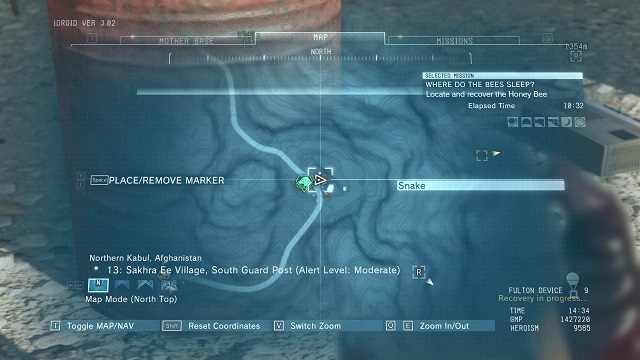 The location of the tape #11
The Planet Scape tape is in the cassette player which is on the table in the middle of the guard post.
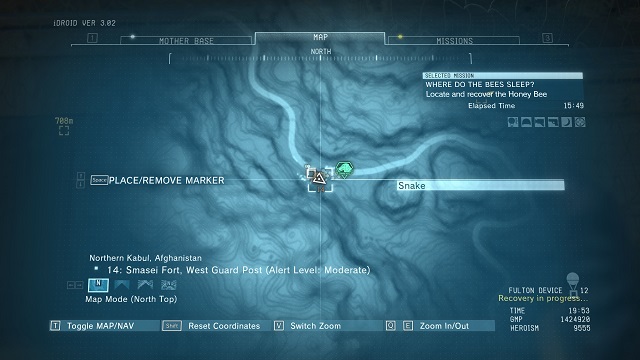 The location of the tape #12
The Dormant Stream tape is in the cassette player which is on the table in the center of the guard post.
 The location of the tape #13
The Take the D.W. tape is in the cassette player which is on the box in the northern part of the northern part of the camp.
 The location of the 14th cassette.
The cassette (Maneater) is in the tape player on the table, on the roof of the palace (in the building's corner).
 The location of the 15th cassette.
The cassette (Ride a White Horse) is in the tape player ob the table in the center of the camp.
 The location of the 16th cassette.
The cassette (Take on Me) is in the player on the table inside one of the rooms in the Western part of the military camp.
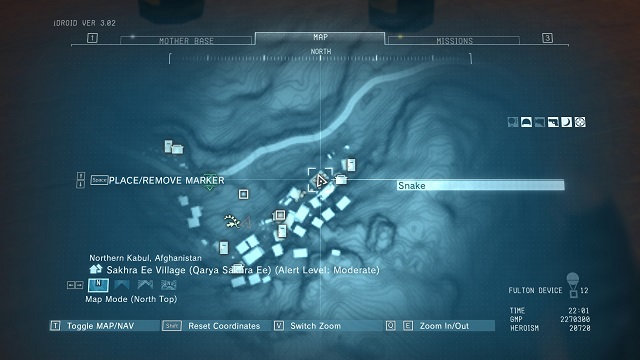 The location of the 17th cassette.
The cassette containing the recording (Enemy Eliminated) can be found on a table, inside one of the buildings on the Eastern end of the village.
 The location of the 18th cassette.
The cassette containing the recording (The Final Countdown) can be found in the player, standing on a shelf, inside a small house in the Southern section of the village.
 The location of the 19th cassette.
The cassette containing the recording (Nitrogen) can be found on a table, inside a longitudinal building, located in the Northern section of the power plant.
 The location of the 20th cassette.
The cassette containing the recording (Love Will Tear Us Apart) can be found on a table, in one of the green tents, located in the Northern section of the base.
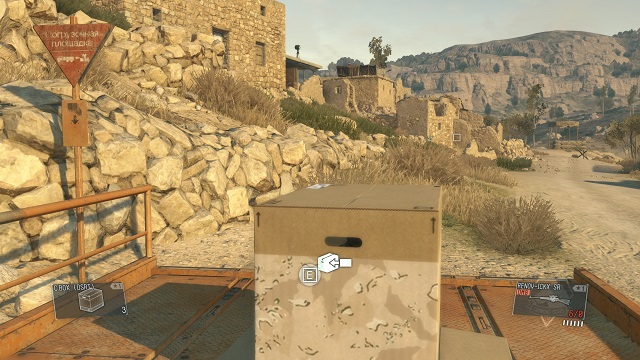 A fast travel
Delivery Point Invoices may be found in many different locations. If you will get close to one of the orange platforms and you will rip a special piece of paper from a sign you will unlock the access to this location. If you have at least two of those Points you may use them to receive a C.BOX from your equipment. Unlocking all of these points in either Afghanistan or Africa will result in receiving a Key Item named Master Certificate - Box, which allows you to use a better version of cardboard box. There is 21 Points to find in total.
 The location of the Delivery Point
The Point is nearby the road leading south of Wialo Village, next to the gate and close to the first few buildings.
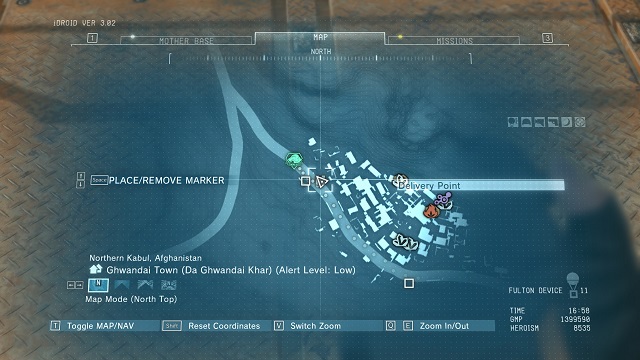 The location of the Delivery Point
The Point is nearby the road which is close to Ghwandai Town.
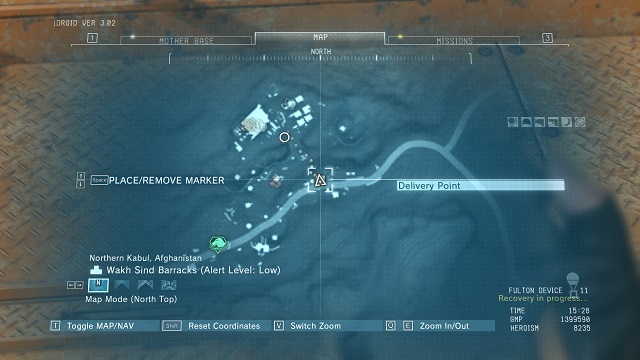 The location of the Delivery Point
The Point is close to the Wakh Sind Barracks military base, nearby the containers and watchtowers.
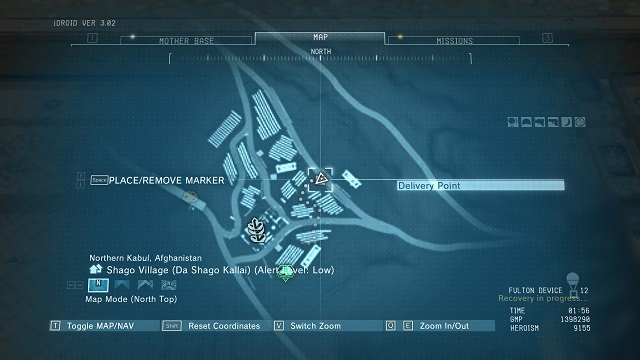 The location of the Delivery Point
The Point is nearby the road south of Shago Village.
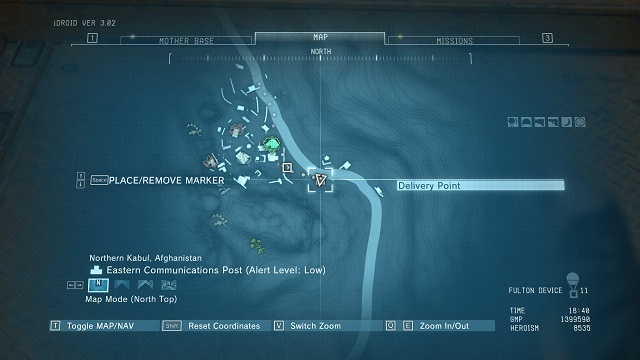 The location of the Delivery Point
The Point is nearby the road leading south of Eastern Communications Post, next to the gate.
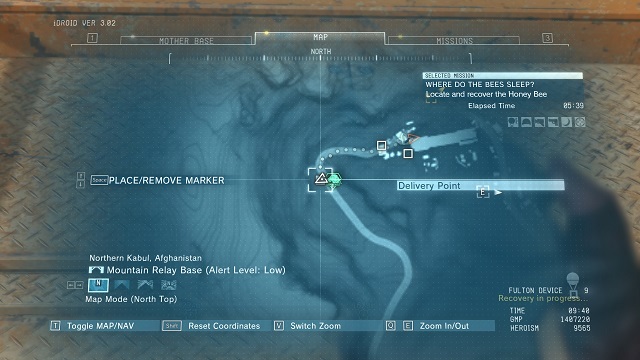 The location of the Delivery Point
The Point is nearby the road leading south of Mountain Relay Base.
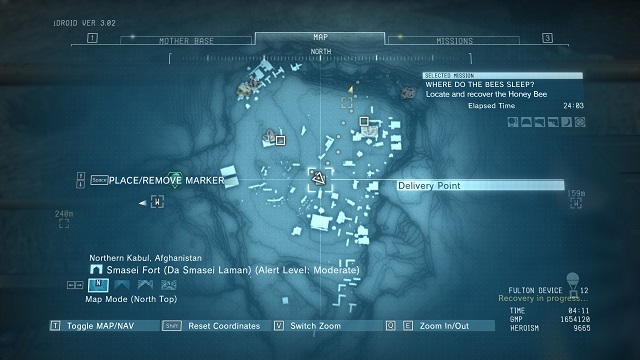 The location of the Delivery Point
The Point is almost in the center of Smasei Fort.
 The point's location.
The point is right next to the road to the palace (from the South).
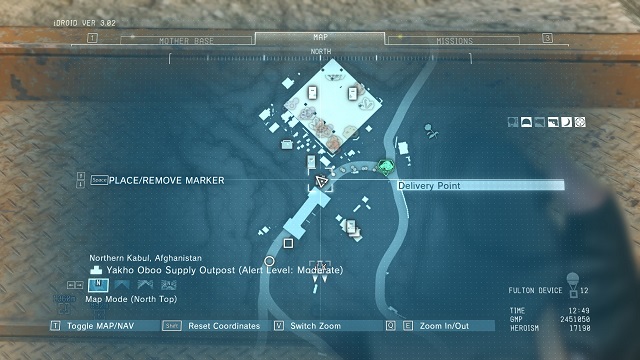 The point's location.
The point is near the bridge to the base (from the South).
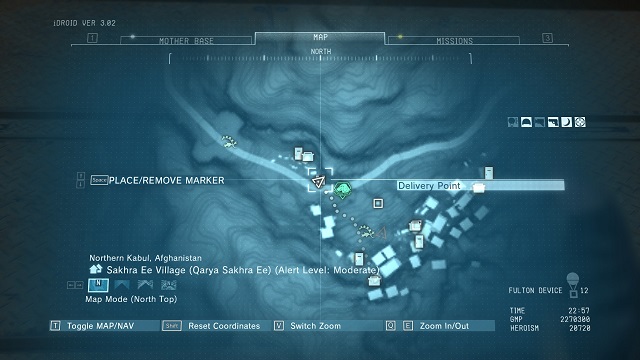 The location of the point.
The point is located next to the main road, leading to the village from the West.
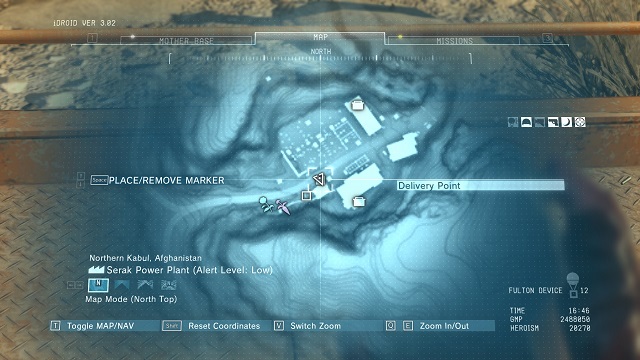 The location of the point.
The point is located next to the main road, just as you enter the power plant area.
 The location of the point.
The point is located next to the main road, leading to the East from the base (right next to two barracks).
 The location of the delivery point.
This delivery point is located near the buildings on the plantation area. You can find it right by the road leading to this place.
 The location of the delivery point.
It's located by the road in the southern part of Bwala ya Masa.
 The location of the delivery point.
This point is located in the central part of Ditadi Abandoned Village, near the crossroads.
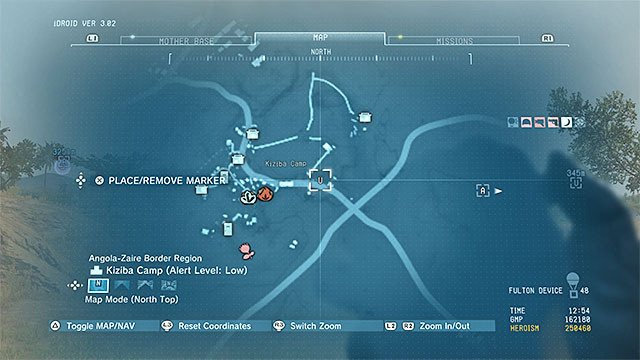 The location of the delivery point.
This point can be found near the road in the eastern part of Kizimba Camp.
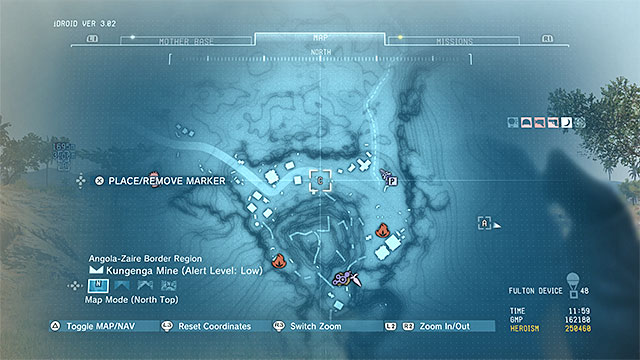 The location of the delivery point.
This point is located near a path in the southern part of Kungenga Mine.
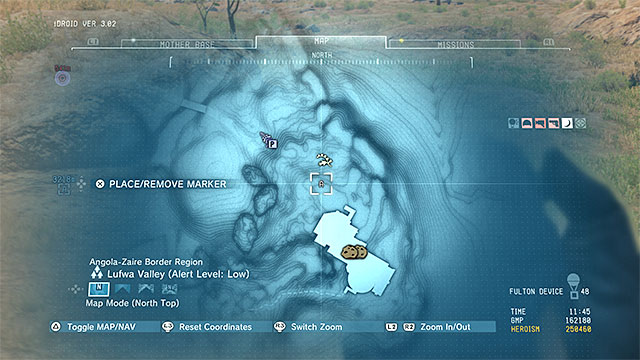 The location of the delivery point.
You can find this point to the North from the large mansion in the valley (the one in which you find Code Talker during one of the main missions).
 The location of the delivery point.
This point is located not far from two buildings in the Eastern part of Mfinda Oilfield.
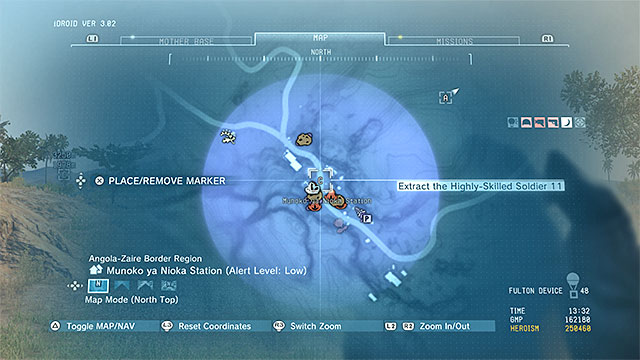 The location of the delivery point.
You can find this point near the road in the central part of Munoko Ya Nioka Station.
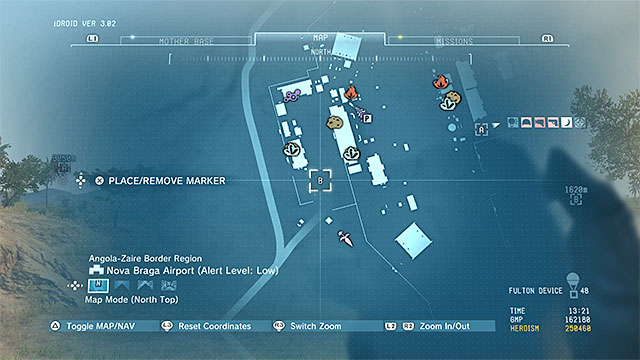 The location of the delivery point.
This point is located near the western gate to Nova Braga Airport.
The Blueprints are special documents which you may collect in specific areas or during the special tasks during the missions. They allow you to unlock the new research projects in the Mother Base and because of that you may upgrade your battle equipment. You may collect 27 Blueprints in total. Out of the list below we have also described the Blueprints which may be found after exploring specific areas.
NAME
HOW TO UNLOCK
AM MRS-71
Contribute to completing a Dispatch mission (the ones on which you send your allies) called Destroy the New Fighter Aircraft.
ANTITHEFT DEVICE
Complete Side-Op number 8.
BAMBETOV SV
Search Lamar Khaate Palace in Afghanistan.
BRENNAN LRS-46
Search Lufwa Valley. Do it no sooner than during mission 28.
BULLHORN SG
Contribute to completing a Dispatch mission (the ones on which you send your allies) called Prevent the Coup d'etat.
FB MR R-LAUNCHER
Contribute to completing a Dispatch mission (the ones on which you send your allies) called Liberate the Tanker.
FLAMETHROWER
Complete one of the optional objectives in mission 47 (collect the blueprint from the gunship).
G44
Search Ditadi Abandoned Village in Africa.
GEIST P3
Contribute to completing a Dispatch mission (the ones on which you send your allies) called Through the Blockade Force.
GUN-CAM DEFENDER
Complete Side-Op number 9.
HAIL MGR-4
Contribute to completing a Dispatch mission (the ones on which you send your allies) called Destroy the Uranium Centrifuges.
IR SENSOR
Complete Side-Op number 7.
ISANDRO RGL-220
Search guard posts number 07 and number 19 in Africa. The blueprint is in one of them.
KABARGA-83
Search Mfinda Oilfield in Africa.
LPG-61
Contribute to completing a Dispatch mission (the ones on which you send your allies) called Recapture the Port Facilities.
MACHT 37
Complete one of the optional objectives in mission 21 (collect the blueprint from the gunship).
PB SHIELD
Search Smasei Fort in Afghanistan.
RIOT SMG
Complete Side-Op number 5.
STUN ARM
Complete Side-Op number 6.
STUN GRENADE
Search Kizimba Camp in Africa.
UA-DRONE
Complete Side-Op number 10.
UN-AMM
Search guard post number 01 in Africa.
UN-ARC
Search Wakh Sind Barracks in Afghanistan.
URAGAN-5
Search Bampeve Plantation in Africa.
WU S33
Contribute to completing a Dispatch mission (the ones on which you send your allies) called Restore the DM2
ZE'EV
Contribute to completing a Dispatch mission (the ones on which you send your allies) called Search and Destroy the Remaining Forces.
ZORN-KP
Contribute to completing a Dispatch mission (the ones on which you send your allies) called Defend the Pipeline.
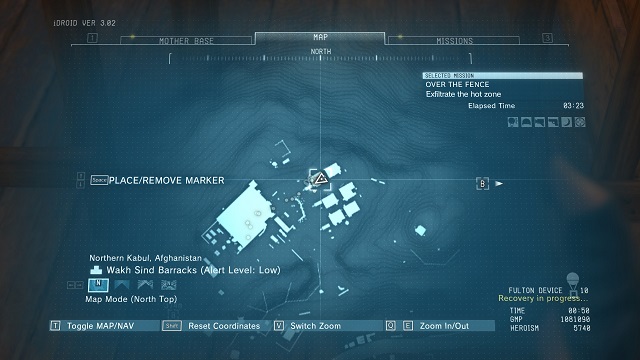 The location of the UN-ARC Blueprint
The UN-ARC Blueprint is on the table in one of the barracks in the Wakh Sind Barracks base.
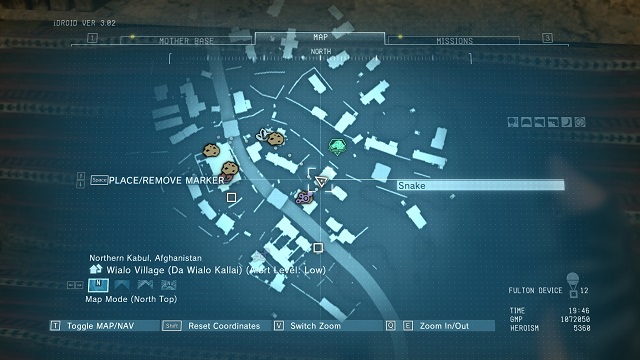 The location of the RIOT SMG Blueprint
The RIOT SMG Blueprint is in one of the buildings in Wialo Village (Da Wialo Kallai). You can collect it during the Side Op 5.
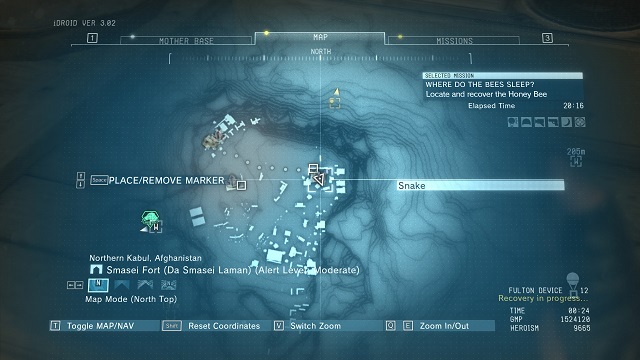 The location of the PB SHIELD Blueprint
The PB SHIELD Blueprint is in the northern part of the camp in Smasei Fort.
 Location of blueprints for BAMBETOV SV.
The BAMBETOV SV blueprint is on the table on the palace rooftop (in the corner of the building).
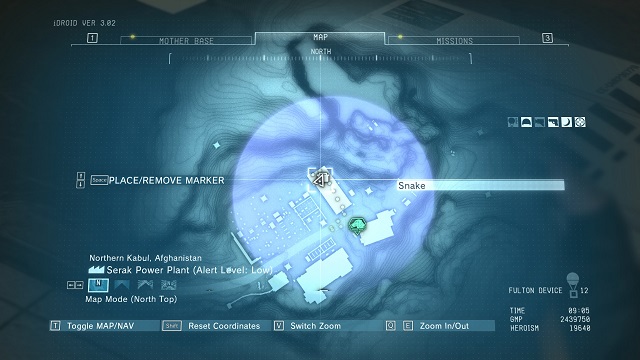 The location of the STUN ARM blueprint.
The STUN ARM blueprint can be found on a table, located in the center of the longitudinal building, in the Northern section of the Serak Power Plant.
The Key Items are unique items which you may receive while progressing in the main plot as well as by facing a specific requirement. Just as the Blueprints it allows you to create and modify your character's equipment. You may receive 20 Key Items in total.
Note - Collecting all the Key Items is one of the requirements to obtain the Collector Achievement/Trophy (Besides that, you have to complete all the Blueprints as well).
Key Item
Reward
How to unlock
Children's Reward
New research project: Water Pistol.
Complete mission 18 (Blood Runs Deep).
Codename: Big Boss
New research project: Leather Jacket Camo
Complete mission 46 (Truth: The Man Who Sold The World).
Conch Shell
Petrol Bomb research project and Children upgrade for the fultoning device (you can fulton children).
Complete Side Op number 113 (Eli's Challenge).
Emmerich's Research Notes
New research project: Stealth Camo
Watch the cut-scene in which Emmerich is exiled from Mother Base.
First Aid Manual
Tactical Fulton upgrade for D-Dog.
Search Bwala ya Masa in Africa after completing mission 18.
Grand Master Certificate - Box
New research project: C. Box (SMK)
Collect all the invoices from fast travel platforms (both in Afghanistan and in Africa).
Grand Master Certificate - Elite
New research project: Naked Camo
Complete all the repeated missions with S rank.
Grand Master Certificate - Fulton
F-Ballista upgrade for D-Walker
Fulton 1000 targets.
Grand Master Certificate - Standard
New research project: Raiden Camo
Complete all the missions (without the repeated ones) with S Rank.
Handkerchief
Sniper Wolf upgrade for Quiet
Complete mission 40 (Cloaked in Silence Extreme).
Man on Fire - Corpse
Furicorn upgrade for D-Horse
Complete Side Op number 144 (Secure the Remains of the Man on Fire).
Master Certificate - Box
New research project: C. Box (WR)
Collect all the invoices from fast travel platforms in Afghanistan and in Africa.
Master Certificate - Elite
New research projects: Naked Camo (Silver) and Bionic Arm (Silver)
Complete all the repeated missions with modified rules.
Master Certificate - Fulton
Third degree upgrade for the fultoning device
Fulton 500 targets.
Master Certificate - Marking
The hero can distinguish real enemies from dummies.
Mark 500 enemies using the binoculars.
Master Certificate - Standard
New research project: Cyborg Ninja Camo
Complete all the missions (without the repeated ones with modified rules).
Quiet's Examination Report
Gray XOF uniform for Quiet.
Complete mission 40 (Cloaked in Silence Extreme).
Skulls Machete
Task-Arm SM upgrade for D-Walker
Complete mission 29 (Metallic Archaea).
Star of Bethlehem
New research project: Infinity Bandana Head Camo
Complete mission 46 (Truth: The Man Who Sold the World).
Strangelove's Memento
Bandana
Complete Side Op 143 (Extract the AI Pod).
The Codename: Big Boss
Leather Jacket
Complete mission 46.
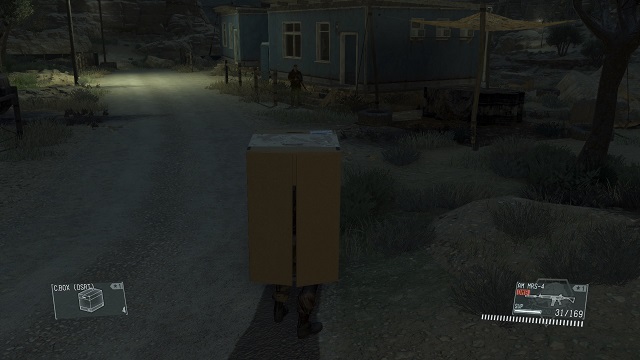 Cardboard boxes affect enemies in different ways.
Posters are a special kind of secrets and collecting them allows you to modify the functions of your Cardborad Boxes, in which the hero can hide. Thanks to them, you will be able to use a cardboard box with a specific symbol by selecting it from the inventory - each one of those affect enemies in different ways.
Note - You can find Posters in various parts of the game world, but a lot of them recur. Every time you collect a poster, you earn a small amount of GMP.
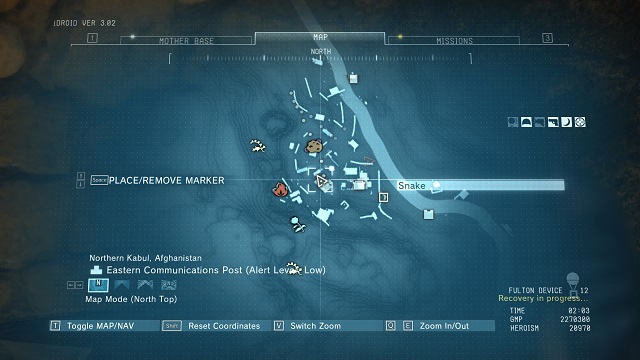 The location of two posters.
Two posters [Soviet Soldier and Glamour Girl (Horizontal)] are hanging on the walls inside one of the buildings, located in the South-Western section of the Eastern Communications Post in Afghanistan. The Soviet Soldier cardboard box in the vertical position allows your character to fool Russian soldiers, if you are in a safe distance from them. If you are in a risky situation and you stand still in a box, while directing the poster in the direction of the enemies, soldiers, after a short time, will think that you are one of them. Unfortunately, if you are too close, they will immediately attack you. The Glamour Girl (Horizontal) cardboard box, in the horizontal position (the character is crawling) causes the enemies, who notice the poster, to immediately run towards your position to take a better look. When that happens, you can either quickly get out of the box and attack the enemy to incapacitate him, or leave it unnoticed and go to a safe spot.
Examples of poster locations:
Note - You should use Soviet Soldier poster when in Afghanistan and PF Soldier when in Africa. Choosing a poster with the wrong soldier will not bring you the required effect.
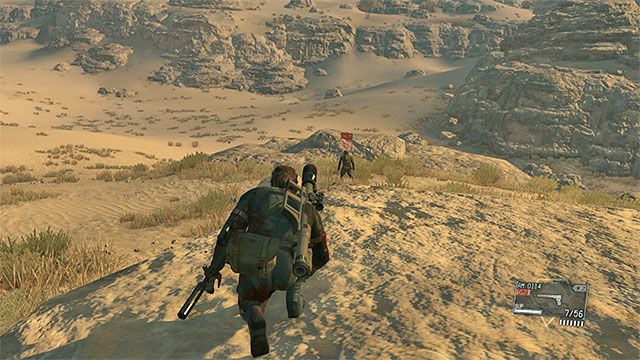 One of the lost soldiers.
Memento Photos is a type of collectibles that can be found in Metal Gear Solid V. There are eleven photos to obtain and for gathering all of them you receive the Reminiscence Achievement/Trophy.
Ten out of eleven photos can be obtained by completing Side-Ops from the Extract the Wandering Mother Base Soldiers type. These are missions 51-60 (Extract the Wandering Mother Base Soldiers 01-10). The walkthrough to this mission can be found in the chapter about Side-Ops. Every mission of this type is similar, because your task is to locate a lost ally (the best way is to use D-Dog's help) and extract him. The difficult part is that the soldiers start running away when they see you, so you need to sneak up to them and knock them out. A sniper rifle will be very helpful when completing this type of missions. When knocking out a soldier from distance, you don't have to worry that you will scare him away.
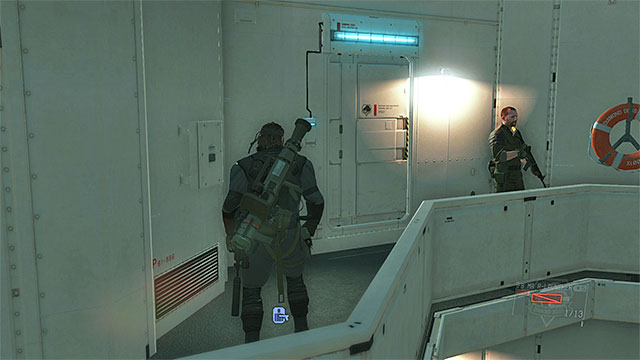
Obtaining the last, eleventh photo is more troublesome. After collecting at least one photo by completing a mission from the Extract the Wandering Mother Base Soldiers type, go back to Mother Base. Choose Medical Platform as your landing site. Take the stairs to reach higher levels and locate the entrance shown in the pictures above (there is a blue light above it). When you're in the corridor, locate the door leading to the medical room, where Paz is.
 Give the photos that you collect to Paz.
After watching a cut-scene, you can give the first photo to Paz. The girl will go to sleep, which means that you cannot give all the remaining photos to her right now. You can solve this problem using Phantom Cigar to fast-forward time or by leaving the Mother Base and going back.
Give all the photos to Paz so that she can watch all ten of them. Then, you just need to leave the room and look around the corridor to find the eleventh Memento Photo. After collecting it, you will unlock an achievement.
 As for bigger animals, you have to put them to sleep and Fulton them.
One of the new features in Metal Gear Solid V is catching animals, which are held in your private zoo in Mother Base. There are 47 species to catch and there is an achievement/trophy called Conservation that you obtain for catching all of them. There are three ways to catch animals.
The table below shows the list of animals that you can catch. The second column provides information on where to look for a certain species. You can track your progress in your iDroid. Select Mother Base tab in the main menu, then Database, Encyclopedia and then Wild Animals.
NAME
HOW TO FIND
Afghan Pika
Set up traps near outpost number 04 in Afghanistan.
African Bullfrog
Set up traps when in Africa. After some time, you will catch this animal.
African Civet
Set up traps when in Africa. It is a rare species, so keep placing them until you find it.
African Fat-Tailed Gecko
Set up traps when in Africa. The best place to leave them is on the rocks, because it increases the probability of catching a Gecko.
African Wild Dog
Look for this animal at night, near Mfinda Oilfield in Africa. It is a rare species, so you have be patient.
Anubis
There is a Side-Op connected to catching this animal.
Bechstein's Bat
Set up traps near Spugmay Keep in Afghanistan.
Black Bamba
Set up cages near Bampeve Plantation.
Black Stork
Set up cages wherever you want. You will eventually catch this animal.
Blanford's Fox
Set up cages when in Afghanistan. It is a rare species, so be patient.
Boer Goat
Look for this animal during the day, near guard post number 15 in Africa.
Brown Bear
Look for this animal at night, near Wakh Sind Barracks in Afghanistan. It is a rare species, so be patient.
Caracal
Set up traps when in Afghanistan. After some time, you will catch this animal.
Cashmere Goat
Look for this animal during the day, near Aabe Shifap Ruins in Afghanistan.
Common Raven
You can find a raven near Aabe Shifap Ruins in Afghanistan. Use non-lethal ammunition and pick up the bird from the ground.
Deathstalker
Set up traps near guard post number 04 in Afghanistan.
Emperor Scorpion
Set up traps near guard post number 12 in Africa.
Four-Toed Hedgehog
Set up traps when in Africa.
Gerbil
This will probably be one of the first animals that you catch. Use a cage.
Grant's Zebra
Look for this animal during the day, near Nova Braga airport.
Gray Wolf
Look for this animal at night, near guard post number 07 in Afghanistan.
Griffon Vulture
Set up traps when in Afghanistan.
Himalayan Brown Bear
Side-Op number 48 is connected to catching this animal.
Honey Badger
Set up traps in any place that you want. You will eventually catch this animal.
Jehuty
Side-Op number 49 is connected to catching this animal.
Karakul Sheep
Side-Op number 47 is connected to catching this animal.
Lappet-Faced Vulture
Set up traps when in Africa.
Leopard Gecko
Set up cages near Spugmay Keep in Afghanistan.
Leopard Tortoise
Set up traps when in Africa.
Long-Eared Hedgehog
Set up traps near Spugmay Keep in Afghanistan.
Marsh Mongoose
Set up traps when in Africa. It is a rare species, so be patient.
Martial Eagle
Set up traps when in Africa. After some time, you will catch this animal.
Namaqua Chameleon
Set up traps when in Africa. After some time, you will catch this animal.
Nubian
Look for this animal during the day, near Bampeve Plantation in Africa.
Okapi
Look for this animal during the day, near guard post number 02 in Africa. It is a rare species, so be patient.
Oriental Ratsnake
Set up traps when in Afghanistan.
Oriental Stork
During main mission number 11, look around the ruins when fighting or search them after you defeat Quiet (before you approach her). Find the stork and Fulton it.
Rainbow Agama
Set up traps near a guard post number 12 in Africa.
Red Fox
Set up traps when in Afghanistan. After some time, you will catch this animal.
Rock Hyrax
Set up traps when in Africa. After some time, you will catch this animal.
Russian Tortoise
Set up traps when in Afghanistan.
Sand Cat
Set up traps when in Afghanistan. After some time, you will catch this animal.
Side-Striped Jackal
Look for this animal at night, near guard post number Africa.
Tree Pangolin
Set up traps when in Africa. It is a rare species, so be patient.
Trumpeter Hornbill
Set up traps near guard post number 12 in Africa.
Tsuchinoko
Set up traps near the streams in Lufwa Valley in Africa.
Wild Ass
Look for this animal during the day, near Lufwa Valley in Africa.
In the base version of Metal Gear Solid V, there are 42 achievements and they have been listed below. These achievements are common for all the platforms - for PC (Steam achievements), for XBOX and for Playstation (trophies).
How to unlock: You have to complete all the main missions of the game.
Comment: You need to complete 50 missions in total. There is 31 main missions and 19 alternative versions which may be completed later on.
Way to obtain: Complete all of the side missions in the game (Side-Ops).
Commentary: You gain access to most of them while playing the game. Only some of the missions set specific requirements - check out the appropriate chapter of this guide to learn more.
How to unlock: You have to complete a mission with a help of a Combat Unit member.
Comment: You may choose a team member during the preparation phase in the preparation menu as well as your support or your equipment. After showing the character list choose any character from the Combat Unit (however don't select Big Boss or your avatar). Remember, that some missions are designed for specific characters and will not allow you to select any other character to play.
Way to obtain: You need to establish all of the available platforms of the Mother Base.
Comment: This achievement takes a lot of time since it requires you to have a lot of money and resources. You need to build seven Mother Base platforms and develop every one of them as much as possible. Remember that every platform level increases the requirements you need to face to level it up again.
Way to obtain: Reach tier 50 with all of the units at the Mother Base.
Commentary: This achievement requires no special preparations. All it requires is lots of time.
Way to obtain: Complete the "Prologue: Awakening" mission.
Commentary: This is one of the first achievements that you obtain. What you need to do is simply complete the prologue (the mission in the hospital).
Way to obtain: Expand the personnel of the Mother Base to, at least, 250.
Commentary: Remember to fulton, or transport with the chopper, as many prisoners and unconscious opponents, as possible.
Way to obtain: Complete the "Where Do the Bees Sleep?" main mission.
Comment: It is the sixth mission of the game.
Way to obtain: Seize control over an enemy outpost.
Commentary: This one is an easy achievement and you can obtain it already during the first main mission of the game. Reach any outpost (they have been enumerated on the map of Afghanistan) and get rid of all the guards there (either render them unconscious or kill them).
Way to obtain: Complete the "Traitors' Caravan" main mission.
Comment: It is the sixteenth mission of the game.
How to unlock: You have to complete all the Side-Ops from the Mine Clearing group.
Comment: You will unlock new Mine Clearing missions during the entire game and they are focused on neutralizing the mine fields. After getting to a mine field try to use the D-Dog's to locate every mine. After that you may either disarm them (what is risky) or destroy them from a safe distance.
How to unlock: Collect all the Blueprints and Key Items.
Comment: Blueprints are collectibles which may be found during the missions as well as during the exploring the world. Kei Items are collected only by completing missions and all of their tasks.
Way to obtain: Extract all of the species of animals in the game, back to the Mother Base.
Commentary: To extract the animals, you can use the pistol with sleeping darts, cages or fultoning devices (the bigger animals). In your zoo you may collect 47 animal species in total.
Way to obtain: Unlock the D-Dog as your Buddy.
Commentary: To learn more about buddies in the game, and about unlocking them, see the walkthrough for the game.
How to unlock: You have to complete all the important Dispatch missions.
Comment: Dispatch missions are solved by your subordinates. After getting to a specific point in a main storyline you will unlock the Combat Deployment menu in your iDroid. From the available missions choose the ones that are on the top of the list since they are the most important ones. Complete as any missions as you can and after some time you will unlock this achievement.
Way to obtain: Develop nuclear weapon.
Comment: This option will be unlocked after getting to a specific point in a main storyline your R&D squad will be ordered to create the nuclear weapon. However you have to remember that this task takes a lot of GMP and resources.
Way to obtain: Complete the "A Quiet Exit" main mission.
Comment: It is one of the side missions during which are becoming available in the last part of the game. To unlock it you need to have a best possible relationship with the female sniper named Quiet.
Way to obtain: Get rid of the nuclear arsenal.
Comment: After creating the nuclear weapon (you may read about this in the Deterrence achievement description) decide to disarm it (what takes 100000 GMP).
Way to obtain: Complete all the missions and obtain rank S.
Commentary: Which rank you are awarded is made known to you at the end of the mission. Apart from that, it is displayed while you are browsing the available missions list.
Way to obtain: You need to research, at least, 50 items in the R&D department of the Mother Base.
Commentary: try to buy new inventions on a regular basis (if your current budget allows that) make sure to obtain new resources and upgrade your R&D team (these are the most frequent requirements for new inventions).
Way to obtain: Complete all the missions and complete all of the objectives.
Commentary: Each mission has one, up to several objectives. You need to complete all of the primary ones (also the ones that exclude each other), secondary and hidden. It is worth mentioning that the complete list of tasks (also the uncompleted tasks) is shown to you after the first completion of the mission. It will help you find out what do you have to do to complete a mission in a hundred percent.
Way to obtain: You need to fulton (extract on a balloon) any given opponent.
Commentary: This achievement, virtually, cannot be missed. You can try to obtain it after you have completed the second main mission, when you obtain the fultoning device. Render any opponent unconscious, approach him and fulton him.
Way to obtain: Complete the "Hellbound" main mission.
Comment: It is the twelfth mission of the game.
Way to obtain: You need to attain the Hero codename.
Comment: While completing the game try to take care of your Heroism Score. We presented this topic in our F.A.Q. chapter in the walkthrough part of the guide. Basically you need to collect 180000 points and also complete the 31st main mission.
Way to obtain: Complete the "Metallic Archaea" main mission.
Comment: It is the twenty fifth mission of the game.
Way to obtain: Interrogate an enemy soldier.
Commentary: Only the interrogations, where you can understand the enemy, count. You first need to recruit the interpreter of the language (e.g. Russian) and you can do this while completing one of the Side-Ops. You start interrogation by grabbing the opponent from behind and picking the right item on the list.
Way to obtain: You need to play the FOB mission in the Infiltration group.
Comment: After completing the 22nd main mission of the game you will be able to use the Forward Operating Base (FOB). From this moment you may connect to the MGS V servers and infiltrate the other players' bases.
Way to obtain: You need to invent, at least 300 items at the R&D department at the Mother Base.
Commentary: try to buy new inventions on a regular basis (if your current budget allows that) make sure to obtain new resources and upgrade your R&D team (these are the most frequent requirements for new inventions).
Way to obtain: You need to gain maximum favor with the D-Dog, i.e. one of your Buddies.
Commentary: Take the dog along on as many missions as possible. To learn more information on gaining favor with your buddies, see the walkthrough for the game.
Way to obtain: Complete the "Phantom Limbs" main mission.
Commentary: This is the first main mission of the game and it starts right after you complete the prologue.
Way to obtain: Expand the personnel of the Mother base to, at least, 50.
Commentary: Remember to fulton, or transport with the chopper, as many prisoners and unconscious opponents, as possible.
Way to obtain: earn a total of 10 million GMP (the in-game currency).
Commentary: The main way of obtaining cash is by completing missions. The other interesting methods have been described in the walkthrough for the game, in the FAQ chapter.
Way to obtain: Invent, at least, 100 items, thanks to R&D at the Mother Base.
Commentary: try to buy new inventions on a regular basis (if your current budget allows that) make sure to obtain new resources and upgrade your R&D team (these are the most frequent requirements for new inventions).
Way to obtain: Obtain all of the hidden Memento Photos.
Comment: You may collect 11 Photos in total.
Way to obtain: Complete the "Sahelanthropus" main mission.
Comment: It is the thirty first and the last mission from the "core" set.
Way to obtain: Unlock Quiet (the female sniper) as your Buddy.
Commentary: To learn more about your buddies and the circumstances in which you unlock them, see the walkthrough for the game.
Way to obtain: Extract a female prisoner.
Commentary: You can obtain this achievement as a result of your progress in the main storyline, or thanks to side missions (Side-Op). After you locate a female prisoner, you can fulton her (extract her using the balloon) or request a chopper pickup.
Way to obtain: You need to gain maximum favor with the D-Horse, i.e. one of your Buddies.
Commentary: Take the horse along on as many missions as possible. To learn more information on gaining favor with your buddies, see the walkthrough for the game.
Way to obtain: Complete the main mission "Truth: The Man Who Sold the World".
Commentary: This is one of the main missions in the game.
Way to obtain: Complete any side mission (Side-Op).
Commentary: Side missions become available only after you have completed the initial main missions.
Way to obtain: Complete the "Voices" main mission.
Comment: It is the twentieth mission of the game.
Way to obtain: You need to gain maximum favor with Quiet (the female sniper), i.e. one of your Buddies.
Commentary: Take Quiet along on as many missions as possible. To learn more information on gaining favor with your buddies, see the walkthrough for the game.


 Mass Effect 2 Game Guide & Walkthrough
 Middle-earth: Shadow of Mordor Game Guide & WalkthroughMetal Gear Solid V: The Phantom Pain Game Guide & Walkthrough
 Minecraft Game Guide & Walkthrough
 Mortal Kombat X Game Guide & Walkthrough