
In this guide to Lost Planet 3 you will find a detailed walkthrough for all of the main missions and side missions. Further parts include the whereabouts of all collectibles available in the game, their descriptions audio logs and text logs, bestiary as well as the whereabouts of the rare Albino Taarkas).
The guide has been color coded in a following manner:
In the game, there is no "artificial" division into missions (just like in e.g. the GTA series). The division presented in this guide is implemented for the need to set boundaries between individual missions, i.e. across the line of cutscenes, or the possibilities of resting throughout the game, while e.g. staying in the HQ.
Norbert "Norek" Jedrychowski ()
 Throughout the game, you will get into places, full of akrids numerous times,.
Here are several advices that may prove useful throughout the game:
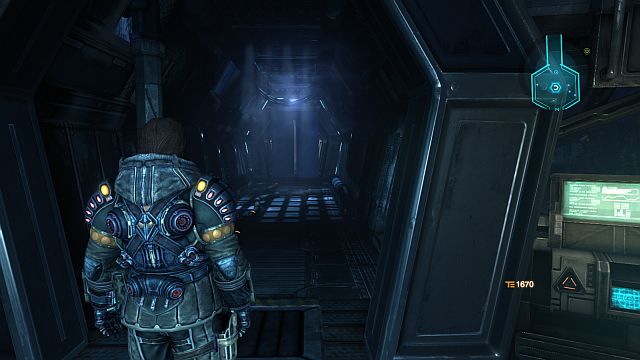
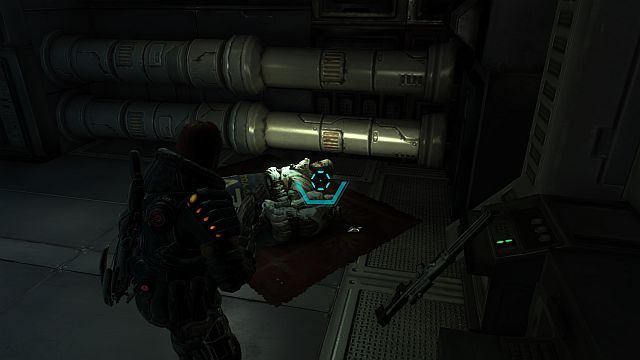
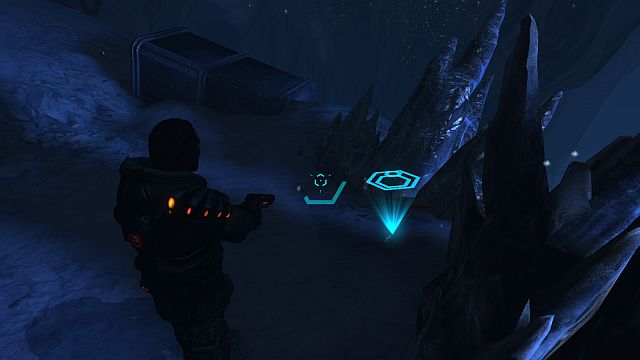
 Jim's first steps.
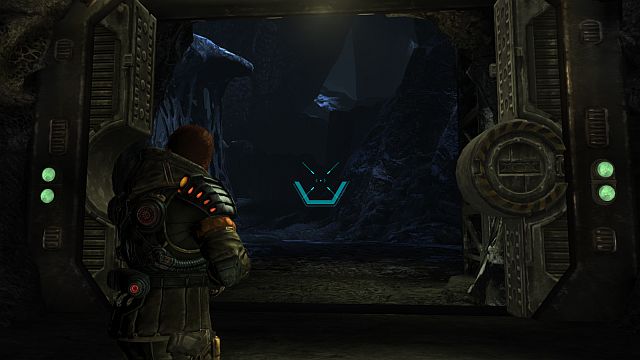
You start as shipwrecked in the frosty and unwelcoming planet of Akrid. Your first objective is to find the transponder so, follow the marker. You will reach a spot where you will obtain a weapon. Shoot the first akrid. Follow the only possible path until you bump into sepias coming in larger numbers.
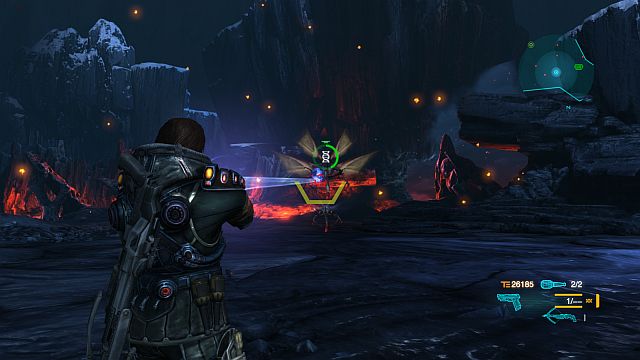
 The welcoming party is already waiting for you.
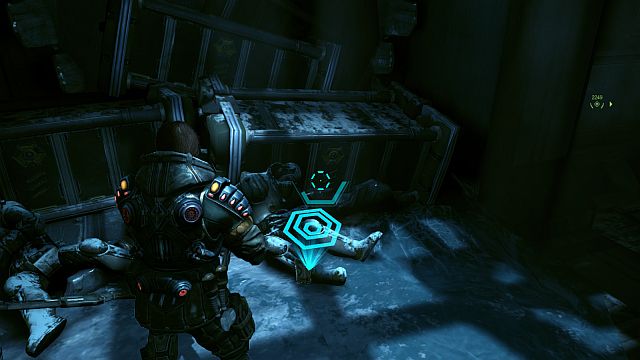
Take them all down, they are not going to be a problem, you also will not deplete your ammo. Reach the spot where the transponder is located and collect it. You will watch a short cutscene, during which you will be able to admire akrids running in your direction (you can also shoot at them). A moment later, you will have to play a QTE event. By pressing the appropriate key [F], you will repel the enemy. You do not need to worry too much because, soon, you will receive reinforcements in the form of a large mech, which you need to follow.
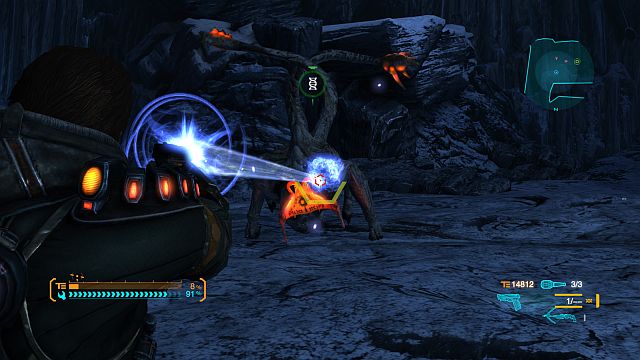
 Sepias are charging.
After a short cutscene, you will watch another cutscene, followed by another monster attack. Keep shooting at them and collect the T-energy that they drop. A moment later, you will have to fix the mechanism - approach the marked spot ad press, and hold down, the repair key [V]. after you succeed, hop onboard.
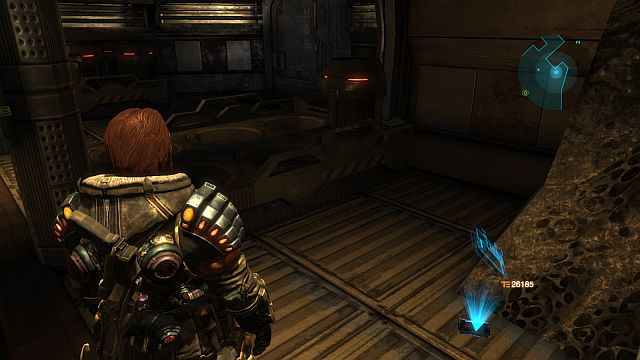
 Welcome aboard.
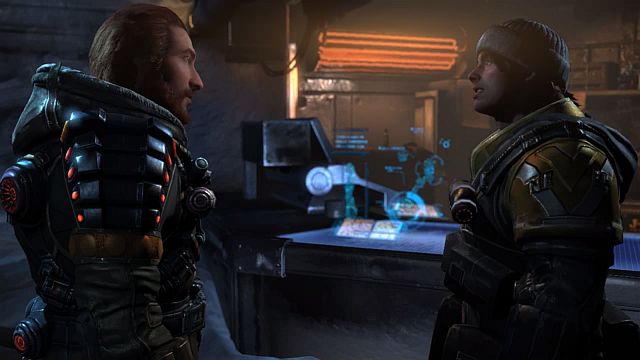
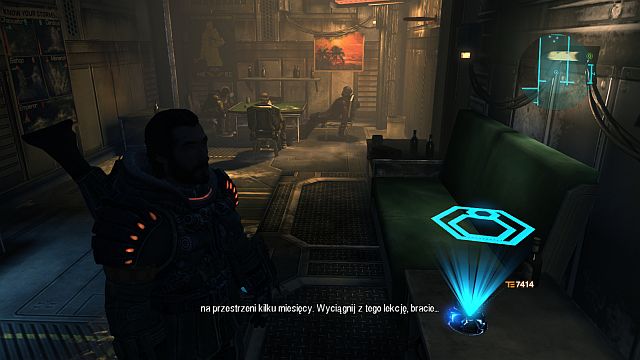
After the cutscene, you will receive a new objective - talk to the mechanic. Before you do, though, explore the board for a moment, in search of e.g. logs (the Collectibles chapter). Finally, take the elevator and go down to level 1 (basement level). Talk to the mechanic Ola. Then, arm yourself with knife at the quartermaster's at the same level.
 Your mech is quite a piece of machinery.
After that, go to level 2 where you need to talk to the mechanic again. Then, mount your mech. Make sure everything is working properly - the claw, the drill. Then go ahead - go towards the gate on the right and walk into Coronis.
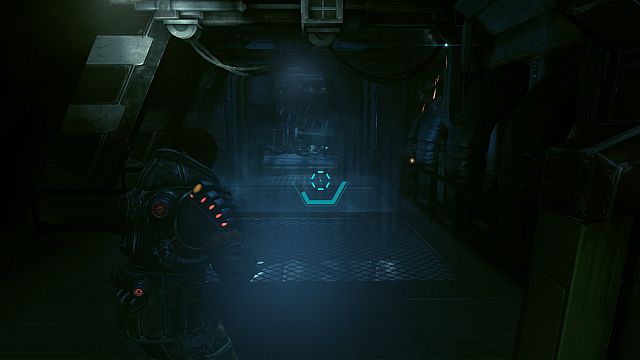
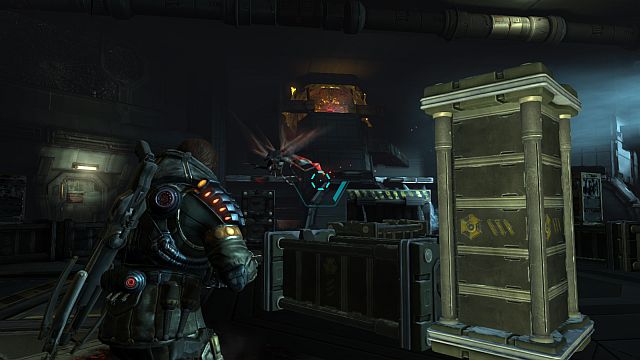
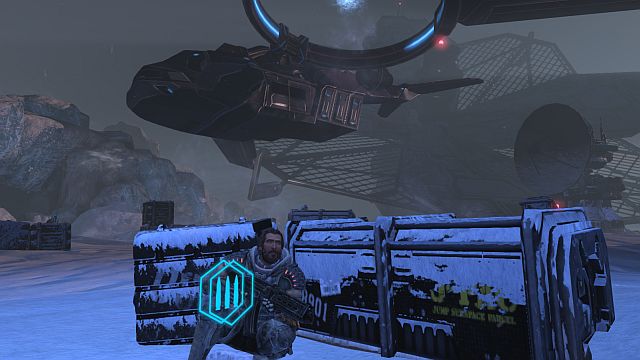
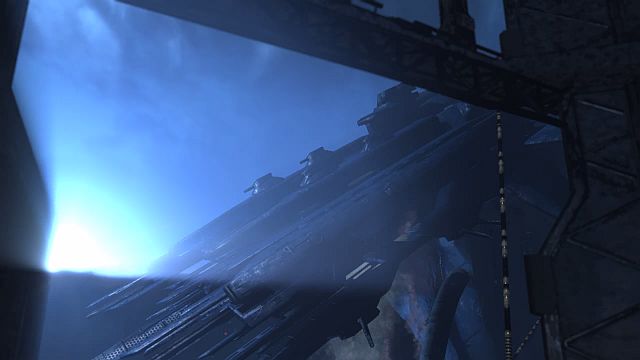
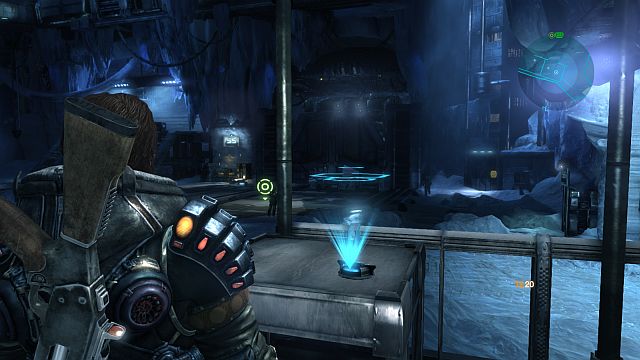
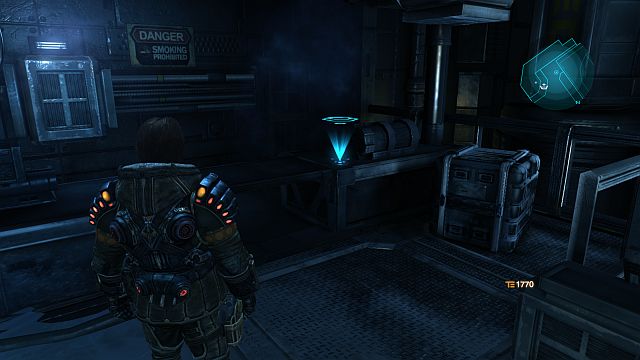
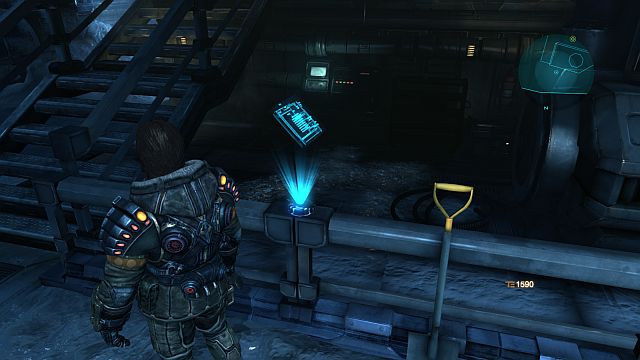
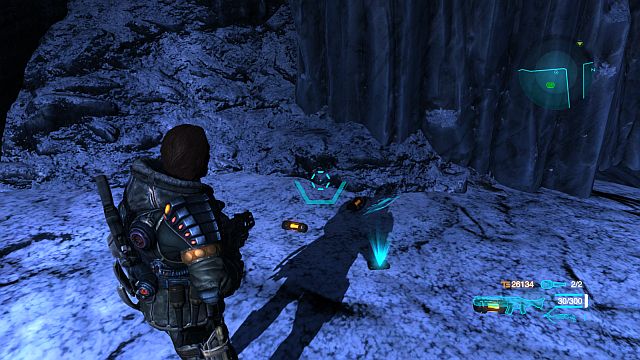
![After you leave the HQ and cover several meters, you will receive the ability to dismount the mech [E] - Mission 1: Save Laroche - Walkthrough - Lost Planet 3 - Game Guide and Walkthrough](https://game.lhg100.com/Article/UploadFiles/201512/2015121617272609.jpg)
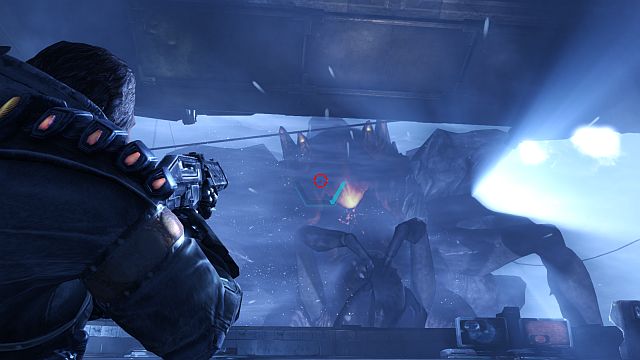
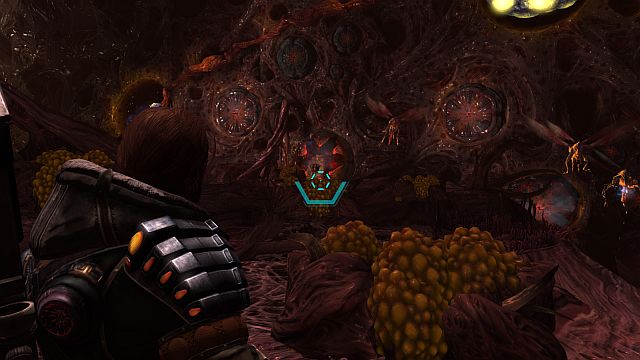
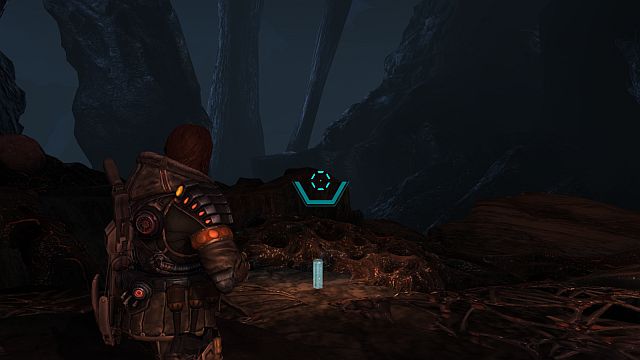
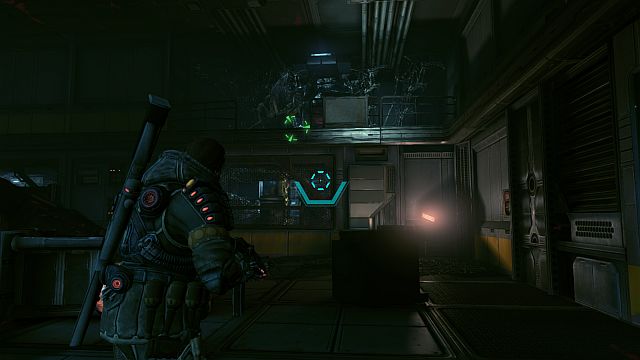
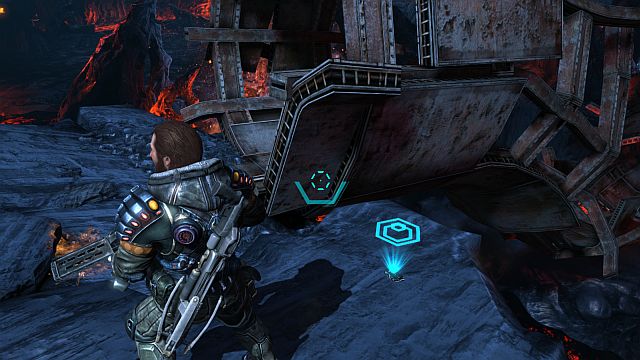
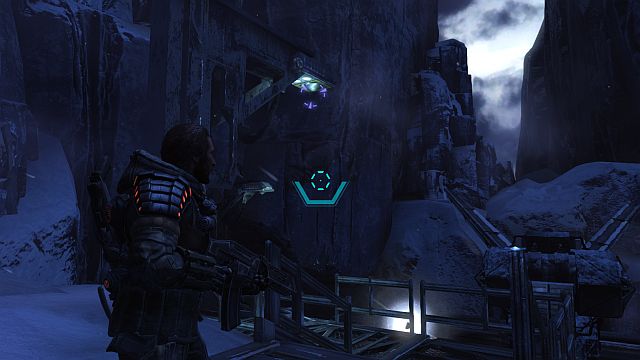
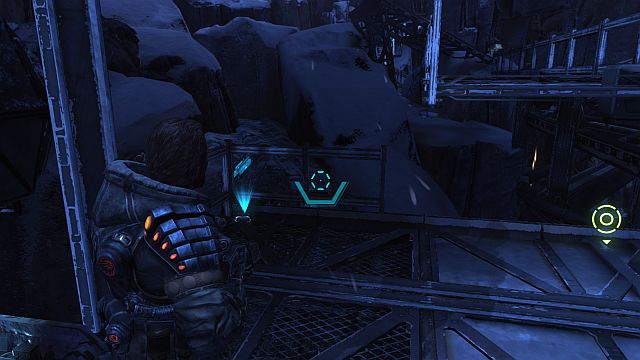
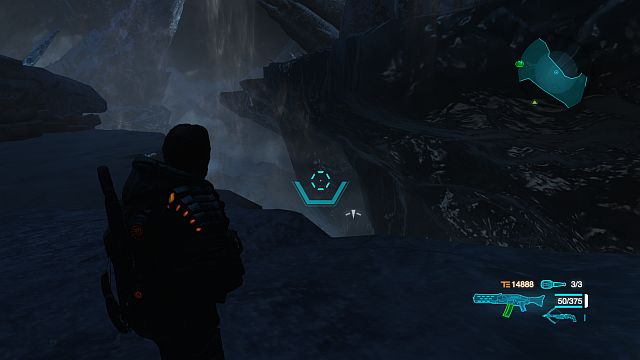
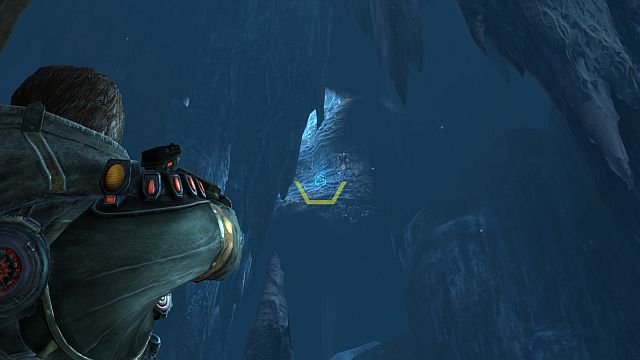
After you leave the HQ and cover several meters, you will receive the ability to dismount the mech [E]. you can do that now to collect the nearby audio log (more about this in the Collectibles chapter), or go ahead, Fuel Depot. Then, go ahead until you reach the ledge shown in the screenshot. Dismount your mech, walk over to the marker below and eliminate several akrids on your way.
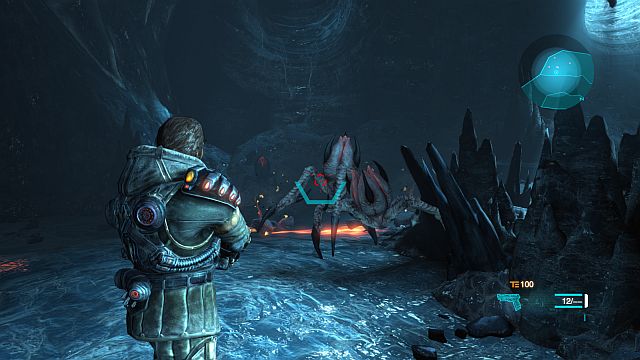
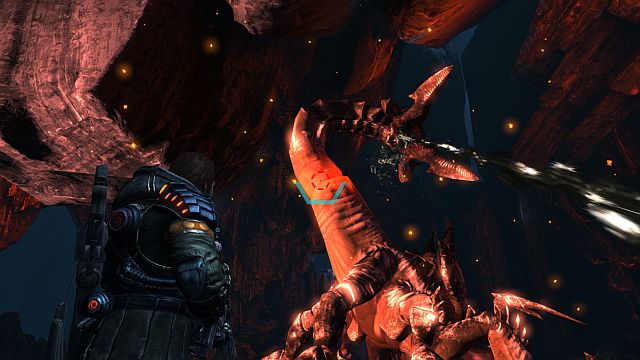
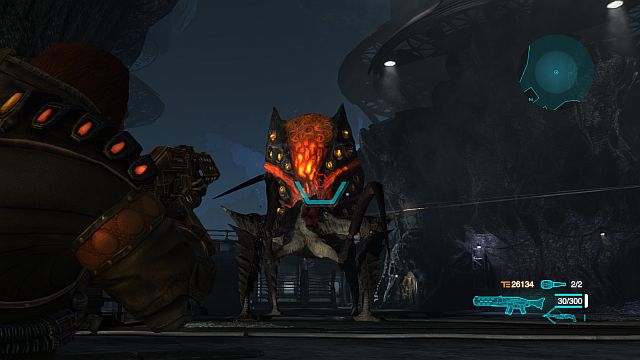
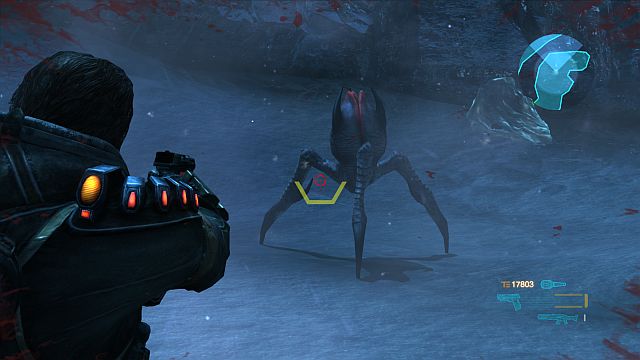
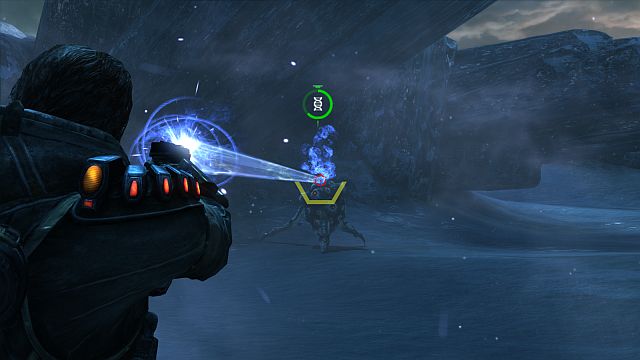
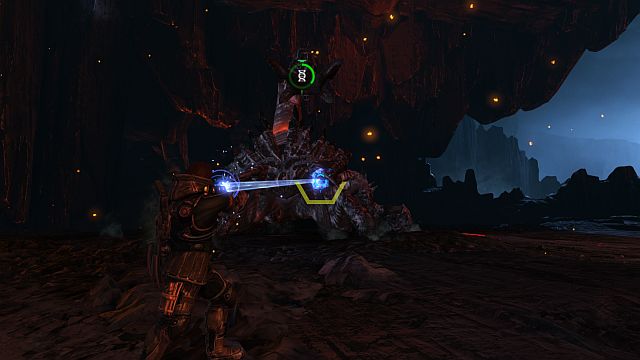
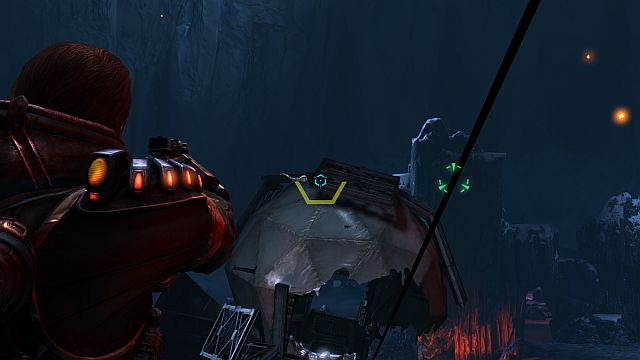
After you talk to Laroche there will appear 2 new monsters there. Their weak point is the orange "abdomen" that you should be aiming at. Also, you should remember about dodging any charges by the creatures [space bar]. After a well pulled-off dodge, you get the best opportunity to shoot at the "abdomen", just like it has been shown in the screenshot. After you win the battle, you will receive another objective to get to the Diaz Cavern.
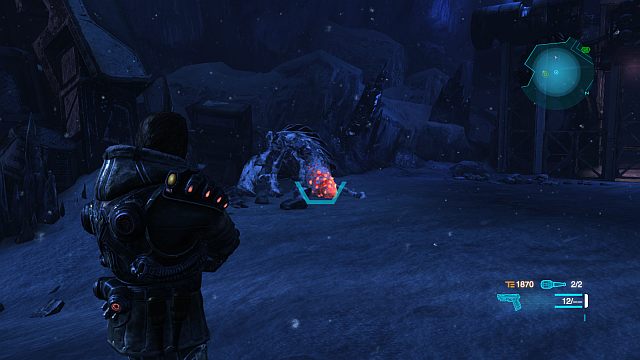
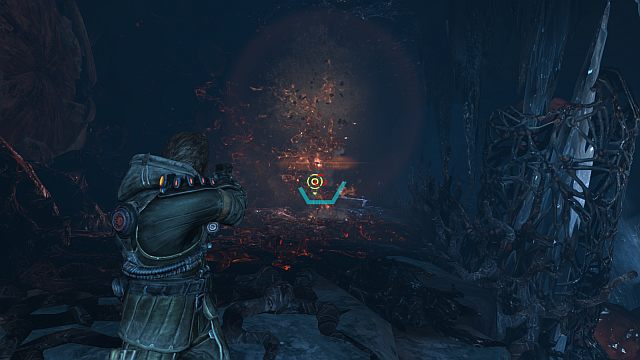
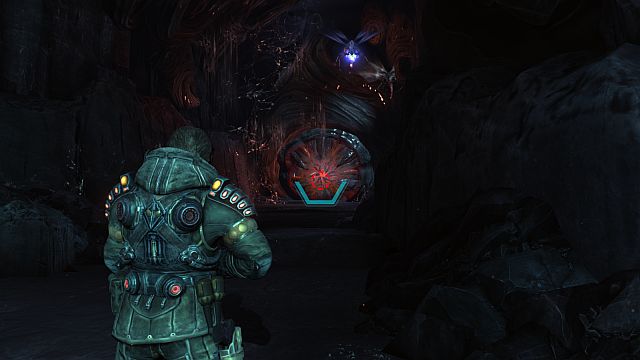
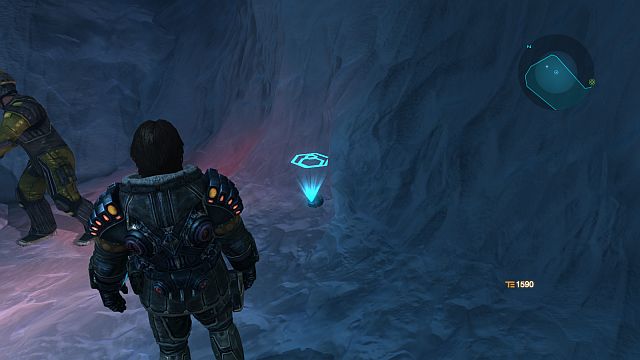
 Watch out for the explosive kinder-surprises.
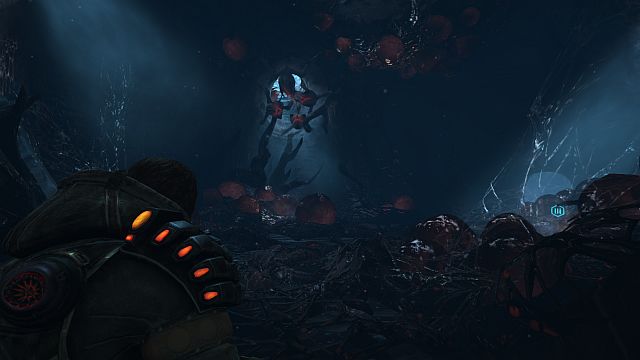
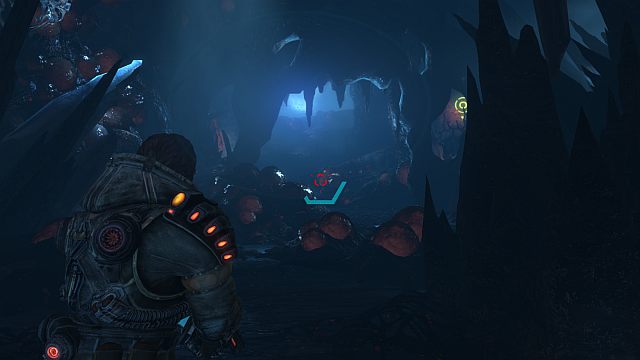
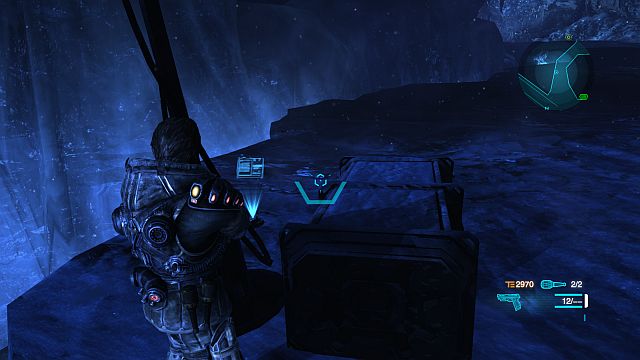
On your way, you will bump into several akrids, make sure that you are not surrounded by too many sepias. You can destroy their hatching spot by discharging a dozen-or-so rounds, or with a well-aimed grenade [G]. You will find an ammo box where you will replenish your grenade supplies. As you go deeper into the cave, you should watch out for the explosive eggs (you'd better eliminate them yourself by shooting at them).
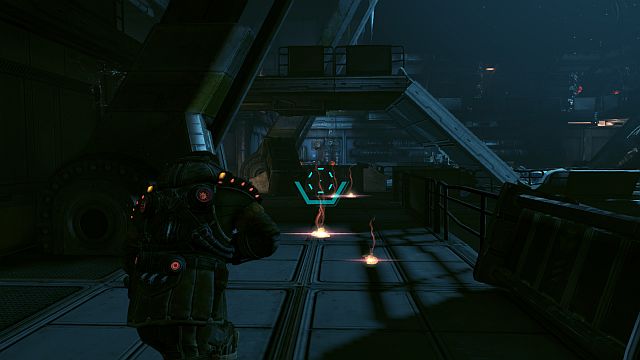
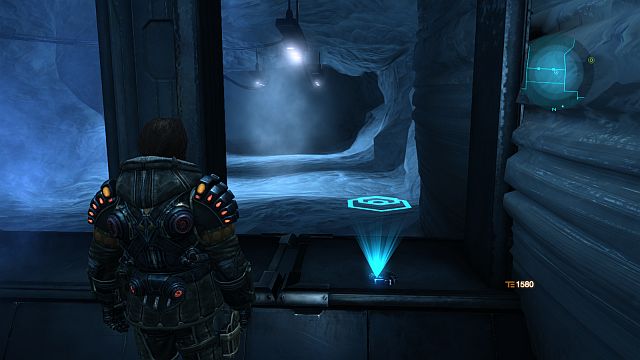
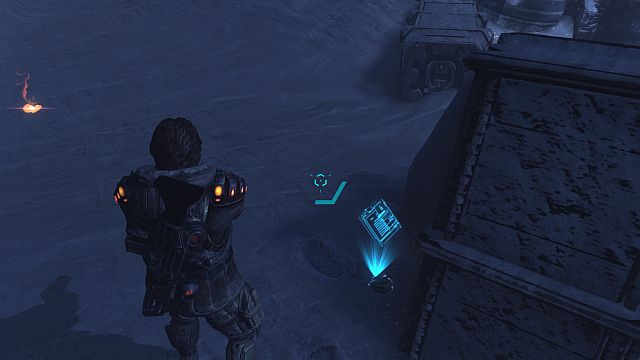
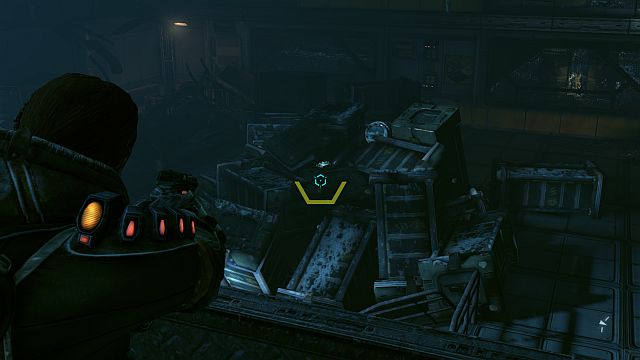
Eventually, you will reach a spot with a station with the T-energy (the screenshot). Destroy all of the eggs and empty the station. There is a crate behind the station, where you can obtain an Audio log. Use the same path to return to your mech and destroy several more akrids on your way there. During your return, you will receive a note that there is a storm coming, as well as an order to return to the HQ. Watch out for the spot where you have helped Laroche, because there is going to be a lot of enemies there. .
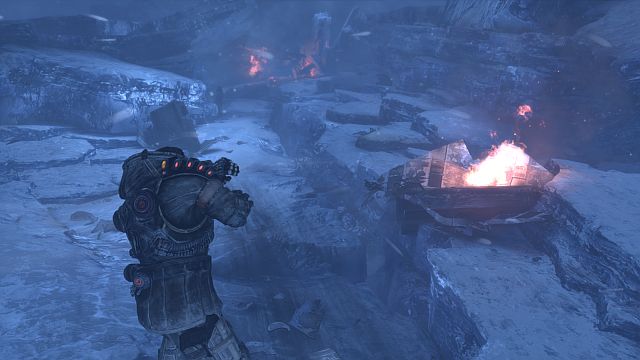
 Repairing the mech is not too big a problem.
As soon as you reach the machine, you need to go towards the HQ straight away. You need to secure the hawsers. This is not a problem. Simply, use the claw [LMB] on the marked area and twist the screws off [F]. After you have performed all of the necessary repairs, you can return to the hangar and park the machine.
After you leave the mech, you will have several moments for yourself. You can talk to the crew members, go to search for logs, or buy a better weapon for yourself. Once you are ready, go to the upper hangar and talk to Braddock.
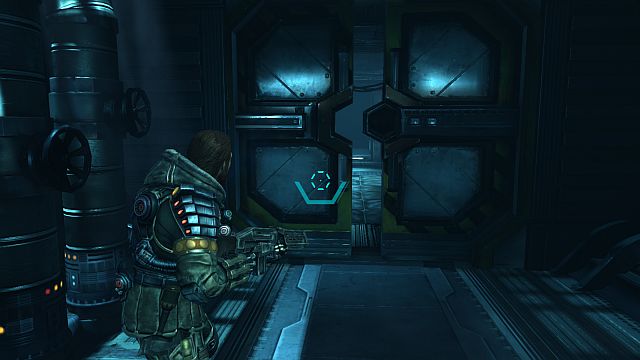
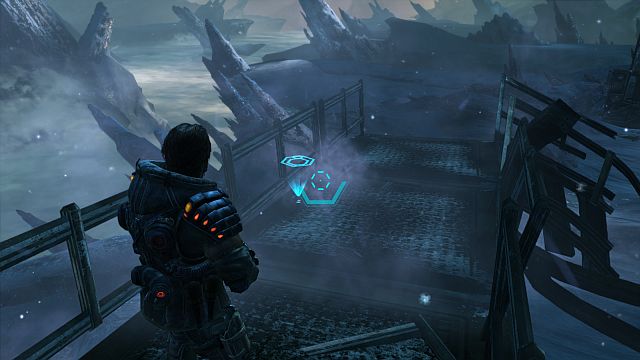
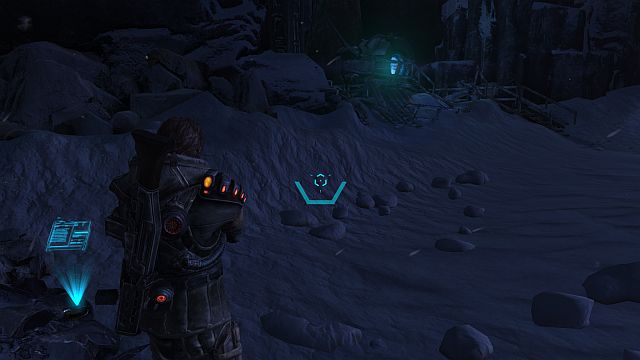
Get into the mech and go towards Coronis. On your way, you will have to help open the gate (just like in the case of the first mission: by grabbing with the claw [LMB] and spin [F]). Follow the marker into the place shown in the screenshot, where you need to drop down by using the hook that you received from Braddock. Simply, approach the edge and Jim will do that automatically. Below, you are up for another repair, and then the way back to the mech. Use the claw [F] to reach the place above. The edges that you can use it on are marked.
 Sepias rarely attack alone.
Hide behind the obstacle and finish out several enemies. Watch out for the projectiles that the newly-met beasts spit. Keep going ahead, along the only possible path (on your way, you will find an automatic weapon that is very useful here, as well as an audio log) .Use the hook for several times and keep going up until you reach again the spot where you have left the mech. There is another task for you to perform ahead - you need to set up your first outpost. Follow the marker until you reach the Hanneman's Basin. Use the drill to cut through your path [T].
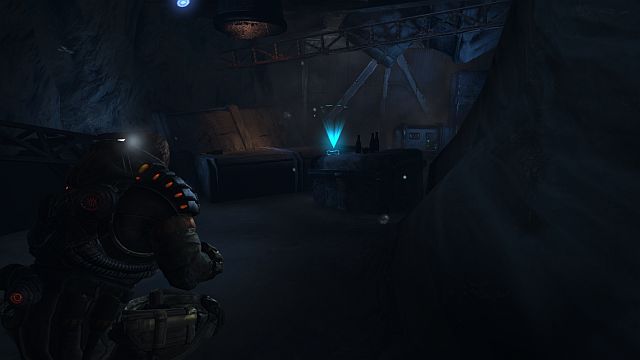
 Gonroe's opened jaws are the best place to plunge your knife into.
After some time, you will have to leave the machine. You will be attacked by an akrid. To liberate yourself, you need to complete a QTE event. Tap on the key that the game prompts you to use [F], and then, use the mouse to target the jaws to use the knife and finish your struggle. Not, it is time to shoot ice off your machine. At the same time, you should watch out and dodge the monster attacks. Remain in constant movement. After you are done removing the ice, return to your mech and resume following the marker.
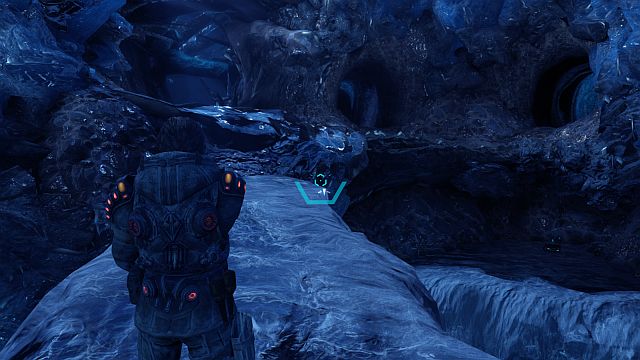
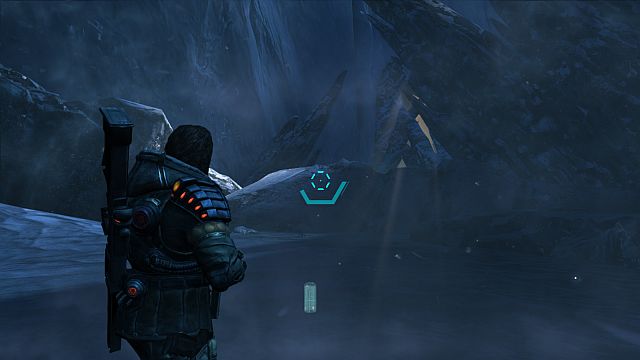
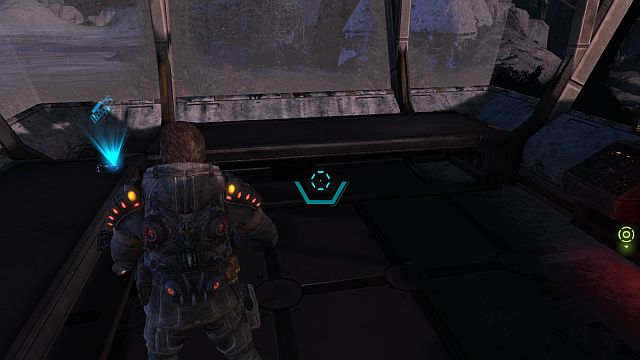
After you reach the edge, use the hook and keep along your path. Jump down in the spot shown in the above screenshot, which will allow Jim to use the hook safely. Keep repeating until you reach your destination at the very bottom.
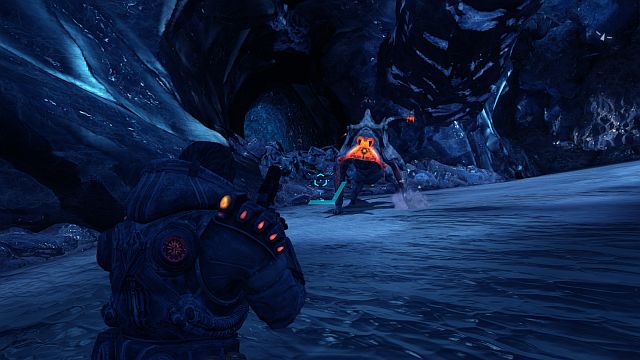 These two are not going to be that easy a job.
You are up for a small skirmish with two akrids. Just like earlier, remember to aim at the orange are (the jaws), avoid their charges [space bar] and remain in constant movement. Nearby, you will find two crates where you can replenish your ammo, if necessary. Once you defeat the two enemies, another one, a bit bigger, will enter. In a similar manner, keep avoiding its charges and, additionally, watch out for its attacks with tail. After you are done with this one, set up your outpost.
 A picturesque view on the Bailey crossing.
Note: Throughout this mission, you will be able to find a lot of logs. If you do not want to miss them, see the Collectibles chapter.
You will be able to start this mission after you watch a longer cutscene. Hop into your mech and go towards the Bailey Crossing. Drill the ice in the pump, and leave to repair. Watch out for the enemies, because this area is swarming with them. To the left of the entrance onto the main rig, you will notice specialized components. Go then to Bishop's Wake. Keep cutting through your path with the drill and reach the Shackleton's Peak.
 Stairs to the malfunctioning stations.
Keep going ahead and dismount your mech at the stairs to climb them. Your task is to repair 5 stations and bring them back online.
Activate the docking panel and go through the tunnel. At the end of the tunnel, you will find 2 akrids. Again, shoot at their vulnerable spots. You can also remain above and continue fire from there but, be careful because the monsters can reach you there also. After you are done with them, use the hook to reach the second station (to the left of the spot shown in the above screenshot). Activate the console, go towards the third station and complete a QTE event on your way there.
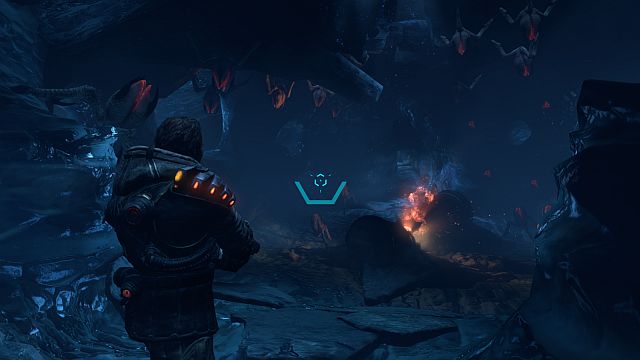
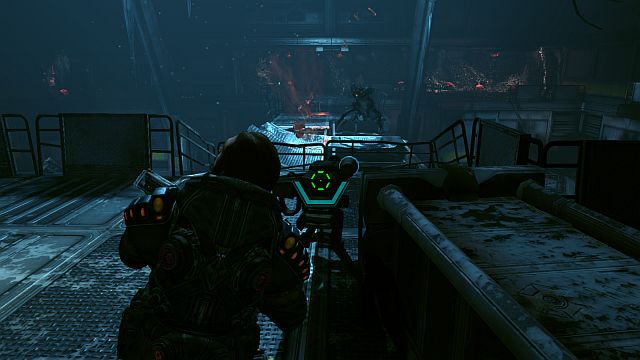
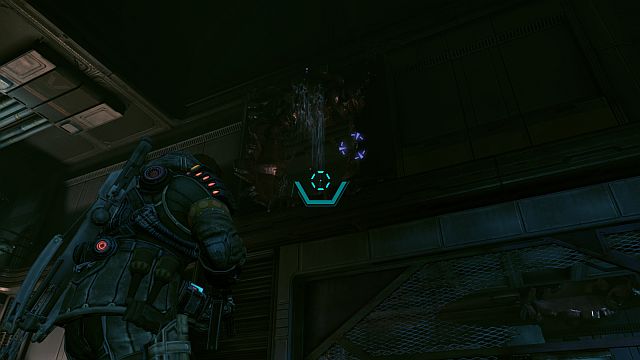
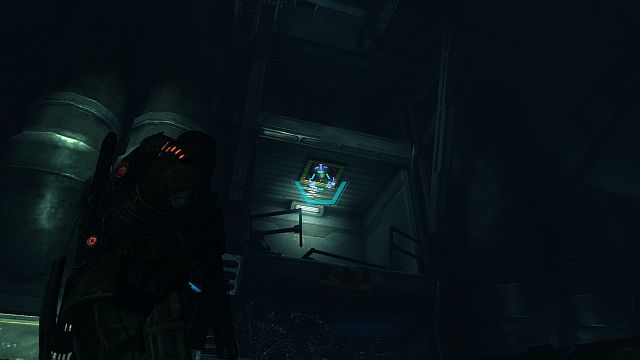
Above, kill several akrids and destroy their nest. Behind this location, there is a passage. Proceed ahead, kill several enemies and watch out for the exploding eggs. Squeeze between rocks to reach the third station and activate it. Keep going higher and higher to reach the fourth station. On your way there, you will be surprised by some airborne akrids. Exterminate them in cold blood, and destroy the place that they come out of (the screenshot). As you go ahead, you will encounter more of them. Keep destroying the genessas and watch out for the projectiles discharged by the airborne enoses. Finally, you will reach the fourth station (use the hook), which you need to start. Use the hook again to reach the platform above and switch the tracks.
Go towards the last one of the stations. On your way, you will get into a room full of enoses. Destroy the genessa, and take the passage behind it. Keep going ahead, to the place where you will have to get through pipes (the screenshot). Here, you will have to pay special attention to the bolsepias that spit from afar. Climb to the scarp above, where you need to destroy the geness. Then, climb onto the top of the Top of the Shackleton's Peak. Go towards the reactor and activate the fifth station. Keep climbing up the stairs.
 Beautiful landscapes are definitely one of the chief assets in Lost Planet 3.
Once on the surface, approach the relay tower and fix it. After a short cutscene, you are going to fight a tough battle with an akrid that resembles a large crab.
Remember that you should remain in movement at all times and perform dodges. Your target is the orange back. First, you need to shoot away all of the spikes and finally, the crust. After a dozen or so of well aimed hits, this area will become vulnerable to attacks. Take advantage of the situation and keep shooting there. You will find ammo in the crates scattered all around the "arena". After you defeat the monster, restore energy supply and mount your mech.
Tip: At all times, try and face vorgg. When it is getting ready to charge at you, you should be prepared to dodge this attack. After you dodge, you still have a moment to attack his exposed back.
 It is a lot of fun to cut up the giant crab with the drill.
You will have to fight again with the giant crab. This time around, however, it should be easier because you are in your mech. Keep blocking attacks [Q], and grab the giant pincers with the claw, after which you should drill through using the drill. The battle hinges on blocking the attacks and using the drill at the right moment. Try to direct your drill towards the monster's orange area of the body. Finally, plunge it into the akrid's back.
UWAGA: Note, if your machine's durability meter drops to zero, you will have to fight on your feet, up to the moment when the mech performs auto-repairs.
Now, without being bothered by anybody, close the valve. On your way back, you should check up with Doctor Romane. Mount onto the mech and go towards the spot where you will watch a short cutscene.
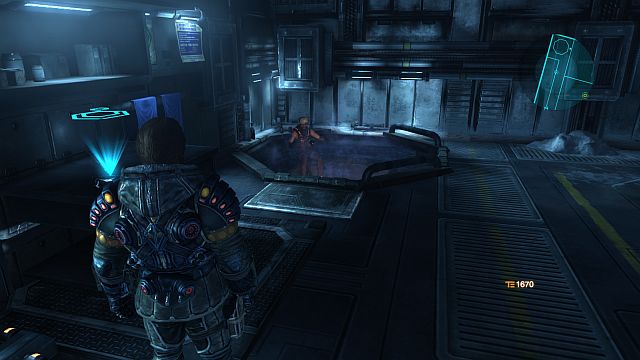
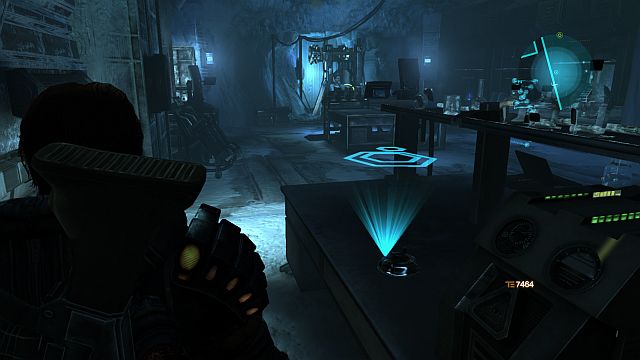
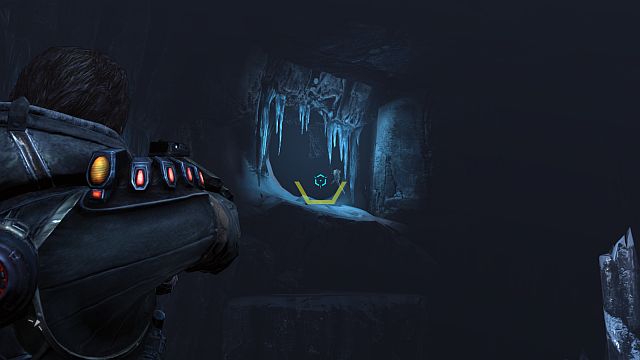
From Doctor Romane you will receive a DNA probe, which you can use to gather information about various akrids (See the Bestiary). At first, however, you need to try it out. Follow the markers. Make your way into the akrid nest using the hook in the spot shown in the screenshot. There, you need to defeat several enemies. Reload (by pressing and holding down the [R] key, take a shot at the eggs, collect DNA and return to the Doctor. You will receive the next objective on the radio. You need to find certain parts needed by Ola to craft an upgrade for you. Approach the Bailey Crossing. Find the part that you need (it is marked on the radar). You can also collect sepia's and bolsepia's DNA that are plentiful around here. Return to the Hangar and equip your mech with a hoist on Ola's workbench.
Across Bailey Crossing make it to the Marshall's Gorge. Use the hoist where necessary [Z]. Exit the mech and go ahead. Use the hook to climb down safely. Watch out, because you will jump into a location full of akrids. Keep destroying the nests that they emerge from. Behind one of them, on a ledge above (where the bolsepias keep shooting at you from) there is a passage that will take you further. If necessary, you will find ammo boxes on the scarps on the side. Keep going towards your destination until you reach the spot where you are supposed to set up a thermal post.
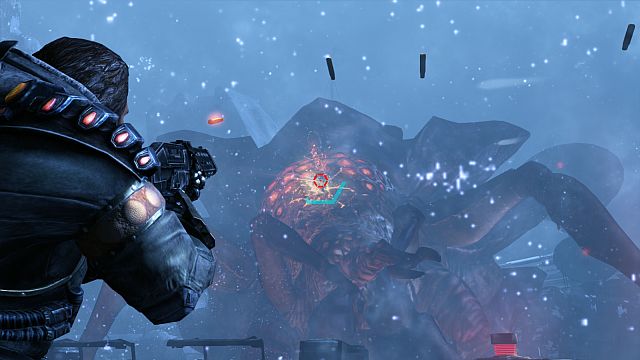
 Vorgg can land quite a blow.
Here, you will encounter the crab- akrid again. The way of dealing with it is the same as in the case of the previous encounter: keep shooting at the icy spikes on its back until they fall off. Then, load a dozen-or-so bullets into its exposed crust, and then at the orange region, where he is most vulnerable. Perform frequent dodges, at the same time and use grenades. If necessary, make use of the ammo crates. After you win, set up the thermal post and walk over to the Unknown Structure.
NOTE: If you want to fill in your bestiary, you can collect the vorgg DNA, before you kill it.
 Something is lurking behind that door.
Go ahead and take the elevator to a higher level. After you open the safety door, you will be attacked (QTE). Go ahead and watch out for taarkas Get into the room where you need to activate the generator. Return to the Marshall's Gorge. Activate the consoles marked as targets and go into the Power Plant.
During the exploration of the Unknown Structure.Keep following the only possible path. You will reach a place where you will be attacked by akrids that shoot "lasers". The best method to fight the male-Wardeyes, because this is the name of the monster, is not to come too close to them and conduct fire from behind a cover. A well-aimed grenade is definitely going to make the situation more advantageous for you. Use the panel to open the next door and after a short battle with taarkas go ahead. You will fall down so, use the hook to make it higher. Walk over the ledge (while holding down the [W] and [A] keys at the same time), and use the hook to make it higher.
You will reach the room shown in the screenshot. Inside, you will have to fight a battle against several Wardeyes and taarkas. It would be best if you stayed behind a cover and conducted fire from there. After you secure the room, from the table in the left-hand corner, collect the specialized component. Replenish your ammo and go ahead through the ice-bound passages, until you reach the place where you can activate the door control panel. Watch out because the place behind the door swarms with t taarkas. Destroy the eggs and go towards the automatic gun.
 Awaiting your company.
Repair it and start its power supply (the lever behind the gun). Watch out for the approaching onslaught and you'd better keep in mind that you are going to need more than the gun only. Remain in motion and pay attention to the approaching Wardeyes. Around you will find ammo. After a short while, and after you repel the onslaught, the door will open . Walk through the door. You will enter a room where you need to activate several panels. After you do, you will receive a message of an intruder in the base. After that, several Wardeyes and taarkas will dash into the room. Keep firing at them from behind a cover and do not hesitate to use grenades (you can replenish your ammo at the crates in the room). Return to the place that you came from (the one with the gun.
After a short cutscene, you will have to walk around the bridge, on the left. Watch out for the Wardeyes and taarkas, because there will be quite a lot of them around. Eventually, get down (the end of the road shown in the screenshot) and start the door, then head towards the Marshall's Gorge. Open another large door, jump into the mech and stand on the platform an which you will ride to the surface. Jump out of the machine and open safety door. Follow the markers into the room with the main computer and download the backup data.
Well, obviously, it could not be that easy. You will have to face a monstrous akrid. Lay fire on its glowing orange back. Avoid its tongue attacks and destroy the eggs that it is spitting out, because soon taarkas will hatch from these (and they can make quite a mess). You can replenish ammo next to the crates all around the place. After you win the battle, return to your mech. It will turn out that you still need to hack the elevator blockade. Go to the control center (use the hook). It is a standard thing that you should watch out for taarkas while doing this. Activate the elevator and return to your machine. On your way, you will be up for another fight with the large Hiveen. Keep performing the same actions as you did just a few moments ago. The only difference is that you now need to avoid its leg attacks instead of tongue attacks.
 The most hideous creature on the planet.
Return to your mech. On your way there, you will have to take a simple QTE and a few taarkas to eliminate. Watch out for them especially in the narrow passages that you will be going along. On the platform, you will have to fight another battle with a huge akrid. Implement the tactic that you have already learned and enrich it with well-aimed grenades. After the battle, fix the elevator, on the left of the spot where the battle took place, and return to your mech.
NOTE: In the 3 battles described above, you can collect the Hiveena DNA before the actual battle, although it is not the easiest of actions to perform. It is best to start targeting the creature from the very beginning, right after it appears. Try and destroy the eggs that it spits out with grenades, still before taarkas hatch.
 Someone has just lost his nerve.
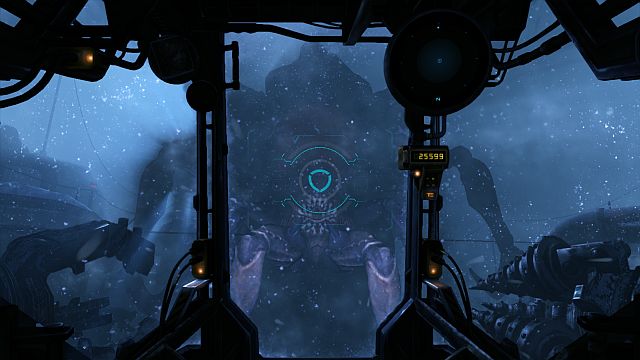
Finally, as you are comfortable in your mech, you finally need to kill the Hiveena. To do that, at the right moment, press the block key [Q], use the hoist [Z], to drag him closer by the tongue, and plunge your drill into its orange back [RMB]. After you are done, you can take delight in the interesting cutscene.
 Jim Peyton as Sam Fisher.
Approach the edge and jump down. Keep going down. Walk through the door and keep ahead, over the pipes. Take the elevator to a platform above, walk forward a bit and take another elevator to get down. Then, walk through another door and walk over the pipe to eavesdrop on the conversation.
 A journey into the unknown.
After you regain control over your character, you will receive an objective to search through the Killing Fields. Go ahead. Use the hook to reach the upper level. Fix the generator and keep going towards your objective, while minding the bolsepias and their projectiles.
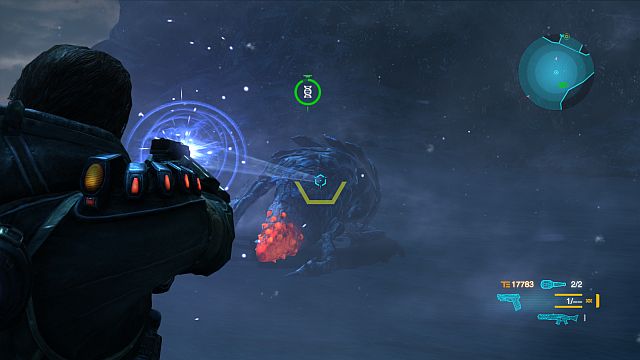
You will reach the place shown in the screenshot and attacked by several akrids. Watch out for the attacking gonroe, dodge their attacks and keep shooting at the orange abdomens. After you clear the area, go ahead until you reach your machine. Clear this area and fix the mech.
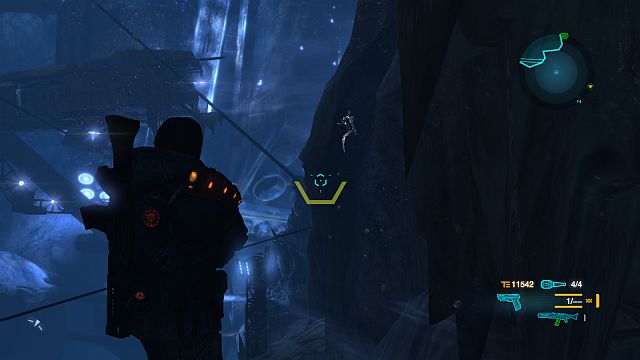
Having fixed the robot, go ahead and defeat the enemies that you encounter on your way. A moment later, you will reach Pickett's Folly. Go ahead in the midst of the bursting lava to reach the place shown in the screenshot. Use the grappling hook to reach the scarp. Walk through the large pipe and watch out for akrids. After you walk out of the pipe, you should go up (on the left of the pipe's outlet, you will find an audio log. On the platform, there is a specialized component. Use the hook and use the rope to get to the rock to the left of where you are standing. .
 The base of the tail is vulnerable to attacks.
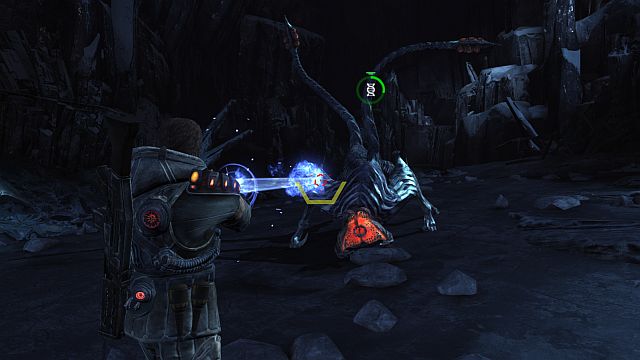
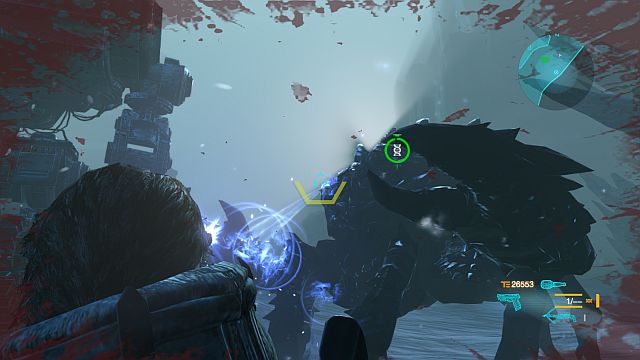
You are up for a fight with tangaant, an akrid that resembles a scorpion, here. You need to watch out not only to its attacks, but also for the venom flowing out of the stinger. Your target is the orange tail. Implement the standard tactic: remaining in motion and dodging are the key to success. After you shoot the tail out, keep shooting at what is left of the beast until you finish it off. Collect the medicine from the crate and return to your mech, taking the same way that you took to get here. Watch out mainly for the bolsepias.
Go towards the location's exit, cross the Killing Fields and towards Mira, who is waiting for you . Follow her. After the attack on the base, keep following her, open the gate and get up (the screenshot) You are up for a fight with sieragz (you can collect its DNA). Watch out for the "flies" (ermmlids) that the monster releases, and either eliminate them or dodge them [the space bar]. Remain in constant motion and keep shooting at the orange area for as long as the akrid remains alive. Talk to Mira, who is waiting at the gate.
You now have a moment for yourself at the Forgotten Camp. You can take a look around the camp in search of logs and talk to people here. If you want to, you can also replenish your supplies here or buy upgrades for your weapon. You can also activate the hunt for the albino taarkas here(see: Side Missions). Once you are ready, approach the gate out into the Killing Fields and talk to Mira.
 Your machine at its best.
At first, go towards the Pickett's Folly, and walk over to the Defense System . Take the elevator down (it is to the right of the entrance).
You will reach the room shown in the screenshot. Watch out for the male-Wardeyes that will be trying to get you from behind. In the left corner of the room, there is a panel that you can use to open the door. The door is located to the right of the entrance to this room. Follow deeper after you walk through.
 A well-aimed grenade and it's done.
You will walk into a room with a lot of sepias and bolsepias in it (a grenade should do them well). Use the hook to reach the upper level. Once there, destroy the nest that spawns akrids. Go towards the main elevator along the passage that the explosion reveals. Keep going ahead to reach the abovementioned elevator.
Once you take the elevator, you will make it into a room full of flying enoses. Eliminate quickly the 2 nests that spawn new akrids, and deal with the ones that remained alive. It would be good to fix the automatic gun that is standing in the room. Then, activate the entrance to the armory, return to the room where you have fought enoses, to fight another battle. This time around, you will have to face Wardeyes (both males and females). Watch out and do not let yourself be surprised from behind by the males, and shoot at females from behind a cover. At this point, you will find grenades useful. You will find ammo in the room that you opened the door to (there are also a T-energy container and a specialized component there). Eventually, fix the entrance door and escape to the Forgotten Camp quickly, to talk to Mira.
 Finally, some warmth on the planet.
You will receive a magnetic upgrade to your hook, which will allow you to get into different, previously inaccessible, regions (e.g. the ceiling in the greenhouse, where you need to talk to Mira's father). Talk to Soichi mentioned before (you will receive from him a task to find keepsakes; more in the Side Missions chapter). Return to Mira, and then to the Hangar.
 Kovac's research pissed akrids off
On your way there, you will learn that the base has been attacked by akrids. Once you make it there, you should help clearing out the upper deck. Once you are done, take the elevator to level 1. There, you will encounter sepias and bolsepias in large numbers so, remain vigilant. Keep cutting your way through until you reach the workshop where you will have to help eliminating akrids. Return then to the main level (level 2) where you will have to face Wardeyes. When the situation is contained here, set out for the Lab (entrance through the barracks on level 3).
 It is time to destroy Kovac's device.
Once you get there, use the elevator to get to a lower level, and continue deeper into the complex. Clear the Lab of taarkas and Wardeyes (in the room, you will find two ammo boxes). Keep going towards Doctor Romane. Then, quickly, approach the device in the lower room and destroy it (a few shots should do). Now, talk to Braddock (level2), and to Ola (level 1), Who will "upgrade" your mech. Return to the Main deck and hop into the machine to try out Ola's new toys.

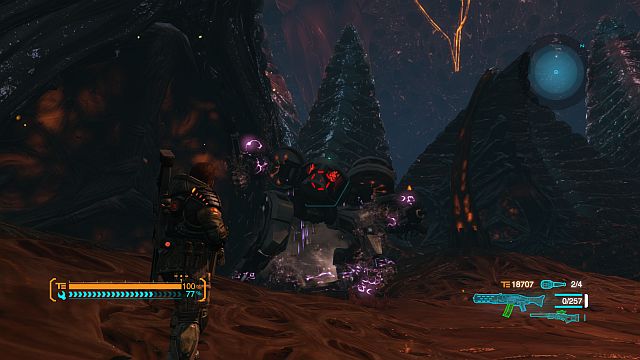
Go in the direction of Bishop's Wake, to the place where you are supposed to set up the rig. After you set it up, you will have to defend this place. Watch the blue bar in the bottom-left corner that shows your mech's durability. Bolsepias will be the first ones to appear. They will be shooting at you from above, from the two icy ledges shown in the screenshot. Then, they will be joined by sepias. Around the 40% of the orange bar, there will appear gonroes, which it is best to deal with using grenades. You should watch out for both the ones attacking the mech, and those trying to kill you.
 Starring: vorgg again.
After you take 3 waves, the time will come for a small finale in the form of vorgg. Remember that its back becomes vulnerable only if you shoot off all of the protective spikes on its back. A good method is to eliminate this enemy by rendering it motionless with a grenade and shooting with automatic weapon at its back then. After the victorious battle, return to your mech and go to the Shackleton's Peak to talk to Romane.
However did this giant get in there?Then, using the elevator, go to a higher level to the place where you have fixed the relay antenna in one of the previous missions. After you leave the elevator, on your left, you will find your mech and on the right, there is a specialized component. You now will have to fight a tangaantem. Keep blocking its attacks and drill through its tail The battle, in general terms, consists in blocking the akrid's attacks at the right moment, and inflicting damage with the drill. After a while, the tangaant will make it back to the cave, and the are will swarm with the airborne enoses. After you defeat them, the scorpion-akrid will return to the battlefield. Keep implementing the block- drill tactic until you finally separate its tail from the rest of the body. At this moment, start hitting the creature with the drill [T] and drill through whatever is left of the tail.
 In the eye of the hurricane.
Take the marked position and shoot your grappling hook towards the tower. After you leave the machine, start shooting at the airborne akrids and collect the DNA from one of them. Then, return to the mech and to the Doctor, and after a short conversation - to the Hangar. Claim the fixed filter from Ola.
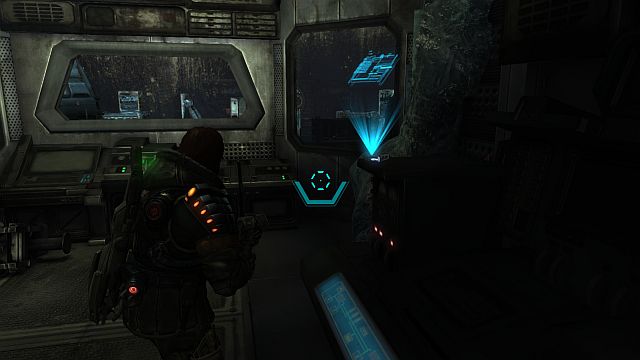
 A small warm-up before the next mission.
Take the fixed filter to the Forgotten Camp and talk to Mira. Enter the mech after the cutscene and go to the Bailey's Crossing. Fix the cranes and return to your machine quickly.
It is time to hunt for big game. The only vulnerable spot on the gorevorgga's body is its underbelly. Fight with the monster is a repetitive scheme: while in your mech, block its attack at the appropriate moment and use the claw to grab its arm and pick it up to expose the underbelly.
 "Arm-wrestling".
Once you rented it motionless for a moment, jump out of the mech and start shooting at the exposed orange abdomen, which it is also withy to serve with grenades. After each such action, the enraged gorevorgg Will make your machine immovable for a moment. You should then watch out for its attacks, after which hop back into your machine and repeat the above actions until the akrid falls dead.
NOTE: It is a good idea to collect the goverogg's, DNA if you want to round out your bestiary.
 At this point of the game, the sieragz should be no challenge for you.
After you regain control over Jim go to talk to Braddock, and go to Ola's workshop then. After you receive upgrades from him, go on your mech to the White canyon Junction, where you have helped Laroche. Charge the first battery and get down to a lower level. You will have to fight a sieragz here. You will defeat it by destroying its cores (the orange "bubbles" around its head) and then, by attacking the orange area that they expose. You can do that while remaining in your mech, or in a more traditional manner, by using your weaponry. Regardless of the method you adopt, after you win the battle, charge the next battery and start the generators.
 Bolsepias like firing at Jim at a distance. They must be too scared to come closer.
Go towards the Shackleton's Peak and talk to Doctor Romane. Next, go to Pickett's Folly. Once there, set up the platform, which you need to defend against akrids again. Keep repelling the consecutive waves of sepias, bolsepias, the airborne enoses, to finally face the herds of gonroes and their stronger variations - the suwaaks. It is best to fight the latter with grenades.
 Closer and closer to learning the truth.
After you repel the last wave, go for the cave and walk into the dead Zone, where you should set up another platform. Once you regain control over Jim return to Romane. After the cutscene, you can start performing the final mission. To do that, talk to Ola.
NOTE: after the final mission starts, you will be no longer able to collect logs, complete your bestiary, or find the albino taarkas. You will also lose the opportunity to perform all of the side missions assigned toy you. That is why, it is a good moment to find all of the Collectibles and complete the missions that you want to complete.
 Ola is a good guy.
After you leave the elevator, go towards the peak. Along your path, you will encounter several NEVEC soldiers (which is a nice change after the battles with akrids), that are not too much of a challenge. The best way to eliminate them is to lay fire on them from behind a cover. Watch out for the grenades thrown in your direction. After a while, you will reach the spot shown in the screenshot. Take cover behind the crate and clear this area. Then, climb to the top of the Shackleton's Peak.
Somewhere on the top all of us will be reunited.Start the console and climb to the top. After you get there, hide behind a cover immediately. Here, you will have to eliminate quite a group of soldiers. At first, you need to deal with the ones that keep changing covers. Use grenades and watch out for the ones thrown by the enemy soldiers. After you eliminate two enemy waves, go towards the open gate Shoot the last one of the enemies and activate the console.
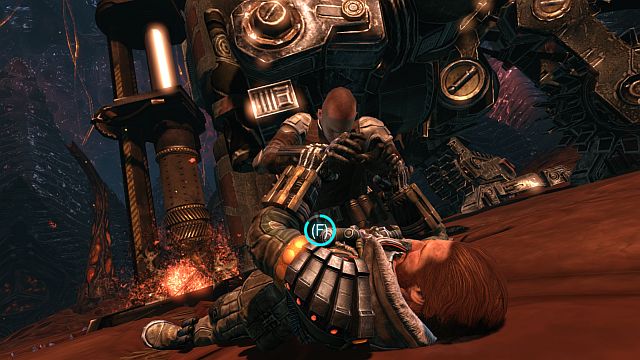
Enter your mech and set the antenna. Things will get trifle complicated and Laroche will enter the stage, and he will be trying to stop you. Keep clocking his attacks and hit with your drill. Listen to Ola's commands, keep grabbing the enemy mech by its arms, and destroying the enemy's consecutive power sources.
 The spots on Laroche's machine which you should grab.
The key to success is to block at the right moment and land your own blows, and later - to grab by the mech's arms and use the drill to destroy the power source highlighted in orange.
After the successful battle, you will regain control over Jim in the Forgotten Camp. Go ahead to find Mira. Watch out for the NEVEC soldiers, they will be especially plentiful in the area shown in the screenshot. First of all, eliminate the ones that are the closest to you. Then, take to the rest of them. Keep going towards Soichi's chamber, and kill several more soldiers along your way (they will be firing at you from above so, watch out).
Things got really complicated .
After you regain control over Jim, pick up the headset from the table. Escape from the cell. On the way, Peyton will pick up a knife. You should be going towards the exit (the torn fence). On your way, you will be attacked by a taarka (QTE).
 NEVEC messed up with the wrong guy.
According with Braddock's suggestion, you should retrieve your gear. Keep going towards the elevator and fight a NEVEC unit along your way. Reach the elevator and get to level 3. Save Laroche's ass and go towards another elevator, this time ride to level 2.
 Jim never leaves his friends in need.
Again, watch out for the NEVEC soldiers. As quickly as you can, go to Braddock's office. After a short conversation, enter the mech and exit the Hangar towards Coronis.
 The master plan has worked.
Your task now is to plant bombs in 3 marked areas. Then, enter the elevator onboard the mech and watch an interesting cutscene.
 The Nushi's insides are, not necessarily, a welcoming place .
Well, there is one more task left to perform. Set out to Nushi. Go deeper and deeper, through the consecutive valves (and destroy things that resemble yellow clots to be able to use the electric pulse to open the valve). You will reach a moment when you will be able to use your grapple. Leave the machine and keep going ahead. On your way, you will be surprised by bolsepias. Eliminate them just like the abovementioned "clots". Return to your machine and open the valve. Walk into Nushi's heart.
Nervous fibers are a good cover in the final battle.Now you will have to fight a final battle with Isenberg. Keep hiding behind nervous fibers. Thanks to it, whenever Isenberg hits such a fiber with laser, he will be attacked by akrids that will, at least for a moment, draw his attention away from you. Attack the orange spots on the shoulders of his mech. They become active when he is getting prepared to attack.
A few well-aimed shots will result in a some sort of infighting (the screenshot) Then, keep shooting at his central (also orange) part. Isenberg will first launch bombs, rockets and then lasers at you. The key to success is to dodge his attacks and to make him irritate Nushi's nerves. Attack him only when he is busy fighting off akrids. Aim at the orange parts and then, at the middle part of the torso. Repeating this action for several times will ensure you with victory. Remember to prevent him from destroying your mech, in which you can additionally replenish ammo.
 Isenberg will not give up without a fight.
The final moment will be a short series of QTE events. After it is done, you can sit back comfortably and watch the game's outro. You have just completed Lost Planet 3. Congratulations!
 Jim's terminal breath.
This side mission activates after you complete the second mission and return to the HQ. You simply need to visit the quartermaster in the Hangar (it is located on level 1) and check what he has new in stock.
 Doctor Kovac is conducting his experiments in the Lab on level 3 of the Hangar.
Kovac's lab is in the Hangar on level three, behind the barracks. The doctor will task you with the collection of samples of 20 sepias. You will find them without any problems in most locations. Return to the Doctor to receive 2000 T-Energies.
As you enter the Bailey's Crossing for the first time, you will receive information from Braddock about the ice-bound cranes. They are located right next to the central platform. You can start them with the mech. Then dismount the machine and fix the pumps. For this "complicated" action, you will receive 2500T-energies.
 Collecting the DNA will enrich the bestiary.
This mission becomes active when you receive a special DNA probe from Doctor Romane which you can use to sample the akrid genetic codes. To learn more, see Bestiary.
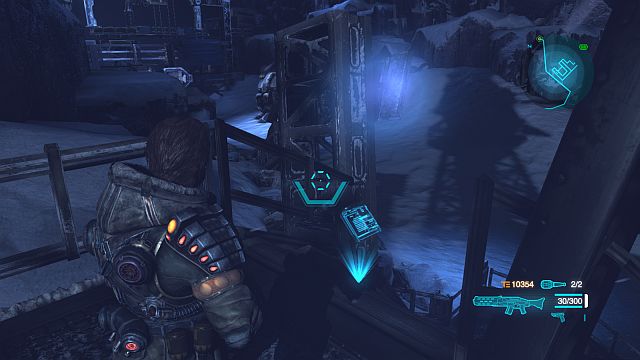
 A place for a post in an akrid nest.
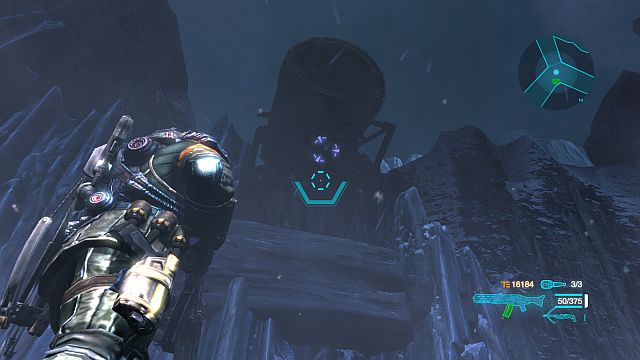
This mission becomes active after you bring Ola a component in one of the main missions. You receive a device that will help you find, with audio signals, a suitable location for a thermal station. To complete this mission, you need to determine 5 suitable locations for such stations. The first one is on the Shackleton's Peak, in the spot in which you collect DNA for Romane.
 The spot for a post is on the rocky ledge in the Bishop's Wake.
You can establish another station in the Bishop's Wake. Right after you enter this location, use the hoist to get to the rocky ledge on the right.
 Among akrids once again.
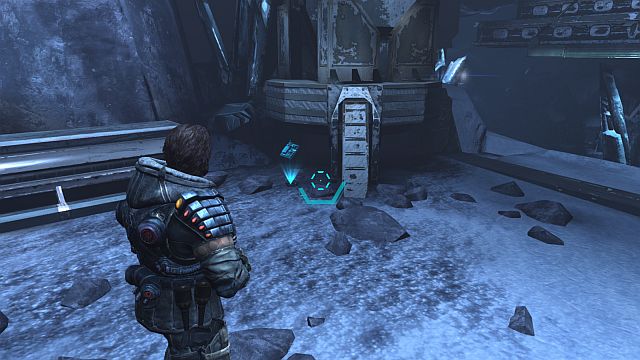
Another spot where you can establish a station is Pickett's Folly. Go into the Western part of the map and use the magnetic hook to make it into the hidden cave.
 You are going to need a good hoist to set up the fourth station.
You can set up the fourth station in the Killing Fields. You are going to need the improved hoist (which you can obtain from Ola). After you enter the location, still before you enter the Forgotten Camp, you will be able to use the hoist to make it onto the scarp on the right.
 Watch out because there is a herd of gonroes around.
You can set up the last station in the cave which the narrow corridor in the Bailey's Crossing leads to. You will receive 3000 T-energies for setting up all of the posts.
NOTE: All of the abovementioned stations, and the one in the Diaz Cavern can be emptied to receive 2500 T-energies each time. Whenever you can harvest a given post, you will be notified about that with an appropriate entry in your journal.
 A shop in the Forgotten Camp where you exchange taarka DNA for upgrades.
A detailed description of how to activate this mission, and how to find all the taarkas, has been included in the Albino Taarkas chapter.
 Fixing the pipeline used to transfer gas from Russia is one of the most important missions in the game.
The mission becomes available after you receive a blowtorch from Ola, at the entrance to the Shackleton's Peak. Simply, approach the marked pipeline and weld close all of the cracks by directing the blowtorch's flame in the correct way. You will receive 2000 T-energies.
The place where you find the Silver Flask.You will receive the task in the Forgotten Camp from Soichi. The first memento is a Silver Flask belonging to Juro Katsuragi. You will find it in the Marshall's Gorge, where you will reach the rocky ledge using the winch from your mech. Continue exploring inside, until you reach a place where you will be able to use the magnetic hook. You will get into a room where you will find the memento on a soldier's corpse.
 Checkmate.
Knight Chess Piece left by Lagan Cherupara is at the Power Plant. It is in the room with many platforms in it. At the highest level, you will notice a hole in the wall on the right. You will get there using the magnetic hook.
 The dog tags are next to the edge.
Another memento are the Rusty Dog Tags, that belonged to Lt. Mason Pickett. You will, of course find them at the Pickett's Folly. Make your way to the rocky ledge using the hoist in your mech. Then, walk over to through the pipe and use the magnetic hook to make it onto the top of the tower. Jump down to a ledge, where there are the mementos.
 A touching moment.
The last memento is the Gold Brooch left by Silvia Herrera. In the main room of the Security Installation, you will find a place where you can use the magnetic hook. The memento is in the room that you fall into. It is also a good idea to turn your attention to the weapon that you can find here.
After you return to Soichi you will receive an upgrade to your suit.
Not all of the logs are available to find from the very beginning of the game. Some of them become available only after you receive the appropriate improvements, like the magnetic hook or the mech hoist. The other ones become available as you make progress in the storyline and discover new locations (e.g. the Forgotten Camp)
 The room at the back of the room where you talk to Braddock and Kovac for the first time.
Log 1: After you have the first conversation with Braddock, walk over to the room behind you, in the direction opposite to the elevator.
 Next to a man warming himself up.
Log 2:At the barracks on the left of the entrance.
 Entrance to the barracks.
Log 3: Similarly, at the barracks, opposite the entrance.
 Gambling is blooming.
Log 4: Once you gain access to the Lab in the newly opened zone, right next to the barracks, at room S6, behind the blue curtains.
 Kovac's research in full swing.
Log 5: After you take the elevator down, in the central part of the Kovec's Lab.
 The akrid attack left no trace.
Log 6: After the arrival of NEVEC forces, at the newly-opened part of the Lab.
 A hot coffee break.
Log 7: On the table, near the group of people and the elevator.
 Ola is already waiting.
Log 8: on the table, opposite the mech's bay.
 Mech in the background, a profile view.
Log 9: Available after the arrival of the NEVEC forces. It is located on an empty platform, net to the S5 station.
 The log is hidden among the crates.
Log 10: Available after the arrival of the NEVEC forces. It is near the second elevator, there is a NEVEC Soldier next to it.
 The blue curtains symbolize homesickness.
Log 11: Also available after the arrival of the NEVEC forces. Next to Braddock's office in the room behind the blue curtains.
 New regulations ban smoking from utility areas.
Log 12: In Ola's workshop.
 Somebody has to work.
Log 13: After you leave the workshop, turn left next to the worker.
 It is interesting why there are no targets here.
Log 14: At the quartermaster's office.
 A place where the next log is hidden.
Log 15: After you leave the Hangar, turn left and go a bit downwards. Turn left then to enter a small cave.
 Interesting who left a log at such a secluded place?
Log 16: you will find it while searching for the workers, on your way back to the mech on one of the scarps, which you can reach thanks to the hook.
 Just do not look down.
Log 17: It is on a platform a bit to the side, on the left of the central one. You will get there using your hook.
 To reach the next log, you need to use the ice remover.
Log 18: from the main platform, right after you climb onto it, you will be able to make it higher using the magnetic hook. The log is in the block of ice next to a small room.
 You will also find ammo in the chest.
Log 19: It is in the chest, behind the thermal post, deep in the cave.
 The Chamber of Secrets without the basilisk.
Log 20: Where you will get to the rocky ledge, using the mech's winch. Continue your exploration inside, until you reach into a place where you will be able to use the magnetic hook. You will make it into the room where the log is.
 At any cost.
Log 21: Right after you enter the location in the corridor ahead.
 You will receive the hook from Braddock.
Log 22: It is in the room with many platforms. In the place where the Wardeyes come from, use the hook to make it to a higher level. The log is behind the pipes.
 A place occupied by akrids.
Log 23: At the other side of the collapsed bridge. Among the akrid eggs.
 Only something big could make such a hole.
Log 24: It is in the room with many platforms, on the higher level there is a hole in the wall on the right. You will get there using the magnetic hook.
 There are a lot of akrids of course, in the pipe.
Log 25: Using the winch from the mech, you will reach a scarp around the center of the map. The log is on the ground to the left of the place where you come out of the pipe.
 The place where you should use the magnetic hook
Log 26: Just like above, use the mech's winch to reach the scarp around the center of the map. Then, walk through the pipe and use the magnetic hook to make it higher. The log is on the next rocky ledge below.
 Another spot where the magnetic hook is required.
Log 27: On the Western end of the map, you need to use the magnetic hook in the marked area. The log is on the ground.
 At the wall, apart from the log, there also is a memento and a nice weapon.
Log 28: In the main room, you will find a place where you can use the magnetic hook. The log is in the room that you fall into.
 The greenhouse's roof covers Mira's log.
Log 29: In the greenhouse where you are supposed to talk to Soichi, hang down from the ceiling using the magnetic hook.
 A well-hidden Log.
Log 30: After you enter from the Killing Fields, on the left under the stairs.
 The place to use the hoist.
Log 31: While standing in front of the entrance to the Forgotten camp, turn left. Walk forward a bit and you will reach a place where you can use the mech's winch. Walk into the room, where you will find the log.
 It is a rare view, no attacking akrids here.
Log 32: After you discover Nushi you will find it in a block of ice, to the right of the spot where you performed the drilling. .
 A way to the place where Diaz is lying.
Log 33: Go down the stairs that you climbed onto earlier in the game. Keep going over the snow and jump down to the rocky ledge below. While there, you should notice a place where you can use the magnetic hook. Continue your exploration until you make it into a small cave there, next to Diaz's corpse, you will find the log.
 Road to Diaz's destroyed machine.
Log 34: Return into the region of the place where you had to start the third station. Use the magnetic hook twice to get down where you will find the log next to the wrecked machine.
 It is easy to find on your way to the Main Deck.
Log 1:It is in a small room that you pass by on your way to the elevator.
 On the table, at the wall.
Log 2: In the barracks.
 It must have been left by someone who likes to drink.
Log 3: You can find it only after you gain access to the Lab. It is in a newly-unveiled area to the right of the barracks, in the kitchen.
 Another conscientious worker.
Log 4: Opposite the elevator, a bit to the right, over the stairs downwards.
 This shovel is probably used for leaning against
Log 5: After you leave the mechanic's room, turn left and to the right to the next room.
 On your way to the cave of evil.
Log 6: After you save Laroche you will receive a mission to go to the Diaz's Cavern. It is behind the crate on the left, along your way to the cavern.
 Since Jim fixed them, the pumps do not stop working.
Log 7: n the central platform, right after you mount it.
 On your way to the malfunctioning stations.
Log 8: On the tower on the left, along your way to the first rig which you need to activate in the main mission.
 While standing in front of the stairs, turn around to the right.
Log 9: Along your way to the second station, in the block of ice on the elevation which you reach the station from using the hook.
 Time to be back on track.
Log 10: After you activate the fourth station, on the upper platform in the place where you need to switch the tracks.
 The log is hidden behind the crates.
Log 11: On your way to the fifth station, after you walk out of the big pipes, where you are attacked by a big swarm of akrids. It is before the scarp that you need to climb onto to reach the top of the Shackleton's Peak.
 In the background, there is a teleport, OF COURSE
Log 12: On your way to the fifth station, turn left in front of the reactor. It is among the rocks.
 A reward for defeating the vorgg.
Log 13: After the battle with vorgg, in the spot where you switched power supply for the last time.
 The area where you go downwards.
Log 14: Examine the crack in front of the entrance to this location and find the place where you can use the hook. The log is on the lower rocky ledge.
 You are going to need the magnetic hook.
Log 15: Right after you enter through the large door and perform the "danger scan", on the left of the entrance, you will reach there using the magnetic hook.
 Just do not pull the lever!
Log 16: Right after you enter a bigger room, on the left on the shelf.
 Another log hidden behind the crates.
Log 17: As you go ahead, you will make it into the room where there is a larger number of taarkas. The log is on the ground behind the crates, on the right of the entrance.
 Containers with T-energy scattered around.
Log 18: In the Southern part of the map, on the ground among the containers with T-energy, close to the passage to the Security Installation.
 I forgot what this camp is called...
Log 19: to the right of the gate damaged by the sieragz.
 I wonder if they sell on tick
Log 20: On the internal yard, a bit off the entrance to the right.
 After you leave this place, a small brawl will start.
Log 21: You will encounter it while performing the main mission, in the spot where you open the door to the armory.
Collecting the DNA of the monsters indigenous to the Akrid can be starts after the receiving of the special tagger from Doctor Romane (during completing one of the main missions). In order to collect the DNA, you need to use the pistol to shoot an akrid (with special ammo loaded) and wait for the dial, which informs you f the amount of the collected sample, to fill, while still aiming at the creature.

Akrid Eggs
Bestiary: A spore sack with the proximity explosive defense mechanism Activate the mechanism and leave the range of explosion.
Occurrence: They occur all around the planet. Their DNA can be collected during one of the main missions.
Sepia
Bestiary: A species of low force, operating in swarms and capable of climbing walls. Bites and performs suicide-attacks. Best weapon automatic weapon.
Occurrence: can be found in practically any location.

Genessa
Bestiary: devoid of self-conscience, organic hideout for many akrids. Best defense: a grenade aimed straight into the maw.
Occurrence: Equally easy to find. Occurs in most locations.
Bolsepia
Bestiary: A sub-species of sepia. Can attack at a distance, like a mortar. Search for a cover to avoid being attacked, or shoot down the incoming projectiles.
Occurrence: Also in most locations.
Dongo
Bestiary: A heavily armored akrid. Attacks by rolling on the ground at high velocity. Avoid attacks with well-timed dodges and aim at the glowing tail.
Occurrence: They occur in big numbers at Bishop's Wake and Bailey's Crossing.
Goonroe
Bestiary: Cunning predators similar to cats that hunt in well-organized packs. Aim at the jaws or at the tip of the tail.
Occurrence: e.g. Shackleton's Peak, Pickett's Folly
Vorgg
Bestiary: A camouflaging akrid of D category. Charges at the enemy and attacks with its pincers. To expose its vulnerable spot, you need to shoot off the ice off its back. The jaw vulnerable to grenades.
Occurrence: You will meet it while completing the main missions e.g. at the Marshall's Gorge, in the Killing Fields or while defending the rig at the Bishop's Wake.
Taarka
Bestiary: Lives indoors and is attracted by T-energy. It attacks with its tail and the maw. Best defense: shotgun.
Occurrence: They come in large numbers at the Power Plant.
Wardeye- female
Bestiary: Attacks at a distance, draws attention away from the males surrounding the enemy. Look for a cover but remember about the lurking males.
Occurrence: They are just as easy to find in the Power Plant.
Wardeye-male
Bestiary: Agile and difficult to notice. Males protect females by tracking down and surrounding the enemy. Then, they attack directly. Avoid enclosed areas.
Occurrence: Mainly the Security Installation
Enos
Bestiary: They are agile, capable of flight and distance attack. In direct fight, the organ for laying eggs can serve as a weapon. Enoses can carry weakened enemies.
Occurrence: They can be encountered e.g. at Pickett's Folly and Shackleton's Peak.
Suwaanka
Bestiary: A formidable and aggressive alpha male. While attacking, it uses teeth, talons and the tail.
Occurrence: Most caves, e.g. the Shackleton's Peak, its DNA can also be collected during one of the main missions.
Sieragz
Bestiary: Akrid of the D category. Lives in symbiosis with ermmlids. You need to stimulate the host for it to release ermmlids and expose its cores.
Occurrence: Appears several times during the main missions. Later on, you can find it in the Fuel Depot.
Ermmlid
Bestiary: Live in symbiosis with sieragz. They attack in groups by swirling and falling onto the enemy. Best weapon: shotgun.
Occurrence: Inseparable company of the sieragz, see above.
Hiveen
Bestiary: Akrid of the G category, that survived near the generators from the first colony. Note: Only its abdomen is vulnerable to direct attacks.
Occurrence: Occurs in only one main mission at the Top of the Shackleton's Peak.

NOTE: The Hiveen DNA can also be acquired in a different way. Go to the Marshall's Gorge, and more precisely to the Power Plant. Walk over to the main chamber with many platforms. Climb to the highest one and use the magnetic hook in the spot shown in the screenshot, close to the collapsed bridge (you will be attacked by wardeyes here). Inside, activate the console to obtain the DNA.
Tangaant
Bestiary: An intelligent akrid of the L category. Attacks with its tail and spits acid. Avoid the acid and shoot at the base of the tail.
Occurrence: You can encounter it while performing one of the main missions or on the Top of the Shackleton's Peak.
Gorevorgg
Bestiary: Akrid of the D category, a subspecies to Vorgg. It is almost indestructible. The only vulnerable point is the middle of its abdomen, which can be exposed by lifting its arm with a machine.
Occurrence: It is your objective during one of the main missions.
You obtain the possibility of obtaining the DNA of the albino taarkas at the Forgotten Camp. Go to the merchant (he is marked on the minimap) that is standing next to the exit from the Killing Fields. Jim will receive from him a device that starts producing sounds when close to an albino taarka. Below, there are their whereabouts listed.
Cross a flying fox for her perilous home near a groaning ravine.
Location: Coronis
Right after you exit the Hangar, go left to the place where you will be able to use the mech's winch. Then, make your way to the scarp above, using the hook. From there, you will be able to target the taarka without any problems.
An elevator reaches for a stormy sky - at its foot, look high.
Location: Marshall's Gorge
Taarka is in the room that you gain access to directly through the door, after you "scan danger". Look up on the right .
Seething Akrid cave with stalactite teeth-skyward is she found.
Location: White Canyon Junction, Diaz's Cavern
In the cavern, walk into the first larger place where you will be attacked by a pack of sepias and bolespias. After you deal with them, look up on the wall, near the destroyed genessa.
T-ENG tank near our forgotten home - go below to find her above.
Location: Killing Fields
As you stand in front of the Forgotten Camp turn left. Walk forward a bit to reach a place where you can use the mech's winch. Walk over to the room where the taarka is clinging to a wall.

Dark hidden belly - she bides her time within the war machines and arms.
Location: Pickett's Folly, Security Installation
As you enter the central room, turn left and over the stairs, down. Walk around the shelves, the taarka in the ventilation shaft in the area that glows red.
Frozen fields of white amidst pumping iron beasts - she hides in its warmth.
Location: Bailey's Crossing
Reach the platform above using the magnetic hook. Then, jump down and turn right
Pristine plain scarred by a fallen cask - look within her dead broken earth.
Location: Bishop's Wake
Approach the Southern part of the map, a narrow pass where you need to jump down.
A tower top in magma seas - testament to a soldier's folly.
Location: Pickett's Folly
The central tower that you gain access to sing the mech's winch. After you exit from the pipe, gain access to the scarp over the winch, where you will notice a taarka on the roof.
Stalkers lurk in a dead courtyard - look down upon trunks, crates and boxes.
Location: Marshall's Gorge, Power Plant
In the room with many platforms, you need to gain access to the top of the collapsed bridge. Once there, look to the right, downwards, among the crates.
She hides within the den of hunters - near a carriage to the sky.
Location: Shackleton's Peak
Z from where you activate the first console, walk through the tunnel to the room where you will be attacked by suwaankas. Climb over to the scarp leading to the second console and, once there, look "behind". To the right of the entrance, you will notice a small cave above, where the last taarka is.


 Life is Strange Game Guide & Walkthrough
 Leisure Suit Larry: Reloaded Game Guide & Walkthrough
 LEGO The Lord of the Rings Game Guide & Walkthrough
 Lord of the Rings Online: Traits Game Guide & Walkthrough
 Legend of Grimrock Game Guide & Walkthrough