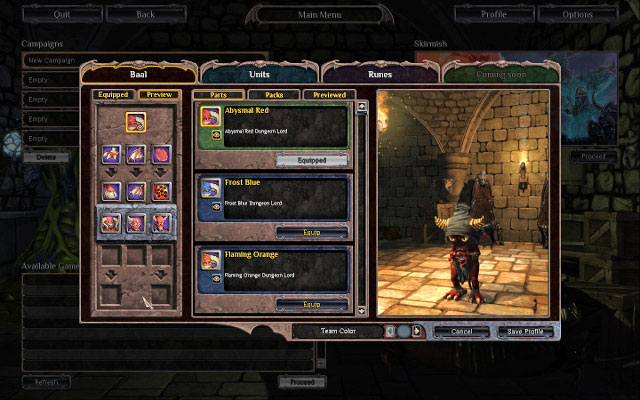
Guide to the Impire contains a detailed walkthrough, description of the game's mechanic, hero, units and chambers. In Impire you have to increase an influence of your evil demon. It does not mean that you have less duties: developing the underground kingdom is as interesting as eliminating another group of heroes who have come to eliminate you.
In this guide you'll find:
Before every mission spare few moments for preparations. Perform many raids for materials and gold so you have a well equipped army before you hit in the mission.
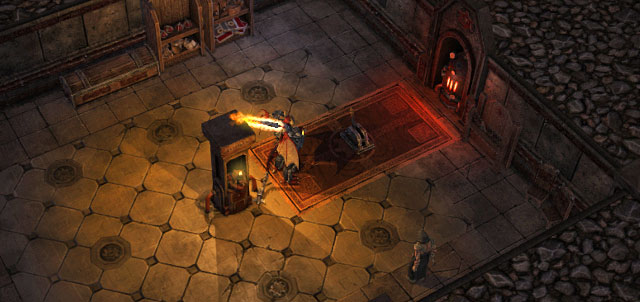
This mission is mostly a tutorial. It shows you how to manage your underground kingdom. Particular options become available as the game moves on.
Main objective: Slay Malister Crueely
Our counsellor doesn't like his friend from demonology. He wants you to kill him.
It's the main plot of this mission. It evolves in particular parts of the tutorial:
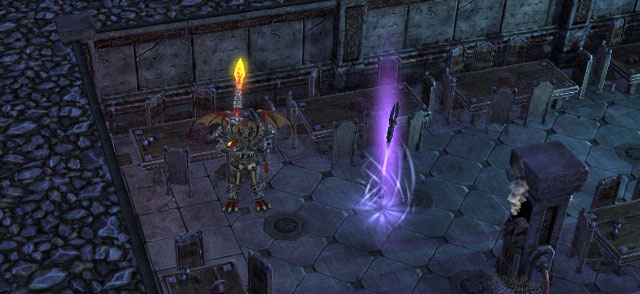
It's worth to create Squads in a way, you have a Priest for every four units. Your units aren't smart, so the free Priest will not know who to heal.
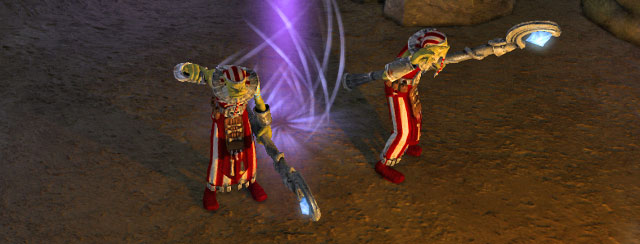
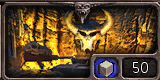
Activate another lever and kill four units. Use a Lightning at Scout and he'll die at once. Now you should have a full Squad: three Berserks and a Priest. After a battle you'll obtain a reward: 25 gold and Teleportation spell.
In that moment you'll get to know that enemy sends heroes at you. If you have two Squads (create them), you'll defeat them easily.
Then walk through door in the room with treasure. Behind them, you'll kill four more units. After searching this chamber, you will see a lack of door key.
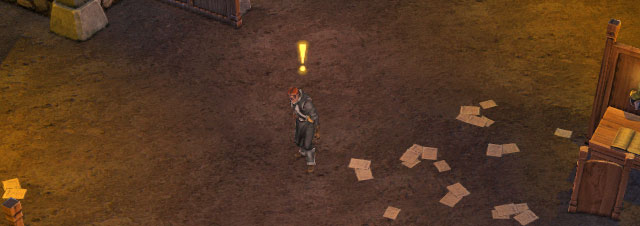
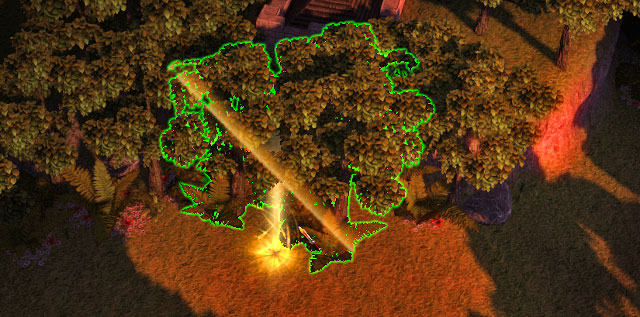
Raid option get activated. You have to find a mark of figure at book on the yellow background. Send one of your Squads. After few minutes it'll be back and the further part of dungeons unlocks. Now you have to build a Kitchen which let you increase an amount of aggression of your Squads.
Later on, you find only one group of monsters.
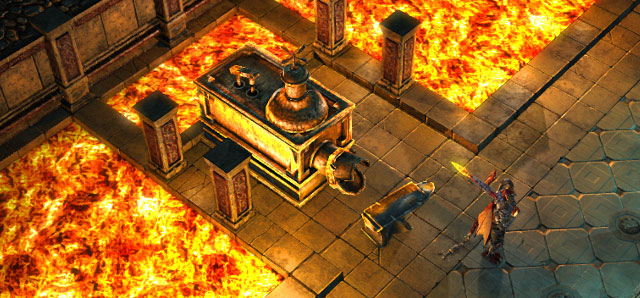
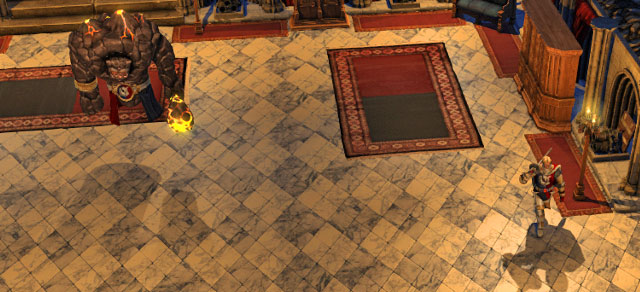
Last step is killing an Overlord what may be problematic, if you don't know how to.
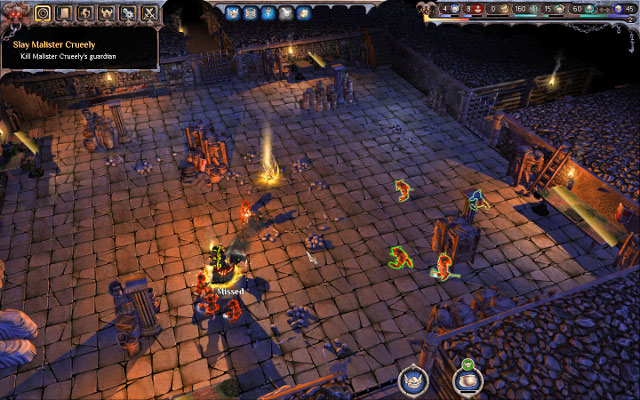
Attack him with one (fed) Squad and destroy tables with food using the other one. When his health drops below a half, an Overlord approaches one of tables and regenerates. After killing him the mission is complete and you obtain a rune.
Secondary mission: Ballet Academy

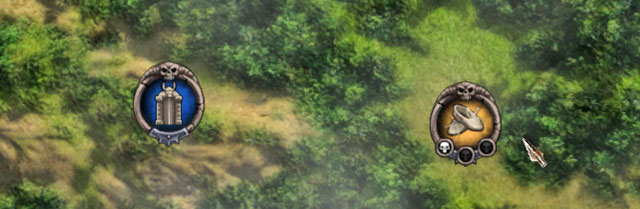
This mission is very simple. You need to find ballet shoes on a violet background on the world map. Perform a raid and the mission is done.
This mission is still kind of a tutorial. But this time your task is harder. Here also achievements begin. From now on heroes are important money-training factor and use a new technic to get into your dungeon - they set up ladders in random places.
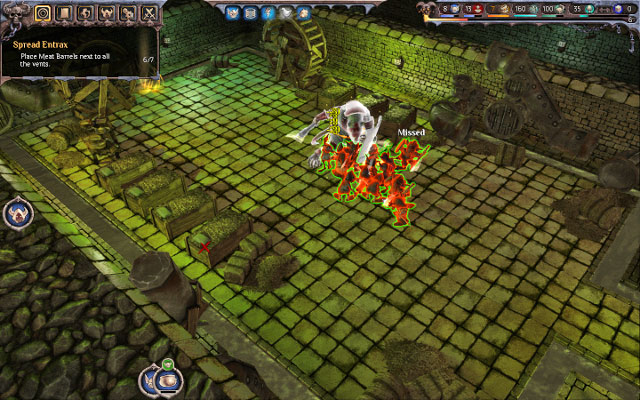
Main objective: Spread Entrax
This mission requires to perform raid at City Hall's Archives. Equip a Squad and send it there.
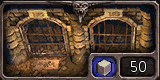
When Squad returns, explore undergrounds. On so far discovered area you find sex chambers. Three are rooms which can be repaired and added to your kingdom: Workshop, Prison and Training Room. In one of these you find table with cards and treasure chests in remaining ones.
In majority of them you find two-three Skeletons which are very weak shooters. Defeat them with your Squad. But when you open a chest, be careful: a Fire Warlock appears.
He can destroy your squad and hero very quickly and has lot of HP. A good tactic is to attack him with two squads, decrease his health about half, teleport out your troops, heal them and attack again. In the meantime, you can use a Lightning on him. Every chest contains 10 gold.
First of all you need to get into a room with door, which lead to the sewers. Here you obtain a new quest (Scirazzia's Heirloom). Now you can freely explore sewers. Every now and then you'll be attacked by Ratmen but they aren't dangerous.
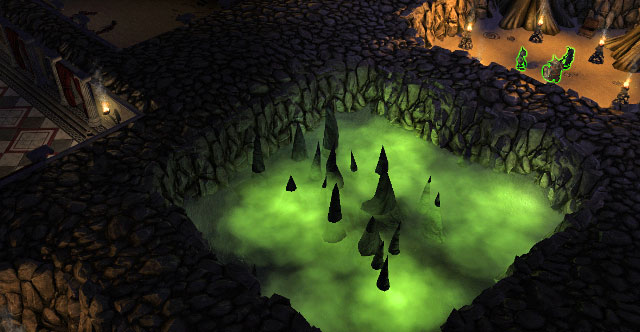
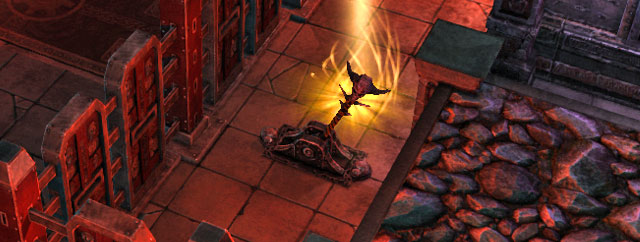
When you get deeper, you'll see a place where you have to leave a poison.
This mission isn't too demanding. You have to find seven such places. To reach one of them, you need to use two levers what opens the door.
In the dungeons, you'll find few squads of Ratmen and heroes. They shouldn't be problematic, if your squads are full and fed. The only problem you may have with a Big Ratman in the locked room.
But if you have three Squads on third level, it should be easy.
Secondary mission: Basic Rooms
Got an army: build Nursery and Kitchen.
Secondary mission: Scirazzia's Heirloom
You need to get into room with cards on the table. There are three heroes you need to kill.
Secondary mission: Smuggling Booze
In one of sewers' room you find three heroes guarding a number of barrels. Kill them and you obtain this mission. Make raid, to convince peasants to selling your booze. You need six raids: three to force an innkeeper to spread your booze and three others (with time limit) to take your money.
Secondary mission: Healing Caravan
This mission appears when you put several barrels in sewers. To finish it, you have to make poison in the Workshop and poison the Caravan during a raid. You have to have a good Squad for this mission.
In this mission you get an access to Dive, a chamber where you can find a free unit from time to time, if you send there at least two Workers.
During defeating monsters, you'll run into guards of the treasures: Fire Warlock and Albino Ratman. Strategy for the first one is listed above. Ratman is just a bunch of meat, keep him busy with someone and he'll be dead after few moments.
Main quest: Kill King Shonan
Oscar wants you to kill King Shona. His father is king's advisor, and he wants to show that he is better than him.
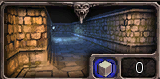
First you need to find an entrance to king's chambers. You have to go through door to the cellar and go through vast corridors, killing several heroes.
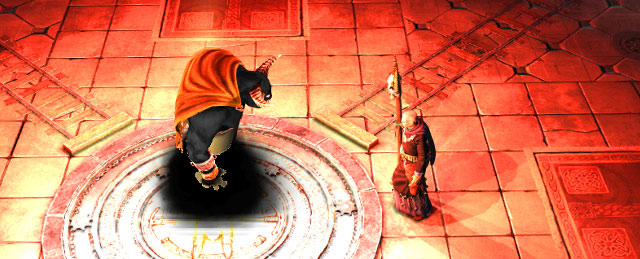
You get to the gate with a password. You have to find it. Send one of your Squads to a goblin shrine (yellow key on the map). You'll get a password and few men.

Now, as the gate is open, you have to destroy king's chamber, what provokes him to appear.
When the next gate opens, you need to do just one thing: kill the king. He is a normal enemy. If you have three good Squads, you should kill him at once. But be careful, there are explosive barrels around, so don't get close to them.
Secondary mission: Trap-Maker
Available from the very beginning.
To make it, enter a chamber with two Engineers. You shouldn't have problems with killing them. As a reward you get sketches of three new traps.
Secondary mission: Spring-Cleaning
In a chamber before Engineers you find an old lady. She wants you to kill rats in the next room. It isn't difficult and you receive 30 gold.
Secondary mission: Rescue Occulus
In one of chambers you find a Dark Dwarf who asks you to find his pet. It has been seen lately in room with Abominations. Find it. Be careful! As soon as you find it, four heroes will attack it.
When the mission begins, two Dark Dwarves join you. They are great melee warriors.
Secondary mission: Abomination Eggs

Defeated Abominations have one egg. Take them! Collect at least for and Oscar will check them later.
Secondary mission: Trap Maker
When you get into king's cellar, you'll find a lever which opens a prison cell. There, you find a bard, who tells you about a talented trap maker.
A new location appears on the world map. You need a strong Squad to raid it.
This mission ends first Act. You get an access to Extractor and Arcanium.
Guards of treasures in your dungeon are Fire Warlock, with which you should deal easily and little overpowered Overlord. After defeating the second one and opening his chest, two ore monsters appear: Priest Soul and Overlord Soul. Two Squads may have problem with defeating them.
Mainquest: Dust of Broken Hearts
Oscar wants you to find for him a Dust of Broken Hearts. It's a very powerful artifact.
At the beginning, raid the surface and encourage an archeologist to help you. Send random Squad to the ruins.
When they return, archeologist will be standing in front the gate.
Now you have to escort him to four places. You don't have to worry about him. Even if he gets into a fight heroes won't attack him. There are a lot of them so two Squads are absolutely minimum.
When you finish walking around the map, you'll get to know that you need two keys to open the crypt. Their location is marked on the map. But wait a while and you'll hear that keys aren't existing.
New enemies appear on the map, and you'll have to escort archeologist to crypt's door.

When the door opens, you'll meet a nice lady called Xaphyna the Lich Queen. She'll give Baal an offer, which he declines.
Fight with Lich Queen is very difficult. Attack her with all you've got. When her health drops below half, she'll teleport away, heal and summon four Skeletons. Eliminate them - until they exist, Queen is invincible. When you resume the battle, she'll summon four Wraiths. They are stronger and fight melee. Again, defeat minions before you hit at the Queen.
Killing the Queen ends mission and the first Act.
Secondary mission: Weapon Shipment
You'll receive an information about a nearby weapon shipment. Find it. It's worth to wait for a good Squad at your hand. It is not because of difficulty, but because every warrior who'll be back, will get maximum weapon upgrade.
Secondary mission: Cursed Skulls
Begins during fighting enemies while escorting the Archeologist. You'll see three skulls on the world map. Activate them, each gives you an undead warrior.
Secondary mission: Goblet of Goo
Mission begins with short cut-scene.

You have to find on the map a mark like above, but be careful. If any of your Squad touches it, it'll be teleported to the other place where will meet few enemies and Minotaur. You should win this. After a win, Squad will be sent back. To get your reward, give mysterious item to the dwarf.
The first mission of the new Act. You get an access to Monster Den.
Treasures guards: Fire Warlock and Albino Ratman.
Main quest: Become Clan Chief
You need to kill a Clan Chef called Red Bull.
Your first task is to get inside and under the Bull's pyramid. To begin with, deal with everything outside and only then go inside.
When you get there, search around and look for gold. You'll find also Red Bull's brother, Red Fajv, who'll offer a help and a Minotaur for Oscar's sofa. He'll show where you can find a Talisman, necessary to survive in Bull's dungeon.
During wandering, you'll run into few groups of minotaurs who shouldn't be problematic. The biggest problem is to open the main gate and killing the Red Bull.
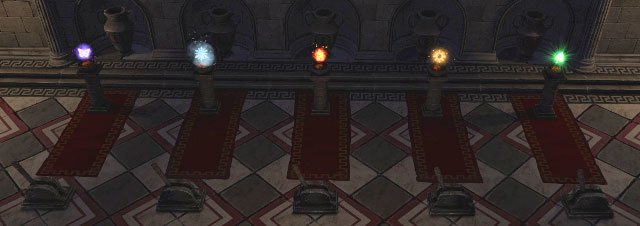
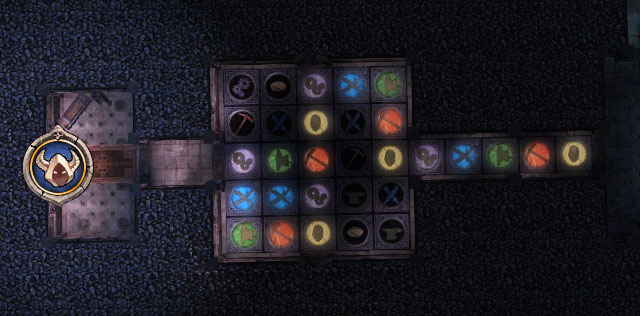
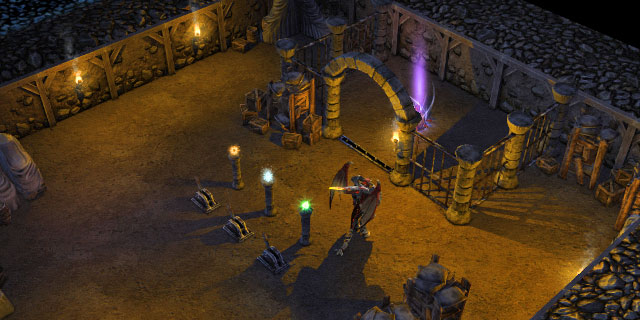
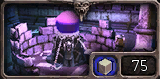
To get there, you have to solve a riddle - place color orbs like on the screen above. Oscar's hints are worthless and cannot be played second time.
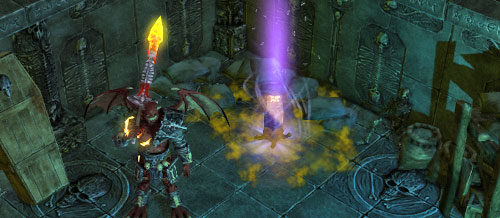
When you pass this, you can enter the throne room. But before you move there, send one of your Squads for Tonic of Tremenduosness.
First portal takes you to the chamber with acid and hurts you quite hardly, only strong units survive. In the second chamber you need to kill a Hero, who guards the chest. Tonic multiplies Baal's damage several times.
The very battle with Bull is demanding: only Baal can enter his room. Every other units is immediately killed. What is more, additional Minotaurs appear every now and then. When they aim you, move to your troops for protection.
The battle may take several minutes.
Secondary mission: Slaughter Chics
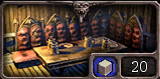
After visitation of F.A.K.E. agent, who shouts at Oscar, your Advisor has to kill... chickens. Get to the chambers with them and begin the slaughter. There is 17 birds to kill.
Secondary mission: Raid Hermits
Raid place looking like a mountain. You find there Hermits, who were seen to have an interesting chest. Take it.
After a pilgrimage, you'll see that there are some old papers instead of gold. Oscar will gladly put it into his library.
Secondary mission: Get Weapons
This quest is tricky. You have to raid abandon cart with weapons. But it turns out to be a trap. Your Squad will return disarmed and beaten up.
In this mission Baal should have his class.
Guards of the treasures: Fire Warlock, Overlord, Overlord Soul and Priest Soul.
Main quest: Glogg Shop
The mission seems weird for someone as bad as Oscar. He wants you to help (!) some gnomes in getting some national drink.
What is more, elves began to make some weird wines, what caught Oscar's attention. At first you have to find six elements of this drink.
Snow Weed grows in your dungeon, for the rest (Red Wine, Cinnamon, Cloves, Sugar and White Spirits) you have to go out on the surface and search the map.
When you get out, Oscar will inform you that he need 10 barrels to make a recipe for it. Barrels are carried by heroes with a special mark over their heads - kill him and the barrel is yours. But be careful: such heroes appear only when you're far from the area with Glogg Shop. If your Squads get there somehow, teleport them out, so they don't die.
When you get all 10 barrels of Glogg and components, you can attack elven brewery. Take all Squads and finish the mission. When you get all enemies into the fight, take one of Squads and destroy blue orbs nearby the portals, which are your targets. Then, kill few heroes and mission ends.
Secondary mission: Majestic Beach Resort
This name stands for king's agents and his advisors. Make a strong Squad and raid this place to finish the mission.
Secondary mission: Mascot Cavern
When you make any raid, Oscar will tell you that your devils have seen a cavern with some bat-like creatures. When you raid them, you'll be able from now to make mascots for Squads, which upgrade them (+1 AGG/s or +20% damage or +10% armor).
Secondary mission: KBI Agents
Oscar will be informed about KBI agents camp, who look for you and your advisor. You have to eliminate them. Use two strong Squads.
Secondary mission: The Beer Baron
This mission appears when you are looking for components. Oscar has heard that one of Beer Barons has opened a brewery nearby. Raid him and eliminate the competitor.
Secondary mission: Crash Party
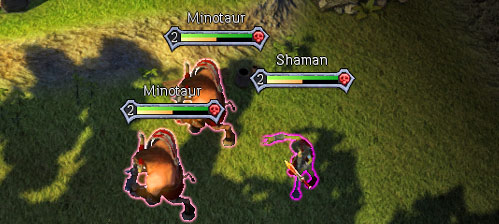
Few Shamans nearby organized a party on which you're not invited. It's outrageous! Attack them and kill. Few Minotaurs and Shamans will fight with you, but you'll get few barrels of Glogg.
In this mission you get an access to the last chamber - Brewery .
Guards of the treasures: Fire Warlock and Overlord with Overlord Soul and Priest Soul. What is more, every chest is guarded by at least one additional Necromancer (and few Skeletons).
Main quest: The Tower of Keftali
You have to disembowel a leader of necromancers living in the big hole in the ground called Inverted Tower of Keftali. This mission isn't difficult. It contains of slaughter and picking up few elements.
The first stage is finding dwarf pump, which drains undergrounds. To do so, search undergrounds of necromancers' lair. Prepare at least four Squads. You will fight necromancers and their minions (Skeleton, Wight and Wraith) on second and third level.
When you find a pump, re-work it. You need to find few items to do so; to find one you need to make a raid. When the pump is done, seal it up with glue (from raid) and send a Worker there.
Now you have to defend it for about five minutes. Waves of Skeletons, Wraiths and Necromancers will be attacking. When the Worker is done, the very leader appears: Sheela Sourman.
Killing her may be problematic. She is tough, has lot of HP and causes fear, what makes most of units run away. But after a massive attack, she'd be dead.
Secondary mission: Trap Maker
This mission demands killing few heroes in your dungeon. This gives you an access to powerful traps.
Secondary mission: Collect Candles
Crazy dwarf gets to Oscar's office once again. Now, he needs two stinking candles. You'll find them in the tower's undergrounds.
When you return with them, he claims that he wanted four of them. Doh. Make two raids at candle stores on the map.
You have four. This time dwarf says, that he wanted FIVE candles. FIVE. One more is in the cells of the tower. But when you get it and return, dwarf will say that he has found candles in his bag.
And how trust someone like him?
In this mission treasure guards are as following: Fire Warlock with Overlord and Overlord Soul with Priest Soul.
Main quest: Capture Bedewer
In this mission you have to seize human's city. The easiest way to do so, is to make their queen abdicate.
To do so, you have to kidnap two royal girls. Raid marked location. When you interrogate those women (and Oscar failed to seduce one of her), you'll have to kill Prancy's love. Raid another marked location.
After killing the lover, you can now inhale the dust. The other princess will be more stubborn and after drinking some potion changes into a succubus. She'll tell you about her mother's sinful life and offer searching the sewers for the proofs.
There you'll find few chests. From four of them you take damning proofs. When you collect all of them, be careful. Your dungeon will be attacked by heroes - you have to survive five minutes. Then the mission ends.
Secondary mission: Treasure Hunt
This mission is tricky. You have to search few chambers with Baal - read the description and decide which chamber it fits.
The last one is not belonging to you chamber with skulls, chimneys and barrels, where you find no enemies. When Baal enters it, he'll be attacked by few heroes. Defeating them ends this mission.
Secondary mission: Charity Event
This mission appears when you meet a familiar bard in the dungeon.
He tells you that there is a charity event nearby. As a evil master, you should "help" the organizers.
First make small pennants in the Workshop and stick them into enemies' bodies.
This mission ends second Act.
There is several heroes in your dungeon. Eliminate them if you can - it isn't necessary for finishing the mission though.
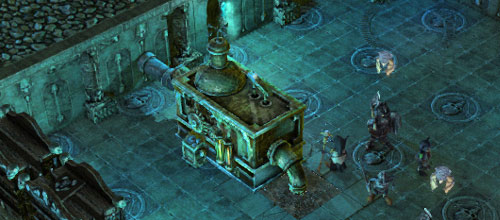
Main quest: Protect the Capital
Beginning is very rapid - you have only half an hour to make the biggest army you can. This is the time in which king's army reaches your capitol.
The best way is to spend DEC points for the best units and buying an additional Squad. Probably, you won't get the fifth Squad (150 gold) but four well trained troops should be enough. Important is to have a good amount of tough units (like Overlords) and Priests on third level, what allows them fight and heal at once. .
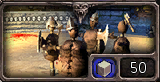
When the time comes, move on the foreground of your capitol. You'll have to kill three waves of enemies, about 50 heroes.
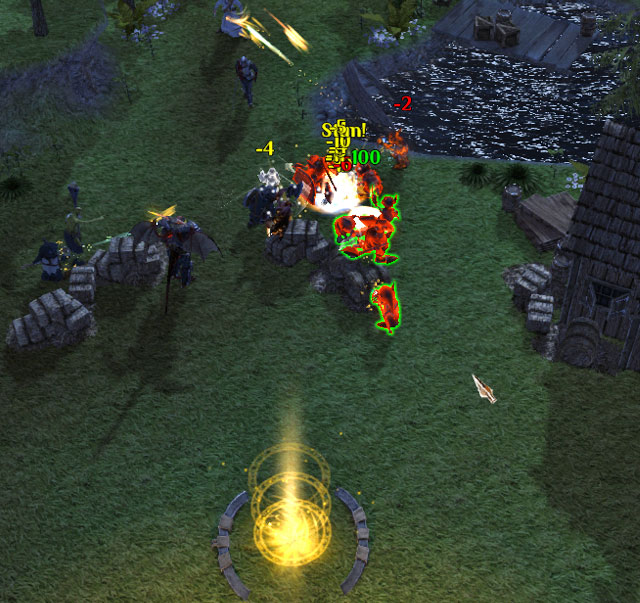
Your goal is defending three portals. One of them (the middle one) is shown on the screen above. You can't let the heroes going solo and double from above reach it. Only nine of them may touch it. But there'll be an additional mission to complete which, you can't let there more than five heroes
When you destroy three waves of enemies (remember about managing your units), the King Thyvid Bannister appears. During a short conversation he'll offer Baal an alliance. After a short hesitation, your demon will decline it, what surprises Oscar.
King is a tough enemy: he has a lot of HP and heavy mallet. He can easily kill your weaker units like Berserks and Champions. Keep some units in reserve, because if you can't kill him in two minutes, he'll summon some backup. Killing him ends the second Act.
Secondary mission: Weapon Carawan
Raid a weapon cart. But be careful: it looks suspicious and is probably a trap. Send very strong Squad which will fight with two enemy squads.
Every survivor will obtain the best quality weapon.
Secondary mission: Romantic Dinner
Baal made a hit with one of succubuses. This demonic lady offers her help if Baal will eat a romantic dinner with her. With candles and stuff.
You have to find three components: a flower (dungeon), heart of the virgin (one of raids) and essence of life of a hero (send a hero to Extractor).
When Baal fulfills his part of the agreement, a succubus summons three Cerbers for you. They have the best weapon and armor, but unfortunately their defense is weak and they die often.
Secondary mission: Deliberate Slip-Up
F.A.K.E. agent again has comments, but he sees an improvement. This time he orders to let five dying heroes enter the city.
The mission is tough. He have to decrease their HP to about one quarter and move aside all units to let them pass. Kill all clerics because they heal themselves.
Remember about limit of heroes who can pass by! When the tenth hero makes it, your mission fails.
In this mission you obtain a magic armor.
Main quest: The Grimoire
You need to find some particular book. Of course, the easiest mission is very difficult with Oscar's plan, so you have to prepare. Librarian will give you this book if you eliminate unknown force from under the library.
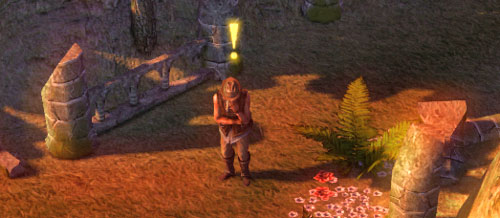
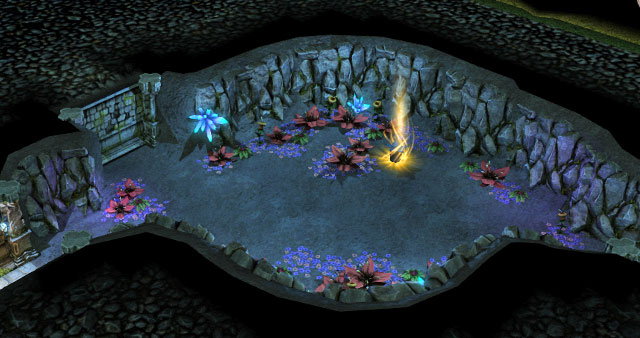
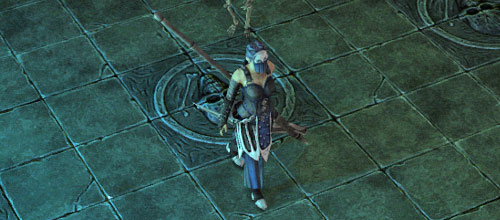
To begin with, build a nice dungeon. When you're ready, move under the library where you meet Warlock who has decided to help you. You have to protect him.
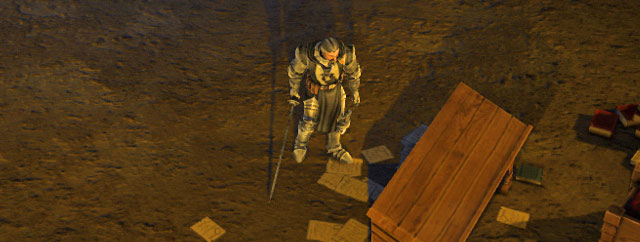
After passing few corridors, you find locked door. Move on until you find a lever - it is in the place where Baal stands on the screen above. Behind the door you find monsters to eliminate: Abomination, Occulus, Dark Dwarf, Succubus, Hellhound and Trolledon. Try to go inside the room to destroy portals so the monsters stop coming out.
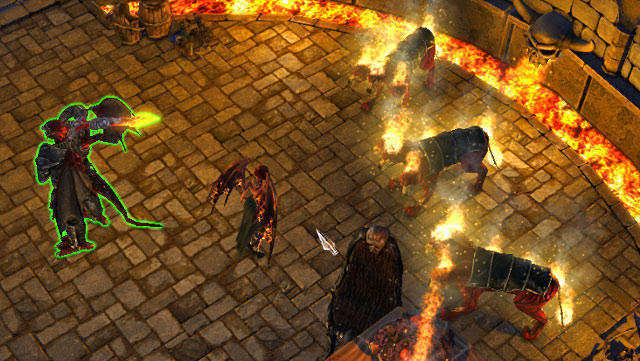
When you get to the curtain of fire, wait until it falls down and kill Big Hellhound. It's a mother with few puppies, which are not dangerous. Killing the main one ends this mission.
Secondary mission: Scirazzia's Book
A beautiful priestesses of death will visit you and ask for finding a book. It's in the chest in one of locked room in your dungeon.
You can't get in there, but do you remember Freila? The elder one, who asked you to kill rats in the third mission? The room turns out to be protected by her magic and she is a powerful witch.
Because you've helped her before, she opens the gate and warns about monsters inside. Two Hellhounds shouldn't be a problem.
Secondary mission: Chosen Ones
Scirazzia told you also about a place where wizards train their successors. Shouldn't you stop it?
Raid a place shown on the world map. Send a very powerful Squad - you'll fight few powerful Wizards.
Secondary mission: Shaman Dig Site
You can play it two ways: help or not.
When you want to help, raid the place where you can find women (some village for example). Then make explosives in the Workshop and find three eager heroes to a work. Heroes should be send to the Prison. In exchange for it, you get a description of a excavations and two Shamans on third level with best armor and weapon.
If you don't want to help, send a strong Squad at excavations and kill shamans. In return you get some artifact.
In this mission you'll get an access to magic weapon.
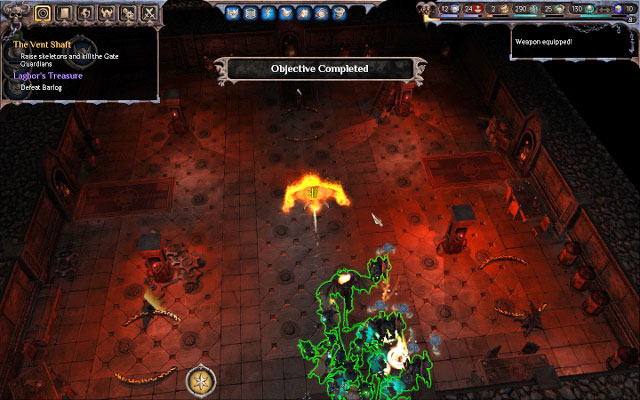
Main quest: The Vent Shaft
The mission is a piece of cake. You need to find an entrance to sewers in dwarves' dungeons.
Most of chambers is locked with barriers, but you'll open them when the time comes.
You first step is finding a necromancer. He wants you to find his father's staff, for what he gives you a useful item. The book is a bit deeper in the dungeon. When you find it, summon two Squads, because necromancer will try to kill you.
When you kill a necromancer his undeads will die because of Baal's lightning. Now you can summon undeads in proper places on the map.
Another step is to search undergrounds. When you approach the gate, summon four undead archers who'll eliminate a single hero in the chamber. You find there also a chest and a lever which opens the further chamber.
Inside, you have to kill two group of heroes what ends the mission.
Secondary mission: Skeleton Staff
Approached the closed door. As in the main quest, summon few skeletons to defeat a hero. There is also a chest in this chamber.
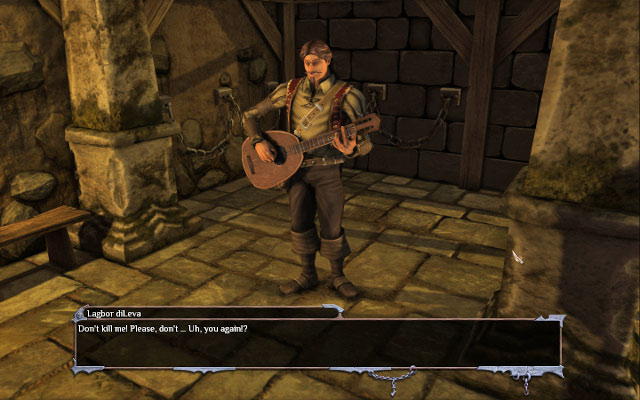
Secondary mission: Lagbor's Treasure
It begins innocently, but it turns out to be a fight with a boss of this map.
You meet your familiar bard again. He'll lie out with a promise of huge amount of gold. You have to follow him to where dwarfs keep their treasures.
When you get there, it come in that our bard is a Lord Barlog - Logic Demon. He hasn't visited hell for a while, so everyone thought he is gone, and he just stuck higher and got stronger. In this moment, he'll gladly eliminate you and become even more important in KBI.
Defeating him isn't difficult, only his fire breath may cause some problems. If you have four trained Squad with good weapons, you'll do him quickly.
Main quest: Recover Key Parts
Your task is to find four altars in which four key parts to prison a demon are hidden. Oscar wants to possess with "his" powers.
It is not difficult. You'll fight few dozens of dwarfs and undeads on your way, but you'll make it. The only problem is a fact that during carrying a part of the key, Baal cannot teleport. Because of that you have to walk through all dungeon.
When you move the third part of key a D.W.A.T. Leader appears nearby an entrance to the dungeon. Kill him. It isn't difficult but time consuming - he has incredibly strong armor.
Transferring the fourth key finishes the mission.
Secondary mission: Rennfield's Book
You'll be visited again by the crazy dwarfs from candles. This time he needs some ancient book for which you'll get resources.
Two parts of book are somewhere in the dungeon. The third part is protected by a riddle.
Solving this riddle is simple. Look how five plates are arranged on the screen above, looking from right. Your path must be the same as their order; otherwise you won't be let in the next room. The book is where Baal stands on the screen above.
Secondary mission: Free Wights
You have to destroy three staffs that bound Wights. it isn't difficult. You'll probably search all possible places in the dungeon.
I didn't get any reward for it.
Main quest: Release the Phantom
Oscar wants you to release a Phantom - powerful demon, who'll burn everything around him. To do so, you need to repair a key, which you've completed in the previous mission.
Your first step is to explore the dungeon and find a dwarf forge.
You need to launch three baskets with coals to turn on the forge. They are in far ends of the dungeon. When you bring them, summon a Worker to take care of it.
You have to defend him against attacking dwarfs. Firstly they go through the main entrance, but later on also through the side ones.
When the work is done, it turns out that the key is a part of the lever. Mount it on and use it.
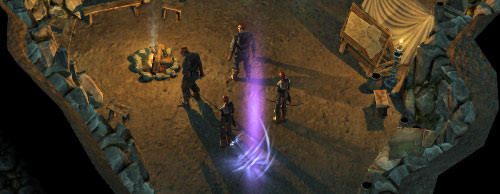
When you release a demon, you'll see that he has other worldview.
Velvet the Avenger is extremely happy that he'll kill Oscar, your "lovely" Advisor.
Now you have a serious choice: choose who you want to have as an Advisor, Velvet or Oscar.
You'll switch onto a good side or stick on the evil side?
Secondary mission: Mascot Cavern
Send a raid to Mascot Cavern. Returning squad obtains random mascot.
Main quest: Raze the tower
Oscar can't wait to conquer all Ardania. Another step to this goal is to destroy unfinished Mage Tower.

Quest isn't difficult: you just need to escort a cart with explosives. Path is guarded by heroes, but you should eliminate them easily.

But when the cart reaches the gate, it won't open. You have to find a key. Next to the gate you find two portals, like on the screen above. Heroes are coming out of them. To turn them off, destroy blue orbs next to them.
On Ratmen's territory, you find a lever which opens the gate. To get there, you need to finish the mission The Gouda Cheese. When the cart go through and explode, you end the mission.
Secondary mission: The Intruders
You have uninvited guests in the dungeon, eliminate them. When you attack Shamans two more clerics appear. It turns out that they have some paper which Oscar wants to read.
Secondary mission: Deal with the Witness
You have two options in this mission: kill the Witness or protect him. Whatever you do, you'll have to raid place where he is and defeat heroes located there. And then give him an amulet or not.
Secondary mission: Aid the Warlock
In this mission you can kill Warlock or help her. Helping means killing a group of nearby heroes.
You can help a nice lady, can't you?
Secondary mission: The Gouda Cheese
It interrelates with the main quest. You have to complete it to get into Ratmen's territory. If you decide to help them, raid a cheese caravan. You can also kill them.
Most of the enemies in your prison are heroes. Use them to train minions or in the Extractor.
Main quest: The Council of the Cities
You have to find resources to play count against count. Oscar won't agree to kill anyone of them.
You first task is to explore the tomb, under the place where the council debates. Kill few knights, open few chests and you get a new task.

You have to destroy all alarm devices. They look like overgrown alarm clocks. They are marked on the map. When you destroy all four, a group of hero appears who will try to repair devices. Kill them.
Then you have to kill three messengers in the tomb.

When you finish them, Oscar will be pleased and order to make two items in the forge (coins and dagger). Send them in the particular place and the war between counts begin. Raiding this place ends mission.
Secondary mission: An Unrefundable Loan
Your Advisor noticed activity of a rich man, who tries to send his goods nearby your seat.
This mission is a neverending source of gold. To complete it, you have to raid all the time - I was making it through all the main quest and reached only 30%.
Secondary mission: Master of the Minions
At some point at the beginning, few enemy imps appear in your dungeon. Baal himself should take care of them.
Only one of further groups will have an information where you have to go, to stop those raids. Send there very strong Squad.
When you Squad returns, you'll be informed that it's... Malister Crueely who is sending those creatures.
Somehow he survived your assault from the first mission. Oscar claims that he'll get him.
Secondary mission: Incoming Heroes
This isn't a proper mission (does not appear in the final statistics).
You need to stop a wave of heroes going to your dungeon.
If you have only three Squads, it may be difficult: train more units to stop enemies. If you have four Squads, you should make it. They + Baal should be enough.
There'll be 3-4 troops of heroes.
This mission is very interesting - you have to play it quickly.
Main quest: KBI Disruption
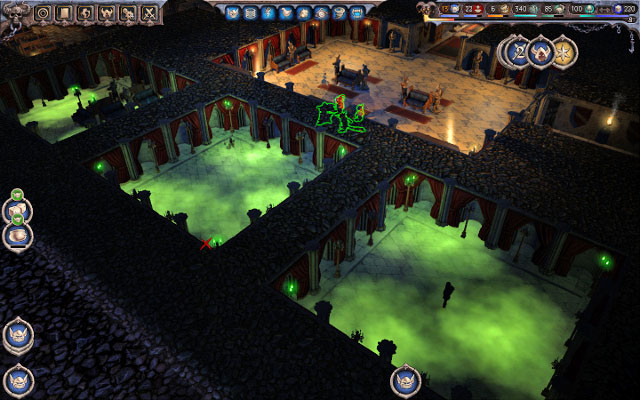
You have to attack four colorful rooms defended by the three KBI agents in the good time. You enter them via teleports in you dungeon.
Making noise there need to catch an attention so our spy will be able to steal some documents from KBI archives.
If he is caught, nothing happens. He'll appear again.
When you get all information, try to run away. Spy will be caught by the main agent, ben Apart. You have to kill him.
But before that, you have to get inside. Destroy all teleport orbs in the colorful chambers, to open door inside KBI. In the biggest one you'll find an agent surrounded by the barrels with explosives. You shouldn't have problems with defeating him. But be careful - he scars your units, who run into explosives.
Secondary mission: The Small Council
When you begin going through the KBI chambers, a beautiful elfish woman appears at Oscar's desk and demands 1) silence 2) some device from KBI seat.
To get there, you have to find a code, which has three colors. To do so, search three shelves. When you have it, put it on torches (like in the mission with minotaurs).
When you set the code, the gate opens and you get a device.
Main quest: Gain entrance
You have to get into the tunnel leading to the castle where you can kill the Sovereign and take control over the Ardania.
Firstly, make a raid and kidnap one of Crypt's sisters. When you do so, you'll hear how stupid Oscar was.
This lady swears she won't tell anything, but your succubus makes her change her mind. Now you know what to do to open secret door.
Firstly, defeat nearby heroes and destroy brushes covering the entrance.
When you do so, launch three shrines. When the last one is done, a ghost appear in front of every of them. Kill those creatures.
To open door, all ghosts must be dead at the same time. It's challenging because they are tough and respawn in few dozens of seconds. Leave two Squads at every shrine and launch the third one. Doing so should solve the problem.
When it's done, the mission ends.
Secondary mission: Wanted Posters
Malister Crueely will send his minions again. They are stronger, so be careful.
As non of them says anything about their base, Oscar has an idea - send all heroes of Ardania against them! To do so, create five posters in the Forge and spread them out during raids.
Make five raids and imps won't bother you any longer.
It's the last mission of the "evil" campaign.
But is it "evil"...? You'll see soon.
Main quest: Conquer the Throne
You have to kill Suveren - the ultimate ruler of Ardania. It isn't difficult, but long and tiresome.
First of all, attack his castle - just go inside. After a while you reach a room with standard. On the other side of the middle room is a similar one. You have to keep them for at least 30 seconds to open the gate inside. It does not have to be in one interval unless you lose both of them at once.
When you get inside, kill heroes and destroy teleport orbs. There are five of them, next to the portals. When it's done, the passage opens.
Now you have two tasks: survive contact with acid and solve a riddle.

Chambers with acid are in the eastern wing: if you have a Squad with the magic armor, it should survive every room. Remember to let them heal.
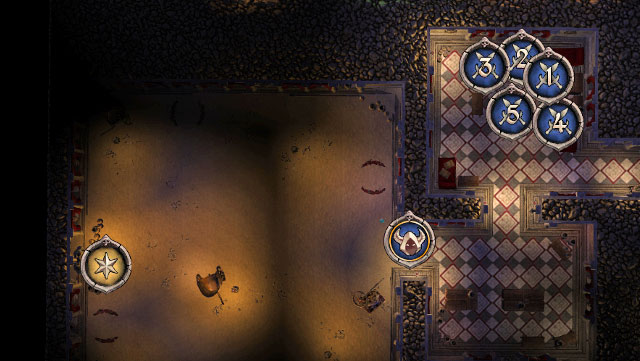
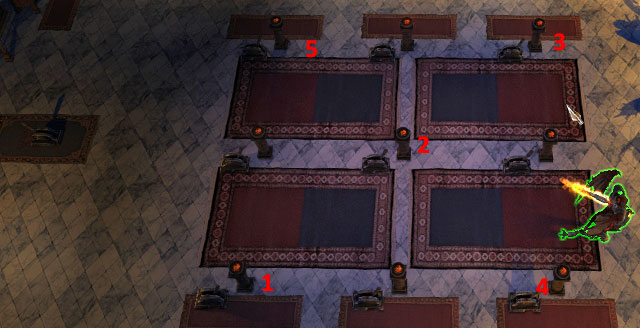
Riddle: turn off all torches. Levers change the torch at which it stands and all in straight line, but not askew.

To do it properly, act like on the screen above - move levers according to the numbers.
Every time you get an access to a room in the particular wing: you have to switch lever there to get into a room with Suveren.
Suveren is guarded by Earth Golem, who is a weak enemy against five Squads, but has lot of HP. Attack Suveren when he set up all his cannons; they wound your troops badly as you approach.
Suveren has small amount of HP, but he deals nice area damage: in few turns he can eliminate weaker units.
When he dies, something unexpected happens. You'll be also surprised by the credits film.
Don't be surprised how the dungeon looks like - Velvet will switch all your units and some chambers.
Full descriptions in chapters Units and Chambers.
Secondary missions and most of Main quests are the same for Oscar and Velvet - i'll recommend which option choose (if there is any).
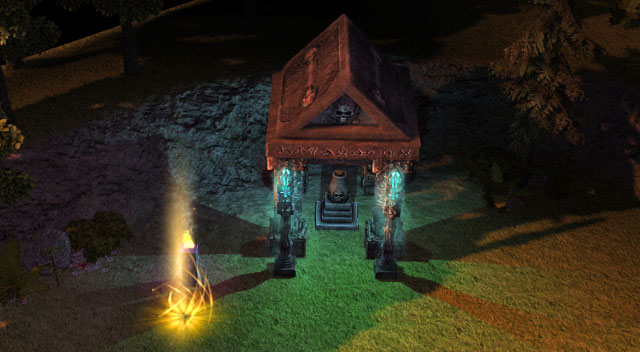
Main quest: Suck the Power Node dry
Velvet takes you under not-finished Mage Tower because he needs power. Here you find a strong source of magic, which he wants to suck to the very end.
You first task is to escort your Advisor to where the knot. Guard him, because he'll be attacked. When you reach a Ratman (mission The Gouda Cheese) you have a choice. It's better to help Ratmen because they'll be protecting Velvet in return.
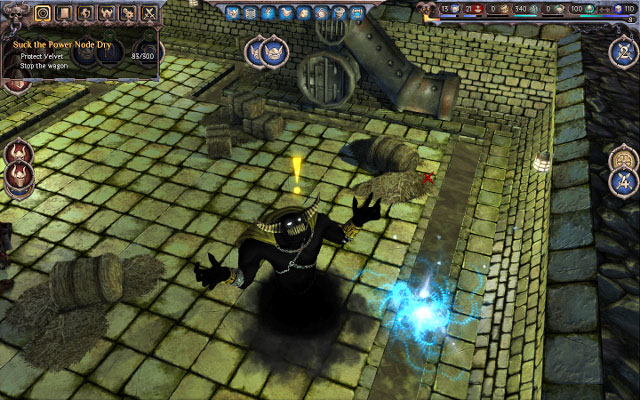
Now you have to defend him for five minutes, while he drains power. What is more, you have to stop the cart which will ride out of the tower. Kill all heroes on its way, it won't ride if there are your units next to its path.
Secondary mission: The Intruders

You have uninvited guests in the dungeon, eliminate them. When you attack Shamans two more clerics appear. It turns out that they have some paper which Oscar wants to read.
Secondary mission: Deal with the Witness
You have two options in this mission: kill the Witness or protect him. Whatever you do, you'll have to raid place where he is and defeat heroes located there. And then give him an amulet or not.
Secondary mission: Aid the Warlock
In this mission you can kill Warlock or help her. Helping means killing a group of nearby heroes.
You can help a nice lady, can't you?
Secondary mission: The Gouda Cheese
It interrelates with the main quest. You have to complete it to get into Ratmen's territory. If you decide to help them, raid a cheese caravan. You can also kill them.
But here I suggest to help the Ratmen, because in return they'll be protecting Velvet.
Main quest: The Council of the Cities
Velvet wants to stir all counts in the Council. To do so, he wants to poison all of them with insides of barrel of Warlocks from under the Mage Tower.
Your first task is to explore undergrounds until you find an alarm clock.
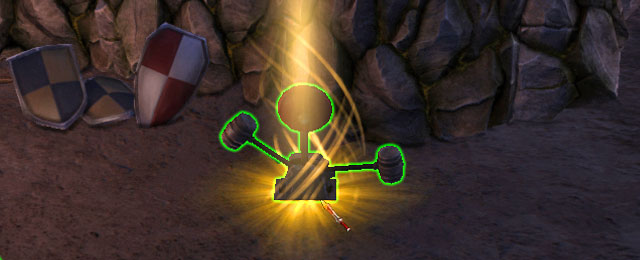
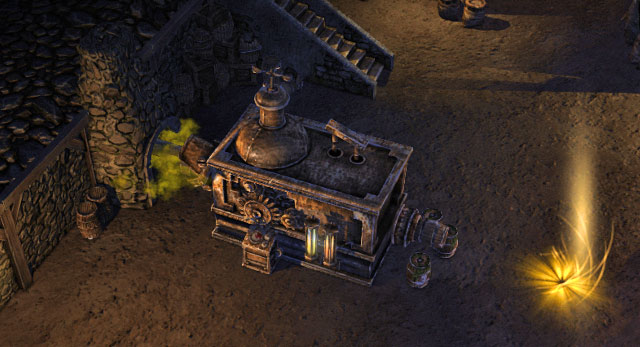
You have to destroy four alarm devices. When all is done, you have to find something to spread out the poison. Find a blowing system approximately in the center.
When you find it, summon Worker who'll use it. Protect him for few minutes. When it's done, you have to find a lever to launch evacuation alarm. It's in the closed chamber at the edge of map, pointed by the pump. Turning it on ends the mission.
Secondary mission: An Unrefundable Loan
Your Advisor noticed activity of a rich man, who tries to send his goods nearby your seat.
This mission is a neverending source of gold. To complete it, you have to raid all the time - I was making it through all the main quest and reached only 30%.
Secondary mission: Master of the Minions
At some point at the beginning, few enemy imps appear in your dungeon. Baal himself should take care of them.
Only one of further groups will have an information where you have to go, to stop those raids. Send there very strong Squad.
When you Squad returns, you'll be informed that it's... Malister Crueely who is sending those creatures.
Somehow he survived your assault from the first mission. Oscar claims that he'll get him.
Main quest: KBI Disruption
You have to find information about Sovereign. Firstly, develop your dungeon: you have to dig to passages leading to KBI.
When it's done, you'll have to destroy four teleport orbs, what takes you inside. Then you'll obtain a task of finding compromising information about Sovereign.

Destroy few shelves. Scrolls will drop out - you need five of them.

When you have all of them, they turn out to be coded lover letters. You have to ask ben Apart - you find him in the corner chamber surrounded by the barrels with explosives. You shouldn't have problems with defeating him. But be careful - he scars your units, who run into explosives.
Secondary mission: The Small Council
When you begin going through the KBI chambers, a beautiful elfish woman appears at Velvet's desk and demands 1) silence 2) some device from KBI seat.
To get there, you have to find a code, which has three colors. To do so, search three shelves. When you have it, put it on torches (like in the mission with minotaurs).

When you set the code, the gate opens and you get a device.
Secondary mission: Security Bypass
You have to find and pull two levers and turn on a security device in KBI. Thanks to that you won't be chased by the horde of KBI agents.
Main quest: Gain entrance
Velvet wants to get to the tunnel leading to the castle, in which he'll finally kill the Suveren.
Firstly, make a raid and kidnap one of Crypt's sisters. When you do so, you'll hear that lady won't tell anything.
But when Velvet invites her to his chambers, she'll start talking very quickly and you'll know what to do to open a secret entrance.
Firstly, defeat nearby heroes and destroy brushes covering the entrance.
When you do so, launch three shrines. When the last one is done, a ghost appear in front of every of them. Kill those creatures.
To open door, all ghosts must be dead at the same time. It's challenging because they are tough and respawn in few dozens of seconds. Leave two Squads at every shrine and launch the third one. Doing so should solve the problem.
When it's done, the mission ends.
Secondary mission: Wanted Posters
Malister Crueely will send his minions again. They are stronger, so be careful.
As none of them says anything about their base, Oscar has an idea - send all heroes of Ardania against them! To do so, create five posters in the Forge and spread them out during raids.
Make five raids and imps won't bother you any longer.
The last one mission of "good" campaign.
But, looking at Velvet's actions, he won't omit burning in hell.
Main quest: Conquer the Throne
You have to kill Suveren - the ultimate ruler of Ardania. It isn't difficult, but long and tiresome.
First of all, attack his castle - just go inside. After a while you reach a room with standard. On the other side of the middle room is a similar one. You have to keep them for at least 30 seconds to open the gate inside. It does not have to be in one interval unless you lose both of them at once.
When you get inside, kill heroes and destroy teleport orbs. There are five of them, next to the portals. When it's done, the passage opens.
Now you have two tasks: survive contact with acid and solve a riddle.
Chambers with acid are in the eastern wing: if you have a Squad with the magic armor, it should survive every room. Remember to let them heal.
Riddle: turn off all torches. Levers change the torch at which it stands and all in straight line, but not askew.
To do it properly, act like on the screen above - move levers according to the numbers.
Every time you get an access to a room in the particular wing: you have to switch lever there to get into a room with Suveren.
Suveren is guarded by Earth Golem, who is a weak enemy against five Squads, but has lot of HP. Attack Suveren when he set up all his cannons; they wound your troops badly as you approach.
Suveren has small amount of HP, but he deals nice area damage: in few turns he can eliminate weaker units.
When the last enemy dies... you'll be surprised when Velvet says: Is there saying you haven't told me yet?
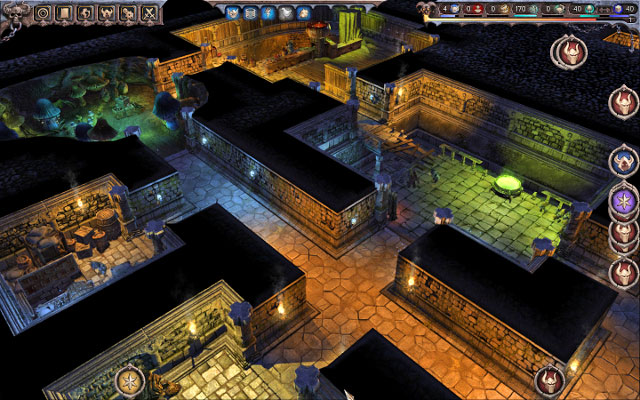
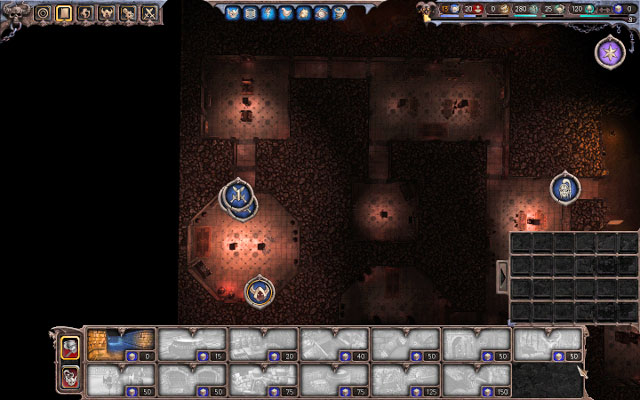
You're a lord of the underground. Dungeon is your base. take care of it, make all chambers able to be used or, at least, repair regularly those invaded by waves of heroes.
The most important chambers are those producing food, storing materials and summoning units. But the most important among all others are Treasuries: destroying any of them finishes the game.
To have a well prospered, beginning dungeon, you should have: Mushroom-room, Nursery, 3 Stockrooms three Treasuries, Kitchen.
Every next chamber improves your power. But be careful, most of them requires workers, and you have only limited amount of them.
It is worth to set up traps at the crossroads of important corridors. They can be useful also at the entrances to Treasuries.
Destroying any of Treasuries automatically ends the game.
There are three types of resources: Mushrooms cultivated in the Mushroom-Room, Materials, which you get from heroes (every of them drops 10 gold if he is not used in the other way) and Raids and also Gold which you should look in chests and get in return for heroes.
Mushrooms and materials are paid for new chambers and training units. Gold is required for making new troops and attracts heroes. The more gold you have, the bigger groups will attack you.
From time to time, your imps will have to go out on the surface to do something. Their missions will be different: burn something, plunder, poison a caravan, blackmail... There is plenty of raid types.
Raids are also a source of resources. But raids for mushrooms are ineffective: you'll make them faster in your own dungeon. But the raids for materials will be the most common ones.
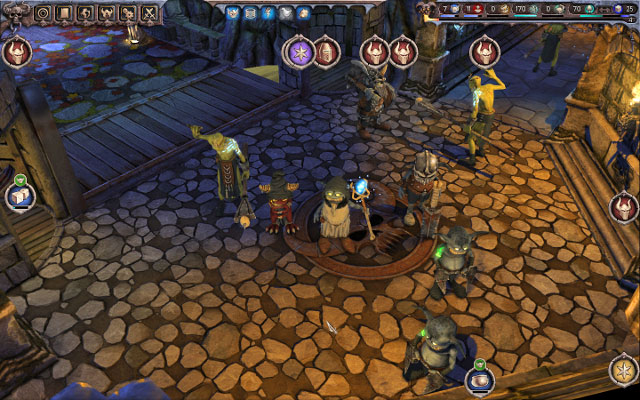
Units in this game aren't too intelligent. You have to control them manually. You have to also care about having a proper number of Workers and soldiers to resupply your army.
Unit balance is rather good: even the beginning units are useful later, because they are universal.
Squad contains of four grouped units. It's a core of your army. You should keep full number of men in experienced Squads.
Here you find few advices about completing Squads:
Aggression is the most important trait of your units. It has the role which Morale plays in the other games. When your unit is very aggressive (glows on orange) it can deal much more damage, even if it's wounded.
It decreases all the time. Other factors also affect it, like spells, Raids or fight. When it drops below the half, send the Squad to Kitchen.
Aggression matters mostly for the fresh units. The more experienced ones suffer less as a result of lack of an aggression. They can also trigger aggression bonus in the fight.
Normal demons, as magical creatures, don't forget. But Ardania has it own rules. Here your demon can have even sclerosis...
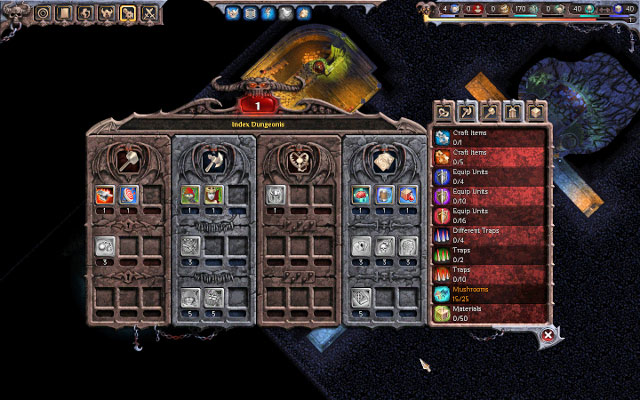
Index Dungeonis let you remind all you've forgotten from the previous map. You get to know the new things, which disappears in the next mission.
On the right, you can see achievements. Every completed achievement gives you a DEC point. You get those points also from using heroes in Extractor.
You spend points on what you want - chambers, units, upgrades, runes.
Use them wisely, because you may not have enough of them to buy all you want. If so, begin the campaign once again and complete few first missions. Maybe you will find a Specialist rune which gives you additional point for every five.
This is a name of your hero. Your Advisor calls him more demonically: Death Slayer. At the beginning he looks like a small imp, but when he gets EXP he'll turn into powerful warrior, leader or mage who'll destroy hordes of enemies.
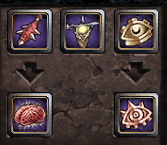
Below you find a description of all his skills.
Skill picture
Ability description (upgraded ability)
Clawed Feet > Hooves - Baal has 5% (upgraded: 10%) more chances to hit an enemy within 10 seconds.
Big Wings > Clawed Wings - Baal drains 5 (upgraded: 7) HP after hit.
Thick Skin > Scale Skin - Baal's armor increases about 10% (20%).
Class skills:
Warrior - Killer machine.
Commander - Supports units with aura, but deals nice dmg.
Mage - Weak in melee but with powerful area spells.
Warrior skills:
Imposing Horns - Baal causes bleeding dealing 3 damage per second within 20 seconds.
IH > Horns of Hunger - Baal can cast Absorb.
Whirlwind Sword - Baal can cast Whirlwind.
Weakening Touch - Baal decreases enemy's chances of hit about 5% for 10 seconds.
WT > Tail of Rage - Baal can cast Hell Rage
Commander skills:
Long Tail - 5% percent of chance to stun enemy.
LT > Brainiac - Baal can cast Healing Aura.
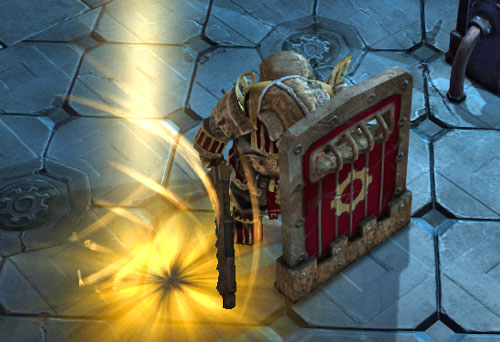
Dummy Banner - Baal can cast Dummy.
Amulets - +10% to critical chance.
A > Nasty Amulets - Baal can cast Portal.
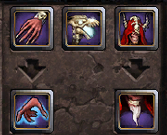
Mage skills:
Hands of Terror - 5% to cause a fear with a hit.
HoT > Croocket Fingers - Baal can cast Rot.
Staff of Motivation - Baal can cast Demonic Whip.
Hastening - + 15% to attack speed.
H > Braided Beard - Baal can cast Lighting Storm.
Spells cost mana.
Icon
Description

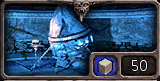
Summon Worker (Cost: 50)
Summons a Worker.

Teleportation (Cost: 5, Cooldown: ~2s)
Teleports Baal and units to where you've been. Decreases aggression about 5 points.

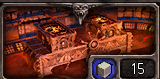
Ligthning (Cost: 100)
Causes 100 damage.

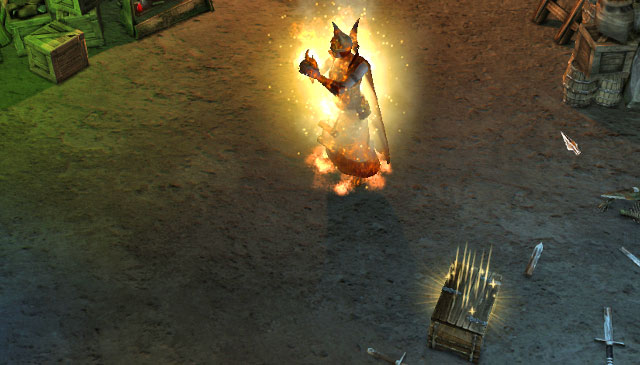
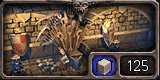
Exploding Turkey (Cost: 125)
Summons a turkey which explodes when attacked. Causes 80 damage for every enemy in the radius of 5 meters. It's counted as a trap, so you can activate it only in your dungeon and counts into number of traps.

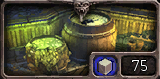
Absolution (Cost: 75)
Explodes selected ally unit what heals 100 HP of all nearby units.

Absorb (Warrior only)(Cost: 125, Cooldown: 1s)
Kills your unit and gives HP to Baal.

Whirlwind (Warrior only)(Cost: 100, Cooldown: 2s)
Baal attacks all nearby units causes 100 damage.

Hell Rage (Warrior only)(Cost: 150, Cooldown: 15s)
Increases aggression of nearby units.

Healing Aura (Commander only)(Cost: 150, Cooldown: 1s)
Heals 5 HP per second for 15 seconds of all friendly units.

Dummy (Commander only)(Cost: 100, Cooldown: 1s)
Changes enemy in a dummy. It can't move or attack.

Portal (Commander only)(Cost: 125, Cooldown: 1s)
Summons Scout or Abomination for 30 seconds.

Rot (Mage only)(Cost: 125, Cooldown: 15s)
Causes 5 dmg per second for 15 seconds for all enemies nearby Baal.

Demonic Whip (Mage only)(Cost: 100, Cooldown: 1s)
+10% to armor, speed and attack speed of friendly unit for 10 seconds.

Lighting Storm (Mage only)(Cost: 150, Cooldown: 1s)
Casts three lightings, every causes 100 dmg.
Here you find description of Minions. They are available from the very beginning. You get them also when you choose Oscar as your Advisor at the end of the third Act.
Those units are created in the Nursery.
Icon and basic information
Name, DEC cost, description
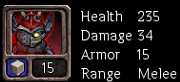
Berserker. DEC: 0 (available from the beginning)
Very solid unit. At the third level is good even against numerous enemies. Of course, it has got solid number advantage.
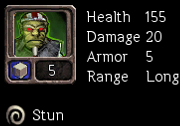
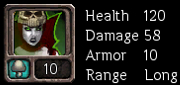
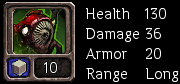
Scout. DEC: 1
Long-ranged bowman. Harass in big group, but low HP makes him useless. There is no way to use all his range in the dungeon and cost is high. He always dies first.
Champion. DEC: 3
Small imp with GREAT sword. He deals huge damage. The only disadvantage is necessity of spending material not mushrooms to produce him. It's better to have other unit to focus damage.
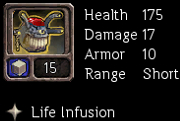
Priest. DEC: 5
The most useful unit in the game. The only one Minion which can heal. But has low HP.
Should be buy out from Index Dungeonis as a first choice always.
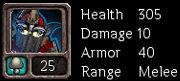
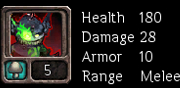
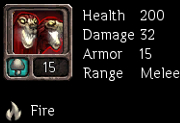
Overlord. DEC: 5
Very useful tank. It's good at focusing damage on himself. He needs good armor. When you plan raids, he should be in the Squad.
Those units require a Dive.
Icon and basic information
Name, DEC cost, description
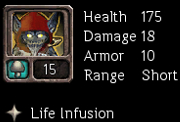
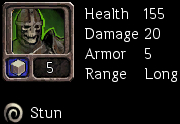
Shaman. DEC: 0 (available from the beginning)
Unit that stuns enemies. In big group they can stop 2-3 enemies, but are very weak at melee and have small amount of HP. The only good thing is a fact that they appear as a Free Unit when two or more Workers play in Dive.
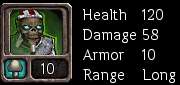
Warlock. DEC: 1
As Shamans Warlocks deal good dmg, but micro number of HP eliminates them from the battlefield.
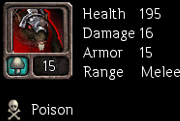
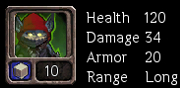
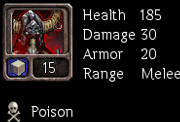
Ratman. DEC: 3
Their poisoning is good. Besides they are not good at all - they have low armor and deal less dmg than Priests. They are produced for cheap Mushrooms, so it doesn't hurt to lose them.
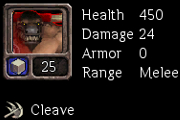
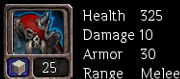
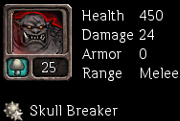
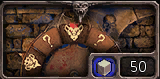
Minotaurus. DEC: 5
Counterpart of Overlord - the latter one is a fortress, the one here is a killing machine. But it has its flows: when enemy focus him, he'll die very quickly. He has no armor but a lot of HP. And he's very expensive...
Weapon:
First level upgrade: +2 damage, cost: 5 materials.
Second level upgrade: +6 damage, cost: 10 materials.
Armor:
First level upgrade: +10 armor, cost: 5 materials.
Second level upgrade: +20 armor, cost: 10 materials.
Mascots:
Shredder - +20% damage
Sheller - +10% armor
Hater - regeneration 1 point of aggression for 6 seconds.
You get an access to this units in the multiplayer and if you choose Velvet at the end of the third Act.
Those units are created in the Screamatorium.
Icon and basic information
Name, DEC cost, description
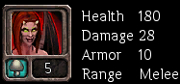
Succubus. DEC: 0 (available from the beginning)
Equivalent of Berserk. Quite good unit. At the third level, with number advantage, can fight against strong units.
Abomination. DEC: 1
Equivalent of Scout. Long range, but low HP. As his equivalent is eliminated very quickly.
Hellhound. DEC: 3
Equivalent of Champion. Deals huge dmg, fire breath. You should have other unit which will focus dmg.
Occulus. DEC: 5
Equivalent of Priest. The only healing unit in Soulless. But has low HP.
Should be buy out from Index Dungeonis as a first choice always.
Dark Dwarf. DEC: 5
Equivalent of Overlord. Very useful tank. It's good at focusing damage on himself. He needs good armor. When you plan raids, he should be in the Squad.
Those units require a Cult.
Icon and basic information
Name, DEC cost, description
Skeleton. DEC: 0 (available from the beginning)
Not bad, undead archer but with low HP. Often appears as a Free Unit in Cult. If you want him in the Squad, have him at the third level.
Wight. DEC: 1
Equivalent of Shaman. They may harass, but has low HP and dies faster than Scouts and Abominations.
Wraith. DEC: 3
Better equivalent of Ratman. Poisoning is useful. They are good: have big armor and deals lot of damage. Use them.
Trolledon. DEC: 5
Precise equivalent of Minotaur, a killing machine. But he has no armor, and his big HP doesn't protect him for too long.
Weapon:
First level upgrade: +2 damage, cost: 5 materials.
Second level upgrade: +6 damage, cost: 10 materials.
Armor:
First level upgrade: +10 armor, cost: 5 materials.
Second level upgrade: +20 armor, cost: 10 materials.
Mascots:
Shredder - +20% damage
Sheller - +10% armor
Hater - regeneration 1 point of aggression for 6 seconds.
In this subchapter you'll find a description of all chambers.
At the beginning you always have: Entrance to the dungeon, destroyed Mushroom-room, one Stockroom and one Treasury. Additional buildings depends on the mission.
Icon and Cost
Name, DEC cost, description
Tunnel. DEC: 0
Joins chambers.
ATTENTION! You can't interrupt a building of corridor!
Nursery DEC: 0
Basic chamber in which you create army. Should be built at the very beginning.
Kitchen DEC: 0
Chamber which let you increase an aggression of your units.
In the further part of the game almost useless.
Stockroom DEC: 0
Place where Workers take mushrooms and materials. Every Stockroom increases a limit of resources about 50. Here you can change mushrooms in materials and other way round.
Dive DEC: 0
Second chamber used to recruit army. It's not a high priority. it's useful because it let you hire 5 workers, who, playing in the Dive, gives you so called Free Units, for which you do not pay. The most often there are Shamans who appear.

Extractor DEC: 0
The only free advanced chamber. It let you extract heroes. You can earn up to 3 DEC points.
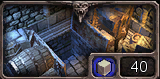
Forge DEC: 1
In here, a Worker let you upgrade weapons and armors and produce traps.
Training Room DEC:1
When it appears, it's vital. It let you train units immediately to second and later (supplied with heroes) to the third level.
Should be built just after Nursery and Kitchen.
Prison DEC: 3
Every hero in here gives you 25 gold.
Arcanium DEC: 5
Arcanium let you make potions and mascots.
Bravery DEC: 3
Brewery attracts heroes. Drunk heroes has 50% chance to miss an attack.
Monster Den DEC: 5
It looks like throne room. You may inscribe a Minotaur here, what increases his stats. What is more, it allows you keep 50 more gold.

Treasury DEC: 0
Default room for keeping gold. Every increases the maximum amount by 50.
Loss of any Treasury ends the game.
Below you find buildings for Soulless units. They replace three chambers from those above. The rest (besides Extractor, look below) is the same.
Sceamatorium (Torture chamber) DEC: 0
Equivalent of Nursery. It let you summon demonic units. It also has a role of Extractor. But to do so, it requires additional Workers.
Sacrifice hole DEC : 0
Equivalent of Kitchen. But you need to sacrifice a Worker here.
Cult DEC: 0
Here you summon undeads. It also works like Dive - hire more Workers and you get free units.

 Indigo Prophecy / Fahrenheit Game Guide & WalkthroughImpire Game Guide & Walkthrough
 inFamous: Second Son Game Guide & WalkthroughinFAMOUS Game Guide & WalkthroughInjustice: Gods Among Us Game Guide & Walkthrough