Pirates of the Savage Sea, an adventure pack to the Heroes VI allows us to play as a legend of the Might and Magic universe: the Crag Hack, barbarian. This time our hero has been involved into the conflict between local brigands, pirate hunters and sneaky Nagas.
During the campaign we lead the Stronghold (Crag Hack didn't forget about his barbarian roots) against the Haven's armies. To help us come the mythical creature, Thunderbird, regiments of elementals and a new equipment, possible to get only on the Savage Sea. One of the hidden items - the Sword of the Pirate King - will be useful even long time after ending this adventure.
So hold you sabre and solve the mystery of the Savage Sea and save Crag Hack's friends before the unavoidable ruin.
Following guide contains:
In the guide following colors are used:
References to maps are marked in such way: (Mx, y), where x is for a map number and y position on it. So denomination (M3, 2) tells, that on the third map you have to go to the place with number 2. Chapters about main quests are marked by (MQ) and about the secondary quests (SQ).
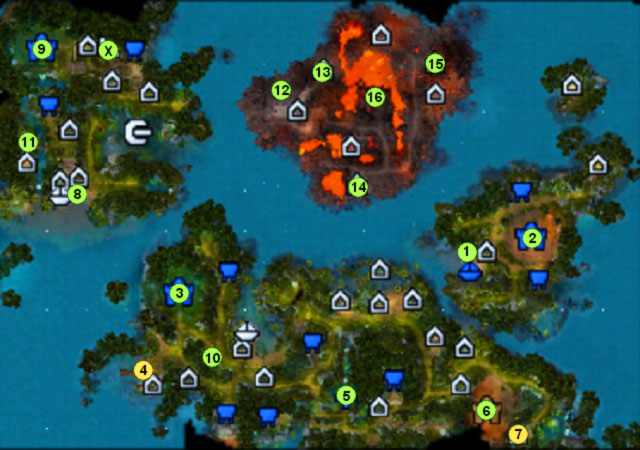
Asmodeusz ()
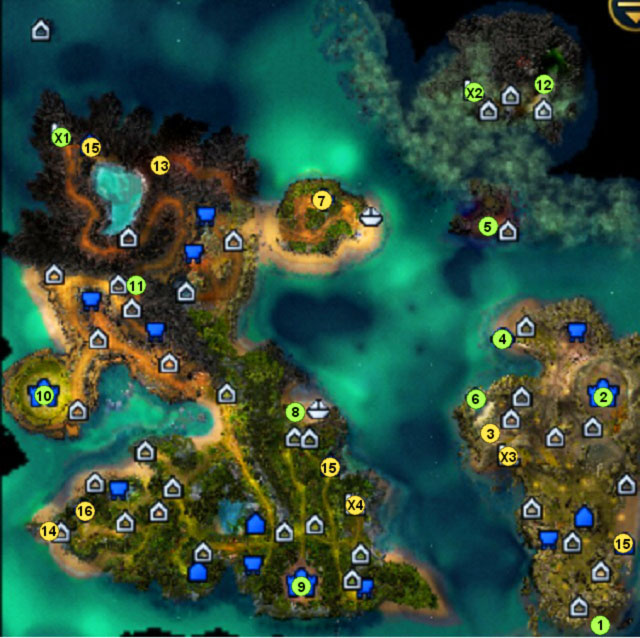
1 - beginning of a mission
2 - city Halaso (Thunder Nest (1/4))
3 - Sailor's Journal (The Captain's Hat, Legacy of a Great Pirate)
4 - shipyard
5 - Falagar (Thunder Nest (2/4), Castaway)
6 - wrecked galleon (Castaway)
7 - neutral fort (Arrr!)
8 - ice barrier
9 - city Koriuaka
10 - city Baile Liam (Pirate Hunter)
11 - closed gate (Thunder Nest (3/4))
12 - Thunderbird (Thunder Nest (4/4))
13 - Thunder Amulet (Kind Pirate)
14 - Father Heaven's altar (Kind Pirate)
15 - raiders camps (Arrr!)
16 - neutral fort (Arrr!)
X1 - descent to the tunnel under the Coral Barrier (Thunder Nest (3/4))
X2 - Exit from the tunnel under the Coral Barrier (Thunder Nest (4/4))
X3 - entrance to the undergrounds (The Captain's Hat)
X4 - exit from the undergrounds (Legacy of a Great Pirate)
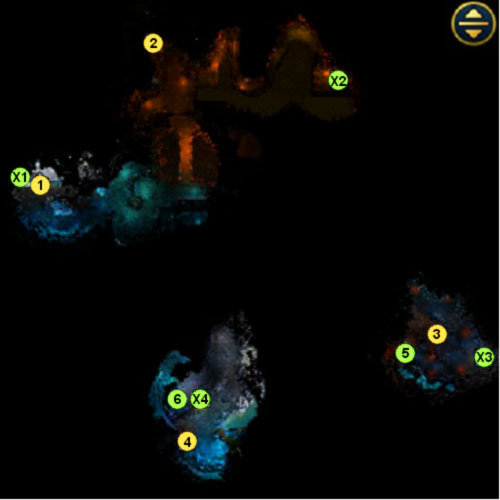
1 - Revelation Crystal (Gives +1 to magic defence permanently. Only one-shot for hero)
2 - Hell Forge (+5 to might power and magic power for a week. Hero can use it once per week.)
3 - Sigil of Arkath (+5 to magic defence for a week. Hero can use it once per week.)
4 - Stone of Enlightment (gives 2500 XP. Hero can use it only once)
5 - Captain's Hat (The Captain's Hat)
6 - Pirate Armor (Legacy of a Great Pirate)
X1, X2, X3, X4 - exits from the undergrounds according to the entrances on the map M1
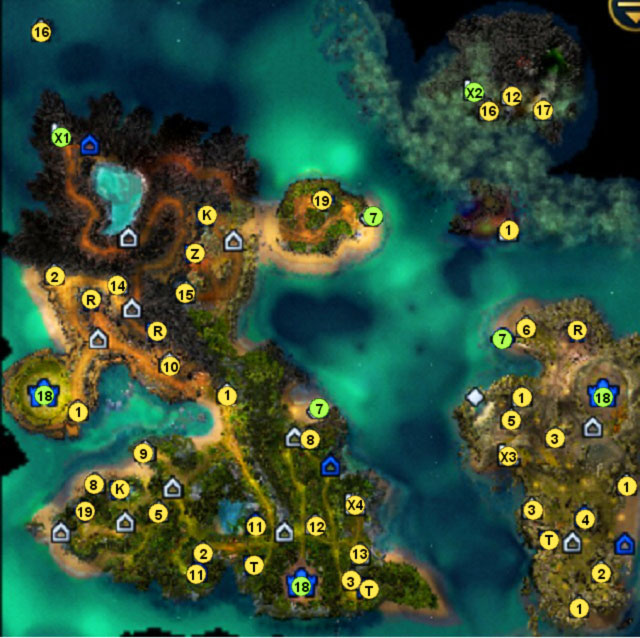
1 - Stone of Enlightment (gives 2500 XP. Hero can use it only once)
2 - armoursmith (permanent +1 to the might defence. Only one-shot for hero)
3 - war ancient (increases hero's fate and Charismatic Leader about 5 for next battle, additionally, he gains 5 movement points. Can be used only one time per battle)
4 - Subordinate altar (increases population in Strongholds)
5 - weaponsmith (gives permanent +1 to hero's might attack. One-shot for a hero)
6 - artifact merchant (Here you can buy and sell items)
7 - shipyard (you can buy ships here)
8 - mother earth shrine (increase hit points of all unit about 10%. Once per every fight)
9 - lighthouse (increase's army morale. Hero can use it once per week. )
10 - arena (After defeating guards it gives +2 to might power or might defence permanently. After fight all lost troops are resurrected)
11 - barracks (increases population in Havens)
12 - arcane library (Gives hero + 1-3 magic power or + 1-3 to magic defence. Number of points depend from hero's level (1-10: 1, 11-20: 2, 21-30: 3). Hero can use it only once)
13 - Crystal of Power (Gives permanent +1 to hero's magic power. Only one-shot for hero)
14 - stable (increases hero's movement points by 5. Hero can use it once per week)
15 - Dragon Nexus (doubles hero's maximum mana points. Can be used once per week)
16 - blind maiden (increase hero's destiny by 5. Only once per fight)
17 - Angels Shrine (+5 to magic power and Leadership do the end of current week. One use per a week.)
18 - city
19 - fort (lets you take control on the nearest area)
T - sawmill (2 wood per turn)
R - stone mine (2 stone per turn)
K - crystal mine (1 crystal per turn)
Z - gold mine (1000 gold per turn)
X1, X2, X3, X4 - entrance to the underground
1 - beginning location on the surface
2 - city Kodibio
3 - city Fukamishiro
4 - Ulagan's ship (Ulagan's Warcry)
5 - Sanctuary's fort (Counterspell)
6 - Pirate Council's city: Libertalia (Medusa (2/5))
7 - ruins (Skull Ring)
8 - place of the attack on the third island (The Pirate King)
9 - city of Ajakashijo and Kaishin (The Pirate King)
10 - Holy Seed (Counterspell)
11 - Holy Seed (Counterspell)
12 - place of the attack on the volcano (Counterspell)
13 - First Conflux (Counterspell)
14 - Second Conflux (Counterspell)
15 - Third Conflux (Counterspell)
16 - Himiko (Medusa (5/5))
X - entrance to the Sunk Temple (The Pirate King)
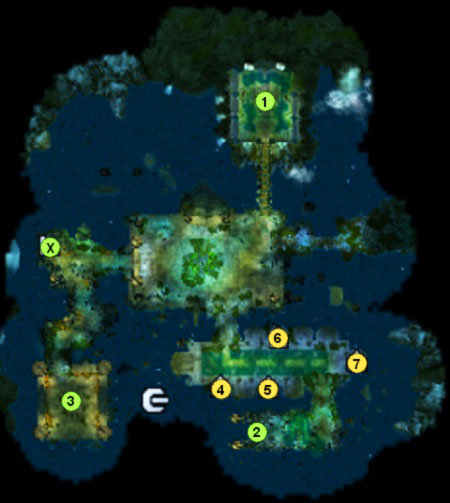
1 - beginning location of the second mission
2 - ship, an escape from the prison (Medusa (1/5))
3 - temple's army defending the Sword of a Pirate King (The Pirate King)
4 - ice pearl shrine (+10 to army's initiative. Once per week)
5 - Crystal of Power (Gives permanent +1 to hero's magic power. Only one-shot for hero)
6 - blind maiden (increase hero's destiny by 5. Only once per fight)
7 - Revelation Crystal (Gives +1 to magic defence permanently. Only one-shot for hero)
X - exit from the western part of the Sunk Temple
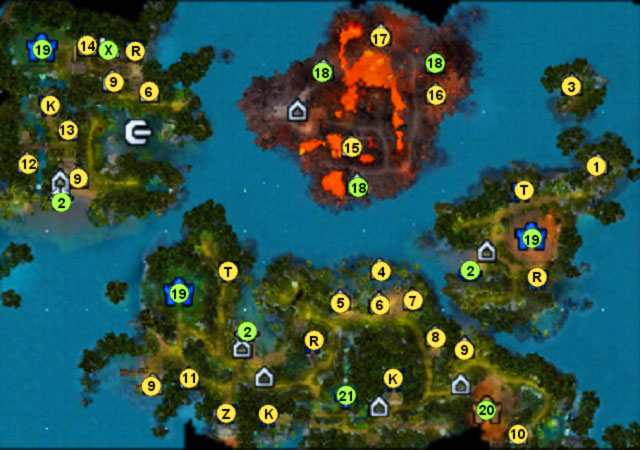
1 - arcane library (Gives hero + 1-3 magic power or + 1-3 to magic defence. Number of points depend from hero's level (1-10: 1, 11-20: 2, 21-30: 3). Hero can use it only once)
2 - shipyard (you can buy ships here)
3 - armoursmith (permanent +1 to the might defence. Only one-shot for hero)
4 - blind maiden (increase hero's destiny by 5. Only once per fight)
5 - Water Elemental Shrine (If friendly units get damaged, they will obtain ice armor spell)
6 - Stone of Enlightment (gives 2500 XP. Hero can use it only once)
7 - stable (increases hero's movement points by 5. Hero can use it once per week)
8 - weaponsmith (gives permanent +1 to hero's might attack. One-shot for a hero)
9 - war ancient (increases hero's fate and Charismatic Leader about 5 for next battle, additionally, he gains 5 movement points. Can be used only one time per battle)
10 - ruins (Guarded by group of creatures - when you win a battle, you get some precious item or troop of friendly units joins you.)
11 - mother earth shrine (increase hit points of all unit about 10%. Once per every fight)
12 - arena (After defeating guards it gives +2 to might power or might defence permanently. After fight all lost troops are resurrected)
13 - reverie shrine (You get bonus +10 to initiative and +5 to might attack. Only once per battle)
14 - Revelation Crystal (Gives +1 to magic defence permanently. Only one-shot for hero)
15 - altar of destruction (In the next battle your enemy will be attacked by meteors. You can use it once per week.)
16 - Chaos Wave (During next battle on your side appears computer controlled monster. It starts eating random enemy units (it can be interrupted by killing a beast). You can use it once per week.)
17 - demons shrine (+5 to might power and luck for a week. You can use it once per week.)
18 - Conflux (allows you to recruit elementals)
19 - cities
20 - city of Pirate Council (you can't conquer it)
21 - fort (lets you take control on the nearest area)
T - sawmill (2 wood per turn)
R - stone mine (2 stone per turn)
K - crystal mine (1 crystal per turn)
Z - gold mine (1000 gold per turn)
X - entrance to the Sunk Temple
Troubles on the Savage Sea: storms consume ships commanded by the experienced sailors. There are rumors that the bad weather is caused by the Thunderbird, who set up his nest somewhere on the islands. To eliminate the threat, the Pirate Council hired a legendary captain Crag Hack - who is you, dear player - to find and defeat the beast.

Goals: Find information about the Thunderbird
Reward: 100 000 XP
We began on the southern-east edge of the map (M1,1). As we have a little army, we can put off an exploration of the island and conquering the mines and start with getting the first city. It's easy, because we can pass most of enemies and, after few turns, stand in front of Halaso (M1,2). It should be a piece of cake - conquering the city ends this part of the main quest.
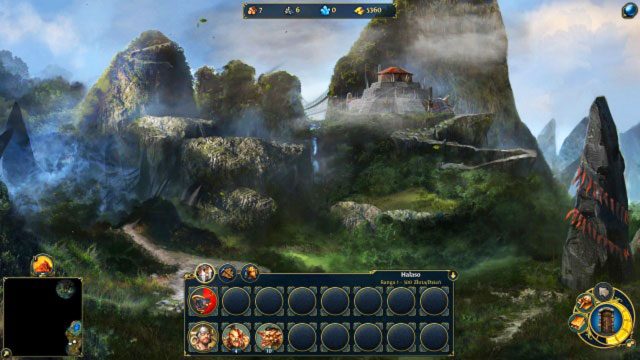
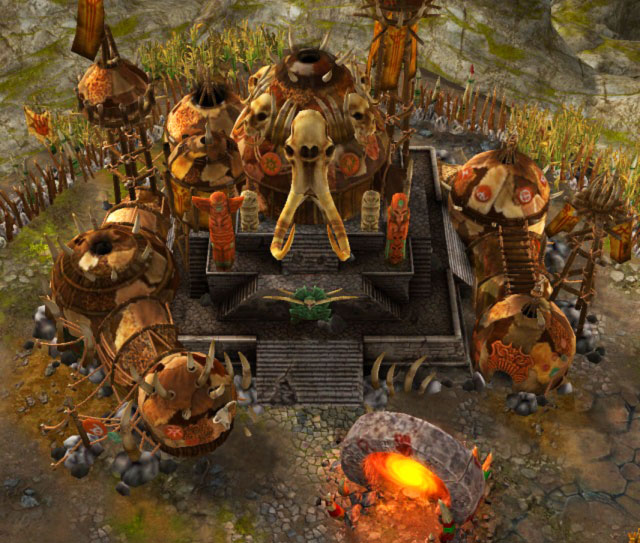
Our first Stronghold.
Goals: find a way to the Thunder Mountain
Reward: 120 000 XP
Conquering Halaso not only pointed out the nest of the Thunderbird but also shows us another clue: Crag Hack found out that on the coral reef nearby lives an old man who is worth to be visited. But before we move on the open waters of the Savage Sea we should upgrade our army and finish an exploration of the island. Firstly, take over two sources of resources: sawmill on the south (M1,T) and the stone mine on the north of an island(M1,R). First building which we should make is a marketplace, which allow us to get remaining crystals. Then we should build ASAP Centaur Camp and Harpy Nest, then upgrade it to the Harpy Colony. Received centaurs and furies let us win most of battles without loses. Besides that, it's good to secure nearby Subordinate altar(M3,4) to maximize a number of our troops. The last one curious thing is a Sailor's Journal (M1,3) - an artifact which begins two secondary quests: " Legacy of a Great Pirate" and "Captain's Hat".
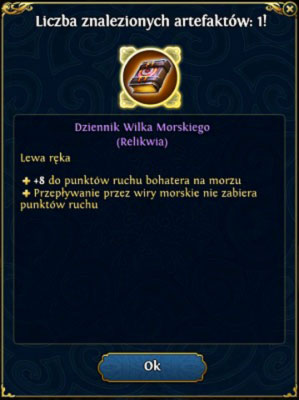
Journal will be useful during travelling through the Savage Sea.
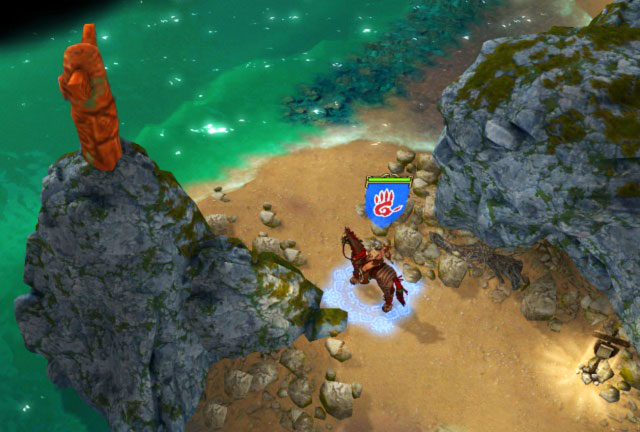
After securing the island and recruiting new troops we can continue our adventure. To do so, we have to build a ship in a shipyard (M1,4) for 10 wood and 2500 gold. First thing that we should pay attention to, after embarking, are Pirate Hunters on the coastal waters. Moving south we'll meet few hostile heroes, one stronger than the other. But it's worth to eliminate them during this quest, because they can suddenly land on the shore and attack our city. After cleaning up, we move north from the shipyard until we find the first island (M1,5). After leaving the boat and approaching the Falagar we'll get to know that he'll help us get to the Thunderbird for a small favour.
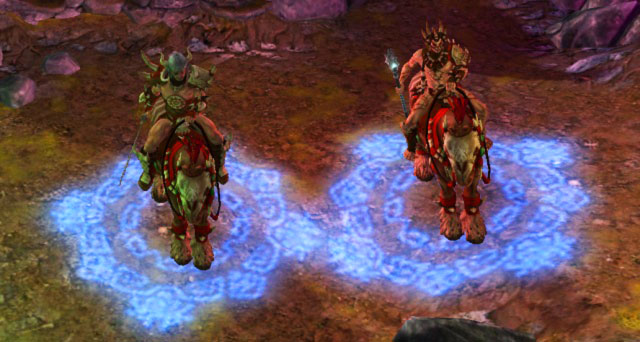
Almost like a family photo: Crag Hack i Falagar.
Goals: find a Archmage Codex
Reward: 50 000 XP, +5 Destiny, 30 furies
The quest is much simpler than it looks like. It's enough that we move south from the hermit's island and we'll find a wrecked ship (M1,6). After short battle with ghosts and darkness elementals we get into possession famous Archmage Codex, what ends the quest. Now, return to the old man and he'll tell us how get to the Thunderbird and what challenges lay before us.
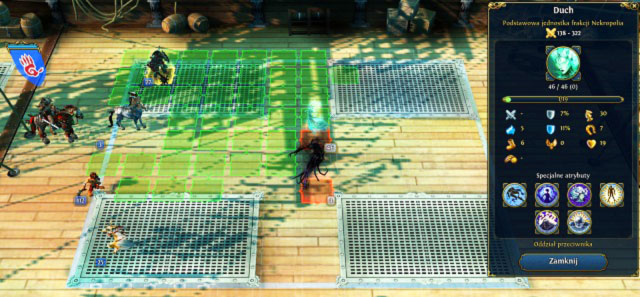
Fight with ghosts and darkness elementals for the....
Goals: defeat the leader of the Pirate Hunters
Reward: 50 000 XP, Hook, +5 to might attack
Falagar told us that we have to go through the tunnel under the Coral Barrier, to which entrance is on the territory of the pirate hunters. Before invading the west island, it's worth to sail it around and collect swimming leavings and treasure chests. Besides, we can conquer one out of two crystal mines on this map (M1,K) and the Haven Fort which controls it (M1,7). At this point you should have most of the recruitment buildings, maybe without the Cyclop Mound. If we have lot of resources, we can trade them for the crystals and build remaining structures.
Ice barrier blocks our way. We need a help of Falagar.
Attack on the pirate hunters we begin from landing on the beach (M1,8). But we quickly find out that the way is blocked by the ice barrier. Here, Falagar will be helpful - we just need to get him to the barrier and he'll disperse the spell and let the Crag Hack to continue his travel. Our first goal should be a city straight on our way - Koriuaka (M1,9). It'll become our base for further island exploration and after building the town portal let you immediately replenish an army from Halaso.
Town portal let you move immediately between the islands.
In this place we have two ways: we can attack the second area controlled by the pirate hunters on the north part of the island or take over the neutral, southern-west territory. As the neutral armies won't attack as I suggest to eliminate our mission goal firstly: a leader of an enemy fraction, Jon. Usually he moves on the northern part of the island, within control zone of his own castle or waits in front the city Baile Liam (M1,10). If we collected all available troops before that attack, the battle should be very easy. In the first turn we should try reduce the number of griffins with the hero's centaurs, goblins and cyclops attacks. Then we eliminate next troops, concentrating on the knights and glories. Defeating Jon ends actual mission. If the battle took place outside the city walls, we'll have to have another one, simpler encounter to seize it.
Battle with the pirate hunter's leader - Jon.
Goals: find the tunnel under the Coral Barrier
Reward: 100 000 XP
Completing of the previous quest opens the gate (M1,11) blocking the way to the undergrounds. But before we go for the Thunderbird, it's worth to finish an exploration of the surface and make all of the secondary quests: as a reward we'll receive another parts of the Pirate Set. It's also a high time to build remaining recruiting buildings in all cities and collect all bonuses available for our hero. Arena (M3,10) increases our might attack or defence while the armoursmith (M3,2) improves our armor - it all will be helpful in the following battles.
When we get prepared to the further travel, just go through the gate (M1,11) and move to the entrance to the tunnel(M1,X1). After using the stairs, another part of the mission ends.
Tunnel under the Coral Barrier is defended by the big troops of the fire elementals.
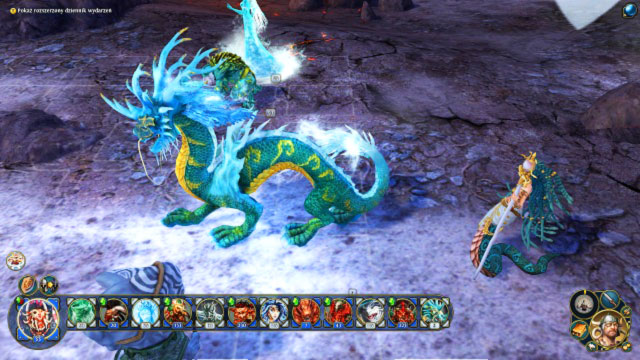
Goals: Defeat the Thunderbird
Reward: 120 000 XP
Difficulty of this part of mission depends on how fast we get to the tunnel and how much army we have. The longer it took us to get here, the stronger enemies will be. First part of the way is blocked by the earth elementals. Fight with them shouldn't be problematic, because they're very slow and can be easily shot down by for example goblins, centaurs or cyclops. Wounded elementals finish using furies and if it isn't enough, then use dreamreavers and then orcs. With a bit of abilities we should defeat enemies with minimal loses. The second part of undergrounds is much more difficult and guarded by fire elementals. If it is possible (depending on size of our army) we let the enemy to flee and avoid the battles. But if we are forced to fight, try fight very carefully and spare your troops. After leaving the tunnel (M1,X2) visit blind maiden (M1,16), arcane library (M1,12) and angels shrine (M1,17). Bonuses will be useful in the following encounter. Way on the north (M1,12) automatically begins the final battle.
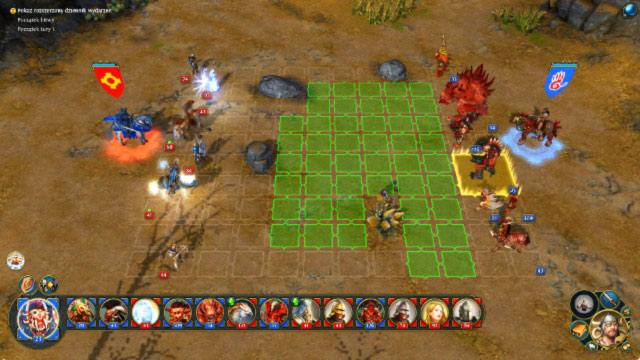
Moving north we begin the battle with the Thunderbird.
During the battle with the Thunderbird we have defined and small amount of the army. Enemy has several thousands HP and cause few thousands damages in a hit. But with a good strategy we can defeat the beast easily. Firstly, look at the abilities it has. Static Shock causes 1000 damages and additional 1000 for every neighbouring unit. To minimize loses it's enough to make a space between our units. Second strong spell is a Lighting: it hits particular troop for three turns and causes 3000 damages. But also in this case we can minimize loses - send the unit nearby the tree and the lighting will hit it. With this wisdom we can begin the battle. As often as possible use the special abilities of your army and protect them before the Static Shock. During the fight use properly the hero's Blood Rage. Every time the second level of this ability is available, you should use it to improve attacks of your army.
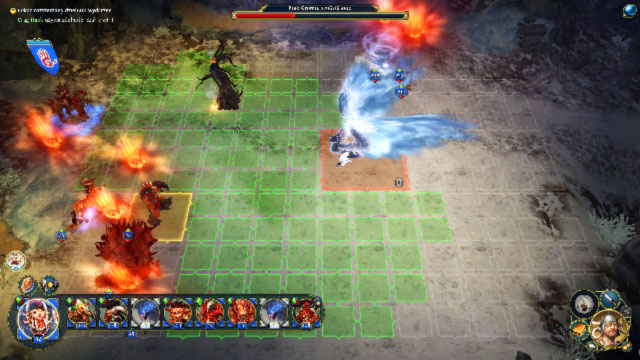
Blood Rage in use: thanks to it our troops will cause thousands of damages.
Using this advices you should win after several turns and end the first mission of a campaign.
Goals: find a Captain's Hat
Reward: 24 000 XP, Captain's Hat, +5 Charismatic Leadership
It's one of few secondary quests available in the first mission. We activate it by taking the Sailor's Journal (M1,3). Hat is in the undergrounds, in the southern part of the first island (M1,X3) and is guarded by few troops of earth elementals. We can defeat them easily before going on a deep waters.
Goals: find a Pirate Armor
Reward: 24 000 XP, Pirate Armor, +5 might defence
This quest is activated simultaneously with the "Captain's Hat" but to complete it we have to wait longer. Armor is in the undergrounds in the eastern part of the second island (M1,X4). The best moment to go for it is conquering the Koriuaka (M1,9). After replenishing army after siege and before an invasion to the northern part of the second island we'll have enough time to go undergrounds. The armor, as the hat before, is guarded by the earth elementals. And again we shouldn't have problems with them. The armor is a part of the Pirate Set - picking it up ends the quest.
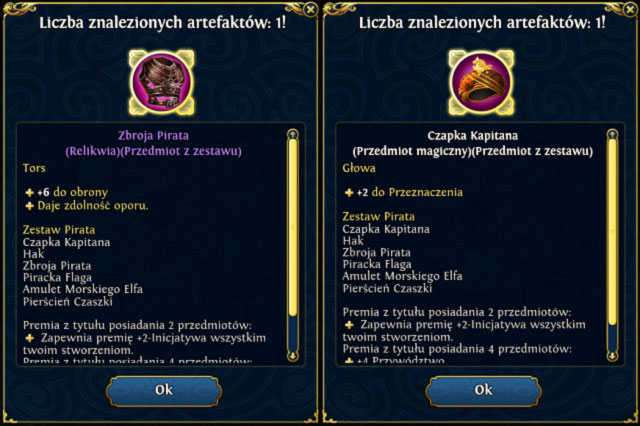
Two out of six artefacts from the Pirate Set.
Goals: Sacrifice the Thunder Amulet on the Father's Heaven Altar
Reward: 24 000 XP, 150 tears reputation points, 50 dreamreavers
This quest activates itself in a middle of a mission of defeating all pirate hunters. It requires having enough tears reputation points. The easiest way to gain them is to let the weaker troops run. After defeating one of such groups Crag Hack announces that we should honour the orc's god, Father Heaven with the appropriate sacrifice which is a Thunder Amulet, which you can find on the northern-west side of the map (M1,13)and is defended by few groups of earth elementals. To complete the quest we have to go to the altar in the southern-west part of the second island (M1,14). After reaching the statue Crag Hack gives the amulet and ends the mission.
In this place we give the amulet to the Father Heaven
Goals: conquer three raiders camp, all cities and forts, collect 50000 gold
Reward: 24 000 XP, 150 blood reputation points, 50 panther warriors
As the previous quest, this one requires having an appropriate amount of the reputation points - blood this time. As we obtain them for fight with enemies, "Arrr!" should activate during battles on the second island. This time Crag Hack, as a pirate, announces that besides heroic acts, his life was full of violence and treasures and he won't change it. To do so, he wants to conquer all raiders camp (M1,15), cities and forts on the surface (M1,7), (M1,16) and, ultimately, collect 50000 gold. This quest is easy, because during preparing to the battle with the Thunderbird you'll do all of that.
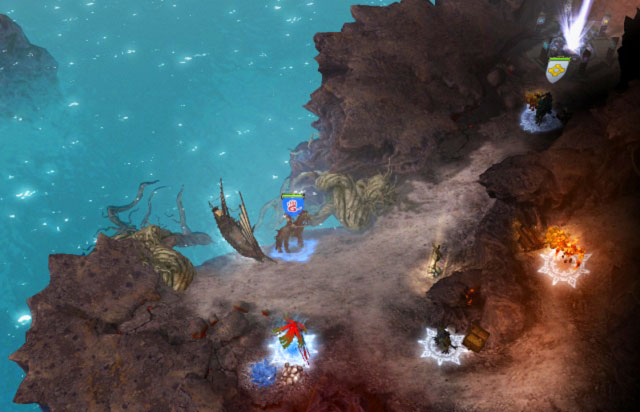
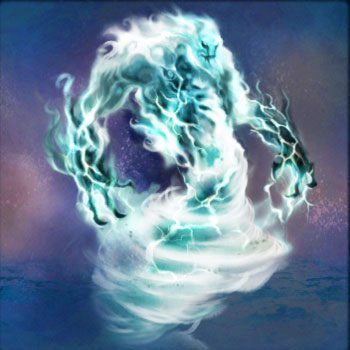
Goals: Escape from the Sunk Temple
Reward: 120 000 XP
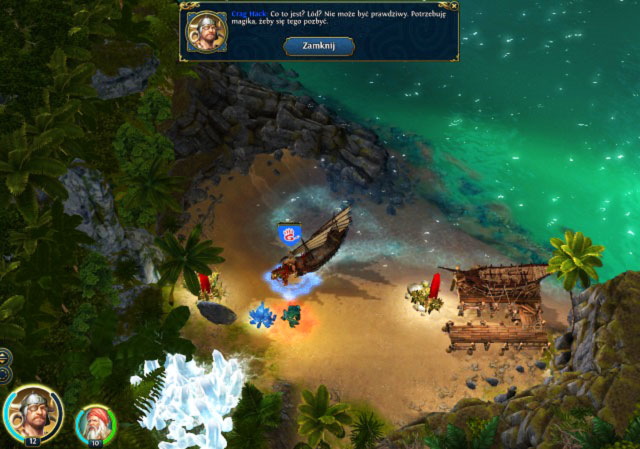
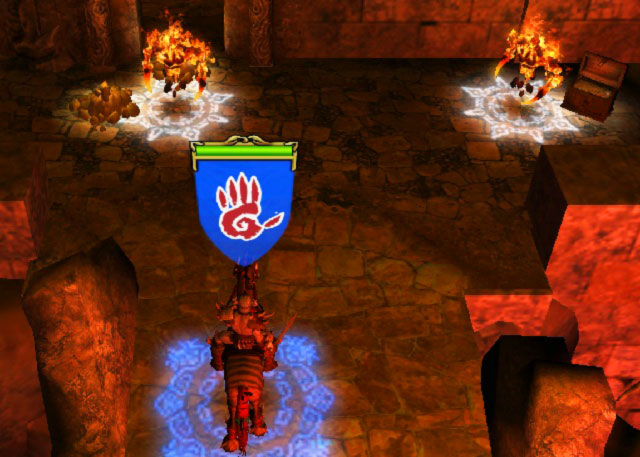
If we want to stop the priestesses Himiko, we have to get out on the surface. We begin in the underwater prison of fallen Nagas (M2,1). Moving south we'll find a big chamber full of spell scrolls, which you can give to your hero. Because the western doors are closed (the area behind it we'll search later on), and the eastern part is a dead end, we have to continue moving south. Next chamber is full of Sanctuary's army guarding the prisoners and various shrines - here you can collect your first army. At the very end you'll find a ship (M2,2) which will take you on the surface and ends the quest.
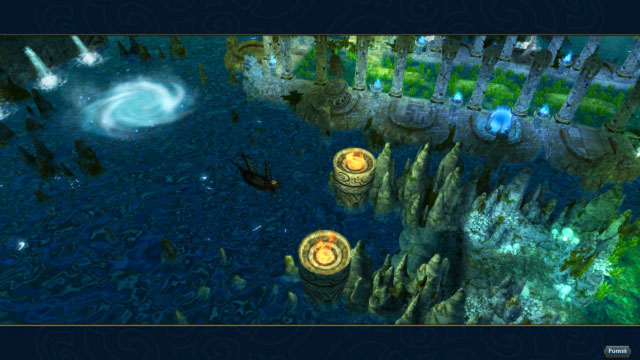
Escape from the Sunk Temple. Whirlpool will take you on the surface.
Goals: Meet with the Pirate Council
Reward: 120 000 XP
At last we get out on the surface! Next part of the main quest we begin from conquering Kodibio (M1,2), stone mine (M3,R) and sawmill (M3,T). Island on which we are is small, so after buying all available units it's time to go on the sea. First problem which you have to solve is a blue enemy. Heroes from the city on the second island, Fukamishiro, will regularly attack our capitol so defeat their castle (M1,3). Battle shouldn't be problematic, because location is rather weakly defended and attacks of Crag Hack only should be enough for defenders. With the city we obtain all connected places: sawmill and gold mine.
WARNING: on the second and the third island you can find an artifact called Holy Seed, which will be needed later. You can pick them up now, but with Crag Hack - otherwise you won't complete the campaign.
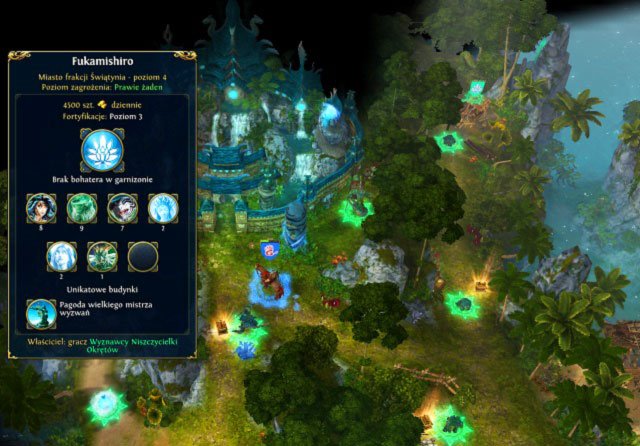
Our first oversea estate - of course, we have to conquer it first.
After seizing Fukamishiro you can begin explore the island. It's a perfect moment to make a secondary "Ulagan's Warcry" because in return you obtain lot of upgraded units, which let you finish few following quests. After that you have to go to the city of the Pirate Council. On the way you'll be passing the Sanctuary's Fort (M1,5); you can ignore it for now, because it's connected with the further part of the main quest. The most important thing now is get to the Libertalia (M1,6) what ends actual mission.

Goals: defeat Kaishin, find the Sword of the Pirate King in the Sunk Temple
Reward: 60 000 XP, 5 destiny points
The Pirate Council is ready to support us in the war with Nagas but only when Crag Hack unites all pirates, becoming their king. Unfortunately, the information about Sword of the Pirate King knows only Himiko's lieutenant, Kaishin, which he won't give without fight. Before moving on, we should build town portal both in Fukamishiro and Kodibio and also collect all possible army. We can also quickly do the secondary quest "Skull Ring" - taken artifact will be useful later.
Our goal is another island, in the northern-west edge of the map. After landing on the beach (M1,8) we should move on north, cleaning up the road and collecting bonuses from the buildings like the reverie shrine. Within few turns you should reach steep stairs at which top is a castle Ajakashijo (M1,9) with the Kaishin you're looking for. If you developed your city properly and took all available soldiers here, the battle will be a piece of cake. Unfortunately, Naga hasn't have the Sword but defeating him opens the entrance to the undergrounds.
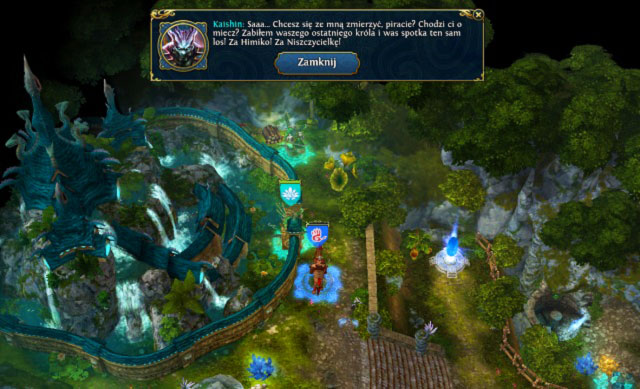
Kaishin and his sharp tongue before the battle of Ajakashijo.
Stairs lead to the Sunk Temple - but this time to its west side, behind the closed doors you've met at the beginning. The item you're looking for is in the big chamber on the south (M2,3) - Sanctuary's army in the middle of the room has it. And as this army is even weaker than the Kaishin's one, the Sword of the Pirate King will be quickly your.
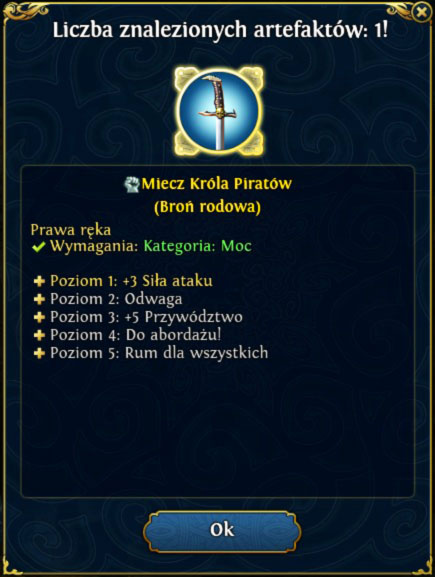
Our goal - one of the most powerful Dynasty weapons: Sword of the Pirate King.
Goals: become the Pirate King
Reward: 120 000 XP
You have the Sword of the Pirate King, now just show it to the world. After leaving the Sunk Temple, this part of the main quest will be completed.
You can boast about your successes to your friends.
Goals: free Ciele from the cultist's fort, find three Holy Seeds, conquer three Confluxes
Reward: Sea Elf Amulet, 24000 XP, +5 magic defence
Hero who you have to free is in the Sanctuary's Fort (M1,5) between the Fukamishiro and the Pirate Council city. It's the central area of the second island and if you hadn't conquer it yet, the high time has come. Its defence is very weak and you shouldn't smash it, even if there are few kirins. After that, Ciele joins you and asks about collecting three Holy Seeds. She has one, so you have to find two next. You'll find them on the second (M1,10) and third (M1,11) island, defended by the neutral creatures. After collecting them Falagar opens the way to the last, central island.
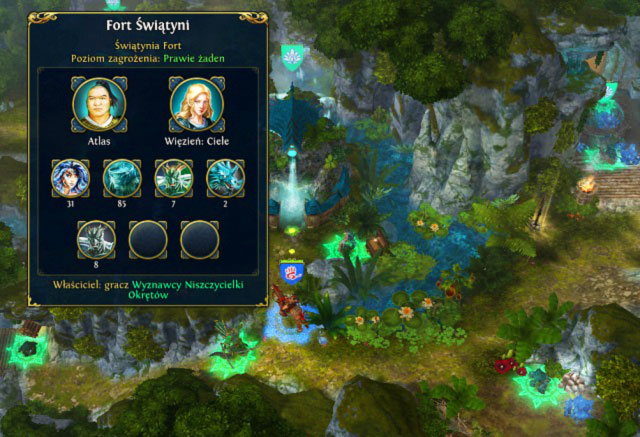
Ciele is a prisoner in the Sanctuary's fort in the middle of the second island.
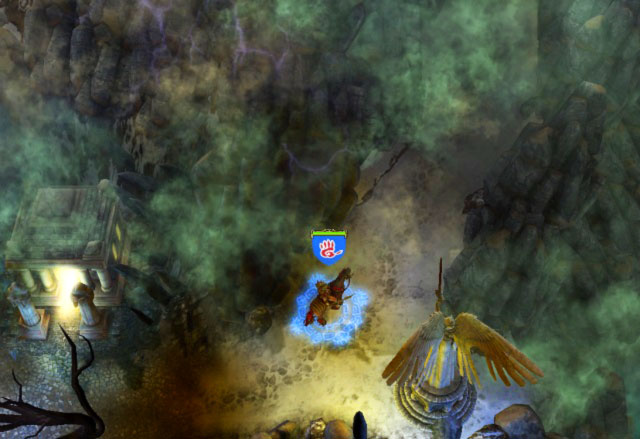
Our last goal is conquer and hold three Confluxes. We land on the vulcanic island on the northern beach (M1,12) from where we head straight to the closest enemy, monk Zhaoyu. After short battle you get the first Conflux (M1,13) and if you need new units, you can use the portal for hiring elementals. Then move deeper into the island. On the way you will pass the Altair of Destruction (M3,15). If you visit it, in the next battle the rain of fire will drop on enemy. It's worth to use because a moment later you'll meet another opponent: samurai Kalindra. As the previous one, she guarded the Conflux (M1,14). With the support of Altair and freshly recruited elementals the battle will be yours. Continuing the travel, omit the Chaos Wave (M3,16). This building we will use before the final battle. Now focus on the fight with the monk Chiyoko, the defender of the last Conflux. After that take over the nearby portal (M1,15) and the way to Himiko (M1,16) will open.
Place of landing on the volcano - away you can see the Conflux and its defender.
Goals: finish the main quest: "Counterspell"
Reward: 120 000 XP
This quest completed itself after finishing the mission "Counterspell" as in the description. It's the easiest 120 000 XP in this campaign.
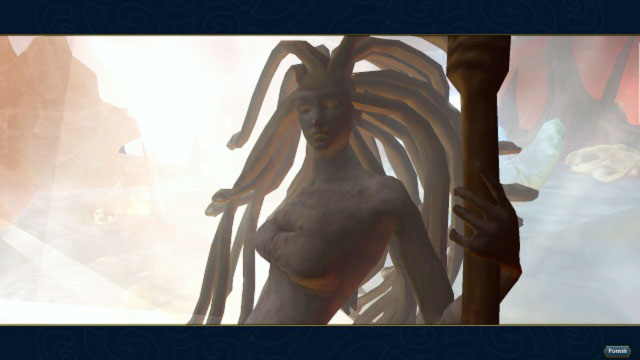
Goals: defeat Himiko
Reward: 120 000 XP
Finally, you opened the way to the person responsible for the chaos on the Savage Sea - the priestess Himiko. As it's the last battle in this campaign, you should complete all secondary quests, collect all artifacts you want and recruit all available troops before it. On the way to Himiko you can also visit Altair of Destruction and the Chaos Wave, which will be very helpful.
Himiko has a Holy Kirin - the most powerful unit in the Sanctuary.
The encounter you should begin from attacking the coral priestesses with your hero, centaurs, goblins and cyclops. Furies should attack kenshis or the holy kirin - depends which one will be in a range. Then you should concentrate on the fastest enemy's units and defend your shooters. As in the battle with the Thunderbird, use the Blood Rage after charging it to the second level. At the end eliminate mizu-kami and wanizame.
After the long and exhausting battle Crag Hack deals with the priestess and his pirate past and you can use taken dynasty weapon in the new games.
Goals: find an Ulagan's ship
Reward: Pirate Flag, 100 crushers, 20 panther warriors
Although this quest is available from the beginning, making it will consume some time. Our goal is a ship on the second island (M1,4) and the best moment for visiting it is during the main quest: "Medusa (2/5)". As you approach the ship, Ulagan's boys join you, so leave some free slots in your army.
Ulagan's ship in the port - his boys will join you cheerfully.
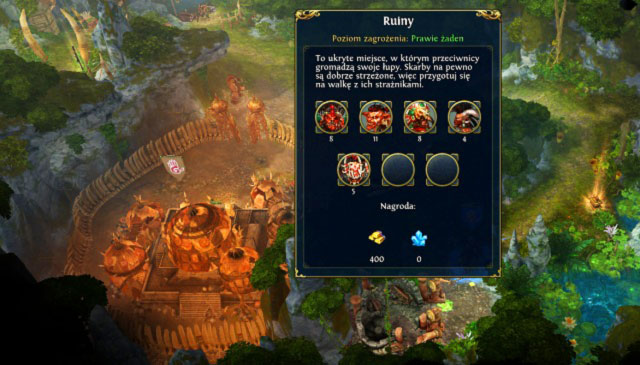
Goals: find the Skull Ring
Reward: 24000 XP, Skull Ring, +5 Charismatic Leadership
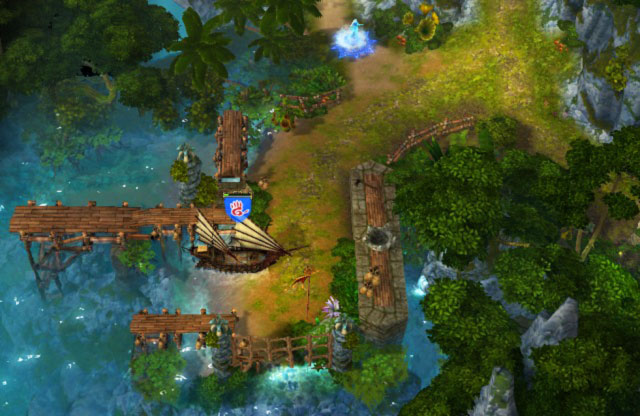
This quest activates after conversation with the Pirate Council during the main quest "Medusa (2/5)". The ring lies in the ruins by the city (M1,7). Just follow the road on east and at it ends you will find the treasure. After short battle with guards you become a new owner of the Skull Ring, another part of the Pirate Set.
Ruins in which you can find the Skull Ring are nearby the Libertalia.
New adventure means new treasures, and this time is no difference. We get the Pirate Set and new, powerful dynasty weapon: Sword of the Pirate King.
Pirate Set you can complete only while completing the campaign of Crag Hack. Every mission contains three elements of the set.
Item
Localization
Properties
 Hook
HookLeft hand
When hero makes an attack all friendly units get +4 morale until the end of the battle. Maximum bonus is +12 to morale.
 Captain's Hat
Head
+2 to Destiny
 Pirate Armor
Body
+6 to might defence
 Pirate Flag
-2 to enemy's units Luck
 Skull Ring
Finger
Fears enemies.
 Sea Elf Amulet
Neck
+3 to Charismatic Leadership
+3 to magic defence
Depending on the number of items from the set, you obtain following bonuses:
Number of items from the set
Bonus
2
+2 to initiative for all friendly units
4
+4 to Charismatic Leadership
6
+8 to defence
It's a new dynasty weapon which we can unlock in the second mission of Crag Hack's campaign. After getting it, you'll have to play at least several missions to get all bonuses. Is it worth it? Of course, especially if you want increase morale of your army.

Level of the dynasty weapon
Bonus
1
+3 to might attack
2
Courage
Units are resistant to effects decreasing their initiative.
3
+5 to Charismatic Leadership
4
Boarding!
Units get +10 morale +5 initiative and +2 movement points in the first turn of battle.
5
Rum for all
Increases morale of all unit about 15. Lasts 3 turns.
Expansion Pirates of the Savage Sea let you recruit elementals. They are an elite neutral units, without a fraction. You can buy them in Confluxes and their presence on the battlefield can be crucial. Every elemental has different abilities and role on the battlefield.
Unit
Statistics
Attributes
Cost
Air elemental
Air affinity: Elementals are dealt 50% reduced damage from their affinity element and 50% increased damage for their counter-element. Elementals are also immune to negative effects from their affinity element.
Spirit form: Spirits benefit from 50% resistance to all damage at the start of each combat. Lasts until an action was taken by the creature.
Living: Can be healed and resurrected. Susceptible to morale.
Wind shield: Attacks cannot be retaliated.
Cyclone: Reduces ranged damage dealt to the elemental.
Lighting strikes: Ranged attacks deals damage (Air) to the target stack and up to three extra enemy stacks. Damage is halved by each jump.
390 gold
Air elementals are born to be snipers. They don't have penalties for long distance, can hit few units at once and get less damages from archers. If you can protect them before melee enemies you may be sure that elementals will shoot down your opponents.
Unit
Statistics
Attributes
Cost
Darkness elemental
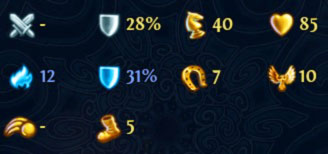
Darkness affinity: Elementals are dealt 50% reduced damage from their affinity element and 50% increased damage for their counter-element. Elementals are also immune to negative effects from their affinity element.
Spirit form: Spirits benefit from 50% resistance to all damage at the start of each combat. Lasts until an action was taken by the creature.
Living: Can be healed and resurrected. Susceptible to morale.
Shadow form: Attacks also dispel one random positive effect from the target.
Weakening grasp: Reduces Damage (Might) by 20% for 3 turns.
Shadow strike: Attacks using the shadows as gates to the Spirit World to come back to its previous position, avoiding retaliation.
440 gold
Darkness elementals are support melee units. Their goals should be strongest enemy melee units, boosted with spells. Shadow form dispels the bonus and the Weakening grasp decreases his strength. Simultaneously the Shadow strike causes no retaliation so the enemy won't hurt your unit.
Unit
Statistics
Attributes
Cost
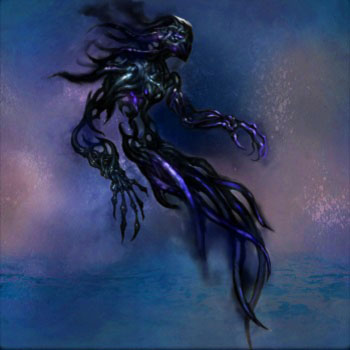
Earth elemental
Petrification: Target creature turns to stone and becomes invulnerable for 1 turn. Target enemies cannot act. Target friendly creatures may act but doing so will dispel this effect.
Earth affinity: Elementals are dealt 50% reduced damage from their affinity element and 50% increased damage for their counter-element. Elementals are also immune to negative effects from their affinity element.
Spirit form: Spirits benefit from 50% resistance to all damage at the start of each combat. Lasts until an action was taken by the creature.
Living: Can be healed and resurrected. Susceptible to morale.
Regeneration: creature heals some of its HP every turn.
460 gold
Slow but tough, that's how you can describe the earth elementals. Thanks to the big resistance to might and magic and regeneration you can be sure, that they get to the enemy's lines. But it's Petrification what is the biggest advantage of this. Properly use can exclude the particular troop from the battle, what may be decisive.
Unit
Statistics
Attributes
Cost
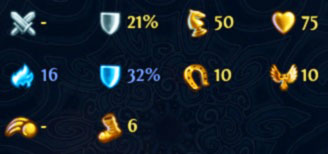
Fire elemental
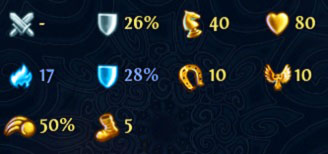
Fire affinity: Elementals are dealt 50% reduced damage from their affinity element and 50% increased damage for their counter-element. Elementals are also immune to negative effects from their affinity element.
Spirit form: Spirits benefit from 50% resistance to all damage at the start of each combat. Lasts until an action was taken by the creature.
Living: Can be healed and resurrected. Susceptible to morale.
Fire ball: Deals damage (Fire) in target 3x3 area. Deals half damage around the center.
Cremation: Turns into a gigantic fire-storm when destroyed dealing damage (Fire) to all adjacent stacks.
450 gold
Fire elementals are another shooters. On the contrary to air cousins, they can't fight on full distance, but when they get close to the enemies, they cause the greatest loses. Fire elementals cause the biggest damage from all troops of Conflux. They can punish troops who dare to attack them melee. Their Fire ball immediately reduces enemies and after-destruction Cremation clears the vicinity from enemies. If you'd like to use both abilities fully, try to heal and resurrect this stack.
Unit
Statistics
Attributes
Cost
Light elemental
Searing light: Target enemy is dealt damage (Light) and is blinded. Consumes the creature's substance (takes self damage, which regenerates after the combat).
Pain mirror: 10% of the damage dealt to the elemental> is returned to its attackers. Only melee attacks are valid.
Light affinity: Elementals are dealt 50% reduced damage from their affinity element and 50% increased damage for their counter-element. Elementals are also immune to negative effects from their affinity element.
Spirit form: Spirits benefit from 50% resistance to all damage at the start of each combat. Lasts until an action was taken by the creature.
Living: Can be healed and resurrected. Susceptible to morale.
Speed of light: Elemental can move, attack and return, avoiding retaliation.
Epiphany: Elemental retaliates with rays of light radiating to eight directions. Enemy stacks caught in the rays are dealt damage (Light). Friendly creatures within the rays are healed.
420 gold
Light elementals are melee fighters but thanks to the ability to jump out after every attack, they're perfect in harassing enemies. Their task on the battlefield is very similar to Furies but on the contrary to the Stronghold unit elementals are stronger and their special attack is deathly.
Unit
Statistics
Attributes
Cost
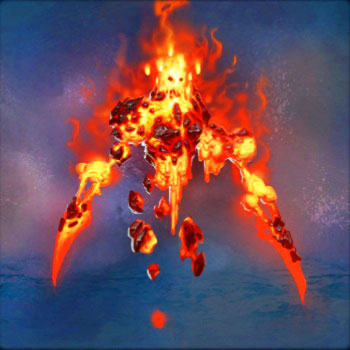
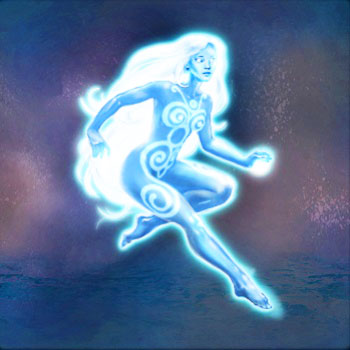
Water elemental
Ice bolt: Deals damage (Water) to a single target. Victim also suffers from the "Frozen" effect.
Amphibian: Immunity to Movement reductions from the Water Magic School. Sanctuary Heroes can travel on the seas if all their army is amphibian.
Water affinity: Elementals are dealt 50% reduced damage from their affinity element and 50% increased damage for their counter-element. Elementals are also immune to negative effects from their affinity element.
Spirit form: Spirits benefit from 50% resistance to all damage at the start of each combat. Lasts until an action was taken by the creature.
Living: Can be healed and resurrected. Susceptible to morale.
Liquid body: Increases resistance to damage by 20%.
Water strike: Elemental's attacks inflict the "Soaked" effect on their targets.
410 gold

Water elementals are another support unit available for your army. They can freeze enemies and receive less damage from attacks, but no ability is stronger than its cousins. Power of this elementals is shown when playing as a Sanctuary - thanks to the Amphibian hero will be able to travel through the seas and rivers.


 Heroes of the Storm Game Guide & Walkthrough
 Hitman: Blood Money Game Guide & Walkthrough
 Harry Potter and the Deathly Hallows Part 2 Game Guide & Walkthrough
 Halo 3 Game Guide & Walkthrough
 Heavy Rain Game Guide & Walkthrough