Events introduced in Hammers of Fate are continuation of the previous ones, from the basic game version. The play course hasn't changed. Players simply get three new campaigns. And again each of them consists of 5 missions.
Please take a look at unofficial walkthrough which describes every of fifteen scenarios in very detailed way.
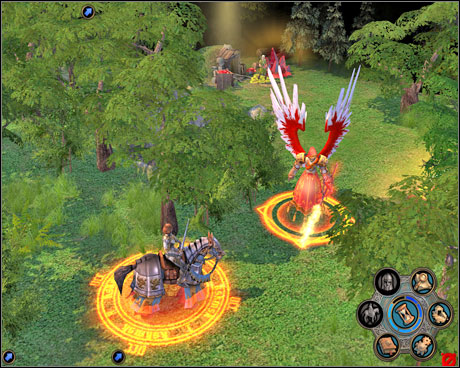
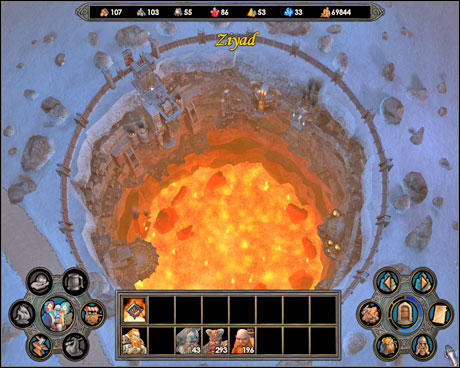
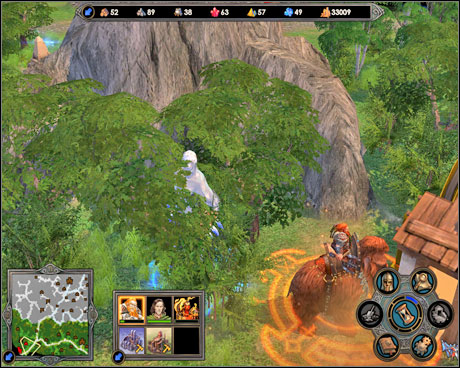
You control two heroes in first mission. There are no enemies wandering around so units which are stationing along roads are only hazard here.
Main tasks:
Secondary tasks:
Hero: Remember that heroes you are controlling have low experience levels. Each of them has 10 mana points and it runs out quickly. They differ in spells: Freyda possess offensive Eldritch Arrow spell, which inflicts minor injuries. Laszlo can use Deflect Missile spell. Heroes can achieve 10th experience level. As a first talent choose Benediction for each hero. Then develop Attack/Defense/Luck to Expert level. Focus your attention on Freyda because in next mission You will control her fate.
Bonus: There is no possibility of choosing any bonus in first mission.
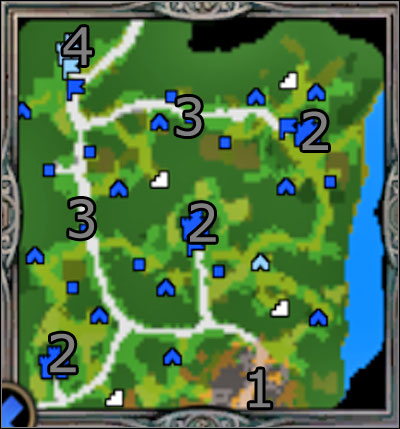
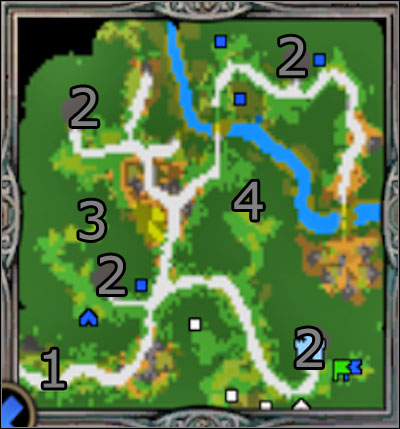
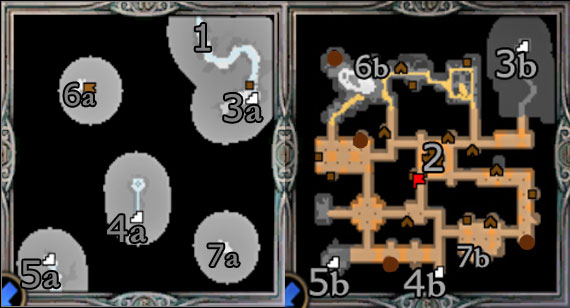
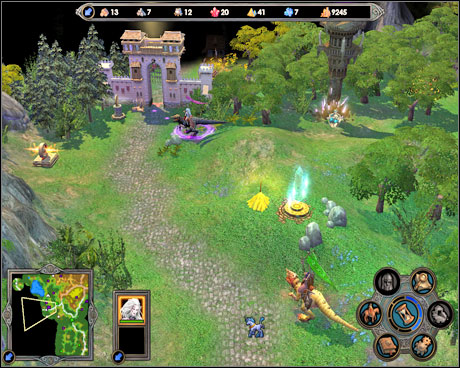
Armies controlled by both heroes will be doing quite well for the time being. You begin on the map's edge (1). Split your heroes - let one take the road to the north and the other one move to the north-west.
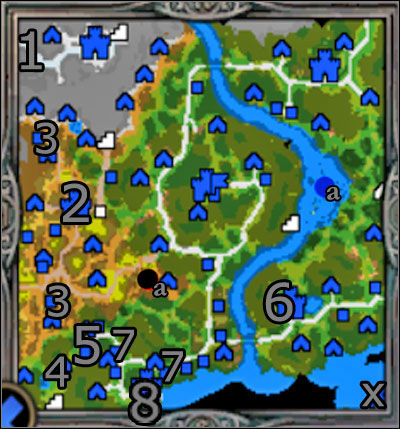
All you should do is to defeat meeting armies (it is not hard). Of course you should do it with as light casualties as possible. Do not rush but remember that the longer you play the stronger enemy is, but not so strong to be a real hazard. Collect all possible resources. Every found gold chest exchange for gold (you will get enough experience points in order to reach the maximum available experience level in this mission). Two hostile camps are your aim (2). They have small amounts of Haven units.
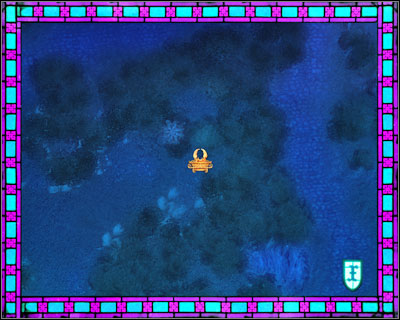
 Always watch out for any obstacles that can block your way (as shown on the picture above).
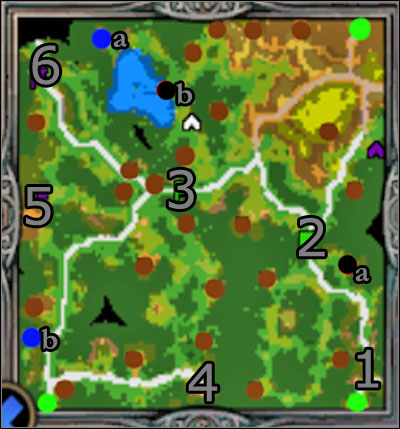
The task concerning rescue of supporting units will become active right after starting the game (3). Best go there with Laszlo, because his Deflect Missile spell cast on your archers will reduce losses. When you done with Sylvan units try to attack units freed by you. Units will be willing to join you.
A shop with the war machines can be also found on the map (4). Ballista is a good friend during long battles. Apart from that in the middle of the map (by crossing roads) there is a unit of Angels. A fight doesn't make sense because there are about 60 Angels in it and it is simply impossible to win.
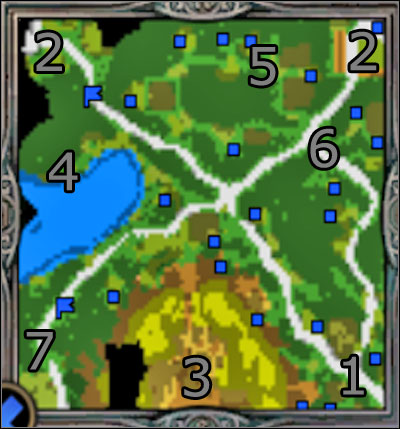
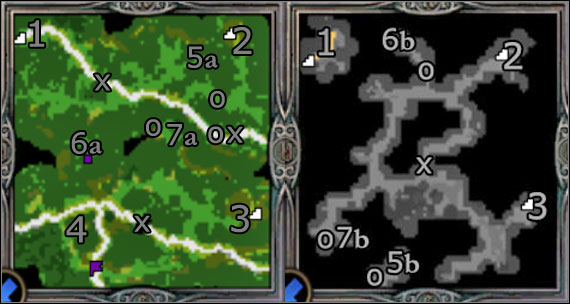
You will be losing your units as a time goes by. Some will die in the fight, some will desert, others will be caught in elven ambush. Don't worry however. Gather as much gold as you can. Also exchange gathered materials for gold at the market (it is found in the centre of the map, on main roads crossing). You will be able to buy units on farms and in garrisons thanks to your reserves. A building where you can recruit Cavaliers (5) is a strategic point. It is they who are the main force of your army during this mission, don't forget about it. Get there as fastest as you can because two units of this type are arriving to the garrison controlled by you every week. And having 20 Cavaliers in the army will make you very powerful. You can also recruit Footmen, Griffins and Marksmen in other garrisons.
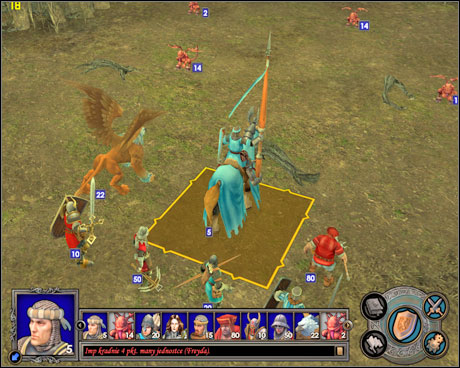
 Don't worry, these units are combined. You won't have to fight with everyone separately. :)
Northeastern part of map is the next important point (6). There are two strong units here: Water Elementals and Phoenixes. Don't even try to attack them with your basic units. Admittedly it will be possible to defeat them but both fights will reduce your army very much. Phoenixes are simply strong and they are reviving when you kill them for the first time. Elementals however are weak in the infighting. However they possess the strong Ice Arrow and the Circle of Winter (remember to never place your units close oneself during this fight). Show interest in this place only after overcoming the entire map and buying mighty armies. Moreover take advantage of the Flag right by which will give you luck and bigger morale during the skirmish.
There is Seer's hut in northwestern end of the map (7). He'll offer you a task: get rid of Druids in the south. As an award you'll get a big amount of experience points.
When the entire map will be plundered by you redeploy all your units to one hero. You should have no problems defeating both hostile camps (2). Secondary tasks will be done when you occupy all opponents' garrisons.
And with this way "then again good persons die because they stood up to us" as Isabel used to say.
The next mission is very schematic. I mean more than usually. Your task is to dash across the entire map and kill and destroy everything what possible. It is second time when we have no castle.
Main tasks:
Secondary tasks:
Hero: Take gold instead of experience out of all treasure chests. Freyda may reach only 16th experience level and she will make it easily only fighting. I advise to develop only Logistics and skills connected with knowledge/intelligence in this scenario for faster experience getting.
Bonus: Before mission beginning choose 10,000 gold as a bonus. It will be useful when recruiting new units. The artifact is weak, and Blindness spell won't be needed.
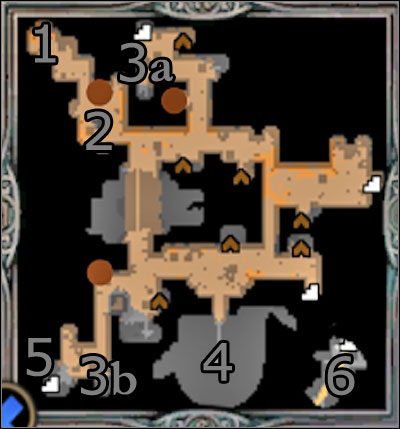
You begin mission in then left bottom map corner (1). Defeat few peasants and go along the west path to first of four rebel's cities (2).
There is a Pit Lord waiting for you in the depths of the forest (3). He is quite weak so he should not cause you many problems. However he guards the precious artifact, which is the Axe of the Mountain Lords. It adds 4 points to hero's Attack.
Go to the east. Destroy the next castle at the end of path, and in (4) a Fort is found. Entire gold will be useful now since improving units isn't cheap. With that kind of army the rest of mission will be piece of cake.
Right behind the first bridge, in the north, there is a Garrison. Defeat guards and you will be able to recruit Griffins, Cavaliers and Priests (little weekly growth, but always something).
 An army of demons will appear after completing all aims. Don't be afraid. It is a harmless, small unit.
After completing the secondary task (rescue five peasants) all Freyda's statistics will be increased by 1. And after destroying four cities, destroying all peasant huts and defeating the last army of demons you will end up scenario victoriously.
You start the mission with Freyda. You must conquer three castles, extend them, make an army and to defeat Duncan. Piece of cake. Occupy all mines and leave little units in them. Tiring. Explore entire map, plunder dungeons and collect the mighty army. Long-term.
Main tasks:
Hero: Freyda will reach maximally 21 level of experience. You can again exchange treasure chests for experience. Having three extended castles and a gold mine you will be making a fortune still. The heroine already has a little bit of mana on this level, it is worthwhile to invest into attributes which improve your Magic (the group Acceleration and the Resistance) when making levels.
Bonus: Choose Vindicators as the bonus before missions beginning. Thanks to Vindicators you won't be losing the base forces for leaving them in mines. And unfortunately you must do it. In the other case after two, three rounds the mine will be retaken by the opponent (peasants units will turn up from nowhere and they will occupy the mine). Therefore always leave 10 Vindicators or a few Griffins in the mine. It will be enough for a long time and you won't be worrying yourself for resources.
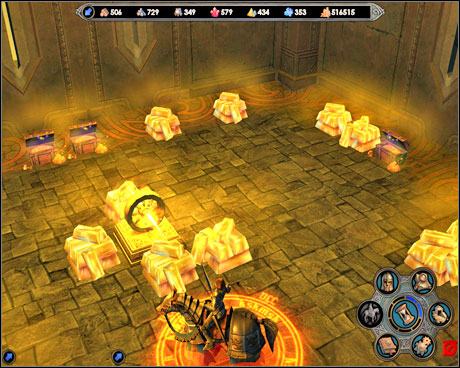
You turn up in (1). You have to occupy all mines on the map. These are needed since you have to capture three castles (2). First head to castle in the centre of the map and make sure to take over the ore mine (incredibly important - this mine is found right next to the centre castle. That is the only mine that belongs to the sea player temporarily, on screen above. Remember that the majority of buildings of the Haven require the big amount of this resource). Then take over the rest of castles and gather anything you can from the map. Extend your castles maximally, in order to produce Cavaliers in two of them and rest units in all three.
Attention - regular popping into the inn is recommended. There is a big chance that you may recruit a hero who has the Recruitment skill. Thanks to that he will increase a weekly growth of units in the castle where he is stationed. It is very useful because you the longer you are gathering your armies the more powerful army of Duncan becomes.
You will defeat the majority of opponents on the map with your base units. Also garrisons, which guard passage to Duncan's castle, should make no problem (3). As a part of waiting for growth of units before the final battle (4) you can go to dungeons (four ways, icon of white steps on the map).
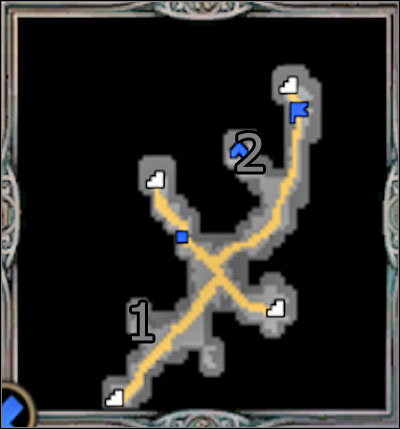
There are two interesting things here. One is Elementals' shelter which can be found on the south (1). There are 15 Elementals of each kind. Eliminate Water Elemental as soon as possible - he possesses nasty Ice Arrow spell. This place will provide you a large number of resources of every type once a month. And there is a gold mine to the north (2).
The success in the final fight depends on shooting units. Zealots and Evil Champions will support you after capturing two castles. You will be also able to train Squires or Priests for yourself. However by collecting Marksmen from all three castles after a few weeks you will be able to blast away Duncan's army with one shot.
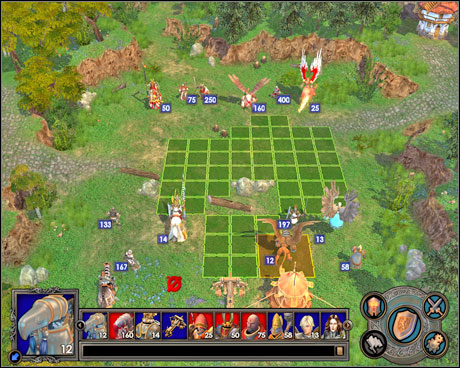
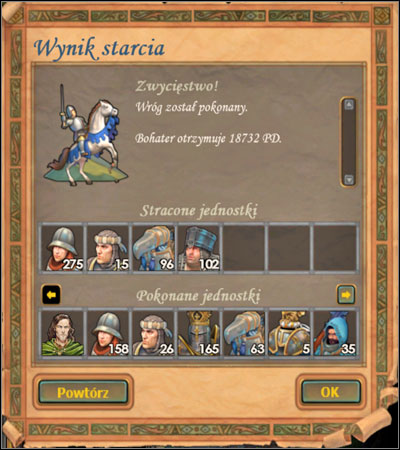 As you can see the battle can't be won without big losses on both sides..
You will complete the mission after winning his stronghold.
This mission is divided into two parts. Don't act fast and take on all actions calmly.
Main tasks:
Secondary tasks:
Hero: Freyda will reach 27 level of experience maximally in this scenario. You will not be able to build inn in the castle, so she will be your only hero through the entire mission.
Bonus: As a starting bonus I advise choosing two Evil Champions. You will have enough gems and you don't have to be rush with Mage Guild. And these two additional units will increase the effectiveness of your army in the initial phase of land exploration.
The first part is about only exploration of the land. Explore the entire south (grassy field). You should have the main castle fully extended in a month.
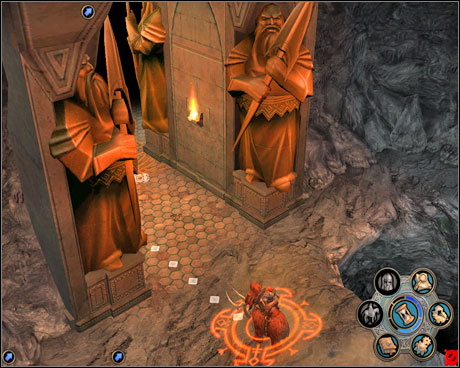
You begin (1) with the good army and you should meet no strong resistance. Capture rebels' castle (2) and attain the first mission goal. Go now to the Dwarven gate (3). They will announce that you will be let in only after giving donation and only with defined number of forces. Well, 100 Conscripts, 80 Marksmen, 50 Squires, 30 Griffins, 15 Inquisitors and 5 Paladins must please you. And the last condition is not to have rebellious units in your army (the Fallen Angel, the Vindicator and Crossbowman.
 The Fallen Angel will gladly join your army - same with every Haven unit colored red.
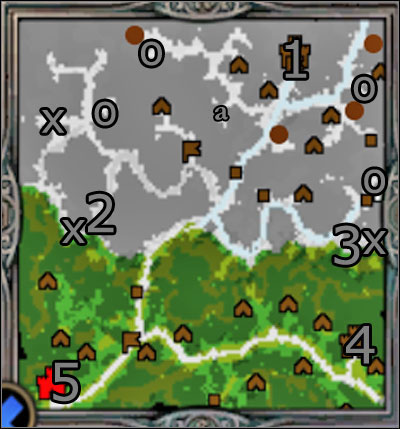
The second part takes place in the north. Dwarven lands are frosty region. You have no chances to win any battle here, because their powers are overwhelming (a few units on the border of the grass/snow are an exception). Spearwielders standing near Dwarven Stronghold are an exception. Head directly your main target (4).
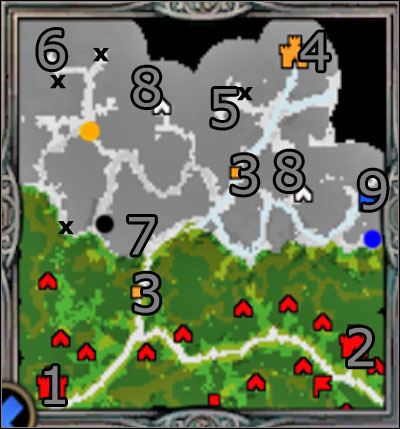
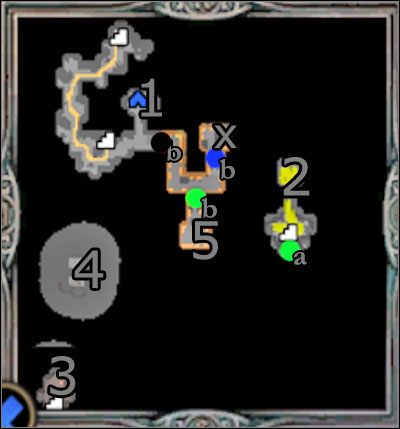
Laszlo triggered off the war! Freyda decided to stand up to him. However she must first escape from the ice land. Head for portal direction (5). Before entering it pick up the Helm of the Dwarven Kings (x) from the ground. It is one of four parts of very mighty artifacts set. Each piece adds 4 points to different hero's statistics.
After the teleportation you will find yourself on northwest end of the map (6). Collect two parts of Dwarven set (x) and defeat the unit of Phoenixes (orange dot). The fight against them isn't heavy since you still have strong units. I mention that because you will get almost 20 thousands of experience for defeating them. Always try to hold the opponent on distance as long as possible (in this case it isn't possible unfortunately) because the smaller own losses the better.
Head south. There is a small hut (the black dot), where you can get some pieces of map uncovered at the cost of Greaves of the Dwarven Kings (you can find them in the place marked with (x) sign). However it makes no sense to rid of the artifact. You can open the passage visiting the key-keeper tent (7) or killing the Hydras unit (8). You will get the key to the Mine - Portal then which will transfer you to the eastern part of the map. Before you will fight final skirmishes join four Paladins to your army (blue dot). There is prison nearby. You will recruit additional 16 Paladins at the cost of two dwarven artifacts.
The last fight awaits you. Defeat local Dragons (they are slow - use it against them weakening them with the distance weapons. Also a Resurrection spell cast on the Paladins will be useful). One more east fight with Phoenixes (only a few units) and then you will be able to go through the gateway (9). Go down to dungeons and the scenario will end.
Capturing the castle, the expansion of the army and freeing Duncan from the prison will be your main tasks. You play in the same team now.
Main tasks:
Hero: Freyda will attain 29th (maximum) level of experience.
Bonus: Choose two Paladins in this mission as the bonus. Artifact and gold will be unnecessary, since you will be earning thousands of gold every round. Additional unit will always be useful.
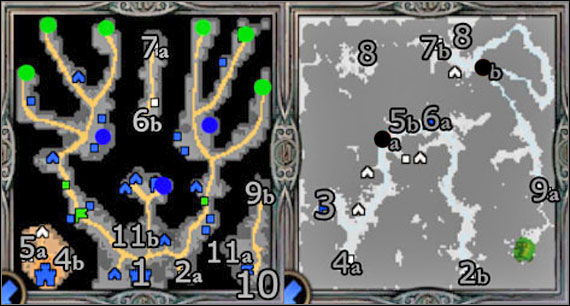
I've described this scenario in two parts. First - that is what we do on the surface. Second - that is the one that takes place in dungeons (four descents to dungeons are placed on the map).
Surface:
You start in northwest end of the map (1). Pay attention, you are being found by not defended artifact. It is an ambush - a small unit of Water Elementals will attack you right away. Conquer closest dwarven castle fast after this clash (you will not be able to extend the army in it) and using the underground passage get to the grassy land (occupy a gold mine below the ground).
Now you will be attacked by Klaus (poor Knight). Defeat him in order to see where Duncan is being kept (5). First occupy the castle being found nearby (2). Explore surroundings around with Freyda and take over nearby mines. You can hire the second hero in order to get resources more efficiently.
Important points are (3) where you will be able to recruit Angels. In this scenario only one Haven city (6) has possibility to construct the Altar of the Heaven, and so it will be the only source of these units through the longer part of the mission.
When you extend the castle and enable the recruitment of Paladins, buy the army. Provide Freyda with Angels and move south. Upgrade Angels in the Fort (4) and defeat the garrison guarding Duncan (5). As soon as he joins you, the sea player will be defeated. You will come into possession of two additional cities (the centre and the north-east) and two heroes.
Defeating the red player and taking a port city is your next task (8). You can play here in two ways. If you dawdled unusually with rescuing Duncan, the red opponent is mighty and he will quickly take the city in the middle of the map. Holding your cities and the expansion of all three are your main objectives at this stage in order to recruit Paladins in them. Attention - absolutely build the fifth level Magic Guild in all castles. The Resurrection spell available there is very valuable and useful.
Interesting note - there is a small unit of Magma Dragons in place marked with (x). They will want to join you. You can get there using the portal which is located in dungeons.
 The army collected in four castles. The final battle becomes very easy.
There is one hero in the opponent army who you must to be afraid of: Andreas. It is him who has main army - the rest of heroes wandering on the map aren't worth a damn. By exploring a map you can find the entrance to dungeons, which are described below.
After having all cities expanded gather whole army with Freyda and head southeast (6). Here the main opponent's castle lies. The fight will be tough. But it is you who has 28th level hero. It's you who has colossal statistics: about +38 Attack and +28 Defense. So having few Archangels, dozen or so Paladins, several dozens of Griffins and horde of shooting units, you will make it.
There is a possibility of Angels recruiting in the new captured city. You should have no problems with resources because all mines belong to you. Provide Freyda with more arms and defeat Andreas' army again (he will be harassing you from time to time) and one of garrisons (7) guarding port city.
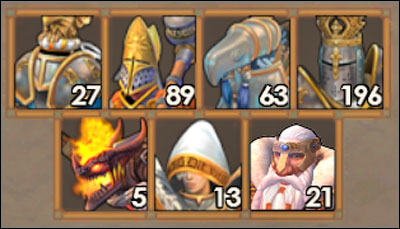
The garrison battle isn't too easy. On the screen above you can see that opponent's army is decent-sized, but my units defeated it easily. On this stage, thanks to Freyda and her statistics, allied Angel's attack factor equals 65 and defense factor equals 63. A good way to win the battle is to send him in fight. Every time when Freyda's turn comes cast a Resurrection spell on him (he will be opponents target with no doubt). Use the special ability of Royal Griffins on Zealots. At the same time finish the opponent with Marksmen and Inquisitors.
Conquer the last city on the map (8) and provide yourself with more arms. Build a ship and step into it. Then the final battle begins, after which you will finish the campaign.
Dungeons:
Now I'll describe underground part of mission. On the surface map I marked (blue dot and black dot) tents where you can get keys needed for underground guard towers.
Using the north passage you will find gold mine (1) easily. Using stairs nearby blue key-master tent on the surface, you will be found nearby green tent (green dot a). He will give you a key which helps to get through the last watchtower. All of them are placed in the dungeon's centre and are marked (with color dots b).
You will find the artifact in the east part of dungeon (2): Skull of Markal. It is ideal for sorcerers but have a little use for Freyda, who prefers fighting with sword.
Using the southwest passage (3) you will come across Devils (set your units as far as possible and kill Devils with distance weapons). The Passage Monolith will carry you to (4) where you can find some minerals and riches.
I marked a portal with sign (x) - it will take you to the island where you can find Magma Dragons - they want to join your forces.
There is a One Way Passage Monolith nearby a green watchtower (green dot b). It will take you to the castle found on the west, marked on the surface map with 2.
There are dwarven treasures behind green watchtower at last (5).
 All I want for Christmas is... Dwarven treasure!
You have to repel opponent's attack in this mission (Haven units).
Main tasks:
Secondary tasks:
Hero: Wulfstan will reach 12th experience level maximally. Develop his logistics, defense and luck.
Bonus: As a start bonus choose 10 Defenders.
You begin your mission in center of the map. Your castles ale placed in points marked with (1). You have one and a half week to expand your cities just before first opponent's attack. First of all - don't fight too much. Due to mission specificity (it means that scenario is awfully onerous) I'll describe play course step by step.
Day 1, Week 1, Month 1
Build a Marketplace in corner cities. Also build Shield Barracks in the main castle. Recruit units and connect them with Wulfstan's army. Add to your army (or defeat) more Defenders in (2) and visit the Magus Hut to uncover one of places where the opponent appears (6).
Gather resource on the south and head west. End turn.
Day 2, Week 1, Month 1
Defeat Peasants unit with Wulfstan, to make access to the Flag possible. Visit your castle. Build a first level Mage Guild there and then take a path to the west.
Build a Resource Silo in corner cities to have 2 gems each turn. They will be useful soon.
Day 3, Week 1, Month 1
Defeat Skeleton Archers unit and visit the Magic Incantation Stone. You should have some offensive spell till now - this is good. Defeat Defenders unit on the north and take experience points from treasure chest. When promoting your hero choose Logistics or Defense (if they are not accessible choose any skill from Rune Magic). Then head south to nearby (brown dot), placed around point (3). Places where Defenders and Spearwielders want to join your forces are marked with the same color on the map above. Additionally their weekly growth will be increased.
Build Blacksmith in corner cities. Build Shield Halls in central castle.
Day 4, Week 1, Month 1
Take your hero the nearest brown dot. Build Blade Barracks in main city. Build Runic Chapels in two of corner cities.
Day 5, Week 1, Month 1
Let Wulfstan recruit some Defenders. Go now to the next brown dot, one on the south, nearby (6) digit. Do not attack anyone just go straight to your target.
 On the way to second brown dot. Time slips by so don't waste it for fights.
Build Blade Halls in main castle. Build Shield Barracks in corner castles.
Day 6, Week 1, Month 1
Gather some Spearwielders in brown dot and start your return way to the main castle with Wulfstan. At the same time build Fighting Ring there. Build Town Halls in other two towns.
Day 7, Week 1, Month 1
Build Fighting Square. Leave two corner towns alone for some time.
Day 1, Week 2, Month 1
Visit the Flag and go back to the castle at last. Build Citadel there.
Day 2, Week 2, Month 1
The opponent has shown himself in southeast corner. Don't worry because he is very limited with range. Stay still in this turn.
Day 3, Week 2, Month 1
Build Runic Shrine. Wait two more days.
Day 5, Week 2, Month 1
Vittorio ad portas! Visit Marketplace in one of your corner castles and exchange gems for wood/stones. You have to have 10 units each in order to build Bear Pens. Recruits these units, add them to the Wulfstan army and end turn.
The fight with an opponent will be tough. Kill the Marksman with help of offensive spells and Spearwielder. Wait till Griffin fly behind your walls and kill him with Berserkers and Bear Riders. Then kill Peasants. You will need great defense of your units because Vittorio - a hero who possess double ballista shooting skill - will invade you.
Scenario isn't slowing down. You have to build Shield Halls in two other castles. Wait till week ends. There is another opponent showing in south part of the map. Build Black Bear Pens in central castle and recruit all available units. Add them to Wulfstan's army and head west immediately. Do not attack anyone. Visit your castle in the west and recruit even more units. There is a Spearwielders unit nearby - they'll gladly join your forces.
Remember not to waste your move points in vain. There is a new opponent wandering about in the southwest part of the map. Leave your castle with no defenses and head east through the bridge. Defeat two units guarding ore mine and sawmill (occupy these mines). Rush east to your third castle. Recruit army here and go back to your west castle.
It can happen that you won't reach the city in time (it depends on having Expert Logistics). Anyway defeat opponent's army, recapture the castle if necessary and rush back to your central castle. There is another opponent on the map.
Buy new units in central castle after two turns and add them to Wulfstan's army. Wait for your opponent in castle. Then again using spells and Spearwielder kill Marksman and Priest first after this.
But this is not the end. Wait till week end and recruit units again. Provide Wulfstan with more arms and head west. Next opponent will show himself there. But he is so weak that you can defeat him without hiding in castle.
 A bird's-eye view of Ironforge?
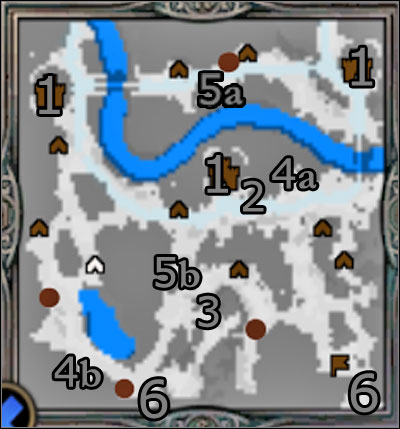
You can now breath a sigh of relief. Finish towns' extending and visit them all because you may find different spells in rune schools. Get all resources and mines with Wulfstan. Fight till you'll reach 12th experience level. You will find Jousting Arena in (3) where you can get +2 bonus for Attack or Defense. I've marked one-way portals on the map also. (4a) will take you to (4b) and (5a) to (5b).
To successfully finish this scenario you have to have really strong army. Several hundreds of Shieldguards and several dozen of Skirmishers/Berserkers/Black Bear Riders.
This time you start the mission with no castle. After completing last mission this one seems to be pretty easy.
Main task:
Optional tasks:
Hero: Wulstan can reach only 16th experience level. All treasure chest exchange for gold. Develop Wulfsten's Rune Magic skill.
Bonus: As a start bonus choose 10 Black Bear Riders
You start the mission in (1). There are some wolves on the path to dungeon's entrance (3a). Defeat them. Being underground clear your path to the castle. After recapturing it begin to occupy resources mines one by one. At the same time take care of your town expansion.
You will get a new task. Free Dwarven headquarters. These are all buildings on the map where you can recruit Fortress units. They are marked with small, brown squares on the map.
After you occupy all gold mines (brown dots) and complete main task you will get a message about approaching army. But your forces will crush these enemy units with no problem. The red opponent will come out in point (5a) just in few days after receiving that message. Then he'll need 3 turns to reach your castle. It is enough for you to wait for him there.
I've marked all places where surface exits are placed on the map (you can find treasures and artifacts) and two-way portals. The letter (a) stands for passage on the surface and the letter (b) stands for the passage underground.
All who enter give up your hope.
After defeating Andreas' army the scenario will end.
And once again we'll have to carry out very stressful task. We have only three weeks to rescue Dwarven Hero from prison. We do not possess any castle and our units are no too mighty also.
Main tasks:
Hero: Wulfstan will reach 22nd experience level maximally. Develop his War Machines and Ballista specializations. Exchange all treasure chests for gold.
Bonus: As a start bonus choose 30 Skirmishers.
Do not fight too much until you finish first main task. In other case your army can be so weak that it will be hard to win any battle.
You begin in (1). You may meet few dozen of Defenders a bit further (2). Ask them to join your forces. Now rush to (3a) to buy Ballista, First Aid Tent and Ammo Cart. You'll also find a red key-master tent here. It will unlock a watchtower (3b) behind which you can find some units ready to join you and artifact.
Now visit all (brown dots) where buildings in which you can recruit units are found. You do not have any castle in this mission so those buildings will be your only army support.
Kill red player (Andreas) fast. He is patrolling dungeons. His army is not too strong. After the fight you should get some fine artifacts and new runes.
Then go to (4) and rescue a hero. Now you'll get secondary task to protect him. So follow his tracks. Defeat Vindicators' unit and go to the surface with rescued hero. Your task will be completed after few turns and you'll get 50 Berserkers as a reward. Now return underground, occupy all mines, get resources and recruit units.
After plundering dungeons go to the surface (5).
There is a piece of exposed land (6) where we can watch Freyda escaping from Dwarven pursuit for two turns.

If you have chosen a passage shown by me, you will come out in (1). You will work out quickly which underground passages are connected.
After rescuing the hero you have got another secondary task: occupy Merasgar castle (5). There is quite strong army there so first explore surroundings.
Absolutely visit all (brown dots) where you can recruit more units. But if you go north you will find (2) one Magma Dragon who joins your forces. If you don't have strong army do not attack Dragon Utopia - there are 16 of them. There is also Vampire Lords' unit that can join you in (3).
I've marked with ??? Stables, where you can fasten your move on the land.
There is a blue player castle in ???. But you can't reach it in the mission.
When your hero starts to leave the brown trail proving mightiness of the army you can go to (5) and capture the castle. The Expert War Machines skill is useful during this fight.
After capturing the castle start extending it. You'll get the message about caravan, which carries aid for Laszlo. And after just under two weeks it will come out in (6). You can defeat it having even medium sized army. You will end the mission after this battle.
And you do not have to hurry - the caravan waits for you to being defeated :)
This mission is easy and no too complicated.
Main tasks:
Secondary tasks:

Hero: Main hero can reach 26th experience level maximally.
Bonus: Choose 50 Bear Riders or 15 Priests - they will reinforce your army substantially.
And you do not possess any castle again so be ready for a walk. Gather all possible resource. Exchange for a gold every treasure chest. It will be useful for allied units who want to join you (you can bribe them for 25 ore/wood, 15 gem/sulfur/mercury/crystal or 3000 gold).
You begin in (1). Head west all the time. Gather all possible resources and defeat all opponents. There is small Magma Dragons unit in (2) - they will join you gladly. But prepare for tough fight with Black Knights in (3). There will be casualties surely because Knights have first attack and they will get you quickly. Try to heal every attacked unit (best is to expose strong Bear Riders unit to them and to cast Raise Dead. Your units won't survive but you'll minimize casualties at least). There is a red watchtower in (4b). Now we have to go back to (7) - two-way passage monolith. You will pop up in (7) on the east.
Here you can visit key-master tent (4a) and then head south. There are many treasures there (9) and also Dragon Utopia (after won fight you can get many artifacts). There is also huge amount of money (10) and 15 Thanes who will join you (there is an invisible path among trees toward this place).
There is also a dozen or so Black Dragons nearby (9). You can use Divine Strength on Magma Dragons and kill beasts with their help. This is the most effective unit against them.
 Easter Egg, which may be found in north-west part of map.
Having the key to red watchtower head north. You will find a Cartographer in (8) who may reveal a whole map (for 4000 gold). Rolf will come out from one-way portal in (6). You have to defeat his small army.
Being in (5) first recruit all units who want that. Then you can upgrade them in Fort. Having all plundered go to the (6a) and be transported to once visited point (6). No you can go and meet Duncan (11) and take a final (and a banal) battle in this scenario (12).
Time to defeat merciless Laszlo!
Main task:
Hero: Wulfstan will reach the last, 29th experience level.
Bonus: Absolutely take 10000 gold. This is needed to expand your city and recruit units.
Your base is situated in (1). And here you also begin mission. After passing first gate guarding your territory, enemies will attack you. Do not be hurry then and calmly expand your castle. Visit all (brown dots) in the first week. Try to build Magma Fissure, Clan Halls, Bear Pens and Castle in first 7 days also (so more units can be reachable in the castle). Absolutely build Runic Sanctuary during the second week.
Soon you will be out of money so every treasure chest exchange for gold. You can pass the gate after week and a half. The opponent will head to your castle after few turns. It is possible that Laszlo will attack you himself. He got mighty army. It is all more stronger, the longer you were preparing to leave own territory. But do not be afraid. Hide Wulfan in the castle and take Duncan to (a) so Laszlo can't surprise him and kill him by chance :) If you didn't waste your time during first two weeks you should now manage with no problems. Some advises:
 And... there is a giant around the corner.
After the won fight provide Wulfstan with more arms and go to explore terrain. You will find Magi Hut in (2) where you can have part of map revealed (the terrain nearby opponent's two castles). And there is also a prison in (3) where you can find a weak hero. Lostdale is the first castle (4). You don't have to capture it. The mission will be over after capturing (5). The fight is not too tough.
There is also a possibility to dig out a treasure in this scenario. I marked with (x) places when you can try to find it (it is placed randomly on mission start). And you can also watch the screens below with puzzles revealed.
 Northwest map side. Characteristic Arena Walk and Flag.
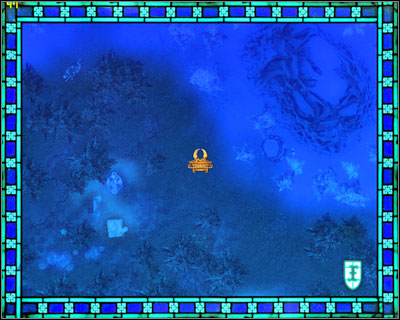 West map side. Characteristic skeleton in northwest screen corner. Grass and snow border.
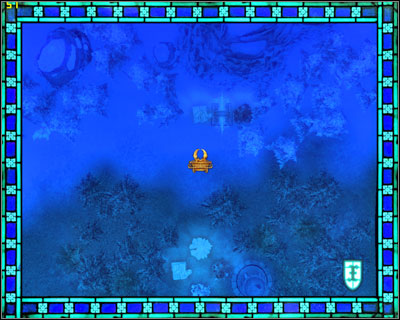 East map side. Border of grass and snow
You control Ylaya in this scenario. You begin with small army and you won't be able to recruit any new forces during the mission - you have no castle.
Main tasks:
Secondary tasks:
Hero: The only chance to win in this mission is to develop your heroine with magic. Choose Destructive Magic, Empowered Spells, Intelligence when promoting her - all what is connected with offensive spells. You can reach 12th experience level maximally. All treasure chests exchange for experience points.
Bonus: 21 Blood Maidens is absolutely best bonus.
Next thing: I marked with (x) places where units that are too tough for you to defeat them are stationed. You will be notified right in front of them that you may be seen if you move one more step further.
And one more. After killing all creatures indicated by Magi Huts you will get piece of puzzle. It indicates ritual place. Of course you don't have to sweat over it - I marked these creatures on the map with (o). Visiting Magi Huts is unnecessary as you shouldn't waste your move points.
Why may you ask? Because the longer you play this scenario, the harder these units are. And you have the same army all that time. So forget about Quick Fights because computer loose units in stupid way and play all by you. Use the Destructive Magic (you have to get some offensive spell from chapels. And while promoting choose some skill which can provide you with 1-3rd level offensive spell). And now precise map description.
You start in dungeons (1). You are on the surface after a bit. Get Windstrider Boots which lie nearby (very useful). Head east with main path. You will find a portal (5a) which will teleport you to (5a). There are units indicated by Magi Hut.
The only way further leads to (2). Do not fight Sukkubs because they don't guard anything worth your attention (you will reach 12th experience level quite quick so you don't need to use Syllana's Ancients). But now you have to fight Druids. It is good to save your game now and then attack Druids. You will see how they are set out thanks to this (army change its position with every map restart. So you can pop into 18 Druids in one unit or two units with 9 Druids in each).
 Blood Maiden can attack first. It is very important. The less casualties, the better.
After defeating them go to the dungeon. Use the portal (6b) and head to (6a) where you can recruit Blood Maidens. You will have to fight Water Elementals in (7b). And there is next opponent right behind portal.
Go to the surface in (3). There you can fight more opponents and get some more knowledge points in chapels. Finally you have to defeat one of units guarding passage to (4) because Watchtower is marked on the map, being ritual place.
 A place indicates Observation Towers. If you go there the mission will be over.
This mission is quite simple considering tough predecessor.
Main tasks:
Hero: Ylaya will reach 16th experience level in this. Develop skills that increase mana points amount (Intelligence) and decrease spell costs.
Bonus: You could take Assassins, Blood Maidens or Tarot Deck. His scenario is so easy that chosen bonus really doesn't master.
You start in (1). Wander around the land in front of the first garrison within two first weeks. Now (and later also) visit places that I marked with (bronze dot). You can recruit unit there. So collect entire gold you come across making it possible.
The enemy will come out after determined time. First one will appear after two weeks in the place (of green dot) in southeastern map corner. Then after three weeks next one will appear in the north. And third one will appear after next month but we have already finished the mission till then.
After passing the garrison enemy will stop chasing you and Ylaya will be safe within the next month.
Before you pass the first garrison visit key-master tent (black dot a). Now go to the (2). You got three weeks for exploration. You will find an artifact on the lake just behind watchtower (black dot b). There is also blue key-master tent a little bit further to the north (blue dot a).
Now you can pass the second garrison (3). There is a Fort to the south (4) (you can upgrade your units there). And another watchtower is nearby (blue dot b) - just behind it you can find interesting artifact (it ensures full effectiveness of shooting units. It is very useful when you have many Assassins).
Head north now. In (5) you will be trapped in an ambush (small Mummy's unit). You can also find an artifact there. When you pass through the last gate (6) the mission will be over. The last fight is not tough. Kill the shooting units with your spells. Then defeat the rest. To tell the true most of this mission can be done only with Empowered Lightning.
This is a very weird mission, kind of "I'll attack that one, but another will hit me from the back - so I'll move back to strengthen my positions but they will capture my second castle. At the same time third one will attack me and fourth enemy will surprise me from other side". Very hard mission because there are also 5 other players. But computer players will eliminate each other so after two weeks there will be only two more opponents.
Main task:
Secondary tasks:

Hero: Main hero will reach 22nd experience level.
Bonus: As a bonus choose 7 Crystals. They will be useful for efficient town expanding.
You start in (1) having only one castle. Start expanding it. Occupy nearby mines with your hero. You should possess majority of buildings bought within two and a half weeks. In the middle of third week take your army to Ylala and head to (2). After capturing the city stay in it a little bit longer.
Now the scenario looks like this: one of your opponents will be attacking castle 2, hoping to capture it. You should stand in garrison nearby (white square close to (2)) and wait for next waves of opponent's forces. The second enemy will attack you from southeast. Wait two weeks then buy second hero and move him to (3). After capturing the castle wait week or two eliminating all enemies that may appear near you.
Now go to the (4). You can recruit here Dungeon units. The only thing you can do now is to recruit new units, take them to Ylaya and move to take over the (5). After battle you will be left alone on the map and you can easily explore it.
Remember to build 5th level Mage Guild in all your cities. Implosion and Meteor Shower will be very useful.
After defeating all fighting units you will get 8-piece set made of Dragon Bone on place situated in (6). When you get it to the Seer Hut (7) you will be automatically teleported to the front of strong unit. You can also find there a portal leading to the end of this mission (8). In other case you have to enter portal labyrinth nearby (7) and then finally get to the (8).
Units on your way are very strong and there are quite many of them (17 Archangels for example). But first you also got strong army and second if you followed my advices your Empowered Implosion should inflict now about 2100 injuries.
We got 3 heroes to control now. There are Isabel and Raelag with Ylaya!
Main tasks:
Hero: Heroes will reach 26th experience level maximally.
Bonus: At the beginning absolutely choose Sack of Endless Gold. This is important because you will have to expand your castle intensively within first two-three weeks..
You start in the castle to the south (1). Take Isabel and Raeleg and move to opposite map sides. Take Ylaya to the surface.
Absolutely visit places marked with (blue dot) within first week. You can recruit high-level units there (Black Dragons, Shadow Matriarches) and you will also increase their growth in your castle.
Opponents will be appearing in places marked with (green dot) after two weeks on average. They have weak armies so they won't be a real danger to your city and heroes.
While Raelag and Isabel plunder dungeons take Ylaya to the (2a) in order to go onto surface. I marked all underground passages and portals on map above. Now it is time for precise description, step by step - how to end the scenario in most economically way.
Gathering all resources and treasures go to the Cartographer (3). He will uncover whole map for you for the 4000 gold price. Then go to the (4a). Defeat brown player here and take Dwarven treasures. You will find one-way monolith nearby (5a) which can carry you to the surface (5b). Visit the key-keeper tent (black dot a) and go back to the (6a). You are in dungeons again.
No go to the (7a). Take all treasures and pass the two-way monolith (8) before you open the watchtower (black dot b). You be teleported a little bit further to the west. Take all resources, visit War Academy and get back through portal. Now move to the (9a). You can upgrade your units in Fort and go with Ylaya to the south in order to increase her level thanks to Syllana's Ancients. Then go down.
You are underground again. Take a few steps and link Black Dragons (10) to your army. There is one-way monolith in (11a) which can take you below your city (11b).
 Final battle. 178 Black Dragons :).
The mighty army of Thralsai will appear on the map in two months from scenario beginning (or just after joining Black Dragons). Having about 200 Black Dragons in your army you can easily defeat him on the ground. But if you can't manage to do this, hide into the castle and wait for him. Remember to cast Empowered Meteor Shower at him (he got his shooting units arranged close to each other).
I defeated him with no reinforces from (10). I produced 35 Black Dragons, 30 Blood Maidens and around 60 Deep Hydras within two months. Combining it with destructive magic this army was enough to win. With some efforts though.
Main tasks:
Secondary tasks:
Hero: You will control all main heroes met in Hammers of Fate. Every one of them may reach 29th experience level maximally.
Bonus: Choose the Golden Horsehoe. Luck and morale may turn the scales in our favor. One Black Dragon is not an army and we'll have enough of gold.
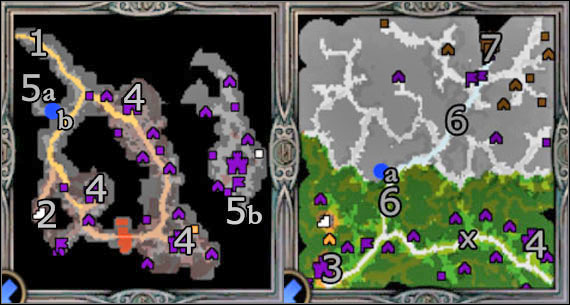
You start in dungeons (1). You got only 7 days to reach Horncrest (3) castle. So move to the surface exit (2). Let Isabel gather resources and Ylaya go straight to the target.
You have to defeat some units of your opponent (3). After defeating them you'll get 5 strong heroes under your control. From now on you have exactly two months for expanding your city and exploring whole map.
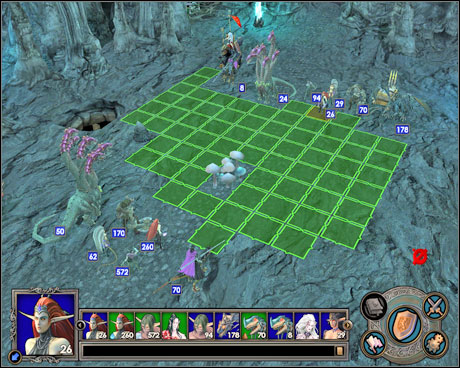
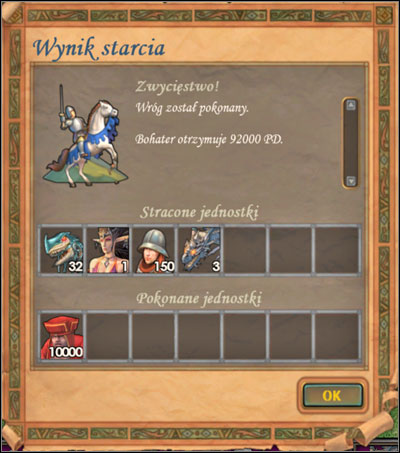
I'm advising to build up Ylaya's army with Rune Patriarch, Marksmen and Inquisitors. With such an army, go east to the point that is with (x) marked. There is a garrison there guarded by 10,000 Enforcers' unit (rebellious peasants). Use Empowered Meteor Shower and Empowered Implosion spells. Remember to set your Grim Raiders close to biggest opponent's unit to fully use their additional attack skill. Hit peasants' clusters with Rune Patriarch. In principle you can't win this fight without casualties but you can reduce them thanks to my advices. You will get 92,000 experience points.
 Peasants are defeated having quite small casualties.
Do not rush into dungeons. The orange opponent possesses quite strong army. Take one hero of yours (for example Wulfstan) and head east to first of fortresses (4). There is second Haven castle and what is more, it is completely expanded (Angels recruiting possibility is missing). When you have both castles on the surface under your control you may occupy all mines situated nearby.
Provide Freyda with more arms after around three weeks and join her forces with Duncan's and Isabel's Army. Then take Freyda with such an army underground. Conquer all three castles (4) as soon as possible. Now you can start gathering your armies for final battle.
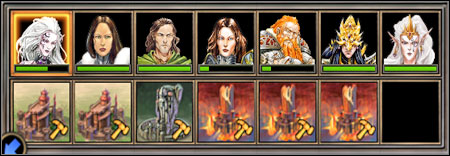 The whole heroes family.
Important advice: build Castle and Temple of the Forsaken in two southern, underground castles in order to recruit Archdevils.
The passage to Tor Hrall is guarded by two garrisons (6). There is also blue key-master tent (blue dot a) which can open the way guarder by the blue watchtower (blue dot b). There is two-way portal right behind it (5a) which leads to Dungeon castle and few mines (5b).
After conquering the second garrison you will be informed about Alaryk's withdraw. Now there is only Dwarven King to defeat. But final battle (7) is quite tough.
The enemy hides behind city walls of course. Your spells are the key to success (so it is Ylaya who should be lead hero now).
 With such an army, supported by spells, you may win easily.
The most imported thing: this battle has time limit. Every unit has only a few second to take an action. This is very stressful. And you can't avoid this even when on Easy difficulty level.
First of all: defend yourself. Wait till Black Bear Rider goes in front of walls and then kill him with Champions. Use your Griffins special ability on one of shooting units (Spearwielder or Rune Patriarch). Your opponent will be hurt badly and there is also a chance that Griffin will land behind city walls. If so most of enemy's units will attack exactly him. And then are perfect target for Empowered meteor Shower.
The second important thing is amount of Squires. The bigger, the better. They won't get hurt most the time. And when most of your units die they will be perfect barrier. Kill Thanes and Magma Dragons with Empowered Implosion.
Your Inquisitor who has very high Defense factor and can also hit badly finishes the battle.
 Very, very impressive effect.


 Hatred Game Guide & Walkthrough
 Hearthstone: Curse of Naxxramas Game Guide & Walkthrough
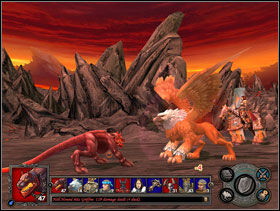 Heroes of Might and Magic V Game Guide & WalkthroughHeroes VI - Pirates of the Savage Sea Game Guide & Walkthrough
 Heavy Rain Game Guide & Walkthrough