This guide for Hearthstone: Heroes of Warcraft is a detailed compendium of knowledge that encompasses a detailed description of special abilities, information about the individual classes, game modes and every type of cards. This guide also includes a chapter entitled "ready-made decks where you can find decks already prepared for each of the classes.
This guide for Hearthstone: Heroes of Warcraft, is:
Hearthstone: Heroes of Warcraft is the most recent game of Blizzard Entertainment, creators of Diablo III, StarCraft II or World of Warcraft. Hearthstone is their first game free2play, which was made for users of PCs and iPads. Simple rules, dynamic game and beautiful, drawn graphic are the most significant assets of this title.
Patryk "Irtan" Grochala ()
In this chapter, you'll find a detailed description of Hearthstone: Heroes of Warcraft interface. Each of its elements will be fully described and explained to make beginning of adventure with this game much easier.
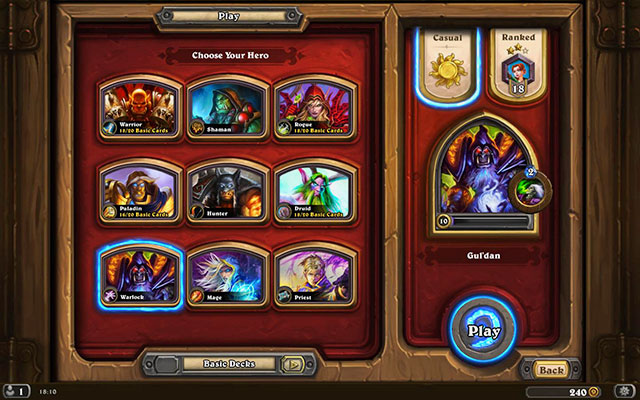
The main menu in the Hearthstone is very simple and minimalistic in its form. From one screen, all of the most important game modes and game options are available: Arena, Training and Duel. You will also find here the amount of your cash, the window of available friends or the quest list. From the main menu, you can also access the store, where you can purchase new decks of cards and <My Collection" will take you to the album with all the cards that you currently have.
The Duel is the basic, and the main at the same time, mode of the game in Hearthstone. During a game, you can use your own decks or the basic decks for the individual classes. Additionally, you also have the opportunity to play a ranking game. In the former case, you match against the enemies with similar rank, which is increased with every win. In the game outside of the ranking, the opponents are selected completely at random and you cannot win medals there.
Rank system is based on stars, 25 ranks and one special, so called "Legend". For each win, player gets a star, while 3 wins in a row gives additional star for each win until you lose. Every defeat over 21st rank substracts one star.
Each new player begins at the rank 25. Higher ranks require more and more stars, up to 5 for ranks 10 to 1. What is more, there are "seasons". Each season takes one month. At the beginning of a new season, all ranks are reseted and you get bonus stars for each rank from the previous season. Each rank over 25th gives you one bonus star. E.g. having rank 10 gives you 15 additional stars in a new season.
When you get all stars at the highest normal rank, you're moved to the Legend. You can't lose it to the end of the current season.
Below you can find a table with all ranks, their names and required stars.
Rank
Title
Stars
25
Angry Chicken
2
24
Leper Gnom
2
23
Argent Squire
2
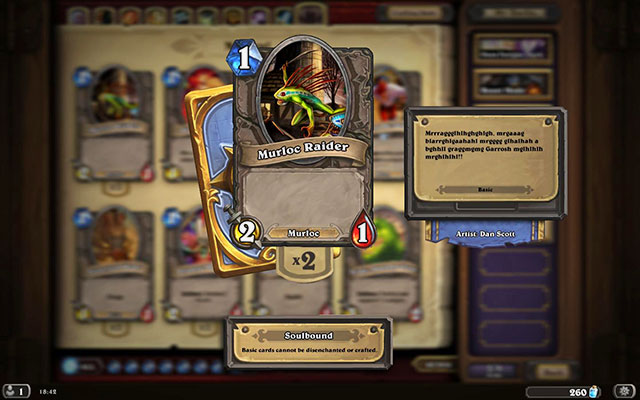
22
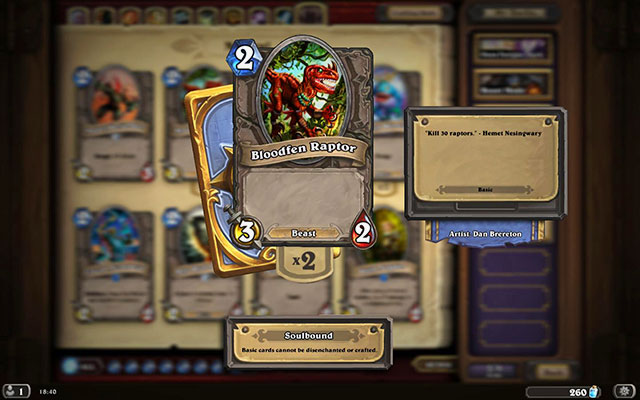
Murloc Raider
2
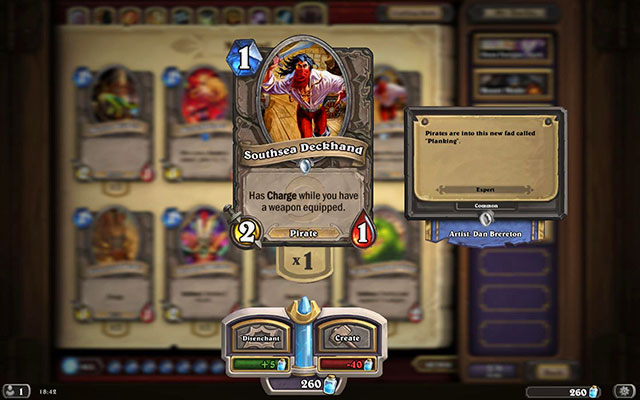
21
Southsea Deckhand
2
20
Shieldbearer
3
19
Novice Engineer
3
18
Sorcerer's Apprentice
3
17
Tauren Warrior
3
16
Questing Adventurer
3
15
Silvermoon Guardian
4
14
Raid Leader
4
13
Dread Corsair
4
12
Warsong Commander
4
11
Big Game Hunter
4
10
Ogre Magi
5
9
Silver Hand Knight
5
8
Frostwolf Warlord
5
7
Sunwalker
5
6
Ancient of War
5
5
Sea Giant
5
4
Mountain Giant
5
3
Molten Giant
5
2
The Black Knight
5
1
Innkeeper
5
0
Legend
None
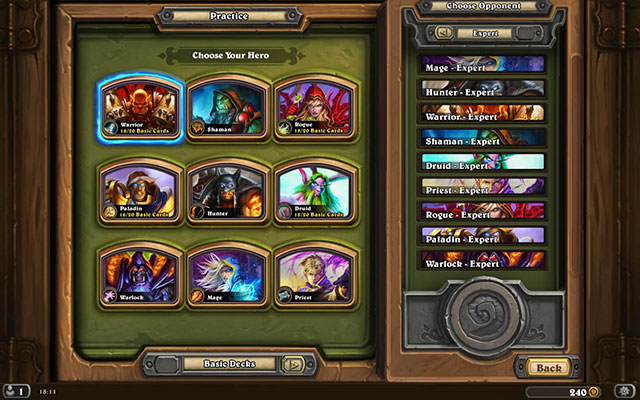
As the name suggests, the practice mode is where you can test new decks and classes. Also, it is the first mode in the game that the player acquaints himself with, since all of the classes, apart from the basic mage, can be unlocked here. There also is an option to fight a duel with the computer at a normal level or, after you have unlocked all of the classes, at the expert difficulty level.
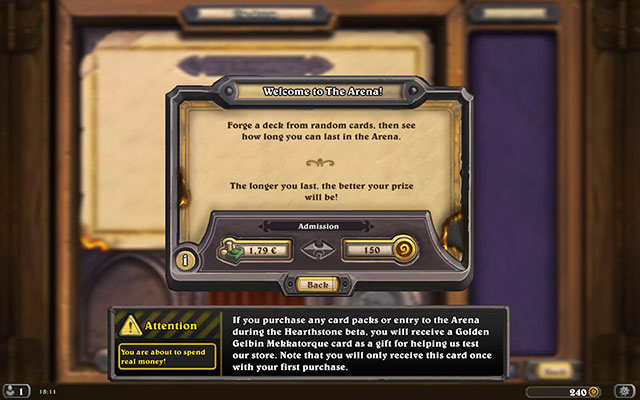
The last mode is the Arena. It is the only mode that requires you to pay before you actually start. A one-time ticket is 1.79 Euros, or 150 gp.
After you have paid your enterer's fee, you receive the opportunity to choose one of 3 random classes. Then, the process of assembling the deck starts, in which you receive one random card until the deck of 30 is full. Unlike in the Duel mode, where the amount of the identical cards is restricted to two, here you can have more identical cards.
After you have assembled the deck, you are pitted against the successive opponents. For each victory you achieve, the key level increases, where you obtain the highest level after 9 victories. The higher the key level, the higher the reward after you complete the game. Still, if you lose three duels, the game ends and the reward, appropriate for the key level, is awarded.
Below you can find a table with rewards for number of wins.
Wins
Rewards
Random reward pool
0
- Pack of cards
- Random reward
- Additional dust
- Additional gold
- Common card
1
- Pack of cards
- Random reward
- Additional dust
- Additional gold
- Common card
2
- Pack of cards
- Random reward
- Additional dust
- Additional gold
- Common card
- Rare card
3
- Pack of cards
- 25-35 gold
- Random reward
- Additional dust
- Additional gold
- Common card
- Rare card
4
- Pack of cards
- 30-60 gold
- Random reward
- Additional dust
- Additional gold
- Common card
- Rare card
5
- Pack of cards
- 50-60 gold
- Random reward
- Additional dust
- Additional gold
- Common card
- Rare card
6
- Pack of cards
- 75-85 gold
- Random reward
- Chance for second random reward
- Additional dust
- Additional gold
- Gold or standard Common card
- Gold or standard Rare card
7
- Pack of cards
- 150-160 gold
- Random reward
- Chance for second random reward
- Additional dust
- Additional gold
- Gold or standard Common card
- Gold or standard Rare card
8
- Pack of cards
- 150-160 gold
- Random reward
- Chance for second random reward
- Additional dust
- Additional gold
- Gold or standard Common card
- Gold or standard Rare card
- Gold or standard Epic card
- Gold or standard Legendary card
9
- Pack of cards
- 150-160 gold
- Random reward
- Chance for second random reward
- Additional dust
- Additional gold
- Gold or standard Common card
- Gold or standard Rare card
- Gold or standard Epic card
- Gold or standard Legendary card
10
- Pack of cards
- 175-185 gold
- Random reward
- Chance for second random reward
- Additional dust
- Additional gold
- Gold or standard Common card
- Gold or standard Rare card
- Gold or standard Epic card
- Gold or standard Legendary card
11
- Pack of cards
- 195-210 gold
- Random reward
- Chance for second random reward
- Additional dust
- Additional gold
- Gold or standard Common card
- Gold or standard Rare card
- Gold or standard Epic card
- Gold or standard Legendary card
12
- Pack of cards
- 215-235 gold
- Three random rewards
- Additional dust
- Additional gold
- Gold or standard Common card
- Gold or standard Rare card
- Gold or standard Epic card
- Gold or standard Legendary card
- Additional Pack of cards
In the quest log, you can find the basic information concerning your profile, e.g. the number of victorious duels in the individual modes, experience levels of the individual classes or the active quests.
The daily quests are assigned on a daily basis, after you log on into the game. You can have the maximum of 3 daily quests at any time, and the next ones are assigned only after you have completed one of the previous ones. The daily quests are the main source of gold in the game.
There also are three, the so called, "Special Quests". These are the single quests assigned to every player. There is no way to display them, though, nor look up the progress, which is why they are deemed the hidden quests.
There are also so called "Unique Quests". Those are special quests, assigned for each player only once for an account. You can't display them or check their progress, that's why there are considered hidden.
Below you can find a list of all in-game Unique Quests.
Quest
Description
Reward
First Blood
Complete a game in Play mode.
1 card pack
The Duelist
Play 3 games in Play mode.
100 gold
Level Up
Get any class to level 10.
1 card pack
Crafting Time
Disenchant a card.
95 arcane dust
Enter The Arena
Enter The Arena
1 Arena credit
Arrrrrr!!!
Acquire every Pirate.
2x Captain's Parrot
Golden Arrrrrr!!!
Acquire every Golden Pirate.
2x Captain's Parrot (golden)
Mrglglglgl!
Acquire every Murloc.
Old Murk-Eye
Golden Mrglglglgl!
Acquire every Golden Murloc.
Old Murk-Eye (golden)
Chicken Dinner
Win 100 games in any mode.
300 gold
Big Winner
Win 1000 games in any mode.
300 gold
Ready to Go!
Unlock every Hero.
100 gold
Crushed Them All!
Defeat every Expert AI Hero.
100 gold
Got the Basics!
Collect every card in the Basic Set.
100 gold
One of Everything!
Collect every card in the Expert Set.
100 gold
Golden Malfurion Stormrage
Win 500 Ranked games with Malfurion Stormrage.
Golden hero portrait
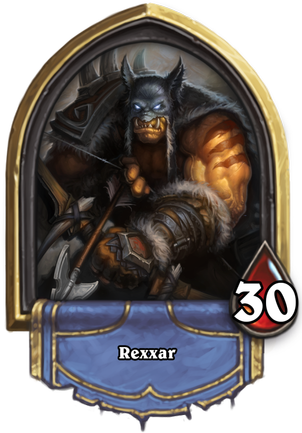
Golden Rexxar
Win 500 Ranked games with Rexxar.
Golden hero portrait
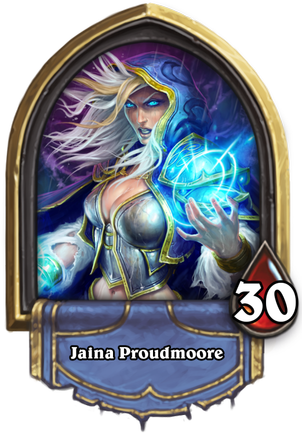
Golden Jaina Proudmoore
Win 500 Ranked games with Jaina Proudmoore.
Golden hero portrait
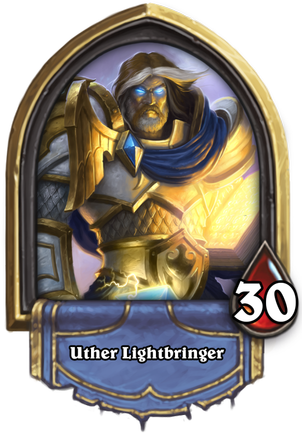
Golden Uther Lightbringer
Win 500 Ranked games with Uther Lightbringer.
Golden hero portrait
Golden Anduin Wrynn
Win 500 Ranked games with Anduin Wrynn.
Golden hero portrait
Golden Valeera Sanguinar
Win 500 Ranked games with Valeera Sanguinar.
Golden hero portrait
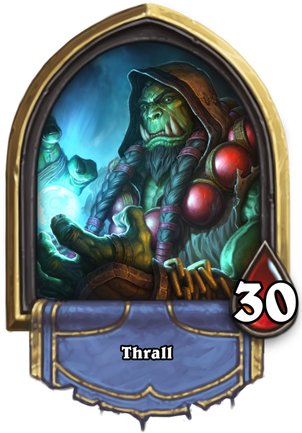
Golden Thrall
Win 500 Ranked games with Thrall.
Golden hero portrait
Golden Gul'dan
Win 500 Ranked games with Gul'dan.
Golden hero portrait
Golden Garrosh Hellscream
Win 500 Ranked games with Garrosh Hellscream.
Golden hero portrait
Fireside Friends
Play 3 matches against other players on the same subnet, with at least 3 players total on that subnet. Hearthstone is better with friends! Enjoy the company, and your new card back!
New card back
Mount Up!
Win 3 games in Arena or Play mode. A special reward for your third win! Log in to World of Warcraft to claim it!
"Hearthsteed" World of Warcraft mount
You are Legend
Reach Legend rank in Ranked Play mode. Welcome to the Hearthstone Elite! Show it off with your Legendary Card Back!
"Legends" card back
In the card collections you can find all of the cards that you currently own. Also, you can forge your own decks here. To do that, you need to press the "New Deck" button on the right, select the appropriate class and assemble a decks of 30 cards. It is also possible to ask for a suggestion, by pressing the "suggest a card" button and selecting one of the three suggested cards.
Crafting allows you to create any card which you desire. It requires spending a mysterious dust. To create a card you need to enter the crafting mode from the My Collection menu. Select a card and press the Craft option or Disenchant option if you want to destroy a card and receive more dust from it.
Creating every card requires a specific amount of dust. The rarer is a card, the more dust it needs to be crafted. The dust you may receive in two ways: by disenchanting the already owned cards or by playing on the Arena.
Below you may read about the values of dust required by the specific types of cards and their golden alternatives during the crafting and disenchanting as well.
Crafting a card:
Disenchanting a card:
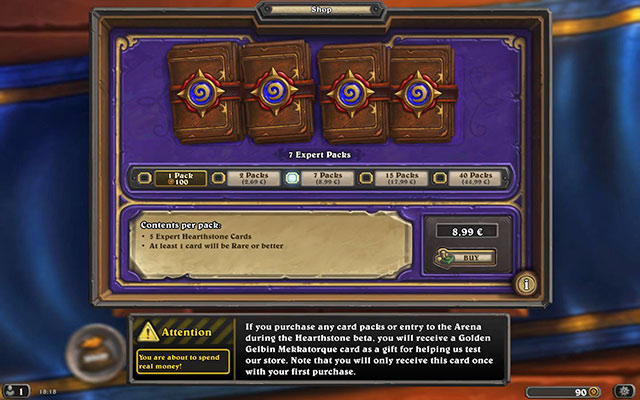
The shop is a place where you can buy card packs that are necessary to play the game. You can use the currency earned in the game (gold) or real money. If you want to buy more than one card pack for gold, you need to press this option twice and write down the number of packs.
Currently, there are three types of card packs: Classic (contains the basic cards), Goblins vs Gnomes (only cards from the Goblins vs Gnomes expansion) and The Grand Tournament (only cards from The Grand Tournament expansion).
This is the current price list for individual packs:

Some of the cards available in Hearthstone have their special abilities, which activate after certain requirements are met. On such cards, the name of the ability is stated and it is accompanied by the description of the ability. Some of the abilities activate right after a card is played, where some other become active only after they are set on the table and certain requirements are met.
Below, you will find a list of all of the card abilities available in the game.
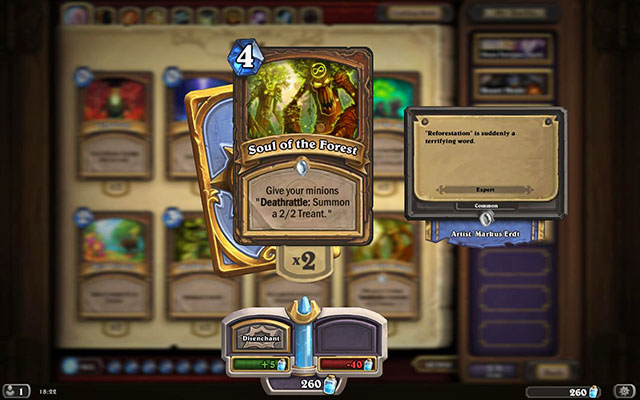
Deathrattle is the ability that activates after it is removed from the table. Once the card with this ability is destroyed, a special event, described on the card, becomes active.
This ability can be silenced and it cannot be overwritten by the other abilities of the Deathrattle.
Hints:
Example cards: Spirit of the Forest (4), Savannah Highmane (6), Loot Collector (2).
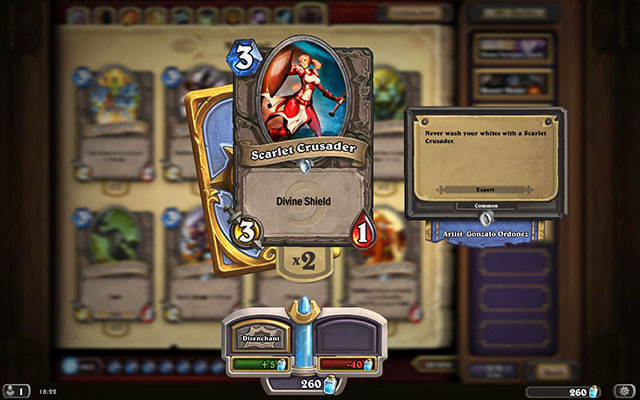
The Divine Shield ability allows for the one-time absorption of damage. This concerns damage taken from the other minions, as well as those dealt with spells or special abilities. The Divine Shield absorbs damage during defense and offence but, it does not block the spells that inflict direct damage like Assassination (5) or the Freeze from the Cone of Cold(4) card.
The card with this ability can be silenced and there cannot be more than one such effect on this card, at a given moment.
Hints:
Example cards: Argent Squire (1), Silvermoon Guardian (4), Blood Knight (3).
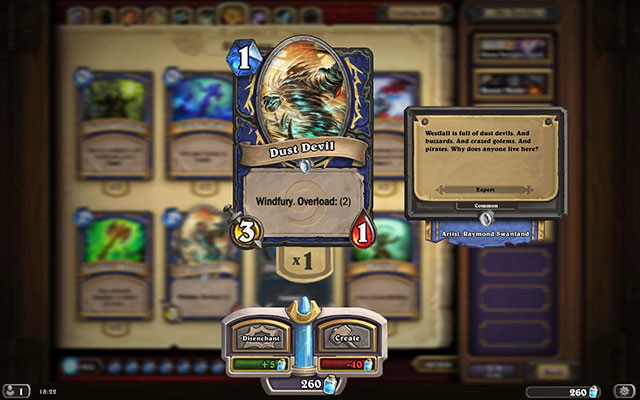
The Windfury allows a given card to attack twice a turn. The attacks may be aimed against either against one, or two different opponents. Additionally, activation of this ability, after the attack (e.g. through the Rage ability) is launched, allows you to attack once more within the same turn.
The Windfury can be silenced. You cannot multiply the number of attacks by using the ability on the card with the active Windfury.
Hints:
Example cards: Dragon Hawk (1), Windfury harpy (6), Thrallmar Farseer (3).
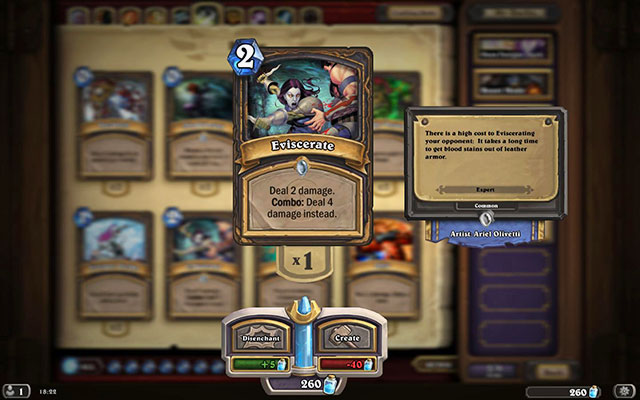
Combo is an ability in which, a given effect included in the card's description activates if the Combo card is not the first one to be played in a given turn. An example of such card is Eviscerate (2), which normally deals 2 pt. damage but, if it is used, say, as the second card in the turn, it activates its Combo ability and inflicts 4 pt. damage. Additionally, for the time being, it is available only for the Rogue class. This ability can be silenced. It is possible to use several Combo cards in one turn.
Hints:
Example cards: Cold Blood (1), defies Ringleader (2), SI: 7 Agent (3).
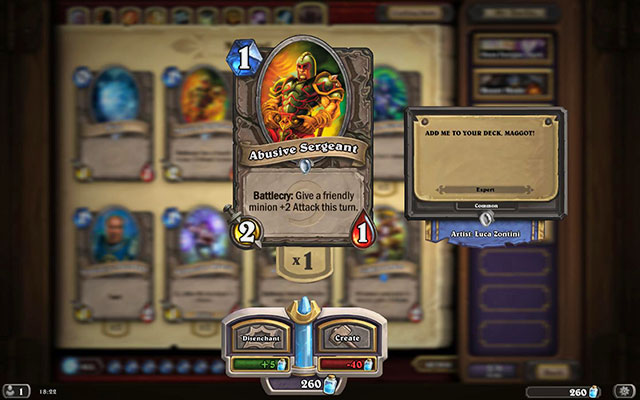
Battlecry is an ability that activates right after you play the card onto the table. The effects vary, depending on the description and the situation on the table.
You need to keep in mind several things while using this ability:
Hints:
Example cards: Youthful Brewmaster (2), Novice engineer (2), Nightblade (5).

The Taunt ability is a very desirable effect that functions as a shield that absorbs damage. After you play this card onto the table, it grows the shield symbol over itself, which makes it impossible for the opponent's minions to attack the other cards and the hero. To unlock the ability to attack the other cards, you need to destroy, or silence, all of the cards with the taunt ability. If there are several cards with this ability, on the table, then they may be attacked in any order.
Hints:
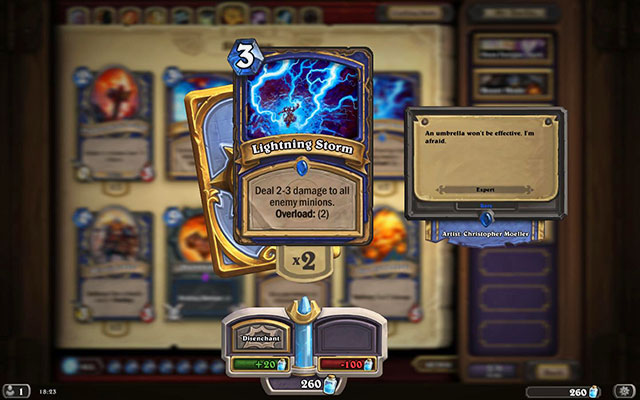
Overload is a negative ability, which decreases the amount of the available mana, by the amount stated in the card's description. It takes effect in the round following the one, in which the card with this ability was played. As of now, this ability is available for the Shaman only.
The Overload ability's effect is similar to that of the Battlecry, and that is why it cannot be silenced. The penalty for using the Overload may be higher than the pool of mana available in a given turn.
Hints:
Example cards: Feral Spirit (3), Lightning Storm (3), Lightning Bolt (1).
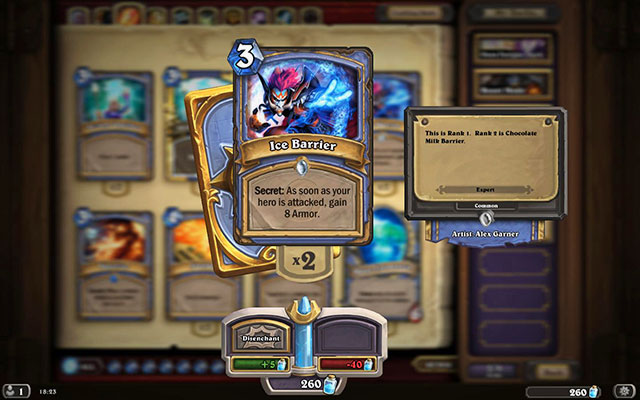
Secret is a special ability of the spell cards. After you use it, it is put aside and the question mark appears on the hero's portrait. The opponent is then informed that the Secret ability has been used but, not which card was it and what its effects are. These effects activate when a certain condition is met, e.g. the opponent plays a card, or the attack on the hero. The only classes that have cards with this ability re the Mage, the Hunter and the Paladin. This ability acts like an immediate spell and that is why it cannot be silenced. It is possible to have several active Secrets at a time, but only one from each card. .
Hints:
Example cards: Counterspell (3), Vaporize (3), Explosive Trap (2).
The Spell Damage ability acts as a buff and it adds 1 pt to damage dealt by offensive spells. If, on the table, there are more cards with this ability, the amount of inflicted damage adds up and it is included into all of the used spells. Still, you need to remember that the power of the spells interacts only with the damaging spells and not the healing ones. Additionally, if a spell that results in several different attacks, is cast, such as the Arcane Missiles (1) then, instead of dealing increased damage, another missile, for each Spell damage card in the table, is added. This means that, if in a regular play, the spell sends out 3 random projectiles, with two cards with the Spell Damage ability on the table, it sends 5 random missiles, each dealing the damage of 1 pt.
This ability can be silenced and there is no restriction on the number of cards with this ability, save the table card limit.
Hints:
Example cards: Kobold Geomancer (2), Dalaran Mage (3), Archmage (6).
Enrage is an ability activated after the card receives damage. It can be either damage dealt by the enemy or with own card. Once the card activates its ability, it receives the bonuses stated in the description. If, the unit is healed to the maximum health, the bonuses resulting from the ability deactivate and they need to be activated again.
The Enrage ability can be silenced and you cannot multiply the effect with further damage.
Hints:
Example cards: Raging Worgen (3), Amani Berserker (2), Tauren Warrior(3).
The Charge ability activates right after a given card is played and allows it to launch an immediate attack without the necessity to wait for the next turn. The Charge works only after the card is played and it does not influence the card's behavior in the turns to follow. The Charge activates right after the card is played, which is why it cannot be silenced.
Hints:
Example cards: Stonetusk Boar(1), Wolfrider (3), Reckless Rocketeer (6).
Stealth makes a card invulnerable to minion attacks, spells and enemy abilities. Does not protect, however, from the enemy Area of Effect (AoE) attacks, or the random ones like the Flame Burst (7) or Swipe (3). The card loses its Stealth ability when it uses the attack ability or is silenced by and AoE spell. Additionally, all of the active abilities on the card with Stealth remain active and taking damage does not remove the ability.
Hints:
Example cards: Worgen Infiltrator (1), Jungle Panther (3), Blood Imp (1).
The Choose One ability, allows the player to select one of the possible effects during the card's effectiveness, while playing the card. Thanks to this, the cards with this ability can perform the functions of several different cards.
As of now, this ability is available only for the Druid, and only a specific effects can be silenced, unless it is immediate.
Hints:
Example cards: Cenarius (5), Power of the Wild (3), Keeper of the Grove (4).

Silence is a very useful ability that allows you to remove the active effects and buffs on a specific card. This ability removes the bonuses active only while the silence is active and does not block the ability to impose new effects and abilities on the card.
Abilities and buffs susceptible to Silence:
Silence does not remove passive effects received by the other cards, nor the effects like Polymorph (4), Hex (3) or the Mind Control (8).
Hints:
Example cards: earth Shock (1), Spellbreaker (4), Silence (0).
The Freeze ability stops the opponent's minions for the duration of one turn. The card or a hero with the Freeze effect covers in ice and cannot attack for one turn. The player may still use his cards and the hero's special abilities and minions can defend from attacks. The effect wears off at the beginning of the next round or, after Silence is used on the frozen card.
Hints:
Example cards: Frost Shock (1), Cone of Cold(4), Frost Elemental (6).
Inspire gives a card an extra effect, like for example summoning another minion/totem or enhancing some or all minions on the table. Thanks to Inspire, you have much more possibilities of controlling the situation on the battlefield.
Tips:
Example: Murloc Knight (4), Lowly Squire (1).
The basic function of each minion is to inflict damage to the opponent's cards and his hero. Each minion card has two values: Attack and Health. The attack value is on the left, within the circle with yellow background. This value corresponds to the damage dealt by the card, with one attack. The second value is the health and it is located on the left within the drop with red background. If this value drops to zero, or lower, the card is destroyed and removed from the table. Both of these values can be increased or decreased, depending on the effects on that card. For example, the River Crocolisk (2) card shown above, has 2 pt attacks (the yellow field) and 3 Health points (the red field).This means that the card can deal 2 pt damage to the card of the opponent or the hero, and can, itself, take 3 points of damage before it is destroyed.
Some of the cards also have special abilities or effects. All of the information is presented in the field at the bottom of the card, below the name. It refers to all the abilities like, e.g. Charge or Taunt, but also to the effects unique to that card, and the ones that do not fall into the category of abilities. In the case of the River Crocolisk (2), this field is empty because this card has no special effects or abilities , unless they are endowed by another card.
To play a minion card, you first need to summon it into the battlefield. To do that, you simply need to select an appropriate card and drag it onto the table, unless there are special requirements for this minion to be summoned, given in the card's description, e.g. having a definite number of minions on the table. You also need to of the mana cost involved in using that card. This value is given in the upper-right corner of the card, on the blue crystal symbol. The River Crocolisk (2), mentioned above, requires 2 mana crystals to be summoned. If you do not have the 2 crystals , at least, in a given turn, then you will not be able to summon this card and you need to wait until the next turn begins.
Each of the cards summoned to the table receives fatigue which disappears in the next turn. In this state, the minion cannot attack and needs to wait for the next turn. The exception are the cards with the Charge ability, which are not subject to the factor of fatigue and who may attack in the same turn in which they were summoned.
Each minion with his attack value equal or higher than 1 is capable of attacking. You can either aim the attack at the enemy card or against the hero. The permissible number of attacks is 1 per turn, unless the card has the Windfury in which case it may attack twice.
During the fight between minions, it does not matter which card attacks as the first one, because both of them deal damage equal to their attack value. The exception here are the attacks on the heroes. If a hero attacks a minion using hi s weapon, he will deal the damage equal to the value of the attack value of his weapon. If, however, a minion attacks a hero, he will inflict damage equal to his own attack value, without losing health himself. For example, if the River Crocolisk (2) is attacked by a hero with a weapon of the attack value of 3, he will be destroyed but, before he dies, he will inflict the damage of 2 pt. But, if the River Crocolisk (2) attacks the hero, he will deal the damage of 2 pt. and come out of that unscathed.
Some minions also have special abilities, which can be activated in the middle of the turn. For example, the Knife Juggler (2) card can perform one regular attack and inflict to the opponent's card, or hero, damage of 3 pt. Apart from that, he also has the ability that makes him capable of dealing 1 pt damage to a random enemy, each time the player summons another minion into the battlefield. Thanks to this, the card can perform a regular attack and deal additional damage thanks to his special ability.
Most of the minion cards do not belong do any group. In action, they do not differ from the other types at all but, because of the lack of definite group, they do not cooperate with the special combination of some of the classes like, e.g. the Beasts with the Ranger class or Pirates with the Warrior or Rogue classes.
Example cards: Elven Ranger (1), Wolfrider (3), Boulderfist Ogre(6).
Beasts belong to the second, most numerous group. Many cards of this kind has a low cost of summoning but, relatively high attack value, in turn. This makes this group best-fitting for the decks that focus on high numbers of units on the table. Additionally, this group ideally interplays with many of the Ranger's special abilities and special cards.
Example cards: Ironfur Grizzly (3), Stranglethorn Tiger (5), Timber Wolf(1).
Demons are, almost exclusively in the warlock's deck and this is the class they harmonize best. Most of them have quite powerful statistics at low Mana Cost but, the negative effects, e.g. damage to the hero, alleviate that.
Example cards: Fire Imp (1), Succubus (2), Dread Infernal (6).
This type of minions was introduced in the Goblins vs Gnomes expansion set. To be categorized as a Mech a minion has to be a mechanical being or a robot. Mechs may be both the neutral cards and the class cards. This group is fairly versatile and contains both cheap and expansive minions. Most of them have some kind of synergy with the other Mechs. For example they may reduce the summoning cost of other Mechs, increase their stats or give you a Spare Part card.
Sample cards: Micro Machine (2), Spider Tank (3), Piloted Sky Golem (6).
Murlocks are the second group that favor quantity over quality. Most of the cards from this group have mana costs. Additionally, the relatively high attack factor, and a big number of cards, make this group an ideal material for a complete deck.
Example cards: Grimscale Oracle(1), Murloc Tidehunter (2), Murloc Warleader(3).
Pirates are another group that can well serve as a core of a deck. Since most of these cards harmonize with the weapon cards, o some extent, they are the warrior's and the Rogue's best choice.
Example cards: Bloodsail Raider (1), Bloodsail Corsair (2), Southsea Captain (3).
Dragons are an interesting group of high mana cost. All of them have special abilities and high statistics, and more than half of them are legendary cards.
Example cards: Twilight Drake (4), Azure Drake (5), Alexstraza (9).
Totems are an unique minion group, available only for the Shaman. With the exception of two cards, all of the totems are to be summoned via a special Shamanic ability. Most of them perform the supportive and buffing function to all the remaining cards, and have no attack abilities at all.
Example cards: Flametongue Totem (2), Mana Tide Totem (3), Healing Totem (1).
Spells are the second type of cards in Hearthstone, when it comes to their numbers. They do not have the Attack nor the Health factors and they disappear from the game right after they are played. You can use them only during your own turn and their effects are presented in the description of each. All of the spells are assigned to individual classes and they do not exist in the category of neutral cards.
The basic function of spells is to cause an immediate effect, without the necessity to wait until the next turn, just like in the case of minions. Spell cards can perform various functions like, e.g. destroying of the enemy minions, buffing cards or dealing direct damage to heroes.
Example cards: Holy light(2), Shadow Word: Pain (2), Execute(1).
The last card category is weapons. In action, they are somewhere between the minions and spells. You cannot summon them directly onto the table. Instead, the summoned weapon makes it into the hero's equipment and gives him the ability to attack. You should remember that, while attacking a minion with weapon, the hero takes damage equal to the attack value of the attacked enemy.
Each weapon has two values: Attack and Durability. The attack value acts on the same principle as in the case of minions and inflicts a certain amount of damage to the target. Durability are a bit different than Health Points. Instead of dropping with the taken damage, it drops by one point each time the weapon is used within the turn. This means that if the Durability of the weapon is 3, the hero may use it to attack for three times before it is removed. A weapon is also destroyed if the player summons another weapon in its place.
Example cards: Gorehowl (7), Perdition Blade (3), Wicked Knife(5).
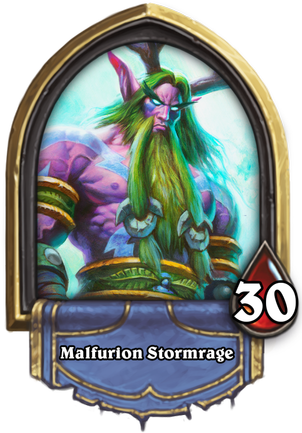
Hero: Malfurion Stormrage
Hero Power: Shapeshift - +1 Attack this turn, +1 Armor
Unique Ability: Choose One
Druid is an immensely versatile class which, as the only one, has the access to the Choose One ability. Thanks to this, and a wide variety of minions and spells in his deck, druid can find his way out of every situation and play with nearly all classes as equal.
The Druid's hero power, Shapeshift, allows him to boost himself by 1 pt. of attack and armor. The attack factor cannot be, however, higher than 1 and it is removed after the turn is over. The armor points disappear only after the druid takes damage and they be accumulated on the character without any limits. This ensures, not only, the opportunity to attack for the hero, nearly at any moment, but also a good way to absorb damage dealt by the enemy.
This class also has a lot of cards with the Choose One ability. Thanks to this, the druid can select an appropriate effect from two available options and use it in the game. The Keeper of the Grove (4), which allows the druid to inflict 2 damage points or to silence the enemy, is a good example here. Additionally, the druid has many spells and minions that perform most f the functions available in the game, which gives him access to healing abilities, AoE attacks, silencing or buffing his cards. However, this class has no weapon cards, due to which he cannot attack directly with his hero, unless he uses a special power.
The last special technique that the druid can use is increasing the mana levels. Thanks to the cards like Wild Growth (2) and Innervate (0), gives the player 2 additional you can increase your supply of mana crystals. The Wild Growth gives you an empty mana crystal, which provides you with quicker access to high-level units. The Innervate (0) on the other hand, provides you with additional 2 mana crystals until the end of the round, thanks to which you can play a card for 4 mana points, in the next round. Both of these cards allow the druid to use strong cards early into the game, where the enemy may be incapable of removing them.
Strong points
Weak Points
+ High versatility and flexibility
+ Choose One
+ Good offensive and defensive abilities
- No strong offensive units
- relies on the class cards to a large extent
Example cards: Savage Roar (3), Ancient teachings (7), Moonfire (0).
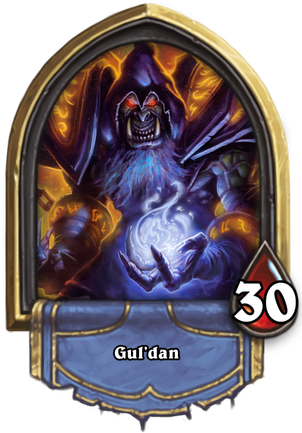
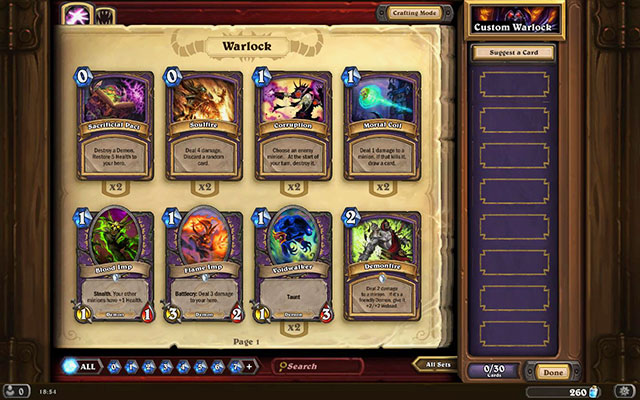
Hero: Gul'dan
Hero Power: Life Tap - Draw a card and take 2 damage
Unique Ability: Demons
The warlock is a quite specific class that can drive away many of the beginner players. The reason for that is the large amount of cards that wound the hero himself. The power of this class itself deals 2 damage per use and many of the warlock's cards can damage him even more. For this reason, you can much more often see advanced players using this class, although unjustly.
This class's hero power is Tap Life. Thanks to this ability, the player can draw a card from the deck, per turn, while taking 2 damage. Although it is a potentially harmful ability, which can bring the warlock down to low health, the warlock, when properly used, can potentially become the most powerful hero powers in the game. In exchange for a little health, the player may draw additional cards, thanks to which he does not need to waste space in the deck for a card with the same ability. Additionally, thanks to his power, the warlock is ideal for strategies centered around a large number of cheap units, and prevents him from having no cards on the hand.
Warlocks another upside are demons - a group of minions that can be found, almost entirely, only in this class's cards. The demon cards usually are double-edged swords, which at the same time provide strong units and abilities, as well as the negative effects like the loss of health points by the hero. However, if you use them wisely, you can quit e easily create a formidable team early into the game, which provides you with considerable advantage over the opponent. Thanks to the group of demons and the Blood Tap, the warlock is an excellent class for the tactic of swift enemy elimination, by deploying big numbers of cheap units and attacking the opponent's hero directly.
Strong points
Weak Points
+ the ability to draw a card at any moment
+ demon cards
+ big amounts of cheap units
- The power and cards that drain the hero's health
- Weak defensive capabilities
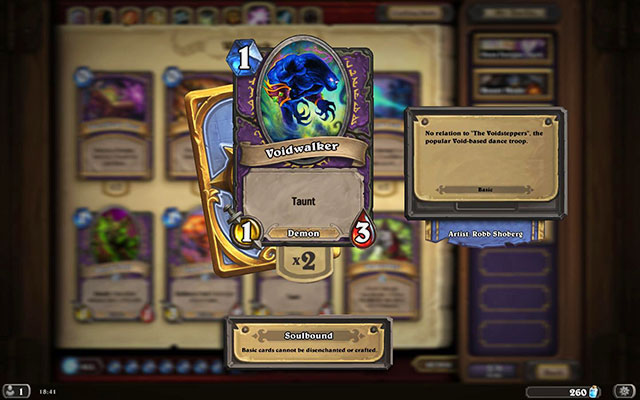
Example cards: Summoning Portal (4), Drain Life (3), Voidwalker (1).
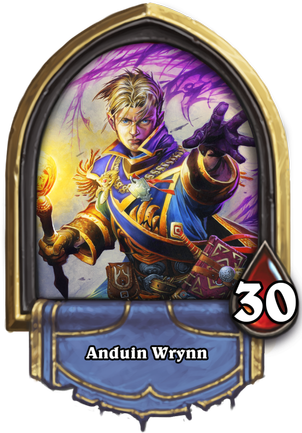
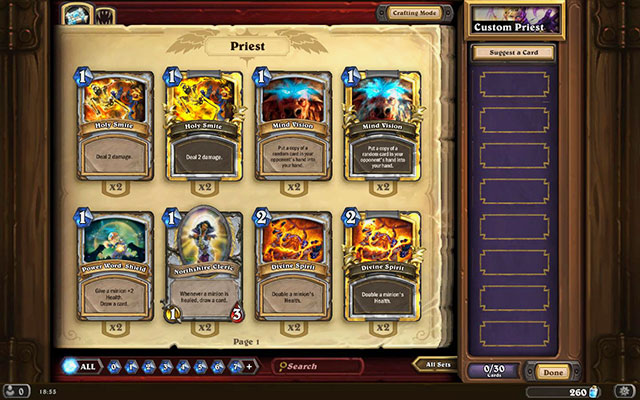
Hero: Anduin Wrynn
Hero Power: Lesser Heal - restore 2 Health
Unique Ability: Healing and strengthening of life.
Priest is a very strong defensive class that specializes in healing and strengthening the life of the summoned minions. Also, he has a lot of cards that facilitate control or swift elimination the opponent's units, which makes him a very dangerous opponent, especially towards the end of the game.
The priests power is the Lesser Healing. Thanks to this power, he can restore 2 health onto himself or onto his units. In combination with many healing cards, or boosting life, like Power Word: Shield (2) or Divine Spirit (2), allows the priest to keep even the most severely wounded units alive.
This class also has access to strong battlefield-controlling abilities. Thanks to cards like Shadow word: Pain (2) or Shadow word: Death (3), the player can eliminate all of the units with the attack factor lower than 4. Thanks to cards like Mind Control (10) or Shadow madness (4), the priest can take control over any enemy unit and turn it against him. With a spell like Shadowform (3), the player can replace the class's healing abilities with the ones that deal direct damage, which changes the playing style. All this makes the priest a very versatile class, which can both keep his own units alive and eliminate the opponent's cards.
Strong points
Weak Points
+ Excellent healing and life-boosting abilities
+ good defensive abilities
+ vast control and ability to eliminate units
+ Versatility
- weaker offensive abilities
- No immediate elimination of cards with the attack factor of 4
Example cards: Inner Fire (1), Mass Dispel (4), Temple Enforcer (6).
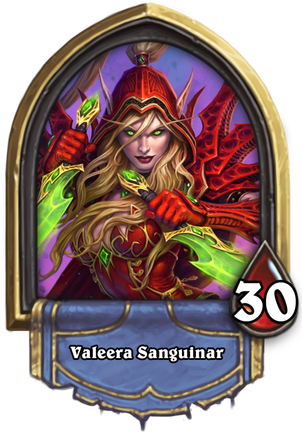
Hero: Valeera Sanguinar
Hero Power: Dagger Mastery- Equip a dagger1/2
Unique Ability: Combo
The Rogue class proves its worth when it comes to elimination and the battlefield control. It is a class that focuses strongly on the defensive aspect and dealing high damage to the opponent's cards.
The rogue's hero power is the Dagger Mastery. After you use it, a weapon with 1 attack and 2 durability is summoned. The Dagger Mastery is subject to the same rules as the other weapons and they disappear only after they are destroyed. This ability is especially useful in the initial turns, which gives the rogue the ability to eliminate the opponent's weaker units and keep the table under control, at the cost of a small bit of the hero's health. The ability to summon weapon at any moment harmonizes with the cards that boost the weapon or take advantage from it in the form of buffed statistics. The card Deadly Poison (1), which adds 2 attack to the weapon, may serve as an example here.
The Rogue's another strong point is the exceptional Combo ability. Thanks to this, this class can deal a lot of damage using the Combo cards in the correct order. This allows the Rogue, not only, to eliminate the opponent's strong units, but also to deal a lot of damage to his hero, and destroy him when least expected.
Strong points
Weak Points
+ Ability to equip the weapon at any moment
+ Unique Combo abilities
+ strong offensive abilities
+ Vast control of the battlefield
- Weak defensive abilities when compared to the remaining classes
- Small number of AoE spells
Example cards: Backstab (0), fan of Knives (3), Patient Assassin (2).
Hero: Rexxar
Hero Power: Steady Shot - deal 2 damage to the opponent's hero
Unique Ability: Beasts
The hunter is yet another class with good offensive abilities and who takes advantage of the large numbers of units in the battlefield. Just like the warlock class, the Hunter has many abilities that harmonize with a certain group of minions, which are the beasts in this case. When it comes to quick elimination and dealing a lot of concentrated damage, this class can easily compete with the Rogue.
The Hunter's hero power is the Steady Shot. It is the strongest offensive ability from among all of the heroes. It allows the player to deal 2 damage, but only to the opponent's hero. The fact that this ability can be used at any moment, makes it an ideal means of weakening the enemy hero, or eliminating him in combination with the other attacks.
The hardcore of every good hunter's deck are the cards from the beast group. Many of the special cards of this class take advantage of the beasts in the battlefield. They are the main cards that increase the attack's potency and provide you with additional cards or abilities. Many of those spells cannot be used with any other card than the beast so, that is why decks centered around this exact group of minions are of key importance to the Hunter.
The hunter is also one of the three classes that have access to the card with the Secret ability, which provides him with additional defense and control over the course of the game.
Strong points
Weak Points
+ Vast offensive abilities and decent defense
+ Good control of the battlefield
+ Strong buffing spells
- Quite a high dependence on the beast cards
- Maimed cooperation with the other groups of minions
- No strong healing cards
Example cards: Tracking(1), Snipe (2), Tundra Rhino (5).
Hero: Jaina Proudmoore
Hero Power: Fireblast - deal 1 damage
Unique Ability: spells and cards with the Secret ability
The mage is a character of vast offensive potential and a very vast control of the battlefield. The main advantage of this class is the vast array of spells and spell-buffing units. The shortcomings when it comes to the defensive units, is made up for by a big number of cards with the Secret ability and enemy-controlling spells.
The Mage's Hero Power is the Fireblast. Thanks to it, the player can deal 1 damage to any unit or the hero. It is also possible to target your own units, which harmonizes with the Enrage ability, and allows it to be activated before attacking with the given unit.
The main strength of each Mage's deck lies in the spell cards. Most of the spells are focused n dealing lots of damage to the enemy like, e.g. the Fireball (6) or the Pyroblast (10), which deals as much as 10 damage. This class also has powerful AoE spells like , e.g. Blizzard (6) or Flamestrike (7), and most of the cards with the capability to freeze like, e.g. the Cone of Cold(4) or the Frost Nova(3).
The last one of the Mage's advantages are the cards with the Secret ability. Only three classes have access to this ability and each has very useful effects, as well as helps control the course of the battle. All of the Mage's Secret cards have the mana cost of 3 but, they offer the strongest effects of this ability.
Strong points
Weak Points
+ Considerable offensive abilities
+ Powerful spell cards
+ Good control of the battlefield
+ Strong Secret cards
- Relatively weak defense
- No strong healing and boosting cards
Example cards: Sorcerer's Apprentice (2), Ice Barrier (3), Arcane Intellect(3).
Hero: Uther Lightbringer
Hero Power: Reinforce - Summon a Silver Hand Recruit 1/1
Unique Ability: Boosting of the units
The Paladin class is a unique merger of the Priest and the Warrior. Not only does it have access to relatively strong weapons and healing abilities, but also to the wide set of cards that boost the units both with respect to attack and health, which makes the Paladin a good offensive and defensive character.
This class's Hero Power is Boost. Similarly to the Shaman's power, it allows the Paladin to summon a special unit, which is the Silver Hand Recruit (2), who has the attack and health of 1. Although such a unit may seem weak, in combination with the many buffing cards that the Paladin has in stock, it can be used as a convenient means of inflicting damage. Additionally, this ability proves invaluable when the player runs out of cards in his hand. Thanks to the possibility of summoning this unit, you never finish with a completely empty table.
The Paladin's basic advantage are the mighty buffing spells. Thanks to the cards like, e.g.. Gift of Power (1) or the Blessed Champion (5), the player can boost the attack of units, within one turn considerably, and attack to deal massive damage. This makes the Paladin a great class for aggressive strategies that focus mainly on dealing damage to the opponent's hero.
The paladin is also another class with access to the Secret cards. Although he has very few of them and the mana cost of each is 1, they are an excellent reinforcement and a defense point.
Strong points
Weak Points
+ Powerful buffing spells
+ Good in attack and defense
+ Decent healing spells
+ Access to good weapon cards
- Units with high attack and low health factors
- Vulnerable to Silence
Example cards: Hammer of Wrath (4), Truesilver Champion (4), Argent Protector (2).
Hero: Thrall
Hero Power: Totemic Call - Summon a random totem
Unique Ability: Overload
The Shaman is a very interesting class that has very good surroundings -controlling abilities, as well as an unique ability of Overload. Thanks to the big number of spell cards, The shaman is a very versatile class that can adjust to many various gaming styles.
The Shaman's Hero Power the totemic Call, allows you to summon one random totem. It is always going to be one of four totems which perform the functions of healing, taunt or dealing direct damage. Just like in the case of the Paladin's power, it is a good source for cheap units, although the factor of randomness is high here.
The Shaman class also has an interesting ability - Overload. This is an ability which is available to this class only and it provides you with the access to strong spells with a certain side-effect. On each Overload card there is always a number, e.g. (2). This means that whenever you use this card, in the next round you will have two mana crystals less. This penalty disappears after one round and, although it may seem a severe restriction, it gives you the opportunity to use very powerful spells at low mana cost.
Strong points
Weak Points
+ Good offensive capabilities
+ Considerable flexibility
+ Ability to summon totems that perform most functions
- Quite weak defense
- No definite specialization
Example cards: Earth Shock(1), Lightning Storm (3), Bloodlust(5).
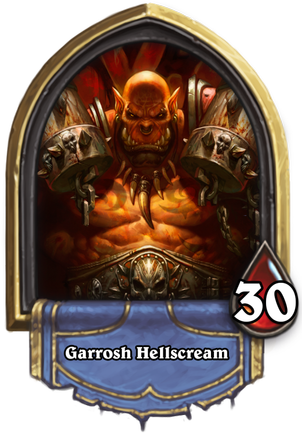
Hero: Garrosh Hellscream
Hero Power: Armor Up! - gain 2 armor
Unique Ability: weapons and attack boost
The warrior class is focused on an aggressive gaming style that uses the units that deal lots of damage, as well as weapon cards. Although the warrior also has a decent defense, he feels best while attacking and eliminating the enemy units quickly.
This class's hero power is Armor Up!. After it is activated, the hero receives 2 armor, which can be increased without limitations, which grants additional life points, in turn. It is a very useful power, especially in the case of a deck centered around weapons, where the hero often attacks enemy units and takes damage himself. However, thanks to this power, you can decrease the damage taken or eliminate completely the damage taken during an attack.
The warrior also has a wide variety of weapons and attack buffing spells at his disposal, which also influence the damaged units. By combining all of these advantages, you can deal high damage even at an early stage of the game and retain control over the battlefield easily.
Strong points
Weak Points
+ High offensive abilities
+ Vast array of weapons
+ Good battlefield control
+ decent defense
- No good AoE spells
- No healing abilities
- Low numbers of cheap units
Example cards: Fiery War Axe (2), Shield Slam (2), Warsong Commander (3).
Neutral cards (20)
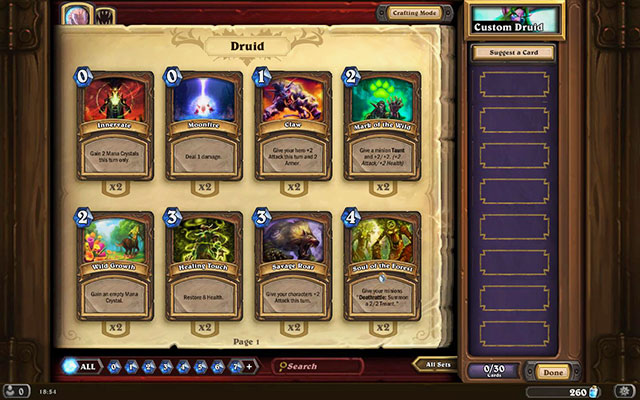
Druid's Cards (10)
Voodoo Doctor (1) x2
Claw(1) x2
Acidic Swamp Ooze (2) x2
Mark of the Wild(2) x2
Novice Engineer (2) x2
Savage Roar (3) x2
Razorfen Hunter (3) x2
Swipe (4) x2
Shattered Sun Cleric (3) x2
Starfire (6) x2
Gnomish Inventor (4) x2
Sen'jinu Shieldmasta (4) x2
Darkscale Healer (5) x2
Frostwolf Overlord (5) x2
Stormwind Champion(7) x2
This deck consists entirely of the basic neutral cards and free druid cards. It ensures a well-balanced gameplay, by combining the offensive spells with large numbers of units with abilities and a plethora of boosting cards. Thanks to the latter aspect, the deck is ideal for the tactic of buffing, which consists in a boosting of units a moment before the attack, and dealing immense damage to the hero or the opponent's strong units.
The Beginning Stage: Try to fill the battlefield with units and eliminate the enemy minions at the same time, even if using the hero power.
The Middle Stage: You can start playing the stronger units and deal some more serious damage. If you need to regain control, use, e.g. the Swipe (4).
The Final Stage: You should be able to deploy the strongest units in your deck, e.g. Frostwolf Overlord (5) or the Stormwind Champion (7). Do not charge at the enemy and, instead, try to eliminate his units while inflicting low damage to the hero.
Strong points
Weak Points
+ Stable, good for most situations
+ Many unit-buffing options
+ High offensive potential and decent defense
- No Silence Ability
- Low numbers of cheap units to fill the battlefield with
- Weak healing capabilities of the deck
Neutral Cards (9)
Druid's Cards (21)
Geomancer Kobold (2) x2
Moonfire (0) x2
Acolyte of Pain (3) x2
Savagery (1) x2
Big Game Hunter (3) x2
Claw (1) x2
Azure Drake (4) x2
Wrath (2) x2
Malygos (9)
Force of Nature (3) x2
Keeper of the Grove (4) x2
Snap (4) x2
Swipe (4) x2
Falling Star (5) x2
Starfire (6) x2
Ancient of War(7)
The above deck consists, mainly, of the druid's offensive spells and the units buffing these spells. It is, at the same time, a slow deck which is quite risky, since it does not have too many minions and requires a good control of the battlefield, with the use of spells. Only later into the game, the deck proves its value, by sending combinations of combined spells towards the hero.
The Beginning Stage: First of all, you need to focus on the control of the battlefield, i.e. on the elimination of the weak minions using the hero power and weak spells like Moonfire (0). Additionally, try to obtain several Pain Aclolyte (3) cards
The Middle Stage: Do not attack with minions spells. If the opponent deploys a strong minion, remove it with the Big Game Hunter (3). Use spells to control the battlefield.
The Final Stage: This is where the strength of this deck is. If you have Malygos (9), summon him and attack the enemy with spells. An ideal mix is the hero power and the Snap (4), Claw (1) and Savagery (1) cards.
Strong points
Weak Points
+ A good control of the battlefield
+ Good spell cards
+ Good source for direct damage
- Low numbers of minions
- easiness to lose control over the battle
- Weak against the deck with strong healing abilities.
Neutral Cards (16)
Druid's Cards (14)
Murloc Raider (1) x2
Wrath (2) x2
Tidecaller (1) x2
Power of the Wild (2) x2
Grimstale Oracle (1) x2
Savage Roar (3) x2
Murloc Tidehunter (2) x2
Keeper of the Grove (4) x2
Bluegill Warrior (2) x2
Soul of the Forest(4)
Murloc Warleader (3) x2
Druid of the Claw(5) x2
Prophet Velen (3) x2
Excess mana (5)
Cult Master (4) x2
Ancient teachings (7)
Old Murk-Eye (4)
Ironbark Protector (8)
This deck is entirely based on the Murlocks. Its strength is in the numbers of units in the battlefield and quick attack on the opponent's hero. It should be used for fast-paced games and it does not do that well in defense although, with good usage of the Druid's cards, you can deal with that also.
The Beginning Stage: The beginning of the game is the best stage for this deck. All of the Murlocks have low mana costs and that is why you should focus on deploying as many of them as possible, buffing them with the other murlocks, or Druid's cards and attack the enemy hero immediately.
The Middle Stage: you need to continue charging and try to retain your control over the battlefield. To remove the opponent's units, it is best to use the druid's spells and his hero power.
The Final Stage: If the tactic of peppering the enemy with the Murlocks worked, you will not reach this stage with your mana full. If, the enemy manages to cut through your units anyways, use cards like Excess mana (5) or Ancient teachings (7), to draw more cards and regain control of the battlefield or, eventually, finish off the opponent.
Strong points
Weak Points
+ Lots of cheap units
+ God battlefield control
+ Designed for fast-paced games
+ Ideal for the first turns
- Weak defense
- Further into the game works worse and worse
- No strong units
Neutral Cards (15)
Druid Class Cards (15)
Mechwarper (2) x2
Innervate (0) x2
Harvest Golem (3) x2
Anodized Robo Cub (2) x2
Spider Tank (3) x2
Wild Growth (2) x2
Tinkertown Technician (3) x2
Keeper of the Grove (4) x2
Mechanical Yeti (4) x2
Swipe (4) x2
Piloted Shredder (4) x2
Nourish (5)
Piloted Sky Golem (6) x2
Mech-Bear-Cat (6) x2
Sneed's Old Shredder (8)
Ironbark Protector (8) x2
An alternative kind of the Ramp Druid deck which uses a lot of common Mech cards. It includes both a high mana pool growth and the powerful druid class cards as well as the synergy of the Mech minions. It works well in the early game because of the Mech cards and in the midgame and late game as well. The main problem of this deck is a low amount of the offensive spell cards although you can use your minions to trade and maintain control.
Early game: Just like in the basic Ramp Druid deck play Wild Growth (2) to increase your mana pool. If you want get this card you may still use Mechwarper (2) which will decrease the mana cost o your other Mechs by one and will allow you to play Mechanical Yeti (4) or Piloted Shredder (4) in the third turn. You may also use Innervate (0) to summon stronger minions.
Midgame: Control the battlefield with the valuable trading. Of Use the Spare Parts left by the death of Mechanical Yeti (4) or from the Battlecry of Tinkertown Technician (3) to upgrade your minions or to downgrade the enemy minions. Save Swipe (4) for a unique situation since its your only offensive spell in the deck.
Late game: Start summoning your giants. Play Piloted Sky Golem (6) and Sneed's Old Shredder (8) to secure a lot of damage potential on the battlefield and even more minions if these will be destroyed. Block your enemy with the help of Ironbark Protectors (8) if you already have some minions on the board and you need a minion with Taunt. If you don't have anything to play use Nourish (5) to draw three extra cards.
Pros
Cons
+ Solid synergy between the druid class Mechs and the neutral Mechs
+ Strong during every phase of the game
+ A possibility of finishing off your enemy during the first few turns
- Small amount of offensive spells
- Small amount of minions with Taunt
Neutral cards (9)
Druid cards (21)
Shade of Naxxramas (3) x2
Innervate (0) x2
Piloted Shredder (4) x2
Living Roots (1) x2
Loatheb (5) x1
Wild Growth (2) x2
Sludge Belcher (5) x2
Darnassus Aspirant (2) x2
Emperor Thaurissan (6) x1
Savage Roar (3) x2
Dr. Boom (7) x1
Swipe (4) x2
Keeper of the Grove (4) x2
Savage Combatant (4) x1
Druid of the Claw (5) x2
Force of Nature (6) x2
Ancient of Lore (7) x2
The above deck consists of good minions and spells, which are supposed to get the druid to the later part of the game, when the combination of Force of Nature (6) and Savage Roar (3) will be available. A solid amount of minions will allow to control the battle and solid taunts, like Sludge Belcher (5) and Druid of the Claw (5) should delay the game. Try to use Emperor Thaurissan (6) to lower the cost of your most important cards, which are Ancient of Lore (7), Force of Nature (6) and Dr. Boom (7).
Beginning phase: focus on gaining control on the battlefield by eliminating weaker minions using your special power and spells like Living Roots (1). Moreover, try to play Darnassus Aspirant (2) to ensure an additional Mana Crystal.
Middle phase: you should focus mostly on using taunts (Sludge Belcher (5), Druid of the Claw (5)). Play Emperor Thaurissan to lower the cost of your cards.
Ending phase: prepare the enemy for the Force of Nature (6) + Savage Roar (3) combo, which deals 14 damage itself, without counting the rest of the minions.
Pros
Cons
+ Good control over the battlefield
+ Solid taunts
+ The ability of quickly increasing your mana
- If you are forced to use both the finishing combos to clear the battlefield, you may have troubles finishing the enemy.
- Expensive minions
- This deck may turn out to be too slow against aggressive decks
Neutral Cards (18)
Warlock's Cards(12)
Geomancer Kobold(2) x2
Soulfire (0) x2
Dalaran Mage (3) x2
Mortal Coil (1) x2
Shattered Sun Cleric (3) x2
Voidwalker (1) x2
Ogre Magi (4) x2
Shadow Bolt (3) x2
Gnomish Inventor(4) x2
Hellfire (4) x2
Sen'jin Shieldmasta (4) x2
Dread Infernal (6) x2
Darkscale Healer (5) x2
Archmage (6) x2
Lord of the Arena (6) x2
This warlock's basic deck is based, first of all, on the offensive spells and the Spell Damage ability. It is, therefore, perfect for direct attacks on the enemy hero or clearing the table of the weaker units. Unfortunately, a lot of these spells deal damage to the player himself and, with a small number of healing cards, this deck should be used carefully.
The Beginning Stage: Use your hero power, additional cards and spells to hold control over the battlefield. .
The Middle Stage: deploy the minions with the Taunt ability to protect units like the Dalaran Mage (3) or the Archmage (6). If you only have the Spell damage, use the offensive spells to eliminate the weaker units or to attack the enemy hero directly.
The Final Stage: watch your own health to prevent losing too much of it. Deploy the strongest units, hide them behind the Taunt and reinforce the Shattered Sun Cleric (3). Hold everything in control with your spells and send the minions against the enemy hero.
Strong points
Weak Points
+ High offensive value of the spells
+ God control of the battlefield
- Considerable number of cards that damage both sides
- No cheap units
- weak healing options
Neutral Cards (13)
Warlock's Cards(17)
Shieldmasta (1) x2
Corruption (1) x2
Acidic Swamp Ooze(2)
Voidwalker (1) x2
Emperor's Cobra (3)
Demonfire (2) x2
Spell Breaker (4) x2
Shadow Bolt (3) x2
Gadgetzan Auctioneer (5) x2
Sense demons (3) x2
Fen Creeper (5) x2
Hellfire (4) x2
Alexstrasa (9)
Siphon Soul (6) x2
Molten Giant (20) x2
Twisting Nether(8) x2
Lord Jaraxxus (9)
Warlock's deck is centered mainly around the control of the battlefield, big number of cards in the hand and quick loss of health. The requirement is to use the hero power to decrease his health. The lower the hero's health, the stronger this deck becomes.
The Beginning Stage: Keep using the hero power and cards at all times, to draw additional cards. Your main objective is to decrease your health to, around 10-15 and hold control using spells.
The Middle Stage: Do not allow the opponent to take control and keep drawing cards. Do not use the Alexstrasa (9) and Lord Jaraxxus (9) cards before your health drops to 10 .
The Final Stage: This is where fun begins, . If you have some 10 health, the Molten Giants (20) should be nearly for free now. Additionally, you can summon Alexstrasa(9) to restore your character to the level of 15 health. You should try to make up for your losses and bring down the enemy's health. If you have to, regain control of the battlefield, using the Twisting Nether(8), and focus, afterwards on dealing damage to the opponent's hero. If you still need healing, use Lord Jaraxxus (9), to return to the level of 15 and continue your charge, while keeping control of the battlefield.
Strong points
Weak Points
+ Good control of the battlefield
+ Strong offensive capabilities
+ You actually cannot finish with a single card in your hand
- Low-health level game
- Quite weak against Mages, due to their spells.
Neutral Cards (12)
Warlock's Cards (18)
Blademaster(2) x2
Blood Imp (1) x2
Ancient Watcher (2) x2
Fire Imp (1) x2
Sunfury Protector (2) x2
Corruption (1) x2
Ironbeak Owl (2) x2
Mortal Coil (1) x2
Defender of Argus (4) x2
Demonfire (2) x2
Stormcity Champion (7) x2
Succubus (2) x2
Shadow Bolt (3) x2
Sense demons (3) x2
Shadowflame (4) x2
This is yet another deck that focuses on the quick elimination of the opponent. To achieve this end, you need two things: hero power and demons. Thanks to cheap demon units, you can quickly gain control over the battlefield and attack the enemy, and the Tap Life (2) will ensure you with reliable control over cards. The rest is boosting your demons and charging at the enemy.
The Beginning Stage: You need to focus on drawing cards, using the Tap Life (2) and by deploying all your units into the battlefield. This should ensure you with strong control at a very early stage. Should the opportunity arise, you should boost your minions and attack the enemy hero.
The Middle Stage: Continue drawing cards and exercising control. You should focus, first of all, on the hero and remove the stronger minions with spells. With a bit of harmonizing of the spells and demons, you should do away with your opponent before turn 10.
The Final Stage: Since the game focuses on rushing at the enemy with your units, it does not do that well in defense and towards the end of the game. If you fail to eliminate the opponent, you should attempt to buy yourself some time and use the Ancient Watchers (2) combined with the Defender of Argus (4) or Sunfury Protector (2), to form an effective defense, while continuing your attacks with demons and spells.
Strong points
Weak Points
+ Quick, reliable offensive
+ Good control of the battle
+ A lot of cheap units
- No stronger units and good defense
- Disastrous in long games
Neutral cards (12)
Warlock cards (18)
Abusive Sergeant (1) x2
Voidwalker (1) x1
Nerubian Egg (2) x2
Power Overwhelming (1) x2
Haunted Creeper (2) x2
Flame Imp (1) x2
Knife Juggler (2) x2
Mistress of Pain (2) x1
Defender of Argus (4) x2
Wrathguard (2) x2
Gormok the Impaler (4) x1
Imp Gang Boss (3) x2
Dr. Boom (7) x1
Void Terror (1) x1
Imp-losion (4) x2
Voidcaller (4) x2
Doomguard (5) x2
Mal'Ganis (9) x1
Just like in the case of the Zoo type deck, this one focuses on minion-based gameplay and using the mana properly. This deck consists of some solid units and thanks to Voidcaller (4), you can play a random demon from your hand for free!
Beginning phase: The perfect beginning would be to play a Flame Imp (1) or even two, if you play as the second one. Alternatively, you can use Voidwalker (1). In both cases, try to make a strong start and deal some damage to the enemy. However, your priority is to make good trades for enemy minions (preferably 2 for 1).
Middle phase: Try to keep control over the battlefield. If you've managed to play Voidcaller (4), then you should probably have Doomguard (5) or Mal'Ganis (9) in your hand. Both the cards can take the Voidcaller's place. This strategy can end the battle even at this stage.
Ending phase: Try to make the best of your units. Place the most important ones behind the taunts made using The Defender of Argus (4). Remember that in order to place Gormok the Impaler (4) effectively, you need to have at least 4 minions on the table! If you are about to make a trade, play Gormok first and then make the trades so that you don't lose the opportunity to deal 4 damage right away.
Pros
Cons
+ Very fast deck
+ Using Voidcaller properly can largely increase your chances of winning
+ Good control over the battlefield using the units
- Low number of spells
- Can be easily blocked by control-based decks
Neutral Cards (14)
Priest's Cards (16)
Novice Engineer (2) x2
Power Word: Shield (1) x2
River Crocolisk (2) x2
Holy Smite (1) x2
Ironfur Grizzly (3) x2
Mind Vision (1) x2
Shattered Sun Cleric (3) x2
Northshire Cleric (1) x2
Ogre Magi (4) x2
Shadow Word: Pain (2) x2
Sen'jin Shieldmasta (4) x2
Shadow Word: Death (3) x2
Darkscale Healer (5) x2
Holy Nova (5) x2
Mind Control (10) x2
One very reliable Priest deck. It has an excellent battlefield control quality, excellent healing and reliable units. It focuses, predominantly, on a slow-paced game, controlling the battlefield by eliminating dangerous enemy units and taking control over his strongest cards. Additionally, in the deck, there are many healing or health-boosting cards and its basic shortcomings are lacks in the offensive and low number of AoE spells.
The Beginning Stage: Try to deploy some weaker units, the Northshire Cleric (1) or the Novice Engineer (2), at best, to gain additional cards and, eventually, eliminate the enemy units.
The Middle Stage: Keep control of the table, using cards like, e.g. Shadow Word: Pain (3) or Holy Nova (5). At the same time, try to deploy as many units as possible and buff them with the available cards.
The Final Stage: If the opponent plays strong cards, use Mind control (10) or Shadow Word: Pain (3), to remove them and open your way to the enemy hero.
Strong points
Weak Points
+ Good, reliable cards
+ Very good battlefield control
+ Good healing and buffing abilities
+ Powerful defensive abilities
- Poor offensive abilities
- Relatively slow game
Neutral Cards (12)
Priest cards (18)
Light warden (1) x2
Silence (0)
Shieldmasta (1) x2
Northshire Cleric (1) x2
Sunfury Protector (2)
Power Word: Shield (1) x2
Defender of Argus (4)
Internal Fire (1) x2
Mogu'shan Warden (4)
Divine Spirit (2) x2
Faceless Manipulator (5)
Lightwell (2) x2
Grubashi Berserker (5)
Lightspawn (4) x2
Holy Nova(5) x2
Temple Enforcer (6) x2
Mind Control (10)
The priest's strength lies in the buffing and healing cards and this is what you can find in this deck. The game focuses, predominantly on powerful buffs on the individual units and using them to attack the opponent. Additionally, the deck ensures a quite decent inflow of healing cards and abilities. This rather, has more in common with free play but, with the appropriate cards you can finish the battle in few turns.
The Beginning Stage: Summon units like Northshire Cleric (1) or Light warden (1) and use them for both eliminating the enemy units and drawing additional cards. For defense, you can use the Shieldmasta (1).
The Middle Stage: Continue attacking with the weaker units. Also try to set defense in the form of Taunt , and use, then, spells like Internal Fire and Divine Spirit to buff the Gurubashi Berserker (5) or Lightspawn (4).
The Final Stage: Continue launching the attacks described above and try to finish out the opponent. If he deploys a really strong unit or the Taunt card, you can use Mind Control (10), to seize it for yourself and create the attack window.
Strong points
Weak Points
+ Very good buffing and healing cards
+ Good card inflow
+ Potentially strong offense
+ Decent defense
- May have problems against decks centered around spells
- Relies predominantly on the effectiveness of buffed units
Neutral Cards (17)
Priest Cards (13)
Farie Dragon (2) x2
Power Word: Shield (1) x2
Novice Engineer (2) x2
Shadow Word: Pain (2) x2
Sunfury Protector (2)
Shadow Word: Death (3) x2
Injured Blademaster (3) x2
Holy Nova(5) x2
Shattered Sun Cleric (3) x2
Holy Fire (6)
Defender of Argus (4) x2
Temple Enforcer (6) x2
Spell Breaker (4)
Mind Control (10) x2
Twilight Drake(4) x2
Azure Drake (5) x2
Onyxia (9)
A priest deck that focuses on a good control of the game course and medium units. It is key here to keep control using the priest's spells while launching buffed attacks. The deck relies also on the unique abilities of dragon cards.
The Beginning Stage: Start by deploying cheap units like, e.g. Farie Dragon (2) or Novice Engineer (2). At the same time, try to keep control with your spells. A good thing to do is deploying the Injured Blademaster (3) in the third turn and healing him in the following one, which provides you with a strong card right at the beginning.
The Middle Stage: Keep eliminating the successive units of the opponent and attack him yourself. If you have a big number of cards, you can summon the Twilight Drake(4) and endow him with Taunt, which will ensure good defense.
The Final Stage: Keep attacking the enemy. If he deploys strong units, use the Mind Control (10) or the Shadow Word: Death (3). Once you get the opportunity to use Onyxia (9), deploy this unit to gain control in units and finish the opponent off.
Strong points
Weak Points
+ Good offensive abilities
+ Great control of the battlefield
+ A lot of healing abilities
- Quite unique defense
- No good buffs
Neutral Cards (10)
Priest Class Cards (20)
Mechwarper (2) x2
Northshire Cleric (1) x2
Spider Tank (3) x2
Power Word: Shield (1) x2
Mechanical Yeti (4) x2
Shadow Word: Pain (2) x2
Piloted Shredder (4) x2
Shrinkmeister (2) x2
Loatheb (5)
Dark Cultist (3) x2
Sneed's Old Shredder (8)
Velen's Chosen (3) x2
Shadow Madness (4)
Holy Nova (5) x2
Upgraded Repair Bot (5) x2
Vol'jin (5)
Cabal Shadow Priest (6) x2
This Priest deck is focused on Mechs which provide a strong advantage in the early game although even later on they are still fairly valuable. It entwines the strength of Mech minions with the Priest class buffs. It also has a very good combos against a minions with the low attack value.
Early game: Begin with the very aggressive strategy. Begin from Mechwarper (2) in your first or second turn and use it to play as many Mechs as you can for example Spider Tanks (3), Mechanical Yetis (4) or Piloted Shredders (4). Use also your power ups such as Power Word: Shield (1) or Velen's Chosen (3) to increase your minion stats. Your main target to receive an upgrade is either Spider Tank (3) or Mechanical Yeti (4).
Midgame: Use your usual minions to attack your enemy and your buffed up minions to trade with his own minions. Play also Dark Cultists (3) to limit the enemy's options. Remember to heal your minions as often as you can.
Late game: If you need more cards play your Northshire Cleric (1) but only if you already have at least one damaged minion on the board. Use Holy Nova (5) to remove a group of small minions an heal your own minions at the same time (it may nicely combo with Northshire Cleric (1)). If your enemy will play anything with more Attack than 3 you can debuff it with Shrinkmeisters (2) and then destroy it with Shadow Word: Pain (2) or, if you prefer to control it, use Shadow Madness (4) or Cabal Shadow Priest (6).
Strong points
Weak points
+ Very strong in the early game and fairly strong later on
+ Good buffs and control cards
- Lack of strong offensive spells
- May have some problems with the control-oriented decks
Neutral cards (8)
Priest cards (22)
Injured Kvaldir (1) x2
Circle of Healing (0) x2
Wild Pyromancer (2) x2
Power Word: Shield (1) x2
Injured Blademaster (3) x2
Flash Heal (1) x2
Sylvana Windrunner (6) x1
Northshire Cleric (1) x2
Ysera (9) x1
Resurrect (2) x2
Shadow Word: Death (3) x2
Thoughtsteal (3) x2
Auchenai Soulpriest (4) x2
Holy Champion (4) x2
Holy Nova (5) x1
Vol'jin (5) x1
Lightbomb (6) x1
Cabal Shadow Priest (6)x1
This deck is based on cards that will help you control the battle. It consists of powerful minions that can be strengthen by healing or convert healing to damage (Auchenai Soulpriest (4)). Holy Champion is a very important card in this deck. It can be buffed by healing any minion.
Beginning phase: Try to draw Northshire Cleric (1), Injured Kvaldir (1) or Injured Blademaster (3) during the first rounds. Mind that using one Circle of Healing (0), you can place 2/4 (Injured Kvaldir (1)) or 4/7 (Injured Blademaster (3)) on the table early in the game and then you can draw cards thanks to the priest.
Middle phase: Try to make good trades with enemy minions and keep your units alive. If you control the battle, you can use Thoughtsteal (3) to steal some of the enemy cards.
Ending phase: If you need cards, play Northshire Cleric (1), but only if you have at least one wounded unit on the table. Use Holy Nova (5) to get rid of a bunch of weaker or wounded minions, heal your own units and buff Holy Champion (4). The Auchenai Soulpriest (4) + Circle of Healing (0) or Lightbomb (6) combo can quickly clear the table of enemy minions.
Pros
Cons
+ Very strong during the beginning phase; also pretty good during the next phases
+ Huge healing ability
+ The ability to buff Holy Champion and increase her damage largely
+ A solid burst using Auchenai Soulpriest + Flash Heal combo
- If you don't draw a card that allows you to quickly clear the table, you might have some trouble during the middle phase
- Might be difficult against aggressive decks
Neutral cards (12)
Priest cards (18)
Wild Pyromancer (2) x2
Holy Smite (1) x1
Blackwing Technician (3) x2
Power Word: Shield (1) x2
Twilight Guardian (4) x2
Northshire Cleric (1) x2
Azure Drake (5) x2
Twilight Whelp (1) x2
Abomination (5) x2
Wyrmrest Agent (2) x2
Sylvana Windrunner (6) x1
Shadow Word: Death (3) x2
Ysera (9) x1
Dark Cultist (3) x2
Velen's Chosen (3) x1
Holy Nova (5) x1
Vol'jin (5) x1
Cabal Shadow Priest (6)x1
Lightbomb (6) x1
This deck consists mostly of dragons and cards with synergy with dragons. It is very good for controlling the battle. The ability to buff your own minions and healing them will surely cause some trouble to the enemy.
Beginning phase: try to draw Nortshire Cleric (1), Wild Pyromancer (2) or Twilight Welp (1) during the first rounds to be able to play cards at the beginning. Make trades and heal your own minions.
Middle phase: try to make good trades with enemy minions and keep your units alive. Also, try to make use of the special effects of the cards that have synergy with dragons. Twilight Guardian (4) will be a perfect taunt and Blackwing Technician (3) can be a very useful body on the table.
Ending phase: if you need cards, play Northshire Cleric (1), but only if at least one of your units is wounded. Use Holy Nova (5) to get rid of a bunch of weaker or wounded enemy minions. If your enemy plays a very good unit, you can use the Sylvana Windrunner (6) + Shadow Word: Death (3) combo on your own unit, to steal the enemy minion. Make sure that Ysera (9) lands on the table and try to keep her alive.
Pros
Cons
+ Very strong at the beginning of the game; pretty good in the later phases
+ Synergy with dragons
+ Units with good stats
- If you don't make use of the fact that some cards benefit from having dragons in your hand, then playing this deck makes no sense
- You can have some trouble against aggressive decks
Neutral Cards (16)
Rogue Cards (14)
Voodoo Doctor (1) x2
Backstab (0) x2
Rayorfen Hunter (2) x2
Deadly Poison (1) x2
Geomancer Kobold (2) x2
Sap (2) x2
Shattered Sun Cleric (3) x2
Fan of Blades (3) x2
Ogre Magi (4) x2
Hidden Blade (5) x2
Sen'jinu Shieldmasta (4) x2
Assassination (5) x2
Darkscale Healer (5) x2
Sprint (7) x2
Stormwind Champion (7) x2
It is a very good deck for new players. It focuses mainly on spell cards and buffing them with Spell Damage. It also has solid, but cheap, units and two weapon cards for the elimination of weaker units or attacking the hero directly.
The Beginning Stage: Use your cheaper units like the Rayorfen Hunter (2), to ensure yourself with control over the battlefield. Use the Backstab (0) and the hero for the elimination of the weaker units..
The Middle Stage: Start playing the units with Spell Damage and launch your attacks against the opponent's hero. If you need many cards, use the Sprint (7).
The Final Stage: Use the offensive cards to clear the opponent's side and use the Stormwind Champion (7), to buff the remaining units and deal the critical blow.
Strong points
Weak Points
+ A lot of offensive cards
+ Reliable units
+ Strong weapon cards
- Relatively weak offensive abilities of the minions
- Almost no healing cards
Neutral Cards (7)
Rogue Cards (23)
Mana Addict (2)
Backstab (0) x2
Novice Engineer (2) x2
Shadowstep (0) x2
Knife Juggler (2) x2
Conceal (1)
Questing Adventurer(3) x2
Adrenaline Rush (1) x2
Patient Assassin (2) x2
Defias Ringleader (2) x2
Sap (2) x2
Stun (2)
Eviscerate (2) x2
SI: 7 Agent (3) x2
Edwin VanCleef (3)
Perdition's Blade (3)
Fan of Blades (3) x2
Assassination (5)
It is a strongly offensive Rogue deck, meant to be used by the more experienced players. Most of the strong attacks of this deck are hidden in the Combo ability and appropriate spell cards. The number of minions is not too high, which is why this is a deck for purely offensive use and charging on the enemy hero.
The Beginning Stage: The key is to gather the appropriate cards for the Combo and hold back until the right moment. Try to hold control using your hero power and the weaker of the cards.
The Middle Stage: Time to have fun. There are many stunning combinations of cards that you can use in turns 6+7. The use of the Knife Juggler (2), Mana Addict (2) and the Questing Adventurer(3) may serve as an example. The later card is mainly a bait here. In the next turn, you can initiate the example combination: Backstab (0), Defias Ringleader(2), using the Shadowstep (0) on the previous card and use it again, to summon Edwin VanCleef (3), in the end, with 10/10. Additionally, the Mana Addict (2) is boosted to 6/3 and the Knife Juggler can throw 5 random blades. This is only one of the many possible combinations
The Final Stage: The aggressive profile of this deck will rather not let you wait until this stage. If this happens, though, try to determine the right combination and eliminate the largest threat, by using, e.g. the Perdition's Blade (3) or Assassination (5).
Strong points
Weak Points
+ Incredible offensive potential
+ Good control
+ To be used for fast-paced games
- Relies entirely on spells and combo cards
- To be used by more experienced players
Neutral Cards (16)
Rogue Cards (14)
Elven Archer (1) x2
Backstab (0) x2
Novice Engineer (2) x2
Sinister Strike (1) x2
Knife Juggler (2) x2
Sap (2) x2
Demolisher (3) x2
Eviscerate (2) x2
Ironsmith Ranger (3) x2
SI: 7 Agent (3) x2
Gnomish Inventor(4) x2
Fan of Blades (3) x2
Gromdarda Commando (5) x2
Assassinate (5) x2
Nightblade (5) x2
Another strongly offensive deck for the Rogue, which focuses mainly on the direct spell damage. Has a good control of the battlefield and many ways for the elimination of the opponent. Its major shortcoming is that it lacks a reliable defense, although this has no meaning if the enemy does not manage to attack.
The Beginning Stage: You should focus, predominantly on obtaining cards and securing your control over the battlefield. Use Novice Engineer (2) and Gnomish Inventor(4) when the opportunity arises.
The Middle Stage: Eliminate the opponent's stronger units and use the remaining cards against the hero. Remember to use your spells in combinations and try to bring down the enemy's health as soon as possible.
The Final Stage: Keep the strong cards, like the Assassinate (5) for later, to eliminate the opponent's really strong units. Continue decreasing his health while attempting to keep relative control over the table.
Strong points
Weak Points
+ Strong offensive abilities
+ Very good spell cards
+ Decent minion cards
- Poor defense
- Relies on spells and combos strongly
- Weak towards the end of the game
Neutral Cards (16)
Rouge Class Cards (14)
Mechwarper (2) x2
Backstab (0) x2
Harvest Golem (3) x2
Deadly Poison (1) x2
Tinkertown Technician (3) x2
Blade Furry (2)
Mechanical Yeti (4) x2
Eviscerate (2) x2
Piloted Shredder (4) x2
Goblin Auto-Barber (2) x2
Azure Drake (5) x2
SI:7 Agent (3) x2
Sludge Belcher (5) x2
Tinker's Sharpsword Oil (4)
Argent Commander (6) x2
Assassin's Blade (5)
Sprint (7)
A rouge deck from the Tempo genre. It focuses on using every mana crystal as valuable as you can and on strong minions. It is fairly easy to construct this deck since it has almost only basic and common cards and only few rare cards.
Early game: Start with playing Mechwarper (2) to receive the mana cost reduction for your other Mechs such as Harvest Golem (3) or Mechanical Yeti (4). Use Backstab (0) to clean the 3/2 minions or connect it with your hero power's dagger to kill a 2/3 minion. Try to play Tinkertown Technician (3) as fast as you will have a Mech on a board to give a 4/4 minion instead of 3/3 and a Spare Part as well.
Midgame: Play Azure Drake (5) to receive a bonus card and Spell Damage +1. Protect your weaker minions with Sludge Belcher (5) who will provide you two minions with Taunt with one card. Remember about the Combo ability from some of your cards suck as Eviscerate (2) or SI:7 Agent (3). You may activate them with cheap cards like Backstab (0), Deadly Poison (1) and Harvest Golem (3).
Late game: Arm yourself with Assassin's Blade (5) and power it up with Deadly Poison (1), Goblin Auto-Barber (2) and Tinker's Sharpsword Oil (4). Use this strengthened weapon to either damage your enemy or clean some strong minions. If your enemy will gain control over the board use the Blade Furry (2) spell on strengthened weapon to deal a lot of damage and clean his side of the battlefield. If you control the board or have not a lot of cards in your hand problem use Sprint (7) to draw four more cards.
Strong points
Weak points
+ Smoothly passing through consecutive turns
+ Good connection of strong minions, buffing spells and offensive spells
+ Good card draw
- Rather weak in the later parts of the game
- Using weapons may kill your hero fast what may be a problem since this deck offers no cards which may heal you
Neutral cards (9)
Rogue cards (21)
Southsea Deckhand (1) x1
Backstab (0) x2
Bloodmage Thalnos (1) x1
Preparation (0) x2
Piloted Shredder (4) x2
Deadly Poison (1) x2
Antique Healbot (5) x1
Blade Flurry (2) x2
Azure Drake (5) x2
Sap (2) x2
Loatheb (5) x1
Goblin Auto-Barber (2) x1
Emperor Thaurissan (6) x1
Eviscerate (2) x2
S1:7 Agent (3) x2
Fan of Knives (3) x2
Tinker's Sharpsword Oil (4) x2
Sprint (7) x2
This is a Tempo type Rogue deck, which means that the most important thing is using the mana that you have in every round in the most efficient way. The deck is not expensive to collect, but playing it the proper way may take hours of practice.
Beginning phase: Try to draw cards that will allow you to survive the beginning of the game: Backstab (0), Deadly Poison (1), Goblin Auto-Barber (2), S1:7 Agent (3). When playing against a Paladin or against a Zoo type deck, keep Fan of Knives in your hand.
Middle phase: Try to clear the table of enemy minions. Keep your units on the table to be able to buff them with Tinker's Sharpsword Oil (4) and thus dealing a lot of damage to the enemy. To effectively clear the battlefield of all the enemy units, you can use the Azure Drake (5) or Bloodmage Thalnos (1) + Deadly Poison (1) or Tinker's Sharpsword Oil (4) to increase the weapon damage (if you have two weapon charges, first attack enemy hero if it's possible) and use Blade Flurry (2) to deal AoE damage. If you lack cards and the situation on the table allows it, use Preparation (0) + Sprint (7) to draw additional cards and save some mana.
Ending phase: At this stage of the game, you should probably already have cards that you can use to burst the enemy, like for example Deadly Poison (1) or Tinker's Sharpsword Oil (4), Eviscerate (2). These cards will allow you to deal huge damage. It is good to first lower the mana cost on the cards using Emperor Thaurissan (6), which will allow you to play more cards and use combos. If you have an additional minion on the table or if you use Southsea Deckhand (1), who will obtain Charge ability right away, you can add a lot of extra damage (the Oil also buffs a random minion). If you need more damage to finish the enemy, you can use Blade Flurry (2).
Pros
Cons
+ Fast tempo of playing and large offensive abilities
+ A good combination of solid minions and powerful offensive and buffing spells
+ Good choice of additional cards
- If you don't draw minions during the beginning phase, you may fall a little behind the enemy
- Using weapons can quickly lower your hp and there is only one healing card in the deck
Neutral Cards (12)
Hunter Cards (18)
Stonetusk Boar(1) x2
Hunter's mark (0) x2
Bloodfen Raptor (2) x2
Arcane Shot (1) x2
Ironfur Grizzly (3) x2
Timberwolf (1) x2
Silverback Patriarch (3) x2
Starving Buzzard (2) x2
Oasis Snapjaw(4) x2
Kill Command (3) x2
Core Hound (7) x2
Animal Companion (3) x2
Multi-Shot (4) x2
Houndmaster (4) x2
Tundra Rhino (5) x2
<br>This deck heavily relies on beasts and offensive spells. It is very good for aggressive tactics of rushing at the enemy or focusing mainly on the attack and control over the battlefield, which may result in a quick elimination of the opponent. It is much worse when it comes to the slow-paced games that rely on better offense and haling abilities.
The Beginning Stage: deploy cheap units and boost them with the Timberwolf (1). Also, use the Starving Buzzard (2) for additional cards.
The Middle Stage: Keep control over the battlefield with spells and lesser beasts. Use the strongest ones to attack the hero. For defense, it is a good idea to summon the Oasis Snapjaw (4), and boost him with Taunt from the Houndmaster (4) card.
The Final Stage: Use the Multi-Shot (4) and Kill Command (3) to eliminate the stronger units. For strong attacks, you could well use the combo of Tundra Rhino (5) and Core Hound (7).
Strong points
Weak Points
+ Lots of cheap beast units
+ Strong offensive spells
+ Good boost cards
- Weak defensive
- No reliable options to deal with the stronger units
Neutral Cards (10)
Hunter Cards (20)
Bloodfen Raptor (2) x2
Hunter's mark (0) x2
Emperor Cobra (3) x2
Timberwolf (1) x2
Ironfur Grizzly (3) x2
Unleash Hounds! (4)
Sen'jin Shieldmasta (4) x2
Scavenging Hyena (2)
Oasis Snapjaw(4) x2
Snake Trap (2)
Explosive Trap (2)
Starving Buzzard (2) x2
Kill Command (3) x2
Animal Companion (3) x2
Houndmaster (4) x2
Multi-Shot (4) x2
Explosive Shot (5)
Savannah Highmane (6)
It is a Hunter deck that revolves around beasts. The basic here, are the minions of low mana cost as well as keeping big number of units in the battlefield. In other words, the decks focuses mainly on numbers, and on buffing those numbers. For this reason, it is immensely vulnerable to AoE attacks, due to which it works bad against characters like Mages.
The Beginning Stage: First of all, you need to focus on flooding the battlefield with cheap units. This is the basic way to keep control. If you are expecting that the opponent may have the AoE spells, try to lure him with several weaker units and make him use up those spells at the very beginning.
The Middle Stage: Use your beasts and spells to eliminate the enemy minions, and try to maintain a steady source for damage, at the same time, even if in the form of the hero power. Also, remember about the cards of Secret, to gain additional control.
The Final Stage: Continue your charge. If the enemy rolls out heavy guns, eliminate them with spells like Hunter's mark (0), Kill Command (3) or, in the end, Explosive Shot (5). A good method is to gather a few cheap units in your hand and summon them all at once, and use the Unleash Hounds! (4) spell, which will grant them with immediate Charge and +1 to attack.
Strong points
Weak Points
+ Many cheap units
+ Good control via the minion cards
+ Very good Secret cards
- No strong units
- Pretty poor defense
- Disastrous against magical decks with AoE spells
Neutral Cards (12)
Hunter's Cards(18)
Confidant (1) x2
Flare (1)
Wild Pyromancer (2)
Arcane Shot (1) x2
Novice Engineer (2) x2
Tracking (1) x2
Ironbeak Owl (2)
Snipe (2) x2
Arcane Golem (3) x2
Explosive Trap (2) x2
Filth (5)
Freezing Trap(2) x2
Gadgetzan Auctioneer (5)
Hunter's Mark (0)
Argent Commander (6) x2
Eaglehorn (3) x2
Kill Command (3) x2
Animal Companion (3) x2
Unlike the previous ones, the above deck focuses, almost entirely, on control with spells, weapons and secrets, while rejecting, to a large extent, the beast cards. To defend and clear the battlefield of the enemy minions, mostly traps from the Secret cards, and offensive spells, are used. Due to the small number of offensive units, you can succeed only through constant control over the battlefield and through using units to attack the enemy hero.
The beginning stage: First of all, you should focus on eliminating the enemy units, using Eaglehorn (3), Arcane Shot (1) or the Explosive Trap (2). When it comes to attacking, it is best to use the Confidant (1) in combination with the cards of Secret. You should also remember that the Eaglehorn (3) replenishes 1 endurance point, each time that you discover a Secret. Remember to use it, to increase the number of available attacks.
The Middle Stage: Keep control and slow down enemy's actions. For that, use cards like the Anima Companion (3) or Filth (5). If you need cards, play the Gadgetzan Auctioneer (5) before you use spell cards or Tracking (1). You should also seize the opportunity to use the hero and decrease the enemy's health gradually.
The Final Stage: At this point, the enemy should already be low on health. In this case, you can use the Argent Commander (6), in combination with your offensive spells, to finish him off. Otherwise, use it to clear the battlefield, while remembering to use the Hero Power
Strong Points
Weak Points
+ a lot of offensive spells and secrets
+ Very good control of the battlefield
+ It is easy to obtain new cards
- Few minions
- Is not that good for longer matches
Neutral cards (11)
Hunter cards (19)
Ironbeak Owl (2) x1
Hunter's Mark (0) x1
Haunted Creeper (2) x2
Webspinner (1) x1
Mad Scientist (2) x2
Freezing Trap (2) x2
Piloted Shredder (4) x2
King's Elekk (2) x2
Loatheb (5) x1
Kill Command (3) x2
Sludge Belcher (5) x2
Eaglehorn Bow (3) x2
Dr. Boom (7) x1
Animal Companion (3) x2
Unleash the Hounds (3) x2
Houndmaster (4) x1
Ram Wrangler (5) x2
Savannah Highmane (6) x2
Mid range hunter, whose cards are chosen in such a way so that you can do the most during the middle phase of the game. However, there are also some solid late-game units. Very good synergies between cards will ensure a large effectiveness and solid damage.
Beginning phase: During the first rounds, play minions like Webspinner (1), Haunted Creeper (2), Mad Scientist (2) or King's Elekk (2). Animal Companion (3) is a card that you should keep in your hand. Try to make good trades if it's possible and use the class special ability to deal extra damage.
Middle phase: Continue with the aggressive strategy, trying to deal as much damage as you can to the enemy. Remember that thanks to Mad Scientist (2), you can draw Freezing Trap (2) from the deck in such a way so that you don't need to use any mana. The trap is very good against stronger enemy units.
Ending phase: Remember about using the special ability to deal 2 damage constantly to the enemy hero. You can slow down the enemy using Sludge Belcher (5) and Savannah Highmane (6), which will probably become a priority for your enemy to eliminate. You can also use Houndmaster (4) on this card, which will give it Taunt and +2/+2. Use Ram Wrangler (5) wisely to summon an additional beast right away.
Pros
Cons
+ Very strong synergy between cards
+ Solid beginning and very good middle phase
+ Good control over the battlefield and strong offensive abilities
- If you don't manage to control the game from the beginning, the stronger units may turn out to be too slow in the later phase
Neutral Cards (16)
Mage Cards (14)
Geomancer Kobold (2) x2
Mirror Image (1) x2
Novice Engineer (2) x2
Arcane Missiles (1) x2
Raid Leader(3)
Frost Nova (2) x2
Dalaran Mage (3)
Arcane Intellect (3) x2
Shattered Sun Cleric (3) x2
Fireball (4) x2
Sen'jin Shieldmasta (4) x2
Polymorphy (4) x2
Ogre Magi (4) x2
Fire Blast (7) x2
Grubashi Berserker (5) x2
Archmage (6) x2
The mage's Basic Deck focuses mainly on spell cards and strong offensive. Most of the minions are used for defense and for buffing mage's spells. The cost for the strong attack is quite weak defense, which is why it is better to rely here on the battlefield control by means of eliminating the enemy units. The deck also has two Gurubashi Berserkers (5), cards, which receive +to attack per each received damage. This is an ideal ability in the case of the mage, who thanks to his hero power, can deal 1 damage and activate their ability at beck and call.
The Beginning Stage: Use cheap units to ensure the opportunity to attack. Destroy the opponent's minions with the hero power or with your units.
The Middle Stage: Start deploying the minions with the Taunt, so that they can protect the cards with Spell Damage. At the earliest opportunity, use the Fireball (4) or Fire Blast (7), to deal shattering damage to the opponent's hero.
The Final Stage: try to deal as much damage to the enemy hero and control the battlefield with the spells with Freeze, like, e.g. Frost Nova (2) or neutralize units with Polimorphy (4). At the earliest opportunity, use Fireballs (4), to finish off the enemy hero.
Strong points
Weak Points
+ Powerful offensive spells
+ Good battlefield control
- Poor defense
- No good buff and healing cards
Neutral cards (9)
Class cards (21)
Kobold Geomancer (2)
Ice Lance (1)
Sen'jin Shieldmasta (4) x2
Mirror Entity (1) x2
Azure Drake (5) x2
Arcane Missiles (1) x2
Gadgetan Auctioneer (5) x2
Ice Missile (2) x2
Venture Co. Mercenary (5) x2
Sorcerer's Apprentice (2) x2
Fireball(4) x2
Polimorph (4) x2
Cone of Cold (4) x2
Water Elemental (4) x2
Blizzard (6) x2
Flamestrike (7) x2
This deck focuses on control of the battlefield, mainly with the mage class cards. Eliminating bigger threats and controlling the smaller ones with Freeze effect is a key to victory here. Deck doesn't have too much strong minions, so you need to balance between attacking enemy minions and hero.
Beginning: You have to play defensively. Clean the field with Arcane Missiles (1), Ice Missile (2) and hero's power.
Medium game: Use minions like Water Elemental (4) and Sen'jin Shieldmasta (4) and spells like Ice Lance (1), Cone of Cold (4) and Blizzard (6) to slow down enemies. In the same time attack enemy hero with remaining minions, especially with Venture Co. Mercenary (5).
End game: Use Fireball (4) and Polymorph (4) at the greatest threats and minions with Taunt. Flamestrike (7) should be used when enemy has 2-3 minions with life lower or equal 4. Attack enemy hero until he dies.
Advantages
Disadvantages
+ Very good control
+ Strong defensive
+ Easy to master
- Small number of strong minions
- You can easily get an empty hand
Neutral cards (19)
Mage cards (11)
Clockwork Gnome (1) x2
Frostbolt (2) x2
Cogmaster (1) x1
Snowchugger (2) x2
Mechwarper (2) x2
Mirror Entity (3) x2
Mad Scientist (2) x2
Fireball (4) x2
Annoy-o-Tron (2) x2
Goblin Blastmage (4) x2
Spider Tank (3) x2
Archmage Antonidas (7) x1
Tinkertown Technician (3) x2
Mechanical Yeti (4) x1
Piloted Shredder (4) x2
Loatheb (5) x1
Toshley (6) x1
Dr. Boom (7) x1
This is an aggressive Tempo type deck, focused around the legendary card - Archmage Antonidas (7). This card, connected with Spare Parts, is the core of the deck and helps the aggressive game style. Spar Parts not only enhance your minions' attack power, but also can be treated as low-cost spells that trigger the special power of the legendary card, which is an extra Fireball (4) for every spell that you cast.
Beginning phase: Start from playing Cogmaster (1) x1 and/or Clockwork Gnome (1). Next, play Mechwarper (2) to lower the cost of other mechs. Gain some advantage over the enemy by using Frostbolt (2) and Hero Power. Use it to eliminate the first enemy minions without trading.
Middle phase: Play more mechs, like Spider Tank (3) and Piloted Shredder (4). If you have at least one mech on the table, play Tinkertown Technician (3) to enhance attack power and obtain a Spare Part. Use Snowchuggers (2) to Freeze the more dangerous enemy units and eliminate them easily. Goblin Blastmage (4) should be played only if you have at least one mech on the table, just like in the case of Tinkertown Technician (3). This will make him deal 4 damage split randomly between enemy minions.
Ending phase: Use Fireballs (4) on targets with a lot of hp or on enemy hero. Try to clear the table and keep your units alive. Toshley (6) will provide you extra spare parts and make a good body on the table. Eventually, play Archmage Antonidas (7) and use the Spare Parts that you have to get Fireballs (4). Use the spells to eliminate enemy minions or to finish the hero.
Pros
Cons
+ Good connection between the beginning and middle phase
+ Goo control over the battlefield
+ You can finish the opponent even during the first few rounds
- This deck is only effective when you make use of the synergy between cards and of Spare Parts
- Sometimes you can quickly run out of cards in the hand
Neutral cards (11)
Mage cards (19)
Doomsayer (2) x2
Ice Lance (1) x2
Loot Hoarder (2) x1
Frostbolt (2) x2
Bloodmage Thalnos (2) x1
Arcane Intellect (3) x2
Mad Scientist (2) x2
Frost Nova (3) x2
Acolyte of Pain (3) x2
Ice Barrier (3) x2
Antique Healbot (5) x1
Ice Block (3) x2
Emperor Thaurissan (6) x1
Cone of Cold (4) x1
Alexstrasza (9) x1
Fireball (4) x2
Blizzard (6) x2
Flamestrike (7) x1
Archmage Antonidas (7) x1
A passive deck that will allow you to slow down the battle and thus to wait for the cards that you need to finish the enemy. It is a deck focused mainly on drawing more cards and clearing the table of enemy minions. When you use cards like Ice Block (3) and Ice Barrier (3), the enemy will have a lot of trouble to finish you.
Beginning phase: Try to have in your hand cards that will allow you to draw more of them, meaning Loot Hoarder (2) or Acolyte of Pain (3). Mad Scientist (2) will also do well during the beginning of the battle. This card will allow you to draw a secret for free. Draw more cards to obtain Ice Lance (1) and Frostbolt (2), which will be useful during the end.
Middle phase: Control the situation on the table and try to draw more cards, for example using Acolyte of Pain (3) + Hero Power. If it gets dangerous, you can always use one of the following combinations" Frost Nova (3) + Doomsayer (2), Cone of Cold (4) + Doomsayer (2), Blizzard (6) + Doomsayer (2), or just use Flamestrike (7).
Ending phase: At this stage, you should have Alexstrasza (9), which is the key minion in this deck, in your hand. If you can, play Emperor Thaurissan (6) to lower the cost of the cards. Using Alexstrasza (9), lower the enemy hero's hp and in the next round, use the Frostbolt (2) + Ice Lance (1) x2 combo, or just cast Fireballs (4) if you have them.
Pros
Cons
+ You can slow down the game and force the enemy to make mistakes
+ Good control over the battlefield
+ Very good burst during the ending phase
- Very hard to master
- Slow games
- If you can't draw more cards, it gets difficult
Neutral Cards (18)
Paladin Cards (12)
Voodoo Doctor (1) x2
Gift of Power (1) x2
Novice Engineer (2) x2
Hand of Protection (1) x2
River Crocolisk (2) x2
Truesilver Champion (4) x2
Shattered Sun Cleric (3) x2
Consecration (4) x2
Ogre Magi (4) x2
Hammer of Wrath (4) x2
Sen'jinu Shieldmasta (4) x2
Guardian of Kings (7) x2
Darkscale Healer (5) x2
Frostwolf Overlord (5) x2
Stormwind Champion (7) x2
The Paladin's stable deck focuses mainly on the buff cards and strong minions. Additionally, it has several useful offensive spells, good healing cards and weapon cards. Thanks to this, the player with this deck can find his way out of nearly every situation, although with offense preferred over defense.
The Beginning Stage: Use cheaper units to keep in control of the battlefield. You should also remember to summon recruits with the hero power.
The Middle Stage: Buff units such as the Darkscale Healer (5) or Frostwolf Overlord (5), to launch powerful attack. You should also remember about your weapons when you need to eliminate some of the units.
The Final Stage: Continue your attack with the buffed units. If you need it, use the Hammer of Wrath (3), and the - Guardian of Kings (7) in the case of strong healing. It is also a good idea to use the Hand of Protection (1) on the buffed units, to protect them from dying.
Strong points
Weak Points
+ Strong offensive potential thanks to buff cards
+ Decent healing options
+ Good defense
- Few cheap units
- relies to a large extent on buffed units
Neutral cards (14)
Paladin class cards (16)
Wild Pyromancer (2) x2
Humility (1)
Sunfury Protector (2)
Equality (2) x2
Ironbeak Owl (2)
Aldor Peacekeeper (3) x2
Acolyte of Pain (3) x2
Argent Protector (4) x2
Blood Knight (3)
Consecration (4) x2
Big Game Hunter (3)
Hammer of Wrath (4) x2
Earthen Ring Farseer (3)
Avenging Wrath (6) x2
Sen'jin Shieldmasta (4) x2
Guardian of Kings (7)
Harrison Jones (5)
Lay on Hands (8)
Stampeding Kodo (5)
Tyrion Fordring (8)
Cairn Bloodhoof (6)
Paladin deck focuses on control with spells and several minions. It's dedicated for more advanced players, because it requires knowledge of particular cards and rather rare minions.
Beginning: As in most cases, you try to gain control. Use Consecration (4), Argent Protector (4) and Hammer of Wrath (4) to eliminate weaker minions and protect your own units.
Middle game: Similar to the beginning. Control the battle with cards like Aldor Peacekeeper (4) and Humility (1). If enemy set up a strong line of minions, you can use a combo of Equality (2) and Consecration (4) or Wild Pyromancer (2) and Equality (2) to clean up the battlefield. But be careful not to destroy your own unit.
End game: You can start using your legendary minions. Cairn Bloodhoof (6) is ideal for eliminating enemy minions while Tyrion Fordring (8) is one of the best legendary unit in this game. It has not only Taunt and Divine Shield but also provides you with 5/3 weapon after death. If you need healing, use Guardian of Kings (7) or Lay on Hands (8) for additional cards.
Advantages
Disadvantages
+ Good balance between attack and defense
+ Strong control
+ Good minions
+ Versatile
- Very expensive
- Only for experienced players
Neutral cards (10)
Paladin cards (20)
Silver Hand Regent (3) x2
Equality (2) x2
Piloted Shredder (4) x2
Shielded Minibot (2) x2
Sludge Belcher (5) x2
Aldor Peacekeeper (3) x2
Loatheb (5) x1
Muster for Battle (3) x2
Sylvana Windrunner (6) x1
Warhorse Trainer (3) x2
Justicar Trueheart (6) x1
Consecration (4) x2
Dr. Boom (7) x1
Truesilver Champion (4) x2
Murloc Knight (5) x2
Quartermaster (5) x2
Lay on Hands (8) x1
Tyrion Fordring (8) x1
This paladin deck focuses on control. It works best during the middle and the ending phase of the game, but it also has a few cards that will allow you to start the game well. It connects a solid amount of offensive spells, useful minions and weapons.
Beginning phase: Try to have Shielded Minibot (2) in your starting hand, as thanks to the Divine Shield ability, they handle 3/2 enemies very well. Other cards that are worth keeping in hand are Muster for Battle (3), Warhorse Trainer (3) and Silver Hand Regent (3). When you play against an aggressive deck, search for Consecration (4).
Middle phase: Equip Truesilver Champion (4) and start eliminating the more dangerous enemy units. Save Consecration (4) for a combo with Equality (2), which will allow you to eliminate almost any danger. Use Muster for Battle (3) to summon three Silver Hand Recruits (1) 1/1 and equip a 1/4 weapon. Next, play Quartermaster (5), which will give all the Silver Hand Recruits (1) +2/+2 making a solid 3/3 minions of them. You can also give them +1 attack using Warhorse Trainer.
Ending phase: If you need healing or extra cards, use Lay on Hands (8). Using Aldor Peacekeeper (3), you can get rid of stronger enemy units. At this stage, you should play Tyrion Fordring (8), as well as Dr. Boom (7). Sylvan Windrunner (6) can slow down the enemy so it's always good to throw her in during late game. The enemy will then think twice about playing the most powerful units, as they can get captured by her.
Pros
Cons
+ Very good during any stage of the battle
+ Good combination of solid minions, spells and weapons
+ Works against most types of decks
- A major part of your success is based on combos
- Lack of strong, purely offensive spells
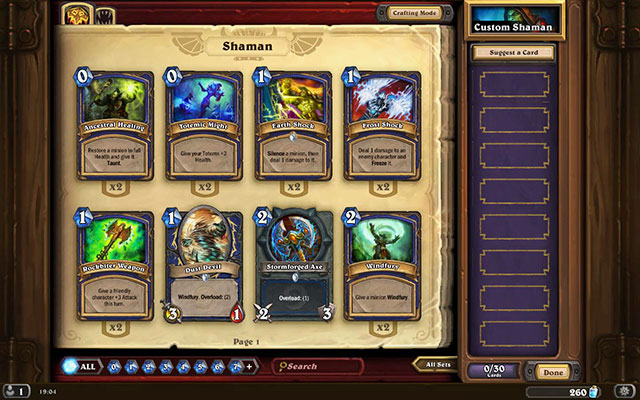
Neutral Cards (16)
Shaman Cards (14)
Voodoo Doctor (1) x2
Ancestral Healing (0) x2
Murloc Tidehunter (2) x2
Rockbiter Weapon (1) x2
Rayorfen Hunter (3) x2
Flametongue Totem (2) x2
Shattered Sun Cleric (3) x2
Evil Charm (3) x2
Dragonling Mechanic (4) x2
Windspeaker (4) x2
Sen'jinu Shieldmasta (4) x2
Bloodlust (5) x2
Frostwolf Overlord (5) x2
Fire Elemental (6) x2
Stormwind Champion (7) x2
Shaman's basic deck relies mainly on attacks of buffed units and strong strikes. The best tactic, in the case of this deck, is deploying large numbers of units onto the battlefield and using buff cards to attack the hero directly.
The Beginning Stage: Use such cards as Murloc Tidehunter (2) or Rayorfen Hunter (3), to fill the table with minions. A good way to play is to reinforce them with the Flametongue Totem (2), to achieve high damage in the first turns. .
The Middle Stage: Continue fighting y eliminating the units with your spells and weaker minions.
The Final Stage: If you manage to deploy sufficient numbers of units, you can try playing two cards: Bloodlust (5), to add 6 attack to your units and crush the enemy in one attack. If you are obstructed by an unit with the Taunt, you can try eliminating it with an offensive spell, or use Evil Charm (3) and eliminate the unit with something weaker.
Strong points
Weak Points
+ Lots of minions
+ Big offensive potential
+ Good healing cards
- Useless in long games
- Poor defense
Neutral Cards (19)
Shaman Cards (11)
Murloc Raider (1) x2
Earth Shock (1) x2
Tidehunter (1) x2
Ancestral Spirit(2) x2
Grimstale Oracle (1) x2
Flametongue Totem (2) x2
Murloc Tidehunter (2) x2
Mana Tide Totem (3)
Bluegill Warrior (2) x2
Evil Charm (3) x2
Murloc Warleader (3) x2
Bloodlust (5) x2
Coldlight Seer(3) x2
Coldlight Oracle (3) x2
Old Murk-Eye (4)
Faceless Manipulator (5) x2
Another efficient deck based on the Murlocks. Just like any deck of this type, it is immensely effective at the initial stages of the game but, this changes with each successive turn. The basic tactic here is to flood the battlefield with murlocks and attack the enemy directly. For eliminating the enemy units, it is best to use spells.
The Beginning Stage: The most important stage for this deck. Start by deploying the cheapest units, like e.g. Tidehunter (1), which will buff the murlocks to come. Continue deploying your units and charging at the enemy.
The Middle Stage: At the stage, the enemy should already be quite beaten up. Try not to sacrifice your units to eliminate the minions. Instead, use your spells and remember to summon totems when you have some mana.
The Final Stage: Is not the most fortunate for this deck. It happens, though, use such spells as Evil Charm (3), to eliminate threat and the Faceless Manipulator (5), to copy the more powerful units, or your own. You should focus, first of all, on attacking the enemy hero.
Strong points
Weak Points
+ Ensures advantage at the beginning of the game
+ Quick and aggressive gaming style
+ Good offensive spells
- Based mainly on fighting throughout the initial turns
- Weak defense and lack of strong units
Neutral cards (10)
Shaman cards (20)
Zombie Chow (1) x2
Rockbiter Weapon (1) x2
Haunted Creeper (2) x2
Earth Shock (1) x2
Defender of Argus (4) x1
Totem Golem (2) x2
Piloted Shredder (4) x2
Flametounge Totem (2) x2
Azure Drake (5) x2
Hex (3) x2
Dr. Boom (7) x1
Lightning Storm (3) x2
Tuskarr Totemic (3) x2
Mana Tide Totem (3) x1
Bloodlust (5) x1
Thunder Bluff Valiant (5) x2
Fire Elemental (6) x2
For this deck, you will need cards from The Grand Tournament expansion. The cards are chosen in such a way so that you can easily control the game. Thanks to low mana cost and the ability to summon and buff totems, you will be able to put pressure on the enemy and clear the table.
Beginning phase: Try to draw cards like Zombie Chow (1), Haunted Creeper (2) or Totem Golem (3) to be able to play the minions in the first rounds. A good thing to do would be also to use Flametongue Totem (2). This will give you a lot of damage during the beginning of the game.
Middle phase: Try to make trades in such a way so that you always have minions on the table. Thanks to Tuskarr Totemic (3) you can summon extra totems and using Thunder Bluff Valiant (5), you can buff them with +2 attack.
Ending phase: If you manage to place the proper amount of units on the table, you can use Bloodlust (5). This should be enough to win the game. If there's an enemy minion with Taunt on the table, you can try to eliminate it with an offensive spell or use Hex (3) and get rid of the hexed opponent with something weaker. If the enemy has more minions on the table than you have, you can use Lightning Storm (3), but first try to draw a totem that would enhance the spell.
Strong points
Weak Points
+ Large number of minions
+ Huge game control abilities
+ The ability to buff and summon extra totems
- This deck may not be so effective against heroes that use fast tempo and try to put pressure on the enemy.
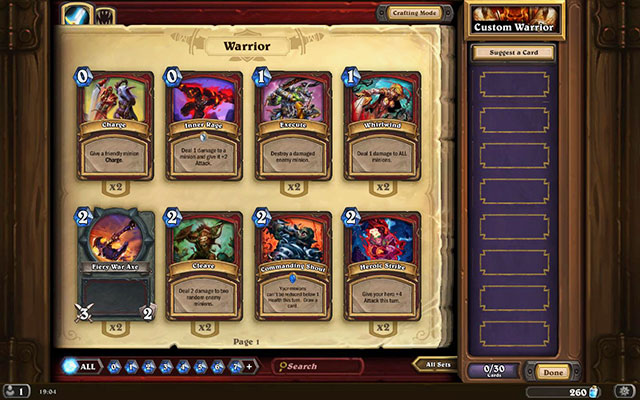
Neutral Cards (16)
Warrior Cards (14)
Voodoo Doctor (1) x2
Execute (1) x2
Frostwolf Grunt (2) x2
Fiery War Axe (2) x2
Shattered Sun Cleric (3) x2
Heroic Strike (2) x2
Chillwind Yeti (4) x2
Cleave (2) x2
Sen'jinu Shieldmasta (4) x2
Shield Block (3) x2
Darkscale Healer (5) x2
Warsong Commander (3) x2
Boulderfist Ogre (6) x2
Arcanite Reaper (5) x2
Stormwind Champion (7) x2
Strong and stable warrior deck which focuses mainly on the strongest units and buffing cards. Apart from that, it also has several weapon cards and offensive spells. It is a deck that is good in most situations but, rather one which favors slow-paced games over quick attacks on the enemy hero.
The Beginning Stage: Summon cheap units and use Fiery War Axe (2), to eliminate the most dangerous units.
The Middle Stage: Start buffing your stronger units and protect them with Taunt. You can also attempt a combo of z Arcanite Reaper (5) and Heroic Strike (2), to deal the crushing 9 damage to the enemy hero.
The Final Stage: Play the Boulderfist Ogre(6) and Stormwind Champion (7), and start launching powerful attack with those units. If possible, it is a good idea to deploy the Warsong Commander (3) first, to give them immediate Charge. You should also remember about your weapons. They may be n ideal method to finish off your opponent.
Strong points
Weak Points
+ Good defense and attack
+ Strong weapon cards
+ Flexible
- No stable battlefield control
- Due to the numerous weapons, potentially dangerous for the hero's life
Neutral cards (11)
Warrior class cards (19)
Wild Pyromancer (2)
Execute (1) x2
Acolyte of Pain (3)
Shield Slam (1) x2
Big Game Hunter (3)
Whirlwind (1)
Spellbreaker (4)
Fiery War Axe (2) x2
Sen'jin Shieldmasta (4) x2
Cruel Taskmaster (2) x2
Faceless Manipulator (5) x2
Armorsmith (2) x2
Sunwalker (6) x2
Cleave (2)
Ragnaros the Firelord (8)
Slam (2)
Shield Block (3) x2
Frothing Berserker (3) x2
Brawl (5)
Grommash Hellscream (8)
Rather advanced deck which focuses on control at each stage of the game. It's designed in away so you can keep on in every situation. It's great both against quick decks and the more defensive ones.
Beginning: Use minions like Armorsmith (2), Frothing Berserker (3) and Cruel Taskmaster (2) to provide danger for enemy. In the same time control enemy minions with Cleave (2), Slam (2) and Fiery War Axe (2).
Middle game: Minions with Taint (Sen'jin Shieldmasta (4) and Sunwalker (6)) provide great defense at this stage of the game. If you need to get rid of especially dangerous units, use Execute (1) and if enemy gains too big supremacy, use Brawl (5) to eliminate most of his units.
End Game: Use your legendary cards to finish the game. You can play Ragnarosem the Firelord (8), and then copy him with Faceless Manipulator (5). You can also combo Grommash Hellscream (8) with Battlecry of Cruel Taskmaster (2) to activate Enrage and deal additional 10 damage in the round.
Zalety
Wady
+ Versatile deck
+ Good minions
+ Good balance between attack and defense
- Expensive deck
- Lack of strong offensive cards
Neutral Cards (11)
Warrior Class Cards (19)
Annoy-o-Tron (2) x2
Execute (1) x2
Mechwarper (2) x2
Warbot (1) x2
Harvest Golem (3) x2
Whirlwind (1) x2
Spider Tank (3) x2
Fiery War Axe (2) x2
Tinkertown Technician (3) x2
Battle Rage (2) x2
Junkbot (5)
Frothing berserker (3) x2
Death's Bite (4) x2
Kor'kron Elite (4) x2
Screwjank Clunker (4) x2
Iron Juggernaut (6)
A Zoo-oriented deck focused on controlling the board. Uses the synergies between Mechs and also the spells and weapons of Warriors. It allows you to keep control over the board and then finish off your enemy with the quantity advantage.
Early game: Start with playing Warbot (1) who may block some 2/1 minions. Follow it with Mechwarper (2) for his mana costs reduction and arm yourself with Fiery War Axe (2) which will allow you to eliminate a lot of early game threats.
Midgame: Play new Mechs such as Harvest Golem (3) and Spider Tank (3) on their lower mana costs. Try to play Tinkertown Technician (3) when you have at least one Mech on the board so he will get a +1/+1 buff and you will receive a Spare Part. If you need more cards play Whirlwind (1) to deal one damage to all minions when you already have a lot of minions on the board and then play Battle Rage (2) which will let you draw one extra card for every damaged friendly character. You can also connect it with Frothing berserker (3) to increase his damage.
Late game: Use Death's Bite (4) to destroy stronger minions. Use Screwjank Clunker (4) to give one of your Mech +2/+2. When you will play Junkbot (5) start trading with your other Mechs since every dead friendly Mech will give him +2/+2. Save Execute (1) for the biggest threats since it is your only removal spell. When you will be able to play Iron Juggernaut (6) you may use it to drop a Mine to your enemy's deck which will later on explode in his hand and deal him 10 points of damage.
Strong points
Weak points
+ Strong in the early game and midgame
+ Allows you to use one of the strongest weapons in the game to do valuable trades
+ Good synergies between Mechs
- Rather weak in the late game
- Lack of strong offensive spells
Neutral cards (9)
Warrior cards (21)
Unstable Ghoul (2) x2
Inner Rage (0) x2
Acolyte of Pain (3) x2
Execute (1) x2
Gnomish Inventor (4) x1
Whirlwind (1) x2
Harrison Jones (5) x1
Fiery War Axe (2) x2
Grim Patron (5) x2
Battle Rage (2) x2
Emperor Thaurissan (6) x1
Cleave (2) x1
Armorsmith (2) x2
Shield Block (3) x2
Warsong Commander (3) x2
Frothing Berserker (3) x2
Mortal Strike (4) x2
It's a quite difficult warrior deck, which focuses on the best choice of cards so that in the right moment, you can use the Warsong Commander (3) + Grim Patron (5) / Frothing Berserker (3) combo. If you use the cards well, you can take total control over the battlefield or buff Frothing Berserker (3) to a very powerful minion.
Beginning phase: Try to draw cards like Acolyte of Pain (3) + Inner Rage (0), Shield Block (3) and cards that will allow you to control the game (Fiery War Axe (2)).
Middle phase: Try to use Emperor Thaurissan (6) in such a way so that you lower the cost of the most important cards, which are: Warsong Commander (3), Frothing Berserker (3), Grim Patron (5), Whirlwind (1). Also, use Battle Rage (2) well, as you can draw one card for every wounded friendly unit (including the hero) on the table.
Ending phase: Prepare whirlwind effect on Mortal Strike (4) or have some other cards that can use this effect. If the enemy has a lot of minions, try to use the Warsong Commander (3) + Frothing Berserker (3) combo with a weapon with whirlwind effect or just using Whirlwind (1). For every wounded unit, the Berserker gets +1 attack and when playing Warsong Commander (3) first, the Berserker will obtain charge. This can cause a lot of trouble to the enemy. When using this combo, you can also play Armorsmith (2) to increase armor. Warsong Commander (3) + Grim Patron (5) is another combo that you can use with whirlwind. If a Grim Patron (5) is hit, he will summon another, who will also obtain charge.
Pros
Cons
+ Great buffing possibilities
+ Large possibility of drawing extra cards
+ The ability to get armor
+ Fun to play!
- If you don't draw to appropriate cards, you won't be able to perform combos
- If your most important cards get neutralized, you will most probably lose the game
Neutral cards (13)
Warrior cards (17)
Big Game Hunter (3) x1
Execute (1) x1
Blackwing Technician (3) x2
Shield Slam (1) x2
Twilight Guardian (4) x2
Fiery War Axe (2) x2
Azure Drake (5) x2
Alexstrasza's Champion (2) x2
Blackwing Corruptor (5) x2
Armorsmith (2) x2
Sylvanas Windrunner (6) x1
Shield Block (3) x2
Dr. Boom (7) x1
Mortal Strike (4) x2
Ysera (9) x1
Shieldmaiden (6) x2
Nefarian (9) x1
Grommash Hellscream (8) x1
Varian Wrynn (10) x1
In the Dragon Warrior deck, there is a large number of dragons, along with cards that have synergy with them. Thanks to that, when you have dragon minions in your hand, other cards will obtain an extra effect. These are for example cards like Alexstrasza's Champion (2), which gets +1 attack and charge. Also, Blackwing Corruptor (5) will be able to deal 3 damage right away. The deck is focused on controlling the battlefield using minions, spells and weapons.
Beginning phase: try to draw minions which can be played during the first rounds, like for example Alexstrasza's Champion (2) or Blackwing Technician (3). Fiery War Axe (2) can also be helpful during the beginning of the game.
Middle phase: try to keep control over the battlefield and eliminate enemy minions. Remember to make use of the synergy with dragons so that you buff the cards that can be buffed. Use armor strengthening every time you can.
Ending phase: at this stage, you should have a lot of armor and some minions on the table. This should provide you a good control over the battlefield. Eliminate bigger enemy minions using Execute (1) or Shield Slam (1). Ysera (9), Dr. Boom (7), Nefarian (9) and Varian Wrynn (10) will give you the required power during late game. Grommash Hellscream (8) is also a very good card to finish the enemy.
Pros
Cons
+ Very strong control abilities
+ Some of the best weapons in the game, which allow you to make good trades
+ Very good synergy with dragons
- The beginning of the game may be a little slow
- If you don't use the cards with synergy the proper way, you may lose the game
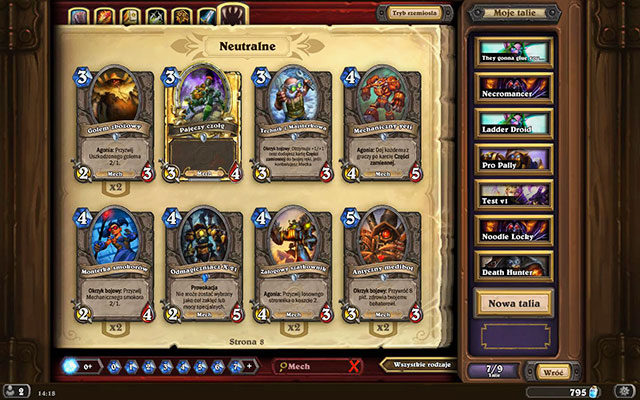
Goblins vs Gnomes is a first expansion set to Hearthstone: Heroes of Warcraft. It focuses on introducing a lot of new neutral cards and class cards. Unlike the Naxxramas set it does not introduce a single player campaign or challenges. The expansion set is completely free and introduces over 130 new cards which you can collect the same way as the usual cards: by spending the real money or through the in-game gold. The new cards are mostly focused on a new group of minions - the Mechs - and introduce some new mechanics such as an instant effect after drawing a card or a 50% chance of hitting a specific target. Mechs themselves are a huge percentage of the new cards and have a lot of interesting combos that are reserved only for them.
Beside the new cards this expansion set also introduced some new comfortable functions and modernized in a usual card set. The spectator mode which allows you to watch your friends games has been introduced. Some of the old minions have been tagged as Mechs and the rewards from the Arena mode has been refreshed to suit the expansion set.
New and old MechsThe old minion types have been expanded by the Mechs. Just as the name suggests the Mechs include machines, bots or other goblins' or gnomes' constructions. Mechs don't share a specific feature and they are fairly varied considering their mana costs and special skills. Starting with the little robots like Clockwork Gnome (1) and Micro Machine (2) and finishing with the powerful colossi such as Clockwork Giant (12) or Force-Tank MAX (8). However most of them have a beneficial synergy with other Mechs. In result the more Mechs you will have in your deck the stronger synergies you may use.
Sample cards: Target Dummy (0), Shielded Minibot (2), Screwjank Clunker (4), Mechanical Yeti (4), Antique Healbot (5), Foe Reaper 4000 (8)
 A Spare Part
Spare Parts are the first neutral spell cards in Hearthstone (apart of Ysera's Dream Cards) however they cannot be put in your deck such as the usual cards. The main way to receive them is using the special ability of a specific minion (most of the time - a Mech). The game has introduced six different Spare Parts and each one of them provides a power-up or a debuff for a minion (you can always decide which minion do you want to target). Whenever you will receive a Spare Part you will get a random card from the mentioned six of them.
All of the available Spare Parts are listed below:
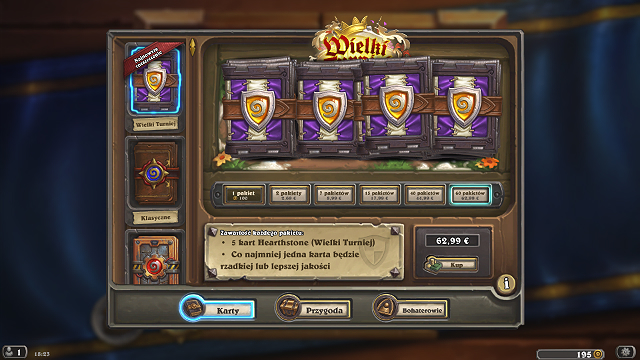 New card pack.
With the release of the next expansion, a new card pack has been introduced. It contains only cards from The Grand Tournament expansion. The price is the same as always, that means 100 gold for one pack of 2,69 for 2 packs. Inside, you will find 5 cards from the expansion and at least one of them will be rare. The type of the rest of the cards is up to luck. Moreover, card packs from the expansion will now replace classic packs as rewards in the Arena mode. Basic cards, as well as those from the Goblins vs Gnomes expansion can still be obtained by buying classic packs in the shop or by crafting them.
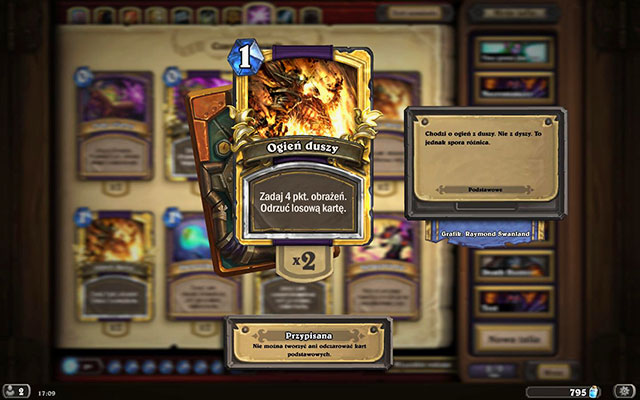 The free card has now it's mana cost
The expansion set has also introduced some important changes in the classical cards. The most important are listed below:
 From now on you may spectate your friends!
The spectator mode is a new option that allows players to watch the games of their friends live. However it is a somewhat limited tool. First of all we have to have a player on our friend list and he has to mark the "Allow Friends to Spectate my Games" option in the Options menu in the Preferences category. If all of these requirements are fulfilled and your friend is playing right now you may find him on your friend list and click the "Spectate this game" option next to his name.

The Grand Tournament is the second expansion to Hearthstone: Heroes of Warcraft. The expansion brings a lot of new cards to the game, both class-based and neutral. It is totally free and offers over 132 new cards, which can be obtained the same way as previously - for real money, gold (game currency) or for Arena victories. The main novelty concerning the new cards is the Inspire effect. There are also a few new features, like for example an additional effect for Battlecry (for example revealing a minion from both player's decks; if your minion costs more mana than the enemy's one, you take it to your hand). Moreover, the expansion brings a new arena and new reward system. From now on, the player can win one of three card packs: Classic, Goblins vs Gnomes or The Grand Tournament.
The Grand Tournament expansion also introduces new rewards for ranked matches. From now on, depending on the rank that you gain in a given month, you will obtain an appropriate reward.
Rank 20 - 1 Common Golden Card, 5 Arcane Dust
Rank 19 - 1 Common Golden Card, 10 Arcane Dust
Rank 18 - 1 Common Golden Card, 15 Arcane Dust
Rank 17 - 1 Common Golden Card, 20 Arcane Dust
Rank 16 - 1 Common Golden Card, 25 Arcane Dust
Rank 15 - 1 Common Golden Card, 1 Rare Golden Card, 5 Arcane Dust
Rank 14 - 1 Common Golden Card, 1 Rare Golden Card, 10 Arcane Dust
Rank 13 - 1 Common Golden Card, 1 Rare Golden Card, 15 Arcane Dust
Rank 12 - 1 Common Golden Card, 1 Rare Golden Card, 20 Arcane Dust
Rank 11 - 1 Common Golden Card, 1 Rare Golden Card, 25 Arcane Dust
Rank 10 - 2 Common Golden Cards, 1 Rare Golden Card, 5 Arcane Dust
Rank 9 - 2 Common Golden Cards, 1 Rare Golden Card, 10 Arcane Dust
Rank 8 - 2 Common Golden Cards, 1 Rare Golden Card, 15 Arcane Dust
Rank 7 - 2 Common Golden Cards, 1 Rare Golden Card, 20 Arcane Dust
Rank 6 - 2 Common Golden Cards, 1 Rare Golden Card, 25 Arcane Dust
Rank 5 - 2 Common Golden Cards, 1 Epic Golden Card, 5 Arcane Dust
Rank 4 - 2 Common Golden Cards, 1 Epic Golden Card, 10 Arcane Dust
Rank 3 - 2 Common Golden Cards, 1 Epic Golden Card, 15 Arcane Dust
Rank 2 - 2 Common Golden Cards, 1 Epic Golden Card, 20 Arcane Dust
Rank 1 - 2 Common Golden Cards, 1 Epic Golden Card, 25 Arcane Dust
Legend Rank - 3 Common Golden Cards, 1 Epic Golden Card
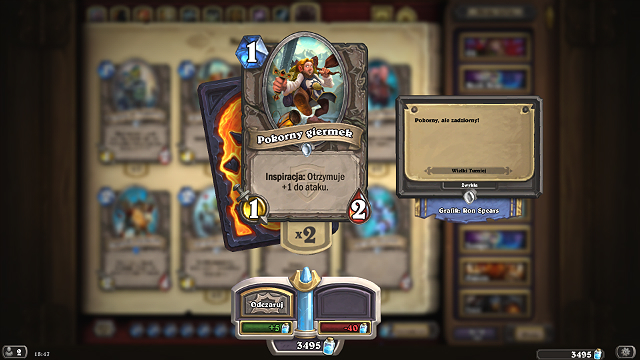
Inspire is a new unique effect in Hearthstone. It is triggered by using Hero Power. On the screen above, you can see that after using it, the card gets +1 attack. There are quite a lot of other bonuses to get. For example getting extra minions, lowering the cost of Hero Power, the ability to use it several times per round or even obtaining a random legendary card.

 Heroes of the Storm Game Guide & Walkthrough
 Heroes VI - Pirates of the Savage Sea Game Guide & WalkthroughHeroes of Might and Magic V Game Guide & Walkthrough
 Hotline Miami 2: Wrong Number Game Guide & Walkthrough
 Halo 4 Game Guide & Walkthrough