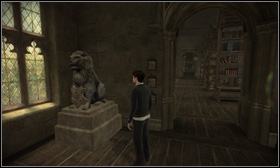
You could say that this guide is a compendium of knowledge on the newest entry in the Harry Potter series. Every spell, minigame and places where you can find the Hogwart crests have been described in it. Additionally, you will find a complete walkthrough of the game, together with lots of screenshots and some advices, useful during the game. The blue numbers in brackets - [1], [2] - correspond to the screenshots above the text. 1 is of the screen on the left and 2 for the screen on the right. Every important place has been marked with a green colour and the spells with brown. Have fun playing the game!
Michal "Wolfen" Basta
Translated to English by Jakub "cilgan" Lasota
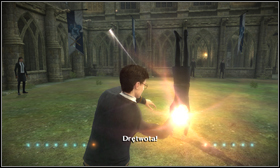
During the adventure, Harry can use two types of spells. The first ones (Spells and charms) are used while travelling across Hogwart. Thanks to them we can catch, throw and repair item etc. The second group (Duels) consists of offensive spells, which we can use only during fights. Below you will find a description of each spell, divided into two groups. Not every spell is available from the start of the game. You will learn and upgrade many of them during the adventure.
Spells and charms
Wingardium Leviosa - a spell that allows you to pick up and move items from one place to another, pull or throw them. The spell is especially useful for knocking down crests that can be hit only using the surrounding objects like benches of stone jugs. Using this spell you can also throw dungobombs.
Reparo - allows you to repair damaged items like keys or crests. You need to use keys at some spots to get through closed gates. Crests can sometimes break, for example when they hit a wall fall from a high spot. In such case you need to approach the item and cast the spell until it's repaired.
Incendio - a spell that comes in useful while blowing up firework boxes and destroying obstacles like plants or spider webs, blocking the access to some crests.
Duels
Stupefy - a basic spell used during combat. It's quite weak at the beginning, but it becomes very powerful later on. The high speed at which you can throw it makes up for its quite low power. You can literally cover the screen with red bullets. Later on, you can charge up a very powerful shot by holding down the left mouse button.
Protego - a defensive spell that lets you reflect enemy attacks. In not only allows you to avoid enemy attacks but also reflects the weaker ones, damaging the enemies with their own spells. Of course, if they don't manage to dodge in time.
Expelliarmus - this spell is useful when we want to knock an enemy to the ground. It does cause some damage, but its biggest advantage is that it immobilises the enemy for a while, leaving him open for attacks. Not too much honourable, but effective. Take note that the spell takes more time to cast than Stupefy.
Petrificus Totalus - using this spell, you can paralyse an enemy for a short while. During the paralysis, he will slowly loose energy. However you cannot attack paralysed foes, as attack will bounce off of them. ATTENTION: this is the only spell which you WON'T gain during the story. In order to gain it, you have to go to the Paved Courtyard and talk with one of the student, who will challenge you to a duel. You will be able to use the spell after winning the battle.
Levicorpus - a useful spell which turns your enemy upside down and immobilises him for a short period of time. During the paralysis, you are free to attack the enemy. If you get hit by one, quickly move the mouse right and left and Harry will free himself from the spell.
Charging - it's not quite a spell, but an ability thanks to which you can attack more effectively with the Stupefy. In order to use it, you have to press and hold down the left mouse button. Thanks to this ability you can also hold the Protego longer and cast it in the right moment. You need to press and hold the right mouse button then.
Learning how to duel is one of the most basic things you have to do. There will be lots of fight, in the clubs and during the story as well. At the beginning you have only some basic spells at your disposal, but as the story progresses you will learn more of them. Below I'll give you some tips on how to fight properly.
- Above all, you have to constantly move. There's nothing worse than standing in one place and getting hit by the enemy attacks. That's why you should strafe during the battle and if you see that the enemy is readying a spell, wait for the proper moment and dodge or cast Protego.
- Sometimes it's good to make use of obstacles like screens or bookshelves. You won't find them around during every fight, but you can hide behind them to catch a breath and ready another spell while fighting a strong enemy. Just remember that you can destroy these items and so can your enemy.
- If you want to quickly eliminate an enemy, try to immobilise him. Expelliarmus and Levicorpus spells are the way to go. By using them, you will gain time during which you should attack your foe with the strongest spells you've got.
- At the same time, try not to fall in such a trap yourself. If you will be knocked down with the Expelliarmus spell, you are unable to do anything until Harry stands up. However if you get hit by the Levicorpus spell, begin to move your mouse left and right and you will regain control quicker.
Mixed style
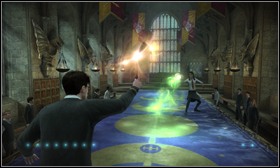
You will use this style mostly during the beginning of the game, as you won't have too much spells and when you want to play with your opponent. It's a combination of defensive style with a high amount of dodges [1], after which you can launch your own attacks [2]. While moving, it's good to use the Stupefy, which will give the enemy a hard time.
Defensive style

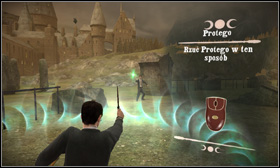
In this style, you focus mainly on defence, without attacks. It's definitely the least stunning and effective style, but you can gain one of the badges thanks to it and practise your defensive skills. In order to defend effectively, you need to have the Protego spell, thanks to which you can reflect enemy attacks [1]. It's actually the only way to deal damage to your foes. During the fight you must also remember to frequently dodge and use various covers [2].
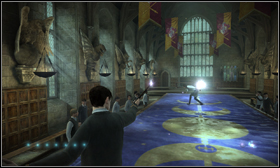
Offensive style
The offensive style is all about defeating your enemy as quick as possible. You just have to throw everything you've got at your foe. A good example of fighting with this technique is using the Levicorpus together with the Stupefy spell. First, you immobilise your enemy using the first one [1], charge up Stupefy and cast it once close to the enemy to finish him [2].
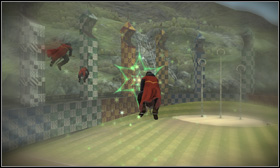
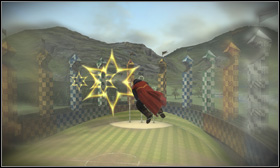
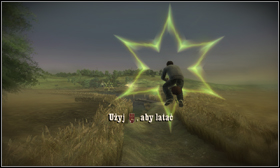
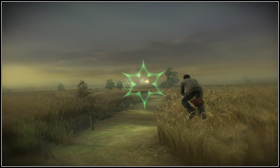
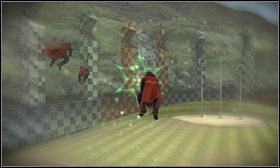
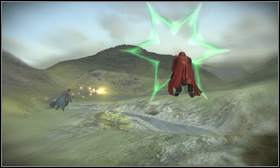
Quidditch is one of the three minigames available. The rules are very simple, as you just have to fly through the stars appearing before you. If you miss them or hit obstacles too much you will begin to lose time which can end in losing the match. Pay attention to the stars colours. If they are green [1] then everything's just find, because you have lots of time left. Once they turn yellow [2] it will mean that the time is running out.
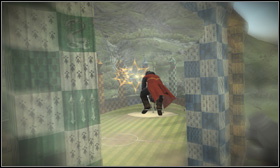
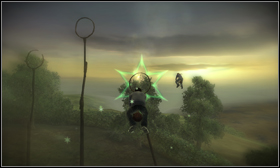
![If the stars begin to turn red [1], you have very little time and every mistake can end the match - Quidditch - Harry Potter and the Half-Blood Prince - Game Guide and Walkthrough](https://game.lhg100.com/Article/UploadFiles/201512/2015121519400310.jpg)
If the stars begin to turn red [1], you have very little time and every mistake can end the match. Dolls with pumpkin head will appear during some matches [2]. You will gain additional time if you fly into one of these. During the matches, try to keep an eye on the enemy team players, they will attempt to disturb you. Try to fight them off by flying into them.
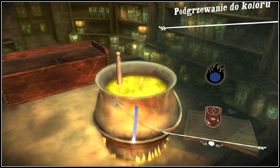
Making potions is the last minigame available. The rules are simple - you have to mix, warm up and pour and throw in ingredients on the right in the right amounts, so that the potion changes colour. If you overdo, smoke will begin to come out of the pot - move the mouse to the sides to get rid of it. Also keep an eye on the time limit, displayed in the upper right corner. A good ingredient adds a few second to the timer, but you can forget about any additional time if you make something wrong. Basically, that's all there is to know about making potions. It can be quite tricky in the beginning, but you'll get a hang of it after a while.
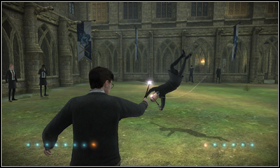
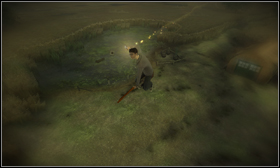
At first, the controls and basic activities will be explained to you. Firstly, you will learn how to fly on a broom [1]. Harry has to catch the golden snitch - he will automatically fly after it. You have to steer using the mouse and fly through the stars to get time bonuses. If you're flying well, the stars will be green [2]. Missing them will cause the time to deplete and the stars will turn red.
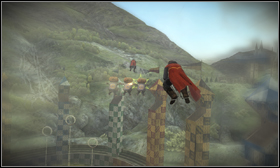
![From time to time you will pass through metal hoops [1] or other obstacles, in this case a house [2] - Introduction - Walkthrough - Harry Potter and the Half-Blood Prince - Game Guide and Walkthrough](https://game.lhg100.com/Article/UploadFiles/201512/2015121519400445.jpg)
From time to time you will pass through metal hoops [1] or other obstacles, in this case a house [2]. Be very careful around those, because you will lose lots of precious time if you hit them.
![In the end, Harry will finally get the snitch [1] - Introduction - Walkthrough - Harry Potter and the Half-Blood Prince - Game Guide and Walkthrough](https://game.lhg100.com/Article/UploadFiles/201512/2015121519400494.jpg)
In the end, Harry will finally get the snitch [1]. After landing, head to Ron and Hermione [2], waiting by the pond.
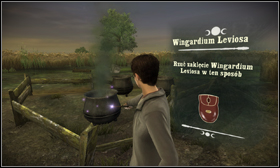
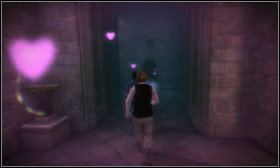
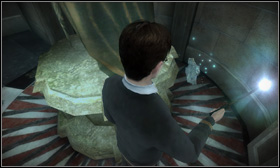
After a short cutscene, you will have to throw dirty pots into the water. You will do this by using the Wingardium Leviosa spell [1], thanks to which you can pick up objects. Follow the instructions displayed on the screen - look at the pot, press and hold the left mouse button and move the mouse to the left, right and left again. The pot will fly up. Move it using the W, S, A, D keys and aim at the pond. Afterwards quickly move the mouse forward and you will throw the pot [2] into the water.
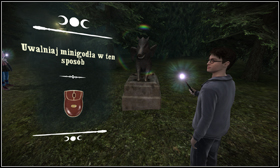
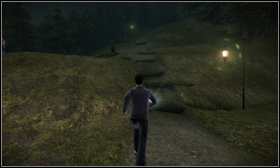
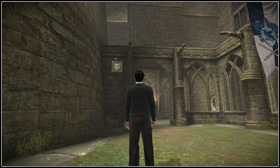
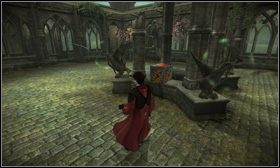
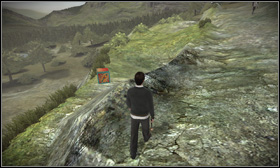
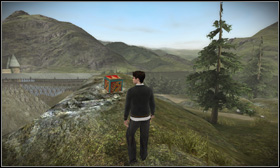
After a cutscene, head to the school. During the journey, you will see some crests. Follow the path the whole time [1]. Once you reach a monument on the right side [2] you will be familiarized with the mini crests. These are like normal crests, only smaller. They fall out of every shining item. You just have to approach one and press the mouse button twice. Generally, you can press the left button the whole time when you're travelling through the world - this way you will get more mini crests. Remember that these items tend to regenerate, so don't be surprised to see a shining object in a previously visited location.
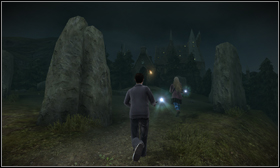
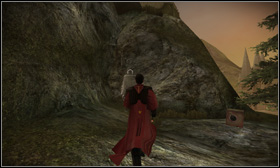
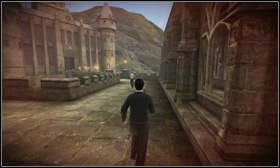
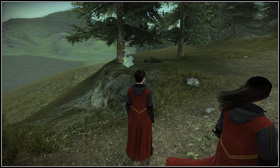
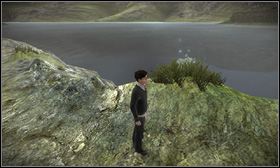
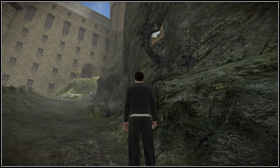
Continue down the road. At some point you will reach some stairs [1]. Go up and afterwards through the stones [2] on the top of the hill. After you pass them, another cutscene, after which you will finally arrive at Hogwarts.
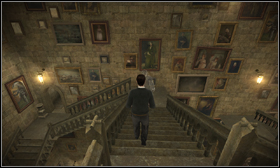
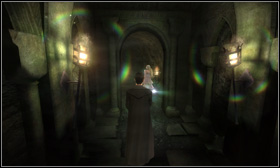
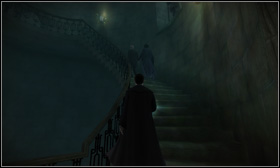
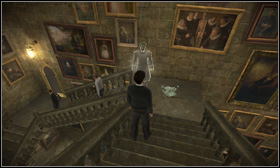
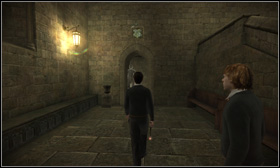
Press N and wait for the cutscene with Nearly Headless Nick to end. Afterwards, follow the ghost [1], which will lead you to the potions lesson. After exiting the Gryffindor Common Room, head down the Grand Staircase [2].
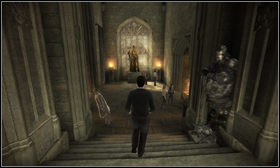
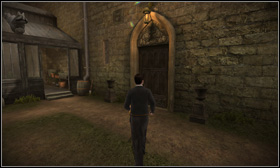
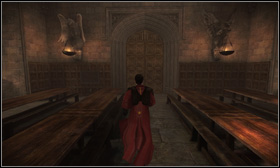
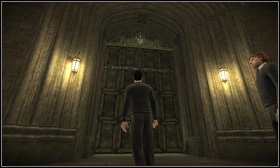
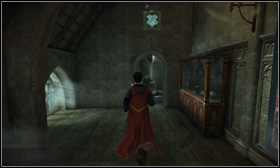
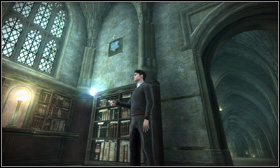
![At some moment turn right after Nick [1] and afterwards go through the big door on the left [2] - Nearly Headless Nick and a Potions lesson - Walkthrough - Harry Potter and the Half-Blood Prince - Game Guide and Walkthrough](https://game.lhg100.com/Article/UploadFiles/201512/2015121519400511.jpg)
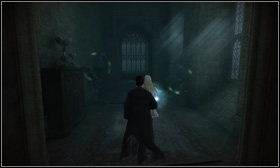
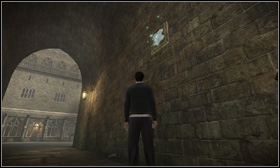
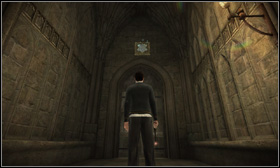
At some moment turn right after Nick [1] and afterwards go through the big door on the left [2].

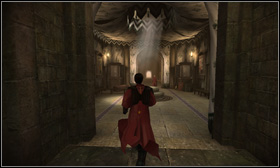
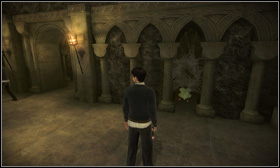
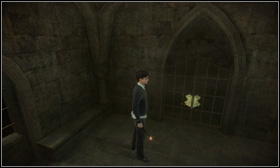
![You will get to the Entrance Courtyard [1] - Nearly Headless Nick and a Potions lesson - Walkthrough - Harry Potter and the Half-Blood Prince - Game Guide and Walkthrough](https://game.lhg100.com/Article/UploadFiles/201512/2015121519400554.jpg)
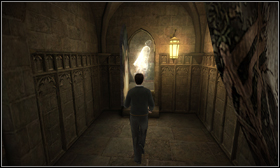
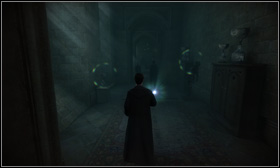
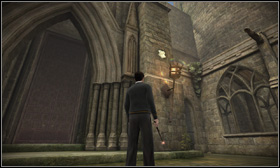
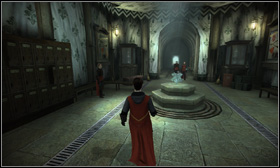
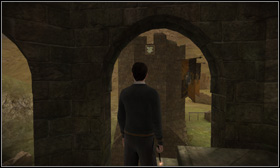
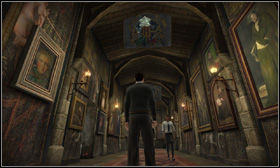
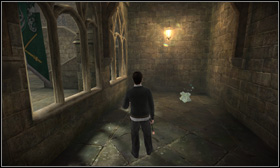
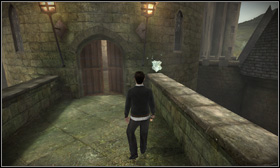
You will get to the Entrance Courtyard [1]. Go across the square and follow the ghost into the corridor on the left [2]. Exit through the passage on the right and continue to follow Nick.
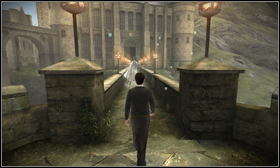
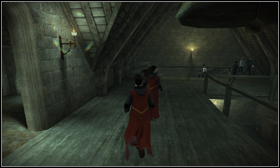
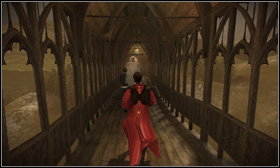
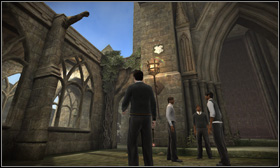
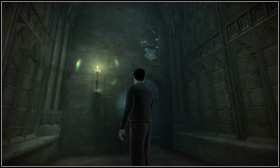
![Eventually you will reach the Viaduct [1] - Nearly Headless Nick and a Potions lesson - Walkthrough - Harry Potter and the Half-Blood Prince - Game Guide and Walkthrough](https://game.lhg100.com/Article/UploadFiles/201512/2015121519400572.jpg)
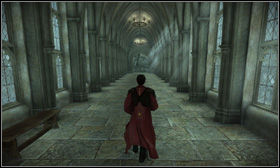
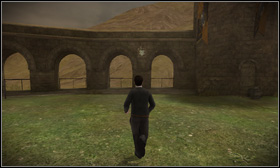
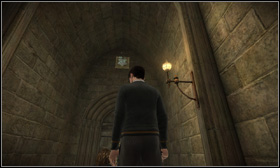
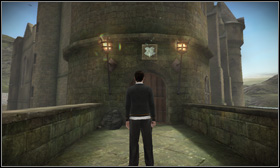
Eventually you will reach the Viaduct [1]. You can press Shift in order to get to the other side quicker. At the end of the road, go through the big door and you will enter the Viaduct Entrance [2]. Go into the corridor on the left.
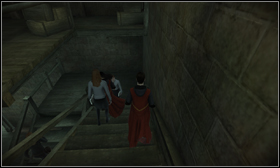
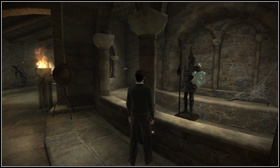
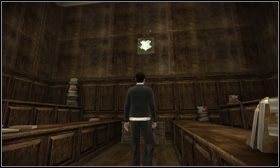
![Soon you will reach a staircase [1], go down using them - Nearly Headless Nick and a Potions lesson - Walkthrough - Harry Potter and the Half-Blood Prince - Game Guide and Walkthrough](https://game.lhg100.com/Article/UploadFiles/201512/2015121519400676.jpg)
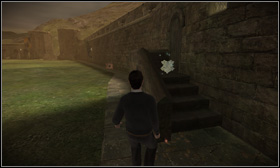
Soon you will reach a staircase [1], go down using them. Afterwards go pass the crosswise corridor and enter the Potions Classroom [2] in front of you.
![After the conversation with your teacher, a potion tutorial will begin [1] - Nearly Headless Nick and a Potions lesson - Walkthrough - Harry Potter and the Half-Blood Prince - Game Guide and Walkthrough](https://game.lhg100.com/Article/UploadFiles/201512/2015121519400635.jpg)
After the conversation with your teacher, a potion tutorial will begin [1]. Just perform the tasks displayed on the right side of the screen. Don't get upset if you have problems making potions and try again. You'll get a hang of it eventually. Here's a little tip if you have problems with pouring liquids into the pot and you spill them onto the table. Try to place the bottles above the pot in such a way that their shadows are at the top edge of the pot. Tilting the bottle in such a position will cause the liquid to hit the exact spot. Remember to add the ingredients with care. If you add too much, smoke will burst out of the pot [2]. In order to get rid of it, put back the item you're currently holding and move the mouse above the smoke.
![After you learn how to add the ingredients, you will have to warm up the mixture [1] - Nearly Headless Nick and a Potions lesson - Walkthrough - Harry Potter and the Half-Blood Prince - Game Guide and Walkthrough](https://game.lhg100.com/Article/UploadFiles/201512/2015121519400670.jpg)
After you learn how to add the ingredients, you will have to warm up the mixture [1]. To do this, just move the mouse up and down at the bottom of the pot. After completing this task, you will have to prepare some potions. Once you're done with that, exit to the corridor through the wooden door [2].
![After exiting the classroom and watching a cutscene, head to the corridor on the right [1] - Dueling Club - Walkthrough - Harry Potter and the Half-Blood Prince - Game Guide and Walkthrough](https://game.lhg100.com/Article/UploadFiles/201512/2015121519400686.jpg)
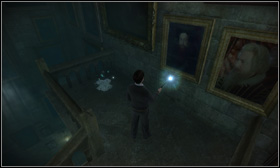
After exiting the classroom and watching a cutscene, head to the corridor on the right [1]. Cross it and approach the painting [2] leading to the Grand Staircase.
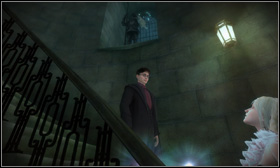
![Call Nick and follow him downstairs [1] - Dueling Club - Walkthrough - Harry Potter and the Half-Blood Prince - Game Guide and Walkthrough](https://game.lhg100.com/Article/UploadFiles/201512/2015121519400616.jpg)
Call Nick and follow him downstairs [1]. You will once again arrive at the Entrance Hall [2].
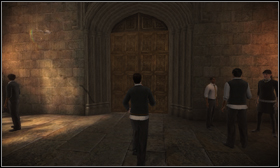
![Enter it and approach the big door on the right [1] - Dueling Club - Walkthrough - Harry Potter and the Half-Blood Prince - Game Guide and Walkthrough](https://game.lhg100.com/Article/UploadFiles/201512/2015121519400733.jpg)
Enter it and approach the big door on the right [1]. Go through it and you will get to the Great Hall, where the Gryffindor Dueling Club is located. Once you're inside, walk onto the platform in the centre [2] and approach the student in the middle.
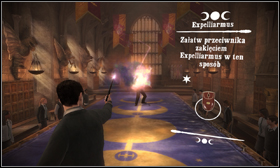
![After the cutscene, training will begin [1] and you'll learn how to use the Stupefy and Expelliarmus spells - Dueling Club - Walkthrough - Harry Potter and the Half-Blood Prince - Game Guide and Walkthrough](https://game.lhg100.com/Article/UploadFiles/201512/2015121519400725.jpg)
After the cutscene, training will begin [1] and you'll learn how to use the Stupefy and Expelliarmus spells. Afterwards there will be a practice duel. It's not too hard, just dodge the enemy attacks and attack when you see an opening. You can try to knock him over [2] and repeat the spell as he tries to stand up.
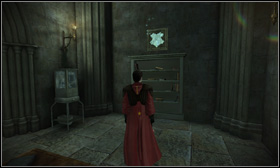
![After the fight, you can head to the wooden board [1] hanging to the left of the door through which you entered - Dueling Club - Walkthrough - Harry Potter and the Half-Blood Prince - Game Guide and Walkthrough](https://game.lhg100.com/Article/UploadFiles/201512/2015121519400707.jpg)
After the fight, you can head to the wooden board [1] hanging to the left of the door through which you entered. Thanks to it you can fight with four club members. In the end a champion will await you. If you manage to defeat them all, your duel spells will become more powerful. Whether you want to fight them or not, you can exit the room through the big door [2] that you used to get here.
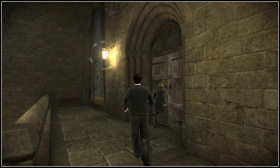
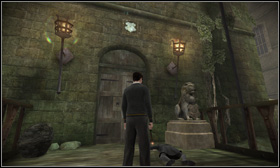
![After the cutscene ends, go to the Entrance Courtyard [1] and into the corridor on the right - Dumbledore's Office and Quidditch - Walkthrough - Harry Potter and the Half-Blood Prince - Game Guide and Walkthrough](https://game.lhg100.com/Article/UploadFiles/201512/2015121519400755.jpg)
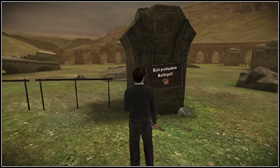
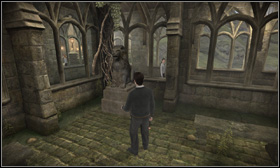
After the cutscene ends, go to the Entrance Courtyard [1] and into the corridor on the right. Approach the stone monument in the corner [2]. If you have problems with finding this location, you can press N and ask Nick for help.
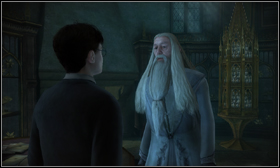
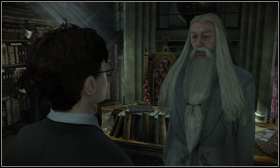
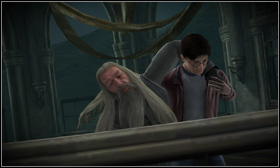
![Inside you will have a conversation with Dumbledore [1] - Dumbledore's Office and Quidditch - Walkthrough - Harry Potter and the Half-Blood Prince - Game Guide and Walkthrough](https://game.lhg100.com/Article/UploadFiles/201512/2015121519400728.jpg)
Inside you will have a conversation with Dumbledore [1]. Once it ends, you will be transported to the corridor [2].
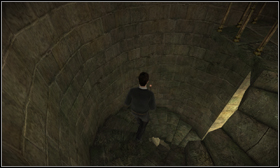
Follow Katie. After a while you will get to the top of the Clock tower. Turn left [1], head to the stairs and go to the very bottom [2].
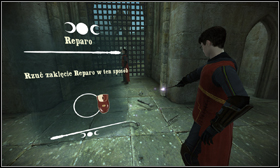
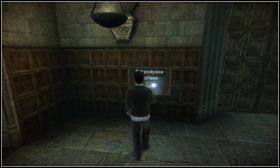
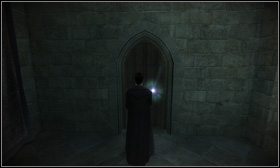
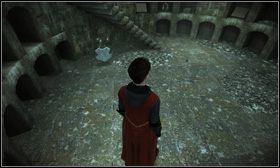
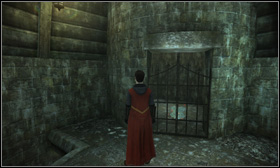
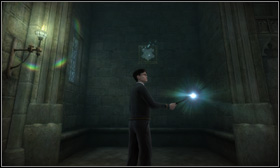
Try to leave to Clock tower through the wide passage. The gate will be locked in the last moment [1]. Now you have to assemble a key [2] with the Reparo spell. In order to do this, hold down the left mouse button and move the mouse clockwise.

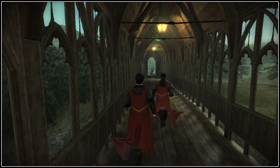
Once you're done, Katie will raise the gate. Run through the Clock Tower Courtyard [1] and head to the wooden bridge [2] in front of you.
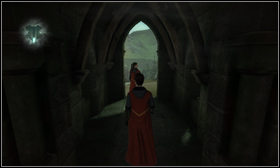
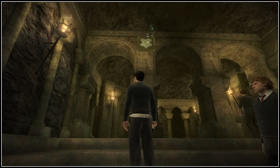
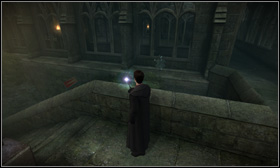
![After you cross the bridge, you'll arrive at the vestibule [1] leading to the Stone Circle - Dumbledore's Office and Quidditch - Walkthrough - Harry Potter and the Half-Blood Prince - Game Guide and Walkthrough](https://game.lhg100.com/Article/UploadFiles/201512/2015121519400804.jpg)
After you cross the bridge, you'll arrive at the vestibule [1] leading to the Stone Circle. Once you leave the building, you will be attacker [2] by one of Malfoy's thugs. Knock him down using Expelliarmus and finish with Stupefy.

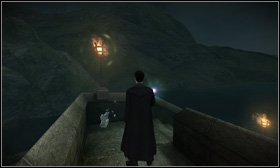
![After the duel, go down the road on the right [1] (looking from the vestibule exit) - Dumbledore's Office and Quidditch - Walkthrough - Harry Potter and the Half-Blood Prince - Game Guide and Walkthrough](https://game.lhg100.com/Article/UploadFiles/201512/2015121519400950.jpg)
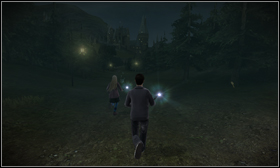
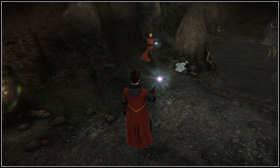
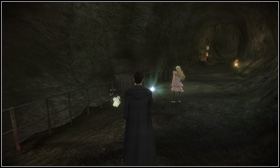
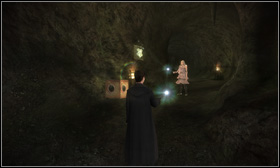
After the duel, go down the road on the right [1] (looking from the vestibule exit). After getting to the top, follow Katie and she'll show you the way to the cave [2].
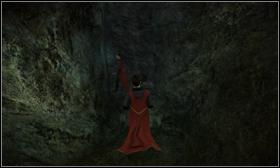
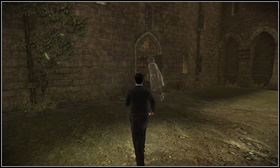
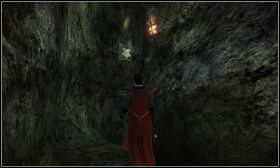
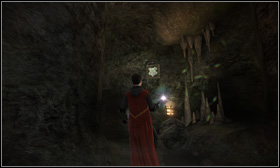
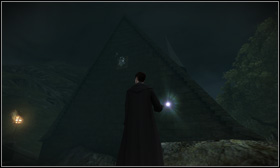
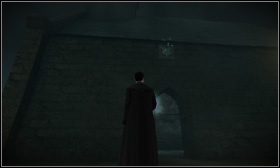
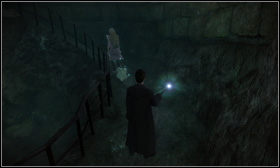
![Go inside and forward all the time [1] - Dumbledore's Office and Quidditch - Walkthrough - Harry Potter and the Half-Blood Prince - Game Guide and Walkthrough](https://game.lhg100.com/Article/UploadFiles/201512/2015121519400947.jpg)
Go inside and forward all the time [1]. The cave will lead you to a wall [2], surrounding this part of the castle. Run across it.
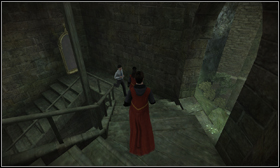
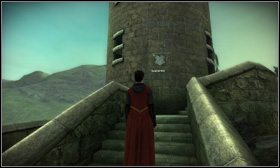
![Enter the tower ahead of you and go down the stairs [1] - Dumbledore's Office and Quidditch - Walkthrough - Harry Potter and the Half-Blood Prince - Game Guide and Walkthrough](https://game.lhg100.com/Article/UploadFiles/201512/2015121519400917.jpg)
Enter the tower ahead of you and go down the stairs [1]. Once you exit the building, head to the Quidditch Gate on the left [2].
Once the scene is over, training will begin. Your task, as always, is to fly through the stars appearing in the air [1]. In the later part, dummies with pumpkin heads will also start to appear [2]. Try to fly into them, as you will get additional time for that. After the trainings over, you will find yourself back in the Quidditch Gate.
![Head to the door [1] and once the scene ends, go to the stairs [2] leading to the Training Grounds - Ginny and the Potions Club - Walkthrough - Harry Potter and the Half-Blood Prince - Game Guide and Walkthrough](https://game.lhg100.com/Article/UploadFiles/201512/2015121519400956.jpg)
Head to the door [1] and once the scene ends, go to the stairs [2] leading to the Training Grounds.
![Once there, head right, through the door [1] and then across another passage [2] - Ginny and the Potions Club - Walkthrough - Harry Potter and the Half-Blood Prince - Game Guide and Walkthrough](https://game.lhg100.com/Article/UploadFiles/201512/2015121519401008.jpg)
Once there, head right, through the door [1] and then across another passage [2].
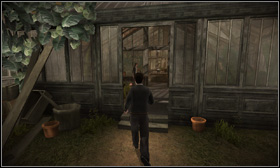
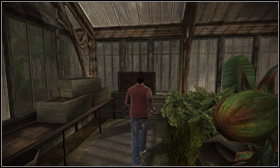
![After getting to the Potion Club, head to the building on the left [1] - Ginny and the Potions Club - Walkthrough - Harry Potter and the Half-Blood Prince - Game Guide and Walkthrough](https://game.lhg100.com/Article/UploadFiles/201512/2015121519401084.jpg)
After getting to the Potion Club, head to the building on the left [1]. Once you're done talking with the girl, go to the wooden board [2] on the right, with a list of potions needed to be made.
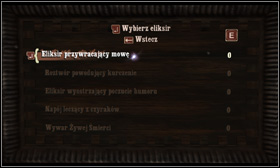
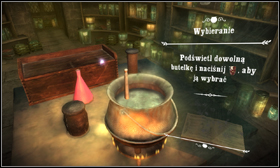
![Choose the potion that restores speech [1] and make it - Ginny and the Potions Club - Walkthrough - Harry Potter and the Half-Blood Prince - Game Guide and Walkthrough](https://game.lhg100.com/Article/UploadFiles/201512/2015121519401007.jpg)
Choose the potion that restores speech [1] and make it. Once you're finished, you will learn more actions connected with making potions. The first one is adding solid ingredients to the pot. You just have to take one from the box and move it above the pot. The second one is shaking the liquids [2]. In order to do this, pick up a bottle and start moving it to the sides. Look out however, because it you shake the bottle too much it will explode and you'll lose some precious seconds. After the training, make the potion you promised to Ginny.
![After you finish, head to the exit door [1] - Ginny and the Potions Club - Walkthrough - Harry Potter and the Half-Blood Prince - Game Guide and Walkthrough](https://game.lhg100.com/Article/UploadFiles/201512/2015121519401039.jpg)
After you finish, head to the exit door [1]. Go to the Training Grounds where you will need to fight one of Malfoy's friends [2]. It's best to knock him down with Expelliarmus and then finish with Stupefy.
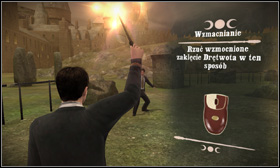
After the fight, a Hufflepuff student will approach you and ask to show him the Protego spell. Wait for him to attack you and reflect the spell [1] by pressing the right mouse button. The next step of the training will be enhancing the spells. To do this, press and hold the left mouse button. Once the spell is at its maximum [2], cast it at the foe.
![After the tutorial ends, you can approach the wooden board [1] hanging from the stone and challenge more Hufflepuff students - Ginny and the Potions Club - Walkthrough - Harry Potter and the Half-Blood Prince - Game Guide and Walkthrough](https://game.lhg100.com/Article/UploadFiles/201512/2015121519401183.jpg)
After the tutorial ends, you can approach the wooden board [1] hanging from the stone and challenge more Hufflepuff students. Whether you want to play some more or not, the next thing to do is head to Ginny [2] waiting by the stairs you've used to get to the Training Grounds.
![Leave the room through the wooden door [1] and on the Great Staircase head to the painting [2] leading to the Clock tower - Quidditch match - Walkthrough - Harry Potter and the Half-Blood Prince - Game Guide and Walkthrough](https://game.lhg100.com/Article/UploadFiles/201512/2015121519401177.jpg)
Leave the room through the wooden door [1] and on the Great Staircase head to the painting [2] leading to the Clock tower.
![Head to the Clock tower courtyard [1], where you will have to fight one of the students - Quidditch match - Walkthrough - Harry Potter and the Half-Blood Prince - Game Guide and Walkthrough](https://game.lhg100.com/Article/UploadFiles/201512/2015121519401128.jpg)
Head to the Clock tower courtyard [1], where you will have to fight one of the students. The quickest way to get rid of him is using Expelliarmus, followed by maximally charged up Stupefy [2].
![After the duel, run across the wooden bridge [1], turn right after getting to the Stone Circle and run along the path [2] - Quidditch match - Walkthrough - Harry Potter and the Half-Blood Prince - Game Guide and Walkthrough](https://game.lhg100.com/Article/UploadFiles/201512/2015121519401156.jpg)
After the duel, run across the wooden bridge [1], turn right after getting to the Stone Circle and run along the path [2].
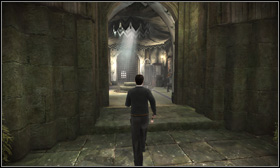
![Turn right and go into the cave [1] - Quidditch match - Walkthrough - Harry Potter and the Half-Blood Prince - Game Guide and Walkthrough](https://game.lhg100.com/Article/UploadFiles/201512/2015121519401223.jpg)
Turn right and go into the cave [1]. After getting out, run to the next building and go down the stairs [2].
![Eventually, head to the Quidditch Gate [1] - Quidditch match - Walkthrough - Harry Potter and the Half-Blood Prince - Game Guide and Walkthrough](https://game.lhg100.com/Article/UploadFiles/201512/2015121519401253.jpg)
Eventually, head to the Quidditch Gate [1]. Your task is to play two matches - a warm-up and a real one. As always, you just have to fly the stars appearing in your way [2].
![Go to the Entrance Courtyard [1] and make your way to the corridor on the right - Slughorn's party - Walkthrough - Harry Potter and the Half-Blood Prince - Game Guide and Walkthrough](https://game.lhg100.com/Article/UploadFiles/201512/2015121519401230.jpg)
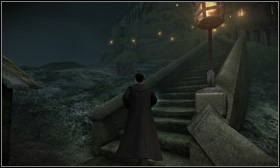
Go to the Entrance Courtyard [1] and make your way to the corridor on the right. At its end you will find a passage leading to some stairs [2].
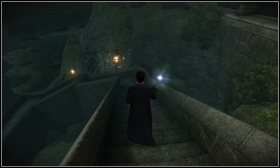
![Go down [1] until you reach the Boathouse [2] - Slughorn's party - Walkthrough - Harry Potter and the Half-Blood Prince - Game Guide and Walkthrough](https://game.lhg100.com/Article/UploadFiles/201512/2015121519401224.jpg)
Go down [1] until you reach the Boathouse [2]. Luna is waiting there for you.

After the conversation, you will learn the Incendio spell. In order to use it, approach the nearby fireworks and launch them by pressing the left mouse button and moving it up and down [1]. After the training's over, head to the stairs [2] and go back up.
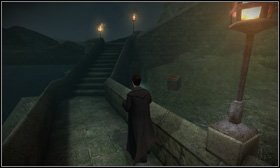
![On your way, you will bump into some fireworks boxes [1]; use the newly learned Incendio spell on them - Slughorn's party - Walkthrough - Harry Potter and the Half-Blood Prince - Game Guide and Walkthrough](https://game.lhg100.com/Article/UploadFiles/201512/2015121519401338.jpg)
On your way, you will bump into some fireworks boxes [1]; use the newly learned Incendio spell on them. Once you're on the very top, start following Luna [2].
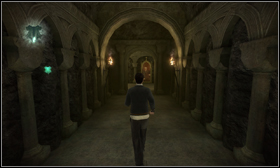
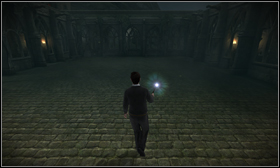
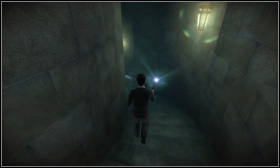
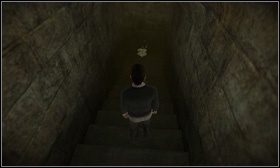
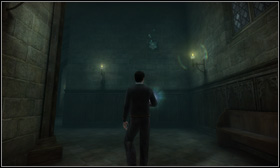
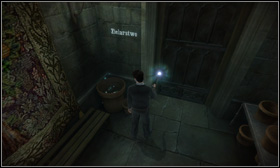
![At some point you will reach an underground passage [1] - Slughorn's party - Walkthrough - Harry Potter and the Half-Blood Prince - Game Guide and Walkthrough](https://game.lhg100.com/Article/UploadFiles/201512/2015121519401365.jpg)
At some point you will reach an underground passage [1]. Once you cross it, head up using the stairs [2].
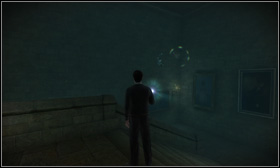
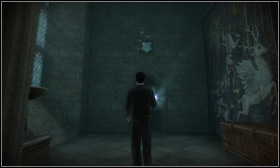
![Afterwards run across the corridor [1] and enter Slughorn's office [2] - Slughorn's party - Walkthrough - Harry Potter and the Half-Blood Prince - Game Guide and Walkthrough](https://game.lhg100.com/Article/UploadFiles/201512/2015121519401344.jpg)
Afterwards run across the corridor [1] and enter Slughorn's office [2]. Inside, after a short cutscene, you will have to prepare the punch.
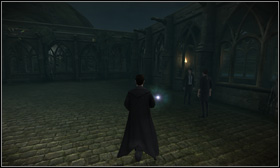
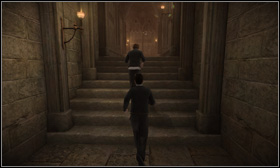
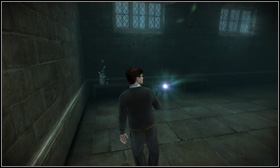
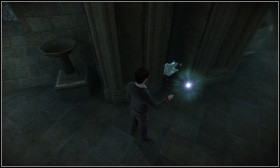
This time you must stalk Draco and Snape. Follow them across the corridor [1], but don't get too close to them. However you also can't stay behind too much or else you'll lose them. After the corridor, follow them on the stairs [2].
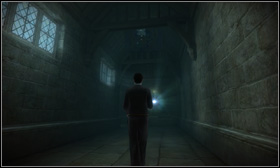
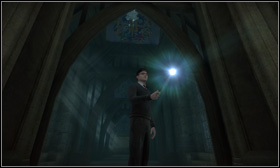
![After getting to the 7th floor go through the door [1] and eavesdrop on their conversation [2] - Draco, Snape and Bellatrix - Walkthrough - Harry Potter and the Half-Blood Prince - Game Guide and Walkthrough](https://game.lhg100.com/Article/UploadFiles/201512/2015121519401481.jpg)
After getting to the 7th floor go through the door [1] and eavesdrop on their conversation [2].
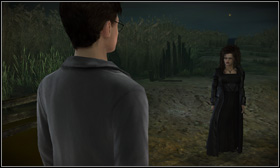
![A cutscene will play and after it, you'll meet Bellatrix [1] - Draco, Snape and Bellatrix - Walkthrough - Harry Potter and the Half-Blood Prince - Game Guide and Walkthrough](https://game.lhg100.com/Article/UploadFiles/201512/2015121519401417.jpg)
A cutscene will play and after it, you'll meet Bellatrix [1]. The fight will begin shortly after. In order to quickly win this duel, knock down the witch with Expelliarmus and finish her with charged up Stupefy [2].
![You will have to repeat the fight once more [1] - Draco, Snape and Bellatrix - Walkthrough - Harry Potter and the Half-Blood Prince - Game Guide and Walkthrough](https://game.lhg100.com/Article/UploadFiles/201512/2015121519401424.jpg)
You will have to repeat the fight once more [1]. You can use the same trick to win. After dealing with Bellatrix you will have to defeat Fenrir [2]. He's got quite a bit of stamina, but the tactic from before works well this time as well.
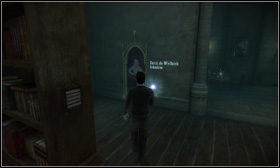
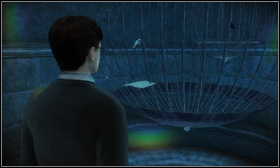
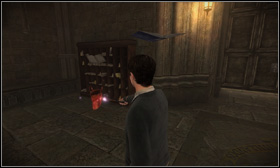
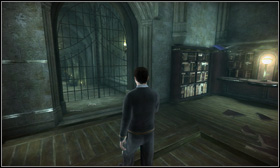
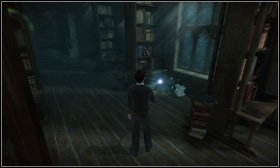
After the cutscene you will be in the library. Head to the painting [1] and use it to get to the Great Staircase. Go to the 7th floor and in one of the corridors you will find a bird cage [2], with an unknown potion recipe inside.
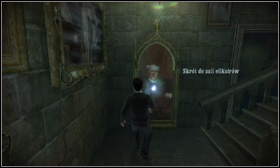
![Take it, go back to the Great Staircase and approach the painting [1] leading to the Potions Classroom - The mysterious potion - Walkthrough - Harry Potter and the Half-Blood Prince - Game Guide and Walkthrough](https://game.lhg100.com/Article/UploadFiles/201512/2015121519401452.jpg)
Take it, go back to the Great Staircase and approach the painting [1] leading to the Potions Classroom. Once you're there, approach Hermione [2] and after the cutscene, prepare the potion according to the recipe found.
![Head to Dumbledore's Office and you will see a girl in front of it [1] - Dumbledore, McGonagall and Quidditch - Walkthrough - Harry Potter and the Half-Blood Prince - Game Guide and Walkthrough](https://game.lhg100.com/Article/UploadFiles/201512/2015121519401518.jpg)
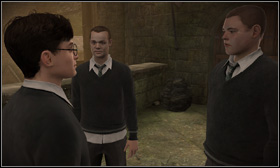
Head to Dumbledore's Office and you will see a girl in front of it [1]. After the conversation you will learn that one of the students has taken a present she got from her mom. Go to the guy [2] showed by the girl.
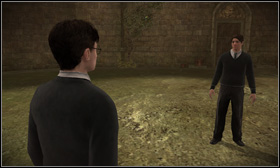
![He won't like the idea of giving the item back and a duel will begin [1] - Dumbledore, McGonagall and Quidditch - Walkthrough - Harry Potter and the Half-Blood Prince - Game Guide and Walkthrough](https://game.lhg100.com/Article/UploadFiles/201512/2015121519401584.jpg)
He won't like the idea of giving the item back and a duel will begin [1]. Once you've dealt with him, return to the girl [2] and give her back the recovered present. Afterwards, enter the office.
![A conversation with Dumbledore will begin [1] - Dumbledore, McGonagall and Quidditch - Walkthrough - Harry Potter and the Half-Blood Prince - Game Guide and Walkthrough](https://game.lhg100.com/Article/UploadFiles/201512/2015121519401538.jpg)
A conversation with Dumbledore will begin [1]. Once it's over, follow Hermione [2].
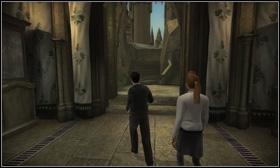
![Follow her all the time [1], until you reach the Transfiguration Courtyard, where you will meet with professor McGonagall [2] - Dumbledore, McGonagall and Quidditch - Walkthrough - Harry Potter and the Half-Blood Prince - Game Guide and Walkthrough](https://game.lhg100.com/Article/UploadFiles/201512/2015121519401542.jpg)
Follow her all the time [1], until you reach the Transfiguration Courtyard, where you will meet with professor McGonagall [2].
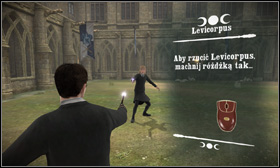
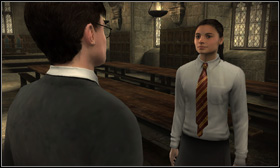
![Once the conversation is over, a Ravenclaw student [1] will ask you to show her the Levicorpus spell - Dumbledore, McGonagall and Quidditch - Walkthrough - Harry Potter and the Half-Blood Prince - Game Guide and Walkthrough](https://game.lhg100.com/Article/UploadFiles/201512/2015121519401599.jpg)
Once the conversation is over, a Ravenclaw student [1] will ask you to show her the Levicorpus spell. In order to perform it, you must move the mouse from left to right. After the training, you will duel with a young club member, after which you can continue the tournament. You just have to approach the nearby wooden board [2].
![Afterwards, whether you did fight or not, go to the Quidditch Gate [1], where you will prepare for the meeting - Dumbledore, McGonagall and Quidditch - Walkthrough - Harry Potter and the Half-Blood Prince - Game Guide and Walkthrough](https://game.lhg100.com/Article/UploadFiles/201512/2015121519401695.jpg)
Afterwards, whether you did fight or not, go to the Quidditch Gate [1], where you will prepare for the meeting. After the cutscene, you will have to play a match [2].

![After the meeting ends head to the exit door [1] and after a cutscene, follow Ron [2] - Mon Ron - Walkthrough - Harry Potter and the Half-Blood Prince - Game Guide and Walkthrough](https://game.lhg100.com/Article/UploadFiles/201512/2015121519401631.jpg)
After the meeting ends head to the exit door [1] and after a cutscene, follow Ron [2].
![You will be challenged to a duel before the Potions Club [1] - Mon Ron - Walkthrough - Harry Potter and the Half-Blood Prince - Game Guide and Walkthrough](https://game.lhg100.com/Article/UploadFiles/201512/2015121519401689.jpg)
You will be challenged to a duel before the Potions Club [1]. Deal with your rival and enter through the wooden door [2].
![Follow Ron the whole time [1] - Mon Ron - Walkthrough - Harry Potter and the Half-Blood Prince - Game Guide and Walkthrough](https://game.lhg100.com/Article/UploadFiles/201512/2015121519401670.jpg)
Follow Ron the whole time [1]. At some point you will meet Lavender and Ron will want to hide from her. Go down [2] and talk with her. It will turn out that she has a problem with some books that got scattered throughout the whole room.
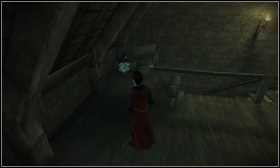
![Pick up the red bag on the left [1] and catch [2] every one of the five books that are flying around the room - Mon Ron - Walkthrough - Harry Potter and the Half-Blood Prince - Game Guide and Walkthrough](https://game.lhg100.com/Article/UploadFiles/201512/2015121519401621.jpg)
Pick up the red bag on the left [1] and catch [2] every one of the five books that are flying around the room.
![Afterwards, continue following Ron [1], who will lead you to the Potions Classroom - Mon Ron - Walkthrough - Harry Potter and the Half-Blood Prince - Game Guide and Walkthrough](https://game.lhg100.com/Article/UploadFiles/201512/2015121519401751.jpg)
Afterwards, continue following Ron [1], who will lead you to the Potions Classroom. As you have probably guessed, you will have to prepare another magical potion [2].

![Head to the Training Grounds and to the door [1] leading to the Astronomy Tower - Meeting at the Astronomy Tower - Walkthrough - Harry Potter and the Half-Blood Prince - Game Guide and Walkthrough](https://game.lhg100.com/Article/UploadFiles/201512/2015121519401733.jpg)
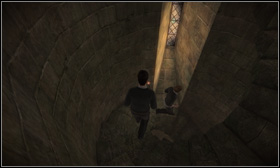
Head to the Training Grounds and to the door [1] leading to the Astronomy Tower. Go through it and take the stairs [2] up.
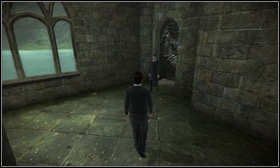
![Turn right on the fork and go down the stairs [1] - Meeting at the Astronomy Tower - Walkthrough - Harry Potter and the Half-Blood Prince - Game Guide and Walkthrough](https://game.lhg100.com/Article/UploadFiles/201512/2015121519401799.jpg)
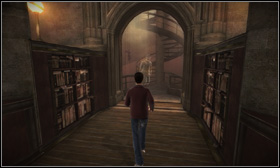
Turn right on the fork and go down the stairs [1]. This path will lead you to the library [2].
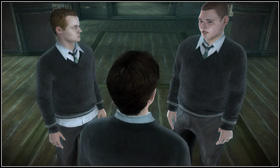
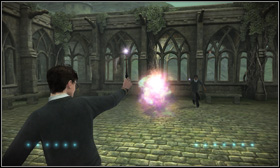
![Once you enter it, Draco's friends will appear [1] - Meeting at the Astronomy Tower - Walkthrough - Harry Potter and the Half-Blood Prince - Game Guide and Walkthrough](https://game.lhg100.com/Article/UploadFiles/201512/2015121519401756.jpg)
Once you enter it, Draco's friends will appear [1]. You have to fight with each of them [2].
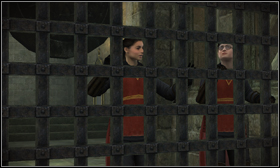
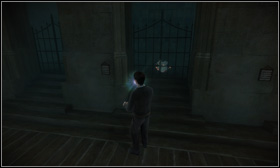
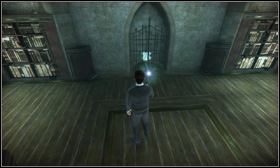
![After the fight's over, smash the key against the wall and pull it through the bars [1] - Meeting at the Astronomy Tower - Walkthrough - Harry Potter and the Half-Blood Prince - Game Guide and Walkthrough](https://game.lhg100.com/Article/UploadFiles/201512/2015121519401789.jpg)
After the fight's over, smash the key against the wall and pull it through the bars [1]. Afterwards repair it with Reparo and put into the mechanism [2].
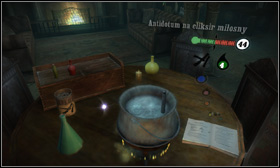
This time you will control Ron. Follow Harry [1], who will lead you to Slughorn. Once you're there, prepare an antidote [2] for Ron.
![Go through the long corridor [1] and head to the Quidditch Gate - Another Quidditch match - Walkthrough - Harry Potter and the Half-Blood Prince - Game Guide and Walkthrough](https://game.lhg100.com/Article/UploadFiles/201512/2015121519401857.jpg)
Go through the long corridor [1] and head to the Quidditch Gate. Once you're there, talk with your team [2] and play two matches.
![Go to the Great Hall, Katie is waiting for you there [1] - Chase after Draco - Walkthrough - Harry Potter and the Half-Blood Prince - Game Guide and Walkthrough](https://game.lhg100.com/Article/UploadFiles/201512/2015121519401836.jpg)
Go to the Great Hall, Katie is waiting for you there [1]. Malfoy will disrupt the conversation [2], run after him.
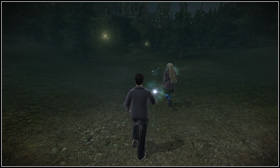
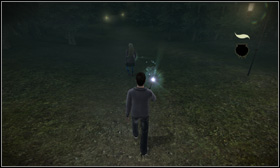
![Don't let him get too far away [1], because you will fail the mission if you lose sight of him - Chase after Draco - Walkthrough - Harry Potter and the Half-Blood Prince - Game Guide and Walkthrough](https://game.lhg100.com/Article/UploadFiles/201512/2015121519401874.jpg)
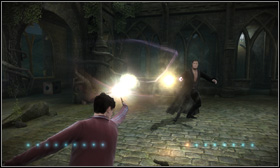
Don't let him get too far away [1], because you will fail the mission if you lose sight of him. After a while you will catch up with him and a duel will begin [2]. Win it to complete the mission objective.
![After the cutscene, you will be attacked by Malfoy's friends [1] - A potion for Slughorn - Walkthrough - Harry Potter and the Half-Blood Prince - Game Guide and Walkthrough](https://game.lhg100.com/Article/UploadFiles/201512/2015121519401920.jpg)
After the cutscene, you will be attacked by Malfoy's friends [1]. Defeat them in a duel [2] to continue the story.
![Afterwards go to Slughorn [1] and prepare a special potion for him [2] - A potion for Slughorn - Walkthrough - Harry Potter and the Half-Blood Prince - Game Guide and Walkthrough](https://game.lhg100.com/Article/UploadFiles/201512/2015121519401924.jpg)
Afterwards go to Slughorn [1] and prepare a special potion for him [2].
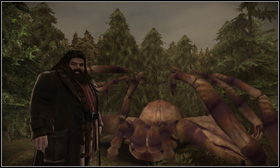
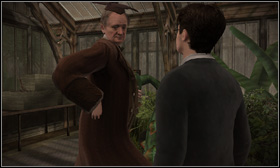
![Head over to Hagrid with the professor [1] - A potion for Slughorn - Walkthrough - Harry Potter and the Half-Blood Prince - Game Guide and Walkthrough](https://game.lhg100.com/Article/UploadFiles/201512/2015121519401984.jpg)
Head over to Hagrid with the professor [1]. After the cutscene, head towards the school [2].
![Go to Dumbledore [1] and watch the secret Slughorn has been hiding together [2] - Slughorn's secret - Walkthrough - Harry Potter and the Half-Blood Prince - Game Guide and Walkthrough](https://game.lhg100.com/Article/UploadFiles/201512/2015121519401979.jpg)
Go to Dumbledore [1] and watch the secret Slughorn has been hiding together [2].
![After the cutscene, the last Quidditch match will begin [1] - Quidditch final - Walkthrough - Harry Potter and the Half-Blood Prince - Game Guide and Walkthrough](https://game.lhg100.com/Article/UploadFiles/201512/2015121519401932.jpg)
After the cutscene, the last Quidditch match will begin [1]. Professor McGonagall will reward you for winning [2].
![Head to the Potion Club and approach the wooden board [1] - The end - Walkthrough - Harry Potter and the Half-Blood Prince - Game Guide and Walkthrough](https://game.lhg100.com/Article/UploadFiles/201512/2015121519402039.jpg)
Head to the Potion Club and approach the wooden board [1]. Go to the last page and select the Wiggenweld potion [2], which will increase your stamina during duels.
![Go to the top of the Astronomy Tower [1] and speak with Dumbledore [2] - The end - Walkthrough - Harry Potter and the Half-Blood Prince - Game Guide and Walkthrough](https://game.lhg100.com/Article/UploadFiles/201512/2015121519402089.jpg)
Go to the top of the Astronomy Tower [1] and speak with Dumbledore [2].
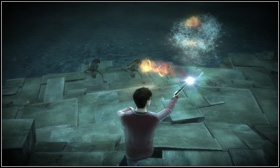
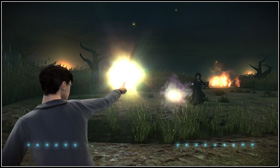
![After the cutscene you will have to fight off some living skeletons [1] - The end - Walkthrough - Harry Potter and the Half-Blood Prince - Game Guide and Walkthrough](https://game.lhg100.com/Article/UploadFiles/201512/2015121519402019.jpg)
After the cutscene you will have to fight off some living skeletons [1]. It's not hard. All you have to do is strafe and cast Stupefy [2].
![After dealing with three waves of skeletons, another cutscene will play [1] - The end - Walkthrough - Harry Potter and the Half-Blood Prince - Game Guide and Walkthrough](https://game.lhg100.com/Article/UploadFiles/201512/2015121519402035.jpg)
After dealing with three waves of skeletons, another cutscene will play [1]. Afterwards, another battle awaits you [2]. The enemy is quite powerful, so use the bookshelves as cover.
![After the duel you will have to fight some more enemies, including Fenrir [1] and in the end - Bellatrix [2] - The end - Walkthrough - Harry Potter and the Half-Blood Prince - Game Guide and Walkthrough](https://game.lhg100.com/Article/UploadFiles/201512/2015121519402168.jpg)
After the duel you will have to fight some more enemies, including Fenrir [1] and in the end - Bellatrix [2]. The enemies are quite strong, however the basic strategy - Levicorpus followed by a maximally charged Stupefy still works great. Once you finish the last battle, a cutscene will play and the game will end.
There are 150 crests in the game, divided into two types - mini crests and normal, big ones. The first ones can be found in shining items. You'll run into them on every step in Hogwarts and additionally the crests hidden inside them will recover after some time. In order to get them, you just have to click the left mouse button twice. Generally you can just run around a press it the whole time and you'll be receiving crests the whole time. After getting enough of them, you will receive a normal crest. Overall, there are 25 of them to collect.
The big crests are hidden in various places. Some of them are just lying around, ready to collect while the ones hanging on walls must be firstly knocked down with an item, usually found somewhere around (for example a chest or a vase). There are also some that you will have to break at first and then reassemble with the Reparo spell. These are often hidden behind bars and it's the only way to get them out of there. Some crests may be also hidden in fireworks boxes and special traps which you have to first destroy with the Incendio spell. The last possibility is a crest hidden beneath an unfolded flag, which should be treated as the traps. You have to continue until you reach the flag with the crest and knock it down to the ground. There are 125 big crests in the game, out of which 10 are located by the stone lions, described in another chapter. Beneath there is a list of all 115 big crests:
#1
In the middle of the road leading to Hogwarts.
#2
Also in the middle of the road, just a little bit further.
#3
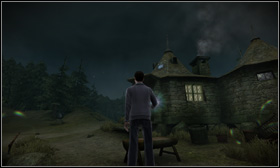
The third crest is also on the road to Hogwarts, right before the entrance to the area with Hagrid's Hut.
#4
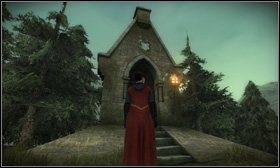
The next crest is located on Hagrid's Hut roof.
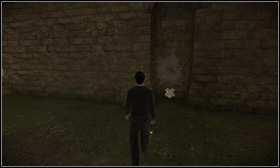
#5
The fifth one is on the left side of Hagrid's Hut. In order to get to it, you must use Incendio on the trap.
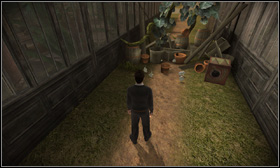
#6
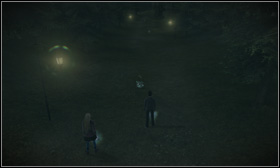
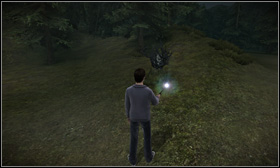
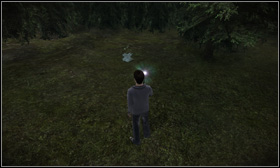
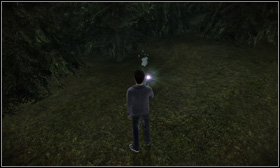
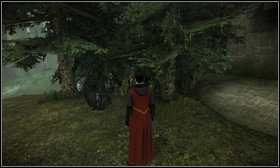
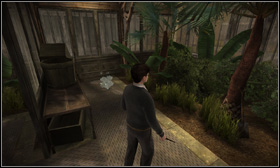
In order to get to the 6th crest, you must go to the woods behind Hagrid's Hut.
#7
You'll find the 7th one on the opposite side of the road leading to Hagrid's Hut.
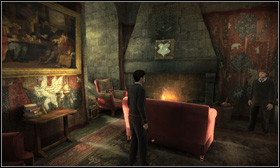
#8
Above the fireplace in Gryffindor Common Room.
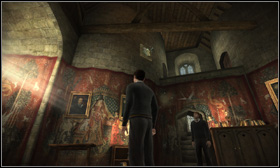
#9
In the Gryffindor Common Room, on the wall opposite to the fireplace, next to the bedroom entrance.
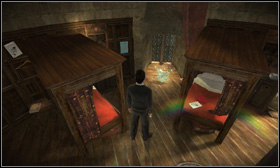
#10
Between the beds in Gryffindor Common Place.
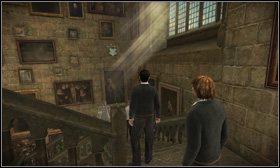
#11
On the wall by the Great Staircase.
#12
During the first trip with Nick, on the middle platform of the Great Staircase.
#13
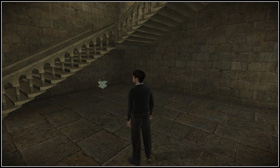
At the very bottom of the Great Staircase, in the corner.
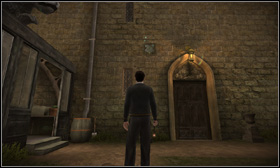
#14
In the Entrance Courtyard, on the pillar on the left side of the entrance door.
#15
In the Entrance Courtyard, on the pillar on the right side of the entrance door.
#16
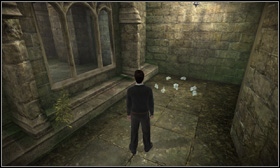
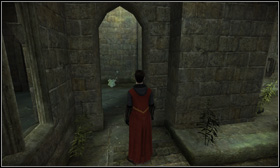
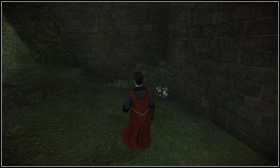
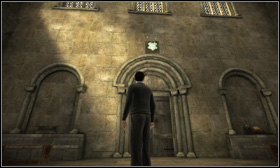
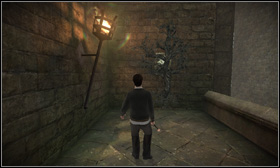
Go through the corridor in the Entrance Courtyard and look at the wall on the left. You will find a broken crest that you have to repair with Reparo.
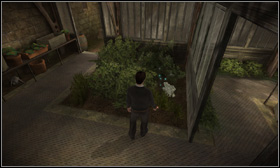
#17
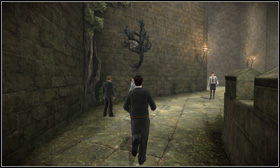
On the road from the Entrance Courtyard to the Paved Courtyard. The crest is on the wall, blocked by a plant. You need to use Incendio to get to it.
#18
After crossing the long, stone bridge leading to the Viaduct Entrance, on the right.
#19
In Viaduct Entrance, on the right side of the stone monument.
#20
In Viaduct Entrance, above the entrance to the corridor on the left.
#21
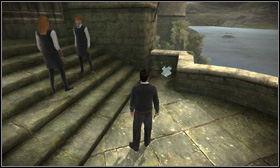
Above the big door leading to the viaduct. In order to get this one, you have to throw an item at it (for example, use the nearby stone vase) from the stairs in front of the gate.
#22
Between two pillars in the corridor leading to Potions Classroom. Use Incendio on the web to get it.
#23
In the room from which you can get to the corridor leading to the Potions Classroom. In order to get it, you must first break it and then repair it Reparo.
#24
Opposite to the place where you found the crest there is a room and in front of the entrance - a corridor with a staircase leading down. Another crest awaits you at the end.
#25
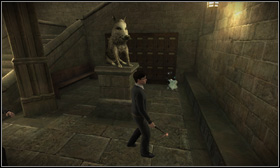
In the same room, go to the alcove with two armours and a stone bench. Turn around and look at the pillar on the left.
#26
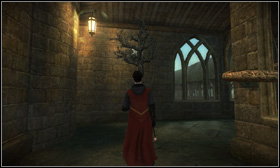
In the corridor on the 5th floor. Turn in the direction of the door leading into the room with a stone monument and look up.
#27
On the top of the Clock tower, in the left corner.
#28
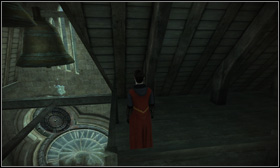
On the top of the Clock tower, on a wooden beam behind the bells.
#29
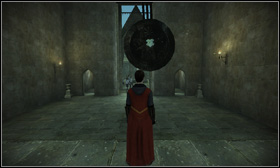
On the bottom of the Clock tower, on one side of the pendulum.
#30
In the right corner (looking from the pendulum) on the Clock Tower Courtyard. Use Reparo to repair it.
#31
On the wall in the left branch of the corridor (looking from the pendulum), which is located in the Clock Tower Courtyard. You need to use the Incendio spell to get to the crest.
#32
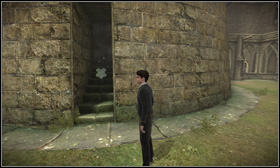
After entering the Clock Tower Courtyard turn right (looking from the pendulum) and go through the narrow passage.

#33
On the wooden bridge in front of the Clock Tower Courtyard.
#34
In Stone Circle, look above the entrance leading to the wooden bridge.
#35
In Stone Circle, to the left of the entrance to the stone bridge. You have to use the Incendio spell to get it.
#36
On the left side of the path from Stone Circle to the Owlery.
#37
On the wall by the entrance to the tunnel beneath the Owlery. In order to knock the crest down, use the dungobomb lying by the entrance. Set it as close to the crest as possible and then throw it so that the bomb doesn't hit anything in the air.
#38
On the right side of the path in the tunnel below the Owlery.
#39
On the wall before the exit from the tunnel below the Owlery.
#40
On the outer wall of the Owlery.
#41
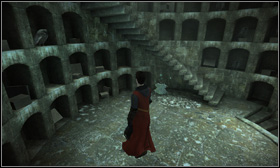
Under the stairs at the very bottom of the Owlery.
#42
Under the stairs on the 1st floor of the Owlery.
#43
Behind the bars on the top of the Owlery. You have to break the crest, carry it over to yourself and repair it with Reparo.
#44
In the very middle of the Quidditch Gate.
#45
In the left corner, behind the bench on the stairs leading to the Training Grounds.
#46
After getting up the stone stairs leading to the Training Grounds turn right and look in the corner. You need to use Incendio to get the crest.
#47
On the top of the big tower with yellow-black flags, by the Training Grounds. Knock down the crest in the opposite tower.
#48
On the Training Grounds, on one of the pillars on the left side of the tower with yellow-black flags.

#49
In the middle of the wall on the Training Grounds. You need to use Incendio to get it.
#50
On the Training Grounds, on the right side of the wall, on a small set of stairs before the wooden door.
#51
On the fork of the road, before the entrance to the Potions Club.
#52
On the left side from the Potions Club entrance. You have to break the crest by throwing it at the wall, get it through the bars and reassemble it with Reparo.
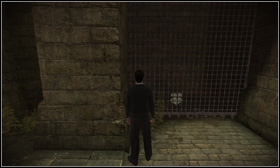
#53
To the right from the Potions Club entrance. You have to break the crest by throwing it at the wall, get it through the bars and reassemble it with Reparo.
#54
On the wall above the alcove, on the right side of the Potions Club entrance.
#55
Behind the corner of the wall to the right from the Potions Club entrance. Burn the web with Incendio to get it.
#56
In the Potions Club, between two building. Use Reparo on the crest.
#57
On the left, above the Potions Club entrance door.
#58
In the Potions Club, in the building on the right, between some bushes by the entrance.
#59
In the Potions Club, in the second part of the building on the right.
#60
By the window on the top of the stairs leading to the Boathouse.
#61
On the stairs leading to the Boathouse.
#62
On the top of the Boathouse wall, from the stairs' side
#63
Above the Boathouse entrance.
#64
In the underground passage leading to the Seventh Floor.
#65
On the wall in the underground passage leading to the Seventh Floor stairs.
#66
On the stairs leading to the Seventh Floor.
#67
In the window next to the armour on the stairs leading to the Seventh Floor.
#68
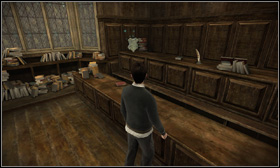
In the Library, between two bookshelves.
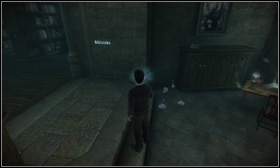
#69
At the end of the Library, behind some bars. You have to break the crest by throwing it at the wall, get it through the bars and reassemble it with Reparo.
#70
By the Library exit, on the left. Use Reparo to reassemble the crest
#71
On the wall on the right, after exiting the Library.
#72
In the stairwell which you can enter by leaving the Library. The entrance is on the left side. The crest is hanging from the wall.
#73
In the corner of the corridor by the entrance leading to the Transfiguration Courtyard.
#74
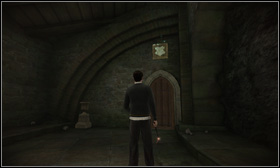
On the flag hanging beneath the ceiling in the corridor by the Transfiguration Courtyard entrance.
#75
In the corridor leading to the Potions Club look into the pot standing in the left corner.
#76
On the Seventh Floor, above the door next to the tapestry.
#77
On the Seventh Floor in a narrow opening between two pillars.
#78
On the Seventh Floor, on a flag beneath the ceiling next to the cage with a potion recipe inside.
#79
On the Seventh Floor, on the right side of the room into which you can get through the corridor perpendicular to the cage with the potion recipe.
#80
On the Great Staircase by the wall on the right, around the middle floor.
#81
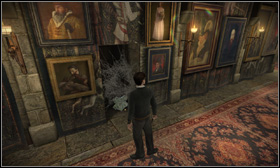
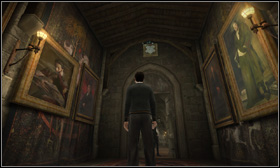
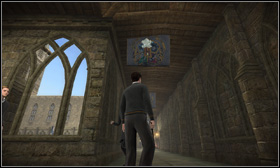
In the beginning of the corridor with lots of painting, leading from the Viaduct Entrance to the Transfiguration Courtyard. On the left side, behind a web which you should burn with Incendio.
#82
In corridor with lots of painting, leading from the Viaduct Entrance to the Transfiguration Courtyard, on a flag beneath the ceiling.
#83
Above the door in the same corridor as before.
#84
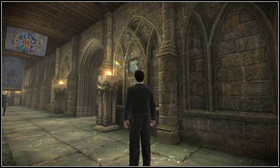
In the stone corridor leading to the Transfiguration Courtyard, above the door.
#85
In the corridor around the Transfiguration Courtyard, on a flag beneath the ceiling.
#86
On the Transfiguration Courtyard, before the classroom entrance.
#87
In a narrow alcove in the round building on the Transfiguration Courtyard.
#88
On the wall on the right side of the round building on the Transfiguration Courtyard.
#89
Above the entrance to the Transfiguration Classroom.
#90
In the middle of the Training Grounds there are some fireworks, which you should ignite with Incendio. Afterwards, reassemble the crest using Reparo.
#91
On the left wall, by the Astronomy Tower entrance.
#92
In the Astronomy Tower, behind the stone monument by the stairs.
#93
Above the entrance to the Suspension Bridge.

#94
Behind the bars on the right, in the room after the Suspension Bridge.
#95
By the armour standing in the corridor one floor above the last crest.
#96
In the Astronomy Tower, above the passage after getting down on the stairwell fork.
#97
In the Astronomy Tower Library, on the wall on the right.
#98
At the end of the Astronomy Tower Library, behind bars.
#99
On the wall before the Hospital Wing.
#100
In the Clock Tower Courtyard in a fireworks box.
#101
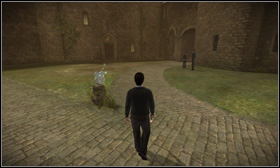
On the left side of the path leading from the Boathouse to the Paved Courtyard.
#102
On the same path as before, in a fireworks box on the left.
#103
On the same path as before, on a wall on the right.
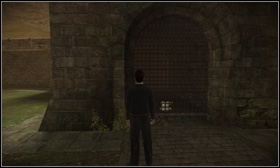
#104
In the passage leading directly to the Paved Courtyard, on the wall on the right.
#105
In the corner of the corridor running around the Paved Courtyard.
#106
In the middle of the upper corridor in the Paved Courtyard.
#107
On the wall in the end of the upper corridor in Paved Courtyard.
#108
Above a wooden door in the corridor leading from the Paved Courtyard to the Great Staircase.
#109
In the corner of the Charms Classroom.
#110
On the wall in the Charms Classroom.

#111
On a flag in the corridor before Slughorn's Office.
#112
On the balustrade of the Stone Bridge.
#113
Above a wooden door at the Stone Bridge.
#114
Above the big door in the corridor running from the Stone Bridge to the Great Staircase.
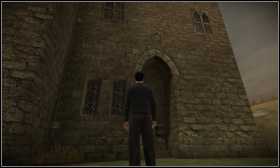
#115
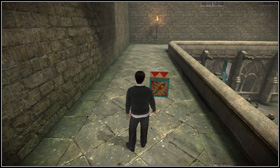
In a fireworks box lying on a hill before the underground tunnel running below the Owlery.
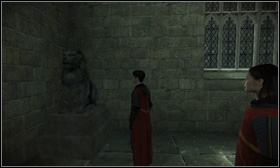
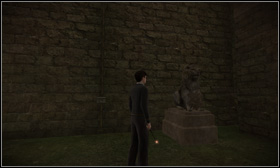
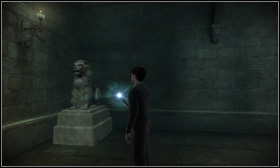
There are ten stone lions in Hogwarts. To get them, you have to search for a student near every single one of them and he will give a mission. Most of times, it will be winning a duel with a student bullying someone. Some of them will ask you to prepare them a potion which you can make in the Potions Club. After completing the task, you will be able to take the crest from near the lion. The students are placed randomly, so search for another one if there's no one around. Below there's a description of the places where you can find them.

The first lion can be found near the forest behind Hagrid's Hut.
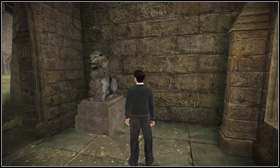
The second lion can be found in the corner of the Courtyard Entrance.
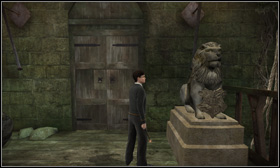
At the bottom of the Clock Tower, in the corner of the room with the pendulum.
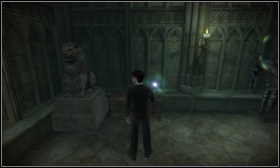
On the Training Grounds, going right from the Potions Club entrance. The lion is in the corner at the end of the wall.
In the corner of the corridor by the Transfiguration Courtyard entrance.
At the end of the corridor on the Transfiguration Courtyard.
In the corner at the Suspension Bridge.
In the Astronomy Tower after getting down from the stairwell.
In the corner of the Library.

In the corner of the corridor leading to the Hospital Wing.


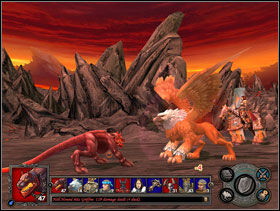
 Heavy Rain Game Guide & WalkthroughHeroes of Might and Magic V Game Guide & Walkthrough
 Halo 3 Game Guide & Walkthrough
 Harry Potter and the Goblet of Fire Game Guide & Walkthrough
 Heroes of Might and Magic V: Hammers of Fate Game Guide & Walkthrough