
Welcome to the unofficial guide to "Tom Clancy's Ghost Recon: Advanced Warfighter 2" PC game. It's a sequel to one of the most playable tactical shooters. If you had some contact with the first part in the past, you should find some of the features of the sequel to be very similar. For example, we'll be using the exact same tactical map. This tool allows you to see your opponents and other important things in real time, so you won't have to search for these units on your own. You will also be able to use the map to command your squadmates. Thankfully, this isn't going to be the only possibility to command their movements. You will also be giving standard commands by using an on-screen menu. Additionally, you will be allowed to switched to their views in other to command them from there. My game guide consists mainly of a detailed walkthrough of the singleplayer campaign of the game. You will have to finish ten different missions in order to succeed. The campaign has been divided into three acts, so you will have to take on missions in a certain order. Thankfully, the missions are more non-linear this time, especially if you compare "Advanced Warfighter 2" to its predecessor. I've tried my best to show you a best possible route to your current destination. As a result, you won't have to worry about getting to your goal areas in time or having to take on too many enemy soldiers. This guide should be useful mostly to less experienced players. I've displayed all necessary actions, whether you're taking on a single opponent or an entire squad of enemy units.
I would also like to mention about a few other important things. Before you'll proceed with the main singleplayer of the game, I'd strongly recommend taking a closer look at the tutorial section. This mission is going to be very short, so you shouldn't skip it. In order to participate in the tutorial you would have to choose the Tutorial: Training Grounds option from the main menu. This tutorial would teach you how to use different types of weapons, including grenades, sniper rifles, pistols and rocket launchers. You would also find out about your team and giving correct orders to your teammates, however I think that you'll learn a lot more on the real battlefield, even if it would mean repeating a level. Have fun playing the game!
Stranger
Important! The following hints were made mostly for less experienced players. If you had any contact with the first "Advanced Warfighter" game, I guess you won't have to read this section of the guide too thoroughly.
1) First of all, I wouldn't recommend being in a lot of hurry, especially if you had chosen one of the higher difficulty levels. Otherwise you would probably die very soon or you would endanger the lives your teammates. Obviously I wouldn't recommend risking too much, especially since it's very easy to die in this game and you will be dealing with a lot of elite enemy units (including snipers) later during the course of the singleplayer campaign.
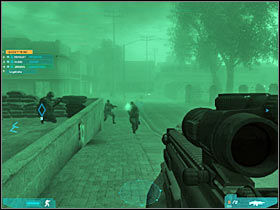
2) Try using all available cover areas to your advantage. You will come across a lot of standard or destroyed vehicles. You will also be able to hide behind barrels and brick walls. This will allow you to increase your chances for survival. Additionally, some of the enemy soldiers will have hard time hitting or even spotting you.
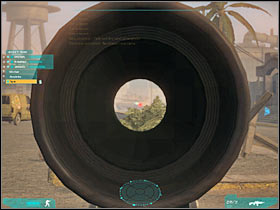
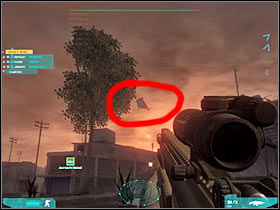
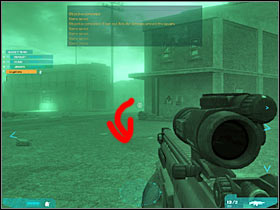
3) Make sure that you're using the tactical view all the time, even if you don't plan on using this view to command the rest of the team. The tactical map allows you to see all enemy units and you wouldn't be able to find them on your own. You will also be allowed to use the UAV drone in several missions. This machine can prove to be very useful.
4) Explore your surroundings very carefully. You should try to secure all previously explored zones, so you won't be surprised by enemy soldiers (those who have managed to survive the initial assault). There are many roads leading to some of your target areas. Try choosing less obvious passageways.
5) Most of the enemy soldiers will be standing in the exact same spots each time you load a level, however some of them will be on the move. As a result, don't worry if you can't see them right away. You will have to use the tactical map in order to find their new positions. Also, I wouldn't recommend letting them survive the initial attack, because they would probably try to organize a surprise counter-attack and you could have some serious problems defending against these types of actions.
6) Remember to take good care of your teammates. You won't be punished if they die during the course of a mission, however I'd personally recommend focusing all of your efforts on bringing the entire team to the extraction point. You should be able to take out most of the enemy soldiers on your own, however a friendly sniper may be useful during some of these fights.
7) Make sure that you've chosen a proper team for every mission. Each level will require you to deal with different types of threats. For example, I wouldn't recommend choosing a sniper for a small urban mission, because he wouldn't be able to take out enemy soldiers from larger distances. I guess you won't have any problems figuring out the correct setting of your team. As for the weapons, I'd strongly recommend focusing only on taking single shots. You will also be able to use silenced weapons during some of the missions, however this isn't going to be necessary. Grenades seem to be very useful to take out larger groups of rebel units. You will also be using night vision goggles during two night missions or while trying to explore underground bunkers.
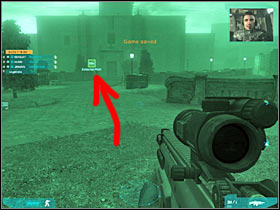
8) Don't forget about the possibility of saving your current progress. This can be done by pressing the K key (by default). The game will create three different quicksave slots, so you won't have to worry about not being able to continue if you've saved the game in a dangerous area. Additionally, each time you succeed with one of the main goals, an auto-save is going to be created. As a result, you won't have to worry too much about having to repeat entire missions, however there are a few spots which will require you to break into enemy territory without being able to save your progress.
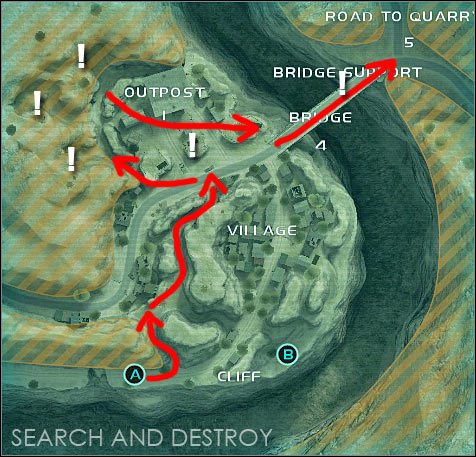
Main mission objectives:
1) Locate Rebel Outpost
2) Eliminate Outpost
3) Destroy Enemy Artillery
4) Destroy the Bridge
5) Proceed to the next Target - This is going to be done automatically. You will only have to destroy the bridge in order to finish this mission.
Possible drop zones:
A) Main road leading to an enemy camp
B) Cliff area, closer to one of the roadblocks
I'd strongly recommend choosing the first option for a drop point (the main road). This will allow you to avoid several stressful situations. You will also be able to choose a safer passageway which leads to the main camp area.
Once you've been fully briefed, you will have an opportunity to manage your team for this mission. I would recommend letting go of one of the rifleman units. Choose the sniper, because you're going to need him, especially while trying to take control over the enemy camp.
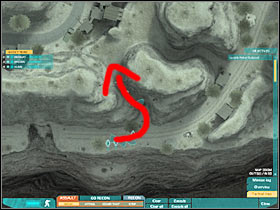
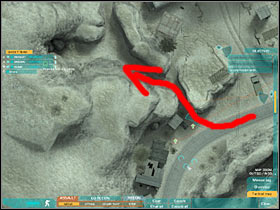
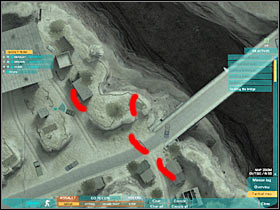
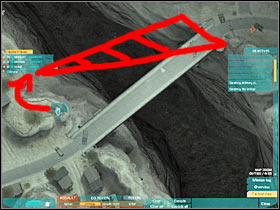
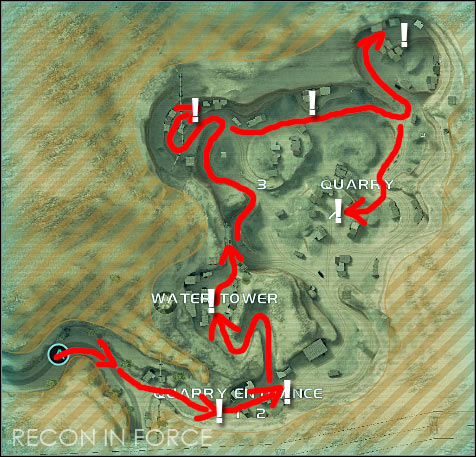
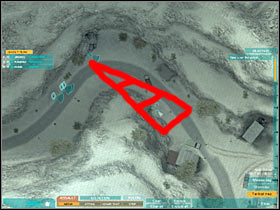
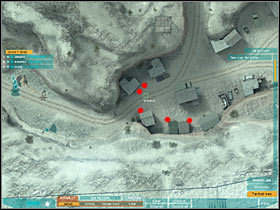
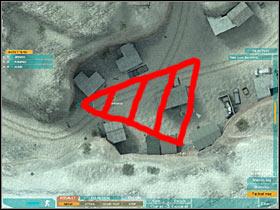
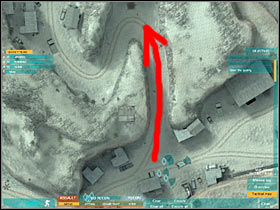
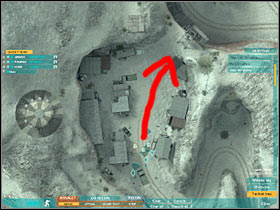
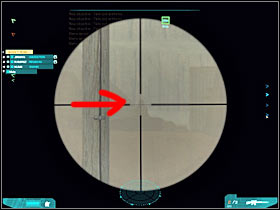
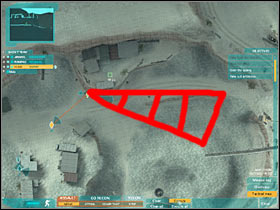
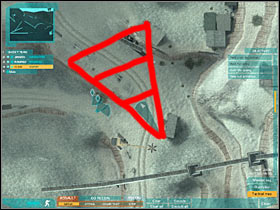
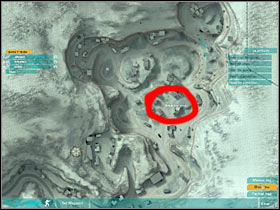
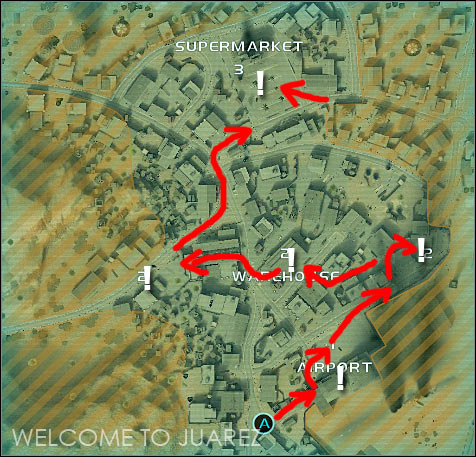
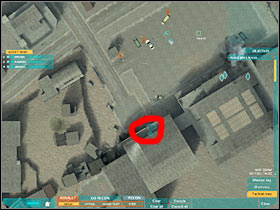
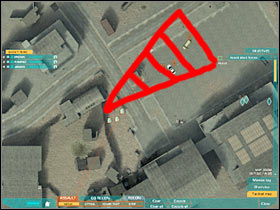
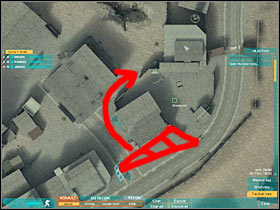
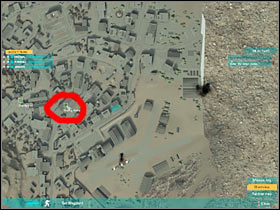
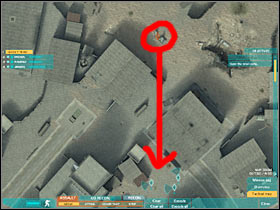
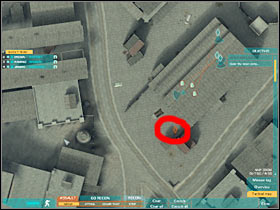
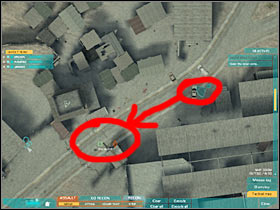
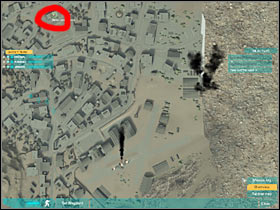
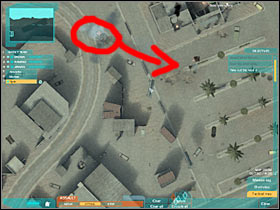
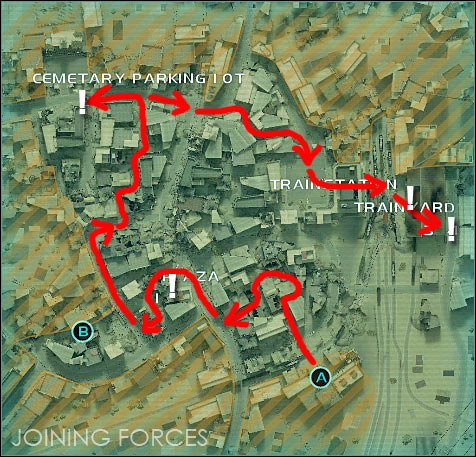
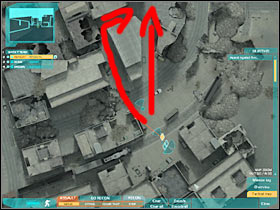
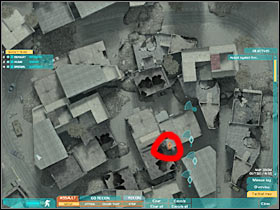
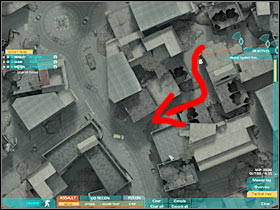
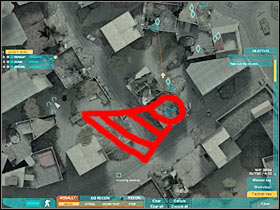
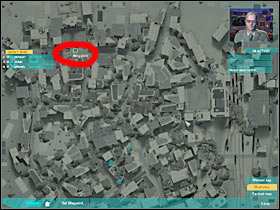
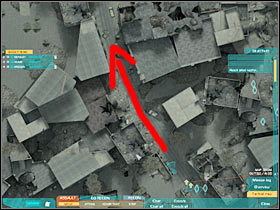
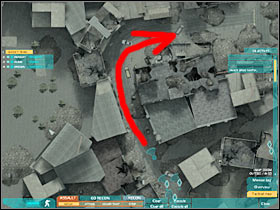
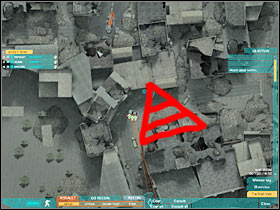
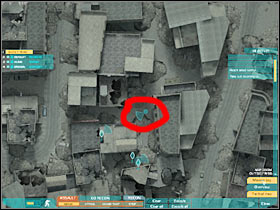
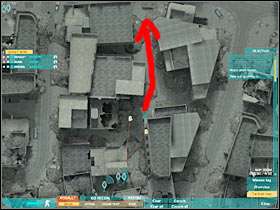
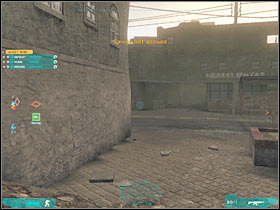
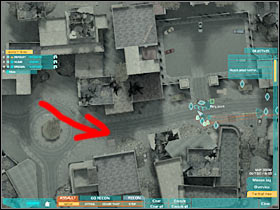
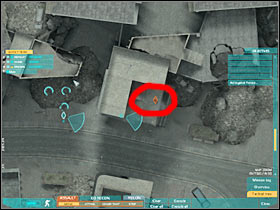
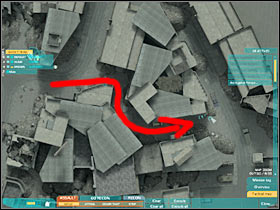
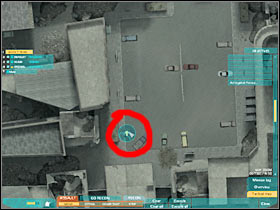
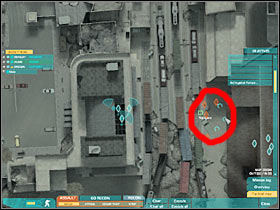
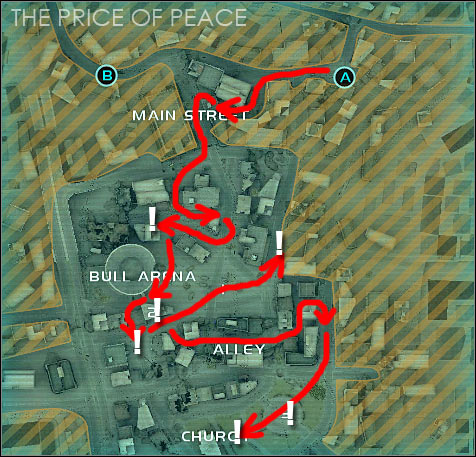
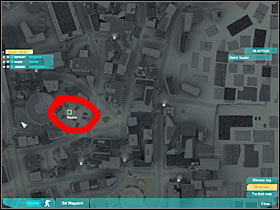
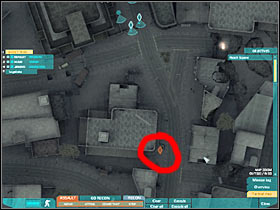
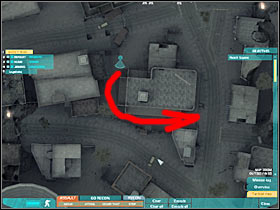
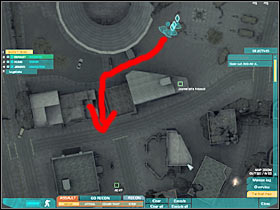
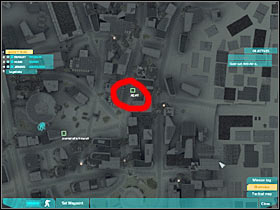
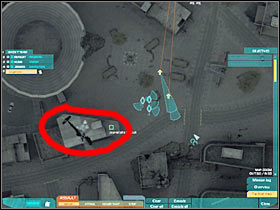
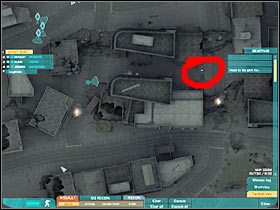
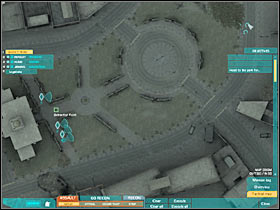
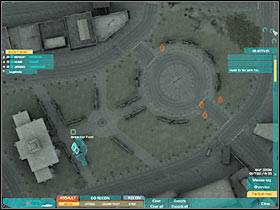
Mission map:
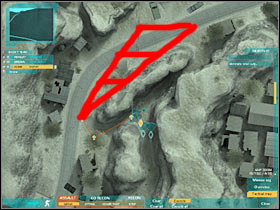
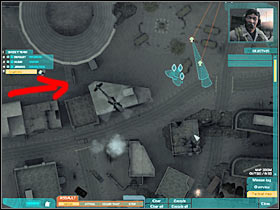
Red arrows represent suggested routes to all of your main goal areas. Obviously you will have to divide your team and figure out a correct tactical approach. Check the main description for this mission if you want to find out more. This picture was added only for a better orientation. A and B icons are possible drop zones. The exclamation mark icons represent mission goal areas. You will have to go there in order to fulfill main mission objectives.
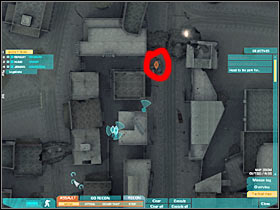
1) Locate Rebel Outpost
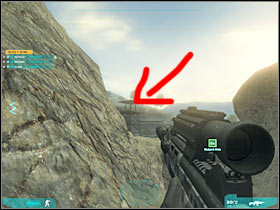
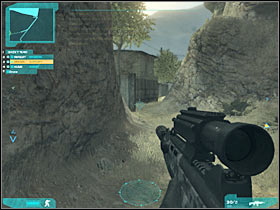
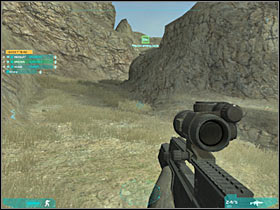
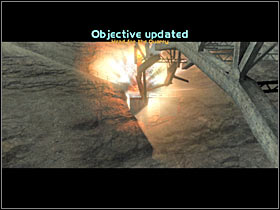
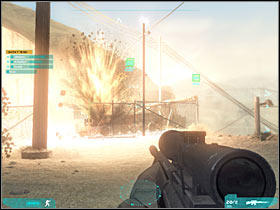
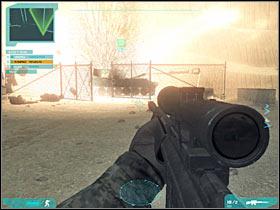
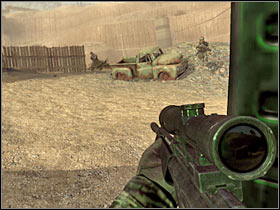
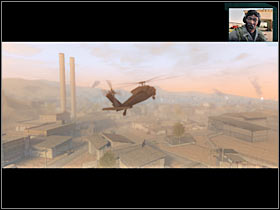
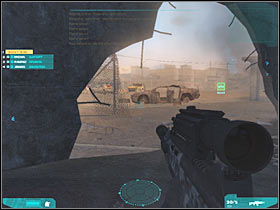
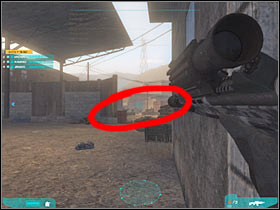
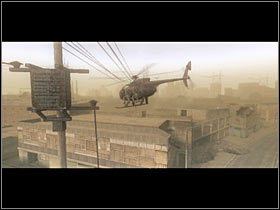
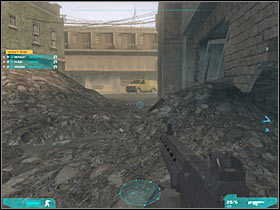
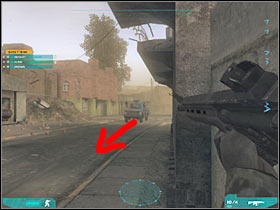
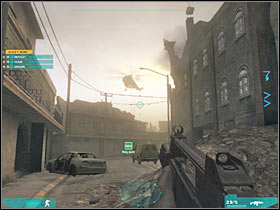
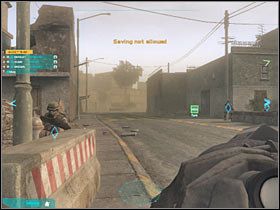
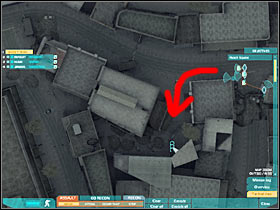
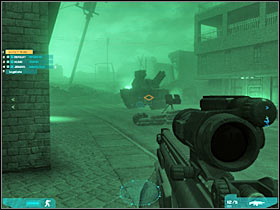
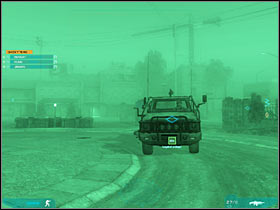
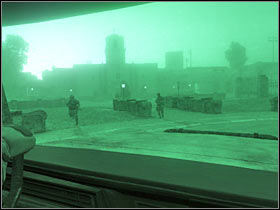
I take it that you've chosen a first drop zone, so you'll be transported to a main road leading to an enemy camp. You could also choose a second drop zone, however you would have to participate in more difficult fights right away and you won't be able to plan your next actions. This missions is going to begin with a short cut-scene (#1). Obviously you will have to wait for an allied gunship to drop your team to a starting point (#2).

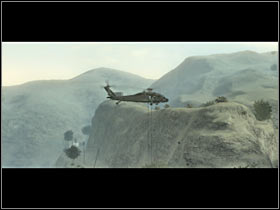
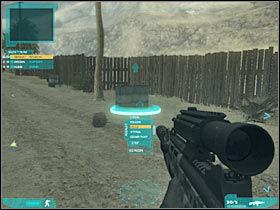
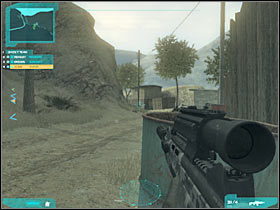
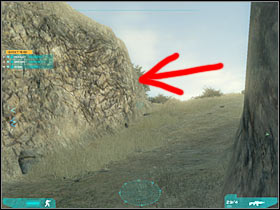
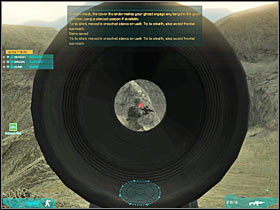
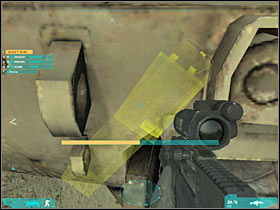
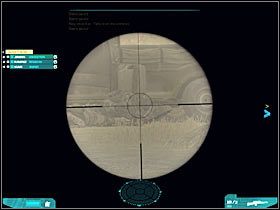
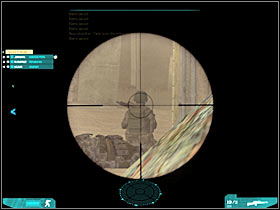
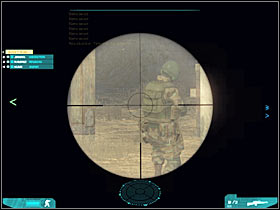
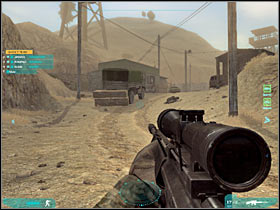
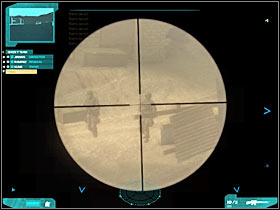
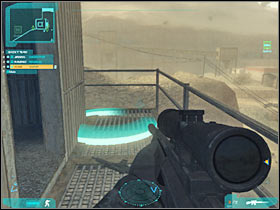
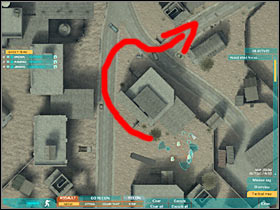
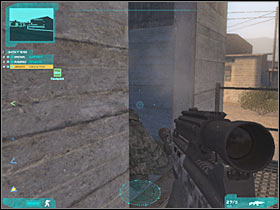
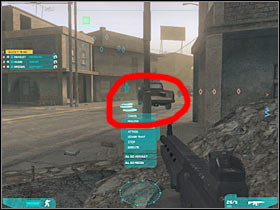
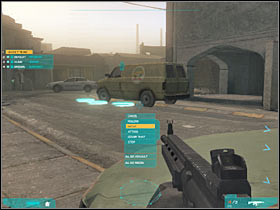
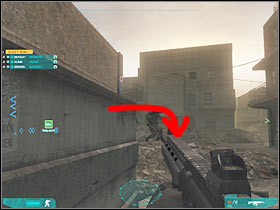
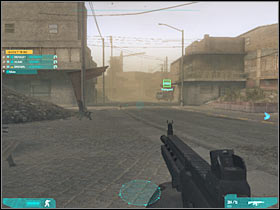
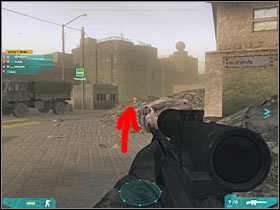
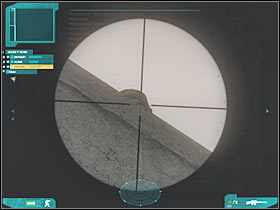
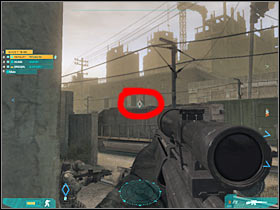
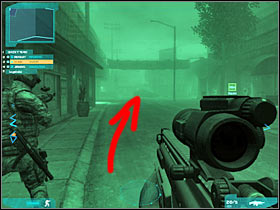
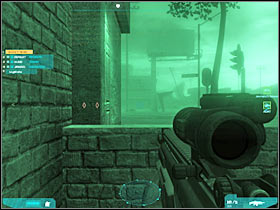
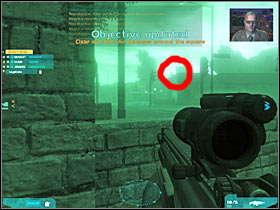
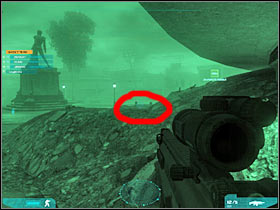
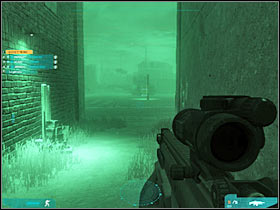
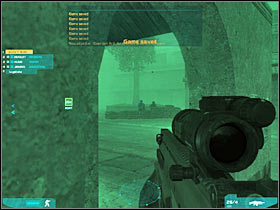
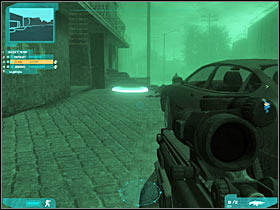
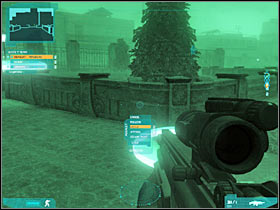
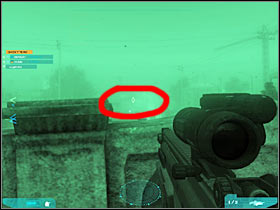
Before you decide to move any further, I'd strongly recommend that you activate your tactical view for the very first time. You will have to press the TAB key (#1). As you've probably noticed, a small group of enemy units is coming from the east. It would be a good idea to get ready for this fight. Order two of your squad members to hide somewhere to your left (#2). It's very important, because they wouldn't have enough cover to repel such an attack.
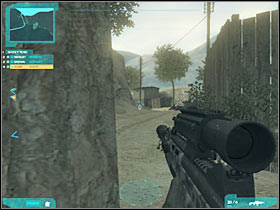
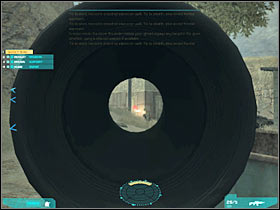
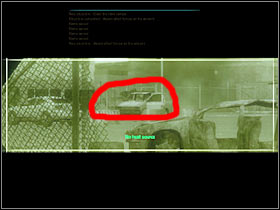
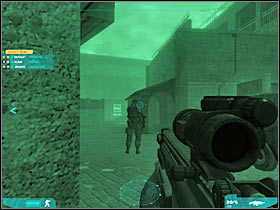
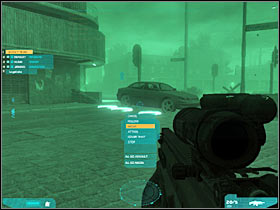
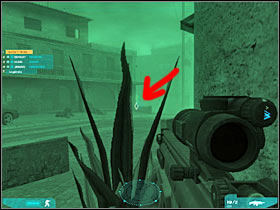
The third party member (preferably a sniper) should join you. I would recommend sending him to a nearby cover point. Barrels seem like a good idea (#1). Try hiding there as well (#2). Also, make sure that you aren't standing too close to these objects. Otherwise you wouldn't be able to use your gun.
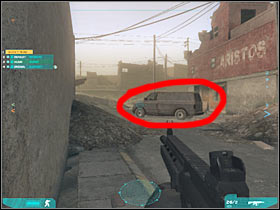
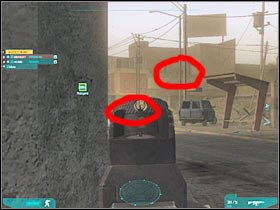
You will have to wait for TWO enemy soldiers to get here. You should be able to kill the first soldier without any major problems (#1). Even if you fail, your squad member should take care of this small problem, because the soldier would probably hide to your right (#2). You won't have to worry about your teammates.
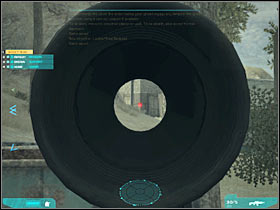
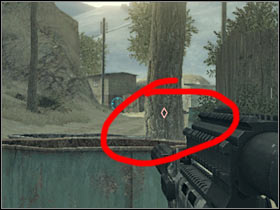
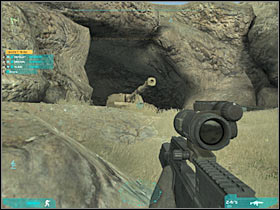
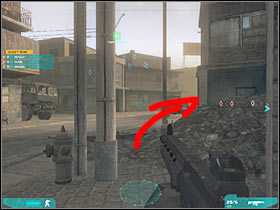
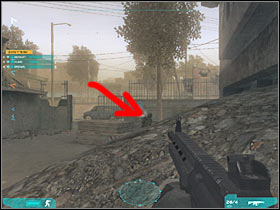
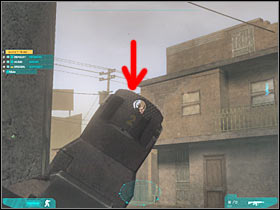
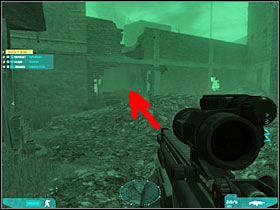
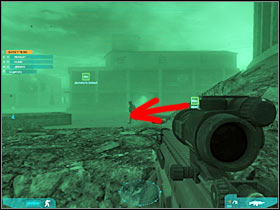
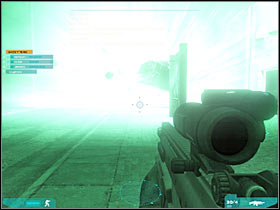
The second rebel unit will immediately hide. He may go back to the north, however he will probably find a cover area nearby. I would recommend moving forward a little. You should be able to find a second barrel (#1). Hide here and wait for the enemy soldier to reveal his position (#2). You should also consider leaning out for better view.
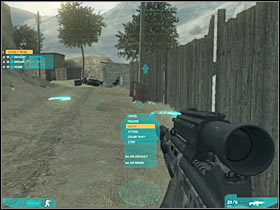
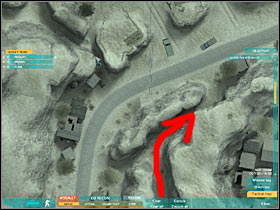
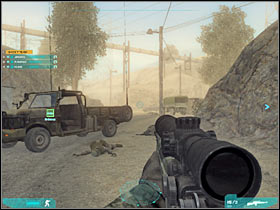
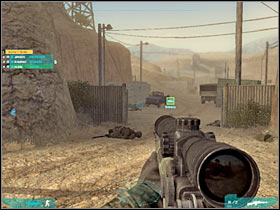
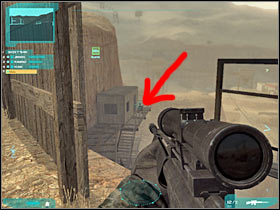
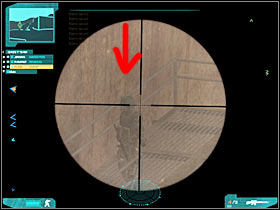
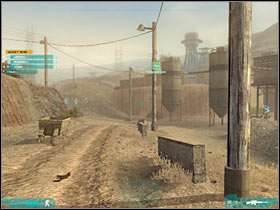
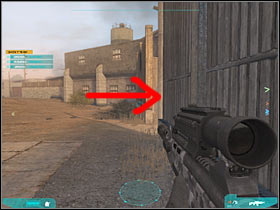
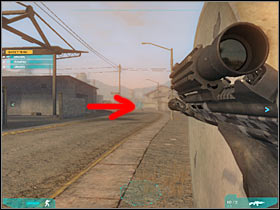
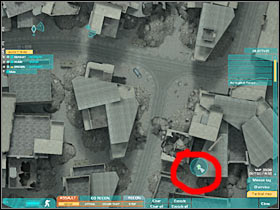
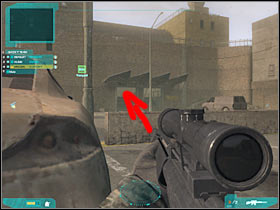
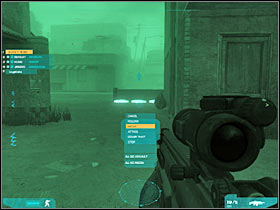
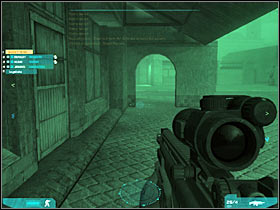
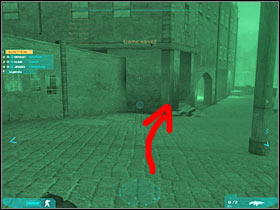
Now you will have to order your men to move forward (#1), however I wouldn't recommend choosing the main road to an enemy camp. If you take a closer look at your tactical map, you should notice that it's very well defended. As a result, you will have to find an alternate route to the base. Head on to your left. You should be able to locate a small passageway nearby (#2). Go there now. I would recommend choosing a silenced weapon from your inventory, however this is optional.
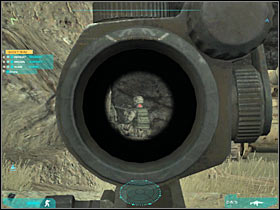
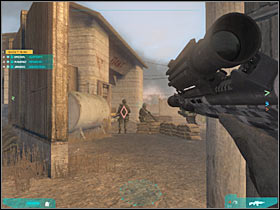
Go ahead and press the crouch button. Start sneaking towards a smaller encampment. One of the enemy soldiers should be standing to your left (#1). It doesn't really matter whether he sees you or not, because you shouldn't have any problems pulling the trigger before he manages to start firing at you. Move to your right and take out his colleague (#2). Once this is done, press the crouch key once again, because the area is not safe.
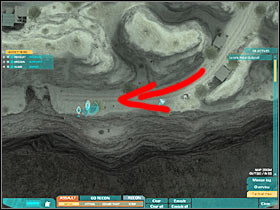
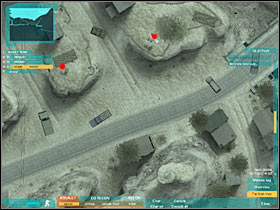
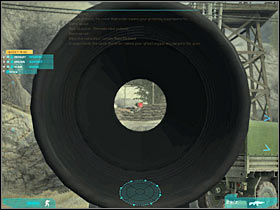
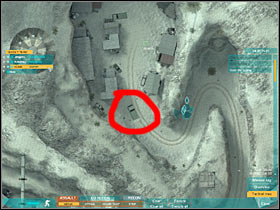
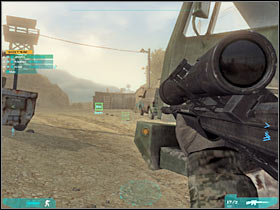
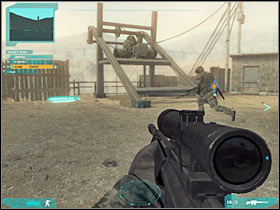
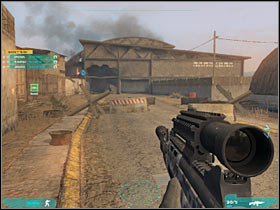
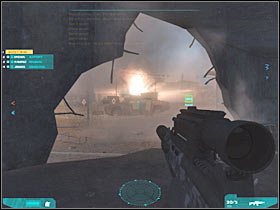
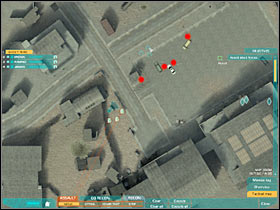
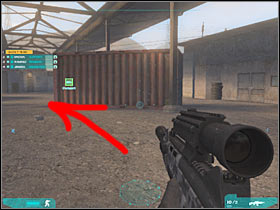
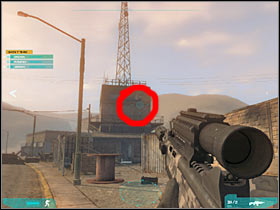
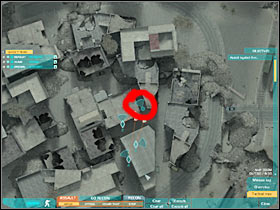
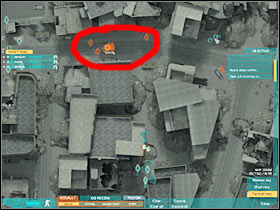
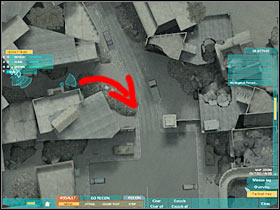
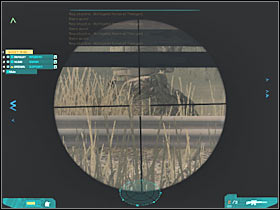
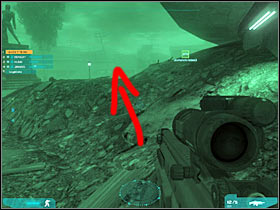
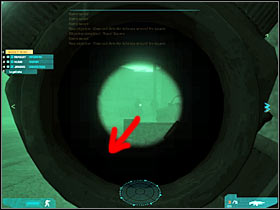
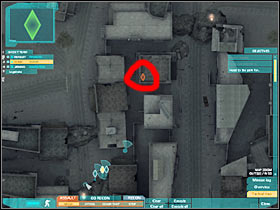
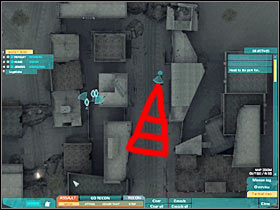
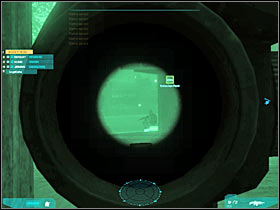
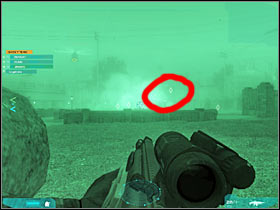
Activate the tactical map. You should be able to notice that a nearby road is being occupied by a large group of rebel forces (#1). If you've killed previous soldiers quietly, you should be able to perform a new surprise attack. The easiest way to kill these guys would be to get closer to a small hill. You should score a few headshots from here (#2), however make sure that you don't expose yourself too much. Once they're gone, order your men to get here, however your teammates should remain here for the time being. Don't send them towards the enemy base just yet!
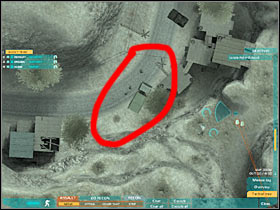
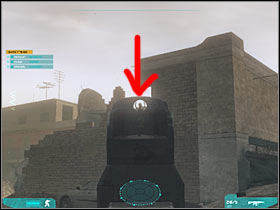
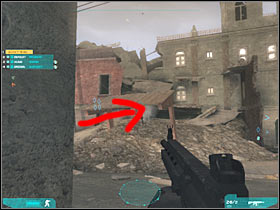
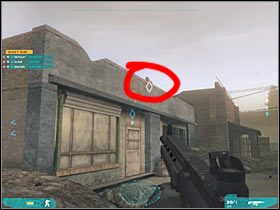
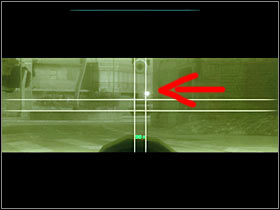
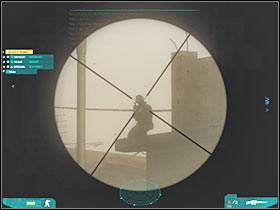
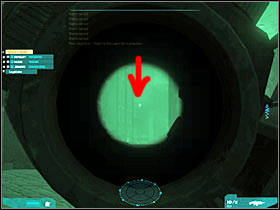
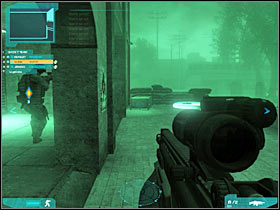
Important! DON'T expose yourself too much, because the northern passageway is being guarded by a single sniper. You will have to kill him in order to secure a safe passage. As a result, try leaning out CAREFULLY (#1). Take him out before he sees you. Once he's gone, head on with the rest of the team to the north. There's a narrow passageway here (#2). Don't even think about using the western road.
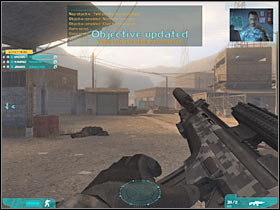
2) Eliminate Outpost
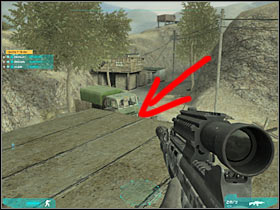
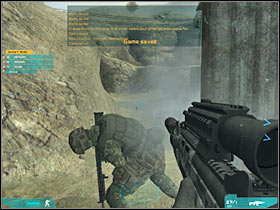
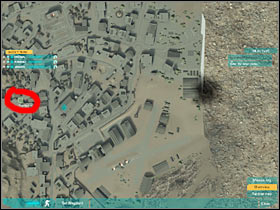
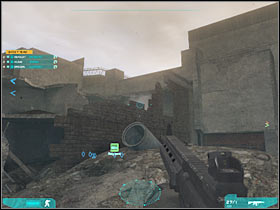
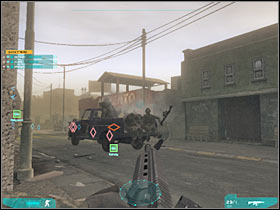
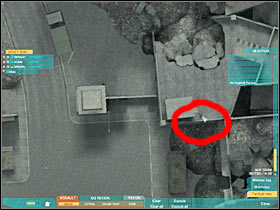
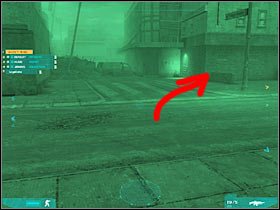
The game should automatically create an auto-save once you've gone closer to the enemy base. I would recommend that you plan your next moves very carefully before attacking any of the surrounding soldiers. First of all, you should consider ordering your sniper unit to go west. He should have a nice view of the base from there (#1). You could also order him to hide behind some of the smaller buildings, because he would be safer there. The sniper should automatically take out at least two enemy units (#2).
You, on the other hand, should go to your right. There's a small passageway in front of you (#1). Order your men to hide behind a larger cover (#2). I wouldn't recommend allowing them to lean out or stay in the open for too long. You should also create a quicksave here, because you'll take part in some challenging battles in a short while.
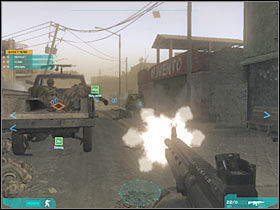
Now you will have to provide some sort of an assistance for your sniper. Attack some of the visible enemy units (#1). You will be attacking these rebels from the left flank, so it shouldn't be a problem. Nevertheless, don't leave your cover unless you want to get shot. Additionally, some of the enemy soldiers may try advancing to your position (#2). Thankfully, you'll see them on the tactical map.
Don't leave this area just yet, because more enemy units will appear near the main encampment. Try killing them from a larger distance (#1) or at least distracting them in order to allow your sniper to kill them. Make sure that your teammates are safe. You could also turn right and take out more enemy units. They are standing closer to a large bridge (#2). Just as before, don't risk too much, especially if you're taking on larger groups of enemy units.

The last group of enemy units should appear in the central section of the encampment (#1). I wouldn't recommend changing your tactical approach. Try distracting them or kill them from larger distances. You will also have to watch out for your sniper, because one of the rebel soldiers may try to surprise him from the left flank (#2). You would have to kill this guy as soon as possible. Once you've killed all rebel soldiers, you will receive new orders.
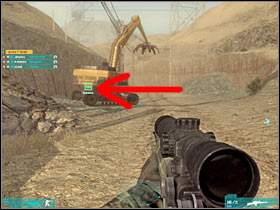
3) Destroy Enemy Artillery
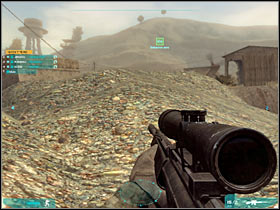
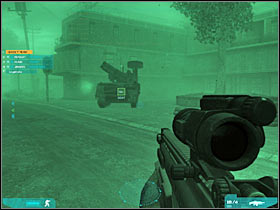
You will only have to destroy two artillery units, however you must explore three caves in order to find the tanks. As you've probably noticed, you will be given control over a flying machine, called UAV. It would be wise to use it to scan the entire area. Head on to a small passageway. It's located to the left of the secured base (#1). Keep moving north. Order your UAV to scan this entire area (#2). You will have to scan two lower caves, because we'll explore them very soon.
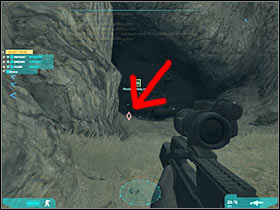
You should be able to spot one of the enemy soldiers (#1). He will be guarding the middle cave, however there's nothing wrong about taking him out right away. Head on to the lower cave. It should be located to your left (#2). I'd strongly recommend leaving the rest of the squad behind. Make a second scan with the UAV.
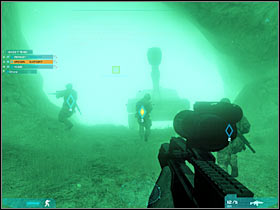
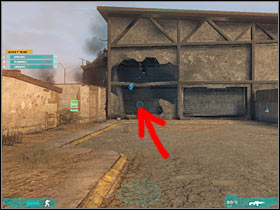
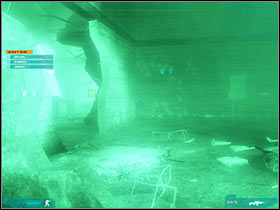
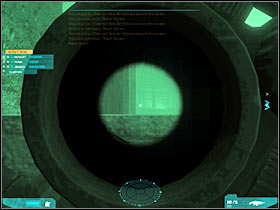
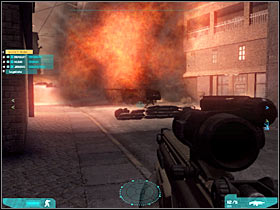
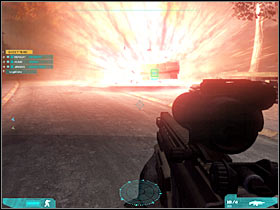
Sadly, you won't be able to see what's inside the cave, because it's very dark here and using a night vision goggles wouldn't help you. As a result, I'd recommend throwing a grenade inside the cave (#1). Once the explosion has occurred, run to the entrance and deal with the remaining enemy units (#2). You won't find an artillery piece here.
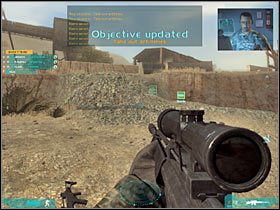
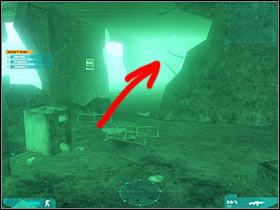
Go back to the main passageway and start moving north, towards the second cave. Once you're closer to it, turn left. Once again, all enemy soldiers should be hiding inside the cave and you won't encounter any snipers on your way to the cave (#1). Once you're there, you will receive an information about the visible artillery piece. You should be able to notice it without any problems (#2).
I would recommend that you repeat the attack from the previous cave, so you should try throwing a grenade. All enemy soldiers should be standing to the left of the cannon. Wait for the explosion to occur and kill them (#1). I would recommend leaving the rest of the team behind. Make sure that the area has been secured (#2).
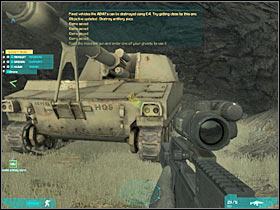
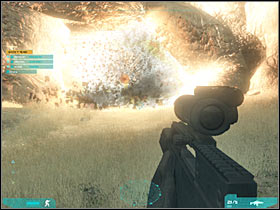
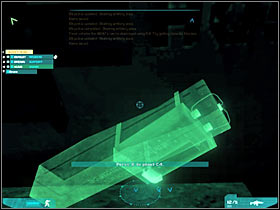
Obviously you will have to get closer to the artillery piece. Press and hold the X key. This will allow to place a C4 charge on the tank (#1). It's going to take a few seconds, so you must be patient. Once this is done, move back to a safe distance. Press the X key once again in order to detonate the charge (#2). Go back to the main passageway and start moving towards the final (third) cave. The rest of the squad should be following your lead.
You could also order your UAV to scan this area. This will allow you to locate one of the rebel units and you'll be able to take him out without even seeing him (#1). You could also throw another grenade, however this won't be necessary. I would recommend that you allow the rest of the team to take part in these fights. You will have to secure this cave (#2). Thankfully, it's not going to be well defended, so it shouldn't be a huge problem.
Now you will have to order your men to leave the cave, because you will have to destroy the tank. Head on to the artillery piece. Place a C4 charge on the tank (#1). Just as before, you will have to move back to a safe distance. Blow up the tank in order to finish up with this mission objective (#2). Wait for some new orders to be displayed on your screen.

4) Destroy the Bridge
Now you will have to go back with the ENTIRE team (order them to follow your lead) to the main encampment (#1). The base should be safe, however more enemy units are heading your way. Head on to a nearby bridge. It's going to be located in front of you. Now you will have a few seconds to prepare for a counter-attack. I would recommend ordering two of your men to hide behind cover (#2).
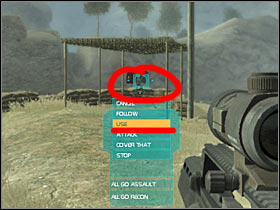
The third team member may use a nearby heavy machine gun. You would have to select him from the menu. Aim at the machine gun and choose Use function (#1). This won't be necessary, however it would help you in your defence. Hide behind one of the sandbags and wait for the enemy units to arrive in this area (#2). Rebel soldiers will appear near the bridge.
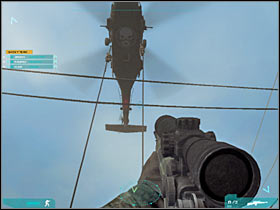
Once you've dealt with the first group, reinforcements should arrive near the bridge (#1). You won't have to destroy the helicopter, because it won't fire any missiles at you. Instead, take care of all of the remaining enemy troops. You could also order your sniper to move left (#2).
If you've decided to move the sniper, he will have a much better view at what's going on in this area (#1). As a result, he will be able to take out all remaining soldiers. Once they're gone, head on to the secured bridge (#2). The rest of the squad should be following your lead. You could also activate the tactical map to make sure that the area is clear.
You will have to reach the opposite end of the bridge. Once you're there, order your men to make a stop. They won't have to follow you. Just make sure that they've crossed the bridge. Turn left. There should be a narrow passageway here (#1). Go there now. Once you've reached your destination, press the X key. You won't have to detonate the charge, because this will happen automatically. A new cut-scene is going to be displayed on your screen (#2). This is it for this mission. You will be debriefed very soon.
Main mission objectives:
1) Take over the Entrance
2) Wait for Reinforcements
3) Clear the Camp
4) Secure Extraction point
Possible drop zones:
A) Main road leading to the quarry
This time you won't be allowed to choose between several different drop zones, mostly because there's only one main road leading to the quarry. As you've probably suspected, the first part of the mission is going to have a very linear structure.
Just as before, it's crucial that your team has a sniper, mostly because there will have plenty of opportunities to take out enemy units from larger distances. Additionally, your main character should also take a sniper rifle. You will be able to choose between several different guns. The reason for choosing this gun is that you won't be able to rely on your AI sniper all the time. You will have to take out several enemy soldiers on your own, especially early during the course of this mission.
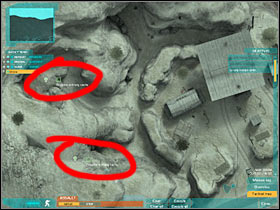
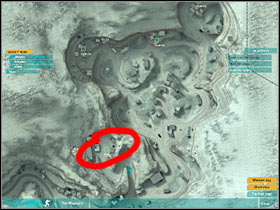
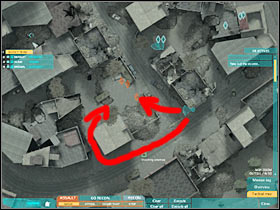
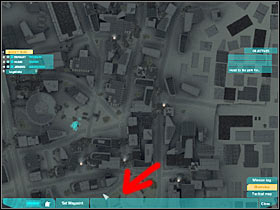
Mission map:
Red arrows represent suggested routes to all of your main goal areas. Check the main description for this mission if you want to find out more. This picture was added only for a better orientation. A icon is the only possible drop zone for this mission. As a result, you will begin the game there. The exclamation mark icons represent mission goal areas. You will have to go there in order to fulfill main mission objectives.
1) Take over the Entrance
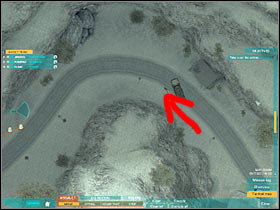
Like always, this mission is going to be begin with a short cut-scene (#1). As you've probably noticed by now, there's only one road leading to your destination (quarry). Order your men to follow your lead and start moving forward. Activate the tactical view. You should notice that some of the rebel soldiers are heading towards a nearby vehicle (#2).
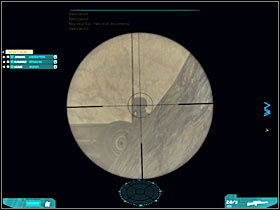
Head on to your left. Use the sniper rifle and zoom in on the vehicle. You will have to wait for the rebel units to get there (#1). Kill the first soldier. Once he's gone, take care of his colleague (#2), however some of your team members may kill him as well. Either way, these soldiers have to die. Order your squad members to stay here.
I would recommend that you head on to the northern part of this passageway. Check the first screen if you want to find out more (#1). You should be quite safe there, mostly because these rebels aren't carrying any sniper rifles. You should be able to notice two enemy soldiers (#2). Take care of this small problem. Gather the rest of the team around your position and head south.
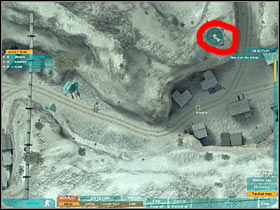
Keep heading south-east. You shouldn't encounter any new units for the time being, so you may speed up a little (#1). Once you've reached a junction, you will have to turn left, because you wouldn't be able to enter a large tunnel. I'd recommend slowing down. Start off by sending your squad members towards an excavator (#2). This is an ideal cover point, so they should stay there. Make sure that your sniper is guarding this road, so he should more exposed.
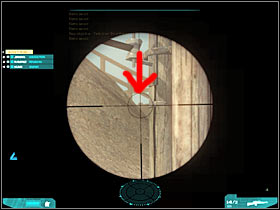
Before you'll be able to proceed any further, you will have to take care of an enemy sniper. Check the first screen (#1) if you want to find out exactly where he is. Sadly, you will have to move to your right in order to be able to kill him. Also, take out a single enemy unit. He should be standing in front of you. Use your rifle to dispose of an enemy sniper (#2).
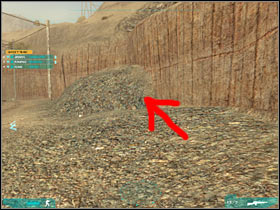
I would recommend that you head on to your right. You should be able to find a good cover here (#1). There's at least two-three rebel soldiers ahead. Kill them right away (#2). Most of these thugs will appear near a large gate. Remember that you won't have to be in a lot of hurry. Choose your targets carefully and use the tactical view as often as possible.
Most of the enemy soldiers will be hiding near the entrance to this small camp. Check the tactical view to find them (#1), so you'll know where to shoot. Try getting closer to the gate. You must be VERY CAREFUL here. Kill all nearby troops (#2). You shouldn't have any problems doing that. Just make sure that you aren't attacked and wounded by any of the rebel soldiers.
Try moving even closer. Use the metal gate for much needed cover (#1). This will allow you to eliminate all of the remaining enemy forces (#2). Make sure that you have used the map to find them. Wait for some new objectives to be displayed on your screen.
2) Wait for Reinforcements
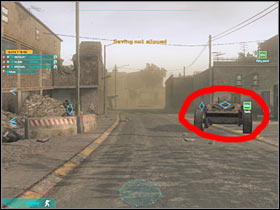
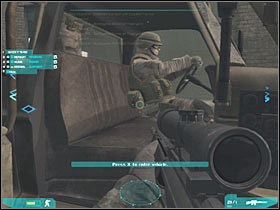
Order your team members to enter this new base. You will be able to rest here for a while. The objective is to wait for the reinforcements to show up. You'll probably notice at least one allied gunship (#1). Sadly, you won't be allowed to take command over new soldiers. Instead, head on to a new vehicle. It's called Mule (#2). This vehicle will allow you to rearm yourself. You will also be able to give it simple commands, so you won't run out of ammo even if you enter the quarry. I wouldn't recommend exchanging a sniper rifle for anything else, because you're going to need this weapon.
3) Clear the Camp
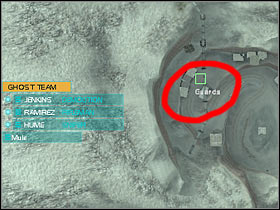
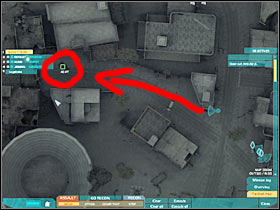
It's time to take on the main objective for this second mission of the campaign. You will have to secure three different camps, located throughout the entire quarry. The closest outpost is located to the north of your current position (#1). As a result, that's where you'll need to go (#2). It's going to be a small hill. The rest of the team should be following your lead.
As you've probably suspected, you'll have to be extremely careful here, mostly because you won't have any cover areas or alternate routes in order to surprise enemy soldiers. Check the first screen, because that's where you'll have to make a stop (#1). There are at least two enemy units to your right (#2). They are standing near a truck.
Lean out carefully. You will have to kill two enemy soldiers (#1). Focus all of your efforts on killing them as soon as possible. Otherwise you would have to pursue wounded soldiers. Once they're gone, move to the left. Take out a single opponent. He should be patrolling a nearby square (#2). Thankfully, his death shouldn't result in raising the alarm.
Start moving towards the left truck (alone). I would recommend that you hide behind this vehicle. Lean out carefully for a better view. You should be able to kill at least two enemy soldiers from here (#1). The rest should be standing at the opposite end of the camp (#2). You will have to wait for them to leave their cover areas.
Make sure that you've killed all enemy units. This will allow you to secure this first (out of three) camp. DON'T go back to the allied camp just yet. Instead, head north (#1). As you've probably noticed, you're going to have an excellent view at the entire quarry (#2). I wouldn't recommend sending your sniper here right away, because he would have been probably shot. You'll have to secure this area without his immediate help.

You will have to kill more than 10 enemy soldiers from here (#1), so obviously I won't tell you exactly where to look for them. Just make sure that you're using the zoom feature and the tactical view to find them. You should also take a out a single sniper. He will be standing to your left (#2). He must die as quickly as possible, because he poses a serious threat to your safety.
The second enemy soldier is standing on a lower level of the exact same construction (#1). You will also have to dispose of him quickly. Once these guys are gone, allow your sniper to take your spot (#2). He should be able to deal with the remaining enemy forces.
Once the area has been cleared, try moving (along with your sniper) to the left. You will end up standing on a metal construction (#1). Allow your sniper to stay here, because he should kill a few additional enemy units. Use the nearby staircase. Obviously you will have to go down to the ground level. Be careful, though. One of the rebel soldiers will probably be guarding the staircase (#2), so you must kill him quickly. Save your game and order the rest of your squad to get here.

Now you should consider moving towards the left camp. Check the first screen if you don't know where it is (#1). As a result, you will have to be moving near a left wall of the quarry. Once you're half way through, you will receive a short transmission from the commanding officer (#2). It turns out that there are a few RPG soldiers in the area. You will also have to find a good cover in order to avoid being killed by them.
3a) Take out artilleries (Obviously you won't find this mission objective on the main list of goals for this level. This is a follow-up for the third main objective - clearing out the quarry.)
I wouldn't recommend changing anything in your approach. Keep heading west. You should be staying close to the left wall. Make sure that you don't stop along the way, because that would make you and your men an easy target. You will have to reach a large truck (#1). Order your squad members to hide there. Turn right. You should be able to notice one of the RPG soldiers. Kill him from a larger distance (#2).
Once the soldier with the rocket launcher is dead, go back to your men. You're directly under the second encampment (#1). I would recommend allowing your men to deal with the initial wave of enemy soldiers. You should also order your sniper to get here in the meantime. Once you've secured the entrance to the camp, try moving closer to it. You'll probably encounter at least one new opponent (#2). Kill him.
You shouldn't encounter any other rebel units, especially if the Guards icon has vanished from the tactical map. Head on to the second camp. You should be able to locate an artillery piece. Get closer to the tank. Press and hold the X key in order to put a C4 charge on the tank (#1). Move back to a safe distance and blow up the tank (#2). You may go back to the ground level. Now we'll be moving east. Try staying inside the northern section of the map.
Check the first screen, because that's where you'll need to order your sniper to go (#1). Also, make sure that he doesn't go to the southern part of the quarry. Your ally should be able to take out at least three-four enemy units. You could also assist him in doing that (#2). Make sure to use a tactical map to find some of your opponents.
As you've probably noticed, the RPG icon is still active. This means you will have to kill a second soldier that's equipped with a rocket launcher. You should be standing beneath his current position, so you won't have any problems performing a surprise attack (#1). Once he's gone, head on to the eastern part of the quarry. The final camp is on a top of a large hill. Order your sniper to cover this area, especially the larger road (#2). The rest of the team should stay behind, because you won't need them during these fights.
Use the sniper rifle to kill one of the guards (#1). His death shouldn't affect behavior patterns of his colleagues. Start moving towards the main camp. You won't have to turn right, because you'll be able to hide behind one of the nearby buildings (#2). Just make sure that you don't make too much noise!
Lean out carefully. The camp is going to be guarded by several enemy soldiers and you will have to kill them from here (#1). Once they're gone, head on to the artillery piece. Place the C4 charge on the tank and detonate it (#2). You will have to do this from a safe distance.
4) Secure Extraction point
Despite what you might think, you won't have to put any efforts into securing the landing site, because the area is already safe. As a result, you will only have to go there. The extraction point is located in the central section of the quarry (#1). Keep heading south (#2). I WOULDN'T recommend going too fast. Otherwise your colleagues will probably get stuck or have some problems finding a correct route.
Once you're closer to the extraction zone, you will have to climb up (#1). Just as before, make sure that the rest of the squad does the same thing. You will have to move closer to the gunship. Take a seat inside the helicopter and wait for the rest of the team to join you (#2). Once you're in the air, this mission will come to an end.
Main mission objectives:
1) Assist Allied forces
2) Destroy Checkpoints
3) Take out Rebel Stronghold
Possible drop zones:
A) Main road leading to the city of Juarez
Thankfully, you will begin this mission far away from the endangered areas, so you won't have to enter combat right away. You won't be able to choose between several drop points. You will be dropped near the southern end of the map. This is a very good starting point, so you should be happy about that.
I wouldn't recommend taking a sniper for this mission, mostly because you'll be fighting at a close range. As a result, he wouldn't be able to provide a much needed assistance. Instead, it would be wise to stick with the default setting of the team, so you should have two rifleman units at your disposal.
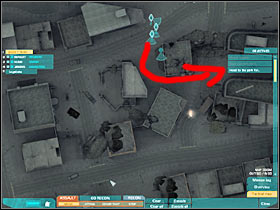
Mission map:
Red arrows represent suggested routes to all of your main goal areas. Check the main description for this mission if you want to find out more. This picture was added only for a better orientation. A icon is the only possible drop zone for this mission. As a result, you will begin the game there. The exclamation mark icons represent mission goal areas. You will have to go there in order to fulfill main mission objectives.
1) Assist Allied forces
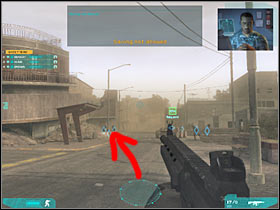
You will have to begin this mission by watching a short cut-scene (#1). Wait for the allied gunship to land. You will also notice that some of the allied soldiers are defending their positions. You will have to deal with this problem in the near future. Once you've landed, listen to what your colleagues have to say. You must start moving towards a nearby airport which is located to the north of your current position (#2).
Keep heading towards the airport area. You shouldn't encounter any hostile units for the time being, so you may speed up a little. You will have to approach the partially destroyed airport building from the west (#1). You should be able to hear a distress call very soon. As a result, you will have to hurry in order to rescue some of the allied soldiers against a massive rebel attack. Keep heading towards the building (#2). I'd strongly recommend that you leave the rest of the team here.
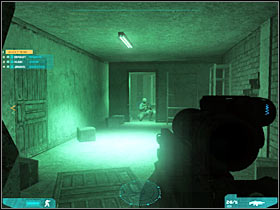
Before we'll be able to take care of the rebel soldiers, you will have to destroy a tank which is heading towards this area. Enter the building. It shouldn't be a problem, since there are a lot of destroyed walls here. Turn on your night vision goggles (#1). Head on to the left room. Don't leave the building just yet. Instead, turn right (#2) and keep going straight.
You will have to stop your main character once you've reached the final room of this complex (#1). It would be wise to choose a crouching stance. Check the second screen (#2) if you want to know exactly where this room is. Press the F key, so you'll be able to choose a new weapon. It has to be a ZEUS rocket launcher.
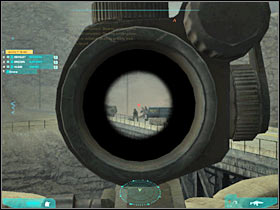
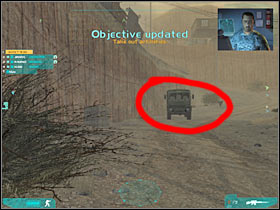
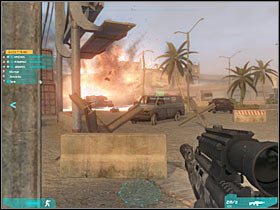
Press the right mouse button in order to zoom in the view. The tank will approach the airport area from the left side of the parking lot (#1). You won't be able to destroy it right away, because there are cars, building and other obstacles blocking your view. You will have to wait for the tank to drive into the open. Once the target is locked, IMMEDIATELY fire the missile and wait for the explosion to occur (#2). You may go back to your squad members. Once you're there, order them to follow your lead.
Now we're going to have to take care of the remaining rebel forces. The easiest way to get rid of them would be to flank them (#1). In order to do that, you would have to hide your character along with the rest of the team behind nearby obstacles (#2). You shouldn't have any problems issuing these commands.
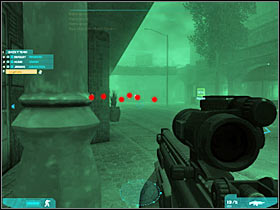
You should be able to surprise most of the rebel units from here. They will be scattered throughout this entire parking lot (#1). Remember to use your tactical view in order to find them, however you should also be able to do this on your own. Also, try aiming at their heads (#2), so you'll lose less ammo and you'll receive a higher score at the end of this mission. Once the first group has been eliminated, start moving SLOWLY towards the rest of these guys.

The last group of enemy units should appear near a small checkpoint that's located in front of your current position (#1). If you plan on taking the entire team with you, make sure that your men are using various obstacles (such as buildings and cars) for much needed cover. Once you've killed all enemy units, wait for a short transmission (#2). You will receive new orders shortly.
2) Destroy Checkpoints
As you've probably noticed by now, three new objects have been marked on your map - two checkpoint areas and a supply dump. I'd strongly recommend that you start off by going towards the right checkpoint (#1). Head on to your current destination (#2). Also, make sure that the rest of the squad is following you, because you'll need your men very soon.
You should be able to reach a parked truck in just a few seconds. Get ready, because you'll notice at least one enemy guard in the distance. Kill him as soon as possible (#1). Once this is done, order your teammates to hide behind this truck (#2). They'll be able to use it as an excellent cover.

Your colleagues should automatically start firing at enemy troops. In the meantime, it would be a good idea to surprise rebel forces. As a result, head on to your left (#1). This will allow you to get closer to the military checkpoint. There's going to be a small passageway here (#2). Move up closer to it. Reload your weapon, because there are a lot of enemies just around the corner. You will also have to keep quiet, so they don't hear you coming.
Lean out carefully and start shooting at the visible enemy units (#1). You shouldn't have any problems surprising rebel forces, so you will be able to kill them very quickly. Now you will have to deal with an enemy sniper. He is currently occupying a roof of the left building (#2). You should also perform a surprise attack here. This will allow you to secure this first checkpoint. Order your men to get here.
Now you will have to think about your next goal. I would recommend going to the supply dump. This building is located in the central part of the city (#1). You will probably have to kill at least one enemy soldier along the way. He appeared on my right (#2), however you must be careful, because he may choose a different approach. Remember that you won't have to be in a lot of hurry. Explore your surroundings carefully, before proceeding to your target.
You should be able to reach this huge warehouse building very soon (#1). I wouldn't recommend attacking in from the front (main entrance), because it would be too risky and it would take a lot of your time. Instead, head on to the back and find a small staircase (#2). Be careful, though. This area is being patrolled by a single rebel unit. Kill this guy.
Now we're going to try to secure the building. Head on to a small entrance. Lean out very carefully, because one of the rebel soldiers may be standing here (#1). You'd have to eliminate him IMMEDIATELY. Once he's gone, enter the warehouse and start shooting at the remaining enemy soldiers (#2). You can use pillars for cover. Most of the soldiers should be standing in front of you. Allow your men to enter the warehouse, however don't leave this area just yet.

Try moving towards the front entrance to the warehouse. It should be guarded by at least one soldier (#1). Thankfully, you should be able to perform a surprise attack here. There's only one more checkpoint on the map (#2). You will have to go there. Gather the rest of the team around your position. You should also consider quicksaving here.
BEFORE you decide to proceed any further, you will have to get closer to the main street which leads to the northern part of the town. Zoom in the view. You should be able to notice two enemy units (#1). Kill them. Once they're gone, start moving towards the final checkpoint. You will have to turn left very soon (#2). Make sure to be stealthy, so you'll be rewarded with a possibility of making a surprise assault.
I would recommend that you order your teammates to remain here (#1). You could wait for one of the rebel soldiers to show up, however your colleagues would take care of that small problem. You, on the other hand, should hide behind one of the smaller buildings. You will be standing in front of the roadblock (#2). If you lean out properly, you should see most of the rebel units.

You should be able to take out at least two-three enemy units from here (#1). If you're spotted, you would have to find a new cover point. I would recommend moving to your right and hiding behind one of the parked cars (#2). Sadly, you'd have to be very careful here, because you would be exposed to enemy fire.
Once you've killed all rebel units, you should hear a new transmission from your commanding officers. You will also receive new orders (#1), however don't leave this area just yet. One of the snipers should still be hiding inside a nearby tower (#2). Make sure that he's been killed. Otherwise he would have probably attacked your team (and succeeded).
3) Take out Rebel Stronghold
Your final objective for this entire mission will be to regain control over a shopping mall. It's being heavily defended by rebel forces. The shopping mall is located to the north (#1). There's only one road leading there, so I guess you can't get lost. You shouldn't encounter any additional enemy units along the way. You'll approach the shopping mall from the left (#2). Make sure that you have saved your current progress here, because you'll take part in some challenging fights.
I have to warn you, because some of the upcoming fights are going to be very chaotic. As a result, don't worry if you die unexpectedly (without receiving any warnings from the enemy units). Thankfully, you won't have to do all the dirty work, however you must remain very careful and you will have to act properly in order to assure the safety of your entire squad. I would recommend that you leave your team members behind, because they would only get in your way. Start leaning out CAREFULLY. You should be able to kill at least one enemy soldier from here (#1). He will be standing in front of your current position. You could also try and find one of the snipers, however this won't be necessary. Be careful, though. Some of the rebel soldiers are going to surprise you from the left flank (#2).

You will have to wait for a new radio transmission. As you've probably heard, you've been rewarded with reinforcements - mortar assault and airstrike (#1). I would recommend that you use these options wisely. Remember that you will have to designate targets on your own. Additionally, an allied tank will appear near the shopping mall (#2). You'll be able to control its movements.
I suspect that you may have some troubles with getting rid of an enemy tank. This machine will appear to the left of the shopping mall (#1). It would be wise to use the tactical view to order your armored unit to attack the enemy tank. You could also order a mortar strike to help you out in this fight. The objective here will be to destroy the tank (#2).
Remain in the exact same spot. You will have to focus most of your efforts on killing rebel soldiers (#1), because they will try to advance towards your positions. I wouldn't recommend risking too much, because you probably won't be allowed to save your progress. Allow your tank to kill most of the enemy soldiers. Once this is done, you will receive a confirmation (#2).
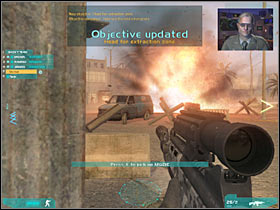
3a) Head for extraction zone (Once again, you won't find this objective on the official list of the main mission goals. Thankfully, there's nothing you should be worried about. This is a very simple task.)
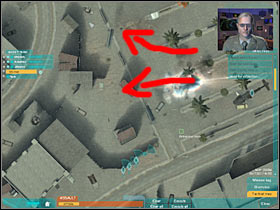
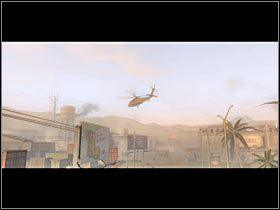
It would be wise to allow your tank to advance even more into the enemy territory (#1). I'd recommend allowing it to secure the entire parking area. It's going to be very important, because the gunship is going to land near your position (#2) and you would be exposed to enemy fire while trying to evacuate from the map.
Order your men to follow your lead. Obviously you will have to start moving towards the allied gunship. Once you're close enough, press the X key and wait for the rest of the squad to join you (#1). If your tank has secured the parking lot, there's nothing you should be worried about. Wait for a short cut-scene to be displayed on your screen (#2). You should also listen to a short radio transmission. This is the end of this mission.

Main mission objectives:
1) Assist loyalist forces
2) Reach Allied reinforcements
3) Establish contact
Possible drop zones:
A) South section of the railway station
B) Alleyway, near one of the endangered zones
Both drop zones are equally interesting this time, however they offer different approach tactics. If you decide to choose the first drop zone, you will have an opportunity for a slower and much safer start of the mission. You won't have to participate in any fights right away and you will only kill a few soldiers on your way to your first mission goal area. If you've chosen the second approach, you will find yourself under heavy fire from the rebel forces. It's going to happen right away, so you will have to be very skilled and careful not to let anything bad happen to your squad members. As a result, I'd strongly recommend choosing the first drop zone. If you plan on going with the second zone, you may skip the first part of the guide, however you must remember to avoid being surprised by rebel forces.
Now we should focus on your team. I wouldn't recommend changing anything here. The default setting seems to be the most suitable one. You could only make one exchange by taking a soldier with a grenade launcher. This is not necessary, however you would be able to take out larger groups of enemy units more efficiently. Don't worry that your main character doesn't have a weapon with a scope attached to it. You won't need it early during the course of the mission. The second part of this level will require you to deal with a lot of snipers, however you will be allowed to use the Mule, so that's when you should make the exchange.
Mission map:
Red arrows represent suggested routes to all of your main goal areas. Check the main description for this mission if you want to find out more. This picture was added only for a better orientation. A and B icons are two possible drop zones for this mission. You will have to choose between them before proceeding any further. The exclamation mark icons represent mission goal areas. You will have to go there in order to fulfill main mission objectives.
1) Assist loyalist forces
Obviously this mission is going to start with a short cut-scene (#1). Once your helicopter has safely landed, you will find yourself south to your first target. Gather the rest of the squad around you and start moving towards your current goal. You will have to go north (#2). Don't worry, because you won't encounter any hostile units here.
Check the first screen (#1), because that's where you'll have to make a necessary stop. I would recommend that you leave the rest of the team behind. One of the rebel soldiers should be standing just around the corner. Lean out quickly and kill him (#2). Hide once again, because the area is not safe.

You will also have to deal with two enemy snipers. The first sniper should be hiding in front of you. He will be standing on top of a partially destroyed building (#1). You shouldn't have any problems killing him. The second sniper is to your left (#2). Your teammates should be able to take care of this problem.
Now you will have to keep moving towards the main road leading to a nearby square (#1). Sadly, you won't be allowed to choose any alternative routes to your first destination. Once you've reached a narrow passageway (#2), order your men to follow you. I would also recommend that you save your current progress, because you'll take part in some challenging fights.
You will have to make sure that the entire squad is following you. Start running towards the square. You will have to turn right very soon. Head on to a large building which should be located in front of you (#1). You should be in a lot of hurry, because there's a second wave of soldiers heading this way. Order your teammates to hide behind a small pick-up truck (#2).
You should be standing to the right of the vehicle. Maintain a crouching stance. Start shooting at the visible enemy units (#1). You will have to kill four rebel soldiers. Once this is done, head on with the entire squad to your left (#2). You must hurry, because the enemies will attack from the west.

You should be able to locate a small tunnel here (#1). Use it. You could also order your men to hide here, because they shouldn't stay in the open. You will be able to kill at least two rebel soldiers from here. Watch out, because one of these thugs will probably be standing on your right (#2). Once he's gone, you should order your men to hide there (near the sandbags).
You will also have to watch out for an additional enemy soldier. He MAY appear in one of the windows of the opposite building (#1). The easiest way to get rid of him would be to use a grenade, however this won't be necessary. Either way, you will be informed about an incoming counter-attack. You will have to order your men to stay put. Head on to a destroyed building (#2). Check the second screen in order to find out which one it's going to be.

If you want to try a more direct approach, you would have to ignore the building and keep moving left. Next, you would have to lean out carefully. There would be a car coming this way. You would have to kill the gunner (#1) and the rest of the crew (#2), including the driver. It shouldn't be too difficult.
I assume that you have taken care of the first group of rebel soldiers. The second group will be occupying a nearby square. If you take a closer look at the first screen (#1), you should notice that you will be able to surprise them. You could also remain here and wait for them to reveal their positions (#2). The choice is yours. Just make sure that the enemy soldiers have been killed. Once this is done, you will receive a radio transmission. Gather the entire team around your current position.

2) Reach Allied reinforcements
Now you will have to reach the northern sector of this map (#1), because that's where you'll team up with allied forces. This is going to be a long and a very difficult walk, so get ready. You will have to be alerted to all kinds of possible threats. Start moving towards your new destination. Your team should hide behind a nearby pick-up truck (#2).

Get ready. You should be able to spot a small patrol. It's heading your way. You will have to kill these soldiers (#1) in order to be able to move on. It shouldn't be too hard. You could also allow your sniper to deal with this problem, however he should be standing near a good cover. Once the area is clear, start moving (with the entire team) to the north (#2). You shouldn't encounter any additional hostiles here, so you may speed up a little.
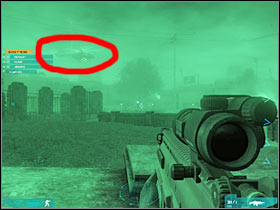
You will have to reach the upper section of this road. This is where you'll start moving east (#1). Get ready, because this area will probably be lightly guarded. You will also notice an enemy gunship in the area (#2), however you won't have to attack it, so ignore the helicopter and keep heading towards your current goal area.
I would recommend that you order your squad members to hide behind a large van (#1). You could also send them to a nearby car, however they would be more exposed to enemy fire there. You, on the other hand, should be standing near one of the northern buildings (#2). This will allow you to surprise a few rebel units which are coming this way.
You will have to kill at least three enemy soldiers. Two of them are probably heading your way (#1), so it should be fairly easy. If you're hiding behind one of the northern buildings, you will be able to surprise them. The final opponent is probably standing behind a nearby van (#2) or he can be hiding somewhere else. Either way, you must hunt him down. Once he's gone, head down to a small passageway which should be located to the north. SAVE your game, because you'll participate in some very challenging battles here!
Start moving SLOWLY towards a nearby road. The rest of the team should be following your lead. You will have to be very precise here, so you don't end up getting shot. The first group of enemy soldiers will be located to your left. You can't reach them directly, but you will be able to kill them from here. Be careful, though. One of the rebel soldiers may be lurking in the shadows (#1). His colleagues are standing to your left (#2).
2a) Take out incoming convoy (This objective should be added to your list of current goals as soon as you've entered this section of the map. You will have to reach your allies quickly, because there's an enemy convoy heading their way.)
Immediately turn right and get ready to kill more enemy soldiers. You are going to be attacked by at least one rebel unit (#1). Thankfully, it should be quite simple, especially since you know that someone's coming. Go left. Once again, you could wait for more enemy soldiers to arrive (#2). You would also find them standing just around the corner.
Check the first screen (#1), because that's where you should be standing at the moment (#1). I wouldn't recommend moving north right away, because there are at least three snipers in this area. Start off by taking out a single opponent who should be standing to your left, on top of a smaller building (#2).
The second sniper is probably hiding inside the ruins. He also can be found to your left (#1). You may not notice him at first glance, but I assure you that he's there. You could also ask your teammates for help. The third sniper will be standing to your right (#2). He is also occupying a roof of one of the buildings. Lean out quickly in order to kill him.
Once the area has been secured, start RUNNING towards your current destination (#1). Like I've said before, you should be in a lot of hurry, because the convoy has probably reached its destination. Check the second screen if you want to find out exactly where to go (#2). Also, stay away from the main road (to your east), because there are a lot of snipers there.
If you take a closer look at the tactical view, you should notice that all enemy soldiers are standing close to each other (#1). As a result, it's going to be much easier to kill them in a single attack. Head on to the nearest building (#2). Reload your weapon!
Lean out and start shooting at the enemy soldiers. Like I've said before, most of them will be standing near a pick-up truck (#1). They will also be surprised with your attack, so you won't have any problems taking care of this problem. Some of them will probably survive your initial assault. Kill them as well (#2). The rest of the team may join you now.
You will have to make sure that this whole area has been secured. Once you've dealt with this problem, start moving west. You should notice some of the allied units (#1). You will also be informed that an enemy tank is heading this way. Order your men to stand down. Check the second screen, because that's where you will have to be standing (#2). Choose a ZEUS rocket launcher from your inventory.
You will be able to observe the tank, because it's going to be represented by a small icon. The tank is heading towards a nearby square (#1), so you will have to wait for it to get there. Zoom in on the tank and wait for the right moment to fire the missile (#2). As a result, you will destroy the tank without receiving any losses. Wait for new objectives.
3) Establish contact
Before you decide to proceed any further, you should consider rearming yourself. As you've probably noticed, there's a Mule vehicle here (#1). Use it and exchange your current weapon for a sniper rifle. Once this is done, start moving east (#2). I'd strongly recommend that you leave the rest of the team behind, because you'll be playing as a sniper for the next few minutes. As a result, you will have to be very precise in order to succeed.
There's a large crossroad in front of you. This area is being guarded by AT LEAST five enemy snipers. You will also come across a heavy machine gun post, as well as a few standard enemy units. As you've probably suspected, you will have to plan your EACH move very carefully. I would recommend by taking out some of the standard soldiers. They will be standing in front of you (#1). There's going to be two or three of them. Once they're gone, take out a single opponent who's hiding behind the sandbags. Check the second screen if you can't find him (#2).

Now we're going to have to take care of two enemy snipers. They are currently standing to your right. One of the snipers is occupying a roof of a closer building (#1). You will have to wait for him to reveal his position. The second sniper is a lot more difficult to find. Check the second screen if you're having problems with that (#2). Make sure that he's dead before proceeding any further. Otherwise he would have probably killed you.
Now you will have to take a look at one of the northern buildings. You're probably standing next to it, so you won't have to spend too much time searching for the sniper (#1). Once you know where he is, move to the right and try aiming at his head (#2), however make sure that you don't expose yourself too much, because there's at least one more sniper covering this area.
Like I've said, you'll have to deal with one more sniper. Check the first screen if you want to know where to look for him (#1). Make sure that you've taken him out from a larger distance, so you won't lose any health points. Now you will have to disable the heavy machine gun post (#2). The easiest way to do this would be to attack this soldier from the western ruins. You may proceed to the eastern part of the map (along with the rest of the team).
You will have to choose several narrow passageways in order to reach your current destination (#1). Despite what you might think, you shouldn't be in a lot of hurry, because you will come across new rebel units along the way. You should also consider ordering your teammates to stay behind. The first rebel soldier is standing on a top of a scaffolding (#2). Kill him quickly.
You will come across two-three new enemy units just around the corner. Most of the rebel soldiers will be standing near a large van (#1). It would be wise to allow the rest of your squad to take part in these fights. Once the enemies are gone, go straight. You are getting closer to a much larger square (#2). You must be careful here.
This square is being defended by two heavy machine gun posts. The first machine gun post is located in front of your current position (#1). It would be wise to use the scope. Lean out very carefully and kill the enemy soldier by aiming at his head (#2). He can't survive this attack!
It would be a good idea to make a run towards the left brick wall. You should be able to take out several other rebel soldiers from here. One of them will be using a heavy machine gun post (#1). Be careful, though. He's not the only one you're after. There's also an enemy sniper there (#2). You will have to kill him as well.
DON'T enter the square area just yet, because this sector hasn't been fully secured. If you take a look at your map, you should be able to notice one more sniper. He is standing on a top of a large building (#1). Kill him (#2). Once he's gone, allow your men to join you. Go south.
Your objective here will be to reach a large entrance which leads to the train station (#1). Thankfully, this entrance isn't going to be guarded by any additional units, however you will probably notice a few red icons to your east. We'll deal with this problem in a short while. Head on to the exit which should be located to your left. A small group of enemy units will appear in front of you. Attack them (#2).
I would recommend that you take a closer look at your tactical map, so you'll know exactly where your opponents are standing (#1). It's very important, because it's highly unlikely for them to move somewhere else. DON'T leave the building just yet. There's a single sniper to your left (#2). You must kill him before proceeding any further!
Now you will have to start moving between carragies. You will be killing enemy soldiers along the way. You should be able to surprise them from the back. I would recommend that you start shooting at their... feet (#1). This will allow you to take out most of the rebel units. I would have to kill two additional units. You can do this by leaning out carefully (#2).

Once you've secured this area, you will be allowed to proceed to the train station, because that's where your allies were defending themselves (#1). You will have to listen to a short dialog. Once this is done, start moving towards a nearby extraction zone (#2).
As you've probably noticed, a pick-up truck has arrived in this area. Your men will automatically take seats in the pack. You will have to go to passenger's seat (#1). Press the X key. After that, you will only have to watch a short cut-scene (#2). This is it for this mission. Get ready for your next challenge.
Main mission objectives:
1) Reach the square
2) Cover emergency extraction
3) Reach extraction point
Possible drop zones:
A) Smaller road, located to the east of the city
B) Main road leading to the town's square
I think that the choice is going to be very obvious this time. If you decide to choose the first option, you will have a much easier start. This is very important, because despite what you might think, you won't be rushed by anything or anyone. Additionally, this is going to be your first night mission, so you will have plenty of opportunities to stay in the shadows and attack enemy units by surprise. If you've decided to choose the second drop zone, you would be more exposed to enemy fire and you wouldn't be able to surprise enemy units by flanking them. As a result, it would be a lot more difficult to deal with some of the first large group of rebel units.
The first part of this mission is going to be very simple, however later during the game you will have to participate in some very difficult challenges. MAKE SURE that you have a sniper in your team, because you're going to need him in the future. I wouldn't recommend saying goodbye to any of your rifleman units, especially since they have been equipped with decent guns (as well as your main character).
Mission map:
Red arrows represent suggested routes to all of your main goal areas. Check the main description for this mission if you want to find out more. This picture was added only for a better orientation. A and B icons are two possible drop zones for this mission. You will have to choose between them before proceeding any further. The exclamation mark icons represent mission goal areas. You will have to go there in order to fulfill main mission objectives.
1) Reach the square
Like I've already said, this is going to be your first night mission. As a result, you will have to be using night vision goggles all the time (#1). You will also be allowed to perform more stealth maneuvers. Sadly, you won't be able to use tactical map too often (#2), because you won't see too much on it. As a result, you will have to rely mostly on your skills or on your team, especially since you'll encounter a few snipers along the way. Start off by moving west. The rest of the team should be following you.
You could also activate the global view (#1). Sadly, it's going to be very misleading, because you won't see your team members at the start of the mission. There's nothing you should be worried about. Just remember that you have to keep going south. You will have to make a left turn very soon (#2). I'd strongly recommend that you start crouching, because you will encounter your first enemy in just a few seconds.
Lean out carefully. You will probably come across a single enemy soldier (#1). Kill him quickly. It would be wise to aim at his head. You should also use a silenced pistol or a gun with an attached suppressor upgrade. Head on to this alley. Order your men to hide behind a large brick wall (#2). You may proceed to the next section. I would recommend moving close to the left wall.
You will come across a partially destroyed building (#1). Get ready, because this area is going to be swarming with enemy troops. The first group will be standing in front of you. Try killing at least two soldiers. IMMEDIATELY turn right, because one of the rebel soldiers will probably be guarding this corridor (#2). Once he's gone, head north. Don't worry, because this is the only passageway leading to the main road.
You will receive some small reinforcements. As a result, you will be allowed to take command over three allied units, however they will pose as a one team. It would be wise to order them to hide behind the left pillars (#1), so they won't die right away. Start leaning out in the meantime. You will have to secure this first roadblock area (#2). There are at least 3-4 enemies to kill.
The second large group of enemy units is standing to the south. You should be able to take them out from here (#1), especially since you'll notice red icons around each of the soldiers. You could also ask your sniper for help, however it would be better to take them out on your own (#2). Also, your new allies should automatically help you during these fights.
Make sure that all visible enemy units have been killed. Once this is done, gather your entire squad (not your new allies!) and start moving to the south (#1), towards your first target area (the main square). Once you've reached a previously secured roadblock, order your men to hide behind one of the vehicles (#2), so they'll be able to take out new enemy soldiers. You could also ask your sniper to hide behind the sandbags, so he would have a much better view at the surrounding area. Also, watch out, because some of the rebel soldiers may try flanking you.
There are some additional enemy units to the south (#1), but you'll be dealing with very small groups, so you shouldn't have any problems killing these soldiers. Also, if you place your sniper unit correctly, he will take out all rebel soldiers, so you won't have to do anything else. Keep heading south, however you should turn right once you've reached some large containers (#2).
Activate your tactical view. Check the first screen (#1), because that's where you'll have to go (south and then east). You shouldn't encounter any additional enemy units here. Order your team members to hide behind a small brick wall. Look at the second screen if you're having problems finding it (#2). Don't worry about your teammates, because they'll also be protected by a nearby building.
As for your main character, I would recommend running towards an opposite building (#1). It shouldn't be too hard. Once you're there, hide behind the left wall. Lean out carefully. I would recommend that you kill one of the snipers. He will be standing to your right (#2). This is very important, because he wouldn't have any problems killing you.
Once you've killed the sniper, try moving closer to one of the brick walls (#1). Obviously you must be crouching here, so you won't expose yourself too much to enemy fire. Start shooting at the visible enemy soldiers (#2). Most of them will appear in front of you. Also, your team members will assist you during these fights.
You could also order your squad member to move to the left. You would find a smaller brick wall here (#1). This would allow to surprise all of the remaining rebel soldiers (#2). Don't enter the square area just yet. Instead, wait for some new objectives to be displayed on your screen.

1a) Clear out Anti-Air defenses around the square (Obviously you won't find this objective on the official list, because the commanding officers didn't suspect that there may be AA tanks in the area.)
There are three Anti-Aircraft tanks near the square. I guess you will be pleased to hear that you will be allowed to take them out in any order. I will do my best to show you the easiest and the most efficient route. We'll start off by going towards a tank which is located to the west (#1). It's also to the north of the big arena. You could take the rest of the team with you, however this won't be necessary and you would only endanger lives of your men. You will have to be very stealthy here. The tank is being guarded by a heavy machine gun post (#2). Kill this soldier.

You may proceed to an unguarded tank (#1). I guess you should by now what should be done here. You will have to approach the artillery piece. Press and hold the X key in order to place a charge on the tank. Once this is done, move back and press the detonation key (#2).
Now we'll have to proceed to the second tank. It's located closest to your main goal. It's to the south of the journalist location. As a result, you must go back to the arena (#1). I'd strongly recommend that you stay close to the buildings visible on your right, because it's going to be very easy to die here. You should notice some rubble here. Start moving forward (#2).
You will have to be very stealthy here, so you aren't noticed by anyone. Make a few steps forward. You should be able to notice a few soldiers (#1). Kill them. Once they're gone, wait for their colleagues to show up (#2). Order your men to get here.
Check the first screen if you want to find out where the second tank is and how to reach it (#1). This is going to be the safest route, so you won't have to worry about any unforeseen events along the way. You should order your men to hide behind a small brick wall (#2) or a parked car. It's very important that they stay here, because there's a possibility of defending against an enemy counter-attack here in the near future.
You should be able to locate a small passageway that's located between buildings (#1). Use it. Once again, you must keep quiet. The first group of enemy units will be standing to your left (#2). Surprise them.

Once the enemies are dead, turn right and lean out carefully. You should notice that some of the rebel soldiers are heading this way (#1). Kill them. If you don't see them, this means your team will have to defend their positions very soon. Either way, you must take care of this problem. Approach the tank, place the charge and detonate it (#2). Go back to the main square.
There's only one more artillery piece for you to destroy. You shouldn't have any problems finding it (#1), especially since it's close to the main road and you've already been there. I would recommend that you go there alone. Order your squad members to stay near the journalist location. Once you're close enough to the tank (#2), you should reload your weapon. You could also save your current progress. Get ready for some challenging fights.
Lean out carefully. You will come across two enemy soldiers here (#1). They are hiding behind the sandbags. Kill them, before they start firing at you. You've got two choices here - you can either proceed to the tank right away or wait for some additional enemy reinforcements to show up. Enemy units will appear to the north (#2). It would be better to wait for them, because you probably wouldn't have enough time to place the charge and leave this area.
Either way, you will have to focus most of your attention on destroying the tank (#1). Just as before, you will have to approach it. Press and hold the X key in order to place the C4 charge. Move back and detonate the charge (#2). Now you should return to your team as soon as possible. You will have to protect the trapped journalist.
2) Cover emergency extraction
Make sure that you're standing close to the designated building. You will probably notice that an enemy gunship is heading this way (#1). You will have to prevent the mercenaries from reaching the building. As a result, start shooting at them while they're using ropes (#2). You will have to kill about 3-4 rebel units. MAKE SURE that no one safely lands on the roof of the building! Once this is done, wait for additional tasks from the commanding officers.
You will have to be careful, because a small group of rebel soldiers may appear in the eastern side of the square (#1). You shouldn't have any problems killing them and your team will probably assist you during these fights. An allied gunship will land on top of the nearest building (#2). As a result, you will have to defend this area against enemy attacks.
The first group should appear to the left of the large building (#1). This means the opponents will be coming from the west. If you place your team members correctly, they should be able to withstand anything. The second group will appear to the right (#2). You shouldn't change your tactical approach. Just make sure that you don't lose any health points here.
3) Reach extraction point
This is going to be the final and the most difficult objective of this mission. You will have to reach the extraction zone which is located near the church, to the south of your current position (#1). There's only one road leading there, so you can't get lost. Check the second screen (#2) if you want to find out where you'll have to go. You won't encounter any hostiles right away, however I wouldn't recommend moving too fast.
Take a closer look at the first screen (#1), because that's where you'll probably encounter your first opponent (#1). I think it's fairly obvious that you should try and eliminate him from a large distance, so he won't have any chances of performing a successful counter-attack. Keep heading east. The rest of the team should be following you, but try maintaining a larger distance from your colleagues. You will encounter your first sniper just around the corner (#2). Thankfully, it's going to be very easy to locate him.
You may proceed to the next section. Make sure that you're not moving too fast. The second sniper will be to the north (#1). Once he's gone, go there with rest of the team. You will encounter two additional hostiles just around the corner (#2). Kill them.
Try making a few steps forward. The third opponent will appear to your left (#1). You will have to kill him, however he may also hide. If he does that, you would have to throw a grenade at him. Hide behind the plant. Try taking out at least one enemy soldier from here (#2). The second group MAY appear to your right. If you don't see anyone, you will have to be more careful while trying to secure this area.
Don't head on to the extraction zone right away, because the area is not safe. Try hiding near one of the buildings to your left (#1). You should be able to take out a single enemy sniper from here (#2). You must do this quickly, before he sees you.
Now you may allow the rest of the team to enter this area. Send one of your colleagues to hide behind the sandbags (#1). It should be your sniper, because he'll have a chance of spotting other enemy units. Once the area is clear, start moving forward. You should consider hiding behind one of the building which are located to your left (#2).
Turn right. You will probably notice at least one additional opponent near the crossroads (#1). You will have to take care of this small problem. You should be able to surprise him. Once he's dead, head on to a small platform which should be located to your left (#2). This will allow you to have a much better view at this area.
The final group should be hiding BENEATH your current position (#1). As a result, you must be very careful, so you won't lose any health points. Once all the enemies are gone, gather the rest of the team around you and start moving towards the designated extraction zone (#2). You shouldn't encounter any additional hostiles for the time being.
You will have to get closer to the church building (#1) if you want to advance with this mission objective. Once you're there, listen to a short radio transmission. One of the allied gunship is going to be shot down by rebel forces (#2). As a result, you will have to defend yourself while waiting for a new extraction vehicle.
This is going to be the most difficult fight of this entire mission. Before we'll go into details, there are a few important things you should know about:
1) You MUST order your men to hide behind small brick walls. Otherwise they would have died almost instantly. Make sure that your teammates aren't standing too close to each other.
2) Perform quicksaves each time you manage to kill a larger team of enemy soldiers. You will have to defeat 3-4 waves of rebel units. Sadly, you won't be allowed to save your progress during these fights or if the area is not safe.
3) Focus most of your efforts on eliminating enemy snipers. Additionally, some of the enemy units may actually advance towards your position. Thankfully, you won't have to worry about enemy units trying to flank you.
4) It would be wise to use the grenade launcher during the final stages of this battle. Try aiming at larger groups of enemy units.
Now we can focus on the details. Once you've received an information about the incoming attack, you will have to order your men to hide behind some of the nearby brick walls (#1). The sniper should be standing to the left while the rest of the team may occupy the walls to the right (#2).
You should be standing near your rifleman units (#1). Make sure that you're crouching behind one of the brick walls, however you can't be too close to the wall, because you wouldn't be allowed to use your rifle. The first group will probably use a helicopter (#2). You could consider shooting at them, however don't waste too much ammunition.
The first phase of each battle will require you to locate and eliminate enemy snipers (#1; #2). They will appear on the rooftops of the nearby buildings. Most of these objects will be located in front of you. Don't worry if the enemy forces will use smoke grenades, because you'll still see red icons.
Once you've taken out each sniper, you will have a few seconds to deal with the remaining enemy soldiers (#1). Try aiming at larger groups. You should also be using your tactical map in order to know exactly where they are currently standing (#2).
Keep shooting at the enemy snipers (#1), because they'll be your main concern. The snipers are going to be the only ones to threaten your safety. You will also be able to listen to short radio transmissions. Also, don't forget that you will be allowed to save your progress, however only if you aren't attacking anyone. You will have to defend this area for about two minutes. Once this is done, you will receive a proper confirmation (#2). Get ready, because we'll going to leave this map very soon.
You will have to use a pick-up truck, instead of a gunship, to evacuate from the area. The vehicle will approach the square from the right (#1). IGNORE enemy icons. Order your men to follow you and start RUNNING towards the central section of the square (#2). You shouldn't perform any unnecessary stops.
Once you've reached your destination, head on towards the passenger's seat area (#1). You won't have to worry about your men, because they will take their seats automatically. Enter the vehicle (#2) and wait for the rest of the team to do the same thing. This mission is going to end in a short while.
Main mission objectives:
1) Reach the extraction zone
Possible drop zones:
A) A small road
Obviously this is going to be the only road leading to your final destination. You will also witness a very interesting cut-scene. As a result, you will have to modify your plans from the briefing area and you won't be able to reach your goal area by choosing a shortest possible route. Instead, you will have to explore most of the map, including some of the very tricky eastern regions.
This is going to be a very unique mission, because you won't take command of the entire team. Instead, you will be issuing orders to only one squad member. You will also be given full control over a group of allied soldiers, however they won't be too useful and they would probably die very soon. Also, you would have to command them as one person, so you wouldn't be able to give them precise orders. As a result, it's best to focus all of your attention on your Ghost team member. I wouldn't recommend making any unnecessary exchanges here. Rifleman unit will do the trick. Just make sure that both your main character, as well as your team member are carrying ZEUS rocket launchers. You're going to need these weapons later during the game.
Mission map:
Red arrows represent suggested routes to all of your main goal areas. Check the main description for this mission if you want to find out more. This picture was added only for a better orientation. A icon is the only possible drop zone for this mission. As a result, you will begin the game there. The exclamation mark icons represent mission goal areas. You will have to go there in order to fulfill main mission objectives.
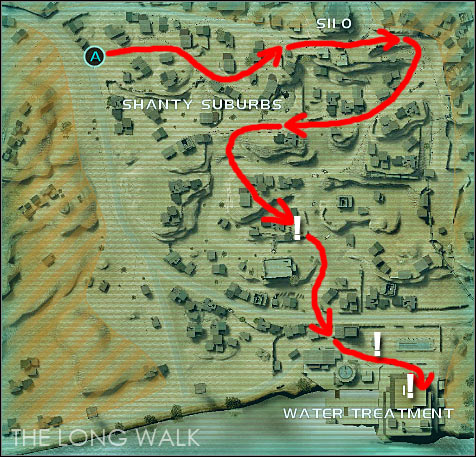
1) Reach the extraction zone
The official introduction to this mission is going to be very short and it will take about 30 seconds. This mission is going to start with a typical cut-scene (#1). You will see allied trucks heading towards a nearby base. You will have to wait for the game to transport you into one of the trucks. The second vehicle is going to be destroyed in just a few seconds (#2).
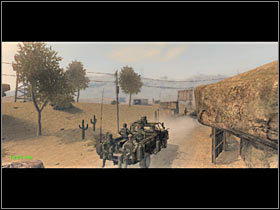

Your vehicle isn't going to be entirely destroyed, so you'll survive the attack, however you will have to wait for the main character to regain consciousness (#1). Once this is done, you will have a few seconds to organize your team (#2). As you've probably noticed, you will be issuing commands to one of the members of the Ghost team, as well as a small group of allied units.
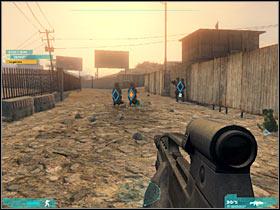
1a) Clear the roadblock (Your main objective here will be to disable a roadblock which has been placed in the central section of the map. This is going to be the only passageway leading to an allied base, so you won't have any choice.)
I would recommend that you IMMEDIATELY hide your men behind available objects, because there are some rebel forces heading here from the east. Your allies should hide behind a destroyed truck (#1). As for the member of the Ghost team, you should move him to your left. Start firing at the enemy units (#2), however your men may be able to take of this problem without your assistance.
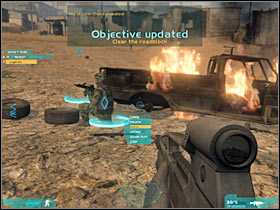

Start moving east (#1). I would recommend that you secure the entire map with the help from your team member, so you won't have to waste too much time giving orders to allied soldiers. The second group of rebel units can be found near a larger hill (#2). You will have to place your teammate correctly, so he'll be able to cover this entire area.
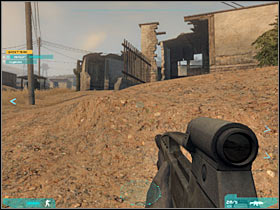
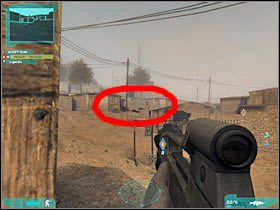
There's also a possibility that one of the attacked rebel soldiers manages to survive. He would probably hide behind one of the lower buildings (#1). As a result, you would have to kill him before moving on any further. Keep heading east. Make sure that you and your colleague cover this entire area (#2), so you won't go past anyone along the way.
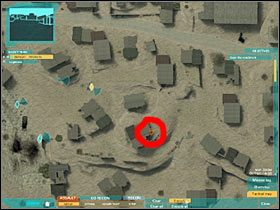
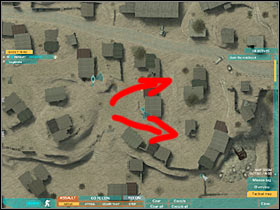
Now you will have to start moving towards a nearby road. It's going to be located to the north-east (#1). I'm sure that you won't have any problems finding it. BEFORE you proceed any further, you will have to kill a single rebel unit. He is hiding inside a small building to the south-east (#2). Make sure that you don't lose any health points here.
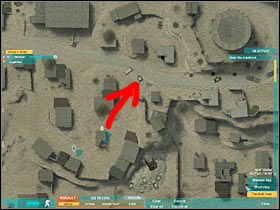
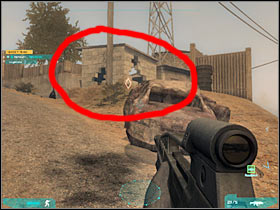
You should be able to spot some rebel units in the distance (#1). I'd strongly recommend attacking them from here, because you will be exposed to their attacks and you wouldn't have anywhere to hide. Once they're gone, order your team member to hide behind an opened gate (#2). He shouldn't have any problems following your orders.
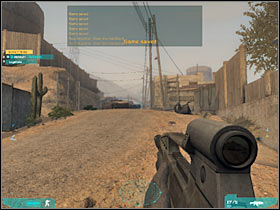

You should consider approaching the metal gate as well, because you will be able to take out a few additional rebel soldiers from here (#1). Make sure that the area has been secured. Check the second screen (#2), because that's where you'll need to go. Save your game here. It's important, because you will be dealing with a lot of well hidden enemy soldiers.

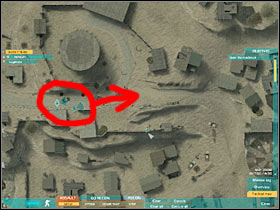
Important! There are two well hidden rebel units in this area and you will have to eliminate them as soon as possible. Otherwise they would do the same thing. The first rebel soldier will probably be hiding behind the wall of the southern building (#1). You could consider throwing a grenade at him or you could lean out very carefully. The second one is the sniper. He is standing on top of a large container which should be located to the north (#2). Once he's gone, order your squad member to guard this area. Head east.
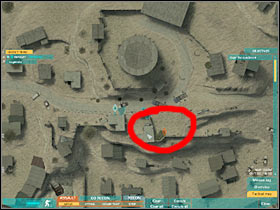
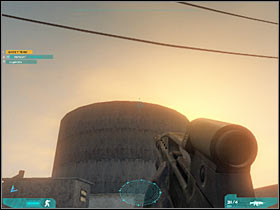
Two important things should come to your attention. There are some enemy forces heading this way. There's a military pick-up truck coming from the south (#1). You will have to take care of it. There's also a rebel patrol to the south-west (#2).
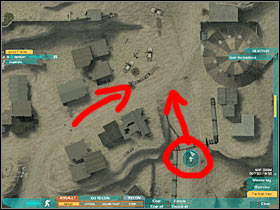

You've got two choices here. If you want to choose a more standard approach, you will have to start shooting at the crew of the truck (#1). Obviously you will have to make sure that the gunner dies in the first place, because he's using a heavy machine gun. Once he's gone, take care of the passengers and the driver. You could also wait for the pick-up truck to get closer. You would have to use a grenade launcher to destroy it (#2).
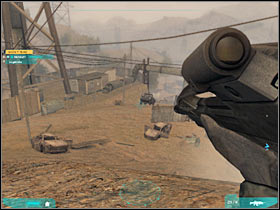
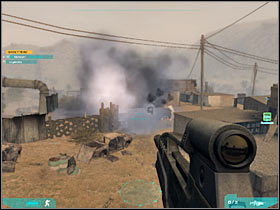
Once the truck is out of your way, you will have to kill a few enemy soldiers. One of them should be standing near your current position, so make sure that he dies first (#1). More troops will arrive from the west (#2). You should be leaning out a lot, so you're not standing in the open.
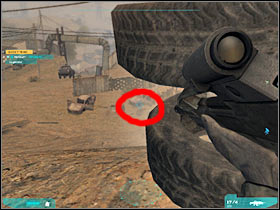
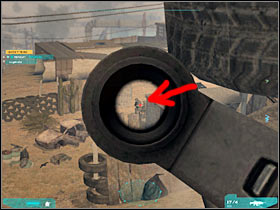
BEFORE you proceed any further, you will have to take care of two other enemy units. One of the rebel soldiers is standing to the west of your current position (#1). Obviously you must kill him from a larger distance. Once he's gone, move to the east. Look at the southern part of the map. You should be able to notice a single opponent (#2). Kill him quickly, because he carries a rocket launcher. Once he's gone, order your team member to follow you and wait for him to show up.

Check the first screen (#1), because that's where you should be standing at the moment. You will have to start moving west. Once you've reached the crossroads, leave your team member and head south. You will have to kill an additional soldier (#2). Go back up.
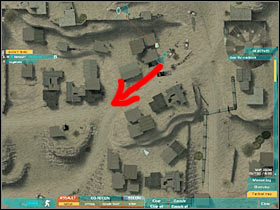
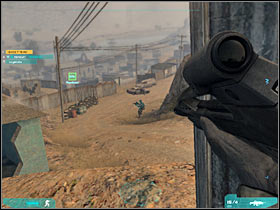
Sadly, you won't be allowed to choose this southern road, because the area is being guarded by the soldiers from the roadblocks (#1). Many of them are using heavy machine gun posts, so you would die almost instantly. Instead, start moving west (#2). You should encounter any additional units here, however I wouldn't recommend moving too fast.
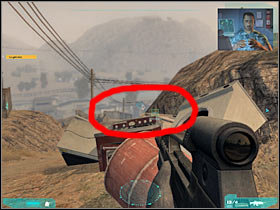
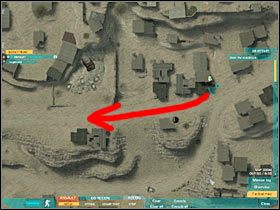
You will have to keep moving west. Once you've reached the last group of buildings, turn left and start moving south. You will come across a new group of enemy soldiers (#1). Take care of them quickly, before they manage to see you. Once they're gone, start moving south. Don't worry, because you won't be injured here, so you may head down to lower platforms (#2). Turn left and start moving towards nearby buildings.
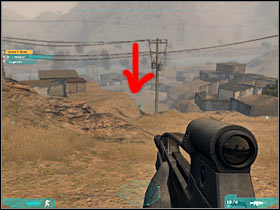
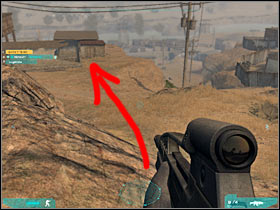
Now we'll have to deal with the roadblock problem. You should be standing to the north-west of the blockade (#1). I would recommend that you once again go in alone, because you will have to be very precise here. Head on to the blockade. Don't worry that you're exposed (#2), because the enemy soldier won't suspect that you're heading their way.
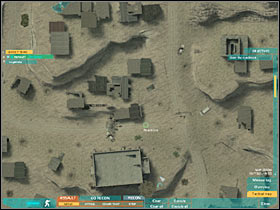
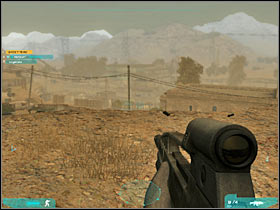
Once you're close enough, you should notice two enemy units (#1). Obviously you will have to kill them quickly. If you're lucky, they won't even be able to respond to your attacks. Try sliding down (#2). You shouldn't lose any health points here.
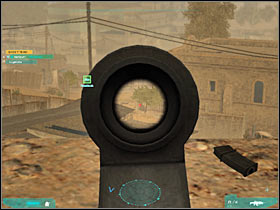
If you take a closer look at your tactical map, you should notice that there are THREE heavy machine gun posts guarding this blockade. We'll start off by disabling the western heavy machine gun post (#1). You will have to surprise the gunner from the north (#2). Don't worry if he leaves his post, because he probably won't see you coming.
Start moving CAREFULLY to your left. Your objective will be to surprise the second gunner. He is occupying a higher floor of the building (#1). Make sure that you kill him instantly, so you will have to aim at his head. You will have only one more heavy machine gun post left. Head on to a metal construction. It should be located to your left (#2). Head down to the ground level.
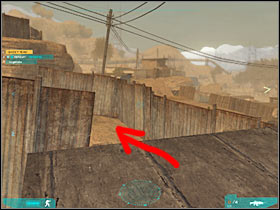
Now you will have to lean out very carefully (#1). Just as before, even if this gunner leaves his post, you shouldn't have any major problems killing him. His death will probably allow you to fulfill this mission objective, because you've already killed other soldiers. You will have to wait for new objectives to be displayed on your screen (#2). Order your colleague to follow you.
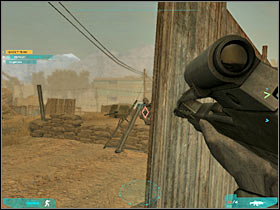
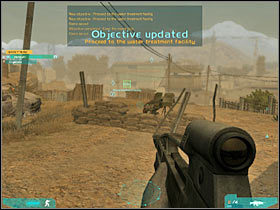
1b) Proceed to the water treatment facility (This is going to be a follow-up to the previous objective. This time you will have to reach an allied base which is located to the south-east.)
Like I've already said, you will have to start moving south (#1) and then you will turn to south-east. Be careful, though. You should encounter at least one group of enemy soldiers along the way (#2). You won't have to be in a lot of hurry, so take your time and eliminate them, one by one. You will have to make sure that the area has been secured.
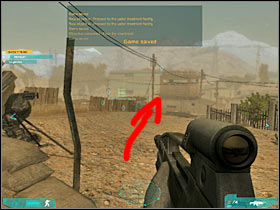
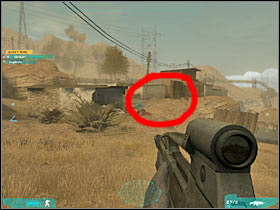
I'd strongly recommend that you head on to the nearest entrance to the allied base (#1). Also, make sure that your squad member is following your lead and that he's nearby. You will receive a confirmation about a possible counter-attack. You will also notice that military vehicles are heading this way (#2). Spend this time on ordering your team member to hide inside the base. He can't be standing on the main road!
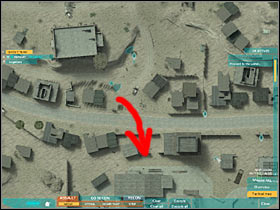
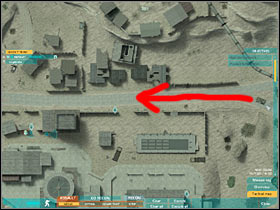
1c) Clear the airspace (This is also going to be a very short task. This time you will have to take out two enemy gunships.)
The helicopters will arrive from the west. The first gunship will probably slow down over your allied base (#1). You will have to act swiftly here, so none of the rebel soldiers actually lands on the top of this building. Use your ZEUS rocket launcher to destroy the helicopter (#2).
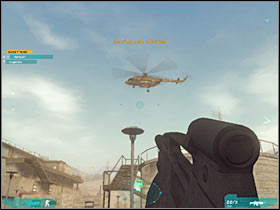
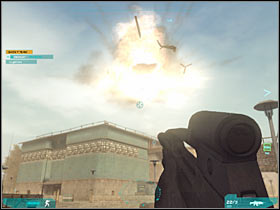
Make sure that you're hiding, so you won't receive any injuries. Now we'll have to deal with the second gunship. Sadly, you won't be able to fire the ZEUS launcher for the second time, however you will be able to resolve this issue very quickly. If you have more time, you could head on to one of the balconies in order to pick up a standard rocket launcher (#1). You would have to keep firing at the gunship in the meantime (#2).
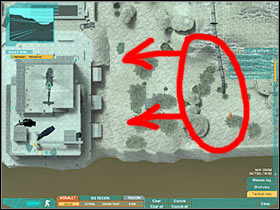
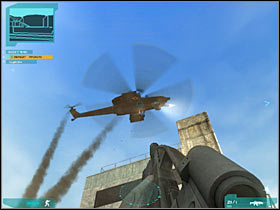
The easiest way to get rid of the second gunship will be to ask your teammate for help. Make sure that you're aiming at the gunship (#1). Choose the ATTACK option from the menu. Now you will only have to wait for your colleague to fire the missile. This will allow you to fulfill this objective (#2). The rest of the base will also be secured, so you won't have to worry about that anymore.
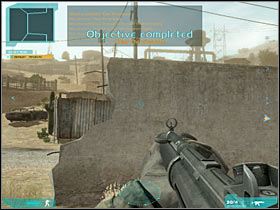
1d) Reach extraction point (This is going to be a very obvious objective. You will only have to reach the extraction zone in order to leave the map.)
You've got two choices here. If you want to choose a safer approach, you would have to defend this base against a MASSIVE rebel attack. Enemy forces would come from the east (#1). It would be wise to head on to one of the balconies for a better view of the battlefield (#2).
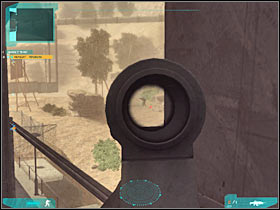
If you want to resolve this problem quickly, you will have to reach the extraction zone as soon as possible. Order your squad member to follow your lead. He shouldn't have any problems doing that, so you won't have to monitor his movements. Head on to the rear side of the base building. You should be able to find an entrance here (#1). Head on to the staircase (#2).
Once you've left the staircase, you can either go left or right. Just make sure that you're moving forward. You will have to use the stairs (#1) to reach the roof area of this building. Once you're there, head on to the landing pad. You shouldn't have any major problems finding your gunship (#2). Don't worry by the fact that it's being attacked by rebel units.
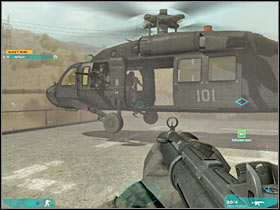
Head on to the gunship. Press the X key in order to take a seat inside the helicopter (#1). You should be safe there. Now you will only have to wait for your squad member to join you. If you've done all of these actions quickly, you shouldn't sustain any injuries. This mission will end once the gunship has left the map (#2).
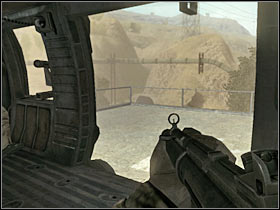

Main mission objectives:
1) Destroy Blackhawk remains
2) Evacuate Lt Rosen
Possible drop zones:
A) The southern road
B) Near the hacienda
This is going to be an exceptional choice, because I will recommend that you choose a second drop zone. It's located near the hacienda, to the east of the main building complex. This is going to be a much better choice if you plan on acting quietly. You will be able to complete this mission without raising any alarms. I wouldn't recommend continuing to play if this happens, because the alarm would be equal to additional reinforcements and you would have to kill all of those soldiers in order to succeed. If you plan a stealthy approach, you will only have to take care of about 15-20 rebel units.
Just as before, you won't be playing with your entire Ghost squad. Instead, you will only have one teammate at your disposal. I wouldn't recommend choosing soldiers from other professions, because it won't be necessary. Rifleman unit seems like a best choice here. As for the weapons, if you plan on taking out enemy units one by one, you could consider choosing a sniper rifle, however it must have a suppressor attached. Otherwise you should stick with your default gun, especially since it should already be properly silenced.
Mission map:
Red arrows represent suggested routes to all of your main goal areas. Check the main description for this mission if you want to find out more. This picture was added only for a better orientation. A and B icons are two possible drop zones for this mission. You will have to choose between them before proceeding any further. The exclamation mark icons represent mission goal areas. You will have to go there in order to fulfill main mission objectives.
1) Evacuate Lt Rosen (We're going to make an exception here, because we'll complete main objectives in a different order.)
This is going to be a very simple and a very short mission. Despite what you might think, you won't have to be in a lot of hurry. You must focus all of your attention on eliminating correct enemy units, so the enemies won't be able to raise the alarm. Like I've said before, it wouldn't jeopardize your entire mission, however you would have some serious problems defending against enemy attacks. Wait for the game to display a short cut-scene (#1). You will start your game to the east of the hacienda (#2), however you will be standing relatively close to the building complex.
Important! If you plan on choosing a stealthy approach, don't forget to order your teammate to act in a Recon setting. Otherwise he would have automatically attacked all visible enemy units.
Start off by moving towards the hacienda. You should be able to reach some cover points very soon (#1). It would be a good idea to use these objects. Obviously you shouldn't head on into the open, because you will have to secure this area in the first place. Start off by eliminating a single opponent who should be standing in front of you (#2). Obviously you should try aiming at his head, so you will only fire one bullet.
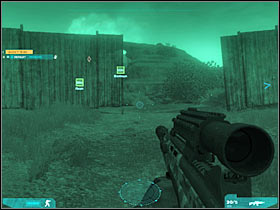
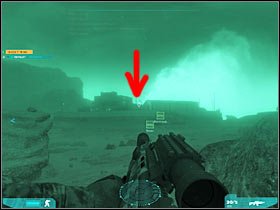
Now you should turn left, so you'll be looking at the south-western part of the map. As you've probably noticed, one of the guards will be guarding the area outside of the main complex (#1). Kill him quickly, before he manages to see you. Now you will have to deal with the second guard (#2). Once again, make sure that you're aiming at his head.
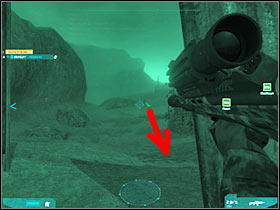
The area should be safe, so you may as well start moving towards the western building complex (#1). Once you've reached the rocks, turn left. You shouldn't be moving too quickly, because there's a single rebel unit in this area (#2). He will appear near your position. Wait for him to get here and kill him quickly.
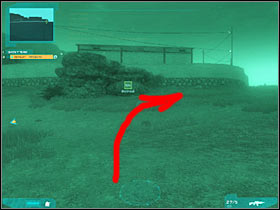
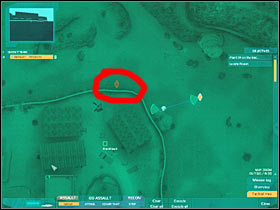
Keep heading towards the western buildings (#1). You should be standing near a large brick wall, so you won't be noticed by any of the snipers. Your team member should be following your lead, however you won't have to give him any specific orders. You should be able to reach the back entrance leading to the hacienda (#2). Make a stop here and save your current progress.
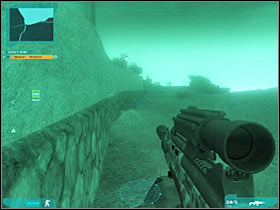
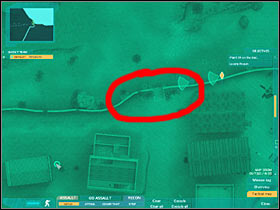
Activate your tactical view. This will allow you to find out the exact locations of all rebel units. The first group should be standing near your current position. Wait for them to turn around and attack them (#1). Once they're gone, take out a single opponent who should be standing in front of you, near the stairs (#2). Make sure that his death didn't affect any other rebel soldiers, especially the ones near hangar with the helicopter.
You will have to deal with two additional rebel units. One of the soldiers will be standing to your right (#1). He is constantly moving, so you must wait for him to stand correctly. The second rebel unit is patrolling one of the balconies of the hacienda (#2). Make sure that his body doesn't fall to the ground, because it would have been spotted by the others.
Once you've secured this area, head on to the southern building. Check the first screen if you want to know which one it's going to be (#1). Also, make sure that you aren't seen by anyone. One of the enemy soldiers will be guarding this room (#2). Kill him and get back to the rear entrance. Now you will have to start moving west. It would best if you went alone.
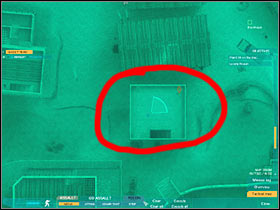
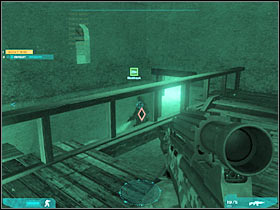
If you take a closer look at your tactical map, you should notice that one of the surrounding balconies is being guarded by a single rebel soldier (#1). You will have to kill him right away (#2). DON'T GO there just yet, because this area is being guarded by a well hidden sniper. Try using a small tunnel which should be located to your left.
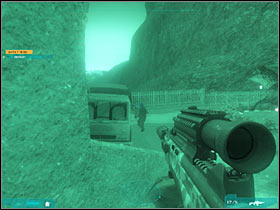
Once you've reached the other end of this tunnel, you will have to take out this new sniper (#1). Take a look at the second screen (#2) if you want to know exactly where to find him. Once he's gone, head on to a large southern gate.
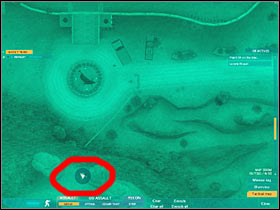
This section of the map is going to be patrolled by at least two enemy units. You will have to kill them, especially if you want to ensure a safe extraction. The first guard should be standing here (#1). The second one is to the east (#2). Thankfully, no one will see his body.
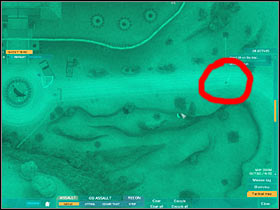
Once you've taken care of that small problem, go back to the hacienda and head on to a designated area of the map. You should be able to locate a small passageway here (#1). Use it. Be careful, though. You will encounter at least two rebel units here (#2). Kill them.
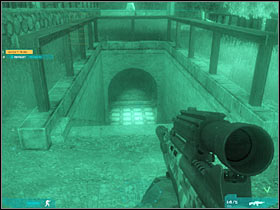
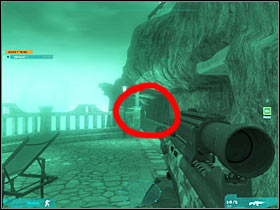
Now you will have to turn right. You must be very careful here, because the third guard may be hiding to your right (#1). Make sure that he's been killed. Head on to the cell and listen to what the pilot has to say (#2). Order him to follow your lead. Now you will have to return with him to the back entrance. That's where your other Ghost member is currently standing.
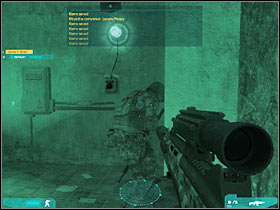
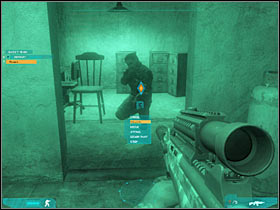
2) Destroy Blackhawk remains
Order both of your colleagues to stay put. I would recommend that you follow my instructions, so you won't have to worry about raising any alarms. Start off by moving east (#1). Thankfully, the guards will be guarding the southern entrance, so you'll be able to surprise them (#2). Just make sure that you don't make too much noise!
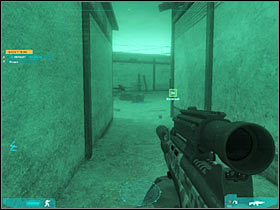
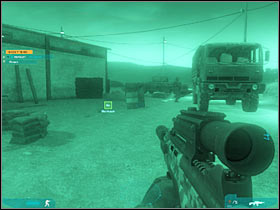
Try moving to your left. Check the first screen for additional clues (#1), because that's where you should be standing at the moment. Start off by killing one of the enemy soldiers. Once he's gone, take out his colleague. Activate the zoom feature in order to take out the third rebel soldier (#2). It's very important that he dies quickly, because he will be standing near the alarm button.
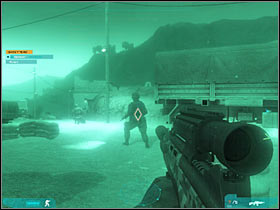
The fourth rebel soldier is going to be standing to your left, behind one of the vehicles (#1). You shouldn't have any major problems surprising him. Once he's gone, make sure that this whole area has been secured. You may proceed to the warehouse (#2).
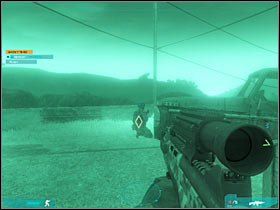
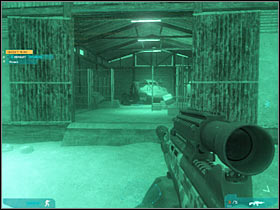
Obviously you will have to approach the partially destroyed helicopter (#1). Press and hold the X key in order to place a C4 charge on the gunship. You won't blow it up right away, because you will have to evacuate in the first place. Wait for some new orders to be displayed on your main screen (#2).
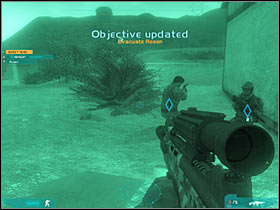
2a) Evacuate Rosen (This is a follow-up to a previous mission objective.)
I take it that you didn't allow the rebel soldiers to raise the alarm. As a result, leaving the map is going to be very simple, because you won't encounter ANY rebel soldiers near the hacienda. You will have to go back to the starting area (#1). Once you're there, don't go east. Instead, head south. There should be a road nearby (#2). Make sure that both your Ghost team member as well as Rosen are following your lead.
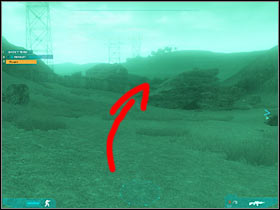
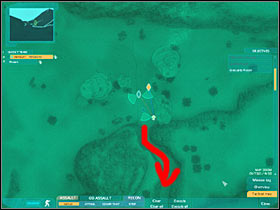
Once you've reached a new area, you should notice a few enemy icons to your right (#1). Thankfully, you won't have to worry about them, because they aren't looking this way and the crew of the gunship will kill most of the rebel units. Head down, however you should stay close to the rocks on your left (#2).
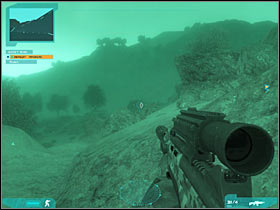
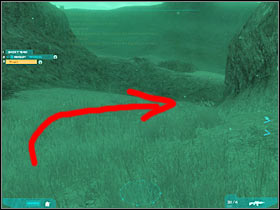
Once you've safely reached the extraction zone, you will have to wait for the rest of the team to get here. It'll probably take them a few seconds. Enter the gunship (#1). You will have to be very patient here (#2).
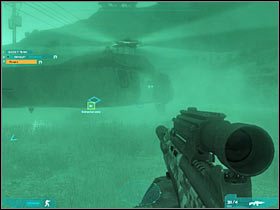
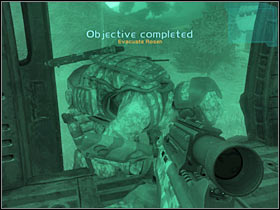
Once everyone is on board, this mission will come to an end (#1). Obviously you will also be able to take look at an excellent explosion. It's going to be the friendly gunship (#2). You weren't able to blow it up earlier. This is also the end of the second act of the singleplayer campaign. Get ready for the next mission.
Main mission objectives:
1) Eliminate air threats
2) Cover Bravo team
Possible drop zones:
A) Southern section of the city
B) Eastern road, near one of the RPG sites
There is going to be a very similar choice to the previous missions of the campaign. The main difference is that one of the drop zones is located in a safer spot, while the other one offers immediate fights. The A icon represents the safer start, however I wouldn't recommend choosing it. You'd still have to go through dangerous sectors and fight off a lot of enemy units. Furthermore, you'd have to clear out the same road and cross it twice. The second option will allow you to take out one of the RPG sites very soon, however you will have to be very careful to lead the entire team to victory.
This mission returns to the standard setting of the team, so you'll take command over three other Ghost members. I wouldn't recommend changing their weapons. You should also stick with your default gun. Sniper rifle is not a good idea here, mostly because you will be operating at a close range. You could consider changing the setting of your squad. I'd recommend taking a sniper, instead of one of the rifleman units. The sniper will only support you in few of the upcoming battles, however he'll play an important role, especially during the final part of the mission.
Mission map:
Red arrows represent suggested routes to all of your main goal areas. Check the main description for this mission if you want to find out more. This picture was added only for a better orientation. A and B icons are two possible drop zones for this mission. You will have to choose between them before proceeding any further. The exclamation mark icons represent mission goal areas. You will have to go there in order to fulfill main mission objectives.
1) Eliminate air threats
Start off by watching a short cut-scene (#1). There's nothing special about it. You'll only see the starting area for this mission. Once you're on the ground (#2), you will have to react very quickly in order to ensure the safety of your squad members. As you've probably suspected, enemy forces are heading this way.

I would recommend hiding your team for the time being, so they won't be threatened by the incoming enemy forces. There's a small to your right (#1) and that's where your team should hide. You, on the other hand, should find a good cover. Enemy soldiers will be coming from the west (#2), so get ready to fight them.
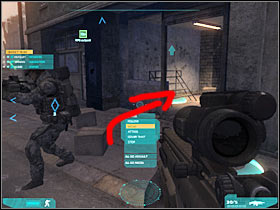
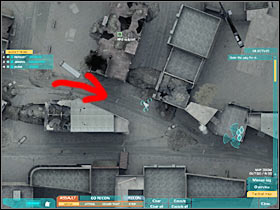
I would recommend hiding behind one of the smaller obstacles, so you'll be able to see hostile units (#1). It wouldn't be wise to stay in one spot, so you should consider changing your positions from time to time. Also, don't forget about the possibility of using your tactical map (#2). It'll help you to find enemy troops and you'll know where to hide.

Once you've dealt with the first group of enemy units, you should try and run towards the buildings on your left (#1). This will allow you to take out a few additional troops. Check the second screen (#2) if you want to know where exactly you should be standing.
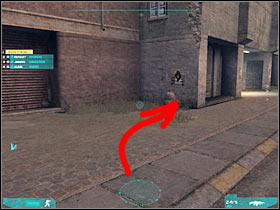
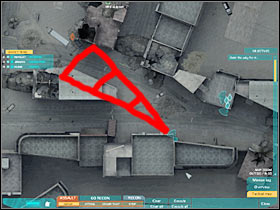
Before you order your men to get here, you will have to make sure that this entire road in front of you has been properly secured (#1). Start moving towards the first RPG site. You must be VERY CAREFUL here. Once you've reached this building (#2), order your squad members to guard this area. Try moving closer to the building and a nearby square.
Obviously you won't be allowed to proceed directly to the main square, because that would be equal to an instant death. Instead, try leaning out carefully. Start off by taking out one of the enemy snipers (#1). Once he's gone, deal with the remaining enemy troops (#2). Most of the rebel soldiers will be hiding behind sandbags.
Now you should notice that a humvee has appeared in the area (#1). Obviously you will have to take out its gunner, before taking care of the remaining soldiers (#2). Most of them will be standing near the vehicle, so you shouldn't have any problems finding them. Just make sure that you're standing behind a good cover (preferably a wall of the right building). You will have to secure the entire square from here.
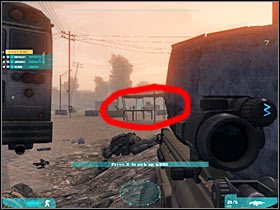
Try moving north a little. If no one fires at you, keep moving towards the northern side of the building. Obviously you will have to be standing near the wall of the right building (#1), because this is where you'll find soldiers equipped with rocket launchers. The second team of enemy units is going to appear on your left (#2). Take them out from here.
Sadly, you won't be allowed to move to some of the nearby obstacles, because you would have been automatically attacked by the RPG crew. Nevertheless, try securing all of the western roads (#1). Once this is done, head on to the northern wall of the designated building (#2). It would be wise to save your current progress here.
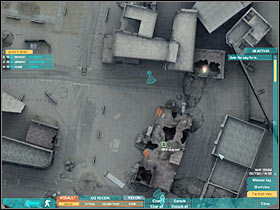
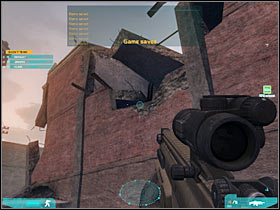
Your objective will be to secure this first RPG site. As a result, you will have to kill two soldiers equipped with rocket launchers. Make sure that you're standing correctly, so you don't expose yourself to enemy fire. Start off by eliminating a soldier who is standing closer to your current position (#1). Once he's gone, take out his colleague. Check the second screen (#2) if you want to find out their exact locations. Order your squad members to get here.
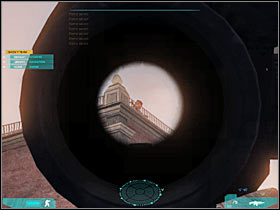
Now you will have to locate the second RPG site. It is located in the central part of the city (#1). I'm sure that you won't have any problems finding it on the map. You will have to go west in order to reach it. I would recommend choosing the lower road (#2). Start moving to that location. You should be careful. Make sure that the rest of the team is following you.
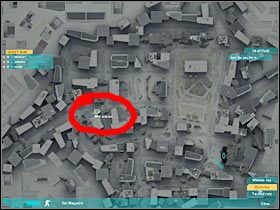
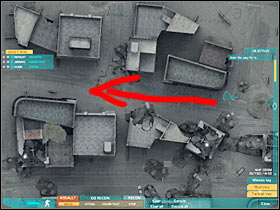
You will encounter the first group of enemy soldiers in just a few seconds (#1). They will appear near the crossroads. You may decide to take them out on your own or you could ask your teammates for help. If you choose the second approach, you will have to issue a few additional orders (#2), so they'll use nearby objects for cover.
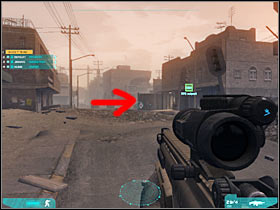
Watch out for a single sniper. He will be occupying one of the largest buildings of this area (#1). Take a look at the second screen (#2) if you want to find out exactly where he can be found. Once he's gone, head on west until you reach a blockade. This will force you to turn north. Save your game here, because you'll take part in some challenging fights.
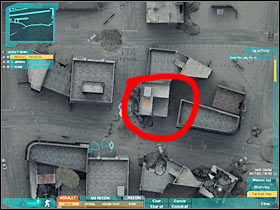
Now you will have to start moving north-west. Take a look at the first screen (#1) if you can't find a way to your current destination. I WOULDN'T recommend going too fast, because you will encounter TWO enemy soldiers just around the corner (#2). They will be hiding behind sandbags. It would be wise to surprise them.
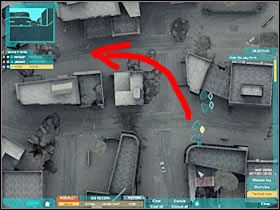
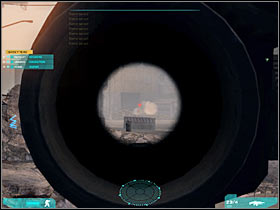
Keep moving towards your destination. Check the first screen (#1), because that's where you'll have to make a stop. You can't move to your left, because you would be exposed to enemy fire, including the RPG crew. If you take a look at your tactical map, you should notice that a small group of rebel soldiers is heading your way (#2). Get ready!
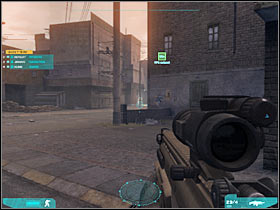
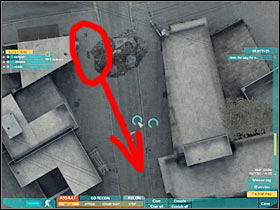
Make sure that you have a reloaded weapon. You shouldn't have any problems killing your opponents (#1), mostly because they won't be too smart. There should be four of them. Once they're gone, turn left and start RUNNING (#2). The guy with a rocket launcher will probably fire a missile at you, but he will miss.
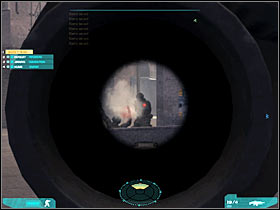
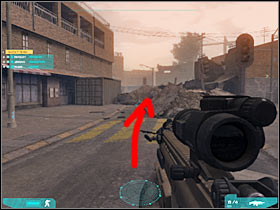
Once you've reached the other end of the street, turn right and kill your opponent. He will be reloading the rocket launcher, so that makes him an easy target (#1). You would also be protected by a nearby scaffolding. Once he's gone, order your men to get here. You will also have to listen to new instructions (#2).
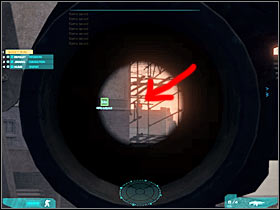
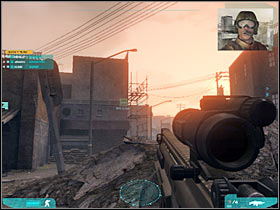
2) Cover Bravo team
Now you will have to (QUICKLY!!) reach one of the northern buildings. It's being taken over by the Bravo team and you would have to assist them from the outside (#1). As a result, start running towards your new destination. Go north and then north-east (#2). Make sure that your squad is following you, because you won't have much time to prepare for an assault.
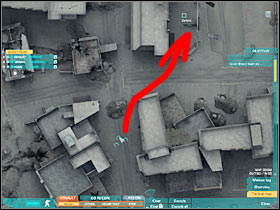
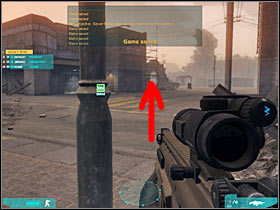
Your objective for this part of the mission will be to defend the eastern section of the building (#1), because all enemy soldiers will be coming from that direction. Before we'll take care of that problem, you will have to kill all enemy units (#2). Most of the rebel soldier will be standing in front of you, however one of these units may be hiding to your right.
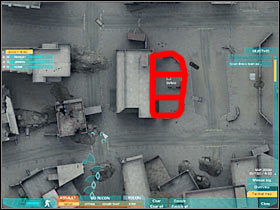
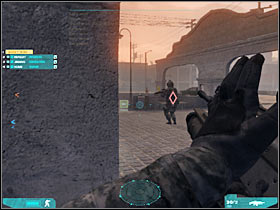
This is a very similar fight to the church mission, so you'll have to make sure that your men aren't standing too close to each other (#1). You could also order one of your squad members to use a nearby heavy machine gun post (#2), however this won't be necessary and your colleague would be exposed to enemy fire. It's best that your team uses brick walls for cover.
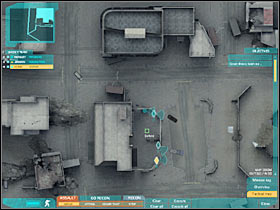
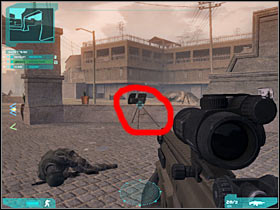
As you've probably noticed, there are two roads to the east and enemy soldiers will be using these to get to your location (#1). I'd strongly recommend that you change your positions frequently, so you'll assist your men where it's needed the most. The northern route is going to be occupied by larger forces, so you must cover that area in the first place (#2).
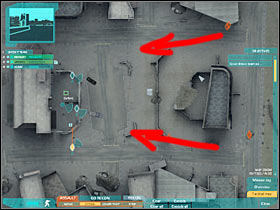
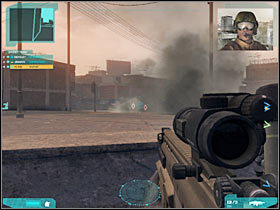
You will also have to watch out for single rebel units, because they may actually get closer to you and your men (#1). You must kill these guys as soon as possible, because they will pose a serious threat to your safety. You could also consider using a grenade launcher (#2) which should be attached to your default weapon. You will have to aim the launcher at larger groups of enemy units.
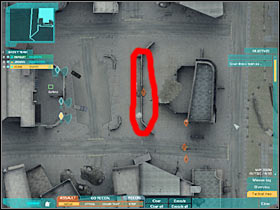
Keep firing at the enemy soldiers. The next part of this battle will require you to defend the lower road, because that's where most of the rebel units will appear (#1). Make sure that you're using your tactical map to find them. You will have to defend this area until you've received a new radio transmission from your commanding officer (#2).
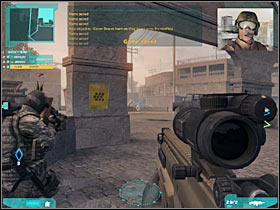
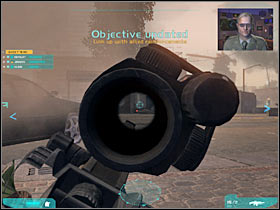
2a) Link up with allied reinforcements (This isn't going to be a difficult task, mostly because it'll only prepare you for the final challenge of this mission.)
Obviously I wouldn't recommend running towards the allied zone right away (#1), because the area is not safe. Allow your men to stay here a little while longer, so they'll be able to deal with the remaining rebel units. More rebel soldiers will arrive from the east, so you should find a good cover and kill them (#2). Turn around, so you will be looking at the western road. Wait for the second group to arrive.
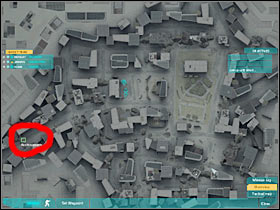

You shouldn't have any problems spotting these units. I think it's fairly obvious that you need to attack them (#1) before they manage to find good cover. Otherwise you wouldn't be able to surprise them. Once they're gone, start moving west. It would be a good idea to stay close to the buildings on your left (#2).
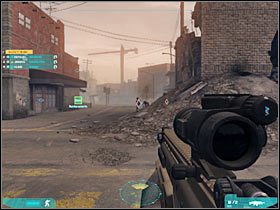
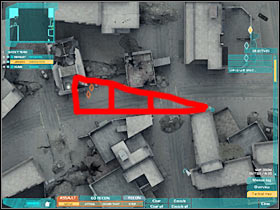
You could consider leaning out a lot, so you won't have any major problems killing the soldiers (#1). You could also ask your sniper to help you during these fights. I wouldn't recommend involving the rest of the team, because they could sustain major injuries. Try killing most of the enemy units from larger distances. Be careful, because some of the rebel soldiers may already be hiding.
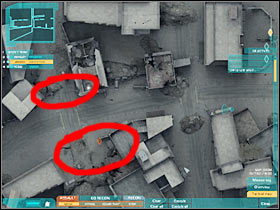
Keep heading towards your current destination (#1). You will have to check all of the side alleys for enemy troops. Thankfully, you will come across single units, instead of larger groups, so it should be fairly easy to get rid of them. Once you've reached an allied tank (#2), you will have to order your men to hide somewhere nearby. Also, wait for new orders.
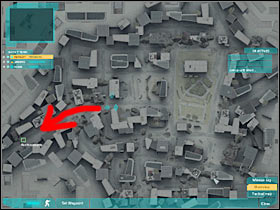
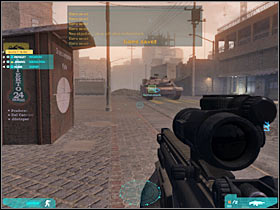
2b) Locate the eliminate the last rebel leader (You will have to go back to the eastern section of the map, because one of the rebel leaders is in possession of a nuclear warhead.)
Thankfully, you won't have to be in a lot of hurry here, because the game will advance with this mission only if you're close enough to the eastern mansion (that's where the rebel leader is hiding). As you've probably noticed, you've received some back-up units, including a drone and an artillery strike (#1). Order your tank to move east (#2). I wouldn't recommend moving near the tank. Allow it to move in alone. You could also send your drone to scan this entire area.
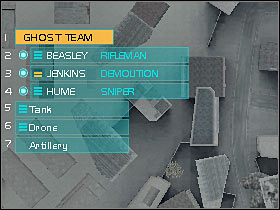
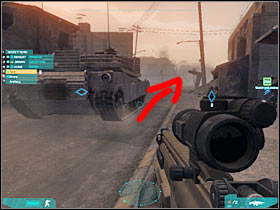
Your tank will probably come across an enemy humvee (#1). Thankfully, this vehicle is going to be destroyed. Furthermore, none of the rebel soldiers will carry a rocket launcher, so you won't have to worry about your tank. Allow its crew to deal with most of the soldiers. You could also take out a few of them from a larger distance (#2), however you shouldn't risk too much.
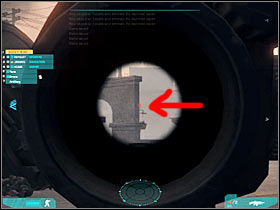
Now you will have to reach a well known building, the same you've tried to defend a few minutes ago (#1). I'd strongly recommend that you order your tank to stop here. Head on to your left. You should be able to notice two enemy units in the distance (#2).
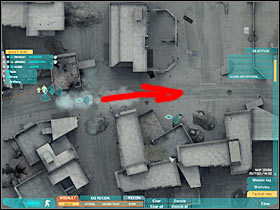
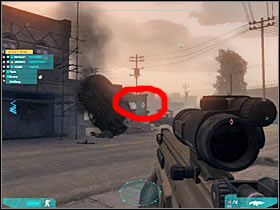
You will have to kill those soldiers, because they would threaten the safety of your tank. Eliminate them by leaning out carefully (#1). Once they're gone, order your tank to get here. I wouldn't recommend sending the tank to a nearby square. Allow its crew to take care of the remaining enemy units. You will also listen to a new radio transmission.
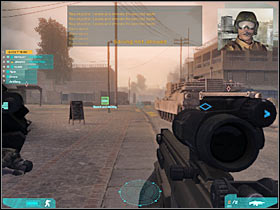
Now you will have to deal with the leader of the rebel soldiers. He will be using a gunship to escape from the map. Thankfully, you won't have to rush to get to the square. Instead, open your inventory and choose a ZEUS rocket launcher. The gunship will arrive from the east (#1). Once you have an opportunity to destroy it, fire the missile (#2). Otherwise the gunship would have probably attacked (and destroyed) your tank.
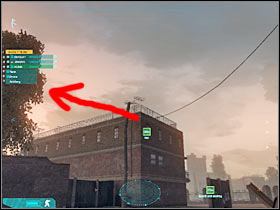
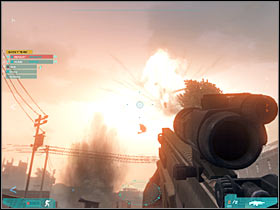
2c) Reach the extraction zone (This is going to be a very typical mission objective. Sadly, you won't be allowed to command your tank and drone any longer, however reaching the extraction zone won't be extremely difficult.)
I would recommend that you start off by going to the north-east, so you'll be able to use the upper road. You will probably notice a single sniper hiding in front of you (#1). You can kill him on your own or ask one of your teammates for help. You will also notice a lot of red icons near the square (#2). Don't worry about it too much, because the crew of the allied gunship will kill most of the rebel units.
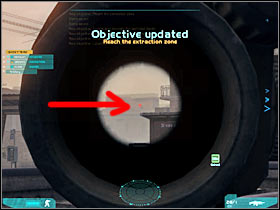
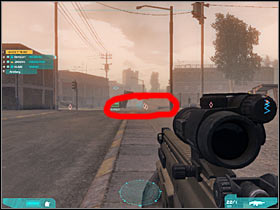
Thankfully, you will be able to take out several rebel units on your own (#1). You will have to scope the zoom feature in order to score decent headshots. Once they're gone, head on to the extraction zone (#2). The rest of the team should be following your lead.
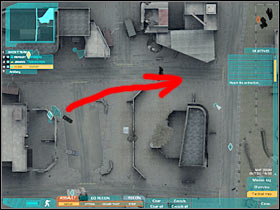
I would recommend that you reach the extraction zone by moving near the northern buildings. I had to deal with a single opponent here (#1), so it wasn't a huge problem to kill him. Once he's gone, you would have to go to the north-east. Be careful, though. One of the enemy snipers may still be hiding to your south (#2). You would have to secure that area as well.
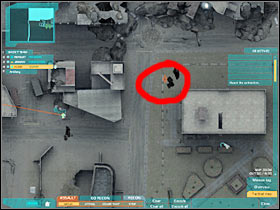

Remember that you won't be allowed to make any unnecessary stops, however you will have to make sure that none of your squad members got lost along the way. Head on to an allied gunship (#1). Obviously you will have to take a seat inside the helicopter and wait for the rest of the team to join you (#2). Once the gunship is in the air, this mission will come to an end.
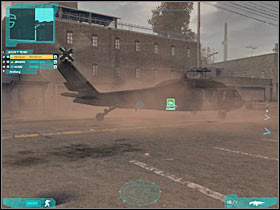
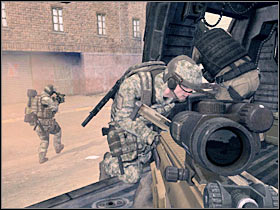
Main mission objectives:
1) Secure the Entrance
2) Secure the Power plant
3) Secure the Generator chamber
4) Locate the nuke
Possible drop zones:
A) Main road leading to the dam and the power plant
This time you won't be allowed to choose between two different drop zones. As a result, the first part of this mission is going to have a very linear structure, mostly because there's only one road leading to the power plant area. Thankfully, you will be rewarded with more routes later during the game, because you'll be allowed to use tunnels instead of the main entrance.
This is going to be a long and very challenging mission, so it's going to be very important that you're ready for it. I wouldn't recommend exchanging your default guns, however you could leave one of the pistols and upgrade your main weapon instead. For example, you could attach a Front Grip to your main weapon. Don't leave your second gun at the base, because you might need it, especially since you will probably use a lot of ammo during the fights. Also, make sure that at least two of your squad members (including the team leader) will be carrying ZEUS rocket launchers, because you'll need them to take out enemy gunship. As for your squad, I'd STRONGLY recommend taking a sniper character for this mission. You're going to need his help, especially on the dam and while trying to reach the power plant arena. He should replace one of the Rifleman units.
Mission map:
Red arrows represent suggested routes to all of your main goal areas. Check the main description for this mission if you want to find out more. This picture was added only for a better orientation. A icon is the only possible drop zone for this mission. As a result, you will begin the game there. The exclamation mark icons represent mission goal areas. You will have to go there in order to fulfill main mission objectives.
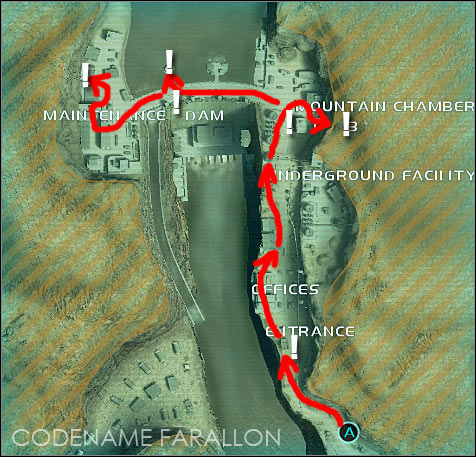
1) Secure the Entrance
Obviously this mission is going to begin with a short cut-scene (#1). You are going to be deployed to the south of the dam area. This road is going to be patrolled by at least one rebel soldier, however you won't encounter him right away. Your first objective will be to secure the entrance (#2). As a result, you will have to go north-west. The rest of the team may be following you, however make sure that there's a distance separating you from each other. Take good care of the sniper, because you're going to use his abilities very soon.
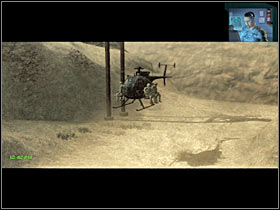
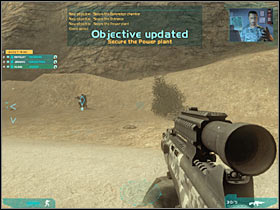
Start moving forward. Make sure that the sniper is following your lead. The first rebel soldier should appear on your left (#1). He'll be standing near the cliff area (#2). Be careful, because he is constantly moving. You could also ask your sniper for help, however this won't be necessary.
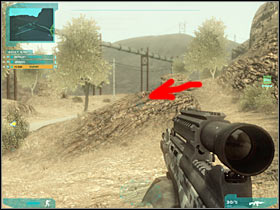

Keep moving towards the northern buildings. This time you will have to deal with at least two enemy units. Enemy soldiers will be standing near a pick-up truck (#1). You could try and take them out from a larger distance, however it would be wise to surprise them from the right flank (#2). If you'll move close to the rocks, you should be able to get closer to them without being spotted.
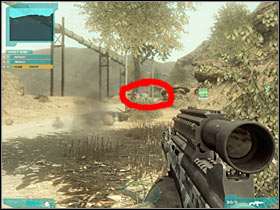
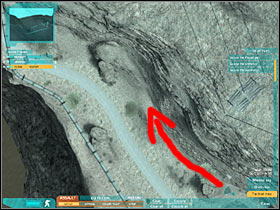
Killing the soldiers from a smaller distance should be much easier (#1), however you will have to be very careful in order to avoid sustaining any injuries. Your sniper may accompany you during these fights, however make sure that he's not standing in the open. Head on to the truck. Order your sniper to go left (#2), so he'll be able to cover this entire area.
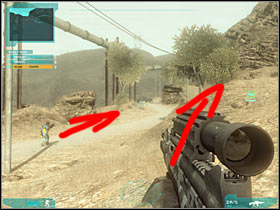
You should be able to reach the pick-up truck area very soon (#1). As soon as you get there, order the rest of the team to move to this area. Your sniper should be standing near the pick-up truck. Turn right and head on to a small hill (#2). You will have to go in alone.
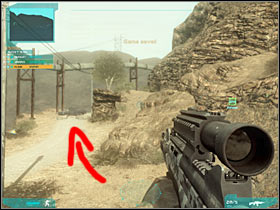
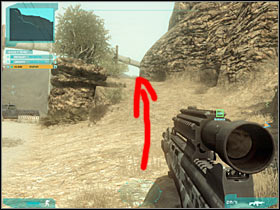
I would recommend that you order your sniper to move left. Check the first screen (#1), because that's where he should be standing. He will also be quite safe there and he will kill all enemy soldiers. It's very important, because some of them will actually try getting closer to your position. Head on to the top of this small hill. Once you're there (#2), reload your weapon and get ready.
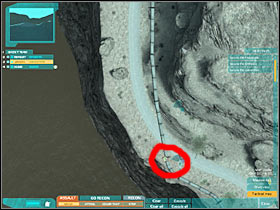
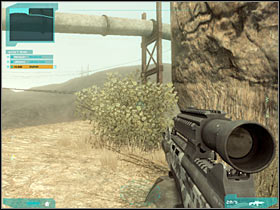
The first enemy soldier should be standing to your right (#1). Be careful, though. More enemy units may appear in that area. Now you will have to kill an enemy sniper. He will be standing inside a large building which should be located in front of you (#2).
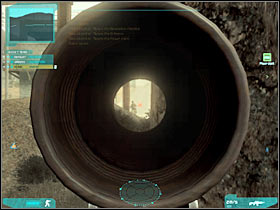
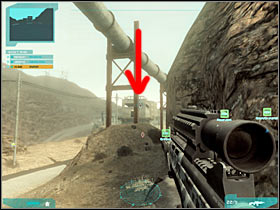
Like I've already said, some of the enemy soldiers will decide to leave the base (#1). Thankfully, your sniper should take care of that problem. Once you've secured this area, you may allow him to move forward. I would recommend that you order your sniper to hide behind some of the nearby rocks (#2). He should be quite safe there.
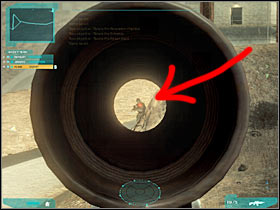

Now you should consider moving to your left. This will allow you to take out a few additional rebel soldiers (#1). Also, make sure that you're using your tactical map to find them. You will have to secure the entire entrance to the power plant. Once this is done, you must wait for the commanding officer to give you new instructions on how to proceed with the next part of the mission.
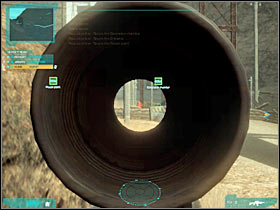
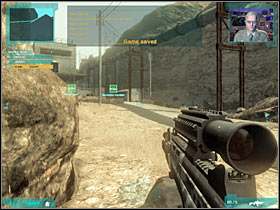
2) Secure the Power plant
This is going to be a very challenging part of this mission. Your main objective here will be to secure the northern part of the power plant. Remember that you won't have to be in a lot of hurry, especially since you will encounter A LOT of enemy units along the way. If the entrance is clear, order your sniper to get here (#1). You should join him, because more enemy units will appear to the north (#2).
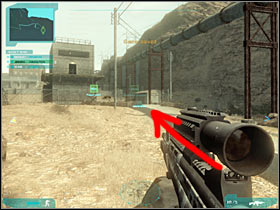
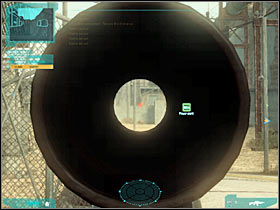
I guess I won't have to add that you will have to use some kind of a cover during these fights (#1). Thankfully, there are a lot of these objects here, so it shouldn't be a problem. Now you will have to start moving towards nearby buildings. Order your sniper to move to the right. You, on the other hand, should go to the left (#2), so you'll cover a much larger area.
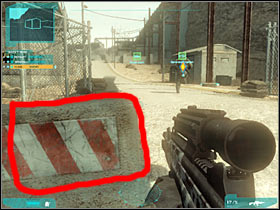
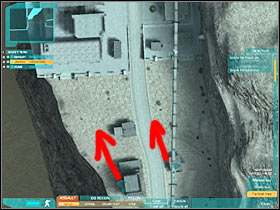
Your objective here will be to reach a much larger entrance which leads to the main section of the building complex (#1). Be careful, though. The entrance is going to be guarded by a few rebel soldiers. You might want to consider killing some of them right away (#2). Don't go to your right, though. This isn't a wise choice, because you would find yourself under heavy fire from the rebel units.
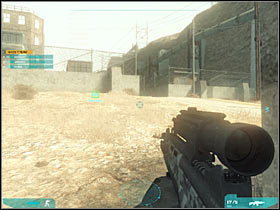
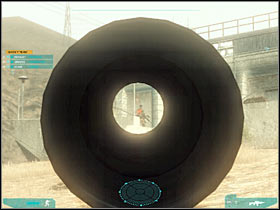
Instead of choosing the main entrance, you should consider heading to your left. You should be able to locate a small staircase here (#1). Order the rest of the team to get here. Your colleagues should hide behind the wall of the northern building. Go there now. Turn right. Check the second screen, because that's where you should currently be standing (#2).
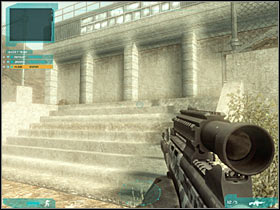
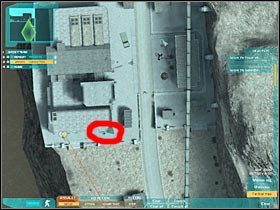
Some of the enemy soldiers may actually try getting closer to your current position (#1). Kill them before they manage to start shooting at you. Don't lean out here, because you would be exposed to enemy fire. Instead, go left. You will have to locate a small tunnel which will allow you to surprise some of the enemy units (#2).
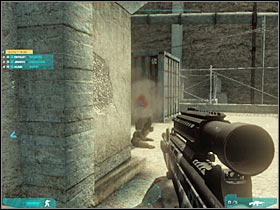
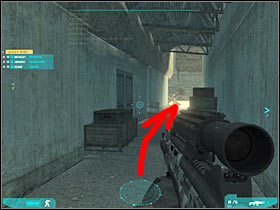
If you're having problems finding this tunnel, you should take a closer look at the first screen (#1). Obviously you will have to approach the tunnel from the west and head on east. Start off by killing two enemy soldiers (#2). They should be hiding behind sandbags, so you must aim at their heads. Be careful, because one of the rebel units may try surprising from the west. You should send your team to that location (only Rifleman units, not the sniper).
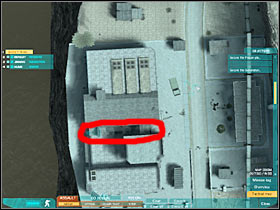
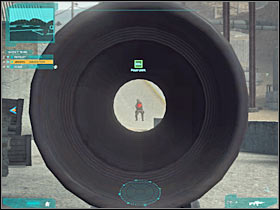
Order your sniper to move forward. It would be a good idea to hide him behind the sandbags, because you've already secured this area (#1). I think that you won't be surprised by the fact that a new group of rebel units will appear to the north. You will have to go there now. Just as before, you should be staying close to the western section of the road (#2). Your sniper may occupy the main road.
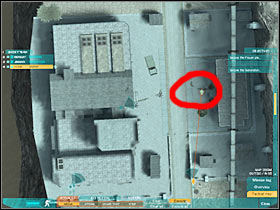
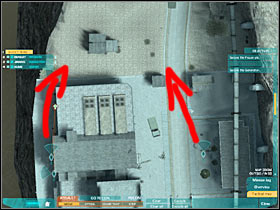
There are some new buildings to the north. I would recommend ordering your sniper unit to hide behind a small hut. Take a loot at the first screen (#1) if you're having some difficulties finding it. Head on to the stairs which should be located in front of you (#2). The rest of the team may remain south to your position or hide behind a large brick wall.

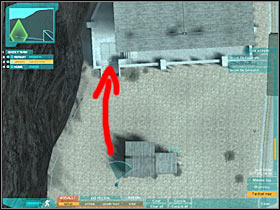
You will have to start off by killing one of the enemy snipers. Thankfully, it's going to be very easy to find him (#1). Once he's gone, order your sniper to hide behind a large truck which should be located to your right. Now you will have to assist your sniper in eliminating enemy forces (#2). Also, make sure that you're guarding your left flank, so none of the rebel soldiers manages to surprise you.
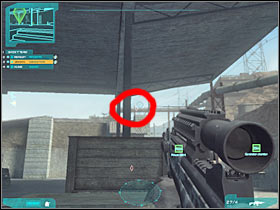
Keep going north. There's a new building here and you'll be able to use it for much needed protection against enemy attacks. Once again, you will have to start off by dealing with an enemy sniper (#1). You must kill him quickly, before you're attacked by other rebel units. You should also take a closer look at the right hill (#2). There are going to be some rebel forces there, however you won't be able to kill them from here.
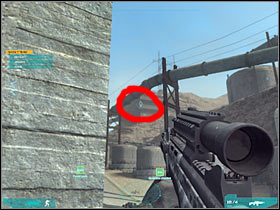
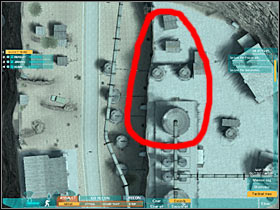
Order your men to get here (#1). They should hide behind the wall of this building. Order your sniper to move forward. I'm sure that you'll be able to find a good cover spot for him. You'll probably notice that an enemy gunship has appeared in the area (#2). Don't waste your bullets or the ZEUS rocket launcher trying to shoot it down. The gunship will drop a few mercenaries, so you'll have to prepare for their attack.
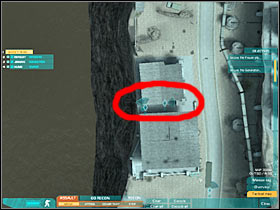
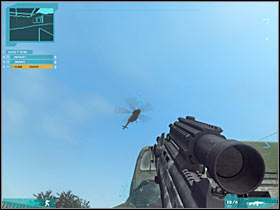
Make sure that you're standing behind the wall of the nearest building. You should notice that a large group of enemy units is heading your way (#1). There's going to be at least five-six of them. Furthermore, one of the rebel soldiers will be guarding a nearby truck. He may also team up with the main group. Try shooting these guys from a larger distance (#2), before they manage to find a good cover.
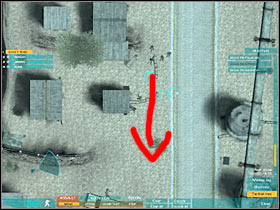
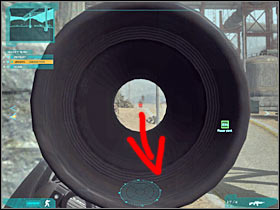
You may proceed to the northern section of the map. I would recommend choosing the left road which leads directly to the truck (#1), mostly because this area should already be secured. You will be able to kill at least one of the soldiers from the eastern hill (#2). Otherwise he would have started firing at you.
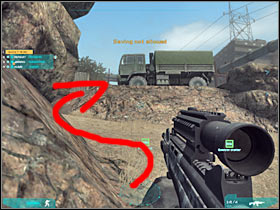

As you've probably noticed, you're getting closer to a very large container (#1). This object is going to be guarded by at least one soldier and there are more of them to the north, near your main objective. Order your men to get here. Obviously they should be standing behind some sort of a cover. Your sniper should remain near the main road (#2), however don't order him to advance too far, because that would endanger his life.
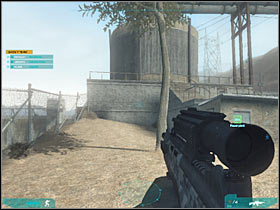
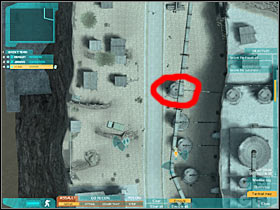
Try heading on to a nearby staircase (#1), however make sure that you don't expose yourself too much along the way. Like I've already said, one of the enemy soldiers will be guarding this large container (#2). Kill him and immediately hide, because you will have to prepare for the assault.
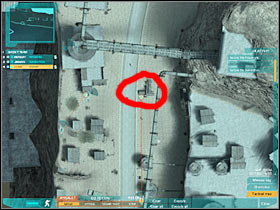
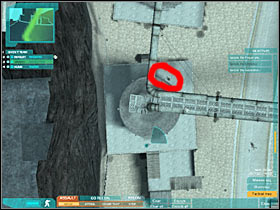
I would recommend that you order your sniper unit to move forward a little. He should be standing near the container. Check the first screen for one of the possible locations (#1). It's going to be quite risky, but you'll help him. Lean out carefully. You should notice at least 2-3 guards near the main gate (#2). Kill them.
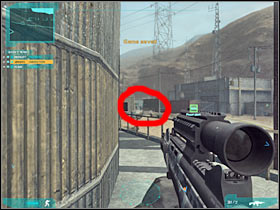
Be careful, because there's a new sniper in this area and you may not notice him at first glance (#1). He will also have to die (as soon as possible). Now you will have to focus all of your attention on the main gate. You'll notice that a lot of enemy units will arrive here (#2). You won't have to preserve your ammunition. Focus on killing them without any major interruptions.
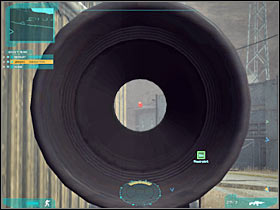
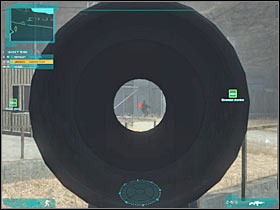
Make sure that you're using your tactical map all the time, especially if you're having some difficulties finding some of the enemy units (#1). Thankfully, all of them sooner or later will arrive near the gate. Once they're gone, you will receive a confirmation (#2). Order your men to follow your lead (including the sniper).

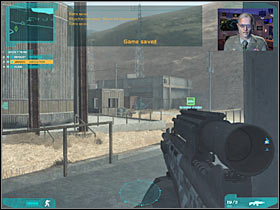
3) Secure the Generator chamber
There are two different routes leading to the generator chamber. If you want to surprise enemy soldiers, you would have to go back to the eastern hill. You've probably ignored it before, but now you would be able to explore it a little bit more. You would have to use the stairs to reach the secret entrance (#1). You should also know that the area would be protected by at least three soldiers, so you would have to kill them (#2). Only then you would be able to head on to the tunnels. I wouldn't recommend choosing this entrance, because:
a) it would be very easy to die in the tunnels, because enemy soldiers would be hiding
b) you would leave the tunnels in a very bad spot and you would be exposed to enemy fire
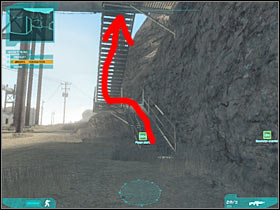
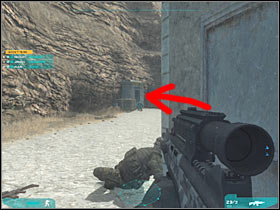
I wouldn't try any experiments here, so you should head on towards the main entrance to the power plant (#1). Ignore the dam which should be visible to your left, because we'll go there in a few minutes. Now you will have to locate a large entrance which leads to the bunker (#2). Save your game here, however you won't have to be worried about the upcoming battle.
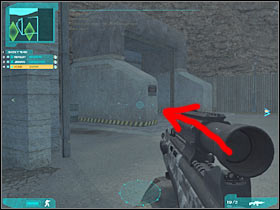
As you've probably noticed by now, you're standing close to a generator chamber which is your current objective. This room is going to be guarded by at least ten enemy units. I would recommend ordering your sniper to hide behind one of the nearby obstacles (#1). Lean out carefully and try to take out a few rebel soldiers from here (#2).
Move back to a safe distance (corridor), because one of the enemy soldiers will probably try to reach you. You will have to kill him quickly (#1). It shouldn't be a problem. Start shooting at the remaining enemy soldiers. Try to kill them from larger distances (#2).
You could also try and perform a full scale assault, however this would be risky and you would have to order your men to find good cover areas (#1). One of the trucks seems like a good idea. You will have to secure this entire room in order to fulfill this mission objective (#2). Wait for some new tasks to be added to your list of mission goals.
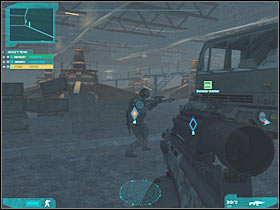
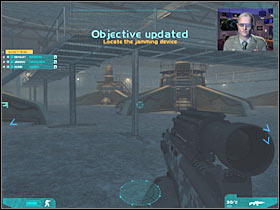
4) Locate the jamming device (As you've probably noticed, this is going to be a different objective, because you won't find any nukes near the dam. As a result, you will only have to find the jamming device.)
Exit the bunker (you won't have to find any alternative routes). Now we're going to have to approach the dam area. I would recommend that you leave your Rifleman units in the lower section of the building complex (#1). As for the sniper, he should hide behind a van (#2). It would be wise to join him. Get ready for some challenging fights!
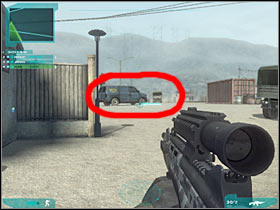
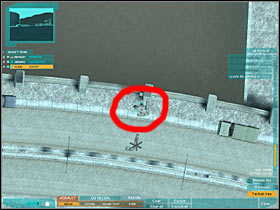
The first group of enemy soldiers is going to appear near the sandbags which are located close to a large truck (#1). You must be very careful, so you won't lose any of your teammates here. Also, try to place your sniper character in a correct spot, so nothing is going to block his view. You will also have to watch out for buildings which are located to your left. Start off by killing a sniper. He will be hiding inside the closest building (#2). Additionally, you should consider taking a closer look at the balconies, however your Rifleman units should be able to guard that area.
Check the first screen (#1), because that's where you should be standing at the moment. You will have to remain as long as it's necessary. Make sure that the area has been secured and start moving towards the dam (SLOWLY!). You will probably encounter new enemy soldiers. Most of them will occupy nearby balconies (#2), so make sure that you're using a good cover before attacking them.
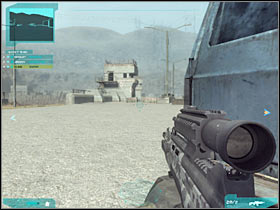
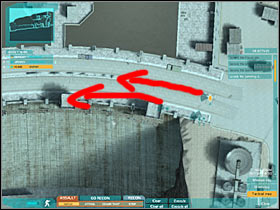
Now you will have to kill an enemy sniper. He will be hiding inside the second building (#1). Check the first screen if you're having some difficulties finding him. You could also ask your sniper for help, however I'm sure that it won't be necessary. It would be wise to use one of the smaller containers for cover. You should be able to see the third building from here (#2). Just as before, try securing it from a larger distance.
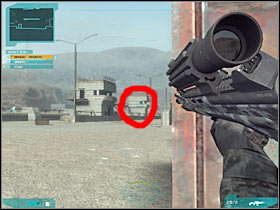
Keep heading west (#1). You should allow your team members to follow you, however you will have to make sure that there's a large distance separating your main character from the rest of the squad. You should be staying close to the left side of the dam, because some of the nearby buildings will provide a much needed cover. You should be able to locate a small area to your right. There are more containers there (#2). Make a stop and save your game.
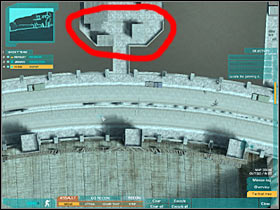
You will probably notice that enemy troops have appeared near the containers. Enemy soldiers will probably start running to the left, so you shouldn't have any problems killing them with effective headshots (#1). Make sure that they have been killed. Keep going straight. You will come across new buildings very soon (#2).
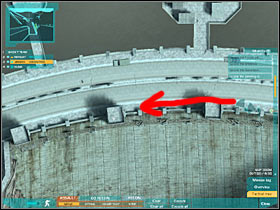
You should be able to notice two enemy units in the distance (#1). Thankfully, you shouldn't have any problems killing these guys, especially if you plan on leaning out a lot. You could also order your sniper to move to the right. He should hide behind a small pick-up truck (#2).
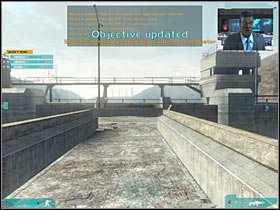
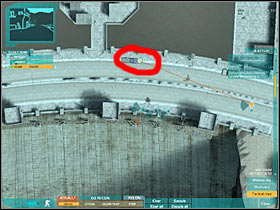
Keep heading towards the opposite end of the dam. Don't forget that you have to check all upper balconies for additional enemy forces (#1). Thankfully, rebel units probably won't be hiding inside buildings. You should allow your sniper to move forward. Hide him behind a much larger truck (#2). Check the second screen if you're having problems finding this vehicle.
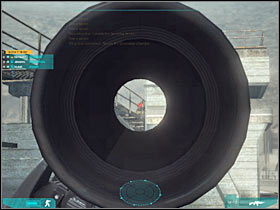
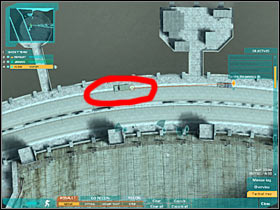
Once you've secured the dam area, you will have to reach one of the northern towers (#1). This object shouldn't be guarded by anyone, but you should still be very careful while trying to reach that location. The rest of the team should stay on the dam. Enter the building (#2).
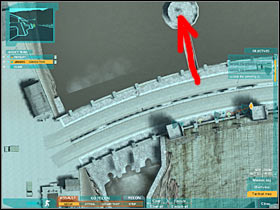
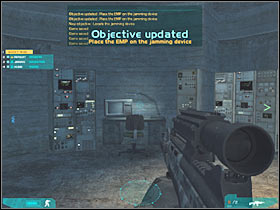
4a) Place the EMP on the jamming device (You will only have to do one very simple thing here.)
The jamming device is going to be located to your right. You will have to approach it. Press and hold the X key in order to place a charge (#1). You may exit the building (#2). The explosion won't be imminent, so you will have to defend against enemy attacks in the meantime.
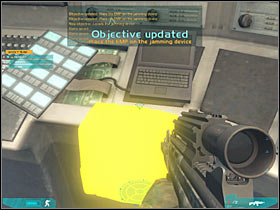
4b) Stop the mercenaries from deactivating the detonator (You will have to defend this position against a few waves of enemy attacks. It's not going to be difficult.)
Despite what you might think, you won't have to hide your men inside the nearby buildings. Allow your sniper to stay near the truck. The first group of rebel units is going to appear on your right (#1). Focus all of your efforts on killing them. You will also have to take out a military vehicle (#2). Make sure that you kill the gunner!
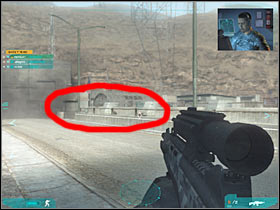

The last attack is going to happen from the east. Thankfully, it's going to be a much smaller assault (#1). If you're lucky, your sniper will probably kill all enemy units and the enemies won't injure any of your teammates. You will have to wait for the EMP pulse (#2). This will allow you to disable the device. Don't worry that you can't hear your colleague. Everything will get back to normal in just a few seconds.
4c) Destroy the enemy helicopters (You will have to destroy two enemy helicopters in order to ensure a safe extraction. Follow my instructions if you want to finish up with this task quickly and without any major problems.)
Immediately order your men to hide behind the nearest building. Enter it and head on to the balcony. The helicopters will arrive from the south (#1). You shouldn't have any problems spotting them. Choose the ZEUS rocket launcher from your inventory. Zoom in and wait for the launcher to lock on a target (#2).
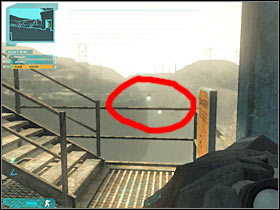
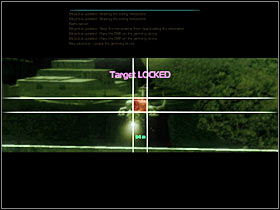
Fire the missile. You will probably have to wait for a few seconds, but eventually one of the gunships is going to be destroyed (#1). QUICKLY start aiming at the second gunship. You will have to choose the ATTACK option from the menu (#2).
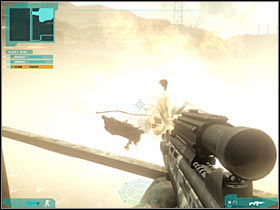
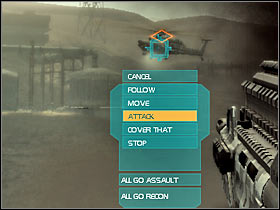
One of your teammates will use his rocket launcher. You must be patient, because it's probably going to take about 10-15 seconds. After that, the second gunship is going to be destroyed (#1). Wait for some new objectives to be displayed on your screen (#2). As you've probably suspected, you will have to evacuate from the map by reaching a nearby extraction zone.
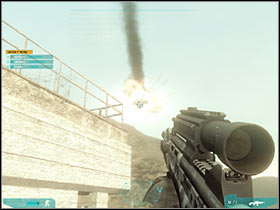
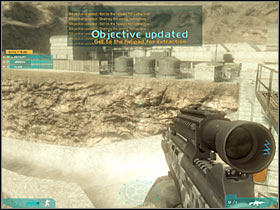
4d) Get to the helipad for extraction (This is going to be a very obvious task. Your goal here will be to reach a well defended extraction zone.)
The landing pad is going to be located to the west (#1). I'm sure that you won't have any problems finding it. Sadly, enemy troops have arrived in the area, so you can't reach the extraction zone right away. Start shooting at the visible enemy units. Most of the rebels will appear near an upper balcony (#2). It should be fairly easy to find them.
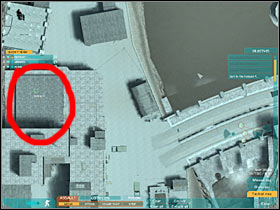
Once you've dealt with the first group, start moving towards this new base (#1). The rest of the team (including the sniper) should be following you. Turn left, so you'll be moving south-west. You will probably encounter a few soldiers along the way. Find a small tunnel and use it (#2).
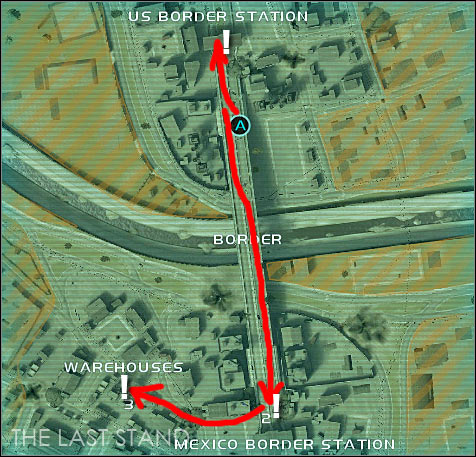
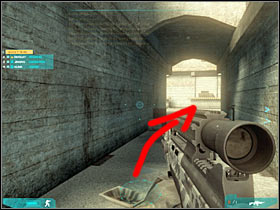
Be careful, because one of the enemy soldiers may be hiding just around the corner. You will have to secure this entire area (#1). Once this is done, head on to a nearby staircase (#2). You will have to reach the roof of this building. Go left.
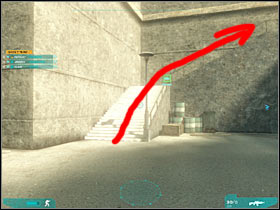
You shouldn't encounter any additional problems here. The landing pad is going to be located in front of you. Take a seat inside the gunship. Now you will only have to wait for the rest of the team to do the same thing (#1). Don't worry about new rebels (they may appear near the dam). Once you're in the air, this mission will end (#2). It's time for the final challenge of the campaign!
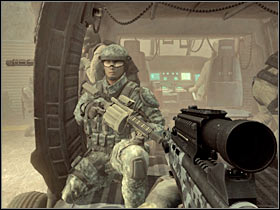
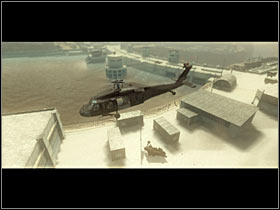
Main mission objectives:
1) Secure U.S. border station
2) Secure Mexican border station
3) Locate missile launch bunker
Possible drop zones:
A) Central section of the large bridge, connecting U.S. and Mexican borders
Just as in the previous mission of the campaign, you won't be allowed to choose a drop zone. You should also know that you'll have to take part in VERY CHALLENGING battles right away, so you should be extremely careful while giving orders and moving on the map. You will have to watch out for your squad members, because you'll need them to reach the Mexican border (later during the course of this mission).
I'm sure that you won't be surprised by the fact that this is going to be the most difficult mission of the entire singleplayer campaign. You will have to be very precise, careful and... lucky. You will also have to prepare for the mission in order to ensure your success. I would recommend exchanging a default weapon. Sniper rifle will do the trick, especially sine you'll have to take out a lot of enemy units from larger distances. Furthermore, some of these posts aren't too accessible, so you would have some problems trying to get closer. Sadly, you will have to preserve your ammunition, because you will need to kill a lot of enemy soldiers along the way. As a result, I would also recommend using a standard machine gun which should be your secondary weapon. You will have to clear out a few buildings and a bunker and that's when the machine gun may come in handy. Remember to save up at least three clips for the grand finale. If you want to start with a default weapon, you would have to rely on your team members a little bit more and you would have to perform risky maneuvers. As for the setting of your team, you must take a sniper with you, especially since you won't be able to take out all enemy units on your own. Choose this soldier even if you have a sniper rifle in your inventory. The rest of the team is going to be less important, especially since you are going to be given a command of a small unit of allied soldiers.
Mission map:
Red arrows represent suggested routes to all of your main goal areas. Check the main description for this mission if you want to find out more. This picture was added only for a better orientation. A icon is the only possible drop zone for this mission. As a result, you will begin the game there. The exclamation mark icons represent mission goal areas. You will have to go there in order to fulfill main mission objectives.
1) Secure U.S. border station
Obviously this mission is going to begin with a cut-scene (#1), however it's going to be more important and longer this time. You will be able to take a look at the map, so try to memorize some of the crucial areas. You will begin the mission inside the allied gunship (#2). Get ready, because you will reach the drop zone in just a few seconds.
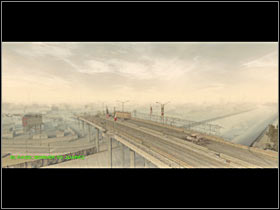
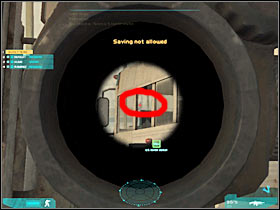
The door of the helicopter should open. After that, your character will automatically use the rope to the reach the bridge (#1). It would be a good idea to spend this time on observing your opponents, especially since they can be found in front of you. Once you're on the ground, order your squad members to hide behind a nearest bus (#2). It's VERY important that they follow your orders. Additionally, you CAN'T stand up or leave this cover. Otherwise you would have died almost instantly, because enemy soldiers are well prepared for this assault.

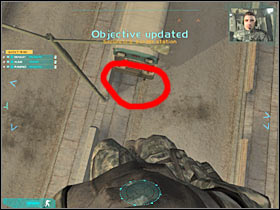
Once you've got everyone on the ground and hidden behind cover (buses), you should take a look at your tactical map (#1). You won't see any enemies from here, but you'll at least know where you are and what kinds of obstacles are in front of you. Make sure that you're hidden! Start off by eliminating a soldier equipped with rocket launcher (#2). You will have to crouch and shoot through the windows of the northern bus in order to kill him without risking any injuries.
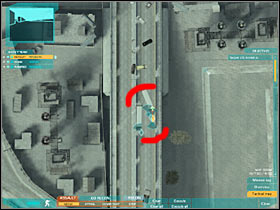
If you have a sniper rifle at your disposal, you won't have any major problems with some of the upcoming fights. You will have to lean out VERY carefully. There are THREE heavy machine gun posts in this area. Start off by disabling two posts - the left one (#1) and the middle one (#2). DON'T lean out too much, because there's a third machine gun post to your right!
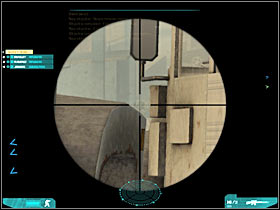
Now you will have to focus your efforts on killing a few additional enemy troops. Most of the enemy soldiers will be standing near the American checkpoint (#1). Also, if you don't have a sniper rifle at your disposal, you may use the grenade launcher to take out most of the heavy machine gun posts (#2).

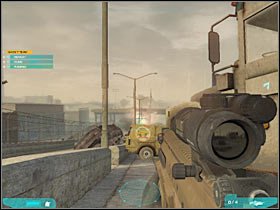
You would have to choose a very similar approach with the third gunner. This machine gun post is located to your right. Check the first screen (#1) if you want to find out about its precise location. If you don't have a sniper rifle, you would have to lean out VERY carefully. Once he's gone, start moving towards the border station (#2).
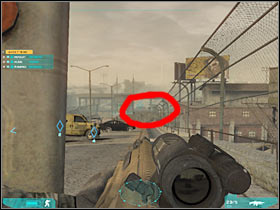

One of the enemy soldiers may also be standing inside the checkpoint building (#1). Thankfully, he should expose his position to you, so you shouldn't have any problems killing him. The second one is hiding behind the sandbags (#2), to the north of the border station. Once again, you will have to lean out carefully in order to get rid of him. This should allow you to secure this border station. Now you will have to defend it, however wait for some new objectives to be displayed on your screen. The game will also create an auto-save here.
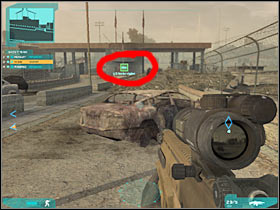
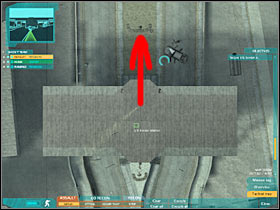
1a) Protect the U.S. border station (You will have to protect the border station against a counter-attack. It shouldn't be too difficult, especially since you'll have plenty of cover points to hide your men. Focus most of your attention on the enemy humvee.)
Obviously rebel units will arrive from the south (#1), so that's the same area you've already explored during the first part of this mission. You should also know that there's going to be a mortar strike (#2), so you will have to hide your men near the checkpoint. Make sure that they're not standing too far from the main building. You will also have to act quickly, because you will only be given a few seconds before the attack will take place.
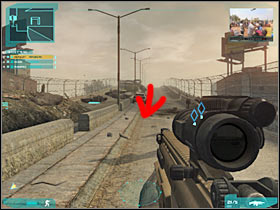
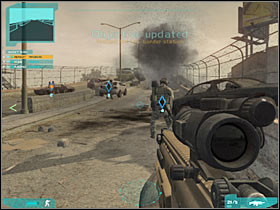
Like I've already said, you will have to place your team members in correct spots in order to increase your chances for a successful win. Order your Rifleman units to use two heavy machine gun posts (#1). As for the sniper, he should be hiding behind one of the sandbags. You, on the other hand, should enter the border station building. Wait for the attack to take place (#2).
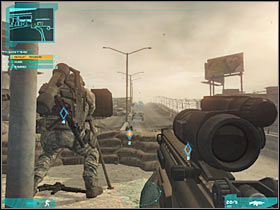
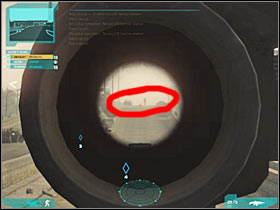
You shouldn't have any problems with the first wave of enemy soldiers and your men will probably assist you during these fights (especially if you have a sniper with you). Sadly, it's going to get more difficult very soon. You'll probably notice a humvee heading your way. Take out its gunner AS SOON AS POSSIBLE (#1). You could also use a grenade launcher to destroy this vehicle. You will have to maintain this position for a few more seconds (#2). You should receive a proper confirmation that the border station has been saved.
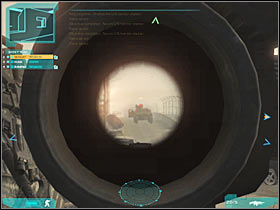
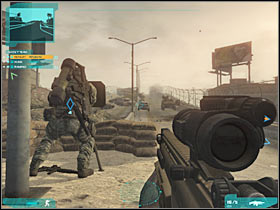
1b) Collect reinforcements (This is strictly a formality. You will have to wait for one of the allied gunships to get here. You will be given a new team, as well as other toys. ;-))
Ignore the mortar assault, because most of the explosions will occur to the north and you won't have to go there. Instead, head south. Obviously the rest of the team should be following your lead. You will have to get to the reinforcements area (#1). Now you must wait for an allied gunship to get here (#2). Just as before, you will command two new soldiers like they would be only one person (member of the Ghost squad).
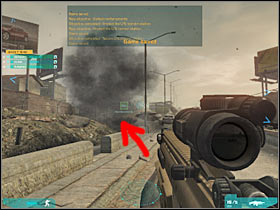
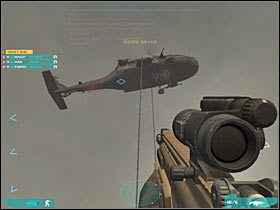
2) Secure Mexican border station
This is going to be a very long and quite challenging run. Your objective will be to reach and secure the southern border station. You will have to eliminate everything that stands in your way. Gather your men around your current position and start moving south (#1). Make sure that your soldiers are using various objects for cover. This is going to be quite important, because you'll come across new enemy units very soon (#2). Try taking them out from larger distances.

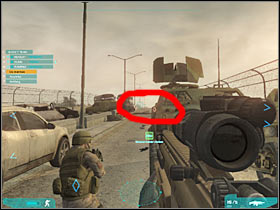
You will also have to guard the left side of the bridge (#1), because some of the rebel units may try surprising you from the left flank. You would have to be ready for that. Make sure that you don't move too quickly and that your men are hiding behind cover. You should be using cars for cover, because smaller brick walls won't do the trick here. The second group of enemy soldiers should appear once you're close enough to the truck (#2).

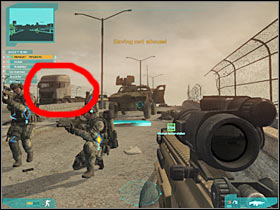
Check the first screen (#1). Once you've reached that area, you MUST stop. This is going to be very important. Open your inventory and choose a ZEUS rocket launcher. Start moving south (slowly). Your team is going to be attacked by an enemy gunship (#2).
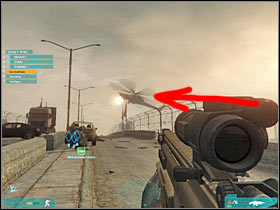
You will have to use the zoom feature to lock on the target (#1). Once this is done, fire the missile before the gunship manages to attack your team (#2). You could also try and prevent it by hiding your men behind buses and larger trucks. Otherwise you would have to repeat this entire sequence.
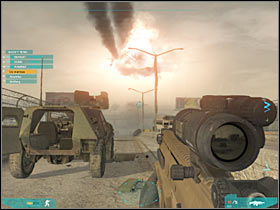
Keep heading south, because you won't be allowed to leave the bridge. I would recommend that you choose the left lane, because the right one doesn't have any larger obstacles which you could use for much needed cover. You will come across a larger truck here (#1). Once you're close enough to the Mexican border station, you will have to slow down and plan each move carefully. Order your squad members to hide behind a smaller van (#2). It shouldn't be more than two soldiers (including the sniper).
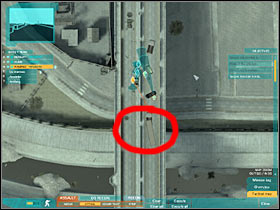
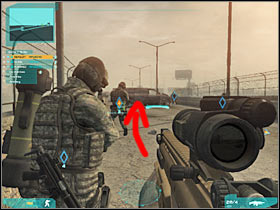
You will probably notice an enemy sniper. He will be standing to your left (#1). He should become automatically designated, so you won't have to search for him on your own. Get rid of him as soon as possible. You will also have to secure the area in front of you. Try moving there alone or with one of your teammates (#2). You will have to hide behind a new car. Ignore enemy mortar fire, because none of the blasts will occur near your position.
If you have a sniper rifle at your disposal, you should be able to take out at least two-three enemy units from here (#1). Rebel soldiers will be standing near the border station building. You will also have to take out one of the heavy machine gun posts. It's located to your right (#2). You will have to target limbs (hands - to be more specific), because you won't be allowed to expose yourself too much.
Try moving closer towards a suspended truck (#1). I'm sure that you won't have any problems finding it. You should have a decent view at the border station from here. Start off by killing some of the standard rebel soldier (#2). Don't leave this area just yet, because you would be exposed to enemy fire.
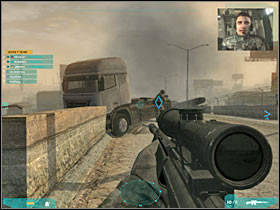
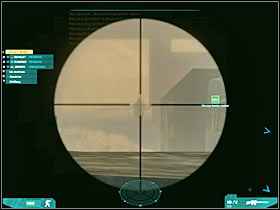
You will have to kill all visible soldiers. Once this is done, try moving a little bit closer. You shouldn't leave the left lane. Some of the rebel soldiers will be hiding behind sandbags (#1). Kill them. Watch out for enemy snipers! You should be able to disable the second heavy machine gun post from here (#2). Obviously you will have to aim at the head of the rebel soldier.
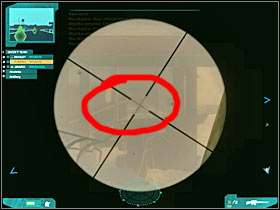
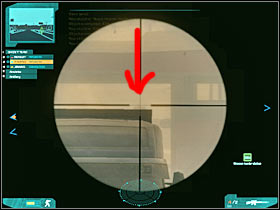
You should be standing near a small yellow van (#1). Remember to scan the entire area before you decide to move on any further. You should be going in alone or with your sniper. DON'T leave this area just yet, because you will have to take care of a few other problems. As you've probably noticed, an enemy tank has appeared near the border station (#2). You should be safe here, but you will have to deal with this new threat.
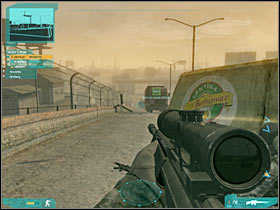
Start off by zooming in the view, so you will be able to see the tank. You will have to choose the Airstrike feature. Click on Attack (#1), however make sure that the enemy tank is your target. Now you will have to wait for the allied gunship to destroy the tank (#2).
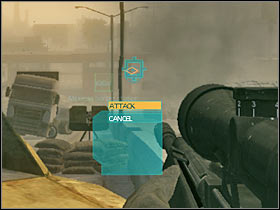
BEFORE you decide to move closer to the border station, you will have to deal with the third heavy machine gun post. It's going to be located to your right (#1). As you've probably noticed, it's close to a previously disabled heavy machine gun post. Once again, you will have to lean out very carefully. Start shooting at arms or legs of the enemy soldier (#2). DON'T even think about sending your squad members here, because they would have probably died.
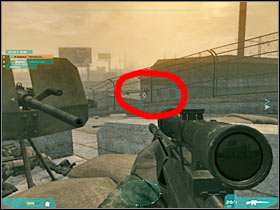
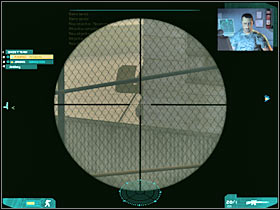
You will have to make sure that the entire area around the Mexican border station has been secured. You will probably have to take care of a few additional enemy units (#1). Most of the enemy soldiers will be hiding behind walls and sandbags. You will also have to take out a guy who is equipped with a rocket launcher (#2). It's fairly easy to locate him. Just make sure that he doesn't fire a missile at you.
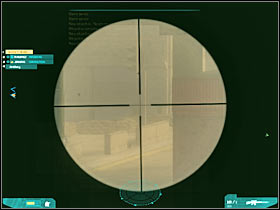
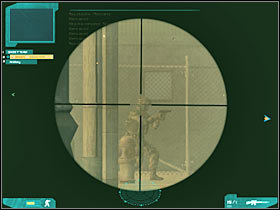
Now you may start moving towards the border station (#1). You should remember that enemy units may still be hiding inside the main building. I would recommend that you stop near the right wall of the border station. You should be able to spot at least 2-3 new enemy units. Furthermore, there's a sniper to your left (#2). You would have to kill him as soon as possible. Once the area has been secured, order your squad members to get here.
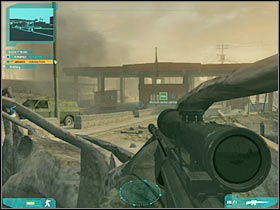
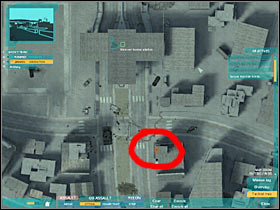
Stay here for a few more seconds, because more enemy soldiers may arrive in this area (#1). You would have to kill them quickly. Make sure that you're using your machine gun during these fights, so you won't waste more precious ammo for the sniper rifle. Order the rest of the team to follow you. You will also have to wait for the game to display new objectives (#2).
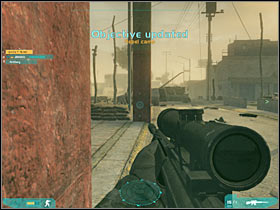
3) Locate missile launch bunker
Now you will have to start moving towards a main rebel base. It can be found to the west of your current location. Start moving forward (#1). I wouldn't recommend spending too much time here, because you will receive an information about an incoming vehicle (humvee). As a result, you will have to order your men to use nearest cover (#2). I wouldn't recommend attacking the vehicle and its crew right away, because it would be very risky.
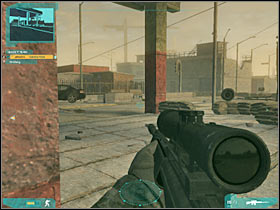

The vehicle will probably stop near the crossroads (#1). Enemy soldier will exit the vehicle, however you MUST remember about the gunner. Eliminating him should be considered a top priority. You could try and lean out a few times. This would allow you to kill some of the rebel units (#2).
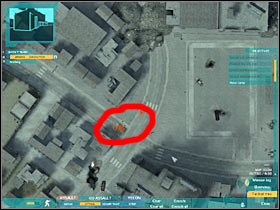
As for the gunner, it would be wise to attack the humvee from the left flank (#1), however you would have to disable the heavy machine gun post immediately. If you have a sniper rifle at your disposal, you should try and aim at the head of the gunner (#2). Once he's gone, deal with the remaining enemy units. You may allow the rest of the team to assist you.
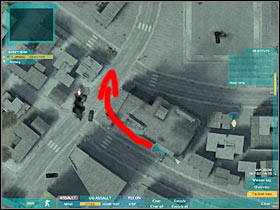
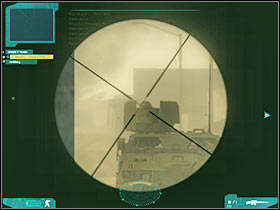
Keep heading towards the main encampment. You will have to be moving north-west. You will probably encounter one of the soldiers along the way (#1), however you shouldn't have any problems surprising him. Once you've reached the base, you will have to listen to a short radio transmission. You will also be given locations of all enemy troops (#2).
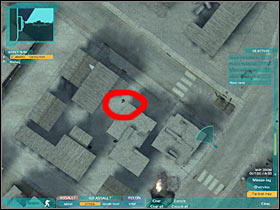
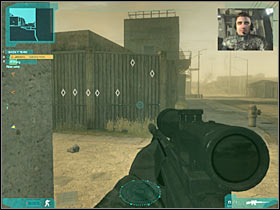
Now it would be a good idea to use a mortar strike in order to take out some of the enemy troops. As a result, you would have to activate your tactical view. I would recommend targeting the main encampment (#1). Now you will have to wait for the mortar strike to take place (#2). As you've noticed, some of the enemy soldiers have survived the attack, however it's going to be quite simple to get rid of them (without any assistance).
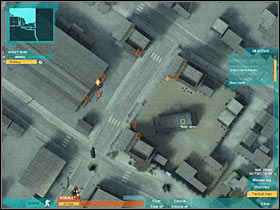
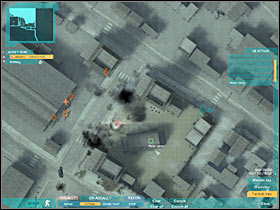
Start moving forward. You should see that one of the enemy soldiers is standing to the right of the main group. He is also facing the main encampment, so you should have any problems surprising him (#1). Once he's gone, head on towards the larger group (#2). Thankfully, you'll be able to use higher brick walls for much needed cover.
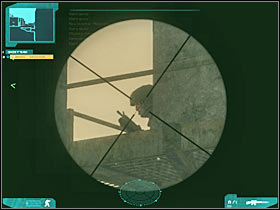
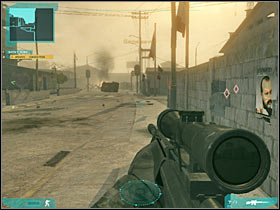
Lean out carefully in order to disable one of the heavy machine gun posts (#1). You could also use a grenade here (or a grenade launcher), however this won't be necessary and even if you don't have any explosives with you, there's nothing you should be worried about. Now you will have to kill one of the enemy soldiers (#2). Use a machine gun.
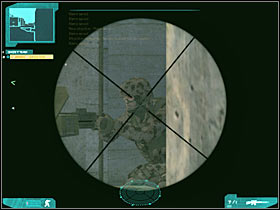
It would be a good idea to turn left here. You will have to enter the main rebel base (#1). The objective here will be to find a better shooting spot. You will have to place your main character correctly, so he'll be looking at the entrance to the warehouse. Disable the second heavy machine gun post (#2). After that, move to the left and take out a single soldier.
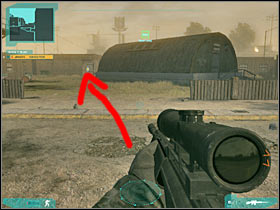
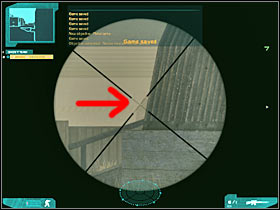
3a) Locate the missile inside the bunker (This is going to be a follow-up for the main objective of this mission. You've already found the missile bunker. Now you will have to reach the missile itself.)
Obviously you should start moving towards the warehouse, the same one that was guarded by the rebel units (#1). You shouldn't encounter any new units for the time being. I would also recommend that you leave your team here. You will have to locate a small staircase which leads to the bunker area (#2). Go there now. You should also save your game.
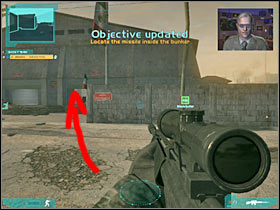
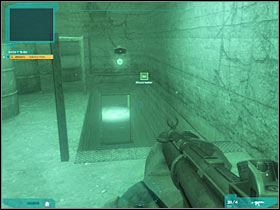
You probably won't encounter rebel soldiers right away. Despite what you might think (radio transmissions), you won't have to be in a lot of hurry. Stop once you've reached a left turn (#1). There are two enemy soldiers just around the corner (#2). Choose longer bursts (instead of single shots), so you'll be certain that they die.
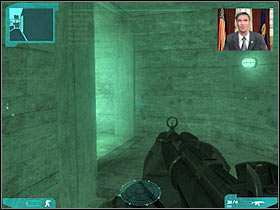
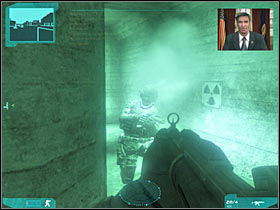
Try entering a new room. The lower floor is going to be guarded by at least two enemy units. You should be able to kill one of the soldiers right away (#1). As for his colleague, you will have to move to the right (#2). Once he's dead, use the stairs.
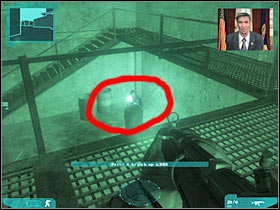
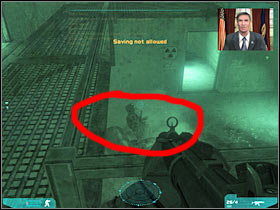
The next corridor is going to be guarded by a single rebel unit (#1). If you're lucky, you should be able to surprise this soldier. Just make sure that you're aiming at his head. Go straight. You must be careful here, because one of the enemy soldiers will be hiding inside a small room (#2). Kill him, before he manages to fire at the main character.
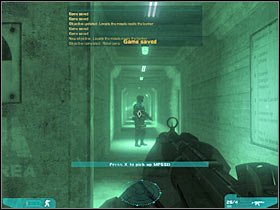
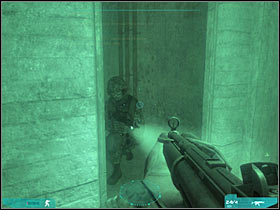
The next room is going to be defended by FOUR enemy units. As a result, you shouldn't even try entering it. Wait for some of the soldiers to get here (#1). There should be two of them. Once they're gone, try to take out a third opponent. He will be standing on the upper balcony (#2). The fourth rebel soldier is hiding to your right. Once the area is clear, enter this room and go right.
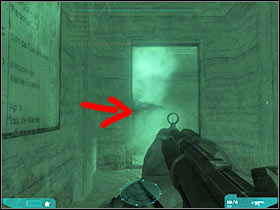
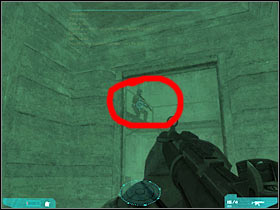
I would recommend that you keep quiet, so you won't attract any unnecessary attention. You will have to reach the opposite end of this corridor (#1). You will encounter several enemy units just around the corner (#2). Start shooting at them.
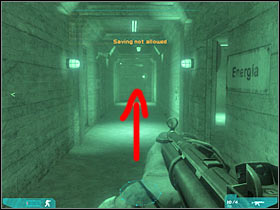
The second group of enemy soldiers will be hiding to your right (#1). Once again, you should consider choosing longer bursts, so you won't receive any injuries. You may enter this new room (#2). The missile is in front of you. Listen to the commanding officer.
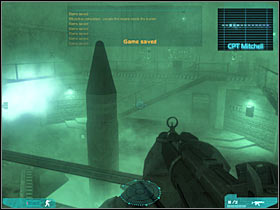
3b) Target designate the warhead (Your objective here is going be quite simple - you will have to get closer to the missile in order to designate the warhead. Thankfully, you won't encounter any additional rebel troops.)
You will have to reach the opposite end of this room, because that's where you'll find the stairs (#1). Head on to the lower level. Turn left and get closer to the missile. You will have to press the X key in order to designate the warhead (#2). You will receive a confirmation. Go back to the upper level (quickly).
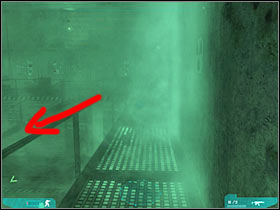
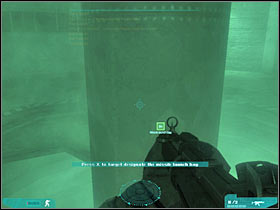
Now you will only have to start running towards the exit (#1), so you will have to choose previously explored corridors. Don't worry about the timer. Just keep going. A new cut-scene is going to be displayed on your screen (#2). Congratulations! You've just finished the game!!
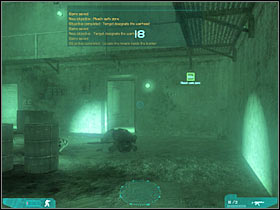
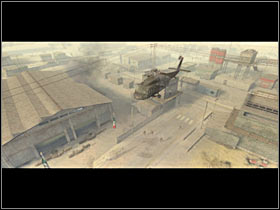

 Grand Theft Auto: Chinatown Wars Game Guide & WalkthroughGhost Recon: Advanced Warfighter 2 Game Guide & Walkthrough
 Grand Theft Auto IV: The Lost and Damned Game Guide & Walkthrough
 Gears of War: Judgment Game Guide & Walkthrough
 Grand Theft Auto Online Game Guide & Walkthrough