This is guide for Drakensang: Phileasson's Secret, add-on to Drakensang: The River of Time. You will find here a description of all quests, both those related to the main plot of the additive, and a few side quests. Guide is also enhanced with detailed description maps to facilitate orientation during the game. In addition, introduced a short description of a new companion, with whom you will travel the land of the High Elves - Phileassonia.
Artur "Arxel" Justynski
Legend
Red - enemies, monsters eg. scarabs.
Green - characters eg. Phileasson.
Orange - items eg. Ring of Nature.
Blue - places, locations, transitions eg. cave.
1 $ - 1 ducat
Treasures cave (M2, 4) - means that the treasures cave is on map M2 at the point 4.
Main tasks are marked only by a number eg. 1. Guard in trouble.
Side quests are marked by letter "Z" and by number eg. Z2. Condemned ghost.
#1, #2 - characters refer to the above this text images (if there are two, not one). Number one means the image on the left and two on the right.
The new character, which appears in the add-on, is Thorwalian warrior Phileasson.

Type: Warrior
Race: Thorwalian
Level: 11
Advantages and disadvantages:
Bonus to swords
Penalty to ceremonial
Strong features: ST (18), COU (16), CHA (16)
Weak features: DEX (12), AG (12)
Favorite weapon: Sword
Join: Repeatedly but only during the task Back to the world in a bubble you get full control.
Perfectly wielding a sword and throwing weapons warrior. You can use it to direct confrontations and ranged combat. Joins you at the very end of the story of addiction, so that is very developed in terms of skills and characteristics. For the rest of meetings he will also assist you, but you will not have any influence on the use of his special abilities.
Abilities

Physical: Sneaking (1), Willpower (10), Perception (11)
Nature: none
Knowledge: Wound healing (3)
Social: Ceremonial (7), Human nature (7), Twaddle (8)
Craft: none
Weapons

Close:
Distance:
Special abilities

Close: Offensive II, Defensive II, Powerful Punch, Abolition, Broad Blow, Dodge, Precision Strike, Blade Storm
Distance: Measured Throw, Strong Throw, Masterful Throw
Defense: Resistance II, Armor II, Shield Fighting III
Received: Night watch (M1, 1). The character will appear only after the quest Toll is not enough (basic version of the game).
1) Speak with guard
You will learn from the guard that the earlier events in the port someone had to cover here on guard, and fell on him. The problem stuck in fact that the guard happens to fall asleep and not being able to draw up the morning report. You will be asked to help him wake up at dawn.
a) You can promise that you'll wake the guard.
b) You can lie and do not wake up.
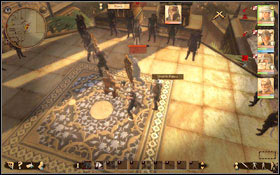
2) Go to the toll keeper's house

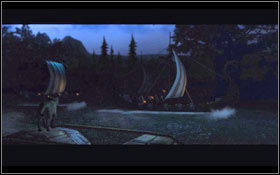
Whatever your choice, go to the Watchtower at the port (M1, 4), where you will spend the night # 1. Activates a cut-scene showing the two Thorwalian ships coming on the Great River # 2. Moments later you will have a conversation with Night guard - your previous choice has no influence on its course. Naturally, guard will not believe you, it automatically starts the next task 2. Thorwalians on the Great River.
Received: After quest 1. Guard in trouble.
1) Go to Thorwalians camp
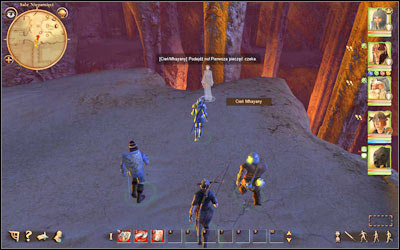
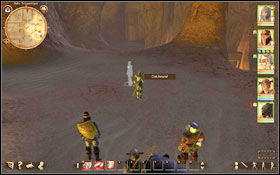
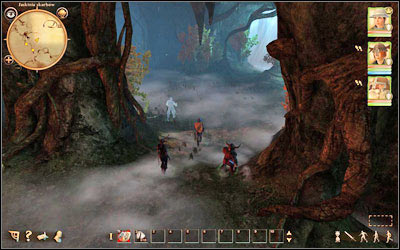
Thorwalians (M1, 4) encamp their little camp in the north of the city. When you come close enough to - a conversation will start with Keileasson, who will greet you and send back to the Ynu, which head the camp. Asked about the captain will tell you that Phileasson went to toll chamber, because this location dreamed Ynu. Return to the port, go on board the ship and head to Thurstein's toll chamber.
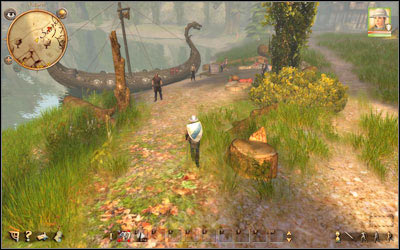
2) Find captain Phileasson
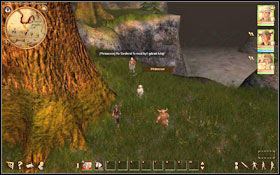
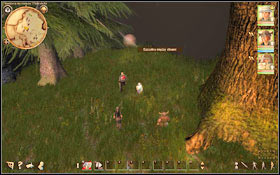
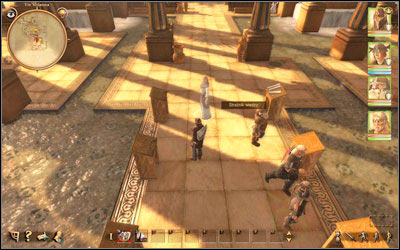
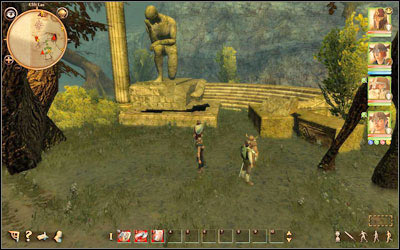
After reaching the Toll chamber go around the whole mansion and go to the north. Near the old harbor, surrounded by trees, you will see Phileasson (M2, 2) # 1. However, there will be no occasion to him too long, because he orders you to go. After a while Phileasson will run - go after him. Encounter a mysterious gap between the spheres (M2, 6) - After a brief exchange of sentences with the captain, he will go through the portal.
3) Go in the gap between the spheres
Just go through the portal, you will go to Tie'Shianna. You will overheard a Phileasson's conversation with Mhayana about the princess. On the first questions you will find answers in Nurti sanctuary - follow Mhayana. Automatically starts the third task 3. Heal the Nurti chapel.
Received: After quest 2. Thorwalians on the Great River.
1) Defeat scarabs in Nurti chapel
Notice: At this point Phileasson joins you - but you're not able to issue his commands. Additionally, keep in mind that he is immortal (he cannot die)!
Apparently, the task is not easy, but its good to take advantage of the fact that Phileasson is immortal. If only you will lose advantage in fight, back off your team, leaving the captain himself - his personal struggle can take a little longer, but do not expose the same any member of your party to death. You must eliminate five groups of scarabs (M4, 3) hang about the chapel.
2) Report to the priestess Orima
Return to Mhayna (M4, 2) to report the completion of the extermination of vermin. You will find out that it was only a first step towards the re-revival garden. You have to get Nutri's Seeds from the guard of knowledge - go to the meeting with him.
3) Go to the guard of knowledge
Unfortunately, massive gates are closed, in addition, the Palace Guard (M4, 4) is standing on watch. The fact that you are sent by the priestess Orim not change anything, the correct answer to a question on which side of a conflict you are too. You will find out only that a member of the Guard of Honour can attain the privilege of passing through this gate. Ask a venerable Aman'Sha, which is responsible of recruiting members to the Guard.
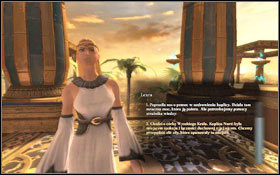
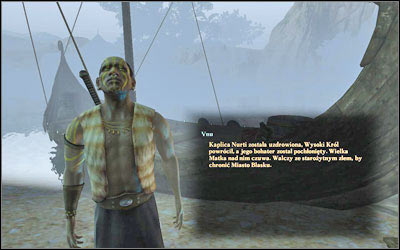
3) Speak with Aman'Sha Nirtana
Nirtana (M4, 6) you will find just before entering the throne room. On request to join the Guard of Honour you will meet with disapproval. Although at the end of the conversation will be submitted offer for the transition test of blood and spirit (initially to demonstrate how weak you are). Before you accept the challenge purchase stocks of potions and prepare yourself - remember that you can also return through the gap between the spheres (M4, 1) to the Toll Chamber and for example to Nadoret too, where are more buyers available.
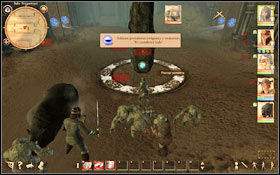
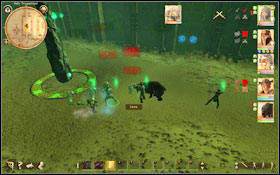
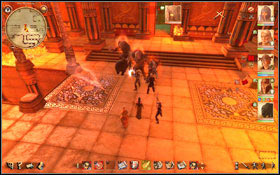
4) Proceed Nirtana's test
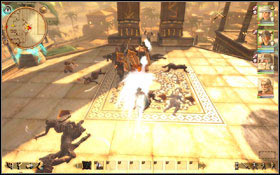
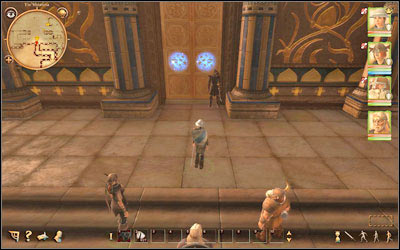
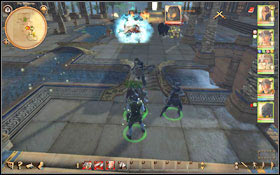
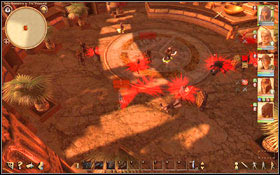
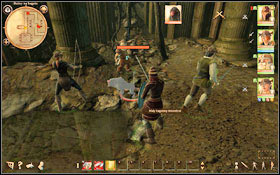
After the accepted challenge you will enter the Rose Portal (M4, 7). Your abilities will be tested in combat. The task is not easy, you will stood against another waves of the Palace Guards # 1, at the very end to take a stand against the Nirtana # 2. During the fight, remember that Phileasson is still immortal - if your whole team will be close to death, try not to interfere in the fight. Subsequent waves will include a larger number of guards. Nirtana itself is a magician, but it is not a tough opponent - try to mainly focus on the guards.
5) Speak with Aman'Kai
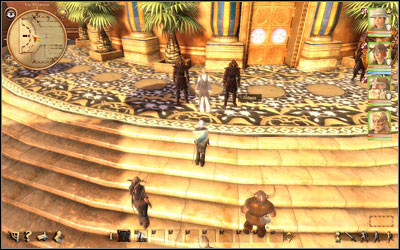
After winning the fight its time to choose the elements you want to bind with. First you will have to pass a blood test. On the square you will find three Aman'Kai of the Palace Guard (M4, 8), each of them will tell you about the power of one of the elements (the order does not matter):
6) Go to the Aman'Sha Nirtana
When you talk to all three Guardians return to Nirtana (M4, 6), where you make the first pledge. Repeat the words of the oath, and when the time comes to finish her words, you must choose one of the three elements that you want to bind with. After your election, you will receive as a gift Leather cuirass of Tie'Shianna, which will have bonus depending on your choice:
a) might of air: +10 VIT.
b) might of ore: +3 AT.
c) might of ore: +5 Willpower.
You will also receive a Message for Biundrale.
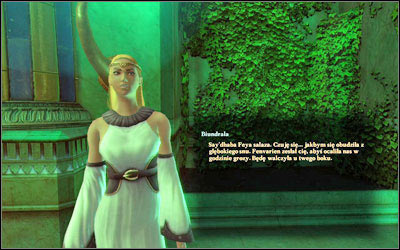
7) Introduce yourself to Biundrale

On the other side of the square you will find the mentioned Biundrale (M4, 9) # 1, which pass the scroll. There will be time for an oath of spirit. Because you want to save the chapel Nurti you will not have to undergo additional tests.
8) Speak with Biundrale students
Again you have to speak with three characters - children of Tie'Shianna (M4, 10) #2. Each of them tells you about one of the elements, which you could choose:
9) Find Biundrale
Return to Biundrale (M4, 9), repeat her words of the oath, and when the time comes to finish her ??words, you must choose one of the elements that you want to bind with your spirit. After your selection, you will receive as a gift Tie'Shianna helmet, which will have the other bonus depending on your choice:
a) fire: +3 CUR, +2 VIT.
b) earth: +3 INT, +1 VD, +1 VE.
c) water: +10 EA.
You will also receive Sigil of Tie'Shianna, which allow you for rambling on whole Tie'Shianna.
10) Go to the palace guard
Once again, go to the Palace Guard (M4, 4) and show him acquired stamp - the doors will open to you. By corridor go to the next part of the palace, where you will meet with the Guardian of Knowledge (M4, 11). During the conversation remind that you want heal Nurti chapel and you need seeds (you can also use the Twaddle). No matter how you lead the conversation further - you get the seeds.
11) Follow the guard's daughter
Run after daughter of the guardian of knowledge - Odana (M4, 13), you will get from her Seeds.
12) Report to the priestess Orima
If you already have seeds, you can return to Mhayana (M4, 2) and inform her. Your task will be planting seeds. The task is not quite simple - you need to plant seeds in the appropriate places where the power of the earth is still clean and uncontaminated.
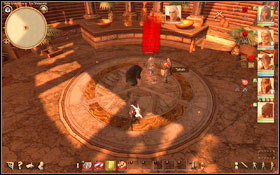
13) Plant a seed and heal the chapel
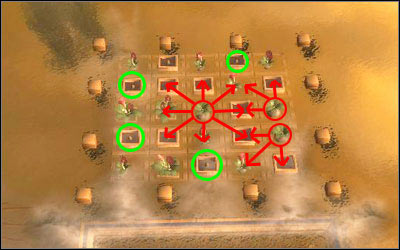
As the instructions received from the Orima priestess was not really bright and clear, read the Sacred flowerbed (M4, 14) contains more guidance planting seeds. Some important information you should know:
- If you plant a seed in the wrong place, at the time scarabs will appear.
- you have planted four seeds.
- the more red buds, the more close to place you are where you can plant a seed.
- if there is none red bud, adjacent fields (all eight) are not suitable to be filled, if there is a one red bud - near there is only one place where you can plant the seeds (if you have two buds - two seats, etc.)
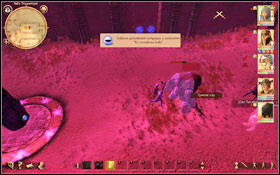
In the above picture is presented, in which areas should be planted the seeds. No red buds - red color, places for planting - the green one.
When you plant all the seeds - chapel revived again. After a while the princess Amariel comes. As a sign of gratitude you will get from her the Amulet of treatment (+5 Wound healing). After a while of the conversation High Elf will appear and inform about the attack of the Nameless Horde. Automatically begin the task of the 4. Interrupted conversation.
Received: after quest 3. Heal the Nurti chapel.
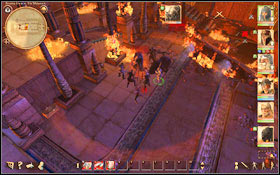
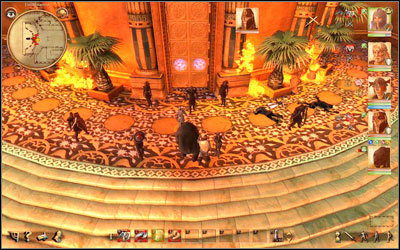
1) Help in palace defense
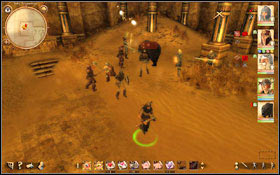
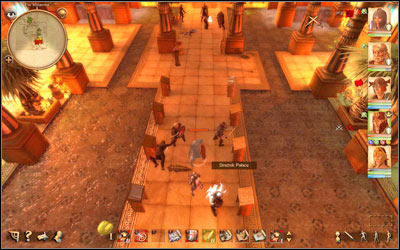
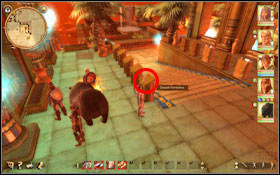
After conversation with the princess, don't waste the time and run into the courtyard. You'll meet there Tarkatha, from which you learn that the Nurti chapel powered Rose Portal, therefore, you just activated the portal. Fight with first hordes units should not be difficult. The first one goes, a small group closest to the entrance to the throne room #1.
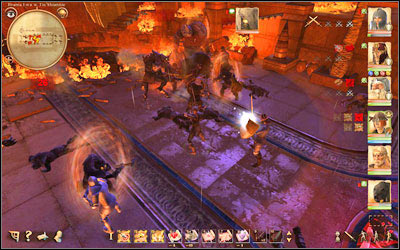
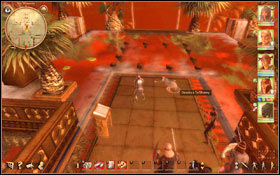
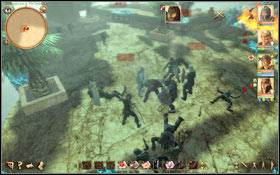
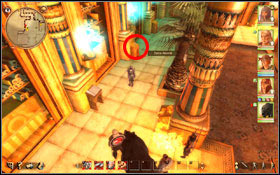
2) Protect the main courtyard
Another goal is to clear the rest of the courtyard #2 - come here with the help of the Palace Guardians and Tarkath himself. Also, the task should not cause you any trouble.
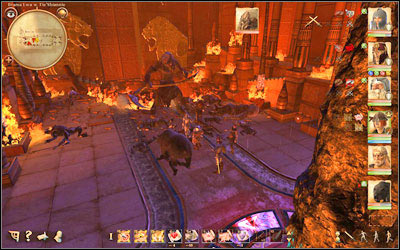
3) Protect the Tarkath
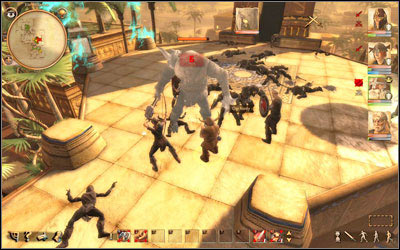
After clearing the courtyard Tarkath will be able to securely begin the casting a spell on the Rose Portal, to close it. Your task is to defend against the four waves of horde. This time you're on your own (no help guards). During the last fight will be a new opponent - horde ogre. Focus on it mainly (try to don't forget about the other warriors). Also remember that Phileasson is immortal - you can take advantage of this fact. After a short cut-scene you will teleported back to the Thurstein's toll chamber, but without Phileasson. Automatically activates the task 5. Another way to Phileasson.
Received: After quest 4. Interrupted conversation.
1) Speak with Ynu
Back on the ship (M2, 1) and go back to Nadoretu where have a conversation once again with Ynu (M1, 5). After a moment, mysterious voice from the darkness will speak to you. You will learn that the gap between the spheres is now near of the elves tree. Location of the Elven forest you will know in the task Find a way to heal Ardo (basic version of the game).
2) Find the gap between the spheres
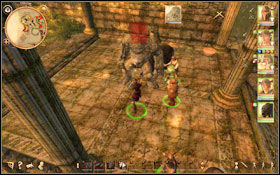
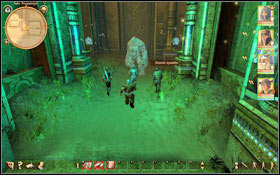
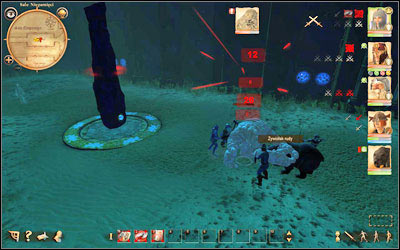
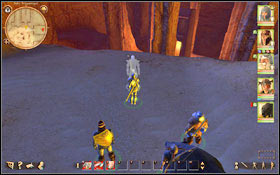
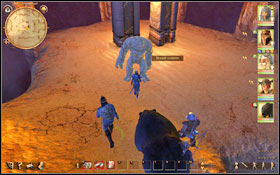
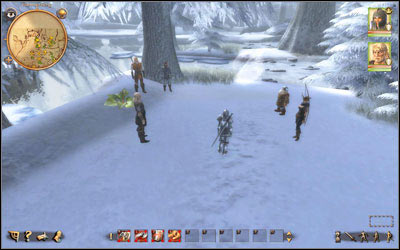
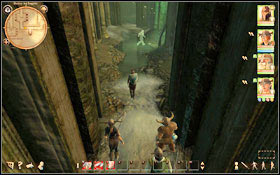
When you will be already in the Elven forest, head to the northeast, where you will find the entrance to the elves tree (M5, 2). Being at the top (first level), this time go to the northwest, toward the ravine of the memory. Another gap guards huge stone golem (M5, 6) # 1. Before you stand with him to the fight kill all the wolves running around in the area. Despite appearances, he's not a tough opponent.
3) Enter the second gap between the spheres
Go through the second gap between the spheres (M5, 3) #2. You'll get back to Tie'Shianna, where you will meet with Phileasson.
Received: After quest 5. Another way to Phileasson.
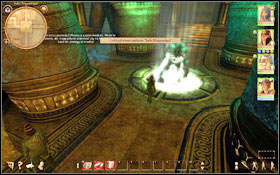
1) Defend yourself against Orima's priestess
When you return to Tie'Shianna you will meet there Phileasson which Mhayana (M9, 2) presented the glowing stone from her mask. Phileasson considered himself for the High King, the ruler of the High Elves. Moments later the Orima's priestess rushes to attack you. The opponent is demanding and persistent, albeit Phileasson helps you, but you are not able to guide him yet. Mhayana can convert enemies into stone for a one and a half minutes. When combat ends, the new High King will go to the Rose Portal, which will take them to the Lion Gate - currently located under attack of Kazak.
2) Stop the attacking troops
Unfortunately you won't be able to run up to the portal after Phileasson, arrives Nameless Horde (M9, 4). After breaking the first wave another will appear. This time, have an attention to the Leader of the horde, which has the highest durability and strength. It is true that there are Guardians of the Palace, but you will be the main target of the opponents.
3) Go after the Phileasson to the Lion Gate
Go through the Rose Portal (M9, 3), but unfortunately you won't be direct to the Lion Gate, but to the Halls of Oblivion. Perform the task 7. Halls of Oblivion. After completing the tasks automatically activates the task 8. Kazak, Wading in Blood.
Received: During quest 6. The faith of the High King.
1) Find an exit
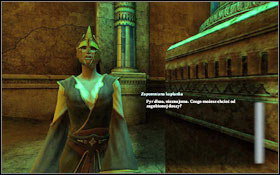
You will appear at unspecified location. Vis-a-vis you, in the distance, you will see the Guardian of the elements (M10, 2) #1 - he will not answer of any of your questions, but he will command you to go after him. You will reach the room of forgotten, in which reside other lost creatures. Another gate is guarded by a guard. Shortly after entering the center you will talk with the Forgotten, from which you will learn exactly what kind of place is this. In the hall look after Lost priestess (M10, 3) #2 and ask her for more details about this place. Priestess tell you how to get out - you need to break the Pyra seal. You will learn the Star Poem, which will allow you to go through the locked gate (M10, 4). Approach to the guard and ask him about your passing through the locked gate. At this point you have to recite a poem:
"Life, Death, Destiny. Eternal war, till the seal will not break the hand of the annunciation."
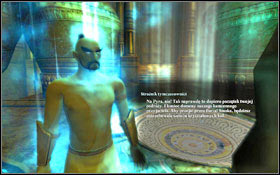
Guardian will open the pass and again you have to follow him #1. After reach the target the Guardian of transience will appear #2. He will guide you forward - you have to collect six crystal orbs to pass through the Dragon Portal.
2) Find six crystal orbs
This task is very easy - you need to go into six rooms with altars, take a crystal orb from each of the altar, and then fight with the dead Servants of Nameless (M10!). Guardian of transience appoit your way, so you cannot make your own way. On your way you will encounter on a lot of traps (M10, !) and smaller creatures such as scarabs (M10, !). All this information you can find marked on the map. The order of obtaining the crystal orbs is as follows:
1. Crystal orb (M10, 6) - altar of ice.
2. Crystal orb (M10, 7) - altar of ore.
3. Crystal orb (M10, 8) - altar of fire.
4. Crystal orb (M10, 9) - altar of earth.
5. Crystal orb (M10, 10) - altar of air.
6. Crystal orb (M10, 11) - altar of water.
After remove Crystal orb from the altar #1 entry will be blocked until you slavy all the servants of Nameless #2. Besides the usual skeletons, also there will be fighting mages - especially having a spells based on the element of the altar (ice, fire, etc.).
3) Return to the guardian of elements
Now return to the Guardian of the elements (M10, 5) - the same place where you meet guardian of transience. But to go through the Dragon Portal you need to complete one more test - to challenge with Shadows of Sources.
4) Challenge with Shadows of Sources
In the next part of the Halls of Oblivion you will meet Shadow of Mhayana (M10, 12). She is one of the Shadows of Sources, she will also explain you what the circle of the elements is and how you can open the portal. You'll also learn that only after opening the seal by a crystal orb you will be able to release the power of the element that will allow you to destroy the guardians of the seal.
5) Destroy the circle of elements

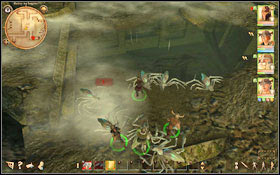
Follow the Shadow of Mhayana which will open first gate for you. Inside you'll find Stamp of air (M10, 13) and several rock goblins #1. You will not be able to defeat them until you put a crystal orb in the stamp. The best and universal way is, after switching pause and play, sending one of the heroes of the seal, and other launch an attack on the opponents. When you break the seal will appear few Guardians of transience, who will assist you in the battle #2. When you get rid of the enemies follow the Shadow of Mhayana to the next room.
Another Seal of water (M10, 14) watch ore elementar. As before - send one hero to break the seal with a crystal orb, and only then start to attack the elementar. Otherwise, you will not be able to do any harm to the opponent.
After breaking the second seal, before the third, you will encounter Shadow of Amariel (M10, 15) - she will guide you through the next two rooms: seal of earth (M10, 16) and seal of fire (M10, 17). Same as before - break the seal by placing in her crystal orb, and only then destroy rock goblins.
To the fifth and sixth seal you will be taken by Shadow of Tarkatha (M10, 18). First, you will visit the room with the seal of ice (M10, 19), which guards the ore elementar, and as last you have to break the seal of ore (M10, 20) protected by a rock goblins.
6) Go through the Dragon Portal
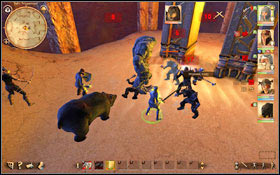
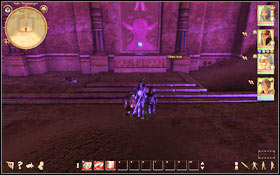
After breaking the last seal the Shadow of Tarkatha will inform you that the Dragon Portal (M10, 21) has been opened and you can go through it. When you reach the portal you will meet the Guardian of the elements #1, which will allow you to go through the portal, but before this, you have to defeat some of the horde warriors #2, who infiltrated impunity from the Lion Gate to the Halls of Oblivion. A huge guardian will assist you, so the fight won't be difficult. Go through the portal. Automatically activates the task 8. Kazak, Wading in Blood.
Received: After quest 7. Halls of Oblivion.
1) Defeat rest of attackers
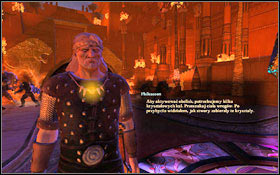
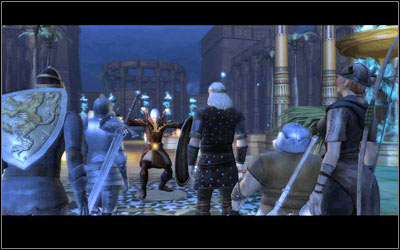
When you will teleport to the Lion Gate, quickly speak with Phileasson (M11, 2) #1. Tell him about the fact that his amulet should provide him protection. Your task is to counter the attacks of the horde #2 until the obelisk will be ready. Besides - search the dead bodies (mainly the leaders of the horde), because they can carry a Crystal Orbs, which could be useful later. Try to collect as many as you can (it will help you in last fight - versus Kazak). When you get the first orb, it activates another part of the quest.
2) Hold the Lion Gate
Repulse next waves of enemies (M11, 3), all the time researching corpses for the Crystal orbs. Phileasson joined your team, but you're still not able to control his actions. After three waves you will have some time to search the whole area and take the necessary things to the last fight. After a moment Kazak will creep from a hole.
3) Support Phileasson in fight with Kazak
Begin fight with Kazak. Also watch out on horde, which will support him.
4) Use the Pyra Obelisk
When Phileasson realizes that his opponent is too powerful, he will issue an order to use the Pyra Obelisk (M11, 1). Depending on the number of crystal orbs you have, you can activate so up to the elements. You can also keep your orbs, and then sell them after returning to town for a little over 5 $ a piece. But then the battle can be terribly difficult. If you choose to use the obelisk, here's a list of available supported:
[Ore] Cut off the supply of ogres and leaders - very useful, none of strong attacking enemies allows you to focus almost all members of the squad on Kazak.
[Fire] Increase the attack of the team - use only if you absolutely cannot defeat the Kazak and see that your attacks do not impress on him.
[Ice] Shoot in Kazak ice bullets - ideal in a crisis situation, when the characters are close to death, as well as Kazak, missiles can be also a weapon of finishing.
[Water] Decrease Kazak armor - use only if you absolutely cannot defeat the Kazakiem and see that your attacks do not impress on him.
[Air] Rescue the trapped army - the army can fight with the hordes, while you'll be attacking Kazak. However, support does not present too high level.
[Earth] Aura of treatment for the team - useful if you have problems with the use of the treating team member (or, for example, when he dies in battle).
5) Defeat Kazak
Somewhere along the line, Kazak will hit Phileasson by a strong blow, he will fall on the ground and lost the magic stone which gives him protection. From this moment you have to fight without thorwalian friend. The fight will not be easy, at any time your opponent can knock a teammate thereby exclude him for a time of fight. Remember to use the Obelisk in assurance.
After defeating the creature speak with Phileasson, using Secret knowledge explain him what happened and why he doesn't remember anything.
6) Face Tarkath
Leave the Lion Gate, passing through the portal (M11, 4). Near Rose Portal you will face Tarkatha, but unfortunately you won't catch him and attack, because your opponent will send you to the Elven forest, and the gap will be closed. Automatically activates the task 9. Back to the world in a bubble.
Received: After quest 8. Kazak, Wading in Blood.
1) Ask Ynu
To continue the quest first you have to complete task Hidden Harbor (basic version of the game).
After returning to the Elven forest back to the ship (M5, 1), which navigate to the Nadoret. Exit the northern part and go talk to the Ynu (M1, 5). He will tell you that Phileasson visited him some time ago, but he wasn't waiting for you and went to Hammerburg.
2) Enter the gap between the spheres
Location of Hammerburg you will know after complete the quest Find a way to heal Ardo (basic version of the game).
After reaching the place, go through the dwarven bridge to the north, where you will find another gap between the spheres (M7, 3) as well as Phileasson and Captain Eilif "Thunder Fist". After short conversation, Phileasson consider that this time he will join you (NOTICE: at this time you will take over control of he and also the character will lose immortality). Choose two additional characters who will visit for the last time the Tie'Shianna, then go through the gap.
Be sure to get stores and buy all necessary things (weapons, new armors, ammunition, potions). Almost in any time you can go back and change the team members (except the moment when the last task, 11. Tarkath the Traitor, will activate).
Received: After quest 9. Back to the world in a bubble.
1) Help Nirtana in Halls of Knowledge
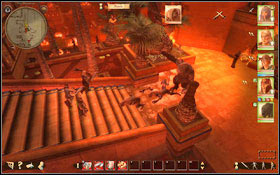
When you will be again in Tie'Shianna you will see how Tarkath closes himself with the princess in the Throne Hall. During a conversation with Phileasson you can use the Perception notice that at the entrance is lots of guards. Also, ask him about more details - you'll find that Phileasson knows some word which might give him authority over this place. After a while the guard will come and ask for help for Nirtana - agree then. As soon as you will enter the Hall of Knowledge defeat the first group of warriors #1. A little further bomb spores will get in. At the end defeat the horde which attacking the Guardian of Knowledge #2.
2) Find Odana - guardian's daughter
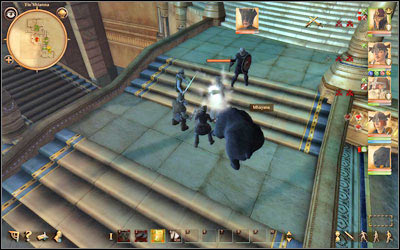
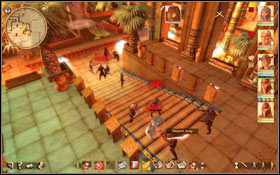
During the conversation with Nirtana and Guardian of Knowledge magic words happen that you can remind everything to the guard. At the same time he will declare that he will fight with you against the traitor, if only you will bring back his daughter. On the map will be marked two terraces - on one of them resides Odania (M9, 6). You can skip the lower terrace (looking at the map), because only there you will find warriors of the horde. Defeat the horde in the courtyard - a bit further there will appear a spore bombs #1. Do not forget about two archers attacking from behind the pillars. When you reach the terrace, defeat the ogre #2 and save the princess.
3) Escort Odania to the Hall of Knowledge
First reinforcements will appear on the stairs #1, and then at the door leading to the Hall of Knowledge. In the second case there are two leaders of the horde. Fights should not cause you any problems, the number of the opponent is small.
4a) Defeat Aman'Sha Nirtana

As soon as you return to the Halls of Knowledge, there you meet Nirtana and Guardian of Knowledge's dead body. If you decide to throw down a challenge (or just you don't have enough skill level to use the second option) - right away you'll fight Nirtana and lots of the Palace Guards. In this case, you have a tough nut to crack. Palace Guardians are tough enemies (same Nirtana should die rather quickly.)
4b) Fight at the side of Aman'Sha Nirtana
You can convince her by a Twaddle (need a minimum of 8) to try once again to restore her memories with the magic word.
This option is recommended - if you have requirement level of Twaddle. In that, Nirtana will be on your side in the battle against the Palace Guardians, and due to the fact that he will be immortal, effectively she will take on herself almost all opponents, and you'll be able to eliminate them one by one.
5) On request Biundrale research the Nutri chapel
After defeating Nirtana or the Guardians with her help, you will receive Power of Nirtana, which allow you to open the door to the Throne Hall. Unfortunately, it will be too small force. Odana mentions of another Fanvarian's servant - Biundrale. You'll find her at the Nurti chapel. You will also received a Key to the Nutri chapel which you can open the gate (M9, 8). In the corridor will be waiting for you Biundrale (M9, 9), who by the magic word will remember everything and will help you in the fight against a traitor.
6) Rescue the students of Biundrale
Your task is to save three students (M9, 16), attacked by scarabs. This time, they shouldn't be a problem as when your first visit. Once when you will have completed the extermination speak with each of the students - they will return to Biundrale.
7) Speak with Biundrale
After rescue all three students return to Biundrale (M9, 9) and speak with her. After a moment she will disappear with her students and you will receive from her Power of Biundrale.
8) Open the gate to the Throne Hall
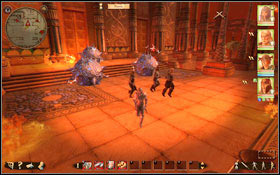
Return to the courtyard and go at the door to the Throne Hall (M9, 17). You have to face five Palace Guardians, they should be killed quickly and smoothly. After clearing a path, use the Force previously received to open the door. Automatically activates the task 11. Tarkath the traitor.
Received: After quest 10. The Fall of Tie'Shianna.
1) Defend yourself against the Tarkath
After a short speech of Tarkath (M12, 1) princess Amariel shall command to kill you. Not having more choice you have to stand up to fight. The struggle will not be easy, if you made ??task Z5. The mystery of the bubble and you have holy water - use it. When Tarkath is about half the life, from the four directions reinforcements will come. In addition to warriors and archers (4 enemies of each type) there will also be a priestess which cast powerful spells, each with different character.
Combat priestess (M12, 2) increases the armor of Tarkath.
Combat priestess (M12, 3) reduces the armor of your team.
Combat priestess (M12, 4) increases power of Tarkath.
Combat priestess (M12, 5) reduces the strength of your team.
Defeat them in the first instance, while continue watching out on the other warriors and on the Tarkath. Make sure that one of your character is attacking him.
When you will the battle, everything starts to crumble.
2) Convince the Amariel princess
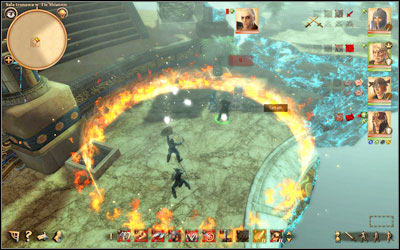
If during the conversation you will select the first option, after a moment Tarkath will reveal his true face - the princess will stand on your side.
If you choose the second dialogue option, Tarkath will square off to the next fight. This time, the field will be limited by a ring of fire, and no reinforcements will come from the enemy side. After defeating him in battle, Tarkath will reveal his true face.
3) Defeat the undead Tarkath

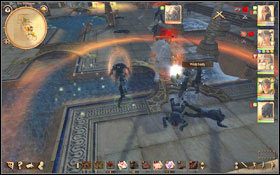
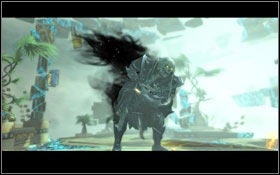
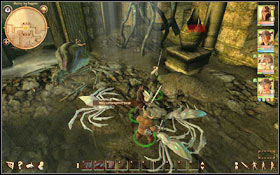
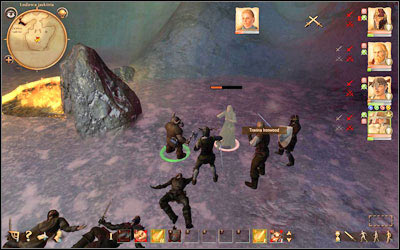
Before you will face the final battle, you need to defeat few waves of Nameless Horde (M12, 7), (M12, 8), (M12, 9) #1. After defeating the waves you will travel further. Notice - after reaching the third wave, in place (M12, 8) once again will appear few spore bombs and horde ogre #2.
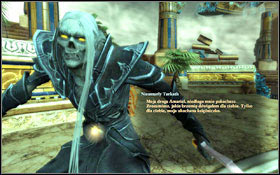

Fight against the undead Tarkath definitely will be the hardest fight #1. Often use the holy water. From time to time will be arriving reinforcements of Nameless Horde (with time much stronger enemies) - use maximum two members of your team to occupied them. Particular attention is paid to the attacks of undead Tarkath and his spinning attack #2. His range is a fair-sized, and he does damage to all around. When the attack starts, try to avert by your whole crew.
After defeating the undead Tarkath you will return to the Hammerburg. In vote of thanks you will received some acquired inventory (available in the box on the ship: holy water, sword, shield and Phileasson's jacket and some minor stuff) and the Phileasson's Diary on results effect (unlimited by time): Sneaking +1, Willpower +1, Perception +1, Twaddle +1, Cunning +1, Human nature +1, Trading +1, Swords +1, Throwing weapons +1.
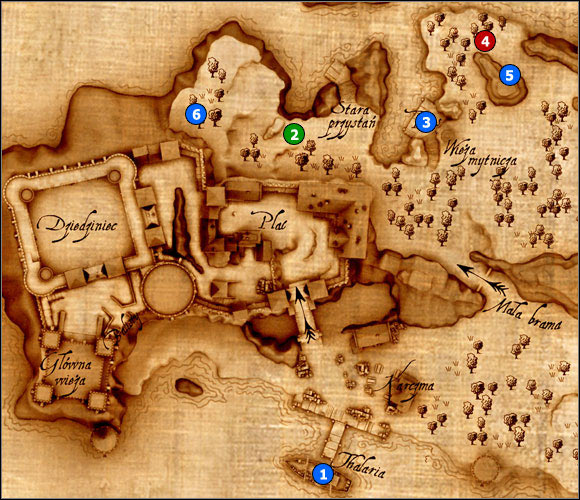
Received: Travina Ironwood (M1, 2). Character will appear after quest Toll is not enough (basic version of the game)
At the port you will meet the woman who is not an ordinary trader. You will know that she sells old maps, which can allegedly lead to the treasure, but not necessarily to have any value for collectors. To activate a task you need to buy Little treasure map for 0,5 $.
1) Use the map
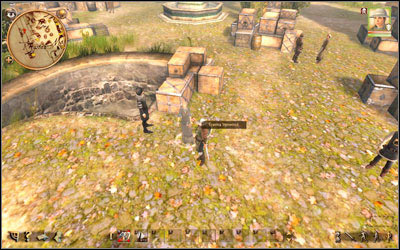
On the map will appear the place of the Treasury (M1, 3), without losing any time head to the front of northern part of town. Run into two townspeople talking about place where there should be a treasure.
2) Defend yourself against the marauder
Shortly after reaching the place you will be attacked by two thugs. The fight should not cause you big problems. When you will defeat them, do not forget to talk with two townspeople.
Received: Guard (M1, 6). After first visit in Thorwalian's camp.
1) Speak with Thorwalians
When you will leave the Thorwalian's camp, near the city walls you will be stopped by the guard. Once again, you'll hear about maps trader, which allegedly was assaulted and robbed. Come back and talk to Keileasson (M1, 5), you will receive from him a real Travina's treasures map.
2) Find first place marked on the map
To be able to continue the adventure you need to go to the Thurstein's toll chamber, where you will be able to follow next steps. When you will reach the place, head in the direction of the old wharf (M2, 3) where you will be able to read the next clue.
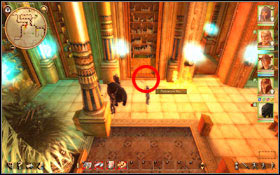
3) Follow the clues
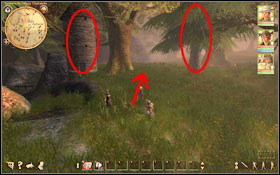
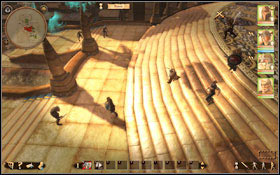
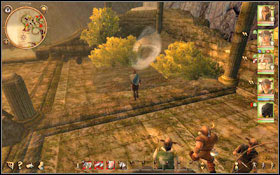
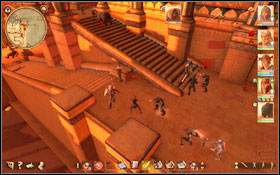
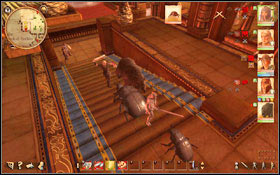
You have to follow the instructions on the map:
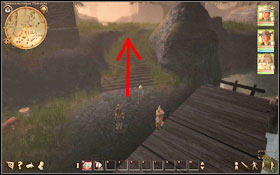
On pier go up the stairs #1. Turn to the north-east and go until you stand between a tower and a pine tree #2.
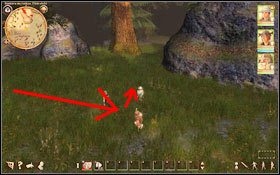
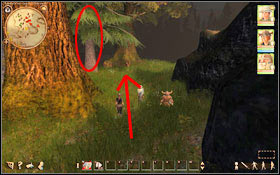
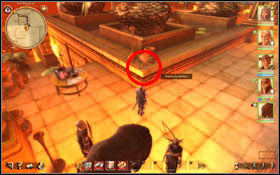
Then you have to go in the same direction (means in north-east) on the same path as from the stairs to the tower #1. Turn left and keep going straight ahead, until you will achieve another pine #2.
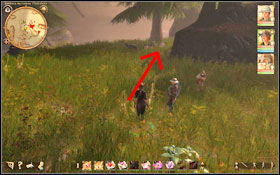
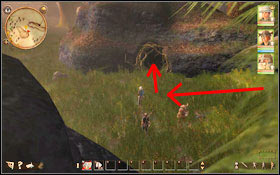
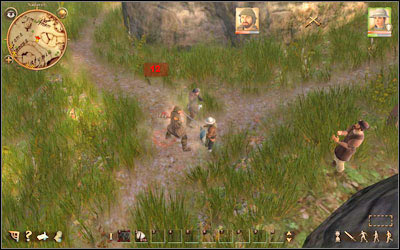
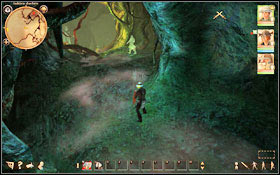
Turn right and go straight until the cliffs will be on the right. Also watch out for the wolves (M2, 3) #1. Go 15 steps along the cliff - you will get to enter of the Cave of treasures (M2, 5).
4) Find the treasure
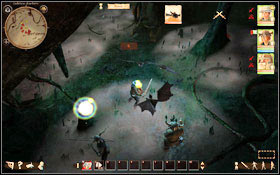
Go ahead all the time, the initial path in the cave will be full of surprises. After encountering on the first bigger cave you'll be attacked by a several bats (M3, 2). A little further will appear a mysterious spirit (M3, 3), however, which disappear after a while and from the corners will creep the Morfu (M3, 4).
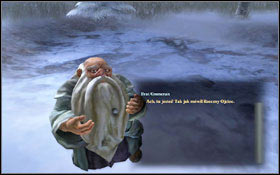
A few dozens steps away, again you will see the ghost - Eirik (M3, 5). You will know that the trader of treasure maps grabbed the treasure, and Eirik was cruelly murdered. You'll find that most of the treasure sunk (River's Father grabbed it), but few of them have been drawn to the surface. Spirit will direct you to other ghost, which should have information about one of the artifacts. It activates task Z3. Condemned spirit. You can leave the cave (M3, 1).
Received: Eirik (M3, 5). After quest Z2 Treasure hunt.
1) Find ruins on the marshland
Location of the Elven forests you will find in the task Find a way to heal Ardo (basic version of the game). After reaching the place, head west, where near the swamps you will locate the entrance to the Haunted ruins (M5, 4). On your way you will encounter on a lot of swamp stinkers - combat against them are not very difficult.
2) Searching the ghost
In the haunted ruins you need to watch out, because its full with not only the creatures but also with the traps. All traps were marked on the map by the red exclamation (M6, !). Shortly after passing a few steps you will be attacked by a small group of swamp stinkers (M6, 2) #1. Next around the corner are bats (M6, 3). Before the first big room you will find the trap, and in the same room - a few spiders (M6, 4). In the next corridor you notice the ghost (M6, 5), which will disappear in a blind alley #2.
The next room is the Hall of illusion (M6, 6), after entering there you will be attacked by a large amount of spiders #1. But keep in mind that these huge are just an illusion and they won't be able to hurt you. In the next room so easily not be, because in addition to small spiders (M6, 8) you'll fight with big one #2. Attack him by two of your characters, because the big spider can fuddle his opponent. So try all the time to have someone to help.
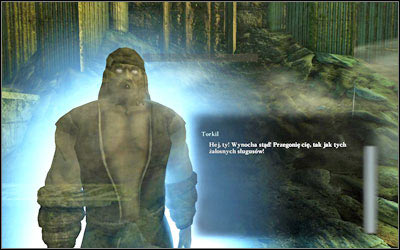
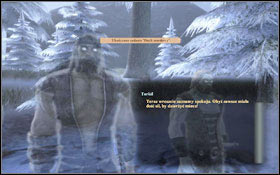
At last you will reach the room with the spirit of Torkil (M6, 9). It won't be set a friendly and without explanation will attack you.
3) Defeat the ghost
Very easy fight - Torlik should be surrender pretty soon. No additional creatures appear out, so you can attack the spirit by whole team. When the fight will interrupted, the spirit will give you an artifact and he will mention of another spirit - Hjore. You will find that he had murdered Eirik and sank the ship with treasures. You can find him in Hammerburg, on the south in the deep forest is a hidden cave. The entrance to the cave you can see only when you have equip the Ring of nature, which spirit will present you.
4) Familiar face
Shortly after leaving the surface you will meet an old friend - maps trader, Travina Ironwood (M5, 5). Trying threats come to nothing, she just will say that she will meet you someday again. It activates task Z4. Ghost of the murderer.
Received: Torkil (M6, 9). After quest Z3. Condemned spirit.
1) Find the frozen lake
Location of the Hammerburg you will discover after the quest Find a way to heal Ardo (basic version of the game). To be able to get out of the village you have to take the quest: Furry escapee (basic version of the game).
Then go to the south part of location, where near the woods you will find the source of the frozen lake (M7, 2).
2) Use Torkil's ring to find the entrance
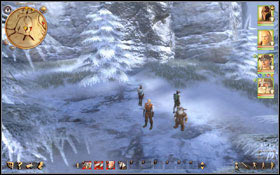 Without equipment ring.
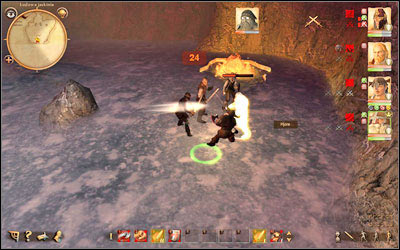 With equipment ring.
To see the entrance of the Ice cave (M7, 2) you have to equip ring which you received earlier from Torkil - Ring of nature.
3) Get to the ghost of Hjore in the cave
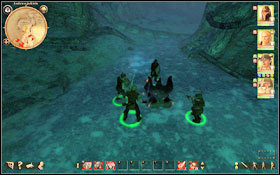
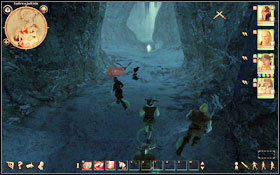
On a frozen lake you will meet a few giant amoebas (M8, 2) #1, also they can't move, but they can paralyze opponent for some time - keep that in mind and be careful to your team members to won't be defeated in this way. A little further the spirit (M8, 3) will appear, showing you which way you have to go next. At the furcation you will be greeted by a group of bats (M8, 4) #2. If you don't care about next battles (in the various ways of furcation you will find boxes that don't contain very valuable items), select the straight path. The same you will bypass the fight with beetles (M8, 5) and with another amoebas (M8, 6).
After reaching the last large part of the cave you will meet the Hjore (M8, 8). The ghost will reveal you that at the time of possession of all the artifacts he will be able to remove the curse from himself, and also that he had cooperated with the cheater - maps trader. Moments later, you'll fight against the ghost.
4) Defeat the ghost of Hjore
Despite the fact that the spirit is quite powerful, he shouldn't cause you any problem, since you'll be able to attack him with all your characters. Hjore focuses mainly on one character so try to treat this one regularly.
5) Defeat the maps trader
Shortly after defeating Hjore - Travina Ironwood (M8, 8) will arrive. The conversation won't convince her too much for a peaceful solution - you will have to stand up to fight. Maps trader has as powerful spells, also supports the three thugs. It's good to split your team and send one part of fighting, and one familiar adept with treatment spells (for example, Fayris) at the maps trader. The other two have to quickly defeat the thugs, and then assist in attack on Travina. When the enemy dies you get the Golden statue. You can leave the cave (M8, 1).
6) Give artifacts back to the River's Father
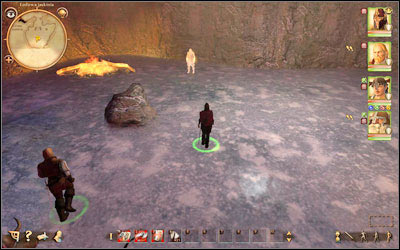
As soon as you leave the cave you will meet Brother of Emmeran #1. He will take from you acquired artifacts, allowing you to keep the Ring of nature, who had Torkil promised you. There will also appear the spirits of the dead, who will thank you for freeing their souls #2.
Received: Odana (M9, 7). After task from Nirtana in quest 10. The Fall of Tie'Shianna.
1) Speak with Odana
Speak with Odana and ask her for help during the quest 10. The Fall of Tie'Shianna (just after the disappear of Nirtana).
2) Find all scrolls
Sorrow of Fenvarien (M9, 10)
Hearth of Amariel (M9, 11)
Divided Power (M9, 12)
Helpful recipe (M9, 13)
Every time you will find another scroll, you will be attacked by the Nameless Horde. At the next scrolls the more powerful opponents will appear. After defeating all the opponents return to Odana - she will read following scroll fragments.
When you will give recipe to Odana, she will teach you how to create a potion that will help you in the fight against Tarkath. You will get a Recipe for a holy water.
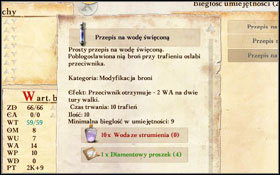
The potion you can create at the alchemic table (M9, 14). To create a potion you need:
10x Water from the stream
1x Diamond powder
In fact, you will create 10 bottles, each of them allow to shots 10 hits. Result: the opponent gets -2 ATT for next two rounds of the fight.
Water you can purchase from the merchant (M9, 15), while the diamond powder, you could find during your travels, for example, in the Halls of Oblivion.
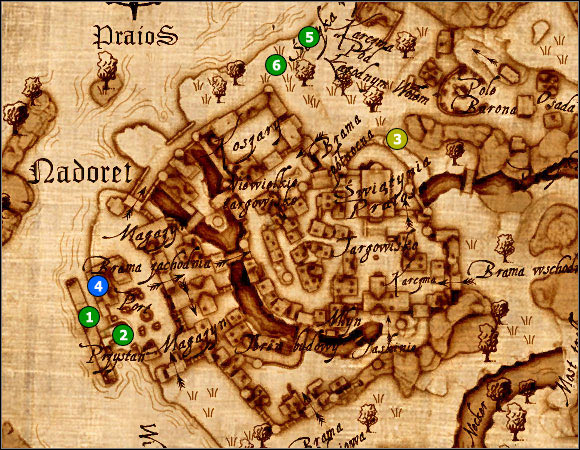
1. Night watch - depute quest 1. Guard in trouble. Available after quest Toll is not enough (basic version of the game).
2. Travina Ironwood - depute quest Z1. Maps trader. Available after quest Toll is not enough (basic version of the game).
3. Treasurer - relevant with quest Z1. Maps trader. Thugs - appears during the same quest.
4. Watchtower at the port - relevant with quest 1. Guard in trouble.
5. Thorwalians: Ynu, Keileasson, Suffgur, Torstor - available after quest 1. Guard in trouble.
6. Guard - depute quest Z2. Treasure hunt. Appear after first visit in Thorwalian's camp.
Notice! To the chamber you can sail after quest Ship's crew and Brother of Emmeran (basic version of the game).
1. Ship
2. Phileasson - relevant with quest 2. Thorwalians on the Great River. He's available there only on the start of this quest.
3. Old wharf - relevant with quest Z2. Treasure hunt.
4. Wolves
5. Cave of treasures - relevant with quest Z2. Treasure hunt.
6. Gap between the spheres - it will appear during quest 2. Thorwalians on the Great River.
Notice! The cave is available during quest Z2. Treasure hunt.
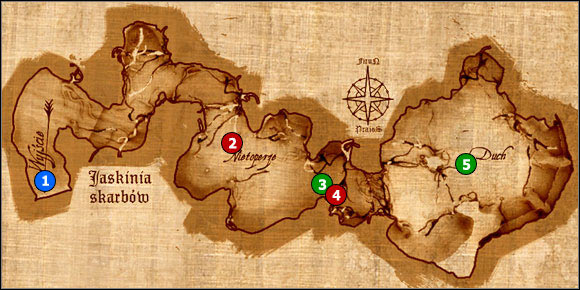
1. Toll chamber Thurstein
2. Bats
3. Ghost - relevant with quest Z2. Treasure hunt.
4. Morfu
5. Eirik - relevant with quest Z2. Treasure hunt.
Notice! To the Palace of the High Kings you will visit (at the first time) during quest 2. Thorwalians on the Great River.
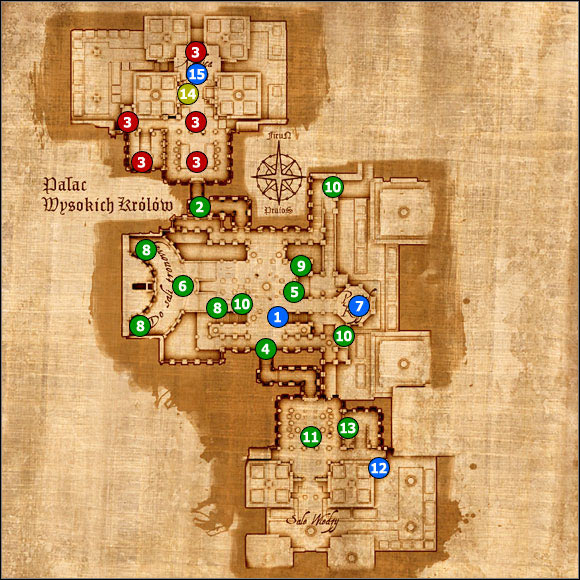
1. Gap between the spheres
2. Mhayana - relevant with quest 3. Heal the Nurti chapel.
3. Scarabs - relevant with quest 3. Heal the Nurti chapel.
4. Palace Guard
5. Merchant
6. Nirtana - relevant with quest 3. Heal the Nurti chapel.
7. Rose Portal
8. Aman'Kai of the Palace Guard - relevant with quest 3. Heal the Nurti chapel.
9. Biundrae - relevant with quest 3. Heal the Nurti chapel.
10. Child from Tie'Shianna - relevant with quest 3. Heal the Nurti chapel.
11. Guardian of knowledge - relevant with quest 3. Heal the Nurti chapel.
12. Laboratory
13. Odana - relevant with quest 3. Heal the Nurti chapel.
14. Sacred flowerbed - contains instructions of planting the Nurti Seeds.
15. Nurti chapel
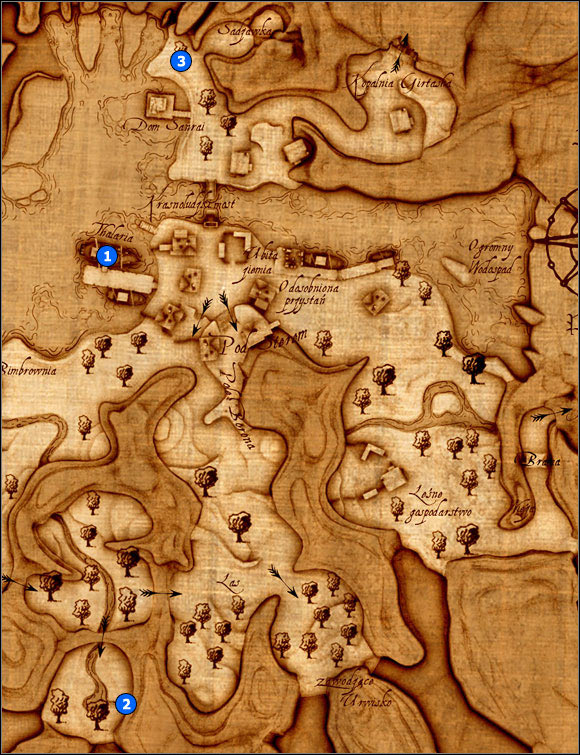
Notice! Location of the forest you will know from the Emmeran's brother during quest Find a way to heal Ardo (basic version of the game).
1. Ship
2. Entrance on the elven tree
3. Gap between the spheres - relevant with quest 5. Another way to Phileasson.
4. Haunted ruins - relevant with quest Z2. Condemned ghost.
5. Travina Ironwood - relevant with quest Z2. Condemned ghost. She will appear after leaving the Haunted ruins.
6. Stone golem - relevant with quest 5. Another way to Phileasson.
Notice! Ruins are available during quest Z2. Condemned ghost.
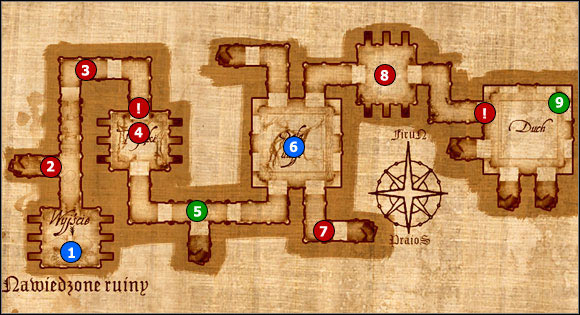
1. Elven forest
2. Swamp stinker
3. Bat
4. Spider
5. Ghost - relevant with quest Z2. Condemned ghost.
6. Hall of the illusions - spiders appears inside.
7. Bats
8. Spiders
9. Torkil - relevant with quest Z2. Condemned ghost.
! - traps
Notice! Pirates village is available after quest Find a way to heal Ardo (basic version of the game).
1. Ship
2. Ice cave - relevant with quest Z4. Ghost of the murderer.
3. Gap between the spheres - relevant with quest 9. Back to the world in a bubble.
Notice! The cave is available during quest Z4. Ghost of the murderer too.
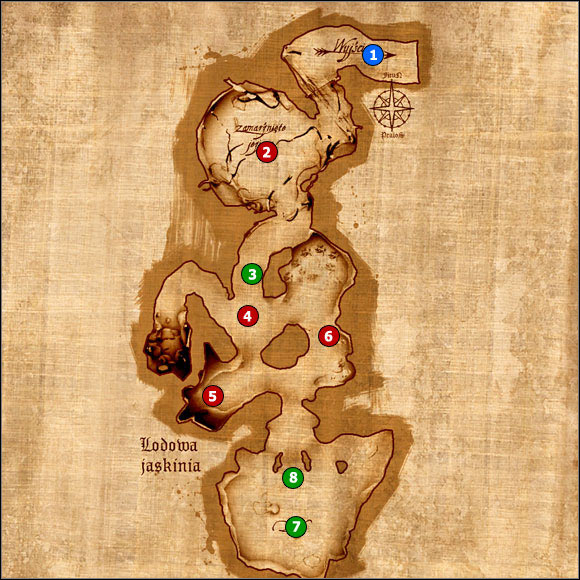
1. Hammerberg
2. Giant amoebas
3. Ghost - relevant with quest Z4. Ghost of the murderer.
4. Bats
5. Beetles
6. Giant amoebas
7. Hjore - relevant with quest Z4. Ghost of the murderer.
8. Travina Ironwood - relevant with quest Z4. Ghost of the murderer. Appear after defeating the Hjore.
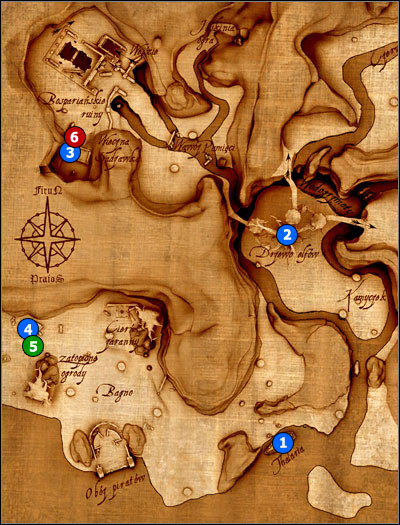
Notice! The Palace of High Kings you will visit (at the second time) during quest 5. Another way to Phileasson and (at the third time) during quest 9. Back to the world in a bubble.
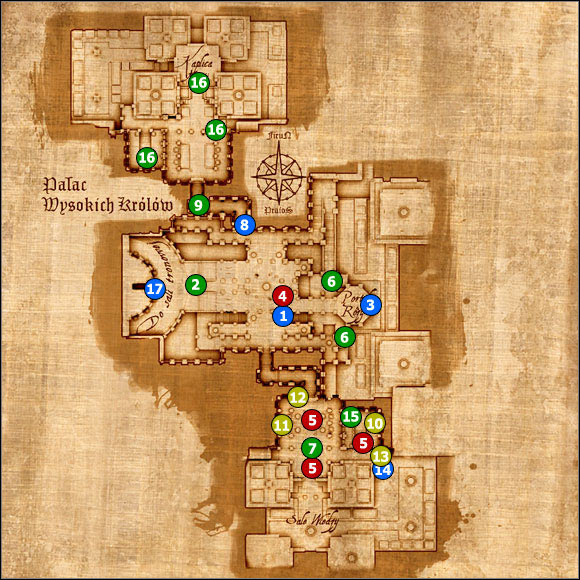
1. Gap between the spheres
2. Mhayana - relevant with quest 6. The Faith of the High King.
3. Rose Portal - teleport you to the Halls of Oblivion during quest 6. The Faith of the High King.
4. Nameless Horde - relevant with quest 6. The Faith of the High King.
5. Horde - relevant with quest 10. The Fall of the Tie'Shianna.
6. Odana - relevant with quest 10. The Fall of the Tie'Shianna.
7. Nirtana / Odana - relevant with quest 10. The Fall of the Tie'Shianna. Nirtana will appear just after rescue the Knowledge Guard's daughter. Odana will appear there after defeat the Nirtana.
8. Closed gate - the key you will receive during quest 10. The Fall of the Tie'Shianna.
9. Biundrale - relevant with quest 10. The Fall of the Tie'Shianna.
10. Sorrow of Fenvarien - relevant with quest Z5. The mystery of the bubble
11. Hearth of Amariel - relevant with quest Z5. The mystery of the bubble
12. Divided Power - relevant with quest Z5. The mystery of the bubble
13. Helpful recipe - relevant with quest Z5. The mystery of the bubble
14. Alchemic table.
15. Merchant - he owns ammo, few armors, water from the stream and lots of other lesser things.
16. Child from Tie'Shianna - relevant with quest 10. The Fall of the Tie'Shianna.
17. Entrance to the Throne Hall
Notice! The Halls you will visit during quest 6. The Faith of the High King.
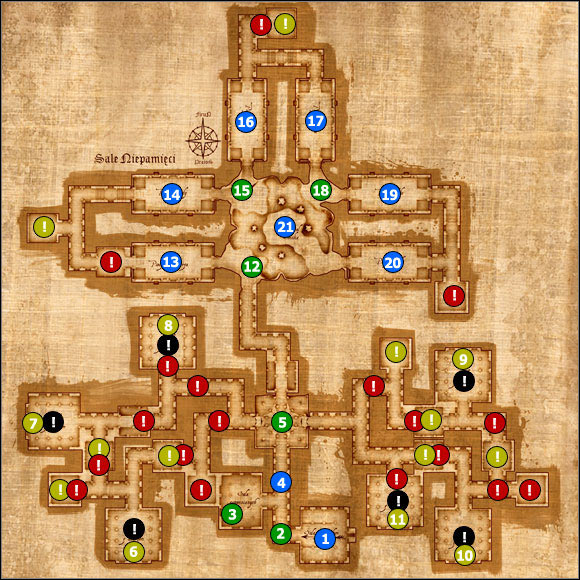
1. Room, in which you will appear after passing through the Rose Portal during quest 6. The Faith of the High King.
2. Guardian of elements - relevant with quest 7. Halls of Oblivion.
3. Lost priestess - relevant with quest 7. Halls of Oblivion. He will teach you the Star Poem.
4. Closed gate - you have to know the Star Poem to may pass.
5. Guardian of transience - relevant with quest 7. Halls of Oblivion. You will meet him in this place for the first time.
6. Crystal orb (altar of ice) - relevant with quest 7. Halls of Oblivion.
7. Crystal orb (altar of ore) - relevant with quest 7. Halls of Oblivion.
8. Crystal orb (altar of fire) - relevant with quest 7. Halls of Oblivion.
9. Crystal orb (altar of earth) - relevant with quest 7. Halls of Oblivion.
10. Crystal orb (altar of air) - relevant with quest 7. Halls of Oblivion.
11. Crystal orb (altar of water) - relevant with quest 7. Halls of Oblivion.
12. The Shadow of Mhayana - relevant with quest 7. Halls of Oblivion.
13. Seal of air - relevant with quest 7. Halls of Oblivion.
14. Seal of water - relevant with quest 7. Halls of Oblivion.
15. The Shadow of Amariel - relevant with quest 7. Halls of Oblivion.
16. Seal of earth - relevant with quest 7. Halls of Oblivion.
17. Seal of fire - relevant with quest 7. Halls of Oblivion.
18. The Shadow of Tarkath - relevant with quest 7. Halls of Oblivion.
19. Seal of ice - relevant with quest 7. Halls of Oblivion.
20. Seal of ore - relevant with quest 7. Halls of Oblivion.
21. Dragon Portal
! - traps
! - Servants of Nameless
! - scarabs or scorpions
Notice! The Lion Gate you will reach during quest 6. The Faith of the High King.
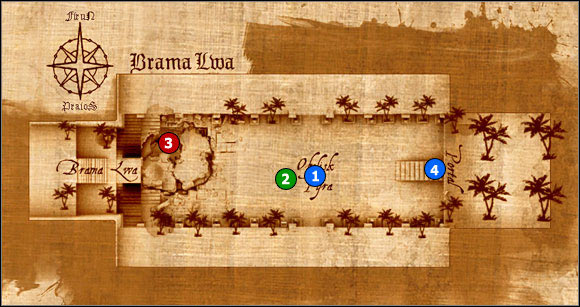
1. Pyra's Obelisk
2. Phileasson - relevant with quest 8. Kazak, Wading in Blood.
3. Nameless Horde, Kazak - he will appear at the end of quest 8. Kazak, Wading in Blood.
4. Portal
Notice! To the Throne Hall you will enter after completed quest 10. The Fall of the Tie'Shianna.
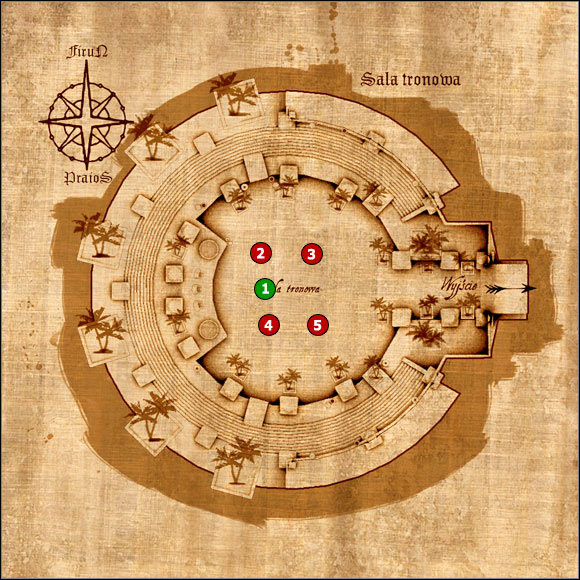
1. Tarkath - relevant with quest 11. Tarkath the Traitor.
2. Combat priestess - relevant with quest 11. Tarkath the Traitor. Increases the armor of Tarkath.
3. Combat priestess - relevant with quest 11. Tarkath the Traitor. Reduces the armor of your team.
4. Combat priestess - relevant with quest 11. Tarkath the Traitor. Increases power of Tarkath.
5. Combat priestess - relevant with quest 11. Tarkath the Traitor. Reduces the strength of your team.
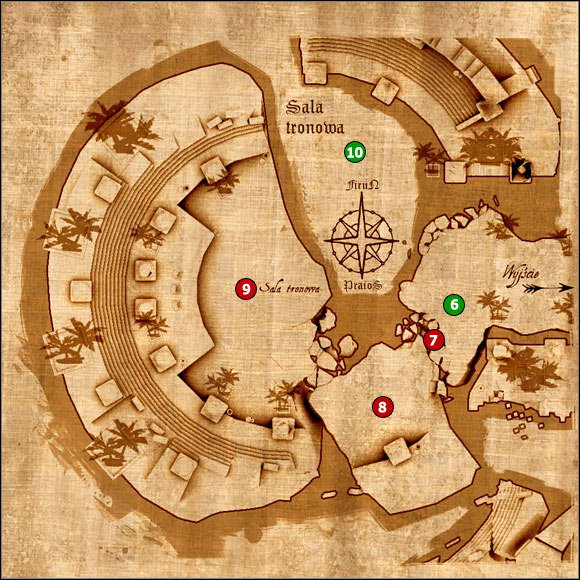
6. Tarkath - he will appear there only if you will choose the second dialogue option during quest 11. Tarkath the Traitor.
7. Nameless Horde
8. Nameless Horde
9. Nameless Horde
10. Undead Tarkath - relevant with quest 11. Tarkath the Traitor.


 Dust: An Elysian Tail Game Guide & Walkthrough
 Daylight Game Guide & Walkthrough
 Dracula: Origin Game Guide & Walkthrough
 Destiny Game Guide & Walkthrough
 Dragons Dogma Game Guide & Walkthrough