Welcome to the unofficial guide to one of the most enjoyable first person shooters of all time. This guide contains a detailed walkthrough of all of the singleplayer missions. You will also find many clues explaining how to deal with the opponents or certain combat situations. This guide should be useful for all players with insufficient experience with these kind of games. That is why you might find certain descriptions to be rather obvious ones. The guide is also concentrated on following the actual orders and completing presented objectives. We hope that you find this walkthrough both interesting and informative. Have fun!
TIME AND PLACE: December 16, 1941; Near Moscow
YOU ARE: Private Vasili Ivanovich Koslov
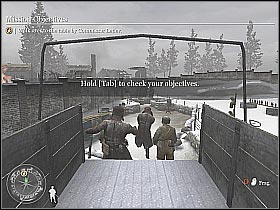
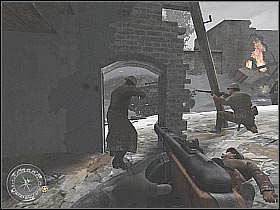
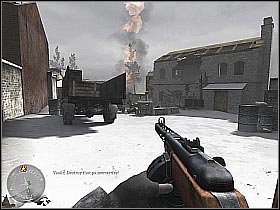
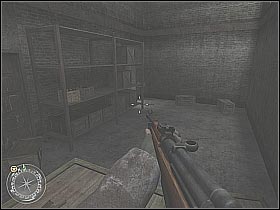
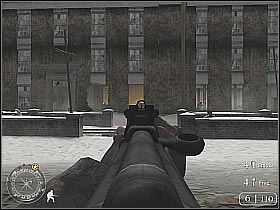
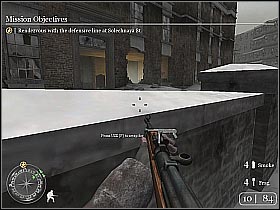
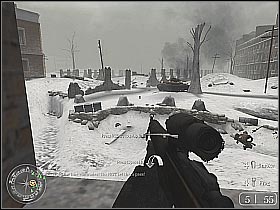
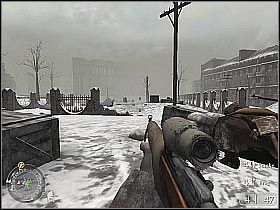
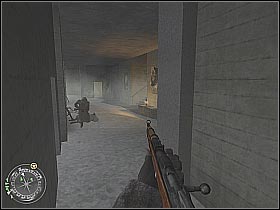
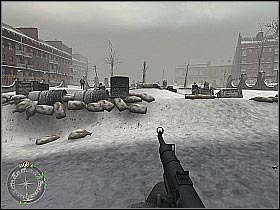
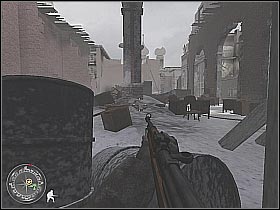
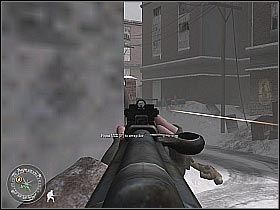
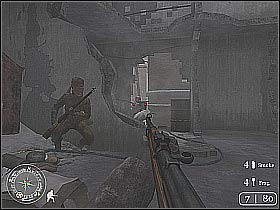
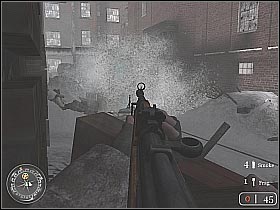
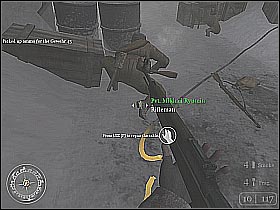
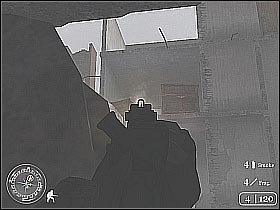
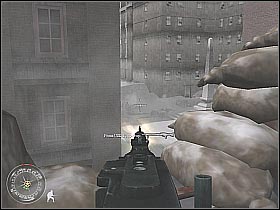
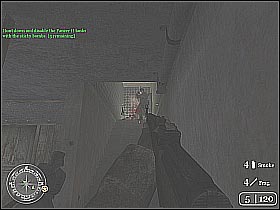
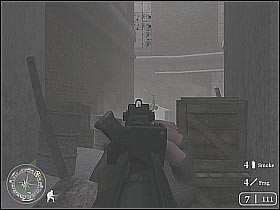
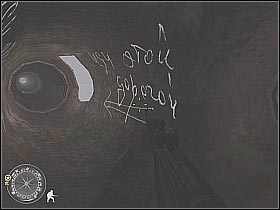
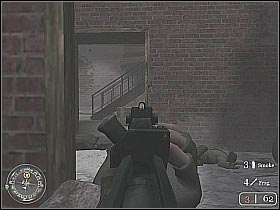
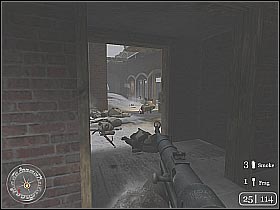
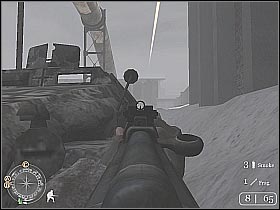
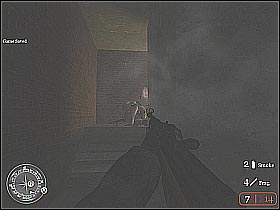
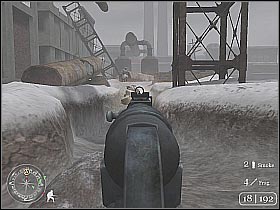
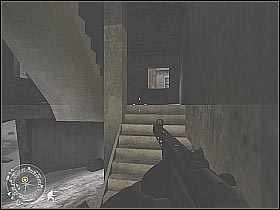
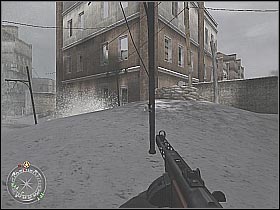
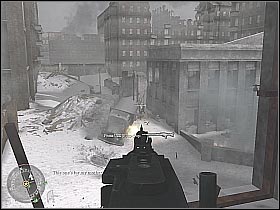
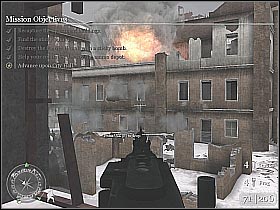
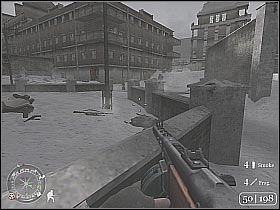
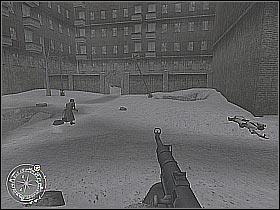
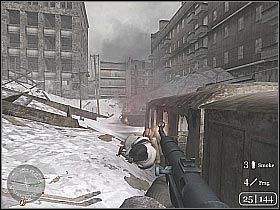
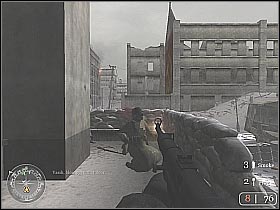
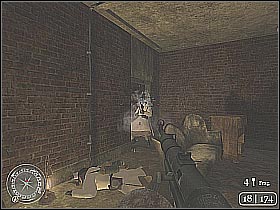
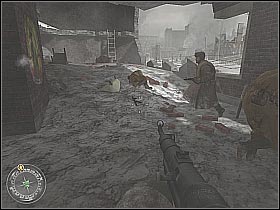
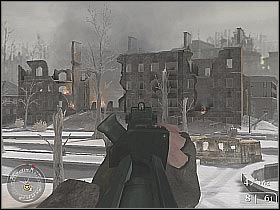
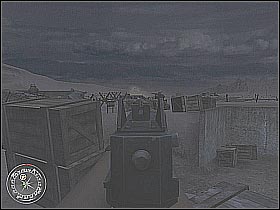
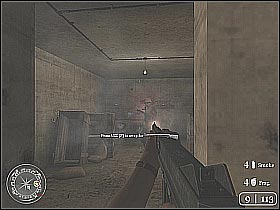
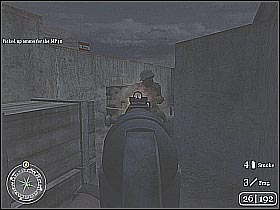
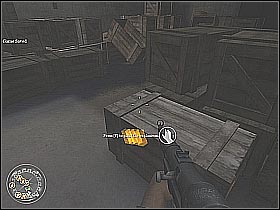
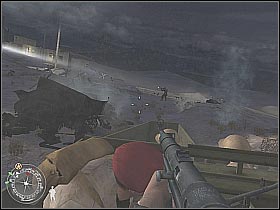
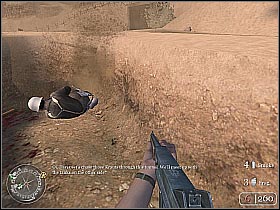
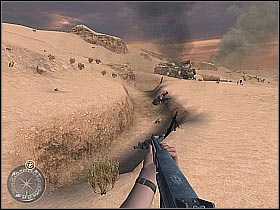
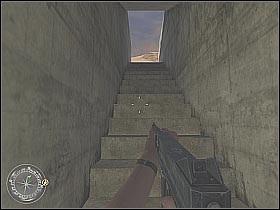
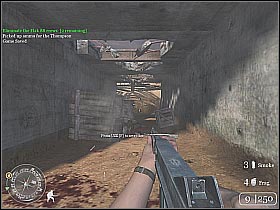
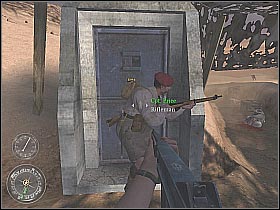
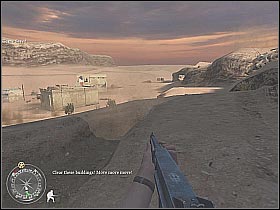
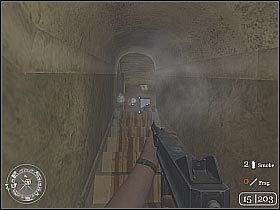
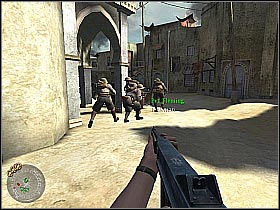
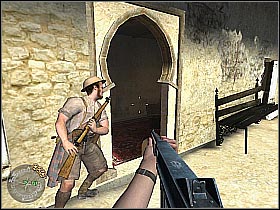
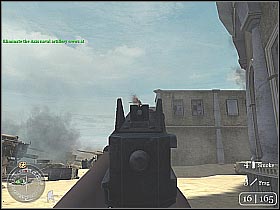
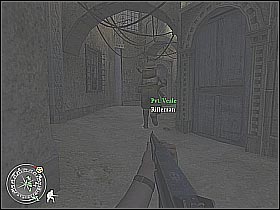
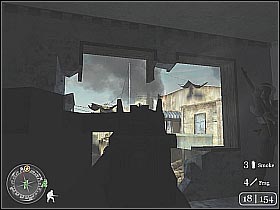
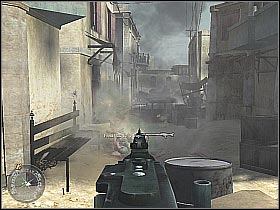
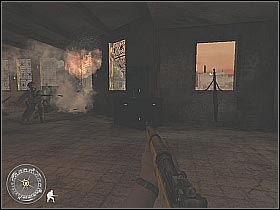
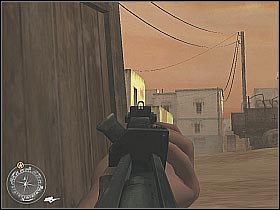
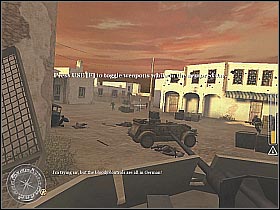
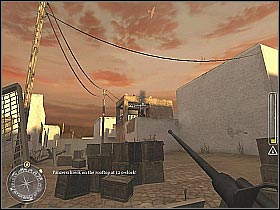
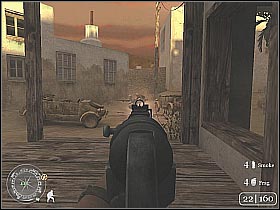
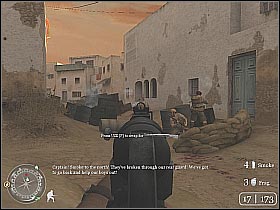
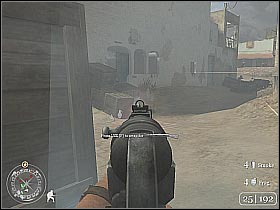
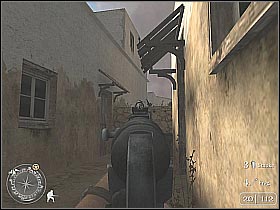
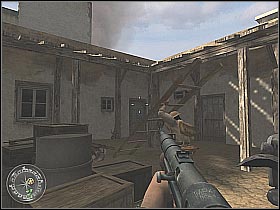
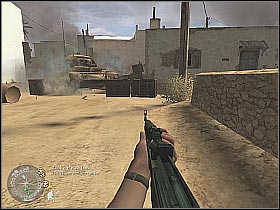
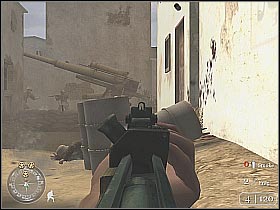
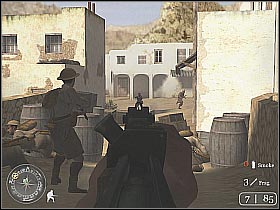
You start off on the back of the truck. Be sure to read hints displayed by the game itself. You can also check the current objectives by pressing the TAB button (screen 1). The game has a linear progress with predictible events, although in some moments it gets more interesting. Jump off the truck and talk to the squad commander (screen 2). He will present you with new orders. You will have to go the nearest building in order to arm yourself with basic weaponry.
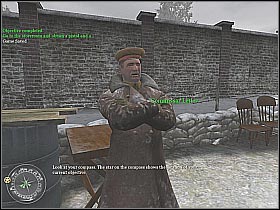
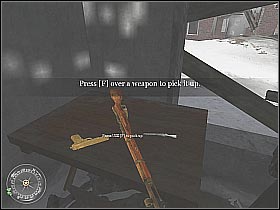
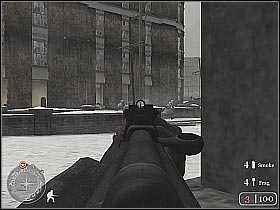
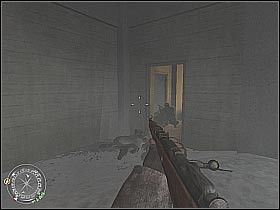
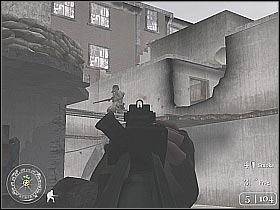
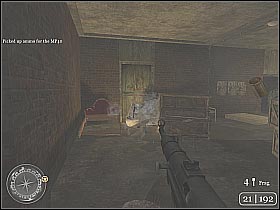
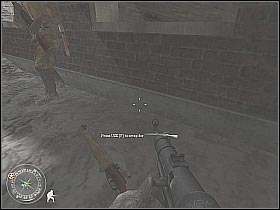
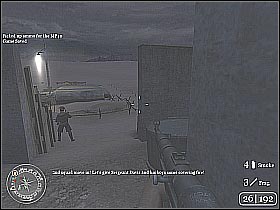
After hearing what the commander had to say, turn left. Be sure to check your compass for actual headings. You should also remember to use it in the future. Keep going straight (screen 1). There's only road leading to the desired building so you shouldn't have any problems getting there. Enter the destroyed building. Take the weapons lying on the table (use the F button) - a pistol and a rifle (screen 2).
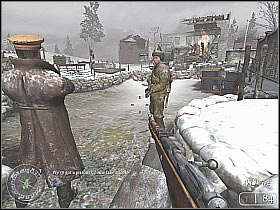
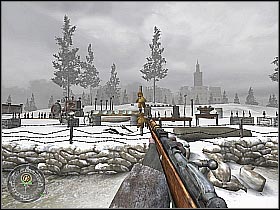
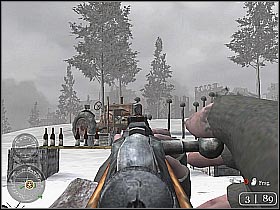
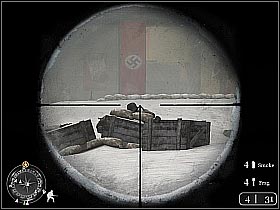
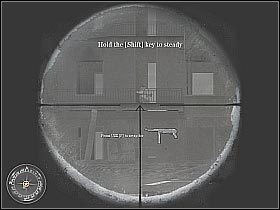
You should go back to the squad commander now (he is standing near the truck). Now you will have a chance to test these new weapons. Start off by aiming at the teady bears (screen 1). You should use a pistol at this situation. Now arm yourself with the rifle. Start shooting at the plates. You should zoom in the view by pressing the right mouse button (screen 2).
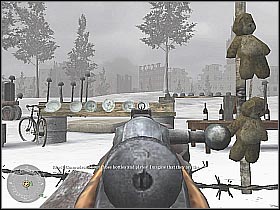
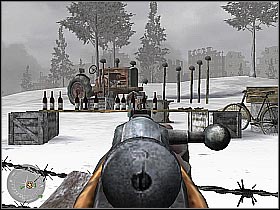
Next, you will have to take care of some bottles (screen 1). You should remember one thing - take your time for more precise shots. Last but not least, you will have to aim at some helmets (screen 2). The squad commander will give you 15 seconds to shoot as many of them as possible.
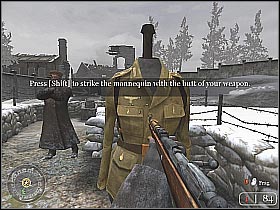
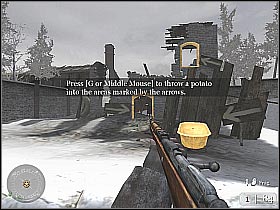
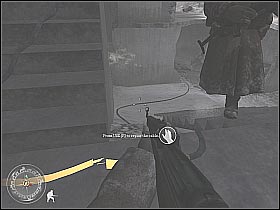
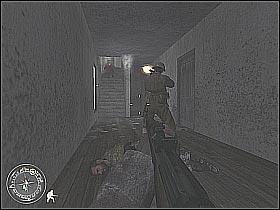
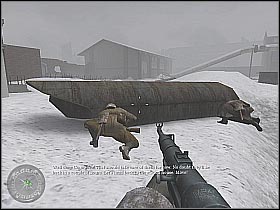
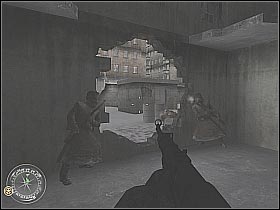
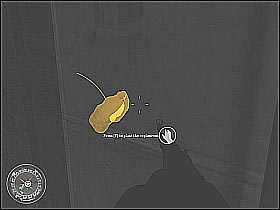
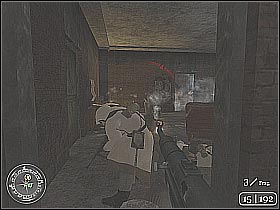
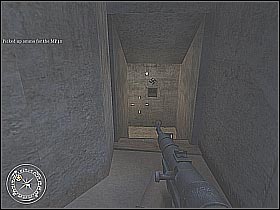
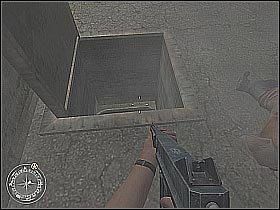
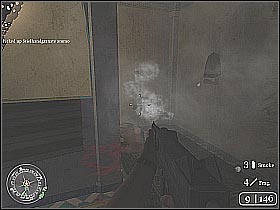
Now you will have an opportunity to get acquainted with bashing the enemy soldiers. Use the nearest uniform for practice (screen 1). You should press the SHIFT key in order to attack it. Remember this move because you will have many opportunities to use it in the future. Follow the commander to the next location. Now you will learn how to use grenades. In this exercise, you will use potatoes instead of the real objects. Start off by throwing them at the highlighted holes (screen 2). Remember that you have an unlimited supply of these objects. You can practice as much as you want.
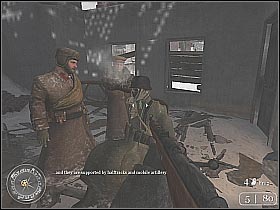
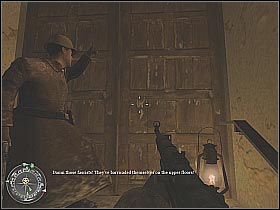
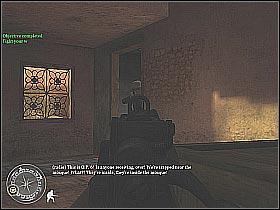
After completing these tutorials return to the point where you have started this mission. One of the soldiers will arrive here shortly. The man will inform the squad commander that one of the enemies was captured. He is being held in the destroyed building. You should go there now. Stand back and listen to the interrogation (screen 2). It looks like the Nazis are planning a major counteroffensive. You will help in stopping it.
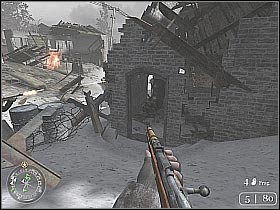
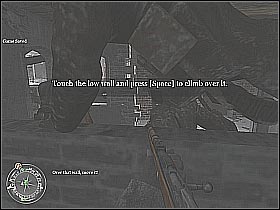
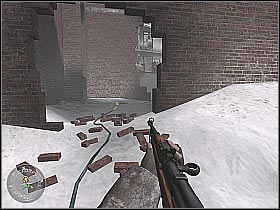
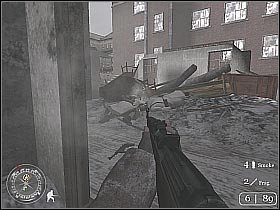
You should receive new orders from the squad commander. You will have to get to the nearest armory in order to arm yourself with better weapons. Start off by following the other soldiers (screen 1). At some point, you will have to jump over the brick wall (screen 2). Use the SPACE key to do that. Keep going straight. Next you will have to crouch in order to avoid other obstacles. You shouldn't have any problems doing that.
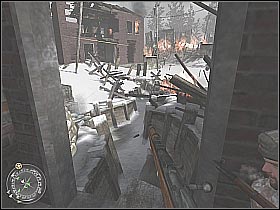
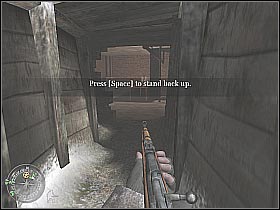
You should stay here and wait for a couple of seconds. When the shooting stops, use the trenches to safely get to the other side (screen 1). Keep going straight. Duck in order to get to the nearest building (screen 2).
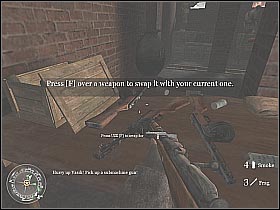
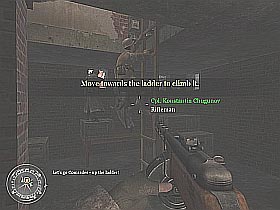
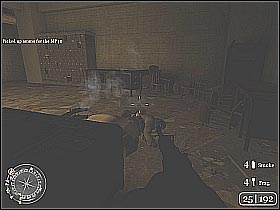
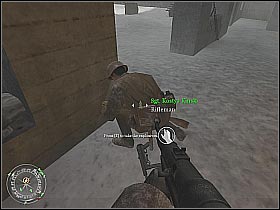
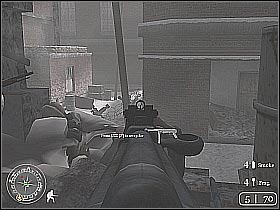
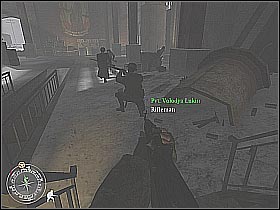
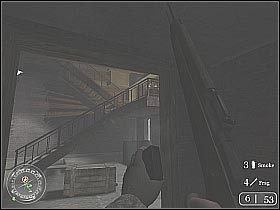
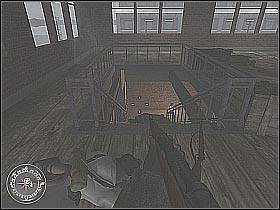
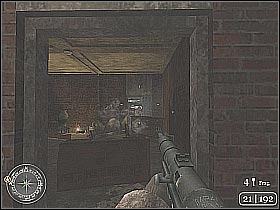
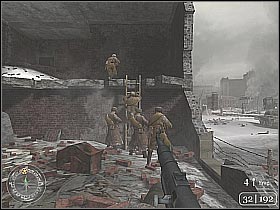
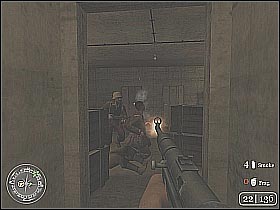
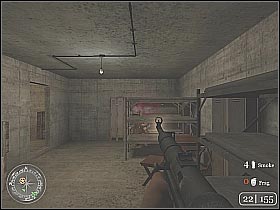
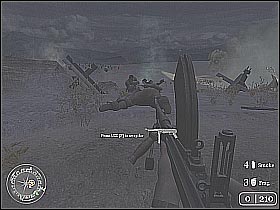
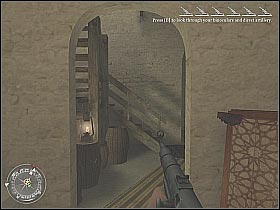
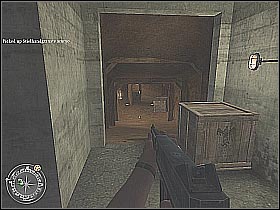
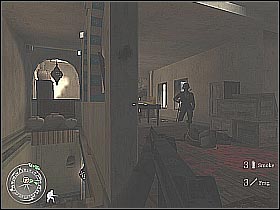
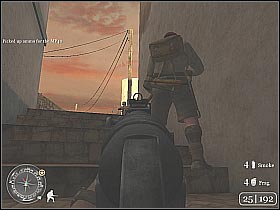
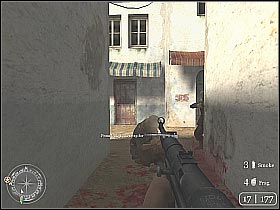
You should find another allied soldier in here. He will inform you about the guns lying on the table. Pick up a machine gun (screen 1). You should also take some grenades. They are very useful in many kinds of situations. Bear in mind that you can only have one "big" gun at the moment. Use the ladder in order to get to the upper floor (screen 2).
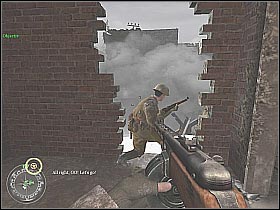
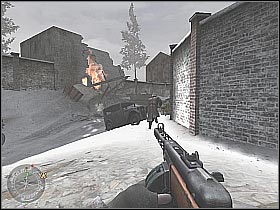
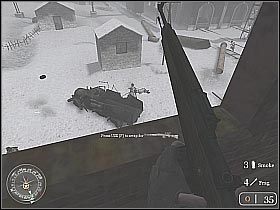
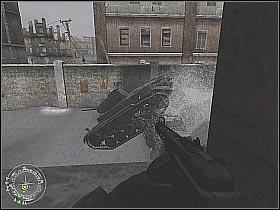
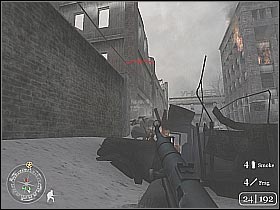
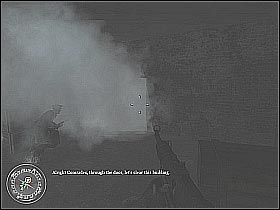
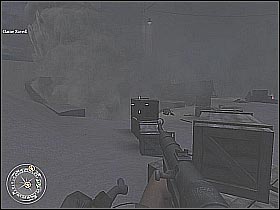
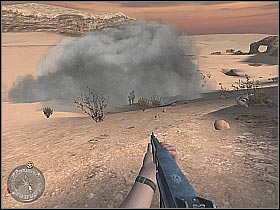
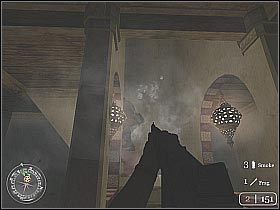
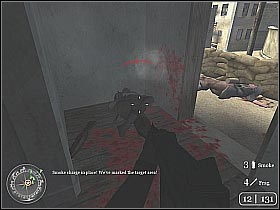
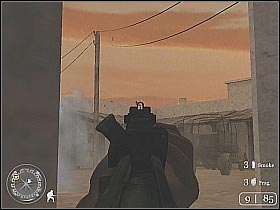
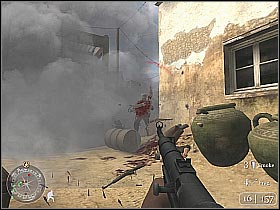
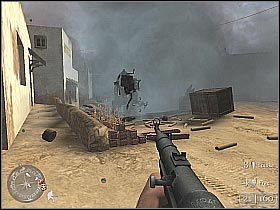
A couple of seconds later, your team will come across an armored car occupied by the enemy soldiers. You will have to use your smoke grenades ('4' key) in order to blind it and pass through safely. The grenade should be thrown at the highlighted area (screen 1). Wait for the reaction of the other squad members. When the time is right, start running (screen 2).
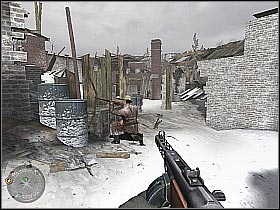
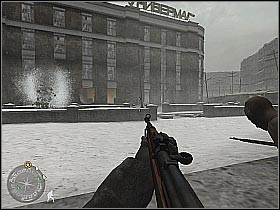
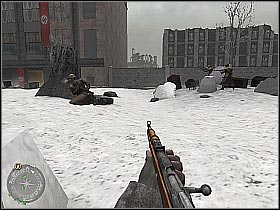
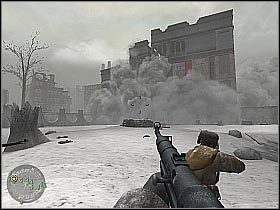
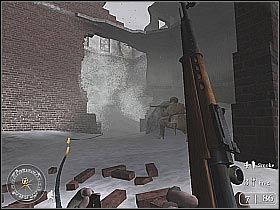
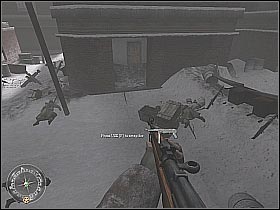
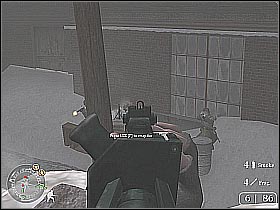
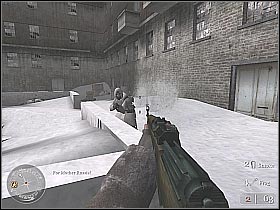
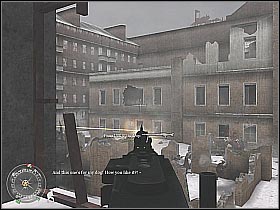
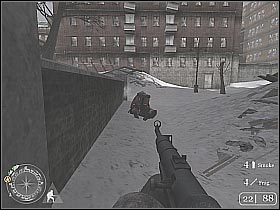
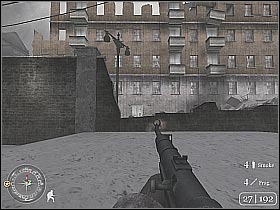
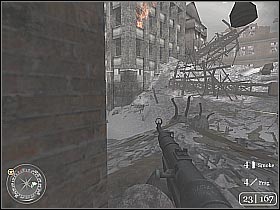
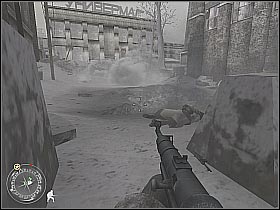
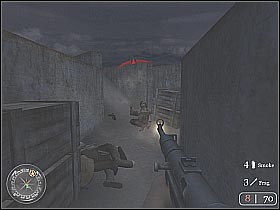
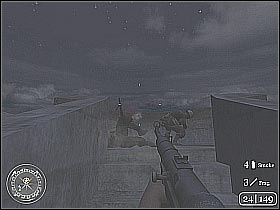
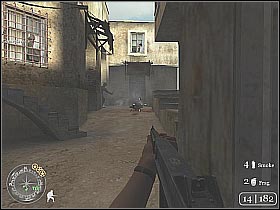
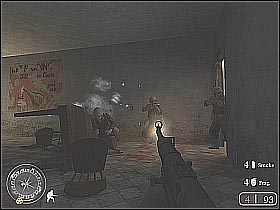
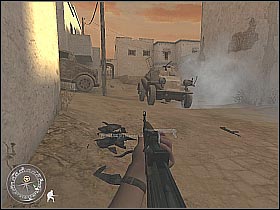
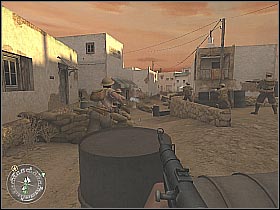
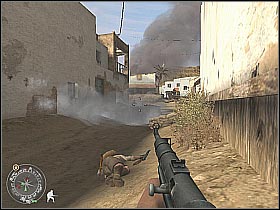
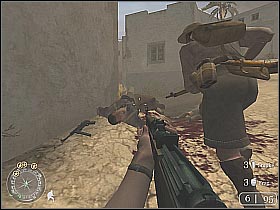
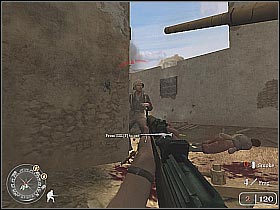
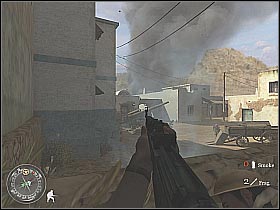
Keep running straight, don't stop until you get to the other building (screen 1). Ready your weapon. Start off by shooting the enemy soldiers. Be sure to not to harm any of the squad members, because this will jeopardize the whole mission (you will have to repeat the fights from the last savepoint). Remember to use possible covers (screen 2). It would be also wise to zoom in the view to get better shots.
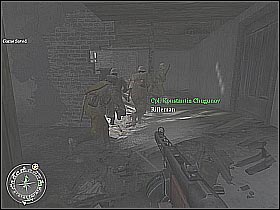
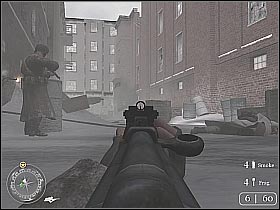
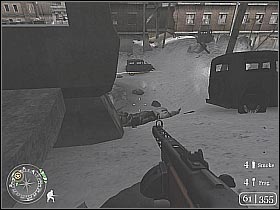
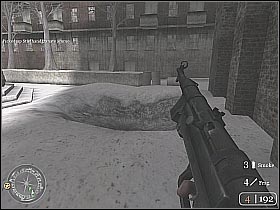
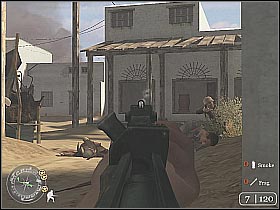
You shouldn't have any problems with killing the first group of the enemy soldiers. Continue moving straight (screen 1). Use all possible covers. One of the squad members should kill a Nazi who has hiding in the tall building (screen 2). Remember to check corpses of the killed enemies in order to get ammo and grenades.
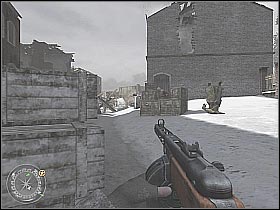
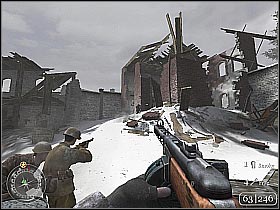
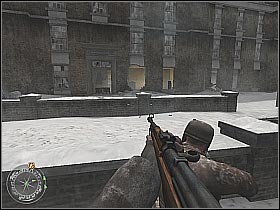
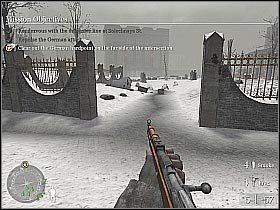
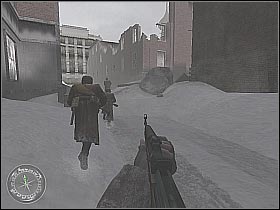
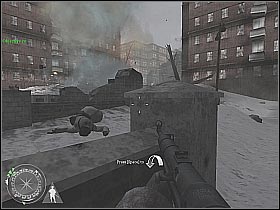
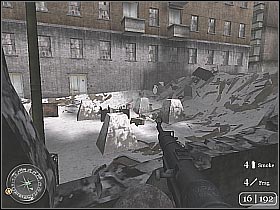
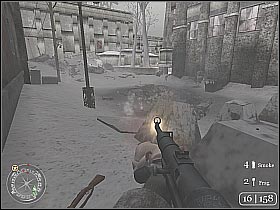
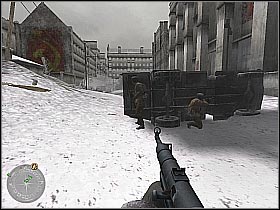
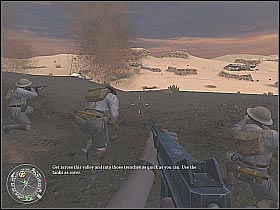
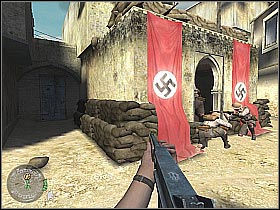
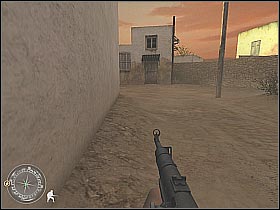
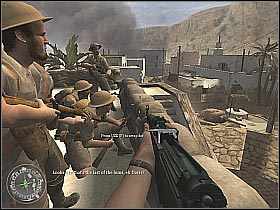
Take care of the enemies that were standing near the destroyed jeep. Wait for the other squad members to arrive. It looks like that the gate leading to the main complex is closed (screen 1). You will have to find another way to reach that spot. Choose the nearest ruins (screen 2). Now you have two options. You can either help the allies, or watch them deal with the enemy soldiers.
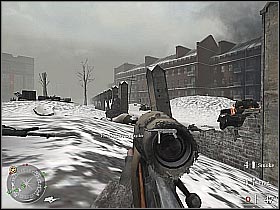
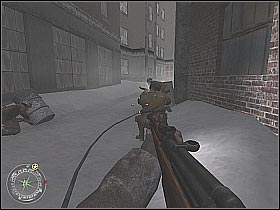
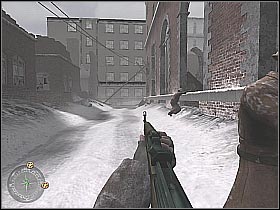
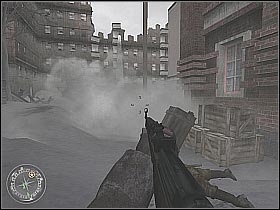
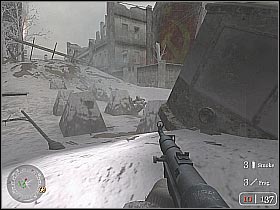
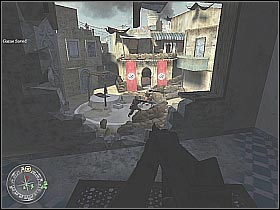
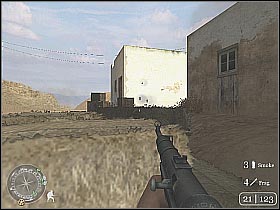
If you decide to choose the second option, you shouldn't have any problems surprising the enemy soldiers from the flank. Use the destroyed buildings for better cover (screen 1). Keep moving straight. From time to time, your team will be encountering new waves of enemy soldiers (screen 2). Remember to check all of the surrounding buildings. The Germans may be hiding there.
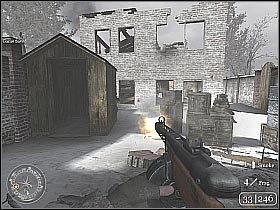
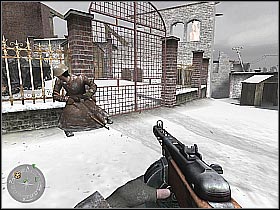
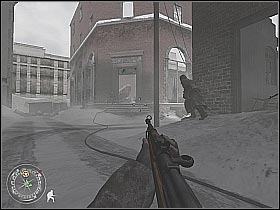
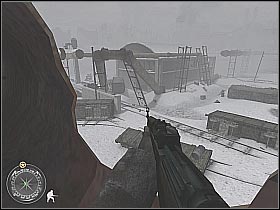
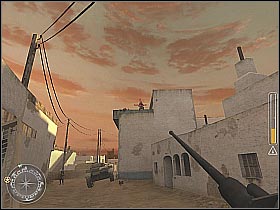
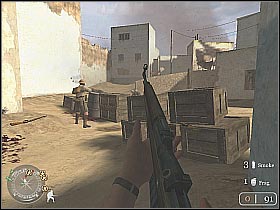
Watch out for one of the enemy snipers. He is hiding on the first floor (screen 1). Keep moving straight. Just as before - use cars, buildings, crates and barrels for cover (screen 2). In many situations, it would be wise to wait for the other squad members to join the fight.
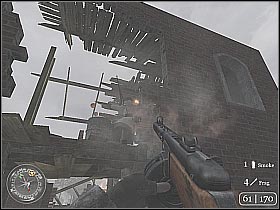
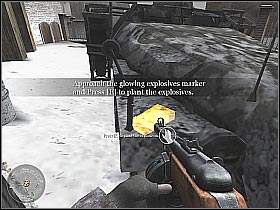
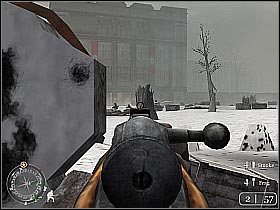
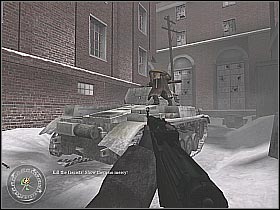
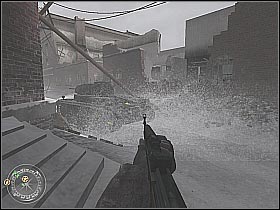
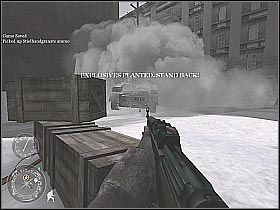
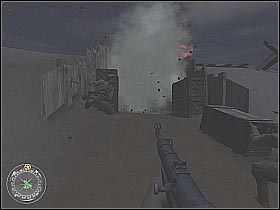
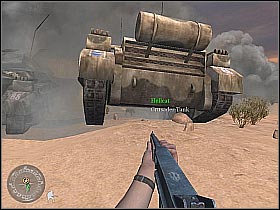
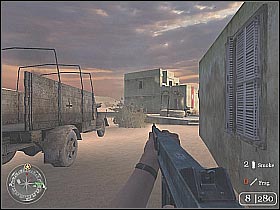
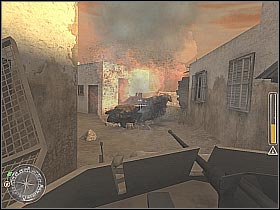
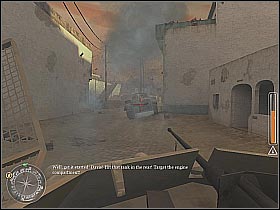
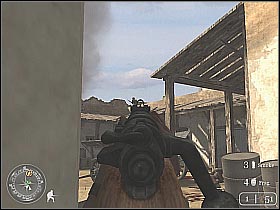
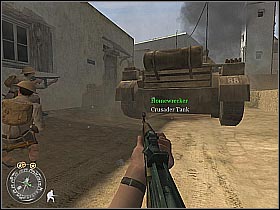
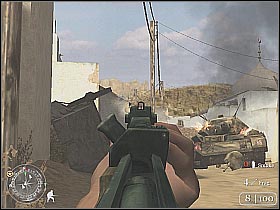
You will come across an armored vehicle. Use the truck to surprise the enemy soldiers who were standing next to it (screen 1). If you're lucky, they won't even have time to respond to your attacks. Go to the highlighted spot and press the F button in order to set the charge (screen 2).
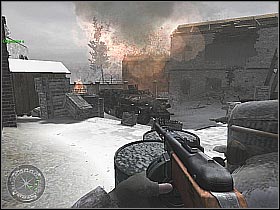
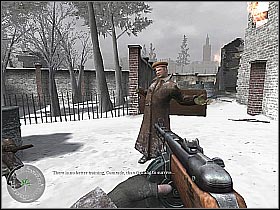
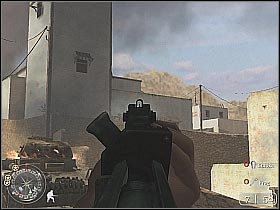
You can watch the explosion from the safe distance (screen 1). Wait for the squad leader (you met him before) to arrive (screen 2). If you want to, you can listen what's he got to say. Congratulations! You've just finished the first mission!
TIME AND PLACE: December 2, 1942; Stalingrad
YOU ARE: Private Vasili Ivanovich Koslov
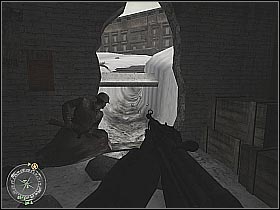
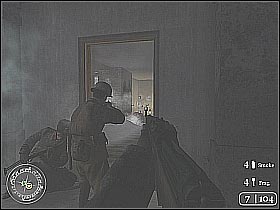
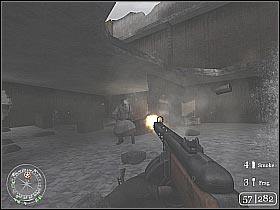
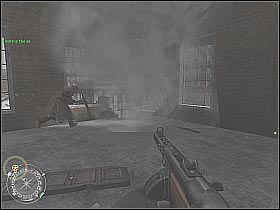
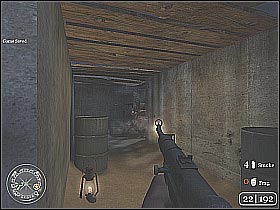
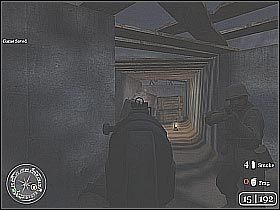
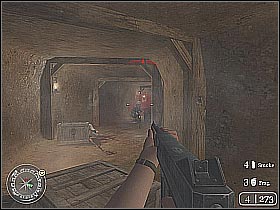
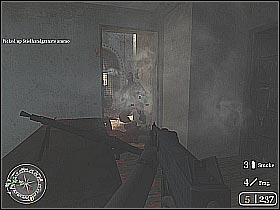
You start off in the small warehouse (screen 1). You ought to know that many close quarters battles await you in this missions. Keep moving forward. An enemy soldier is hiding behind one of the columns. Take him out as soon as possible (screen 2).
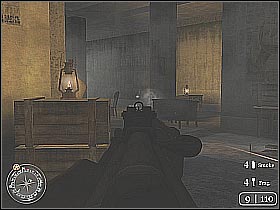
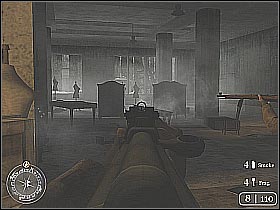
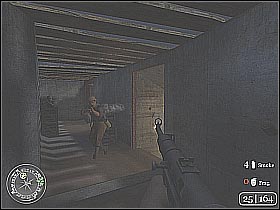
Behind one of the corners you should encounter a couple of his buddies (screen 1). I would recommend to keep the crouching position in order to improve your aim. Bear in mind that there's not too much light in room, so you might have some problems locating all of the enemies at once. After defeating them, get closer to the exit (screen 2).
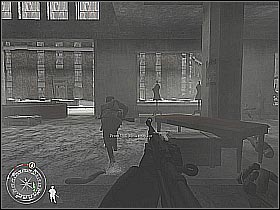
Stand in one of the destroyed windows (screen 1) and start aiming at the enemy soldiers (they are defending the opposite building). Remember to use all possible cover. You should reload your weapon frequently. I would also recommend changing your position often so you won't be killed by any snipers (screen 2).
You can consider using some of the carried frag grenades, although it is not necessary (screen 1). After defeating the first group of Nazi soldiers you should try to get closer to the enemy positions. Hide behind the small brick wall (screen 2) and start shooting from there.
You should concentrate all of your efforts on one thing - getting to the occupied building (screen 1). Before you do that be sure to wait for the other squad members. Don't forget to reload your weapon! Start off by killing the nearest enemies (screen 2). At least one of them had a machine gun. Take it.
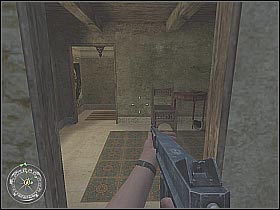
Be sure to explore all rooms thoroughly (screen 1). You shouldn't encounter any more enemies at the moment. Head to one of the small rooms, leading to the nearby square (screen 2). Before you go any further, wait for the other team members and reload your new weapon.
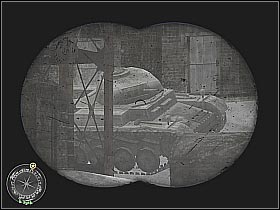
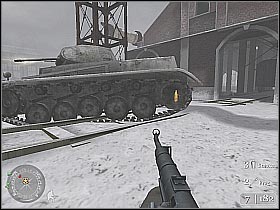
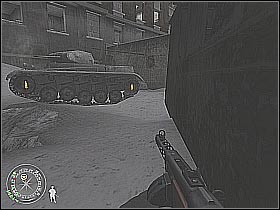
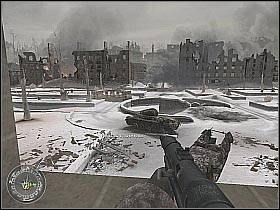
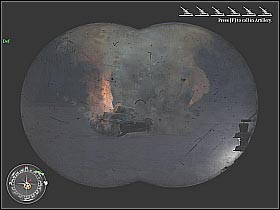
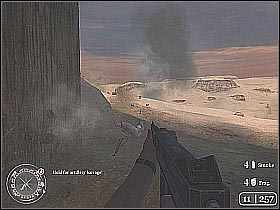
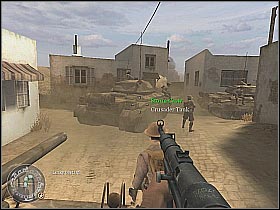
A couple of new hints should appear. You can use your binoculars if you want to. You should see a couple of german tanks. Unfortunately, we can't do anything about them at the moment. Use the nearest stairs to get to the ground floor. Get closer to the hole. You should see a small tunnel (screen 2). Use it to get to the other side of the occupied square.
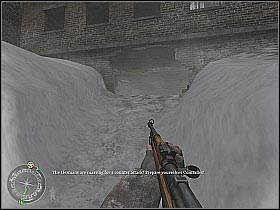
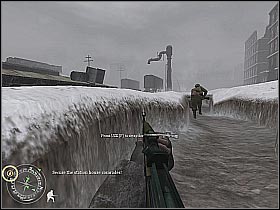
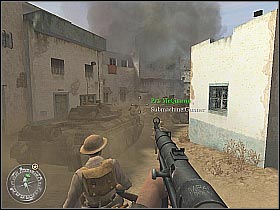
Keep moving straight. At some point you will have to stop for a couple of seconds in order to avoid german tanks (screen 1). Don't worry, nothing bad isn't going to happen. Continue moving forward. You should be crouching at all times. Head to the nearest hole in the wall (screen 2). Be sure to get your weapon ready because you will have to defend some positions against another German counteroffensive.
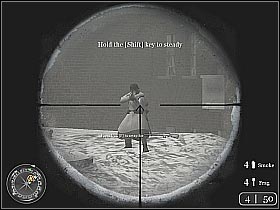
You will meet some of the allied soldiers in here. The game should give you some time to prepare for the counteroffensive. I would recommend hiding in the left building. You should find a sniper rifle in here. Take it (screen 1). After a couple of seconds you should start seeing German soldiers (screen 2). Use your sniper rifle to take them out. It would be wise to aim at their heads.
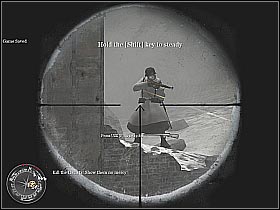
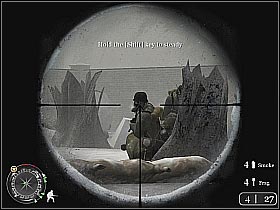
You can also hold your breath in order to improve aim. You can do that by holding the SHIFT key (screen 1). After defeating German soldiers some of the allies will try to attack enemy positions. Join them (screen 2). Be sure to reload your rifle. This action takes a few seconds, so it's better to do it right now.
You should get closer to the huge building occupied by the German soldiers (screen 1). I would recommend to lie down. You should start killing enemy soldiers that are appearing on the map. It would be wise to check the right road often. Some of the enemies may be hiding by the destroyed vehicle (screen 2). Just as before, score as much headshots as possible.
By now you should have noticed that some enemies rarely change their initial positions. If you're lucky, you might score some headshots (screen 1). After defeating the second group of enemies you should join allied soldiers in securing the square leading to the main building (screen 2). You can also change the current weapon, although it is not necessary.
I would recommend crouching by one of the brick walls (screen 1). Keep firing at the German soldiers. You can pick up the sniper rifle again. It's the best weapon to eliminate soldier that are standing by the occupied building (screen 2). Just as before, you should score at least a couple of effective headshots. Keep moving forward.
It would be best to flank enemies standing in the nearest trenches. It's a little bit risky, but this method can help you to save a lot of time (screen 1). The occupied building should be attacked from the right side. You can use some smoke grenades to blind enemy soldiers while going to the other side of the square. Keep moving forward (screen 2).
You must watch out for the enemy grenades. They will be thrown at you and your teammates (screen 1). It would be best to pick up a standard rifle or a machine gun. There's a lot of closed spaces coming up. After reaching the occupied building kill the enemies standing by the heavy machine guns (screen 2). You can also throw some grenades at them.
Head to the right hallway. You can wait for the other team members or try to take the Nazis by yourself (screen 1). It would be wise to use grenades every time you want to explore some new rooms (screen 2).
You should pick up a MP-40 (machine gun) from one of the killed German soldiers (screen 1). It's probably the best choice for closed spaces, similar to this one. Explore the other rooms, killing everything that gets in your way (screen 2). Some of the allied soldiers will join you in these fights, so they shouldn't be that hard.

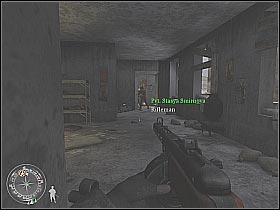
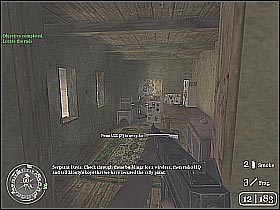
After you take care of the enemy soldiers, head to the first floor. Unfortunately, the door leading to the next room will be closed. Looks like the Nazis have barricaded themselves out there (screen 1). You will receive some new orders. Head back to the ground floor. Talk to one of the soldiers. He will give you some explosives (screen 2).
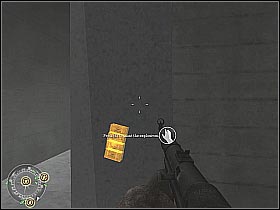
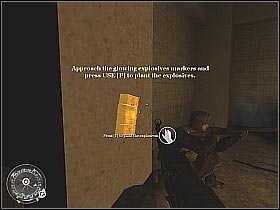
The charges must be set in three designated spots. Their locations are shown on your compass. The first point is near the place where you got the explosives. Press F to plant it (screen 1). The other two spots are in the surrounding hallways (screen 2). Bear in mind that the barricaded soldiers may try to shoot you. They will use the holes in the ground.
After planting the last explosive you will have a couple of seconds to leave the building. Start running towards the square (screen 1). You should try following the other soldiers. Turn around and watch the explosions (screen 2). Well, that's it. You've finished the first campaign of the game.
TIME AND PLACE: December 8, 1942; Stalingrad
YOU ARE: Private Vasili Ivanovich Koslov
During this mission you will be connecting parts of the telephone wire. Start off by running straight (screen 1). You don't have to wait for other team members. They will take care of themselves. After a while you should reach crossroads. DON'T turn right because there are heavy machine guns out there. Instead, keep running straight. Now you can enter the right building.
Enter the destroyed building. Duck behind cover and start shooting at the enemy soldiers (screen 1). The rifle you have right now is made for these kind of situations. You shouldn't have any problems with eliminating the Nazis. Keep moving forward (screen 2). Remember to use all possible cover. You mustn't forget about reloading your weapon.
You should now repair the first part of the telephone line. Press F in order to link both cables (screen 1). Before you go any further be sure to take out a guy who's crouching by a heavy machine gun. If you stand correctly, you shouldn't have any problems eliminating him (screen 2). Keep moving forward.
You should now get closer to the neutralized machine gun position. From this point you will be able to kill other German soldiers (screen 1). You can throw them a couple of grenades if you want to. This is not necessary. After you take care of the surrounding enemies run to the destroyed wall. You will find a second part of the destroyed line here (screen 2).
Before you take care of the telephone wire you will have to kill a group of German soldiers. They will appear in one of the surrounding buildings. Bear in mind that they may throw some grenades at you (screen 1). You have to avoid them at all costs. Repair the cables. You can now proceed to the nearest building (screen 2).
You have to watch out because there are more soldiers nearby (screen 1). Take them out. It would be wise to lean out a lot. You may want to take a machine gun from one of the killed soldiers. Continue moving forward. Start shooting at the soldiers hiding on the lower floor (screen 2). Remember that you have wide field of fire. Use this to your advantage.
After you take care of this problem try getting closer to the dead soldiers. Hide behind one of the crates (screen 1). If the coast is clear, start moving forward. In a couple of seconds you should encounter a second group of German soldiers (screen 2). I would recommend lying down on the ground to get better aim. You must remember to keep moving forward. This is very important, because it's the only way to keep enemies from respawning on the map.
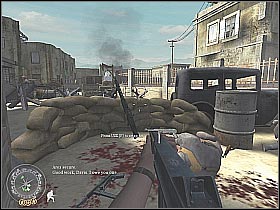
There's a machine gun post at the other end of this street. It would be best to get closer. Throw a couple of grenades there to get rid off the enemy soldiers (screen 1). You can also use smoke grenades, especially when running between covers. After you take care of the enemy forces repair the third part of the telephone wire (screen 2).
You should now go to the nearest building. Watch out because there are a lot of enemy soldiers out there (screen 1). You've got two choices - you can either sacrifice a couple of grenades, or wait for the other members of the team and storm the place together. Be sure to check all rooms (screen 2). Some Nazis may be hiding behind crates and house equipment. Remember to use all possible covers.
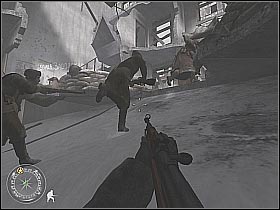
Leave the building. You must be very careful, because there are additional enemy soldiers nearby. The Nazis are hiding mostly in the ruins of the destroyed buildings. Be sure to check all floors, including the highest one (screen 1). One of the enemy soldiers will try to smash you with the cupboard. That's a huge mistake, because doing that he accidentally exposed himself (screen 2). Kill him.
You can now use the stairs. They will be on your right. While doing that you should also turn around and starting shooting at the enemy soldiers (screen 1). If you're lucky they won't even get to the nearest cover. Now you can take care of the telephone wire (screen 2). There are two more spots to find.
You can now continue to the first floor. You will encounter additional units here (screen 1). It would be wise to throw at least two grenades on the destroyed roof. There's a MG-42 stationed in here. Use it. Start shooting at the German soldiers (screen 2). After a couple of seconds allied units will start to appear. DO NOT shoot them! Instead, help them to get rid off the enemy forces.
After you deal with the enemy soldiers leave the MG-42 and turn around. Repair the next part of the telephone wire (screen 1). Continue moving forward. You should choose the left path. It leads to unexplored regions of the map. You should come across a small bridge made of the wooden planks. Use it to get to the other side (screen 2). Be sure to reload your current weapon.

You will be surprised by a small group of enemy soldiers. They are hiding behind the sandbags. Move to the left so you can get a better shot and avoid most of the attacks (screen 1). Turn left and clear all surrounding rooms (screen 2).
Keep moving forward. Kill everything that stands in your way (screen 1). Remember that you aren't rushed by anything. It would be best to check your surroundings. This way you won't avoid anyone. You should reach new stairs leading to the basement (screen 2). Start moving forward. Kill the enemies that tried to surprise you.

Connect the last two wires. This way you will complete the first main objective of this mission (screen 1). Now you have to find a radio station and use it. Continue moving forward. You will be encountering massive enemy forces (screen 2). Use your grenades wisely.
Continue the exploration of the whole complex (screen 1). Bear in mind that you're fighting in close quarters. Don't forget about the grenades. It's also good to lean out a lot. After you've reached your destination pick up the sticky bombs (they're lying on the crates). Now you can use the radio (screen 2) to receive new orders. You will have to blow up THREE (!!) tanks that are currently patrolling the whole area.
Keep moving forward. You will be attacked by some new soldiers near the stairs (screen 1). Kill them and get back to the ground floor. Another group is waiting by the destroyed exit (screen 2). Just as before, watch out for the soldiers located on higher levels. Eliminating them should be considered an absolute priority.
You should now reach a long hallway with a lot of windows on the right (screen 1). On the other side you should notice new enemies and a tank. Don't attack anyone just yet. Continue moving to the end of the hallway. Use your rifle to eliminate some of the soldiers (screen 2). You shouldn't attract too much attention to yourself, especially since the area is patrolled by a tank.
After getting rid off visible enemy soldiers start RUNNING towards the opposite building. Be sure to reload your weapon there (screen 1). Head on to the next room. Eliminate all the Nazis that have decided to station here (screen 2). Start moving towards the destroyed wall leading to the street itself.
Wait until the enemy tank gets closer to the building you're actually hiding in. Start running towards it. Use one of the marked spots to put a bomb on it (screen 1). Move away so you won't be harmed by a explosion. Bear in mind that the tank has only been immobilized. Thankfully, one of the allied soldiers should appear. He will throw a grenade inside the machine, destroying it once and for all (screen 2). You can continue moving forward (the other two tanks have been marked on your compass).
After a couple of seconds you should encounter new groups of enemy soldiers (screen 1). Find a good cover and start shooting at them. You could also use some grenades, although this is not necessary at the moment. Head on to the right building. You'll end up in a narrow hallway (screen 2). Kill some new soldiers that should appear near the stairs.
You can starting heading towards the exit. Take out all of the nearby soldiers. When you're done with them, start attacking the Germans that are hiding behind some barrels (screen 1). After defeating them, you can take control of their positions. The area is being patrolled by two other tanks. You have to take them out (one by one). After reaching the tallest building climb up and join your squad members (screen 2).
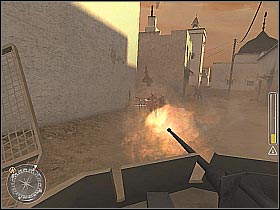
Your teammates should deal with the German soldiers located in this area. Meanwhile you have to destroy one of the remaining tanks. Wait for the machine to get past your current position and start running towards it (screen 1). Set a charge in one of the highlighted spots. Move back and enjoy the explosion (screen 2).
You should wait for the other squad members. They will help to get to the last remaining tank. I would recommend crouching by the stairs on the left (screen 1). From here you will be able to kill most of the enemy soldiers. You will also be protected from their attacks. The tank has parked just around the corner. Use at least one smoke grenade to blind the soldiers sitting inside the machine (screen 2).
First of all, you will have to set a charge in one the highlighted spots. Now hide behind the crates located on your left (screen 1). After the initial explosion the other squad members will help you destroy the tank. Meanwhile you should take care of a couple of remaining enemy soldiers located in this area (screen 2).
Once you've completed all of the primary objectives squad leader should appear on the map. Listen to what he's got to say. After that, follow him (screen 1).
TIME AND PLACE: December 8, 1942; Stalingrad
YOU ARE: Private Vasili Ivanovich Koslov
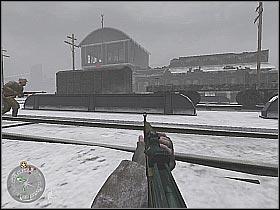
You start off in the dark hallway. You will receive new orders (screen 1). This time you will have to take control of the train station. The complex recently fell into the hands of the German troops. Step into the pipeline. Start moving forward. From time to time you will have the opportunity to see what's happening around your current position (screen 2). Follow the other soldiers.

One of the upcoming holes will give you an opportunity to make a surprise attack against some German soldiers (screen 1). They are leaving an armored car. You can either attack them or try to ignore their actions. The other teammates will probably die here. You will also have to watch out for other attacks. Move up to the next hole and take care of the new group of enemy soldiers (screen 2). Just as before, you may try avoiding them.
Keep going straight. Start shooting at Germans hiding behind the small brick wall (screen 1). If you're lucky they won't even respond to your attacks. Nevertheless, you have to be extra careful. Don't expose your current position too often. The next group of enemy soldiers is standing by the fireplace (screen 2). You've got two options - you can either start shooting or wait for them to leave this place.
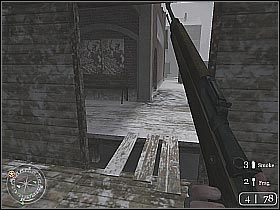
Turn into the right pipeline. The other one leads to a dead end. The pipe you've just chosen should be marked with a chalk (screen 1). Keep going straight. A couple of meters away from here you will have an opportunity to take care of enemy mortar teams (screen 2). The Germans don't expect any attacks. You should surprise them without any problems. Be sure to score at least a few decent headshots.
You should reach the end of the pipeline in a couple of seconds. Use the nearest platform to get to the ground floor. DO NOT shoot your teammates. (screen 1). They are guarding this warehouse, although they will soon be storming the central building of this complex. You should join them. Exit this building using the right door (screen 2).
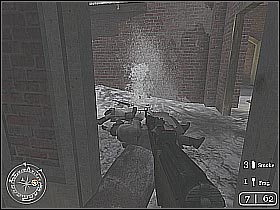
You will find yourself in a small ditch. Leave it and start moving towards the central building of the station. You shouldn't attract too much attention to yourself. It will help you to avoid the MG-42 and the enemy snipers (screen 1). Use the parked carriage to get closer to the building itself (screen 2).
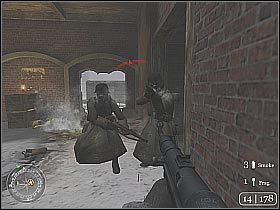
Get closer to the main building and enter it. You can now start eliminating German soldiers (screen 1). It would be wise to pick up a MP-40. With this weapon you will be able to deal with the enemies more efficiently. You should also consider using grenades, especially while exploring smaller rooms (screen 2). If anyone tries to get closer to you bash them with your gun.
You ought to get closer to the last room of the complex. Throw a couple of grenades in there. Use your machine gun to dispose of the remaining troops (screen 1). Watch out for the Germans coming from the first floor (screen 2). They will be stopping in the middle of the stairs. You can now head up to the upper floor.
Eliminate the remaining soldiers (screen 1). Most of them will be stationed near the windows. Use your machine gun to dispose of them quickly. Wait for the other squad members to arrive. Now you will have to defend this building against enemy attacks. Pick up a rifle and stand near one of the windows. Start shooting at the German soldiers (screen 1). Choose your targets carefully.

Sooner or later you will have to start dealing with these soldiers who actually made it into the main complex. You've got two options - you can either stay here are guard the stairs (screen 1) or get back to the ground floor and try to surprise enemies coming this way (screen 2). In both cases you have to watch out for frag grenades. They can hurt or even kill you.
After defeating a couple of waves the Germans will begin to retreat. Reload your weapon or pick up a machine gun. Now you will have to take care of a single tank that has appeared near the station. Leave the building. Start moving close to the right wall (screen 1). It would be wise to not attract attention to yourself. Move a little closer (you should be crouching at this point) and stick one of the charges on the tank (screen 2). Well... you don't have to worry about him anymore.
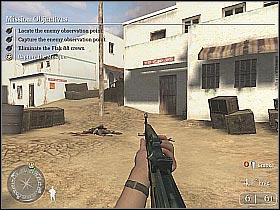
First of all, you should deal with the surrounding soldiers (screen 1). You didn't have the chance before... now is the best time. Head on to the nearest warehouse (screen 2). Eliminate a couple of new groups. Remember to use all possible covers. New objectives should appear on your screen. Bear in mind that you may accomplish them in a preferred order. I would recommend starting with C.
Use your compass to help you navigate to your objective. You'll find a small ditch. Use it for cover against enemy attacks. You should reach destroyed armored vehicle. Stop here. First of all, turn left and take care of visible enemy soldiers (screen 1). It is important, because if you chose otherwise they would probably interfere with the following fights.
Lean out CAREFULLY. You should be able to take out a guy standing by a heavy machine gun (screen 1). You can throw there few additional grenades (it'll provide much needed cover) or make a run for it (screen 2). You have to take care of all the Germans that were standing near the machine gun post.

One down, two to go. Now you should go to the huge warehouse located near the pipeline. Use your compass to help you navigate to your destination (screen 1). You might have to take out a few soldiers along the way. It's best to use the rifle. Try to get a little closer to the entrance. Before you start exploring the warehouse be sure to reload your current gun (screen 2).
A group of enemy soldiers is guarding the entrance. Take care of them. Once you get inside, turn left. Kill a couple of new soldiers that've appeared in here (screen 1). Use the stairs to get to the upper floor. I would recommend throwing some grenades. Kill those who managed to survive the explosions (screen 2).
Now you should turn left and explore this new room. You'll encounter at least two or three new soldiers. Kill them (screen 1). It would also be wise to use all possible cover. Once you've completed this objective, leave the building using the second stairs (screen 2). Use your grenades to kill some German soldiers.
Keep running forward. You should end up in a small ditch. Stay here. Use your gun to eliminate enemy soldiers (screen 1). Now you should move to the destroyed pipeline (screen 2). From this point you will be able to take out soldiers that were hiding near the machine gun post.

After defeating all of the enemy soldiers join the other crew members. Go to the designated point. Squad leader will have something important to say (screen 2). After that, the mission will end.
TIME AND PLACE: January 15, 1943; Stalingrad
YOU ARE: Private Vasili Ivanovich Koslov
The following mission is very short, but it has some difficult moments. You will have to take control of some of the surrounding buildings and destroy a couple of enemy tanks. You start off in a small building. Exit (screen 1). Keep going straight. You should reach the rest of the team. Get ready, because the allied soldiers are playing on taking enemy positions. You should join them (screen 2).

Keep moving forward. You should see some enemy soldiers. Start shooting at them (screen 1). There are a lot of allied forces taking part in this battle, so you won't have to use any covers. Watch out for some new snipers hidden on one of the right balconies (screen 2). I would also recommend sending them at least one grenade.

Continue pushing forward. You've got to be extra cautious. There are a lot of new enemies nearby. Some of them may be hard to find. Take out the Germans hiding in one of the right buildings (screen 1). After you killed them, use the stairs to get inside (screen 2).
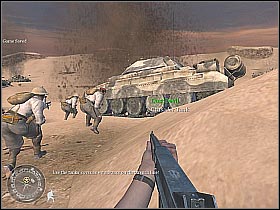
Get closer to one of the windows. An enemy tank should arrive here shortly (screen 1). You will receive some new orders, including destruction of the tank. Use the stairs to exit the building. You have to be cautious. Some German soldiers may have been sent here. You've got to take them out (screen 2). Reload your weapon.
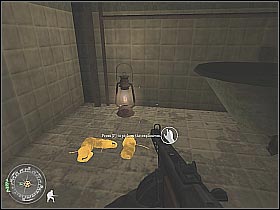
You have to start running towards the opposite building. Remember that the area is being patrolled by an enemy tank. You can't stop or you will be shot. Enter the new building (screen 1). Go to the room shown on your compass. Pick up some sticky bombs. They should be lying on the floor, near the lamp (screen 2). Head towards exit.
Start running (yes... AGAIN!!). You have to get to the building you previously had chance to explore (screen 1). This is where you saw the tank for the first time. Doing that will help you to get closer to the machine. Use a sticky bomb in one of the highlighted spots (screen 2). Move back. Be sure to keep a safe distance.
After the explosion go to the building where you found the sticky bombs. Join the other squad members that have stationed here (screen 1). You've got only one more building to go. After you get there start moving towards the occupied building (screen 2). You should choose the right side. Doing that will help to organize a surprise attack at enemy forces.
Get closer to the building and throw a couple of grenades in there (screen 1). The entrance is being watched by a guy with a heavy machine gun. It is very important that you take him out. Enter the building and deal with the other enemy soldiers who managed to survive the explosions (screen 2). Some of the Germans will use the grenades. You must avoid them at all costs. Use the stairs to go to the upper floor.
After you get to the first floor move to the next room. You should see a couple of heavy machine guns. Use one of them (screen 1). Now you will have to take care of a couple of groups of enemy soldiers. Be sure to check the right building from time to time (screen 2). Some new Germans may be appearing there.
Some allied soldiers should appear on the map in a couple of seconds. You have to help them. Start shooting at the Germans hiding in the left building (screen 1). You don't have to aim in anything in particular. The key is to supress enemy fire while allied soldiers are setting the charges. After that, the building should explode (screen 2). One less problem for you to worry about.
You should hear a warning from the other squad members. An enemy tank is coming. Leave the MG-42 AT ONCE. The tank will be aiming at the wall (screen 1). After the explosion follow one of the allied soldiers. Once you get to the square, start off with eliminating German soldiers (screen 2). It would be wise to use surrounding brick walls to your advantage (mostly for much needed cover).
You should reach a small square, that is being patrolled by an enemy tank (the same one that was firing at you). Ignore the tank for a couple of minutes. First of all, you should take care of the German soldiers (screen 1). They are mostly hiding behind the brick walls. After you deal with the Nazis crouch by one of the brick walls and wait for the tank to pass by (screen 2). Start running. Set a charge in one the highlighted spots.
The tank will be destroyed without any other problems. You can witness the explosion if you want to (screen 1). One of the squad leaders should arrive here shortly. You have to follow him (screen 2). There's only one path leading to the exit, so you shouldn't have any problems getting there. Well done, you have successfully completed another mission.
TIME AND PLACE: January 15, 1943; Stalingrad
YOU ARE: Private Vasili Ivanovich Koslov
You shouldn't have any problems with this mission. It's very short and simple. You will have to reach the town hall. You start off in a destroyed house (screen 1). There are some allies nearby so you don't have to worry about anything at the moment. Exit the building and start moving forward. Enemy soldiers should arrive here shortly (screen 2). You will have to deal with them.
Move a little bit closer and start shooting at German soldiers (screen 1). Most of them will be hiding behind concrete walls. After you deal with them it would be wise to take their positions. You will encounter the next group of enemy soldiers near the destroyed truck (screen 2). I would recommend using your grenades. Don't forget to reload your weapon before you move on to the next section of the map.
Start running towards the left building (that's where the enemies showed up). Hide behind the nearest wall. You should be able to surprise some of the German soldiers (screen 1). You can also use the grenades if you want to. It would be wise to pick up a rifle from one of the killed soldiers. Use this weapon to get rid off some Nazis hiding at the other end of this street (screen 2).
Sooner or later you will be forced to storm enemy positions (screen 1). Remember to you use concrete walls for cover. You should encounter a heavy machine gun at the end of this street. Use smoke grenades in order to blind it. Start running towards the machine gun post (screen 2).
Keep moving forward. Turn right at the first possible occasion (screen 1). It will help you with the attack from the right flank. You should encounter some new enemies. Take them out (it would be great to have a machine gun). When they're gone kill the Nazis that were standing by the MG-42 (screen 2). Wait for the other squad members to show up.
Turn right. You should see a small passage leading to the new sectors of the map (screen 1). Warning! You have to be extra CAUTIOUS!! There's a sniper hiding in a destroyed tram. You've got two options - you can either deal with him quickly (use a rifle) or start running towards his position (screen 2). I wouldn't recommend using smoke grenades. Just as before, wait for the other teammates to arrive.
Wait for the other squad members to take appropriate positions (screen 1), mostly behind one of the trucks. Turn right. Start moving towards the huge building. If you're lucky, you will be able to surprise some of the enemies crouching by the concrete walls (screen 2). You can also use grenades, although this is not necessary.
Watch out, there's a heavy machine gun post nearby (screen 1). Use some of the grenades to get rid off soldiers crouching behind sandbags. Start running towards them. Kill those who've managed to survive the explosions (screen 2). You could also use smoke grenades to blind the MG-42 crew.
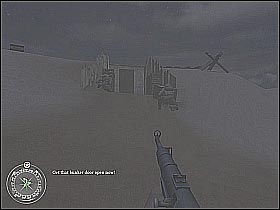
Wait for the rest of the team to get here. There's a small room near the machine gun post. Go to the designated point and set the charges in order to blow up the door (screen 1). Move back to a safe distance. After the explosion head into the new room (screen 2). The game should automatically finish this mission.
TIME AND PLACE: January 15, 1943; Stalingrad
YOU ARE: Private Vasili Ivanovich Koslov
This is the last mission of the Russian campaign. It's not too hard, although it has some challenging moments. Get your MP-40 ready. Lean out and start eliminating enemy soldiers. They can be found in a nearby room (screen 1). More Nazis should arrive here shortly (screen 2). Explore the surrounding rooms. You will be encountering massive enemy forces.
Continue the exploration process (screen 1). Remember to lean out at every possible occasion. You can also use grenades. They will come in handy while fighting larger groups of enemy soldiers. Remember to check bodies of the fallen Nazis. You will find ammunition and grenades. After a couple of seconds you should reach some stairs (screen 2). Use them to get to the upper floor.
After you've checked all new rooms use the hole in the ground to reach your new teammates (screen 1). Try to move forward. An enemy sniper appears. He will kill one of the allied soldiers (screen 2). Before you can move on to the next sectors of the map, you will have to take care of him.
There should be a sniper rifle lying on the ground. Pick it up (screen 1). Stand by the nearest window. One of the squad members will help to locate the enemy sniper. It appears that he's hiding in the balcony of the right building (screen 2). You have to be quick about it. Otherwise, he will locate your position. After you've disposed of him pick up a machine gun. You can now head on to the next rooms.
Wait for your squad members to use the ladder (screen 1). Ready your gun. In one of the surrounding rooms you will encounter at least 4-5 new enemy soldiers (screen 2). Take them out, one by one. You can also use grenades, although they aren't necessary at the moment.
Be sure to kill Nazis standing by the windows (screen 1). If you're lucky, they won't even notice your movements. After you've checked everything use the stairs to get down to the ground floor (screen 2). Kill some enemy soldiers. You should receive an information concerning new objectives. You will have to defend this building against a massive German counteroffensive. Get back to the upper floor quickly.
Stand by one of the windows on the left. You can pick up a rifle (standard, not sniper) if you want to. This is not necessary at the moment. If you have the MP-40 you will need to wait for the enemies to get a little bit closer (screen 1). Sooner or later you will have to pick up a rifle. There's a MG-42 in one of the buildings on the left (screen 2). You have to take it out (as soon as possible!!).
Remember to concentrate your efforts on larger groups of enemy troops. Many of them are stopping near the fountain (screen 1). It's one of the best spots to take them out. You should receive some new orders concerning an enemy armored car. Pick up a MP-40. Use the stairs to go back to the ground floor. Stand by the windows and start shooting at those Nazis who actually made it into the building (screen 2).
After a couple of minutes the Germans will begin to retreat. You can go back to the upper floor and shoot some of the escaping soldiers (screen 1), although this is not necessary. Congratulations! You've just finished the Russian Campaign.
TIME AND PLACE: October 29, 1942; near El Alamein
YOU ARE: Sergeant John Davis
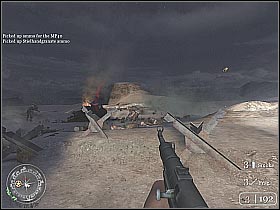
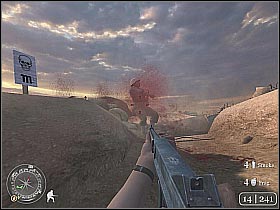
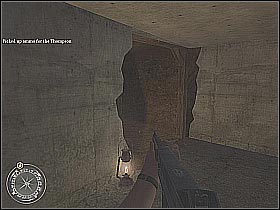
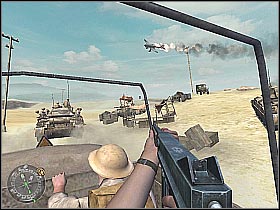
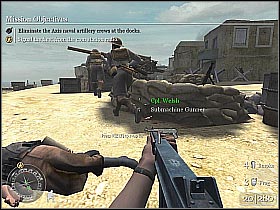
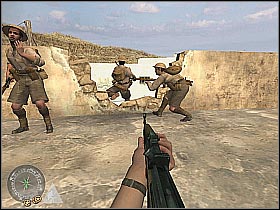
The first mission of the African campaign is (as you probably expected) a rather simple one. You should be able to finish it without any major problems. Jump off the small cliff and start moving forward (screen 1). It would be great to not attract too much attention to yourself. That way you should be able to surprise some of the enemy soldiers stationed near the crates (screen 2). You probably noticed that the Thompson machine gun can only fire 20 rounds before reloading. It would be best to attack enemy troops with short bursts.

Use the small passage located below your current position. Continue moving forward. You will have to deal with some enemy soldiers along the way (screen 1). Fortunately, the Thompson was made for these kinds of situations. You can use one of the surrounding heavy machine guns to eliminate some new troops (screen 2). Remember, this is optional.
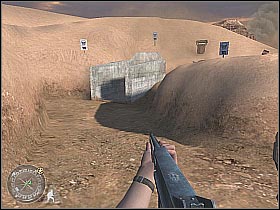
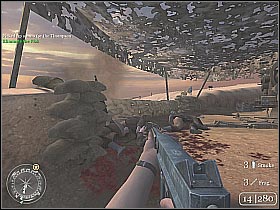
Explore the trenches. Enemy soldiers will be attacking your positions. You have to watch out for those occupying the upper levels (screen 1). They may not be seen at first glance. You should now head on to the entrance leading to the underground bunker (screen 2). It would be great to wait for the other crew members to arrive.

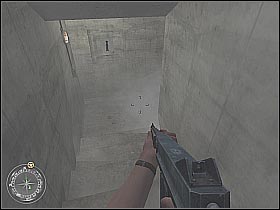
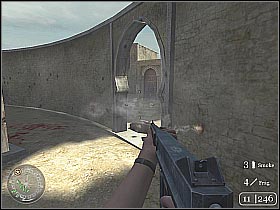
The first group will appear near the entrance to the bunker (screen 1). Use your Thompson to deal with the enemies swiftly. Watch out for the guy hiding behind a small window surrounded by a lot of concrete. Enter the nearest room and start eliminating enemy soldiers (screen 2). After you're done with them exit the bunker.
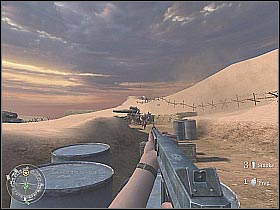
Continue moving forward. Go to the small crossroads. First of all, take care of the enemy soldiers (screen 1). They will appear on both levels (inside and outside the trenches). After you're done with them head to the unexplored passage. You will come across another heavy machine gun. Take out the German soldiers standing by it (screen 2). You should wait for the rest of the team to reach your current position.
You can use the heavy machine gun if you want to. You should be able to take care of a couple of enemy soldiers (screen 1). Don't stay here too long or you will expose your position to enemy snipers. Keep moving forward. Eliminate soldiers hiding in the right bunker (screen 2). Throwing them a couple of grenades would be a good idea.

Keep pushing forward. You will encounter at least few additional units along the way (screen 1). Pick up a MP-40 from one of the killed soldiers (Thompson is probably running out of ammo). You will reach the entrance to the second bunker (screen 2). Use it. You have to be cautious, because there are a lot of enemy soldiers inside it.
After clearing the first room head on to the second one. You should see a ladder. Move a little bit closer. The enemies will try to throw a couple of grenades at you (screen 1). Move back QUICKLY!! After the explosions use the ladder to get to the top of the bunker. Kill the enemy soldiers who were standing by the heavy machine gun (screen 2).
You can now go down the ladder, exit the bunker and rejoin your team. Keep moving forward. Use your compass to help you navigate through the enemy positions. You will have to expose of some Germans along the way (screen 1). Use your MP-40 to deal with them quickly. After exiting the trenches talk to the squad leader (screen 2). You will have to help his team and take control of the enemy camp.
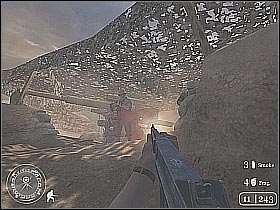
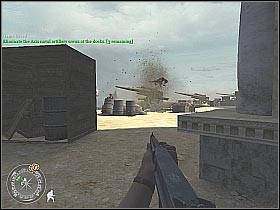
Join your squad members and start shooting at the enemy soldiers (screen 1). You can destroy the fuel depots if you want to. Other allied soldiers will probably take care of this. Be sure to explore the whole area (screen 2), eliminating German troops along the way. Use your MP-40 to deal with them swiftly.
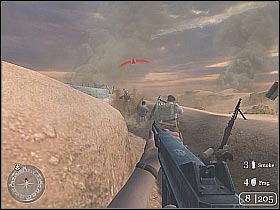
You will have to take care of three ammunition stockpiles (screen 1). They are hidden near the underground bunkers. You must plant charges in the designated spots. Stand back and enjoy the fireworks (screen 2). Return to your previous tasks (eliminating German soldiers ;-)).
Now you should destroy all of these barrels that managed to survive the last fights (screen 1). You don't have to use any charges, just shoot them and they will blow up. After completing all of the objectives head on to the underground bunker. Use your compass in order to locate it (screen 2).
Move a little bit closer. One of the allied soldiers will plant a charge on the bunker door (screen 1). After the explosion enter the bunker. Start off by eliminating nearby soldiers (screen 2). Remember about attacking them with short, controlled bursts. You mustn't forget about reloading your weapon.
After reaching the crossroads check the left path (screen 1). You must eliminate one German soldier. He is hiding behind one of the barrels. Now choose the opposite path. You will be attacked by a much larger group (screen 2). You can use your grenades, although this is not necessary. Use the stairs to get to the next room.
You will be attacked by three German soldiers simultaneously (screen 1). It would be wise to use your whole clip to take them down. You should reach a small bedroom. Kill one of the enemy soldiers. He is hiding behind the right bed (screen 2). Keep moving forward.
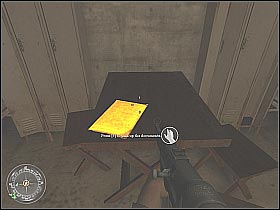
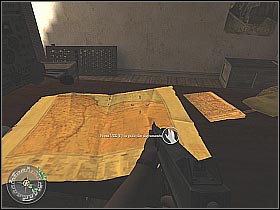
You should finally reach the room designated on your compass. Move closer to the table and pick up the documents (screen 1). You may exit the bunker now. Talk to the squad leader (screen 2). He will be very pleased with your actions. Well done! This is the end of this mission.
TIME AND PLACE: October 29, 1942; near El Alamein
YOU ARE: Sergeant John Davis
This is one of many defensive missions of the game. You will have to repel enemy attacks. At first, you will be invaded by some german troops. Later, enemy armored cars and tanks will appear. You start off on a back of an armored truck (screen 1). You may want to aim at the German soldiers. After you reach your destination, jump off the truck and listen to what the squad leader has to say (screen 2).
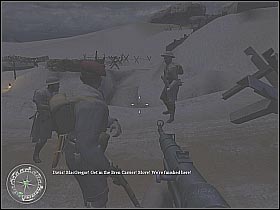
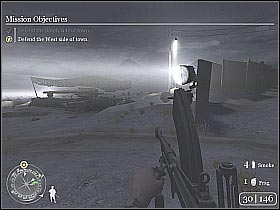
You will have to defend the central buildings of the complex at all costs. The enemies will be storming the place from many directions. The first groups are coming from the south. Go there (remember to use your compass). You should meet a couple of teammates in here (screen 1). They will help in the following fights. You should see enemy troops advancing to your position (screen 2). Wait for them to get closer. Remember that your current weapon has a very limited range of fire. You wouldn't want to waste any ammo. Ignore the armored car, it won't do you any harm.

You should practice aiming at the heads of the enemy soldiers. Do not waste too much ammo (screen 1). It would also be wise to use some of the grenades. Start throwing them at larger groups of German soldiers. Next you will have to defend the western side (screen 2). Go there now. Use the compass to help you navigate to your destination.
More Germans are coming. Start shooting at them. The enemies will try to use smoke grenades to blind your sight (screen 1). This will make your job a little more complicated. You have to be extra cautious. Do not let any soldiers reach the occupied trenches. You must also watch out for the enemy grenades (screen 2). If possible, return them to their original owners. ;-)
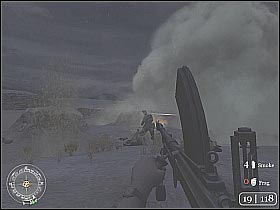
After dealing with the enemy soldiers you should receive some new orders. Head to the south-west (screen 1). There are more Germans coming from the nearby hill. Just as before, use your grenades to eliminate larger groups of enemy troops (screen 2). Do not let the Germans get closer to your positions.
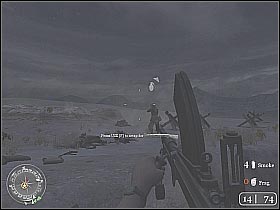
The enemies will probably try to use smoke grenades again (screen 1). Be CAREFUL. The Germans may be hiding almost everywhere. You may want to step back a little and start shooting at those soldiers who actually made it into the trenches. You should also use frag grenades to dispose of them faster and safer (screen 2).

You will receive new orders in a couple of minutes. This time you will have to defend the northern part of town (screen 1). Leave the current station. It would be wise to choose the path located between two buildings. DO NOT step into the trenches. Instead, occupy the heavy machine gun. Start shooting at the visible enemy soldiers (screen 2). If you're lucky, they won't even get close to your positions... and even if the do, your teammates will handle them without any problems.
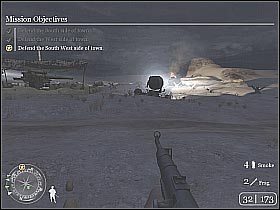
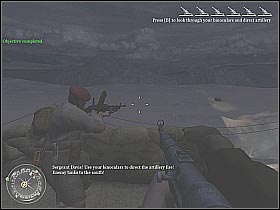
You will have to eliminate at least 3-4 waves of enemy soldiers (screen 1). You shouldn't have any problems. After that, new objectives will appear on your screen. The allied artillery is ready to attack enemy positions. You will be responsible for designating the targets. Leave the MG-42 and head on to the nearest house. Use the stairs and the ladder to get to the roof (screen 2).
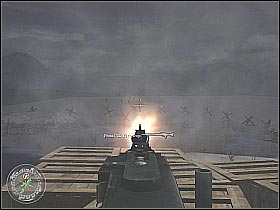
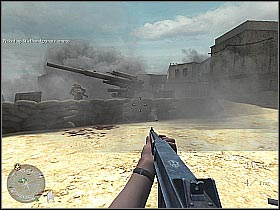
Listen to what the squad leader has to say (screen 1). You will have to use your binoculars in order to designate enemy targets. First of all, take care of an enemy armored car (screen 2). You should notice that targeting mobile units is very hard. It would be better to wait for them to stop. You can also make some corrections that will include the movement of the targeted unit.
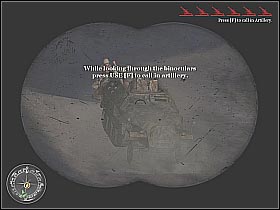
You've got to focus mainly on enemy tanks. You have to use your binoculars in order to designate the targets (screen 1). After you've picked one press F. Note that the actual explosions take place a couple of seconds later (screen 2).
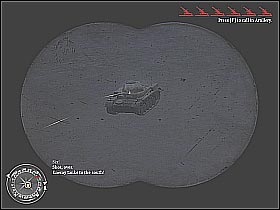

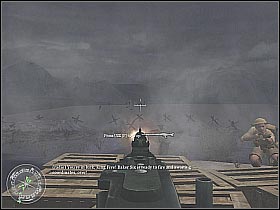
You have to assist in destroying all of the attacking tanks (screen 1). Thankfully, you don't need to worry about enemy troops. Allied forces should deal with them. Listen to the other soldiers. They will help in locating the enemy tanks. Who knows, maybe even you will be able to destroy two of them simultaneously (screen 2). :-)
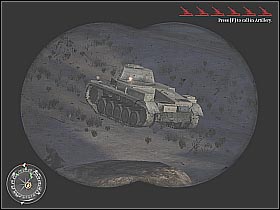
Don't let the tanks get closer to your positions (screen 1). Thankfully, the machines will be stopping from time to time. This will give an opportunity to mark their locations for artillery bombardment. After a couple of minutes the enemy forces will start to retreat (screen 2). That's it for this mission.
TIME AND PLACE: November 3, 1942; near El Alamein
YOU ARE: Sergeant John Davis
The mission starts on an open field. Follow one of the allied tanks (screen 1). I would recommend the closest one. Use the tank for cover against enemy attacks. You should be standing by one of his sides. After you reach your destination jump into the ditch and start eliminating enemy soldiers (screen 2).
You should join the rest of the team now (screen 1). Head on to the nearest tunnel. You might want to stay in the back and let the other teammates do all the "dirty work". Sooner or later you will be forced to join them (screen 2). It would be wise to use all possible cover. You might also crouch or lie down to improve your accuracy.

After a couple of seconds you should reach the second exit. First of all, take care of the nearby German troops (screen 1). Wait for the other squad members to arrive. They might come in handy, especially when it comes to dealing with the enemy soldiers. Start moving forward (screen 2). I would recommend crouching at all times. It helps to reduce the risk of being seen by one of the enemy snipers.
Wait for one of the allied tanks to arrive. Just as before, you will use it for cover against enemy attacks (screen 1). Follow your crew members movements to reduce a risk of taking a deadly bullet. Keep moving forward. Head on to the next ditch (screen 1). Ready your gun. There are more enemy troops nearby.
Continue pushing forward. You will be encountering massive enemy forces. Nevertheless, you shouldn't have any problems eliminating German soldiers (screen 1). There's only one road leading to the next checkpoint. You can't miss it. You should finally reach a small entrance leading to the underground bunker (screen 2). It would be wise to wait here for the other crew members. They will assist in the following fights.
The entrance is being defended by one of the enemy soldiers. He is looking through a small hole. You've got two options - you can either throw a couple of smoke grenades in there (screen 1) or let your teammates deal with the enemy forces. After taking care of this problem enter the bunker itself. Use the small hatch to get to the lower level (screen 2).
You may start exploring the bunker on your own or wait for the other squad members to arrive. Either way, you will have to reach the destroyed entrance (screen 1). You'll end up in the second tunnel. You have to be extra cautious. There are a lot of enemy soldiers nearby (screen 2). Keep moving forward.

After exiting the tunnel take care of some new German soldiers. They are standing by one of the huge guns (screen 1). You might also try surprising them by throwing a couple of grenades. Continue moving forward. Take out the guys standing by the heavy machine guns (screen 2). At first, they shouldn't even notice you coming. It'll make killing them a lot easier.
Keep moving forward. You will pass through one of the bunkers along the way (screen 1). There aren't any enemies in this area. You will meet up with a new crew of allies. DON'T kill any of these soldiers. Otherwise, you will jeopardize the whole mission. You should finally reach the entrance leading to the next bunker. Keep quiet. Throw some grenades at the enemies standing by the big gun (screen 2). If you're lucky, they won't even start shooting at you.
Remember to check your ammo. It would be wise to pick up a rifle or a machine gun from one of the killed soldiers. Move up to the next tunnel (screen 1). Keep going forward. After exiting the tunnel wait for the allied tanks to arrive. Just as before, follow them using their armor for cover (screen 2).
The tank on the left is going to be destroyed in a couple of seconds. You couldn't prevent that in any way. Wait for the other tank to arrive (screen 1). Follow it. After reaching your destination head on to the small ditch. Start shooting at the nearby enemy soldiers (screen 2). It would also be wise to wait for the other crew members. They may prove useful. Choose the path leading to the next tunnel.

You are going to be attacked be several groups of enemy soldiers (screen 1). I wouldn't recommend using grenades at this point. After you reach the crossroads, choose the left path. It should lead you straight to the next gun. Start shooting at the visible enemy soldiers (screen 2). It would also be a good idea to blind them using some of the smoke grenades.
Taking care of the Germans standing by the huge gun shouldn't be a problem (screen 1), especially if you decided to use the smoke grenades. Continue moving forward. You should pass by a closed door. You will be encountering enemy soldiers quite regularly (screen 2).

You should finally reach the last gun (screen 1). Use your grenades to take care of the German soldiers. Now you must go back to the door you've missed earlier. Wait for the other crew members to arrive. One of the allies will blow up the door leading to the next bunker (screen 2).
You will be attacked by an enemy soldier almost instantly (screen 1). Take care of that problem. Now you may proceed to the bunker. Be sure to check all rooms. They will be well guarded (screen 2). Before you move any further wait for the other crew members.
First of all, find a room with the destroyed wall. Head on to the tunnel (screen 1). After a couple of seconds you should reach a small village occupied by Nazi forces (screen 2). Before you do anything stupid wait for the other crew members to arrive. They will help you in taking control of the surrounding buildings.
There's a heavy machine gun post on the roof of the largest building. I would recommend arming yourself with a decent rifle. If you're lucky, you should be able to score a good shot. You can also use some smoke grenade in order to blind the enemies (screen 1). Start running towards the complex. You may want to use a couple of frag grenades to take care of the Nazis hiding on the roof of the nearest building (screen 2).
OK, that was the easy part. ;-) Now you must get rid off the rest of enemy soldiers (screen 1). Use all possible cover - trucks, crates, walls etc. You should also use some of the frag grenades in order to eliminate larger groups of enemy troops. After you're done with them head on to the building designated on map (screen 2). Reload your current weapon (before stepping inside).
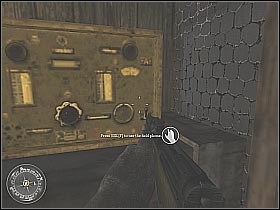
Start shooting at a guy standing on the stairs (screen 1). You have to be quick about it. You can move up to the upper floor. Be sure to check all rooms. Another Nazi soldier is hiding near the radio station (screen 2). Kill him. Use the radio to finish this level.
TIME AND PLACE: November 6, 1942; El Daba
YOU ARE: Sergeant John Davis
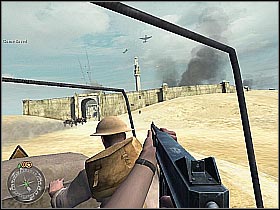
You should remember this mission from the "Call of Duty 2" demo version. You start off on a back of the truck. Enjoy the views (screens 1 & 2). You may want to take a closer look at the fights taking place near the city walls.
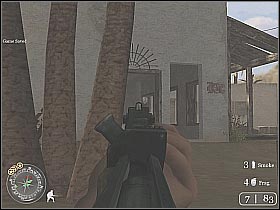
After reaching your final destination jump off the truck and start moving towards the right passage. Follow the current squad leader (screen 1). The idea of these actions is to surprise Germans standing by the heavy machine guns. Take care of some enemy soldiers (screen 2). I would recommend using the grenades. Start shooting at those guys who actually managed to survive the explosions.

Continue pushing forward. It would be best to crouch at all times. Choose the darker passage. Start shooting at the enemy soldiers (screen 1). A couple of Nazis will be hiding in one of the surrounding buildings (screen 2). Use some of your grenades to take care of this small problem.
You should be able to surprise the MG-42 crew without any major problems (screen 1). Remember to pick up some grenades lying by the killed soldiers. New mission objectives should appear on your screen. You will have to take care of some big guns located on the beach. Head on to the nearest building (screen 2). It is being guarded by one of the allied soldiers.
Use the stairs to get to the upper floor. You should come across another group of allied soldiers. Keep moving forward. One of the enemies is lying on the ground (screen 1). Deal with him QUICKLY!! It is very important, because he possessed a heavy machine gun. You should also watch out for some grenades. Take care of the other enemy soldiers. Continue moving forward (screen 2). Use your compass to help you navigate to your destination.
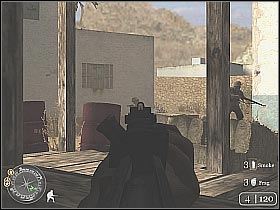
You should finally reach the beach guns (screen 1). Start off by throwing some grenades at the enemy soldiers. You will also have to take care of an enemy sniper. He is standing on the roof of the right building (screen 2). Before you move any further wait for your squad members to show up.
Start moving forward. Use barrels for extra cover. It would be wise to use your grenades while fighting larger groups of enemy soldiers (screen 1). Hide behind the crates located on the right (screen 2). You should be able to take care of some new enemies. Be sure to kill guys standing by a heavy machine gun post.


You should be informed about fulfilling one of the main objectives of this mission (screen 1). Now you will have to transmit a radio signal, so the allied destroyers will be able to destroy the unprotected guns. Use some smoke grenades in order to blind the nearest group of enemy soldiers (screen 2).
Start off by eliminating soldiers that were trying to hold on to this square. Be careful to not to shoot any of the allied troops. Stand near one of the exits (screen 1). New enemies will be trying to breach this position. Continue moving forward. It would be wise to choose a small alley. You will encounter at least one group of enemy soldiers (screen 2).
You will have to deal with at least two more enemy soldiers along the way (screen 1). Remember to lean out a lot. You can also use some of your grenades, mostly to take care of the Nazis hiding on the roof of the nearest building (screen 2).
After securing the whole area enter the nearest building. You will be encountering some massive enemy forces in here (screen 1). Be sure to check all rooms. Watch out for some additional units. The soldiers are hiding below the stairs leading to the first floor (screen 2). You should go there now.
You should reach a small balcony. Take out the remaining enemy soldier (screen 1). He should be hiding, so you might have some problems locating him. Go to the balcony now. Use the radio to send a message to one of the allied destroyer ships (screen 2).

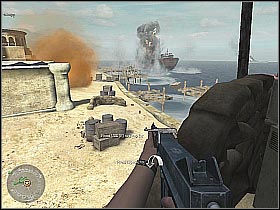
You might want to take a look at the naval forces destroying the guns (screen 1). After the fireworks have ended rejoin your team. The other soldiers should be waiting near the entrance to this building. Now you will have to take care of the enemy headquarters. Use your compass to help you navigate to your current destination (screen 2).
You should notice a couple of heavy machine gun posts in the area. You will have to avoid them in order to surprise enemy soldiers. Follow the rest of your squad members (screen 1). One of the allies will try to gain access to the nearest building. He will be killed. Throw a couple of grenades in there. Enter the building and deal with those soldiers who managed to survive the explosions (screen 2).
Start shooting at the another group of enemy soldiers. They were trying to use the nearest stairs (screen 1). If you're lucky, they won't even have the opportunity to turn around and respond to your actions. Use the stairs and enter the second building. Get closer to the hole in the wall (screen 2). You should see a couple of guys standing by the heavy machine guns. Kill them. You may also want to use come of the carried grenades.
You've got to be careful. A couple of enemy snipers have just appeared on the map. It would be best to pick up a standard rifle and score some headshots (screen 1). After you're done with them, get closer to the MG-42 positions. Turn around and start shooting at the soldiers hiding inside one of the surrounding buildings (screen 2).

You can finally proceed to the German headquarters (screen 1). The building itself is well defended. There are a lot of enemy troops inside. You will have to deal with them (screen 2). Be sure to clear the ground floor and then head on to the nearest stairs.
Before you reach the upper floor you should turn around and start shooting at the enemy soldiers (screen 1). They will be guarding one of the tables. You may also want to use some grenades, although they aren't necessary at this point. Pick up the documents. They are lying on the main table (screen 2). Exit the building.
You should try using one of the heavy machine guns. You will be able to kill some of the nearby enemy soldiers (screen 1). Rejoin the rest of the squad. Choose the left path (screen 2). You will have to get back to the beach... exactly where the big guns were standing.
You should notice a couple of enemy soldiers along the way. They will be retreating (screen 1). You can deal with them if you want to. Head on to the beach. Talk to the squad leader in order to complete this mission (screen 2).

TIME AND PLACE: January 15, 1943; Libia
YOU ARE: Commander David Welsh
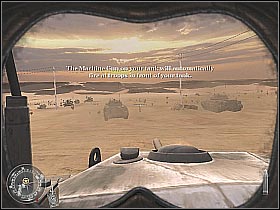
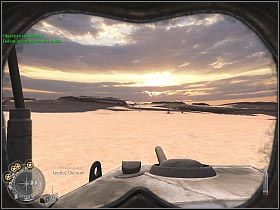
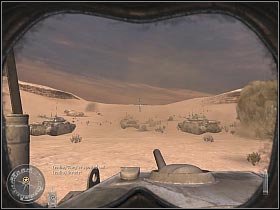
You've got two short missions ahead of you. Both of them will include using allied tanks. You start off near the small village (screen 1). Utilize your free time to familiarise yourself with the steering procedures. Start moving forward. You won't have to attack enemy soldiers - one of the other crewman is operating the machine gun. Furthermore, they are harmless at this point. Follow the other allied tanks (screen 2).
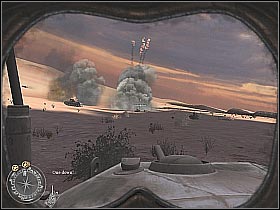
You should reach an open space in a couple of seconds. The enemy troops will begin the main attacks (screen 1). DON'T STOP, keep moving forward. You should start seeing enemy tanks in the distance. They will be guarding the other side of this valley (screen 2).
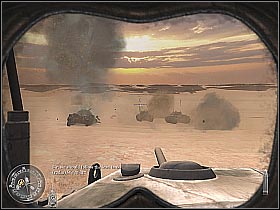
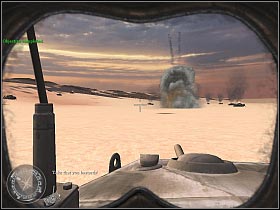
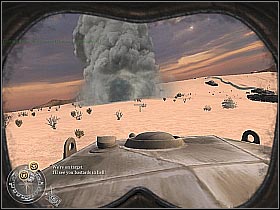
Wait for the enemy tanks to get a little bit closer. Thankfully, you will be able to destroy them without any major problems. You just have to remember about a few things. First of all, you have to keep moving at all times. Furthermore, aim at the back of the tanks (screen 1). After you deal with the couple of the nearest machines start heading towards the second group (screen 2).
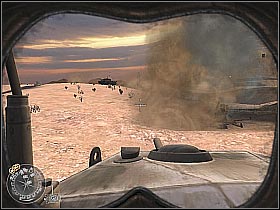
There are more enemy tanks nearby, you will have to deal with them (screen 1). Watch out for the allied units. You should avoid shooting them. You've only got one more group of enemy tanks to deal with (screen 2). Use the same methods as before. After a couple of minutes the game will end this mission.
TIME AND PLACE: January 18, 1943; Libia
YOU ARE: Commander David Welsh
This time you will be taking part in a major offensive. Some of the allied tanks will be surprising enemy units from the flank. You will also have to dispose of a couple of enemy units. Follow the other allied tanks (screen 1). The artillery will start bombarding your positions, mostly near the top of the hill (screen 2). DON'T STOP!! Keep pushing forward.
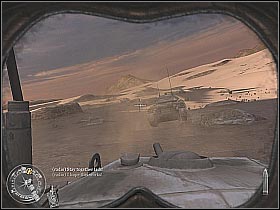
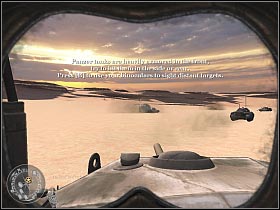
You will encounter some enemy tanks in here. Take care of them quickly (screen 1). Now you must start attacking Nazi soldiers standing by one of the cannons (screen 2). They shouldn't pose any threat.
Use your compass to help you navigate to your next objectives. You will be encountering new cannons and enemy tanks along the way (screen 1). You have to be cautious. Some units are well hidden and you may not see them at first glance (screen 2).
Keep moving forward. You will reach another group of enemy units. First of all, take care of the anti-tank guns (screen 1). You will probably notice an enemy truck leaving the battlefield. Ignore it. Move up to the next objectives. This time you will have an opportunity to get rid off some enemy vehicles (screen 2).
You will reach the last group of enemy soldiers and tanks very soon. Remember that all of the main targets are shown on your map. Take care of the designated targets (screens 1 & 2). After that, you will complete this mission.
TIME AND PLACE: March 10, 1943; Toujane
YOU ARE: Sergeant John Davis
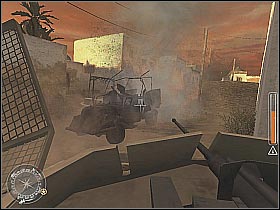
This is a very challenging mission. You will have to escape from this city. Toujane is being occupied by the enemy forces. First of fall, use the right machine gun post. Start shooting at the enemy soldiers (screen 1). A truck should arrive here in a couple of seconds. It will appear on your right. Take care of some additional units (screen 2).
Keep shooting at the enemy soldiers. Most of them will be coming from the nearby street. Nevertheless, you also have to watch out for smaller groups. They will be appearing near your building. It would be wise to shoot at some barrels to dispose of them faster (screen 1). You should see an armored car heading this way (screen 2).
The moment you hear your squad leader shouting ABANDON this post. The armored car will start shooting at the nearby windows. You'd be killed almost instantly (screen 1). You should receive some new orders. Wait for the enemies to arrive. Kill them the moment they try to get in (screen 2). You may now proceed outside.
I would recommend taking a machine gun (MP-40) from one of the killed soldiers. This weapon may come in handy in the following fights. Use the stairs to get to the ground floor. Throw a couple of grenades to the nearby room. Start shooting at those who managed to survive the explosions (screen 1). Leave the building. Turn left. Start moving forward (screen 2).
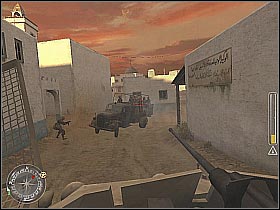
The idea of this whole thing is to take control of the armored car. You should start seeing new soldiers. Kill them (screen 1). You may pick up a rifle for a couple of minutes. This is not necessary. The other enemy soldiers will appear on the roofs of the surrounding buildings (screen 2). You've got to eliminate them.
Eliminate the guards standing by the armored car. You have to do it from a safe distance. You may consider throwing a couple of smoke grenades (screen 1). Wait for the other crew members to arrive. Stand by the car and press the F key in order to take control of the gunner's position (screen 2).
You will be taking care of the enemy soldiers. WARNING!! DO NOT overheat the gun. Otherwise, you will have to wait for it to cool down. You should start seeing enemy soldiers on the nearby square (screen 1). Kill them. You will encounter another armored car in a couple of minutes. Start shooting at it. You'll be able to blow it up without any problems (screen 2).
You've got to watch out for guys armed with rocket launchers. One of them will be standing on the roof of the right building (screen 1). Eliminating those soldiers should be considered as an absolute priority. The second shooter can also be found on the right roof (screen 2).
The armored car will encounter an enemy tank in a couple of seconds. It'll force your team driver to pick a different route (screen 1). Watch out for a soldier with the rocket launcher (screen 2). Listen to your squad members in order to locate these enemies. They will help you a lot.
One of the surrounding buildings is being defended by two enemy soldiers armed with rocket launchers (screen 1). Thankfully, they're staying close to each other, so you shouldn't have any problems eliminating them. A second tank will block your way. Use your gun to get rid of it (screen 2).
Keep firing at the enemy soldiers. They will be coming from all directions. Concentrate your efforts on checking the nearby houses and darker alleys (screen 1). You will be attacked by a truck loaded with enemy troops (screen 2). Kill the soldiers and destroy the vehicle itself (aim at the engine).
A second truck will appear on the map in a couple of seconds. Take it out (screen 1). There are more soldier armed with rocket launchers nearby. Just as before, listen to your teammates. It will help you in locating their positions. Destroy the barrels in order to blow up one of the trucks blocking the way (screen 2).
There should be at least two more soldiers (I'm talking about the guys armed with RPG's) in the vicinity. You have to locate and kill them (screen 1). Nevertheless, the armored car is going to be destroyed. As a result, your soldier will lose consciousness for a few seconds (screen 2). Don't worry, because this couldn't be avoided in any way.
Wait for your soldier to regain full consciousness. Rejoin the rest of the team (screen 1). You will have to reach the extraction zone on foot. It will be also important to AVOID contact with larger groups of enemy soldiers. Reaching the extracting point should be considered an absolute priority. Start moving forward. You will be attacked by a small group of enemy soldiers. Kill them or let your teammates deal with the Nazi forces (screen 2).
Head on to the darker passage. You will be attacked by some German troops. Killing them shouldn't be a problem (screen 1). I wouldn't recommend using grenades. You should meet some new allied soldiers along the way. Ignore them (screen 2). Follow the squad leader. Remember that you should concentrate your efforts on reaching the extraction point safely.
You should be killing only those soldiers who present immediate threat (screen 1). It would be wise to use some grenades. Thanks to them you'll deal with the Nazis faster than usual. Your goal is the extraction point located outside the city walls. You will notice a truck. Wait for your team members to use it.

TIME AND PLACE: March 11, 1943; Toujane
YOU ARE: Sergeant John Davis
The goals of this mission are quite obvious. You will have to retake control of the most important sectors of this city. You start off on a moving tank (screen 1). You don't have to do anything at the moment. It would be a good idea to listen what the other allies have to say. One of the tanks moving in the front of the column is going to be destroyed (screen 2). Get ready!
You will have an opportunity to surprise enemy troops located in this area and responsible for the destruction of the allied tank. Choose the right path (screen 1). Start moving forward. If you're lucky, the enemy soldiers won't even notice you coming (screen 2). Kill them all.
There's a heavy machine gun post nearby (screen 1). Listen to what the other squad members have to say about this. Use your smoke grenades (at least two) in order to blind the enemy soldiers. Start running towards the MG-42 position. Turn right at the first possible occasion (screen 2). Some of the enemies may be standing near the smoke. You should be able to take them out at this moment.
The enemies will be coming from many different directions (screen 1). You don't have to worry about the machine gun post anymore. Instead, look for a small passage located between the buildings. You should encounter some new enemies here (screen 2). I would recommend using your grenades on them (the soldiers are hiding on the upper level).
Keep pushing forward. Bear in mind that you will be attacked by enemy forces quite regularly (screen 1). You should reach one of the bigger guns in a couple of seconds. There are some allied soldiers nearby. One of them will set the charge. Wait for the gun to explode (screen 2). You may proceed to the next sectors of the map.
I would recommend taking a rifle from one of the killed soldiers. Enemies will be appearing on the roofs of the surrounding buildings (screen 1). Take them out, one by one. Use all possible cover - crates, walls, barrels etc. Eliminate the remaining soldiers. One of the allies should pick up a ladder (screen 2).
Use the ladder to get to the roof of the nearest building. Follow your teammates. You will have to make a jump at some point (screen 1). Warning! There are some enemy troops hiding in one of the nearest buildings (screen 2). Organize a surprise attack. It would also be great to use some of the carried grenades.
Keep pushing forward. You will be encountering massive enemy forces along the way (screen 1). Remember to use barrels and crates for extra cover. Stick close to the squad leader. He should pick one of the side alleys. Follow him. There are more enemy soldiers behind the nearest corner (screen 2). Kill them.
I would recommend picking up a rifle again. You should reach a small square (screen 1). Start shooting at the enemy soldiers. It would be wise to use the surrounding crates for cover. After that, start moving forward. You will notice some new Nazis standing on the roof (screen 2). Use your rifle to dispose of them quickly.
Try moving forward. An enemy tank should arrive here shortly. You MUST use your smoke grenades (at least two). If you don't blind him, he will kill you in a matter of seconds (screen 1). Furthermore, you won't be able to avoid his attacks. Choose the left path. One of the allied tanks should break through the wall (screen 2). Step back and let him deal with this problem.
Rejoin the rest of the team and start following the allied tank (screen 1). You should keep a safe distance. There are a lot of enemy soldiers armed with rocket launchers (screen 2). You won't be able to eliminate all of them. Sooner or later the tank will be destroyed. Don't worry. You will be able to handle things on your own.
Keep pushing forward. You will be encountering massive enemy forces. Concentrate your efforts on soldiers hiding in the nearby buildings (screen 1). You might not see them at first glance. You should finally reach the second gun (screen 2). Throw a couple of grenades to get rid off enemy soldiers. Start shooting at those who actually survived.
There's a large group of enemy soldiers nearby (screen 1). You've go to be extra careful. Arm yourself with a machine gun (the immortal MP-40) and start eliminating them. Choose the left path at the first occasion. This way you will be able to surprise Nazis standing by the MG-42 (screen 2). Bear in mind that they may be replaced by their colleagues. Keep pushing forward.
Don't forget about the enemy snipers located in this area. One of them will be hiding near the destroyed tank (screen 1). Your team will be encountering large group of enemy soldiers (screen 2). It would be best to find a suitable cover. Grenades are also welcome.
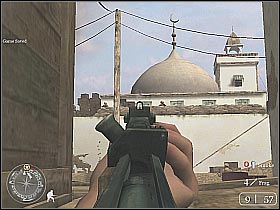
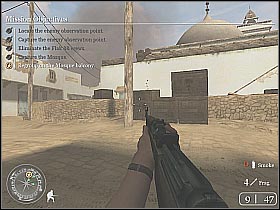
The last of the big guns will be located on your left (screen 1). Throw a couple of grenades to that position. You could also deal with the enemy forces personally. Be sure to check nearby alleys. Additional units may be hiding there. Now you will have to take control of the mosque located in the central part of this town. Follow your team members (screen 2).
Crouch by the nearby crates and start shooting at the visible enemy soldiers (screen 1). You could aim at their heads if you wanted to deal with them faster. Start moving towards the mosque itself (screen 2). Use the nearby stairs to get to the roof.
The building may be attacked by some desperate Nazi units. Wait for them to get closer and start shooting at the nearby barrels (screen 1). After that, listen to what the squad leader has to say (screen 2). Well done. You've just completed this mission.
TIME AND PLACE: March 30, 1943; Matmata
YOU ARE: Sergeant John Davis
This is the last mission located in the African region. It's not that hard, although it has some challenging moments. You start off inside a moving jeep (screen 1). You can listen to your teammates dialogs if you want to. You will be hit by an enemy truck in a couple of seconds. It looks like the Nazis were trying to surprise your squad members (screen 2). You'll have to take care of this problem.
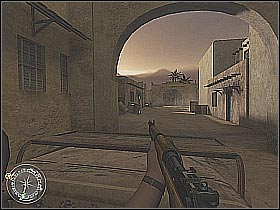
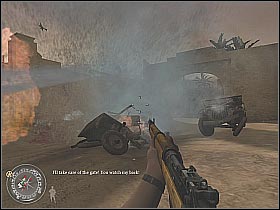
First of all, you will have to take care of a guy that's been equipped with a rocket launcher. You shouldn't have any problems locating him, especially since he'll manage to score at least one successful hit (screen 1). You must find a good cover and start eliminating the remaining enemy soldiers from there (screen 2). Watch out for the grenades!
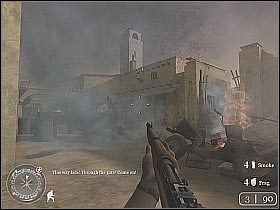
After you deal with the enemy soldiers (involved in the surprise attack) start following the squad leader. You should encounter several new groups of enemy troops very soon. You must be crouching at all times, it would also be great to find some cover (screen 1). Take care of the guy standing by the heavy machine gun post (screen 2). He can be found inside one of the surrounding buildings.

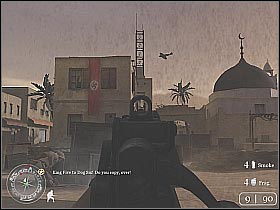
Start moving forward. Duck behind the brick wall in order to avoid one of the Nazi fighters. You also have to watch out for enemies standing on balconies (screen 1) and hidden in the nearby buildings (screen 2). You might want to use some grenades to dispose of them more efficiently.
You should encounter the new heavy machine gun post in a couple of seconds. Just as before, use your smoke grenades in order to blind enemy soldiers (screen 1). Start off by running forward. You will have to turn right at some point. Eliminate the nearby Nazis. It would be wise to use concrete walls for extra cover (screen 2). Wait for the other team members to join you.
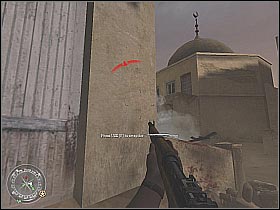
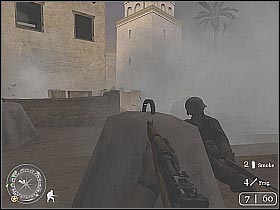
You've got to be careful! There's an enemy armored car nearby! You have to take out its gunner (screen 1). You might also want to kill a guy standing by the MG-42. You were trying to avoid his attacks earlier. Throw a couple of grenades in there (screen 2). If you decided to choose otherwise, rejoin the rest of the team.
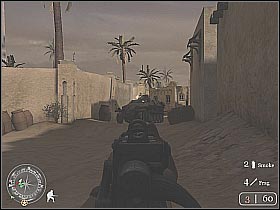
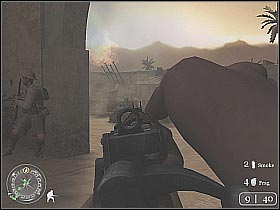
You should be able to reach a bigger square in a couple of seconds. WAIT here. Find some good cover and start shooting at the enemy soldiers (screen 1). An allied tank will arrive here shortly. Step back and let it do the dirty work (screen 2). You might also try following the tank. Remember to keep a safe distance.
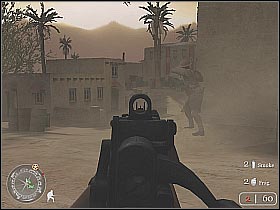
Unfortunately, the tank that was trying to help your team is going to be destroyed. Join your squad members and start running towards enemy positions (screen 1). After you've taken control of this point stand near the destroyed tank and get your rifle ready. More Nazis are coming. You will have to deal with them (screen 2). Keep moving forward.
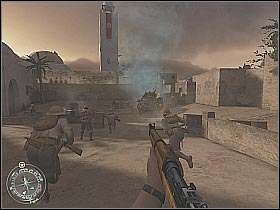
Continue pushing forward. You should be getting near the enemy positions. It would be best to lean out a lot. Eliminate soldiers standing by the Anti-Aircraft gun (screen 1). It would be wise to use some of the carried grenades. The Nazi snipers are next. First group of enemy soldiers will appear at the western part of the complex (screen 2).
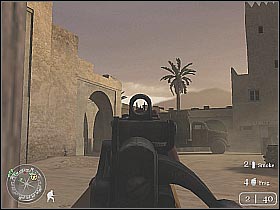
Taking care of the first group shouldn't be a problem. Watch out. There are more Nazis here!! The second group will be coming from the north (screen 1), and the last one from the east (screen 2). Remember to use all possible cover. Start moving towards the AA gun.
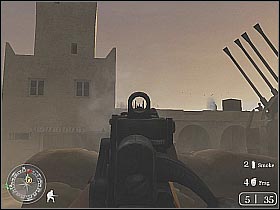
Step a little bit closer. Press the F key in order to use the Anti-Aircraft gun. Start shooting at the enemy planes (screen 1). WARNING! One of the Nazis will probably throw a grenade at you. AS SOON AS the grenade icon appears on your screen, leave the AA gun and step back (screen 2). Otherwise, the explosion would've killed you almost instantly.
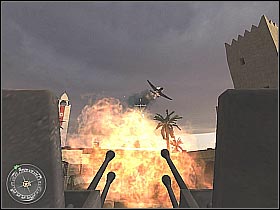
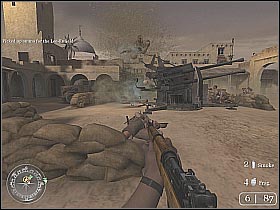
You may now go back to the AA gun. Continue shooting at the enemy fighters. They will be coming from only one direction, so you shouldn't have any problems locating them (screen 1). You will have to destroy at least 15-20 enemy fighters. After that, the mission is going to end (screen 2).
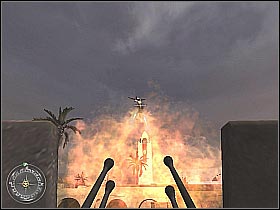
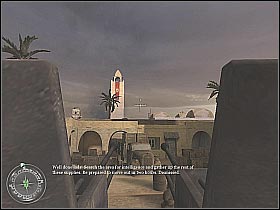
TIME AND PLACE: June 11, 1944; Beltot
YOU ARE: Sergeant John Davis
Here's one of the missions located in the infamous Normandy area. You will have to take complete control of the small town of Beltot. First of all, listen to what the squad leader has to say (screen 1). After that, follow him. You should reach a larger field in a couple of seconds (screen 2). Start crouching behind one of the brick walls. You've got to use all possible cover. Don't expose yourself too much.
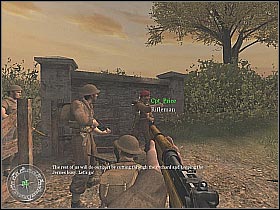
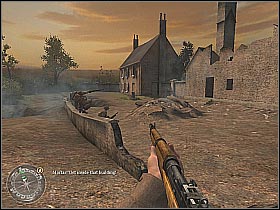
You should encounter some of the Nazi forces in a couple of seconds. It would be best to aim at the heads of the enemy soldiers. Zoom in the view if you need some help with that (screen 1). Some of the Germans may surprise you from the left flank. You've got to be careful. Follow the rest of the team members. You will have to cross a small creek. Choose the path leading between the bushes (screen 2).
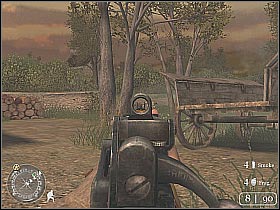
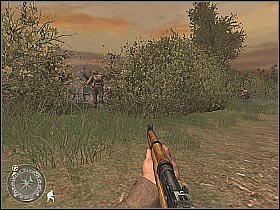
Ignore the enemy forces for the moment. Start running towards the buildings located on your right. Remember to use all possible cover (screen 1). Some of the enemy mortar teams will start bombarding the whole area. You will deal with this problem later. Now head on to the nearest building (screen 2). You might want to let your teammates deal with the enemy soldiers.

I wouldn't recommend going up to the first floor. That's because you'd probably expose yourself to enemy snipers. Instead, get closer to one of the walls and take care of the MG-42 crew (screen 1). You shouldn't have any problems with locating enemy troops. Continue shooting at the Nazis (screen 2). Remember to use barrels, walls and destroyed cars for extra cover.
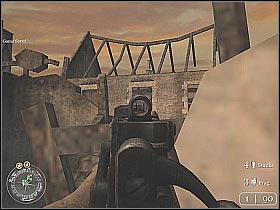
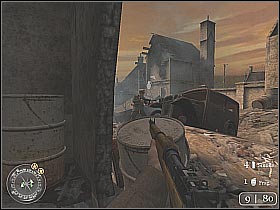
Keep pushing forward. You will be encountering some massive Nazi forces (screen 1). Watch out for the grenades. Remember to avoid them at all costs. It would be best to head on to the nearest buildings. Take out a single soldier. He was guarding the stairs (screen 2). Use them to get to the first floor.
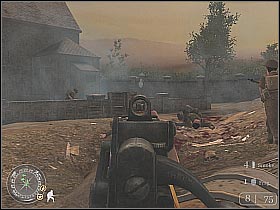
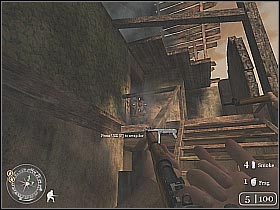
Get closer to one of the nearby windows and start shooting at the visible enemy soldiers (screen 1). You should be just fine. Remember to keep a crouching position at all times. You will also be able to take care of the first mortar team (screen 2). After you've taken care of all enemy units use the stairs to leave this building. Rejoin with the rest of the team.
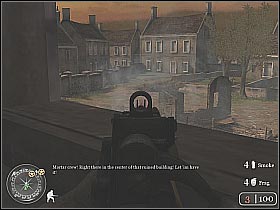
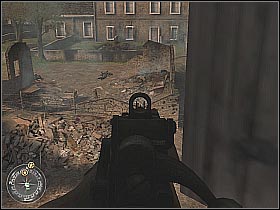
Start moving forward. Remember to use destroyed buildings and other objects for extra cover. Keep heading towards the right path (screen 1). You will encounter some enemy forces in here (screen 2). Just as before, headshots are most welcome.
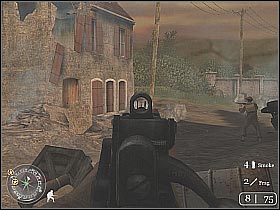
You probably noticed a heavy machine gun post on your left (screen 1). Take it out (aim for the heads). Bear in mind that there are more MG-42 posts nearby. Head on to the nearest building. You will encounter some enemy soldiers in here (screen 2). Kill them. Use the stairs to get to the upper floor.
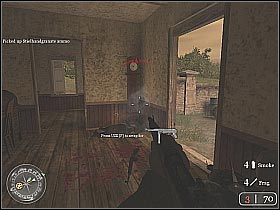
Start off by choosing one of the windows. It would be best to keep a crouching position at all times. Eliminate all nearby soldiers. After that, you'll have to take care of the other heavy machine gun posts (screen 1). Be sure to kill all visible Germans (screen 2). Leave the building and rejoin with the rest of the squad.
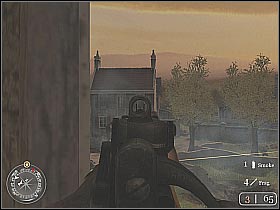
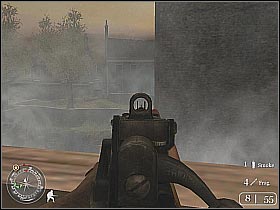
Keep moving forward. It would be best to stay close to the buildings located on your right. You will encounter some brick walls along the way (screen 1). Jump over them. You should finally reach one of the destroyed buildings. Try to locate enemy soldiers that were probably hiding in the ruins (screen 1). I would recommend zooming in to get the better view of the situation.
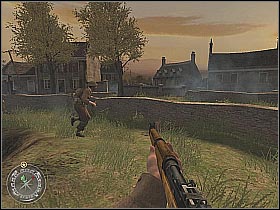
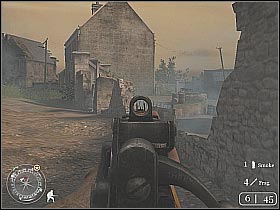
After taking care of the enemy troops head on to the nearest street. Continue moving forward. You should be staying close to the right wall at all times. You will reach an open window in a few seconds (screen 1). There are some enemy troops inside. It would be best to throw a couple of grenades in there. Enter the building and deal with the rest of the Germans. Some new soldiers will appear near your current position (screen 2). Kill them. I would also recommend picking up a machine gun (MP-40).
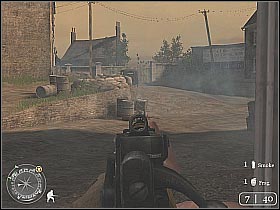
You should notice a new MG-42 post nearby. First of all, use some of your smoke grenades in order to blind it (screen 1). Start running towards its position. Take down the Germans who were standing by the machine gun (screen 2). Reload your weapon before you decide to enter the closest building.
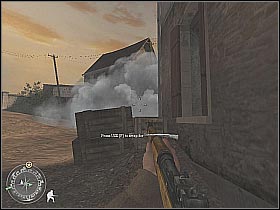
You will be encountering some massive enemy forces. I would recommend choosing longer, but controlled bursts. This will help you to eliminate enemy soldiers more efficiently (screen 1). Join the squad leader (he will be shown on your compass). The man is going to bash one of the doors (screen 2). You will find some wounded troops here. DO NOT shoot them! They will be treated as prisoners.
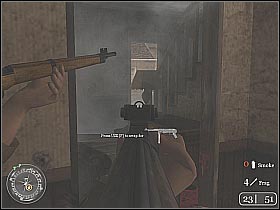

Listen to what the squad leader has to say. You will have to team up with MacGregor in order to bring one of the trucks to this position (screen 1). This will help in transportation of the wounded soldiers. Start off by following the allied soldier. You shouldn't encounter any Germans at the moment (screen 2).
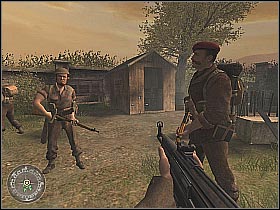
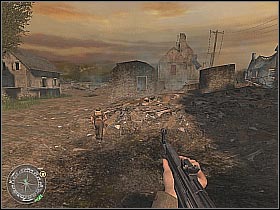
Once you get closer to one of the explored buildings new enemies will begin to show up (screen 1). It would be best to throw a couple of grenades at them. Deal with those who managed to survive the explosions. A second group is waiting for you near the concrete walls (screen 2). Just as before, the grenades will do just fine. Continue moving forward.
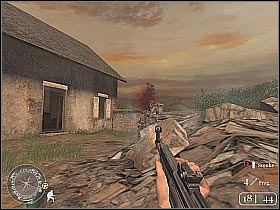
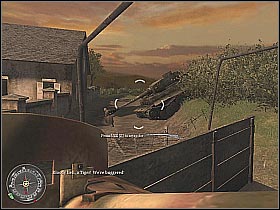
There are no major surprises planned for the next 30-40 seconds. Follow MacGregor to your destination. At some point you will have to jump over the small fence (screen 1). Listen to what MacGregor has to say. He will be able to start the ignition. Head on to the back of the truck (screen 2). You should notice a rocket launcher lying there. Don't pick it up just yet.
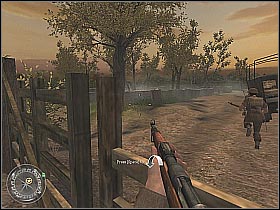
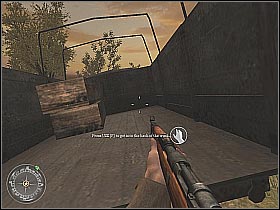
You will have to defend the truck. Enemy troops are occupying most of the nearby buildings. It would be best to aim at some of the explosive barrels (screen 1). This way you'd be able to dispose of them quite easily. An enemy tank will arrive (screen 2). Pick up the rocket launcher and fire your first shot.
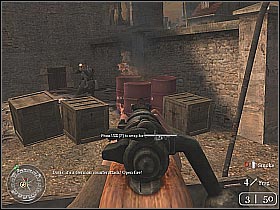
One hit is not enough. Reload your weapon quickly and shoot again (screen 1). This time the machine should explode. There's nothing else to worry about. You'll reach your destination in a few seconds (screen 2). Congratulations, you've just completed this mission.
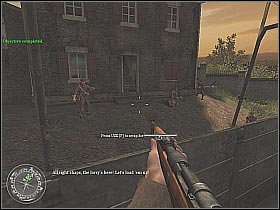
TIME AND PLACE: June 12, 1944; Anctoville
YOU ARE: Sergeant John Davis
During this mission you'll be trying to secure the crossroads located near the city of Anctoville. Start off by following the rest of the team members (screen 1). Bear in mind that there's a heavy machine gun post nearby. Use some smoke grenades in order to blind some of the enemy soldiers (screen 2).
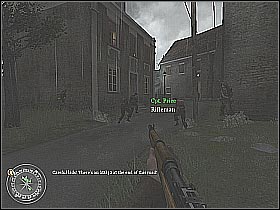
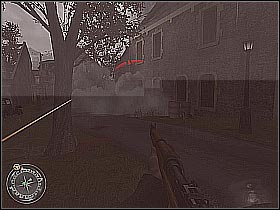
You've got to turn around now, because enemy soldiers have appeared in one of the surrounding buildings (screen 1). It would be wise to enter it, so you could deal with them personally (screen 2). I'd also recommend picking up a machine gun from one of the killed Nazis. You may join the rest of the squad now.
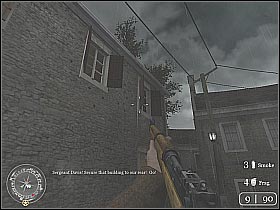
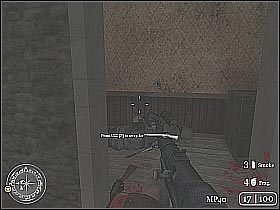
If it's necessary, throw some additional smoke grenades. Otherwise, start moving forwards. New enemy soldiers will appear on your left (screen 1). Kill them. Choose the path there were trying to protect. You'll encounter some new troops along the way (screen 2). Thankfully, you shouldn't have any problems with getting rid off them.
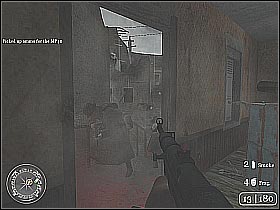
You should receive an information concerning one of the enemy tanks. Start running towards the nearest building. You will encounter some additional units along the way (screen 1). It would be best to look around a lot, so you won't miss anyone. Choose the stairs leading to the first floor. You have to be careful, the area is well guarded (screen 2).
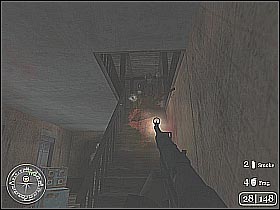
First of all, take care of the Germans who were standing by the windows (screen 1). Thankfully, you can surprise them quite easily. Move closer to the left window. You should see a rocket launcher lying on the ground. Pick it up. Step a little bit closer. You probably won't have any problems destroying the tank (screen 1). One rocket is enough. Take the rifle and exit the building.
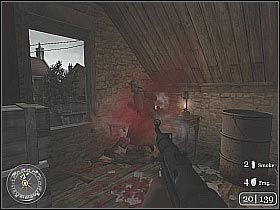
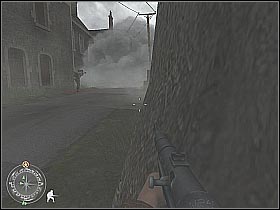
You can rejoin with the rest of the squad. Stick close to your teammates. Otherwise you'd might encounter some additional Nazis and eventually die. You will have to get past through a hole in the wall (screen 1). New objectives will appear shortly. You must surprise the MG42 crew. Go to the nearest building. Some of the Germans will be waiting for you there. Kill them (screen 2).


Use the stairs to get to the first floor. Get closer to one of the windows. Start shooting at the German soldiers (screen 1). You may also consider using some grenades. Head on to the next building. You will be able to kill more Nazis from here (screen 2). Be sure to take out soldiers who were standing by the heavy machine gun post. You may rejoin your team now.
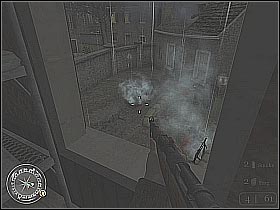
Keep pushing forward. It would be wise to check all surrounding buildings. They may be occupied by small groups of German soldiers (screen 1), After that, start following your squad leader (screen 2). Don't get to close to him, though. Enemy forces have stationed themselves nearby.
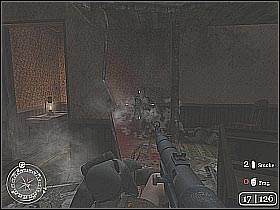
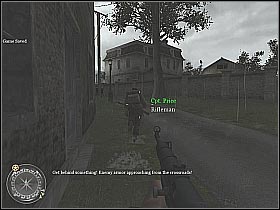
First of all, use some of your smoke grenades in order to blind units stationed at the other end of this road (screen 1). Start running towards that position. Bear in mind that you should be staying close to the buildings located on your right. Kill all of the surrounding soldiers (screen 2). They'll probably be surprised with your attack. You shouldn't have any problems eliminating them. Remember to use all possible cover (trees, building, crates...).
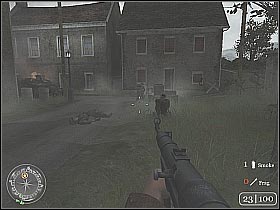
Before moving forward, you should take care of a single German soldier. He's currently occupying the turret of an enemy armored car (screen 1). You can wait for the rest of the team to get here, although this is not necessary. Start running towards the nearest buildings (screen 2). Make sure you've got a lot of ammo at your disposal.
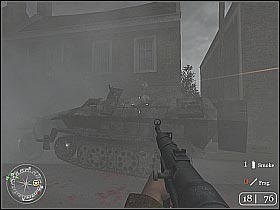
Enter the right building. First of all, you should take care of the welcoming commity. Enemies can only be found on the ground floor. Stand by one of the windows (screen 1). You should start seeing enemy soldiers in a couple of seconds. Kill them all. Bear in mind that Germans might keep respawning for a short period of time (screen 2). Don't worry about those soldiers who actually evaded your attacks - the rest of the squad is stationed nearby.
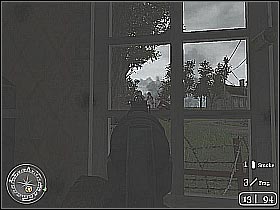
You should receive some new objectives in a few seconds. One of the nearby farm is going to be our next target. Follow the squad leader. You should reach a small gate. Wait for the squad leader to open it (screen 1), granting you access to the farm itself. Start off by running forward. It's very important. You will have to avoid a heavy machine gun. The MG-42 is stationed inside the main building (screen 2).
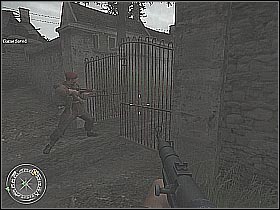
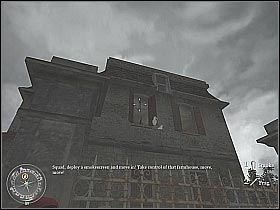
Move up to the nearest door. First of all, you should take care of those Germans who'll actually have the courage to leave the building (screen 1). Enter the complex. You will have to clear all rooms located on the ground floor. After that, use the stairs. Start shooting at the enemy soldiers. They should be standing near the MG-42 (screen 2). You can exit the building now. Our next target is the barn.
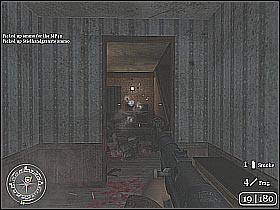
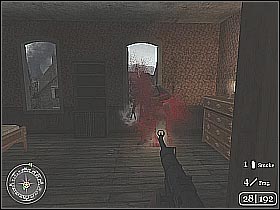
Keep moving towards the barn. You will have to use some smoke grenades. The barn itself is being defended by a few MG-42 posts. Blinding them should be considered an absolute priority (screen 1). Turn right. It would be wise to surprise enemy units. Start moving by the left wall (screen 2). You shouldn't encounter any units at the moment.
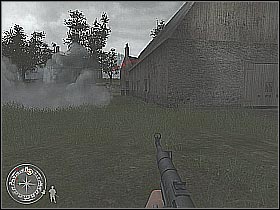
You've go to be careful. First of all, take care of the nearby soldiers. You were trying to avoid them earlier (screen 1). You might consider using some of the grenades. It would also be wise to crouch behind trees. Finally, enter the barn. Warning! There should be a guard near the door. Dispose of him quickly (screen 2).
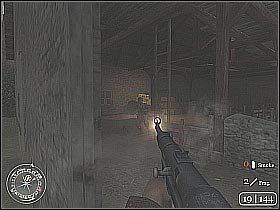
Start shooting at the soldiers who were standing by the heavy machine guns (screen 1). If you're lucky, they won't even have an opportunity to respond to your actions. Head on to the designated point. Destroy the radio (screen 2) with one of your guns. OK, now for the hard part. Occupy the MG-42 post (I would recommend the left gun).
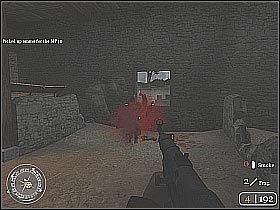

The enemy forces are organizing a massive counterattack. You have to defend this barn at all costs. Start shooting at the nearest enemy soldiers (screen 1). Most of them will be jumping over surrounding walls. Remember that your squad members are also taking part in these fights, so you won't have to kill everyone personally. Warning! Some of the Nazis may get inside the barn. It would be wise to check the surrounding area from time to time (screen 2).
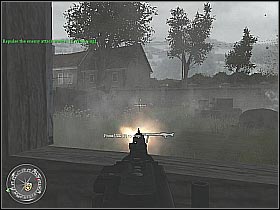
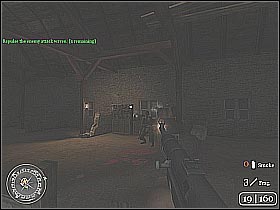
You should receive a new message after a couple of minutes. An enemy tank has appeared in the area. IGNORE this information. Continue shooting at the German soldiers (screen 1). You may want to leave the MG-42 post for a couple of seconds. You will be able to witness what's left of the barn (screen 2). Don't worry, you should be just fine.

The enemies will be retreating shortly. Leave the barn. You don't have to wait for any of your team members. Head on to the gate, the same one you encountered earlier (screen 1). Move closer to the main street. You will notice an allied convoy (screen 2). The mission will automatically end in a few seconds.
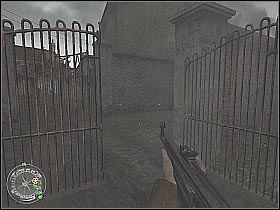
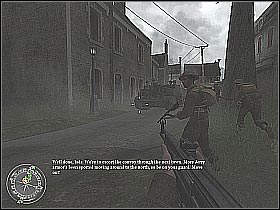
TIME AND PLACE: June 12, 1944; St. Louet
YOU ARE: Sergeant John Davis
You will have to take control of some key structures of this city. The other important thing are the Tiger tanks. You must avoid them at all costs. I would recommend looking at the mission objectives. Bear in mind that you may accomplish them in any order, although we will stick with the presented one (screen 1). Start off by running forward. One of the Tiger tanks will appear in front of you. Turn right. Follow the other team members (screen 2).
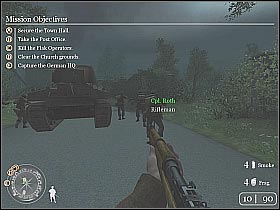

Start moving forward. You might want to use trees and brick walls for extra cover (screen 1). You should reach a small building occupied by German forces. First of all, start shooting at soldiers who were standing on the upper floor. It would be also wise to throw a couple of grenades there (screen 2).
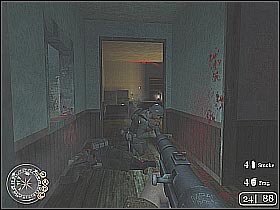
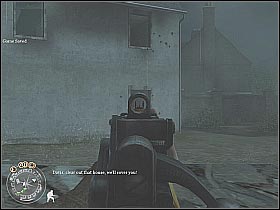
You will have to get inside one of the surrounding buildings. Don't worry, the rest of the team is covering your back. Some new enemies can be found here (screen 1). It would be wise to take a machine gun (MP-40) from one of the killed German soldiers. Head on to the upper floor. You should be able to surprise one of the Nazis. The soldier was standing by the window (screen 2).
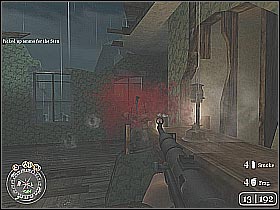
Head back to your squad leader. Follow him. You will encounter some new enemy troops in this area (screen 1). You might want to surprise the Nazis by flanking them. You must check one of the surrounding buildings (screen 2). Bear in mind that it is being guarded by larger groups of enemy soldiers. After that, leave the building and rejoin with the rest of the squad.
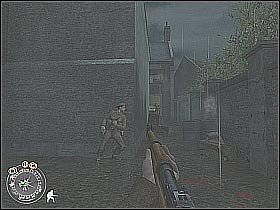

First of all, you should be crouching at all times. It will help you in avoiding some of the attacks. Allied forces are fighting with the Germans in this area. I would recommend listening to one of your squad members. Throw some of the carried grenades into the occupied building (screen 1). After that, follow one of your teammates (screen 2). It would be wise to avoid any other fights.
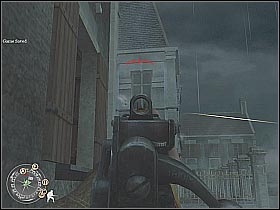
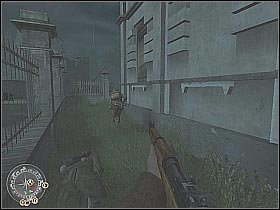
You will come across an open window. A heavy machine gun post has been organized in this position (screen 1). Move up closer and make use of some of the carried grenades. You should be able to take out soldiers who were standing by the MG-42. Continue moving forward. You've got to reach the town hall (screen 2). Taking control of this building is necessary to complete one of the main objectives of this mission.
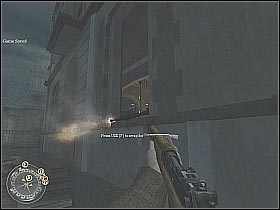
Start off by eliminating the nearby German soldiers (screen 1). Bear in mind that they will be advancing from many different directions, however most of them should be located near the stairs. Make sure you clear all of the surrounding rooms. Head on to the first floor. You will encounter some additional units here. Take care of them (screen 2).
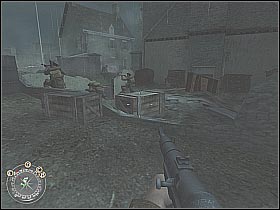
After securing the town hall (you will receive an additional information) rejoin with the rest of the squad. Head on to the nearest exit (screen 1). You may proceed to the unexplored sectors of this city. I would recommend following one of your teammates. Ignore German troops for the moment. You should reach a larger groups of Allied soldiers in a few seconds (screen 2).
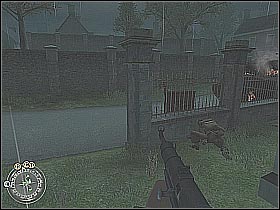
The Allies will provide a covering fire, enabling you to get closer to the enemy positions (screen 1). Bear in mind that the Germans will throw a couple of grenades at you. Avoid them at all costs. Eliminate the enemy soldiers. Continue moving forward. You should be able to surprise some of the German troops (screen 2). I would also recommend using grenades.
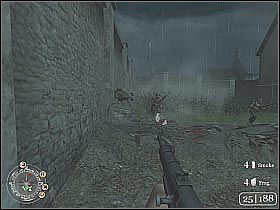
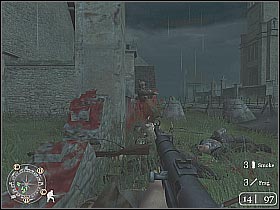
Head on to the nearest building. You will have to take care of some German soldiers. They were trying to defend this area (screen 1). Bear in mind that some of the Nazis may be hiding in darker corners. You won't notice them at first glance. Use the stairs to get to the first floor. Stand by one of the windows. You should be able to notice even more German troops. The soldiers are hiding in one of the nearby buildings. Start shooting at them (screen 2).
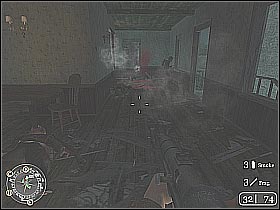
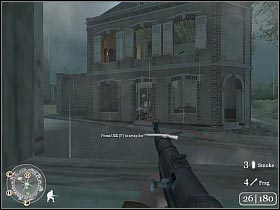
After getting rid off enemy forces leave this building. Start moving towards the post office. The building should be marked on your compass. First of all, take care of the welcoming commity (screen 1). Enter the building. One of the German soldiers will be hiding in the nearby room. Kill him (screen 2).
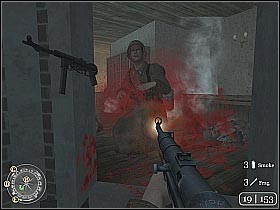
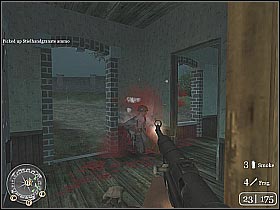
Use the stairs in order to reach the upper floor. You should take care of the Germans who were standing by a heavy machine guns (screen 1). After that, the post office will be secured. Get back to the ground floor. Exit the building. Start moving towards the nearest objective. The only road leads through a cemetery (screen 2).
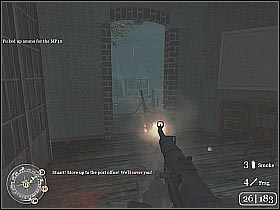
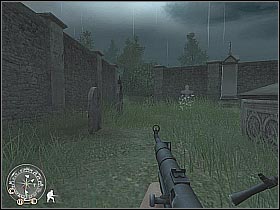
You will be attacked by a small group of German soldiers. They will be standing behind one of the corners (screen 1). It would be wise to use your machine gun with a little help from your teammates. You should see a small building. It's being occupied by the Nazi forces. First of all, take care of the nearest soldiers (screen 2). After that, enter the building.
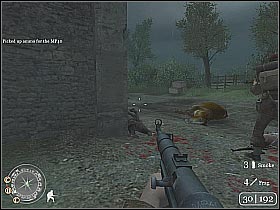
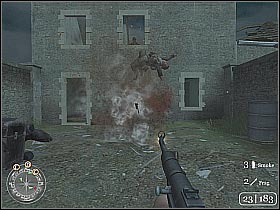
You will have to deal with a small group of enemy soldiers (screen 1). Be sure to check all rooms (both floors!!!). After that, exit the building. You should be getting closer to your next objective. Use some smoke grenades in order to blind enemy troops (screen 2). Start running. You don't have to wait for the other team members at this point.

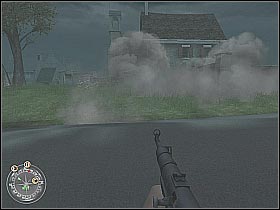
You will probably notice a huge artillery gun along the way. Take care of the Germans who were trying to protect it (screen 1). Thankfully, you don't have to blow up the gun itself. Continue moving forward. Head on to the building located near the church (screen 2). It would be wise to use some of your grenades. I'd also recommend crouching by the left wall.
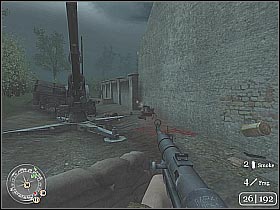
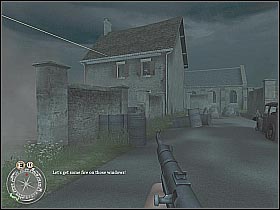
Turn left once you get that opportunity. Some of the German soldiers will probably attack you. Deal with them swiftly (screen 1). Enter the building and move closer to one of the windows. You should be able to take out soldiers located near the church grounds (screen 2). Bear in mind that some of them will arrive here much later. It would be wise to pick up a rifle earlier. This'll help you a lot.
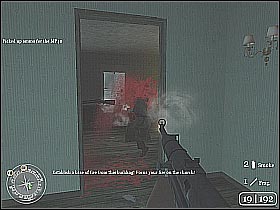
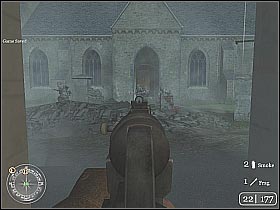
Exit the building and start running towards the occupied church (screen 1). Instead of choosing the front entrance, turn right. Start off by eliminating enemy soldiers. Continue moving forward. You should reach a small entrance in a few seconds. You've got to be careful. At least one German soldier will exit the church (screen 1). Kill him.
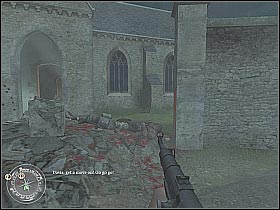
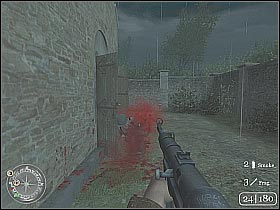
Explore the rest of the church grounds. Another German soldier will be standing behind one of the pillars. Take him out quickly (screen 1). Move up closer to the destroyed window. Start shooting at the visible Germans (screen 2). After that, reload your weapon and enter the church.
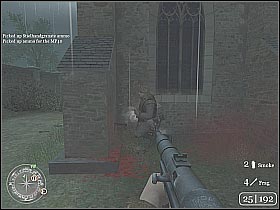
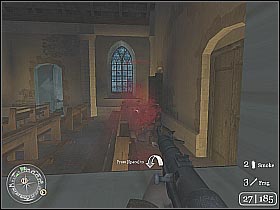
Start shooting at the other German soldiers (screen 1). I wouldn't recommend looking for any cover. There's not enough time for that. You may want to use some of your grenades. Leave the church. You should only have one more target - enemy headquarters. Wait for the other crew members to arrive. Follow them to your destination (screen 2).
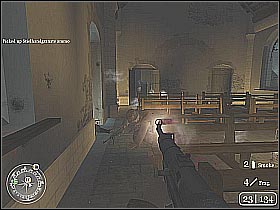
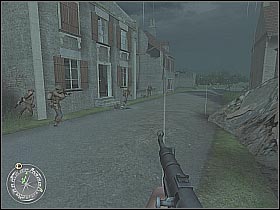
You will encounter some additional enemy forces in one of the nearby buildings. It would be wise to take care of this problem (screen 1). After that, continue pushing forward. You should be following the team leader. A larger field lies ahead. The enemy HQ is on the other side of it (screen 2).
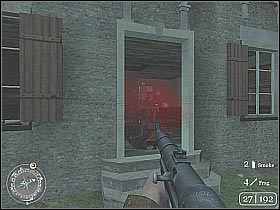
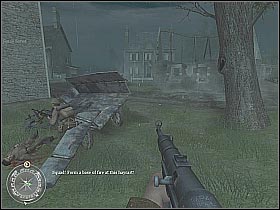
I would recommend using at least two smoke grenades. They should land on the other side of the small fence (screen 1). You will be able to blind most of the German troops. Go there now. After reaching the HQ building stand by the wall and turn right. Start moving forwards. You will have to take care of a guy standing by the heavy machine gun post (screen 2).
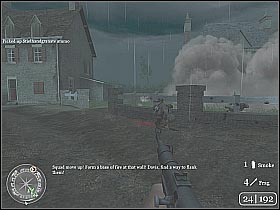
Move closer to the entrance (screen 1). Before you go in any further, make sure you're equipped with a machine gun. The headquarters are being defended by several groups of elite enemy soldiers. You will have to start killing them (screen 2). Be sure to check all rooms.
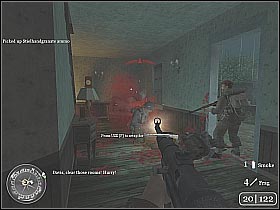
Use the nearby stairs to get to the upper floor. Bear in mind that the area is defended by at least 6-7 new soldiers (screen 1). I would recommend throwing a couple of grenades there. Use your machine gun to deal with those soldiers who actually survived the explosions (screen 2).
You should be able to secure the enemy headquarters within a few seconds. Use the stairs to go back to the ground floor. Listen to what the squad leader has to say (screen 1). After that, the mission will come to an end.
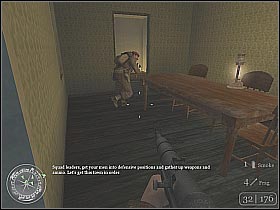
TIME AND PLACE: June 14, 1944; Amaye sur Seulles
YOU ARE: Sergeant John Davis
This is the last mission of the British campaign. It's not that hard, though. You shouldn't have any problems completing the primary objectives. Start off by running forward. You should follow the rest of the team members (screen 1). DON'T STOP!! It's very important, because the area is being bombarded by enemy mortar crews. You should reach a small barn in a couple of seconds (screen 2).
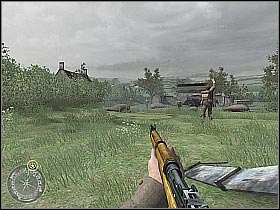
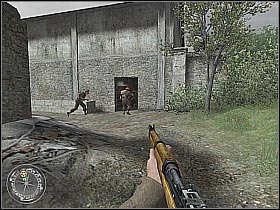
You may enter the barn on your own or wait for the teammates to do that. There are some German soldiers inside. You've got to kill them (screen 1). Wait for the squad leader to bash the door leading to the surrounding buildings (screen 2). Follow him. You will have to take care of two mortar crews. They are both located in this area.
You will encounter some enemy forces along the way. First of all, I would recommend taking down the heavy machine gun post (screen 1). It's hidden in one of the surrounding buildings. After that, start shooting at the other Nazis. An enemy armored vehicle will arrive here shortly. Use your smoke grenades in order to blind its crew (screen 2).
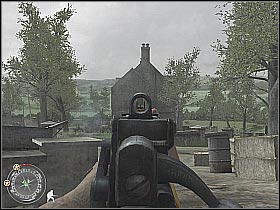
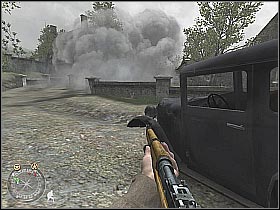
Keep moving towards the building that had been protected by the MG-42 crew. You should be able to surprise some of the nearby soldiers (screen 1). You might want to wait for the rest of the team to arrive here. The next group of Nazis will be waiting near one of the buildings. It would be wise to start shooting at the nearby barrels (screen 2).
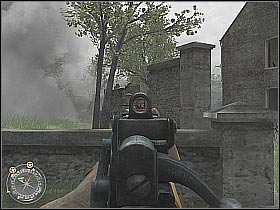

I would also recommend checking the building itself. It shouldn't be occupied by enemy forces. Use the stairs to get to the upper floor. Stand by one of the windows and start shooting at visible enemy soldiers (screen 1). After that, leave the building and follow the rest of the team (screen 2).
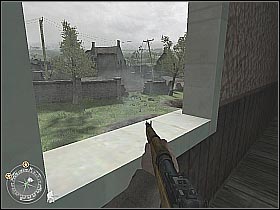
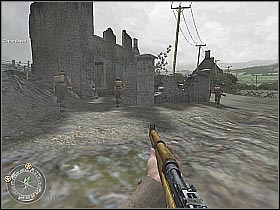
You should be able to reach your destination point in a few seconds. It would be best to duck behind the destroyed vehicle. Start off by killing some of the German soldiers (screen 1). Head on to the first mortar station. Deal with those guys who managed to survive the Allied attacks (screen 2). Start moving towards the second mortar crew.
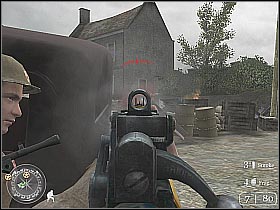
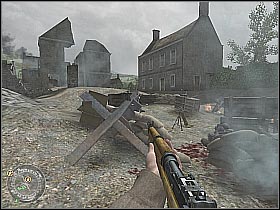
Head on to the nearest building. Stand by one of the windows located on the ground floor. You should be able to take out a heavy machine gun post from here (screen 1). Exit the building. Continue pushing forward. I would recommend using destroyed buildings for extra cover. The enemy troops will be hiding almost everywhere (screen 2).
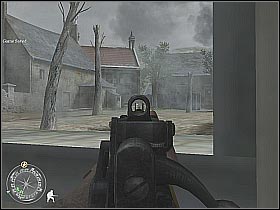
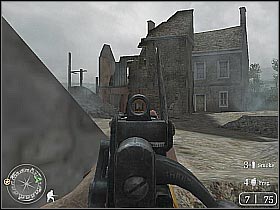
Start moving towards the heavy machine gun, the same one you neutralized earlier. You will be attacked by some German soldiers along the way (screen 1). Concentrate your fire on those who are equipped with the machine guns. You have to reach the machine gun post. Lean out carefully. You should see a second MG-42 (screen 2). Eliminate the shooter QUICKLY, so he will not be able to harm you.
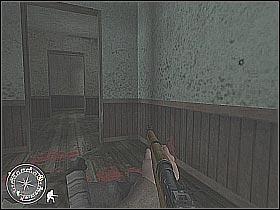
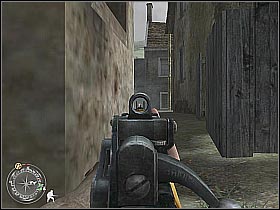
Continue pushing forward. You will come across a new building (screen 1). Start shooting at the German soldiers. They will be standing near the windows (mostly on the first floor). Enter the building itself. Start shooting at the remaining survivors (screen 2).

Be careful! Some of the German soldiers will organize a small ambush near the stairs. After you're done with them, start shooting at the groups located on the other side of the square (screen 1). Headshots are most welcome (it might be worth taking a decent rifle). If you're lucky, you will be able to take out the second mortar crew. Enemy headquarters are next on the list. Rejoin with the rest of the squad (screen 2).
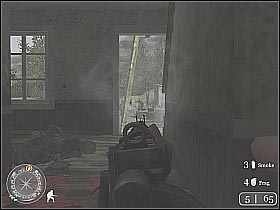
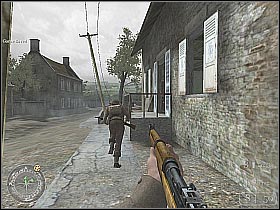
Watch out! You will encounter additional units near one of the surrounding buildings (screen 1). You may have some problems locating their positions. After that, your squad will be attacked by a larger group of enemy forces (screen 2). Concentrate your efforts on those soldiers who will be standing near the brick walls. You also have to watch out for enemy grenades.
There is a heavy machine gun post nearby. Just as before, use some of the smoke grenades in order to blind it (screen 1). Choose the path located on your right. Thanks to that, you will be able to surprise the MG-42 crew (screen 2). It would be wise to keep a crouching position at all times. Wait for the rest of the team to show up!!
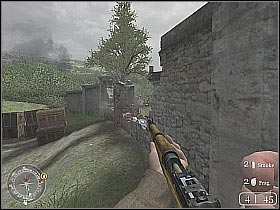
You will have to make use of smoke grenades again (screen 1). The enemy HQ is being guarded by two frontal MG-42's. You have to blind them. Start off by running to the right side of the house. Warning! There's a third heavy machine gun post here (screen 2)! Wait for your teammates before you move any further.
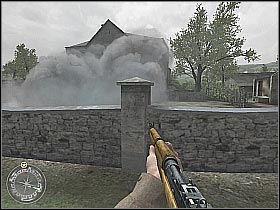
Clear the surrounding field with a little help from the rest of the team (screen 1). Use the stairs to get to the basement. Start moving forward. You will be attacked by new Germans in a couple of seconds (screen 2). It would be wise to take a machine gun from one of the killed soldiers.
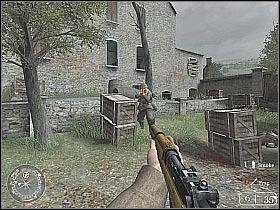
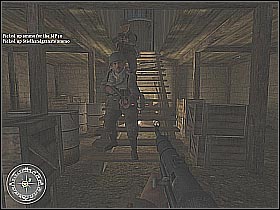
Use the stairs to reach the German headquarters. You should be able to secure the place within a few seconds. Head on to the kitchen and listen to what the squad leader has to say (screen 1). You will have to defend these positions against a massive German counteroffensive. I would recommend going to one of the heavy machine guns (screen 2). Get ready!!
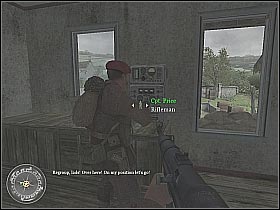
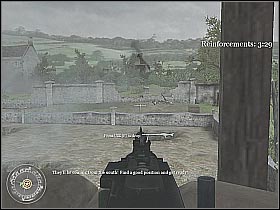
The German forces will be using holes in the destroyed wall to get to the field (just as you did). Start shooting at them. The enemy soldiers will probably decide to use smoke grenades for the very first time (screen 1). Leave the current post and go to the MG-42 located on the left side of the building. More Germans will arrive here (screen 2). Kill them all.
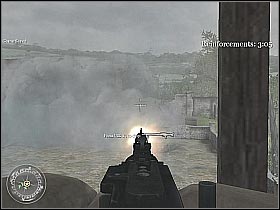
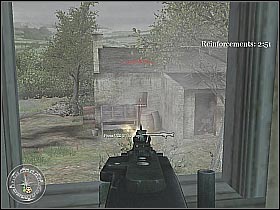
Bear in mind that some of the German soldiers will actually made it inside. You will have to take care of this problem (screen 1). Longer, but fully controlled bursts are most welcome. After that, return to one of the machine gun posts located in the front (screen 2).
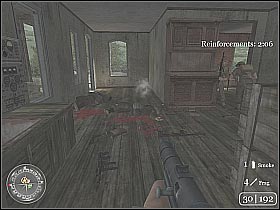
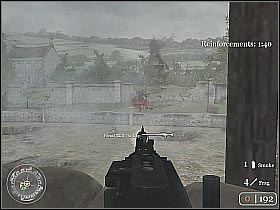
You will have to be very cautious. Some of the Nazis will be attacking your current position, probably from the left side (screen 1). It would be wise to throw grenades at them. An enemy tank should arrive here shortly. Leave the MG-42 post. Use one of the windows in order to leave the captured headquarters. Start moving towards the LEFT hole in the wall (screen 2).
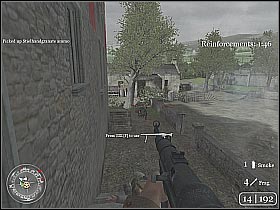
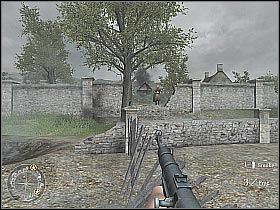
Step up closer to the destroyed wall. Start shooting at the visible enemy soldiers (screen 1). After that, jump over to the other side. Start moving towards the tank. You will have to set a charge in one of the highlighted spots (screen 2). Move back to a safe distance.
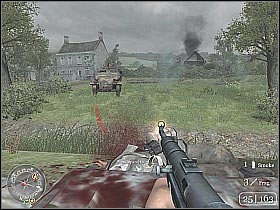
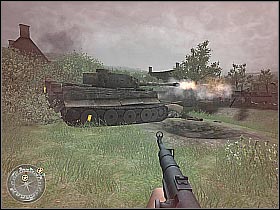
The tank is going to explode in a few seconds (screen 1), and the German forces will begin to retreat. You might want to start shooting at the running soldiers, although this is not necessary. Get back to your squad leader (screen 2). He will be very pleased with your recent actions. This mission has come to an end. Congratulations! You've just finished the British campaign!
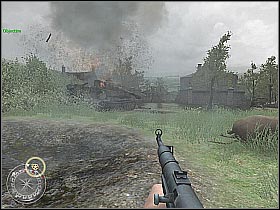
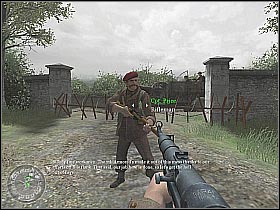
TIME AND PLACE: June 6, 1944; Normandy
YOU ARE: Corporal Bill Taylor
The first mission of the American campaign looks a lot like the Omaha Beach level from the "MOH: AA" game, although I can assure you that it's going to be presented in a more spectacular way. You start off inside a boat (screen 1). You can observe your surroundings. After that, start moving forwards. Taylor (your new hero for the following missions) is going to lose consciousness for a few seconds as a result of a huge explosion (screen 2).
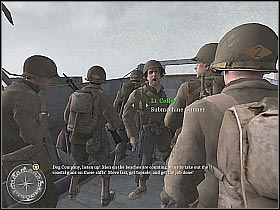
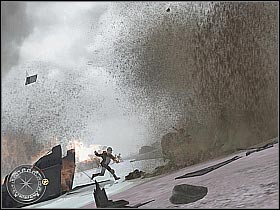
One of the Allied soldier will show up (screen 1). He will be carrying your soldier to safety. You can't do anything at the moment. I would recommend observing your surroundings. After that, start moving towards your current target (use the compass). Remember to stick close to the cliff (screen 2), so you won't be hit by any of the German snipers.

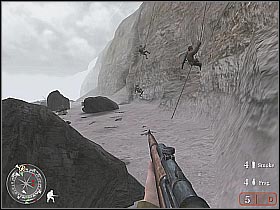
After reaching your destination talk to one of the Allied soldiers. New orders should appear on your screen. Press the F key in order to use the rope. The goal is simple - you will have to get to the top of this cliff (screen 1). After that, follow the other Allied soldiers. It appears that the huge guns aren't here. You will have to find them. Use one of the nearest trenches for cover. It would be wise to pick up a gun from one of the killed soldiers (screen 2), because the sniper rifle will not be useful at the moment.
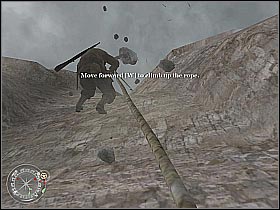
Keep heading towards the next objective. Remember that you shouldn't expose your position, because the area is swarming with enemy forces (screen 1). You might want to kill those Germans who aren't protected by anyone. It would also be wise to use grenades. You should see a bunker in a few seconds. Use some smoke grenades in order to blind German soldiers (screen 1). Exit the trenches and follow the rest of the Allied soldiers.

You should kill some of the Germans hiding in one of the bunkers, although this is not necessary (screen 1), because you will return here in a few minutes. Follow the rest of the squad (screen 2). I would recommend picking up a decent rifle or a heavy machine gun with a lot of ammo.
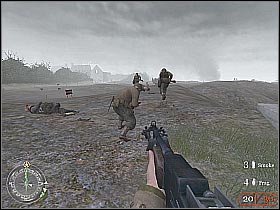
You should reach your destination point in a few seconds. Wait for the other crew members to arrive. The area is going to bombarded by Allied units (screen 1). Start shooting at the German soldiers. You should use the destroyed truck for extra cover (screen 2).

After taking care of the German units start following the current squad leader (screen 1). You won't encounter any more Nazis at the moment. The enemy forces will appear inside the village. You will have to take control of the surrounding buildings (screen 2), clearing them one by one.
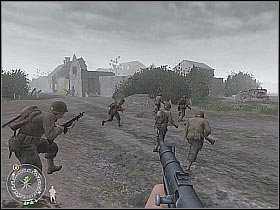
Start off by checking all of the surrounding buildings (screen 1). Some of them may be well guarded. There's a heavy machine gun post hidden inside the destroyed roof of one of the buildings (screen 2). You've got to take it out, either by shooting the Germans, or by throwing some of the carried grenades at them. Bear in mind that more enemy troops may appear in the area.
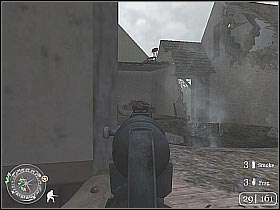
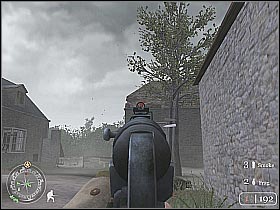
I would recommend checking your surroundings before moving any further. Some Germans may be hiding in the narrow alleys (screen 1). Head on to the building with the destroyed roof. Use the stairs to get to the upper floor. You should encounter some new enemy units here (screen 2). Take them out swiftly.
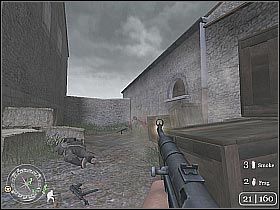
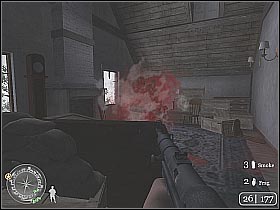
Stand by the right window and press the F key in order to use the heavy machine gun. Start shooting at the visible German soldiers (screen 1). You may return to the ground floor. Warning! There might be some additional enemy units hiding in the unexplored rooms of this complex (screen 2).
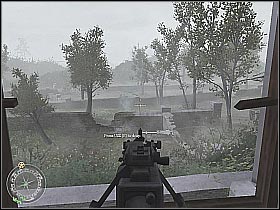

Head on to the small door leading to the nearby field (screen 1). Rejoin with the rest of the squad. Remember to keep a crouching position at all times. You should try attacking enemy forces from the left flank. It would also be wise to use some of the carried grenades (screen 2). Be sure to hide behind the brick walls.

You should see a second group of enemy soldiers in a few seconds (screen 1). I would recommend scoring at least 3-4 headshots. Wait for the other squad members to advance to new positions. You should reach small crossroads very soon. Most of your teammates will stay here. You will have to follow sergeant Randall (screen 2).
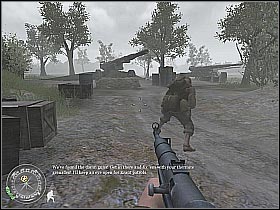
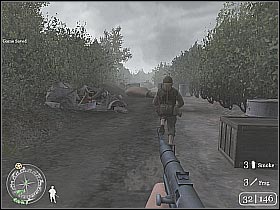
You should reach the field with the guns in just a few seconds (screen 1). You won't have to worry about German forces at the moment. There aren't any soldiers nearby. You will be placing small charges on each of the guns (screen 2), so they can be safely neutralized. After that, get back to your squad leader. Start running towards the rest of the team.
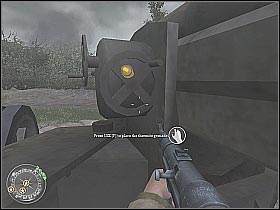
Once you reach the crossroads some new objectives should appear on your screen (screen 1). You will have to secure three enemy bunkers. They are located near the cliffs. You were trying to avoid them earlier. Start off by following the rest of the squad. You will encounter German forces along the way (screen 2). Just as before, I would recommend surprising them from the flank.
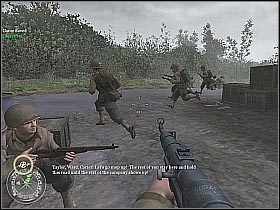
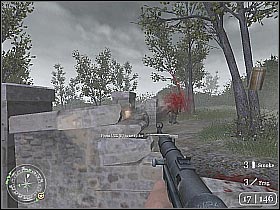
Keep pushing forward. A large group of Nazi soldiers should appear on the nearby field. It would be best to throw a couple of grenades at the enemy troops (screen 1). You might also consider waiting for the other crew members to show up. Head on to your destination. Wait for one of the team members to blow up the gate leading to the destroyed field (screen 2).

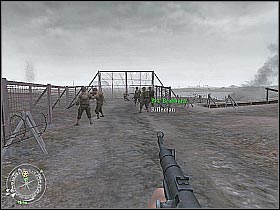
I would recommend taking on the left bunker, because it's separated from the other two objects. Start off by killing some of the nearby soldiers (screen 1). Enter the bunker itself. You will be surprised by at least 3-4 Germans (screen 2). You've got to be careful. One of the soldiers may be hiding near the entrance (on the left). Leave the bunker. Use the nearby tunnel.
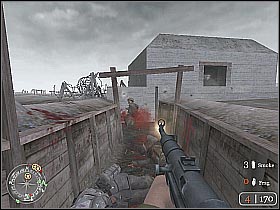
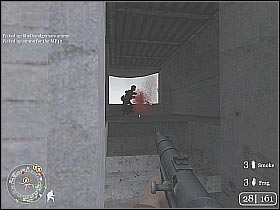
You should reach the second bunker within a few seconds. First of all, take cake of the soldiers who were brave enough and decided to join you (screen 1). Enter the bunker and kill the rest of the Germans. Head on to the last bunker. You've got to be very careful, because it is being defended by some massive enemy forces. Eliminate soldiers who were hiding in the room located on the left side of the bunker (screen 2).
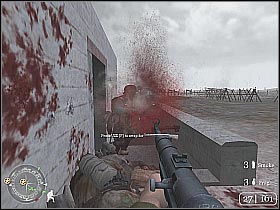
Start running towards the entrance. Take care of a single soldier. He will be standing by the heavy machine gun post (screen 1). There are some more Germans on the right side. Enter the bunker and deal with two of the German officers (screen 2). Thankfully, they'll be only equipped with some weak pistols. You can exit the bunker now.
The last objective requires you to clear out the rest of the field (screen 1). You can do this on your own or wait for your teammates to track down and kill remaining German soldiers. After that, rejoin with the rest of the squad. Listen to what sergeant Randall has to say about this (screen 2).
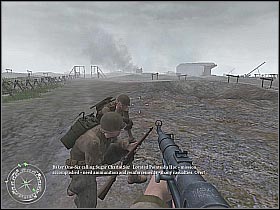
TIME AND PLACE: June 6, 1944; Normandy
YOU ARE: Corporal Bill Taylor
This time you will have to defend Pointe du Hoc against a massive German counteroffensive. It's one of the most challenging missions of the game. Bear in mind that you will be heavily outnumbered. Furthermore, the Germans will be coming from many different directions. You start off near the barricaded crossroads (screen 1). Keep shooting at the German soldiers. It would also be wise to use grenades from time to time. Don't leave this post until you will receive some new orders from the current squad leader (screen 2).
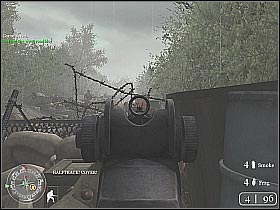
After taking care of the first wave of enemy soldiers you will have to move to the western part of the blockade (screen 1). Keep shooting at the Germans. Remember to use all possible cover in order to avoid enemy attacks. A Tiger tank will arrive here shortly (screen 2). Wait for the other crew members to show up. They will decide what to do next.
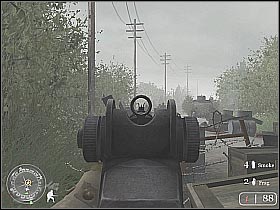
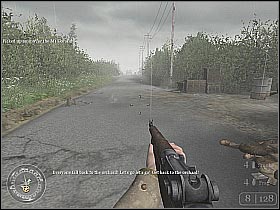
You will have to retreat to the nearest field. Follow the rest of the team members (screen 1). Stand near the designated spot. You must defend this position against enemy attacks. Start shooting at the visible German soldiers (screen 2).

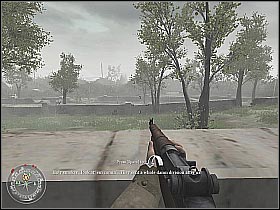
Some Germans will be trying to surprise you from one of the flanks. You must stop them at all costs. The first soldiers will appear on the right side of the field (screen 1). You will have to deal with several groups of enemy troops. After a couple of minutes the Nazis will try to attack from the left flank (screen 2). Remember to listen to what the Allied soldiers have to say. They will be trying to warn you.
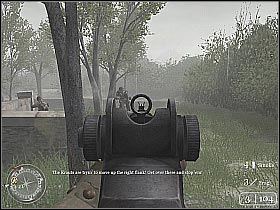
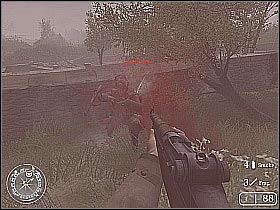
You should receive some new orders in a few seconds. Move up to the nearest building (screen 1). Use the stairs in order to get to the first floor. You should notice a heavy machine gun post which you probably used in the previous mission. Start shooting at the nearby German soldiers (screen 2).
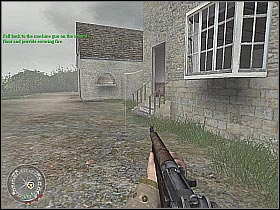
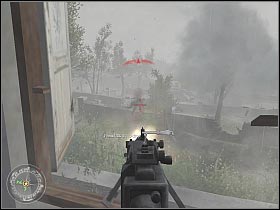
You should receive some new orders from the squad leader. Leave the machine gun post quickly, so you won't be harmed by the enemy forces. Use the stairs to get back to the ground floor (screen 1). Warning! The area is swarming with German troops! You will have to start shooting at the attacking soldiers (screen 2). I would recommend advancing towards enemy positions at all times. You shouldn't stay here too long.
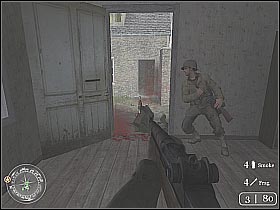
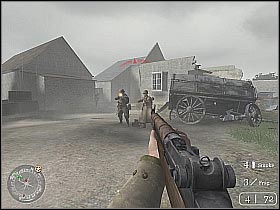
You should be heading towards the huge field, the same one you were trying to clear out in the previous mission. It would also be wise to aid your team members in the following fights (screen 1). You should reach your current destination in just a few seconds (screen 2).
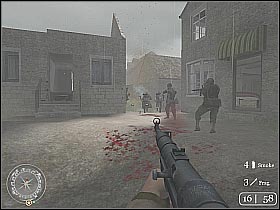
Turn around and start shooting at the German soldiers. Some of them will be hiding inside an enemy armored truck (screen 1). I would also recommend throwing a couple of grenades at them. You should notice a heavy machine gun post nearby. Use it (screen 2). Most of the Germans will appear near the buildings located on your right, although smaller groups may be coming from the opposite direction.
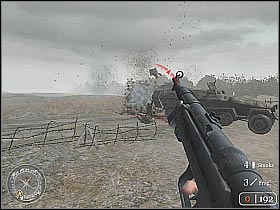
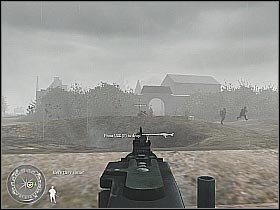
Keep firing at the German soldiers as long as possible. An enemy tank will arrive here shortly, the same one you've encountered near the blockade (screen 1). You will have to avoid its attacks at all costs. I would recommend crouching at all times. You should receive some new orders in a few seconds. Follow the other team members (screen 2).
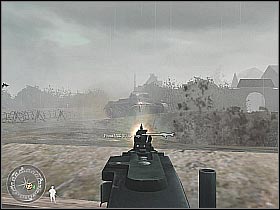
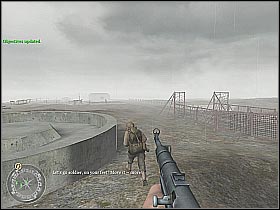
Stand near one of the bigger guns (screen 1). Start shooting at the advancing Germans. You should receive a new information. Allied troops will arrive here in about 5 minutes and you will have to defend these positions until then. Start running towards the next point. I would recommend using the trenches for extra cover (screen 2). You will be taking care of the nearby enemy soldiers.
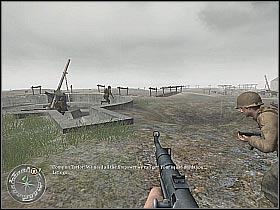
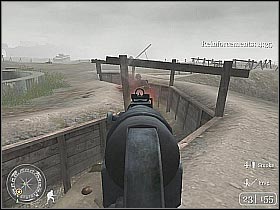
You've got to be extra careful. The Germans will probably use smoke grenades in a couple of seconds (screen 1). Killing them will be a lot harder from this point. Be sure to check your ammo supplies frequently. Most of the Germans will be coming through the trenches (screen 2). Nevertheless, you should stay on your guard.
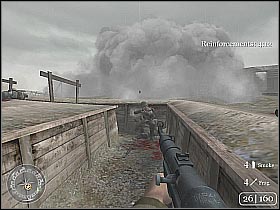
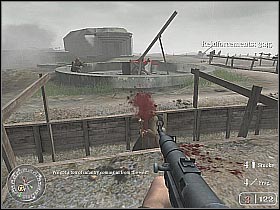
You have to avoid an enemy tank. He will be closing on your position (screen 1). It would be wise to use ditches and bunkers for extra cover. You will be forced to retreat to one of the previous spots (screen 2). Follow the rest of your team members.
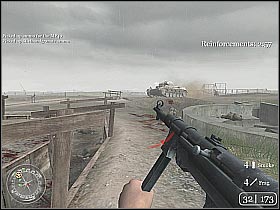
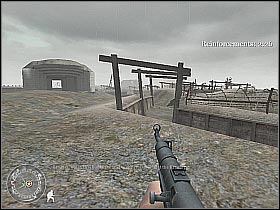
You have to watch out for enemy grenades. They will be thrown either at you or one of the current squad members (screen 1). The Germans will be coming from all directions. I would suggest concentrating your efforts on soldiers hiding in one of the surrounding bunkers (screen 2). You may not notice them at first glance. I'd also recommend throwing a couple of grenades there.
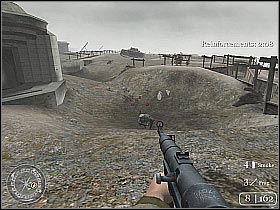
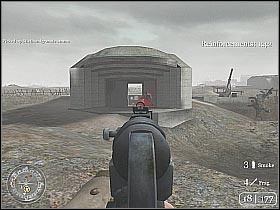
Even more smoke grenades will be deployed shortly (screen 1). Just as before, you have to be very cautious. You will probably have serious problems locating most of the enemy soldiers. Keep firing at the Germans. Some of them will be hiding in the nearby ditch (screen 2).
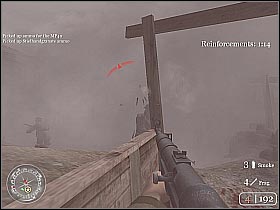
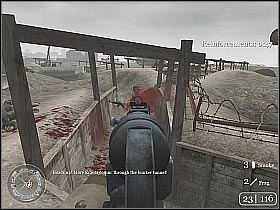
You will have to put up a smoke screen in a few seconds. That way the allied fighters will know you're still holding to your positions. Otherwise, the whole area would be heavily bombarded. Head on to the roof of the nearest bunker (screen 1). Press the F key in a designated spot. A green smoke will appear (screen 2).
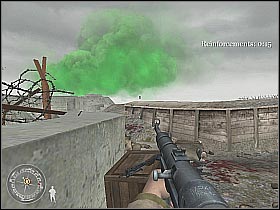
You've only got a couple more Germans to take care of (screen 1). You don't have to worry about the ammunition anymore. Allied planes should arrive here shortly. The enemy forces will be destroyed (screen 2). Remember to keep a safe distance from the explosions!!
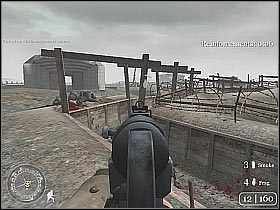
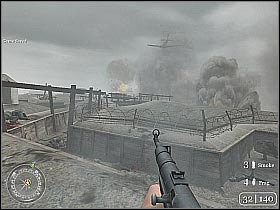
You might want to head on right into the open. Allied forces will arrive here in a few minutes (screen 1). After that, the mission is going to end. Congratulations! You've defeated the German forces!
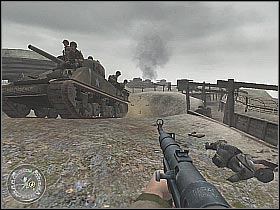
TIME AND PLACE: June 14, 1944; Beaumont-Hague
YOU ARE: Corporal Bill Taylor
This is a very enjoyable mission. You will have to take control of the city of Beaumont-Hague. The last part of the mission will require you to take down some of the mortar crews with a sniper rifle. Listen to what the squad leader has to say. Start following him (screen 1). You won't encounter any German forces at the moment. You should reach the rest of the team in a few seconds. Get down to the ground (screen 2). You will provide a covering fire for the Allied troops.
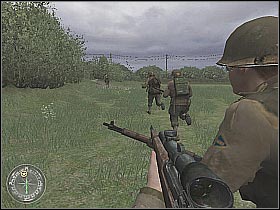

First of all, you should be able to neutralize a LEFT heavy machine gun post (screen 1). The second MG-42 is located on the first floor of the tallest building (screen 2). Bear in mind that the soldiers may try using the machine gun post in the future. You'll also have to take care of them.
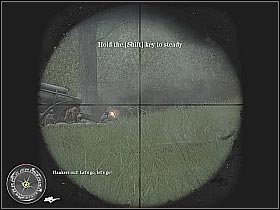
The third MG-42 post can be found on the left field. It's surrounded by a lot of grass, so you might not see it at first glance (screen 1). Help your teammates advance towards enemy positions. Larger groups of enemy soldiers can be seen near the city buildings (screen 2). Start shooting at them.

You might want to turn off the sniper view for a few seconds. One of the silos is going to explode in a very spectacular way (screen 1). After that, you will have to follow the team leader. Start heading towards the designated area (screen 2). Some new objectives will appear on your screen. You may complete them in any order. Let's start with "A".
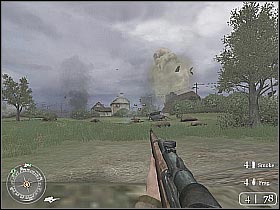
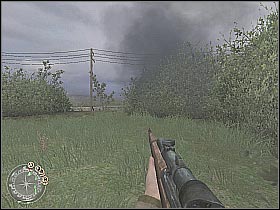
Use the sniper rifle to get rid off some German troops (screen 1). The enemy soldiers will be crouching mostly behind destroyed cars, brick walls, and crates. You should also be able to locate the second group (screen 2). After that, pick up a machine gun from one of the killed soldiers.
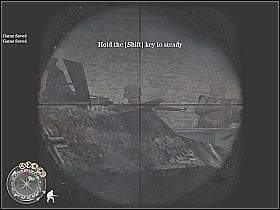
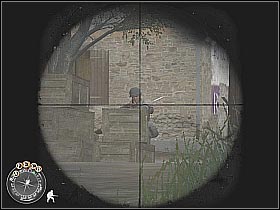
Head on to the nearest building. You will be attacked by some German troops. The Nazis are standing near the entrance (screen 1). Kill them. A second group will be waiting for you near the stairs (screen 2). Some of the Allied soldiers will join these fights. Be sure not to shoot them!!
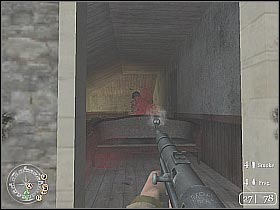
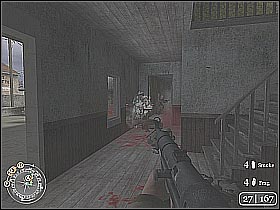
After you clear the surrounding rooms use the stairs in order to get to the upper floor. There are some more German troops here (screen 1). It would be wise to use grenades frequently, especially while exploring new rooms. You may leave the building now. Start running towards the "F" objective. Jump over the brick wall. A German soldier will be hiding here. Kill him (screen 2).
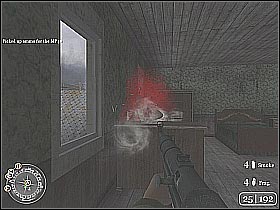
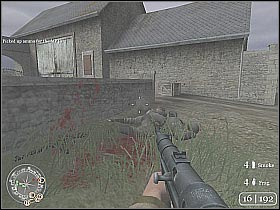
You should be getting closer to the enemy headquarters. Use some your smoke grenades in order to blind shooters who were standing by the windows (screen 1). Enter the building. Start shooting at the German soldiers (screen 2). Watch out for your squad members! They may get in your way.
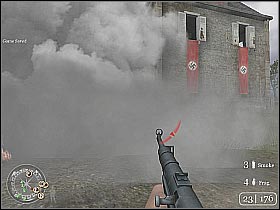
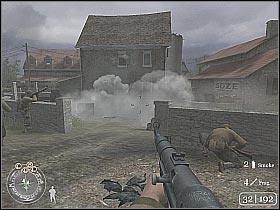
Be sure to check all rooms located on the ground floor. After that, head on to the nearest stairs (screen 1). You've got to be very careful. Massive enemy forces have stationed themselves there. You should be able to clear the HQ in a few seconds. After that, leave the building. Start moving towards the "D" objective. Use the smoke grenades again (screen 2).
Enter the building. You should be attacked by a large group of enemy soldiers (screen 1). Make sure you've cleared all the rooms. Use the stairs in order to check the upper floor. You should be able to surprise some of the German shooters (screen 2). After that, you will complete this mission objective.
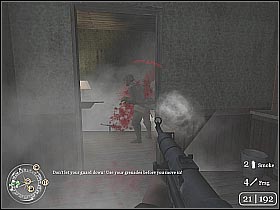
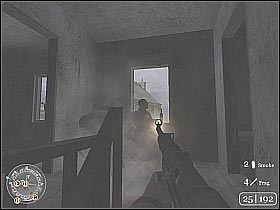
Don't leave this building just yet. Instead, stand by one of the windows and make use of the heavy machine gun (screen 1). Start shooting at the visible German soldiers. They will be coming out from one of the surrounding buildings. Leave this area and continue moving towards the "E" objective. Start off by killing some of the Germans hidden near the entrance (screen 2).
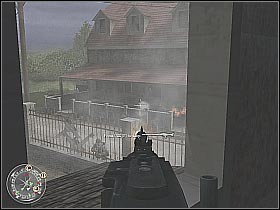
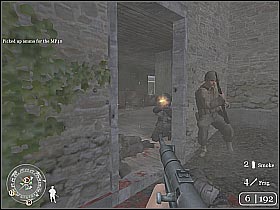
Enter the building. You have to check all of the surrounding rooms. Bear in mind that some of them may be heavily guarded. After that, use the stairs to get to the first floor (screen 1). Now head on to the nearby barn (screen 2). Start shooting at the German soldiers. You might also consider throwing some of the carried grenades at them. Jump over to the other side of the sandbag wall. Wait for the other crew members to get here.
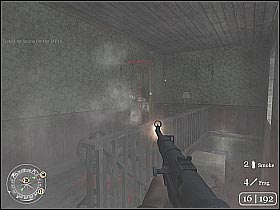
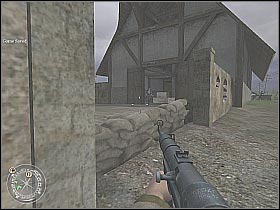
You might consider throwing a smoke grenade inside, although this isn't necessary. You have to take out one of the snipers located on the upper floor (screen 1). Enter the barn and start killing enemy soldiers. Most of them will be coming from the left side (screen 2). You should be looking around a lot, so you won't miss anyone important.
You shouldn't have any problems clearing the ground floor. Use the wooden stairs in order to get to the upper floor (screen 1). Kill the remaining Nazis. You should only have one more objective on your list - the post office. Start moving towards it. You may encounter some new German soldiers along the way (screen 2). I would recommend getting into the post office from the RIGHT side, because it isn't guarded by anyone.
Move up closer to one of the opened windows. Make sure no one's around (screen 1). Enter the post office. You shouldn't encounter any soldiers on the ground floor. Use the nearby stairs. I would recommend throwing a couple of grenades into the surrounding rooms. Get your rifle ready and deal with the remaining soldiers (screen 2).
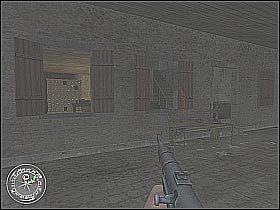
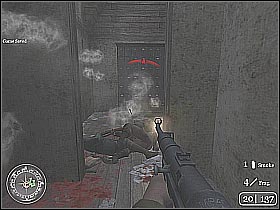
You may leave the post office now. Start running towards the new objective. Listen to what the squad leader has to say (screen 1). You will have to get on top of the nearby silo. Continue moving forward. After reaching your destination use the small ladder (screen 2).
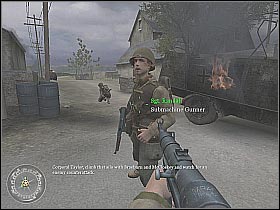
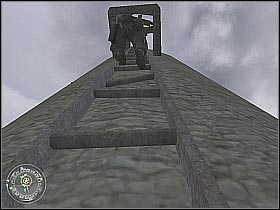
First of all, pick up a sniper rifle (screen 1). It should be lying somewhere on the ground. You will be taking care of enemy mortar crews. Thankfully, their positions will be marked on your compass. All you have to do is find the correct spot (screen 2). Bear in mind that some of the mortars may be reoccupied in the near future.
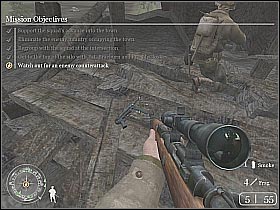
You must observe your compass at all times. You probably won't have any problems locating the mortar crews. There are some exceptions (screens 1 & 2), although in most cases their locations should be rather obvious. Don't worry. There's will be enough time to locate and neutralize all of the mortar squads.
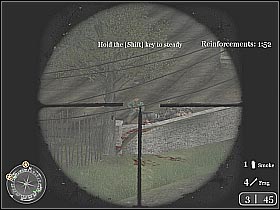
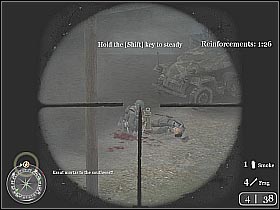
Allied tanks should arrive here shortly (screen 1). Thankfully, you won't have to do anything else. You might want to observe their actions, though. You should receive new orders in a few seconds. Use the ladder to get down from the silo (screen 2).
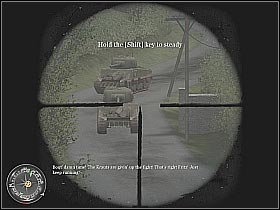
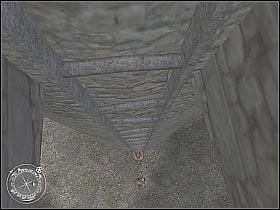
All you have to do is talk to the squad leader (screen 1). His location will be pointed on your personal compass. Listen to what he's got to say. After that, the mission will come to an end.
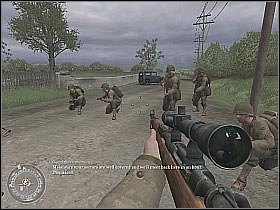
TIME AND PLACE: December 6, 1944; Bergstein
YOU ARE: Corporal Bill Taylor
You will have to take full control of the German town of Bergstein. First of all, listen to the current squad leader (screen 1). He will issue some orders. Start off by following him. You will encounter German forces around the corner. It would be best to keep a crouching position at all times. Start shooting at the enemy soldiers. They will be hiding mostly near the windows (screen 2).
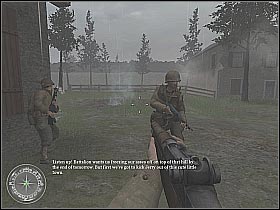
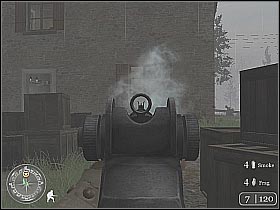
It would be best to pick up a machine gun from one of the killed enemy soldiers. Enter the building and start shooting at the nearby Germans (screen 1). You will have to check both floors. I would recommend using grenades while exploring larger rooms. Now head on to the next building. First of all, take care of the shooters who were hiding by the sandbags (screen 2).
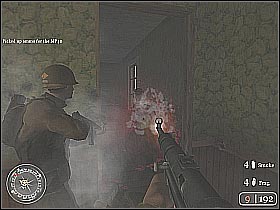
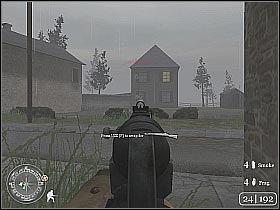
Now you will have to get closer to the building itself. I would recommend hiding by the tractor, and then throwing a couple of smoke grenades towards the enemy positions (screen 1). Surprise enemy forces from the left flank. Enter the building. First of all, take care of the Nazis hidden on the ground floor (screen 2). Next, use the stairs in order to check the upper level.
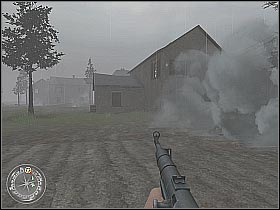
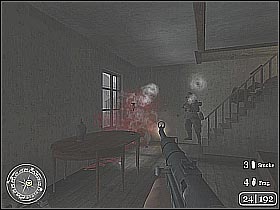
Start heading towards the third building. You should be passing a smaller house along the way. It would be wise to check it. Use the stairs to get to the first floor. Stand by one of the windows and start shooting at the enemy forces. You might want to use the heavy machine gun post (screen 1). Exit the building. Continue moving forward. I would recommend using the side entrance to the house (screen 2).
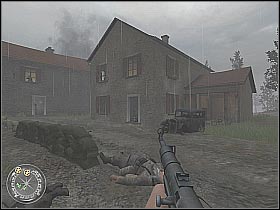
Be sure to check all of the surrounding rooms. Use the stairs in order to get to the upper floor. Stand by the window. Start shooting at the visible enemy soldiers. They were hiding in the nearest house (screen 1). After that, exit the building and head over there. You have to be careful, because this house is being guarded by at least 5-6 soldiers (screen 2). It would be wise to use grenades from time to time, especially before going up to the first floor.
New objectives should appear on your screen in a while. You will have to rejoin with the current squad leader. Listen to what he's got to say (screen 1). After that, enemy mortars will begin the attack. Your hero might lose his consciousness for a couple of seconds (screen 2). Don't worry, this was a planned action. Follow the rest of the team members.
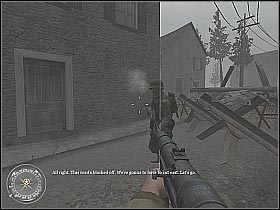
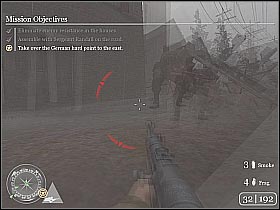
You should be able to reach a larger field within a few seconds. Massive enemy forces have stationed themselves on the other side of this sector. It would be wise to throw a couple of smoke grenades in order to blind them (screen 1). I would suggest attacking German troops from the left flank. Stand by the metal gate and wait for the other crew members to show up (screen 2).
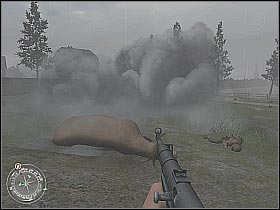
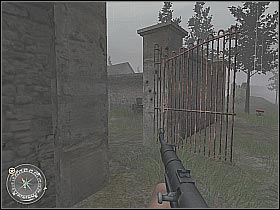
Start running towards enemy positions. You will be able to see some Germans. They are hiding in a nearby house. Kill them (screen 1). After that, enter the building and deal with the rest of the soldiers. Continue moving forward. You should notice a second occupied building. BEFORE you get there TURN AROUND, because some new Germans have appeared on the map (screen 2). You must deal with them swiftly!

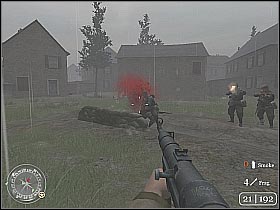
I would recommend using smoke grenades. Thanks to that, you will be able to blind most of the German shooters (screen 1). Get closer to one of the windows on the right. You should see a heavy machine gun post. Throw a couple of grenades inside (screen 2). After that, enter the building and deal with the rest of German troops. Don't forget to check the upper floor!!
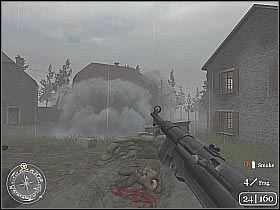
The time has come to take care of enemy mortar crews. Follow the squad leader to your new destination. Wait for him to bash the door leading to one of the surrounding buildings (screen 1). Enter it. You won't have to do anything in particular at the moment. One of the squad members is going to use a rocket launcher in order to create a hole in a nearby building (screen 2). You have to get there now.
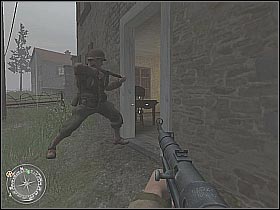
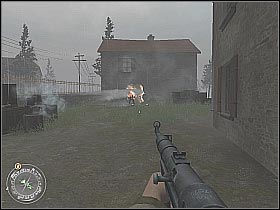
You've got to be careful. The area is swarming with German troops (screen 1). Remember to use all possible cover. You will encounter a destroyed building along the way. Thankfully, it's not being guarded by anyone. You should reach a new heavy machine gun post (screen 2). Use the smoke grenades in order to blind its crew. Start running towards the MG-42 post. You have eliminate soldiers who were standing by it.
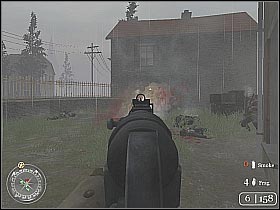
Deal with the rest of the German soldiers. You should join your team now. Wait for one of the soldiers to bash the door leading to a new house. It would be wise to throw a couple of grenades inside (screen 1). Enter the building and deal with the rest of the Nazi forces (screen 2). Don't forget to check the first floor!
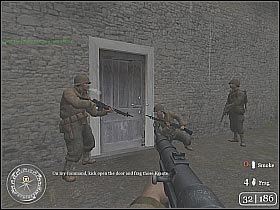

Stand by one of the windows and start shooting at visible enemy soldiers (screen 1). After that, leave the building and start heading towards that position. You should be able to surprise soldiers who were standing by the mortars (screen 2).
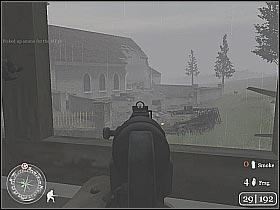
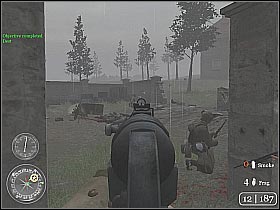
You probably noticed an enemy armored vehicle. You will have to destroy it. Place a charge in the highlighted spot (screen 1). Move back and enjoy the explosion. Now you will have to clear the nearby church. Start shooting at the German soldiers (screen 2).
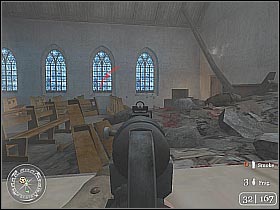
Enter the destroyed church. You've got to be VERY careful. A small group of enemy soldiers will be hiding on the upper floor (screen 1). You've got two options. You can either use some of the carried grenades or head on to the nearest stairs and deal with them personally. After that, leave the church and talk to the squad leader (screen 2). That's it for this mission.
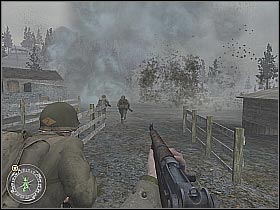
TIME AND PLACE: December 7, 1944; Bergstein
YOU ARE: Corporal Bill Taylor
This time you will have to take complete control of the nearby hill. You will concentrate your efforts on clearing out four enemy bunkers. The mission starts where it left off (screen 1). There aren't any enemy units nearby. Wait for the squad leader to give you an order. Start RUNNING towards the hill (screen 2). DON'T STOP, because the area is bombarded by enemy mortar teams. Jump over the small fence and continue pushing forward.
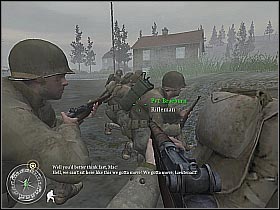
You will probably notice that other Allied forces are taking part in this battle. You should see them on your left (screen 1). Keep moving forward. Don't stop until you reach a fallen tree (screen 2). You should receive some new orders in a few seconds. You will have to take complete control of four enemy bunkers. Three of them can be found nearby, the fourth bunker is on the top of this hill.
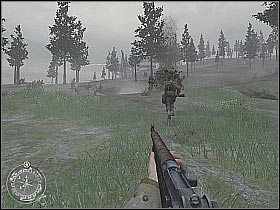
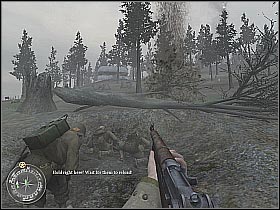
You've got to throw at least two smoke grenades before you decide to move any further (screen 1). They should land near the first bunker. Start running towards it. You might want to surprise German soldiers who were standing by the heavy machine gun posts, although this is not necessary (screen 2).
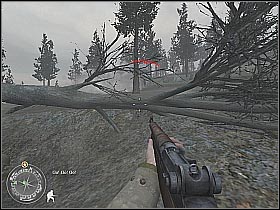
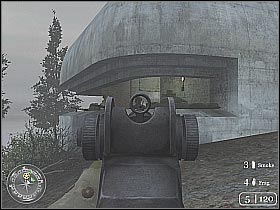
You have to reach the rear side of the bunker. Jump into the small passage. You should notice some steel doors. The right path leads to a tunnel, so you might want to ignore it. Place a charge on the bunker entrance (screen 1). Move back and wait for the explosion (screen 2). It would be wise to throw a couple of grenades inside.
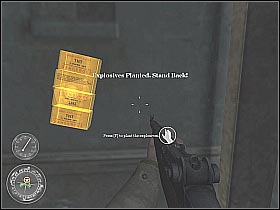
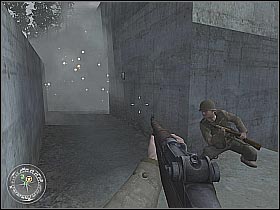
Enter the bunker and start shooting at the enemy soldiers (screen 1). The first group will be standing near the destroyed entrance. You might want to pick up a machine gun from one of the killed Germans. After clearing the surrounding rooms leave the bunker and join the rest of the squad. Start moving towards the second bunker (screen 2).
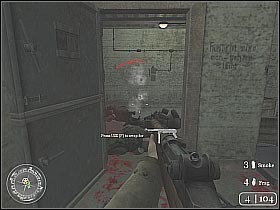
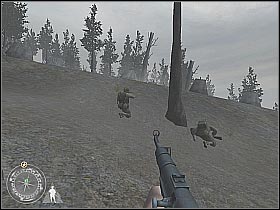
You have to be careful, because there are a lot of minefields in the area. Thankfully, these places will be marked with special signs. It would be best to stick close to the other team members. You will be encountering massive enemy forces along the way (screen 1). Remember to use trees and crates for much needed cover. You should reach a small camp within a few seconds. I would recommend using grenades (screen 2).
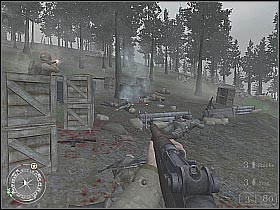
Keep pushing forward. It would be wise to use one of the nearby gun posts in order to get rid off some German troops (screen 1). Remember to stick close to the rest of the team. You should also use grenades frequently. You will finally reach the second bunker (screen 2). Wait for the other crew members to show up.

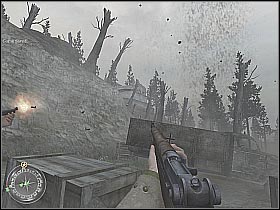
First of all, deploy some of the carried smoke grenades (screen 1). Start moving towards the enemy bunker. If you're lucky, you will be able to kill some additional enemy units. The Germans will be crouching near the trees (screen 2). It would be best to concentrate your efforts on getting closer to the bunker itself.
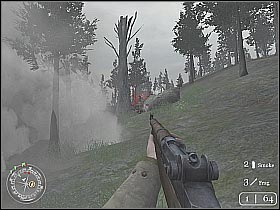
You should be able to reach your destination within a couple of seconds. Head on to the rear door. Set a charge in the highlighted spot (screen 1). Wait for the explosion to occur. After that, throw some of the carried grenades inside the bunker. Enter it and deal with the rest of the soldiers (screen 2). The largest group will be hiding near the machine gun posts.

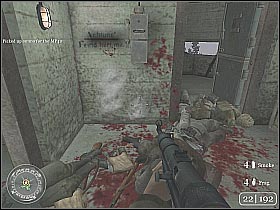
Don't leave the bunker just yet. You should be able to find a sniper rifle. It's in one of the larger rooms, by the crates. Pick it up (screen 1). This weapon will become useful in some of the following fights. Leave the bunker. You will be encountering German troops along the way (screen 2). Use your sniper rifle in order to take them out from a safe distance. Keep moving forward.
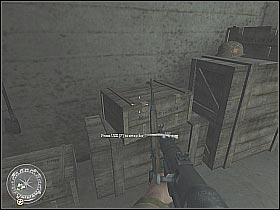
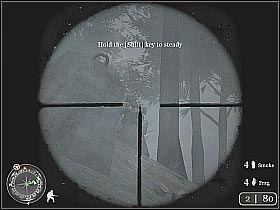
You should be getting closer to the third bunker. Nevertheless, you have to be very careful. Some of the German soldiers may be hiding nearby (screen 1). I would recommend scoring at least 2-3 headshots. You might want to pick up a machine gun before you get to the bunker. Use a satchel charge in order to blow up its door (screen 2).
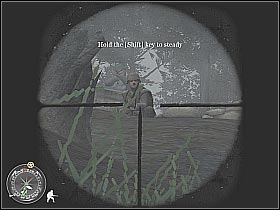
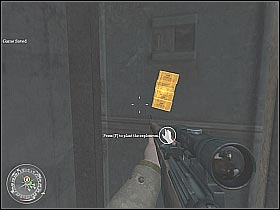
Just as before, throw a couple of grenades inside, and then enter the bunker to deal with the remaining German soldiers (screen 1). You will probably notice a rocket launcher lying on the ground. Ignore it. Leave the bunker. Pick up the sniper rifle again and head on towards the last remaining bunker (screen 2).
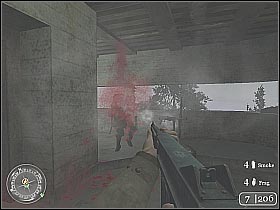
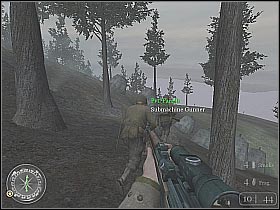
You have to be very careful, because there are two heavy machine gun posts nearby (screen 1). You must deal with them quickly. Continue moving forward. New objectives will appear on your screen in a few seconds. Ignore the armored vehicle for the moment. Keep shooting at the German soldiers (screen 2). It would be wise to trade sniper rifle for a machine gun.
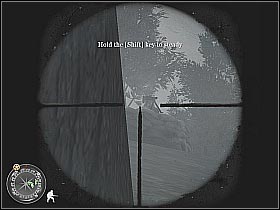
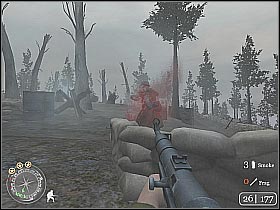
I would recommend listening to the other members of your team. You will have to blind some of the German soldiers. Use the smoke grenades. They should land near the fourth bunker. Keep moving forward. You will be encountering some massive enemy forces along the way (screen 1). You should come across an abandoned vehicle (screen 2). Destroy it (you have to use the explosives).
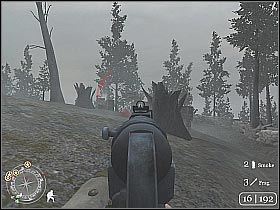
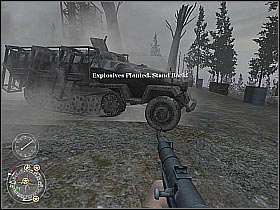
Mortar crews should be next on your list. The first group is located near your actual position (screen 1). I would recommend shooting at the explosive barrels, so you won't have to take part in any serious fights. The second mortar crew should also be visible on your compass. Take it out (screen 2).
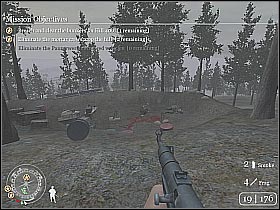
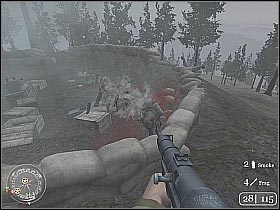
Head on to the central area of the hill. First of all, take care of the German troops. Enemy soldiers were trying to protect the entrance (screen 1). Move a little bit closer. You will have to use explosives in order to blow up the front door (screen 2). After that, throw a couple of grenades inside.
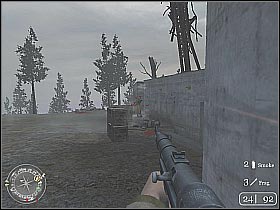
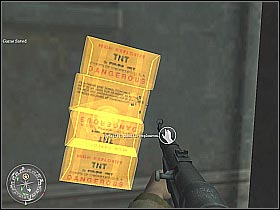
You may proceed to the bunker now. Bear in mind that there are a lot of German troops here. You've got to be very careful. First of all, take care of the Nazis who were standing by the heavy machine gun posts (screen 1). You will come across a second steel door. Use the explosives (screen 2).
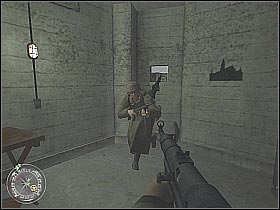
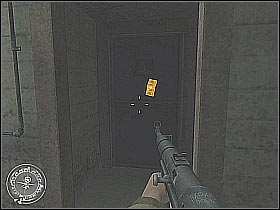
Start shooting at the German soldiers (screen 1). You will have to locate and kill all of them. You may leave the bunker now. There's only one more objective on the list. You will have to take care of the remaining German soldiers. If you're lucky, Allied soldiers will take care of this problem. Listen to what the squad leader has to say (screen 2). That's it for this mission.
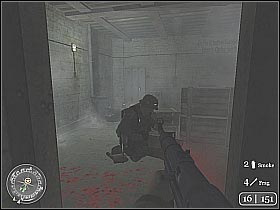
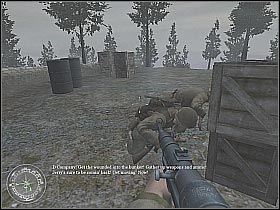
TIME AND PLACE: December 8, 1944; Bergstein
YOU ARE: Corporal Bill Taylor
This is one of the most challenging missions of the game. You will have to defend this hill against enemy attacks. You start off inside the central bunker. One of the Allied soldiers will arrive here shortly. He will inform you about the incoming German forces (screen 1). Leave the bunker. First of all, you will have to take care of the enemy mortar crews (screen 2). Thankfully, you've got a sniper rifle.
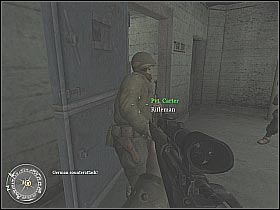
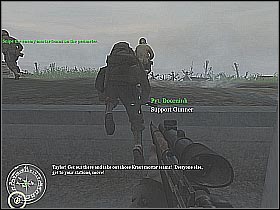
Thankfully, you will be able to see mortar positions on your compass. You can also look for the additional smoke (screen 1). You don't have much time to take care of a single mortar crew, however headshots are most welcome. You must neutralize all targets (screen 2). Watch out for additional enemy soldiers.
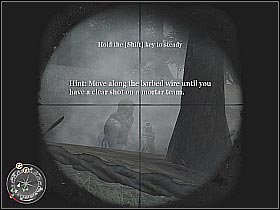
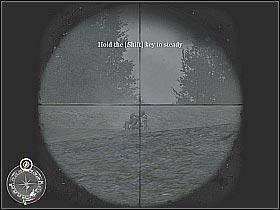
You will have a few seconds to arm yourself with a decent gun (screen 1). Head on to the nearby crates. I would recommend picking up a heavy machine gun (BAR), because there will be a lot of close combat situations. The top of the hill is going to be bombarded by an enemy artillery. You have to get out of here. All hideouts should be visible on your compass (screen 2). If you don't know where to go, try following one of the Allied soldiers.
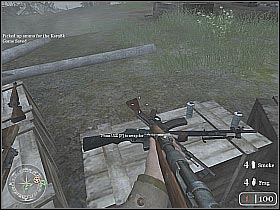
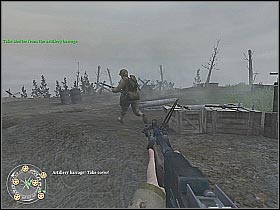
You can go back to the central bunker. The first wave of enemy soldiers will appear on the western side of the hill. Bear in mind that the Germans will deploy some smoke grenades in order to blind you (screen 1). This will make killing them a lot harder, because you won't have much time to score a good shot. I wouldn't recommend staying by the heavy machine gun post for too long. The second wave will attack from the south-west (screen 2).
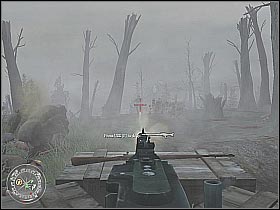
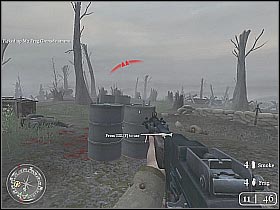
The third wave is coming from the north (screen 1). Don't forget about the carried grenades. I'd recommend throwing them at larger groups of enemy soldiers. It would also be wise to check your ammo supplies frequently. Remember that you can always pick up one of the MP-40's. Enemy armored vehicles will be coming from the south-west. You've got four options:
A) take out their shooters (sniper rifle)
B) use one of the rocket launchers (challenging...)
C) blind them with a smoke grenade (it won't last for too long, though)
C) ignore them for the rest of the battle. If you choose this option you will have to remember to avoid this part of the map.
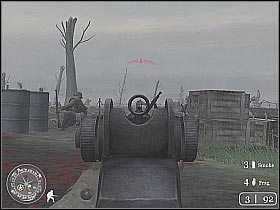
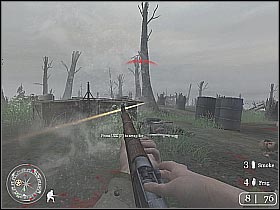
I would recommend staying close to the western side of the bunker (screen 1), mostly because of larger groups of enemy soldiers. Don't forget to use your grenades. A countdown will begin very soon. You will have to defend the top of the hill for about five minutes. Start running towards one of the possible covers (screen 2), because enemy artillery has awaken itself again.
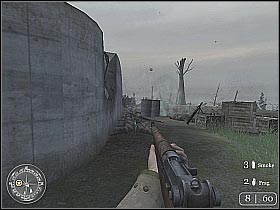
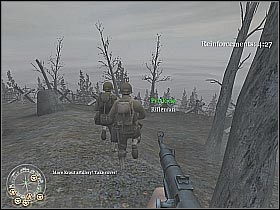
Get back to the central bunker. Start shooting at the visible enemy soldiers (screen 1). The Germans will be coming from north and west. If you have some smoke grenades at your disposal, now would be the best time to use them (screen 2). Thanks to that, you will be able to blind some of the snipers and the armored vehicles. Concentrate your efforts on soldiers equipped with machine guns.
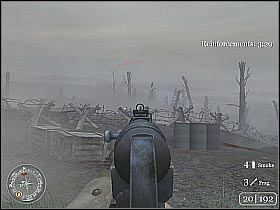
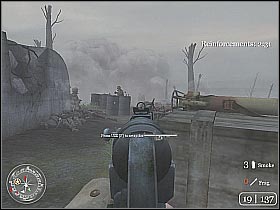
An enemy tank will arrive here shortly. Wait for him to get to the top of the hill. Now you will have to surprise him from one of the flanks (screen 1). Set a charge in a highlighted spot. Move back (watch out for additional enemy units!!) and enjoy the fireworks (screen 2). Get back to the entrance. Remember that you must protect it at all costs.
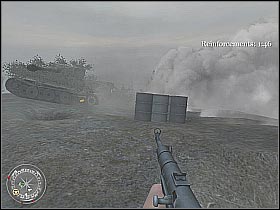

You will be encountering massive enemy forces. The Germans will be attacking mostly from the western side of the hill (screen 1). Don't forget to use your grenades during these fights. A second tank will arrive. You've got to get rid off him swiftly (screen 2).
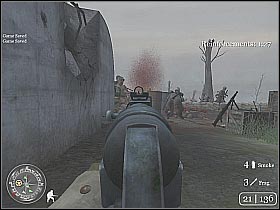
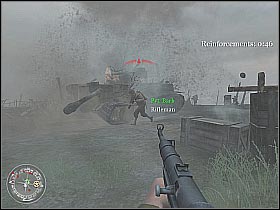
You've got to survive only a few more attacks. After that, Allied planes will appear over the hill (screen 1). The enemy forces will begin to retreat. Go to your squad leader and listen to what he's got to say (screen 2). Get ready for the final mission of the game!
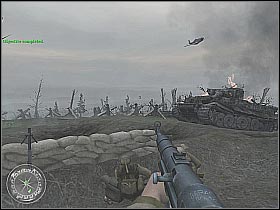
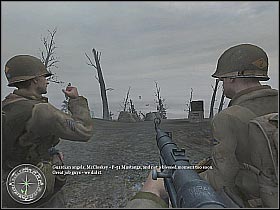
TIME AND PLACE: March 24, 1945; Wallendar
YOU ARE: Corporal Bill Taylor
The following mission is not that challenging (as you probably might have expected). You start off on a moving boat (screen 1). Use the heavy machine gun in order to supress enemy fire. You don't have to aim in anything in particular. Just be sure to keep your finger on the trigger. After reaching the shore leave the gun and jump into the water. Start moving towards the small beach (screen 2).
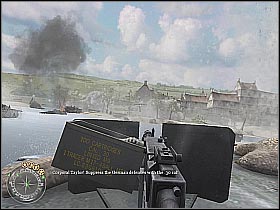
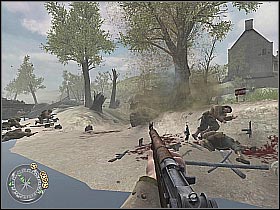
You should deploy at least 2-3 smoke grenades around your current position (screen 1). The goal is simple - you will have to blind surrounding German troops. Start heading towards the first huge gun. You will be attacked by a small group of enemy soldiers (screen 2). Kill them.
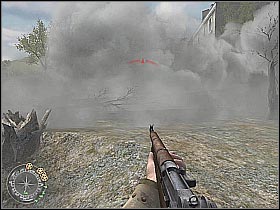
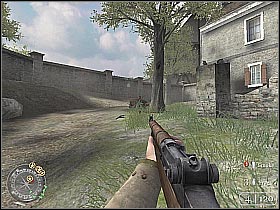
Now you will have to take care of those Germans who were standing by the gun itself (screen 1). It would be wise to throw a couple of grenades at them. You will be finding these objects quite frequently. I would also recommend picking up a machine gun from one of the killed Nazis. Bear in mind that some enemy troops may be hiding in the nearest building (screen 2).
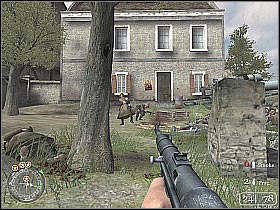
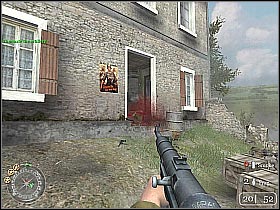
Continue moving forward. It would be best to check one of the surrounding buildings. You will be able to surprise some of the enemy troops from the small window located on the first floor (screen 1). After that, leave the building. Head on to the nearest street. You will be encountering massive enemy forces along the way (screen 1). Nevertheless, you must keep pushing forward. I'd also recommend using grenades often.
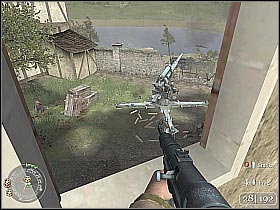
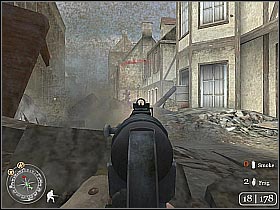
You will encounter a small group of enemy soldiers in one of the smaller buildings (screen 1). You must deal with them swiftly. Keep pushing forward. Unfortunately, you won't be able to reach the next gun because of the barbed-wire. Choose the left path (screen 2). Bear in mind that there a lot of German troops nearby. I'd recommend waiting for the other crew members to show up.
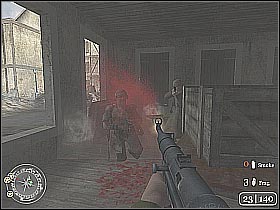
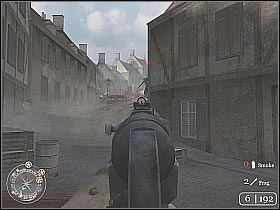
You've got some challenging fights ahead. Most of the city streets are being occupied by German soldiers. Some of them may also be hiding in the nearby buildings. You must reach the third gun (screen 2). Thankfully, there's only one path leading to it.
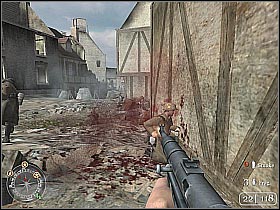
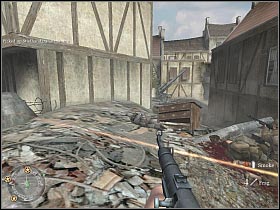
You should be able to reach your destination within a few seconds. There are some German soldiers crouching behind sandbags (screen 1). You might want to surprise them with a small pack of grenades. Head on to the destroyed house (screen 2). You should see a small path. It leads to the next gun.
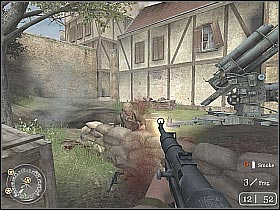
Warning! The German forces will organize an ambush somewhere near this location (screen 1). Throwing a couple of grenades at them would be a good idea. After that, attack their positions. Keep moving forward. I'd recommend hiding behind buildings (screen 2). You'll be able to reload your gun and organize next movements.
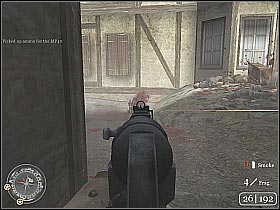
You have to get to the other side of this street. Take your time in order to plan next movements. Remember that you're not being rushed by anything. You should finally reach a small hole in the brick wall (screen 1). Get to the other side. You'll find yourself on a small cematary. Be careful. The Germans will be standing by the gravestones (screen 2).
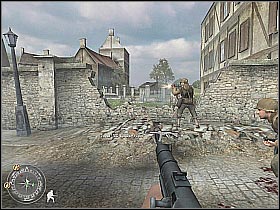
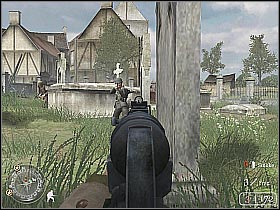
You should be getting closer to your next objective. Start off by throwing some of the carried grenades at enemy soldiers (screen 1). Deal with those Germans who were able to survive the explosions. Continue moving forward. There's only one path leading to the town square, so you shouldn't miss it. You will be encountering large groups of enemy soldiers along the way (screen 2). Don't forget about the possibility of using grenades!
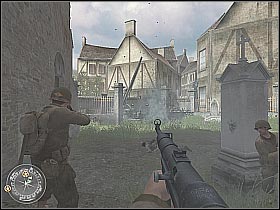
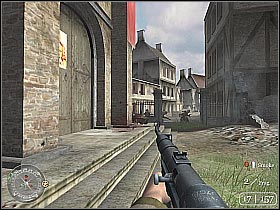
You will probably notice a small building on your left. It would be best to clear it out. There are some Germans inside (screen 1). Be sure to check all rooms. Use the stairs in order to get to the upper floor. Stand by one of the windows. You should be able to take out a few Nazis (screen 2). You may exit the building now.
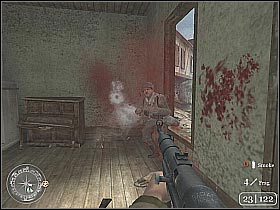
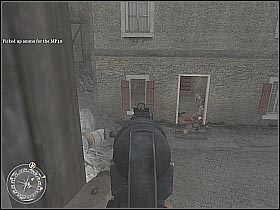
You should finally reach the town square. First of all, you must take care of the last cannon (screen 1). Get ready, because the following fights will be very challenging. Move to the central part of the square. Start shooting at the enemy soldiers. You will probably notice a heavy machine gun post. I would recommend surprising it from the left side (screen 2).
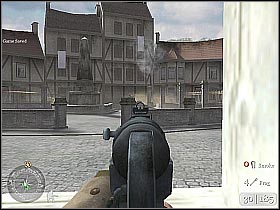

TWO enemy tanks will arrive here shortly. You will have to take care of them both. I would recommend doing that quickly. Otherwise, the area is going to be invaded by massive enemy forces. First of all, you should start running towards the right tank. He will appear near the neutralized gun (screen 1). Be sure to keep firing at enemy soldiers. Set a charge in one of the highlighted spots (screen 2).
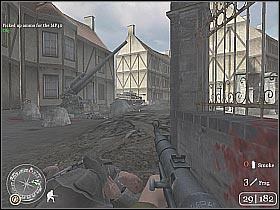
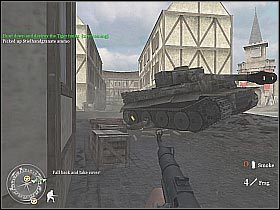
Now you will have to locate the second tank. Don't forget about the German troops. The tank is going to be protected by large groups of enemy soldiers (screen 1). I would recommend shooting only at the closest Germans. Neutralize the tank with a little help from the explosives (screen 2).
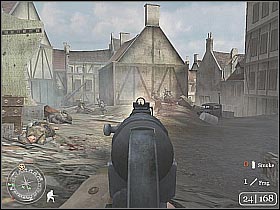
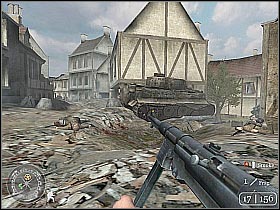
It's not over yet. One of the squad members is going to help you. He will throw a grenade inside the tank. Enjoy the fireworks (screen 1). There's only one more objective on your list. You will have to clear out the town square of any enemy units you may encounter (screen 2). The largest group of German soldiers will be standing near the first tank.
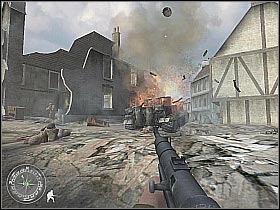
Start shooting at the visible enemy soldiers (screen 1). You may also use your grenades on them, because you won't need them anymore. You should deal with this problem in a couple of seconds. After that, talk to the squad leader (screen 2). CONGRATULATIONS! You've just finished the game!
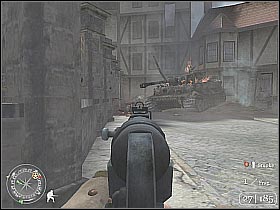
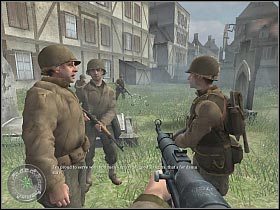


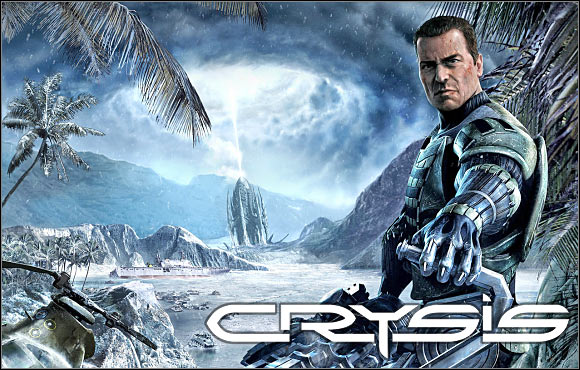
 Call of Duty 2 Game Guide & Walkthrough
 Chronicles of Mystery: The Tree of Life Game Guide & Walkthrough
 Command & Conquer 3: Kanes Wrath Game Guide & Walkthrough
 Call of Juarez Game Guide & Walkthrough
 Colin McRae: DIRT Game Guide & Walkthrough