
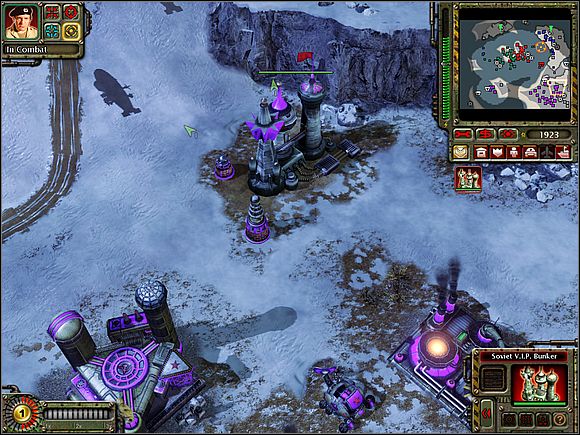
Welcome!
I am glad that I can give the Command & Conquer: Red Alert 3 guide into your hands, game prepared by the Electronic Arts Los Angeles studio.
The guide contains descriptions of all missions forming the single player campaign. Apart from general advices, in this guide you will find particularly leads concerning individual fractions. Every task was provided with big pictures from the game (over 250) and with maps (about 30), and the walkthrough alone in itself is divided into small fragments, from which everyone is describing executing one concrete purpose. I hope that you will enjoy this form of the article and will facilitate understanding crucial for the games cause. If neither the text, nor graphics deliver the desired information to you, ask your questions in the system of commentaries on this text.
In content of the article you will find reference materials [1] [2] [3], etc. They concern points marked to the map of the given mission. These points are explained under maps, in the legend.
This guide is based on the 1.00 version of the game. I got through all the missions on the medium level of difficulty.
Enjoy this guide and have a lot of successes in the battle, playing as Allies, Soviets and Empire of the Rising Sun.
Maciej "Sandro" Jalowiec
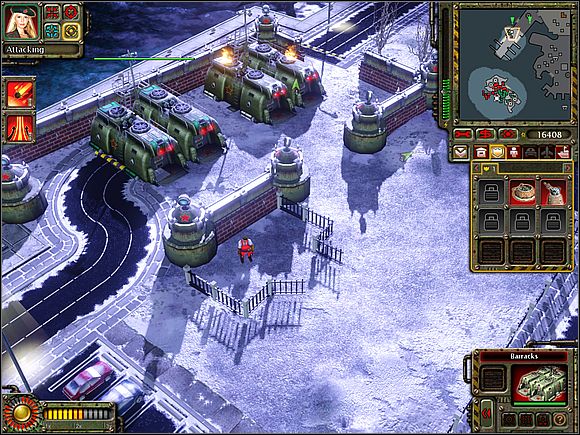
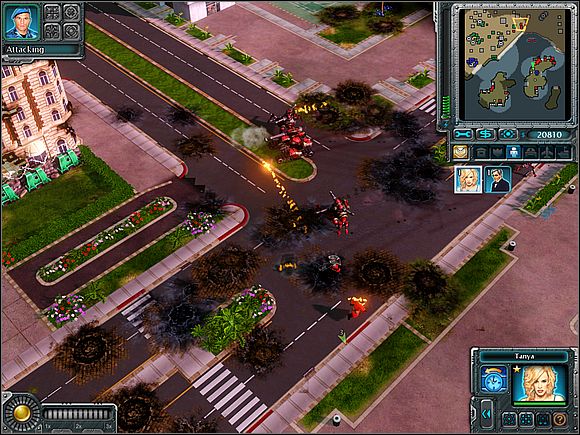
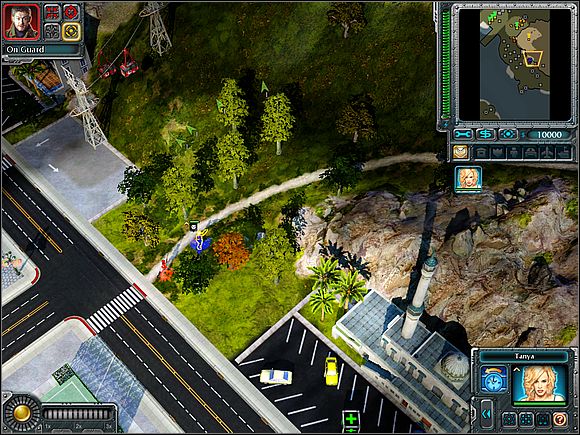
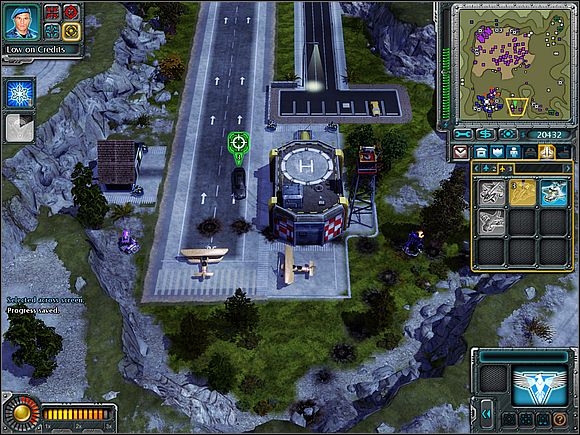
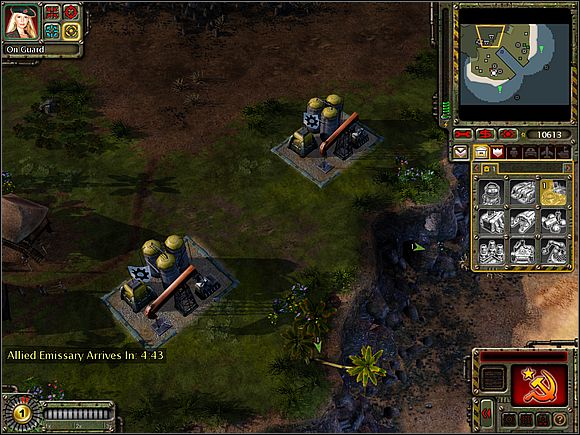 That looks oil wells. Intercepting them allows for drawing additional earnings.
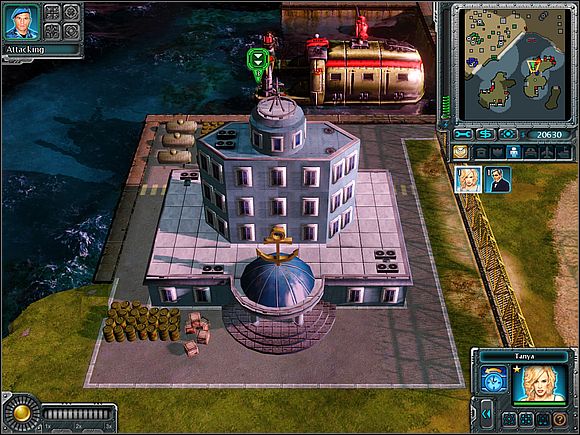
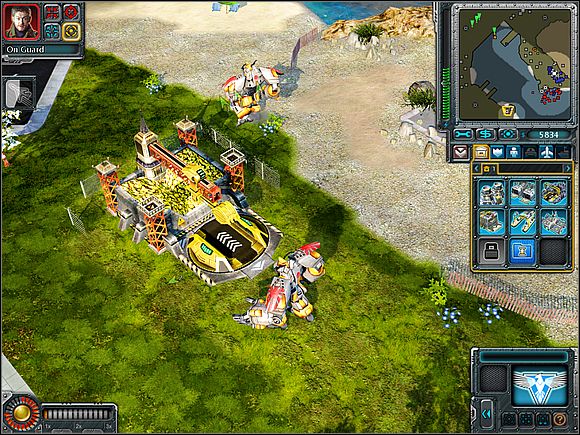
 Hospital is specially recommended if you are using infantry.
 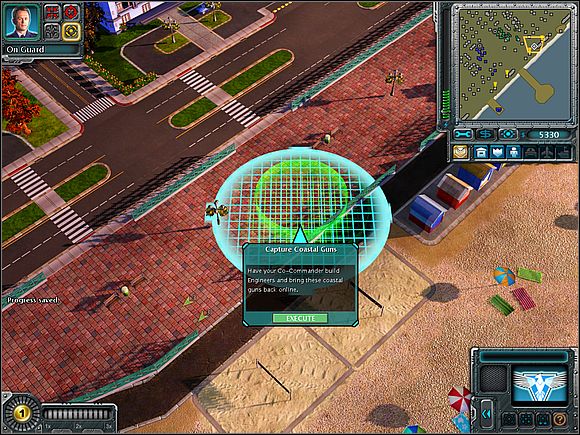 Flags can be very useful. If you know you can't handle with something, ask Ally for help.
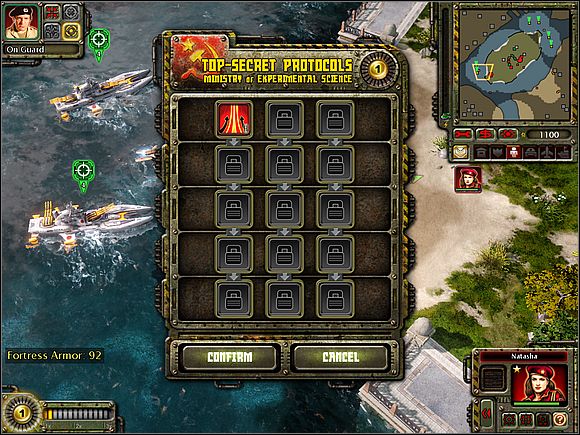
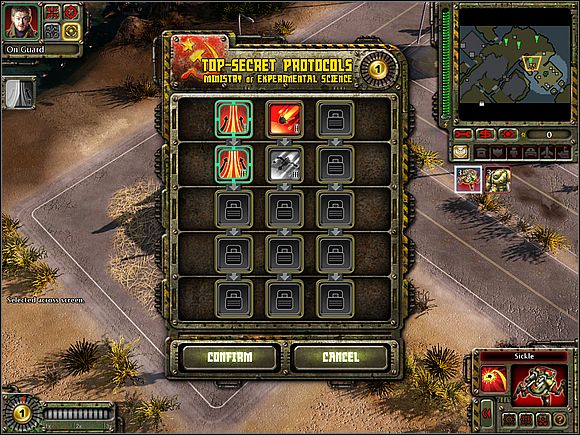
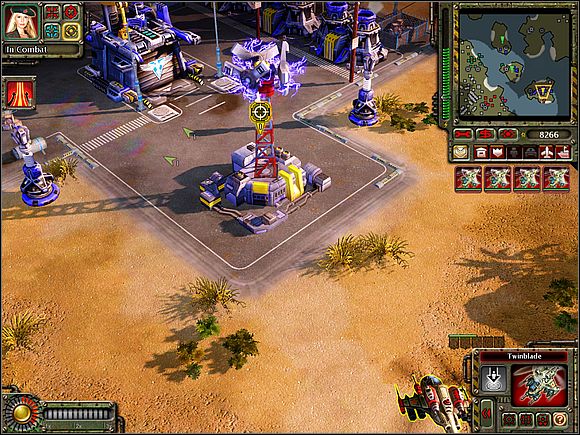
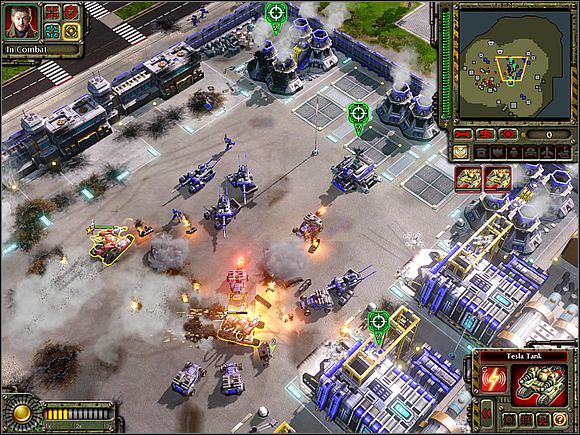
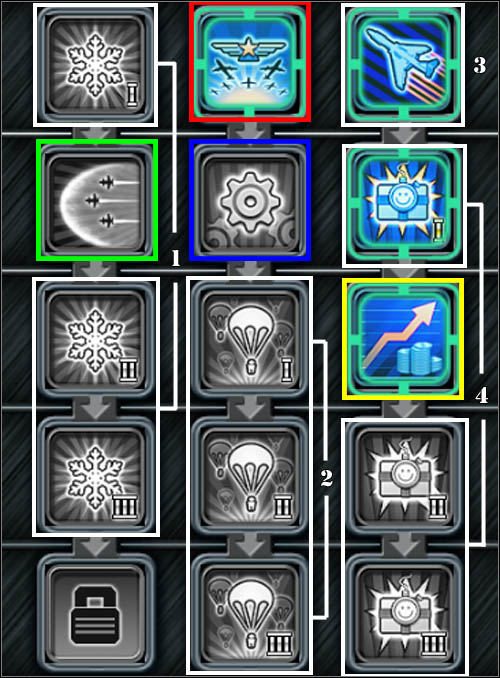
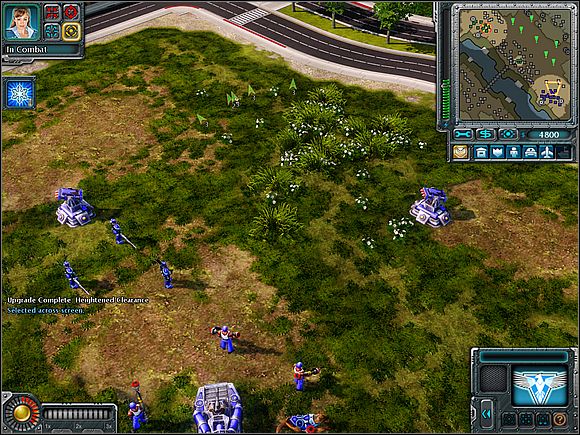
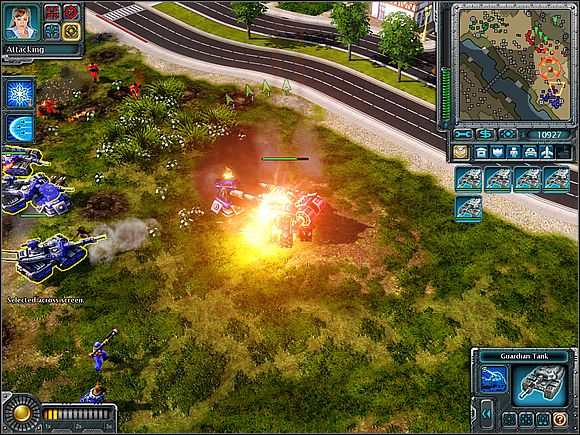
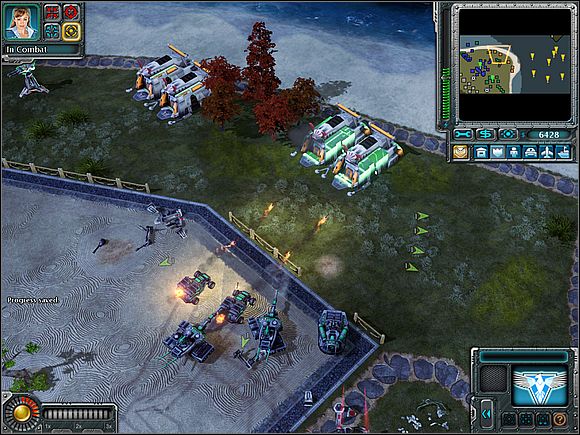
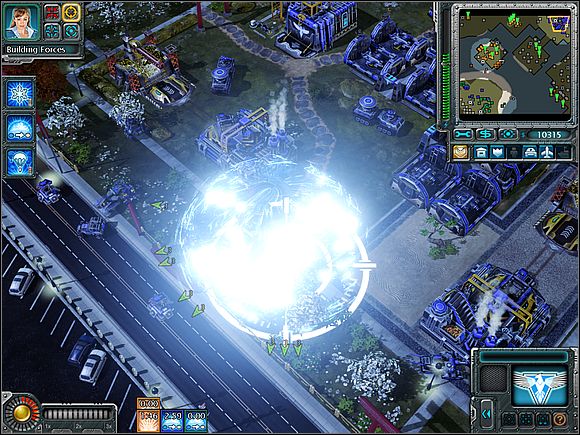
Without special powers it is hard to finish soviets campaign. Spending points on powers, first try to unlock those marked on screen below.
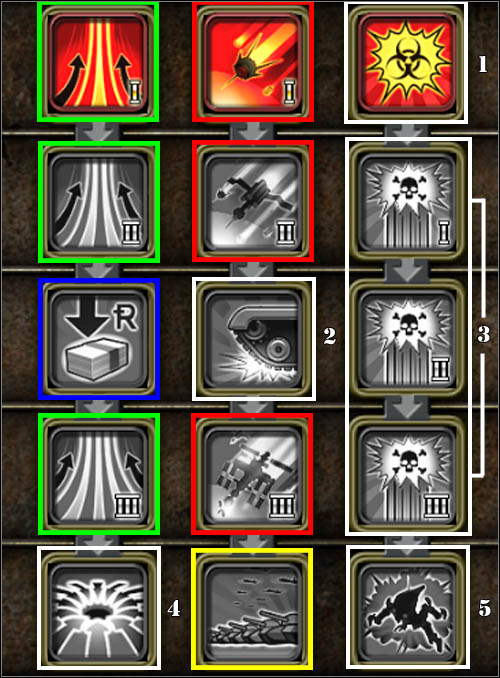
Magnetic Satellite - after you marked a place to use this power, a sucking radius of enemy vehicles, ships, planes and helicopters appears. It doesn't work on buildings and infantry. With each new level of sophistication suction time increase. Radius after locating on the board can move, taking units standing near or trying to escape from radius into space.
Orbital Drop - area attack, relies on drop of space satellites into selected place. Each next level of weapons increases its strike power. What's more, you can increase the number of objects falling to the ground by prior sucking enemy units into space (by Magnetic Satellite)!
Cash Bounty - thanks to this power you can ensure additional, albeit modest, the revenue to the treasury. After marking a several units or buildings enemy, you need to quickly destroy them, to get some money. Always select these objectives, that are able to destroy them for a while.
Mass Production - decrease all units production cost (about 25%).
1. Toxic Corrosion - little useful power. With this power can obtain a unit in the tank with toxins. When the unit (car or boat) is moving, it leaves a poisonous substance, which is deadly for infantry, vehicles and boats. When a unit with tanks will be destroyed, toxins will spray within a radius of several meters from the place of explosion. Power extremely impractical.
2. Grinder Treads - Soviets land units can't be repaired, but it's possibility to help them in auto repair. If any large unit (such as Hammer tank or Apocalypse) will drive over another, the energy bar will be renewed. The most of the enemy units are eliminating by navy or air strike, so it's rare opportunity to run over an opponent.
3. Desolator Air strike - pretty good weapon, but - in contrast to Orbital Drop - works properly only against units, especially infantry. It consist on drop toxins in the selected area. The higher the level of this weapon, including a wider area and the chemicals can contaminate much longer on the map.
4. Magnetic Singularity - it is an area attack. After using it, all units located on your territory will begin to approach each other, getting into one mass. Power to apply only in conjunction with attacks from the air or discharge equipment from space. This requires exceptional strength of involvement in an attack: you must find the appropriate group of units, then use the power, and then start hitting. It's definitely easier to contaminate the area of chemicals, suck opponents into space or drop satellites.
5. Terror Drone Surprise - non practical power. It consists in the fact, that from time to time from a vehicle destroyed in fight, Terror Drone robots showing up. However, the best is to use the navy or air, power described here is losing on value. What's more, it is available only at the end of the game, and it requires a lot of points to unlock.
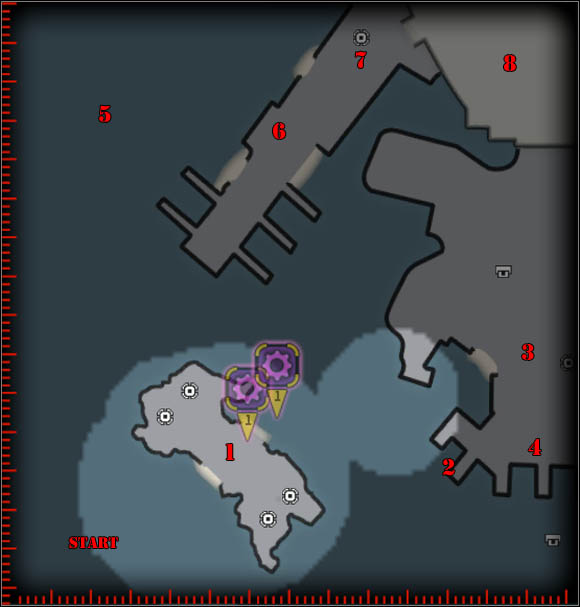
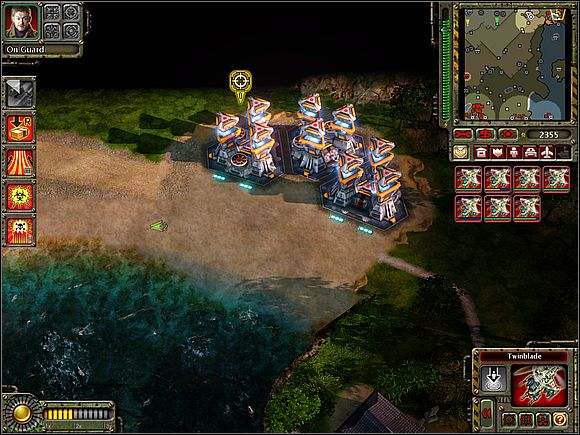
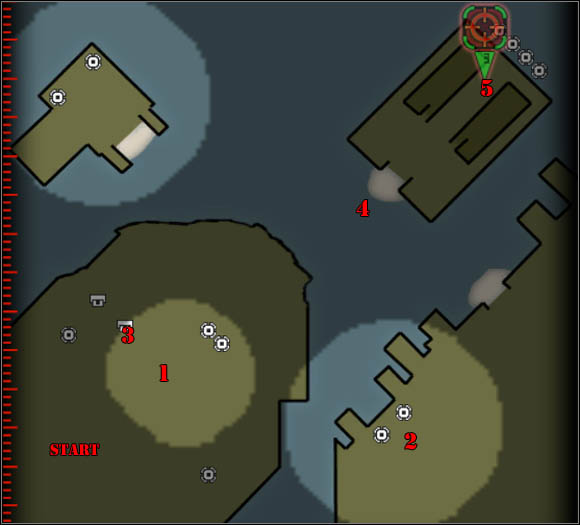
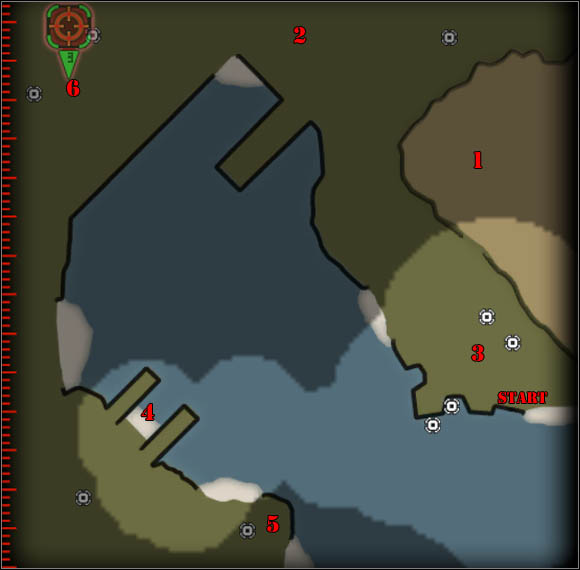
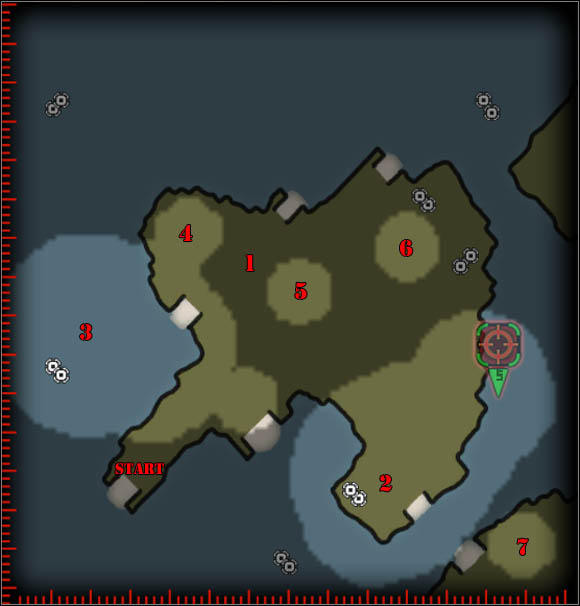
1. The Fortress gate;
2. The Fortress;
3. Hermitage;
4.-7. Enemy Battleships.
1. Secure the Fortress;
2. Train 5 Flak Troopers;
3. Protect the Fortress;
4. Save the Hermitage;
5. Destroy the Battleships.
1. Secure the Fortress;
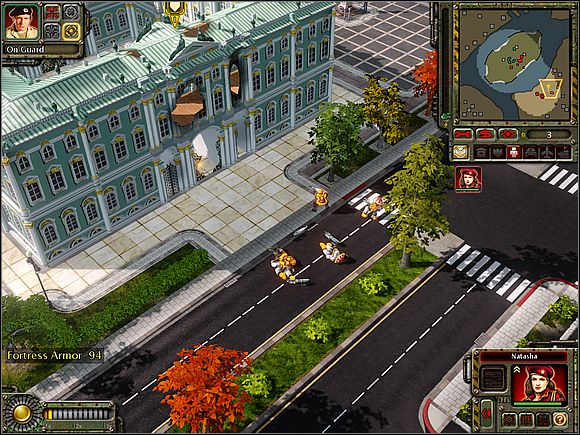
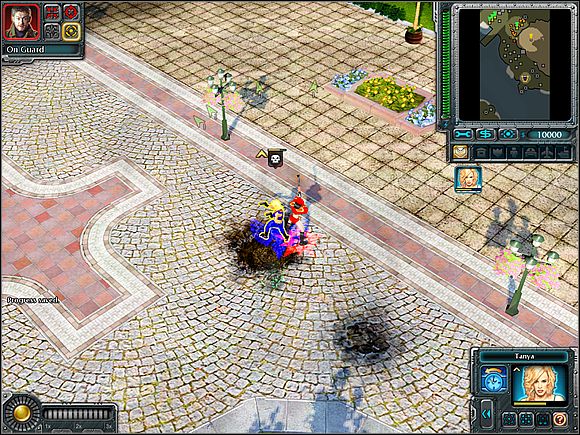
Mission will start with Natasha - Mrs. sniper. Select her and order to eliminate soldiers standing at the gate [1]. When all will die, command Natasha call the air strike on the white gate to the fortress [2].
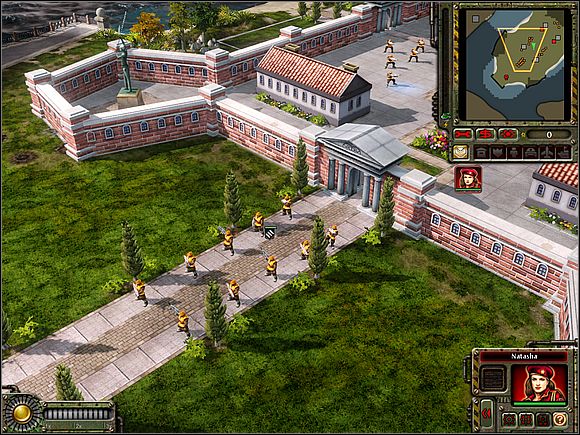
The fortress is one, big building, firing by enemy soldiers.
Eliminate them, and watch cut scene with Oleg.
2. Train 5 Flak Troopers;
Near by fortress, there are barracks. Train five flak troopers.
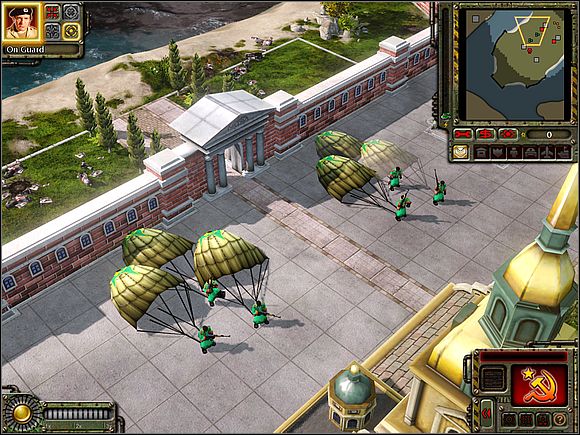
3. Protect the Fortress;
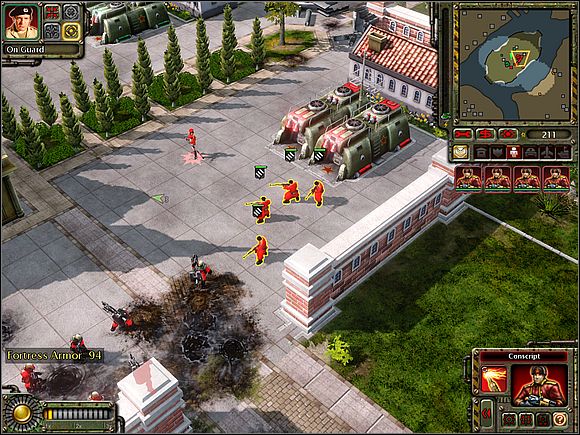
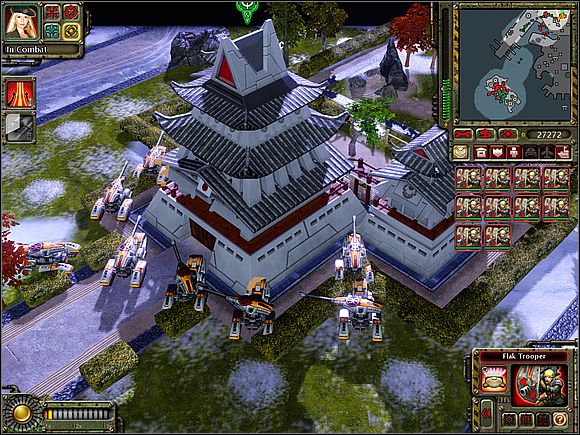
Flak Troopers are pretty good in fight with air units. Train a few more units of this type, because your next target in this mission is to defend the Fortress from impressive forces of Empire.
 Your enemy has Tsunami tanks.
Set your soldiers in the southern corner of the entire complex. In this way they can both firing forces coming from the south east (where is absolutely no protection) and coming troops from south west (although there are Oleg people, but as we all know never too much carefulness).
 Nothing can stop you, to capture the building with soldiers standing south of the fortress.
Natasha will be useless in this part of the mission. Although she is able to summon air strikes on enemy tanks, your Flak Troopers will faster destroy the enemy machines before bombers arrive. The level of the fortress energy is displayed in the lower left corner. Remember that it can not fall to zero.
Following the destruction of the enemy troops, you will get the possibility of training Conscripts - they are ordinary soldiers equipped with Kalashnikov and Molotov cocktails. Train a few and set them near the barracks. From here they will be able to calmly fight around with Empire troops.
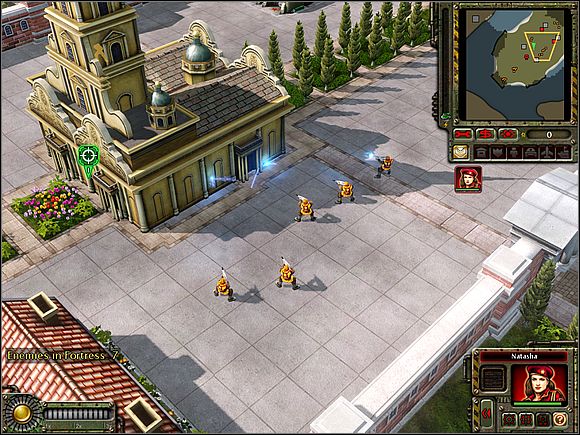
4. Save the Hermitage;
Japanese units will attack the nearby hermitage [3] with Russian art. You should to protect this place. You will get the Bullfrog. Load Natasha to him.

Bullfrog has a catapult, which can fire loaded in units. Shoot Natasha in hermitage area.
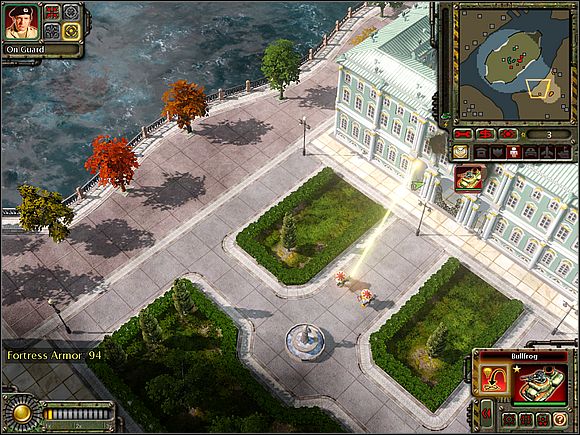
Command Natasha to shoot all Empire soldiers attacking hermitage.
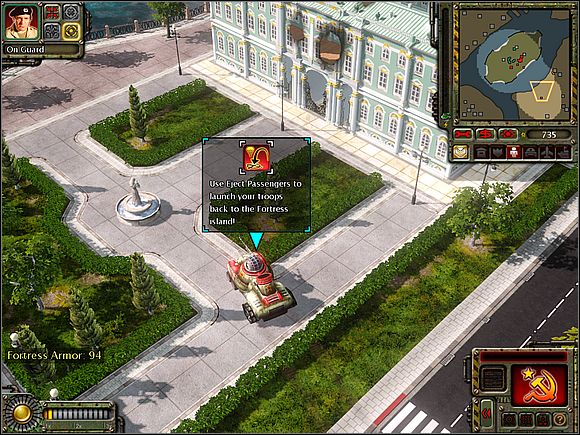
Ally Bullfrog will appear near by hermitage. Use it to shoot Natasha back to fortress.
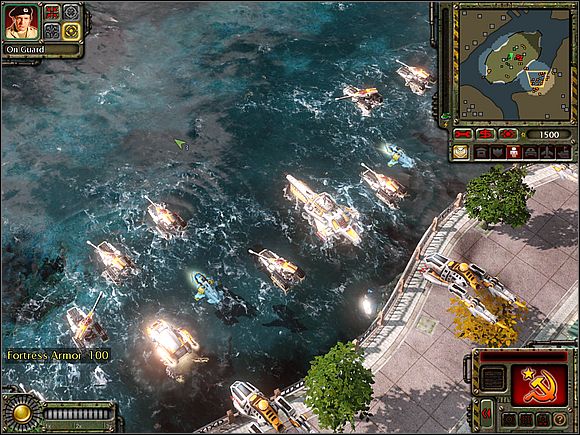
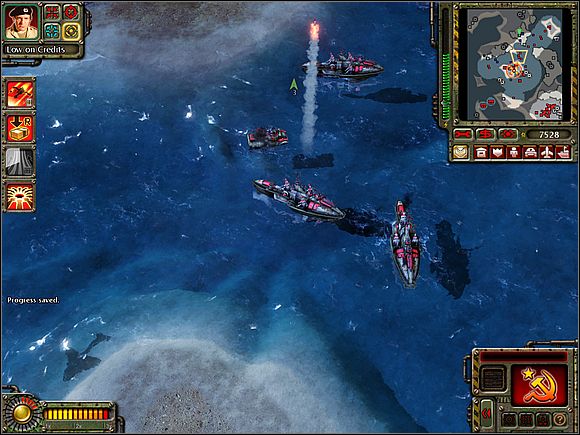
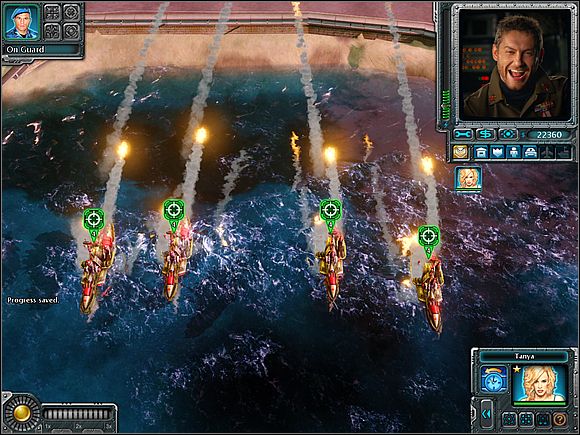
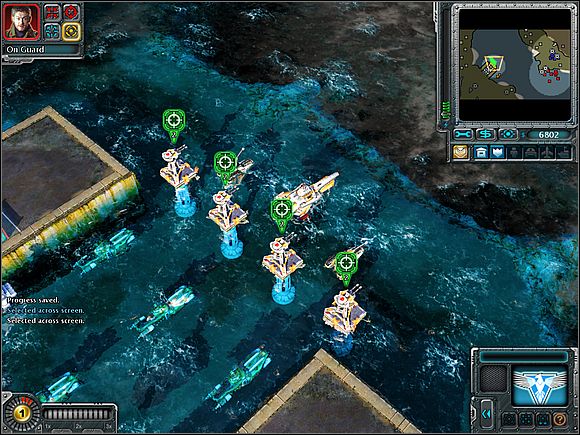
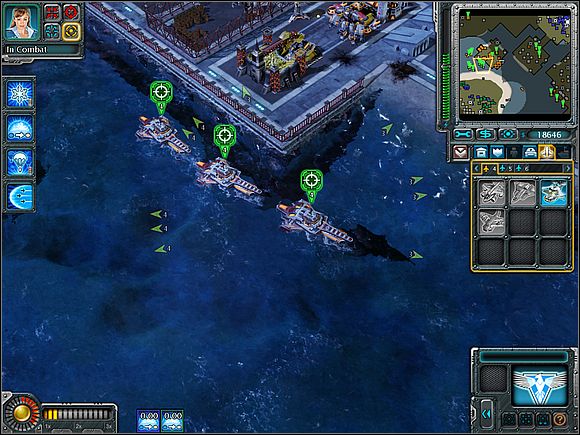
5. Destroy enemy Battleships.
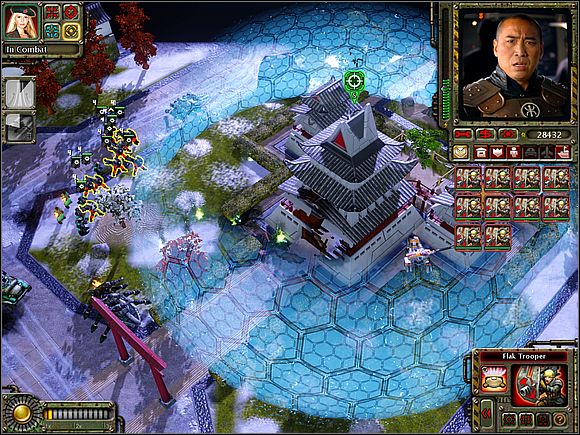
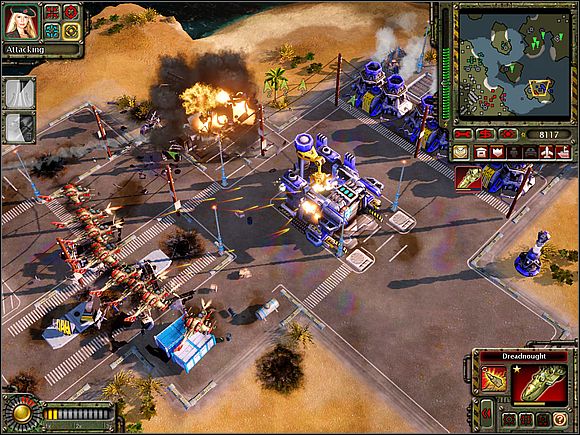
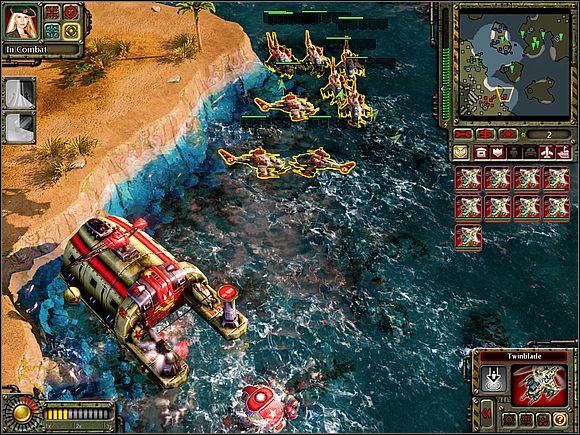
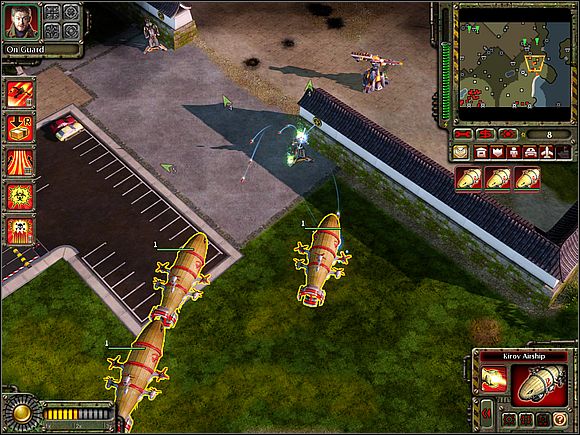
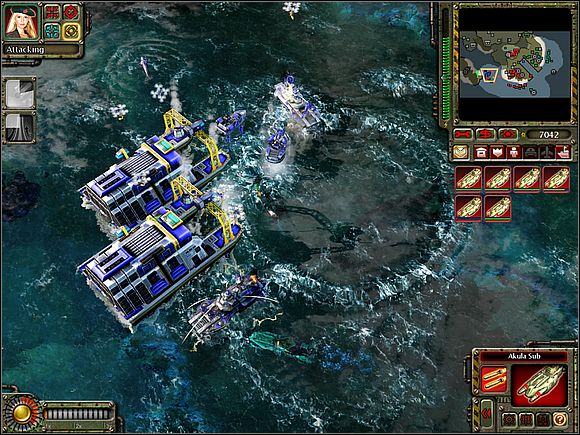
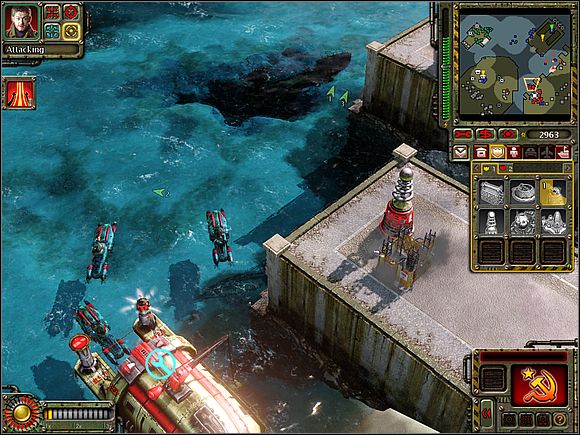
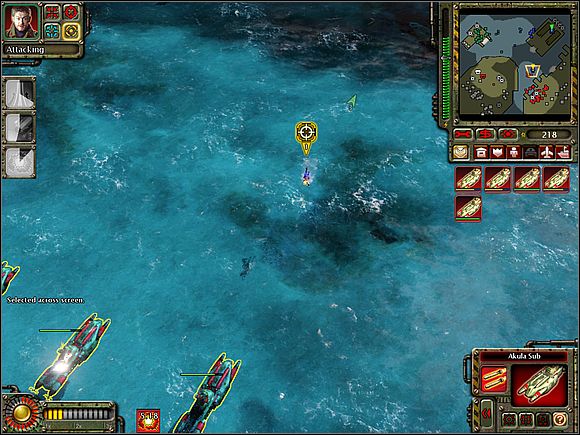
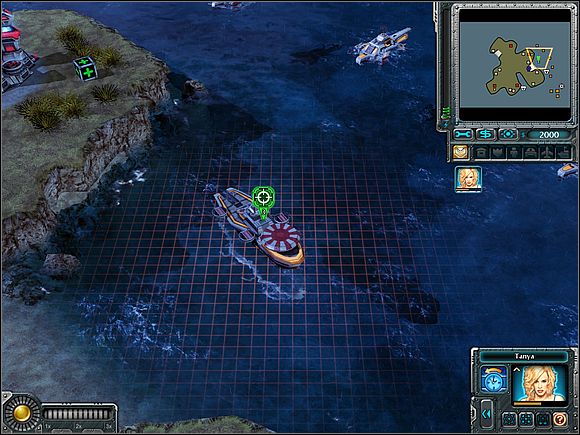
Fortress will be attacked by the Japanese navy [4] [5] [6] [7]. The island is surrounded by several ships (exactly 8) equipped with long-range missiles. Order Natasha order to call air strike on each green marked ship. It is also the occasion to eliminate smaller units protecting them.
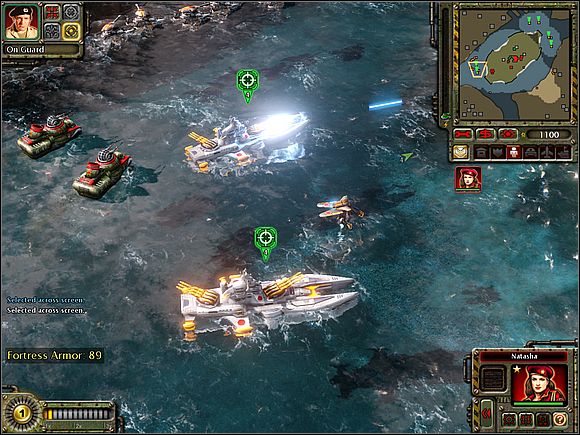
Following the destruction of the first two ships you will get an access to the Magnetic Satellite. In the lower left corner of the screen is a button that opens the power window. You can use satellites to throw ships from the water straight into space.
Mission accomplished when you will destroy all the ships.
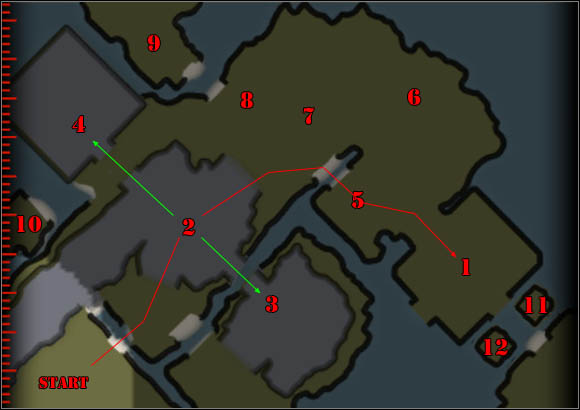
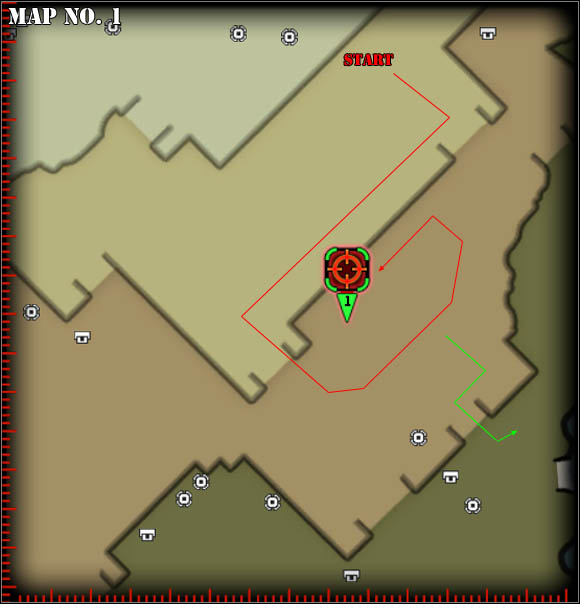
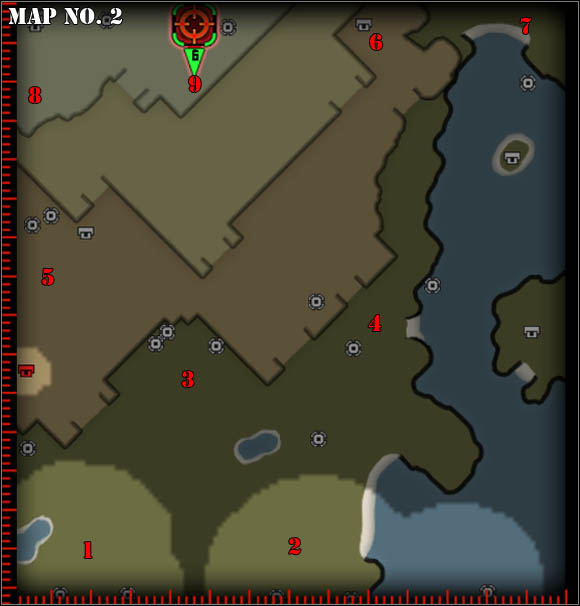
1. K-45 Launcher;
2. Trapped War Bears;
3. Fighting Tesla Troopers;
4. Trapped Tesla Troopers;
5., 6., 7., 8. Tents with Empire forces hidden in;
9., 10., 11., 12. Boxes raising the level of units experience.
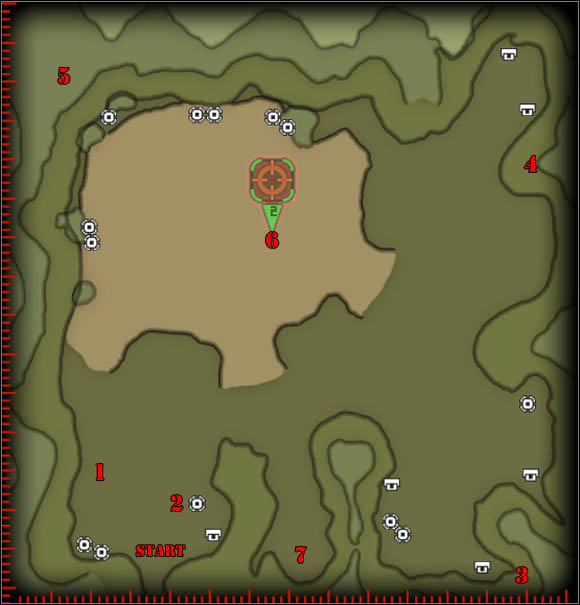
Red lines guides you to K-45 Launcher.
Green lines guides you to secondary objectives.
1. Get Natasha to the K-45 Launch Facility;
2. Assist the Tesla Troopers;
3. Rescue the Tesla Troopers;
4. Eliminate the Imperial Ambush Division.
1.1. Get Natasha to the K-45 Launch Facility;
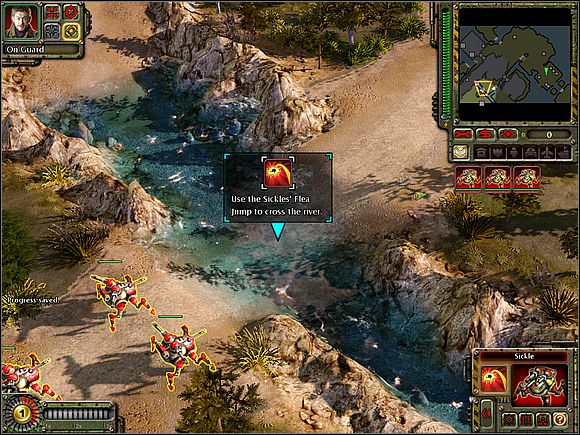
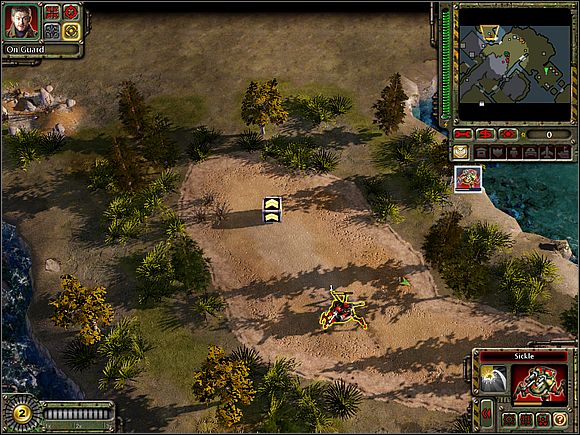
You will start your mission with Sickle vehicles. One of them are damaged but you can fix it with green package.
Natasha is driving by allied commander - Mosqin. You must ensure security for her during the road to the K- 45 launcher [1].
Sickle vehicles are able to perform high and quite distant jumps. Take advantage of this ability to jump above the small river right next to the place where the repair box was.
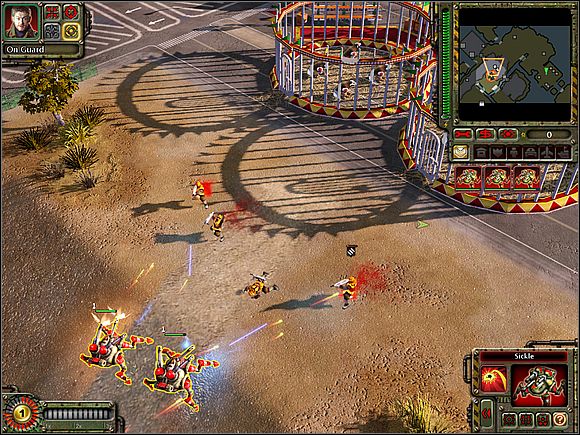
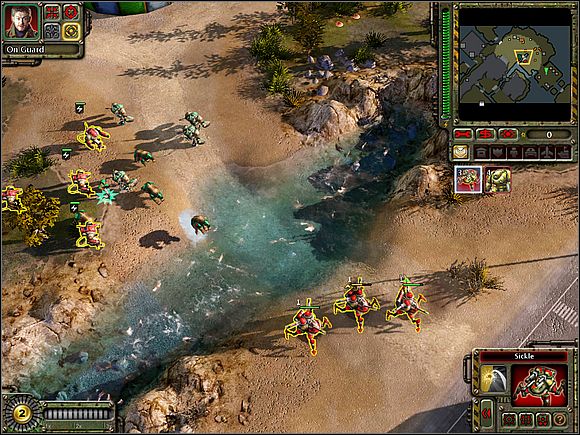
On the second edge you will be attacked by the Japanese infantry. Sickle vehicle was designed to the fight against units of this type, so you will manage with opponents without any problems.
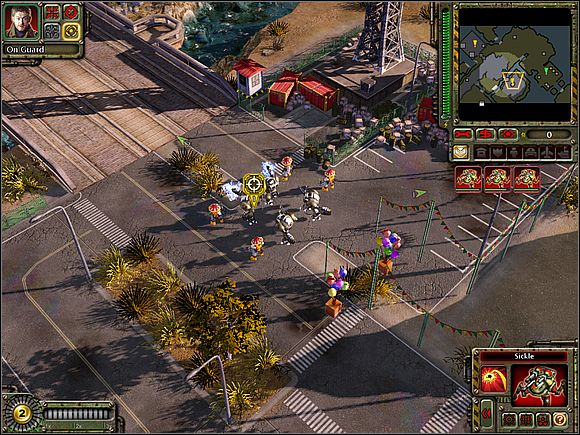
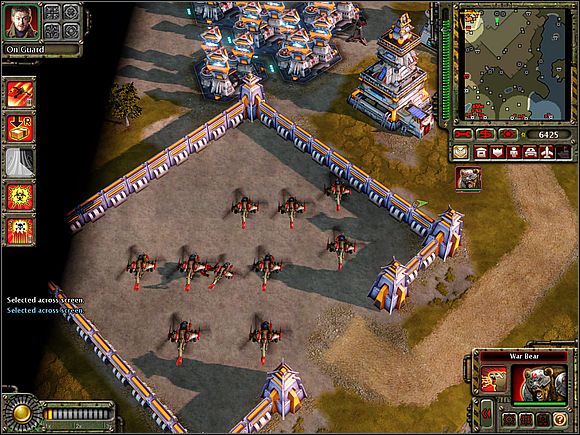
Move through the footpath marked on the map above. You will come across on next infantry (four). Liquidating them will cause that nearby cages will be left opened, but being in them War Bears [2] will be put at your disposal.
To the north-east from cages with War Bears, there are Japanese soldiers equipped with the armor-piercing weapon. In order to avoid damaging Sickle vehicles, attack enemies with War Bears.
 War Bears are quite good in confrontation with infantry. It's time to use them.
Now, try to complete secondary objectives.
2. Assist the Tesla Troopers;
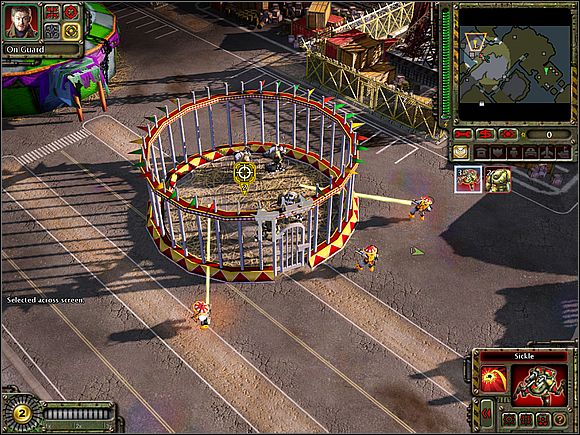
Tesla Troopers equipped with the striking weapon are in a south-east part of the map [3]. Direct your Sickle vehicles at them. Natasha will go behind them and he will take off the enemies wanting to defeat allied soldiers.
 Rescued Tesla Troopers are good in confrontation with vehicles.
Rescued Tesla Troopers will join your forces.
3. Rescue the Tesla Troopers;
Next Tesla Troopers soldiers are in a north part of the map [4] - they were imprisoned by enemies and you should help them.
 Rescued Tesla Troopers will join you as soon as you will free them up.
Tactics is still the same - go up the route leading into the cage with Tesla soldiers, and then let Natasha take off all Japanese men in this area.
1.2. Take Natasha to the K- 45 launcher;
We are coming back to the important objective of this mission. Go to the launcher [1].
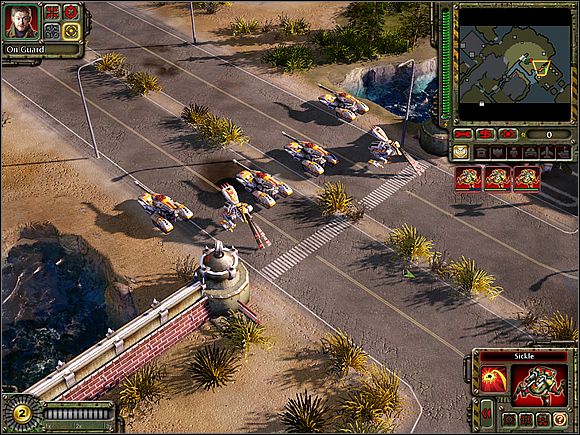
In the north part of the map you will come across two enemy tanks. Liquidate them with Tesla soldiers, and then immediately retreat - because an infantry of the opponent will come. Let Natasha take care of them.
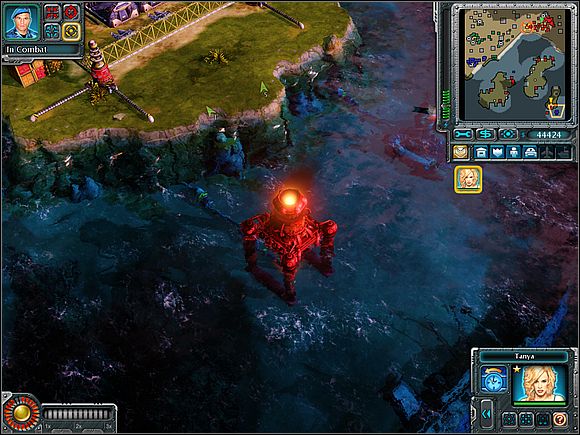
![Before you move farther, stop your armies and order one of Sickle vehicles to leap to the pocket being in a north-western part of the map [9] - Soviets - Krasna-45 - part 2 - Soviets - Command & Conquer: Red Alert 3 - Game Guide and Walkthrough](https://game.lhg100.com/Article/UploadFiles/201512/2015121413555062.jpg)
Before you move farther, stop your armies and order one of Sickle vehicles to leap to the pocket being in a north-western part of the map [9]. There's an experience box. Similar boxes are arranged on fringes of the entire map [10] [11] [12]. Collecting them isn't necessary for completing the mission.
It is time to come back to the accomplishment of the task. Follow the road outlined on the map above. Sickle units are able to jump over the small river of course. Natasha will sail to the other edge and she will be holding on right by your vehicles.
It's worse with Tesla soldiers and bears. This team must go on about, struggling on the way with tanks of the opponent. However it isn't exceptionally difficult opponent.
A group of vehicles being at entry to the launcher area will be more demanding. Tesla soldiers, Natasha with air strikes and ability to suck of vehicles into the space, will be very much useful in the fight against the enemy.
Right behind the tanks you will find boxes to repair units. If you must, use them. Natasha will approach the launcher automatically you enter complex area.
4. Eliminate soldiers of the Empire hiding themselves in tents.
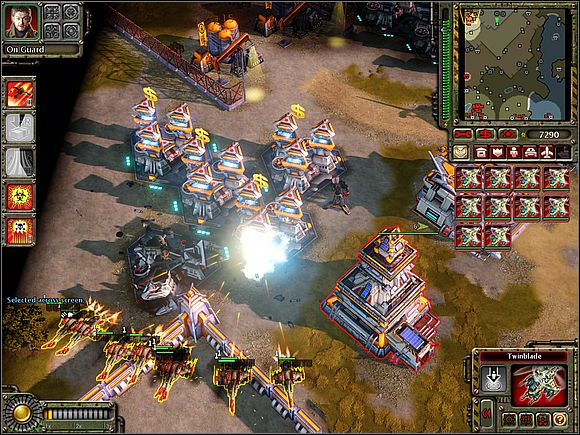
An orbital airdrop will become available. Open the power menu and enable this weapon.
 Orbital Drop is the one of the most important powers of the Red Army.
All hostile vehicles suck in to the space, it is possible to knock them off into the any place on the map. The falling tanks can destroy other hostile units! Use this fact for destroying all enemy forces in this area [5] [6] [7] [8].
You can be stopped by a few tanks. Destroy 2-3 vehicles, to unblock the access to the all powers, then suck them in to the space. However you can let Natasha destroy them.
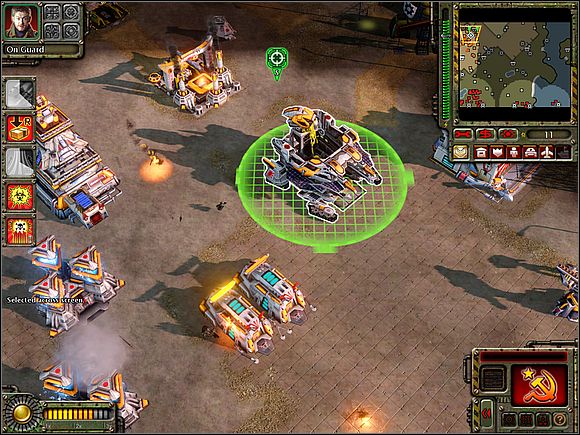
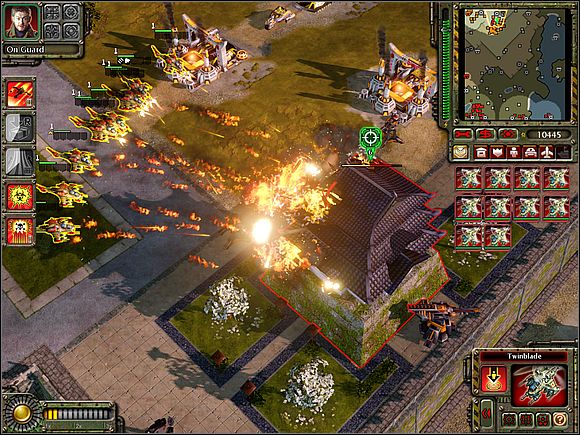
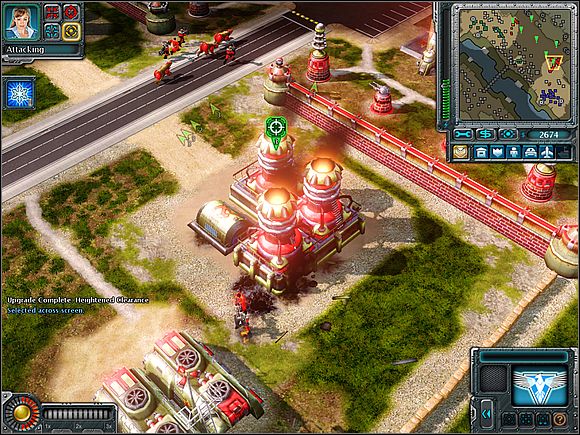
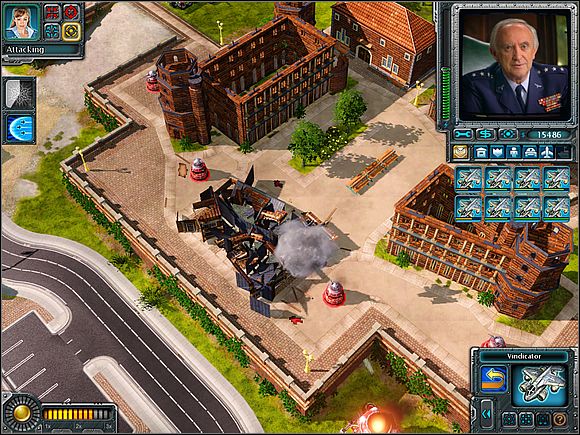
![A CY is the one of the enemy buildings [7] - Soviets - Krasna-45 - part 3 - Soviets - Command & Conquer: Red Alert 3 - Game Guide and Walkthrough](https://game.lhg100.com/Article/UploadFiles/201512/2015121413555147.jpg)
A CY is the one of the enemy buildings [7]. Prepare to the fact that the under fire building can transform to MCV and roll away. The best choice is to let Natasha call the air strike.
The last target is not the building but Japanese - Yuriko Omega [8].
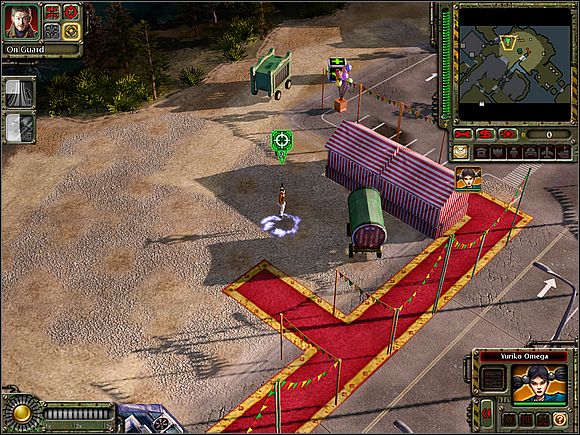
When you are being close to her, bodyguards will appear (soldiers of the Empire). Natasha will take care of these soldiers, and your Sickle units should at that time finish Yuriko. Her death will finish the mission with the success.
1. Island occupied by enemy;
2. Imperial Naval Base, 2 Dreadnought ships to capture;
3. Imperial Scout Base;
4. Japanese generators;
5., 7. Imperial Naval Base;
6. Engineer need to be rescue and barracks;
8. Imperial Military Admin.
1. Clear the Island of Enemy Forces;
2. Construct a Barracks and Naval Yard;
3. Set Up Base Defenses;
4. Destroy the Imperial Scout Base;
5. Destroy the Generators;
6. Destroy the Imperial Naval Base;
7. Destroy the Imperial Military Admin.
1. Clear the Island of Enemy Forces;
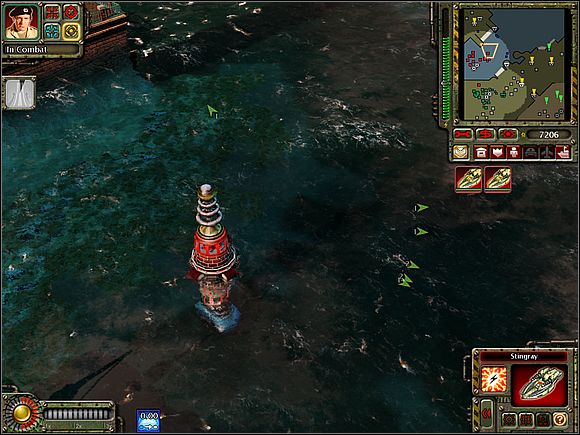
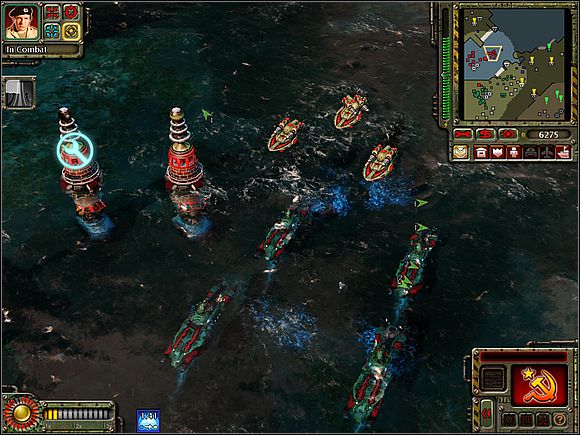
Mission will start with three Bullfrog vehicles. After destruction of the first flying vehicles, command each Bullfrog to fire infantry to the nearby mainland [1].
Zhan, the commander assisting you in this mission will do the same. Use your infantry to eliminate several nearby enemy units. As soon as possible drive your Bullfrogs onto the island. Their ability to combat against flying units will very useful in a moment.
Destroy also standing nearby power plants - without them, the enemy towers will not work. So destroy them too. In the meantime, you can be attacked by the enemy flying vehicles. Your Bullfrogs should give them advice.
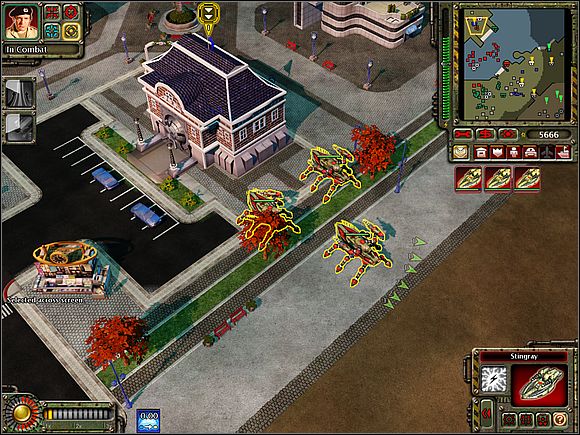
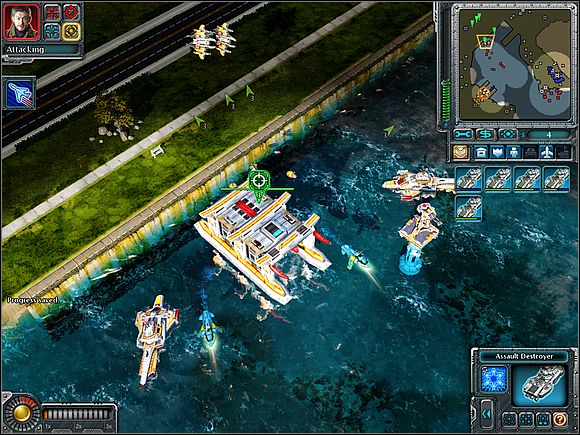
Following the destruction of the towers, finish remaining enemy forces in this area - all the buildings, the whole infantry, etc. Soon, you will get Stingray boats support. They are able to navigate both on the water, and when the land. Use them to clean up the island.
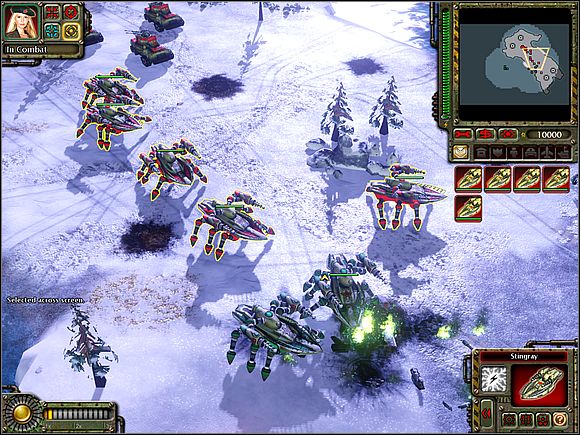 At the beginning, Stingray boats can be very useful but with Progress of the game, you will see their defects.
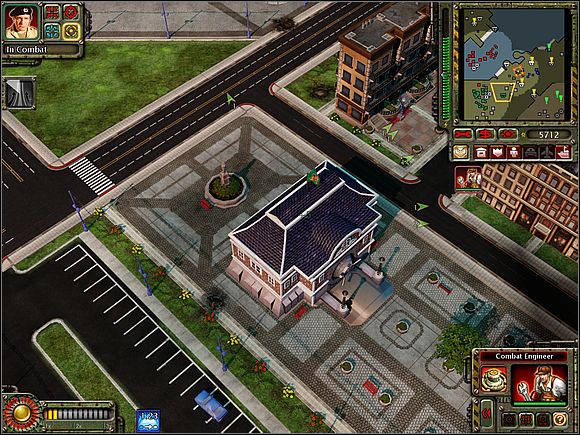
2. Construct a Barracks and Naval Yard;;
After securing the island you will get MCV. Unpack it somewhere on the island or nearby (I set it up in the southern beach - look at the picture below). Then build an Reactor and the Ore refinery (it doesn't matter how many will you build. If you do not reserve any ore, your ally will do it, you are dividing your incomings in the half), then barracks and a water factory (Naval Yard).
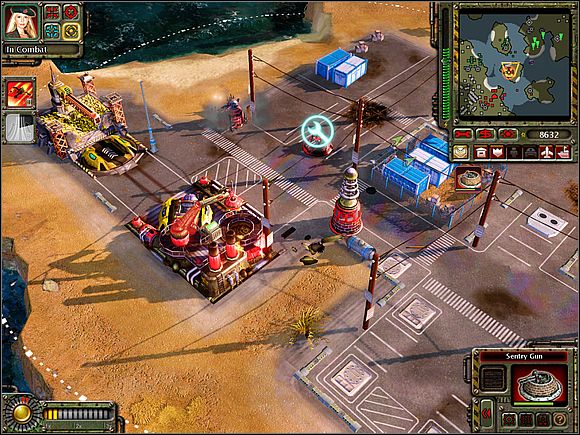
3. Set Up Base Defenses;
You will pass this bonus target, if you will set up Sentry Gun and Flak Cannon.
4. Destroy the Imperial Scout Base;
Southern part of the coast is occupied Imperial Scout Base. To destroy it, you will use Stingray and assisting them Bullfrog vehicles (anti air defense is always included in the fight against Japan).
In yours Naval Base produce a few additional Stingrays (6-8), then let 3-4 Bullfrogs to join them.
This team can move against the enemy. Start your attack by exploring the whole coast and find water factories [2]. Try to destroy as many enemy equipment as possible. Support yourself with the powers.
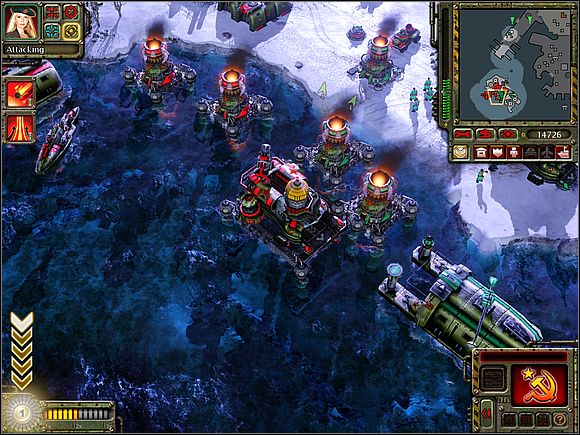
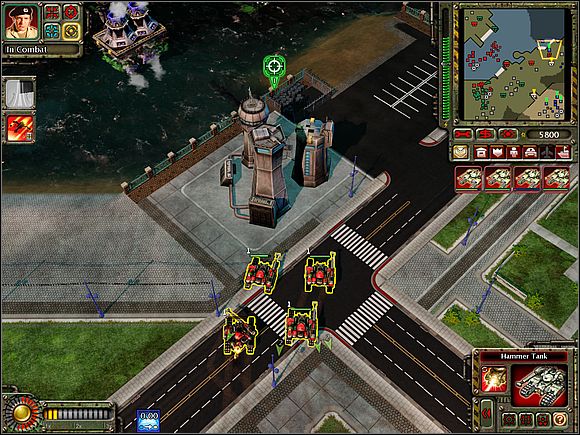
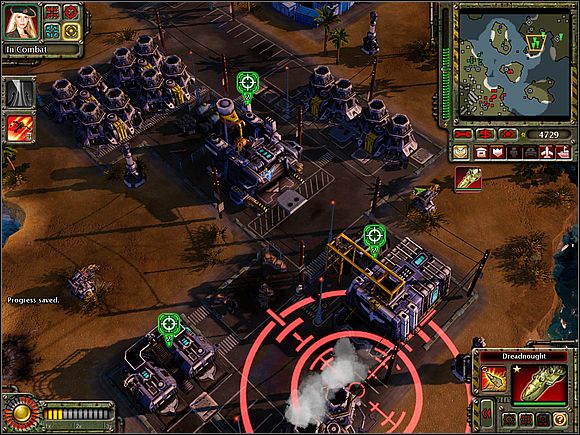
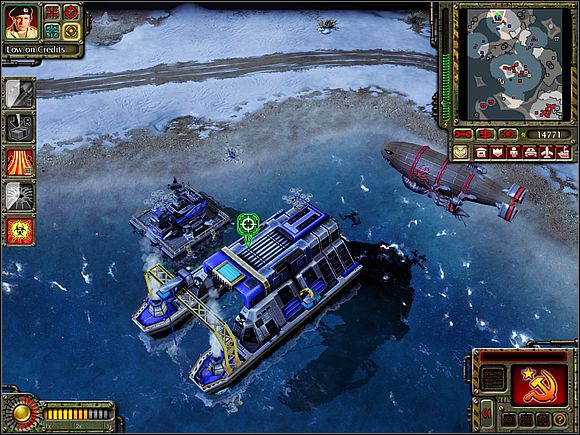
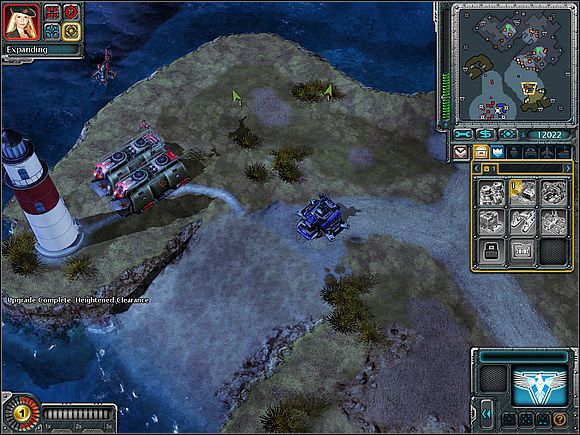
![After cleaning the Japanese coast, you will get two Dreadnought ships [2] - Soviets - Vladivostok - part 2 - Soviets - Command & Conquer: Red Alert 3 - Game Guide and Walkthrough](https://game.lhg100.com/Article/UploadFiles/201512/2015121413555381.jpg)
After cleaning the Japanese coast, you will get two Dreadnought ships [2]. Their missiles have a very large extent. Use them to destroy enemy buildings located in inland areas [3]. Watch these machines - the will a lot help you to perform this mission.
5. Destroy the Generators;
On the south to the Scout Base you will find three Empire power stations [4]. For Dreadnought ships is a peace of cake.

6. Destroy the Imperial Naval Base;
The final objective of this mission is Japanese water base. First, address your guns at water buildings [5] in the north-western part of the map.
Prepare to fight a few Stingray's (8-10), about 2 Bullfrogs and some Dreadnoughts. Send smaller units straight into the battlefield - they should divert enemy's attention off your biggest ships. Order Dreadnoughts to fire enemy buildings. Retreat to your base after destroying them.
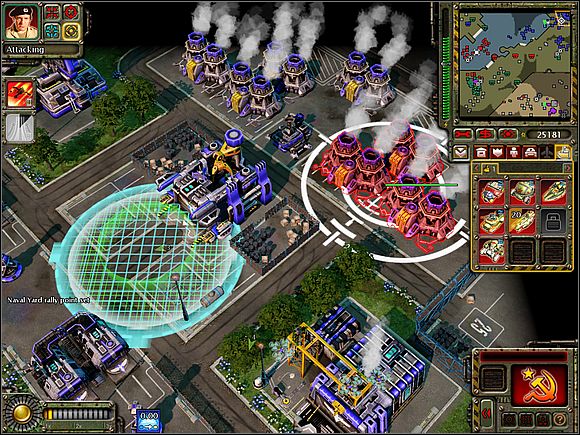
 Dreadnoughts will help you to destroy Japanese installations.
The next stage of the destruction of the base do the same - prepare some Bullfrogs and Stingray's, and guide them to the north-eastern part of the map. Keep them on the front in the case your enemy want to get in front of you. Use dreadnoughts to kill everything on and around the pier located in the northern part of the map.
Cleaning it gives you access to an engineer imprisoned at the pier [6]. Use it to take a nearby barracks. Now you can train a few Flak Troopers, who will help you in the fight against the Japan.
Use the boats to destroy the protection of the bay, which is located in the north-eastern corner of the map. When you will destroy all the Japan towers, reach the bay and destroy Empire buildings [7].
7. Destroy the Imperial Military Admin.
The last objective is located in north-eastern corner of the map [8]. Unfortunately, it is already beyond of the Dreadnoughts reach (you can destroy defense installations at the entrance of the enemy's camp). You have to organize an attack against this land. Flak Troopers (about 10) and Stingray (about 15-20) should go to the enemy base to complete the task.
When you will damage the administration building, it will activate force field, and additional enemy units will appear on the map. You have to wait a while to deactivation the sheet. In the meantime, finish attacking you hostile units. Now, you can destroy the target. Mission completed.
1. Allied base;
2., 3., 4., 5., 6., 7. Swiss Banks;
8. Allied Supply Port;
9. Allied Army Base;
10. Krukov's HQ;
11. Water buildings of the allied HQ;
12. Allied HQ buildings.
Green districts means observation towers.
1. Capture All Six Swiss Banks;
2. Destroy the Allied Supply Port;
3. Destroy the Allied Army Base;
4. Destroy the Allied Command HQ;
5. General Krukov's HQ Must Survive.
You will get pretty big base. Start to improve it, and set yours objectives on the other plan.
Start your fun with building barracks (you can place the structures of buildings near your ally. And he spread his base on the ground in south-western part of the map) and train engineer. Also build Battle Lab and create defense system. Note that in this mission, there are Tesla available.
Set 2-3 Tesla, build a few Stingray's to protect and create anti-defense (3-4 Bullforg's should be fine). When the Allies use Chronosphere to transport its Aircraft Carrier near your base, you will get four Akula boats.

Use them to destroy enemy's aircraft carriers, and then send them in the near of Tesla and Stingray's. 4 Akula, 3-4 Tesla's, 5-6 Stingray's and 2 Bullfrogs it's all you need to protect the base.
1. Capture All Six Swiss Banks;
Now it is time to take the appropriate task. Start with a secondary objective, which is to capture banks in Geneva. The first is located near the base of your ally [1]. If you already build barracks at the base, train engineer and bring it into the building [2] (unless your ally is able to do it earlier).
Next banks in the southern part of the map are protecting by a hostile units. Although your ally will be fought with them constantly, you have to help him somehow. Build War Factory near barracks.
At a time when the factory will be built, you can take care on the bank located in the north [3]. Create a group of Stingray's (3-4 should be fine) and train one engineer. Take your boats off the water and delete a few Allies. Then command the engineer to enter the building.
Come back to the situation on the southern coast. You already have a barracks and War factory. Post a factory to produce several types of Hammer tanks and two Sickle vehicles. Don't forget to use powers!
Engineers should capture banks [4] [5] [6] without any problems when they are under Tanks protection.
![The problem you should worry about is a bank located on the south [7] - Soviets - Geneva - part 2 - Soviets - Command & Conquer: Red Alert 3 - Game Guide and Walkthrough](https://game.lhg100.com/Article/UploadFiles/201512/2015121413555507.jpg)
The problem you should worry about is a bank located on the south [7]. It is guarded by the allies defense system. Try to use Orbital Drop on those systems. When any structure will no longer protect the bank, send there your tanks and one engineer.

2. Destroy the Allied Supply Port;
During the takeover of banks on the southern coast to reach the port supply the Allies. Destroy the building standing there [8]. That is all you need to do.
3. Destroy the Allied Army Base;
Another goal is a military base in south-east corner of the map [9]. Accordingly a large number of tanks (and Natasha) can handle with this without any problem. Just concentrate on their production and instant sending them to the battlefield.

4. Destroy the Allied Command HQ;
5. General Krukov's HQ Must Survive.
Following the destruction of both allied bases, battlefield will increase and General Krukov will join the game. His base [10] is located in south-east corner of the map. One of the goals is to make sure that it can't be destroyed. However, both Krukov & commander assisting you in this mission are quite good in kicking Allied assess, so you shouldn't worry about Krukov capitulation.
And one more thing - Krukow will be capturing banks for their own needs, stealing your money. You must somehow cope without them.
Produce several Akula submarines and move them to the enemy's water buildings [11] (6-8 ships should be fine). Support yourself with Orbital Drop - it's a great weapon against hostile power stations.
The enemy will teleport their aircraft carriers by using Chronosphere. They are not demanding opponents. Use your ships to destroy all the water buildings. You need to destroy remaining buildings on the land [12].
This may be a hard nut to crack, since the Allies have developed defense systems. Fortunately, you have V4 missile launchers. Create a few vehicles at the War factory (and a few dozen or tanks) and fire the enemy base. You can also use Orbital Drop to destroy the power station - they are arranged exactly in the corner of the map.
Note also that in the middle of a hostile base specific marker will appear. You can use it to order your allies to fire this area with V4 rockets. Whatever you will use against enemies, mission will be accomplished as soon as you destroy the base.
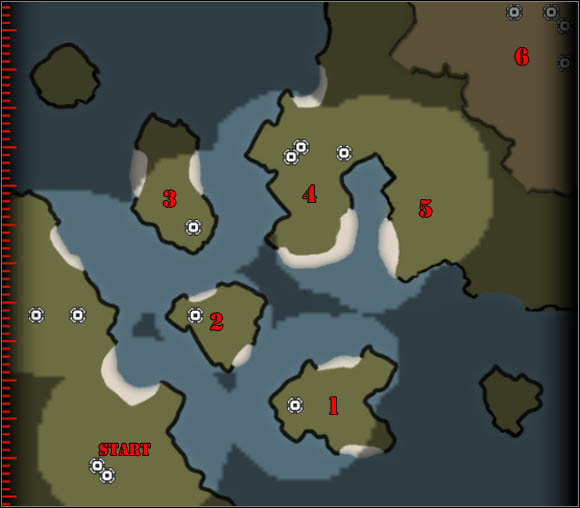
1. South island, Tech inhibitor;
2. Middle island;
3. North Island;
4. Allied Naval Base;
5. Science Facility;
6. Allied main base.
1. Destroy the Tech Inhibitor;
2. Expand to the Islands;
3. Destroy the Allied Naval Base;
4. Capture the Allied Science Facility;
5. Hold the Science Facility.
1. Destroy the Tech Inhibitor;
The first objective is to capture nearby islands with Sputnik's or MCV, but is better to destroy Tech Inhibitor [1] firstly, which is located in south-eastern part of the map.
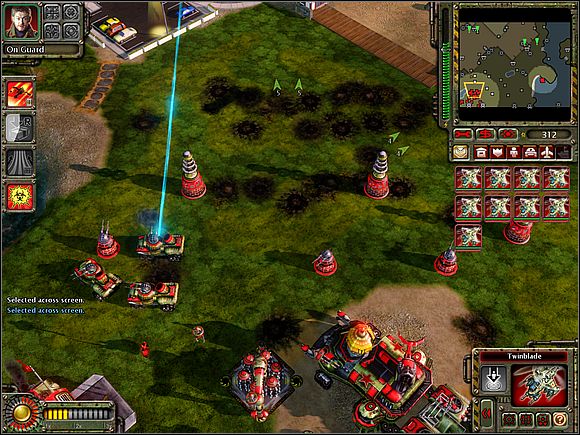
Note that you have an airport. Produce 5-6 Twinblade units, and then attack inhibitor from the south. Retreat as soon as you complete objective.
2. Expand to the Islands;
Now you need to take control over those nearby islands [2] [3].
Now address the main objective is to gain control over nearby islands [2] [3]. Note that there are tags on them, which you can command your ally to attack islands with infantry. Take advantage of this facility.
Destruction inhibitor unlocks access to additional things. Build Battle Lab - thanks to it you may be able to manufacture Dreadnoughts.
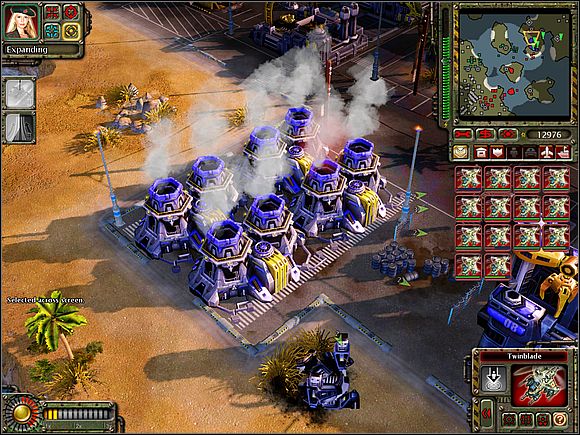
Build a ship of this type and create his guard (10 Twinblades). One more Sputnik, to build a small base on the island - with this equipment you are able to attack.
Also, remember to collect produced Twinblades near a water factory (as in the picture below). This solution will be defend your buildings against the Allies Dolphins. When you need to move these units to an attack, replace them with Tesla.
Several enemy hovercrafts can enter your base. To defend yourself against them, set on the beach at least one Sentry Gun.
Your ally will take the island in the north. You can take the center and south. You must necessarily equip them to the anti air protection - hostile aircraft carriers only waiting on uncovered ore refineries.
3. Destroy the Allied Naval Base;
In the north-eastern part of the map there is the naval base [4] of your enemy. Destroy it using mentioned Dreadnoughts. To fight against the enemy water units use your Twinblade's or Akula submarine boats.
You can also use Orbital Drop. My advice is to strike at the power stations. Their large gatherings can be found on the shore. Expose them by sending one suicide Twinblade as a scout.
4. Capture the Allied Science Facility.
The final objective of this task is to capture (using the engineer) science facility of the allied forces [5]. Train one engineer and move it into the place of the former naval base with one of the Twinblades.
Command one of the Dreadnoughts to destroy one of the towers that surround the center of defense. When these are history, save the game progress, and then capture the facility.
4. Hold the Science Facility.
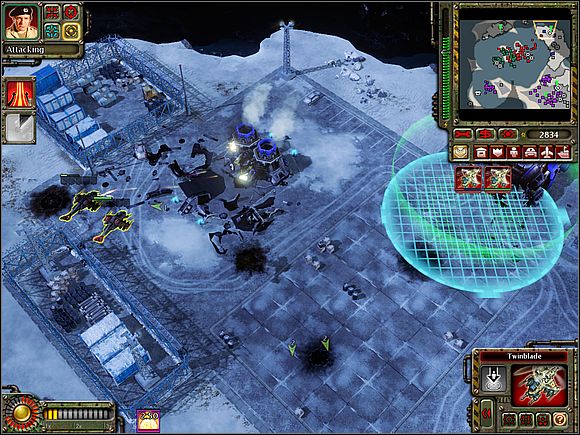
You must now defend the building occupied for seven minutes. You will get MiG fighters as a support. Produce 4 airplanes, and then concentrate on the Twinblade production. Need to have dozens of them. Set group point near the airport in science - after production, they will get automatically get into the point.
You may also build one Sputnik, unpack him near the center, and then raise several defense structures. This is particularly useful at the higher levels of difficulty - it is the best to build a wall around the center and then put up some of Tesla and Sentry Guns. This has to be done before the center interception.

1., 2. Allied Forward Bases;
3. Krukov base;
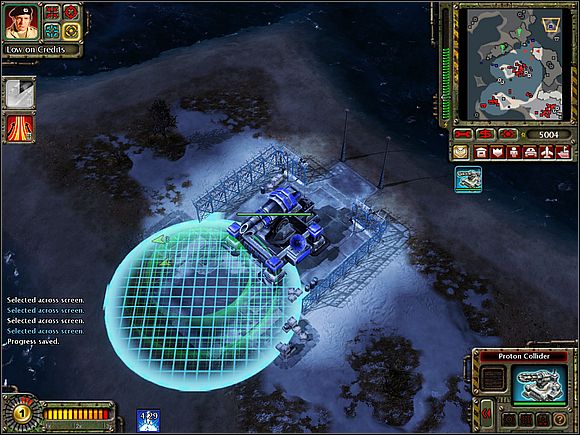
4. Proton Collider;
5. Von Esling Airbase.
Especially important oil pipelines are marked with green color.
The main lines of attack an enemy are marked with blue color.
1. Destroy Both Allied Forward Bases;
2. Eliminate Krukov;
3. Destroy the Allied Strategic Airbase.
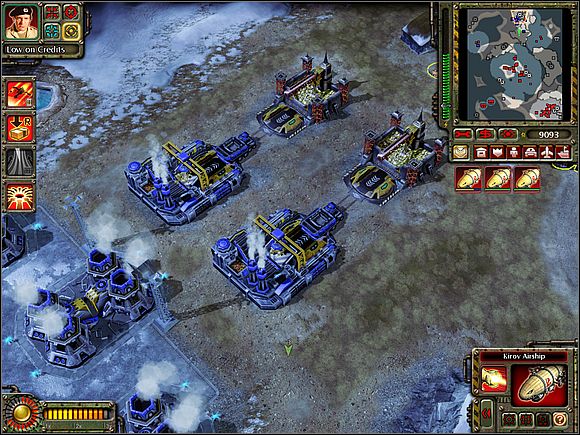
Before proceeding to execute the tasks you need to fortify and expand the base. Place a Crusher Crane and set a few Tesla coils and Flak Cannons on the outskirts of the base. Build the Naval factory and barracks.
Produce Bullfrog and 2 engineers. Take care of the oil pipelines marked on green on the map above.
Thanks to oil pipelines you will ensure enough money to put Battle Lab and finance the construction of a powerful army. In the meantime, you General Krukow will join [3] you. There will be additional oil pipelines, which you can take care ... only if you have properly divided attention and sufficient funds to train engineers.
1. Destroy Both Allied Forward Bases;
Tell your ally to focus on one of the bases (I recommend [2]). Thanks to this everyone will get one base per head.
Although at the beginning, your account was full of money, now you can have some problems finding funds. Slowly, without haste, create a Dreadnought ship, some Bullforgs and several Akula boats for protection.
Command Dreadnought to destroy enemy buildings [1], paying special attention to Allies airports. Deprivation of their air forces greatly facilitate your mission.
Following the destruction of the most buildings one the posts, your recent ally, General Krukow, will become your enemy. Destroy the post, and then start production of Kirov airships and Dreadnoughts.
Your ally should disable second Allies post. If he didn't, destroy the Allies AFTER defeating Krukov.
2. Eliminate Krukov;
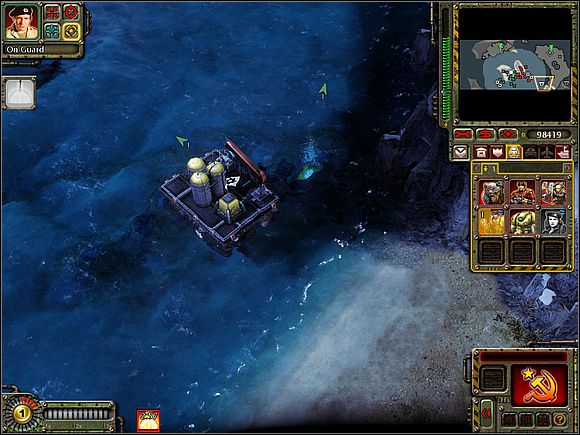
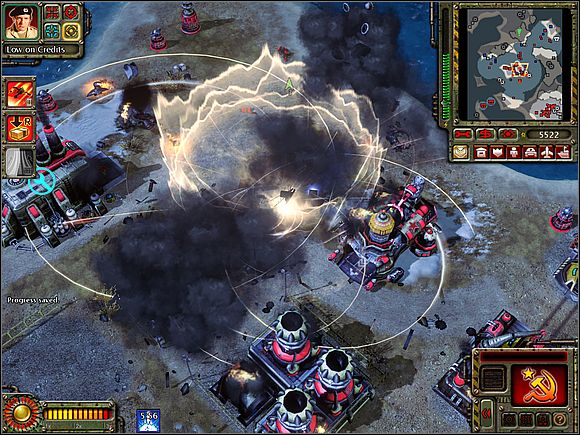
Built Dreadnoughts (with the Bullfrogs as a guard) and Kirovs sends to the Krukov's base. Also keep in mind to using Magnetic Satellite and Orbital Drop.
You also need to get yourself good defenses in the south of your island. Krukov will be happy to attack you their Kirov's (see the map above). A few Dreadnought's also may surprise you.
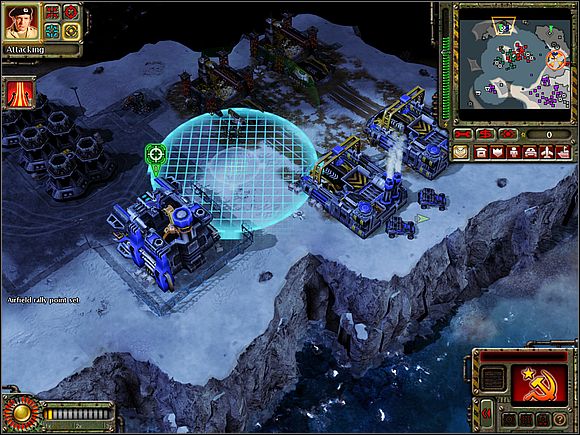
Try to first destroy the Krukov's bunker, and then tear down its other installations.
 Bunker taps is one of the most important buildings in his base.
Following the destruction of all major Krukov buildings (try not to demolish Iron Curtain!), His army will be on your side. Send Dreadnoughts to another Allies post, if it still exists.
3. Destroy the Allied Strategic Airbase;
The battlefield will be soon increased, and station forces will join in Von Esling [5]. It is a air base, so be prepared for air strikes. After eliminating Krukov, you can sell the embankments in the south of the island and build some those in the north.
What's more, try to avoid a situation in which the Allies can fire up your Proton Collider [4].
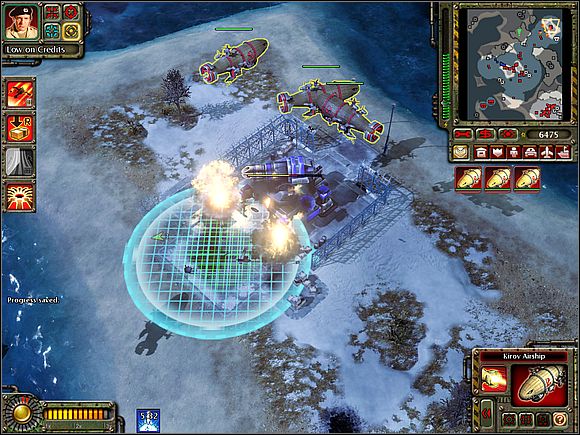
Send 3 Kirovs to this building. With Krukov's base, production of these troops shouldn't be a big problem.
If you fail to destroy the collider before it is used, your base will suffer heavily. However, this should not determine the success of the mission.
 Proton collider is an Allied super-weapon. It can destroy every building in one shot, including CY and other super-weapons.
When Kirovs destroy the collider, direct them to the west and start to destroy Allies base [5].
At the same time organize an attack from the sea. You probably know everything about Dreadnoughts strength.
 Dreadnoughts are excellent to destroy the bases.
With Kirovs and Dreadnoughts on the board you will definitely win. Destroy the entire enemy base. You can also test the new powers. Until now, you should unlock a lot of them.
Defeating Allies will complete the mission.
1. Your base;
2. Ally base;
3. Shinzo's base;
4. Naomi's base;
5. Kenji's base;
6., 7. Generators;
8. Recruit and the War bear;
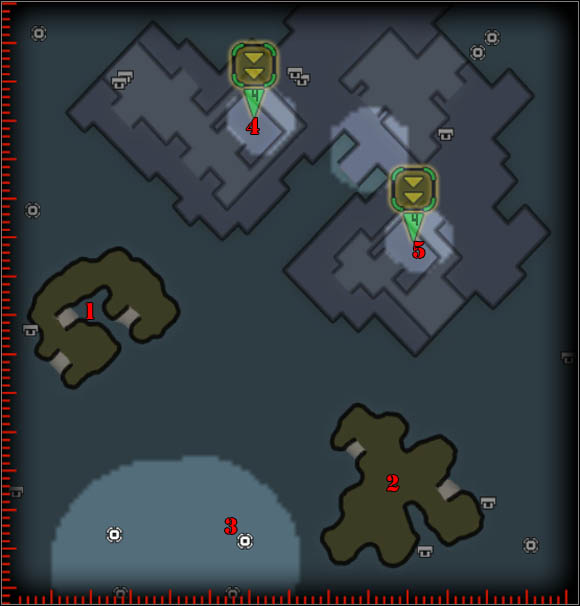
9. Emperor palace.
The red line on the first map will guide you to Emperor
The green line on the first map will guide you to secondary objective.
1. Assassinate the Emperor;
2. Turn the guards attention away;
3. Destroy Shinzo's Base;
4. Destroy Naomi's Base;
5. Destroy Kenji's Base;
6. Destroy the Generators;
7. Rescue the Captured Conscript and War Bear;
8. Destroy the Emperor's Palace;
9. Kill the Emperor.
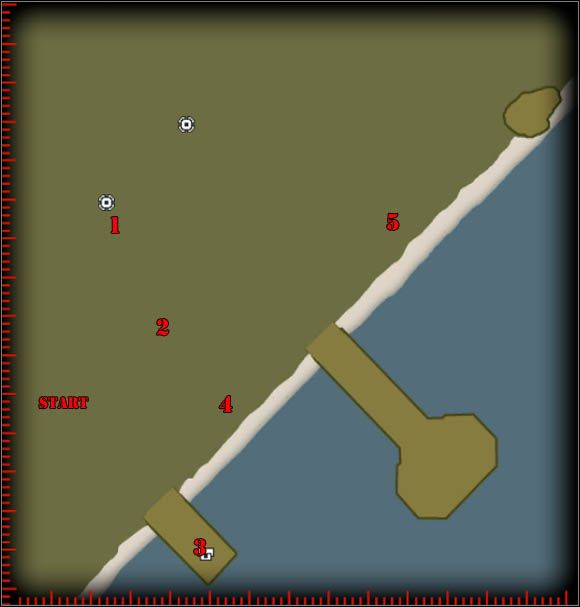
1.1. Assassinate the Emperor;
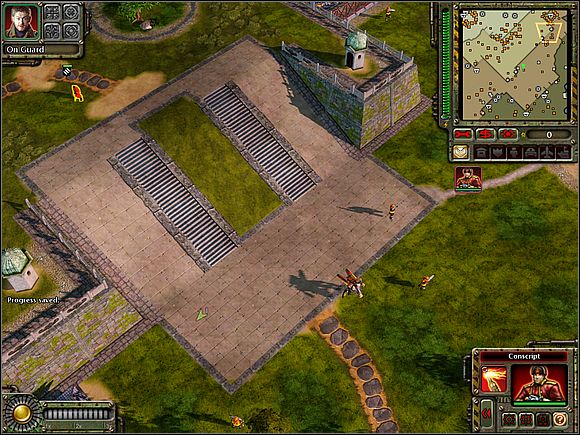
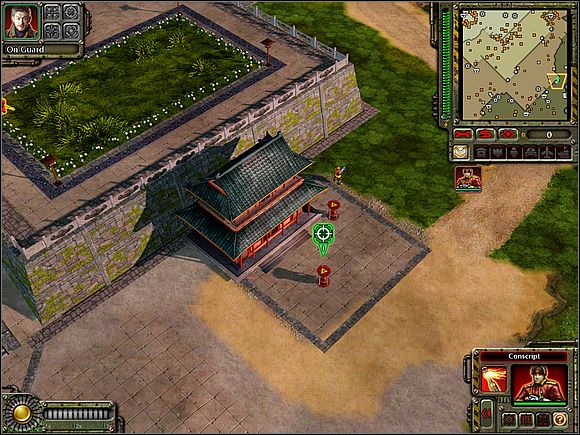
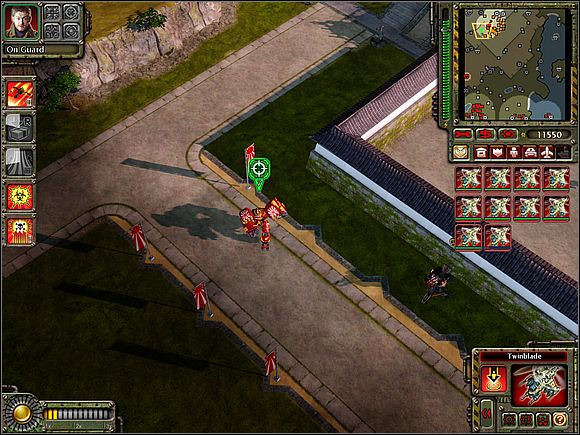
This will be a long mission, and the beginning will be especially impolitely. You have only one War bear and one recruit. You can see the red route on map no.1 but above you will also find detailed description.
Send your units in the area of stairs on the south-east from the place of start.
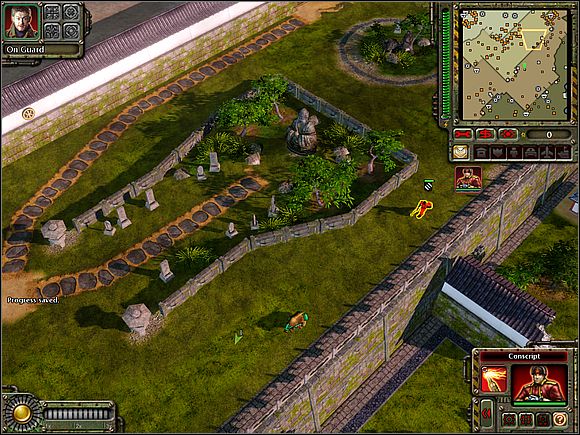
Too many troops here. Move to the south west, along the gardens. Hang on the wall all the time!
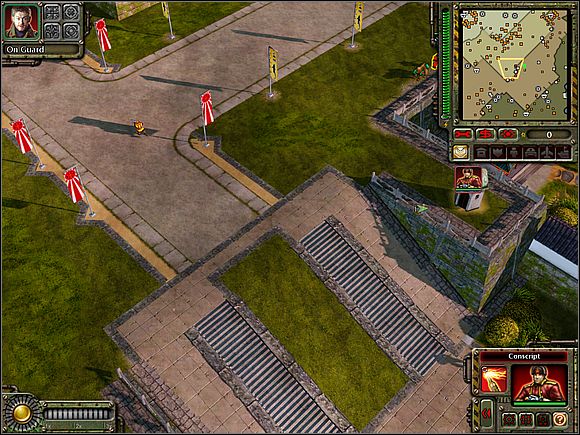
Get to the next stairs. Wait until the soldiers protecting the place will gone. When the site will be clean, go down the stairs.
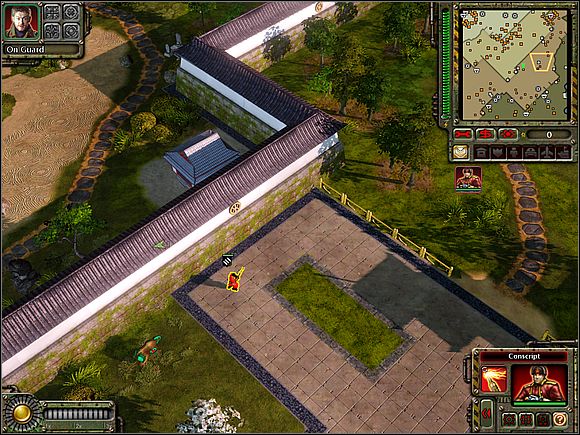
The Emperor is sitting in his garden. But he is surrounded by a high wall. Move it along.
At some point, you will get information about the fact that it will be necessary distract the emperor guards.
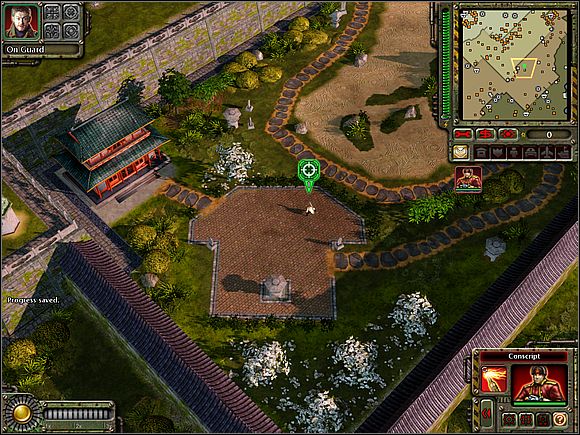
2. Distract the guards ;
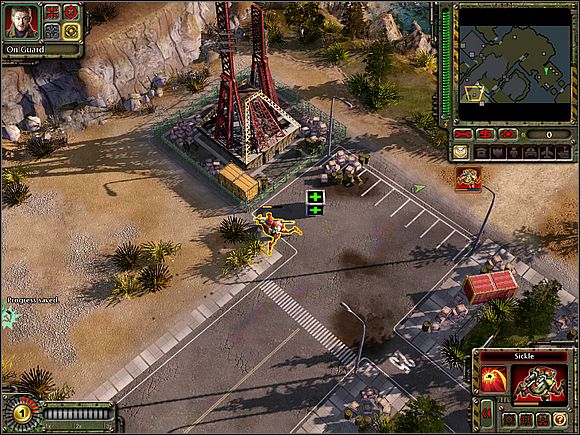
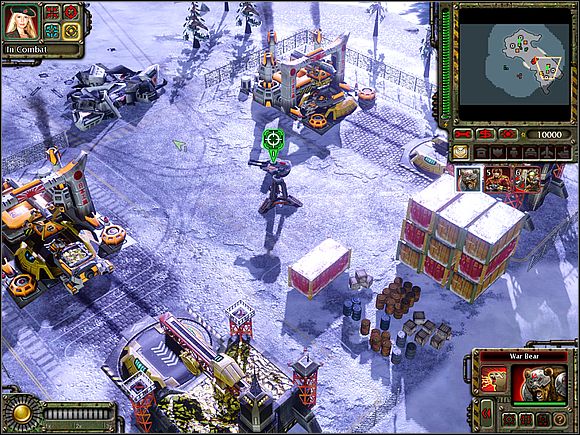
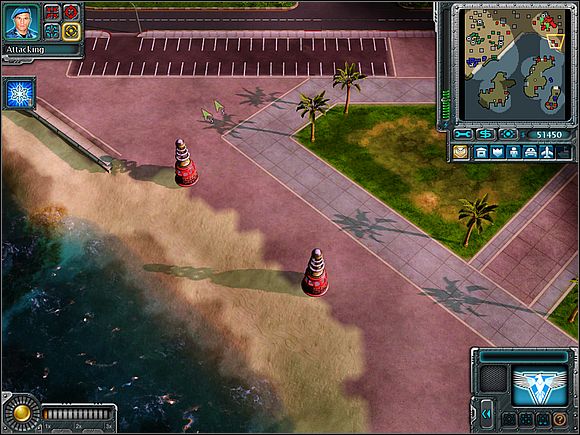
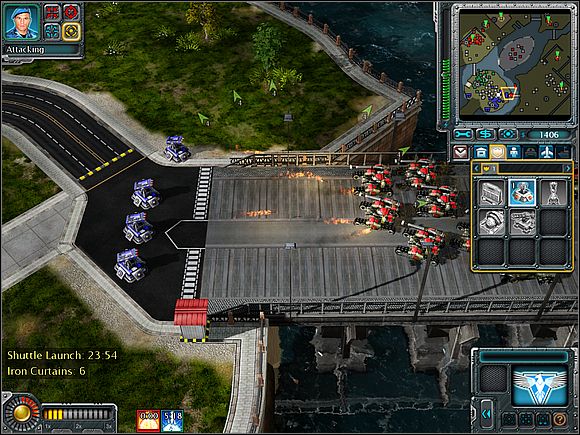
Move to the south east, according to the green line on the map no 1. Walk to the red barrels with fuel and blow them up. Japanese standing next to barrels will die, and the Emperor guards will leave his master, allowing you to kill him.
1.2. Kill the Emperor;
The entrance to the Emperors garden is an ordinary hole in the wall, on the north east. Get to the target and do the job.
3. Destroy Shinzo's Base;
This is just the beginning of the fight at the top of Mt. Fuji. You will get MCV [1] and an order to destroy enemy's base [3] in this area. Firstly, you need to rise your own.
Puts next structures, do not forget about anti air defense. Train two engineers and send them to capture two oil pipelines located near both your base and that belonging to ally [2].
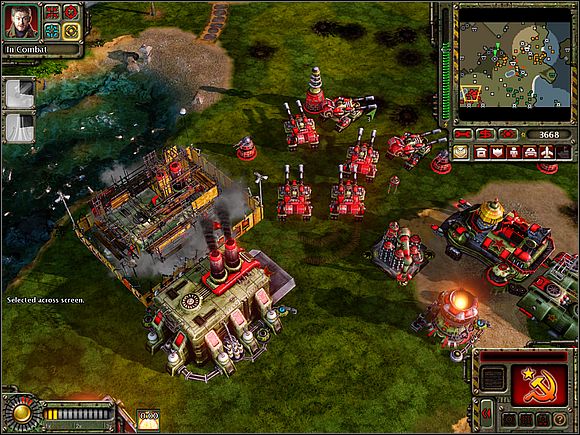
 Tesla, anti air guns and a few tanks based defense are extremely effective.
You are far from the water, so forget to build navy. Build two War factories and a Battle Lab. In one of the factories produce Apocalypse tanks and other Bullfrog's (in the 5:1 or 5:2 relationship). It will be good to send your ally a few Flak Troopers to defend the base.
During this construction, order your ally to focus on Naomi's base [4]. To do it, it must be uncovered. If not, send there one, suicide Twinblade. After uncover the area, command to attack.
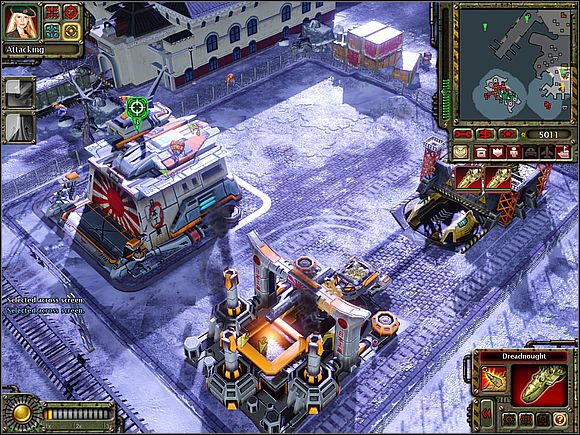
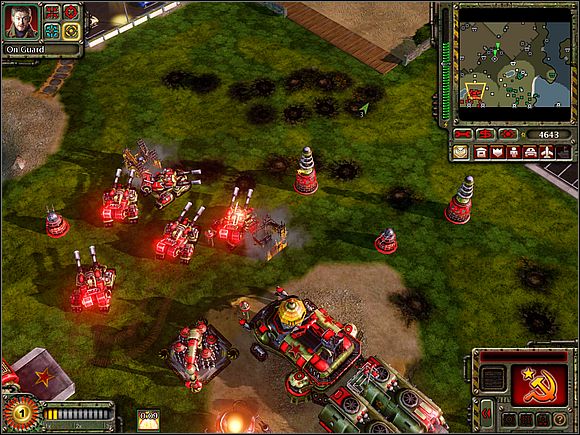
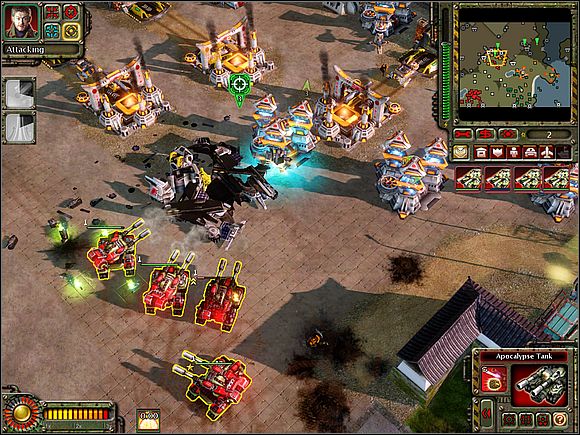
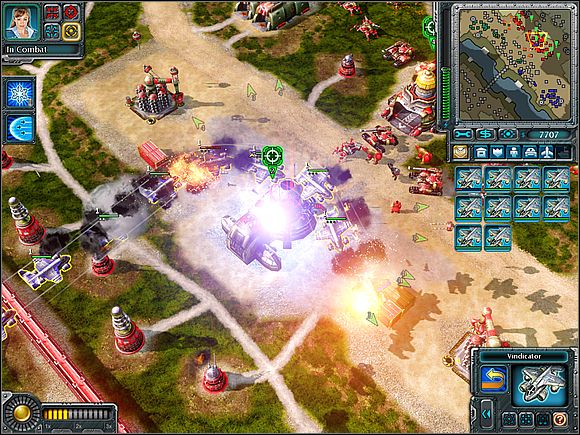
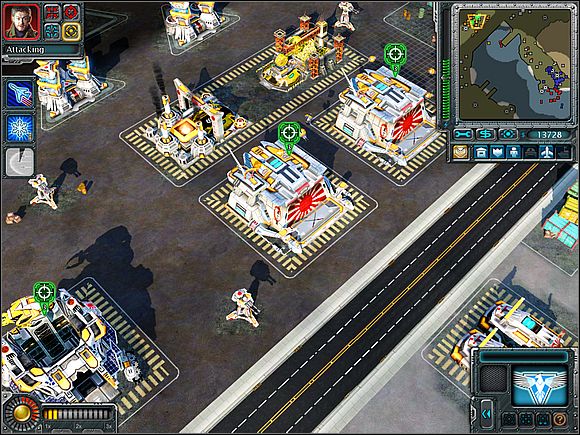
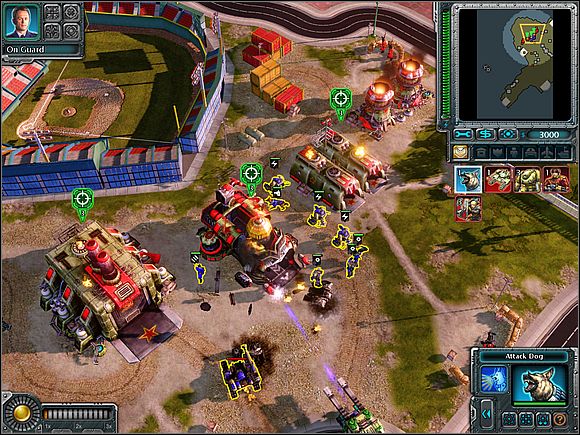
![With 10 tanks and 3 Bullfrogs, you can attack Shinzo's base [3] - Soviets - Mt. Fuji - part 3 - Soviets - Command & Conquer: Red Alert 3 - Game Guide and Walkthrough](https://game.lhg100.com/Article/UploadFiles/201512/2015121413560268.jpg)
With 10 tanks and 3 Bullfrogs, you can attack Shinzo's base [3]. Do not interrupt the production of the machinery. If your power does not cope with the base destruction, prepare another group. Kirov's attack is useless if the Yuriko Omega units will show up.
4. Destroy Naomi's Base;
Naomi's base [4] mainly produces aircraft and watercraft units. If your ally was not able to destroy it, begin Twinblade & Kirov construction. Attack the enemy buildings with them. Commander Naomi is rather not training Yuriko Omega, so Kirovs don't need to be download to the ground.
Cancel construction of the tanks (you can even sell one of the War factories). You need at least Tesla and anti air guns. Watch your back as often as possible - it must be in very good shape.
Fights may be long if your ally will be in bad shape. Get ready, that destruction of the Naomi's base can take a long time.
5 Destroy Kenji's Base;
Commander Kenji has a camp in the north-west corner of the map [5]. Again, attack him with air units. Fly close to the edge of the screen and you will without a problem reach its power stations and CY.
 Kenji's base has a weak anti air protection.
Prepare some air attacks to destroy the base.
6. Destroy the Generators;
On the north side of the map there are generators [6] [7]. You can destroy them (use Twinblade units, in a groups of at least 7 machines) flying to them over the Naomi's land. In this option you will avoid hostile anti air protection. What's more, generators stand so close together, so you can use Orbital Drop to destroy many buildings at one shot.
7. Rescue the Captured Conscript and Bear;
Your first two units - recruit and bear - are kept in the north-west corner of the map [8].
No problem - just fly there with one Twinblade and that's all. You do not need to export them from there, to complete the task.
8. Destroy the Emperor's Palace;
Now is time once to take care of Japanese Emperor for the last time. First, make sure that your opponent FOR SURE will be out of electricity. Destroy other power stations nearby the place of recruit and bear.
Now is time once to take care of Japanese Emperor for the last time. First, make sure that your opponent FOR SURE will be out of electricity. Destroy other power stations nearby the place of recruit and bear.
Best choice, is if you do not use Orbital Drop on them. It is better to wait with this weapon's for better target.
Before you attack, prepare a few Apocalypse tanks. Keep them in the database. Then strike at the palace [9] their Twinblades. Without electricity, his defense system are not working, so building is very weak.
9. Kill the Emperor.
It is not easy to kill him. Emperor hide themselves in mech, and defeating of this machine may be a big problem. Attack him with Twinblades and wait for a moment when Emperor will stop - in this moment you need to hit him by Orbital Drop.
There is a great risk, that orbital Drop may be not enough. What's more, the emperor will start on your base... but there are already waiting Apocalypse tanks :>
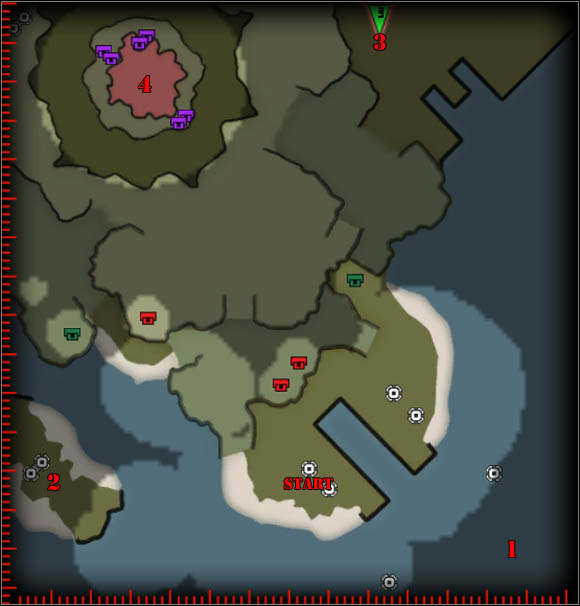
1. Allied navy, The place where Emissary show up;
2. Allied base;
3. Bomb silo;
4. Premier's Volcano Fortress;
1. Make a trap;
2. Destroy the Allied Emissary and his Escort;
3. Stop the Allied Counter-Offensive;
4. Destroy the Vacuum Imploder Before It Fires;
5. Destroy the Premier's Volcano Fortress.
1. Make a trap;
You have five minutes to build your base and produce a large number of units. Place a 2-3 ore refineries and military barracks. You also need to decide - which type of units you will focus on: navy or air?
Train engineers and send them to capture crude oil in the north. Select Magnetic Satellite - sucked vehicles will be helpful soon.

If you want to play as navy, you will need Super-reactor and Battle Lab that would produce the best available units - Akula boats and Dreadnoughts. However, you can put off advanced structures for a while and focus on the Twinblades production. The choice is yours.
Allied emissary will appear on the map after five minutes. Do not attack him; wait for a clear command.
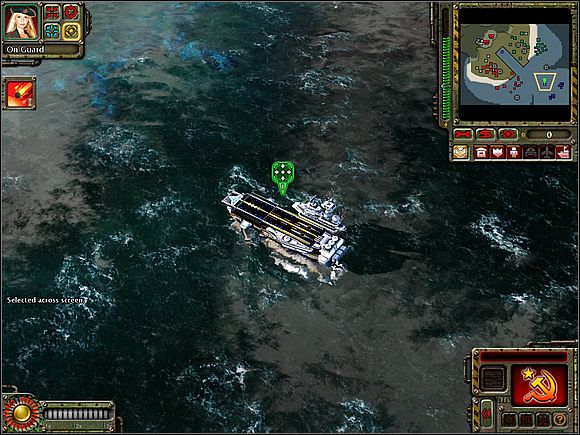 Emissary will show up on the board of aircraft carrier.
2. Destroy the Allied Emissary and his Escort;
When you receive the appropriate command, use Magnetic Satellite, to remove aircraft carrier with emissary on the board.
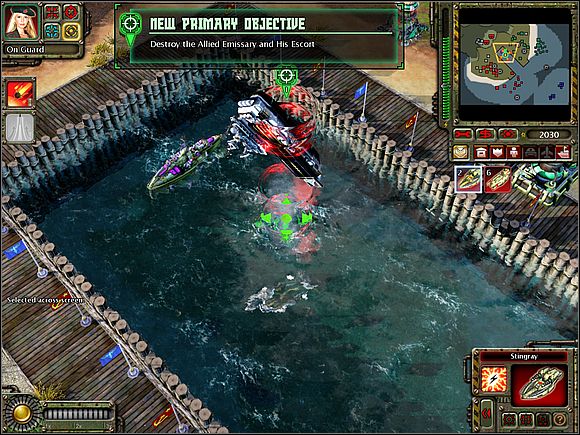
Then send your boats against emissary escort units. Destroy them all.
3. Stop the Allied Counter-Offensive;
The battlefield will increase, and Allies will set up a base on the island in the western part of the map. Train additional engineers to capture the remaining oil reserves are on your own island.
Build Tesla and anti-air guns on the west shore of your island. Certainly you have any submarine boats or helicopters - send them to the Allies destroyed yards.
 Allies base was built so quickly, that it don't have any good protection. It's easy to destroy.
It's better to start production Kirov and Dreadnoughts units. Give them adequate protection against hostile aircrafts (the best are, of course, Bullfrogs), and then send them to the enemy to destroy the base. It is very poorly defended.
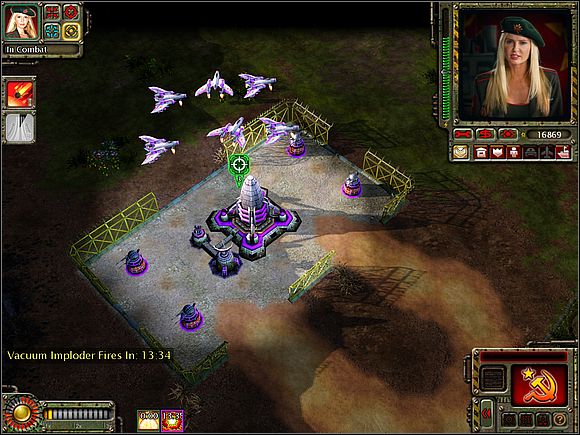
4. Destroy the Vacuum Imploder Before It Fires;
After the cut scene the battlefield once again will increase. You can sell some defense base systems in the west. In exchange, the attitudes of a pair of division p-flight and a few Tesla in the north.
You have 15 minutes to destroy the Russian super-weapon - Imploder vacuum. This is a vacuum bomb, operating similarly to allied Proton Collider.
If the speed of getting money are not quite enough, capture ore deposits on the island, which was Allies area. But there you have to create anti-air defense, to use located there deposits without any problems.
If you destroy Allied with Dreadnoughts, make an escort with Akula boats and Bullfrogs (if you don't have them yet). If you used the air units, focus on building Twinblades and a few MiG fighters.
It doesn't matter which weapon are you fighting, remember to always attack super-weapons from the water - there is very weak defence (I suggest to move units just at the edge of the map). Note also that over the silos there are some MiG fighters waiting. Use your own machines of this type to get rid of them.
NOTE! If you are playing at lower levels of difficulty, you do not need to carry out so serious attacks. It's just enough to expand your base and the military (air units especially), a silos with a bomb you gonna destroy by using Orbital Drop.
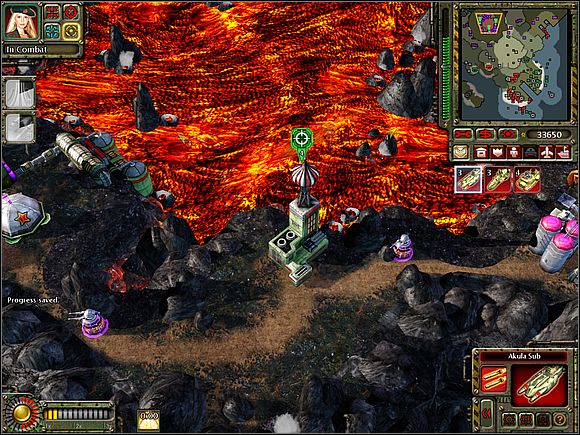
5. Destroy the Premier's Volcano Fortress.
Now it is time to deal with Premier Cherdenko. If you don't have good defense, do it now.
Invest in Twinblades, even if you don't have them yet. Your objectives are three small buildings located close to the crater.
You can destroy her using air units (it won't get to much time) or wait and slowly blow up buildings with Orbital Drop.
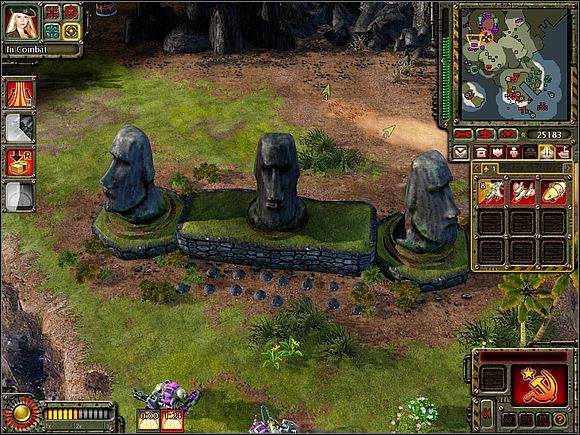
If you want to help yourself and your ally, destroy the statues located on the island - enemy infantry are showing up from there.
1. Ft. Bradley;
2. Your base;
3. New York Stock Exchange
4. Allied shipyard;
5. Statue of Liberty.
1. Eliminate Ft. Bradley's Prospectors;
2. Destroy Ft. Bradley;
3. Capture the New York Stock Exchange;
4. Eliminate Agent Tanya;
5. Destroy the Statue of Liberty.
1. Eliminate Ft. Bradley's Prospectors;
This mission is simpler and shorter than it may seem. You start with the one of the most important units already known from Red Alert 2. Of course I'm talking about Terror Drones. Attack prospectors delivering ore to refinery. Destroy also units protecting this place.
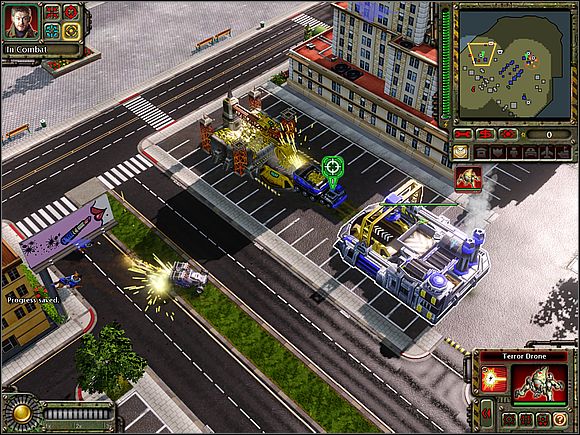
2. Destroy Ft. Bradley;
Now it is time to start a real war. You will get some troops, which will become possible to destroy enemy buildings [1].
Before you start the attack, look, in this area are still some vehicles, which you can destroy with Terror Drones. Waste them and then move on the enemy base.
Be careful - enemy has a radar Jammer - although at first glance, the base is empty, but in fact, is almost filled with tanks. So it is important to enter into the camp with all available units - so you can almost overwhelm the opponent.
Try to save Kirov's - they are your best unit in this mission and you may not want to lose them.
3. Capture the New York Stock Exchange;
This secondary objective you will receive shortly after receipt of the 4 and 5 tasks. Because it provides additional money, it is worth it to do as quickly as possible. Before attempting, expand the base [2], to have at least barracks and the airport. At the stock exchange building [3] face hostile units. Just nearby should be your remaining group striking Fort Bradley (including 2 Kirov's). Use these forces to defeat the Allies at the stock exchange.
You can't beat two flying machines near stock exchanged but you can use Magnetic Satellite on them.
After their destruction produce one Twinblade and train an engineer. Transport him tich helicopter near the stock exchanges and order him to capture the building.
4. Eliminate Agent Tanya;
5. Destroy the Statue of Liberty.
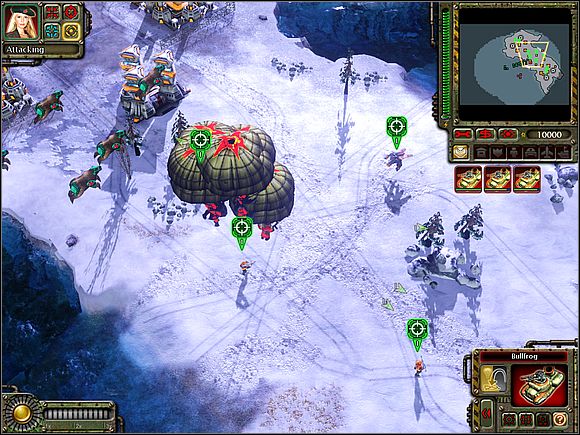
Enhance your base [2] with the shipyard and defense systems. Your opponent will be attacking you with parachuters, so quickly build 8-10 Bullfrogs. Set wagons to the north of your base - enemy planes will show up. Keep 2 Bullfrogs near the yard - there may also occur enemy machinery.
Tesla will be very useful. One nearby the yard, the other between Bullfrogs in the north and the third on the south - in case of parachuters, they will be not able to land there.
Now you have to concentrate on the production of the Twinblades and Kirov's or Dreadnoughts. I suggest the second option - 2-3 Dreadnoughts plus 3 Akula submersibles and 3 Bullfrogs as an escort. In the meantime, build a silos vacuum bombs.
Produce some forces and use them to destroy enemy buildings [4].
There is a chance that Tanya will came to you on her own. This is only a man - finish her with submarines or Twinblades.
During the fight, you will be informed that the enemy uses Chronosphere. Several tanks will appear north of your base near Bullfrogs. If you have a Tesla over there, congratulate yourself.
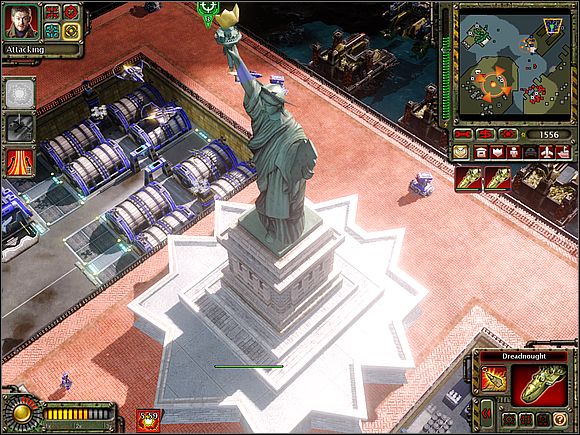
Statue of Liberty [5] is a very tough building. Very reluctant based bombie vacuum; use it on against groups of vehicles and buildings. Destroy the monument traditionally - by air units or navy.
Without special powers it's hard to accomplish Allies campaign. Spending points on each powers, first try to unlock those marked on the picture below.
Surveillance Sweep - very helpful power. With it you can expose yourself any piece of the map. Simply select two points and the exposing area airplane will fly straight line passing through these two points. With this power you can not only check what's the enemy entity is keeping in a base, but also uncover buildings and mark them as a targets for the ally army.
Advanced Aeronautics - if you want to use airplanes in combat, this power is ESSENTIAL!!! This improvement has works permanent, after you unlock it, all of your aircrafts (both owned, and produced in the future) become with better armor and will take on board more bombs and ammunition. Don't move without this!
Advanced Technology - quite a nice thing if you are defending the base with Guardian tanks, or when using combat aircraft carriers. Similar to Advanced Aeronautics, this power also improve strike power and units armor. It works not only on Guardian tanks and aircraft carriers but also on the dogs and Cryocopter helicopters.
Free Trade - useful thing, if your problem is too slow work of collecting ore cars. With this power, Prospector vehicles are able to deliver more ore in a single shipment, accelerating the collection of money necessary to lead the war.
1. Cryoshot - you can freeze units and buildings in a certain area, thus making them unable to function. Every next level increases the degree of frozen area. This power is rarely used in the game. If you have it available (for example, there was nothing else to take), you can turn off the hostile power stations or defense towers. The freezing took several or a dozen seconds, depending on the degree of sophistication of weapon. So much time is enough to perform attack from the air. The freezing does not work on the air units.
2. Paratroopers - useless power in single player missions. Very often it's likely that the enemy has the most map under the control, and this means that soldiers disposal on the battlefield will immediately be discovered and beaten. So paratroopers can serve rather to defend own bases. A dump consists of a dogs, peacekeepers and Javelin Soldiers. The higher level of progress of power, the more paratroopers jump off the aircraft.
3. Surgical Strike - one very accurate bomb. It serves only to destroy these targets, in which the missile is deposited directly. The problem with the Surgical Strike is that it is exceptionally weak. It can only with an average single armored units (if they don't run away just before bombard) or to the beat up buildings, which were extremely low energy.
4. Time Bomb - an explosive, which appears when Chronosphere is working in almost any place on the map. After locating him in a spot, counting starts (a few, dozen seconds). It is hard to destroy enemy units - they have had enough time to get away from the explosive. In connection with this time bomb is rather to damage hostile buildings. The higher the degree of sophistication, the longer timer is and the greater power of the explosion.
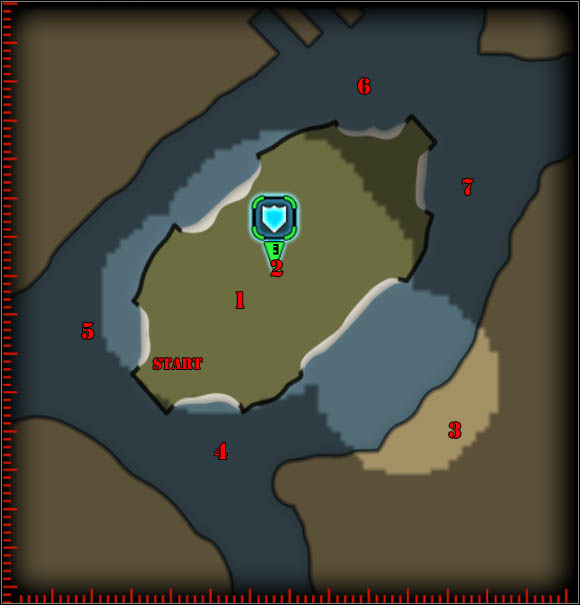
1. Your base;
2. Buildings to capture;
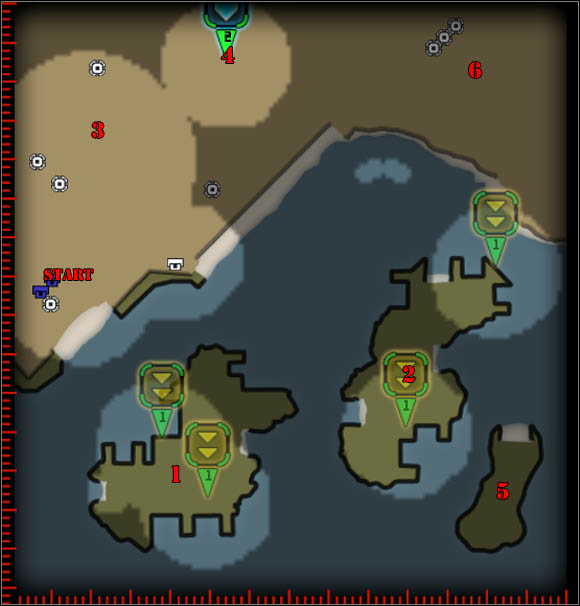
3. Hospital;
4., 5. Coastal Guns.
1. Eliminate the Soviets in Brighton;
2. Garrison Four Civilian Structures;
3. Capture the Hospital;
4. Hold Out Against the Incoming Soviets;
5. Repair the Coastal Guns;
6. Train 5 Javelin Soldiers;
7. Repel the Soviet Navy;
8. Build Amor Facility;
9. Build 5 Multigunner IFVs;
10. Eliminate the Remaining Soviets.
1. Eliminate the Soviets in Brighton;
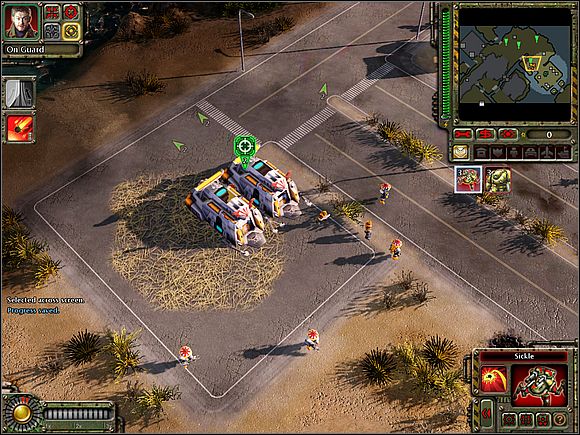
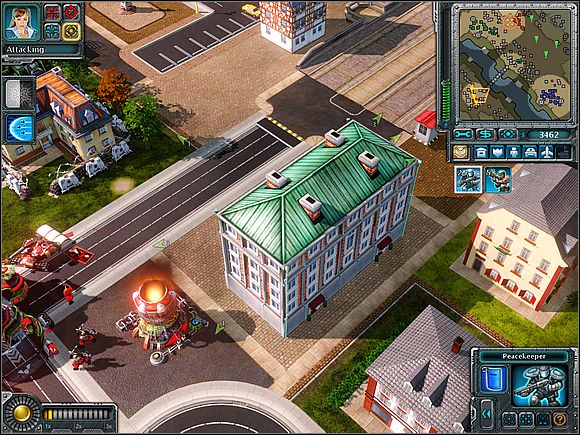
You are getting started with small forces: 2 dogs and 4 Peacekeepers. On the streets of the city are a lot of Soviet infantry and a few War bears. The best way to eliminating these units without any loss is to capture civilian buildings.
Lead your men into the buildings. They will shoot Soviets from the windows.
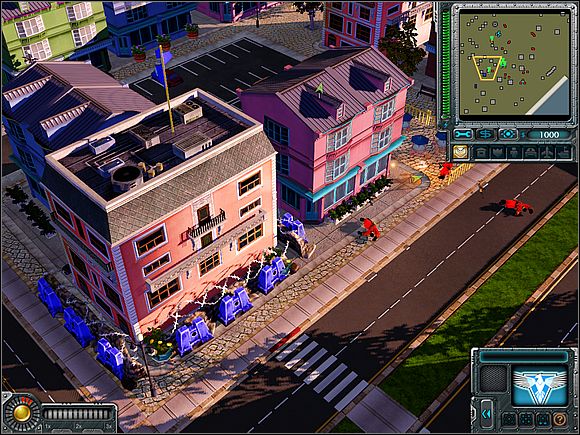
In special cases (where nearby is no buildings to be filled), you can use a special ability of Peacekeepers - walking with a shield. Thanks to it your soldiers may approach the Russians without any problems, and then do defeat them.
You don't need to use the Dogs.
2. Garrison Four Civilian Structures.
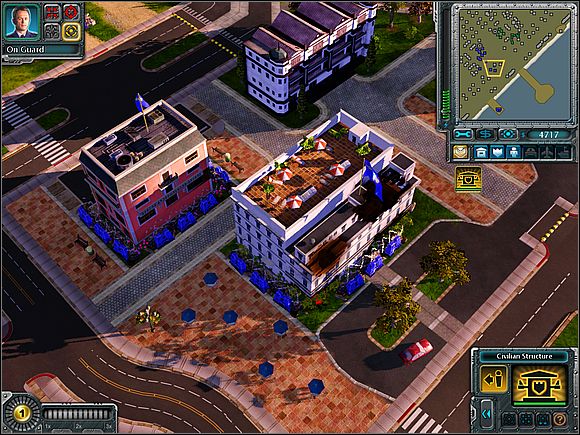
After beating the Russians you will get your own base [1]. The buildings [2] selected on the map, need to be filled with at least one soldier. Nothing simpler.
3. Capture the Hospital;
There is a hospital in the southern part of the map [3]. Train one engineer and send him to capture this building.

4. Hold Out Against the Incoming Soviets;
Get to your base all units and start training infantry in the same time. You do not have too much time.
If you want to accomplish secondary objectives (2 and 3), you have to move quickly. You need to do all orders from the instructions in points 2, 3 and 4 in the same time.
You can protect your base if you will capture the building, which I was taking in second task [2]. Infantry will hold out against incoming Soviets.
5. Repair the Coastal Guns;
There are four guns [4] [5] to fight with ships on the beach. There is special marker on the north from these guns [5] which you can order your ally to repair the guns. Do it.
![Take care of other two [4] - Allies - Brighton Beach - part 2 - Allies - Command & Conquer: Red Alert 3 - Game Guide and Walkthrough](https://game.lhg100.com/Article/UploadFiles/201512/2015121413560899.jpg)
Take care of other two [4]. train two engineers and command them to capture the guns.
6. Train 5 Javelin Soldiers;
You can train a new type of infantry in the barracks. Soldiers equipped with missile launchers, are quite good against the machines, but they cannot defend themselves against other infantry. Train five (or more) units of this type and make them enter the buildings on the coast.

7. Repel the Soviet Navy;
You have less than two minutes to repair guns on the shore (target 5) and train additional troops (target 6). Russian navy is coming. With Javelin Soldiers and guns you gonna win without any problems with the vehicles.
Keep also some Peacekeepers - Soviets will attack the beach with infantry and neither guns and soldiers can handle with them.
The Soviets will attack twice. Repel their attacks is not a difficult task.
8. Build Armor Facility;
You will get Armor Facility - build it in your base.
9. Build 5 Multigunner IFVs;
Multigunners are equipped with standard anti-panzer and anti-air rocket launchers. However, you can modify their armor by appointing them with various units. For example, Multigunner with peacekeeper (armed with gun) will change his weapon into anti-infantry gun. Such a connections will be the best in this part of the mission, so if you do not have Peacekeepers, train and load them into vehicles.
Create 5 vehicles and send them to the beach, near the guns.
10. Eliminate the Remaining Soviets.
The enemy will be attacking again. With IFV vehicles you will defeat them without a problem.
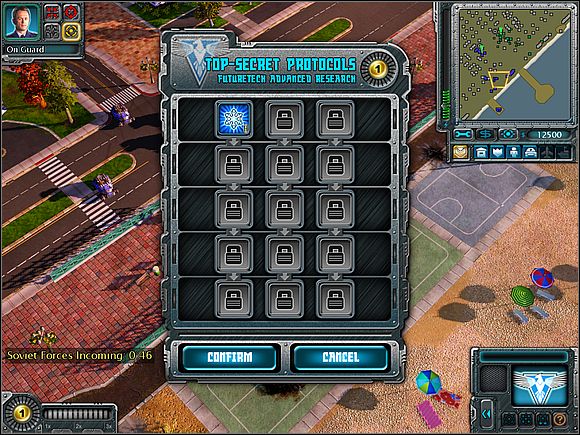
In the meantime, try out the first special power (Cryoshot) in the allied campaign. Activate it by clicking the only active icon in the top-secret protocols table.
As soon as Kirov planes will show up, command your soldiers to leave IFV Multigunners. Order to attack Kirov's.
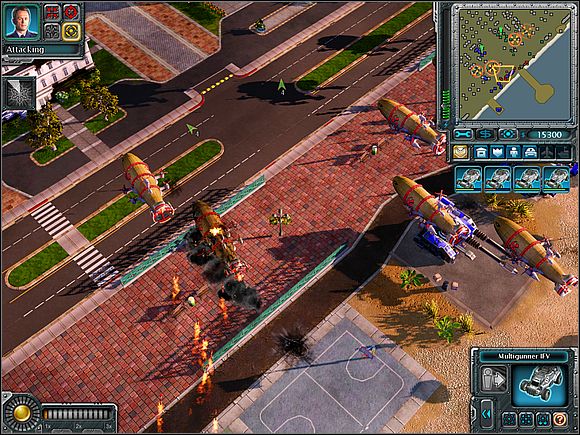
You will be also attacked by the Soviets Dreadnoughts. However, air unit will take care of them.
1. West Island;
2. Central Island;
3. Ally base;
4. Leaders of the United Nations;
5. East island;
6. Soviet base;
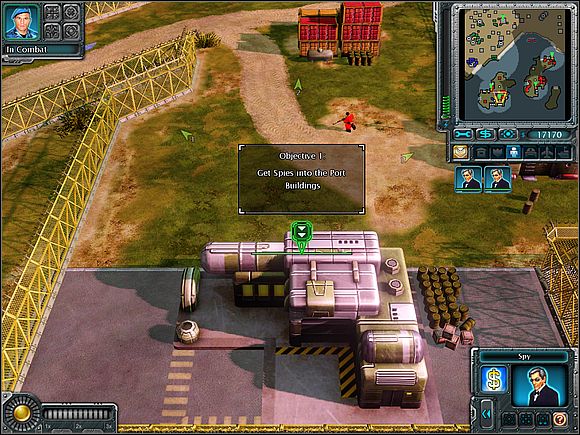
1. Get Spies into the Port Buildings;
2. Save the Allied Leaders;
3. Get Tanya into the Port Authority Building;
4. Sink the Soviet Dreadnoughts;
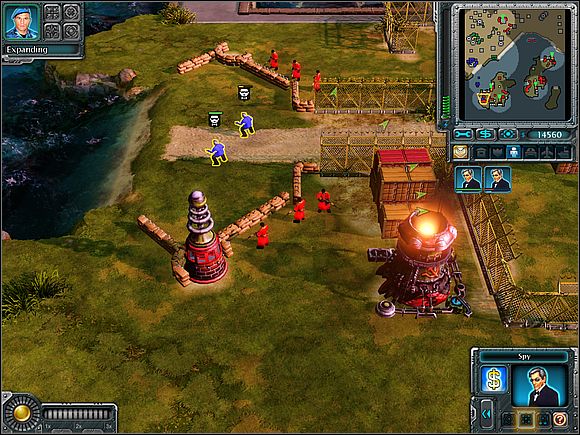
At the beginning you have three spies. Tell them to attack the Russians.
They will do not kill anyone, but they will change the clothes. With Russian uniforms, they may be recognized only by the Soviet War Bears.
1. Get Spies into the Port Buildings;
First, take care of the west island [1]. Send three spies and agent Tanya near the beach on the west. Send spies to ashore. One of them send to a nearby Soviets power station.
 Changed spies can be recognized only by War Bears. These animals can sense sabotage.
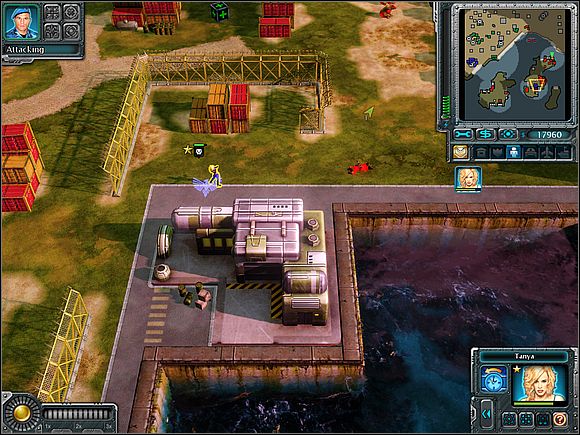
It will temporarily switch off power of Tesla - soviets defense structure. Now go Tanya to the island, blown up Tesla and shoot Soviet soldiers.
Clean island with Tanya, allowing spies to reach the port buildings.
Get experience box - Tanya level will increase.
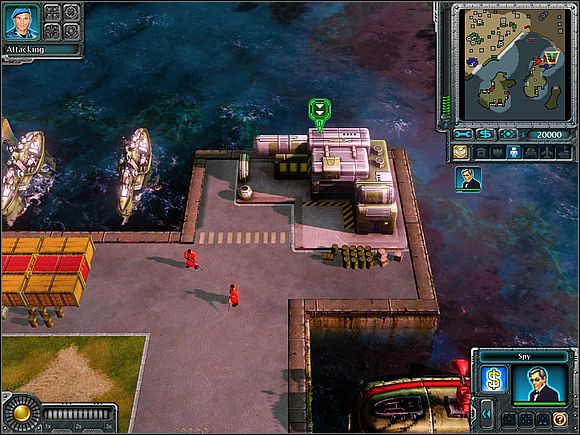
![Now it is time to move on the second island [2] - Allies - Cannes - part 1 - Allies - Command & Conquer: Red Alert 3 - Game Guide and Walkthrough](https://game.lhg100.com/Article/UploadFiles/201512/2015121413560961.jpg)
Now it is time to move on the second island [2]. Train 4 spies, change Russian uniforms, and then enter the beach in the west of the island.

As previously - command one spy to enter the power station at the beach (standing experience box leave for Tanya), and then order Tanya to get on island and clean up.
Tanya will not be able to blow up Tesla before it get power. So enter another spy to power station and destroy defense structure.
Enter the spy to a nearby port building, and get experience box with Tanya. She should already have the maximum level.
Blown up all power stations in the neighborhood and shoot all Soviets.
The last building (in the north of the island) is not protected by the bears. You can send your spy there with no worries.
2. Save the Allied Leaders;
This task must be done by an ally [3]. It consists of eliminating the Soviets forces [4] in the north of the map. In the meantime take care of other objectives.
3. Get Tanya into the Port Authority Building;
On the central island [2] there is a port administration building. Enter Tanya inside, and then watch cut scene.
4. Sink the Soviet Dreadnoughts;
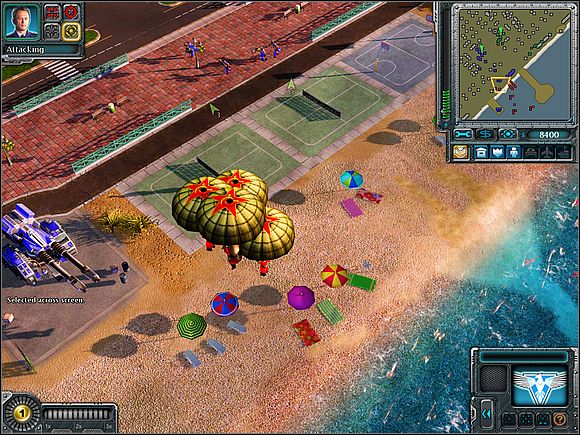
Send Tanya near the Soviet ships, which are not back to the port - they are on the north of the central islands [2]. Place a bomb on each.
5. Neutralize the Defenses Guarding the Vindicators;
Send Tanya near the east islands [5]. Eliminate enemy infantry defending the airport, and then blow up Tesla power supply - power stations.
You will get access to the airport located on the island.
6. Wipe Out the Soviet Base;
If you have problems with protecting your own base, build some tanks. If you completed the task with airport, you can build Vindicator planes. Bombard the enemy base [6], from the east (fly at the edge of the map) - then you will avoid anti air defense.
Destroy also the Tesla in the south, near the beach. When they will gone, it will be possible to enter enemy base with Tanya and engineers.
Do not forget you can also enter the base with tanks. Your ally should care about the money to finance the war. Remember that you can always steal opponent money - send a spy to the refinery.
1. Beach protecting by copters;
2. Beach protecting by Tesla;
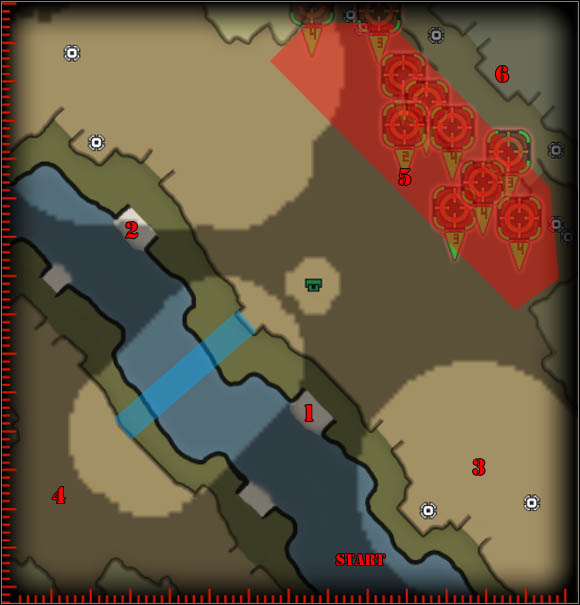
3. Your base;
4. Tanya;
5. Iron Curtain;
6. Soviets HQ.
The Blue area is a bridge;
The Red area is an Russian base
1. Escort the MCVs;
2. Destroy the Four Super-Reactors;
3. Assist Agent Tanya;
4. Destroy the Iron Curtain;
5. Destroy Soviets base;
6. Destroy the Soviet Headquarters.
1. Escort MCV;
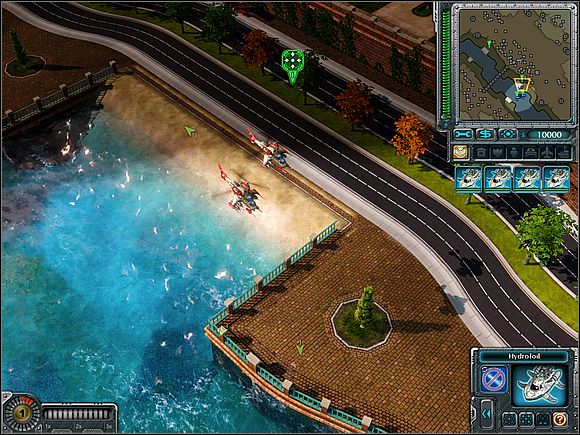
The mission begins on the river. To get ashore, you need to eliminate Twinblades protection [1]. Hydrofoil vehicles, which you got, will definitely take care of them.
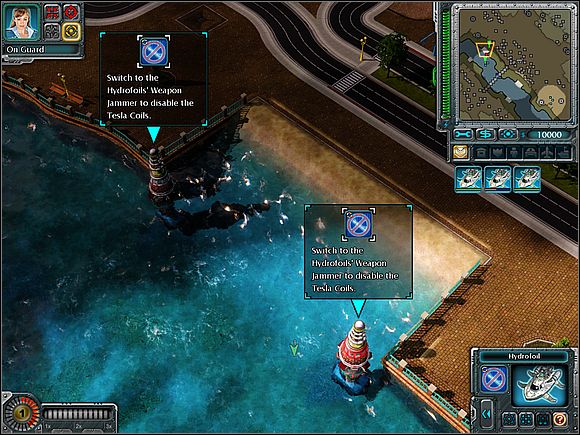
Your MCV will enter the land and spread in the most convenient place. Order your Hydrofoil vehicles to swim forward the river to the next beach [2], guarding by two Tesla.
Your vehicles have an interesting special ability - they can block the shooting ability of the opponent. Use of this ability on Tesla, and then command your ally to attack these structures.
2. Destroy the Four Super-Reactors;
Expand your base [3] with some power plants, two refineries, barracks, Armor Facility and three Bomber landings. Create also a defense system with 3 to 4 towers (in the highest difficulty level - 5). Do not capture them with any soldiers.
From additional special powers, select Advanced Aeronautics. Thanks to this power, your Bombers will be harder and be able to carry more bombs.
Start building bombers. Attack Soviets super-reactors. Note that there are 3 buildings of this type surrounding you. If your ally fails to destroy any reactor, you have to take this task in your hands - sending some troops to him.
Following the destruction of reactors opponent will sell part of his defense systems.
3. Rescue Agent Tanya;
Tanya [4] is imprisoned in a building in south-western corner of the map. Create a team composed of 1-2 Peacekeepers and 3-4 Javelin Soldiers. Enter them to the civil building, located in the vicinity of Soviet troops and wait until your units will finish up those opponents. After that, beat Russians with a few tanks or Bombers.
Send Tanya to your base.
4. Destroy the Iron Curtain;
Attack your enemy's most important buildings with bombers. Note that 12 bombers will be enough to destroy Iron Curtain at one attack [5]. Attack with aircraft, coming from the south west - in this way to avoid many of anti-air guns.
5. Destroy Soviets base;
Do the same with other buildings in the base - focus on Bombers production and send them as often as possible. Look also at your base defense line - you can't overlook the moment of damage or destruction one of the towers. Keep in mind that your opponent will be attacking you with the most powerful land vehicles - apocalypse tanks. Produce your own 10 tanks, to destroy them.
If you have previously take care of four super-reactors, the task will be much easier - without a part of its defense systems, opponent does not cause too much damage your flying machines.
6. Destroy the Soviet Headquarters.
Collect your Bombers, and send them into the north-eastern corner of the map (flying at the edge of the map!), and then make them attack the headquarters building [6].
1. King Oni;
2. Hangars;
3. Your base;
4. Assault Destroyers;
5. Additional ore deposits;
6. Empire base.
1. Eliminate the King Oni;
2. Destroy the Hangars;
3. Recover the Assault Destroyers;
4. Set Up an Expansion Base in the Southwest;
5. Destroy the Empire Base;
1. Eliminate the King Oni;
Mission start with Tanya only. You will have Natasha as a support.
Move north and finish the Japanese you met there. You will get the information about King Oni at the east of the map [1]. You need to destroy it.
Enter the path leading to the top of the mountain guarding by the robot. Get health packs from the road if you need them.
To destroy the robot, you need to come closer and plant the bomb, and that's all.
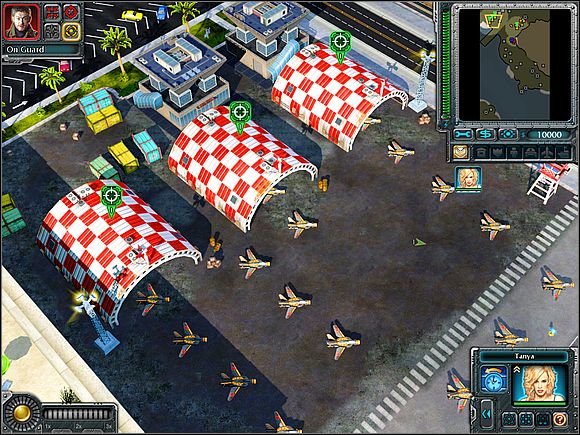
2. Destroy the Hangars;
In the northern part of the map there are hangars [2] occupied by the Empire of the Rising Sun. Get in their area. Let Natasha demolish captured buildings, which are on the way. There will be a lot of them.
In the hangars and other major facilities area (including the Japanese forces) are standing aircrafts. They will explode like a barrel with fuel - they destroying everything around, and if they are arranged in a row, one exploding under the influence of another. Use this fact to destroy both hangars and the Japanese base located in this area.
3. Recover the Assault Destroyers;
Start expanding your base [3]. You will need the airports (and some bombers) and good defense system. At the beginning, prepare yourself to infantry attack infantry from the north - set 2 towers with Peacekeepers inside there, also two empty, just west of the base.
![In the west Japanese base there are the Allied destroyers [4] - Allies - Gibraltar - part 2 - Allies - Command & Conquer: Red Alert 3 - Game Guide and Walkthrough](https://game.lhg100.com/Article/UploadFiles/201512/2015121413561410.jpg)
In the west Japanese base there are the Allied destroyers [4]. To recover them, you have to destroy their protection. Do this by using bombers (improved by Advanced Aeronautics)
At a time you recover your ships, order to retreat to the base.
4. Set Up an Expansion Base in the Southwest;
In the south-western corner of the map there is an additional ore deposit [5]. It is protecting by Japanese robot's. Destroy them with bomber's.
Then send there one Prospector (vehicle for the collection of ore). Use it to create the post. If you want to use the ore deposit, you need to make a good defense system. Personally, I think that ore is not necessary, because there is a huge cash bonus when you create a post.
5. Destroy the Empire Base;
To this moment, you should be able to unlock another special power. I recommend going the path on the left side of the table, and it is because it gives you access to that uncovering the map airplanes.
Russians will swim to the attack. This allows you to reveal the hostile yards.
Do some courses to eliminate Japanese shipyards. These, fortunately, have extremely poor anti-air protection.
After their destruction in the south of the map, Japanese navy will appear including vehicles to expand the base. The most of the fire will damage Russians. Help them with your destroyers.
![Use Surveillance Sweep spy planes to uncover the hostile base [6] - Allies - Gibraltar - part 2 - Allies - Command & Conquer: Red Alert 3 - Game Guide and Walkthrough](https://game.lhg100.com/Article/UploadFiles/201512/2015121413561575.jpg)
Use Surveillance Sweep spy planes to uncover the hostile base [6]. Then use your bombers to destroy the most important buildings in the camp.
Don't worry about Russians - they will not attack you.
1. West island;
2. East island;
3. Your base;
4., 5. Power Cores.
1. Protect the Salvage Ship;
2. Destroy the Generators;
3. Destroy the First Radar Ship;
4. Capture the Generators;
5. Destroy the Second Radar Ship;
6. Capture Both Fortress Power Cores.
1. Protect the Salvage Ship;
At the beginning, you have several boats and dolphins. You need to protect salvage ship for the next one and a half minutes.
Let the Russians attack enemy boats, and take care on air units on your own.
2. Destroy the Generators;
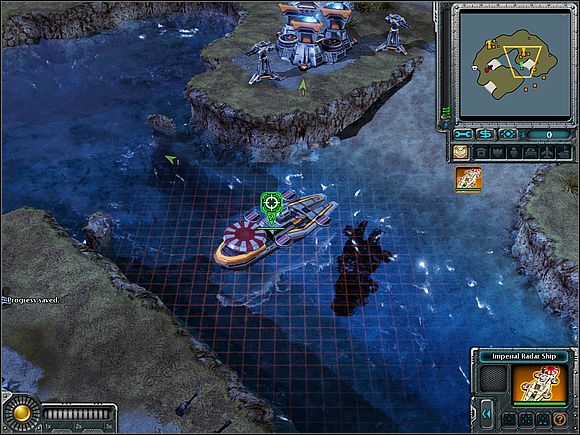
3. Destroy the First Radar Ship;
The next job you will do on the western island [1].
You will get four spies, and your ally Natasha. Command spies to change the uniforms, and then take care of generators. Enter the spy to a nearby building and wait until Natasha will call the air strike on it.
To do the same with the next two generators. Then order your ally to attack rada ship.
4. Capture the Generators;
5. Destroy the Second Radar Ship;
Now the roles reverse - Tanya is on your commanding, and you ally has four engineers. Go on the east island [2]. Shoot all Japan soldiers in this area, allowing technicians to occupy a nearby generator.
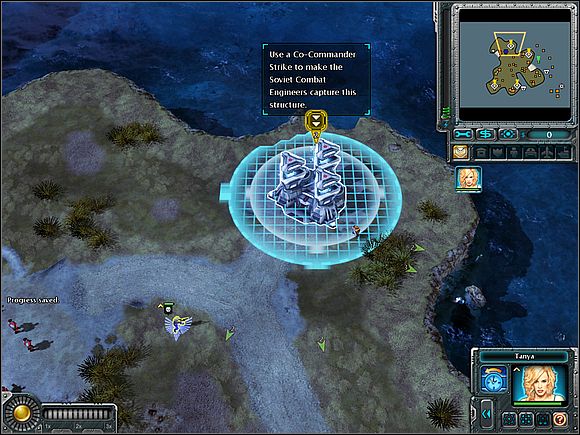
The order of protection and taking over of generators is as follows:
Do not forget to collect the money boxes (there are two - near power plants 2 and 3). At the end, order Tanya to blow up the ship radar.
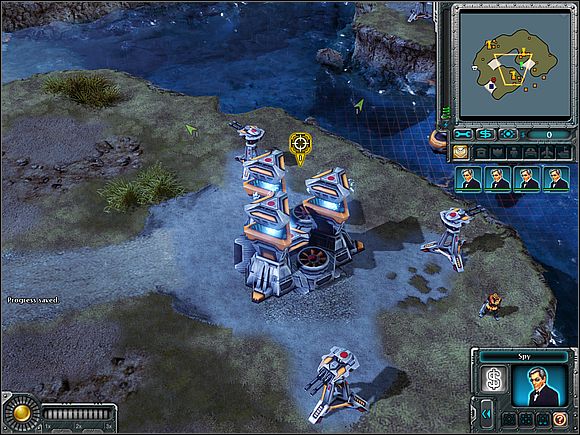
6. Capture Both Fortress Power Cores.
Swimming Japanese fortress is huge. Before you start the war, expand your base [3]. Build a good defense system (4-5 towers in the north of the base), and also send Prospector to the eastern island. Unpack it there and build barracks, 1-2 defense towers against Japanese air units.
Immediately train about 10 engineers. Most of them send back to the base, 2-3 address to capture crude oil (two are located at the coast of the island where your barracks are. Vessels Japan ships should not attack you).
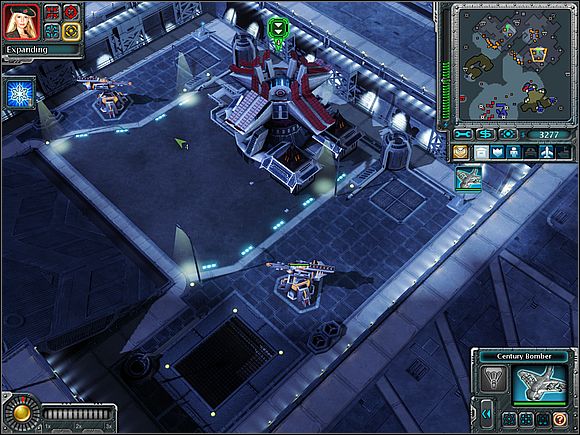
Build about 2 airports. Build Century Bombers - new type of bombers. They allow not only to bomb enemy facilities, but also to transport the infantry. Do not forget to improve your aircraft (Advanced Aeronautics).
Your goal are two cores [4] [5] which ensuring the power to the fortress. You have to capture them with your engineers.
Command your new bombers to destroy towers keeping the cores first, and then send the planes there with engineers on board.
Problem is with units running in core area. So, on the aircraft board must be a few engineers (4 or 5). At a time when the parachutes will open, all engineers must have orders to capture the core as soon as they touch the ground. Many of them will die, but remember that only one engineer is necessary to enter.
1. Power plant;
2. Com Tower;
3., 4., 5. Command centers on mount Rushmore;
6. Rushmore Firebase;
7. Presidents airport.
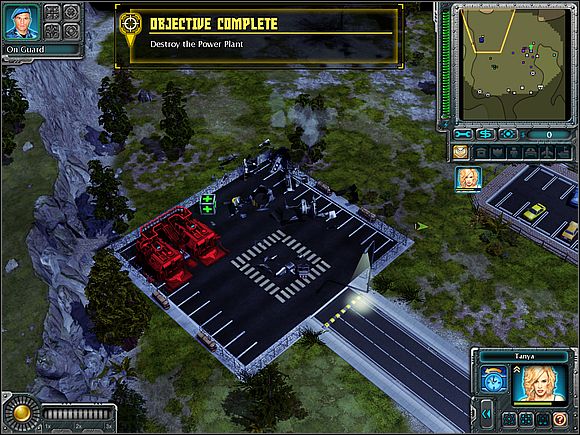
1. Destroy the Power Plant;
2. Capture barracks;
3. Destroy the Com Tower;
4. Capture the Lincoln Head Control Center;
5. Capture the Jefferson Head Control Center;
6. Capture the Washington Head Control Center;
7. Destroy the Rushmore Firebase;
8. Eliminate the President of the United States.
1. Destroy the Power Plant;
2. Capture barracks;
At the beginning you have Tanya, three engineers and three spies. Walk to power plant [1] and shot all running around dogs. Command one of the spies to enter power plant to temporary turn off the power. When this happens, order Tanya to blow up the plant. Then ask your ally to take charge of barracks.
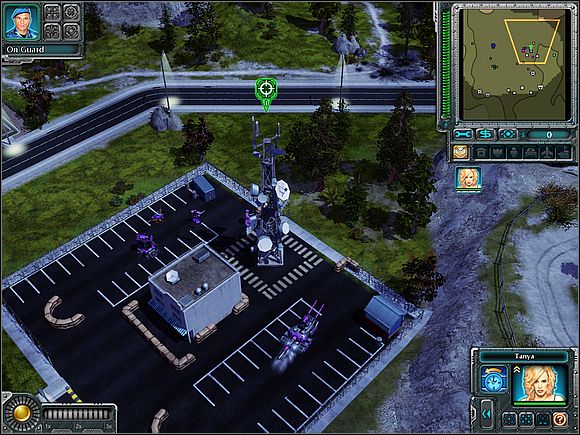
3. Destroy the Com Tower;
Now it is time to take care of the tower [2]. Tower is turned off so, you can safely eliminate both soldiers, and the tank (try to avoid damaging a nearby civil building). When you will done, destroy the tower and wait for the next orders.
4. Capture the Lincoln Head Control Center;
5. Capture the Jefferson Head Control Center;
6. Capture the Washington Head Control Center;
MCV appears on the map. Now it is time to create your own base. Please note that in your area is a lot of ore. Operate all three deposits and additionally take the one nearby oil pipeline.
Make sure you have good ground defense. Your opponent will be attacking you with groups of vehicles. Put Javel soldiers in a civilian building standing next to the ruins of the communication tower. Set the 6-7 towers in the north of the base.
Your opponent will be sending some planes from time to time. His objectives are mostly power plants, but remember to have some reserve of a few units of energy in the event that any of the generators has been destroyed.
Control centers are distributed on the edge of the map [3] [4] [5]. They are used to control weapons, which has been placed in the sculptures at the top of the Rushmore. Train three engineers and put them into three bombers. Each of them send to another control center and desant soldiers. I recommend to fly at the edge of the map (except presidential airport [7]) - and you will surely not meet the enemy anti-air defense.
With taking those commands, you will get target no. 6 to realize. However, complete previously tasks.
7. Destroy Rushmore base;
You have to destroy the CY [6] on the Rushmore base before the president arrives (keep an eye on his limo - is marked with a blue box on minimap). You do not have much time so far. The best way to destroy the target with century bombers.
Build about 2-3 airports and in the meantime reach next expand levels of the base. You have a lot of money in this mission - keep on building bombers, and send them for a marked building.
Before you will destroy the building completely, prepare 3-4 Apollo fighters.
8. Eliminate the President of the United States.
Following the destruction of Rushmore, presidents limo will be teleported by Chronosphere to the airport [7] in the southern part of the map.
Ackerman will be trying to escape with helicopter. When he will get far away of the airport anti-air defense, send four fighters to shoot the president machine.

1. Empire barricade;
2. The place for your base;
3. Empire super-weapons;
4. Prince Tatsu navy;
5. Navy equipped with anti-air defense;
6. Yards.
1. Hold out for Soviet Reinforcements;
2. Destroy the Imperial Blockade;
3. Sink Prince Tatsu's Fleet;
4. Take Out the Imperial Military.
1. Hold out for Soviet Reinforcements;
2. Destroy the Imperial Blockade;
It will be a long mission. From now you will get an expanded base. Place some towers and create a dozen of tanks against Japanese attack (their buildings will rise next to your right).
Empire will be attacking you with it's air and tank units. Your tanks should be take care of the enemy without any problem.
Japanese set a lot of water towers and yards, creating a blockade [1]. Use Advanced Aeronautics power and build 4 vindicator bombers on your airports. Bombard Japanese water units with them. You do not have a lot of time to destroy the blockade (it ends when General Krukov for the second time informing about lately arrival of the Soviets army).

3. Transport an MCV Across the Harbor;
You will get Chronosphere - a device able to move the unit to any place on the map. One of the commanders must move his MCV on the other end of the map [2] and build its own base. You can move your own car or tell your ally to do it. The following description applies to the first variant.
Build an power station to ensure the Chronosphere a power. Then pack your CY to MCV and use Chronosphere to transport the vehicle (including survived tanks) in the north-eastern corner of the map. Start construction of the base there.
3. Sink Prince Tatsu's Fleet;
4. Take Out the Imperial Military.
You have to destroy a lot of bases. Build three airports and fill them with Vindicators (raise the buildings next to each other, you do not have too much space for expansion).
Use them to attack the most important targets (marked with green pointers) in enemy bases. You can also send groups of tanks (9 units) with Chronosphere straight into the enemy camp. In the first order, focus on the north base [3] - the Japanese have his super-weapons there.
Opponent will become extremely passive. You do not need to build a strong defense. Six towers on the periphery and some tanks - such protection will be enough. When Prince Tatsu will appear on the map [4], set 3 additional towers in the base center (!). They will be very helpful against Japanese bombs.
Try to not fly over the fleet [5] stationed just south of your base. Some of them are equipped with anti-air weapons. That fleet will shoot your base if you start bombing docks [6] in the south-eastern part of the map.
![Prince Tatsu [4] fleet will appear as soon as the super-weapons on the north of the map will be destroyed - Allies - Tokyo Harbor - Allies - Command & Conquer: Red Alert 3 - Game Guide and Walkthrough](https://game.lhg100.com/Article/UploadFiles/201512/2015121413561977.jpg)
Prince Tatsu [4] fleet will appear as soon as the super-weapons on the north of the map will be destroyed. You can destroy it in a very cool way: Use Chronosphere to move his ships to the land. Treated in this way ships, will be destroyed immediately.
 Chronosphere can move hostile ships to the land, for example, in the place of enemy buildings. This will complete destroy the boats and light damage these buildings.
The navy is composed with ships that can transform into planes. To finish those units, you will need Apollo fighters.
1. Soviets base;
2. Your base;
3. Ally base;
4., 5., 6., 7. Kirov Launch Facilities.
1. Investigate Havana for Soviet Activity;
2. Recruit a Force of 10 Soviets;
3. Locate a Soviet Base;
4. Destroy the Soviet Base;
5. Destroy the Kirov Launch Facilities;
6. Do Not Let a Kirov Leave Havana.
1. Investigate Havana for Soviet Activity;
This will be a short mission. You start with two dogs and two spies. Your ally has a car, which can hide all units in his area. Try to keep your units in this vehicle area.
After a few moments of the march, task will be completed;
2. Recruit a Force of 10 Soviets;
Your spies can bribe enemy soldiers and drag them into your army. Tell one of spies to change the uniform. Then keep on walking to Soviets and use special power in their area.
You must bribe Soviets standing on the blocking.
3. Locate a Soviet Base;
After bribing troops on barricade your ally car will drive ahead. You will meet two Apocalypse tanks. If you have not done the 2nd target, retreat and allow Soviets to drive over.

However, if the objective 2 has already been done, destroy enemy tanks and kill the war bear standing nearby.
Soon you will reach Soviet base [1].
4. Destroy the Soviet Base;
Destroy the most important buildings in the Soviets base [1]. They are poorly protected, so there will be no problem to complete the task.
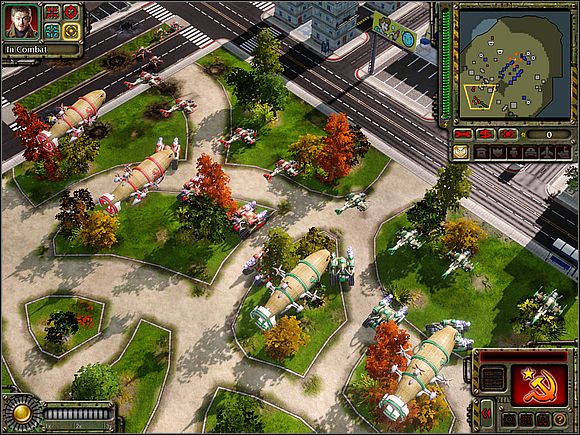
5. Destroy the Kirov Launch Facilities;
6. Do Not Let a Kirov Leave Havana.
There are bases in the [4] [5] [6] [7] stadiums, which Kirovs are equipped with extremely powerful bombs. Destroy those places using Vindicator bombers. Build in your base [2] 3-4 airports for these machines and follow the regular courses with bombs on the board. Create also 2-3 Apollo fighters. Do not forget to use Advanced Aeronautics power.
![Many Kirovs leaving Havana, are flying over or near your ally base [2] - Allies - Havana - Allies - Command & Conquer: Red Alert 3 - Game Guide and Walkthrough](https://game.lhg100.com/Article/UploadFiles/201512/2015121413562062.jpg)
Many Kirovs leaving Havana, are flying over or near your ally base [2]. Tell him to destroy these machines.
Some airships will fly over your base too. Build a few defense towers in the north, to not only bring Kirovs to the ground, but also to protect yourself against land attacks.
 Two towers will definately bring down one airship to the ground. Set them more to fight the ground units also.
Some Kirovs may fly to the east. Kill them with Apollo fighters.
1. Chrono Drop Zone 1/Your base;
2. Chrono Drop Zone 2/Your ally base;
3.-9. Iron Curtains;
10. Vacuum Imploder silo;
11. Comrade Cherdenko fortress.
1. Unpack MCV 1 at Chrono Drop Zone 1;
2. Unpack MCV 2 at Chrono Drop Zone 2;
3. Clear the Plateau of Soviets;
4. Destroy All Seven Iron Curtains;
5. Destroy the Vacuum Imploder;
6. Destroy chairman fortress.
1. Unpack MCV 1 at Chrono Drop Zone 1;
2. Unpack MCV 2 at Chrono Drop Zone 2;
This is one of the most difficult missions in Red Alert 3. Save your game often.
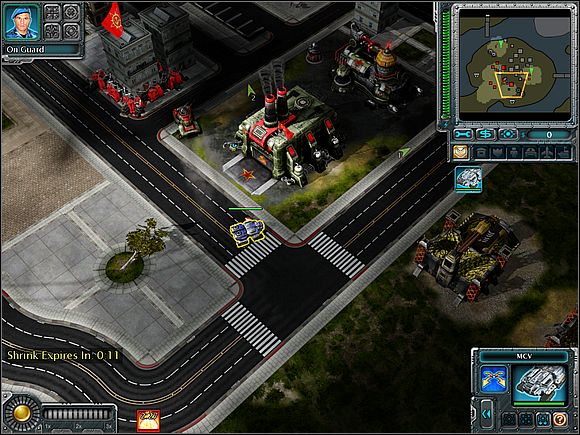
Your MCV will be reduced to a few seconds. In the meantime, you have to get to the area of Chrono Drop Zone 1 in the south [1]. Do not let anyone shoot or drive over you. Unpack MCV in the marked area and wait for backup.
Your ally will do the same with his MCV [2].
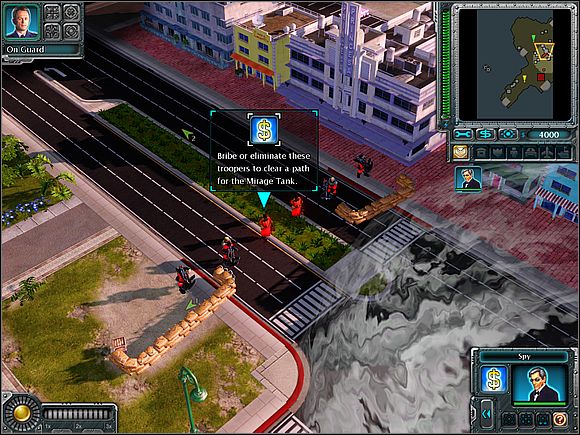
3. Clear the Plateau of Soviets;
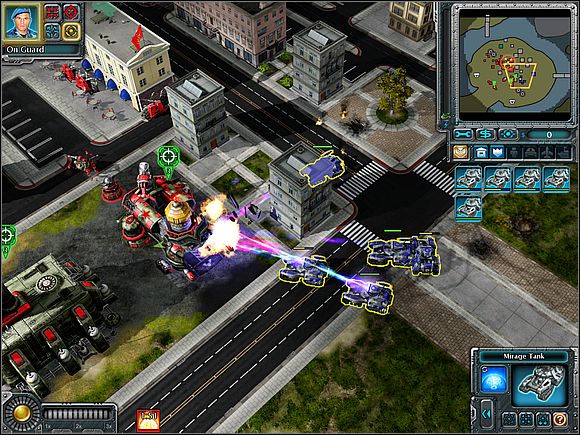
You will get some Mirage tanks. Use them to clean the area up Soviets.
4. Destroy All Seven Iron Curtains;
Now it is time to start to build your base. You have half an hour to carry out the tasks, so hurry up. Capture the nearby oil crude, begin exploitation of the ore and set 3-4 airports for Vindicator bombers.
Your ally will take care of the curtains located in the west [6] [7] [8]. You need to kill those on the east [3] [4] [5].
Your opponent will gather a lot of troops against you in the east, around the point [3]. Make sure you have adequate protection on the bridge, which is located in the east of your base. Build a lot of Spectrum towers and set there your Mirage tanks.
 In addition to defense presented in the picture, you should set 2 towers and 3 Spectrum towers more.
Build also two towers near the airports - there is a risk that enemy fighters will come shoot every starting bomber.
The worst, you may imagine is the combination of the Apocalypse tanks with V4 launchers. Such a mixture will shock your defense. If such as team will come to you, beat them with Mirage tanks and bombers, and then focus on reconstruction of your defense system.
Set also 2 Spectrum towers in the south.
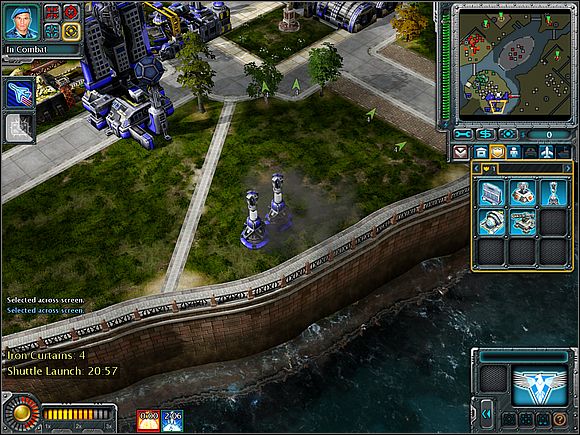 Pod At the end of the mission you will be attacked by two Dreadnoughts. Spectrum towers will protect you against them..
After getting the power called Free Trade, wait to see results from increased efficiency of Prospectors, and then build Proton Collider.
Fly with your bombers from the south. Send them first in the south-eastern corner of the map, and then command them to fly to your destination from there.
![Try to make the final blow to the last Curtain [9] using only proton collider - Allies - Leningrad - Allies - Command & Conquer: Red Alert 3 - Game Guide and Walkthrough](https://game.lhg100.com/Article/UploadFiles/201512/2015121413562122.jpg)
Try to make the final blow to the last Curtain [9] using only proton collider. At the same time hold the Bomber in the base - they must be ready to quickly attack Objective no. 6
5. Destroy the Vacuum Imploder;
Nearby Iron Curtain in the north-eastern corner of the map it will start construction of the vacuum imploder [10]. Use both bombers and proton collider to eliminate this weapon.
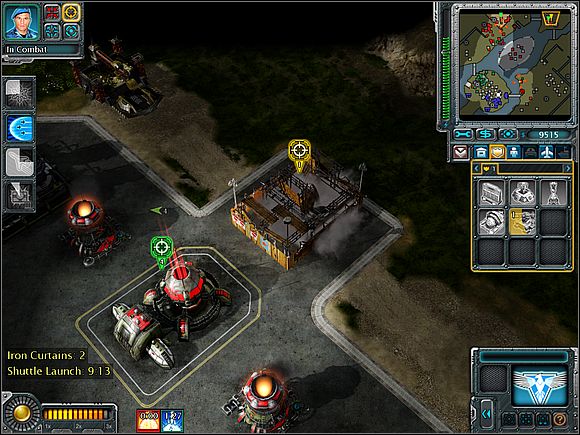 All targets, it's the best to destroy with bombers.
6. Destroy chairman fortress.
Comrade Cherdenko is hiding in the fort [11] located in the center of the map. If you have over 15 minutes after destroying Iron Curtains, its' mean that you can congratulate yourself. Destroy it using bombers, proton collider and Time Bombs teleported by Chronosphere. It is very hard, but it will surrender.
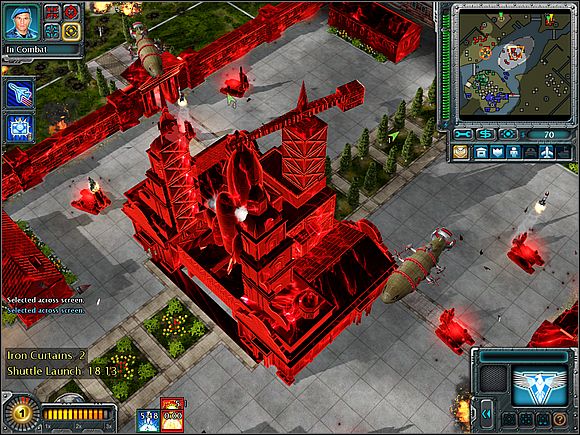
Without special powers, it is difficult to complete Empire campaign. Spending points on each powers, first try to unlock those marked on the picture below.
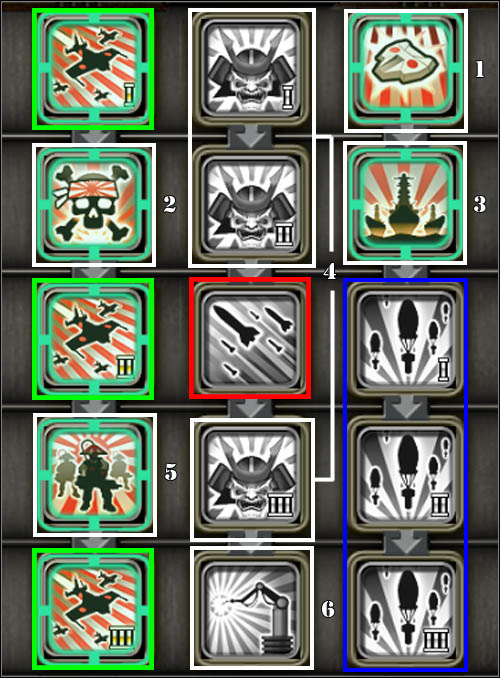
Final Squadron - ABSOLUTELY NECESSARY POWER! Suicide bombers are superior weapons against everything that is located on land or water. Buildings, infantry, vehicles - all this is a great target for suicide pilots. Best use of Kamikadze is in co-op with the Rocket Angels units. Each next level of the weapon means increase of the number of pilots and enlargement of the attacked area. Suicide bombers have, unfortunately, one major disadvantage - you never know exactly where planes are going to hit. In practice, this means that the building or unit located in the center of attacked territory can not be serious damaged, as opposed to objects, for example, located at the edge of the area.
Advanced Rocket Pods - increases the shooting rate of all units and vehicles using rockets. In the guide I very often recommend to use a Striker-VX machinery, as well as Rocket Angels infantry - both of these types are instantly using. To make it more devastating, improve their missile trays.
Balloon Bombs - a very interesting weapon designed to destroy buildings. Bombs slowly fall to the ground and explode, doing quite a lot of damage. On 2 and 3 the level this great weapon works well in the destruction of hard buildings, such as CY or super-weapons. The disadvantage of this power is that it is slowly falling bombs can be shot before they reach the ground. Try to choose them for such targets, which are not have quite good anti-air protection.
1. Point-Defense Drones - one of the first power acquired on the way to improve the navy and Balloon Bombs. If you planning to execute an attack with units moving after land and water, it is best to invest one point for protective robots. They collect the missiles, which your opponent shoot in your units direction. They are not too tough, but you need to unlock them to be able later get better powers.
2. Honorable Discharge - Totally useless. After unlocking of this the power, your units will be blowing up shortly after their destruction by the enemy. However, in most cases, Japanese tanks, mechs, conveyances, etc., are destroyed from a distance (by defensive towers, tank guns) or from the air. There is no question that an exploding unit was able to damage any enemy located at a distance of a few dozen meters from the place of the explosion.
3. Fortified Fleet - if you want to use navy in the fight, you might be interested in this improvement. The ships are faster, harder and have a greater range of view. Unfortunately, a lot of missions in the Empire of the Rising Sun campaign are constructed that, the meaning of the navy is marginal or even zero. This automatically makes that power a little useless.
4. Emperor's Rage - as in the case of protective robots: this power can be unlocked very quickly, it may be helpful in land unit attacks. Emperor rage reduces the speed of selected units, but instead of this it increase their fire power. Japan units (King Oni robots, self-artillery) are not too fast, so the additional reduction of their speed is not particularly onerous. Moreover, it is always possible to ensure them a shield by described above robots.
5. Sleeper Ambush - very rarely used power. Firstly, it will be able at the very end of the game, and secondly it is firmly impractical. You can create a group of infantry Tankbusters anywhere on the map. While it's sounds interesting and tempting, I must mention that the process of creating such a group takes a lot of time. Before the units will be ready to fight, opponent will finish them.
6. Robotic Assembly - this power reduce the time of units production. Great deal, but unfortunately you will get access to it very late. What's more, it will be able when you will not spend points on Kamikaze or Balloon Bombs.
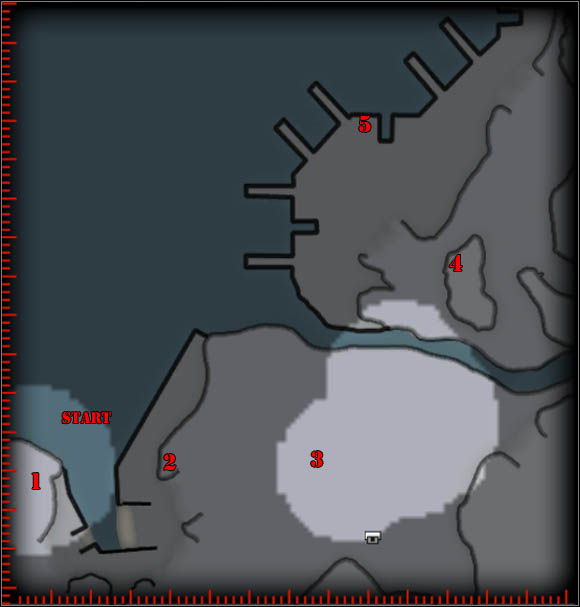
1., 2. Soviets Reactors;
3. City area;
4. Reactor powering Tesla;
5. Soviets navy base.
1. Destroy the Reactors;
2. Destroy the Statues around the Square;
3. Destroy All of the Barracks;
4. Bring Down the Tesla Coils;
5. Destroy the Soviet Navy at Harbor.
1. Destroy the Reactors;
You start with Sudden Transport with troops. Nearby you'll find a Soviets Bullfrog. Command amphibia to attack.
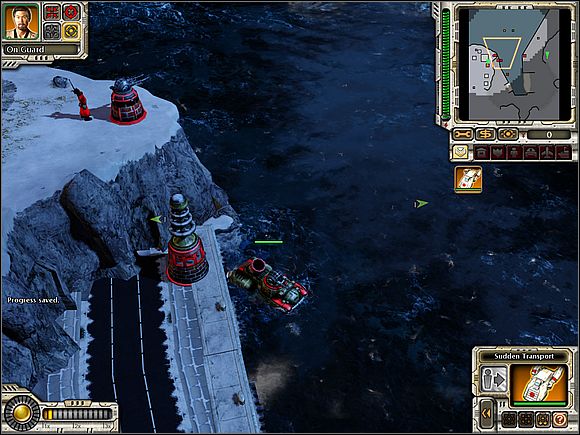
The attack does not happen, but your vehicle will look like an Bullfrog. Now you can get to a hostile base without obstacles.
When you get to the mainland, order each infantry to go out. Your soldiers are equipped with assault rifles and they are great with the enemy infantry. Your ally has a Tankbusters. These units are quite good against vehicles and buildings.
Use the infantry to destroy western Soviets reactor [1].
Eastern reactor [2] is located on a hill and it can not be attacked by infantry. However, you will receive access to some kind of attack from the air (Final Squadron X) - this is nothing else, like another raid carried out by soldiers Kamikaze.
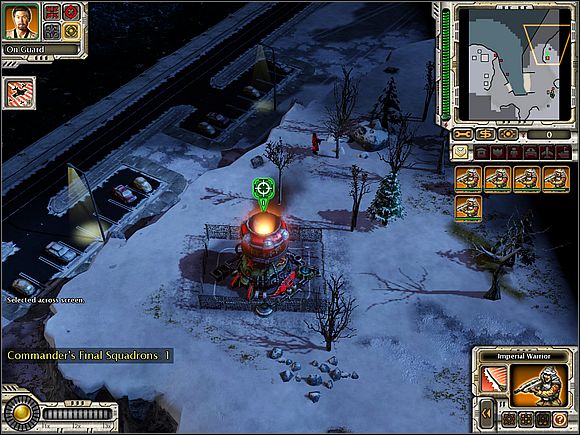
2. Destroy the Statues around the Square;
3. Destroy All of the Barracks;
The battlefield will enlarge and you get a few Tankbusters. Now it is time finally enter the city [3]. You will find two buildings here which training Soviet soldiers and four monuments. All these objects must be destroyed. Try to not use the Kamikaze soldiers. You shouldn't meet any enemy units here, so your infantry will be enough.
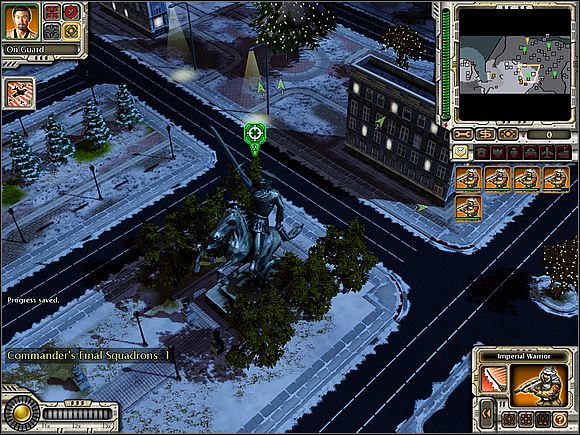
Following the destruction of barracks you will get five Shinobi soldiers. It is better to not use their services for now.
4. Bring Down the Tesla Coils;
Once again, the map will increase. Your task is to turn off the Russian defense structures - Tesla.
![You can either send Kamikaze troops to reactors [4] supplying Tesla, or capture them with your Ninja soldiers (you can walk next to Tesla without any damage if you will use Shinobi special ability which they disappear in smoke clouds) - Empire of The Rising Sun - Vorkuta - Empire of The Rising Sun - Command & Conquer: Red Alert 3 - Game Guide and Walkthrough](https://game.lhg100.com/Article/UploadFiles/201512/2015121413562345.jpg)
You can either send Kamikaze troops to reactors [4] supplying Tesla, or capture them with your Ninja soldiers (you can walk next to Tesla without any damage if you will use Shinobi special ability which they disappear in smoke clouds).
After Ninja capture a reactor, electricity will be turn off for a dozen seconds. This should be enough to destroy Tesla with your remaining units and take care of reactors.
Personally, I recommend to use the Kamikaze... only if you used them rarely before.
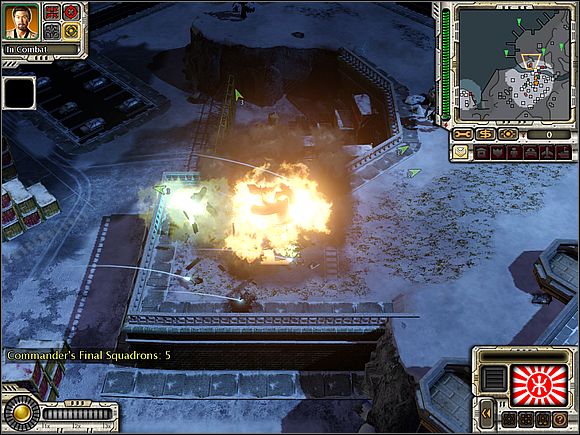
5. Destroy the Soviet Navy at Harbor.
You will get a few submarines. Destroy all Russian ships in Vorkuta [5]. They will not attack you any more.
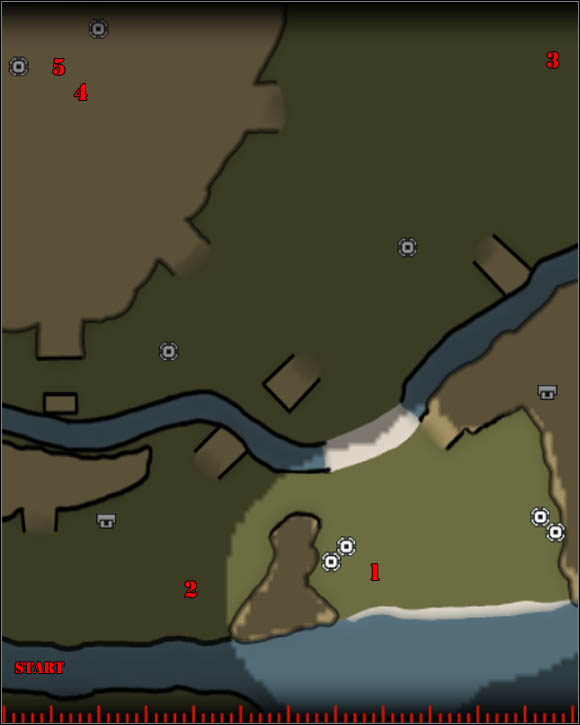
1. Place for your base;
2., 3.,4. Monuments;
5. Mother Russia Statue.
1. Establish a Base;
2. Destroy All Soviet Monuments;
3. Destroy the Mother Russia Statue;
4. Defend the Transports.
1. Establish a Base;
You start off with 4 MCV units and Mecha Tengu. Send them slightly forward, to eliminate the Russians standing on the banks of the river.
Go to the eastern part of the map - there you will be able to create the base [1]. When you will be attacked by the Soviet Air Force, use a special ability Mecha Tengu - transforming themselves into the plane. As airplanes, vehicles will be able to beat Russian Twinblades.
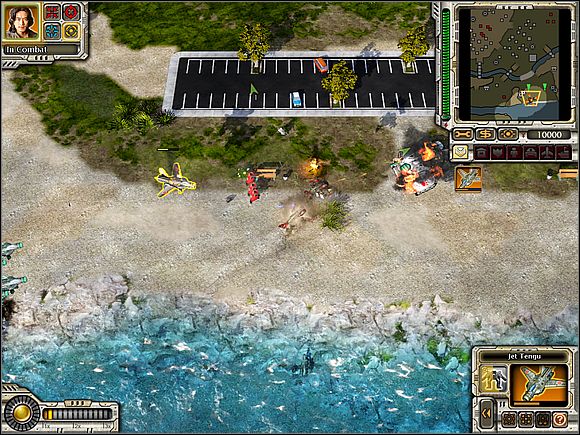
When MCV arrives on the land, unpack it.
2. Destroy All Soviet Monuments;
Start the expansion of the base. Set power plant, two refineries and barracks. Train 5 imperial warriors (ordinary soldiers with guns) and 5 Tankbusters. Send them to destroy the monument [2], which is located on the west to your base. Do not forget to collect the money boxes.
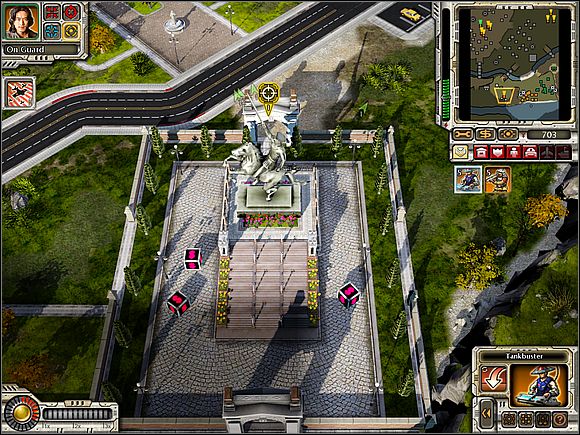
Retreat you infantry back to the base and build Mecha Bay. Do some improvement immediately and start building Tsunami tanks. Set also 1-2 defense towers.
All the time produce tanks. Send 10 of them to the north-eastern corner of the map [3]. There are three more standing monuments. Destroy them and collect lying nearby money boxes.

Press the button in the lower left corner of the screen. You will activate the window of special powers, which you can unlock along with your experience level. Until now, you should be able to unlock only one such power. Select Kamikaze soldiers (the left button). If you wish, you can use them to destroy Soviet monuments.
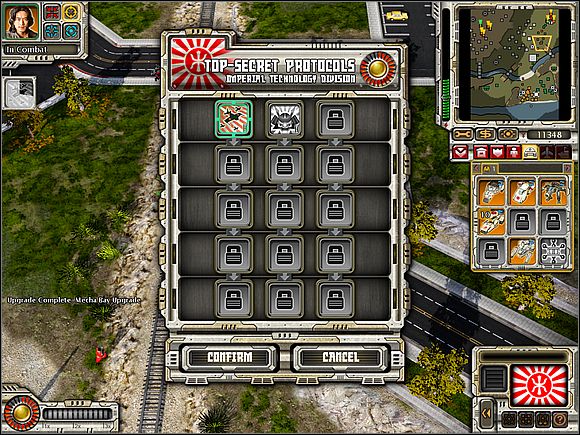
Last part of the monuments are in the north-west corner of the map [4]. Drive your tanks there, destroying everything and once for all. All the time produce Tsunami tanks.

3. Destroy the Mother Russia Statue;
The largest monument in the vicinity [5] must also be destroyed. Make sure that your Tsunami tanks turned this statue into the dust.
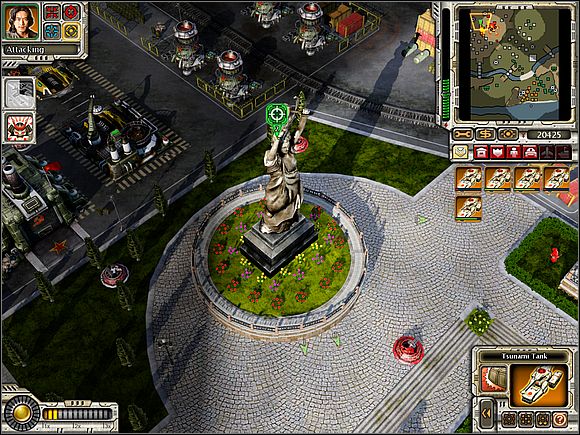
4. Defend the Transports.
Soon, the carriers will appear on the river. Your task is to make sure they reach from east to west in one piece. Send your tanks near the river and kill all the Russians, who wish to destroy the carriers.
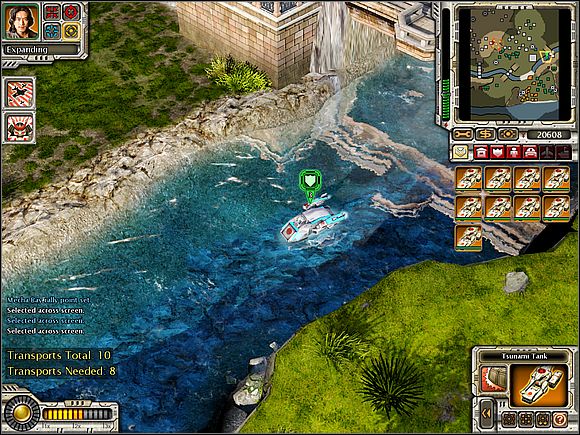
Call Kamikadze strike on the Apocalypse tanks. Your Tsunami are too weak to be able to effectively counter them. Order also your ally to attack - he should take care of these units which you can't attack at this moment.
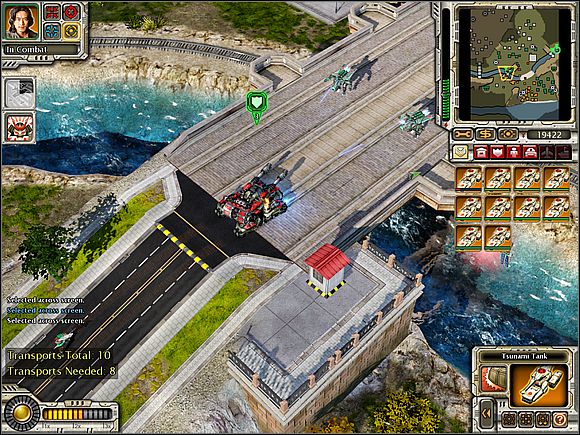
Produce also 2-3 Mecha Tengu and transfer them into planes. Several Russian helicopters will be attacking your carriers and you have to protect them. If you note that your ally is dealing quite good with enemy, command him to destroy Soviet Twinblades.
Across the river will swim 10 carriers, 8 of them must reach the western part of the map.
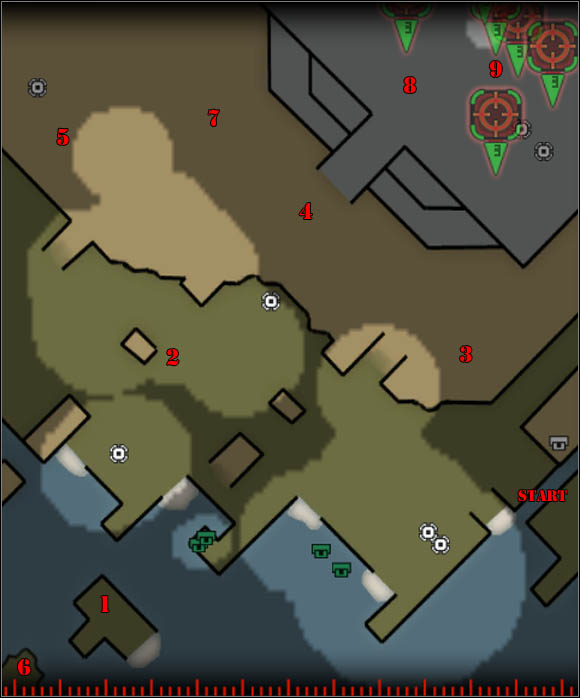
1. Carriers destination;
2.. 3., 4., 5. Artillery bases;
6., 7., 8. Landmarks;
9. Soviet base / Iron Curtain.
1. Escort the Transports;
2. Destroy the Artillery Bases;
3. Destroy the Landmarks;
4. Destroy the Soviet Bases.
1. Escort the Transports;
You start with four specific units. They are rolling machines that can transform into helicopters. At a time when walking on land, they are called Strikers-VX. As helicopters, are known as Chopper-VX.
At the beginning let them fly in the form of Choppers. You have to escort carriers, which you protected in previous mission. Kill all the Soviet boats (both on-and underwater), which attack your carriers. You have to protect at least 8 out of 10 machines.
![When the carrier will get ashore [1], transform Choppers into Strikers - Empire of The Rising Sun - Odessa - Empire of The Rising Sun - Command & Conquer: Red Alert 3 - Game Guide and Walkthrough](https://game.lhg100.com/Article/UploadFiles/201512/2015121413562523.jpg)
When the carrier will get ashore [1], transform Choppers into Strikers. As a rolling machine, your vehicles are able to fight with hostile helicopters. Several Russian Twinblades will soon came over with carriers destroy intent. Do not let them do it.
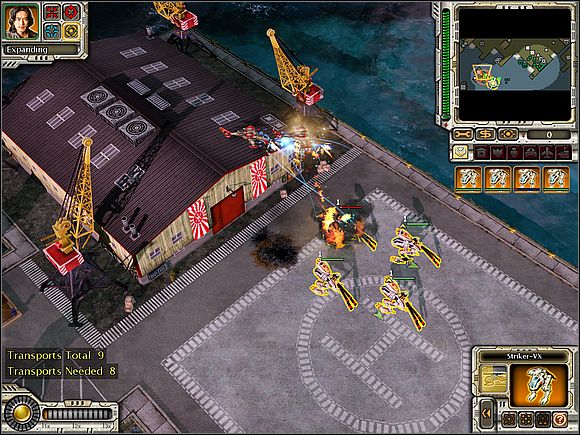
2. Destroy the Artillery Bases;
This has not been played yet! You have Shogun executioner for your disposal. He is very hard and take a lot of damage at one light sword cut, but on the other hand he is extremely slow and vulnerable from air attack. If any helicopters will buzz you, ask an ally to eliminate them.
Know also that you can repair it when you send it to the enemy Tesla or Stingray boats - electricity shocking the robot, healing him.
![Start destroying artillery bases [2] [3] [4] [5] - Empire of The Rising Sun - Odessa - Empire of The Rising Sun - Command & Conquer: Red Alert 3 - Game Guide and Walkthrough](https://game.lhg100.com/Article/UploadFiles/201512/2015121413562558.jpg)
Start destroying artillery bases [2] [3] [4] [5]. Shells from this guns, are exceptionally strong and can seriously damage Shogun, so after the destruction of any artillery base visit hostile Tesla to regenerate.
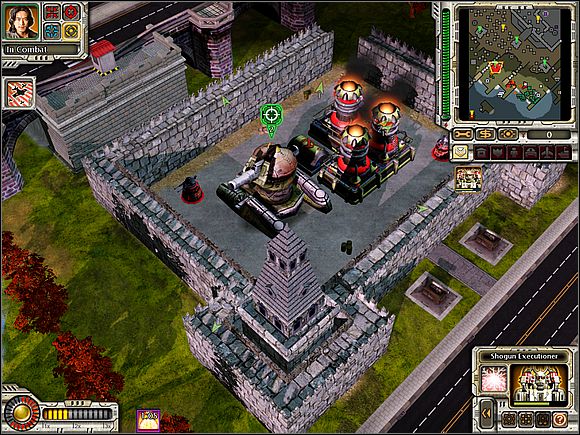
If you have a problem with the fence surrounding the guns, use the robot special ability - destructive shock wave. She is able to destroy every wall.
3. Destroy the Landmarks;
On the way also destroy a civilian objects [6] [7] [8], if you'd like to complete the only secondary objective in this mission. Only one point [6] may be a problem - Your robot is slow so don't waste your time to walk there. Tell your ally to destroy the object.
4. Destroy the Soviet Bases.
Just guide your Shogun to the north east corner of the map [9]. Destroy all important Soviet buildings (including the Iron Curtain - shown in the picture below), which you'll find there.
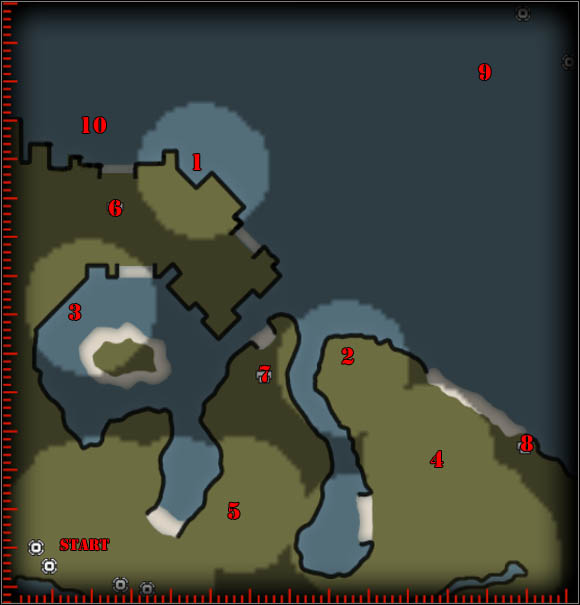
1.-5. Objects to protect;
6., 7., 8. Long Range Radars;
9., 10. Ally buildings.
1. Defend Pearl Harbor;
2. Capture the Long Range Radar Towers;
3. Defend the Long Range Radars;
4. Destroy the Allies' Assault Base.
1.1. Defend Pearl Harbor;
You start with an extended base and a few objects for protection [1] [2] [3] [4] [5]. Note that you have 5 vehicles in your camp, which unpack into defense towers. Build two towers next to the objects, which are the closest to the coast [1] [2].
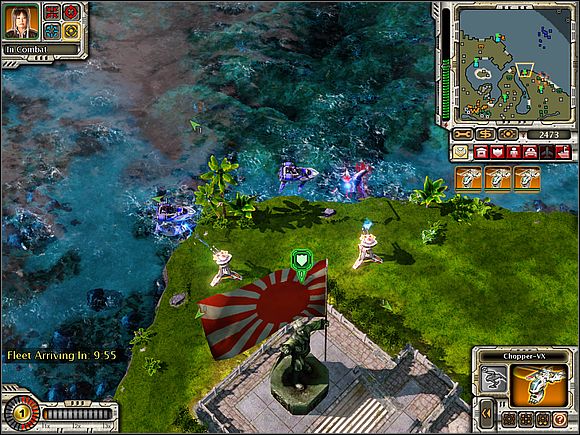 If you can, put the towers on the ground. In this way, hostile dolphins will not be able to damage them.
2. Capture the Long Range Radar Towers;
There are three different radars on the map [6] [7] [8]. Send one of the engineers (get two on startup) to the radar in the north. Your ally will take care of the rest
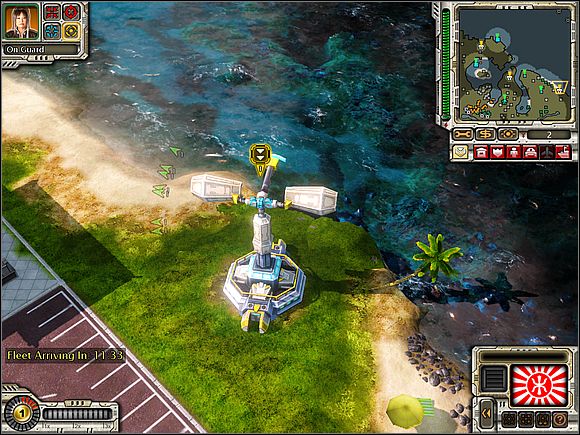
Start Striker production. Transform them into Choppers and send to defend those radars (2 on each radar should be enough).
1.2. Defend Pearl Harbor;
The enemy will send his units very fast. To deal with them, command your strikers (got some units immediately). Now send them to the monuments that are the nearest coast [1] [2]. Produce dozen units of this type.
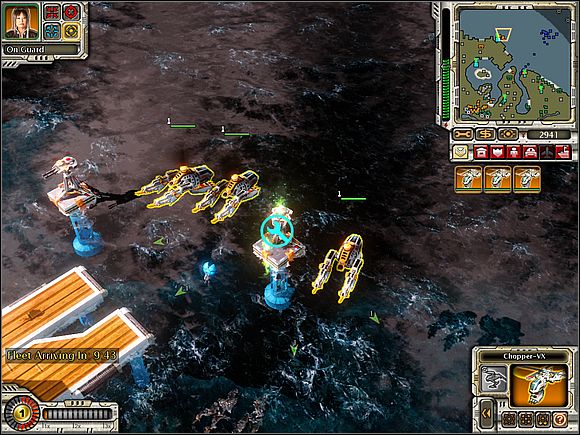
Start the production of Yari Mini-Sub. Send those units to protect the facility on the west edge of the map [3]. In fact, the building has a repair properties - keep your boats close to him, to keep them in the perfect condition.
![It may happen that your ally can not deal with the protection of the monument on the east [4] - Empire of The Rising Sun - Pearl Harbor - part 1 - Empire of The Rising Sun - Command & Conquer: Red Alert 3 - Game Guide and Walkthrough](https://game.lhg100.com/Article/UploadFiles/201512/2015121413562782.jpg)
It may happen that your ally can not deal with the protection of the monument on the east [4]. Support him with Choppers and Tsunami tanks (but only a few! You must have some units in the base in the event of an attack enemy paratroopers and other units).
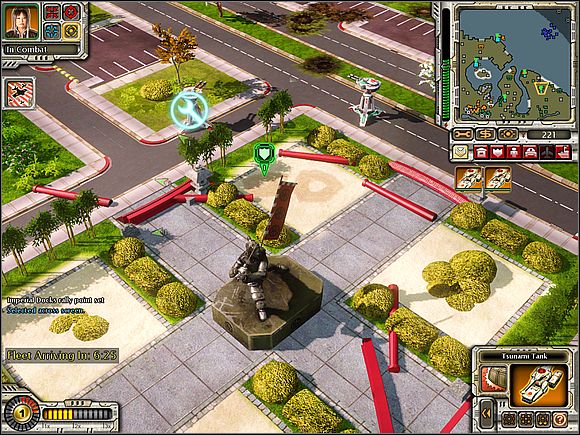
Soon you will get some cruisers. They appear in the north-eastern corner of the map. Send them to destroy the allied yard [9].

3. Defend the Long Range Radars;
The Allies will send its engineers. Their task will be to turn off the radars [6] [7] [8], which together with your ally recently capture. If you sent Choppery-VX for their defense, you should not worry about this task.
1.3. Defend Pearl Harbor;
Will produce a vehicle that can create Nanoswarm Hive. Make sure you have enough energy and then build this facility.
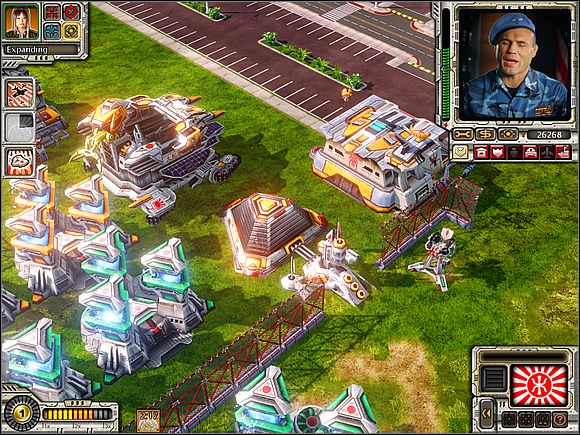
His action is to create temporary defense barrier. Use it to protect endangered objects.
Soon the timer will reach zero. Repair facilities and command you Choppers to visit all places at risk of destruction.
4. Destroy Ally base.
You will get quite large fleet (north-eastern corner of the map).
In this fleet, there are several top units, which may have an army of Japan - the Shogun warships. Their missiles have a huge range. With these units, the destruction of the Allies [9] [10] is practically only a formality.
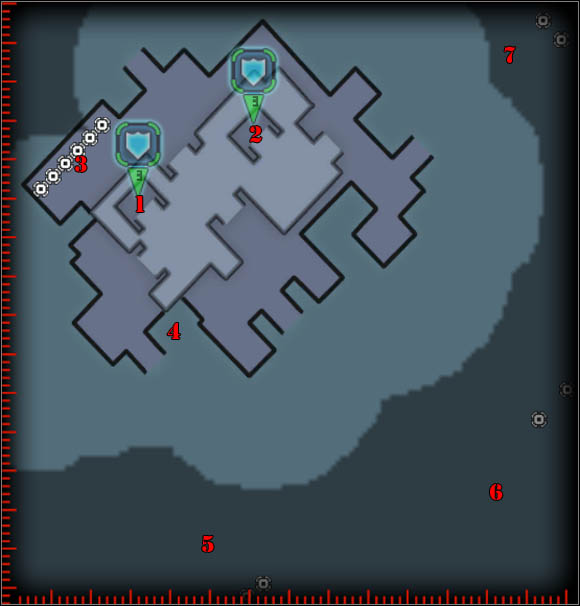
1., 2. Power cores;
3. Ore deposits;
4. Yard;
5., 6., 7. Allied bases.
1. Stop the Allied MCVs;
2. Protect the Fortress Power Cores;
3. Repair the Fortress Power Cores;
4. Escort the Engineers to the Power Cores in 3 Minutes;
5. Destroy the Allied Assault Forces.
1. Stop the Allied MCVs;
There are hostile MCVs on the map. Order your Shogun units (and only them!) to destroy them. They must make experience.
You will also get several Rocket Angel units - as usual you will notice they are able to disable enemy vehicles, both land and water. In addition, they can attack enemies with rockets but they are very poor armored.
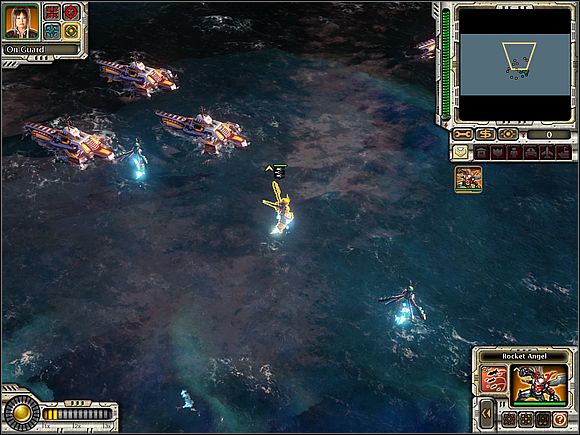
Soon, in the north will appear another MCVs. Destroy them too. Shogun battleships should already get the maximum experience (symbolized as star). Now command your Naginata Cruisers to destroy Allied MCVs.
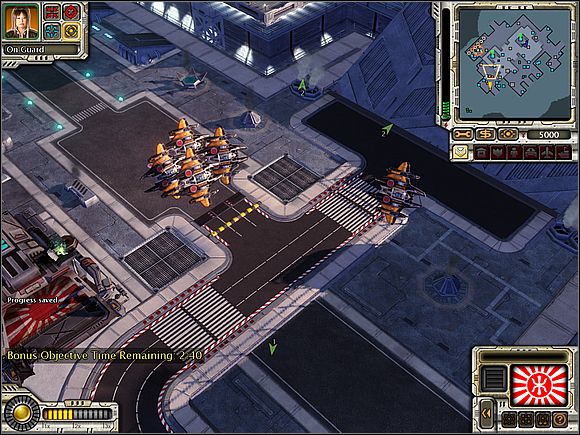
They will have units to practice, because the next MCVs will come both from the north, and from the east. Sometimes there will show also Allies armed units. Attack them all with all your units.
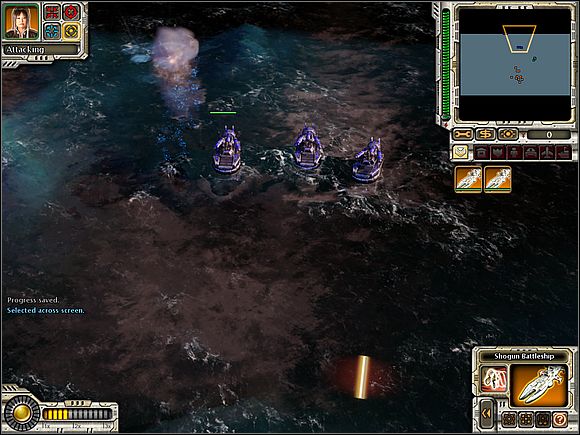
2.1. Protect the Fortress Power Cores;
Floating fortress is powered by two Power Cores [1] [2]. They can not be destroyed. You will get some Sea Wing aircrafts - use them to suppress enemy vehicles and infantry. They should have support from the known Rocket Angels.
Sea Wings in large groups poses a serious threat.
You must destroy units attacking power cores as quick as possible. This is not difficult, but you have to hurry up.
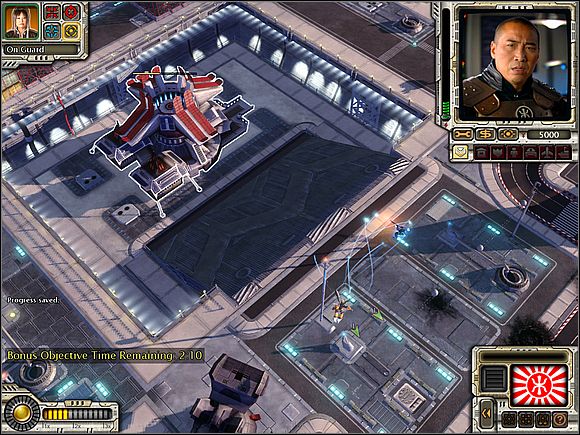
3. Repair the Fortress Power Cores;
4. Escort the Engineers to the Power Cores in 3 Minutes;
After eliminating the attacking cores Allies, command your engineers to enter those structures. If you command your engineers to enter the platform BEFORE beating Allies attacking the cores, you will have no problem to complete this task in three minutes.
2.2. Protect the Fortress Power Cores;
The next Allies units will come on fortress. Beat them and wait for help.
Fleet will come to you, which you fight at the beginning, and MCV. Unpack them near other buildings. To do the same with the other vehicles that can be able to unpack.
![Build some refineries near the ore [3] located in the western part of the fortress - Empire of The Rising Sun - Pacific Ocean - part 2 - Empire of The Rising Sun - Command & Conquer: Red Alert 3 - Game Guide and Walkthrough](https://game.lhg100.com/Article/UploadFiles/201512/2015121413562988.jpg)
Build some refineries near the ore [3] located in the western part of the fortress.
Create some additional Sea Wings in the yard [4]. They will be useful to destroy ships which will soon attack your fortress.
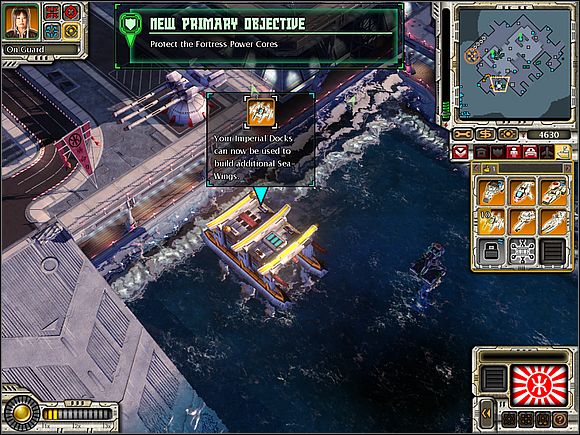
Train additional Rocket Angels. They will also assist in the fight.
As far as possible, repair guns set on the fortress.
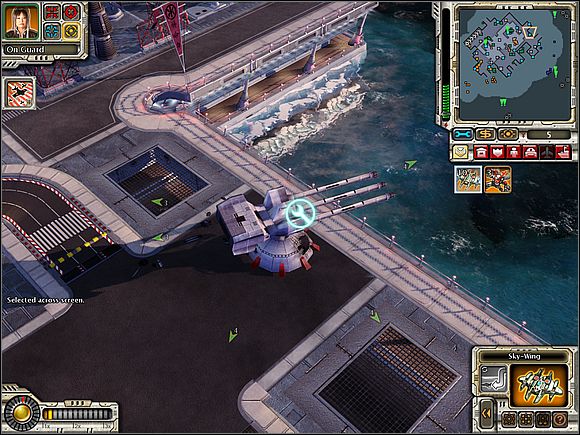
Armor yourself with Kamikaze units also. With the mission progress it will be possible to improve the Navy (Navy Upgrades, second item in the right column) - is worth taking advantage of it.
Your ally should take care of cores defense [1] [2]. Check them from time to time. If you find out that the Allies have a significant opportunity to destroy the structure, send your air units for defense. Engineers are needed to repair cores. So it was good to keep a few on standby.
5. Destroy the Allied Assault Forces.
The enemy navy will soon arrive. Use your air units to destroy them. Set Shogun ships in the vicinity of the yard (check screen above) - they will be able to shoot Allies from time to time.
Attack large sections of the buildings in the allied bases [5] [6] [7] with your Kamikaze. Move all you air and water forces near the enemy base in the southwest. Let the Shogun units shoot Allies buildings from a distance.
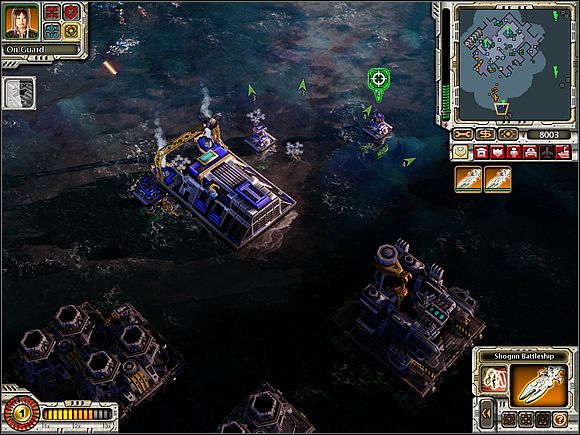
Destroy all Allies buildings in this region.
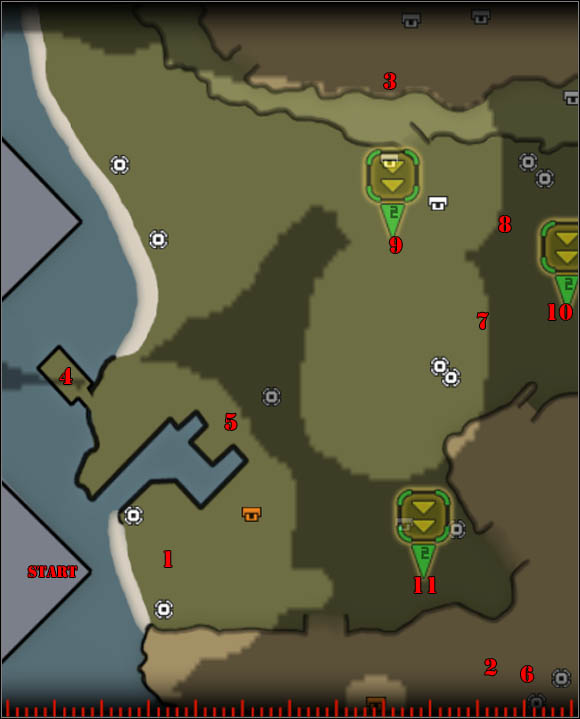
1. Your base;
2. Control tower;
3. Observatory;
4. Amusement;
5.-8. Allies bases;
9., 10., 11. Media centers.
1. Clear a Landing Zone;
2. Capture the International Airport;
3. Destroy the Observatory Cannon;
4. Destroy the Amusements;
5. Capture the Media Centers.
1. Clear a Landing Zone;
Use your guns placed in the floating fortress to put an end to the allied vehicles on the beach.
![Following the destruction of the vehicles, your MCV will unpack on the shore [1] - Empire of The Rising Sun - Santa Monica - Empire of The Rising Sun - Command & Conquer: Red Alert 3 - Game Guide and Walkthrough](https://game.lhg100.com/Article/UploadFiles/201512/2015121413563098.jpg)
Following the destruction of the vehicles, your MCV will unpack on the shore [1]. Make sure to build barracks and refine them to the highest possible level. You need to have access to the Rocket Angels units.
Build also 2-3 towers in the north-eastern part of the map.
 Build towers in this place.
2. Capture the International Airport;
In the south-east corner of the map there is an airport [2]. You have to load in control tower your engineer. Send him with Rocket Angels company. If you do not do this, enemy helicopters will froze your engineer. If you want, you can order your implementation of this objective.
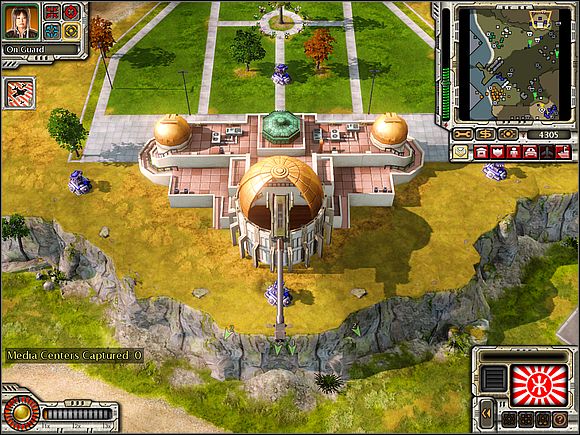
3. Destroy the Observatory Cannon;
The observatory [3] is in the north part of the map. Attack them with Kamikaze (requires 4 or 5 Air strikes).
4. Destroy the Amusements;
Send some Rocket Angels, Choppers and Shogun ship to destroy the park [4].
5. Capture the Media Centers.
Several radio and television stations are located in Santa Monica. Before you start to capture them, destroy absolutely every buildings on the Allied site [5] [6] [7] [8]. The enemy will recover these buildings, so there is no point in sending engineers in this moment.
Produce a lot of aircraft (Rocket Angels, Choppers-VX) and attack the enemy base. Support yourself with Baloon Bombs (which is the additional power, just as pilots Kamikadze).
Following the destruction of buildings hunt enemy units. Send your engineers as soon as you beat all with your ally [9] [10] [11].
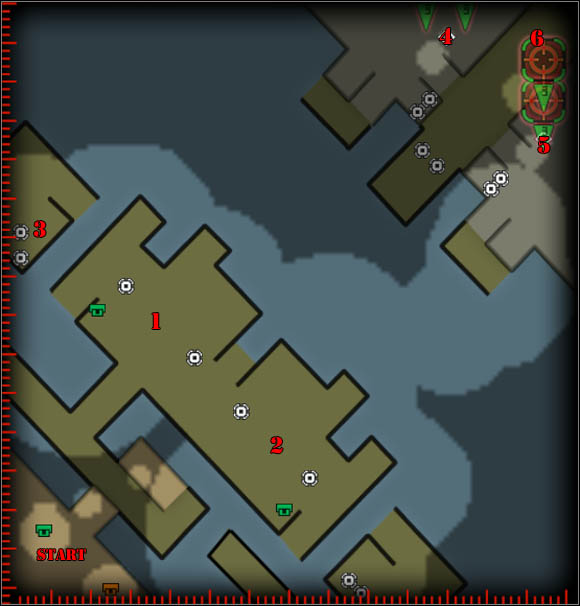
1. Your base;
2. Ally base;
3. Additional ore sources;
4., 5. Relay stations;
6. Enemy Power stations.
1. Retake the Forward Bases;
2. Capture the Nanoswarm Hives;
3. Hold Out for Reinforcements;
4. Destroy the Allied Relay Stations;
5. Destroy the Soviet Forces.
1. Retake the Forward Bases;
2. Capture the Nanoswarm Hives;
You have only one unit at the beginning - Yuriko Omega. Attack the nearby tanks.
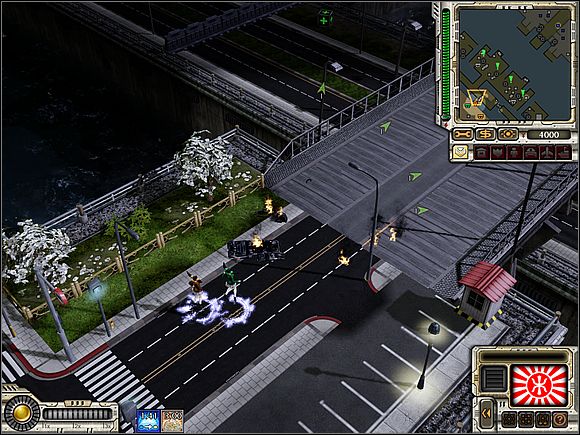
Her attacks are quite interesting. Go ahead, eliminating along the way any enemy.
Ultimately, you will get to the wall, behind which there are support - King Oni. Destroy the wall and move towards the base.
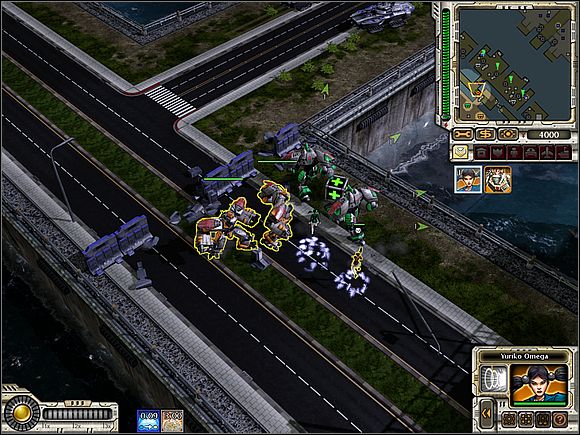
On the way you will even find a few Ninja warriors. Tell your ally to take care of the bases on the east [2] and you attack those in the west [1].
The only problem here is the infantry. Eliminate them with Ninja warriors and Yuriko. Leave robots alone at this time.
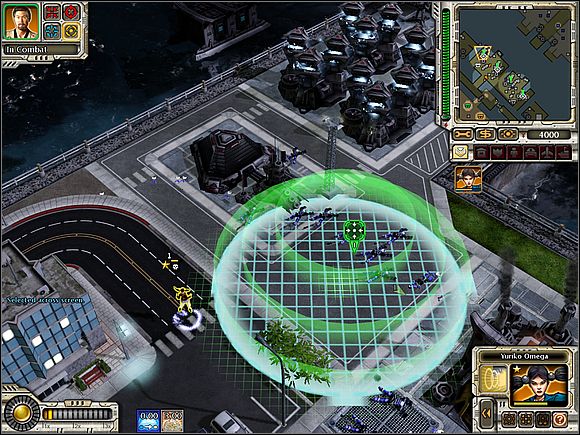
When you finish all enemies, base buildings will be available to you and your ally.
3. Hold Out for Reinforcements;
Start building Strikers-VX. Transforms them into Choppers and send to fight against hostile float units.
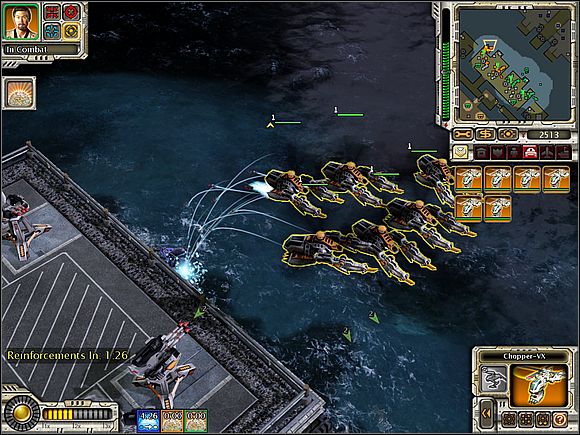
If you have a barracks, train also Rocket Angels.
Your enemy will be send you his units straight to the base by Chronosphere. Remove them using a King Oni robots.
4. Destroy the Allied Relay Stations;
5. Destroy the Soviet Forces;
Hurry up, because you don't have too much time.
Get a few vehicles, which you can unpack into the buildings. Make sure that you can produce Rocket Angels units and start training them. Start also building Japan super-weapon - Decimator. Spread everything on the water, near your CY.
Do not forget to get additional ore [3] from a nearby island.
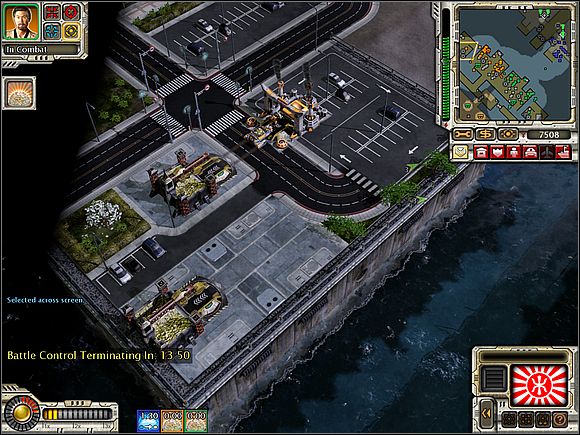
The Russians have its base in this region. First, send Yuriko to the north-west corner of the map - there, on the river, there will be a hostile Dreadnoughts. The thing is, to dispose of them immediately after their appearance on the map. You must then return Yuriko to the base. Set her in the place shown in the picture below.
 Standing in this place, Yuriko can destroy coming Soviets carriers.
Create some Strikers-VX (14 should be enough). Change them into Choppers and send near the northern edges of the map (over water). Then command them to attack two relays [4], which the enemy has in the north. These devices must be destroyed. Your machine probably will not return to base. Finish their produce after this action.
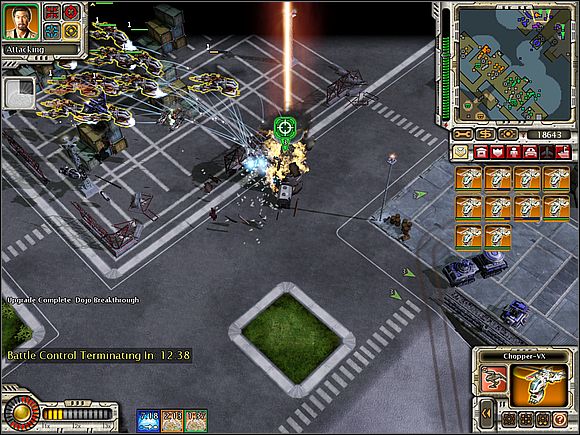
Build some Yari Mini-Sub in the yard. Use them to the absolute destruction of all hostile yards. In this way, you will get rid off the carriers and Dreadnoughts. Set remaining boats in the middle of the map, or in the vicinity of the ramp leading to the ore deposits.
 Do not let the Soviet ships swim up to your base.
Except Yuriko, hold some Rocket Angels in the base - they will assist in fight against both the aviation and tanks, which the enemy will teleport by Chronosphere to your base (King Oni should fight with those last).
When Decimator will be ready to fire, be prepared to serious fight with the enemy. You should already have a dozen or even several dozen Rocket Angels. Hit the power station with super-weapon [6] in the north-eastern corner of the map.
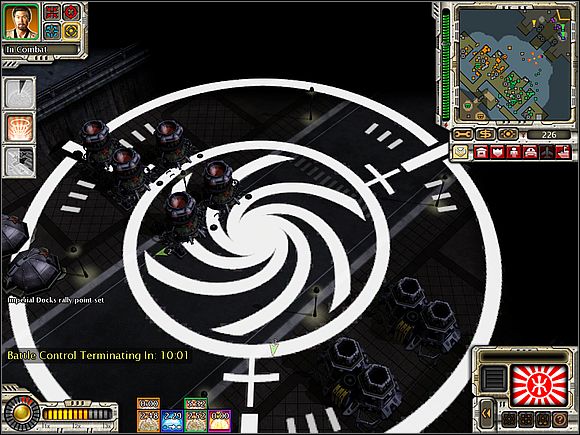
This will seriously cross the enemy plans. Shortly after the attack send your Rocket Angels, to destroy the hostile buildings. First, attack a Russian CY, power plants and airports (note that these two last groups of buildings are located just right the water).
From now, organize the attacks on enemy buildings. Attack the enemy with large groups of Rocket Angels. Support yourself with Kamikaze bombs and Baloon Bombs also.
![For the station destruction [5] you have only a few minutes - Empire of The Rising Sun - Yokohama - part 2 - Empire of The Rising Sun - Command & Conquer: Red Alert 3 - Game Guide and Walkthrough](https://game.lhg100.com/Article/UploadFiles/201512/2015121413563367.jpg)
For the station destruction [5] you have only a few minutes. Note, that if you use Nanohives on them, the timer stops for a few seconds. Follow this type of actions as often as possible. You can also order your ally to use Nanohives.
![After beating all Russians, the opponent should already have enough little anti-air protection that the destruction of the remaining relays [5] should not be a problem - Empire of The Rising Sun - Yokohama - part 2 - Empire of The Rising Sun - Command & Conquer: Red Alert 3 - Game Guide and Walkthrough](https://game.lhg100.com/Article/UploadFiles/201512/2015121413563376.jpg)
After beating all Russians, the opponent should already have enough little anti-air protection that the destruction of the remaining relays [5] should not be a problem.
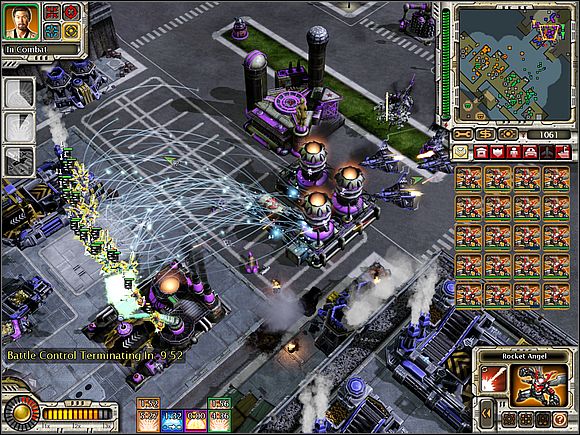 Destruction of Soviets super-reactor (firing at the picture) will end with a powerful explosion that damage all around.
1., 2., V.I.P. bunkers;
3. Eastern Soviet base;
4. Kremlin.
1. Await the Shogun Executioner;
2. Capture the Soviet V.I.P. Bunkers;
3. Destroy All Soviet Forces and the Kremlin;
4. Destroy the Time Machine;
4. The Shogun Executioner Must Survive.
1. Await the Shogun Executioner;
Expand your base and set 3-4 towers on the North of the base.
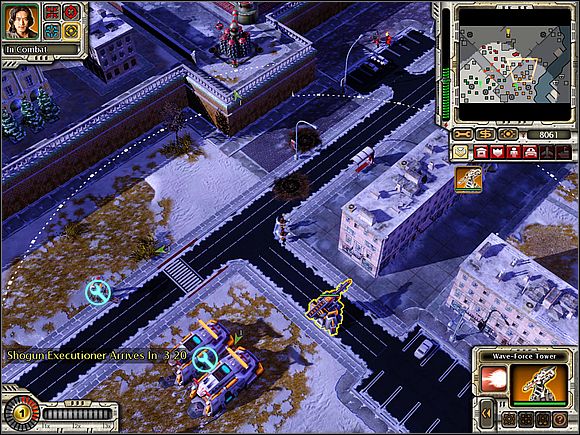
Build also Decimator. Train several Rocket Angels to defend the base against V4 Rocket Launchers. Set also several towers inside the base to protect against Kirovs.
2. Capture the Soviet V.I.P. Bunkers;
The robot will soon appear on the river. Do not move it from there. And remember - the primary task in this mission is that the robot must survived the battle.
You should have a Sudden Transport. Load up several engineers to the vehicle, extract them in their bunker near [1], and then enter at least one of the technicians inside. In this way, you will take control over all Soviet buildings.
![Map will be increased, exposing a larger piece of Moscow and another bunker [2] to take over - Empire of The Rising Sun - Moscow - part 1 - Empire of The Rising Sun - Command & Conquer: Red Alert 3 - Game Guide and Walkthrough](https://game.lhg100.com/Article/UploadFiles/201512/2015121413563444.jpg)
Map will be increased, exposing a larger piece of Moscow and another bunker [2] to take over. Repeat the procedure with engineers transportation. In the meantime, make the robot go to the northern part of the river. Save the game now.
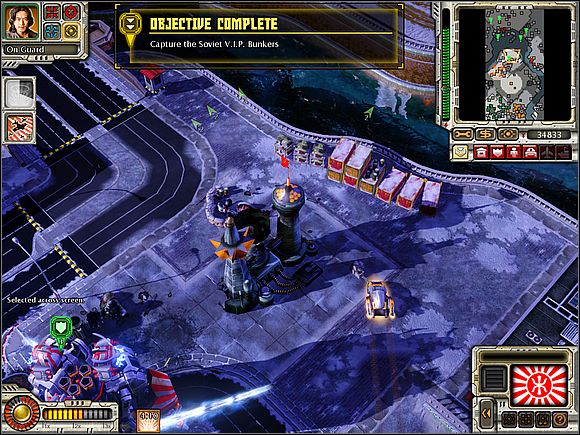
3. Destroy All Soviet Forces and the Kremlin;
When the second bunker will be captured, focus on the use of the robot. Destroy all the buildings on the map marked with green flags. In fact, in the northern part of the map is a lot of Tesla, so the robot will have many opportunities to repair. Remember that you can always support yourself Decimator in this battle.
When you destroy the last building (with the monument of Lenin, I have no idea why it is known as the Kremlin [4]), the target No. 2 will be completed. Retreat a robot to the place where he appeared on the map.
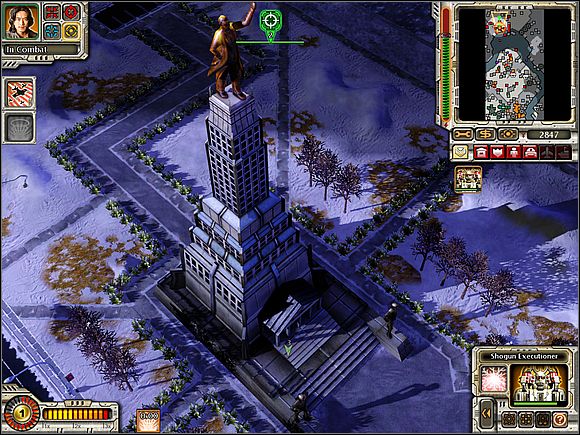
4. Destroy the Time Machine;
From a hole that show up after destroying the last building, the Russian helicopter fly over, carrying time machine in the package. Send your Rocket Angels to the place where was the location of the eastern Soviets base [3]. Helicopter arrive there - then attack him.
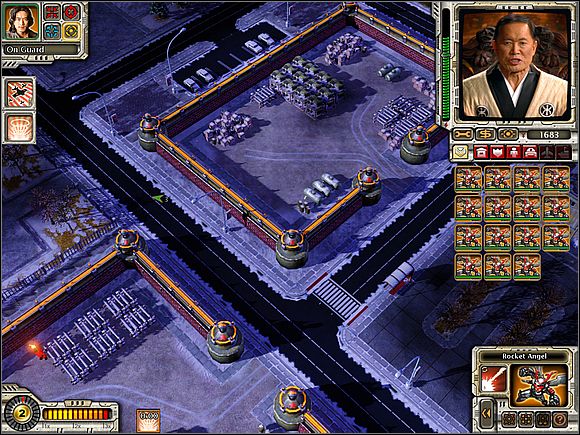 You will come here and destroy the helicopter with Time Machine.
4. The Shogun Executioner Must Survive.
There is great risk that the robot will be destroyed AFTER finishing helicopter with Time Machine. Despite of this, the task is still classified. If hostile aviation will be too strong that manage to destroy the robot, load the game progress and make sure that the Shogun has the support of several Rocket Angels.
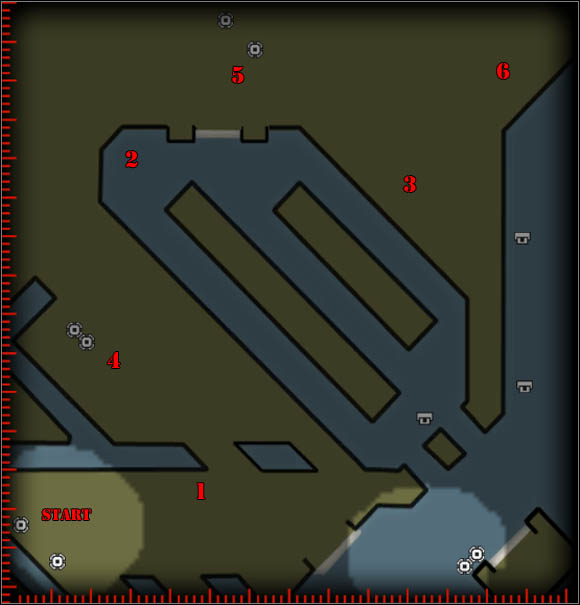
1. Building to capture;
2., 3. Proton Colliders;
4. Allied Air Base;
5. Final Allied Base;
6. Future Tech HQ/ Iron Curtain.
1. Destroy the Allied Advance Base;
2. Neutralize the Proton Colliders;
3. Destroy the Allied Air Base;
4. Destroy the Final Allied Base;
5. Destroy the FutureTech HQ.
1. Destroy the Allied Advance Base;
When some first units will show up on the battlefield, destroy all the buildings facing the Allies in the vicinity. Start expanding your base (most of the necessary vehicles you will right now). Set them all right off the southern coast. In the north, set several Strikers-VX to defend against hostile bombers (produce them you need to improve the vehicle factory). After rising 6-8 machines create about 15 Tsunami tanks.
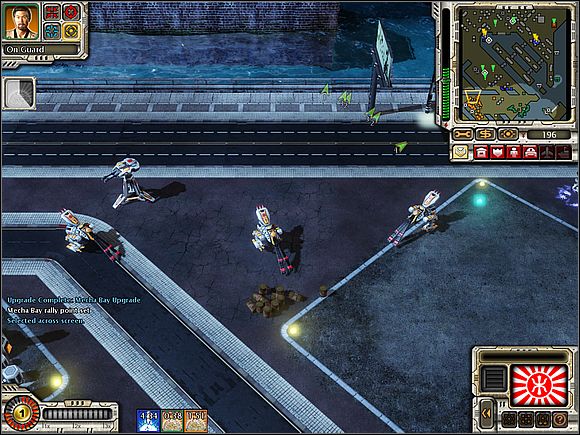 Strikery-VX can destroy coming enemy Bombers.
Capture also building on the east [1]. Load in 5 Tankbusters and 3 Imperial Warriors. If you notice that the building became the target of hostile bombers, send 1-2 Strikers-VX in its area.

2. Neutralize the Proton Colliders;
This secondary objective is very simple to complete. From the additional power select Kamikaze pilots shortly after the start of the mission. The first two air-strikes destroy (or at least break) power plants next to Colliders [2] [3]. Without electricity the device will not work, and task will be classified.
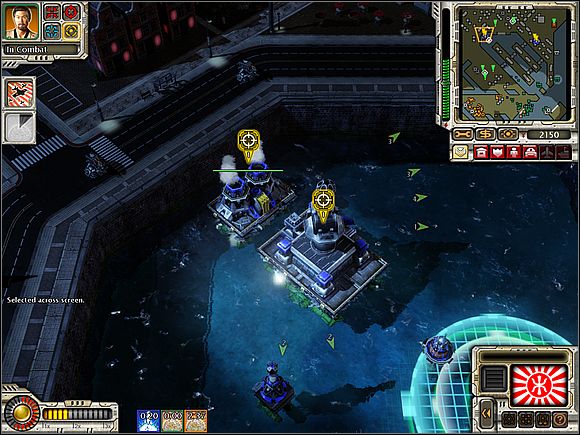
3. Destroy the Allied Air Base;
Ask your ally, to concentrate his efforts on the airbase [4]. You will also take care of it; as long as it stands, you can not use air units. Use King Oni robots (2 get right away) to destroy the base defense structures. Spectrum Tower and the smaller towers are located near the building, which is occupied by the above-mentioned. Destroy these structures, and then retreat your robots to the base.
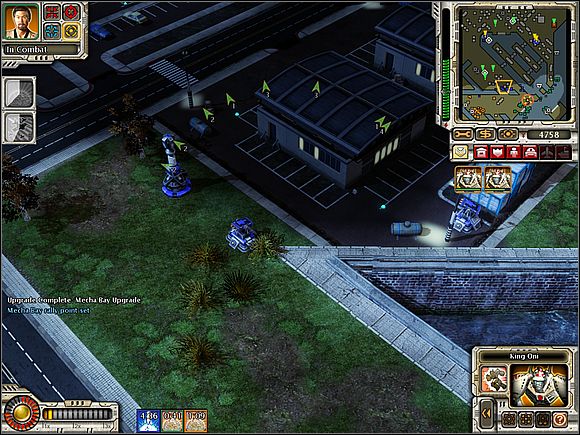
Use Kamikaze, Tsunami tanks (groups of 5 units) and Yuriko to put an end to the allied three buildings in their base - two airports and CY. All these structures are marked with green flags. Attacking tanks, do not pay attention to the enemy units and buildings protection - simply enter the base and kill designated targets.
After several tank attacks improve factory vehicles and create some King Oni robots. Complete their work.
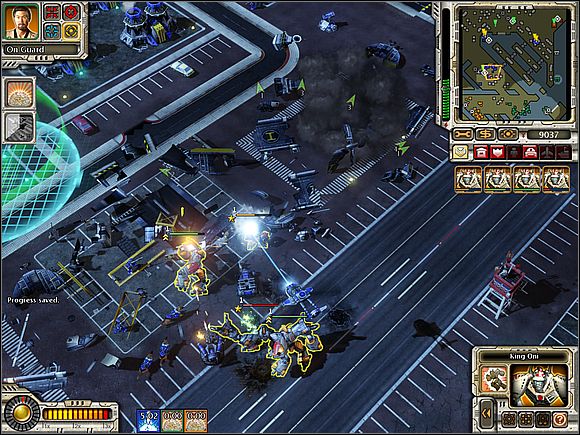
If you do not have what to do with a field force created by Nanoswarm, check if your ally does not need it.
4. Destroy the Final Allied Base;
5. Destroy the FutureTech HQ.
Set Japan super-weapon - Decimator. Once you have done, improve barracks and start training Rocket Angels units.
Use King Oni robots to protect the base. The enemy will often attack you with artillery; keep your eye on base constantly. You can not allow, to destroy your barracks or weapon factory from a distance.
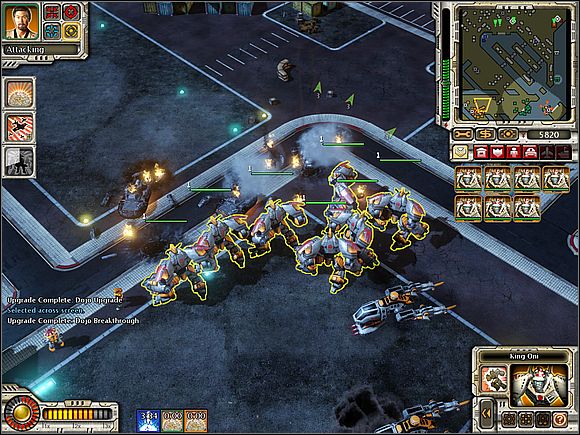
Set also 1-2 towers in the north of the base - there may occur Soviet vehicles.
![First, take care of the enemy Iron Curtain [6] - Empire of The Rising Sun - Amsterdam - part 2 - Empire of The Rising Sun - Command & Conquer: Red Alert 3 - Game Guide and Walkthrough](https://game.lhg100.com/Article/UploadFiles/201512/2015121413563687.jpg)
First, take care of the enemy Iron Curtain [6]. To turn it off, an Kamikaze attack (Final Squadron X) should be enough. If this does not help, create a trap near the building from composed Tankbusters (additional power called Sleeper Ambush). Soldiers should be enough to cope with Curtain.
![Following the destruction of Iron Curtain, FutureTechu [6] building will be vulnerable to various types of missiles - Empire of The Rising Sun - Amsterdam - part 2 - Empire of The Rising Sun - Command & Conquer: Red Alert 3 - Game Guide and Walkthrough](https://game.lhg100.com/Article/UploadFiles/201512/2015121413563644.jpg)
Following the destruction of Iron Curtain, FutureTechu [6] building will be vulnerable to various types of missiles. Attack him with Rocket Angels - you will easy get near the building if you command your craft to fly over water, just on the right edge of the screen. Two MiG fighters will be waiting for you there. They are not demanding opponent. After their defeat shoot of the FutureTechu building.
Once you seriously damage the building, watch cut-scene. It will show you, why you should not worry about Allies [5]. The battlefield map will change, and you will stay with some handful units.
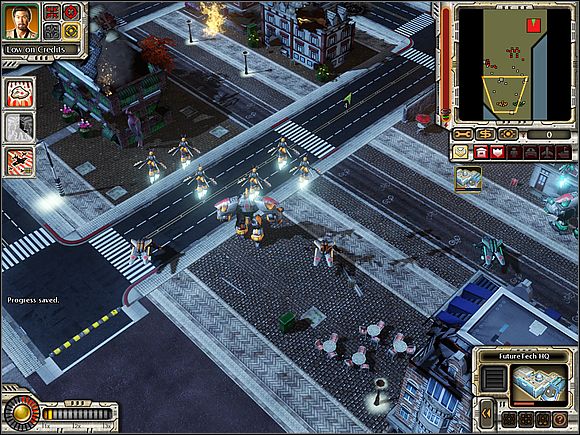
Send your Rocket Angels over the water to the south-east corner of the map. Note, that on the map, there are actually two groups of Russian troops. One of them destroy with Kamikaze (the last level of this weapons should be available so far).
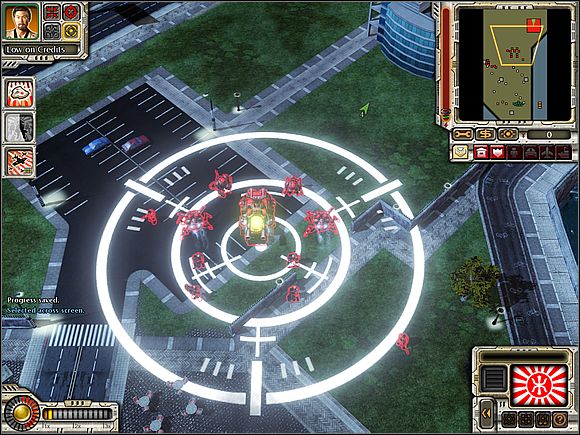
For the second group send ally army. During this fight, send your Rocket Angels to destroy the FutureTechu building. Without the fight against hostile units (and therefore without loss of your own), you can easily finish the Empire of the Rising Sun campaign.
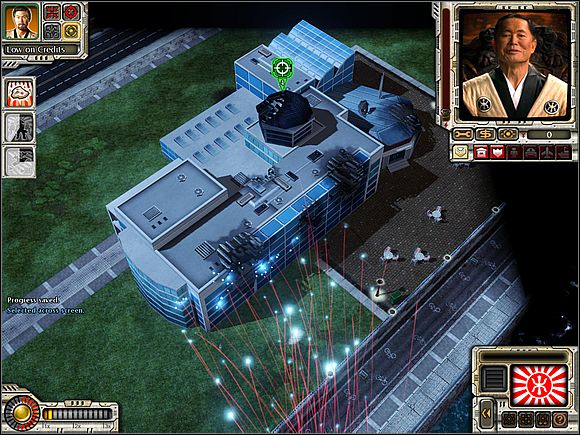


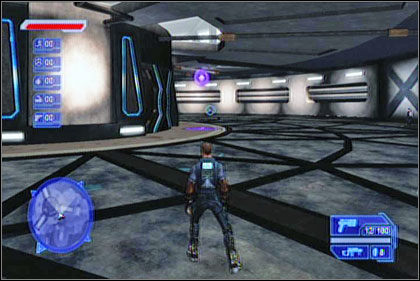
 Crysis 3 Game Guide & Walkthrough
 Castlevania: Lords of Shadow 2 Game Guide & Walkthrough
 Call of Duty: Modern Warfare 2 Game Guide & Walkthrough
 Chronicles of Mystery: The Tree of Life Game Guide & Walkthrough
 Company of Heroes 2 Game Guide & Walkthrough