


Welcome to the unofficial guide to "Alone in the Dark" PC video game. This guide consists entirely of a very detailed walkthrough of all eight chapters of the game. "Alone in the Dark" is a rather challenging survival horror game and there many places where you might end up getting lost or not knowing what to do next. I would recommend that you follow my instructions right from the start, so you'll avoid any unnecessary problems. I've focused mostly on the main goals of the game, however you'll also find out how to find and destroy all roots of evil. These locations appear later during the course of the game, so you won't have to worry about them right away. Have fun playing the game!
Stranger
Ignore the fact that the image is blurry, because your main character is starting to regain consciousness. Use this time to listen to a conversation in the background. You can also look around a little with your mouse. One of the bad guys is going to approach you in a short while. Listen to what he's saying. You must use the mouse to look up (screen), so you'll see his face.
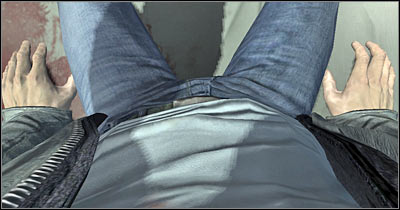
Now you must perform a second action. Wait for a confirmation window to be displayed on your screen. Blink your eyes. You can do this by pressing the X key. I would recommend closing your eyes for at least one second. This will restore your vision for a longer period of time. You will be forced to press this key every 15-20 seconds. Thankfully, your vision will return to normal once you've finished this introductionary level of the game.
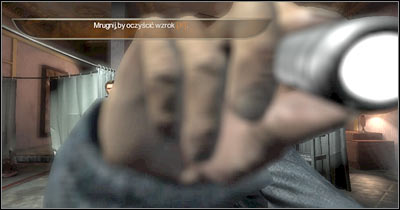
Be ready to leave this room in a short while. You will be moving in the first person perspective view, so you shouldn't have any problems using the movement keys. Leave this room and turn left (screen). Don't follow the second group. Instead, make a second left turn. Thankfully, your guard will hit you whenever you try going the wrong way, so you really can't get lost here. :-)
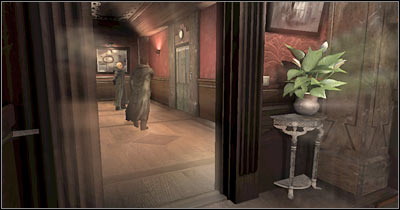
You should be able to approach a new door in just a few seconds. Wait for your guard to open the door and proceed to a new corridor. Your character will automatically use the switch on the wall. Your task will be to move up the staircase. Just as before, there's only one passageway here. Notice the weird creature inside the walls (screen). It's called a Fissure. Thankfully, you won't have to worry about taking part in any battles here and your life won't be endangered in any way.
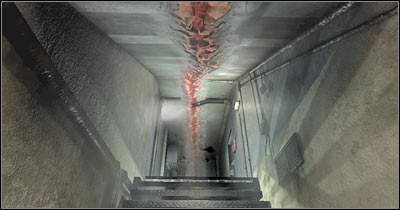
Keep heading forward until you've reached a new door. Ignore the door. Make a few steps forward and turn around. Now you must only wait for your guard to get here. He will try opening the door, however he is going to be swallowed by the monster (screen). You, on the other hand, will end up on a lower floor. Proceed to the nearest corridor. It shouldn't take you too long to reach a new area.
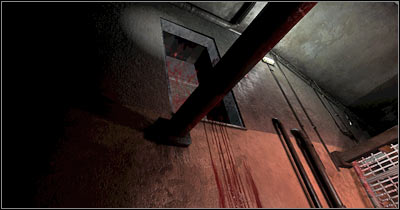
You are going to be rewarded with a new cut-scene during which you'll be given an opportunity to see how Edward looks like. You should also notice that you've been given a chance to switch to TPP view. You can do this by pressing the TAB key. Take your time to familiarize yourself with the controls, especially since it's fairly difficult to move the character in the TPP view. Notice that you can use the SHIFT key for running and you can turn around quickly by pressing the ALT key.
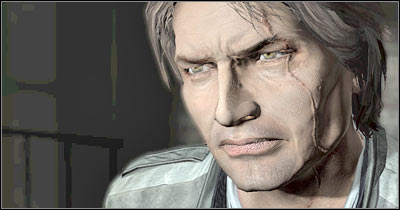
There's a small balcony to the right of the mirror and that's where you'll have to go. Obviously you must be extremely careful here, because it's very easy to lose balance and fall. Proceed to the upper part of the screen and turn right, so you'll end up standing on top of an elevator (screen). Watch a new cut-scene.
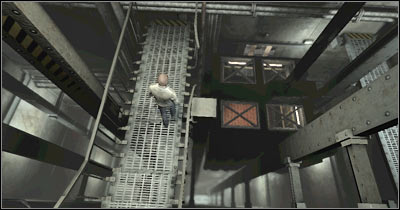
You should be able to regain control over Carnby very soon. Once again, you'll end up standing on a very narrow balcony, so you shouldn't even think about using the sprint button. Start moving forward. Eventually you'll come across a ladder. Use it to get to the upper platform by pressing the action key (E by default). Once you're there, approach a large device (screen) and press the action key to lower down the rope.
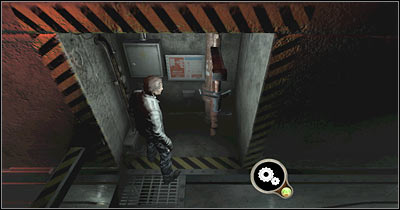
You will have to press the action key once more in order to grab the rope. Familiarize yourself with the content of a new hint. Press and hold the S key and Edward will start lowering himself on the rope. Once you've reached a large fan, you will have to press the SPACE key. This will allow your main character to perform a jump (screen), preventing him from being cut to pieces by this device.
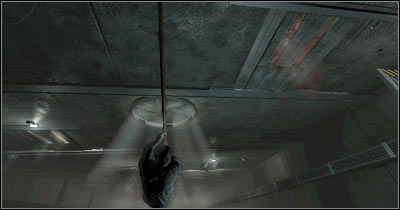
Use the SPACE key for the second time in a row to avoid a new fan. Ignore the camera trying to warn you about falling objects. You should be fine as long as you don't move. You will have to deal with a short puzzle before moving on. Thankfully, it's very easy to solve. Make sure that you're somewhere above the electricity (screen).
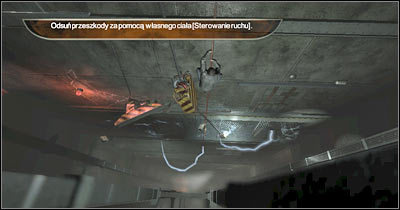
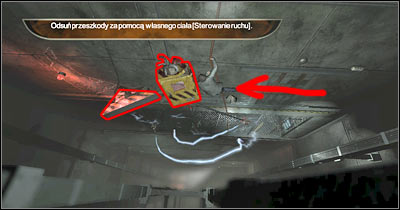
Your objective here will be to start swinging on the rope. You can do this by pressing side movement keys (A and D by default). Doing this will allow you to push a large electricity box to the left. This object will have to be blocked there (screen). If you've done everything according to the plan, you will be allowed to slide down all the way down without having to worry about receiving any injuries.
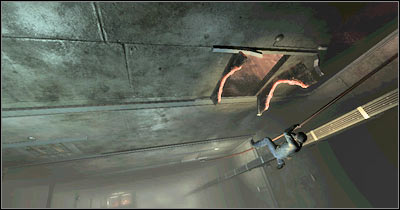
Proceed to the end of the rope. You won't have to release the rope. Instead, take your time to look around. The door on your right should explode. Pull up a little and start swinging. After that, press the SPACE key in order to get inside the building (screen). Thankfully, you'll be allowed to try this as many times as you need.
This is going to be a much longer level and you will have to be careful, because there are a few places where you may actually die. Obviously you will have to stay away from the flames and larger holes. You must also remember that some fires you'll be encountering, will spread over time. You won't have to worry about that right now, but it'll become an important issue in a few minutes. You might want to consider moving forward, however both corridors are going to be blocked by flames (screen) and large wooden objects.
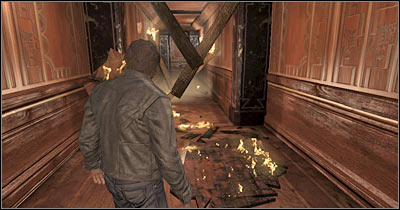
Turn around and approach a small door. Obviously you will have to open the door and enter a new room. A young woman should be standing here. Listen to what she has to say. Apparently her husband is trapped inside the apartment. Sadly, you can't help her from here. Proceed to your right (screen). Edward should automatically enter a new room.
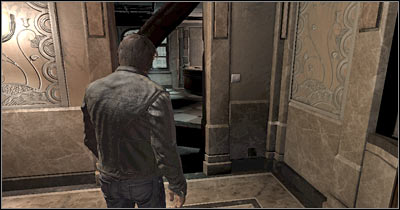
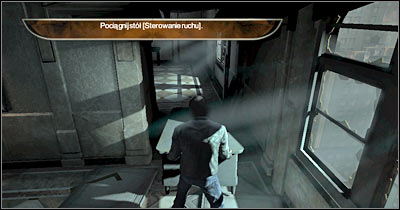
Ignore the message about the possibility of picking up certain items. None of these objects is useful to you at the moment. Proceed to the left corridor. A small desk is blocking your path (screen). Approach this object and press the action key. Start pulling the desk towards you. Leave this object somewhere nearby and head on to a new room.
You'll end up standing inside a room with a blocked exit. You should also notice that fire has spread itself to this area of the building. Dealing with this problem should be considered a top priority. There's a fire extinguisher in the corner of the room (screen). Take this item and turn left, so you'll be facing the flames.
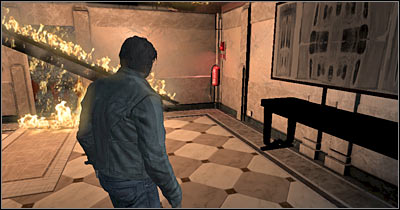
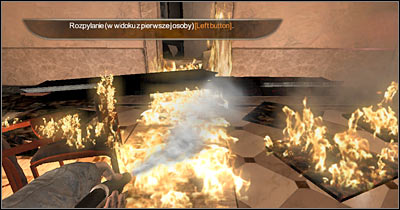
The game will suggest to switch to FPP view and you should follow this advice by pressing the TAB key. Start using the fire extinguisher to put out the flames (screen). It's extremely important that you secure this entire area, so you won't have to worry about going back here again. It's also a good training before having to deal with burning corridors.
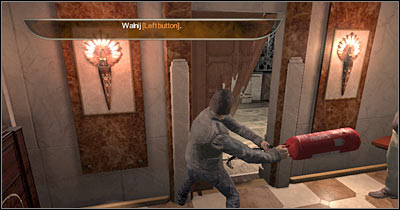
Once you've taken care of the flames, you may finally proceed to a new room. You'll encounter one of the civilians here. As you've probably suspected, your next task will be to smash the door to his room, allowing him to escape. Don't throw away your fire extinguisher just yet. Instead, switch to TPP view and start smashing the door with this object (screen). You can change the position of the extinguisher in your hands by using your mouse. I would recommend aiming for the lock, because there's a high probability of destroying the door quickly. Once this is done, go back with your new ally to the main corridor.
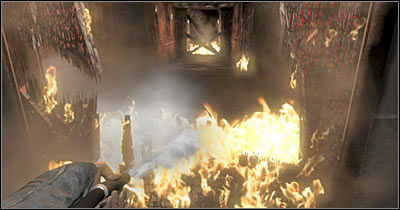
Once you've successfully left the room, turn right and move forward. As you've probably noticed, the fire has begun to spread. Smash the burning door with the extinguisher. Once this is done, switch to FPP view and start acting as you're a pro fireman (screen). Prevent the fire from getting too close to your character, because you would sustain unwanted injuries.
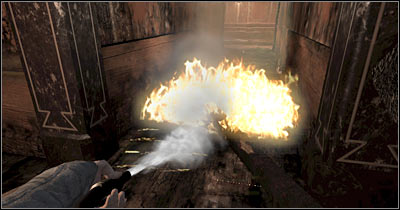
Despite what you might have heard from your new allies, you won't have to be in a lot of hurry. Keep moving slowly and watch out for additional explosions. Focus only on putting out the fire and prevent the flames from reappearing behind you. Once you've reached a junction, turn right and keep using the fire extinguisher (screen). You will have to secure this entire corridor. It shouldn't be a major problem.
Make sure that the area has been secured. Throw away the fire extinguisher, because you won't need it anymore. You can do this by pressing the Q key. Notice a large hole in the ground (screen). Move back, start running and perform a jump by pressing the SPACE key. This will allow you to reach a new corridor safely. Press ALT and see what happened to your allies.
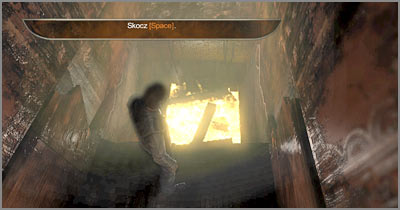
Proceed towards a new junction and wait for the camera to change its location. Turn right and approach the body of a killed police officer. You should be able to find a gun here (screen) and obviously you will have to pick it up. Once this is done, open your inventory by pressing the I key. Choose the pistol from your inventory and turn around. Leave this area before the flames get here.
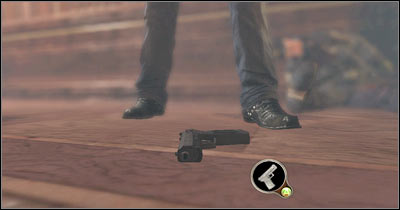
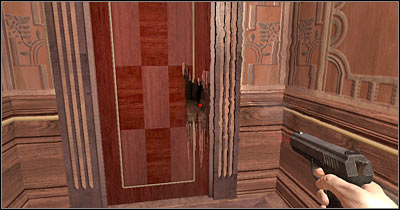
Keep moving forward until you've reached a closed door. Switch to FPP view and aim your newly acquired weapon at the lock. Fire a single bullet (screen) and you should be able to get inside. Witness a very interesting cut-scene. Thankfully, you won't have to worry about your character losing his life.
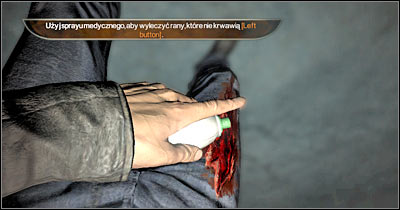
Head on to the nearest room and read a new hint. You'll learn how to heal your wounds. Now you should focus on exploring your surroundings. Remember that you can open most of the cupboards and lockers by pressing the action key. You should gain possession of a few batteries, a medical spray and a duct tape. Press the H key and you'll be presented with areas of your body which you'll need to heal (screen). Use the spray to heal your wounds. Close this window once you're back in full health.
Once you're ready, proceed towards a partially destroyed wall. You've seen this area during the cut-scene. Once you're there, you will witness a large portion of the building collapsing. Go back to the previous room as soon as possible, however avoid getting too close to a cable, because you would end up getting electrified.
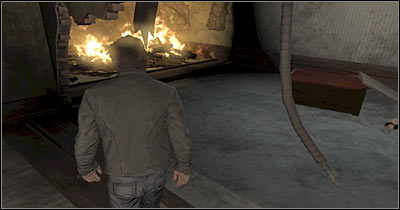
Don't go too far, because an entire floor will collapse in front of you. Watch out for the electricity, stay away from the fire and avoid being hit by smaller objects. Start moving upwards (screen) and eventually you'll be rewarded with a new cut-scene. Ignore the fact that you're falling down, because you'll land on a small balcony.
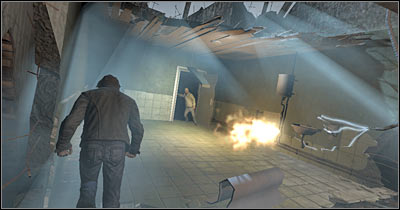
Proceed to your left and press the action key. This will allow your main character to grab a nearby rope. Climb up a little and start swinging on the rope. Your objective will be to let go of the rope at the appropriate time. You can do this by pressing the... PrintScreen key! Your task here will be to land on the left ledge. Team up with one of the survivors.
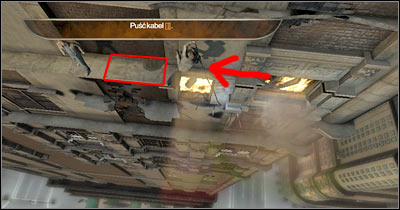
Start following your new ally. Thankfully, you won't have to worry about being attacked by anyone and even if you move too far to the left, you'll have a chance to climb back up. This ledge is going to collapse in a few seconds and you'll find yourself in a very awkward position (screen). DON'T let go. Instead, start moving right.
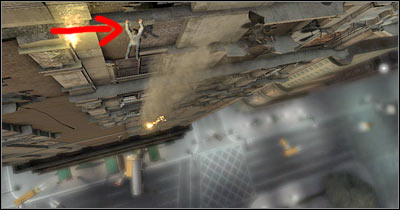
A huge explosion is going to take place below you. As a result, some of the vehicles are going to be destroyed and one of the wrecks will fly over here (screen). Remain where you are and wait for it to pass by. Keep moving right and climb up once you've reached the end. Press the SPACE key to perform a single jump and you'll automatically grab onto a new ledge.
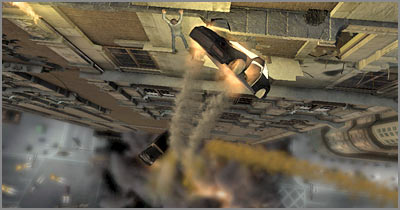
This time you'll be presented with a different challenge. Your task here will be to avoid objects falling down from higher floors. Thankfully, it's a very easy task, because you may use two large statues (screen) for cover. Wait for the situation to calm down and start moving left. You will only have to watch out for smaller objects along the way. It's going to be much easier.
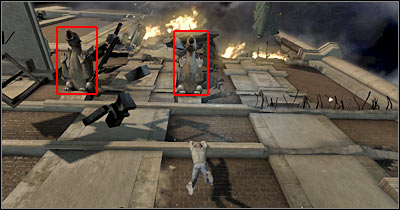
Wait for the large balcony to be completely destroyed. The balcony is located next to the left statue. Once this has occurred, continue moving left. You will have to press the release button and you'll end up standing on a lower balcony. After that, grab a new rope. You will have to release the rope and it can be done in two different ways - you can start climbing (screen) or you can press the SPACE key at least once. Either way, you will have to deal with this small obstacle.
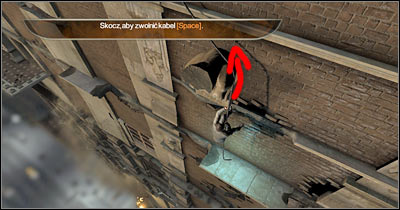
Start swinging on the rope. Obviously you will have to reach a new platform (screen) by performing a successful and precise jump. Once you've arrived at your new destination, grab onto a ledge and start moving left. You can't make any stops here, because the wall will start moving, separating itself from the rest of the building.
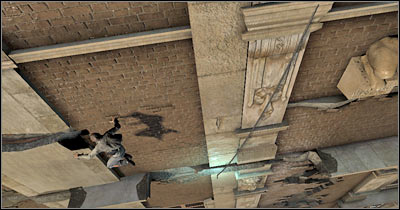
Your objective here will be to reach a new balcony (screen) as soon as possible. Let go of the ledge and move to the left quickly. Wait for a large part of the wall to leave an opening behind. You may enter the building. Once this is done, wait for the camera to make a sweep of the area.
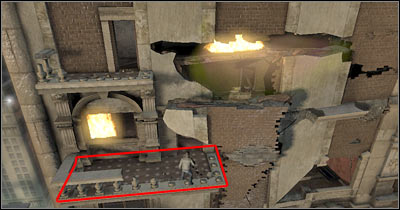
Ignore an information about the possibility of grabbing a rope, because you will have to make some preparations in the first place. Head down to a lower level and find a new fire extinguisher. Pick up this object and place it on a small platform (screen). Turn around and go back to the upper floor by climbing up twice.
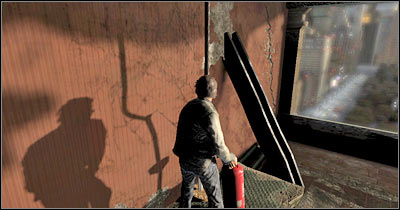
You may now focus on grabbing the rope. Obviously you will have to start running towards it. Press the jump key at the last moment. As for the rope itself, look at my screen if you can't find it on your own. If you've placed the extinguisher correctly, it will be transported to this level. Go back up once again.
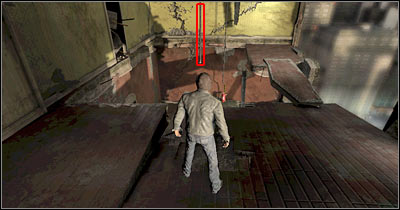
Head on to the fire extinguisher and pick it up. Once this is done, get closer to the flames and start using the extinguisher to put out the fire. Obviously you will have to switch to FPP view in order to use this object. Once the area is clear, get rid of the fire extinguisher and climb up to the upper floor (screen). Proceed to your left and exit the building.
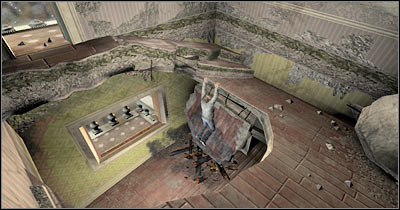
Once you've left the building, you will have to focus on grabbing a new rope. Start moving towards the upper floors. You may ignore one of the civilians. Instead, avoid other large objects which you'll eventually see flying your way. Use the side movement keys (screen). Thankfully, they're very easy to spot and you'll have plenty of time to dodge them.
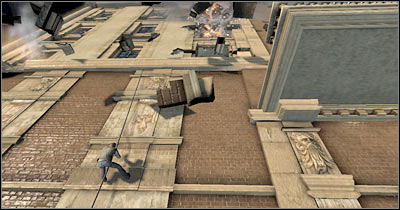
Eventually you should find yourself near a large balcony. I guess it won't come as a surprise that you must start swinging and let go of the rope at the appropriate moment (screen). Enter the building right away.
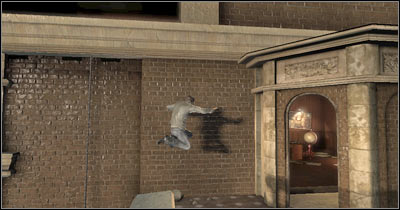
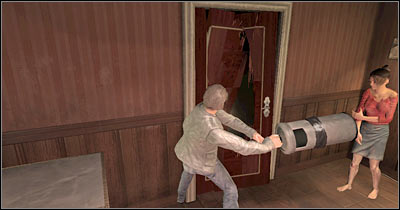
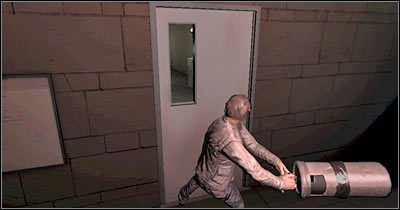
You will find yourself standing inside a fairly small room. You can look around a little if you want to, however it's optional. Find a metal trash can and pick it up. Use this object to destroy the only available door (screen). Doing this will allow you to leave this area. Start moving forward. You should be able to reach a large room in just a few seconds. Wait for the game to display a new cut-scene here. A woman who was with you is going to be swallowed by the fissure monster. Thankfully, you won't have to worry about the same thing happening to your character.
You won't have to spend additional time trying to scout this area. Stay where you are and approach a small table. Press the action key and start pushing this object. The table has to be placed somewhere near the upper floor (screen). Let go of the table and order your main character to climb on top of it. Once this is done, jump towards the upper floor. You should end up standing near the flames and the electricity, so you must be careful.
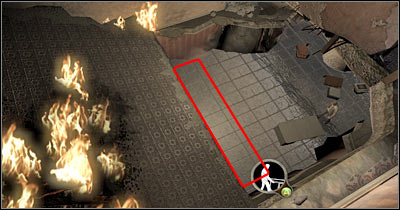
As you've probably noticed, you aren't allowed to move forward unless you've cut power to this part of the building. As a result, you will have to turn left. Grab onto a small ledge. Once this is done, start moving to your left (screen). Keep heading that way until you're capable of climbing up. You should be standing in a destroyed childs room.
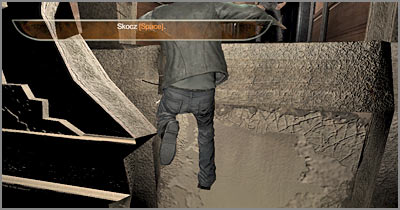
Once again, you will have to go to your left. Get closer to a small fuse box. Carnby should automatically avoid several obstacles along the way. Turn right and press the action key (screen). Doing this will allow you to cut the power to this building. You may turn left and perform a single jump. If you're lucky, you'll end somewhere near the flames. Start moving forward. Obviously you can't get too close to the fire. Keep heading straight until you're rewarded with a new cut-scene.
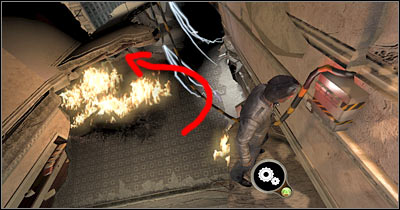
You should be able to find several chairs here. You can also look around a little if you want to and you would receive a new clue in the meantime. Once you've picked up a chair, get closer to the flames and light the chair on fire (screen). Maintain a safe distance at the same time, so you won't get burned.
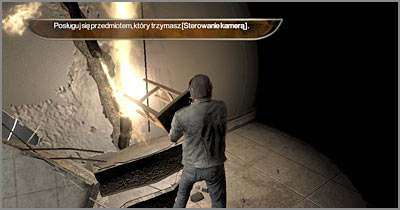
Your objective here will be to reach the policeman and you will have to use the chair as a source of light. I wouldn't recommend moving too slow, because you might not make it to the end. The chair should provide you with light for about 20 seconds before it has to be dropped by the main character. Thankfully, it's going to get brighter near the end, so you won't moving in the dark.
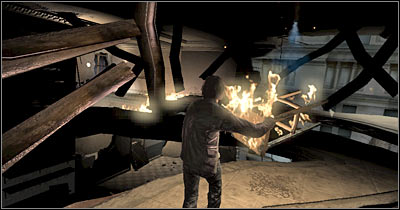
Once you've reached the brighter area of this ledge, start running and perform a single jump. Try reaching the upper platform (screen). It shouldn't be too difficult and even if you make a mistake, you won't die and you'll be allowed to return to this area. This is the end of the first chapter of the game.

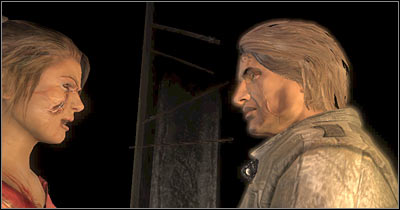
You'll start the game exactly where you left off. This means you will have to deal with a monster who now possesses the body of a young woman (screen). You will have to wait for the monster to end its speech. Carnby will land on a lower level. This is where the first battle of the game is going to take place.
This fight may prove to be quite challenging to you, especially since you haven't encountered any monsters before, so you weren't able to practice how this all works. Once you've regained full control over your main character, consider picking up one of nearby items. You'll probably take a kettle or a hammer. Alternatively you could move to your left, because you would find a much better sword (screen).
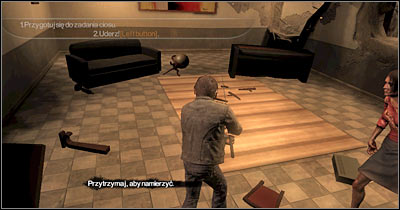
Ignore the hint about the possibility of targeting your opponents. Wait for the monster to get here. As you've probably noticed, you can use the mouse to move the weapon in your hands. Try attacking the monster with a few swift blows (screen). Sadly, this fight isn't going to end with you knocking out your opponent. This is merely the beginning.
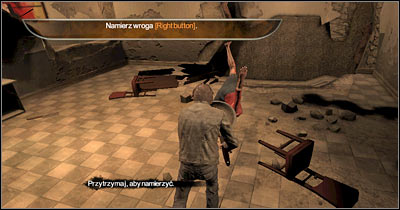
You will have to keep attacking your enemy until the monster is on the ground. This is an excellent opportunity to score a few additional shots (screen) by having your weapon over your head. Prevent the woman from getting up too many times, because you would have continue avoiding her attacks.
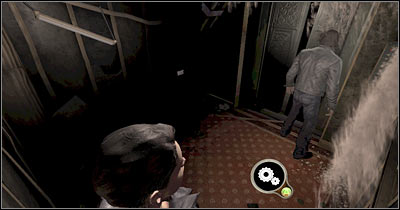
You will have to repeat all of these actions until fire has breached this room. Once this occurs, drop your current weapon and pick up one of the chairs. Approach the flames and light the chair on fire (screen). It shouldn't be a problem, however prevent your enemy from attacking you at the same time. Once you've lit the chair, find your opponent as quickly as possible.
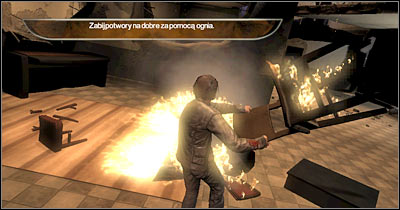
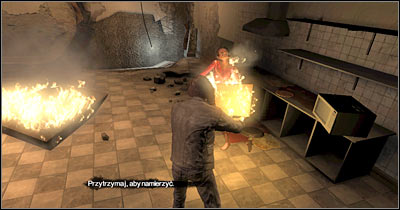
You should be able to receive a hint on how to defeat your opponent - with fire. There is no other way and you will have to remember about this, because you'll encounter similar creatures later during the course of the game. Use the chair on the demon and enjoy when it bursts into flames (screen).
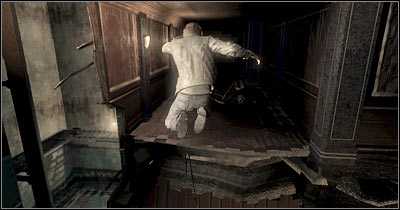
You won't have to perform any other activities here, so you may proceed towards the rope right away. The rope can be found near the area where you've started this battle. Use this object to get to an upper platform and you'll return to where this all has started. Watch a new cut-scene and make a few steps forward. Wait for the right moment to make a move. Start running and jump over a large gap (screen) without being hit by a swinging obstacle.
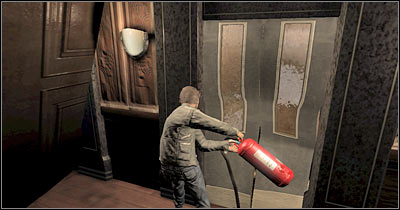
You may keep heading forward. Approach a large hole and wait for the camera to change its position. Lower yourself carefully, without making any unnecessary jumps. You should be able to find a new fire extinguisher here. Take this item, however don't use it on the flames. Instead, use the extinguisher to destroy an elevator door (screen). Enter the new area and you'll be rewarded with an interesting cut-scene. Here's where you'll meet your new companion - Sarah.
You'll start this level inside an elevator, near the reception area. As you probably remember from the previous scene, the elevator hasn't reached its destination. Thankfully, you won't have to worry about encountering the monsters from the movie right away. Approach the elevator door and press the action key (screen). Watch a new cut-scene (a scary one for a change :-)).

Turn around and listen to what Sarah has to say about this whole situation. Approach your companion and press the action key. Carnby will help her to leave the elevator. Thankfully, you can do the same thing on your own. All you have to do is to press the jump button (screen). Once you're at the top, proceed to your left and head over to an opened hatch. You'll end up standing inside a second elevator.
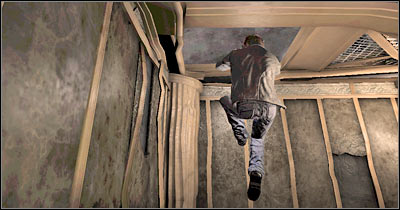
Watch a short cut-scene and leave the elevator. This is going to be a much larger area and you'll be allowed to explore it before focusing on the main goals. Start off by picking up a flashlight (screen). Obviously you should choose this object from your inventory. I would recommend having a flashlight in pair with the pistol. You should have plenty of bullets, so there's nothing you should be worried about. Take your time to explore the area around the body of a killed police officer. You should also read additional hints on how to use the flashlight. Remember that you should turn it off whenever you don't need it. Thankfully, finding new batteries for the flashlight is going to be extremely easy.
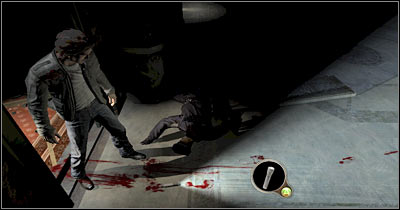
I would recommend that you start exploring this location by heading to your right. Eventually you should end up standing inside a very small room. There are a lot of interesting items here (screen). Take whatever you may find useful. Ignore the staircase for the time being, because you wouldn't be allowed to get past the flames. There's also a broomstick here, but you won't have to pick it up.
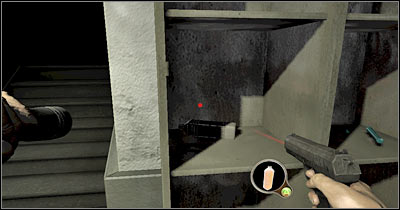
Go back to the reception area. It's fairly dark in here, so you should consider using the flashlight all the time. Try moving towards a new area and you're going to be attacked by a small group of creatures. Eliminating these bugs is going to be easy. I would recommend using a pistol to kill them (screen), however you could also pick up a new weapon or choose a bug spray from your inventory. Either way, you will have to get rid of all of these creatures. Notice a small door to your left. Listen to what Sarah has to say - you'll have to find a good weapon to destroy this door.
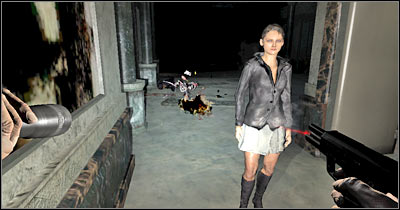
Now you should check the area to your right. Get behind the counter and you will come across a single door. Enter this small area and proceed towards the fuse box (screen). Press the action key to trigger a simple mini-game. Your objective will be to bring two cables closer to each other, however they can't touch. I would recommend that you practice finishing this mini-game, because you'll encounter more fuse boxes later on during the course of the game.
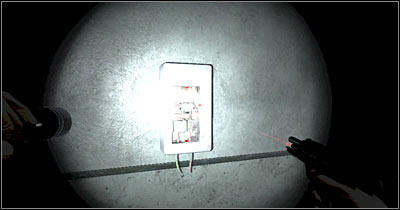
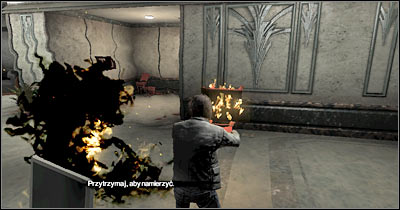
If you've done everything correctly, you'll bring back power to this part of the building. You'll also trigger a new cut-scene during which you'll notice your next opponent. A monster has appeared in the reception area, so you'll have to act swiftly. Exit this room and go to your right. Find a new chair and light it on fire. Once this is done, use the chair to dispose of the creature (screen).
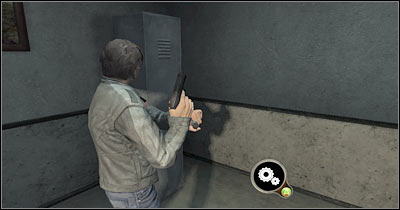
Once you've killed this monster, start searching for a fire extinguisher. Go back to the previous area, where you found a broomstick. Head up the stairs and use the fire extinguisher to get rid of the flames. You'll find a bug spray here. Go back to the room with the fuse box and inspect a nearby locker (screen) while you're at it.
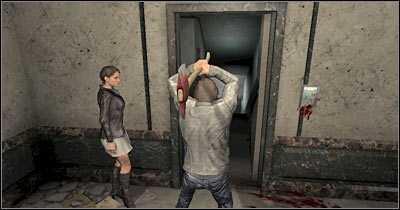
Head back to the main area of the building. You should be able to find an axe here and obviously you will have to pick up this object. Go to Sarah. You'll find hear next to the closed door. Use the axe to open this passageway (screen). Once this is done, try using the stairs. You will trigger a new cut-scene. This is going to be a very similar battle. Find a new chair quickly, light it on fire and kill the monster before you sustain any major injuries. You should also know that this monster may temporarily blind you. If this occurs, press and hold the X key to clear your sight. Proceed to the stairs once again. This time you won't encounter anyone else.
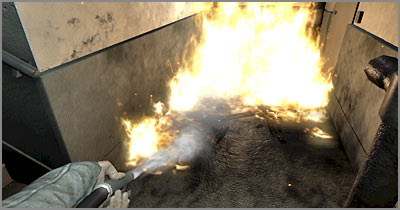
You should end up standing in a burning corridor. Thankfully, you won't have to go back up, because there's a new fire extinguisher here. Take this object and use it to put out the fire (screen). It shouldn't take you too long. Leave the extinguisher here and proceed towards a new door. Open the door and you'll be rewarded with a much longer cut-scene.
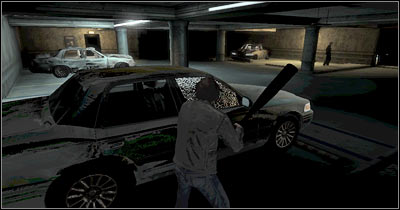
Ignore the noises coming from the background, because you won't have to worry about any monsters breaching the door to this parking lot. You may as well explore this area, however this is optional. You could try looking inside wrecked vehicles. Once this is done, pick up a baseball bat and proceed towards a silver car (screen). Use the bat to destroy the window on the passengers side.
You may finally enter the car. Notice that you're allowed to look around. You can also move inside the cabin, however you can't stay here for too long, because the monsters will eventually get here. This was triggered once you've entered the vehicle. I would recommend turning the light on (screen), so it'll be easier for you to notice other interactive objects.
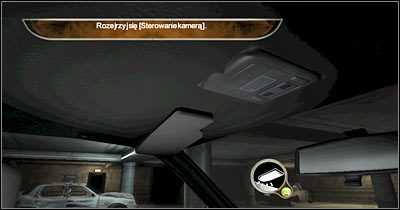
You can start the car using various methods of approach. I wouldn't recommend trying to solve the mini-game, because it would take too long. Instead, click on the ceiling compartment (screen) and you'll find a key there. Edward should automatically use the key to start the car.
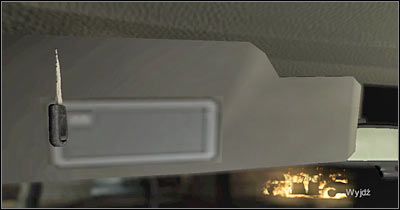
Thankfully, driving a car in "Alone in the Dark" is a simple thing. For now, you can focus only on using four movement keys. As for the monsters, you may try running them over, however you can also ignore them. Start off by moving towards an opened gate (screen). Turn left and eventually you'll get to a new area of the parking lot.
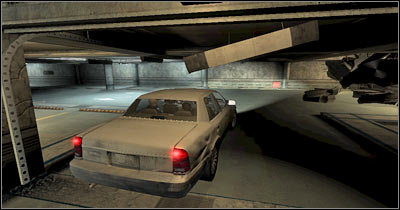
Obviously you will start the game exactly where you left off. Keep moving forward. Ignore the fissure on the left wall, because you won't have to fight this monster. Make a sharp right turn. You should come across several creatures along the way. It's best to avoid them, so you won't take part in any unnecessary accidents. Also, you won't return here later on, so you won't have to worry about securing the parking lot. Avoid two wrecks (screen) and head on to the upper level of the parking lot.
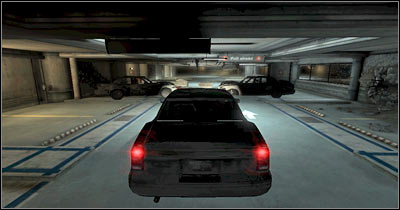
You shouldn't have any problems avoiding larger obstacles. Increase your speed and get ready to perform a tricky jump (screen). The most important thing here is that you're moving in a straight line. Watch out for other wrecks and make a second sharp turn. Keep heading towards the flames. You'll crash your car there, however there's nothing you should be worried about, because this was all a part of the plan.
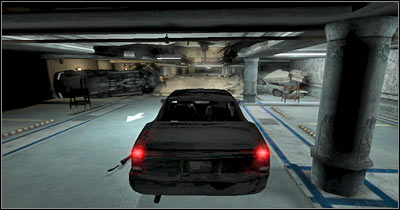
Ignore your new friends. You won't have to worry about them, because they'll exit the car and find a good cover on their own. Focus on exploring the surrounding area. The most important thing here is that you find a lighter (screen). Drop some of the less useful items from the left side of your inventory if you don't have any free slots for the lighter.
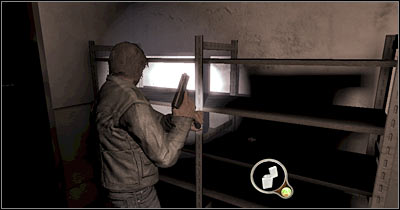
Choose the lighter from your inventory right away. Go back to the car you've wrecked a few minutes ago. Locate a pool of gasoline and press the action key (screen). Obviously you will have to move back, because there's going to be a huge explosion. Notice that you're allowed to explore a new area of the parking lot.
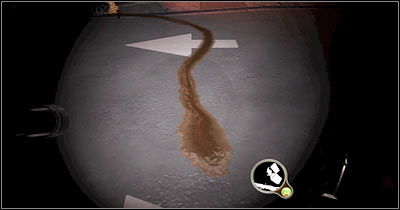
It's very dark in here, so obviously you should be using a flashlight all the time. On the other hand, you won't encounter any monsters, so drawing your gun isn't necessary. Keep heading forward. You will come across several vehicles along the way. I would recommend exploring them from the inside, especially the side compartments (screen). You could also ignore all of this and focus only on finding a new car for you and your friends.
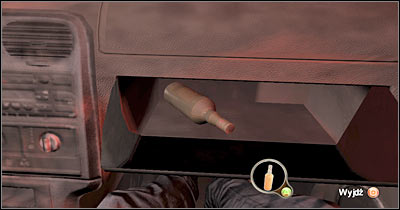
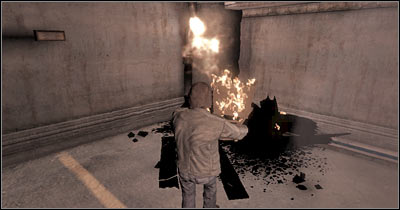
You should be able to find a body of a dead police officer. Inspect the surroundings and you'll find some ammo. Proceed to the other end of the tunnel. Pick up one of the chairs and light this object on fire (screen).
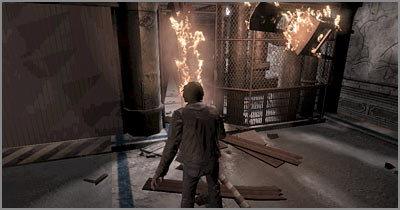
Once you've acquired a burning chair, proceed to your right. Wooden planks are blocking your way and you'll have to light them on fire as well (screen). Once this is done, you'll receive a warning that a fissure monster is heading your way. You could try and fight it, however it's optional. I would recommend that you start running to your left. Don't stop at nothing and eventually this chase sequence is going to end. If you get caught, you'll have to try and free yourself by pressing certain movement and action keys (instructions will appear on your screen).
As you've probably noticed, the flames have disappeared and you may inspect a new area of the underground parking lot. Ignore the car for the time being and check your surroundings very carefully. You will find TWO medical sprays here and it's extremely important that you take them. The first spray is next to the cab and the second one can be found in the corner of the room (screen). Heal yourself if you have to.
You may finally proceed to the cab. Take a seat in the front and wait for your colleagues to get here. Thankfully, you won't have to search for the key, because it's already in the ignition. Start the car. Move back a little and destroy the gate in front of you by slamming it. Turn right and dispose of the second gate (screen) which can be found next to a dead policeman. Keep heading towards the exit.
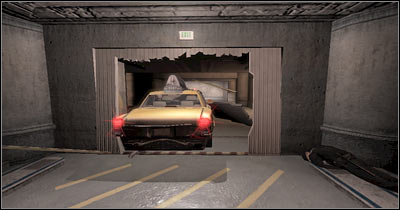
Keep moving towards your current destination. There's only one passageway, so you can't get lost. Destroy the final third gate and you'll end up on the main street. Wait for the game to display an extremely interesting cut-scene (screen). Get ready for a difficult chase!
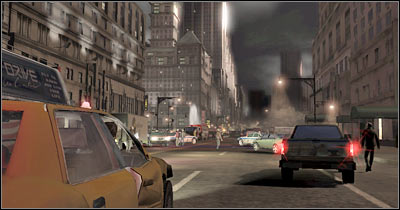
The key to success here will be to memorize the track, because you won't be allowed to make any mistakes and you'll be dealing with a large number of tricky obstacles. Moving at a maximum speed is going to be an important thing throughout most of this "race", because driving slower would result in getting caught by the forces destroying the city. The first part of this chase sequence will require you to deal with three sharp turns (screen). You should be fine here, as long as you don't end up on the outside. Also, prevent your car from sliding too much, so you won't lose too much time.
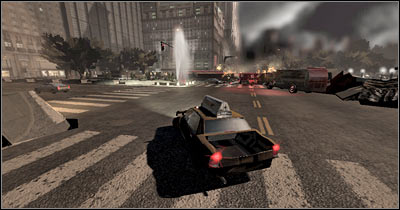
You should be getting closer to a much larger hole. Notice a fire truck on your left. You CAN'T hit this vehicle, because it would probably mean end of the race for you. Also, try steering left a second before you're sent flying in the air. Doing this will allow you to continue to move on once you've safely landed (screen).
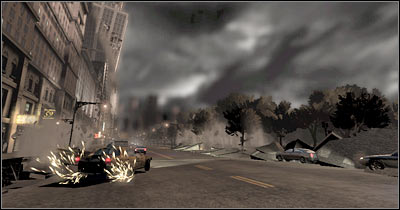
As you've probably noticed, the asphalt is being destroyed around you, so it's very important to stay in the middle of the road. Avoid hitting civilian vehicles. Also, it's often wise to slow down a little, rather than losing control over your car. Move over to the right and avoid a large building (screen). Get ready for a second jump. You won't find any obstacles here, however you must maintain maximum speed in order to reach the other side of the large gap.
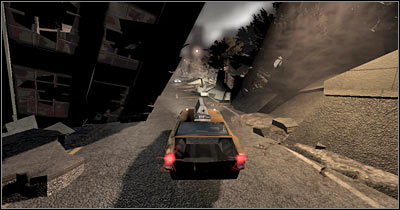
Now you'll have to move over to your left. Avoid hitting a large blue van and don't crash into the building. One of the vehicles will be heading your way. Prevent your car from hitting that vehicle. Enter a destroyed building and drive through a tight corridor. Once this is done, turn left and avoid falling into a huge abyss (screen). Don't move too much to the left, though.
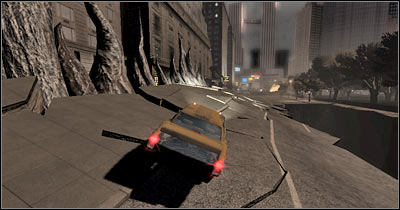
This is going to be an extremely difficult section of the track, because you'll encounter a lot of civilian vehicles here. Drive over to the left and then turn right, near the limousine. Proceed to the next alley. Keep driving in the middle of the road (screen) and avoid hitting larger obstacles. You can't crash here, because you would have been swallowed by the monster and you would have to restart the scene.
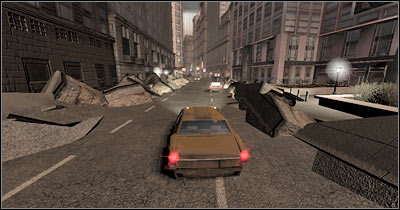
You will have to turn right once you've reached a new junction (screen). This is a tight segment, however you won't have to be in a lot of hurry here. Even if you crash, you will be allowed to correct your mistake. Turn left and then immediately right.
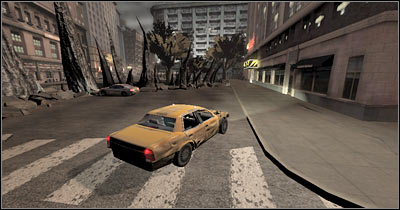
Once again, you will be driving in a straight line. Ignore a large object which you'll see flying your way. You won't have to perform any dodge maneuvers. Turn right. It's also very difficult here, mostly because a lot of cars have been parked in this area. Start off by destroying a small scaffolding (screen). Thankfully, doing this won't slow you down.
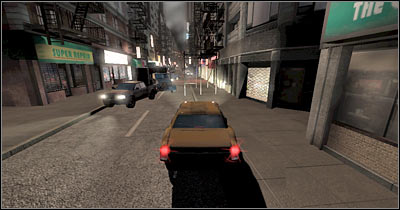
Keep moving forward. Your route is going to be blocked, however it's not going to be a problem. Notice a second cab and follow it to the mall. Once this is done, find the stairs (screen) and make sure that you're driving in a straight line. Reach the top and brake through the glass wall.
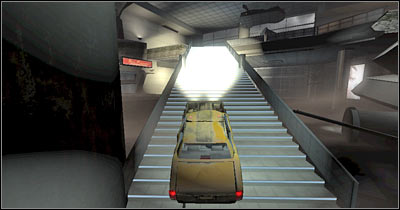
Make sure that you've landed properly. You will have to be very careful here, because it's easy to get stuck due to asphalt moving. Try leaving this area as soon as possible and without crashing into anything. Keep heading left. Drive over a few large pipes to get to the next section.
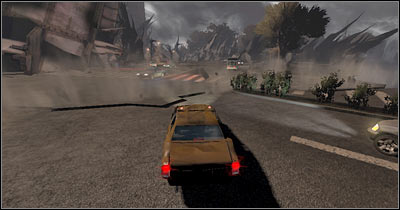
It's very important to maintain maximum speed here, because you should be getting closer to the final area of the map (screen). Perform a jump here and you'll be automatically rewarded with a very interesting scene.
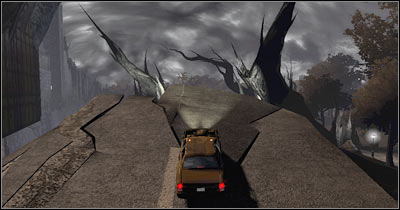
Sarah will notice that one of your wounds looks really bad. As a result, you will be given seven minutes to patch yourself up. This will also occur later during the course of the game, however this time you will have to focus on finding the bandages, because it's the only way to survive. Thankfully, even if you'll be moving slowly, you should be able to end this level in 4-5 minutes, so you'll have plenty of time to look around. Start off by moving forward. Head over to a large tunnel (screen). Sadly, the opposite exit is going to be blocked by a bus.
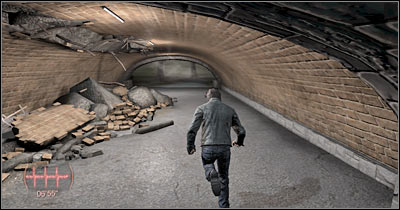
Go back to the start area and wait for the camera to change its position. Sarah will notice that an ambulance has appeared near the bridge. She will also ask you to help her. You can find her in the middle of the screen. Approach Sarah and press the action key. This will allow her to pull herself up. Listen to a short dialog.
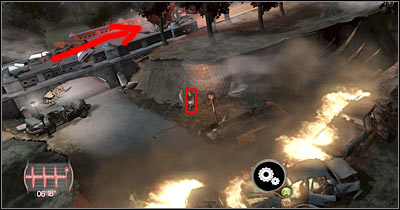
You should be able to hear a sound of a cell phone ringing. Approach the body of a dead man who committed suicide earlier on (screen). Check this area for the cell phone and pick it up. You will be rewarded with a new cut-scene. Edward will have a chance to talk to Crowley.
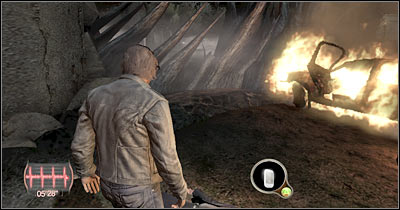
Notice that you've been awarded with some new functionalities. A map has appeared in the upper right corner of your screen. Also, you can access the menu of your new cell phone by pressing the T key (screen). I would recommend that you spend some time to familiarize yourself with it, especially since the time limiter will be stopped.
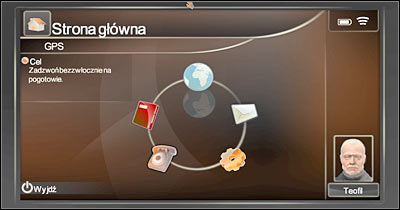
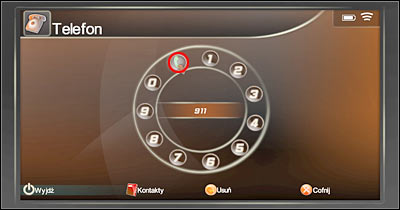
You can choose between five main options. GPS is the most important function of the phone. You can use it to find out where you are and where you need to go. It's not that important at the moment, however it's going to get more interesting later on. Check the messages window and some of the remaining menus. As for your main task, click on the phone icon and wait for a new screen to be displayed. Click on 9, 1 and 1. After that, click on the green phone icon (screen). Listen to a short conversation. You will be instructed to look for a medical kit in a public toilet.
You can check the main map of the area if you want to, however it's optional, mostly because you'll find the public toilet nearby. Start moving forward, however turn left when you have the chance. Get closer to burning vehicles and you'll be rewarded with a new cut-scene. You'll be dealing with flying monsters from now on. I would recommend that you ignore them here by staying away from them. An explosion will open a passageway for you (screen).
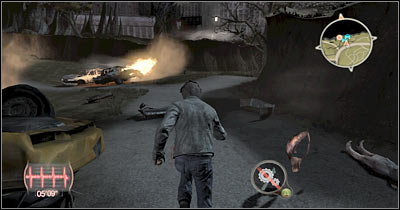
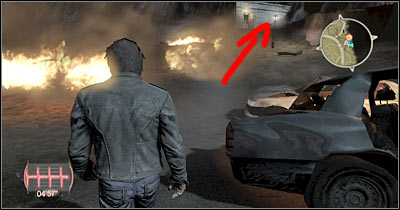
The public toilet can be found on top of a small hill (screen). Obviously that's where you'll have to go right now. Don't stop at nothing and stay away from the fire to avoid unwanted injuries. You could search some of the nearby cars, however it won't be necessary. The most important thing is that you reach your final destination.
Enter the public toilet and proceed to your right without any hesitation. Ignore the fact that winged creatures have gathered near the windows, because they won't get inside. There's a small room here and you must enter it. Find the medical kit (screen) and press the action key to look what's inside.
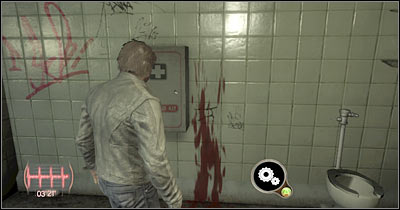
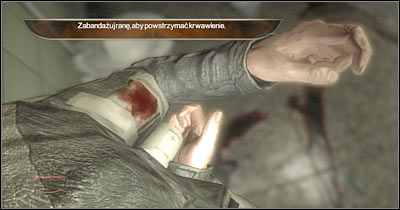
Open the medical locker. It's extremely important that you pick up bandages. If you don't have enough space in your inventory, free up at least one slot by throwing out items from the LEFT side of your jacket. I would recommend getting rid of the duct tape or the second set of batteries. Leave ammo for your pistol, because you never know when you might need it. Read a new text message on how to use bandages. Press the H key and locate your wound. Use the bandages to patch it up (screen). Once this is done, close this window.
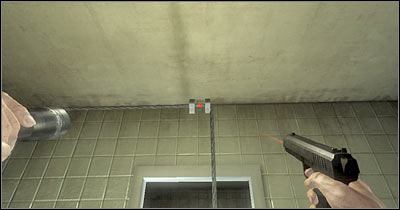
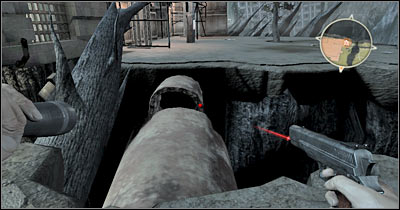
DON'T leave this area, because you'll have to deal with a new problem in the first place. You would have been electrocuted on your way out. Choose a pistol from your inventory and switch to FPP view. Destroy a small object which holds the cable (screen). Doing this will allow you to exit this room safely.
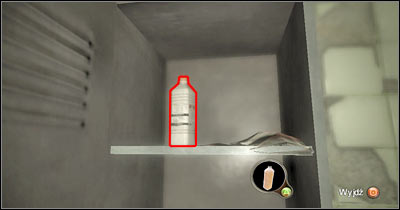
Take your time to explore the surrounding area, especially since you won't have to worry about being attacked by the winged creatures. You should be able to find a lot of interesting items here. Check the locker near the medical point. You'll find a plastic bottle inside (screen) and it's extremely important that you pick it up.
Choose the explosive bottle from your inventory. Move back and throw the bottle at the partially destroyed wall (screen). You can do this by pressing and holding the right mouse button. Make sure that the bottle has landed near the wall. You could also drop it or use a gun right away, however it won't be necessary.
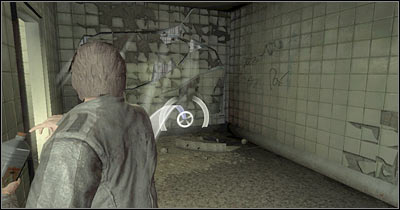
Choose a pistol from your inventory and aim at the explosive bottle. Once you've found it, take your shot and enjoy a nice explosion. You should be able to destroy the wall which will allow you to exit the public toilet. Enjoy the view. :-)
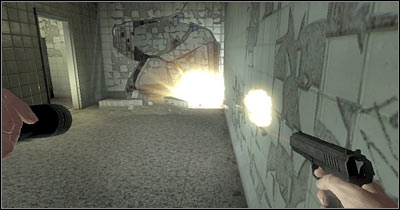
Start off by turning left. You'll have to make a very precise jump here and your objective will be to grab a new rope (screen). Once this is done, press 2 to choose a pistol from your inventory. You'll have to start shooting at the winged creatures. You could also try going back to the previous platform, however it won't be necessary. You'll probably have to kill three monsters before being able to focus on the task at hand.
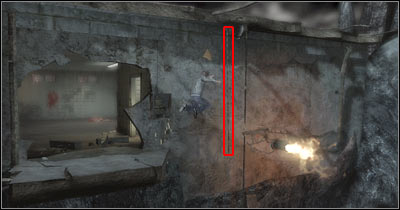
Don't holster your weapon just yet. Instead, look up. You'll have to be aiming at a small hook (screen). Destroying this object will allow you to lower the rope a little. Destroy the second hook and you'll slide all the way down to the lower platform. You'll be forced to deal with a new group of winged creatures here. Use a pistol or combine a spray with a lighter to get rid of them. Also, make sure to heal your wounds after each fight (only if it's necessary).
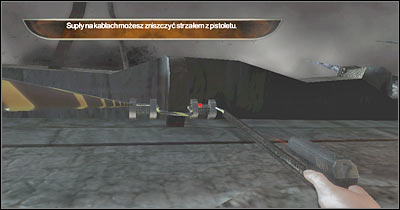
You may finally holster your pistol, especially since you won't have a lot of ammo at your disposal. Pick up a large metal pipe. Use this object to destroy the glass surface (screen). Obviously you will have to adjust the position of the pipe in your hands, so you'll be able to perform this activity. Drop the pipe and head on to the lower platform. Search this area for new objects and proceed to the lower level once again. Thankfully, this time you won't have to brake any objects.
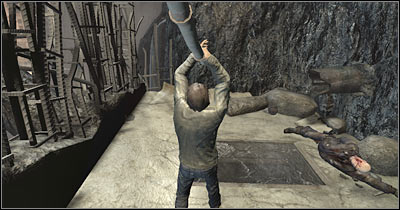
It would be a good idea to use your pistol here. You should notice a few creatures in the distance and I'd recommend killing them. Use the fact that the monsters are focused on a body of a killed civilian, so you won't have to spend too much time aiming at them. Get rid of all of these creatures and holster your gun. Start running and jump towards that platform (screen).
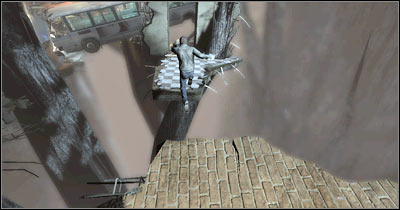
Make a few steps forward and wait for the camera to change its position. Approach the hanging bus and perform a single jump which will allow you to get on board (screen). You will have to be very careful here, because you may die by mistake. Follow my instructions to avoid unwanted problems.
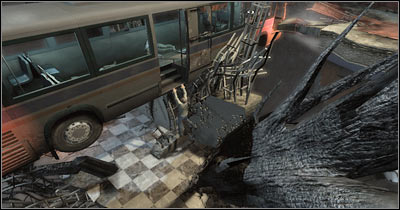
It's going to get very tricky here, so pay attention to what I'm saying. Your task will be to balance the bus, so it doesn't fall to the abyss. You'll find bodies of three dead civilians here. Start dragging them towards the back of the bus (screen). You can't move forward unless you've transported all of them. Approach driver's cabin and open the door. Leave the bus slowly.
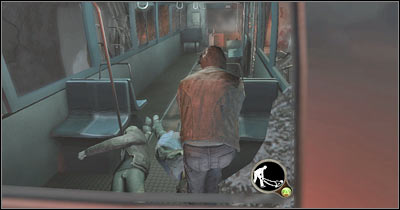
Don't forget to pick up interesting items along the way. For example, you should be able to find more ammo for your gun near the bus. Keep heading forward. Once you've reached the end of this ledge, jump towards a nearby platform (screen). Get ready to defeat a few monsters.
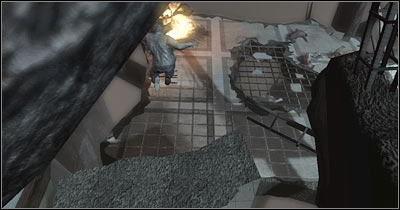
Don't wait for the monsters to show up. Instead, pick up a chair QUICKLY and proceed towards the flames. Light the chair on fire. Obviously you will now have to use this object as a weapon. The demons will arrive here shortly (cut-scene).
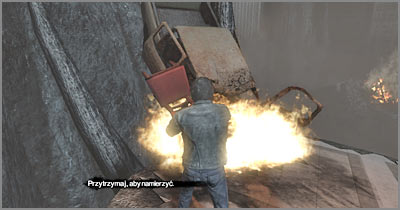
Since you have a burning chair at your disposal, killing the monsters is going to be very easy. All you have to do is to light them on fire (screen) and they'll die instantly. Watch out for their attacks, though. Prevent the monsters from taking the chair away from you. Thankfully, some of these creatures will make your life easier by falling into the abyss while trying to run away. Defeat all of them and you'll be rewarded with a short cut-scene.
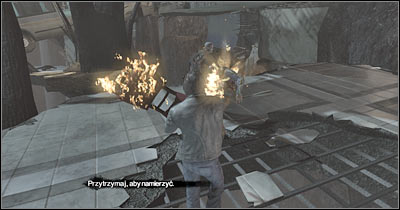
Once again, you will have to drop to a lower platform. Keep heading forward and then turn right. You should be able to find a healing spray here. Pick it up, especially if you've suffered some injuries recently. Don't fill the right side of your jacket only with healing sprays. Get closer to a new ledge and jump towards it (screen). Start moving to your right.
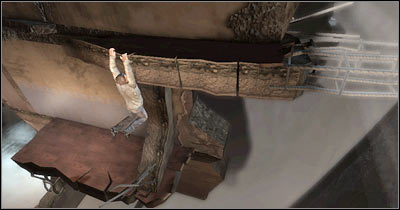
Once you're about a half way through, take a look at what's happening with the bus. Be careful - you can lose balance here. If this occurs, start pressing the action key, because otherwise you'll fall into the abyss as well. Keep heading to your right. Drop down once you're above a new platform. Choose a pistol from your inventory and look up. Try aiming for the lock on the door (screen).
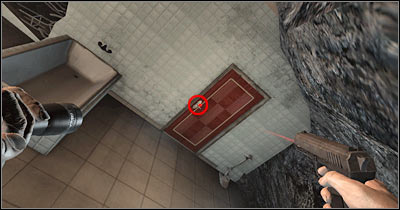
Destroying the door will allow you to lower down a rope. Obviously you will have to grab the rope and start climbing. Once you're at the top, proceed towards the bottom of the screen and turn left. Grab onto a new ledge and start moving to your right (screen).
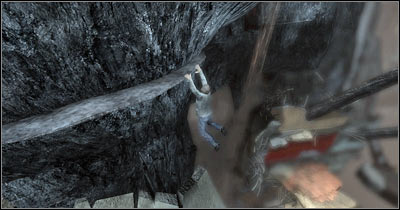
The camera should change its position very shortly, showing you that there's a trapped vehicle above you. Edward will lose his balance here (screen), so you'll have to start pushing the action key. Climb up and you'll end up standing next to the vehicle.
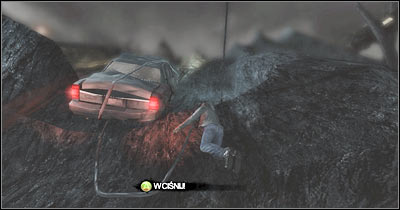
Approach the car and press the action key. This will allow our main character to enter the vehicle. You'll automatically end up sitting on the rear couch. Use the mouse and the cursor keys to get to drivers seat. Now all you have to do is to exit the vehicle by pressing the Q key. Move to the left quickly, so you'll avoid being hit by the car.
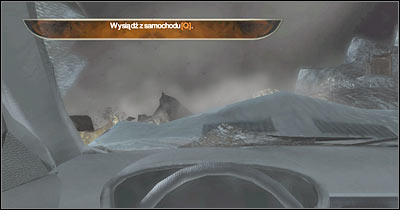
You should be able to find a new rope. Obviously you must grab onto it and start climbing. Use the jump key to release the rope. As a result, you will be allowed to get to the entrance to a small cave (screen). Start moving forward and head on to the flooded area.
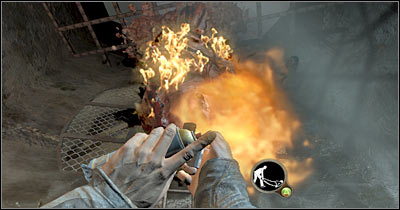
You should be able to find an alien cocoon here. Getting rid of it is going to be extremely easy. Notice that a lot of valuable objects are floating on the surface. Find some kind of a spray and combine it in your inventory with a lighter. Switch to FPP view and burn the alien creature (screen). Doing this will grant you access to a ladder.

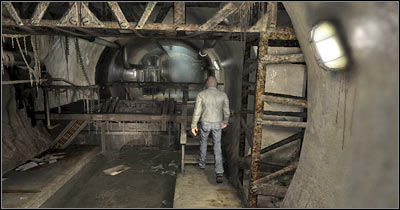
Keep heading forward until you've reached a larger area of the sewers. You won't have to inspect this area, because you wouldn't find anything of interest. Instead, proceed to the stairs (screen). You will have to make a stop here, because your cell phone will start ringing. Listen to a conversation and continue moving forward. Thankfully, you won't encounter any monsters here.
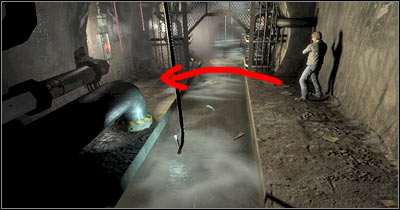
Notice that the water has been electrified. As a result, you won't be allowed to enter the new area of the sewers, because you would have died instantly. Try moving to your right and jump over the water (screen). Obviously you should be running and you can't make any mistakes.
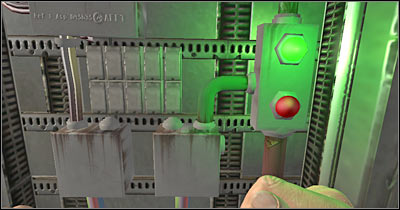
There's a fuse box here and obviously you will have to examine it by pressing the action key. You will be dealing with a slightly more challenging mini-game. The main problem is that you'll have to bring the cables closer while the green lamp is on (screen). Otherwise you would have sustained major injuries as a result of electrocution. I would recommend spending some time to figure out the correct sequence, so your actions won't be random.
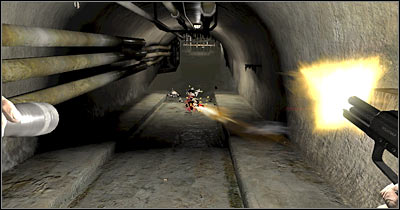
You may finally enter the flooded corridor. Proceed to the next area of the sewers. Once you've reached a new corner, don't enter the water. Instead, stay close to the right wall. Keep heading forward and eventually you'll come across a few bugs (screen). Kill these creatures with your pistol. I would recommend attacking them from a larger distance.
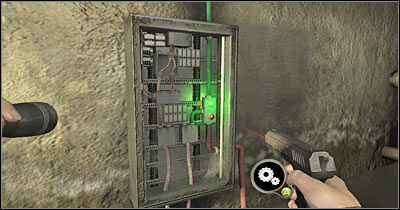
Enter the flooded area of the corridor. You should be able to find a few interesting items here. Take whatever you might find interesting. The more important thing is that you approach the second fuse box (screen). This time you won't be allowed to make any mistakes, because you would have died instantly. Also, the sequence is more complicated, so you should spend a lot of time trying to figure out when to expect the green light and not the red one.
Go back the same way you came before. You are going to be attacked by a new bug. Deal with this problem swiftly. Remember that if you're poisoned by the bug, you can refresh your sight by holding the X key. Turn right and start moving forward. Stop once you've reached the third flooded corridor. You will have to grab an orange pipe (screen) which can be found to your right.
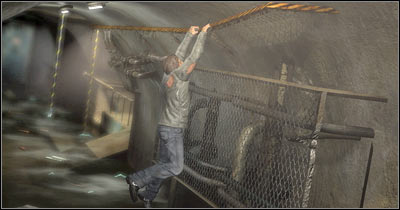
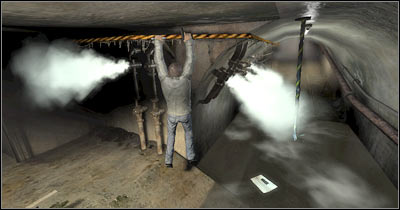
Make sure you've grabbed the pipe and start moving to your left. This time you will have to avoid the steam coming out of other pipes. Don't even think about travelling all the way to your destination without making any stops. Try stopping between some of the pipes, so you won't make any mistakes. Land safely on the ground and watch a short cut-scene. As suggested, you will have to find a way to the blue door and open it.
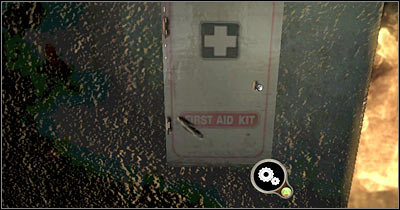
Head on towards the nearest room. I'd strongly recommend that you explore your surroundings, especially since you'll find a lot of interactive objects here. There are some shelves to your right, as well as a locker. You can also open a medical cabinet (screen). You would find a medical spray and some bandages inside.
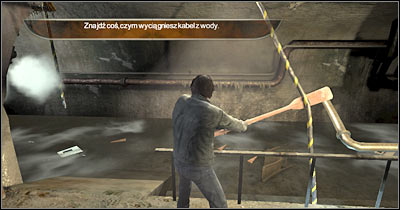
There are also a lot of interesting objects lying on the ground. Ignore chairs and weapons for the time being. Instead, try finding a wooden sandal. Once you've acquired this object, go back to the flooded corridor. Use your newly acquired sandal to pull the cable out of the water (screen). Once this is done, drop the sandal, because you won't need it anymore.
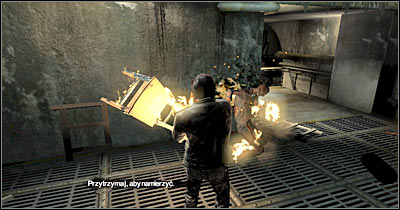
Try going towards the blue door. Sadly, you won't be able to get through. As a result, go back to the room with the medical cabinet. You are going to be attacked here by one of the infected. Pick up a chair and light it on fire. Once this is done, use the chair to get rid of the monster (screen). Thankfully, you won't have to worry about any other monsters attacking you.
Head on to your right and take a look at objects available for taking. Try finding an explosive bottle amongst those things. Once this object is in your inventory, go back to the closed door. Place the bottle near the door, move back to a safe distance and use the pistol to blow up the bottle (screen). You could also throw the bottle at the door. Either way, you will be allowed to get inside. Keep heading straight and then turn right. A very interesting cut-scene is going to be displayed on your screen.
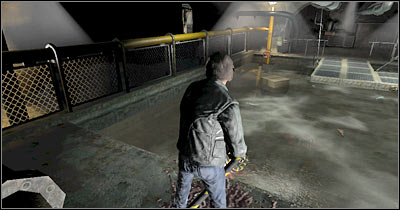
Your top priority here will be to avoid the black mass at all costs, the same one that has swallowed one of the workers. Choose a flashlight from your inventory and make sure that the battery isn't depleted. If it is, place a new battery in the flashlight. Start moving towards the black mass and use your flashlight to scare it off (screen). I wouldn't recommend going too fast, because there's a chance that part of the mass may stay behind, swallowing you right away. Proceed to a new corridor which can be found to your right. You may turn off your flashlight.
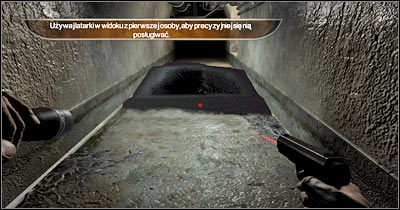
Head on to the opposite end of this corridor. Turn right and press the action key to interact with the valve (screen). Doing this will allow you to get rid of the flames, so you can back to the previous area whenever you need to.
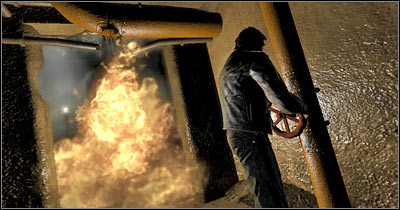
Move back a little and notice a large flooded room. Try neutralizing a nest from here (screen), as well as all alien creatures. Once this is done, head over to where you've seen the nest. You can't leave the metal platform, because you would have been electrocuted. Thankfully, you don't have to be in a hurry.
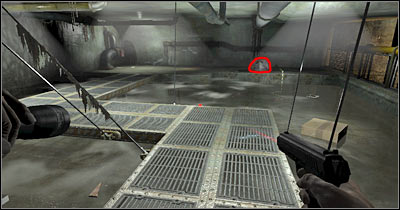
You should be able to spot a new cable here. Obviously you will have to approach it. Press the action key (screen). Start retreating in order to pull the cable out of the water. Once this is done, you will be allowed to enter the flooded area. A second valve is to your left. Use it and you'll get rid of the flames in the second room. Now you should go back to the room with the medical cabinet.

Make sure that your flashlight has sufficient power and choose this object from your inventory. Now you must pick up a chair (without holstering your flashlight). Light the chair on fire (screen) and go back to the corridor with the first valve.
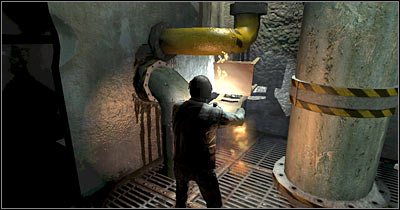
You should be standing next to the valve. Turn right and you'll notice that black mass is protecting this room (screen). You must have a burning chair with you, as well as a flashlight. Head down and start moving forward.
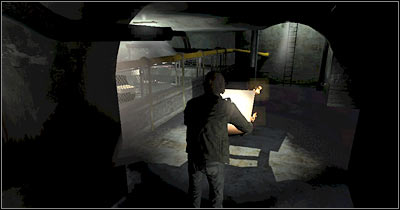
You should be able to reach a ladder very soon (screen). Turn around quickly and place the burning chair on the ground. Once again, you must turn around. Use the ALT key to speed up this process. Use the ladder before the black mass gets closer to you. Thankfully, the chair should protect you long enough for you to escape. Get to the top.
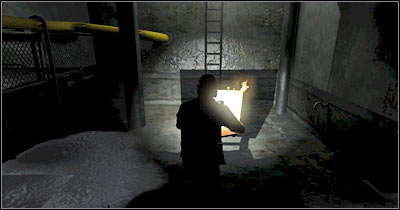
Listen to a short statement made by one of the workers. Approach the left panel and use the switch to turn off the electricity. Sadly, this won't solve all of your problems, because winged creatures will appear in the area. You'll have to go deal with this problem before moving on.
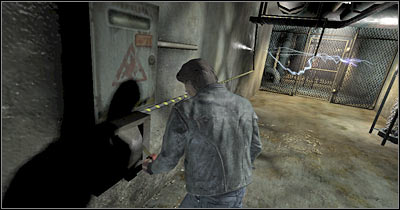
Listen to a second hint. Pick up the cable and start moving towards the fence with the winged creatures. Leave the cable as close to the fence as possible and go back to the switch. Turn it on and you'll have one problem less to worry about. Turn off the system once again and proceed towards the gate. Open it and head on to the ladder. Use the ladder to reach the surface.
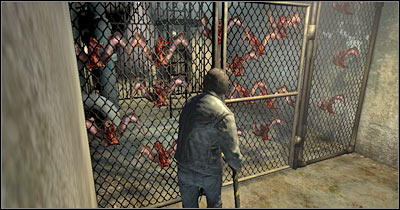
Notice that a new location has been added to your personal map. Make sure that you've left the sewers safely. Once you've reached the surface, draw your weapon, because you are going to be surrounded by monsters almost right away. Your top priority at the moment is to reach the ambulance (2 on the map).
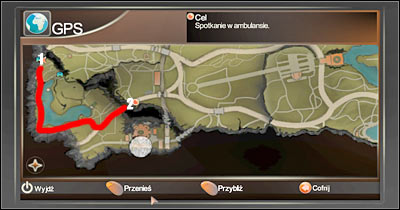
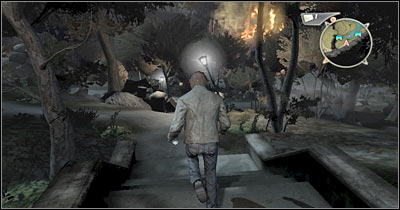
You won't have to fight with any of the monsters. I wouldn't recommend engaging in any duels, because more demons would eventually get here. Also, you shouldn't try hiding inside some of the nearby cars, because the monsters would pull you off. Start off by running south. You should be able to reach the stairs in a short while (screen). Try staying on main paths, so you won't have to look at your map all the time.
You've got two choices here - you can continue moving south or you can proceed to the east. You would find a few items here, as well as a golf cart (screen). Sadly, you would also have to kill a few bugs. Try using the golf cart as a vehicle. Keep heading south.
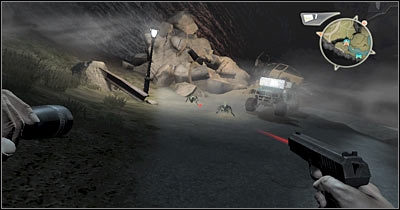
You should be able to get to a new area very soon. As you've probably noticed, a car has been parked here (screen). You could try using it right away, however you'll probably want to destroy the nest in the first place. Obviously you will also have to get rid of all the bugs. As for the car, make sure to check the side compartment. You would find a knife there, among other things. You should also know that the keys to the car are already in the ignition.
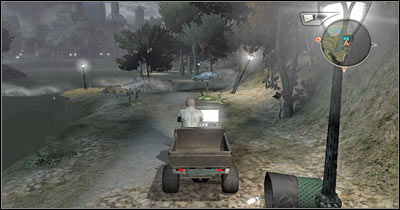
Keep heading south. You should stay close to a large reservoir, so you won't get lost. You are going to be attacked by a much stronger creature in a short while (screen). The biggest problem is that these monsters are capable of jumping over to the rood of your car. You'll have to be moving really fast to prevent them from doing that, so it's best to avoid them. If you can't, try hitting something and they'll fall off.
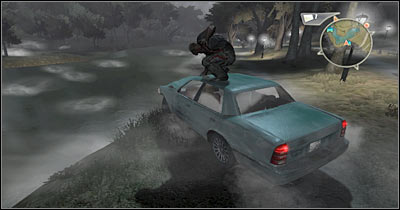
You will come across at least two other vehicles along the way and it's always a good idea to examine them. Obviously this is all optional. You can try focusing only on reaching your destination. The game should create a checkpoint (screen) once you're close enough to the ambulance.
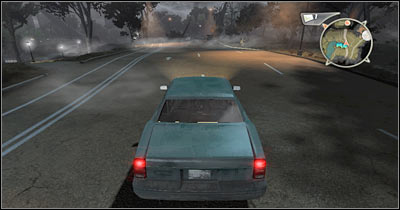
You will be allowed to decide whether you want to move on or maybe you want to destroy some roots of evil. If you plan on spending more time in the park, check Optional: Roots of Evil - Part 1 section for more clues. Either way, you will have to deal with two new monsters here (screen). I would recommend leaving your car and using a spray and a lighter to get rid of them.
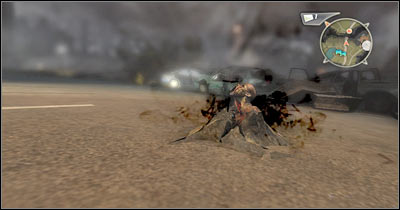
Make sure you've dealt with all nearby monsters. Once this is done, focus on clearing out the bridge. You will have to push the blue car which is in the middle of the roadblock. There's also a second car near the cliff (screen). Push it gently, so you won't have to worry about crashing into it later on. Start backing up.
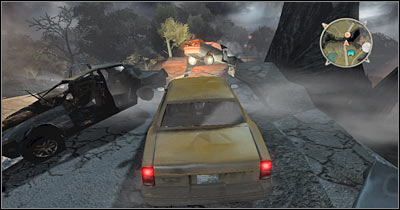
You must be travelling at maximum speed here for obvious reasons. Also, try maintain a straight line, so you'll avoid hitting smaller objects along the way. As long as you don't make any mistakes, you shouldn't have any problems reaching a new area of the map (screen). Wait for a cut-scene to be displayed on your screen. This is the end of the third chapter.
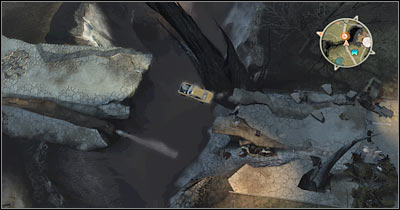
This chapter will begin with a new cut-scene which is a follow-up to the last one. Your first objective here will be to reach a new car. You can see this vehicle on your personal map. You'll have to use the car to get to the museum. Start off by moving north. Notice that Sarah automatically follows your lead. Read a new text message along the way. You'll come across a small building here (screen) and it would be wise to explore it.
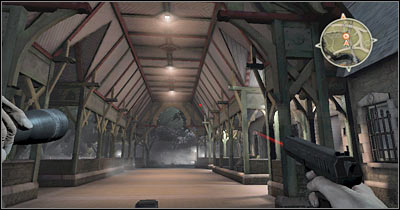
You shouldn't have any problems finding the entrance to the building. Notice that the camera has changed its position. It shows you that a new weapon is lying on the table. It's a Magnum pistol. If you haven't been to the first root of evil, you don't have this weapon, so you should pick it up. Sadly, this is when flying creatures will appear. Move back with your new gun to the exit.
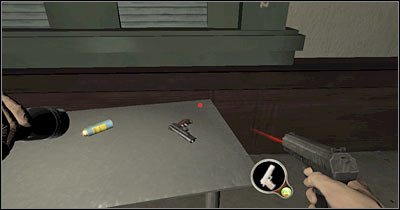
Once you've left the building, turn right and start running towards the car. Don't stop at nothing and don't even think about fighting the creatures, because more of these monsters would appear in the area. Approach the vehicle from the left side and enter it (screen). Thankfully, the key is already in ignition. Get ready for a very difficult chase sequence.
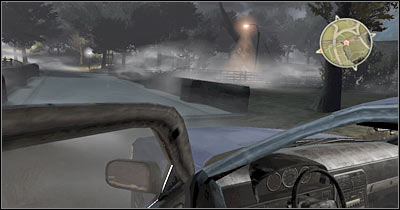
Before you'll decide to proceed with this challenge, there are a few important things you should know about. The whole idea of this chase will be to find compromise between travelling at high speeds and getting rid of flying creatures. You will have to prevent the monsters from lifting up your car too high, because this would be equal to an instant failure. Thankfully, usually you'll some warnings that too many creatures are attacking your vehicle, so you'll have some time to react. You won't be allowed to exit the car, even if it's destroyed, because you would have been killed by the monsters. You can get rid of flying creatures by travelling at maximum speed or by hitting some of the obstacles. I wouldn't recommend crashing too often, because your vehicle won't sustain a lot of damage and you wouldn't be able to reach your final destination. It's a good idea to memorize the track, so you'll know where to watch out for obstacles and you won't have to worry about too many monsters attacking you. Start the chase by going through a tight left turn (screen).
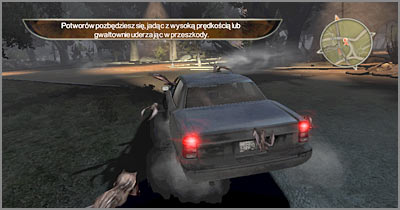
The second sharp turn is nearby and it will require you to leave the main road (screen). You must be careful here, because it's easy to crash the car. You won't be able to move fast here for obvious reasons, however the monsters won't appear right away, so you'll have some time to increase your speed.
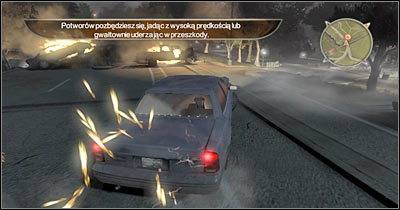
Keep travelling through the park, however focus on returning to the main road as soon as possible (screen). Start heading towards a new checkpoint. Watch out for a civilian car which will appear to your right. Avoiding larger obstacles is equally important. Try maintaining maximum speed, so you'll prevent the monsters from catching up to you.
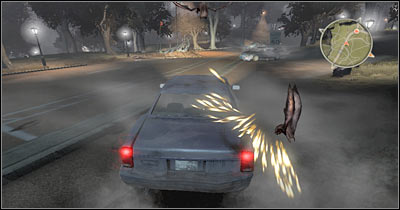
You will have to leave the main road for the second time at about a half way through (screen). Thankfully, this time it's going to be much easier to stay on the track and to avoid the trees. You'll also return to the main road very soon. Eventually you'll come across an area where you'll have to make a precise jump.
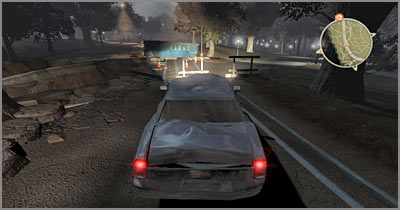
This is going to be the most challenging section of the race, because your task will be to destroy a concrete wall (screen). It's very important that your car has sustained only minimal damage, so you won't end your race while trying to destroy this obstacle. Sadly, you won't be allowed to avoid the wall.
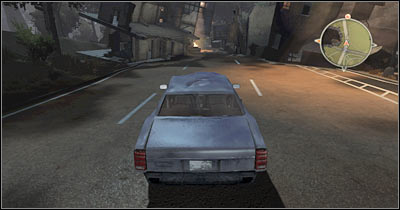
The final part of the chase is going to be much easier. Obviously you will have to focus on avoiding different types of obstacles, so you won't sustain too much damage. If you're lucky, you won't have to worry about the flying creatures anymore. Once you've arrived at your destination, a short cut-scene is going to be displayed on your screen.
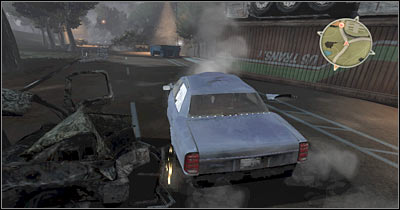
As you've probably suspected, you will have to defeat your first boss. It's going to be a large nest built out of flying creatures. It's extremely important that you act quickly, so you'll have more time to prepare before you're attacked. Hide near Sarah or on the opposite side. You can't stay in the open, because the large creature will throw large objects at you. Clear out your inventory (screen) by dropping medical sprays. I would recommend that you free up at least two slots.
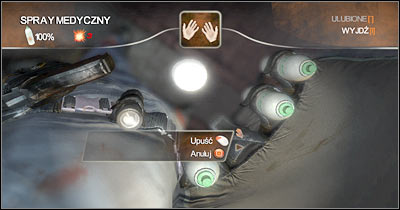
Now you'll have to focus on finding and picking up explosive bottles. Choose one of these objects from your inventory (screen). As for your other hand, choose a pistol. You will have to do all of this quickly, because winged creatures may have appeared in this area in the meantime and they'll start attacking you.
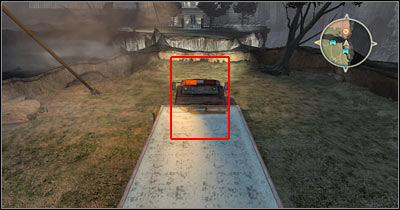
Ignore the flying beasts entirely and start moving towards the big nest. Once you're close enough to the exposed organs, press and hold the right mouse button. Edward should automatically use the bottle. Aim this object at the organs (screen). Throw the bottle and destroy it at the last second with pistol. Notice that if you keep holding the right mouse button, all events will occur in slow-motion. It should make your life a lot easier.
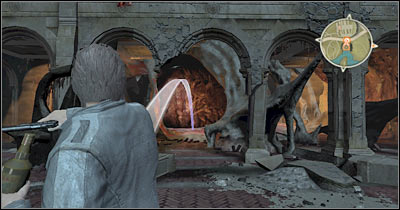
If you've done everything according to the plan, you were able to wound the beast. Obviously the monster is mad at you and it will retaliate by throwing huge objects at you. Avoid them at all costs and choose a new bottle from your inventory. Repeat all actions. You will have to throw 4-5 bottles at the monster before you'll succeed (screen).
Once you've defeated the monster, go back to the burning cars and recollect medical sprays which you've ditched before. You will also find ammo here, amongst other interesting objects. Join Sarah (screen) and start moving through a new corridor. You will be rewarded with a much longer cut-scene in a short while.
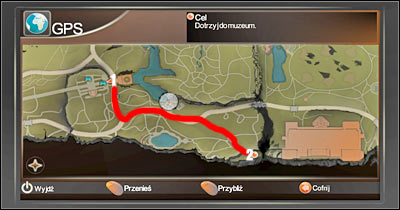
Start off by using your cell phone. Open your personal map and notice that a new location has been added to your map. You will have to go the museum (2 on the map). You should notice that new roots of evil have appeared on the map, however exploring these areas is optional. You can reach the museum any way you want to, however I would recommend following the path from the screen.
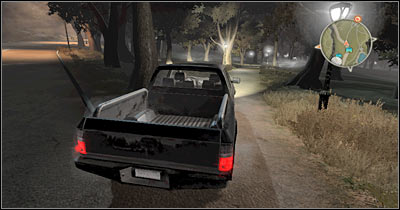
This time you'll be using a pick-up truck to reach your destination. Obviously you should start off by examining the car, especially the side compartment. Start the engine and go to your left. I'd strongly recommend that you remain on the main road as long as possible. Avoid some of the mutants and maintain maximum speed to prevent them from jumping over to the roof of your car. You will have to leave the main road once you're closer to the museum (screen).

You'll be moving south-east. I'm sure that you'll be fine without having to look at your map every 30 seconds. You will encounter more mutants along the way. Run them over or ignore them entirely. You'll have to perform a simple jump near the end (screen). Here's where you'll be rewarded with a short cut-scene.
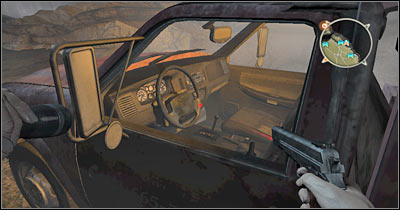
This is going to be a very simple level and it won't take you too long to finish it. Once you've regained full control over Carnby, turn around and start running towards a service truck. You've seen this car during the cut-scene, so you shouldn't have any problems spotting it. Approach the vehicle (screen) and take a seat inside. Obviously you should check the side compartment, especially since it contains a medical spray.

Start off by going forward. You will have to get closer to a large gap which separates your area from the museum. Look at my screen - you will have to be very precise in placing the car near the abyss. Exit the vehicle and use the left panel (it's located near the left door).

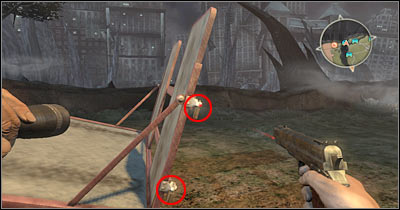
Now you'll have to choose a pistol from your inventory. Fire two shots in order to get rid of two padlocks (screen). Sadly, you won't be able to enjoy your victory, because winged creatures will appear above you. Don't even bother fighting, because you can't win this battle. The beasts will kidnap Sarah and obviously your top priority from now on will be to save her.

You should be able to find a pick-up truck nearby. Enter this vehicle. You won't have to check the side compartment, because you wouldn't find anything of interest. Start moving towards the service truck (screen) and use it to jump over a huge gap. This level will end once you've safely landed near the museum.
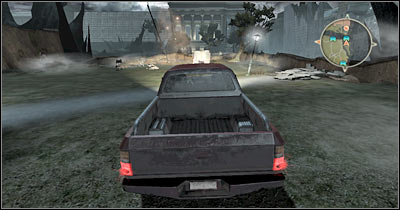
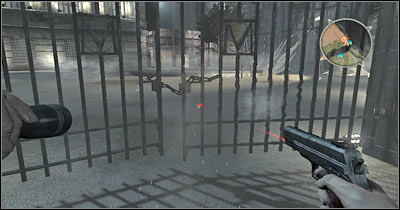
Exit the vehicle, because you wouldn't be able to use it to smash the main gate of the museum. There are some interesting items to your left, including explosive bottles. Make sure that you've taken at least one bottle. Choose a pistol from your inventory and head over to the main gate. Use the pistol to destroy a new padlock (screen) and enter museum grounds carefully.
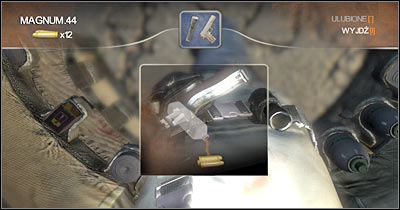
DON'T try moving closer to the museum building, because you'll have to make some preparations in the first place. Open your inventory. Choose an explosive bottle and combine this object with a pistol which will allow you to gain access to fire bullets (screen). Make a few steps forward. You are going to be attacked by a fissure monster and this time you'll have to defeat it. Make sure you're ready and that you're in FPP view.
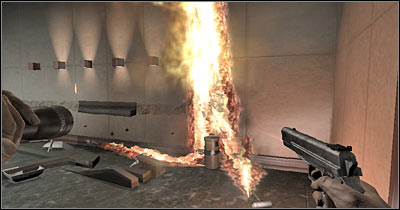
Once the cut-scene has ended, you'll have about two seconds to kill the monster before you're caught. You could also try moving back, however it won't be necessary. The fissure monster will approach you from the left. Start shooting at the ground and one of the bullets should eventually reach its destination. You'll notice this instantly, because the monster will catch on fire (screen).
You may finally start moving towards the museum building. Once you're there, turn right and jump over a small gap (screen). It shouldn't be a problem. Now you'll have to find a small fuse box. Use the pistol to open the box and press the action key. Thankfully, you won't have to worry about being attacked by other monsters.
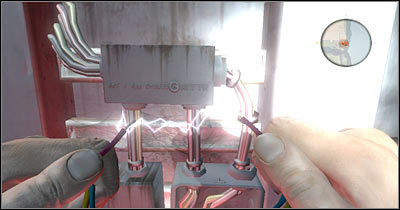
Just as before, your task will be to bring two cables closer. Choose violet cables (screen). You'll also have to wait a little longer before you'll notice that what you're doing has an effect. A nearby elevator is now active and you should go there now. Listen to a short conversation in the meantime. Find a panel and press the first button to go up.
It would be a good idea to prepare for the next battle before the elevator reaches its destination. Use the explosive bottle once again to acquire fire bullets. Once you've arrived, destroy a glass wall and enter a large toilet. Try moving forward and you're going to be attacked by a new fissure monster. Get rid of it the same way you've dealt with the previous creature (screen).
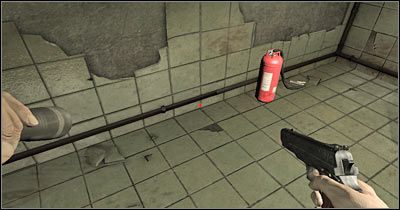
Try going to the next room. Notice that you won't be able to pass through until you've dealt with the fire. Go back to the public toilet and find a small room which is located to the right of the entrance. You should be able to find a fire extinguisher here (screen). Go back to the flames and use the extinguisher. You may proceed to the next section.

Once you've reached a new area, you should receive a call from Sarah. It looks like she's in serious trouble, however you can't help her right now. Go to your right (screen). You will find a lot of interesting items here, so it would be a good idea to look around. Take at least one explosive bottle and choose it right away. Pick a pistol for your other hand.
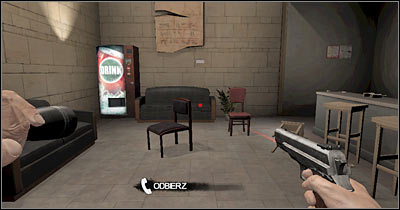
Start moving the other way. A cut-scene is going to be displayed once you're near the corner. This is a warning, because you'll have to deal with a new type of a monster. Once you've regained full control over Carnby, take cover behind the left table (screen). You can't stay in the open, because the monster is capable of attacking you from a distance.
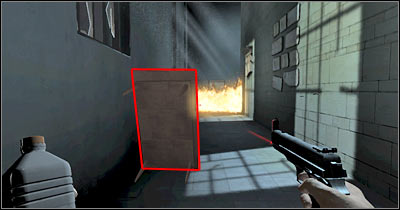
There are two monsters near the flames, however you probably won't be able to kill both of them at the same time. Try leaning out for a short while and throw an explosive bottle at the first monster (screen). Obviously you will have to make sure that the bottle will find its way to that location.
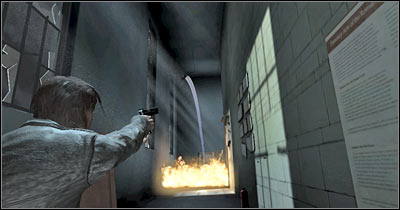
Remember to hold the right mouse button, so you'll have a chance to activate slow-motion and its going to get much easier to coordinate your attack. Try avoiding the projectiles at the same time. Blow up the bottle at the last second (screen). If you're successful, you should kill the creature or at least seriously harm it.
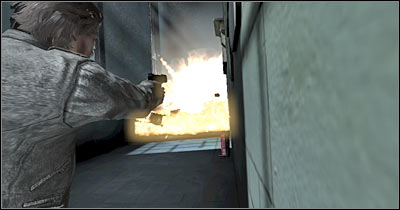
Keep repeating these actions until you've killed at least one monster. Use the fire extinguisher to put out the flames and deal with the second monster. Once this is done, proceed to a new corridor. Thankfully, you won't encounter any other monsters along the way. Eventually you'll come across a closed door. Pick up a larger object and use it to destroy this door (screen). You could also try blowing the door up, however it won't be necessary. Either way, you will have to find your way inside. Keep heading forward until you've reached a much larger area. This is where the fourth chapter of the game will come to an end.
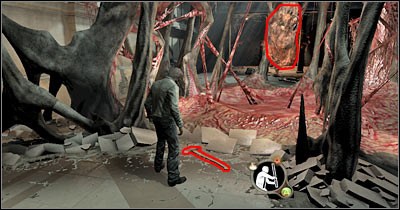
Despite what you might think, you won't encounter any boss creatures here. Start off by picking up an axe which can be found in front of you. Approach the cocoon and use the axe to free Sarah. You will have to aim for the lower parts of the cocoon to succeed. It shouldn't be a problem, especially since you can't kill Sarah by mistake. Watch a short cut-scene.
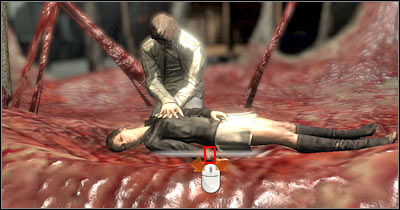
Now you'll have to revive your injured friend. This is going to be a rather challenging mini-game. The first part of the mini-game will require you to push BOTH mouse buttons at the appropriate moment (screen). Ignore the mouse icon and focus on the main bar. Otherwise you'd have some problems finding a correct rhythm. You will have to perform this action eight times in a row without making any mistakes. If you do, you'll have to repeat everything from the start and you can't do this forever, because eventually you would have been caught by the winged creatures.
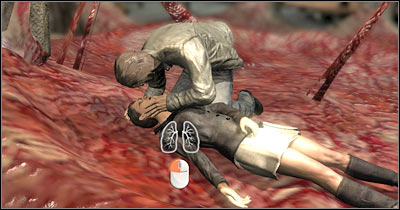
The second part of the mini-game is much easier. All you have to do is to press and HOLD the left mouse button. You must perform both of these activities twice before succeeding. Obviously you will be rewarded with a new cut-scene.
Once you've regained full control over Edward, you will find yourself standing inside a small room. I would recommend that you ignore your surroundings for the time being, because bugs are heading your way. Your first task will be to take a small cylinder (screen). Once this is done, switch to FPP view.
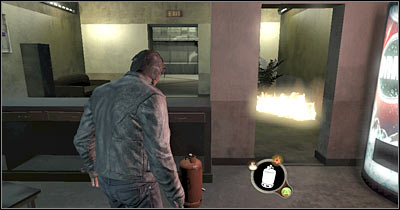
Head over to the flames. Press and hold the left mouse button. As a result, you will gain possession of a home-made flamethrower (screen). Use this weapon to deal with the first group of bugs. Don't release the left mouse button. Thankfully, you won't have to worry about running out of gas.
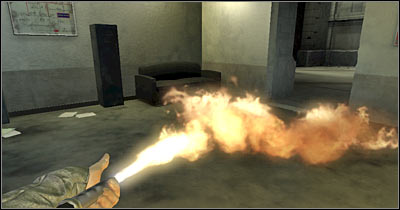
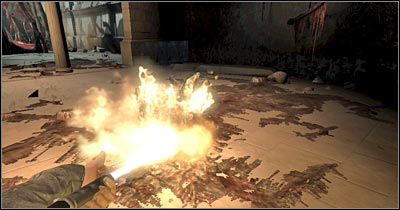
You may finally exit this room. Go back to where you've found Sarah during the previous mission. You'll encounter more bugs along the way, however you should focus on destroying two nests in the first place (screen). Watch a short cut-scene and keep attacking the bugs. You will have to secure this entire ground floor before moving on. Thankfully, you won't have to worry about more bugs attacking you. Go back to the start area and drop the cylinder.
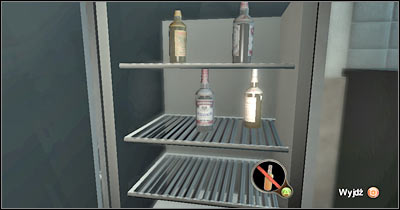
Use the fact that you have some time to explore your surroundings. There are a lot of shelves and lockers here. You can also take a look at what's inside the fridge (screen). Take whatever you might find useful. Don't forget to go to a medical station. Take at least one healing spray. I would recommend having two sprays all the time. As for other two slots, it would be a good idea to fill them with explosive bottles. Also, don't forget to gain possession over new bandages.
Go back to the area shown on the cut-scene. You'll notice a rope here. Use the pistol to destroy two hooks (screen) and the rope should fall down. Approach the rope, however kill all the bugs before using it. Start climbing towards an upper balcony.
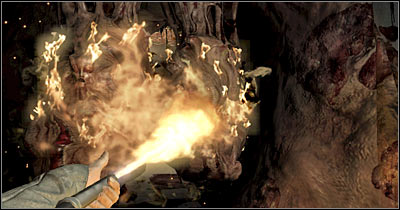
You should notice that a new nest is located to your left. Thankfully, you won't see any bugs coming out of it. Nevertheless, you may decide to destroy it. Proceed to your right. Use an explosive bottle to clear out this passageway (screen). Keep heading forward.
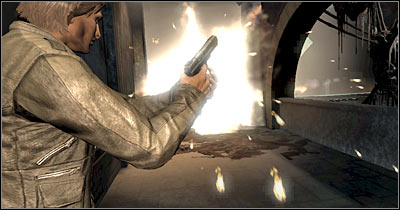
You should be able to reach the stairs very soon. Head on to a lower level. Notice that two large creatures are blocking your path. I would recommend using a spray and a lighter to get rid of them (screen), however you can also throw an explosive bottle at those things. Destroy or move a small object in order to clear the lasers and you'll unlock the main gate. Go back to the start area before moving on to an unexplored section of the museum.

Once again, you should spend some time here, because it would be a good idea to rearm yourself before going to the next area. Remember that you won't be allowed to return here. Take at least two explosive bottles. It would also be a good idea to create at least one Molotov cocktail. You will have to find handkerchief to create such an invention. Once you've acquired the cocktail, have it in pair with the lighter. Issuing a hotkey for this combination is a good idea. Start moving towards an unexplored passageway (screen).
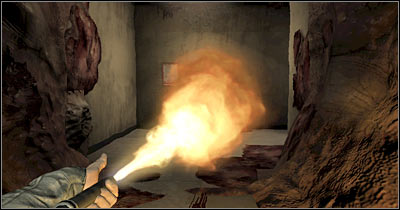
You will come across a body of a killed man. As you've noticed, the body is blocking your way, so you'll have to start pulling it to release two laser beams (screen). Once this is done, a nearby gate is going to be raised and you're going to be attacked by the bugs at the same time. I wouldn't recommend fighting. Instead, start running forward. Once you've reached a new area, you'll watch a short cut-scene. Notice a few nests. Your top priority will be to destroy them to release more laser beams.
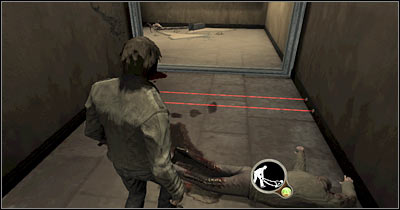
If you don't have any Molotov cocktails in your inventory, you will have to focus on creating such inventions. As a result, proceed towards the kitchen (screen). Jump over the counter, instead of using the door. Thanks to that, you'll have a few additional seconds to make necessary preparations. Start combining handkerchiefs with explosive bottles. Create at least one cocktail.
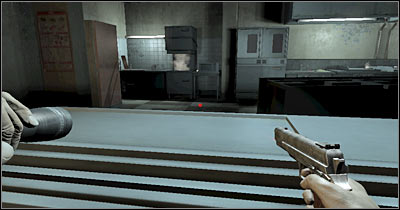
Go back to the main area of the museum. There are two corridors leading to the nests, however you can choose the corridor located in front of you. Get as close to the wall as possible. Light the cocktail on fire and prepare to throw it (screen). Obviously you will have to make sure that it flies over the wall and lands somewhere near the nests.
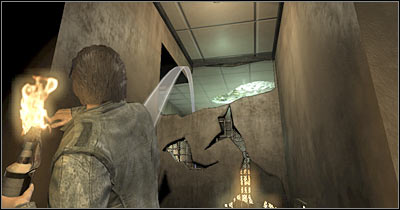
One cocktail should do the trick, however you can speed up this process by throwing a second cocktail inside that room. Wait for the flames to consume both nests. Once this is done, destroy the glass wall on your left and proceed towards a new corridor (screen).
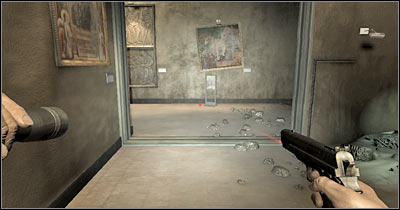
Keep moving forward until you've reached a new gate. Notice that an interesting cut-scene has been displayed on your screen (screen). Observe how the little creature reacts. Go back to the main room and deal with all remaining bugs. It's extremely important that none of these creatures interrupts you later on.
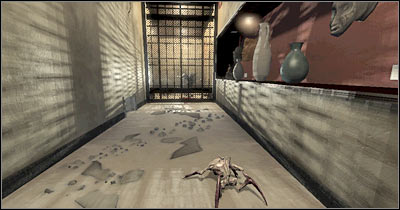
Go back to the kitchen area. You may ditch the handkerchiefs, because you won't need them for this task. Instead, be on a look out for a duct tape and a new explosive bottle. Combine these items in your inventory (screen). Once this is done, choose a lighter for your other hand and head back to the closed gate.
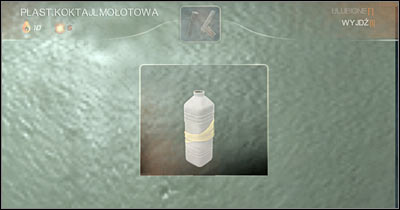
This is going to be a tricky puzzle, mostly because you'll have to be very precise at what you're doing. You should be standing somewhere next to the gate. Wait for at least 30 seconds and observe what is happening around you. Light the cocktail on fire when the creature is near its nest (screen).
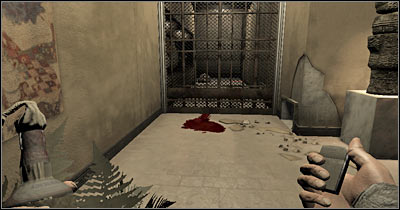
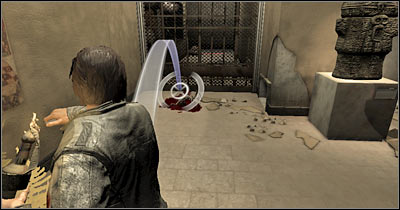
Wait patiently for the bug to get here. Once this has happened, press and hold the right mouse button. Aim the cocktail at the creature (screen) and thanks to the duct tape, it'll automatically remain attached to its body. The creature will go back to the nest and that's when the explosion will occur. If you've done everything according to the plan, you'll be able to destroy the nest and you'll unlock this passageway at the same time. Head on forward and wait for the second gate to be raised as well.
You are going to reach a much larger area of the museum in just a few seconds. Sadly, this area is swarming with monsters. Don't even think about using your pistol against them. Instead, try running towards the opposite end of this hall. You will notice a fire here, so it's fairly obvious that you should pick up a chair.
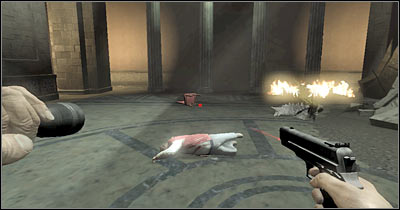
Just as before, you will have to use the chair to get rid of the demons (screen). Be careful, though. Some of the monsters are capable of attacking you with their tongues and that will result in you losing your weapon. Also, remember that you'll have to find a new chair once this first one has sustained a lot of damage.
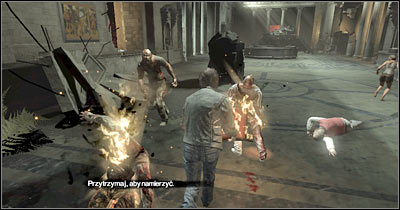
Once the battle has ended, take your time to explore your surroundings. First of all, you should be able to find a medical station here. Pick up some healing sprays if you have sustained even mild injuries. Once you're ready, proceed towards the stairs (screen), however the second you notice more monsters heading your way, go back to the ground floor and use a new chair to get rid of some additional demons.
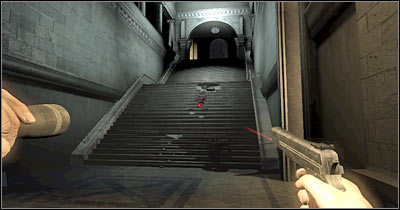
You may proceed to the first floor without any other interruptions. Once you've arrived at your destination, go to your left and approach a new gate. Listen to what one of the guards has to say. If you've eliminated all creatures, he will allow you to enter this new section of the museum.
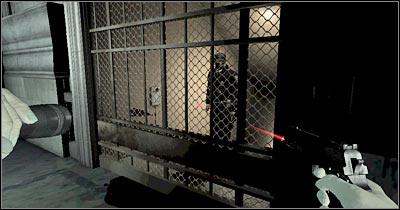
Keep heading towards your current destination, HOWEVER be careful here. Once again, you will have to deal with the black mass. You will be allowed to solve this problem using various approach methods. I assume that you don't have a burning chair at your disposal and that you're carrying only a few standard items. Start running and perform a jump towards the top right corner (screen).
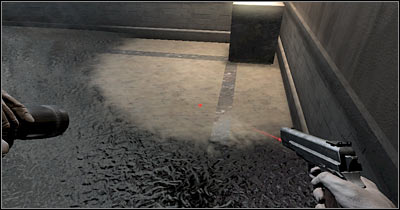
Turn left and look up. Choose a pistol from your inventory and fire a single bullet at the lamp (screen). As a result, the lamp will begin swinging. Wait for the right moment to make a move and start moving forward. You can't leave the brighter area.
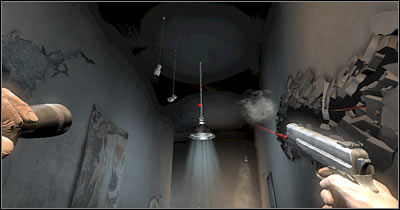
Eventually you will have to get to a second corner (screen). Sadly, you won't be allowed to exit the brighter area, because you would have been swallowed by the black mass almost immediately. Perform a jump towards that corner if you can't make it on foot.
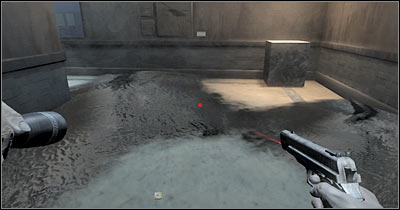
Once you've reached a safe area, turn left and fire a second bullet at the lamp. Just as before, wait for the right moment to occur and start moving forward. This time it's going to get even tougher, because you will have to reach a small circle (screen) without being swallowed by the black mass.
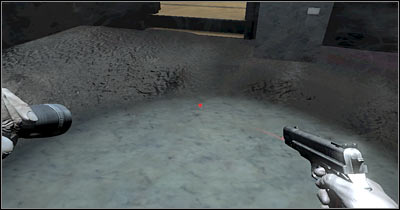
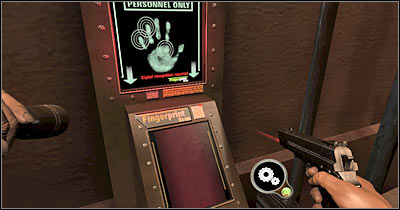
Finally perform a jump towards a new corridor. It shouldn't be a problem, as long as you're careful. You may proceed to the next area of the map. Go to your left and approach a large panel (screen). Try placing your hand on the scanner, however obviously you don't have access to this part of the building. Move back a little and you'll be rewarded with a new cut-scene.
Wait for this conversation to end. One of the guards will unlock a passageway for you. Go there now and eventually you'll find an elevator. Enter the elevator and try using the panel. Press the middle button (screen), because we want go to down.
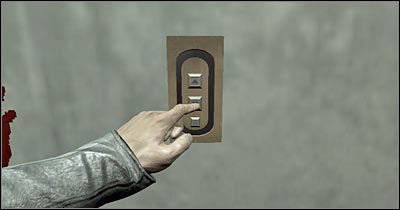
Sadly, the elevator is going to stop in a short while. You can't prevent this from happening. Don't worry, because you won't encounter any monsters right away. Approach the elevator door and press the action key (screen). Exit the elevator and go back to where you've talked to the security guard.
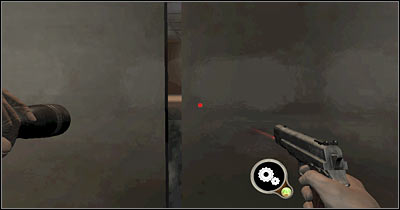
I guess you won't be surprised to hear that you'll have to defeat your second boss here (screen). This one is large, however killing him is going to be fairly easy. Don't even think about using only gun to defeat this creature. You will have to find another way to kill the demon. Start off by leaving his line of sight, so you won't end up getting injured by his attacks. He will be throwing projectiles at you. Try avoiding as many of them as possible. Take cover behind the pillars, however you can't stay there forever. Sooner or later you'll have to fight.
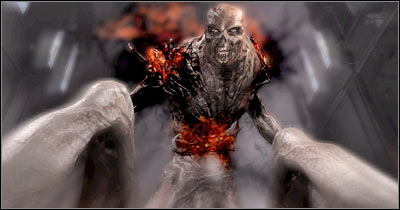
Your top priority here will be to get to one of the corners of the room, because you'll be able to find explosive bottles there (screen). Drop your medical sprays and fill your pockets with the bottles. Also, make sure that you have created a shortcut (hotkey) which allows you to hold a bottle and a pistol in your hands at the same time.
The rest should be fairly obvious to you. Start off by leaning out for a short period of time. It would be a good idea to hide near the boss, so it won't take for the bottle too long to get to him. Use the pistol at the last second (screen) and prevent the demon from hitting you with the projectiles. An explosion will wound the creature.
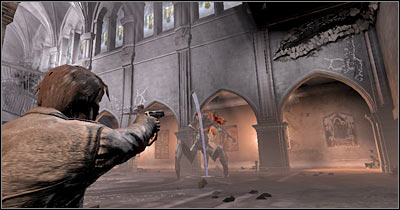
Once you've ran out of explosive bottles, try running towards a different corner of the room. Keep using the bottles to wound the boss. Also, don't forget that you can heal yourself by using medical sprays (screen). I would recommend healing the legs in the first place, because if you're injured, you may have some problems running.
After one or two attacks you'll notice that the demon begins to gather energy around himself. This means you'll have to find cover QUICKLY. Take cover behind one of the pillars, because that's where you'll find special markings on the ground (screen). Wait for this attack to end.
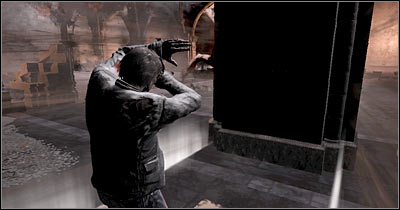
You'll probably have to perform at least four successful attacks to win this battle. Remember to wait for the last second to blow up the bottle, because it'll result in adding more injuries. Once you've won (screen), you will be rewarded with a new cut-scene during which Sarah will rejoin with Edward.
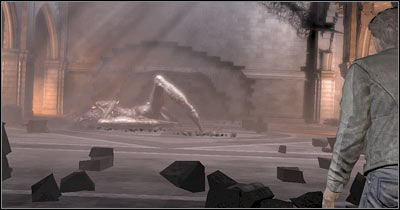
You'll start in the exact same room where you've defeated the boss. Go back to a large panel and listen to what Sarah has to say. It's going to be very important, because this a clue on how you should react in this situation. You should be able to find a sword here. If it's not on the ground, try looking up (screen) and use the pistol to acquire it.
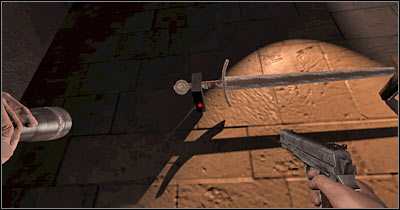
You've probably noticed the body of the guard during the cut-scene. Go there now and get ready to cut off his arm with a sword (screen). The sword has to be placed above your head in order for this action to succeed. Make the swing and drop the sword once you're done. You should notice that you're allowed to pick up the severed arm (screen).
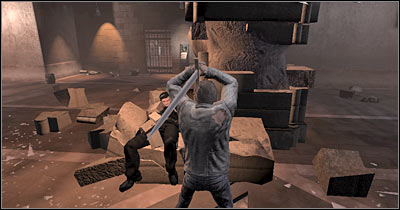
Once you've taken the arm, go back to the large panel which is located next to a closed gate. You won't have to perform any special actions here, because you'll gain access to a new area automatically. Proceed to a new room and turn left. Make sure you've checked all lockers for useful items. Take at least one explosive bottle with you! It would also be wise to heal your wounds.
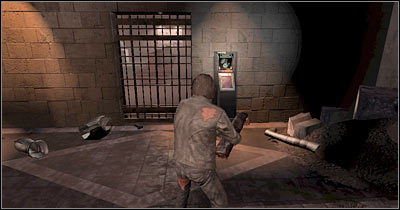
You should be able to find an exit near a vending machine. Eventually you'll end up standing near the elevator. Approach a small hatch and press the action key to open it. DON'T even think about jumping down the hatch. You'll have to release the rope in the first place. You can do this by aiming at the hook (screen).
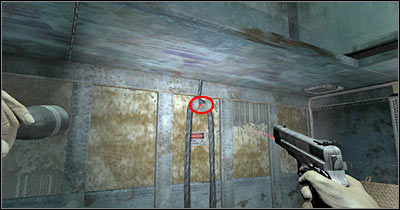
Press the action key once again. This time you'll want to grab the rope. Use this object to reach a lower level safely. You should notice a closed gate here. Press 2 on your keyboard to switch to FPP view. Aim at the padlock and destroy it with a single bullet. Proceed to a new corridor and wait for Sarah to join you. Move forward and turn left at the junction. Keep heading straight until you've reached the flames.
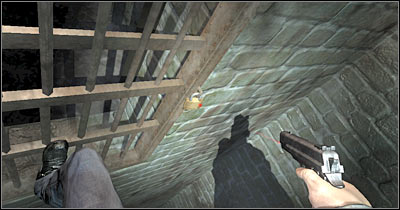
I guess you won't be surprised to hear that you're going to be attacked by some monsters very soon. Sadly, you'll be dealing with very powerful creatures, so you can't use the chair against them. Instead, choose an explosive bottle and a pistol from your inventory. Make a few steps forward and wait for the demons to appear. Once you see them coming, move back quickly and kill them by blowing up the bottle (screen). If any of the creatures survives, use your gun or a burning tool to kill it.
You may now proceed towards a new room. The entrance can be found to your right. As you've noticed, you're very close to room 943. Use a nearby ladder (screen) to get down to a lower level. Approach your target and you'll watch a new cut-scene.
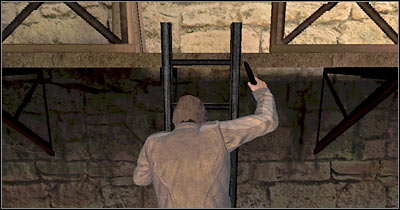
Once you're inside room 943, obviously you should take some time to look around. The game will try to scare you off in the meantime. Thankfully, you won't have to worry about getting killed. Also, ignore the flames, because fire won't spread itself to other objects. I would recommend that you open a secret passage while you're at it (screen).
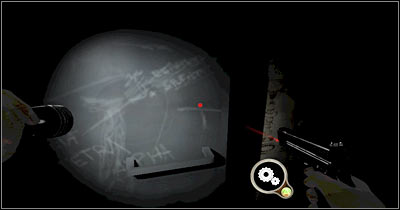
Wait for the whole situation to calm down and ignore the fact that you'll end up standing in a very dark area. Choose a flashlight from your inventory, however don't use it right away. Instead, wait for a new hint. As ordered, press and hold the X key. This will allow our main character to close his eyes. You should notice an old man standing inside this room (screen).
Approach the "ghost" and look at what he's pointing at. Open your eyes and use the flashlight to inspect that area (screen). You'll find a newspaper clip here and it'll say something about Sarah. You will have to focus on the newspaper clip to score this finding (it's going to be a short cut-scene).
Now you'll have to perform a few similar actions. Each time you'll have to begin by closing your eyes. Inspect the area pointed out by the ghost. You will be looking at three different objects - a gramophone, a knocker and a small bottle. Listen to what Sarah is saying after each finding - you'll complete an interesting sentence. Watch a new cut-scene. Listen to the conversation closely, especially the part about Lucifer. You will return to room 943 at the end of this scene.
You may proceed to the secret area which you've discovered before. Notice a brick wall here, however if you close your eyes, you'll see the ghost. He will unlock this passageway for you (screen). Enter a much larger room and approach a weird mechanism.
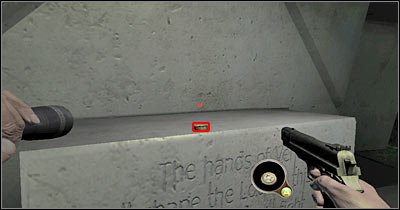
Once you've regained full control over the main character, join Sarah and read four new messages in your cell phone's menu. Now you will have to find and take a small lense (screen). Choose this object from your inventory. As for your other hand, choose a flashlight. You may go back to the previous room.

Activate your flashlight and make sure that the lense is in your other hand. Stand on a large X on the floor and keep looking straight ahead. Press and hold the right mouse button. Notice that the sign from the lense is now visible on the wall. Match it witch a similar sign and you'll unlock a new corridor. Go there now.
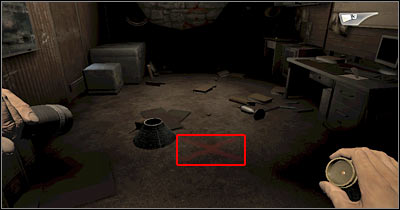
Eventually you'll get to a very large cave. Don't enter it right away. Instead, remain near the entrance and destroy two nests from here (screen). I would recommend using fire bullets, so it won't take too long. Otherwise you would have to jump over the gap and use a spray. You must also kill all the bugs, however there should be only a couple of them in the area.
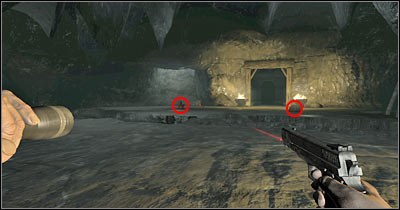
Go back to the entrance to the cave and inspect the area to the left. You should be able to find a forklift truck (screen) and obviously you will have to use it right away. Take a seat and start the engine. Proceed forward, because you'll have to get to a lower level.
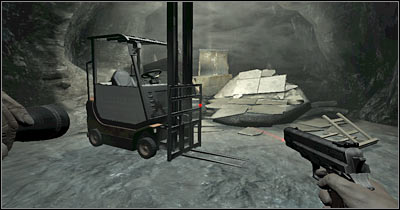
You can use HOME and END keys to move the fork in your vehicle. Lower the fork and approach a large metal bridge (screen). Now you must start raising the fork until you've locked the bridge in place. Once this is done, go back in the forklift truck to the upper level and drive over the bridge. You'll end up near the nests.
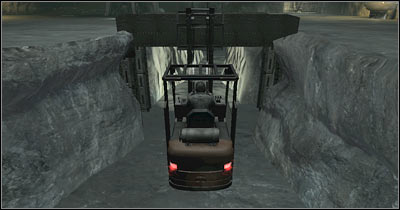
Keep heading forward and you'll end up in a new corridor. You will have to turn left twice and eventually you'll get to a new area. It's very important that you follow my instructions here. Otherwise you would have some problems getting to the next location. Look at my screen - that's where you'll have to go.
Start raising the fork and you'll raise a large object as well. Lock the fork at the highest point and leave the forklift truck (screen). You should be able to find a large switch to your left. Use it and notice that a metal bar will support this structure from now. Be careful. A monster is going to attack you and you'll have to defeat the beast without using any burning chairs. I would recommend using a spray and a lighter to get rid of the creature.
You may go back to the vehicle. Lower the fork and notice that the bridge has remained in this new position. Turn left and use this new structure to get to an upper platform (screen). There are some crates here. Try crashing into them or lift them and place them somewhere else. Either way, you will have to get to a new area. Leave your vehicle for a few seconds.
You should be able to find a locker to your left and it's extremely important that you look what's inside. Pick up an explosive bottle (screen) and open your inventory right away. Use the bottle on the pistol to acquire fire bullets. Choose both of these items and proceed to the next room on foot.
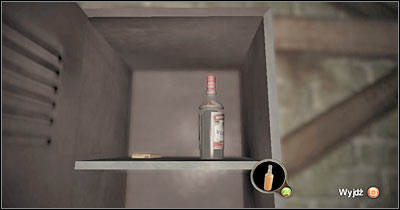
You will have to perform two actions here and it must be done quickly. First of all, throw the bottle at the nest which can be found above you. Obviously you'll have to use the pistol to blow up the bottle. Once this is done, start moving forward until you've reached a ladder. Use it to get to a new platform. Destroy the second with fire bullets and go back to the forklift truck.
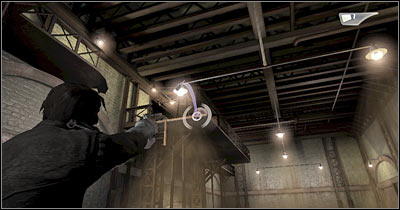
As you've probably suspected, your job here will be to build a tower made out of crates, so you'll be able to get to an upper balcony. You can find the crates to your right. Look at my screen if you want to find out how it should look like. The higher tower should consists of two crates and the smaller tower will be a single crate. Start climbing up and eventually you should be able to get to that platform. Use the switch and watch a short cut-scene.
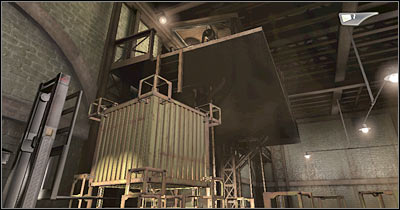
You may go back to the lower level. Use the forklift truck once again. This time it won't take you too long to get to your destination. Use a new switch and notice that the gate hasn't been opened entirely. Use the fork to lift the gate (screen). This will allow you to get inside. Start moving forward until you've reached the elevator. Obviously you'll have to use the elevator to get to a new area. Press the switch and head outside.
You'll begin this short mission outside of the museum. Start moving forward and try to reach an opposite end of a small bridge (screen). Sadly, the structure won't support your weight and you'll end up being surrounded by the black mass. Listen to a new conversation between Carnby and Crowley, because you'll find out what you'll have to do in order to survive.
Your task here will be to stay inside the bright circle, so you'll avoid being swallowed by the black mass. I wouldn't recommend switching to FPP view here, because you would have a lot of problems moving your character. At first it's going to be easy and you won't even have to use the sprint button.
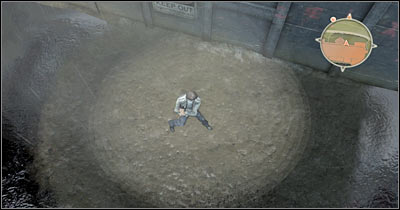
Sadly, it's going to get more difficult in just a few seconds. The bright circle will get bigger, however you will be forced to start running in order to survive. The most important thing here is that you're very precise. You won't be allowed to make any sudden moves and you'll have to stay inside the circle all the time. You'll circle around this area a few times. Watch out for a few unexpected turns. You'll probably repeat this sequence at least once before you'll memorize how to react. Once you've survived, you will be rewarded with a interesting cut-scene.
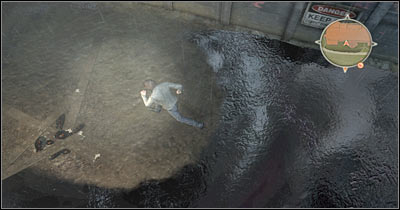
You'll start the game in an awkward position. You'll holding a rope and you can see the helicopter above you. Start climbing towards it. Thankfully, you won't have to worry about the helicopter losing its balance. Instead, you'll have to focus on avoiding smaller objects (screen), so you won't receive any injuries and your character won't release the rope.
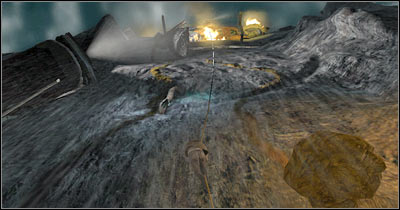
You'll have to be ready to deal with some additional difficulties. Notice the flames (screen). You'll have to avoid getting close to the fire. Also, you'll have to avoid a much larger object. You wouldn't be able to use the side movement keys, so you'll have to press the jump key at the last second. Thankfully, even if you're hit, you'll still be allowed to save yourself by hitting the action key a few times.
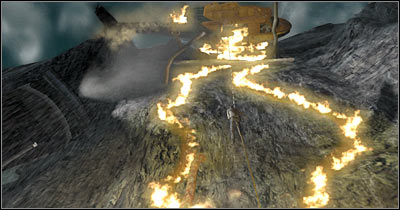
Eventually you should be able to get closer to the helicopter. Notice that the camera has changed its position and now you can see a carriage to your left. Start swinging on the rope and jump towards the carriage (screen). It shouldn't be too difficult.
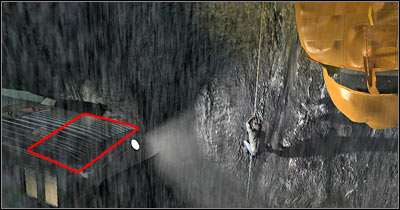
Make a few steps forward and head down the hole to find yourself inside the carriage. Read a new text message from Sarah. Move back a little and pick up ammunition. Now you must start moving forward. The carriage will change its position to vertical. Sadly, it's going to make your progress more difficult.
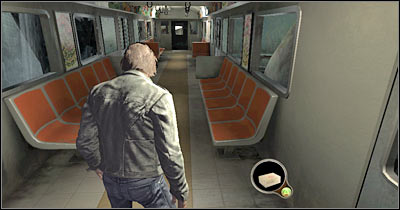
You should be able to find a rope here and obviously you will have to grab onto it. Press the 2 key at the same time to choose a pistol from your inventory. There are some new bugs above you (screen) and it's very important that you kill them as soon as possible. Keep heading upwards and use the gun whenever you see more bugs heading your way. Prevent them from attacking you, because you would have to start all over again.
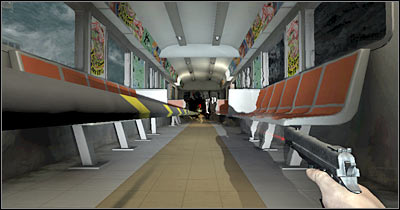
The carriage will separate itself from the main structure in a few seconds, however it won't be a problem, because you won't encounter any additional monsters. Keep heading upwards until you're close enough to a new carriage (screen). Get inside and proceed to the left exit.
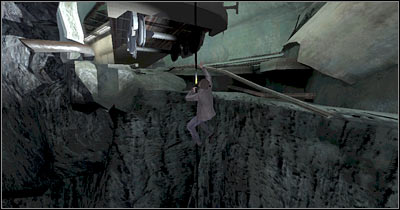
Start off by moving forward. Eventually you'll be rewarded with a new cut-scene. You will have to act quickly here, because a lot of monsters will arrive here very soon. Use the sprint button and go to your left. You should be able to find a baseball bat here (screen). Pick it up.
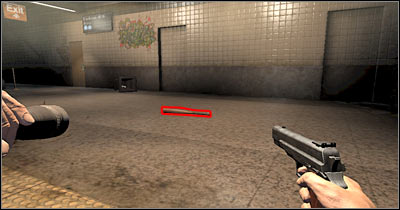
Once you've taken the bat, start running forward. Approach the flames and light your newly acquired weapon on fire. Now you must focus on eliminating as many demons as possible (screen). Just as before, watch out for their tongue attacks. It's often wise to move around a lot, so you won't be an easy target.
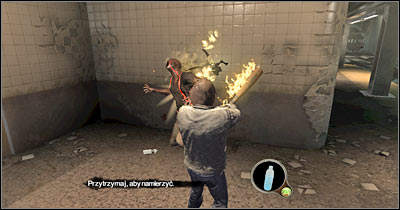
Once you've lost your bat, you should consider heading over to a public toilet (screen) as soon as possible. You can find the toilet to the right of the start area. Scout the toilet for new items and take whatever you may find useful. I would recommend collecting bug sprays in the first place, especially since you'll have to fight here at a small distance.
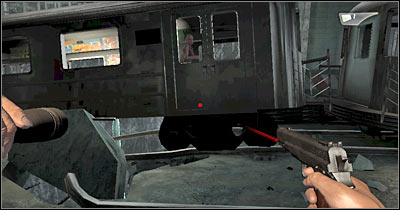
Sooner or later you're going to have to start using explosive bottles, because very powerful creatures will appear near the station (screen). Don't forget that they can harm you from a larger distance. Continue leaning out for a short while and throw a bottle at each creature. Obviously you will have to detonate the bottle at the last second.
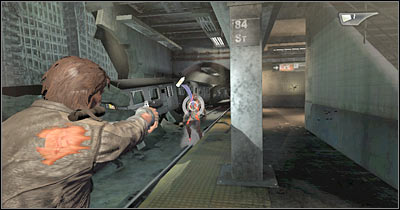
Your objective will be to get rid of all larger creatures. Ignore some of the bugs on the walls, especially since you won't have to worry about them harming you. Once you've defeated all monsters, go back to the toilet and pick up a few explosive bottles. Now you'll have to approach one of the carriages (screen). Get inside and watch a new cut-scene.

Ignore the fact that this carriage is being held by the beast, because nothing bad will happen until you've decided to leave. Find an opening and switch to TPP view. You should notice a small tentacle in front of you (screen) and you'll have to act like it's a rope. Perform a jump towards it.
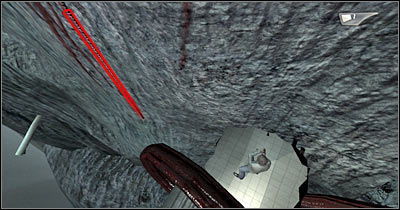
Once you've grabbed the rope, switch to FPP view quickly and kill a few bugs (screen) before they decide to attack you. It's very important, because losing grip here is equal to dying. Check the second rope while you're at it and kill at least one bug. Climb up a little.
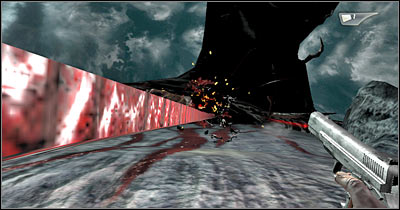
Keep heading towards the creature until you're close enough to the second rope. Start swinging on your rope and perform a new jump. Once again, you will have to act quickly to ensure your safety. Switch to FPP view and deal with the remaining bugs. Keep climbing up until you've reached the belly of the creature.
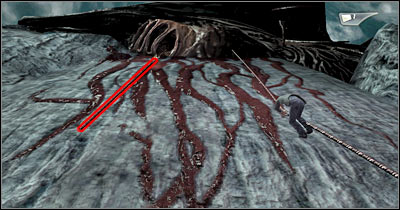
Thankfully, you won't have to worry about any other bugs appearing near your location. You should also know that only one path leads to the exit, so you can't get lost along the way. Approach a weird passageway (screen) and exit the creature. Read a new text message from Sarah and notice that you've returned to the park.
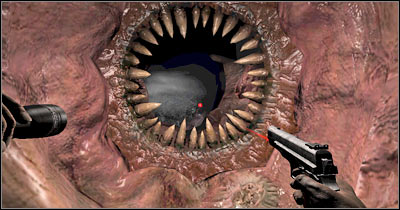
This time you won't have to worry about any creatures attacking you along the way. Reaching the castle should take you about one minute and there's a chance that you won't encounter any new monsters. Take a look at your personal map. 1 is where you've started and 2 is the castle. I would also recommend going to a location marked by X (keep reading for a more detailed description).
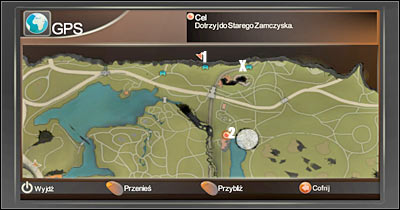
I'd strongly recommend using a car to get to your current destination. Thankfully, a police vehicle should be parked nearby. Enter it and check the side compartment for useful items. You should be able to find ammo here. Sadly, you can't start the car right away. Instead, you'll have to steal it by winning a new type of a mini-game. Your objective here will be to connect two cabels of the same color (screen). If you're unsuccessful, try choosing a different color. Wait for the bar to get to the green field and hold the W key to start the car.
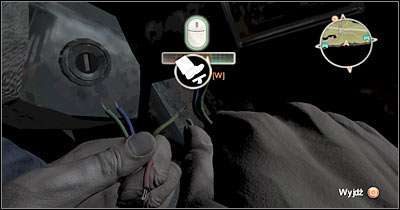
Before you'll decide to go to the castle, you should consider inspecting an area to the east (X on the map). You will come across an ambulance here (screen). Leave your car and spend some time looking for healing sprays and bandages. You can also switch cars by using a nearby cab.
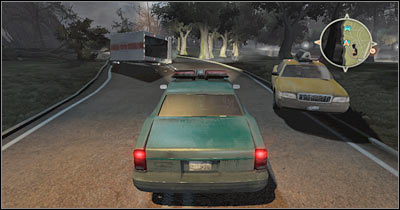
You can reach your destination any way you want to. Just make sure that you stay as far away from the big holes as possible, so you won't lose your life by mistake. Like I've already said, you shouldn't encounter any monsters. Exit the car once you're close enough to the castle (screen). Read a message about roots of evil.
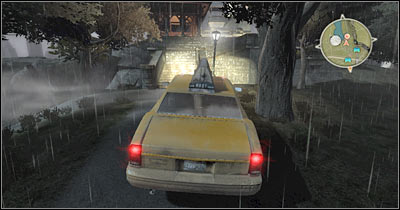
Choose a pistol from your inventory and proceed towards the stairs. It's EXTREMELY important that you pick up an explosive bottle (screen). Open your inventory and use the bottle on the pistol to create fire bullets.
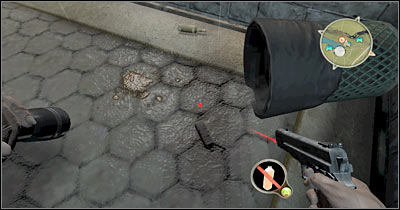
Try getting closer to the main entrance to the castle. You should notice that a fissure monster has appeared in this area. Obviously you will have to defeat it before it gets too close (screen). It shouldn't be a problem, as long as you're using fire bullets.
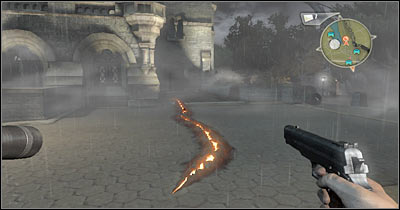
Equip yourself with an explosive bottle. If you don't have any bottles, try looking around and you'll find plenty of those. Aim at the main door to the castle and destroy it a well-placed bottle (screen). Proceed to that location.
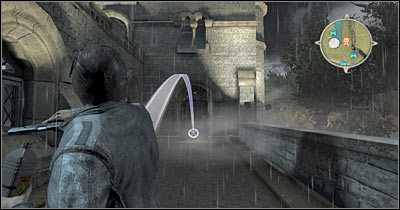
Once you're inside the mansion, it's extremely important that you read a new text message from Sarah. You'll find out that you'll have to improve your spectral sight to at least 30 points. This means you'll have to destroy a sufficient number of roots of evil. Check Optional: Roots of Evil - Part 1 for additional info on how to find the roots and how to destroy them properly. If you have 30 points or more (you'll receive confirmation from Sarah and you can check this in the main menu of your cell phone), you will be allowed to go back to completing the main goal. Go to Scene 4 - Par t 2 and continue playing.

I guess you won't be surprised to hear that you will be allowed to explore Central Park and to destroy the roots in any order. Check my maps, as well as additional info, if you want to find out how to get past this segment of the game. You should know that you won't have to destroy all roots to succeed. The game will require you to gather 30 points, however if you decide to destroy all roots, you will be able to score 47 points.
Important! Don't forget to save your progress each time you've been able to destroy a root, especially if you've visited a more isolated area of the map.
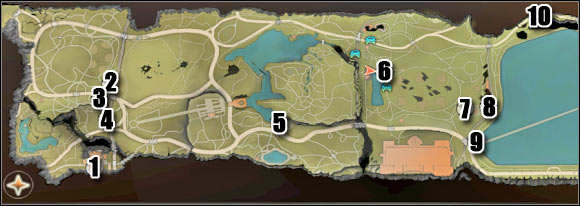
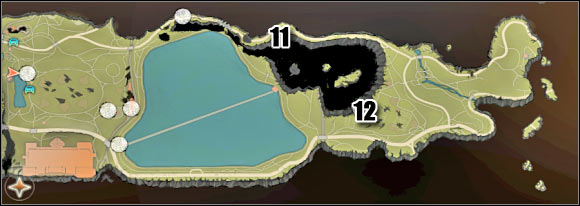
SECTOR 1
Maximum reward: 6 points (2+2+2)
You've had an opportunity to visit this location earlier during the course of the game. I assume that you've ignored it and decided to head on to the ambulance. Thankfully, you won't have to repeat the jump, because you will be allowed to choose between two new passageways (screen). Approach the area from the north or from the north-east.
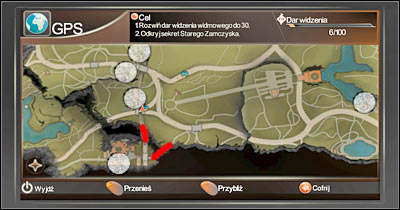
Park your car in front of the main entrance to the southern building (screen). Ignore some of the nearby monsters and head on forward right away. Watch a short cut-scene and use the stairs to get to the flooded cellar. It's very important that you explore the first corridor. Pick up a spray and ignore explosive bottles for the time being.
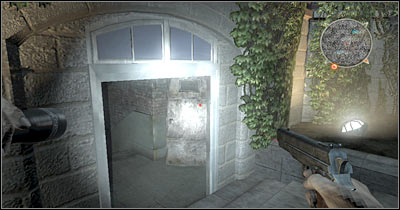
Start moving towards a much darker room. Ignore some of the nearby bugs and focus on destroying a nest (screen). Once this is done, use the flashlight and your gun to get rid of all hostile creatures.
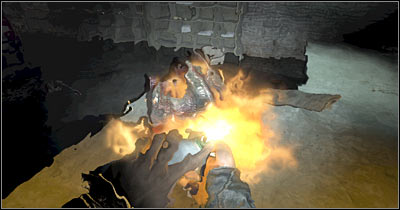
You've probably noticed by now that you'll have to be dealing with unpleasant distortions. This means you're very close to the first root of evil. You can find it near the nest and it looks like a small tree (screen). Use the spray to destroy it, however you could also throw an explosive bottle at the root.
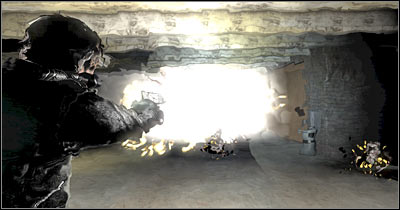
Once you've destroyed the root, your vision should go back to normal. There's a fuse box nearby and you'll have to interact with it. This is going to be a simple mini-game. Choose two violet cabels and draw them together for about two seconds (screen). Notice that the power is back on and you can use an elevator. BEFORE you head over to the elevator, find an explosive bottle and use it to create fire bullets. Once this is done, use the panel and decide to go up.
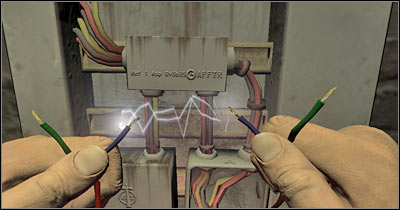
Once you've arrived at your new destination, leave the elevator and proceed to your right QUICKLY. A fissure monster will start chasing you, however you should be safe once you've reached a new room. Turn around and use fire bullets to defeat the beast (screen).
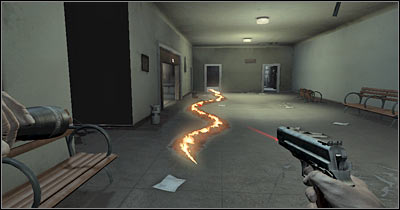
The area is much safer right now, so you'll be allowed to look around. There are two additional roots in this area and you'll have to find them. Each time you've found a root, use a spray to destroy it (screen). As for means of leaving the building, you may go back to the elevator or you can head over to the balcony and use a garden hose to get to the ground safely.
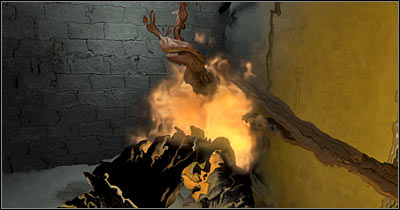
SECTOR 2
Maximum reward: 2 points
You won't have to spend a lot of time here figuring out how to destroy this root. Park the car nearby and ignore smaller creatures, because you won't have to defeat them. Head over to the root and destroy it (screen) with a spray or an explosive bottle. Go back to the car before you're surrounded by the bugs.
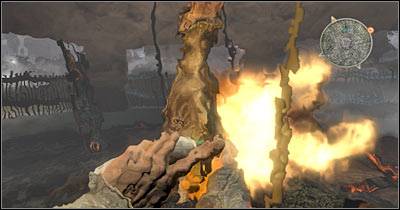
SECTOR 3
Maximum reward: 2 points
You won't encounter any problems here as well. Finding the root is going to be very easy (screen) and you can choose how you want to get rid of it. I would recommend using a spray. You won't be attacked by anyone in the meantime.
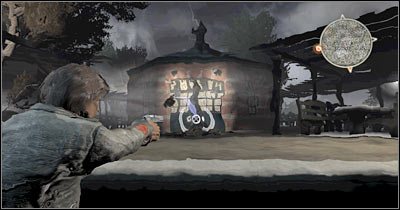
SECTOR 4
Maximum reward: 2 points
The plant can be found inside an unguarded building, to the right of the main entrance (screen). You've been here before (this is where you've collected a Magnum pistol), so you should be familiar with the surroundings.
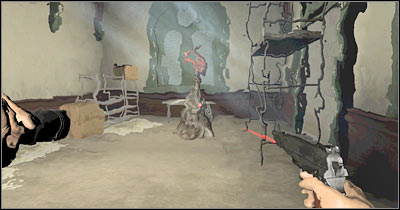
SECTOR 5
Maximum reward: 4 points (2+2)
Sadly, this time you'll have to acknowledge the presence of hostile creatures. Your objective will be to destroy two roots. I would recommend that you proceed towards the side door (screen). Destroy it with a weapon of some kind. Once you're inside the kitchen, pick up valuable items quickly. You won't have much time, because eventually the monsters will get here.
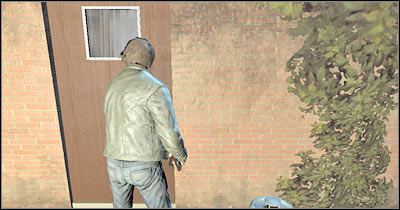
You could try fighting the beasts, however it won't be necessary. You may proceed to the main room right away. A single explosive bottle (screen) should be more than enough to burn down both roots. When this occurs, exit the building quickly. If you want to explore the building more carefully, you'll have defeat the demons in the first place.
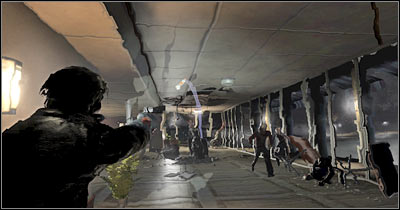
SECTOR 6
Maximum reward: 3 points
Destroying this root of evil is going to be extremely simple, HOWEVER you must have an explosive bottle in your inventory. You can find the root in the middle of the arena. Notice that it's quite large, so can't destroy it with a spray. Throw a bottle at the root (screen) and start retreating at the same time, because there are some monsters in this area.
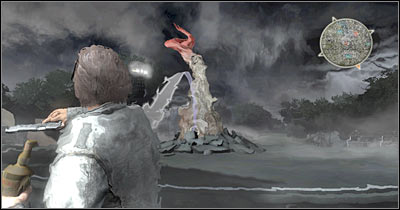
SECTOR 7
Maximum reward: 3 points
This is going to be a very similar area to the previous root. Consider destroying the plant from a larger distance and with an explosive bottle (screen). Once you've succeed, run away, because you wouldn't achieve anything by defeating the monsters.
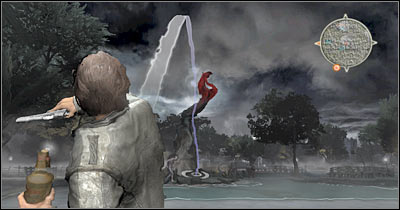
SECTOR 8
Maximum reward: 6 points (2+2+2)
I assume that you may have some problems getting inside the main building (that's where all three roots are located). Ignore the main road and proceed to the back of the building. Take your time to look around and pick up a few valuable items. Your task will be to destroy a small door (screen). Use explosives or an axe.
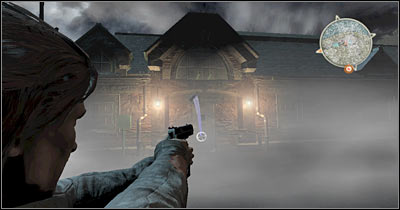
I guess you won't be surprised to find a few monsters inside the building. Avoiding them is possible, however it can get quite tricky, because the rooms are very small. Start off by choosing the left corridor. Destroy a single root and inspect the right corridor. There are two additional roots there. The final one can be found in a small room (screen).
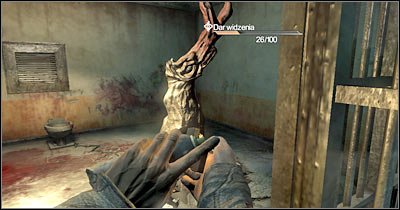
SECTOR 9
Maximum reward: 3 points
This root of evil is by far the most difficult one to destroy, at least in my personal opinion. I wouldn't recommend trying to destroy it unless you plan on securing the entire park. Otherwise focus on destroying other roots. The entrance to this building is being guarded by a few monsters and you'll have to defeat them before moving on. Once this is done, use an explosive bottle to blow up the main door (screen).
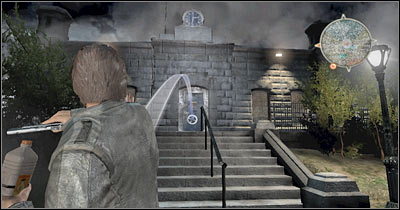
Enter the building and take some time to look around. Inspect the lockers. Collect at least one explosive bottle, however you will have to leave one free slot in your inventory. Head on to a small ladder (screen) and use it to get to a lower level of the complex.
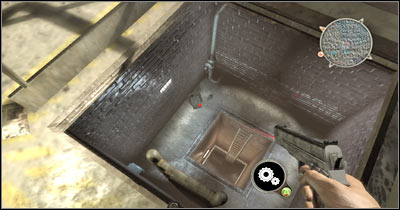
You'll have to be extremely careful from now on, because the lower level is being "guarded" by the black mass and you'll have figure out a way to avoid it. Notice a lot flares in this room. Pick up at least one flare and choose this object from your inventory.
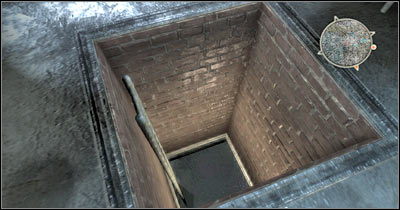
Light the flare and approach the large hole carefully. Your task here will be to drop the flare, however you must make sure that it'll land somewhere near the ladder (screen). It's important, because only then you'll be allowed to get down there without risking your life.
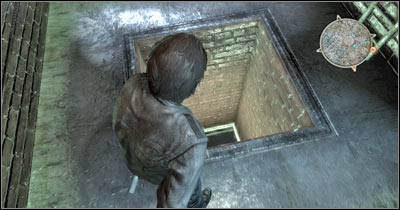
Now you've got two choices - you can drop several other flares just to make sure that you'll be safe or you can start using the flashlight to scare off the black mass (screen). Either way, you will have to get to a new room safely. You'll notice a large plant on the left wall. Sadly, destroying it is going to be tricky.
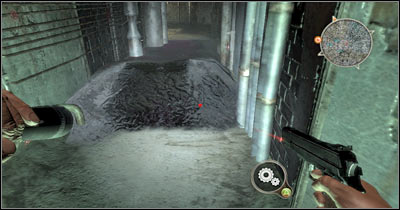
You must make some preparations if you want to destroy this root. Make sure that you have an explosive bottle in your inventory, as well as a duct tape. Use these items to create a sticky Molotov cocktail. Light the cocktail on fire and throw it at a large metal pipe (screen). The cocktail must attach itself to this object.
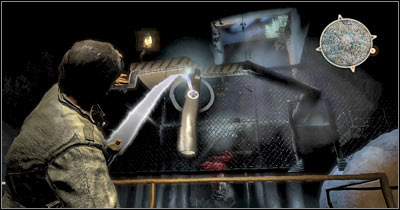
Go to your right quickly. You will have to use a large control panel here (screen). Notice that the metal pipe has begun moving. Wait for the pipe (the one with the Molotov cocktail attached to it) to get closer to the root and press the red button once again to stop it. Now you'll only have to wait for the explosion to occur. Going back to the surface might be a little tricky. I would recommend that you use as many flares as possible to secure the entire corridor with the black mass. You will also have to watch out for new monsters on the surface, however you can't try outrunning them.
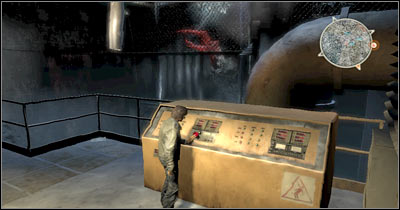
SECTOR 10
Maximum reward: 3 points
You can reach this location only from the eastern side, so you'll have to travel a long way. Watch out for a very tricky section along the way, because it's very easy to make a mistake there. Stop the car near the root. Find a trashcan and pick up a few items (screen). Use an explosive bottle and a duct tape to create a sticky Molotov cocktail.
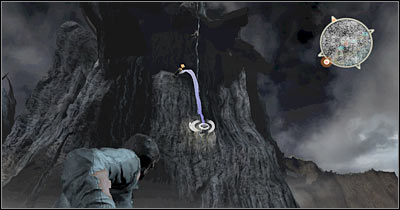
Turn towards the root and choose the cocktail from your inventory. Wait for one of the smaller creatures to get closer to you. Light the cocktail on fire and throw it at the bug (screen). Thankfully, you won't have to wait for a right occasion.

Now you must choose the pistol quickly. Observe the creature with the cocktail and wait for it to get closer to the root. Obviously that is when you'll have to use your gun (screen). The explosion should result in the destruction of the root.
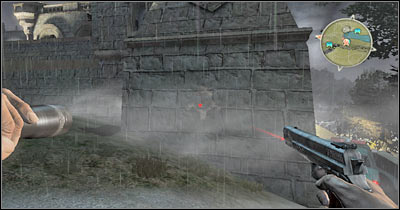
SECTOR 11
Maximum reward: 3 points
It might seem at first glance that it's going to be extremely difficult to destroy this plant. Thankfully, the solution to this problem is very simple. Find a car and start moving towards the plant from the west. You'll be allowed to perform a jump here (screen). Make sure to maintain maximum speed. Your car should land on a new platform, catapulting a burning wreck towards the plant. Mission accomplished.
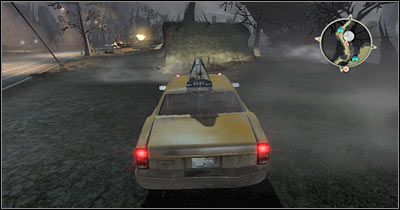
SECTOR 12
Maximum reward: 10 (!!!) points
I would recommend securing this sector in the first place, because you can earn A LOT of points here and you won't have to prepare for anything extraordinary. All you have to do here is to use an explosive bottle to destroy a very large root (screen). Watch out for a few monsters at the same time, however it shouldn't be difficult to dodge their attacks. You could try fighting with them, but it won't be necessary.
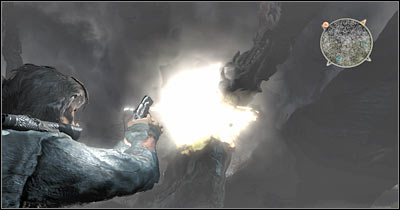
Once you've gathered enough points, you can go back to the castle. I'm sure that you remember where it is and obviously you can still use a map to find your way. Once you've arrived, read a new text message from Sarah. Your objective here will be to find six hidden signs using your newly acquired abilities. Each time you'll have to close your eyes to know their exact location. Look at my screen - this is the location of the first sign.

Open your inventory. Choose a lense from room 943 and a flashlight. Press and hold the right mouse button and focus on covering the symbol on the brick wall. You can close your eyes again to see where it is (screen). Once you've succeeded, you will be rewarded with a short cut-scene. You may proceed to the next symbol.
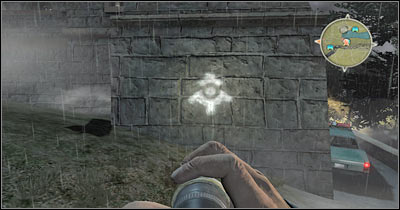
The second sign can be found nearby. Try going to your right. Use the stairs and close your eyes to find it. Be careful, though. You are going to be attacked by a few monsters here (screen). I would recommend using a spray or fire bullets to kill them, especially since you can now find their weak spots. You could also go back to the fireplace and light a wooden object on fire. Either way, find and mark the second sign.
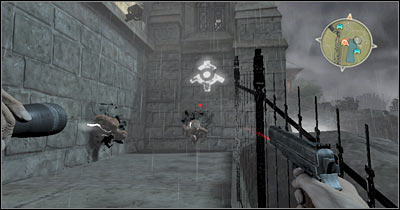
You may get closer to the entrance to the castle, however remain on the outside for the time being. The third sign can be found to the left of the main door (screen). Remember to close your eyes for at least two seconds, so it vanish so soon and you'll have more time to use the lense.
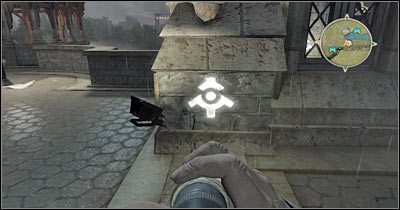
The fourth sign can be found near the flames (screen). This is where you fought the fissure monster. Look at my screen if you're having some difficulties finding it on your own. Mark this sign and proceed to the castle.
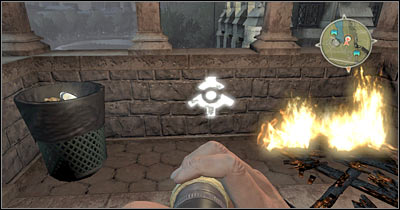
Start off by going left, HOWEVER don't enter this new room just yet. As you've probably noticed, a black mass is inside this room. This means you'll have to make some preparations. Thankfully, you should be able to come across a few flares. Try throwing them across the entire room. The sign can be found on the right wall (screen). As for means of escape - you can go back the same way you came before or you may use an opened window if your don't want to risk too much.
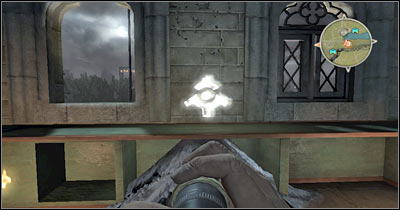
The final sixth sign can be found inside the main room of the castle. Start off by using your gun and destroy a large painting near the fireplace (screen). You can finally mark the sign. Once this is done, watch a longer cut-scene.
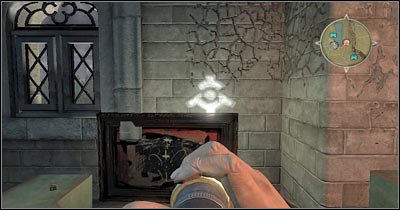
The area shown on the picture is one of castle's towers. You can get there by going outside and finding a rope (screen), however I would recommend reloading the checkpoint, so you won't have to spend too much time trying to get to an upper level. Make sure that you have at least two explosive bottles in your inventory!
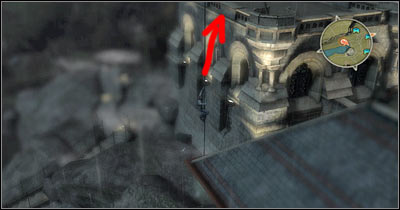
You should end up standing on a small roof. Watch a new cut-scene here. As you've noticed, you will have to defeat a quite powerful creature (screen). It's very important that you have explosive bottles at your disposal, because otherwise you would have some major problems winning this fight.
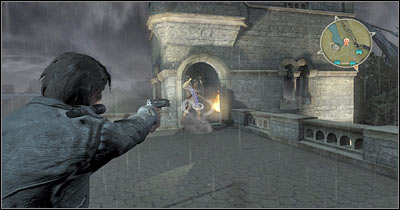
Enter a new area of the castle and take your time to collect the items of the highest value. It's very important that you pick up a fire extinguisher (screen). Use this object to put out the flames. This will grant you access to the staircase. Proceed to the top of the tower. Stand on a plate with six highlighted signs and you're going to be transported to the final area.
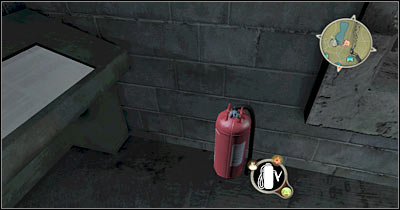
You should be able to receive a new text message from Sarah in the meantime. Once you're at the top, approach a large telescope and use it. All you have to do here is to center the view on the moon (screen). Notice that a distant building has been highlighted. Prepare yourself for the final chapter of the game!
This is going to be a very similar level to the previous one. Check your phone's log for new text messages and additional hints. You'll find out that you'll have to gather at least 50 points. You should also notice that a lot of new roots have appeared on your map. Check Optional: Roots of evil - Part 2 section if you want to find out how to destroy them. Once you've gathered enough points, you may continue completing the main mission - Scene 1 - Part 2.

Just as before, I've added two maps to show you locations of all nineteen roots of evil. I've also described how to destroy them.
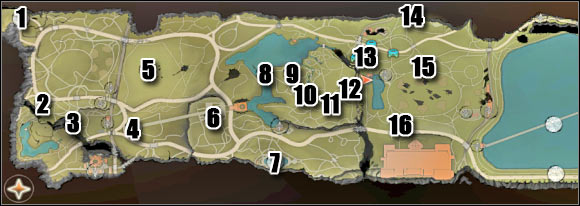
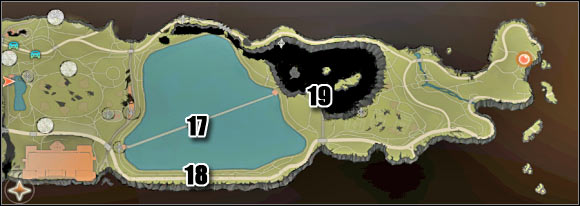
SECTOR 1
Maximum reward: 3 points
Destroying this root isn't going to be too difficult, however you should know that you'll be attacked by some winged creatures. You don't have to fight them, because more monsters would appear in the area. Focus on destroying the root quickly (screen). Notice that it won't catch on fire. Instead, the root will hide inside the pillar. Once you're done, leave this area quickly to avoid unwanted injuries.
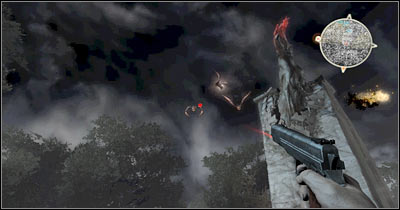
SECTOR 2
Maximum reward: 3 points
Thankfully, you shouldn't encounter any problems here. Destroying this root is going to be extremely easy. Obviously you should consider throwing a bottle from a larger distance. Once this is done, retreat quickly. This is important, because there are some monsters in the area and it would be wise to avoid them.
SECTOR 3
Maximum reward: 10 points
Despite what you might think, you won't have to jump over to a small island where the root is located. Instead, approach your target from the north-east. You should have a nice view of the root from here (screen). Choose an explosive bottle from your inventory and throw it at the root. Blow up the bottle once it's close enough to its target and the root should automatically catch on fire.
SECTOR 4
Maximum reward: 2 points
You can only gain two points here, however it's very easy to dispose of this root. You'll be dealing with a very small plant (screen), so you won't even have to use explosive bottles. Spray will do the trick, as long as you have one in your inventory.
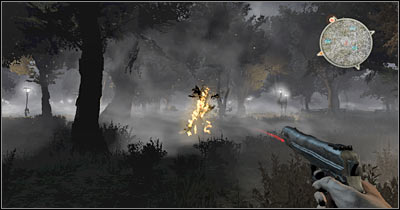
SECTOR 5
Maximum reward: 3 points
Destroying this plant is going to be EXTREMELY challenging, mostly because it's in the isolated island and you'll have to get there in the first place. This means you'll have to steal a car. Notice that you'll be allowed to make a jump here (screen). I would recommend taking a police vehicle. Thankfully, you will find a lot of cars in the area.
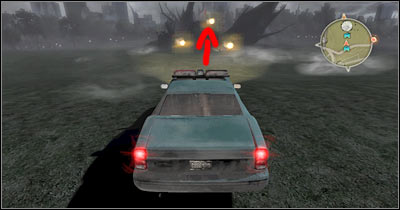
Start moving towards the jump area. The most important thing for you to know about is that you'll have to be travelling at a correct speed. You can't move too fast, because you would crash and you can't drive too slow, because you wouldn't be able to reach your destination during the jump. You'll probably have to repeat this jump a few times before figuring out how this works.
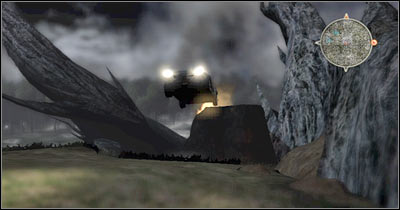
Once you've landed safely, exit your vehicle and use an explosive bottle to get rid of this root (screen). I wouldn't recommend trying to jump down, because there's a risk of sustaining injuries. Instead, try saving your progress and then reload to the last checkpoint.
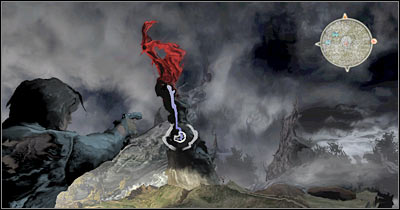
SECTOR 6
Maximum reward: 3 points
This root is going to be guarded by a well-known creature. Don't forget that this monster is capable of attacking you from a distance. You could try defeating it, however I would recommend focusing only on destroying the plant. Leave this area once it's done.
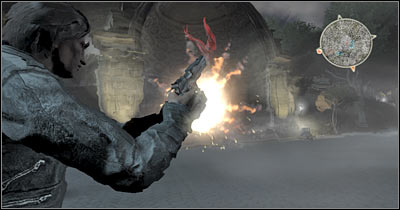
SECTOR 7
Maximum reward: 3 points
Just as before, you will have to watch out for one of stronger creatures, however you should be able to surprise it if you approach this area from the west. Ignore the fact that you'll be standing in the water. Throw the bottle at the root from a safe distance. As for the monster, I would recommend ignoring it.
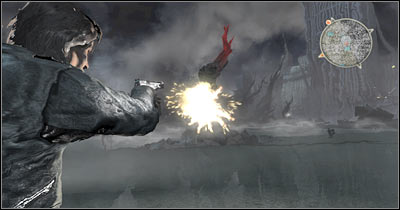
SECTOR 8
Maximum reward: 2 points
This plant, as well as four other roots, can be found in the central part of the map. It's a large island, isolated from the rest of the park. The only way you can get there is by choosing a small bridge which can be found to the north (screen). Sadly, this means you'll have to travel on foot, because the car is too big to fit through.
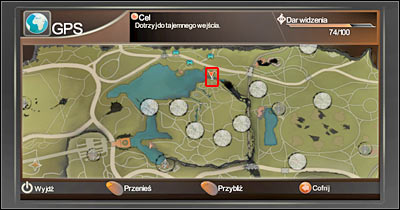
The plant can be found near the water and a destroyed bridge. I would strongly recommend using a spray of some kind here. You could also find some explosive bottles in the area, however I assume that you're being chased by the monsters and it's faster to get rid of a plant with a spray.
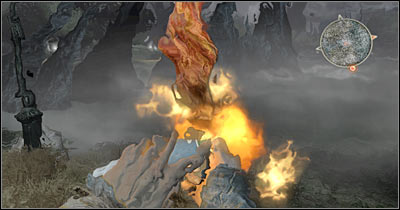
SECTOR 9
Maximum reward: 2 points
You'll be dealing with a similar situation here. There are some monsters in the area, so you should keep moving towards your destination and avoid them whenever possible. Use the spray to destroy this plant. The root can be found near a large hill (screen). Use your vision to find it quickly.
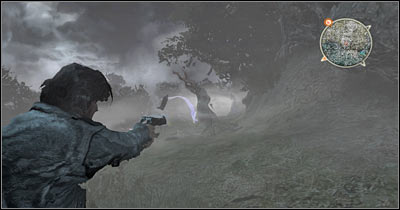
SECTOR 10
Maximum reward: 2 points
This root can be found near a small waterfall (screen). You shouldn't have any problems locating it, especially if you decide to use your new powers. Remember to avoid the monsters at the same time.
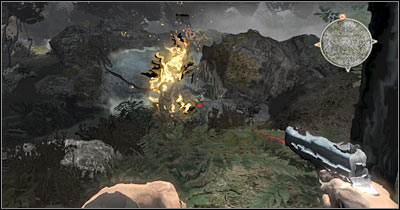
SECTOR 11
Maximum reward: 2 points
Finding this plant can be quite tricky, because it's not in the open. You will have to find a small passageway which leads to the bridge. The plant is located under the bridge (screen). Just as before, use a spray to destroy it.
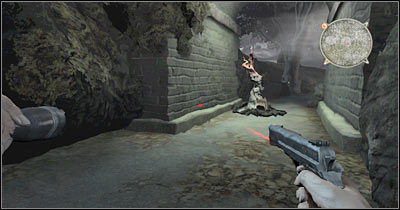
SECTOR 12
Maximum reward: 2 points
The final fifth plant is very easy to spot, even from a larger distance (screen). Approach it and use a spray to destroy it. Now you should go back to the northern bridge to leave this area as soon as possible. Thankfully, the monsters should stop chasing you. There's a car parked near the northern bridge and it would be wise to use it.
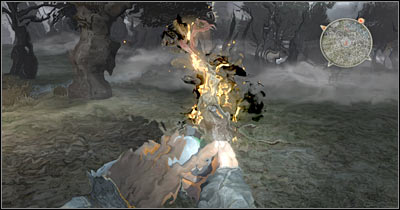
SECTOR 13
Maximum reward: 2 points
Destroying this plant is extremely easy, especially since it won't be guarded by any monsters. You can find the root on top of a small hill. I wouldn't recommend wasting any bottles on it. A spray will do just fine.
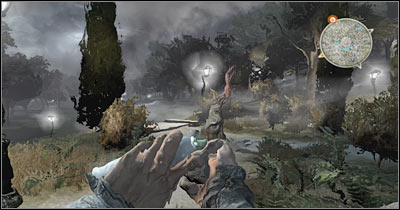
SECTOR 14
Maximum reward: 3 points
It's very easy to find this plant. As you've probably noticed, you will be dealing with a larger root, so you'll have to use at least one explosive bottle to get rid of it. Once this is done, start moving south, because a small group of monsters may arrive in this area.
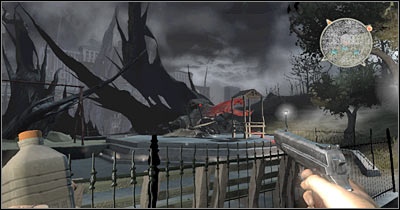
SECTOR 15
Maximum reward: 2 points
It's going to be very easy to get rid of this root. You won't have to climb anywhere and you won't have to waste a lot of time searching for it. Use the spray to destroy the root, however watch out for the monsters at the same time. Leave the area as soon as possible.
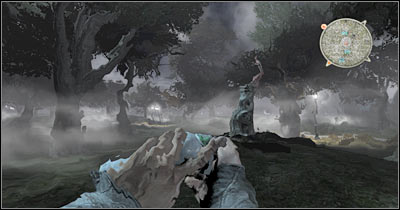
SECTOR 16
Maximum reward: 2 points
This root of evil can be found next to a very large statue. You won't have to move carefully here, because there aren't any monsters in the area. Try using a spray to destroy the root, instead of wasting time by trying to find more explosive bottles.
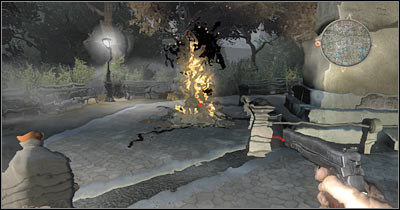
SECTOR 17
Maximum reward: 3 points
This is where it's going to get more complicated. I assume that you want to approach the bridge from the south-west. This means you'll have to deal with a lot of monsters along the way (screen). I wouldn't recommend trying to outrun them, because eventually they would catch up to you and you would have some problems defending yourself.
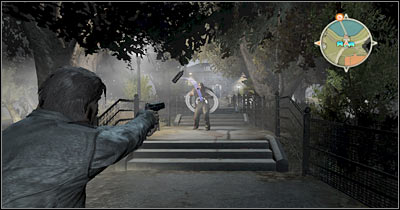
Once you've defeated all monsters, take your time to find new explosive bottles. You should also consider acquiring fire bullets. Start moving towards a highlighted area. There's only passageway here (screen), so you can't get lost.
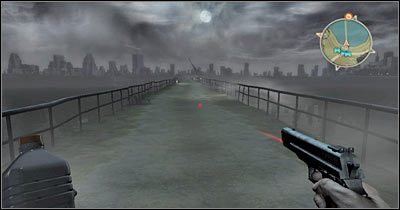
I guess you won't be surprised to meet other monsters along the way. Use your powers to expose their weak spots (white glowing areas) and shoot them with your gun. You could also try throwing explosive bottles at them, however it's very important that you leave at least one bottle in your inventory.
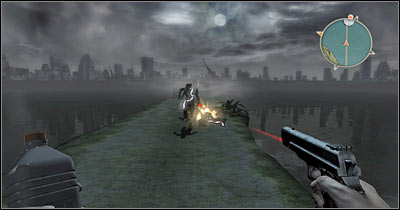
This root of evil can be found in the water, so it's extremely important to destroy it from a larger distance. Obviously you will have to use an explosive bottle (screen). Blow up the bottle at the last second. Once you've destroyed the plant, go back the same way you came before.
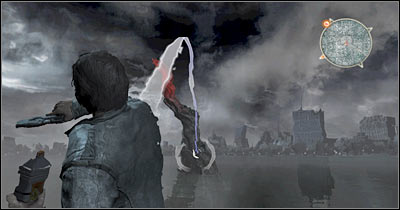
SECTOR 18
Maximum reward: 2 points
You can find this plant at the side of the road (screen). It shouldn't be too difficult to spot. Sadly, you'll have to be in a lot of hurry here, because the root is being protected by winged creatures. Approach the root quickly and use a spray to get rid of it. After that, go back to your car and drive away from this area.
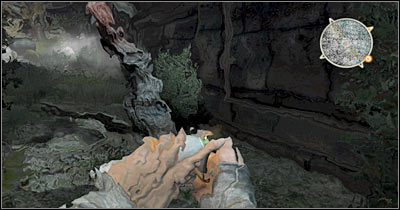
SECTOR 19
Maximum reward: 2 points
The final nineteenth root is located at the edge of the cliff (screen). Obviously you will have to be extremely careful, so you won't lose your life by mistake. Thankfully, you won't encounter any hostile creatures.
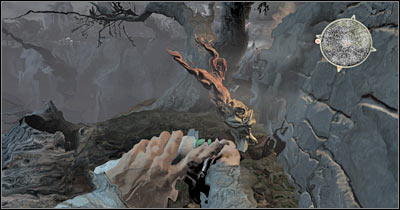
Once you've destroyed a sufficient number of roots, you will be allowed to continue with your main mission. The area you'll have to reach is located at the eastern edge of the map. Look at my screen - this is an example on how you could get there. Ignore the fact that you're driving near a cliff, because you only have to watch out for a sharp left turn. Don't worry about any monsters and focus only on getting to your destination. Leave your car once you're close enough, unless you don't mind avoiding a large number of trees and bushes.
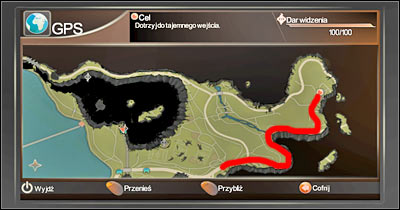
Get closer to the designated area of the map. Notice similar distortions. You could try going towards the building, however you would have been stopped by an invisible barrier. Take a closer look at the barrier by closing your eyes for a few seconds (screen).
Take your time to search the surrounding area. It's very important that you collect all items needed to create a Molotov cocktail. Obviously I'm talking about an explosive bottle, a duct tape and a handkerchief. Combine these items together and choose a lighter for your other hand.
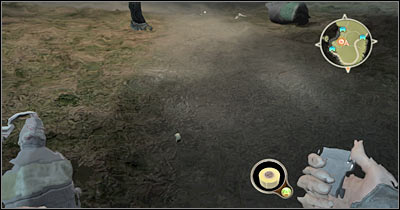
As you've probably suspected, your task here will be to kill a creature which supports the magnetic wall. Find a place where the barrier is lower and throw the flaming cocktail over the barrier (screen). Now you'll only have to wait for an explosion to occur. If you were precise, you'll kill the monster and you'll be rewarded with a short cut-scene.
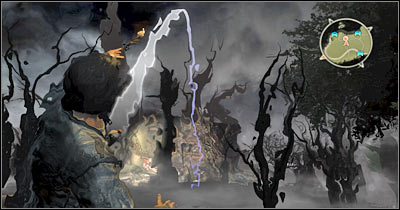
You may finally move towards the small building. Once inside, open your inventory and choose two items - a lense and a flashlight. Obviously you will have to use these objects on a sign on the wall (screen) and you can find the sign by closing your eyes. Notice that a new passageway has been opened.
DON'T get too close to an opened hatch, because you would have died if you have tried to jump down. Instead, choose a pistol from your inventory and destroy a new hook (screen). Grab the rope and start moving towards the hole. Use the rope to get to a lower level.
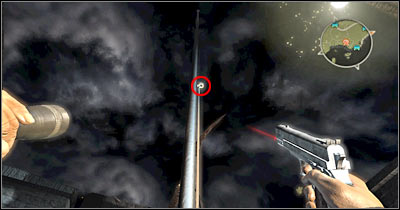
Eventually you will have to get to a small platform. Release the rope and jump towards a small ledge. You must start moving left (screen). Grab a second rope there and proceed towards the ground floor. Once you've arrived at your destination, listen to a short conversation with Sarah and head on to a dark corridor. You will have to get to a huge cave.
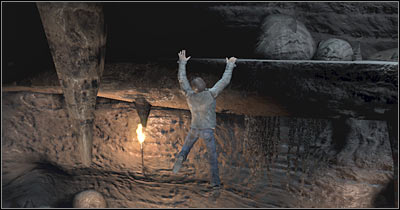
This is going to be one of the most difficult levels of the game. You'll have to solve a large number of challenging puzzles. Avoiding traps is going to be equally important. Make sure that you're following my instructions, so you won't have any problems advancing to the next level. Switch to TPP view and start moving forward. It's very important that you stay away from the ledge. Once you've reached an elevator, use a lense and a flashlight to mark a new sign (screen). Wait for the platform to transport you to a new location.
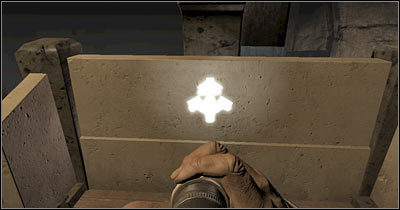
Head on to the first room of the complex. Approach the beam of light and notice that blocking it opens a nearby door. You can solve this problem easily. Pick up a small object found in this room. Place the object near the beam of light and proceed towards the exit.
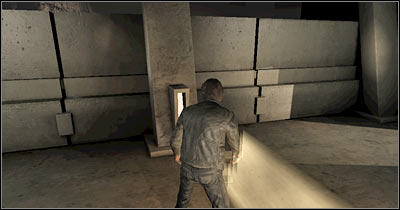
Ignore the fact that you won't be allowed to use your flashlight inside the cave. Proceed towards a new rope and use it to get to a lower level (screen). Jump down to a new platform carefully and proceed towards the second room. This time you'll have to deal with a slightly more challenging puzzle.
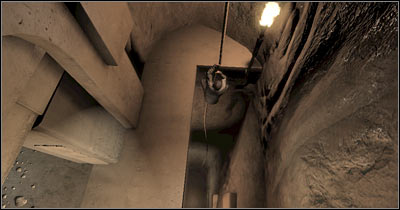
Just as before, your task will be to interact with a beam of light. Sadly, this time it's going to be more difficult to figure out what has to be done. Approach a small stone and press the action key. Start pulling the stone and place it in the top right corner of the screen.
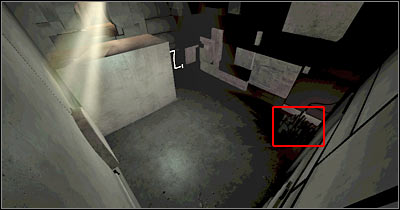
Release the stone quickly and start running towards the left platform (screen). Make sure that you're standing on this platform and see what happens next. One of the smaller platforms will move the stone and by restoring everything to normal, you'll be automatically transported to a higher level. Proceed towards a nearby exit.
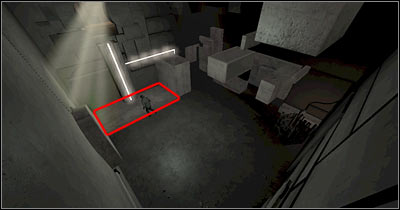
This time you're going to have to spend more time trying to get to a lower level of the structure. Start off by jumping towards a nearby rope. Head down and start swinging on the rope. Your objective here will be to reach a small platform (screen). You can get to a new rope from here. Slide down and make a second jump. This time you must be aiming for a nearby third rope. Use this rope to slide all the way down. Head on to a new room.
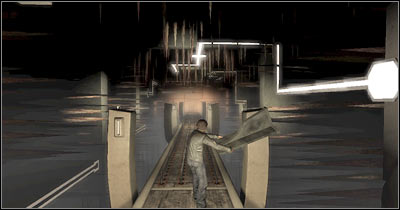
You should find yourself standing inside a much larger room. Start off by taking a small object (screen) which can be found in the center of the room. This will initiate a short cut-scene. Ignore the flames and focus your attention on the spikes.
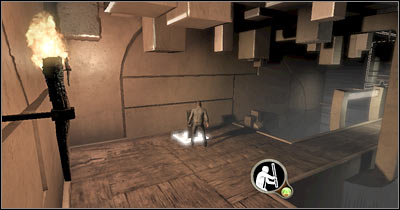
You can solve this puzzle in only one way. You will have to use your newly acquired object to interact with some of the nearby beams of light. Start by blocking the beam on your right (screen), then focus on the left one and finally cut through the right beam. Obviously you will have to keep moving forward at the same time. Avoiding the spikes is equally important here, however it shouldn't be a problem. Drop this object once you've reached the exit.

Keep going straight until you've reached a new area. Order your character to stand on a glowing platform and pick up a new object (screen). This will trigger a new mechanism. Get ready to deal with new traps!
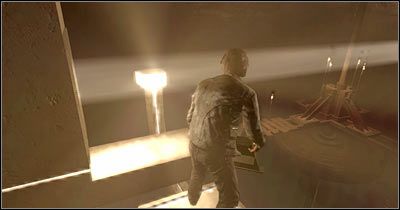
You will have to deal with moving objects and obviously your top priority is to avoid them at all costs. Thankfully, you can stop the platform by blocking the beam of light (screen). Each time you must wait for a huge hammer to pass by before releasing the platform. Be careful near the end - you will have to deal with two hammers there and you'll have to stop between them to ensure your safety. Eventually you'll get to a new passageway.
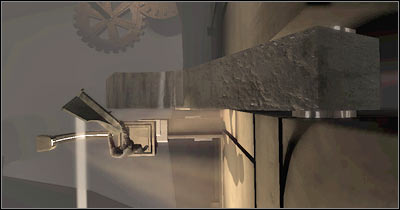
Once again, you will be forced to use a rope to get to your new destination. Slide down to get there. Be careful, though. You will have to be very precise while trying to jump towards a small platform (screen). Enter a new corridor.
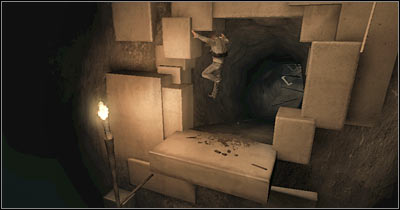
You will find yourself standing inside a blocked corridor. You can't get through, however notice a lot of sticks in the area. Pick up one of these objects and go back outside. Light the stick on fire and head back to the corridor. Use the burning stick to destroy the blockade (screen). You may proceed to the next section.
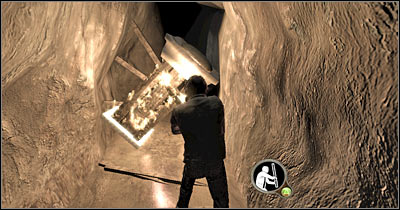
You should reach a new room very soon. This is going to be a very complicated puzzle, so make sure that you're following my instructions. Otherwise you will probably die. Approach a moving torch and press the action key. Start pushing the torch (screen) and notice that you've triggered a new mechanism.
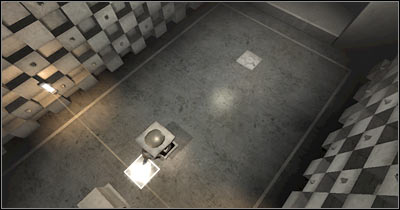
You will have to act quickly here, because otherwise you would have been crushed by the moving walls. You must place the torch on the second plate (screen). This will initiate a short cut-scene. Once this is done, go back with this object to its original location. Place the torch on the first plate and notice that a small staircase has reappeared.
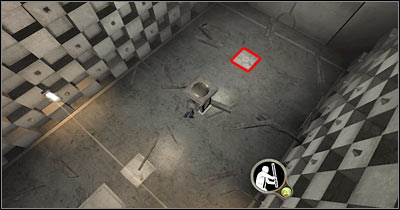
You should now be able to find a lot of wooden sticks in the area. Pick up one of these objects and proceed towards the stairs. Light the stick on fire and go back to the ground floor. Your next task is going to be easy. Use the burning stick on the wooden structure of the mobile torch (screen). Wait for the structure to catch on fire.
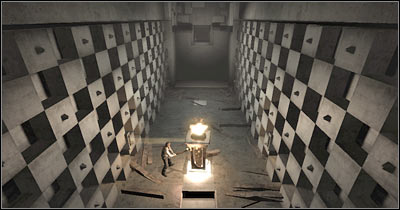
Drop the stick and start RUNNING towards a new platform (screen). Make sure you're standing here before the torch is completely destroyed. The platform is going to be released and all you have to do is to wait for it to reach an upper platform. Proceed towards the exit.
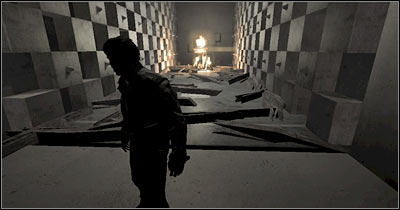
I guess you won't be surprised to hear that you'll have to deal with the ropes once more. Perform a jump towards a second rope, slide down to the lower level and enter a new area of the map. The first thing you have to do is to pick up a wooden object (screen). Light this item on fire by dragging it over to a nearby torch.
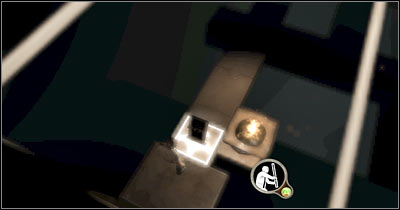
Now you'll have to go through a rather complicated maze. You can use your burning object to light the way. You should also know that you won't have much time to get to the other side, because the roof is collapsing. Notice that you can slow down this process by interacting with some of the beams (screen). Here's the correct route to the exit: turn right, left, left, right, right, right, left, right, left, left and finally right. You can't make any mistakes, because you wouldn't have enough time to get back on track.
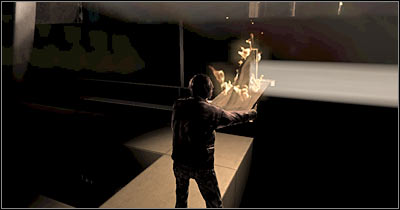
You may drop the burning object you were carrying a few seconds ago. Start moving towards a new corridor. You'll end up standing inside a very large cave (screen). There's a bridge here and obviously you have to move forward. Thankfully, you won't encounter any traps along the way.
Once you've entered a room with a new riddle, start off by picking up one of the torches. Use the torch on the main wooden structure to light it on fire. Notice that this entire structure has collapsed and take you've gained access to a large artifact. Ignore it for the time being and keep using the torch.
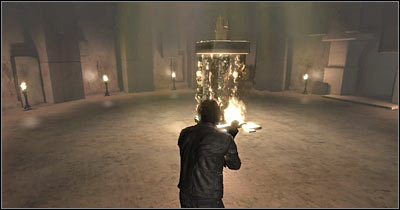
Make sure that you're carrying the torch and proceed towards a small dark corridor. Head on to the opposite end of the corridor and read a message. Start going back, however move slowly. Be on a look out for an area where it's windy. You can notice that by looking at the torch (screen). Drop the torch here and go back to the main room.
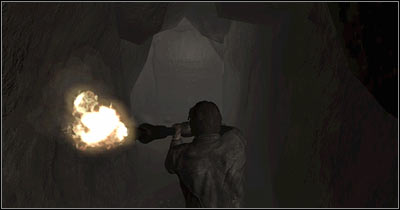
Obviously you will have to pick up the large artifact (the one you've received by burning down a wooden structure). Go back with this object to the torch and hit the right wall. You should automatically trigger a new cut-scene.
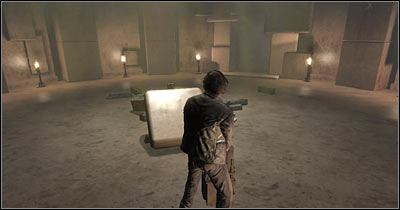
Make a few steps forward and watch a new cut-scene. This is going to be a quite challenging level, because you'll have to race against the clock. Your first task will be to get to a new car. Thankfully, you can see its location on your minimap. Proceed north and enter the vehicle (screen). You won't have to worry about your companion, because he'll find his own way inside.
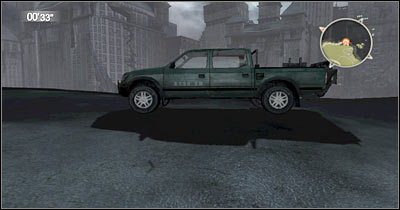
This is going to be the final third chase sequence of the game. Thankfully, it's going to be much easier than the last one, because you won't have to worry about the flying monsters and you'll be free to choose the path to the museum. Don't worry about the time limit too much, because you will have plenty of time to get to your destination. You'll start the game in the northern part of the map (1) and you'll have to get to the museum (2) which you've visited before.
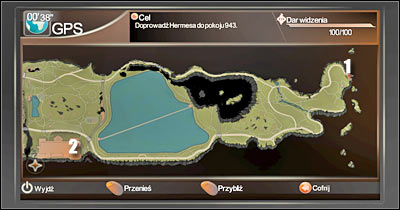
The first part of the chase is by far the easiest one. All you have to do is to stay on the main road (screen). I would recommend choosing the side roads, because you would have some problems maintaining maximum speed. Avoid larger obstacles and don't worry about the original time limit, because you'll get to a lot of checkpoints along the way.
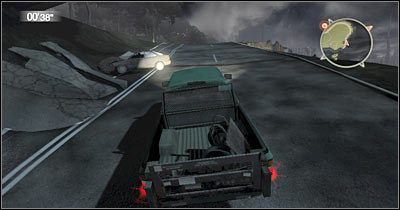
You will have to leave the main road in about one minute (screen). It shouldn't be a problem, however watch out for the trees. Hitting these object is not equal to failure, however you would still lose a lot of time trying to get back on the road.
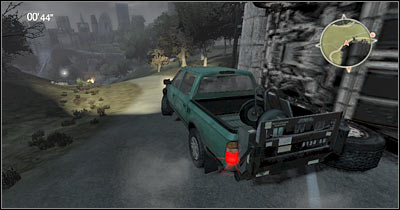
The second part of the chase will present you with new obstacles. Roots of evil will start coming out of the ground (screen) and you usually won't have much time to dodge them. I would recommend slowing down a lot, especially if you're on a tricky part of the road. You must also avoid wrecked cars, however this is a smaller problem. Focus mostly on staying away from the roots.
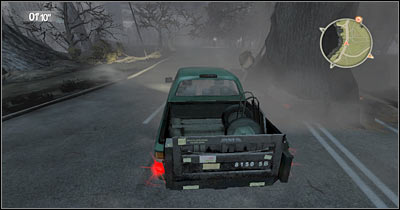
You will have to leave the main road for a longer period of time at least once (screen). It's up to you whether you want to keep using the side roads or maybe you prefer going back to the main road as soon as possible.
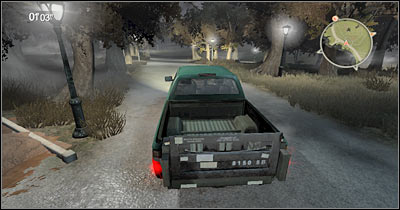
Keep heading towards your current destination and focus on avoiding the roots, especially since you'll be dealing with a lot of them. The final blockade will appear near the finish line (screen). Thankfully, you will have to leave the road only for a second or two.
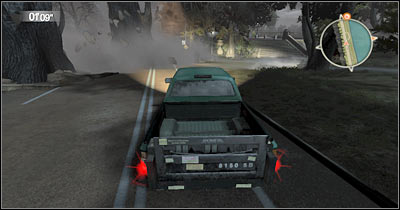
The final part of this chase will require you to perform a successful jump (screen), so it's very important that you're driving in a straight line and that you maintain maximum speed. Notice that the mission hasn't ended. Drive to the underground parking lot and head on to the lower level.
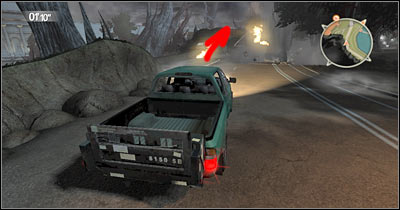
Once you're inside a much larger room, exit the car quickly and start running towards a large gate with 943 inscribed on it. Choose a pistol from your inventory and use it to destroy a small padlock (screen). The gate should raise itself and you won't have to worry about the time limit anymore. It's time for the grand finale! SAVE your game!
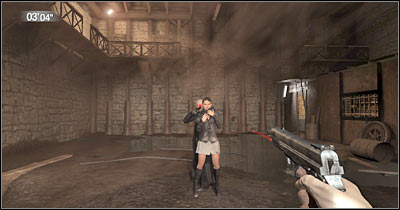
Make sure that you're still using your gun. Start aiming for Crowley's head. Wait for him to end his speech and notice that Sarah has turned her head to your right (screen). This will allow you to kill Crowley by firing a single bullet. Watch a new cut-scene.

Once you've regained full control over Carnby, start following the Key. You will have to enter room 943 (screen). Head on to the secret passageway and watch a new cut-scene. Once it's over, proceed towards a new corridor. You'll also watch a cut-scene here.
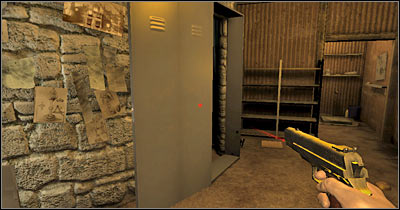
You'll be more a viewer from now on, rather than an active player. All you have to do during the cut-scenes is to place your part of the key on the main altar (screen) and to collect the complete key from the same spot. In both cases, you must approach this structure and use the action key.
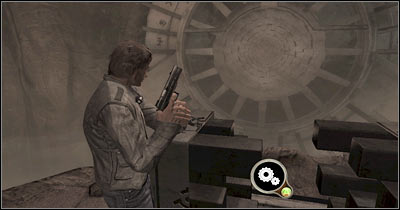
Get ready, because you'll have to make a decision here and this choice will affect the ending of the game. There are two ways to solve this problem.
FIRST ENDING - This ending is far less interesting, however you won't have to do anything in particular to see it. Once you've listened to what the Key had to say (screen) you must wait for the Lucifer to get here. Ignore Sarah completely and see what happens next.
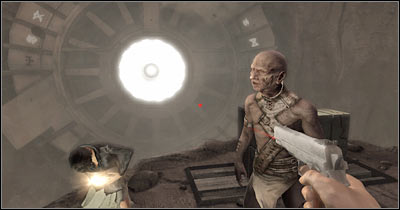
SECOND ENDING - In this case you will also have to wait for the Key to say that you must make a choice. The only difference is that you must kill Sarah by firing a single bullet at her (screen). You'll be rewarded with a longer and far more interesting cut-scene.
Congratulations! You've just finished the game!
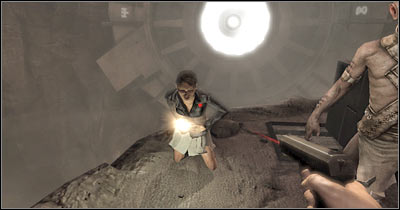
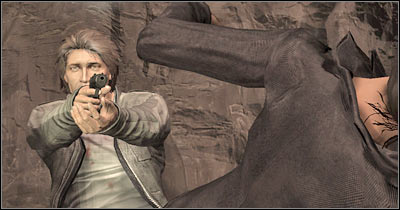


 Alien Rage - Unlimited Walkthrough Infiltration
 Angry Birds Space Game Guide & Walkthrough
 Assassins Creed IV: Black Flag Walkthrough Sequence 1
 Assassins Creed: Revelations Game Guide & Walkthrough
 Armikrog Game Guide & Walkthrough