This guide for the Age of Wonders III is a description of all of the most important elements of the game, as well as detailed hints concerning both campaigns and their endings. So, in this guide, you can find explanations of the basic concepts in the game, including terminology and the game mechanics. In the chapter entitled World Map, all of the available actions have been described, available on the strategic map, as well as the buildings that you can see in the game. Also, this guide includes a detailed description of cities and upgrades, that can be erected. apart from that, you can find here the chapters devoted to the description of races and classes, the units, spells and special skills available for them, which make that class, or race, unique. The chapter entitled Heroes, includes a comprehensive description of the possibilities laid out for the main characters of the game. The last but not least is the chapter entitled Combat, which includes all of the information of fighting skirmishes and battles, information concerning sieges and hints that will allow you to win any fight. This is topped up with a detailed walkthrough for the campaign in the game - the Commonwealth and Elven Court storylines.
Age of Wonders III is the fourth installment of the turn-based strategy developed by the Dutch Triumph. The story takes place in the fantasy world inhabited by various races and classes. The task of the player is to found his own Empire that consists of many unique units. The leaders explore maps, discover new locations and also fight exciting battles, which are the quintessence of Age of Wonders III. developers also made sure that units are abundant and lands, where you can fight your battles, heterogeneous.
In the main campaign, you will pose as a leader that fights for either of the two sides - Commonwealth Empire and the High Elven Tribunal, which has come into being after the unification of dark and wood elves. The player starts the game as a neutral character and it is his choices that result in remaining neutral, or turning good or evil.
This guide for Age of Wonders III includes:
- a detailed description of the 2 campaigns available in the game, along with the presentation of endings available for each of them.
- explanation of game mechanics.
- hints concerning the navigation on the strategic map and exploration of its areas.
- a description of how to found cities quickly and efficiently, as well as the list of available upgrades available in them.
- detailed characteristics of the races, the units and the special skills available for them.
- a description of classes with their special units, spells and research.
- information and hints on the leaders, their development and skills.
- hints concerning combat and sieges on the combat map.
 A stroll in the area of scenic beauty
This guide for Age of Wonders III has been drawn up at the highest difficulty level (hard). When it comes to beginners, the best choice is the easy difficulty level, which will allow you to learn the controls and the basics, both in the case of combat and the game in general. The hard difficulty level is recommended for those of the players who already learn about the game and have already fought several battles, or completed several missions in the campaign mode.
This guide has been color-coded in the following manner:
- the names of the leaders, main opponents in the campaign mode and the names of the remaining leaders have been provided in orange,
- upgrades that are available for research, all sorts of spells, skills of units and leaders, have been provided in green,
- the names of the units in the game have been provided in brown,
- all of the laces that you can visit on the map, the more important names, situations and hints, have been given in bold.
 The climate makes your blood thick.
In Age of Wonders III you will take the control of a leader, who is going to lead the Empire from the very beginning, until the glorious end. Your task will be to expand cities, ensure the appropriate supply of resources and map exploration. Above all, however, you will have to train various units, to learn spells and to fight exciting battles. And all of this in the magical fantasy world. This is the basic bits of knowledge that you need to start the game.
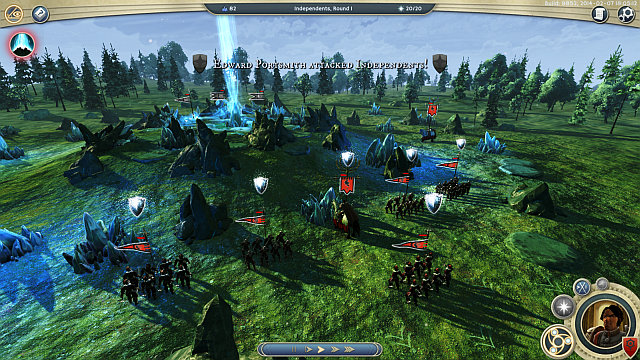
Age of Wonders III is a turn-based strategy. This means that each players has a definite amount of time and limited action points, which can be spent on performing an action during his turn. And so, during your turn, you can start training your army, move the leaders around the map or start the siege of an enemy city. After you have done your move, you need to end the turn and wait for the opponent to make his move. There are two types of turns in the game: classical and simultaneous. During the classical turns, the players make their moves consecutively and, in the case of the simultaneous ones, as the name suggests, the players make their moves at the same time.
Both the strategic and the battle map have been divided into six-side fields, called hexes. Moving around both of the maps consists in moving between the neighboring hexagons. Each single hex can be adjacent to 6 other ones and, on each one of them, there can be an army (consisting of a maximum of 6 units) or one unit (on the battle map). All of the units on the neighboring hexes, in case of an attacks, join in the battle, as a reinforcement (so, a battle can be participated by the maximum of 6 armies, which gives 42 units).
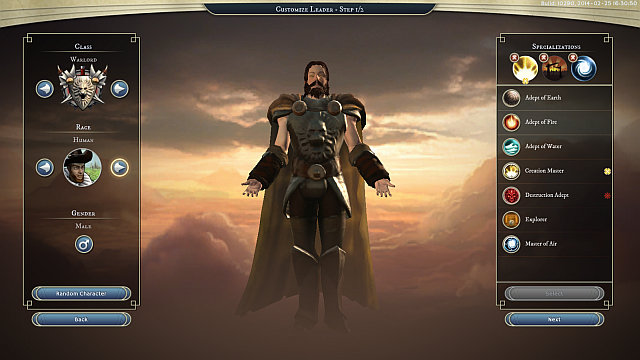 The leader customization screen.
Your leader and the minor leaders are the most important units in the game. They are usually the strongest ones, who have the most health points, can carry items and upgrade their skills. Depending on the selected race and class, at the beginning, there are various units spells and research directions available. After he is defeated, your leader respawns after several turns have passed, in your Throne City. Losing both the leader and the Throne City results in losing the game.
Resources are the propelling factor of your Empire. They are necessary for unit production, development of cities and for casting of spells. In the game, there are 5 main types of resources. You can obtain them by means of exploration of the map, bartering with the other players or plundering the enemy cities. Additionally, your own cities produce a specific amount of each.
Gold - the most important material for production of new units and development of cities. Additionally, aside from production, each unit requires a certain amount of material for upkeep.
Mana - material used mainly for casting spells and creating items. Just like in the case of units, some spells require a specific amount of this material, per turn.
Production points - each city has a specific amount of production points, which determine how fast a unit is recruited or a building built. The way it works is this: if you have 50 production points, and you want to manufacture a unit that requires 150 of gold, then this will take 3 turns.
Knowledge points - these points are necessary to conduct research. Each research requires a specific number of these points, whose amount can be increased with, e.g. appropriate buildings.
Population - the final resource that determines how fast your cities grow. Per each level, you need a defined number of people and, the increase in population can be ensured by expanding the city and erecting appropriate buildings. The higher the increase, the faster the city grows and the wider area it encompasses.
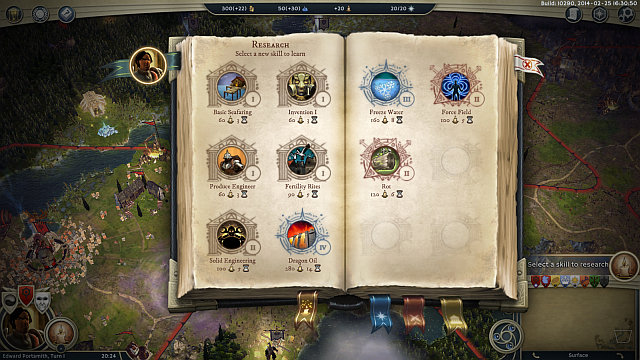 The book that shows available research paths.
In the game, there are several types of races and classes. Depending on the selection, your city and units will be of a different kind, at first. The race selection also influences the kind of terrain, over which your cities will sprawl. The class selection, on the other hand, determines, mainly, the available research, spells and unique units, different for each race.
Available races: Draconian, Dwarf, Goblin, High Elf, Human and Orc.
Available classes: Arch Druid, Dreadnought, Rogue, Sorcerer, Theocrat, Warlord.
If, during the game, you encounter another player (his army or city) you will unlock the option of diplomatic talks with the leader. Depending on the relations with the other player, you will be receiving various statuses:
Unknown - the status before meeting another player.
Neutral - after you encounter the other player, you receive this status automatically. You can then start making forwarding your propositions, e.g. barter.
Peace - you have decided not fight against the other player. If you want to attack the other player, you need to break off the peace. You cannot, then, attack until the next turn.
Alliance -If the appropriate option is on, it is possible for an alliance to be victorious, after all other players, who do not belong to the alliance, are eliminated. The allied armies can reinforce each other in battles and, additionally, the map will be revealed above the cities and armies of the allied player.
At War - while at war, you can easily attack the opponent's armies and cities. You need to be careful, though, because he will probably respond in kind.
 New game starting screen.
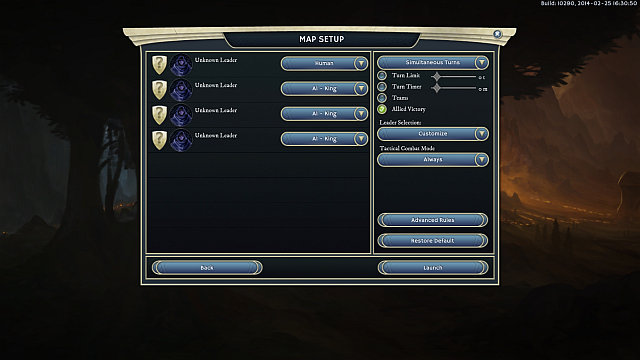
To start a new game, you need to select the New Random Map option. On the starting screen, you can select: the number of players, difficulty level for the AI-controlled ones, the map's size, its type and flow of the game (defines the number of initial cities or units). By selecting the Advanced option, you can additionally define if you want the map to be two-level (Surface + Underground) and allow for the creation of own leaders, or not (Allow custom leaders). In the Game flow tab, you can additionally set options, such as, the size of the city and of the starting army, the distance between players or affluence of the map in treasures, cities dwellings. In the Geography tab, you can determine the terrain type that is to be prevalent throughout the map.
In the next window, you can define the number of human players and the level of the AI-controlled players. The extra element is the limits that you can set on the number of turns, on time per turn and the selection of starting units or allowing alliance victory. You can also define if tactical battles are to be played always, or only in the case of battles between human players. In the advanced options, you can define the starting level of resources and of the already completed researches. Additionally, you can define the maximum number and level of heroes. The last options to define are: map exploration (the map is revealed at the very beginning) and the ability to start cities (if the tab is unmarked, then you will only be able to restore the cities that you have conquered). The final element, before you start the game, is the selection of the hero or, if proper option is marked, creation of a new one.
 The most important hint - do not approach without a sturdy stick.
1. Find your favorite race. The best thing to do is play through several scenarios with each one, to find out which one suits you best and which one you had the most positive feelings with. Thanks to this, you will max out on your effectiveness, both in the development of the Empire and combat, and also you will enjoy the game more, because it is way better to play as the character that you know and like.
2. The same goes for the class, whose influence on the game is also great, especially as far as research and spells, available for the leader, are concerned. Various race-class combinations ensure different bonuses; thanks to experimenting, you may find a combination that will make you indestructible. The selection that you make should be defined by your playing style, e.g. if you prefer a defensive game, the Theocrat is a good choice, where Warlord or Dreadnought is a good option of offensive players.
3. Explore the map - it is imperative that you discover as much of the map as possible, before your opponents do, collect more resources and defeat independent parties, thanks to which your units will gain some experience and the cities will be allowed to develop freely, after you have cleared the structures of the unwanted units.
4. Take care of your leaders - in most cases, losing them is irreversible and it takes some time, after all, to level up a leader and obtain equipment for him. Make sure that he does not roam about the map all by himself, because he is an easy target then.
5. You should also ensure good relationships with the independent cities, which are going to task you with various missions. After you complete some of them, you will receive new units, gold, sometimes some items and, in some cases, that city may join you. If you do not worry about your karma, you can easily attack that city but, this is connected with the loss of karma and potential losses in battle.
6. If you control Dwelling you can profit from that, in a certain way. The available units are quite expensive but, they stand out with useful skills and good statistics.
7. You should make sure that your army is heterogeneous and that there are many various units in it, best if they inflict different types of damage. This will allow you to use their skills, in battle, to the fullest and ensures higher maneuverability in the battlefield.
8. Remember to do everything that you want to do, before the end of the round - so, select a research, the buildings that you want to erect or the units that you want to recruit. Also, you should remember to use the movement points, available for the units, and move them on the strategic map.
9. At least to some extent, it is worthwhile to learn about the skills of units, the available class-dependant researches and spells. This will enable toy to select better tactics and selection of the army, while fighting a representative of a given class and race.
10. Save the game often. This will allow you to replay your battles, in the case of disadvantageous results, and to replay the key moments in different ways, if they fail to serve their purpose.
 The future of your Empire depends on how you start off.
Appropriate beginning is half the success. At the beginning, regardless of the scenario, race and class that you have selected, you need to attend to several things, which will help you gain the upper hand. These are several things that you need to take care of, since the beginning of the first turn.
1. Join a hero. At the beginning of the game, there are going to be various heroes to want to join your army. It is a good idea to capture this opportunity and extend special care over those heroes, ensure them with proper guards and also try them out in the battles at the beginning, for clearing the structures and in fights against the Independent teams, to let them raise their statistics, just by a bit, and gain some useful items.
2. Select your mission. From the very beginning, you should ensure better upgrades, which will be useful at that moment. Remember that, if you choose no research, the research points are lost. A bad idea is to lose your leader in the initial battles - then, the progress in research will e halted, until the leader respawns. Also, you will not be able to cast spells then.
3. Discover as much of the map as you can. Dispatch units in every possible direction, the best ones are those with lots of movement points and skills to decrease the cost of moving over various terrain types. This will allow you to collect the nearby mineral deposits, free upgrades for the city and research points. The knowledge about the nearby cities and the location of enemies is soon prove to be a key in the foreseeable future.
4. Clear the areas around your Throne City. What is meant here is the structures that spawn all sorts of opponents. This will ensure you steady development, your units will gain some experience and your leaders may find some interesting item.
5. Ensure the development of the city and expand its defenses. Try to build, as fast as possible, buildings that provide production points and barracks which will ensure you with better units. Also, a wooden wall will come in handy, which ensures some advantage, in the case of an enemy onslaught.
6. Complete the missions tasked to you by the independent cities and Dwellings. Usually, they are not difficult and they only consist in defeating the opponent. As a reward, you will receive gold, units and sometimes, that city may even join you. This is a much cheaper option than "buying" an independent city and it is the scarcity of gold that you will have to worry about, at the beginning of the game.
7. Try to rebuild the destroyed city, to the extent possible. This is a much better idea than to start a new city from the scrap. If this is not a possible option, remember to found a city where there are many structures that ensure various bonuses.
8. Start recruiting your units. Each unit takes some time to be created. The earlier you start, the earlier your army will grow stronger. Also, you should remember about the constant expansion of cities. If you are not at war, with anybody, at the moment, you can decrease the ratio of recruitment but, you should still conduct it, until you reach the number of units that satisfies you. Peace is never long-lasting and the opponent, who is coming your way is rarely amicable. You should always keep the Roman phrase "Si vis pacem, para bellum" in mind.
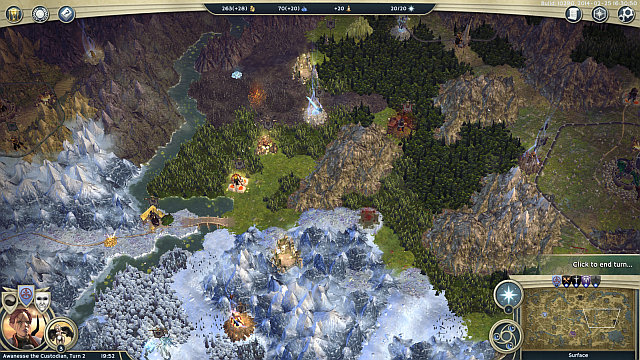
The strategic map is the place where the main game takes place. This is where you found cities, initiate battles and gain new resources. Initially, the world map remains undiscovered, enshrouded in the fog of war. To reveal its successive parts, you need to erect or capture watchtowers and move your armies to increase their range of vision. Revealing the map, as quickly as possible, will ensure you with advantage of knowing the enemy positions, their cities and armies, as well as the places where you can obtain resources or build cities and fortresses.
The most important information that you can find on the main screen of the strategic map is the information contained in point [4]. It informs you of the status of production in your Empire, the condition of your resources and how they change between turns. The next elements can be found in the bottom-left corner of the screen and it is information about the course of the game, turn and your leader's condition [11].
The last bit of information is on the right side of the map - you can learn there about your enemies [15], prepare a spell [3] and end the current turn [14]. On the minimap, you can view the information about cities, armies and structures on the map. The information that you get depends on what you have selected in the map settings [7].
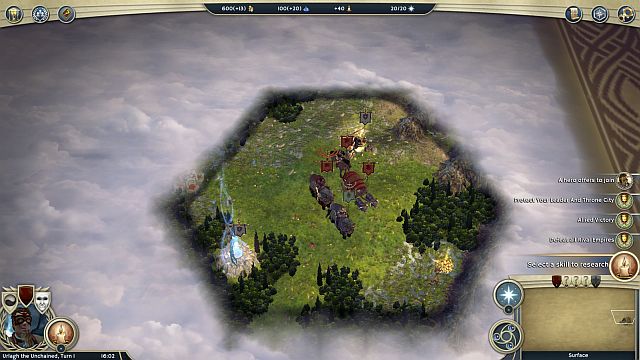
 The maps are colorful and diverse, it is worthwhile to view them from a different perspective.
You move the map with the WSAD keys, or with the mouse. Bu clicking the LMB on the minimap, you will get to the place that you have clicked. Additionally, the map can be freely zoomed in and out, with the mouse scroll or with the X and Z keys. You can also turn the map with Q and E. To move the units across the world map, you need to press the RMB in the selected spot.
All of the control keys can be remapped in the game settings.
 Revealing the map in the game settings makes the game much easier.
At the beginning of each game, the map is usually covered with the, so called, fog of war, unless this has been changed in the game settings. Therefore, it is important that you reveal as much of the map, as fast as possible, thanks to which you will learn about the terrain, find the positions of the other players and you will be able to enter diplomatic relationships with them, and find treasures.
Each game starts with you at the specific place with certain amount of units and the leader of your Faction. All of the units have a finite number of movement points, which can be used in a given turn. You can use these points to move over the hexes and the amount of points, which you need to make a move, depends of the kind of the terrain over which you want to move that unit. To find out how many points you need to make a move, roll your mouse over the area into which you want to relocate and wait for the information to appear. Additionally, not each terrain type can be crossed - e.g. in the Rock Cavern Walls or some mountains (Impassable Mountains). In the case in which there is an enemy army, in the passage between the areas that you cannot cross, the only way to pass trough is to defeat them or find another passage.
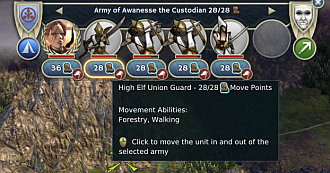
You need remember that the amount of movement points depends on the unit type. Therefore, the maximum reach of the army depends on the unit with the lowest amount of these points. The unused points of the remaining units are lost with the end of the turn. If you want to move them farther, you need to split your army. Also, you should remember about the availability of different types of movement. Some units can move over the water only and, e.g. the ones that can fly, can cross mountains and the other obstacles, without any penalty of movement points.
This is the amount of movement points, necessary to cross a terrain type:
Fertile Plains - 4
Barrens - 4
Lava Pool - 4
Frozen - 4
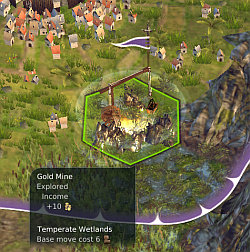
Wetlands - 6
Dirt Cavern Walls - 6
Dense Vegetation - 6
Coastal Mountains - 12
Mountains - 12
Impassable Mountains - impossible to cross
Rock Cavern Walls - impossible to cross
Blocked - impossible to cross
It is also possible to move over water but, for the regular armies, whose units cannot swim or fly, you need to research the Basic Seafaring, thanks to which your units are loaded onto boats, at the moment at which they need to cross a water field. Boarding of the units takes some time, which is represented by losing all of the remaining movement points, at the moment of boarding.
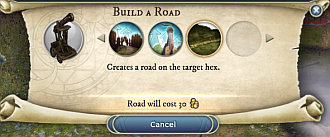
It is possible to create roads, thanks to the Builder option, and they become available after you have erected the Builder's Hall in the city, and recruited builders. To build a road, you need to select the abovementioned unit and select the road in the building options. The builders will move over to the location that you select, while constructing a beautiful highway, as they go, which costs a small amount of gold, depending on the length of the road. Movement over roads costs you less movement points than usually, which is why you should use them wherever possible. It is also a good idea to join cities with roads, so that you can quickly and efficiently relocate your armies.
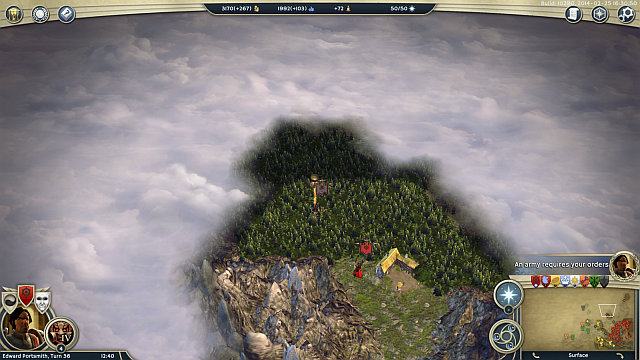 The brighter patches represent the range of vision of a unit, the darker areas are the ones that you have already discovered. The rest is the fog of war.
Each unit has its range of vision. Dissipating the fog of war does not mean that, from now on, you will be able to see each unit in that area. To be able to see the nits, they must appear close to your cities, fortresses or watchtowers. The best way to increase the range of vision, is to erect Watchtowers, which can be done by the Builder units, or by seizing the existing ones (in the case in which someone captures your watchtower, the patch of land that it revealed will be covered again). Another way to do that is to dispatch single units into the corners of the map and deploy them in a way to arrange a ring of units. Thanks to this, you will be able to spot any opponent that appears within the range of vision of your units and you will be able to react properly, e.g. by relocating most of your forces into that area.
Remember that the places, within the range of vision of the allied cities and watchtowers, can also be seen by you. If you break the agreement, these places will be covered again.
There also are units that remain invisible until your army reaches a nearby field. These are the units that have the ability of Concealment. Thanks to this, the units can remain invisible, for as long as they stay on a terrain of specific type and they will be invisible on the world map. The parties and the leaders that have the True Sight ability, do not need to be on a neighboring hex to reveal the positions of the hidden units.
 My army - so powerful.
1. Try to reveal as much of the map, simultaneously, as possible. To the extent it is possible, try to move several armies in various directions, thanks to which you will be able to explore a larger area, before your opponents do, which in turn allows you to gather more gold, gain experience and find items for the leader. Additionally, the faster you find independent cities, and the cities of the other players, the faster you will be able to enter diplomatic relationships with them and prepare for a possible attack.
2. Eliminate all of the places where the Independent group respawn. This way, you will prevent the enemy units from roaming about your area, who are only waiting for the opportunity to capture an unprotected watchtower or city.
3. While at the cities - never leave your own city unmanned by your units, (unless you do not care about it at all). Otherwise, they will be susceptible to being captured even by one, weakest unit. If, however, you need your units for battle and you need to leave the city unprotected, make sure that there are no enemies, capable of reaching the city, around (movement points). You should take into consideration, however, the fact that not all units consume the same amount of these points, while moving.
4. Try to clear all of the structures within reach of your cities. As long as they are occupied by the Independent units, they produce no income and do not foster the development of your Empire.
5. To the extent that it is possible, explore all of the treasure locations, collect chests and attack the other units. This is a good way to gain experience and to increase the affluence of your treasury. Additionally, the exploration of specific places will ensure you with the ability to obtain items, units and researches. Especially the items are important, because they can empower your leader considerably. Researches, on the other hand, can save you several turns.
6. It is imperative that you protect your Throne City. If it is conquered, and your leader is defeated, you will simply lose the scenario. Therefore, you should make sure that your capital is far away from the border with the other players, who may pose a threat to it. If possible, use the option to relocate the Throne City into a safer location.
7. Plan on your steps carefully and predict where the opponent may be, where he will attack or where his weak point is. The knowledge about the enemy's positions and his moves is indispensable to emerge victorious in the end.
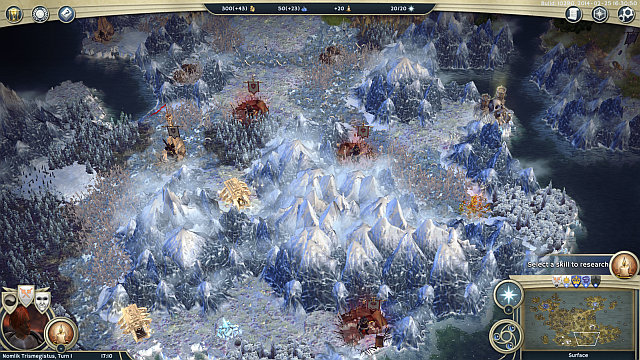
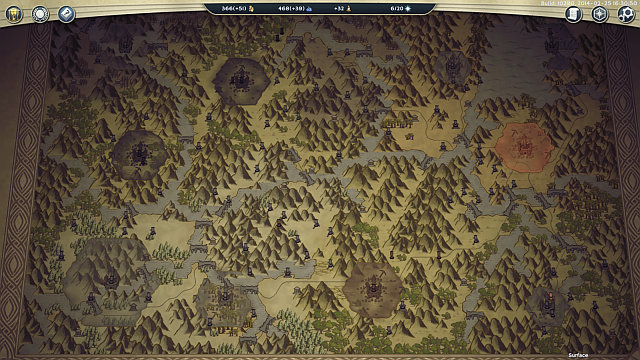 The strategic map, at the maximum zoom out.
While moving around the main map, with your armies, you will often bump into structures, cities or items to collect. Therefore, it is important that you explore the map with several units, thanks to which your chances of finding something interesting, before your opponents do, rise. The knowledge of the terrain and of the opponent's moves, will allow you to plan better on the attack and defense of the threatened cities.
Below, you can find a list of places that you can run into, while exploring the map.
As far as possible, these should be avoided, because they provide negative bonuses to units.
Blighted Vines - deals 8 damage (poison) per turn, for 4 turns.
Giant Cobwebs - the army loses all of its movement points after it enter the field with the cobweb
Hook Briar - deals 20 damage (physical) after you walk onto the field.
These are various deposits that contain resources or provide bonuses They disappear after being collected so, the rule "The early bird catches the worm" applies here.
Cartographer Tent - reveals some of the map.
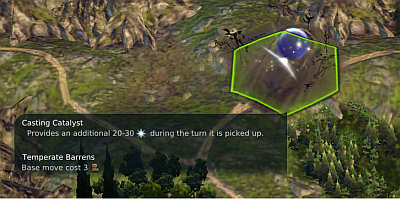
Casting Catalyst - adds 20-30 casting points.
Column of Champions - promotes the visiting army.
Flotsam - a chest with some gold inside.
Gold Stash - a stash with some gold.
Item sack - a sack with items that can be used by your leader.
Mana Stash - a stash with some mana.
Production Resources - builds a free building in the nearby city. If possible, it is also worthwhile to visit this field at the moment at which you still have to erect the more expensive buildings in the city. Otherwise, you should visit them as early as possible - in this case, this will speed up the city expanding process.
Refugee Camp - a place that causes the rise in population of the nearest city.
Scrolls of Knowledge - speeds up the currently conducted research.
Treasure Chest - a chest with some gold and mana inside.
These are the place where the Independent, hostile parties are spawned. The best thing to do is destroy them right after you run into them.
Brigand Hideout - a bandit hideout that produces light units
Haunted Boneyard - produces undead units.
Monster Den - here, various monsters and beasts are spawned.
Pirates' Nest - produces hostile ships.
After you find a place, you can enter by selecting the "Explore" option, on the same hex that the place is located. These places are protected by various units and only one of your armies can fight them (the one located on the field with the structure) After you visit such a place and defeat the defenders, it will start to generate specific resources. The more difficult a place is to explore, the better items can be found inside.
Ancient Ruins - you can find items here.
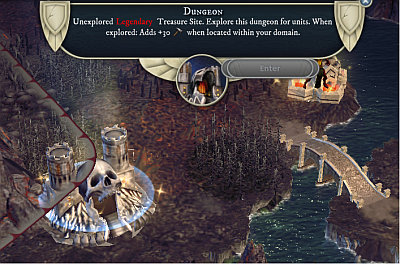
Dungeon - after the exploration, you will find new units here.
Forbidden Sanctum - you can find units, items and skills (for the leader) here.
Sunken City - a zone on water, you can find items and skills here.
Tomb - you can find items here.
Wizard Tower Ruins - you can find skills, items and knowledge (researches) here.
Ziggurat - you can find items here.
Temples ensure blessings, for the units that visit it, which last for a certain number of turns.
Shrine to the Earthen Mother - ensures 40% of Blight Protection and Cave Crawling for 8 turns.
Shrine to the Fickle Mermaid - equips units with the Mariner ability, until the next battle and replenishes their movement points.
Shrine to the Froze Beauty - the visiting units receive the Arctic Concealment for 8 turns and Arctic Walking.
Shrine to the Guardian Angel - ensures the units with Holy Champion for 4 turns and replenishes their health points.
Shrine to the Queen of Spiders - the visiting units are endowed with Wall Climbing until the next battle.
Shrine to the Scarlet Destroyer - units receive protection from fire (40% Fire Protection) and Explosive Death.
Shrine to the Wizard King - for the duration of the next battle, the units receive Life Stealing.
These places ensure quite considerable bonuses, if only they are located within your domain.
Heart of Arctic - increases contentment by 200 and equips the units that you manufacture with Inflict Frostbite. Additionally, it removes all penalties for "disliking" areas of the Arctic type.
Heart of Blight - increases contentment by 200 and equips the units that you manufacture with Inflict Severely Poisoned. Additionally, it removes all penalties for "disliking" areas of the Blighted type.
Heart of Glades - increases contentment by 200 and equips the units that you manufacture with Inflict Bleeding Wounds. Additionally, it removes all penalties for "disliking" areas of the Temperate
Heart of Tropics - increases contentment by 200 and equips the units that you manufacture with Inflict Scorching Heat. Additionally, it removes all penalties for "disliking" areas of the Tropical type.
Heart of Volcano - increases contentment by 200 and equips the units that you manufacture with Inflict Fire Immolation. Additionally, it removes all penalties for "disliking" areas of the Volcanic type.
Places of this type are the most common on the map. After you explore them, you can find units, items and resources there. Additionally, when they are located within your dominion, they increase the influx of resources. Unlike the treasure sites, the units located within one hex, ensure reinforcement in battle. It is best to start cities in the area that is the most abundant in such sites.
Air Node - you can find resources here. Increases influx of mana (+10).
Creation Node - you can find resources here. Increases influx of mana (+10).
Crystal Tree - you can find items here. Increases influx of mana (+20).
Destruction Node - you can find resources here. Increases influx of mana (+10).
Earth Node - you can find resources here. Increases influx of mana (+10).
Fire Node - you can find resources here. Increases influx of mana (+10).
Flowrock Quarry - you can find resources and items here. Increases the influx of production points (+20).
Gold Mine - you can find resources here. Increases the growth of gold (+10).
Great Farm - you can find items here. Increases the growth of population (+100).
Magma Forge - you can find items here. Increases the growth of production points (+10).
Mana Node - you can find resources here. Increases influx of mana (+10).
Spring of Life - you can find items here. Increases the growth of population (+100) and contentment (+50).
Trading Post - you can find items here. Increases the growth of gold (+20).
Vault of Knowledge - you can find knowledge (research) here. Increases the growth of research points (+20).
Water Node - you can find resources here. Increases influx of mana (+10).
These are all types of other sites that cannot be put in any of the above categories.
Blood Altar - The visiting units receive experience, in exchange for the instantaneous reduction of health points by 1.
Cave Entrance - the cave entrance to the underground.
Cave Exit - cave exit onto the surface.
Haste Berries - replenishes movement points of the visiting units.
Inn - the site where you can find heroes to hire.
Master Shipyard - the structure that allows you to build ships.
Reflective Pool - allows you to take a look into "another" pool, which reveals a portion of the map.
Sign - a wooden sign.
Spelljammer - causes impossibility to cast spells within the radius of 3 hexes.
Teleporter - transports the units the teleport, which is coupled with this one.
Watchtower - reveals a big portion of the map around.
Apart from the abovementioned structures and buildings on the map, you can also run into a city or a fortress, both independent and belonging to the other players. Not all of the above places must be on one map, e.g. and entrance to the underground will not show on the map where only the surface is available.
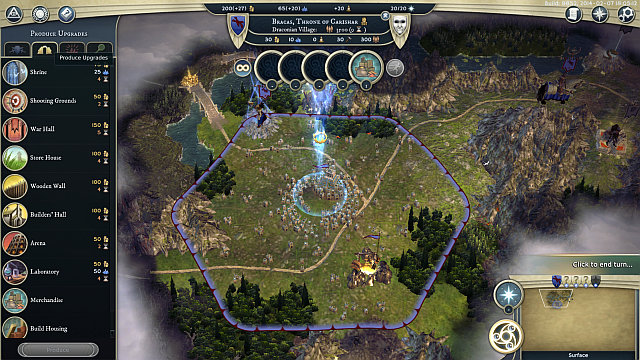
 In this case, the reach of the domain in symbolized by the yellow border. .
Cities are the foundation of the domain. It is here that you can perfect and expand your units, erect new buildings which allow you to do a number of things, e.g. creation of items for leaders or generating of mana. Therefore, the important thing is to ensure proper development of your domain and capture new ones because, the more cities you have, the more possibilities, per turn, you have (some cities may be the forges of units, where the others, more distant from the frontline, may serve as gold generators, which you are going to need for the upkeep of these armies).
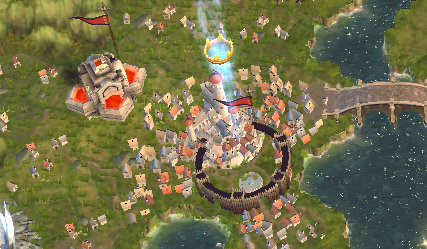
The first city that you found becomes the Throne City (marked with a crown icon), where the throne is placed . It is in this city that your leader is respawned, when he is defeated in battle. The throne itself can be relocated to another city, best in the area close to the battlefield, to avoid having to cross the entire map with your leader, to rejoin fights.
Each city has its own area of influence, which is called a domain. It is marked as a hex of a given color, which surrounds the city. The important thing is that you there are as many resources, within the marking, as possible, which will help you develop your city and, after you clear them of the enemies, ensure a constant income of resources, per turn. This may be, e.g. the appropriate amount of gold, man or research points.
Each city has its own level of contentment, which depends mainly on the overall contentment of the Empire, and the terrain that it is founded on. Contentment influences the income generated by the city, as well as the initial morale of the units that you manufacture. Additionally, the discontent cities may rebel. These are the possible levels of contentment:
Cheerful: 800 to 600
Very Happy: 559 to 400
Happy: 399 to 200
Content: 199 to -199
Unhappy: -399 to -200
Very Unhappy: -599 to -400
Rebellious: -800 to -600
Apart from the cities that belong to the individual players, on the map there also are independent cities. From time to time, these cities offer simple tasks to perform, which mainly consist in removing enemy units from their territories. In exchange, they offer units or, when the relations between the independent city and your Empire are sufficiently high, joining you.
All of the units in the central field of the city, or within its limits, are considered a garrison and, after the battle starts, they are deployed behind the walls/wooden wall/barricades. This ensures a lot of advantage, especially for ranged units. Additionally, such units receive various buffs, depending on the upgrades selected for the city.
Dwelling is a special type of a city, which allows you to manufacture unique units. Unlike in the case of the city, you cannot expand a dwelling because it has no population, which is why it is not good for generating resources. Still, it can be used for production of very good units.
There are the following dwellings available: Dragons' Peak, Giants' Keep, Necropolis and Sylvan Court. each one allows you to manufacture a different type of special units.
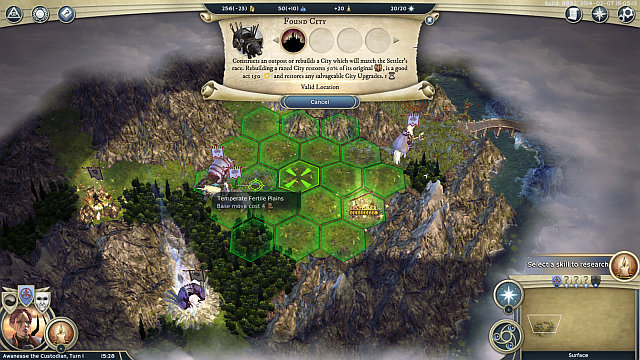 Founding of the first city is an important decision.
Since cities offer a lot of opportunities, both when it comes to buildings and recruiting of units, they are the driving unit of your Empire. Without the appropriate amount of gold, you cannot wage a war and it is cities that ensure you with the ability to manufacture new units and generate the necessary resources, mainly gold. While starting the game, you should remember that you need to found the city in such a place, where you will have access to abundant deposits of resources, which will ensure you with the ability to develop. The faster your city is expanding, the better for you, because the time necessary to erect buildings and to manufacture units will be shorter. Remember not to build cities side-by-side, because they expand with time and the fact that they are adjacent to each other slows down their growth.
To found a city, you need the Settler unit, which you may have from the very beginning of the game, or manufacture in another city, after you build the Builder's Hall. Remember to found cities in resource-rich areas and that these bonuses start being calculated only after you have cleared the area of the enemy units. Restoration of the cities that were destroyed earlier, results in regaining 50% of the original population and of some of the upgrades that were erected.
The status of the city depends on the population. With each successive level, the limits of the city grow. These are the possibilities:
Outpost: 100
Village: 3000
Town: 6000
City: 10000
Metropolis: 18000
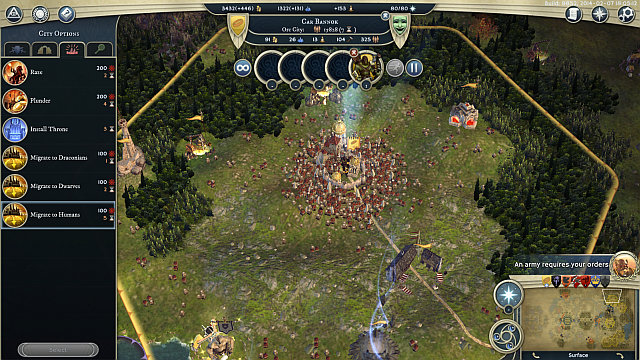
Of course, founding a city is not the only way to expand your influences. One of the ways is seizing a city, by force, from another player. After the successful attack, you can do several things with the city. These are:
Absorb: the city is joined to your Empire. This process takes a specific number of turns, which depends on the differences between your alignment and that city's. This is considered an act of good will, for which you are rewarded with 100 points of alignment.
Plunder: the city gets plundered and you receive a specific amount of gold and mana. After several rounds have passed, the city is razed to the ground. This is considered an act of ill will, (200 points).
Raze: the city is razed to the ground, along with all of its amenities. Takes shorter than plundering and is also considered an act of ill will.
Migrate: alters the city type (e.g. from Goblin to Humans) and is also considered an act of ill will (100 pts.). The number of turns necessary to migrate depends on how far away the closest city of the migrating race is. You can change the population only to the type that you already have in your Empire.
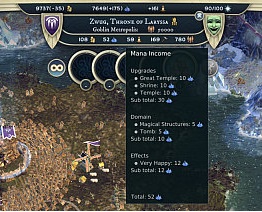
each city generates a specific amount of gold, mana production points, research points and population per turn. Production of a given city can be looked up by rolling the mouse over the resource in question, thanks to which you will learn what influences the generation of that resource. What influences its increase is the size of the city and the areas that it encompasses. An extra bonus is also the contentment of the citizens. The production of each of the resources can be increased by means of erecting appropriate buildings. Additionally, to increase the income of a given resource by 50%, you can switch the city into the mode, in which it will generate only what you have chosen for it to generate.
And so, the city can:
Increase gold income
Increase population
Increase the number of research points (after the Laboratory is built)
Generate mana (after the Shrine is built)
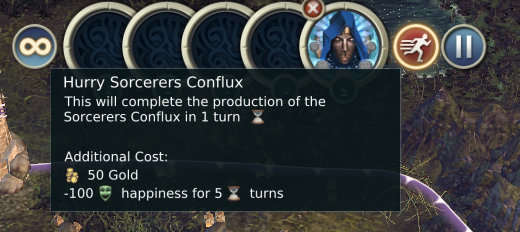
For appropriate payment in gold, and at the cost of temporary decrease in contentment, there ids a possibility to speed up production of a building or a unit. The result is that the recruitment, or building, will be finished in the following turn. The cost of this enterprise is 50 gold pieces per each turn by which the production is speeded up.
After you have built the Arcane Item Forge in the city, you gain access to item forging. You can select the attributes and attributes that you want the item to have but, the number of these is limited. After you have selected the upgrades that you are interested in, you will learn about the cost and the number of turns that this is going to take. Then, it will appear in the center of the city, in the form of a pouch, which the leader will be able to pick up.
Another way to expand your domain is to build fortresses. Fortresses can generate gold, mana and research points income, if you have placed corresponding structures on their premises. Additionally, fortresses can be upgraded from wooden to stone, which increases their range and durability. Fortresses are excellent for defense, where you are expecting an attack (e.g. narrow passages between mountains). Watchtowers, on the other hand, increase your range of vision, and do not require any unit to be stationed near it. The watchtower belongs to the person that was the last one to visit it. It can also be built with builder units (e.g. Orc Builder).
 The beginnings are always tough.
Arcane Item Forge - generates extra 10 research points and unlock s the production of items.
Arena - the newly produced Infantry units receive extra level.
Barracks - unlocks Infantry and Archers production.
Builders' hall - the city generates extra 20 production points and unlocks the production of Settlers, Builders and Battering Rams.
Grand Palace - increases contentment in the city by 100 points and expands the reach of the domain by 1 field. Additionally, your main leader receives 10 casting points.
Great Temple - the city generates extra 10 mana points.
Guard House - the newly-produced Pikemen receive an extra level.
Harbor - unlocks the production of boats.
Hospital - the city receives extra 100 contentment points, 100 population and generates health points for the units in the garrison.
Laboratory - the city generates extra 10 research points.
Masters' Gild - the city generates extra 20 production points and regenerates health points of Machines in the garrison. Additionally, the produced machines receive an additional level.
Observatory - the city generates extra 10 research points.
Public Baths - the city gains extra 100 points of contentment.
Rider's Hall - the cavalry units produced in the city receive an additional level.
Shooting Ground - the archers produced in the city receive an additional level.
Shrine - the city generates extra 10 mana points.
Siege Workshop - the city generates 20 production points and allows you to produce Trebuchets.
Stone Wall - a stone wall is built around the city
Store House - the city generates extra 100 population.
Temple - the city generates extra 10 points of mana. The Support units are manufactured with the higher experience level.
War Hall - allows you to manufacture Pikemen and Cavalry.
Wooden Wall - the city receives a wooden wall.
It is a good idea to ensure a faster population growth at the beginning, and at the same time, the city's faster development (Store House). Then, if there is quite calm in the area, it is a good idea to build the Builder's Hall, which increases production points that are so necessary at the beginning of the game. Also, you can try recruiting a Settler and renovating the city (in the appropriate spot on the map) or founding a new one. The next building that you erect should be the Barracks, which allows you to manufacture better units. Then, it is a good idea to reinforce the city's defenses a bit, by erecting a Wooden Wall which will ensure additional protection to the archers defending the city, who will have the advantage of height. The order in which you place new buildings should depend on your priorities - if you are opting for military advancement, erect the War Hall that allows you to manufacture more units. This should be followed by the buildings that raise the level of the units that you manufacture. In the case in which you go for generating mana, you will find the Shrine and the Temple useful. If you want to recruit siege engines, you are going to need the Siege Workshop and Master's Guild. Setting the city to the production of research points can be possible by building the Laboratory, and then the Observatory. After you implement the necessary upgrades, it is a good thing to build the Public Baths and the Hospital. Try not to build all at once, first build what you are going to need most at this current point. At the beginning of the game, it is very useful to be able to manufacture new units, better than the Irregulars. Later in the game, when you will not be waging that many wars anymore, erect the other buildings, depending on what you want to center your production around. Also, try to develop cities evenly and not invest all of your funds into one of them only. Then it will be easier to come to terms with losing one of them. Of course, if you are certain of a city's safety, for the several turns to come, do not hesitate and invest there. Try to upgrade the newly captured cities only after you make sure that they are not going to be recaptured that soon.
Beetle Command - available for the Goblin. Allows you to manufacture Goblin Big Beetle.
Dark Citadel - available for the Orc. Allows you to manufacture Orc Shock Trooper.
Gryphon Spire - available for the High Elf. Allows you to manufacture High Elf Gryphon Rider.
Hall of Chivalry - available for the Human. Allows you to manufacture Human Knight.
Peak of the Forefathers - available for the Draconian. Allows you to manufacture Draconian Flyer.
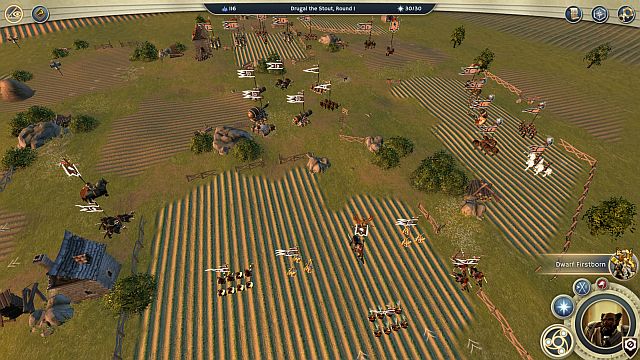
Pool of the First Born - available for the Dwarf. Allows you to manufacture Dwarf Firstborn.
The availability of structures depends on the race that you initially pick and the type of the city. There is nothing, therefore, to prevent you from manufacturing the Draconian Flyer in one city and the Human Knight in another. Remember that these buildings are not available from the very beginning and that they are quite expensive. That is why you should consider if you want to start the production of cheap units quickly, or rather invest into appropriate upgrades and manufacture a smaller amount of better units (the race units are not the cheapest ones to manufacture, nor to maintain, which they make up for in their combat value).
Arch Druid's Dolmen - available for the Arch Druid. After appropriate research, allows you to manufacture Hunters, Shamans.
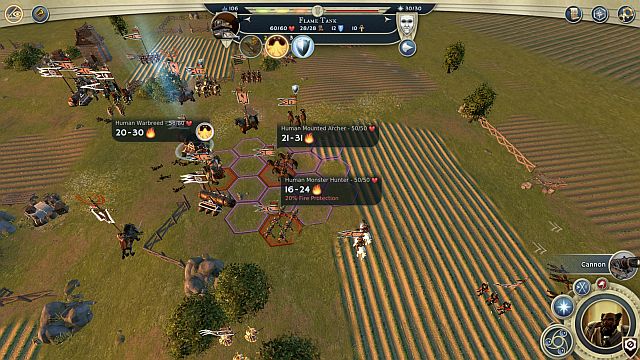
Dreadnought's Foundry - available for the Dreadnought. After appropriate research, allows you to manufacture Engineers, Musketeers, Cannons, Ironclad Warships, Flame Tanks, Golems, Juggernauts.
Rogue's Palace - available for the Rogue. After appropriate research, allows you to manufacture Scoundrels, Assassins, Bards, Succubus', Shadow Stalkers.
Sorcerer's Conflux - available for the Sorcerer. After appropriate research, allows you to manufacture Phantasm Warriors, Apprentices.
Theocrat's Conclave - available for the Theocrat. After appropriate research, allows you to manufacture Martyrs, Crusaders, Evangelists, the Exalted.
Warlord's Command - available for the Warlord. After appropriate research, allows you to manufacture Berserkers, Monster Hunters, Mounted Archers, Phalanx, Warbreeds, Manticore Riders.
Units available for a given class are also different and race-dependent (e.g. Dwarf Hunter, Orc Hunter etc.). The production of units depends on the type of the city in which the upgrade has been implemented - e.g. if you play the beginning class of the Theocrat and you have 2 cities of the Human and Dwarf type, then you can manufacture, e.g. Human Martyr in the former, and Dwarf Martyr in the latter.
Erect those buildings only if you want to start manufacturing the units that you have previously researched into. Otherwise (e.g. when there is still nothing to manufacture) it is better to devote your time and resources to something else, which would be more useful at the moment.
Burrow of Fire - Allows you to manufacture Fire Wyvern.
Burrow of Gold - Allows you to manufacture Gold Wyvern.
Burrow of Frost - Allows you to manufacture Frost Wyvern.
Fire Dragon Ward - units that attack a Dwelling are blasted with the Fireball spell, during each turn of the battle.
Fire Lair - Allows you to manufacture Fire Dragon.
Golden Lair - Allows you to manufacture Golden Dragon.
Frost Lair - Allows you to manufacture Frost Dragon.
Incubation Chamber - the Wyvern units receive an additional level.
Orb of the First Age - the newly-manufactured units receive the True Sight and Giant Slayer skills
Frost Dragon Ward - the units that attack a Dwelling are blasted with the Frost Missiles spell, each turn of the battle.
Burrow of the Degenerate Children - allows you to manufacture Ogre.
Menhir of Fire - Allows you to manufacture Fire Giant.
Menhir of Frost - Allows you to manufacture Frost Giant.
Menhir of Granite - Allows you to manufacture Stone Giant.
Rock of Ages - the newly-manufactured units receive the Dragon Slayer skill.
Stone Quarry - Dwelling generates extra 20 production points.
Fangir's Stone Ward - all of the friendly units receive the Stone Skin skill, in battle.
Barrow - Allows you to manufacture Archon Renevant Caster.
Chamber of the Rite - regenerates health points of the Undead units.
Charnel House - Allows you to manufacture Archon Renevant Archer.
Graveyard - Allows you to manufacture Archon Renevant Infantry.
Haunted Vault - Allows you to manufacture Wraith.
Mausoleum - Allows you to manufacture Archon Renevant Titan.
Obelisk of Undeath - all of the units, apart from the Undead, are Cursed within the limits of the Dwelling.
Sigil of Awakening - Dwelling generates extra 10 mana points.
Throne of Bone - Allows you to manufacture Wraith King.
Buttercup Meadow - Allows you to manufacture Buttercup Fairy.
Aphrodisiac Flower - units other than Undead, Machine or Dragon receive the penalty of -4 Resistance within the limits of a Dwelling.
Fairy Charm - the player's units, within the limits of a Dwelling receive a bonus of +4 Resistance.
Nightshade Hollow - Allows you to manufacture Nightshade Fairy.
Nymph Pond - Allows you to manufacture Nymph.
Toadstool Ring - Allows you to manufacture Toadstool Fairy.
Unicorn Glade - Allows you to manufacture Unicorn.
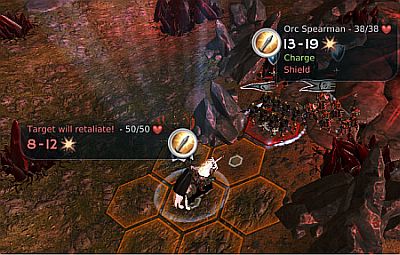
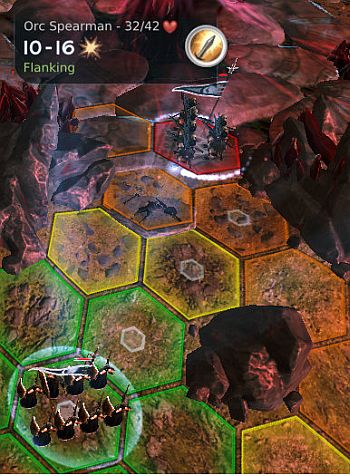
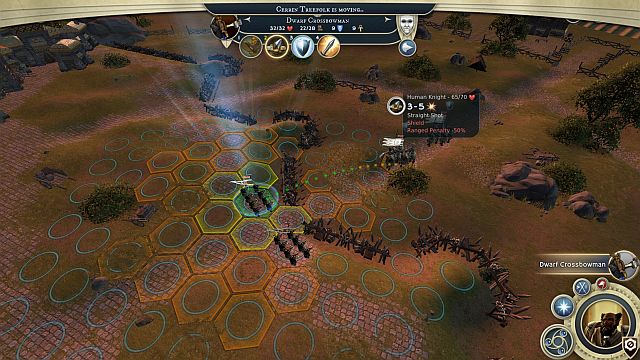
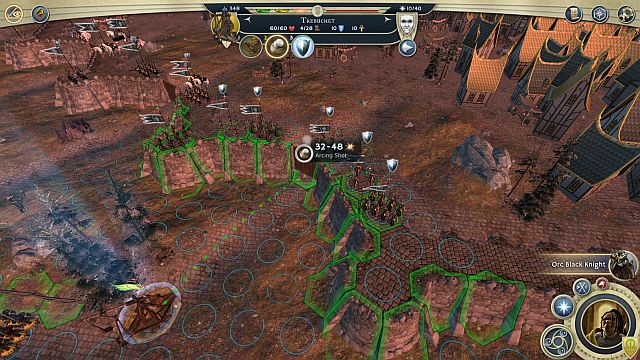
The most important information during the battle appears and in the upper corner, in the middle of the screen. It concerns the amount of mana that is let [3], the number of available Casting Points [4], the statistics available after you have selected a unit [5]. All of the remaining information can be found in the bottom-right corner, where you can end the turn, pick the spell that you want to cast [12], switch into automatic mode (your units will be controlled by the computer) [13]. Also, you can find here the escape button (not recommended; makes you lose all of the units and you lose the battle automatically) [14] and information on the units that can still make a move in this turn [15]. The final important piece of information is the circle that appears in the upper-left corner of the screen [16] at the moment at which a spell took an effect on the entire battlefield.
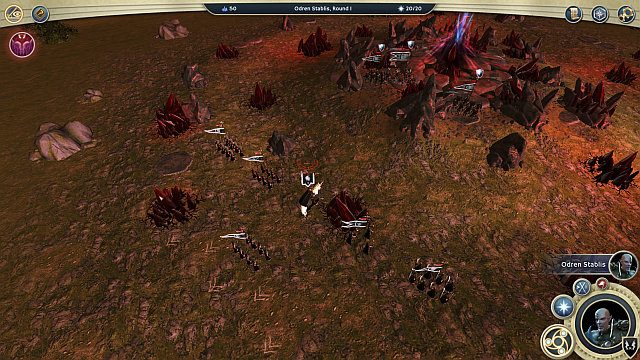 The initial battles are not too demanding.
Combat is an inseparable element of Age of Wonders III. You will fight many skirmishes, by attacking independent group, as well as battles and city sieges. It is very important, therefore, that you master the basic aspects of combat, which will prove very helpful in fight.
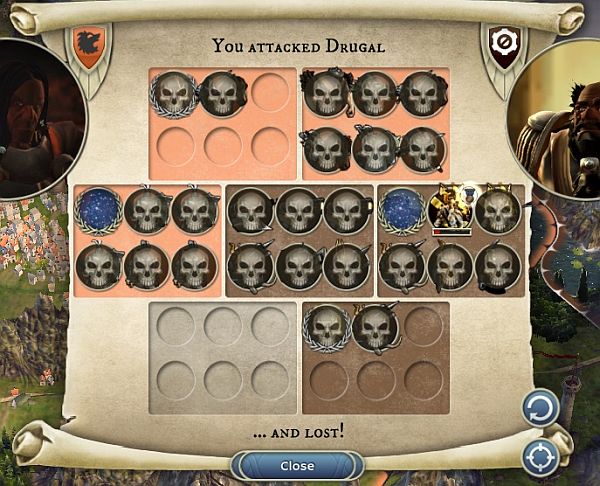
Apart from the units and their skills, tactics and the available skills will prove very important, which can very often tip the scales. To initiate a battle, two enemy armies need to meet on one hex. As the attacking party, you can still retreat but, in the case in which you are the defender, the only thing that you can do is fight yourself or let the computer fight the battle (simulation mode). Every battle can be participated by up to 7 units because not more than 6 fields border one hex. The battle will be fought on the tactical map, in the case in which you decide to fight it yourself. This map, just like the strategic map, has been divided into hexes and turns (rounds). Te defending party has the right to move as the first. After the battle ends, you will be shown a report on who won and about the losses on both sides. In the case in which you go for the simulation option, you will receive the report immediately.
Apart from the basic capabilities, such as movement and dealing damage, each party has, often, a number of skills, which often increase their combat value. The list of the available skills can be looked up in the description of the unit ( you only need to click on its miniature on the strategic map). Units can receive new skills by means of research or by upgrading the leader. Some of the skills are very powerful, which is why they have cooldown, which means that they cannot be used in each turn of the battle. There also are the skills that can also be used once per battle. Therefore, it is worth knowing the capabilities of yours and your enemy's parties, because the correct usage of them can decide about the entire battle, and is often better than the "regular" attack.
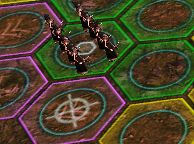
Action points reflect how much, a given unit, can do in battle. It starts with 3 action points, unless the number has been reduced by, e.g. counter-attacking the opponent during his turn. During the battle, the hexes that you can move to have been marked with three colors: green, yellow and orange. Moving to a given field reflects how many action points your unit will have left after the move is made. And so, this may be either, 1, 2 or 3 points. These points are used up on attacking, e.g. archers can usually fire three arrows at a time.. However, if you move them to the yellow area, they will only be able to fire 2. Another issue is that the units deal more damage at short range, which is why it is a good idea to calculate which pays better. Action points renew at the beginning of each turn, unless they have been used up during the opponent's turn, e.g. on the abovementioned counter-attack.
The units that have the right number of action points, when they are attacked with a melee attack, can counterattack, if they have been attacked from the specific direction. This means that they will counter only frontal attacks. This means that the units that have been attacked from a flank, will perform no counterattack, but they will turn towards the attacker and, future attacks, if they actually take place, will be countered. Turning your units in the appropriate direction, at the end of the turn, may be very helpful, because this will allow them to counter the majority of opponent's attacks. Some of the skills influence counterattacks, e.g. the First Strike allows the defending party attack first.
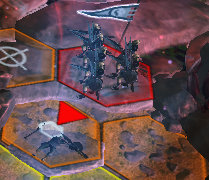
While moving your units in front of the parties of the opponent's, you can perform an occasional attack, which costs them 1 action point. The point of the attack is that, if a unit moves sufficiently close (1 hex in front of the hex that the unit is facing) to another unit, which can perform melee attacks, damage will be dealt. These attacks cannot be countered. Pay attention to the small, red arrows that symbolize this attack - if the route of your units crosses such a field, this means that you will be attacked if you make a move.
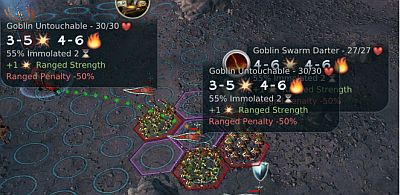
Some of the skills can influence, not only, one selected unit, but an area, with all of the units staying in that area. Such an area has been marked with violet borders. all of the units staying within that area will be affected by the spell. Remember that you should not keep your units close to each other, in case that the opponent wants to use such an AoE spell, because you can then lose several parties in, one go, then. Use this to your advantage and, whenever you see the opportunity to attack multiple enemy units, at a time, it is a good idea to do that. You should remember that not only the opponent's units are affected by such a spell, but also the allied ones, to which the spells deal damage also.
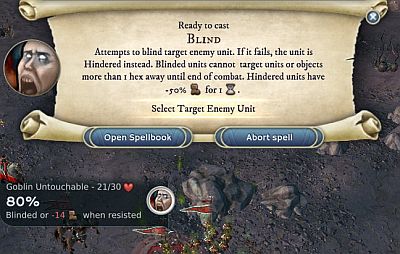
IN battle, it is possible to cast combat spells, which may influence both your units and the enemy units, and sometimes on all the units in the battlefield. You can cast only one spell per turn (one leader=one spell), and they are available at the moment at which a leader stays in the battlefield. It is also possible to cast spells when there is no leader around but, the cost of such a spell, in Casting Points is doubled then. Spells can often tip the scales of victory to your side, which is why it is worthwhile to make sure that you obtain them by means of researching or by upgrading your leader, as well as to ensure his presence in more important and more demanding battles.
The attacks that are not performed from the front, but from the side are flanking attacks. The greatest upside of these attacks is that they deal more damage. The unit that is attacked in this way will not be able to counter the first attack but, it will be able to counter the following attacks, unless it is affected by paralysis, stunned, etc. As much as possible, try to attack in such a way, so as to flank the opponent, while remembering about not exposing yourself to his attacks in the following turn.
On the tactical maps, there often are some obstacles that you can hide behind. Thanks to them, all of the ranged attacks deal less damage, if they are performed from behind the obstacle.
As the attacking party, you can leave the field with selected units, while still in the battle. To do that, you need to move your units to the hexes around the edges of the arena, which are outlined in violet. This is a useful option, if you have miscalculated your chances to win a battle, or you do not want to lose your units, in the face of the opponent's advantage.
During your play, in the Age of Wonders III, sooner or later you will have to fight. In most cases, the initial skirmishes with the Independent, groups are not too demanding, due to the size of the independent armies, but still, you can encounter some stronger groups. In spite of that, the you will be fighting the majority of your battles, with the other players. The appropriate behavior and well-suited tactics, in the battles, will help you win even the most hopeless battles, with time. On the other hand, ignoring the opponent may lead to losing a quite simple battle. Therefore, a lot depends on what units you lead into the battle but, even more importantly, how you do that.
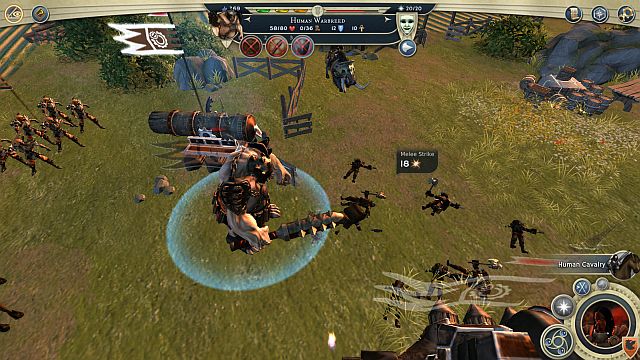
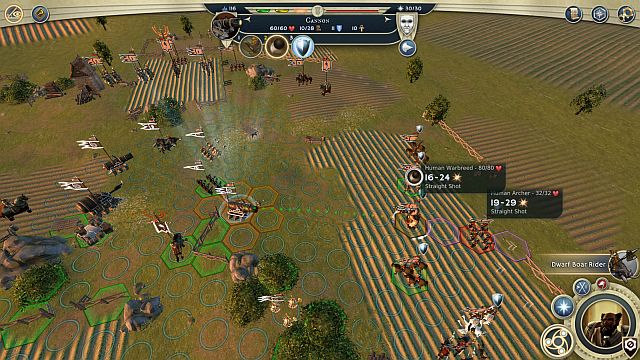
 A well-balanced battle ahead.
In most cases, battles start when you see an enemy and you simply decide that it would be a good idea to whoop his ass. In short, it could be said that these battles need to be fought in the medieval style - infantry fighting in the first line, ranged units provide support from the back and cavalry on the flanks. To top it all, place your leader somewhere at the back and fit the healing units here and there. This basic deployment of units, can well be used in the battle.
 This is it! Taste the Greek Fires.
The battle is started by the player that was attacked. Remember that, as a defender, you do not have the possibility of escaping and, even in a battle that seems to be lost, from the very beginning, it is a good idea to try inflict as severe loses to the opponent as possible. First of all, it is a good idea to soften up the opponent, especially by eliminating those of the units that are weak and vulnerable to attacks, or have the lowest number of health points. For that, use spells that can deal damage to multiple units. After you approach the opponent, try to lay fire down on him and, in the case, when he himself is short of ranged units, do not attack with the rest of the army, yet, and try to deploy your units in a way in which they are able to counter and use attacks of opportunity. Remember that you cannot let yourself be flanked - keep your units about you but, at the same time, know that you are vulnerable to AoE attacks then. Therefore, it is worth knowing what kind of skills the enemy units have up their sleeve. There is an advantage in keeping your units close - once the enemy wants to attack a unit located at the side, or in the back, most probably, he will then have to pass by your units, which results in the performance of an occasional attack, by your units. While attacking, you should watch out for that too - crossing the field between two enemy units is not the best of choices.
 If only there were walls here...
To fight and win battles effectively, whether as the defender or as the attacker, you need o remember about several important rules. First of all, remember about using spells that can considerably improve on the statistics of your units, or deal damage to the opponent's. It would be especially good if you could kill the enemy leader, as soon as possible, however, spells themselves will probably be incapable of doing that. However, you can use the cavalry units here (as well as the other ones with high number of movement points), which you can well use to flank the other units and attack archers, behind the infantry lines (you can also try to get closer to the enemy leader). Cavalry is very good against the enemy ranged units, thanks to which a charge performed at the right moment is capable of destroying the unit. Also, remember to finish off the opponents - such an unit deal the same damage, regardless of the number of health points left (the number of soldiers in such a unit drops, but the unit retains its statistics). An ideal way to defeat the soldiers that are low on health is an AoE attack. The units that are good at close quarters should be moved to fight against units of the same type - do not allow a situation in which the units with low attack statistics fight in melee (e.g. archers, counterparts of priests). Also, you should watch out for counterattacks - do not attacks if you can lose your own unit, as a result of the counter. Even if the opponent attacks it in the following round, he will have to make a move, where he could focus his attack on another unit. Always try not to exert the valuable units, which have lots of experience points and leaders - they are the most difficult to replace.
 two Birds with one stone.
To sum up, the key to victory are:
- appropriate make-up of the army, so that the types and the skills of various units are diversified and allow for dealing different types of damage,
- use ranged units to soften up the opponents, for as long as possible,
- reinforce the fighting units with spells, cast by the leader,
- try to predict the next steps that the opponent takes, pay attention to the range of his units and, at the same time, change the positions of your own units in a situation in which they are in danger and in face of the expected attack
- while relocating your units, watch out for attacks of opportunity and, when you attack, for counterattacks,
- fight on the type of terrain that is preferred by your units; sometimes, it is a good idea to lure the opponent to this kind of ground, thanks to which your units receive higher morale, where the ones that stay on the disfavored ground receive lower morale.
- don't bite off more than you can chew; it is a good idea to attack only if you are sure of your victory and, when you need to defend, fight until the last man standing.
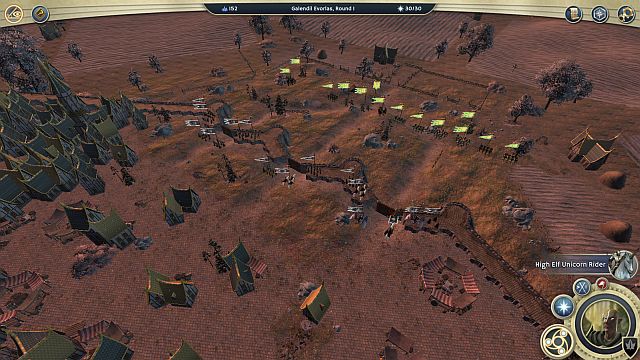 The appropriate view will allow you to prepare for defense.
Sieges usually occur as a result of attack/defense of a city or a stronghold. The defending player usually has some advantage, especially when the city has a stone or a wooden wall. The attacker should remember that he should have siege engines in his army, which make it easier to force the gates down.
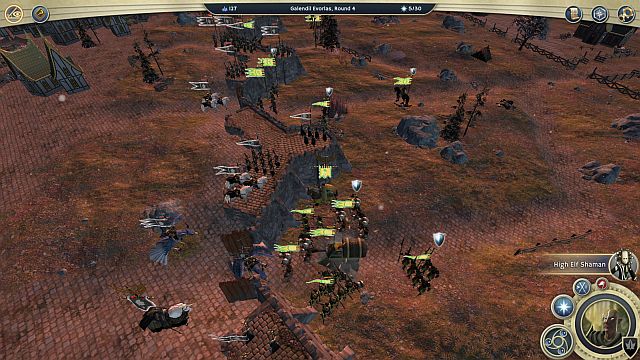 The units gathered at the gates are an easy target.
As the defender: Position your archers on the walls and the fighting units around the gates. The opponent will, most probably, want to force it down. As far as possible, try to destroy, in the first place, battering rams and trebuchets, to make this task as difficult for him as possible. Once you notice that the opponents has units that are going to attempt climbing your walls, send your infantry to the walls, to serve as reinforcements for the archers. In the case in which the gates are forced down, block it with the unit of the highest defense value and high number of health points, so that the units fighting against it, stay there as long as possible, which will allow the archers to deal damage. If you do not have ranged units in your army, you will have no advantage over the opponent, because he will be able to force the gates down without any problems. Try to destroy his ranged units then, to prevent him from shooting all of your units, during fights at the gates. If the opponent has clear advantage over you, and you have cavalry and the other units with high number of movement points, you can try walking past the walls and fighting in the open field.
 Trebuchets are perfect for smashing gates.
As the attacker: Obtain siege engines, which are going to be very helpful - the faster you destroy the gates, the better. If you have the units that can climb walls, use them to attack archers. When it comes to the "regular" units, try to make it past the gates as fast as possible, to avoid staying at it for too long, at which point you will be exposed to attacks from archers. As far as possible, force down the 2 gates, to allow as many units past the walls, within a short period of time, as possible. Then, you will find the battle much easier, because your units will not be waiting, pensively, until there is more space at the gates, because the range of the archers is greater than your own. This is why it is so important to make it past the enemy gates, as quickly as possible. Exchanging fire at the gates always ends badly for the attacker - your units will deal far less damage, because of the distance and the wall in the way.
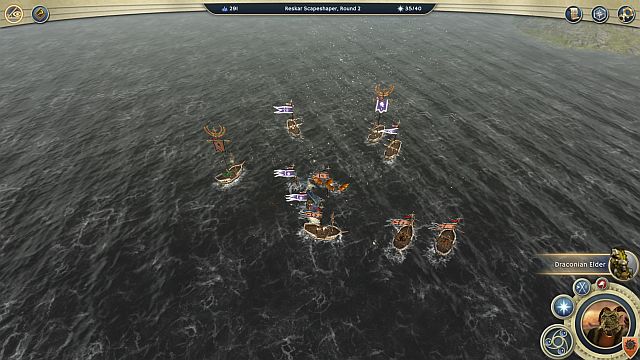 Maneuvers at Trafalgar.
Apart from the battles on the mainland, you may also have to fight naval battles. The units that meet on the sea are represented by ships and it is the health points of those ships that they receive. Their individual statistics, e.g. the strength of the attack, defense or resistance remain unchanged. Apart from that, the units that o not require loading onto the ship have the same statistics (HP) as in a regular battle. Also, the skills of such units remain the same as in the regular battle.
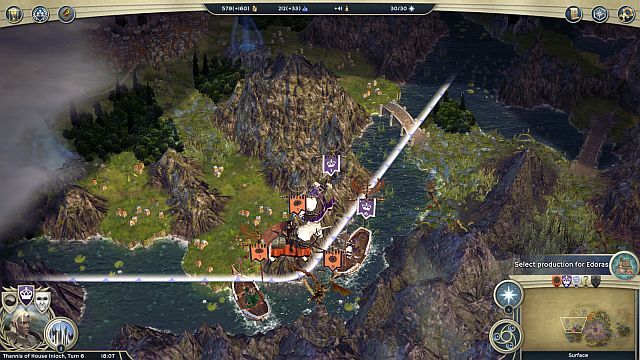 The naval vessels can serve as a support for mainland units. This does not work the other way around .
The main difference, when compared to the regular battles, is the change in the amount of HP, which is increased by the amount of movement points of these units, and also additional attacks, depending on the boats that you have (they can be upgraded with research into naval movement). Thanks to this, the defender gains a certain advantage, connected with the fact that he is the first one to make his move, because, already in the first turn, it is highly probable that he will be capable of approaching the opponent, close enough to attack or even sink the enemy unit. It goes without saying that it is best to attack and destroy the best and the most expensive units, so that the opponent suffers the loss, even if you lose the battle. It is best to invest in the upgrades that allow you to manufacture ships, while playing on a map with lots of islands, where the possibility of a battle is higher than usually. Otherwise, you can try to get the opponent on a river, because this is, usually the faster way to cross, than crossing the land. If there are quite good units, on the opponents army, they may prove to be a morsel. The units that are located on the fields with water can serve as a support for the other units, which attack the opponent in the mainland. Then, the entire battle will take place on the mainland. The units stationed on the ground cannot reinforce the naval units, in battle, even if they are occupying the neighboring fields.
 It's only because he started!
1. Still before you start a battle, i.e. move to the tactical map, you can choose whether you want to fight yourself or whether the AI should control your units. As the attacker, you can also waive the attack. If you want to be sure of your victory, always fight yourself, especially when large number of units are at stake and the outcome of the battle is not sure. Play automatically those of the battles, in which you have the clear majority and you do not want to waste your time. However, you need to watch out, because you may be surprised sometimes and lose much more units than if you played the battle yourself.
2. Remember about the action points. They reflect what a given unit can still do. Melee attacks and ranged attacks can be repeated up to three times (depending on the number of action point left). After you attack, or use a skill, the unit loses the remaining movement points and can do nothing in the current turn, including movement. Therefore, you should make sure if leaving a unit on a given field is safe for that unit (if it is not staying within range of the opponent's units, which could destroy it). While you attack with a ranged attack, the damage is lower, up to a point, and they are signaled with the Ranged Penalty message in the menu that displays how much damage you dealt.
Sometimes, it is better to spend the action points on approaching the opponent, where you can deal more damage (e.g. instead of dealing 3x2 damage, deal 2x6 damage).
3. Use the skills of the units. Many of them, apart from the basic ones, such as attack or movement, has many others, which are much more useful. They can heal the allied units, immobilize the enemy units in a number of ways (the other skills have similar effect - depriving the opponent of the ability to make a move, for some time) and capture control over the opponents. Often, it is the skills that may prove more useful than the standard attacks.
4. Watch out for counters and attacks of opportunity. Most of the units can control your attacks and even attack before you strike (First Strike). Remember about that to avoid exposing your units to unnecessary losses, when the effective ranged attack is available. Some of the units also explode after they die, which deals damage to the others around them. Try to destroy such units at a distance or, at the moment at which there are many enemy units around.
5. Cast spells. Your advantage is a well-developed leader, who can attack effectively at a distance and cast spells that reinforce the allied units and the ones that deal damage to the opponent. Use AoE spells whenever there are many enemy units in an area, the ones that attack single units can be used for finishing off the dying units, who cannot be reached by your own ones, e.g. the leaders who, with low amount of HP hid behind walls.
6. Try to start only those of the battles in which you are sure to win, or deal damage to the opponent, while sustaining small losses yourself. Avoid the pyrrhic victories, because the bleeding out of nearly entire army, in order to capture some small city, is not going to bring you much profit. This is followed by another hint - try to attack only what is really important. If you have to lose your units, let it be over something that matters, e.g. opponent's Throne City or another, well-developed, city. Also, you should pay attention to the range of movement of the enemy armies on the strategic map. If you want to fight, you need to be sure that the opponent will not be able to reach you in the following turn.
7. During sieges, make sure that there is, at least, the wooden wall, around your city, which in itself provides you with an advantage, thanks to archers that can place atop it, which increases their range. The opponent will have to approach the gates, if he wants to destroy it, which will leave units exposed. While defending, you need to have ranged units however, you should also remember about cavalry and infantry, who will be defending the gates and fight on the walls, should the opponent attempt climbing them.
8. While attempting to capture an enemy city, you need to take several siege units along, which will allow you to force down the gates. Otherwise, you will sustain heavy losses, while trying to bring it down with the other units, because the opponent may pepper you with a hail of arrows and spells. Therefore, you are going to need trebuchets, thanks to which you will be able to attack the gates at a distance. Bringing down of the enemy gates is the key, because your units will probably be incapable of attacking (unless they can climb walls) and the ranged attacks will be much weaker, with the better range of the enemy archers.
9. Ensure a diversified army. You are always going to find a job for infantry and ranged units. Cavalry is excellent while attacking at a longer range and while flanking the enemy, thanks to the high number of movement points. The Support usually take care of magical attacks and healing. A diversified army allows the units to complement each other and to deal various types of damage, which will prevent a situation in which there comes a unit with high defense value, which you are incapable to "waste" because there are no units that deal magical damage, in your army.
10. Watch out for the nearby hexes and units placed on them. A battle can be participated by 7 armies, which means that if you strike a central hex, all of the adjoining ones will join the battle.
Sometimes, it is possible to attack some projecting fragment, thanks to which you will have the advantage of numbers in the battle. In the case of cities, which are surrounded by multiple units, it is especially discernible, and attacking the enemies in the proper way, allows you to heal with the siege in installment and increases your chances of winning, thanks to the larger number of participating units.
11. Finish out the enemy units. remember that even an unit with 1 HP left, deals regular damage, i.e. even if there is one soldier in an archer unit, he still deals the same damage as the entire unit, because the unit, in itself, still exists. Therefore, you should not let yourself be misled by the animation that shows the low numbers of soldiers in a unit. It is better to destroy 5 enemy units than to damage 10. The ones that are destroyed, are gone forever, where the ones that are low on health may still regenerate their health and exact revenge in the following turns.
12. Protect your leader and try to kill the enemy one, as quickly as possible. Thanks to this, he will not be able to cast spells and, if it was a well-developed leader, losing him will be excruciating to the opponent. For that reason, you should take care of your leaders and not let them run wild - booth during exploration of the strategic map and in battle. Implement an inventive tactic - let the leaders command the battle from afar, do not order them into a short-range fight.
13. Do not give up. Even if the battle is already lost, it is worthwhile to fight until the very end to deal the opponent some extra damage, or even destroy a unit. At the moment at which you give up, your entire army dies immediately. Retreating is a different pair of shoes (available only for the attacker) - if the situation is hopeless, it is a good idea to attempt saving, at least, some of the units.
Leaders are the most important, and usually the strongest, units in the game It is them that lead your armies into the battle, cast spells, obtain and carry items that boost their statistics. Your first leader is the one that you select at the beginning of the game and it is on him that the initial army, and the city depend on. With time, you will be joined by some other leaders. Take care of them, especially that their death is (in the majority of cases) irreversible. You should care even more about your leader because, after he dies, and you lose the Throne City, you lose the game, or scenario. If the leader dies and the Throne City is still within your dominion, he will respawn there, after 3 turns. For the whole time in between, you cannot cast spells (that your leader knew) and the researches will be halted, until the main leader respawns.
Your leaders, just like the main leader, have their class and race, on which the spells, possible to develop, depend on. Along with a given race, the leader also has its characteristics, which combine all of its units. The leaders, just like the regular units, have the base attributes, such as defense or the number of health points. The main difference between the units and the leader is the ability to expand any attributes, traits, leveling up and gaining items that can considerably buff any unit. Another important attribute is casting spells in the battlefield. All of these make leaders unique units, which are supposed to lead their units (especially useful here are the skills of the leader that influence the entire army), and even to smash entire armies, single-handedly.
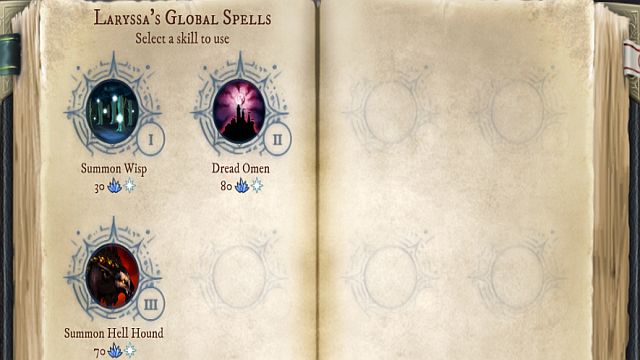 The future Master of the World creation screen.
You can create your own leader thanks to the Customize New option, in the leader selection menu, before you start the game. The most important here, is the first screen, where you can define both the race and the class of lour leader. Another important element is the selection of the specialty, which influences the available spells and research paths. Some of the specialties have the Adept and Master classes. The latter ensures more advanced spells but, it requires the selection of the first level. In the next step, you can customize your character, when it comes to your aesthetic taste - adding of the background against which he is displayed, the pose and the and the miniature. The final step is the selection of the colors, symbol, choosing the name and saving the leader (Save Leader). After you are done with the process, you can start your game with the new character.
Just like the regular units, leaders gain experience by attacking and killing the enemy units, as well as for casting spells. Thanks to this, after some time, their experience level rises. With each level, you receive 5 points that you can spend on any skills, which were unlocked on a given level. These skills depend on the class of the leader and on his experience level - along with successive levels, you unlock new skills. Each upgrade costs you a certain amount of points, which is why it is impossible to buy all of the available skills, because the leader's maximum experience level is 20. This can be changed in the game settings but, gaining the successive levels is time-consuming and the leader may simply, not manage to reach that level, before the game ends. Therefore, it is better to think "here and now", while distributing points, instead of selecting just any skills and delude yourself in thinking that "I'm going to have them all, anyways". Some of the skills influence the leader only, whereas the other take effect on the entire army that he leads.
Not too much to choose from, s for now.The main leader (and the other ones) can cast spells, both global (unavailable for the other leaders) and in battle. You get all of the spells as a result of researching into them, or into upgrades. Research will allow you to upgrade your Empire and learn new spells, which you can then use later on. Apart from mana, each spell consumes a certain amount of Casting points, which are separate for each leader. So, if you cast a global spell, as your leader, you will have less points, at your disposal, during battle. These points regenerates as soon as a turn goes by but, if unused, they are lost. You can increase the number of points with appropriate research (in the case of the leader), or with upgrades (in the case of the remaining leaders).
Another element, apart from skills and casting, is the items that each leader has. They can improve, considerably, on skills and statistics of your leader. There are two types of items - the ones that need to be used (only one item, of a given type, at a time) and the ones that provide a bonus merely by the fact of being in your equipment. You can obtain items, mainly, through exploration of all the Treasure sites. depending on the level, and the difficulty of an army, which you will have to defeat, you can receive items of various classes. regardless of that, exploring, even the most difficult catacombs is very profitable , on condition that your army is strong enough to defeat the defenders. Thanks to this, you will be able to find better items which, in case it is necessary, can also be sold. Another way to obtain items is bartering in the diplomacy window, and the last one, forging your own ones.
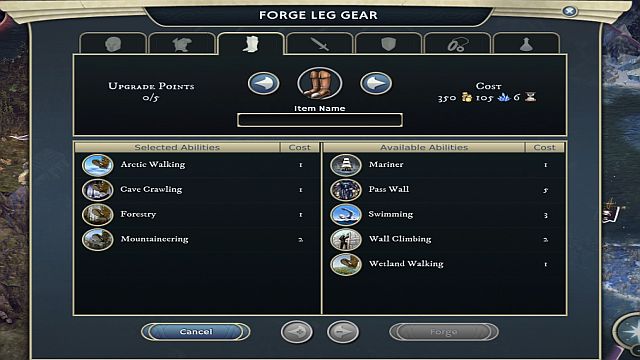 Seven-league boots - the production process.
To forge your own item, you need a proper structure in your city, i.e. the Arcane Item Forge. Thanks to this, it will be possible to select the Forge Item option, which directs you to the item-forging menu. You can create an item of each of the 6 types, which need to be used to provide you with bonuses. You can also forge the "Usable items", which ensure you with their bonuses simply by being located in your inventory. You can select skills for each such items however, this is restricted by the limit of 5 points. Each of the skills has a different price in points so, there is nothing in your way to select 5 skills (for 1 point each). All of this influences the price (in gold an mana) and the amount of turns that the item requires to be forged, which will be added to the building queue in your city. After it has been crafted, it will be deposited on the ground, where you can collect it from, or send it to a certain leader, by the courier.
Additionally, in the game there are items of the Mount type, which cannot be forged, but can be found while exploring buildings.
Try to develop your leader at all times, to reach the highest level possible. Attacking the Independent groups is going to help you with that, thanks to which you will not only develop your leader, but also the units that travel around with him. While distributing the points available after you reach the next level, select those of the skills that you deem useful e.g. if you do not have siege engines in your army, then you are not going to find any use for Repair Machine or, if you have a unit with True Sight you need to decide whether your leader also needs this skill, or not. However, always make ensure yourself with enough health points and high enough level of the attack statistics (both ranged attack and melee, depending on your preferences).
Also, select those of the skills that will be effective on your entire army, which will ensure them with appropriate bonuses. Also, remember that the main leader may cast only those of the spells that you researched into beforehand. The other leaders, on the other hand, need to spend their points, which they earn after they go up a level, to learn a given spell. Select the spells that are the most useful to you. It is always a good idea to have, up your sleeve, a spell that deals damage to the opponent's units, and one that heals your own. remember that you need enough Casting Points to cast a spell, whose limit can be increased with appropriate upgrades and after you reach the next level.
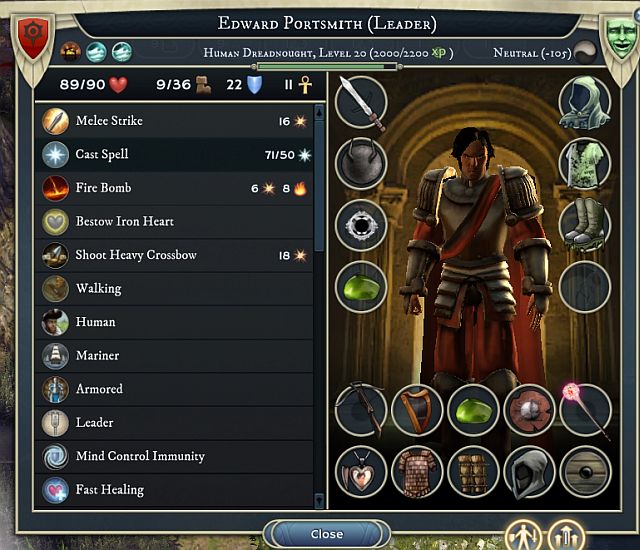
All of the spells and skills, available for the leader, differ from class to class. Additionally, this way of learning spells is only available to the leaders that are not the leaders of the faction. each skill costs you a certain amount of points, which you earn after you level up (5 per level). Some of the skills concern the leader only, where the other ones are useful for the entire army that he leads. The majority of the skills are the ones that need to be used in battle. The category of passive skills consist mainly of buffs and bonuses to attack against a certain type of units, as well as buffs to defense against certain types of attacks. Below, you can find a list of skills available for the leaders of a given class, along with a short description. The spells available for the leaders have been labeled "Only for the Leaders". The rest of the skills (with the exception of the ones that increase the number of Casting points) are available for leaders, as well as for the minor leaders. The suggested upgrades will suit the liking of some of the players, whereas they will be disliked by others. There are plenty of possibilities, depending on the kind of the opponents, or the units that you have. If you, e.g. think that the spells available for the leader are too weak, and it is pointless to spend your points for them, then...it is very well. Spend them on something else then, e.g. on increasing your melee attack, so as to enable him to deal with the opponent at close quarters.
+1 Ranged Strength
+1 Defense
+1 Resistance
+5 Hit Points
Cost: 1-20
With each new level, it becomes possible to enhance the above statistics. Of course, the cost to upgrade them gets higher, depending on the amount of points that you added earlier. In general, the available skills can be divided into the ones that affect the leader himself, the ones that affect the army and the possible spells and skills that affect the enemy units. Also, there also are the upgrades that affect the number of Casting points, available for each class. The cost of this skill is 5/7/9/9/9/9/9 points, for levels 1/3/5/7/9/11/13, correspondingly. It is named differently for each of the classes however, the effect is identical.
Arch Druid - Druidry I-VII
Dreadnought - Invention I-VII
Rogue - Cloak and Dagger I-VII
Sorcerer - Sorcery I-VII
Theocrat - Divine Channeling I-VII
Warlord - Warfare I-VII
Name
Cost
Required level
Effect
Befriend Animal
2
1
Attempts to win the opponent's Animal unit over to his side.
Cure Disease
2
1
Removes all of the negative effects (Poison) from the selected allied unit.
Shock Protection
2
1
The leader receives additional 20% of resistance to a Shock attack.
Nature's Resistance
4
1
Each unit in the army receives +1 Resistance.
Warm at Night
4
1
Each unit in the army receives 20% to resistance to Frost.
Root Spears
5
1
Only for the Leaders. deals 20 physical damage and attempts to "tie up" the enemy unit (it loses 50% of movement points in the following turn).
Rust Strike
5
1
Only for the Leaders. The enemy unit, which has the Armored attribute, loses 2 defense points, or deals 20 physical damage to Machine type of units and attempts to weaken it (in the case of success, it loses 4 defense and attack).
Savage Rage
5
1
Only for the Leaders. The selected allied unit, of the Monster or Animal type, receives the Charge, First Strike, Armor Piercing, Overwhelm, Wall Crushing skills, and 3 additional points to physical attack, until the end of the battle.
Revive Instinct
5
1
Only for the Leaders. all of the enemy units, which have the Mount attribute, lose 12 movement points, for 2 turns.
Healing
2
3
After being used, it restores 20 HP to the selected unit.
Night Vision
2
3
Increases the range of vision, in the underground, by 2 hexes.
Natural Healer
4
3
All of the units of the leader's army regenerate an additional of 6 HP per turn (very useful).
Spirit Protection
2
5
The leader gains and extra 20% of resistance to Spirit type of attacks.
Swimming
3
5
The leader can cross water fields, without the necessity to board and without losing a turn.
Spirit of the Land
4
5
Each unit in the leader's army gains an extra 20% of resistance to Spirit type of attacks.
Natural Immunity
4
5
Each unit in the leader's army gains an extra 20% to Poison resistance.
Hornet Swarm
5
5
Only for the Leaders. The Hornet Swarm deals 20 damage (Poison) to the selected unit. Additionally, it can jump over, to the other nearby units, within the radius of 3 hexes, for 4 times (therefore, a spell cast once can deal damage to 5 different units, if they are staying close to each other). Does not work against the Machine and Undead type of units.
Twisting Roots
5
5
Only for the Leaders. Decreases by a half, the range of the units of the opponent that move on foot (Walking).
Undead Slayer
2
7
The leader deals additional 3 damage to Undead units.
Entangling Touch
3
7
Attempts to entangle the enemy unit. After a successful attempt, the unit cannot make any move (for 2 turns).
Revitalize
5
7
Only for the Leaders. The selected allied unit loses Cooldown necessary for using a skill again, and regains 50% of movement points.
Vageful Vines
5
7
Only for the Leaders. deals 20 damage to walls at the beginning of each round, during battle.
Inflict Bleeding Wounds
3
9
With the leader's each attack, there is a chance to inflict bleeding wounds, which deal additional damage for 2 turns.
Call Ancestral Spirits
5
9
Only for the Leaders. Summons the Ancestral Spirits (for the rest of the battle) into the battlefield.
Sustainable Warfare
8
9
All of the units in the army require 50% lower pay.
Call Beast Horde
5
11
Only for the Leaders. At the beginning of each turn, it summons a random unit (Beast), to reinforce the leader in the battle. .
One with the Trees
6
11
The leader's all units receive Forest Concealment, which allows you to remain invisible in forest.
At the beginning, it is a good idea to invest some into health points, improvement of defense and attack. Out of the starting skills, the Nature's Resistance is excellent, because it affects the entire army, in one go, and the Natural Healer, when it becomes available, which speeds up HP regeneration for the entire army. At the higher levels, it is also going to be necessary to invest into Healing. At the 5th level, the type of resistance, selected for the army, is going to depend on the type of opponent that you are fighting currently - resistance against poison is going to be useful against Goblins, and from Spirit attacks with, e.g. Theocrat. At the higher levels, in the case in which the money supply is tight, you are also going to find Sustainable Warfare useful, and One with the Trees should be a must, because it will allow you to attack by surprise. The leaders other than the faction leader, i.e. the ones that can learn spells, should keep increasing the number of their Casting Points, thanks to Druidry. The spells that should be compulsory are Root Spears (useful for finishing off units at a long distance) and Savage Rage, which raises the skills of the selected unit, considerably. With level five, you gain access to the Hornet Swarm spell, which is perfect for dealing damage to groups of opponent. In the case of sieges, you are also going to do with the Vageful Vines, and finally, it is a good idea to equip the leader with Call Beast Horde skill, which can ensure considerable advantage in battle.
Name
Cost
Required level
Effect
Repair Machine
2
1
Restores 15 HP to the selected allied machine.
Tunelling
2
1
The leader can walk through Dirt Cavern Walls, which will help unlock new passages in the undergrounds.
Vision Range Upgrade
2
1
The range of vision, of the leader, is increased by 1 field.
Lightning Rod Banner
4
1
All of the units in the leader's army receive resistance to Shock type of attack (20%).
Imperial Authority
4
1
All of the units in the leader's army receive an increase in contentment, by 200 points.
Overload
5
1
Only for the Leaders. The selected allied machine deals additional damage (+10) until the end of the battle but, there is a risk that it will be stunned for 2 turns (no possibility of movement).
Repair Fortification
5
1
Only for the Leaders. Regenerates HP of a wall, or a gate, to its maximum value.
Flash Bang
5
1
Only for the Leaders. Deals 4 physical damage and 3 Fire, and attempts to blind the enemy unit. In the case of a failure, its range of attack is decreased to one hex, for the duration of 2 turns.
Force Field
5
1
Only for the Leaders. The selected allied unit receives increased resistance (by 60%) to Frost, Fire and Shock type of attacks, for 3 turns.
Rapid Reload
3
3
Reloads the selected allied machine, thanks to which it reduces the Cooldown necessary to reuse the skill of that machine.
True Sight
3
3
The leader sees the invisible and hidden units on the map.
Forge Aprons
4
3
All of the units in the leader's army receive resistance to Fire type of attack (20%).
Inflict Immolation
4
3
With each attack by the leader, there is a chance to set the enemy unit on fire, which deals additional 3 of damage (Fire) and decreases resistance to magic and strength of attack, for the duration of 2 turns, by 2.
Wizard Hunters
4
3
All of the units in the leader's army receive +1 Resistance and the Summoned Slayer skill, thanks o which they deal extra 3 damage to all the units summoned into the battlefield.
Wall Climbing
2
5
The leader can climb walls.
Throw Net
3
5
An attempt to entangle an enemy unit. In the case of a failure, the enemy unit can take no action for the 2 following turns.
Sabotage
3
5
Deals 30 damage (15 fire, 15 physical) to the selected enemy machine, or 40 damage to the selected wall fragment.
Reassemble
5
5
Only for the Leaders. Repairs the destroyed allied machine, with 33% of the maximum of its health points.
Pest Control Party
5
5
All of the units in the leader's army receive the Animal, Fey and Monster Slayer skills which results in damage, higher by 3 dealt to this type of units.
Weapon Kit
5
5
Only for the Leaders. The allied units of the Infantry or Pikemen type, receive the Fire Blunderbuss, Sabotage and Throw Net skills, until the end of the battle.
Physical Protection
3
7
The leader receives resistance against physical attacks (20%).
Fire Bomb
5
7
Deals Fire damage to the selected unit, and to all the others within the radius of one hex.
Bestow Iron Heart
5
7
The selected unit regenerates 15 HP and receives increased defense and resistance (both +1), and also Strong Will, until the end of the battle.
Summon Siege Engine
5
7
Only for the Leaders. Summons a random machine to the battlefield, which remains there until the end of the battle.
Choking Fumes
5
9
Only for the Leaders. All of the units in the battlefield receive -6 movement points and -2 defense, melee attack and resistance to magic. Does not concern the Dragon, Machine, Undead and Incorporeal units.
Tree Crusher
9
9
While over the Dense vegetation type of terrain, the leader turns it into Barrens, and receives a token amount of gold.
Dampening Field
5
11
Only for the Leaders. Doubles the amount of mana and Casting points necessary to cast the spell, for all the players, except for the caster.
Bomb Party
10
11
All of the units on the leader's army receive the Explosive Death skill - they explode after dying and deal damage to all the units (also allied) within the blast radius.
Destabilized Mana Core
5
13
Only for the Leaders. An explosion that occurs within 2 turns and deals 60 fire damage to all the units in the battlefield. For obvious reasons, - it is best to use this one during battles against the enemy with considerable advantage in numbers, in a situation, in which you are not against wasting your own army.
After a few initial HP points are added, defense and attack are increased, it is necessary that you select Imperial Authority, which increases morale of the commanded army. In a situation in which you fight against a warlock, the Wizard Hunters skill is going to e a considerable reinforcement. The Pest Control Party is compulsory, because it bolsters the attack of all the units against various types of units, which often roam about the map. What is going to be useful, for the leader himself, is the Fire Bomb, which is capable of dealing AoE damage and Bestow Iron Heart, as a skill that enables healing and reinforces both types of defense. Bomb Party is also attention-worthy however, this is a two-edged weapon, and in the case in which you own that skill, you need to remember to keep your units away from the other ones, if they are on the brink of dying. Apart from these skills, leaders cannot forget about increasing the number of Casting Points and choosing appropriate spells. and so, definitely Overload and Reassemble are going to be of use, but only in the case in which you have machines. Flash Bang is also useful, especially if you manage to blind the enemy ranged units. It is also worth selecting Summon Siege Engine, because you are going to do with additional machines, during a siege, especially in the case in which you forgot to recruit your own ones. Dampening Field is an idea l skill against leaders that use many spells in battle, e.g. the abovementioned warlocks. Destabilized Mana Core can help you in the face of the enemy's advantage in numbers however, this should not be your goal that you strive for, at the cost of the other skills that often are more useful.
Name
Cost
Required level
Effect
Armor Piercing
2
1
The leader deals additional 2 damage to the units with the Armored attribute.
Break Control
2
1
Dispels all of the effects of the Mind Control type (e.g. . taking control over an unit, by the opponent) on an allied unit.
Dirty Half Dozen
4
1
All of the units in the leader's army receive Devout Slayer, which increases damage dealt to Devout, units by 3.
Infiltration Party
4
1
All of the units of the leader's army receive the ability to climb walls (Wall Climbing).
Blind
5
1
Only for the Leaders. Attempts to blind an unit. In the case of success, such an unit can only attack enemy units within the radius of one hex In the case of failure, the unit loses 50% of its movement points.
Panic Attack
5
1
Only for the Leaders. In the case of success, the enemy unit attempts to flee from the battlefield, for 2 turns. Otherwise, the unit loses 50% of its movement points.
Quick Dash
5
1
Only for the Leaders. regenerates 10 HP and 50% movement points of the selected allied unit.
Rain of Poison Blades
5
1
Only for the Leaders. Deals 12 physical damage and 8 Poison damage to the selected unit. Damage is higher (by 2) against the units with the Armored attribute.
Projectile Resistance
2
3
The leader receives extra 2 points of defense against ranged attacks.
Stunning Touch
2
3
Attempts to stun the enemy unit. After the successive attempt, it cannot then (for the duration of 2 turns) perform any move.
First Strike
3
3
The leader deals damage as the first (counters even before the enemy's attack proper), unless the enemy unit also has this skill.
Stronger than Steel
4
3
All of the units in the leader's army receive the Armor Piercing skill, thanks to which they deal more damage (by 2) against the Armored units.
Counterpoison
4
3
All of the units in the leader's army receive a boost resistance against poison damage (by 20%).
Sprint
2
5
The leader's movement points are increased by 12, for the duration of this skill.
Taunt
3
5
In case of a success, the enemy unit does not listen to orders and attacks, with melee attack, the nearest unit, for 3 rounds.
Assassin's Strike
4
5
Performs a strong attack against the enemy. This attack cannot be countered.
Poison Knowledge
4
5
All of the units in the leader's army receive a boost to poison attack by 1 point.
Moving Target
5
5
Only for the Leaders. The selected unit receives +8 defense points for the next 2 turns.
Stealth Commander
5
5
All of the units in the leader's army receive the Forest Concealment, skill, which makes it possible to hide in forest.
Cunning Escape
5
5
Only for the Leader. Allows you to retire a selected allied unit from battle. It can be used only by the attacking party.
Pass Wall
3
7
The leader can climb over walls, without any problems.
Weapon Finesse
4
7
All of the units in the leader's army receive +1 to melee attack.
Sadism
5
7
Only for the Leader. Boosts morale of the allied units, each time an enemy unit is killed.
Shadow Form
5
7
Only for the Leader. The selected unit receives defense against physical assault (40%) and the Pass Wall skill, until the end of the battle.
Inflict Severely Poisoned
5
7
Attacks can poison an enemy unit. It then suffers poison damage for 2 turns.
Charm
5
9
Attempts to take the control over an enemy unit. In the case of success, that unit changes sides in the battle.
Inflict Crippling Wounds
5
9
Attacks may maim the enemy unit. It then loses 8 movement points for 2 turns.
Smoke Screen
5
9
Only for the Leader. All of the units on the battlefield receive increased defense and resistance to magic (+4) against ranged attacks.
Urban Stealth Commander
6
9
All of the units in the leader's army remain hidden when they are on the fields with structures erected on them (Urban Concealment).
Mass Battlefield Panic
5
11
Only for the Leader. Attempts to cause panic among all of the enemy units, in the battlefield. The ones that resist the attack, lose half of their movement points for the duration of one round.
Assassin of Kings
6
11
The leader gains the Hero Slayer skill, which increases its attacks against the other leaders (+3).
At the very beginning, you are going to need the Dirty Half Dozen and Infiltration Party skills, where the former is especially effective against the units of the Theocrat, and the latter during all sieges. On the next levels, you are going to find Stronger than Steel and Poison Knowledge, useful. These are skills that reinforce the attacks of the units in the leader's army. Also, you will find the Stealth Commander very useful. It allows the units, commanded by the leader, to hide in forest. Also Weapon Finesse is a good influence on all of the units commanded by the leader, and the skill that acts on the leader himself is Charm, which can be useful while taking control over the enemy units. For units to hide, you are going to need the Urban Stealth Commander, and finally the Assassin of Kings, thanks to which the leader deals increased damage to the other leaders. For the non-leader units, it is going to be necessary to ensure appropriate number of Casting Points, so as to enable them to cast more spells. Definitely, what you will find useful here is the Quick Dash, which allows the selected unit to throw itself into the heat of the battle. Rain of Poison Blades is going to be great for dealing damage. Due to its effect, the Smoke Screen is ideal against the enemies that have advantage in the numbers of archers and often while seizing the enemy cities. Finally, it is a must that you get the Mass Battlefield Panic, which strikes fear into the hearts of the units of the enemy army.
Name
Cost
Required level
Effect
Steal Enchantment
2
1
Steals the spells of the selected unit and makes them available for the leader to use.
Dispel Magic
2
1
Lifts all of the negative, magical effect on the selected unit.
Magic Affinity
4
1
All of the leader's units receive increased defense against magic(Resistance +1).
Charged Army
4
1
Reinforces the magical attack (Shock +1) of all the units in the leader's army.
Magic Fist
5
1
Only for the Leader. A spell that deals 21 damage (physical) to the selected enemy unit.
Star Blades
5
1
Only for the Leader. The selected allied unit receives the Inflict Shocking attribute and +1 damage from this type of attack (Shock) until the end of the battle. You will be able to shock the enemy with this attack, which results in losing of 8 movement points for the duration of 2 turns.
Harmonizing Energy
5
1
Only for the Leader. Restores 30 HP to the selected allied unit. very useful in slightly dire situation.
Sphere of Protection
5
1
Only for the Leader. Bolster defense against physical attacks (+80% Physical Protection) for the duration of 2 turns.
Blight Protection
2
3
Bolsters the leader's defense against poisons (+20% Blight Protection).
Fire Protection
2
3
Bolsters the leader's defense against fire (+20% Fire Protection).
Dragon Slayer Party
4
3
All of the units of the leader's army receive the Dragon Slayer attribute, which reinforces their attacks against the Dragon units (+3 damage).
Spirit Shield
4
3
All of the units in the leader's army receive the increased defense against the Spirit type of attacks (20% Spirit Protection).
Strong Will
4
5
The leader receives complete resistance to Spirit type of attacks and becomes resistant to Mind Control.
Arcane Binding
5
5
Only for the Leader. Allows you to capture control over the enemy magical unit (Magical Origin) or a unit that has been summoned into the battlefield earlier. In the case of failure, it loses 50% of movement points (for the duration of one turn).
Chain Lighting
5
5
Only for the Leader. A spell that deals 18 shock damage to the selected unit. It can pass onto 4 other units, if they are deployed within appropriate distance (3 hexes). Ideal for casting at the very beginning, when the enemy units are, usually, close to each other.
Phase
4
7
The leader can teleport to any field, during the battle.
Inflict Stun
5
7
Attacks by the leader may stun the enemy unit for the duration of 1 turn. It cannot then perform any actions.
Cosmic Spray
5
7
Only for the Leader. The selected enemy unit, and other ones, located within one field, receive 4 damage of each type (up to 24, therefore).
Static Sphere
5
7
Only for the Leader. The allied unit receives a shield, which causes the opponent to receive shock damage, each time it attacks with melee attack
Master Illusionist
15
7
All of the units of the leader's army become invisible on the strategic map. In spite of the steep price, this is an immensely useful upgrade.
Double Gravity
5
9
Only for the Leader. Strips all the units of the Flying type, of their ability to fly, which makes them incapable of flying aver the walls.
Inflict Spirit Breaking
5
9
Attacks from the leader may depress the enemy unit, for the duration of 2 turns. The selected unit, in case of success, loses 2 defense and resistance points, to magical attacks and decreases physical damage dealt by those units. (also by 2).
Mass Stasis
5
9
Only for the Leader. Attempts to immobilize all of the enemy units in the battlefield. In case of failure, they lose 25% of movement points, for one turn.
Projectile Reflection
5
9
50% of damage dealt to the leader returns to the unit that inflicted that damage.
Mend Magical Being
5
11
Restores 20 HP to the selected magical unit.
Static Electricity
5
11
Only for the Leader. All of the units in the leader's army receive Static Shield, and all enemy units suffer from 20% of Shock Weakness.
Chaos Rift
5
13
Only for the Leader. Each turn in the battle, an unit is summoned, which sides with the caster. Additionally, 20 points of shock damage is dealt to 2-3 random enemy units (also each round).
I recommend that, as a beginning set, you choose Steal Enchantment, Dispel Magic, Magic Affinity and Charged Army. These skills will slightly improve on the statistics of the units commanded by the leader and himself, he will receive the ability to steal spells from the other units, which are stronger, as for now, and to dispel the negative magical effects. Then, you can choose the abilities increasing resistance to a given type of spell, depending on who you are going to fight against ( e.g. resistance to fire attacks will be useful for fights against the Draconian race). Also, you are going to find the healing of magical beings, useful (Mend Magical Being) and Projectile Resistance. Thanks to this, some of the damage dealt to the leader will be reflected. I recommend Master Illusionist in the case in which you have abundance of points- this upgrade is great and very useful, although costly. A real Sorcerer also needs to ensure the increased pool of Casting Points, which will allow him to cast powerful spells. First of all, you are going to need Magic Fist, which deals damage to the selected enemy unit, as well as Harmonizing Energy, which is a spell that restores as much as 30 HP. Another good spell is the Sphere of Protection, which is useful, if you are surrounded by the enemy that attacks at short range. At the next levels, you are going to need Chain Lighting, due to the considerable damage that can be dealt to multiple enemies, in one go. Also, to deal AoE damage, you are going to need Cosmic Spray. Finally, and this is compulsory, the Chaos Rift - not only does it deal damage to enemy units, but also summons reinforcements for the player, in the form of various units.
Name
Cost
Required level
Effect
Healing
3
1
Restores 20 HP to the selected unit.
Aura of Resistance
4
1
All of the leader's units receive increased defense against magic (Resistance +1).
Divine Protection
5
1
Only for the Leader. The selected allied unit receives the increased resistance to magic (+6 Resistance) for the duration of one turn in battle.
Healing Aura
5
1
All of the units in the leader's army regenerate extra 6 HP, per turn, which is especially useful while at war with another player, during incessant battles and skirmishes.
Instant Wrath
5
1
Only for the Leader. Deals 50% of all the damage, dealt to the unit, to the unit that dealt it.
Slayer's Doubt
5
1
Only for the Leader. decreases the number of movement points of the selected unit, by 18. In the case of a failure, it decreases by half, but only for the duration of one turn.
Smite
5
1
Only for the Leader. Deals 30 damage (Spirit) to the selected unit In the case of a failure, it deals 15 damage.
Touch of Faith
2
3
The selected unit receives increased resistance to magic (Resistance +3).
Turn Undead
2
3
Attempts to start panic in the selected enemy unit (Undead)In the case of a failure, . In the case of a failure, the unit attempts to flee the battlefield for two rounds. .
Chaplain
4
3
All of the units in the leader's army receive extra 200 contentment points.
Sacred Arms
4
3
All of the units in the leader's army receive increased attack (+1 Spirit).
Monster Slayer
2
5
The leader deals additional damage (+3) to the Monster type of units.
Convert
5
5
Attempts to capture control over the selected unit.
Purifying Burst
5
5
Only for the Leader. Dispels all of the magical effects from the units in the battlefield.
Absorb Pain
3
7
Associates the leader with the selected unit. All of the damage dealt to that unit is "directed" to the leader.
Blessing of Health
5
7
Only for the Leader. All of the allied units (with the exception of machines, and Undead) receive extra 10 HP until the end of the battle.
Control Undead
5
7
Attempts to capture control over an enemy Undead unit. In the case of a failure, the unit receives 8 damage(Spirit).
Holy Champions
5
7
All of the units in the leader's army receive the Holy Champion, thanks to which they deal more damage (+5, Fire) against the Undead and Devout units.
Rebirth
5
7
Only for the Leader. The selected unit receives the Resurgence. If it falls in the battlefield, it will respawn, towards the end, with 1/3 of health points. Works only in the case of winning the battle.
Power of the Word
5
9
Only for the Leader. Attempts to immobilize enemy units, which cannot move, in case of success, for the next 2 turns (however, they can perform the rest of the actions, e.g. attack at a distance).
Vow of Poverty
6
9
The maintenance of all of the units in the leader's army is lower.
Holy War
5
11
Only for the Leader. All of the units of the Devout type, in the battlefield, receive extra reinforcement to damage (+10, Spirit) until the end of the battle.
Divine Justicars
10
11
All of the units in the leader's army receive Resurgence. The units that fell in the battle respawn towards the end with 33% of the initial amount of health points; the condition is that you win the battle.
While playing as the Theocrat you should first select Healing and Healing Aura. As soon as you reach level three, make sure that you have selected Chaplain, which boosts the morale of your armies. For the leader himself, you might find Convert useful.
At the higher levels, it is a good idea to choose Holy Champions, which affects the entire army and increases damage dealt to certain types of units (Undead and Devout).Finally, it is a good idea to invest in Vow of Poverty, a skill that decreases the cost of maintaining the units, as well as Divine Justicars, which will allow you to respawn the units fallen in battle, after you win. Leaders other than faction leaders need to ensure the appropriate number of Casting Points and to choose useful spells. definitely, it is a good idea to obtain Smite, which will allow you to attack enemies at long range, with this spell. During battles, you also are going to need Purifying Burst, especially while fighting enemy leaders who cast a lot of spells. Later on, you will have to obtain Blessing of Health, thanks to which all of the units receive additional health points. At the higher levels, you will also need the Power of the Word and Holy War. As a matter of fact, it is not worth investing in Rebirth, it is better to wait until you gain 4 more levels and get Divine Justicars, which equips all of the units with the Resurgence attribute.
Name
Cost
Required level
Effect
Overwhelm
2
1
The leader deals more damage (+3) to the Pikemen units and the ones with the Shielded attribute.
Defense Command
4
1
All of the units in the leader's army receive a bonus to defense (+1 Defense).
Blood Honor
4
1
All of the units in the leader's army receive the Warrior's Honor skill. When an unit with this skill dies in battle, all of the other units receive higher morale (+100) until the end of the battle.
Last Stand
5
1
Only for the Leader. The selected allied unit receives the Polearm, First Strike skills and increased defense (+2 Defense) until the end of the battle.
Lion's Courage
5
1
Only for the Leader. The selected allied unit receives the Strong Will, Overwhelm skills and increased physical damage (+3).
Berserk
5
1
Only for the Leader. Attempts to enrage the enemy, which results in its uncontrollability. Such a unit attacks the nearest allied units. In the case of a failure, it loses 1 of movement points for the duration of one turn.
Shout of Intimidation
5
1
Only for the Leader. An attempt to intimidate the enemy unit. If it succeeds, the unit attempts to flee the battlefield, for the duration of 2 rounds. Otherwise, it loses a half of the movement points, in the next turn.
Giant Slayer
2
3
The leader deals more damage (+3) to Giants.
Martial Arts
2
3
The leader receives increased defense (+5 Defense) against counterattacks and attacks of opportunity (these are the attacks, by the enemy units, against an unit that crosses the hex, in the direction of which it is facing.).
Melee Command
4
3
All of the units in the leader's army receive a bonus do attack (+1 melee attack).
Ranged Command
4
3
All of the units in the leader's army receive a bonus do attack (+1 to ranged attack).
Dragon Slayer
2
5
The leader deals more damage (+3) to Dragons.
Charge Command
5
5
All of the units in the leader's army receive Charge.
Field Medic
5
5
All of the units in the leader's army regenerate extra 6 HP per turn.
Phoenix Warrior
5
5
Only for the Leader. The selected allied unit respawns after it dies, with 33% of the initial number of health points. The condition for this to work is that you win the battle.
Fleet Command
3
7
All of the units in the leader's army receive Mariner (no penalties while boarding a ship and while moving over water fields).
Killing Spree
5
7
Only for the Leader. The selected unit receives an additional action point and can move 1 hex more, after it kills an enemy unit.
Steadfast Ward
5
7
Only for the Leader. The selected allied unit becomes, virtually, immortal, for the duration of 3 turns (its HP points cannot drop then, below 1).
Blood Brothers
10
7
All of the units in the leader's army receive the Strong Will (invulnerability to Spirit attacks and Mind Control).
Bloodbath
5
9
Only for the Leader. All of the allied units deal more physical damage (+5).
Tireless
6
9
The leader spends no action points on counters and attacks of opportunity.
Relentless Army
5
11
Only for the Leader. All of the units in the leader's army receive the Tireless, which means that they lose no action points for counters and attacks of opportunity.
Toughness
6
11
All of the units in the leader's army receive additional resistance to physical attacks (+20% Physical Protection).
After you increase the amount of HP and attack, or defense (depending on your preferences, it is a good idea to spend some of the starting points to improve on the basic statistics) it is a good idea to invest in Defense Command, which will improve on the defense of all the units in the leader's army. At the next level, what is going to be useful, is increasing the value of attack of the units that accompany the leader (Melee and Ranged Command) as well as Field Medic, which will allow you to regenerate HP faster. Also, you are going to need the Blood Brothers, thanks to which your units will be resistant to Mind Control. When it comes to the leader himself, what is going to be useful is Tireless, and for the army commanded by him - Toughness. As a standard practice, leaders should, gradually, improve on the available Casting Points, which will allow them to cast spells. From among the ones available at the beginning, what is going to be useful is the Last Stand, which improves on the statistics of the selected unit. Later on, it is a good idea to select the Phoenix Warrior, which will allow the selected unit to respawn, after the battle is won. Steadfast Ward is a must - it will come in handy, especially for the units of high HP value and strong attack value, which should be deployed among enemies, where it will be able to wreak havoc freely. Finally, you are going to need Bloodbath, which increases, considerably, the attack value of the available units, as well as Relentless Army, which will allow you to save up on movement points, while performing counters and attacks of opportunity.
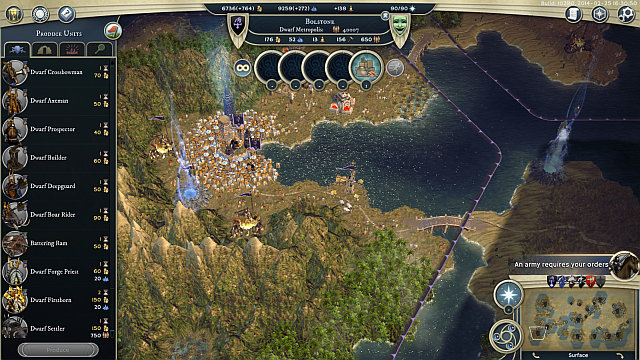 A well-developed metropolis allows starting, nearly, immediately, production of units.
There are 6 races in the game and they differ from each other, mainly in terms of the available units, which they can manufacture. Each race has its upsides and downsides, as well as favored and disfavored terrain type (setting up a city on the favored terrain increases contentment) and race-dependent skills, which can be used by all units. race selection depends on the selection of the main leader - the first city and the units will be of the same race as the leader. Race selection does not exclude ownership of cities and unit of the other races however, it is necessary to capture a city inhabited by another race.
As it has been already mentioned, each race can manufacture different units. They differ, from each other, in terms of type (e.g. cavalry, archers), skills and statistics. There also are units that you can summon into the battlefield and fantastical units - beasts fairies and dragons. Additionally, you can recruit special units, different for each class. It is best to group several units into an army - of up to six units, including the leader. Single armies are easy to defeat and that is why they should be used, mainly, for ma exploration, so as the loss of these units is not too painful. Therefore, it is a good idea to use the cheaper ones, for this purpose, or the less expensive type of cavalry, which has more movement points than the other units.
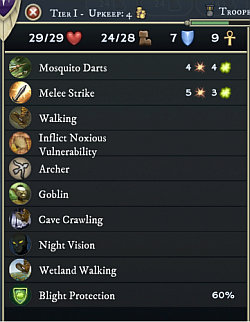
Various units have various skills, which are very important because, it is not only statistics, such as the number of health points, or attack strength that determine the combat value of a given unit. Often, it is skills that are more important than the basic attributes. To find out which unit has what skills, you need to click the miniature of that unit, with the left mouse button. This will open a list of all the skills available for that unit where, apart from the basic ones, such as attack and walking, you will learn about various defense bonuses and weaknesses. Therefore, it is worth knowing about the strong points of the enemy units and of the ones that you have.
An important element of each army is its morale, i.e. the factor of the general contentment and belligerence. The starting morale of the units is dependent on the contentment of the city, where they have been manufactured. Morale is influenced by the events in the game, e.g. a lost battle or lack of gold for maintenance. The low level may result in desertion and dealing damage lower than usually. The high factor, on the other hand, increases the chances of dealing critical damage, higher than usually.
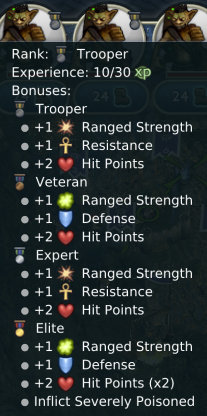
During the game, each unit gains experience. As it grows, the units rise in ranks, which affects, on the other hand, that unit's attributes. You gain experience, of course, by dealing damage and killing the enemy units, using skills or casting spells. The more experience you have, the higher the rank, which is symbolized by the small medal in the upper-right corner of the icon that represents the unit. At the last experience level, the unit additionally receives a skill, e.g. Inflict Severely Poisoned in the case of the Goblin Swarm Darter. The initial experience level can be raised by erecting special buildings in the cities. Heroes and leaders, along with the rising level, can distribute their upgrade points to gain new skills, spells or to improve on their attributes.
Damage that the units deal has been divided into physical and non-physical. You can defend against physical damage with the Defense attribute. You receive such damage, mainly from melee attacks and archer fire. Non-physical damage can be decreased by means of resistance. Non-physical damage is dealt with attacks of the Fire, Frost, Blight, Shock and Spirit types. Therefore, it is worth knowing if a unit is more vulnerable to magical or to physical attack and, not waste archer fire on a unit with high value of defense, but rather move them over the battlefield, and attack a different unit, where they can deal more damage. The conclusion is, therefore, simple - it is better to have in your army, units that deal both types of damage, to avoid problems with defeating a unit that is highly resistant to given type of attack.
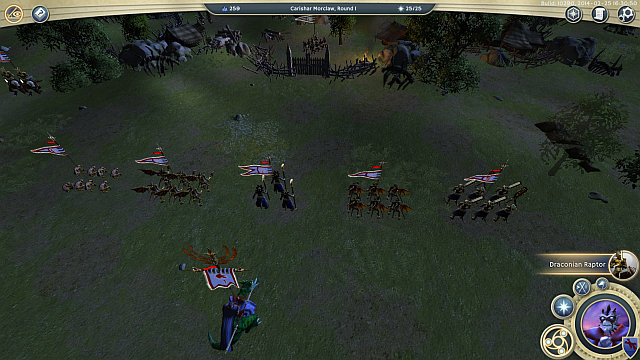 A diversified army is half the success.
1. Make sure that your army is diversified. There is no point in leading, e.g. archers only into the battle. Various types of units have various bonuses against the other units, e.g. the Pikemen units against Cavalry. Aldo, types of attacks are different - some of the units are more resistant, e.g. to physical attacks, and more vulnerable to magical ones. A diverse army will ensure you with the possibility of choosing an appropriate attack a given type of unit, which results in dealing maximum damage.
2. Recruitment at the cities is not the only way to expand your army. Various units can be summoned (depending on the class that you chose), or recruit them in Dwellings. Especially the second option can be very useful - often, it is the expensive, but very good units that will win your battle.
3. Try not to lose your units in a silly way, during battles. The units that gain experience become stronger and stronger, when they receive the highest rank (Elite). The best way to gain experience is by attacking armies that are weaker than your own. Thanks to this, you can be nearly sure that you will win the battle, without sustaining losses.
4. Always try to have, in your army, at least one unit with the True Sight skill, thanks to which you will be able to see the hidden enemy units.
5. Remember about the siege engines, such as the Trebuchet or battering rams. They will help you bring down the gates quickly, during sieges. You should also realize that the abovementioned engines are vulnerable to physical damage (fire), which you should use to your advantage.
6. Not all of the units can be recruited from the very beginning. Most of them require building appropriate structures in the city, which is why, depending on the adopted tactic, try to strive for being able to recruit the best (and the most expensive) units, or flood the enemy with a numerous, cheap but weak in general, army.
7. Experiment with class selection. Description of the units is nothing, in comparison with how they do in battle and the subjective feel. You need to find out which class suits you best. Each race is good for a victorious game and you can play an enjoyable game with each of them.
Elves are exceptionally fragile, they live in forests in harmony with the nature and away from the nosy naggers. This is why, the main advantage of all elven units is the Forestry skill, which reduces the number of movement points, necessary to cross the Dense vegetation terrain, by 2. Additionally, all of the units are vulnerable to poison (20% Blight Weakness). The areas that elves like to dwell in is dense forests (Dense vegetation).
Name
Recruitment cost (gold)
Health points
Movement points
Defense
Resistance to magic
Builder
60
60
28
8
9
Settler
150
60
28
8
9
Initiate
50
36
28
8
9
Longbowman
75
36
28
8
9
Swordsman
50
36
28
10
9
Union Guard
50
36
28
10
9
Unicorn Rider
90
50
36
11
11
Storm Sister
60 (+ 20 mana)
36
28
9
12
Gryphon Rider
140 (+ 30 mana)
65
30
12
12
The Initiate units, and their better counterparts, Storm Sister, stand out thanks to a good attack Shock Bolts and protection against attacks of the same type (Shock Protection). The "Sisters" also have the skill of Stunning Touch, which can immobilize the opponent for 2 turns, which makes them unable to move, attack and counter. Also, Longbowmen, whose ranged attacks are very good, are attention-worthy. Also, the Phase skill, that the Unicorn Riders have, is noteworthy. It allows you to teleport onto any hex, within the unit's reach, in the battlefield. The main advantage of the best, and the most expensive units - Gryphon Rider - are the First Strike (the units counters as the first one, still before the attack proper) and Flying, which makes the rider a bit more mobile. The elven units can also be characterized by their good resistance to physical attacks.
Humans are a mixture of all races, and they also have the skills of all, which makes them mediocre, which does not mean they are weak. The main attribute of all human units is the Mariner, thanks to which the armies do not suffer penalties (-4 to physical attack) while boarding boats. Humans are best on Fertile plains.
Name
Recruitment cost (gold)
Health points
Movement points
Defense
Resistance to magic
Builder
60
60
28
8
8
Settler
150
60
28
8
8
Archer
70
32
28
9
8
Civic Guard
40
35
28
9
8
Halberdier
50
40
28
10
8
Longswordsman
50
40
28
10
8
Cavalry
90
50
36
12
9
Priest
60 (+ 20 mana)
36
28
9
11
Knight
160 (+ 10 mana)
70
36
13
11
Human units cannot be characterized by any outstanding skills however, they are good for each type of tasks. What is noteworthy, is the Priest unit, whose Bestow Iron Heart skills allows it to regenerate 15 HP and reinforce, by 1 point, both Defense and Resistance. The best unit is the Knight whose defense is very good (reinforced, additionally by 2 points, during non-flanking attacks- the Shield skill) and the physical attack (16). Additionally, both of the abovementioned units have the Devout skill, which deals additional 3 points of damage with the Heretic units. Your army is going to consist of the weaker units, which is why you should ensure yourself with each type of units. What is going to be useful here are the archers and the cheaper Cavalry as well as Longswordsman units
Orcs are the race that loves robbery and destroying the others. They rely mainly on the weapons and not magic, which makes them excellent warriors. Their main feature, common for all the units, is the Night Vision, which increases the range of vision, in the undergrounds, by 2 fields. Orc cities thrive in the Barrens.
Name
Recruitment cost (gold)
Health points
Movement points
Defense
Resistance to magic
Builder
60
65
28
8
8
Settler
150
65
28
8
8
Greatsword
50
45
28
10
8
Impaler
50
45
28
10
8
Razorbow
65
37
28
8
8
Spearman
40
38
28
8
8
Black Knight
110
55
36
12
8
Priest
60 (+ 20 mana)
41
28
9
11
Shock Trooper
150 (+ 20 mana)
70
32
13
9
While assembling the army of orcs, it is a good idea to ensure that you have several Spearman units, which can deal both melee damage and ranged damage. Also, they have the Sprint skill, which increases the range of their movement by 12 points. The Priest units, on the other hand, apart from physical damage, also deal Poison damage. Their special skill is Throw Curse, which lowers both types of defense, of the elected unit, by 2 points. The best unit, Shock Trooper, has a powerful melee attack and several interesting skills, which make that unit a real killing machine. What is meant here is Inflict Bleeding Wounds (while attacking, it can inflict bleeding wounds, which results in dealing 4 points of physical damage per turn), Tireless (counterattack costs no action points) and Overwhelm (additional 3 damage to Pikemen and the units with Shield). The main downside of this unit is its low resistance against magical attack, just like in the case of all orc units.
Goblins are small creatures that love destruction. They dwell mainly in caves, which results in the Night Vision (the range of vision undergrounds, increased by +2) and Cave Crawling (the cost of moving underground reduced by 2 Movement points per each move) skills. The additional goblin skill is the Wetland Walking, which reduces the cost of walking over Wetlands, in movement points, by 2.
The most prominent feature of these creatures is their resistance to poison. (40% Blight Protection). Goblins, of course, favor Wetlands.
Name
Recruitment cost (gold)
Health points
Movement points
Defense
Resistance to magic
Builder
60
55
28
8
8
Settler
150
55
28
8
8
Marauder
50
35
28
9
8
Skewer
50
35
28
9
8
Swarm Darter
70
27
28
7
8
Untouchable
50
30
28
8
8
Blight Doctor
60 (+ 20 mana)
31
28
9
11
Warg Rider
90
45
36
11
10
Big Beetle
160 (+ 20 mana)
65
36
12
11
The main downside of the goblin units is their low amount of health points. They make up for that, however, with good skills of the individual units. The Marauder units are invisible in the underground, thanks to the Cave Concealment skill, where the Untouchable unit is good wit non-physical attacks (Poison) and the Inflict Noxious Vulnerability attribute (the unit loses 2 Resistance points). The archers (Swarm Darter), are highly vulnerable to attack, but they can inflict physical damage and Poison type of damage. The greatest upside of the best of the goblin units (Big Beetle) is absolute resistance to poisons and the ability to attack walls (Wall Crushing) and to cross the undergrounds into the areas inaccessible for the other units. (Tunelling).
Dwarves are creatures that dwell mostly, in mountains, they love crafting high-class items and structures. Therefore it is no surprise that the main attribute that common for all dwarves is Mountaineering (reduces the number of movement, needed in mountains, by 4) and Cave Crawling (the cost, in movement points, in the underground, is reduced by 2). Additionally, all of the units have the Night Vision attribute, which increases their range of vision, in the undergrounds, by 2 fields. The final of the advantages is the increased resistance to poison (+20% Blight Protection). The areas favored by dwarves are Mountains and Coastal Mountains.
Name
Recruitment cost (gold)
Health points
Movement points
Defense
Resistance to magic
Builder
60
60
28
9
9
Settler
150
60
28
9
9
Axeman
50
40
28
11
9
Crossbowman
70
32
28
9
9
Deepguard
50
40
28
11
9
Prospector
40
33
28
9
9
Forge Priest
60 (+ 20 mana)
36
28
12
12
Boar Rider
90
50
36
13
10
Firstborn
150 (+ 20 mana)
70
28
14
12
Dwarf have a great Defense. While assembling your army, make sure that you have Axeman and Crossbowmen. The Forge Priest type of units have an excellent fire attack (Fire Bolts), and they can, additionally, move over lava (Lava Walking). An absolute necessity is striving for the recruitment of the Firstborn units. They have an excellent attack and defense, and additionally, they have very good skills - Dragon Slayer and Giant Slayer, which allow them to deal additional damage to Dragons and Giants. The other attributes that increase the defense are Fire Protection (100%), Spirit Protection (100%) and Blight Protection (60%). Combination of all these makes Firstborns and excellent unit.
This race is a mix between humans and ancient dragons. This mixture results in units with decreased vulnerability to fire (20% Fire Protection), but vulnerable to frost (20% Frost Weakness). The greatest advantage of these units is the ability to regenerate (Fast Healing - the units generate additional 6 HP per turn). The types of terrain, favored by Draconians, are Barrens and Lava Pool
Name
Recruitment cost (gold)
Health points
Movement points
Defense
Resistance to magic
Builder
60
60
28
8
8
Settler
150
60
28
8
8
Charger
50
40
28
9
8
Crusher
50
40
28
9
8
Flamer
70
32
28
7
8
Hatchling
45
30
28
9
8
Elder
60 (+ 20 mana)
36
28
9
11
Raptor
90
50
36
11
9
Flyer
150 (+ 20 mana)
64
30
12
11
Apart from their excellent race attributes, out of which Fast Healing is definitely the most useful the Draconian units do not stand out for anything exceptional. Some of them have absolute resistance to fire (Elder, Flamer), where the others have slightly lower resistance, but still good (60 %). The Flamer units also have the Fire Bomb skill, which is especially useful for attacking units clustered together, because it deals AoE damage. The main advantage of the Flyer units is Flying and Overwhelm (+3 to physical damage against Pikemen and the ones with Shield ability). While assembling your army, you should make sure that the ratio between the units, which deal physical damage, and the ones that deal fire damage, is well-balanced.
Leaders and faction leaders, apart from the race, to which they belong, also belong to a class. It influences, mainly, the availability of research paths, that improve on the overall condition of the Empire and unlock spells that you can cast. These skills are class-exclusive, each of the classes has a different set. Additionally, depending on the class that you choose, you can access special units - again, they depend on the class. Therefore, the class-selection has an immense effect on the game - different spells, upgrades for the Empire, different units and also different skills available for the leaders. There are 6 separate classes in the game:
Arch Druid - his domain are the forces of nature.
Dreadnought - Provides better war machines.
Rogue - skillful assassins.
Sorcerer - powerful warlocks.
Theocrat - specialize in defensive magic and blessings.
Warlord - the class for the players who favor constant war.
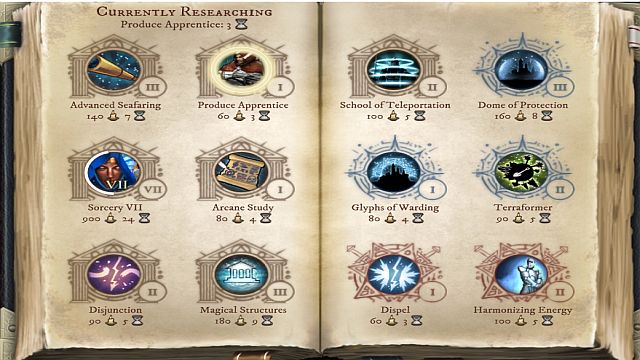 There is still much to discover.
As the faction leader, you can conduct research, which provides you with bonuses, while expanding your Empire, and also allow you to discover many spells. The available research branches, of course, depend on your class and specialty (more about that in the chapter entitled Specialties). The research directions are randomly selected from the pool of the available ones, although the most powerful ones become available only after you have discovered the most basic ones (the research branches are divided into tiers, which reflects their complexity - the higher the tier the more research points you need to spend and the more turns you will have to wait). Remember that you can research into new areas only when your leader is alive - in the case in which he is defeated in battle , the research will be halted until he respawns in the Throne City. The number of turns necessary for the research into an upgrade depends on the income in your Empire (research points): the number that you need is divided by the number of points that you receive per turn. The result shows how much time it is going to take to research into the specific item. The progress in research is saved. This means that, if you need to change the direction of research, out of a sudden, after you return to the previous research, it will start at the point at which it was stopped.
What can you research into:
- Empire Upgrades - skills, that affect your Empire passively, e.g. Basic Seafaring, which allows the units, which do not have this skill, to cross water fields.
- Global Spells - spells that can be cast in the strategic map. They can e.g. modify the area or dissipate the negative effects active in the allied cities. Remember that, apart from the cost of casting a spell, you also need some mana, each turn.
- Combat Spells - spells that you can use in battle, on the battle map. Some of them affect the entire map, whereas the other ones are buffs for the allied units, and still the other ones deal damage to enemy units.
Each class can research, apart from spells and upgrades, special units. They are unique for each class, and they are of the same race as the city in which they were manufactured. The differences between them are minor (e.g. lower number of HP in the Goblin Hunter than in the case of the Human Hunter). Also, they receive race skills. You can manufacture units thanks to special buildings, which can be erected in the city - the name is different for each race but, the results are the same. You can own only one such type of building. Therefore, it is impossible to recruit, during the same scenario, units that belong to class different than the class of the leader.
Druids live in harmony with nature. Their units allow for good protection of their own territories, research areas mainly revolve around receiving of bonuses and buffing own units. They can also summon the more and more powerful beasts - they are the masters of nature, after all, and it is nature that often offers help to them.
The leaders receive the following bonuses:
+ 5 HP
+ 1 Resistance
- increased Vision range
Name
Recruitment cost (gold)
Health points
Movement points
Defense
Resistance to magic
Hunter
75
30-40
32
9-10
8-10
Shaman
130 (+ 30 mana)
55-65
32
11-12
11-13
The main property of Hunters is their ability to cross various types of terrain, while sustaining a lower cost in movement points (the Forestry, Mountaineering, Wetland Walking, Arctic Walking and Swimming skills. Also, they can hide in forest (Forest Concealment). To a large extent, this is it, when it comes to their skills - they are regular archers, after all.
What is noteworthy is their ability to win enemy animals over to their side (Befriend Animal). Shamans also have the ability to cross all types of terrain without penalties (Free Movement). Additionally, they can hide in, as many as, 3 types of terrain- Forest, Mountain and Wetland. They can also attempt controlling enemy animals and try to immobilize the enemies (Entangling Touch).
Name
Tier
Cost (research points)
Effect
Produce Hunter
1
60
Allows you to manufacture Hunter in the cities with the Arch Druid's Dolmen upgrade.
Wildlife Refuge
1
80
The summoned creatures have lower mana cost (--25%), and the units of both Animal and Monster types, lower gold cost (also - 25%).
Hunter's Finesse
2
100
The Archer type of units receive Inflict Bleeding Wounds, which allows them to inflict bleeding wounds (additional damage).
Animistic Knowledge
3
160
Treasure sites within the Domain generate additional income - +5 research points per turn.
Beast Mastery
3
140
All of the leader's units (Animal and Monster type) receive Mind Control Immunity and increased resistance to magical attacks (+2 Resistance).
Produce Shaman
3
140
Allows you to manufacture Shaman in the cities with the Arch Druid's Dolmen upgrade.
Long Strider
4
280
The units of the Archer and Support types receive additional 8 movement points.
Favored Enemy Dragon
5
300
Ranged units (Archer and Support) receive a skill that enables them to deal additional damage (+3) to Dragon type of units. It is only possible to choose one Favored Enemy research (...)!
Favored Enemy Giant
5
300
Ranged units (Archer and Support) receive the skill that allows them to deal additional damage (+3) to Giant type of units. It is It is only possible to choose one Favored Enemy research (...)!
Favored Enemy Monster
5
300
Ranged units (Archer and Support) receive the skill that allows them to deal additional damage (+3) to Monster type of units. It is It is only possible to choose one Favored Enemy research (...)!
Additionally, Druidry I-VII, increases the number of the leader's Casting Points. The cost is 60/100/160/260/400/600/900 research points.
Name
Tier
Cost (research points)
Effect
One with the Elements
1
80
All of the units receive an additional bonus (+50%) on the favored type of terrain, and also lower penalties (-50%) if they are on a disfavored terrain (the bonus concerns contentment).
Summon Wild Animal
1
60
Allots a random Animal unit.
Fertile Domain
2
100
Increases the growth of population, of the selected city, by 200.
Summon Eldritch Animal
2
100
Summons a random Animal unit, which is better than the Summon Wild Animal spell would allow.
Insect Plague
2
120
The selected city suffers a penalty (-25% production points).
Sunburst
3
160
Deals 15 Fire damage to the selected enemy army .
Poison Domain
4
280
The enemy units, in the domain of the city, on which a spell was casted, suffer damage of 8 (Poison) in each turn. Additionally, they lose 2 defense and resistance to magic points.
Summon Gargantuan Animal
4
220
Summons an Animal unit, even more powerful than the previous spells would have allowed.
Wild Growth
4
260
Changes the terrain (hex) type to Dense vegetation.
Thorn Hedge Walls
5
500
The enemy units that move, during the battle, in a given city, suffer 8 damage if they cross the boundary around the city. Additionally, they can be entangled (they will be incapable of performing any action for the duration of 2 turns).
Nature's Eyes
5
500
Shows all of the hidden and invisible units, whenever they enter the player's dominion.
Summon Horned God
6
600
Summons the Horned God - a giant of very high statistics and excellent attack.
The Wild Hunt
7
990
The leader's units receive Floating and Strong Will. The former allows them to travel over each type of terrain (except for Cavern Walls) at the cost of 4 movement points. Strong Will make units invulnerable to mind control and they receive absolute resistance to Spirit attacks.
Name
Tier
Cost (research points)
Effect
Revive Instinct
1
60
All of the enemy units that have the Mount skill, lose 12 movement points for 2 turns.
Root Spears
1
60
Deals 20 physical damage and attempts to entangle the enemy unit (it then loses 50% of movement points in the following turn).
Rust Strike
2
100
An enemy unit with the Armored attribute, loses 2 defense points or deals 20 physical damage to Machine units and attempts to weaken it (in the case of success, the unit loses 4 attack and defense points).
Savage Rage
2
90
The selected Monster or Animal unit gains the Charge, First Strike, Armor Piercing, Overwhelm, Wall Crushing abilities and 3 points do physical attack until the end of the battle.
Hornet Swarm
3
180
The hornet swarm deals 20 damage (Poison) to the selected unit. Additionally, you can skip, as many, as 4 times, in one go, onto the units within 3 hexes (one spell can, therefore, deal damage to 5 units, if they are close to each other). This does not work against Machine and Undead units.
Twisting Roots
3
160
The reach of the enemy units that move on foot (Walking) is decreased by a half.
Revitalize
4
270
The selected allied unit loses Cooldown necessary to reuse a skill, and regenerates + 50% movement points.
Vengeful Vines
4
280
Deals 20 damage to walls, at the beginning of each turn, in battle.
Call Ancestral Spirits
5
500
Summons the Ancestral Spirits until the end of the battle.
Call Beast Horde
6
700
At the beginning of each round, summons a random Beast, to reinforce the leader in battle.
This class specializes in lethal war machines. They make it considerably easier to fight all sorts of battles and sieges. There is a, relatively, small number of spells available here - the strength of this class lies in the siege units.
Heroes and leaders receive the following bonuses:
+1 defense point
- An attribute: Armored
Name
Recruitment cost (gold)
Health points
Movement points
Defense
Resistance to magic
Engineer
70 (+10 mana)
27-37
28
9-10
8-9
Musketeer
80 (+20 mana)
43-53
28
11-12
8-10
Flame Tank
140 (+30 mana)
60
28
12
10
Golem
160 (+40 mana)
76
28
12
10
Cannon
150 (+30 mana)
60
28
11
10
Ironclad Warship
150 (+30 mana)
90
48
15
12
Juggernaut
320 (+80 mana)
110
28
15
11
The engineer unit can reload another machine, which eliminates cooldown, and the necessity to wait until the machine is ready to fire again. The upside of the musketeers is the excellent attack (Fire Musket), which can sometimes wipe the enemy away in one shot, if fired at sufficiently close distance. Flame Tank is excellent against enemy units- it deals as much as 25 damage (Fire) to all the units that stay sufficiently close to the attacked unit. The cannon, on the other hand, is excellent for destroying enemy machines and attacking walls. Golem is and unit that works perfectly at close quarters and has increased defense against ranged attacks (+4 Defense). A real jewel is the Juggernaut - absolutely perfect a unit. its attack (Fire Mortar) deals as much as 40 damage (20 physical, 20 Fire) and can damage units within the radius of 1 hex of the attacked unit. Additionally, if surrounded, it can Fire Broadside, once per battle, which literally obliterates all of the units around (30 physical damage). The marine counterpart of the Juggernaut is Ironclad Warship. It is worth mentioning that all of machines lack the ability to regenerate and, regardless of the race, they have relatively few movement points.
Name
Tier
Cost (research points)
Effect
Steam Powered
1
70
Great Farms and Gold Mines, located within the player's Domain, generate additional income (+5 gold per turn).
Produce Engineer
1
60
Allows you to manufacture Engineer in the cities with the Dreadnought's Foundry upgrade.
Solid Engineering
2
100
The Armored and Machine units receive an additional defense point.
Produce Musketeer
2
100
Allows you to manufacture Musketeer in the cities with the Dreadnought's Foundry upgrade.
Great Blacksmith
2
100
Manufacture of the units with the Armored attribute is cheaper by 10% gold.
Produce Flame tank
3
160
Allows you to manufacture Flame Tank in the cities with the Dreadnought's Foundry upgrade.
Structural Insight
3
150
Irregular units receive the Sabotage skill.
Produce Ironclad Warship
3
260
Allows you to manufacture Ironclad Warship in the cities with a harbor. Additionally, if you have researched into Shipbuilding, the units boarded onto boats will, from now on, move on the Ironclad Warships, instead of the weaker frigates.
Modern Warfare Training
4
150
Machine and Archer units, manufactured in cities, receive an additional rank.
Produce Cannon
4
260
Allows you to manufacture Cannon in the cities with the Dreadnought's Foundry upgrade.
Side Arms
4
220
Cavalry units can also attack at a distance, thanks to the Fire Pistol skill.
Produce Golem
5
440
Allows you to manufacture Golem in the cities with the Dreadnought's Foundry upgrade.
Mana Fuel Factory
5
400
Machines cost 10% gold less to manufacture.
Produce Juggernaut
6
600
Allows you to manufacture Juggernaut in the cities with the Dreadnought's Foundry.
Additionally, Invention I-VII, increases the amount of main leader's Casting Points. The cost is 60/100/160/260/400/600/900 research points.
Name
Tier
Cost (research points)
Effect
Mana Fuel Cells
1
60
The selected allied city receives a bonus for the additional characters, of 20 production points.
Summon Spy Drone
1
60
Allows you to summon Spy Drone.
Supress Nature
3
160
Units and cities do not receive penalty to contentment, if on disfavored terrain.
Dragon Oil
4
280
Surrounds the selected allied city with a ring of fire. The units that move across this ring, in battle, receive 8 damage (Fire). Additionally, they can catch on fire (3 damage per turn, -2 strength, defense and resistance to magic, for the duration of 2 turns).
Forge Blast
5
420
Destroys one, random, upgrade in the enemy city and deals 20 damage to each unit in the central hex of the city.
Spelljammer
5
400
Erects a structure that disables spellcasting in everyone, apart from the player, within the radius of 3 hexes. The cost of the structure is 30 mana and gold, and it takes 2 turns to be completed. It is best to erect it around your cities.
The Great Mobilization
7
950
Machine units receive a bonus of additional 8 movement points and 2 to attack, defense and resistance to magical attacks.
Name
Tier
Cost (research points)
Effect
Flash Bang
1
60
Deals 4 physical damage and 3 Fire damage, while attempting to blind the enemy unit. In case of a failure, the range of the attack is limited to 1 hex, for the duration of 2 rounds.
Repair Fortification
1
60
Regenerates the wall's or the gate's HP to its maximum value.
Overload
2
90
The selected allied machine deals more damage (+10) until the end of the battle, however there is a risk that it will be stunned for 2 turns (impossibility to move).
Force Field
2
100
The selected allied unit receives increased frost Fire and Shock damage (by 60%) for 3 turns.
Reassemble
3
140
Repairs the destroyed allied machine and restores 33% of its HP total.
Weapon Kit
3
140
The allied Infantry or Pikemen units receive, until the end of the battle, Fire Blunderbuss, Sabotage and Throw Net.
Summon Siege Engine
4
220
Summons a random machine to the battlefield, until the end of the battle.
Choking Fumes
5
400
All of the units in the battlefield suffer -6 movement points and -2 defense, melee attack and resistance to magic. This does not concern Dragon, Machine, Undead and Incorporeal units.
Dampening Field
6
600
Doubles the amount of mana and Casting points, of all the players, apart from the player, necessary to cast the spell.
Destabilized Mana Core
7
800
The explosion that occurs within 2 turns and deals 6 fire damage to all the units in the battlefield. For obvious reasons, it is best to use this spell against the enemy with a large advantage in numbers, in a situation when you can allow yourself to lose your army.
The main strength of this class lies in propaganda, of a kind, dirty tricks and surprise attacks. Rogue units are perfect for that. Spells are mainly centered around dealing damage, or negative effects to enemy units and cities.
Heroes and leaders receive the following bonuses:
+1 defense point
+1 to ranged and melee attacks
- A skill: Backstab
Name
Recruitment cost (gold)
Health points
Movement points
Defense
Resistance to magic
Scoundrel
45
30-40
28
8-9
7-9
Assassin
100 (+20 mana)
45-55
32
11-12
8-10
Bard
80 (+10 mana)
41-55
28
9-10
9-11
Succubus
170 (+30 mana)
55-65
30
11-12
10-12
Shadow Stalker
200 (+40 mana)
60
32
11
10
The Scoundrel units are quite decent crossbowmen. The attribute important for them is the Inflict Crippling Wounds, which allows them to maim the units they attack (they then lose 12 movement points for the duration of 2 turns). Also, you are going to need quick regeneration and, above all, Sabotage, which allows you to deal considerable damage to enemy machines or walls. Assassins have a very good attack, which is additionally reinforced by Backstab (6 additional damage during a flanking attack). Once per battle, they can perform Assassin's Strike, which cannot be countered (it deals 20 physical damage and 9 Poison damage). The main property of all the Bard units is the ability to raise the army's morale. (+300 contentment), and also Charm, which allows them to control an enemy unit. Succubus has a similar attribute (Seduce), and also the Throw Curse skill. This causes the loss of 2 defense and resistance of the selected enemy unit, until the end of the battle. the final unit is the Shadow Stalker - it has an excellent melee attack, is invulnerable to control and can Inflict Exhausting Fatigue - the selected unit loses 4 strength. An important attribute is also Incorporeal - the unit has 60% of defense against physical attacks.
Name
Tier
Cost (research points)
Effect
Courtesan Ambassadors
1
70
The player receives a permanent bonus to relations with independent cities.
Produce Scoundrel
1
60
Allows you to manufacture Scoundrel in the cities with the Rogue's Palace.
Irregular Training
2
90
The Irregular units receive an additional rank, after being manufactured.
Produce Bard
2
100
Allows you to manufacture Bard in the cities with the Rogue's Palace.
Trained Killers
2
120
The Scoundrels units evolve to Assassins, after they reach the highest level.
Cruel Backstab
3
160
The Irregular and Infantry units receive Backstab skill (+6 to the inflicted damage, during a flank attack).
Produce Assassin
3
160
Allows you to manufacture Assassins in the cities with the Rogue's Palace.
Urban Cover
3
240
The Irregular units receive Urban Concealment, which makes them invisible on the hexes with structures built on them.
Produce Succubus
4
280
Allows you to manufacture Succubus in the cities with the Rogue's Palace.
Produce Shadow Stalker
5
460
Allows you to manufacture Shadow Stalker w in the cities with the Rogue's Palace.
Additionally Cloak and Dagger I-VII, that increases the number of the main leader's Casting Points. The cost is 60/100/160/260/400/600/900 research points.
Name
Tier
Cost (research points)
Effect
Poison Mastery
1
80
Infantry, Cavalry and Irregular units receive strengthened Poison attack (+2).
Summon Grimbeak Crows
1
60
Summons Grimbeak Crows.
Iron Grip
2
120
The selected city receives, additionally, 300 contentment points.
Treasure Raiding
2
100
The amount of gold collected "from the ground" and after you visit the structures on the strategic map, is increased by 20%.
Corpse Looting
3
170
The player receives a small amount of gold per each unit defeated in battle.
Incite Revolt
3
160
The selected enemy city loses 600 contentment points
Plague of Brigands
4
300
In the selected enemy city, there appears a group of bandits that attacks units within its reach.
Guild of Shadow Thieves
4
200
The selected enemy city generates 20% less gold per turn.
Network of Scrying Eyes
5
460
The 7 central hexes that surround each city on the map are visible for the player that casts the spell.
Night Wish
5
500
All of the units in the premises of the selected allied city suffer a penalty (visibility decreased by 2 fields).
Age of Deception
7
980
All of the units receive Invisibility and strengthened attack (+1, Poison).
Name
Tier
Cost (research points)
Effect
Quick Dash
1
60
Regenerates 10 HP and 50% of movement points of the selected allied unit.
Rain of Poison Blades
1
70
Deals 12 physical damage and 8 Poison damage to the selected unit. Damage is increased by 2 against the units with Armored attribute.
Blind
2
100
Attempts to blind an enemy unit. In case of success, the unit may only attack units 1 hex in front of it. In the case of failure, it loses 50% of movement points.
Panic Attack
2
120
In the case of success, the enemy unit attempts to escape from the battlefield for the duration of 2 rounds. Otherwise, it loses 50% of its movement points.
Moving Target
3
180
The selected unit receives +8 defense points for the following turns.
Cunning Escape
3
140
Allows you to retire the selected allied units, from the battlefield. May only be used by the attacking party.
Sadism
4
240
Boosts the morale of an allied units, each time it kills an enemy unit.
Shadow Form
4
300
The selected unit receives defense against physical damage (40%) and the Pass Wall skill, until the end of the battle.
Smoke Screen
5
500
All of the units in the battlefield receive a boost to defense and resistance to magic (+4), against ranged attacks.
Mass Battlefield Panic
6
700
Attempts to start panic among all of the enemy units in the battlefield. The ones that resist the attack, lose a half of their movement points for the duration of one turn.
The sorcerer does not have powerful units up his sleeve, which he could manufacture, or any meaningful upgrades that improve the condition of the Empire. His strength lies in powerful global and combat spells, and also in the units that can be summoned to the battlefield, with spells.
Leaders receive the following bonuses:
+1 Resistance point
- Skill: Channeler
Name
Recruitment cost (gold)
Health points
Movement points
Defense
Resistance to magic
Apprentice
90 (+25 mana)
35-45
28
9-10
10-12
There is only one unit available for recruitment. It's attack is weak, but its strength lies in skills. It can steal a spell of an enemy unit and use it (Steal Enchantment), heal magical beings (Mend Magical Being), and also dispel the magical effects from the selected unit (Dispel Magic).
Name
Tier
Cost (research points)
Effect
Arcane Study
1
80
The buildings available in the cities (Alchemic Laboratories and Observatories), generate additional income of 5 research points.
Channeler
1
80
The leader receives 5 additional Casting points.
Produce Apprentice
1
60
Allows you to manufacture Apprentice in the cities with the Sorcerer's Conflux upgrade.
School of Teleportation
2
100
Support units receive the Projectile Resistance and Phase skills.
Magical Structures
3
180
Treasure Sites and Mana Nodes, located in the player's w Domain generate 5 additional mana points.
School of Enchantment
5
450
Support units receive the Stun skill- their attacks can stun the enemy unit for the duration of one turn. It will, then, be unable to perform any action.
Additional Sorcery I-VII, increase the amount of the leader's Casting Points. The cost is 60/100/160/260/400/600/900 research points.
Name
Tier
Cost (research points)
Effect
Glyphs of Warding
1
80
When the Domain of the selected allied city is affected by this spell, the enemy units, in the domain of the city, receive 10 damage (Shock) in each turn that they are staying within the city's reach.
Summon Wisp
1
60
Allows summoning Wisp.
Invoke Extraordinary Mount
2
90
Summons an egg, from which a mount hatches (it can b placed in the leader's inventory).
Summon Phantasm Warrior
2
120
Allows summoning of the Phantasm Warrior.
Dread Omen
2
100
The selected enemy city receives penalty to population (-100). Additionally, the enemy units that are staying within the Domain of the selected city, receive penalty to contentment (-500).
Summon Fantastic Creature
3
160
Summons a random unit (Creature).
Dome of Protection
3
160
The selected allied city becomes resistant to all spells.
Lighting Storm
3
180
Deals 5 physical damage and 10 (Shock) to the selected enemy army.
Enchanted Walls
4
280
Encloses an allied city with a force field. The units that cross the field, outside of battle, receive damage (Shock) and may be stunned.
Summon Node Serpent
4
220
Allows summoning of the Node Serpent.
Summoner's Aura
4
270
The summoned units and beings of Magical Origin receive +2 Defense, +4 Resistance and the Regeneration attribute, thanks to which their Health points at the beginning of each turn.
Spell of Return
5
500
Teleports the selected army to the player's Throne City.
Summon Eldritch Horror
6
700
Allows summoning the Eldritch Horror.
Age of Magic
7
1000
The main leader receives 50 additional Casting points.
Name
Tier
Cost (research points)
Effect
Magic Fist
1
70
A spell that inflicts 21 damage (physical) to the selected enemy unit.
Star Blades
1
60
The selected allied unit receives the Inflict Shocking attribute and +1 to attack of this type (Shock) until the end of the battle. Its attacks can shock the enemy unit, which results in losing of 8 movement points for the duration of 2 turns, by that unit.
Sphere of Protection
2
100
Boosts resistance to physical attacks (+80% Physical Protection) for the duration of 2 turns.
Harmonizing Energy
2
100
Restores 30 HP to the selected allied unit. very useful in slightly dire straits.
Arcane Binding
3
150
Allows you to attempt seizing control over a magical enemy unit (Magical Origin), or over one that has been earlier summoned into the battle. (Summoned). In the case of failure, the unit loses 50% of its movement points (for the duration of one turn).
Chain Lighting
3
160
A spell that deals 18 damage (Shock) to the selected unit. It can hop onto the other units for 4 times if they are deployed within the appropriate distance (3 hexes). Ideal to be cast at the beginning of the battle, when the enemy units are, usually, close to each other.
Cosmic Spray
4
240
The selected enemy unit, and the other ones, within the distance of up to one field, receive damage of each type (up to 24).
Static Sphere
4
260
The allied unit receives a shield, thanks to which each attack against that unit is reflected back to the enemy, for 5 damage (Shock).
Mass Stasis
5
440
Attempts to immobilize all of the enemy units in the battlefield. In the case of failure, they lose 25% of their movement points, per turn.
Double Gravity
5
400
Deprives all of the Flying units of their ability to fly, which makes them unable to fly over walls. .
Static Electricity
6
700
All of the units in the leader's army receive Static Shield, and all of the units in the enemy's army suffer a 20% Shock Weakness.
Chaos Rift
7
900
Each round, during the battle, an unit is summoned into the battlefield, which then sides with the summoner. Additionally, 20 damage is dealt (Shock) to 2-3 random enemy units (also each round).
The main advantage of playing as this class are the elaborate defensive and healing spells. Additionally, units have the attributes that allow them to control the minds of the enemy units. Additionally, the Empire is protected by a number of blessing spells and the ones that ensure various bonuses.
Leaders receive the following bonuses:
+2 Resistance points
- Attribute: Devout
Name
Recruitment cost (gold)
Health points
Movement points
Defense
Resistance to magic
Martyr
40 (+10 mana)
27-32
28
8-9
8-10
Crusader
70 (+20 mana)
45-55
28
12-13
9-11
Exalted
160 (+30 mana)
50-60
30
11-12
11-13
Evangelist
150 (+30 mana)
55-65
28
9-10
10-12
Shrine of Smiting
260 (+60 mana)
100
28
14
12
Martyr are the basic units which do not stand out with anything unusual. The only skill that is worth mentioning is Absorb Pain - allows you to intercept damage dealt to another unit. These are directed to martyrs. The important attribute of the Crusader units is the Holy Champion - it allows you to deal additional damage (+5, Fire) to Undead and the units that have the Devout attribute. Additionally, they are resistant to mind control (Strong Will). Two of the most useful skills, of the Exalted is Flying and Resurgence - allows you to extend protection over an allied unit. When the unit dies, and you win the battle, it respawns with 35% of its initial amount of HP. The last unit that you recruit is the Evangelist - their important feature are the abilities that allow you to control an enemy unit (Convert) and causing panic in the Undead units. For the duration of 2 rounds, it will try to escape from the battlefield and will ignore orders. Also, the
Touch of Faith is an important skill - it allows you to increase defense against magical attacks (+3 Resistance) of one of the units. Shrine of Smiting is a unit of the Machine type so, it cannot generate HP. It has an excellent attack (Smiting Prayer Bolts, 10 Fire, 10 Spirit), which is additionally boosted by 2 points (of both types), for each unit with the Devout attribute that you have in the battlefield. Additionally, once per battle, you can use Divine Vengeance (10 Fire, 20 Shock).
Name
Tier
Cost (research points)
Effect
Order of Templar Knights
1
80
Cavalry units manufactured in your cities receive the bonus of reinforced resistance to Spirit attacks (+20%) and the Devout attribute.
Produce Martyr
1
60
Allows you to manufacture Martyr in the cities with Theocrat's Conclave.
Produce Crusader
2
90
Allows you to manufacture Crusader in the cities with the Theocrat's Conclave.
Order of Healing
2
110
Support units receive Healing (allows them to restore 20 HP to the selected unit).
Order of Sacred Support
3
160
Support units receive additional rank and the Devout attribute.
Produce Evangelist
3
160
Allows you to manufacture Evangelist in the cities with the Theocrat's Conclave.
Produce Exalted
4
280
Allows you to manufacture Exalted in the cities with the Theocrat's Conclave.
Exalted Martyrs
5
400
After they reach the maximum experience level, Martyrs evolve into Exalted.
Produce Shrine of Smiting
5
460
Allows you to manufacture Shrine of Smiting w in the cities with the Theocrat's Conclave.
Additionally o Divine Chanelling I-VII, which increase the amount of the leader's Casting Points. Cost to 60/100/160/260/400/600/900 research points.
Name
Tier
Cost (research points)
Effect
Mark of the Heretic
1
80
The selected enemy unit is "branded" and it receives Heretic attribute for 5 turns. The Devout units deal more damage (+3).
Summon Cherub
1
60
Allows you to summon Cherub.
Paid Absolution
2
100
The selected city generates additional income, per turn (+10 gold). All of the units within the domain of that city receive a bonus to contentment (+200).
Beacon of Faith
2
120
The selected city receives an increase in population (+50).
Sanctified Sites
3
180
Treasure Sites provide 20 additional points to contentment for the city, whose domain they occupy.
Prayer for the Hurt
3
160
The players units generate additional 6 HP per turn.
Denounce City
4
280
Brands an enemy city - if there are enemy units in its domain, they will be branded as Heretic.
Wrath of God
4
280
Deals 15 damage (Spirit) to the selected enemy army.
Hallowed Domain
5
450
The units within the domain of the selected city receive additional protection (+40% Spirit Protection), whereas the enemy units receive a penalty (-2 Resistance points).
The Great Purge
6
650
Infantry and Cavalry units receive attributes that allow them to deal more damage to the Dragon, Fey, Giant, Monster, Summon, Undead units.
Armageddon
7
1000
The player's Empire does not receive negative effects that lower morale. Additionally, all of the units receive the Strong Will attribute and the enemies receive decreased resistance to Spirit attacks (80% Spirit Weakness) and cannot regenerate HP.
Name
Tier
Cost (research points)
Effect
Slayer's Doubt
1
60
Decreases the number of movement points of the selected unit, by 18. In the case of failure, it decreases the number of movement points by a half, but only for the duration of one turn.
Smite
1
90
Deals 30 damage (Spirit) to the selected unit. In the case of a failure, 15.
Divine Protection
2
120
The selected allied unit receives the increased resistance to magic (+6 Resistance) for the duration of one turn in battle.
Instant Wrath
2
120
Deals 50%, of all damage dealt to the marked unit, to the unit that dealt damage.
Purifying Burst
3
150
Dispels all magical effects in the battlefield.
Blessing of Health
4
260
All of the allied units, (apart from machines and Undead) receive, additionally, 10 HP until the end of the battle.
Rebirth
4
240
The selected unit receives the Resurgence skill. If it dies in the battle, it will respawn with 1/3 of the total of HP, at the end of the battle. Works only if you win the battle.
Power of the Word
5
500
Attempts to immobilize the enemy unit, which cannot move, in the case of success, for the duration of 2 turns (however, they can perform the other actions, e.g. attack at a distance).
Holy War
6
700
All of the units with the Devout attribute, deployed in the battlefield, receive additional bonus to damage (+10, Spirit) until the end of the battle.
A class for real warriors. The excellent units ensure advantage in the battlefield. Spells and upgrades concern, mainly, warfare - they affect units, increase their damage statistics and improve on their skills, especially the offensive ones.
Leaders receive the following bonuses:
+2 points do melee attack
- An attribute: Armored
Name
Recruitment cost (gold)
Health points
Movement points
Defense
Resistance to magic
Berserker
75 (+10 mana)
47-57
32
11-12
8-10
Monster Hunter
70 (+20 mana)
45-55
32
12-13
9-11
Mounted Archer
100
45-55
36
10-11
8-10
Phalanx
140 (+30 mana)
60-70
32
12-13
10-12
Warbreed
160 (+40 mana)
75-85
36
12-13
9-11
Manticore Rider
260 (+60 mana)
80-90
30
13-14
11-13
The Warlord class allows you to recruit strong, offensive units. Already Berserker units prove that. They have the skill of Charge (additional 6 damage, while attacking a unit 4, or more, fields away) and Overwhelm (additional 3 damage to Pikemen and Shielded units). Monster Hunter are perfect "exterminators" of fauna of all kinds - that have skills that allow them to deal more damage to Animal, Monster, Dragon, Giant and Fey units. Additionally, they have increased protection against magical attacks (+20% Fire, Frost and Shock Protection). The Mounted Archer, apart from the considerable number of movement points, does not stand out with anything in particular. Phalanx do, on the other hand, with formidable attacks (16 damage). Apart from that, they have the First Strike attribute, thanks to which they are the first ones to attack. They also are lethal against units with the Mounted and Flying attributes (additional 5 damage). The main upside of the Warbreed, apart from the powerful attack (20 damage), is the ability that allows them to deal damage to walls. The final chapter, Manticore Rider, has an even better attack (23 damage). Additionally, it is resistant to mind control (Mind Control Immunity) and can fly (Flying).
Name
Tier
Cost (research points)
Effect
Produce Berserker
1
60
Allows you to manufacture Berserker in the cities with the Warlord's Command.
Training Regimen
1
80
Costs connected with the recruitment of Archers, Cavalry, Infantry, Irregulars and Pikemen are reduced by 20%.
War Effort
2
120
The cities of the Empire generate higher income (+10 gold).
Produce Monster Hunter
2
90
Allows you to manufacture Monster Hunter in the cities with the Warlord's Command.
Garrison's Honor
3
140
The units that serve as a garrison, in a given city with walls, receive a buff to defense (+2 Defense). In the case where there is no wall, the attack of the defenders is buffed (+3).
Produce Mounted Archer
3
120
Allows you to manufacture Mounted Archer in the cities with the Warlord's Command.
Warrior Culture
3
150
Time necessary to change the race in the city (Migrate) is decreased by a half. Additionally, the allied cities do not suffer penalties to contentment, in the case of enemy units and their Domain.
Martial Arts Training
4
260
Archers, Cavalry, Infantry and Pikemen receive the Martial Arts skill. It reinforces their defense against attacks of opportunity, by 5 points.
Conqueror
4
240
Units receive additional 50% of XP for killing enemies.
Produce Phalanx
4
220
Allows you to manufacture Phalanx in the cities with the Warlord's Command.
Thoroughbred Mounts
5
400
Cavalry receives additional 15 HP.
Produce Warbreed
5
400
Allows you to manufacture Warbreed in the cities with the Warlord's Command.
Produce Manticore rider
6
600
Allows you to manufacture Manticore Rider in the cities with the Warlord's Command.
Additionally Warfare I-VII, which increase the amount of the leader's Casting Points. Cost to 60/100/160/260/400/600/900 research points.
Name
Tier
Cost (research points)
Effect
Authority of the Sword
1
60
Enlarges the domain of the selected city by 1.
Raise Militia
1
60
Deploys the Irregular in the selected city, at the cost of 100 "men" (population).
Dread Siege
2
100
Units within the domain of the selected enemy city, receive penalty (-500) to contentment if within its perimeter.
Death March
2
120
The units on the strategic map have receive twice as many movement points (at the cost of a half of their HP) until the end of the turn.
Inspire Loyalty
3
140
The costs of maintaining units in the leader armies is half as high.
The Draft
4
240
The leader's units receive 200 points of contentment and cannot desert.
Hero Slaying
5
400
Units receive an additional skill of Hero Slayer, thanks to which they deal more damage to leaders (+3).
Conqueror's Feast
5
420
When the player's units are outside of the Empire, the costs of maintaining them is lower (25%). The negative effects caused by the enemy army, if it is within its domain, are doubled, if your army walks into the domain of an enemy city.
Global Assault
7
900
The player's units receive the Charge and First Strike skills, and the additionally are promoted to the highest possible rank.
Name
Tier
Cost (research points)
Effect
Last Stand
1
60
The selected allied unit receives the Polearm, First Strike skills, and its defense is boosted (+2 Defense) until the end of the battle.
Lion's Courage
1
80
The selected allied unit receives Strong Will, Overwhelm skill and a boost to the physical attack (+3).
Berserk
2
120
Attempts to enrage the enemy, which results in its uncontrollability. Such a unit attacks the nearest allied units. In the case of a failure, it loses 1 of movement points for the duration of one turn.
Shout of Intimidation
2
120
An attempt to intimidate the enemy unit. If it succeeds, the unit attempts to flee the battlefield, for the duration of 2 rounds. Otherwise, it loses a half of the movement points, in the next turn.
Phoenix Warrior
3
180
The selected allied unit respawns after it dies, with 33% of the initial number of health points. The condition for this to work is that you win the battle.
Killing Spree
4
220
The selected unit receives an additional action point and can move 1 hex more, after it kills an enemy unit.
Steadfast Ward
4
280
The selected allied unit becomes, virtually, immortal, for the duration of 3 turns (its HP points cannot drop then, below 1).
Bloodbath
5
400
All of the allied units deal more physical damage (+5).
Relentless Army
6
600
All of the units in the leader's army receive the Tireless, which means that they lose no action points for counters and attacks of opportunity.
While creating the leader, apart from the class, you can also determine his specialty. IT affects the available areas of research - both upgrades for the Empire as well as various spells. To some specialties, there are two levels - Adept and Master. The latter allows you to discover more potent skills but, the selection is only available after the Adept. For the main leader, you can choose up to 3 specialties which, in combination with the selected class, gives the full picture of the available upgrades and spells.
Below, you can find a list of the available specialties and the research areas that they enable:
Name
Type
Tier
Research cost
Effect
Fire Node Mana Bonus
Empire Upgrades
1
-
The structures of Mana Nodes (i.e. Fire Nodes) generate additional 5 mana points.
Domain of the Sun
Global Spells
3
150
From now on, the selected city favors the Tropical and Volcanic terrains.
Summon Hell Hound
Global Spells
3
160
Allows you to summon Hell Hound.
Fire Ball
Combat Spells
1
80
The fireball deals 10 physical damage and 12 Fire damage.
Skin of Oil
Combat Spells
2
100
The selected enemy unit loses 1 point of strength, defense and resistance to magical attacks. Apart from that, it suffers 40% Fire Weakness.
Name
Type
Tier
Research cost
Effect
Tropical Empire
Global Spells
4
240
Terrains of the Tropical type expand gradually from the Empire grounds.
Summon Fire Elemental
Global Spells
6
600
Allows you to summon Fire Elemental.
Fire Halo
Combat Spells
4
220
The selected unit receives total protection from fire (100% Fire Protection) and increased damage (+1, Fire).
Hellfire
Combat Spells
7
900
All of the walls in the battlefield receive 30 damage, and units - 50 (Fire).
Name
Type
Tier
Research cost
Effect
Water Node Mana Bonus
Empire Upgrades
1
-
The Mana Nodes structures (i.e. Water Nodes) generate additional 5 mana points.
Freeze Water
Global Spells
3
160
Freezes the water hex for 3 turns. Units can move freely over that hex, without the losing a turn for boarding a ship.
Summon Baby Kraken
Global Spells
3
160
Allows you to summon Baby Kraken.
Rot
Combat Spells
2
120
Deals 10 damage to the selected Machine unit. This effect hops between machines, up to 3 times, if they are deployed within the distance of 3 hexes of each other.
Vangeful Frost
Combat Spells
1
70
Deals 15 damage (Frost) to the selected unit.
Name
Type
Tier
Research cost
Effect
Drench the Land
Global Spells
4
240
The selected hexes are immediately turned into Wetlands.
Summon Frost Elemental
Global Spells
6
600
Allows you to summon Frost Elemental.
Healing Showers
Combat Spells
4
250
Restores 20 HP to all the units, within the radius of 2 hexes, of the selected one. Also, eliminates all of the Fire effects (e.g. catching fire).
Great Hail
Combat Spells
5
500
Deals 20 physical damage and 5 (Frost) to the units within the radius of 2 hexes of the selected area.
Name
Type
Tier
Research cost
Effect
Earth Node Mana Bonus
Empire Upgrades
1
-
The Mana Nodes structures (i.e. Earth Nodes) generate additional 5 mana points.
Domain of Earth
Global Spells
3
150
The selected allied city favors Subterranean terrains.
Stoning
Combat Spells
1
80
Deals 24 damage to the selected enemy unit.
Stone Skin
Combat Spells
2
80
The selected unit receives additional 3 defense points.
Regenerate Walls
Combat Spells
3
180
At the beginning of each turn, walls regenerate 20 HP.
Name
Type
Tier
Research cost
Effect
City Quake
Global Spells
5
220
Destroys one random upgrade of the enemy city and kills 20% of its population.
Summon Earth Elemental
Global Spells
6
600
Allows you to summon Earth Elemental.
Slow
Combat Spells
4
240
The selected enemy unit has a half of its movement points, until the end of the battle.
Earthquake
Combat Spells
7
900
The walls in the battlefield receive 60 damage, and the units - 40. Ineffective against Flying and Floating units.
Name
Type
Tier
Research cost
Effect
Air Node Mana Bonus
Empire Upgrades
1
-
The Mana Nodes structures (i.e. Air Nodes) generate additional 5 mana points.
Domain of Winter
Global Spells
3
140
The selected allied city favors the Arctic type of terrain.
Summon Zephyr Bird
Global Spells
3
150
Allows you to summon Zephyr Bird.
Suffocate
Combat Spells
1
80
Deals 15 damage to the selected unit (impossible to cast on Undead, Machine and Incorporeal).
Seeker Enchantment
Combat Spells
2
120
The selected units that attack at a distance, do not receive penalties to the damage that they deal, while shooting over obstacles.
Name
Type
Tier
Research cost
Effect
Arctic Empire
Global Spells
4
220
Terrains of the Arctic type gradually spread from the Empire terrains
Summon Air Elemental
Global Spells
6
600
Allows you to summon Air Elemental.
Haste
Combat Spells
4
240
The selected unit has, until the end of the battle a doubled number of movement points.
Wind Ward
Combat Spells
5
400
All of the ranged attacks are less effective (-8 to damage).
Name
Type
Tier
Research cost
Effect
Creation Node Mana Bonus
Empire Upgrades
1
-
The Mana Nodes structures (i.e. Creation Nodes) generate additional 5 mana points.
Cleanse the Land
Global Spells
3
150
The selected terrains are turned into Temperate.
Domain of Life
Global Spells
3
150
The selected allied city favors the Temperate type of terrain.
Bless
Combat Spells
1
60
The selected unit receives a boost to Defense and Resistance (both +2) until the end of the battle.
Holy Cure
Combat Spells
2
100
Restores 25 HP to the selected unit. The Undead and Machine cannot be healed.
Name
Type
Tier
Research cost
Effect
Temperate Empire
Global Spells
4
240
Terrains of the Temperate type spread, gradually, from the Empire domain.
Codemn Killing
Combat Spells
4
240
The killer of the Devout unit, loses 3 Defense and Resistance points , until the end of the battle.
Bane of the Unnatural
Combat Spells
5
400
Units deal more damage (+5, Spirit), when they attack Undead, Summoned or Magical Origin units.
Resurrect
Combat Spells
6
600
Resurrects the selected allied unit with a half of its HP. Does not work on Machine and Undead units.
Name
Type
Tier
Research cost
Effect
Destruction Node Mana Bonus
Empire Upgrades
1
-
The Mana Nodes structures (i.e. Destruction Nodes) generate additional 5 mana points.
Hasty Plunder
Empire Upgrades
1
80
Allows you to plunder the city immediately after you capture it.
Scorched Earth
Global Spells
2
140
The selected allied city is razed to the ground immediately, after you lose it.
Domain of Corruption
Global Spells
3
150
The selected city favors the Blighted terrains.
Killer Instinct
Combat Spells
2
100
The selected unit deals additional damage to all races.
Name
Type
Tier
Research cost
Effect
Storm Magic
Empire Upgrades
5
450
Damage-dealing spells are now stronger by 20%.
Blight Empire
Global Spells
4
240
The Blight type terrains spread gradually from the Empire dominion.
Wreck
Combat Spells
4
240
The selected enemy unit, of the Boat, Machine or Undead type suffers 40% Physical Weakness.
Disintegrate
Combat Spells
6
600
Attempts to deal, to the enemy unit, 50 damage -if failed, the selected unit suffers a half of that damage.
Name
Type
Tier
Research cost
Effect
Fertility Rites
Empire Upgrade
1
90
The population of the Empire grows 15% faster.
Rugged Pioneers
Empire Upgrades
2
100
Settler and Builder units receive additional 8 movement points and the Mountaineering skill.
Expansionism
Empire Upgrades
3
160
Outposts receive additional 20 production points and double population growth.
Swift Migration
Empire Upgrades
4
260
The Migrate option is immediately available.
Name
Type
Tier
Research cost
Effect
Scout Training
Empire Upgrades
1
60
All of the Irregular units receive a boost to range of vision (+1).
Off the Beaten Path
Empire Upgrades
2
100
The Irregular units receive a skill that limits the amount of movement points necessary to move over various types of terrain (Mountaineering, Forestry and Wetlands Walking).
Trail Running
Empire Upgrades
3
160
The Irregular units receive additional 12 movement points.
Name
Type
Tier
Research cost
Effect
Basic Seafaring
Empire Upgrade
1
60
Allows the units to move over water fields. Also, allows you to manufacture Frigate Warship in the cities with a port.
Disjunction
Empire Upgrade
2
90
Dispels all of the spells used globally.
Advanced Seafaring
Empire Upgrade
3
140
The units that move over water receive increased range of vision. Also, it allows you to manufacture Galleon Warship in the cities with a port.
Advanced Logistics
Empire Upgrade
4
420
Decreases the cost of moving over roads, up to 2 movement points. The Flying units, also receive additional 3 movement points.
Terraformer
Global Spells
2
90
Allows you to turn the selected terrain into Wetlands, Fertile Plains, Dense Vegetation or Barrens.
Resurrect Hero
Global Spells
4
220
Resurrects the recently killed leader in the selected location.
Dispel
Combat Spells
1
60
Dispels all of the negative magical effects from the selected unit.
Banish
Combat Spells
4
240
Attempts to send away the enemy Summoned or Magical Origin. In the case of a failure, the unit disappears, otherwise it suffers 25 damage.
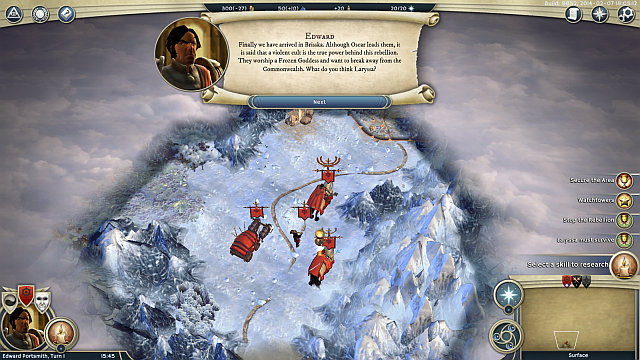 This is where you start your journey.
Conditions of victory:
1. Laryssa must survive
2. Stop the Rebellion (Slay Oscar)
Side missions:
1. Secure the Area
2. Take the first Settlement
3. Capture the Frost Giant's Keep
You start at the Southern end of the map, with two leaders - Edward Porthsmith and Laryssa Mirabilis. Your main objective is to defeat Oscar's army and capture his Throne City. Remember that Laryssa must survive and Edward, in the case of a failure, respawns after 3 turns in your Throne City. However, you need to avoid this, because this will weaken the moral of both your Empire and your army.
First of all, deal with the Watchtower. Then, turn to your Human Settlers move left of the starting point and start your first city in the marked area. Order Edward, Laryssa and the available army to move to the North-West, ignore the enemy settlement for the time being. Remember about choosing an area of research, before you end your turn - a good idea is to choose Fertility Rites, which will make the population of your Empire grow faster, which will result in faster growth of your cities.
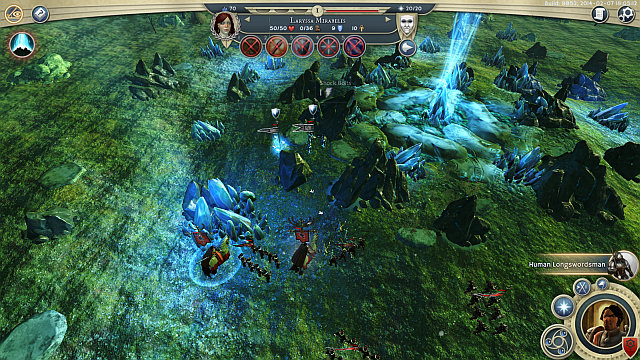 The first skirmish in the game, in a picturesque area.
Follow to the North-West with your forces, where you will find an excellent place to found the second city. Remember that, in the meantime, you should expand the newly-founded cities - invest in the Store House, and then into the buildings that allow you to manufacture new units. Near the second city, you will find a Strong Treasure Site. You should have no problems defeating the small army that defends it. Then, proceed onwards, into the woods. Try not to lose any units because you are going to need them in a moment. The next skirmish that you are going to fight is one with a small band of orcs. Also here, you should have no problems and, after you defeat them, keep going to the West. Take advantage of your ranged units and the two leaders and remember that you should, to the extent it is possible, and eliminate the first, and then the second enemy unit. Capture the Refugee Camp thanks to which your second settlement will receive an injection of manpower.
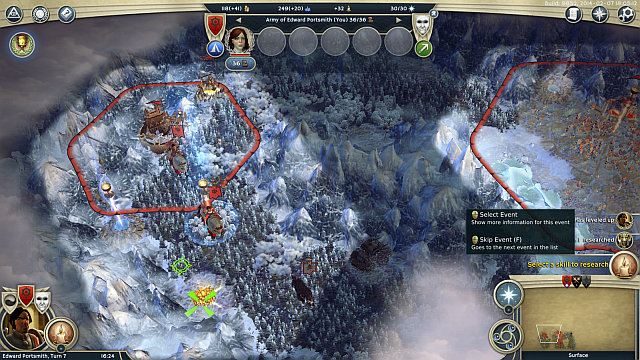 An enemy fortress and just as hostile beasts around it.
After several turns, you will reach an enemy fortress. If you have lost too many units, try to manufacture some reinforcements in your cities. Otherwise,, also here, you should have no problems dealing with the enemies. Watch out for Laryssa, however, and prevent her from getting lost in the heat of the battle, because she can die easily. Again, take advantage of your ranged units and try to eliminate, first the enemy unit and then another. After the victorious battle, you will become the new owner of the fortress, which you can upgrade for the right amount of gold, and make it expand over the Mana Node, which will increase the production of mana per turn. (by 10 units). If the condition of your units is unsatisfactory, train 2-3 units of Human Archers in one of your cities - you are going to need them at the short battle to capture the first enemy settlement.
Order your armies towards the starting point, to the South-East, where there is the last skirmish for you to fight, with a Yeti, among others. Here, you need to watch out, especially, for the melee attacks of the beast and, do not expose your leaders to the attack, because the amount of their HP will drop way too much, as a result. Then, enter the field with Production Resources, which will cause one of upgrades to be built in your nearest city .
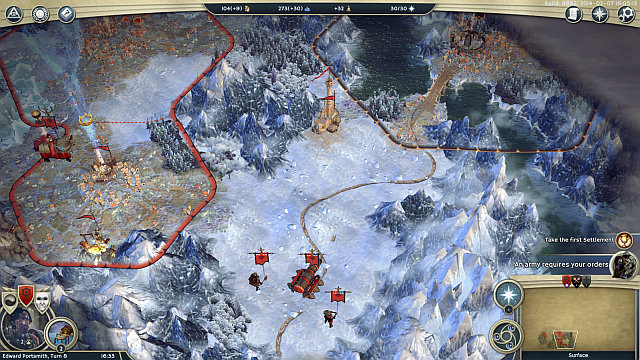 Here's the cavalry! Well, almost.
After the successful introduction, you will receive reinforcements, complete the side mission (Secure the Area) and receive another one (Take the first Settlement). Order your forces to the settlement that you ignored earlier and attack it. Here, if you have amassed sufficient forces, you will have no problems. To destroy the gate and deal high damage, use the Cannon that you have recently received, as well as the other ranged units. You should already have several parties of these. watch out for Laryssa, to prevent exposing her to archer attacks. After you have captured the settlement, it is best to Absorb the city, thanks to which it will become the legal part of your Empire and you will be able to start manufacturing your units there. Apart from the city, also include the settlers into your army (Human Settlement) and 2 other units. Remember that you need to leave some units in the city, to ensure it with protection. At the same time, you should move ahead, with your main army, and follow the road from the city, towards the Southern end of the map.
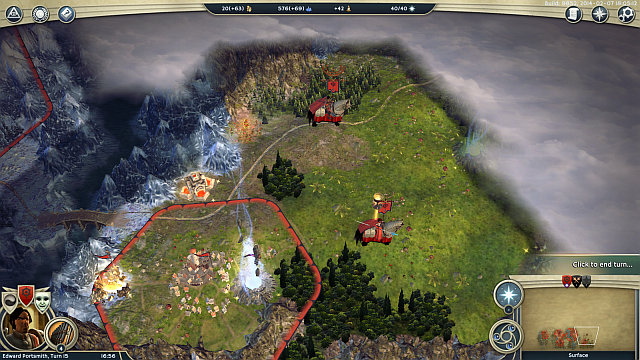
After you walk over the bridge, you will find a perfect place to use your settlers and found another city (see the screenshot). Of course, you should clear the nearby buildings of the enemy units. Then, go up the map. Along your way, destroy the Brigand Hideout, thanks to which you will curb the danger in the area. After a short walk, you will encounter a fortress, which you should capture. A bit higher, there is another enemy city. While seizing it, you should remember to have some siege units in your army, thanks to which you will be able to tear the gates down. Remain in the area for a moment and clear it - it is an excellent way to gain experience for the leaders and the units, which will show its results in the final confrontation. To the East of the city that you have just captured, there is another Brigand Hideout and, past the mountain range, the Ancient Ruins.
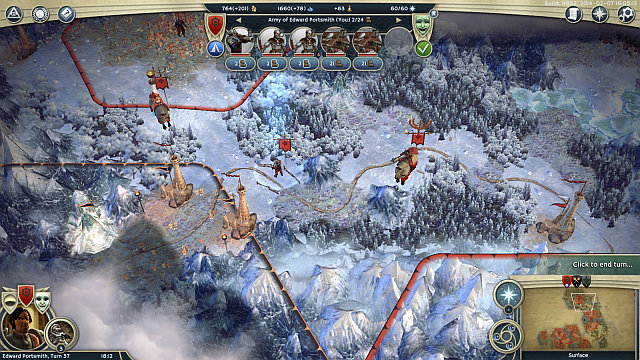 The road to more cities that need to be captured.
After you have cleared the area, go North of the city that you have recently captured, by following the road. Along your way, you will find a Refugee Camp, which will ensure rise in population in the recently conquered city. A bit higher, to the North, you will find an independent settlement, which will join your Empire, in exchange for completing the quest to kill several units (the Independent Party staying around, which remains in the domain of the settlement). Return to the road and go towards the last-but-one city, which you need to capture. Expect heavy guards. This is why you need to summon some more forces and remember about siege engines.
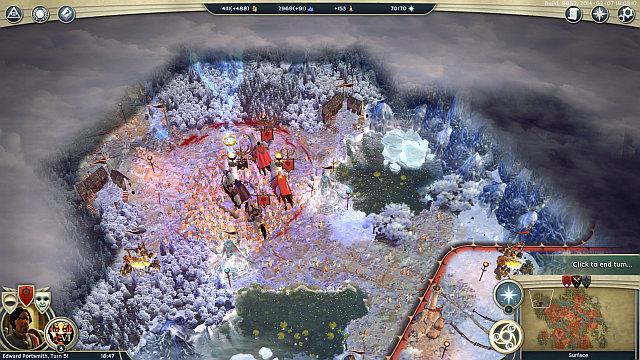 The last city with Oscar inside.
After you have captured the city, you can start preparing for the final battles. To be sure of your victory, you should remember about siege engines and ranged units. Attack at the moment at which your units are in full health. The last city is located to the West of the one that you captured earlier - along your way, you can still capture an enemy keep, but this is not required for the ultimate victory. Remember that, even if you manage to win the battle and Laryssa dies, you will still have to load the game. After you have won the final city, the mission will conclude.
Secure the Area - you complete this task in the way described in the walkthrough for the main mission. It consists in going to the West of the starting point and defeating all of the enemy units, ending with the Yeti. For that, you are rewarded with reinforcements - 2x Human Engineer, 2x Human Musketeer) and Cannons.
Take the first Settlement - this task is a piece of cake - you need to capture an enemy city that you run into along your way, a bit to the east of the starting point.
Capture the Frost Giant's Keep
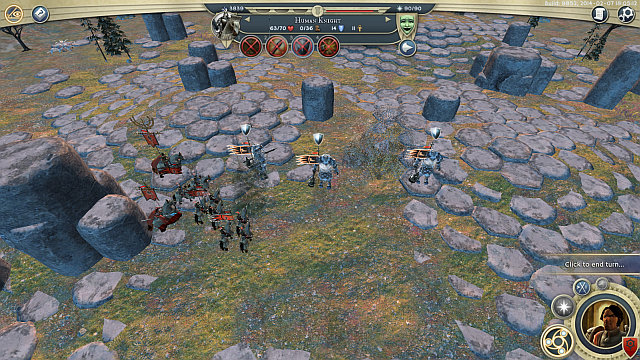 The battle with giants.
You receive this mission after you run to a village inhabited by Stone Giants. It is located to the East of the first enemy settlement that you captured. Then, another enemy location will be marked on your map, which belongs to Frost Giants. After you have captured their settlement, the settlement that tasked you with this mission will join your Empire. The fight with the giants is not the easiest thing to do. What works well here is the strong cavalry - Human Knights. Additionally, if the battle is participated by your leaders, you really need to be careful - one bad move and someone may die.
Note: The quest will be failed, if you open the border with the Stone Giants village and include them in your Empire through diplomacy.
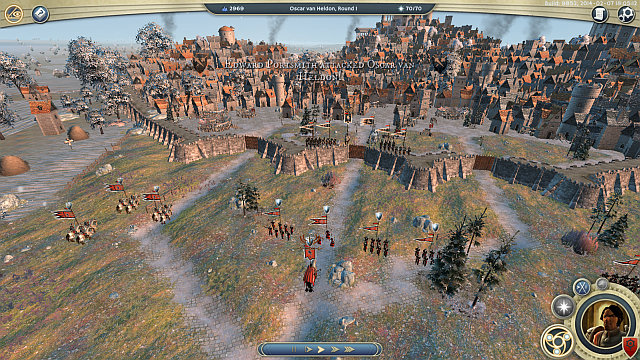 It is more difficult to capture a city without siege engines but still, that's possible.
1. Laryssa must survive, and you need to remember about that. This is why you need to make sure that you do not let her roam about, around the main map. Your enemy may take advantage of that. The same goes for battles - make sure that Laryssa attacks mainly at a distance and is not exposed to melee attacks, especially from the units that might inflict serious damage to her, as a result of such an attack (e.g. Frost Giant), and make it impossible, for her, to retreat.
2. Do not leave the cities unprotected - this way, you will save yourself a lot of trouble, which would occur if an enemy army got behind your lines and capture the unguarded city. You will then have to summon reinforcements from the other cities, or use the main army, which would then probably be somewhere else. This way, you will save yourself some time and, in some cases, alsostress.
3. Make sure that you do not lose too many units, especially at the beginning of the mission, thanks to which you will be able to get about capturing the first settlement straight away. It takes time, and predominantly gold (which you do not have plenty of, at the beginning of the game), to recruit new units.
4. While capturing cities, much of the advantage will be ensured by siege engines, such as Battering Rams, Trebuchets and Cannons. They will allow you to tear down gates quickly and attack enemy units at a distance, while dealing quite decent damage.
5. Remember about the map exploration and about attacking independent parties. Thanks to this, your units, and leaders, will obtain the much-needed experience. When it comes to the leaders, they will also obtain some valuable items, which will raise their statistics.
6. Make the best of your advantage in battles, provided by ranged units and leaders that are stronger and can cast useful spells. The appropriate use of these units should bolster your chances of winning.
7. Remember that you do not need to hurry. There is no limit of turns on the missions, which is why you can slowly explore the map and gain experience. Remember, however that you never know what might happen and the enemy is also developing his Empire. Therefore, it would be a good thing to do, to leave the exploration of the entire map for a moment. Thanks to this, you will minimize the probability of defeat, virtually to zero.
8. Levels and items of the leaders are carried over to the next chapter, where you will be able to assign skills to them again.
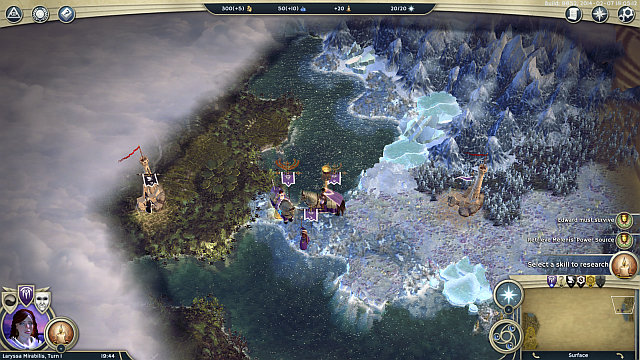 The starting point
Conditions of victory:
1. Edward must survive
2. Valery must survive
3. Retrieve Melenis' Power Source
Find Melenis's Lair
Find the Power Source
Bring the Oscillator Gem to safety
You start the mission at the Eastern end of the map. Your initial objective is to find Melenis's lair but, before you start the mission, you need to settle down in this area. Start by capturing the nearest Watchtower, and then go a bit to the North and capture your first city, which you should include in your Empire. Then, you should go to the South-West to find an independent village. At this point, you should run into the AI-controlled player - Tannah Boslarf, who is better left alone, for the time being. It is a good idea to enter an alliance with him but, you should watch out - he is not that credible. For that reason, it is better if you did not leave your city unguarded and prepare that, sooner or later, you will have to defeat him.
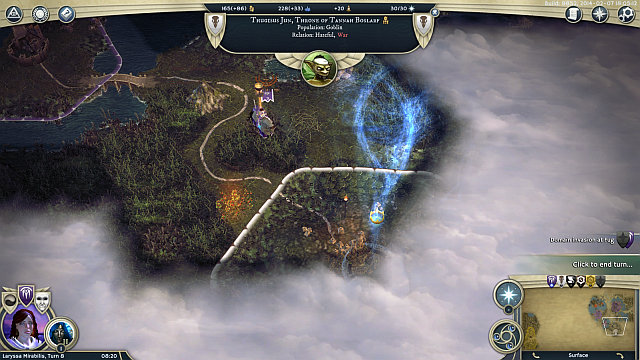 You will have to deal with Tannah, after all.
In the meantime, you should incorporate another city in your Empire, by means of the diplomatic option. If Tannah has not declared war on you, go West, towards the center of the map, while remembering to leave behind a big party, which would be capable of fighting an enemy back. Otherwise, remain in this area, train enough units, especially Goblin Swarm Darter and Battering Ram and go South of the first city, where there is the Throne City of the enemy goblins. You can also summon Wisp, using summoning spells, which will reinforce you in battle. During the siege, you should attempt to eliminate the enemy archers (Goblin Swarm Darter) first. It is imperative that you watch out for Edward. What is going to be useful here is Laryssa's spells.
Note: If Tannah did not declare war on you, you should consider declaring war on him. Thanks to this, your back will be secured and the way, deeper into the map, open.
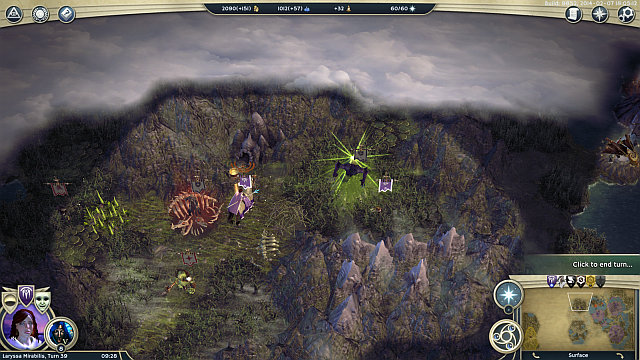
After you capture the city, continue towards the center of the map and train as many units as possible. Along your way, destroy the Monster Den, thanks to which the area will be a bit safer. Keep defeating the opponents and, to the extent it is possible, try not to lose too many units. Still, at this point, you should be secure with enough reinforcements, which you should deploy, incessantly, in the allied cities. Close to the cave that you are going towards, you will run into a strong Independent Party, consisting of Wraiths. They are difficult to defeat so, try to flank the enemies and finish them out one-by-one. This will constitute a certain test to your skills, before the final encounter in this mission, which is why you should master the tactic of fighting with these units. Finally, you will reach Melenis's lair (shown in the screenshot). Descend into the underground.
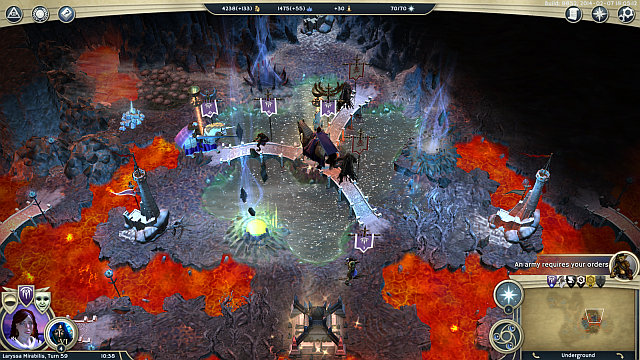 The spot where you will be attacked.
After you enter the cave, you will complete the first part of the mission and the second one will start. In the cave itself, you cannot, actually, get lost. Keep descending deeper and deeper. After a moment, you will encounter an independent town. At this moment, you will be, most probably, attacked by an army of Werlac, which is why, if you are commanding more than one army (which is advisable, if not necessary), you should make sure that they go side-by-side, which will ensure maximum advantage and cut down on your losses. There are going to be two waves, one after the other, which is why your losses need to be as small as possible, during the first one, if you want to be able to fight back the second one. After you win, go deeper into the cave or, if you want to, capture the nearby city.
Finally, you will reach the location shown in the above screenshot. The ruins, with the 3 bridges that lead up to them, are your next destination. Make sure, however, before the attack, that you have sufficient units with you because, after you explore the ruins, you will still have to fight a battle with two strong parties, consisting of the 3x Wraith and the Wraith King. Fortunately enough, you will be aided by the armies of Valerego. Nevertheless, you will have to make sure , additionally, that also he survives.
 The allied city.
After you win, the last thing that you need to do, is take the item that you have obtained, into the safety, i.e. to the allied settlement in the South-Western corner of the map. Go towards the cave's exit. You can leave the undergrounds in two different ways - the safer one and one that requires you to fight several battles. The safer way is the one that you took to get here. This way, you will emerge in the middle of the map. The more dangerous way will allow you to gain more experience, and it is to the left of the point where you were attacked by the armies of Werlac. IF you go that way, you will resurface closer to the allied village but, right next to the Throne City of the enemy army. If you want to deal the final blow to your opponent, here is your opportunity. However, if your armies have been considerably weakened and you want to end this mission as quickly as possible, it seems that the better option is to return to the spot, where you initially entered the cave. Regardless of the way that you chose, your task is to reach the allied village, which ends this mission.
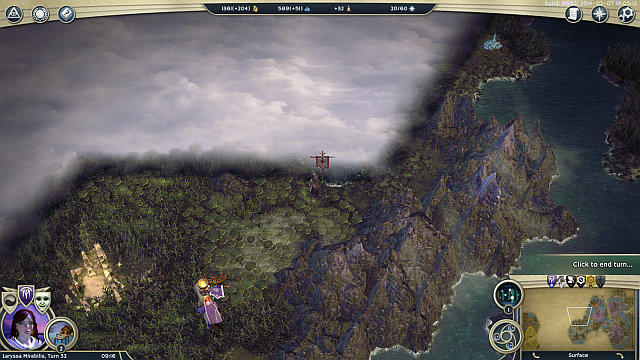 The first encounter with wraiths.
1. Upgrade your leaders at the beginning of the mission. their experience points and the levels that they gained have been transferred, over from the previous mission, which is why you can distribute their skills again. It is best to do that at the very beginning.
2. The fight with Tannah Boslarf is only a matter of time. At the beginning, when your forces are negligible, do not risk considerable losses, by taking a careless step. Also, do not wait endlessly - recruit enough units and attack at the moment convenient to you, thanks to which you will secure your back before you move on.
3. If you are suffering from the meager of units, or you find summoning reinforcements from the city tedious, and your mana supplies are high, consider researches that will allow you to summon more and more powerful units. You can summon them onto the field near the allied city (after you prepare the spell) or to the one, where one of your leaders is currently staying.
4. In the case in which you want your reinforcements delivered to the battlefield, near the cave, a good idea to transport them is to research into Basic Seafaring and transferring them over water. Although you will have to wait for the entire turn, until you get them, all in all, this way it is faster than over the land.
5. In this scenario, an excellent combination is keeping the appropriate balance between archers (Goblin Swarm Darter), and the strong cavalry (Goblin Big Beetle). Thanks to the high defense of the cavalry, they can take on the enemy at close quarters, whereas the archers will be attacking effectively, at long range.
6. The battle against Werlac is not the easiest one, which is why, before you descend into the underground, make sure that you have appropriate forces in your army, especially the units of high endurance. Also, remember that, a moment later, you will have to fight another, probably last, major battle in this mission. That is why the appropriate ensuring of reinforcements, and using the skills of your leaders will be the key to success. It goes without saying that, the more and the better units you summon/include, from the cities, the easier the final battles will be and the lower the losses.
7. After you exit the underground, watch out for your cities, because Werlac's armies will, most probably, attack them. If, however, you are only interested in completing this mission, order your units towards the allied settlement in the South-Western corner of the map, to protect your leaders against the enemy armies tyrannizing the map.
8. If, after the fights in the underground, you still have enough units and the will to fight, it is worth considering the onslaught onto Werlac's Throne City. You can expect that the battle will be interesting and, of course, that you will receive some attention-worthy amount of experience.
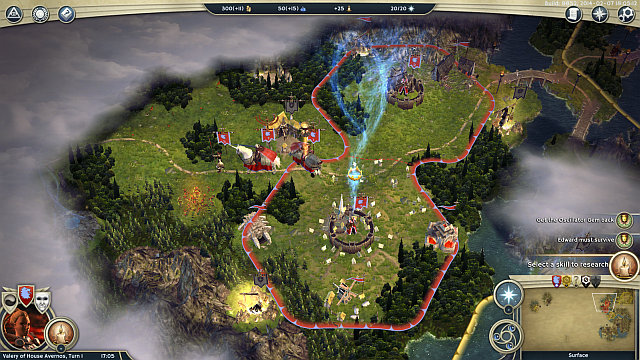 Starting point.
Conditions of victory:
1. Get the Oscillator Gem back
2. Edward must survive
3. Kill the traitors
a) Kill Drugal
b) Kill Gormsog
c) Kill Svengir
Exceptionally, now you start the game with one city, a keep and two (temporary - as it will soon turn out allies). If you choose the "Can you assist me?" dialogue option, and then "Yes" your ally will dispatch his armies to the defense of your city. However, in the light of the events yet to happen, this is not recommended. Gather all of your units, also the ones in the city, which is safe (as of now) and clear the area. In your city, start building the buildings that will allow you to recruit new units, as well as the ones that raise their levels.
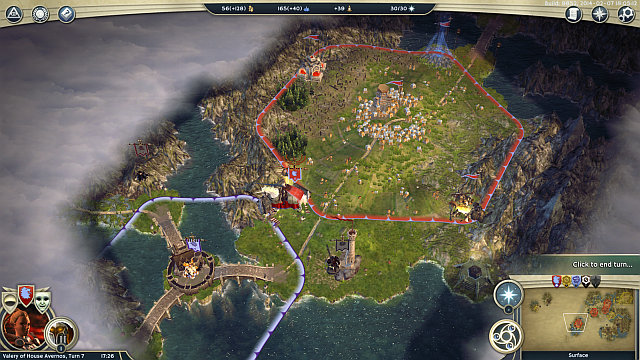 The keep, after the capturing of which, there will be a twist.
Keep following the path to the West, while clearing the path, as you go and exploring Tombs as well as Ancient Ruins. After a moment's walk, you will find a independent city, which you can include in your Empire.. Remain in the area, for a moment and make sure that you have cleared it of the enemy units. Then, follow the road to the South, where you will find another city, which you should also include in your Empire. Below the settlement, you will find a keep, which you should approach ONLY if your cities are secured and the area cleared. ON the East, you will find yet another city, which you can take care of. Before you capture the keep, you should have a good army, which you take on Svengir with, in a hasty attack. Once you are ready, capture the enemy fortress and prepare for a surprise.
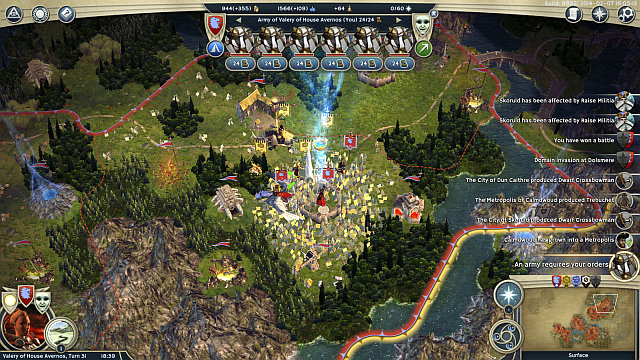 Attack of the "allied" armies.
Well, your former allies are nothing short of traitors and you need to deal with them, one after the other. After you capture the fortress, you should go ahead with your armies, towards the nearest adversary - Svengir - and eliminate him as quickly as possible. First of all, capture the first city and then, try to clear the region and go North-West. At all times, remember to train new units in your cities. In the ones that are the closest to the enemy settlements, also train the units that you are going to need for the future attack. Remember that, most probably, you will be nagged at by incessant enemy attacks, and it is sure to happen at the beginning, right after the change of alliances.
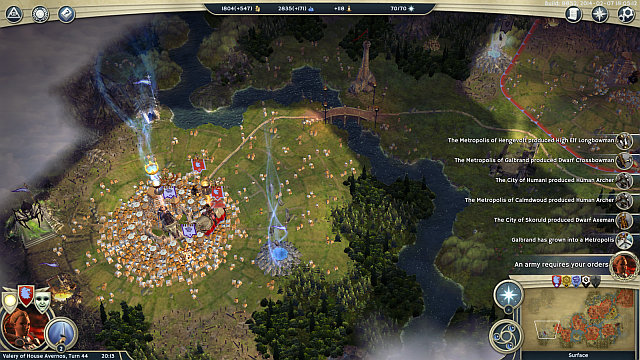 Svengir's Throne City.
In the meantime, you should reach the next city to the North-West of the first one, which you captured from Svengir. Again, include it in your Empire and keep going West, to your opponent's Throne City. If you seize control over the situation and secure successive spoils of war, there will come time for the final showdown, against the first one of the traitors. For that reason, gather your army, along with siege engines, and attack the Throne City. Progress slowly but methodically, thanks to which you will avoid a surprise attack on the weakly-defended city. After the successful onslaught on Svengir's throne room, it is time to turn your attention to the North-West, where there are more enemies waiting for you, which you should be able to handle simultaneously.
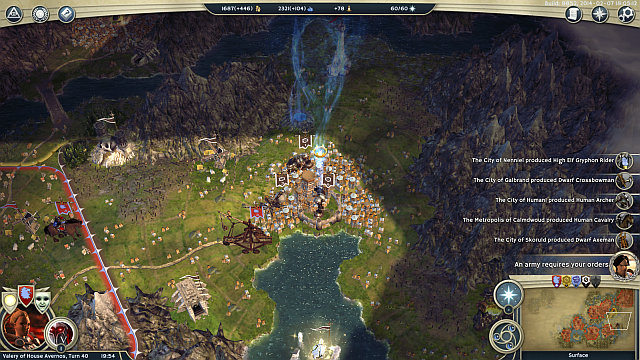 Drugal's Throne City
Drugal's cities are in the Eastern end of the map. You should already have your own, well-developed city in that region, which will be an ideal field base for attacking the opponent. remember that you should prepare an appropriate number of ranged units and trebuchets. To the extent it is possible, you should deliver one of your leaders to the battlefield, which will considerably increase your forces.
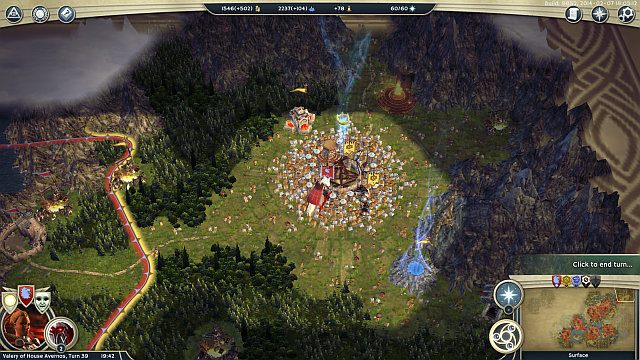 Gormsog's Throne City.
Here, the situation is similar, if not identical, as in the case of the earlier two - gather an appropriate army, including siege engines, and go to the North-East of your first city, which should now be your field base. If you capture the city, and you will not find your main enemy there, you will find him in the second city, which is located to the south of the Throne City. IF you have sufficient armies, go there immediately. Otherwise, wait until you regenerate your forces and deal the final blow.
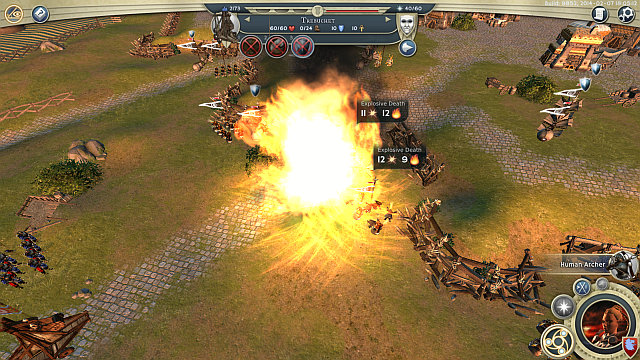 Exploding Spy Drone.
1. The initial alliances are temporary. You should remember about that and take advantage of the time that you have left. Make sure that your cities are safe, develop well and have the base for recruitment of offensive units. Therefore, you should not haste to capture the keep, because it is after this victory that you will be betrayed. If you move too fast into the center of the map, and leave the cities underdeveloped and without protection, you can forget about capturing the enemy fortress quickly (if at all). The game will probably get longer and you will be busy running around the map and recapturing your cities, instead of attacking the enemies.
2. If you need to summon your armies quickly, to defend a city, most probably a newly-captured one, in the face of the approaching armies, use the strategic Raise Militia spell. Thanks to this, there will appear an allied unit in the city and the city will lose 100 population. You should not, however, hope for any strong unit but, if there is no other means of defending the city, remember that there is a way.
3. Do not haste to capture the abovementioned keep. regenerate your units in cities, explore the map and get prepared for the demanding battle.
4. The enemy armies are quite sizeable but, many of the enemy units are Spy Drone. You need to use the fact that they explode, after they are destroyed to your advantage, thanks to which you will be able to deal quite decent damage to all the nearby units. Therefore, you should attempt to start a chain reaction where each Spy Drone destroys, or damages another one. Thanks to this, you will be able to deal considerable damage to the enemy, by detonating him at the right moment. However, this works both ways - you should avoid the situation in which the enemy drones come closer and surround your units.
5. Towards the end of the game, when the enemies only have one city each, you can send all of the units to besiege them and leave the cities with few, or no, units to defend them. Probably, nobody will make it through and, even if the enemy attempts snatching the morsel and splits his forces, the better for you. The less units there are, to defend an enemy city, the easier the siege is going to be.
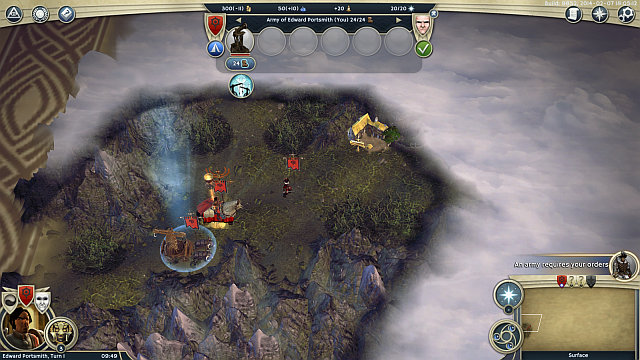 Starting area.
Conditions of victory:
1. Find Laryssa
2. Valery must survive
3. Sulthor must survive
At the very beginning of this mission, it is worth mentioning that you need to care about your units here and lose as few of them as possible, preferably none. The loss of the Flame Tank is impermissible, because it will be, virtually, impossible to seize the first city without it. This is why, while moving to the East, attack only when you are sure to win and where you sustain no losses. After the first move that you make, you will be joined by a new leader, Sulthor. Capture the fortress and take the path into the center of the map. Along your way, eliminate the Brigand Camp.
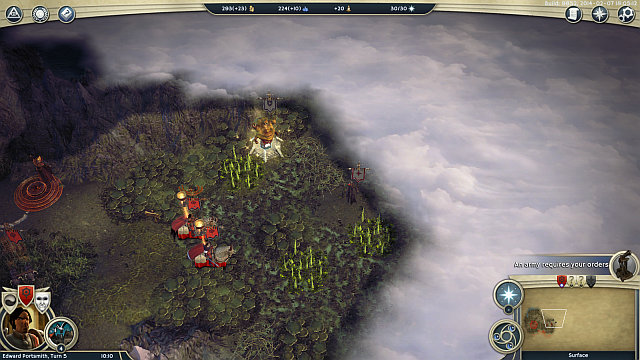
You will reach the place shown in the screenshot. Keep your units close to each other here, and attempt to eliminate the Independent Party made up of Wraiths on your own. Again, after a short walk, you will walk into an area where you can erect a fortress and, after you capture the Watchtower, meet the AI-controlled player - Carishar. The dialogue options are not important here. Keep going North and you will meet Laryssa, and you will have to make a choice. If you choose the "Stopping you traitor." dialogue option, you will make the choice to attack Laryssa. In the case of the "Can we talk?" option, after a short conversation, you will be able to make a choice - whether to remain faithful to your mission and attack Larissa (Commonwealth), or to support her (Torchbearers).
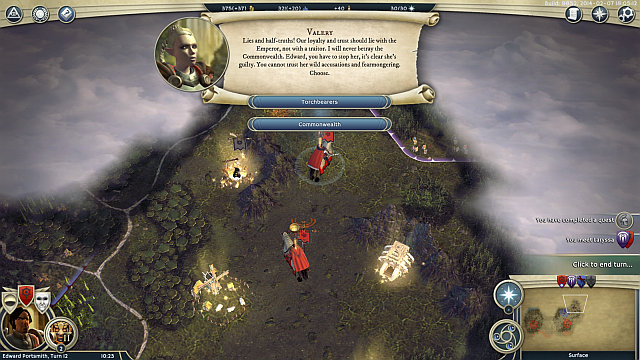 Te moment of choice.
NOTE: On this choice, the course of both this one and the next two mission depends and, which follows, the ending of the campaign.
 The siege of Laryssa's Throne City.
Conditions of victory:
1. Execute Laryssa
2. Dwemus must survive
3. Defeat Carishar
After you decided to remain faithful to the Empire, you have no other choice but to attack Laryssa's city. After two turns, you will be joined by another leader, Dwemus, thanks t which your party will grow to 4, of which (even Edward, until you capture the city) can die. Immediately, launch the attack, with all your units, on Laryssa's Throne City. The most important thing is to make a good use of the leaders and the Flame Tank, which you should use to destroy the gates and to deal considerable damage to the units on the walls. Another important matter is using the Human Knight correctly, because these are tough units of powerful attacks. After you destroy the gate, it is the that should block the passage and take on the majority of attacks. The final matter, which ensures you with success is using the leaders. If, however, the number of their health points is low, i.e. if the next attack is likely to kill them, do not hesitate and retire them from the first line of attack, outside of the reach of the enemy units. You should especially watch out for Laryssa's attacks, here.
IF you have thought that capturing with the city is the end of fun, you will be disappointed p this is only the beginning of the battle, where you need to win against Carishara, who has not one, but several cities. Therefore, start training your units as quickly as possible, in all the cities, including the one that you have just captured. If your army remained strong enough, after the attack on Laryssa's Throne City, the best way in which you can use it is attack the city to the West of yours. Your next goal should be to go South, where you find more of Carishara's cities. Deal with them in the same way as with the previous ones. Slowly, without haste, by producing more units. Then, you should have no problems capturing the rest of the cities. After the last one falls and you defeat the opponent, the mission will end in success.
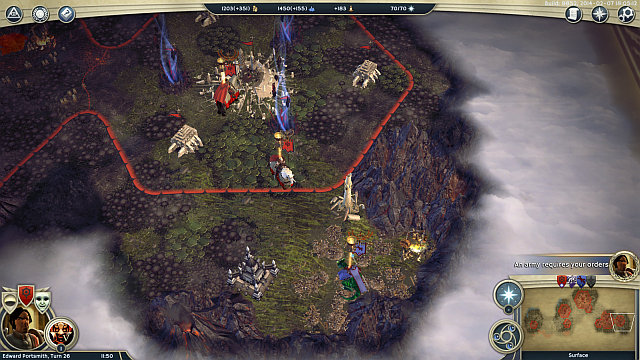 The place of the final showdown with Carishar.
Conditions of victory:
1. Defeat Carishar
2. Laryssa must survive
An alternative way of ending this mission is supporting Laryssa and defeating Carishar together with her. Valery will be outraged over your decision and will leave the party. Laryssa will then become your ally. First of all, command your army to the West, to capture the first city. In the meantime, Laryssa will most probably go South to attack the other cities. You should, therefore, haste to capture your target and dispatch your army to the south, to reinforce her, because she can easily be defeated and the mission will end in failure. In the city that you capture, you should, of course, remember to start the production of new units. Keep pushing to the South and keep capturing city after city. If you still have the Flame Tank, than this will be a piece of cake. If not, then you should train some more units. Then, you will have little problems defeating Carishar.
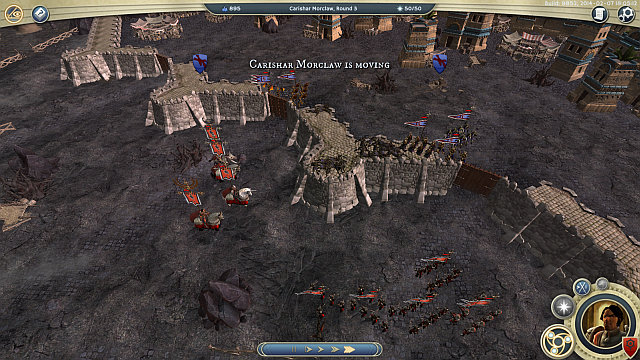 With the help from leaders, the siege is but a breeze.
1. In the initial phase of the game, try not to lose any of your units. This is really important because the successful siege of the first city, with a much limited army, is very difficult, or even impossible. That is why you should try not to lose any units during the initial attacks. Additionally, for the exploration of places on the map, whenever possible, collect the items and additional units.
2. The spell that you can choose for Valery is very helpful at attempts to keep your units alive. It is called Phoenix Warrior. After it is cast on the selected unit, in the case in which it dies, and you win the battle, it respawns with 35% of its health points. It is a good idea to cast this spell on the units that are low on HP and will be, probably, attacked in the next turn.
3. While fighting against Carishar, whether as Laryssa's ally, or alone, it is important that you capture the quickly the city to the West of the one that you have (or haven't) captured from Laryssa. Thanks to this, your back will be secure and your way to Carishar's southern cities paved.
4. Remember that there is no turning back, at the moment at which you make your choice which is why it is a good idea to save the game, in order to try another option of ending the campaign, in the future. On the choice between Commonwealth or Torchbearers depends the course of, not only, this mission, but also of the following two and the end of the campaign, as a result. Choosing the first option leads to Slaying a False God, and then to Ending the Old Ways. Choosing
Torchbearers offers The Rockshoal Isles and Last Chance.
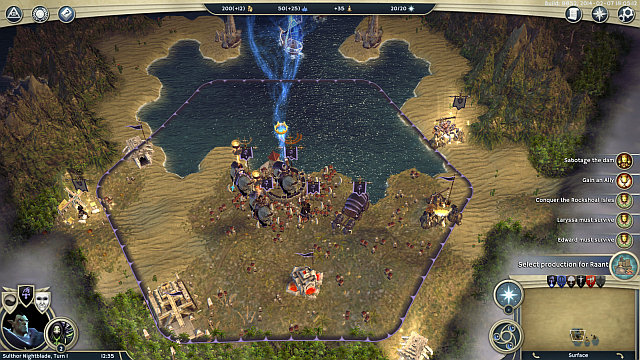 Starting point.
Conditions of victory:
1. Conquer the Rockshoal Isles
2. Laryssa must survive
3. Edward must survive
Side missions:
1. Gain an Ally
2. Sabotage the dam
a) Raze the watchtower
b) Reach the dam unseen
c) Blame the sabotage on Zerti (optionally)
This mission is the continuation of the campaign, from the point in which you helped Laryssa and supported Torchbearers, in mission 4 (Matters of Duty).
Start in the same way as usual, by distributing skills to the leaders and be securing the region. Also, start the production of units and the exploration of the undergrounds, with Goblin Assassins. Try to take away from them as much gold as possible. After you have secured your islet, you should go towards the Western island, where you will find a good spot to found a city. Again, clear the region. Now, as you already have 3 cities, you should have no problems gathering victorious army. Most probably, you will have the opportunity to enter peace with one of the opponents. Take advantage of the time this has bought you and start producing your army, as well as securing your position. Then, attack the individual players, one by one.
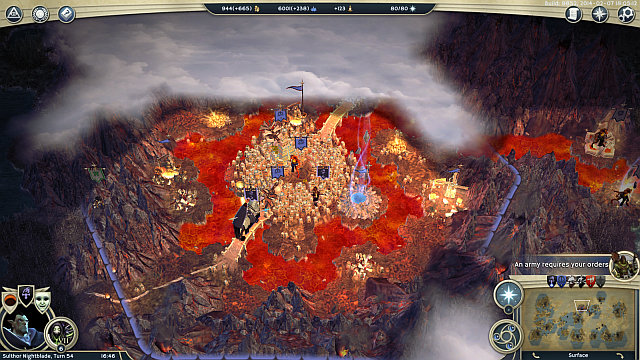 In the heart of the heal.
This mission, in itself, is not too demanding and does not cause too much problems but, due to the size of the map, and the numbers of enemies, it is time-consuming. The cities that belong to Quosk Roothealer can be found in the West, the ones that belong to Rish Kyan the Red are located to the East of your starting position. The final two opponents are: Zerti the Sleek -to the North-East, whereas the last opponent, Argula Ironheart, is in the North-Western corner of the map and in its center. If possible, try to capture the enemy Throne Cities and defeat the opposing leaders in battle straight away. This way, you will save units, which you would otherwise lose, while attempting to seize all cities. If you want to round out your army, a good idea is to capture a city and include it in your Empire. Then, you could take a short rest to regenerate your losses. Elimination of all 4 opponents ends the mission and starts the last chapter of the campaign.
Gain an Ally - it consists in entering an alliance with any of your opponents. It is a good idea to do that at the very beginning, when the relations are not yet that bad (you can improve the by opening your borders)
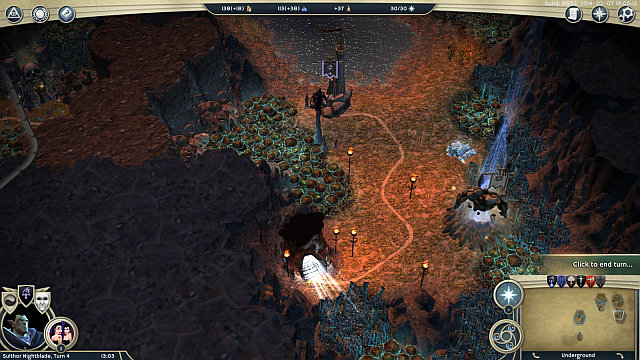 The cave leading up to the exit next to the dam.
Sabotage the dam - to sneak to the dam command your assassins to the undergrounds, towards the exit from the caves marked on the map. The purpose of this is to end up on the surface, right next to the enemy watchtower. Before you surface, you will be allowed to choose from among two options - sacrifice your army and blame it on the other player (losing the army), or not to. Blaming another player will result in the deterioration of relations between Zertim and Rish'em which will lead to war, which is what you would profit from. After you surface, capture the watchtower, and raze it to the ground (raze). In the case in which you are spotted, you can be sure that Rish Kyan will blame it on you. If you decide to sacrifice your army, after some time, you will be able to make peace with Rish Kyan, who will ask you for that himself (the "Offer help" option, one turn after the destruction of the dam).
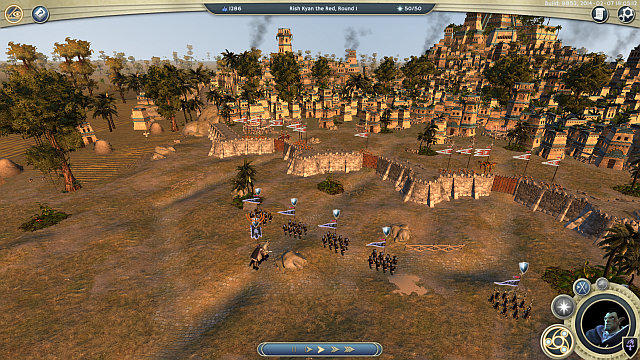 Enemy at the gates.
1. Dfeating the enemies is time consuming. It is best, therefore, to deal with one enemy at a time, two at most, thanks to which you will not have to fight them all simultaneously. When it comes to the order, in which you attack them it is up to you but, it is best to start with those of the cities that are located the closest.
2. In the undergrounds, there are lots of independent cities, which can join your empire, in exchange for gold, or performing a quest. Due to the fact that there are relatively few enemies in the undergrounds, these cities may prove to be your treasury that produces lots of gold., which would allow you to maintain a numerous army.
3. If you are not able to ensure due safety to the cities that you captured, and you do not want them to be recaptured, instead of including them in your empire, you can plunder and destroy them. As a result, by the time that they are restored (and the computer is not too quick to that), they will disappear from the map and will not be able to be captured, as a result.
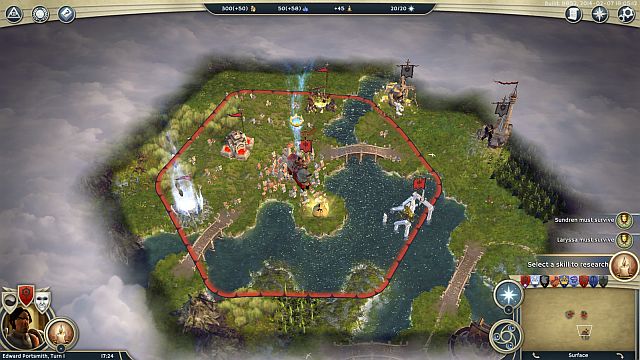 The place where you start.
Conditions of victory:
1. Laryssa must survive
2. Sundren must survive
3. Imprison Leonus and Saridas
This mission is an offshoot of the decision that you made in mission 4 (siding with Torchbearers) and of completing The Rockshoal Isles mission. Your task is to attack two main leaders of the opposing sides- Leonus and Saridas. To make things more difficult, you need to attack them with a special wand, which you need to pick up from the ground right after the game starts. Additionally, you are waging war against everybody around you, and you are stuck among warring parties. There is a lot to come.
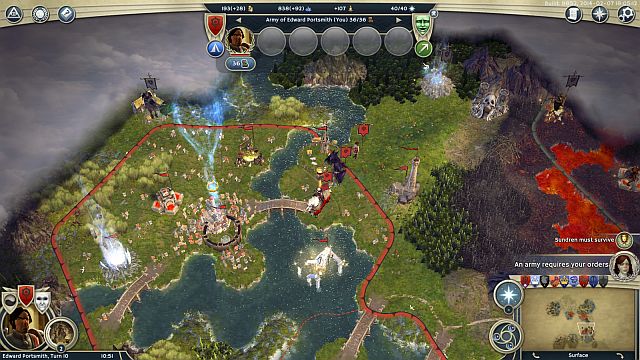 Sundren will bring considerable forces along.
Start by securing the regions around your cities, so as to ensure them with unhindered development. Around, there also are lots of independent areas, which it would be best to capture, best by completing quests, or forcibly, if it comes to that (most probably, there will be too little gold to buy those lands). Ensure appropriate development of the cities, recruit defensive units to station them in the cities and, if possible, also cavalry, which you should use to dissipate the fog of war. The greatest difficulty lies not in defeating the enemies, but in finding them with an army sizeable enough and with Edward equipped with the wand. As for, Leonus look for him in the East, and for the Elven king, Saridas, in the West. It is impossible to say, with all certainty where they are, but most probably they will be around that regions, or they will be hasting towards the center of the map. It seems to be a good idea to capture the city of an enemy and wait, in hope that they bring reinforcements and attempt to recapture the lost city.

After you have located either of the main enemies, the thing is going to be simple - you need to attack and fight a battle with them. Also, the leader with the wand must participate, who needs to attack the enemy leader with a melee attack, before using the wand, which will change his respawn place (otherwise he will return to his Throne City). Also, you need to remember that, during the battle, you do not need to win, what is important is defeating the main enemy. He will then be placed in a "cage" in the undergrounds. Repeat that action with the other of the enemies and the mission will be completed.
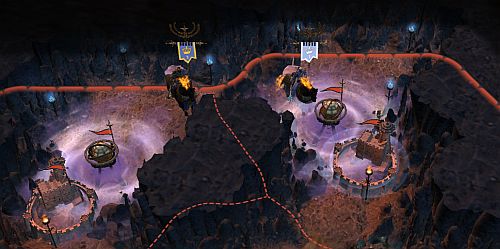
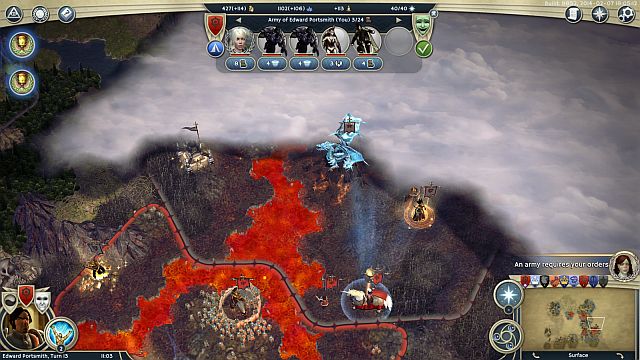 A nearby Dwelling.
1. Secure cities and their regions. Nearby, you will find many enemies on occupied structures. Defeating the enemies will ensure temporary peace and will support the development of the cities.
2. Try to recapture your cities. This will strengthen your position and allow you to produce new, fresh and more expensive units.
3. Locate your main opponents as quickly as possible, do not worry about their allies. What you should be interested in is Saridas, to the West and Emperor Leonus, staying in the Eastern corner of the map. If you find yourself incapable of finding them, seize a city. There is a chance that they will lead the counterattack themselves and then you will be able to attack.
4. Sundren appears after the end of the tenth turn, around your Throne City. He will bring quite an army along, which you can use to clear the region or as a support in the battle against Edward.
5. Close to your Throne City there is a Dwelling, that you might be interested in. It will allow you to produce quite interesting units (Dragon).
6. Try to dispatch as many units as you can, into all corners of the map, so as to be able to see as much of it as possible, at the same time. This will help you locate the enemy units and, with a bit of luck, you might also be able to find your main enemies.
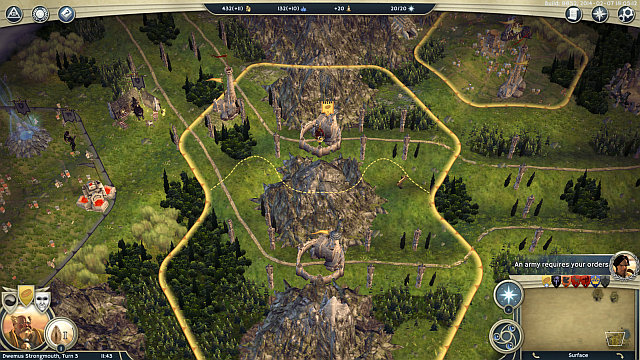 The gates to the empire.
Conditions of victory:
1. Defeat Leonus
2. Defeat Leonus's Generals
a) Defeat Wazuhl
b) Defeat Colm
c) Defeat Baradir
3. Defeat Sulthor
4. Valery must survive
5. Edward must survive
Side missions:
1. Raze enemy targeted city
The mission is the offshoot of your choice of Commonwealth, which you made in mission 4. Your task is to defeat the emperor and his generals. Start by capturing the nearby Watchtower and by starting your first city, right above it. Then, clear the region and, as soon as you are ready, go West, through two keeps, which you need to capture. Right past the keeps, you will encounter the first independent village., which you should include in your Empire. By proceeding to the West, you will find your opponents - Colm. If you want to enter an alliance with Colm, or the city is independent, capture this one, and the one to the North, up the road. Thanks to this, you will you will already have 4 cities, which is sufficient to start producing your armies and take to the main mission.
Colm's home is to the West of your first cities so, you should have no problems finding it. You can end this part of the mission in a standard way, by attacking your enemy, or by entering an alliance with him. As you approach the city, you will be allowed to select several dialogue options. If you keep selecting the options on the top, ("To negotiate", "An alliance with Edward", "With your help, we do!", "Leonus's palace"), you will gain the opportunity to enter an alliance with the general. The additional condition, for Colm to enter the alliance with you is the destruction of one of the cities. to which he will point you. After you capture the city, select the option to raze or to plunder, and after several turns have passed, Colm will join you.
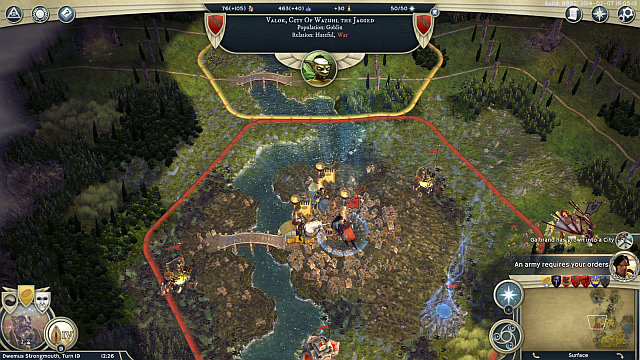 The Throne City of the enemy general.
Things are simple here - you need to capture the enemy Throne City, which should not pose too much of a problem. Use ranged units and the leaders' spells and you are sure to win the battle without any problems, because all the enemy has is weak units with low amount of HP.
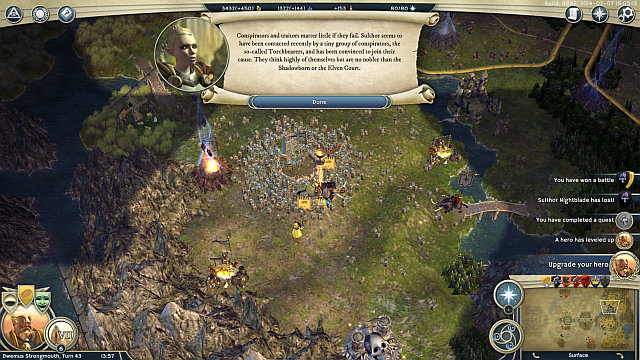 This is how traitors end up.
After you have dealt with the two generals, the time has come for the third enemy to die. However, your initial ally, Sulthor, for the reasons known only to him, decided to betray Edward, which is why you will have to deal with him, before you continue your conquest. Things are easier if you have decided to join forces with Colm. Yet, if you have not done that, you should have enough cities and gold anyways, to deal with the traitor. Make sure, in the first place, that your settlements are well-guarded and attack, best if you do that in several points simultaneously, thanks to which Sulthor will have to split his forces, which is going to weaken him, in turn. After you defeat the former ally, go west, towards the last general, and the emperor himself.
 The last stop before the final battle.
The last general in your way, before you reach Leonus's estate, is Baradir that is staying on the Western side of the map. After you have dealt with the previous generals and Sulthor you should have no problems dealing with this opponent. Remember, however that you need to gather a well-developed army, because Baradir's cities are very well guarded. You will then avoid a lengthy battle and multiple onslaughts - make sure that one powerful strike does the job. This will pave your way towards the emperor's palace. Make sure that you include the two cities into your empire and they remain there, because they constitute a good field base before the final attack on Leonus.
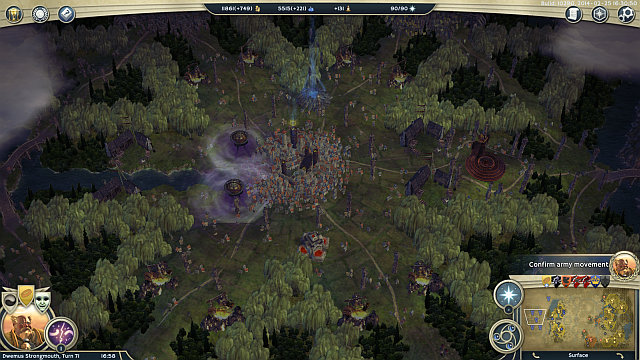 The Emperor's Throne City, veiled in darkness.
The emperor is the last, and the tougher, enemy in this mission. He has several cities, where he continually produces new, very good, units. Before you set out to conquer his Throne City, you therefore need to gather a sufficiently strong and numerous army. to be able to capture, at least, some of his cities, where you could supplement your losses that you have sustained in battle. You can find Leonus's palace on the Western end of the map. Try to capture city after city and, if possible, lure his armies and defend with attacks from behind the walls. If, however, you will be incapable of retaining the city, consider razing it, which is sure to weaken Leonus. In small steps, or in one big, huge attack you will finally capture all of the emperor's cities on the surface. If, however, you manage to defeat Leonus in battle, try to go to his Throne City, as quickly as possible, because after the fall of the leader and after you capture the city, the mission will end in success, without the necessity to capture all of the cities.
Raze enemy targeted city - after you meet Colm on the map you can carry out the conversation in such a way, so as to have him ask you for proofs of your power ("To negotiate", "An alliance with Edward", "With your help, we do!", "Leonus's palace"). The proof is to burn down the city selected by him (Azarog or Morgron), thanks to which Colm will become your ally.
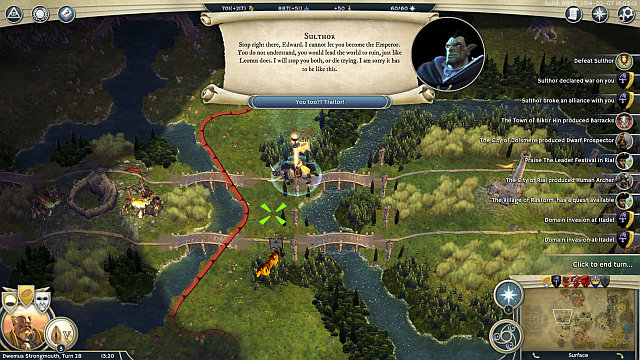 The place, after the capturing of which Sulthor betrays Edward.
1. Consider entering an alliance with Colm. He will support you in your fight against Sulthor and Leonus. Even if the support, rendered by him, is small, you can be sure that he will attract the attention, at least, of some of the enemy forces.
2. More or less, after you reach the middle of the map you will be betrayed by your former ally, Sulthor. Sufficiently early, make sure that you have dealt with the first two generals and that your cities are well-guarded. You can also prepare your army, to be prepared to attack immediately.
3. You should especially watch out for the emperor's Juggernauts, which are very difficult to destroy and have a strong attack. To the extent that it is possible, try avoiding fights with him and, in the case of necessary battle, make sure that you have units with sufficient HP.
4. If you cannot hold a given city, consider razing it to the ground, to prevent it from being recaptured by the enemy. A good solution is to use the Scorched Earth spell, on the newly-captured cities. This will destroy the city at the moment at which it falls back into enemy hands.
5. Try to capture Baradir's both cities. They are close to the emperor's cities, thanks to which you can use them as your field base.
6. As soon as you notice the opportunity to capture Leonus' Throne City, do not hesitate, even for a moment.. After you defeat the main leader and capture his Throne City this mission ends in success, without the necessity to capture the rest of the cities. However, if your forces are too weak, strike in the first place, at the cities with the weakest protection, and then gather more units to supplement the losses that you sustain in the onslaught.
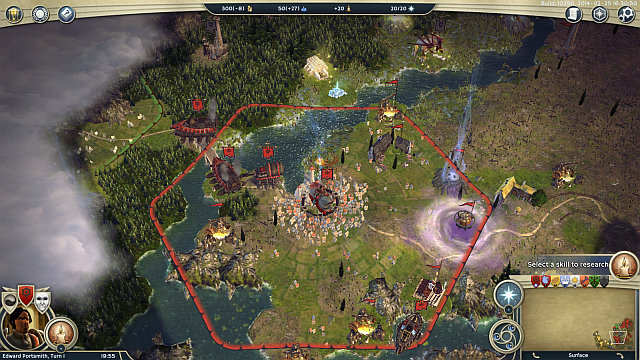 The point where you start your final conquest.
Conditions of victory:
1. Defeat the Elven Court
a) Defeat Saridas
b) Defeat Julia
c) Defeat Fai Dural
d) Defeat Leana
Side missions:
1. Help the Dwarves
This is the last mission of the campaign, and it is available after you have completed the Slaying a False God mission, which in turn, is the offshoot of the choice that you made in mission 4 (Matters of Duty). You start the game in the South-Eastern corner of the map. To the North of you, there are your new ally - Valery, whereas, to the West, there is Dwemus. Your new mission is to eliminate all of the remaining players, in order to unify these lands under your rule.
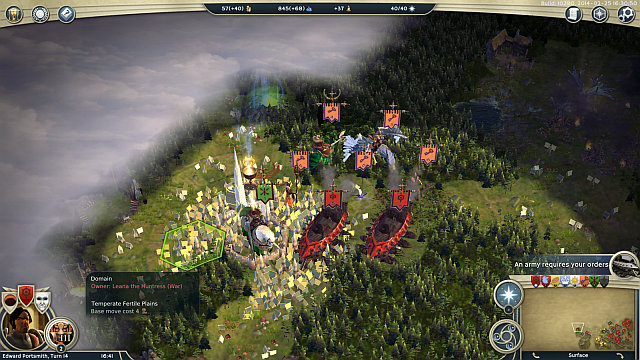 It is going to be quite a battle.
You start with a quite considerable army, which you should command to the West of your city, where you will encounter your first opponent- Leana. With good machines, you should be able to capture the first city, and defeat the High Elf Monster Hunters that are revealed, without any problems. Leana's next city is a bit to the North. It is highly probable that t will be captured by your ally, Valery. As you proceed to the West, you will encounter some more hostile cities, which you do not need to capture, if you do not want to lose your units. Then, continue Westwards, close to the Southern edge of the map. It is best to go towards your opponent's Throne City straight away. You can also capture one of her cities, along your path, in the case in which you are sure that you will win and that you will lose no units. After you have captured the Throne City and you defeat Leany in battle, the first opponent will be off your head.
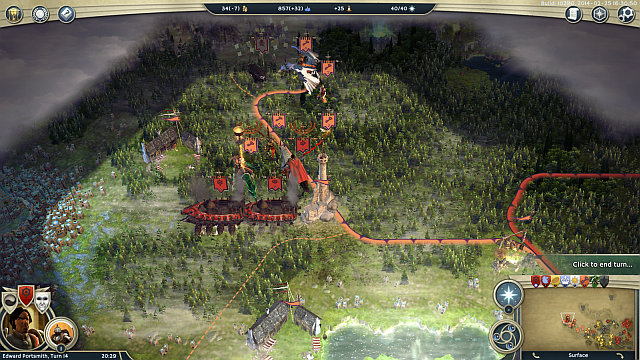 This mission is abundant in big exciting battles .
The next opponent that you encounter is Fai Durai. Also here, you should behave in the same way as in Leana's case. Remember to attack only if you are sure that you will not sustain too heavy losses. Go towards the Throne City straight away, or keep capturing the enemy cities, one after the other. Regardless of the path that you choose, after you capture the last city and defeat the last leader, also this enemy will fall into oblivion.
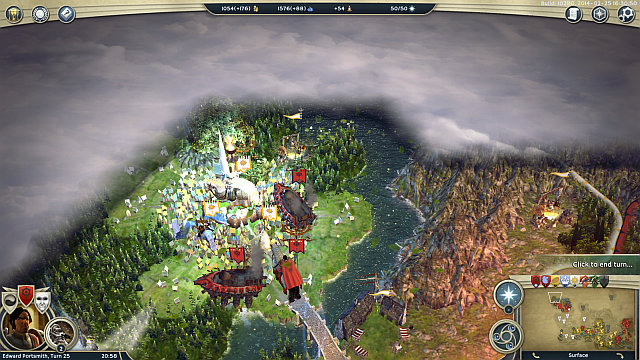 Another Throne City falls to the feet of the new emperor.
You can find the cities of the net opponent, if you keep going to the North-West. Again, there are no surprises here - the Throne City is heavily guarded. Take advantage of that and, if you need to supplement your armies, capture one of the better-developed cities and wait for a moment, until you are able to expand your army. Once you decide to attack the Throne City, make sure that your army is powerful enough. After the victorious besiegement, the road to the final opponent is wide open for you.
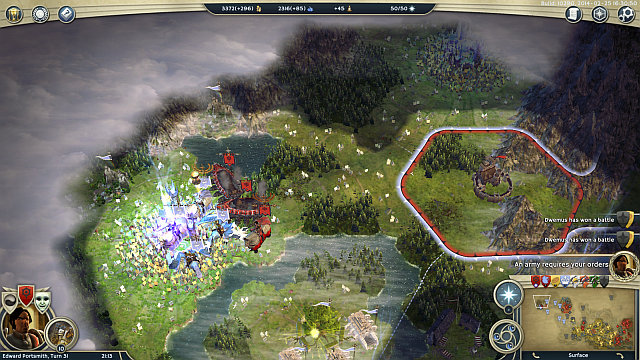 Long living, Commonwealth!
In order to complete the campaign, you still need to defeat one last enemy - Saridas. You should not have too many problems with that. As far as, in the case of the previous cases, you could afford waiting and capturing the consecutive cities, one after another, in this case you should march towards the last Throne City and attempt to capture it in one, confident strike, which completes the last mission in the Commonwealth campaign in success.
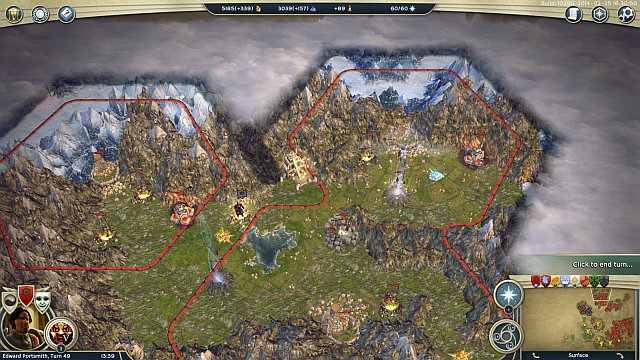 Some of the lands that you receive for the successful completion of the mission.
Help the Dwarves - After several turns, you will receive a piece of information from Dwemus, concerning the friendly Dwarves, that dwell to the north (during the message from Dwemus select the "Excellent, we will" dialogue option, which starts this mission). They will join you if only you clear the region of their cities of the marked opponents (these are elf groups). Dispatch a sizeable army there (or even 2), because the profitability of this mission is high - after you have secured the region, you will be rewarded with several cities, an army to the North of the map and also a fortress in the underground. This is sure to increase your influences in the region and ensures you with income of gold to your treasure.
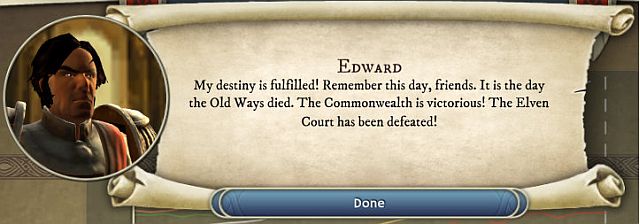
1. This mission is not too difficult, but it is time consuming. - defeating all 4 of the enemies requires you to cover go quite a way on the map and to fight a number of battles. Therefore, you should not haste - it is better to keep pushing forward methodically, than to make risky moves, without the cities secured, and return over and over again to recapture them.
2. You start with a very good army, which cannot go to waste. Therefore, try to progress with reinforcements, because the enemy may destroy one of them without any problems, if you divide it into too many parties.
3. The army that you start the mission with is so good that it should last you until the very end of the mission, especially when it comes to the excellent machines. It would be very costly to try replacing them which is why it is best not to lose them, because they ensure quite an advantage in battle.
4. You can defeat enemies in any order you wish however, it is best to defeat them in the order that you encounter them. This will ensure a quite stable situation at your back.
5. It is worthwhile to complete the side mission and help Dwemus's brothers. Thanks to this, you will gain several cities and your economy will surely not suffer from that. remember that the elven units are not weak and there are several parties of them. This is why you should dispatch a sufficiently strong army to dealing with them.
6. This mission can be completed in two ways - the first, and the slower, one consists in methodical cutting through, deeper into the map, and capturing of the successive enemy cities. The faster one assumes that you defeat your opponents in battle and quickly capture their Throne Cities, which will cause quick defeat. In this case, you especially need to watch out for your units, because the opportunity to supplant them is much limited.
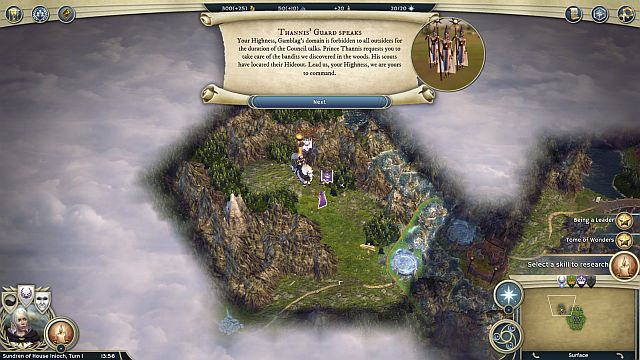 The beginning of the adventure.
Conditions of victory:
1. Liberate the Pool of Origins
2. Reskar must survive
Side missions
1. Hunt Bandits
2. Make your way to Eldaste
3. Find a way in
You start the game as Sundren and you will be joined in a moment by a small army, and you will receive the objective to destroy a Brigand Hideout. Go therefore to the place which has been marked on the map. You should have no problems dealing with them - this is the first battle of this campaign and you could say it is a warm-up. After you win, collect the treasure from the chest, right next to the hideout and go South, to the village that has been revealed.
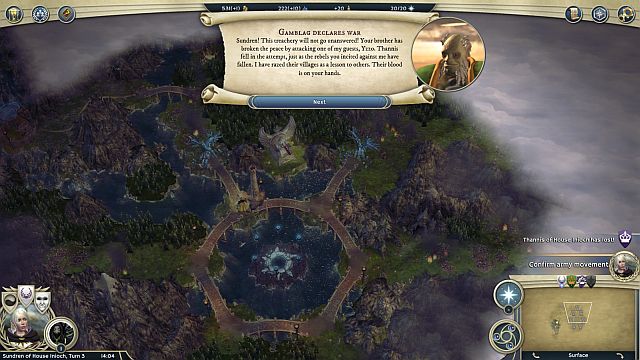 It begins with betrayal? Again...
Along your way, you will receive a message of your brother's alleged betrayal, and Gamblag will declare war on you. Defeat the bandits close to Eldaste and you will be rewarded with that city, where you should start the production of new units. As you continue to the East, you will find a Dwelling, which will most probably task you with a mission to seize the nearby keep, which belongs to your opponent. If you have lost any units, e.g. while fighting the brigands, wait for a moment and summon new units from the city. After you capture the keep, the Dwelling with fairies will join your Empire.
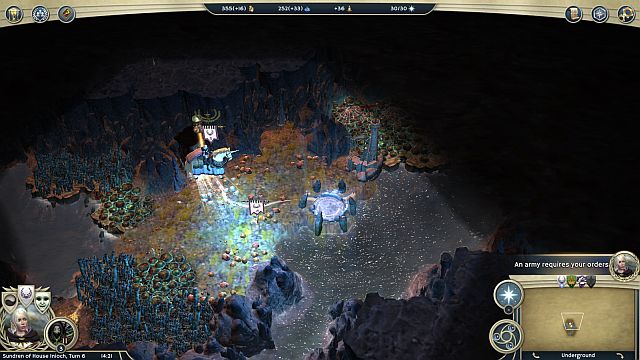 To activate the teleport, you need to defeat the opponents at the other side.
Then, descend to the underground. You will find an inactive teleport here and, after you capture the keep, you will be able to see its other end. Attack the opponent. You should be able to defeat him without any problems, using the army of fairies that you received after the capturing of the castle. Now, you can use the teleport to cross the river.
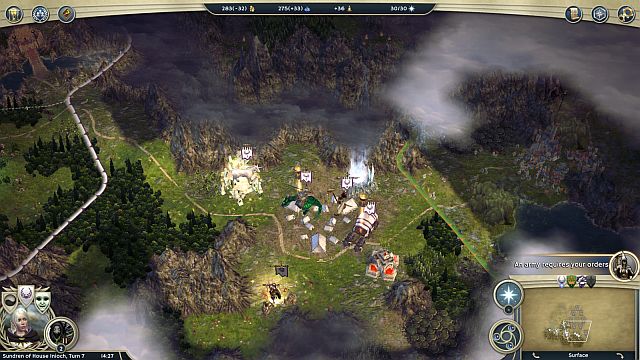 The place where Reskar joins you.
In the meantime, send an unit to the East, to the Dwelling that you captured, where you meet a leader. He will join you after you talk to him, along with his units, the Settlers among others, which you should use to build a village. Command the newly-obtained army to the nearby city of Gamblag's. You can also reinforce them with the units from the undergrounds (the other entrance is right next to your city. Then, you will capture the city without any problems. After that, include the city into your empire. Command your army to the North, where you will capture another keep and find another city. If necessary, take your time and keep supplanting the losses in your army.
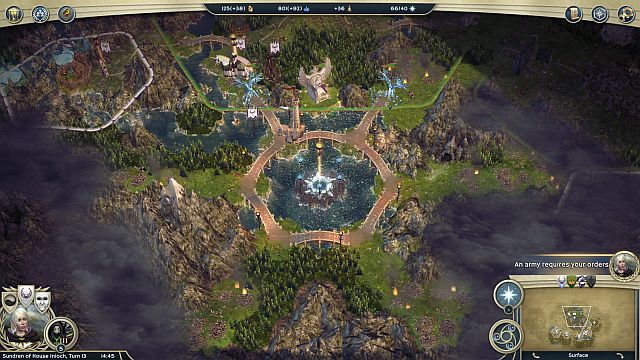 The central point on the map and your final destination right below- the opponent's Throne City .
Your final destination is the Gamblag's Throne City, which is located above the central point in the center of the map. As you approach the city, you will receive additional siege units, which you will surely do with in the battle. Ensure appropriate advantage, because the forces gathered inn the city are considerable. Remember that Reskar cannot die in battle so, try not to get him dragged into the middle of things. The more ranged units in your army, the better, you should not have any problems producing them. After you deal with the opponent, the mission will conclude.
Hunt Bandits - there is nothing easier than that, simply go to the hideout and fight a simple battle to complete this small quest.
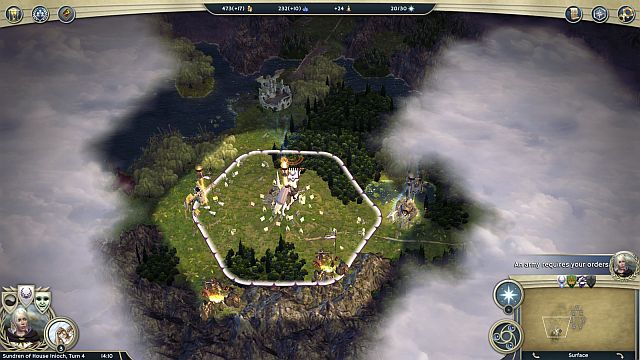 After you defeat the brigands, the Eldaste village will be very grateful to you.
Make your way to Eldaste - along your way to the South of the map, towards the village that is revealed after you destroy the brigand hideout, you will encounter another enemy group, close to the village. After you win the battle, the city will join you and the mission will be completed.
Find a way in - to find the way to Gamblag's, you need to activate the teleport in the underground. To do that, you need o defeat the enemies occupying the hex with the teleport, at the other side of the brook. Thanks to this, you will be allowed to use the teleport to get to the Gamblag's Throne City quickly.
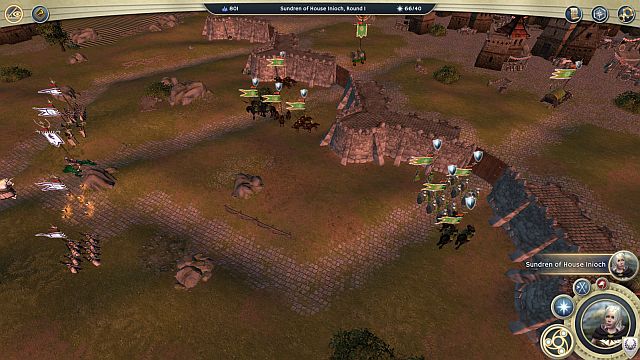 Capturing of the Throne City is not the most difficult thing in the world.
1. Complete the Side missions first- they are not too difficult and thanks to them, you will train fighting in battles and moving around the map. Additionally, they push the storyline forward.
2. Inthe easy beginning battles, try not to lose any units. You are going to need them in the final, a bit more difficult, showdown. If you do not exert them too much no, you will not have to supplant too many of the units, in one go, and wait for reinforcements before you start the onslaught.
3. On the map, there are many places where you can find gold, mana, upgrades for the cities and bonuses to research into. Try dispatching the cheap units into each corner of the map, thanks to which you will be able to gather many bonuses that speed up the development of your empire.
4. The condition of the victory is capturing the Gamblag's Throne City and defeating him in battle (he is most probable to be in the Throne City). Therefore, it is not necessary to capture all the cities along your way but, this will prove quite useful, because you will be able to supplant your units faster.
5. Remember that your leader and Reskar must survive. Until the moment in which you capture your first city - Sundren, he also cannot die. Therefore, you need to watch out for them and make sure that they are not surrounded by the enemy units, because this may have grave consequences for them.
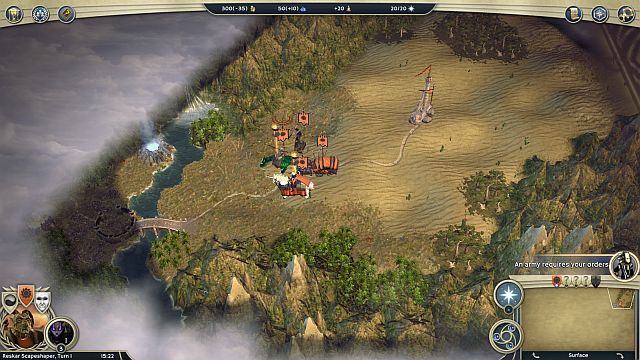 The starting place of the conquest.
Conditions of victory:
1. Sundren must survive
2. Nomlik must survive
3. Groshak must survive
4. Take over the Region
a) Find all opposition
b) Find and Eliminate Shnaga
c) Find and Eliminate Urlagh
d) Find and Eliminate Lucian
Side missions
1. Find the Elves
2. Ride the Gold Wyvern to the Dragon's Peak
Start by rebuilding another city right in front you. Thanks to this, you will start with a bigger city, than in the case in which you would found one in another spot. Keep going West and you will find a Brigand Hideout near the gold mine, which you should raze to the ground, to prevent the groups of brigands from running wild across the area.
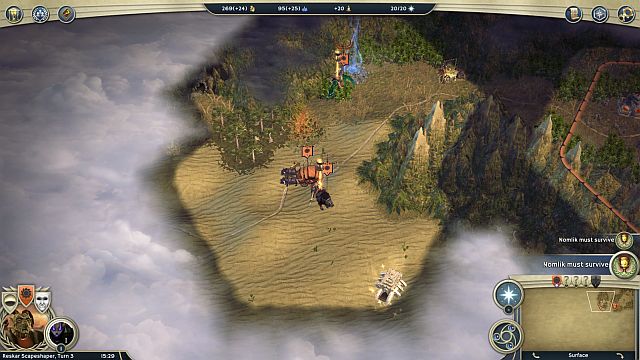 The place where Nomlik's party joins you.
As you follow the road, you will soon find (near the sign) a Goblin leader, who will join you. Several steps ahead, you will find a goblin city and you will meet your future opponent- Shnaga. If you cross her territory, she will declare war on you, which is unavoidable anyways. As for now, it is not recommended - explore the region, defeat the independent parties, start another city, collect the treasures from the undergrounds and strive for experience and items, for your units, in general. Once you are ready, do not hesitate and attack Shnaga. She will be joined by Urlagh, the fun will get into full swing. After you start the war, keep going Westwards and capture your first city. More or less, near the center of the map, you will be joined by another leader- Groshak, as a result of which you will receive a small army and a city. Proceed along your path to the left end of the map and to the southern lands, in search of your enemies
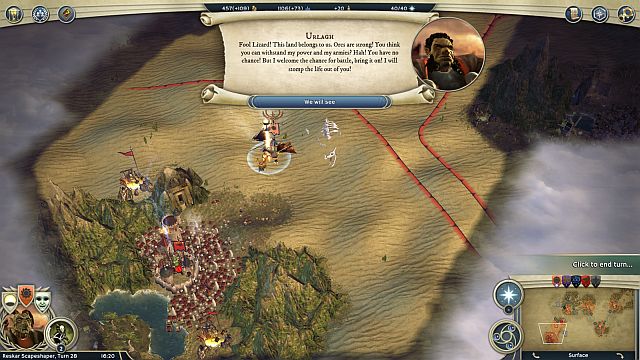 Urlagh's Throne City.
You should start defeating the opponents with Urlagh. His Throne City is located in the lower-left corner of the map, close to the elven towns, which will join you. Supplant your units, if your army is too weak and strike at the enemy. If the leader is not in the Throne City you will have to search for him around in the other cities. In the case in which you do not want to capture them, because they are e.g. too strongly guarded, try defeating Urlagh at a distance, or with magic, and then retreat from the battle. After this trick, capture his Throne City, and the opponent will be defeated.
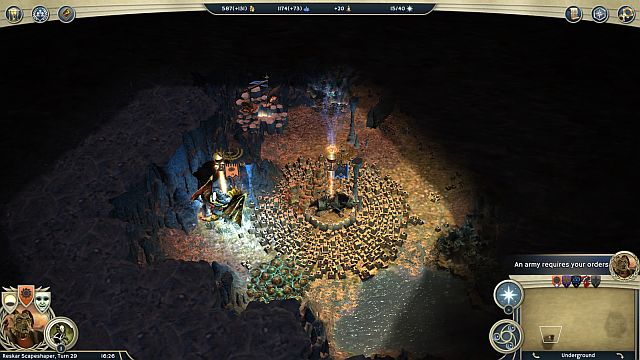 The Throne City of the beautiful Goblin lady.
After you defeat Urlagh it is a good idea to capture Shnaga's cities, which are located on the surface. (if you still haven't captured them), or to perform the same trick as in the case of the previous opponent - defeat the leader in the battle and then retreat from it and capture the Throne City. The opponent's Throne City can be found in the same location as Urlagh's, just in the undergrounds. The entrance is next to the city that you have captured earlier. Do not let the Goblin beauty deceive you with her wicked words - strike hard and with determination and after you capture the Throne City there will be only one more opponent left to defeat.
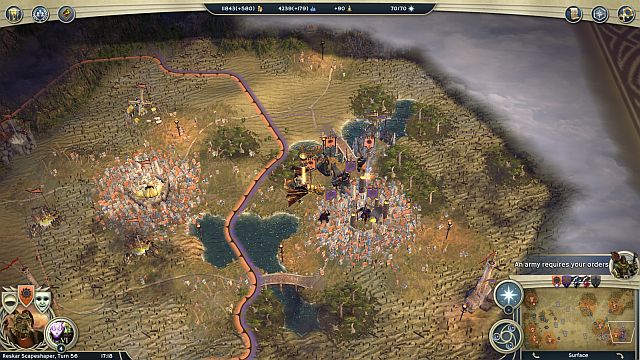 The final opponent, Lucian, and his Throne City.
The cities of the last opponent are located to the South of the map and they sprawl from its center, up to the eastern end. Along your path deeper into the enemy Empire you can try capturing the cities that you pass by. It is compulsory that you, again, capture the city right in front of the enemy Throne City, or even the two nearby ones, thanks to which you will lock the opponent in a ring and you will be able to supplant the units that you lost. Once you are ready, do not wait any longer and defeat Lucian and capture his Throne City, to complete this mission.
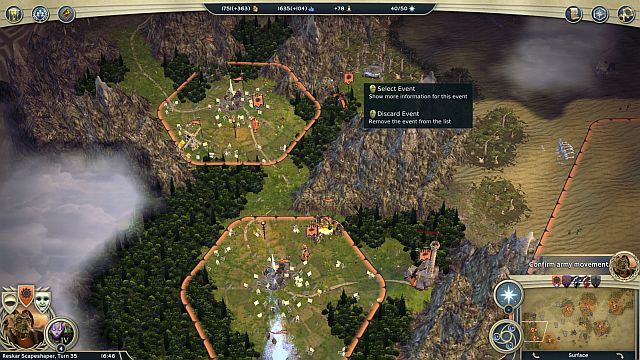 The elven villages are of little help.
Find the Elves - the elven settlements can be found in the lower-left corner of the map. Close nearby, you will find the Throne City of one of your opponents so, the cities close to it and the units produced there will definitely be useful during the siege.
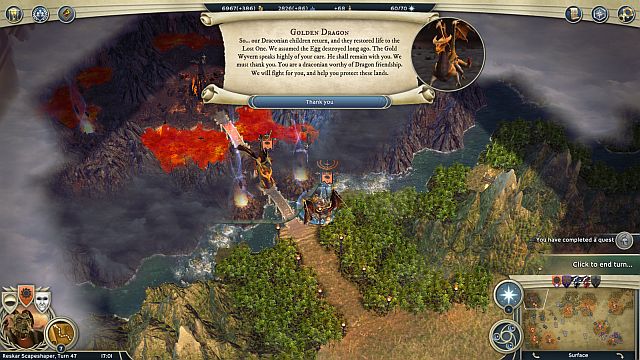 The Dwelling and the units in it may be useful.
Ride the Gold Wyvern to the Dragon's Peak - Dragon Dwelling can be found in the upper-left corner of the map. To complete this mission, you need to get there with your main leader - Reskar. As a reward, you will receive a Dwelling- you will be able to recruit several interesting units there.
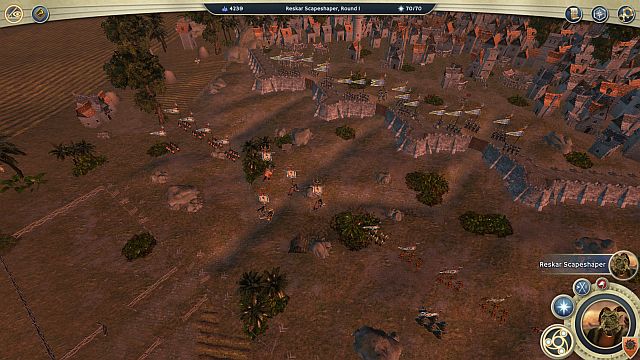 The final showdown.
1. Do not haste to attack the first opponent - take your time and found 2 cities, recruit some units and explore the area with your leaders- gain items and experience. Strike when you are ready, to capture the first city in your way.
2. Complete the Side missions - they are not too difficult (you only need to find the right locations), and you will be rewarded with units and cities. It would be best if you explored the map in wavy line - from the right to the left, and then along the bottom, from the left to the right. This way, you will complete the mission and you will defeat the opponents one after another.
3. Try not to leave your cities unprotected, because they will then be too easy to capture, later in the game.
4. Remember that you do not need to capture all of the cities to defeat your opponent - it is toy waste the leader during the battle and then capture the Throne City, which may become less heavily guarded, with time.
5. Destroy Spelljammers close to Lucian's cities. Thanks to this, during sieges, you will be able to use spells, which should make things considerably easier in the situation in which you have as many as 4 leaders, 3 out of which cannot die in battle, because the scenario will then end in automatic failure.
6. If you want to complete this mission as quickly as possible, focus on capturing the Throne Cities only, and on fighting the armies that you have to fight. Still, you need to make sure that you do not lose too many units because summoning additional ones, from the distant cities will require lots of time.
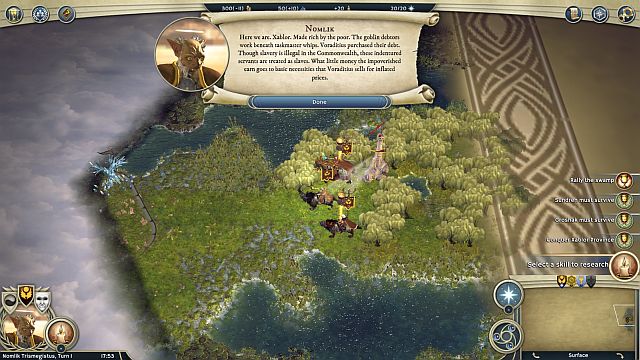 The mission's starting point.
Conditions of victory:
1. Sundren must survive
2. Groshak must survive
3. Conquer Xablor Province
a) Enter Gorsmog's lands
b) Find and defeat Gorsmog
c) Enter Voraditius's lands
d) Find and defeat Voraditius
Side missions:
Rally the swamp
Start by capturing the nearest Watchtower. destroy it and you will obtain your first city this way. The next two cities will task you with capturing an enemy keep and defeating a small arm, as well as capturing one more keep. Then, capture the city of the opponent (Voraditius), which is located nearby. This way, you will complete the first side mission and gain, at the same time, some units, as well as cities that will serve as your field bases. To the North of the place where you started this mission, there is a group of refugees, who you will extend your care over - rebuild the city in the place that they determine (several fields above). As you progress to the West, you will find a town that will join you. Start expanding your cities , destroy the places in the region, where the groups of the Independent respawn and ensure enough gold (there are quite a few deposits around so, dispatch your units around the area). Gather your army and go West, towards the center of the map.
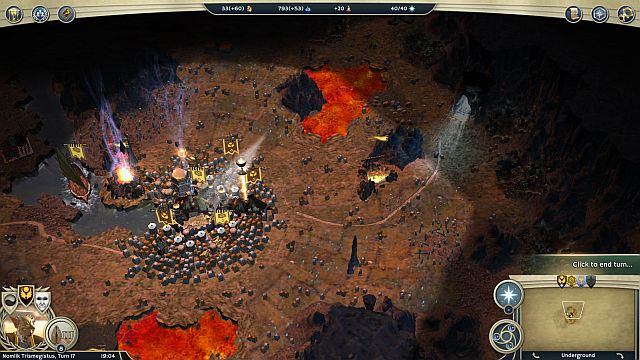 The Throne City of the first opponent, located nearly in the center of the undergrounds.
You will encounter the first opponent right past the narrow passage in the mountain range. As you enter his lands, you have two options. You can either eliminate the opponent, as quickly as possible, and launch a quick attack on the Throne City, or capture successive cities, one after another. I recommend that you do the former - the longer you are procrastinating,, the stronger your opponent becomes. At this point, you should already have an army that is sufficient to launch an attack on the Throne City. If you do that fast enough, you will most probably meet Gorsmog, thanks to which you will kill two birds with one stone. The Throne City of your opponent is located in the undergrounds, you will find the entrance right after you pass through the passage in the mountain range, several fields above. Include the city into your empire, thanks to the excellent location, it will serve as the main facility for the recruitment of units, which you should start training right after you annex the city. Do not leave the city without protection - in the region, there is a quite strong group of the Independent, which is being commanded by a real dragon.
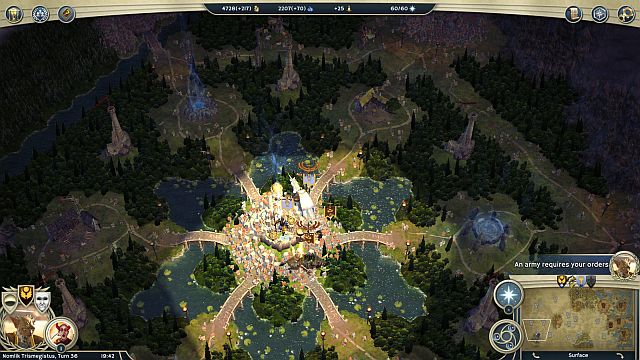 Voraditius's Throne City, right next to the exit, a teleport out of the undergrounds.
After you defeat your first opponent, you should start preparing your army for another battle. While in the undergrounds, go to their Western side. After a short march, you will encounter another teleport, which will take you to the surface. Right after you leave, you will see Voraditius's Throne City (on the left of the exit). Therefore, you should keep as many movement points of your armies, as possible, before you exit the undergrounds, thanks to which you will still be able to attack in the same turn, the opponent's Throne City. It is here that you should also find the enemy leader. Do not take too much time to attack, because the longer you wait, the stronger the protection the city will receive. Also, you should not bother about the other lands and strike with full determination, which will end this mission.
 Completing the easy quests and capturing a few cities is a good start into the scenario.
Rally the swamp - near the place where you start the game, there are independent cities and an enemy one. They will task you with several easy tasks that consist in defeating the enemy armies and capturing several structures, which they have been occupying (e.g. a keep). Thanks to this, the cities will start joining you, one after another. Finally, deal with the enemy city thanks to which you will complete this mission and you will obtain a very good field base for further conquest and several useful units. Around, there is a place good for setting up a city and the others that are not required to complete this mission but, it is a good idea to capture them to ensure yourself with faster development, at the beginning of the scenario.
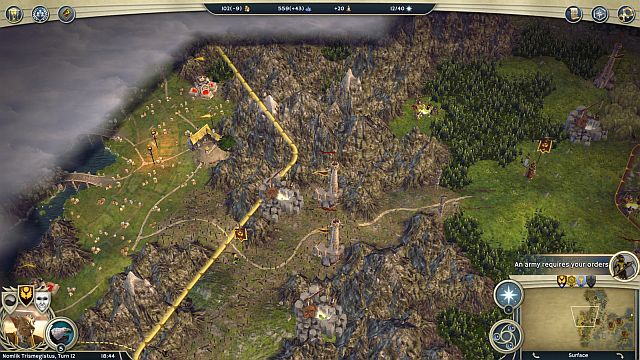 Entering the enemy territory.
1. At the beginning of the game, you will quickly obtain several units so, it may happen that your amounts of gold will start to dwindle. If you start running out of it, set your cities in a way so as to enable production of gold. Around, there are quite a lot of deposits with gold so, this should do to patch up the deficit.
2. Secure your back. Before you start completing the main missions, make sure that your cities have decent protection. They are located in one of the map's ends, which is a good economic backup, whose losing may hurt.
3. Deal with Gorsmog as quickly as possible. Thanks to this, he will not have the time to grow a powerful army and, later on, defeating one opponent will become much easier and faster than defeating two. Therefore, go again into the undergrounds and capture his Throne City, where he probably is staying.
4. Do not put off the final attack for too long- the opponent, just like you, keeps o expanding and soon, his armies will be considerable in size. If you do not want the battles to be tediously long, eliminate the first opponent quickly and march towards the second one, straight away.
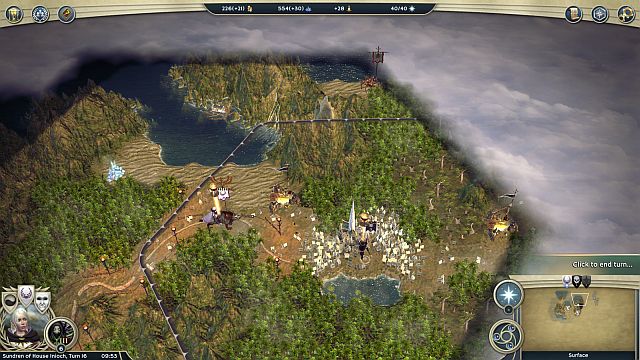 The place where you make the choice that defines further game.
Conditions of victory:
1. Reskar must survive
2. Nomlik must survive
3. Groshak must survive
4. Aid the High Elf Colonists
a) Find the High Elf Colonists
b) Free the Occupied High Elf City
Start the game by unloading your armies to the mainland. Then, go South, along the path, collect treasures and defeat the parties of Independents along your way. After moment, you will run into a Dwelling, which will task you with a mission You need to capture the nearby keep and the Dwelling will join your Empire, which may prove an important advantage in the future. To ensure it with peace, it is a good idea to deal with the parties of the Independent around, and destroy the Monster Den, close to the Dwelling, i.e. to the East of it. As you proceed, you will run into an elven village which will join you without any problems. Also, you will learn about the city that was captured by Isabella. Go towards that city and capture it. At this point, you will have to make a choice, which will influence future events, in this scenario and in the following two missions, as well as the ending to the campaign.
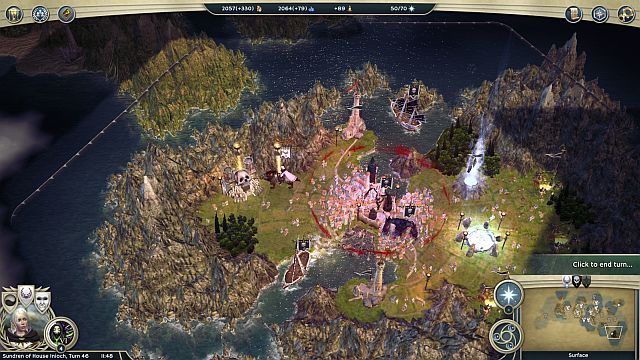
The place where Bormac is being held. Next to it, a teleport that will transfer you to the entrance of Isabell's Throne City.
Conditions of victory:
1. Let the Humans live
2. Find and Eliminate Isabella
3. Free Bormac
4. Bormac must survive
After you make your choice, Groshak will leave your part and your primary objective will become to kill Isabell. Go East, where you will run into more elven villages, where one of them is bordering Isabell's city. Of course, you should capture that cities. Around, there are several more cities and it is a good idea to capture them also, although that is not necessary. What is necessary, though, is go to the South-East of the map, where there is a Dungeon, in the island next to the city that belongs to Isabell, which it is necessary for you to visit, because after you defeat the units that guard it, you will free Bormac. Now you can decide whether you want to capture more cities or do your job quickly.
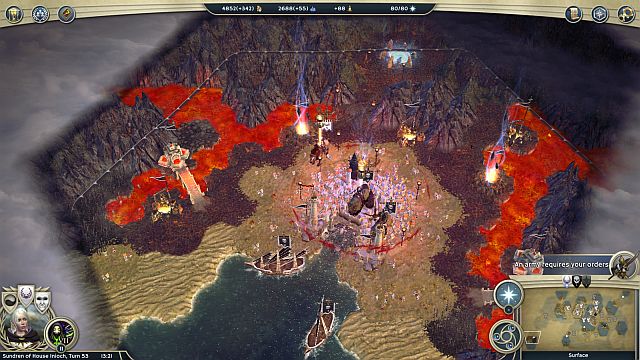 Isabell's Throne City.
Once you are ready, enter the teleport, located at the other side of the city. This will take you to the South-Western side of the map, where you will encounter Isabell with an army that guards the Throne City. Lead your armies to the battle, thanks to which you will successfully end this mission.
This choice leads to the Underground Eruption mission.
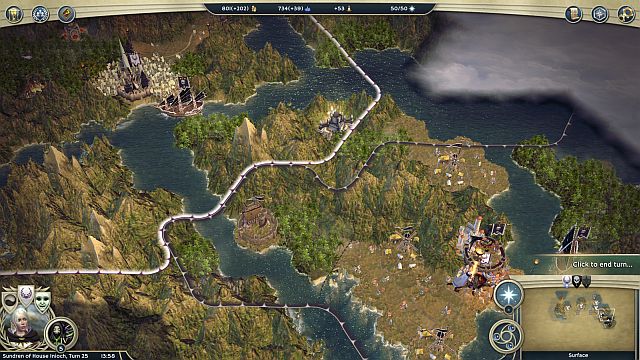 One of the cities which you need to raze to the ground, or change the race that inhabits it.
Conditions of victory:
1. Eliminate all Humans
2. Find and Eliminate Isabella
Your choice will not approved of by Nomlik who will leave your party. Apart from defeating Isabell, will be to capture all of the cities that belong to humans and to either destroy them or use the Migrate option. There are 5 cities that are inhabited by humans, and the sixth one is Isabella's Throne City, where you will also find her. You need to capture all of the human cities quickly, and even the ones that belong to the Independents. Capturing the cities and defeating Isabella results in a positive ending to the scenario. TO gain access to her Throne City you need to go to the South-most island, where you will find a teleport, right next to Isabell's city. It will take you to the other end of the map, to her Throne City.
This choice leads to the Wild Magic mission.
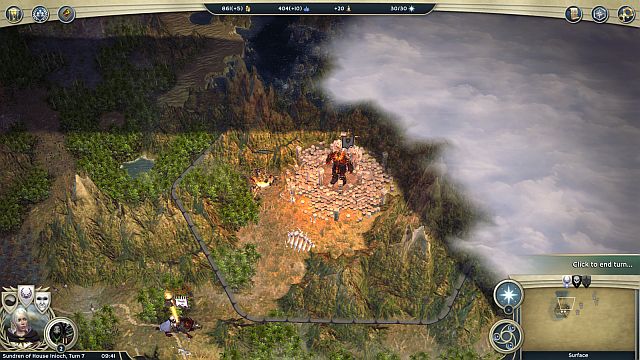 Giants will provide invaluable support.
1. Remember that after you recapture the city determined by the Elven village, from Isabella you will have to make a choice, which determines the following 2 missions, and the end of the campaign, at the same time. If you want to complete in the two possible ways, it is a good idea to save the game before you capture the city.
2. Along your path to the Elven villages (to the East of the starting point), you will be passing by a Dwelling, which you will receive a quest from. It is a good idea to complete it, because it will then join your empire with 2 Fire Giants. Take them along because they provide an excellent support to your army.
3. Be careful while crossing water fields, because the enemy has quite a few combat boats. Therefore, it is a good idea to invest in researching Advanced Seafaring, thanks to which your units will board ships of a better type.
4. It is not necessary to capture the cities to the east of the map (unless you have chosen the Destroy the Humans option, at which point you need to capture most of them). It is a good idea, though, to withhold with your attack, for a moment, ad capture, at least, some of them. Especially, capturing the city right next to the teleport is going to be instrumental, because you will then be able to summon your units quickly, for the attack on Isabell's Throne City.
5. Wtch out for Succubus units and their skill to Seduce. Once they succeed at using it on your leaders that you cannot lose, the battle will end automatically and the scenario stopped.
5. If you have selected the Destroy the Humans option, remember that you do not need to destroy the cities that belong to them. It is a way better idea to change the race that inhabits them (Migrate).
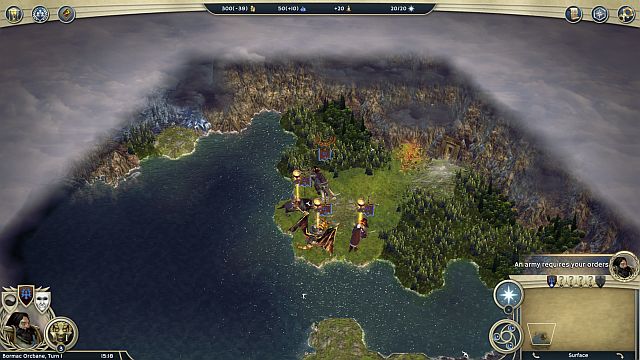 The beginning of the game.
Conditions of victory:
1. Sundren must survive
2. Nomlik must survive
3. Reskar must survive
4. Emerge victorious
a) Defeat Grimdotter
b) Defeat Vontor
c) Defeat Leana
d) Defeat Werlac
This mission is an offshoot of the choice that you made in mission four and it becomes available if you gave decided to prevent the war (Stop the war). Go into the undergrounds, where you will encounter your Throne City, after a while. Automatically, you will take control over the two nearby cities and also several units. Start by clearing the region. Also, choose the buildings that you want erected. As for the armies, command them to the East, deeper into the undergrounds. Do not haste to resurface too much - gather your armies and develop the cities a little (also, do not wait in the undergrounds infinitely). Once you show yourself to the opponents, they will be attacking incessantly, which is why it should be done at the right moment. Once you are ready, you can take your army to the surface.
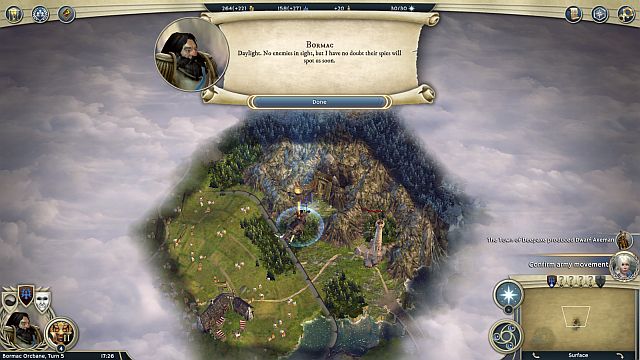 It is time to catch some fresh air.
After you exit the undergrounds, you will find a city, which it is a good idea to include in your Empire. You can now go East or West. At both sides, you will find opponents that you need o defeat. The order in which you do that is up to you, if your army is strong enough, you can try defeating the army, but there is a risk that none of the sojourns will end in success. The best thing to do, therefore, is clear one side of the map of both of the opponents, and then take your armies over to the other side.
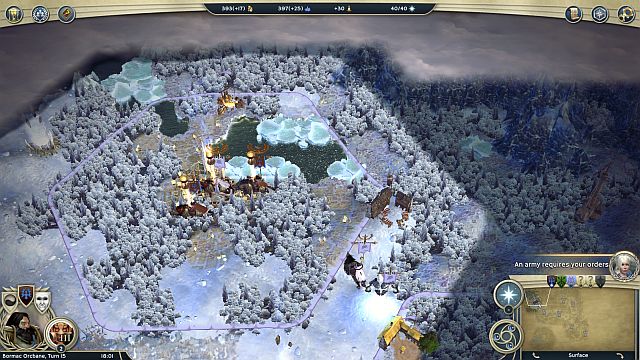 Vontor's Throne City.
Vontor's Throne City is at the very end of the map. Go to the West and avoid fights along your way, if you are not sure of your victory - leave the units to capture the Throne City quickly, which you should have no problems with. If the main opponent was not there, there is a chance that he is somewhere around, or in the other of his cities.
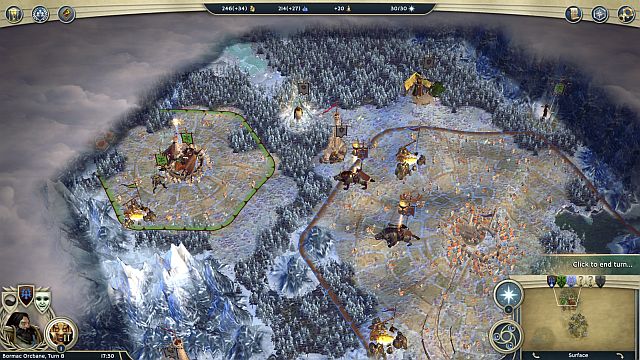 Leana's Throne City.
If you have gone east, the next one to deal with should be Leana, whose Throne City is located, more or less, in the center of the map. If Leana is not in the Throne City most probably she is somewhere around her cities. capture her Throne City, and you will deal with Leana at the next opportunity.
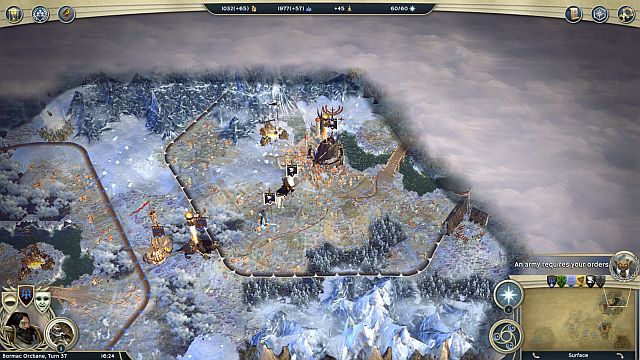 Werlac does not have to be in the West-most city.
The cities and armies that belong to Werlac are located to the North-East. You should not have any problems with defeating him, he does not have too strong armies, which is why the entire army will do the job. Exceptionally now, you do not need to capture the Throne City, because it is not to be found on the surface. Simply, capture his cities (which also is optional) and defeat him in battle, which will get the job done. If you do not want to waste your time over capturing cities, defeating Werlac in battle will do. After several turns, you will receive a message that his armies are fleeing and that he was defeated.
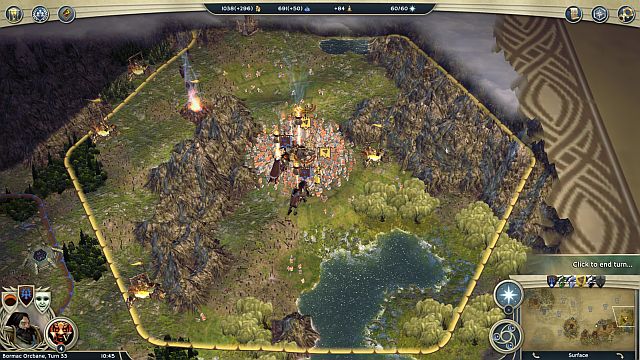 The last ones on the black list- Grimdotter and his Throne City.
You can find the last opponent if you go to the Eastern end of the map. Along your way, you will encounter an army that will join you. This is going to be an excellent support, while capturing the Throne City. Once you defeat the last opponent, this scenario will receive a positive ending and you will be able to start the final mission of the campaign.
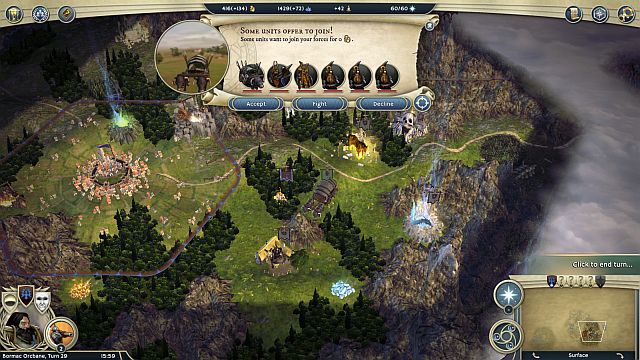 As you go East, you will encounter a party that will gladly join you.
1. After you exit the undergrounds and encounter the first opponents, they will attack you. Therefore, it is important that you remember about your underground cities, because it is them that will be susceptible to enemy attack.
2. While still in the undergrounds, you will find a good spot to found a city, because there are several structures there, which will provide support to development. Te spot is at the other side of the river, close to the exit to the surface.
3. After you leave the undergrounds, you will be nearly in the central point of the map. Your task will be to defeat four opponents, and the order in which you do that is up to you. Split your army only in the case in which are strong enough to succeed.
4. You do not need to capture Werlac's cities. t is enough to defeat him in battle, which is why you should strive to attack as soon as you encounter him on the strategic map. This way, you will quickly eliminate one of the opponents.
5. If you take too long to defeat the opponents, there will appear a condition, under which you will have to end the scenario within the 20 following turns. Otherwise. it will end in failure.
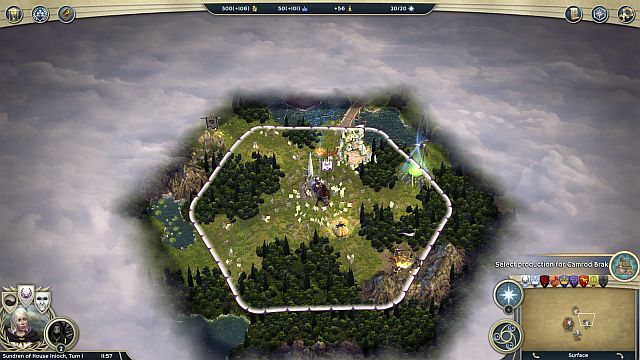 The starting point for the game.
Conditions of victory:
1. Edward must survive
2. Julia must survive
3. Nomlik must survive
4. Imprison Leonus and Saridas
This mission is an offshoot of the choice that you made in mission four and it becomes available if you gave decided to prevent the war (Stop the war) and completed the Underground Eruption. Your mission will be to defeat two main leader of the opposing sides - Leonus and Saridas. To make things more difficult, you need to attack them with a special wand, which you need pick up from the ground, right after the game starts. Additionally you are waging war against everybody around and you are trapped between the warring parties. So, here is a lot to come.
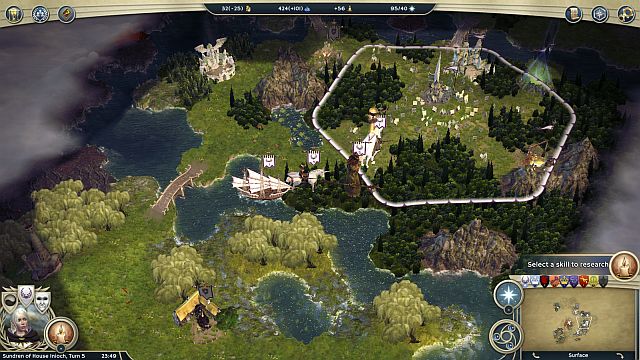 Julia will bring considerable forces along.
Start by clearing the area around your cities, so as to ensure them with peaceful development. Around, there also are lots of independent lands, which would be good to capture, best by completing quests, or by force, if it comes to that (most probably, there will be not enough gold to buy the lands).
Ensure appropriate development of the cities, recruit defensive units to station them in the cities and, if possible, also cavalry, which you should use to dissipate the fog of war. The greatest difficulty lies not in defeating the enemies, but in finding them with an army sizeable enough and with Sundren equipped with the wand. As for, Leonus look for him in the East, and for the Elven king, Saridas, in the West. It is impossible to say, with all certainty where they are, but most probably they will be around that regions, or they will be hasting towards the center of the map. It seems to be a good idea to capture the city of an enemy and wait, in hope that they bring reinforcements and attempt to recapture the lost city.
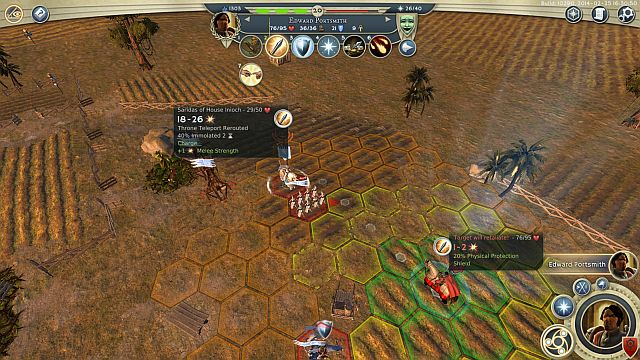
After you have located either of the main enemies, the thing is going to be simple - you need to attack and fight a battle with them. Also, the leader with the wand must participate, who needs to attack the enemy leader with a melee attack, before using the wand, which will change his respawn place (otherwise he will return to his Throne City). Also, you need to remember that, during the battle, you do not need to win, what is important is defeating the main enemy. He will then be placed in a "cage" in the undergrounds. Repeat that action with the other of the enemies and the mission will be completed.

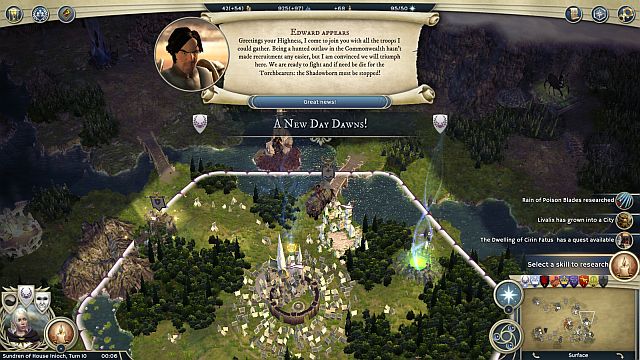 The machines that Edward will roll in, will surely not go to waste.
1. Secure cities and their regions. Nearby, you will find many enemies on occupied structures. Defeating the enemies will ensure temporary peace and will support the development of the cities.
2. Try to capture independent cities. This will strengthen your position and allow you to produce new, fresh and more expensive units.
3. Locate your main opponents as quickly as possible, do not bother with their allies. What you should be interested in is Saridas, to the West and Emperor Leonus, staying in the Eastern corner of the map. If you find yourself incapable of finding them, seize a city. There is a chance that they will lead the counterattack themselves and then you will be able to attack.
4. Edward appears after the end of the tenth turn, around your Throne City. He will bring quite an army along, which you can use to clear the region or as a support in the battle against Sundren. Before Edward arrives, also Julia will come with a sizeable army.
5. Close to your Throne City there is a Dwelling, that you might be interested in. It will allow you to produce quite interesting units (Dragon).
6. Try to dispatch as many units as you can, into all corners of the map, so as to be able to see as much of it as possible, at the same time. This will help you locate the enemy units and, with a bit of luck, you might also be able to find your main enemies.
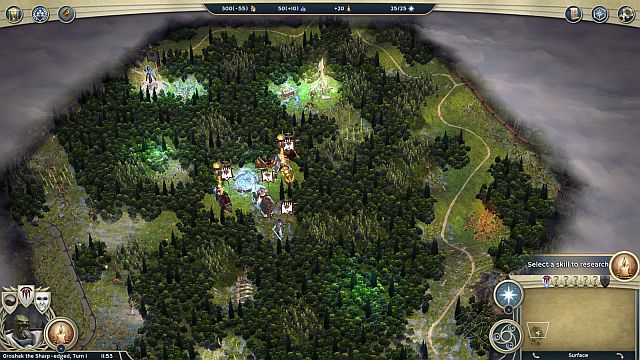 The starting point.
Conditions of victory:
1. Find the teleporter
2. Sundren must survive
3. Reskar must survive
4. Defeat the Commonwealth
a) Defeat Colm
b) Defeat Drugal
c) Defeat Svengir
d) Defeat Sulthor
This mission is an offshoot of your choice in the fourth mission (Destroy the Humans). Your main objective is to defeat several opponents so, there is nothing unintelligible in the mission's premises - a simple deathmatch. At the beginning, it would be good to extend your dominion by the nearby cities, to the South and to the East of the starting location. Then, go deeper into the map, where you will encounter the first opponent.
 Colm can be defeated by hasty attack .
You will encounter Colm close to the starting point, when you go to the East. It would be good to capture his city and then go a bit further, to the South-East, where you will find his Throne City, after you cross the bridge. Capturing it fast, eliminates the first opponent from further game.
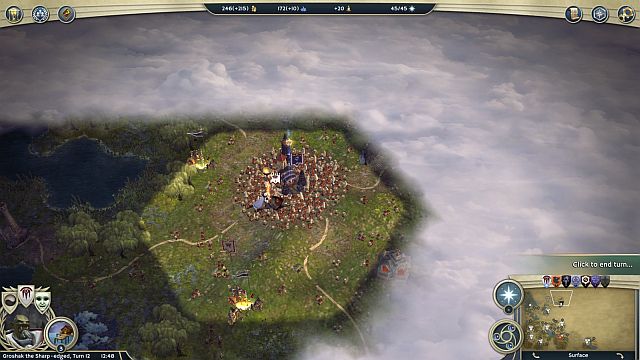 Sundren will be OK.
Sulthor and his cities can be found in the Northern portion of the ma, more or less in the middle. When you send there your armies, at the very beginning, you will, most probably, encounter weakly-defended lands, thanks to which you will be able to capture his Throne City easily and defeat him in battle. This will allow you to eliminate this opponent quickly - when, at the same time, you attack Colm, you will defeat both opponents at the very beginning which, later in the game, will make winning this scenario much easier.
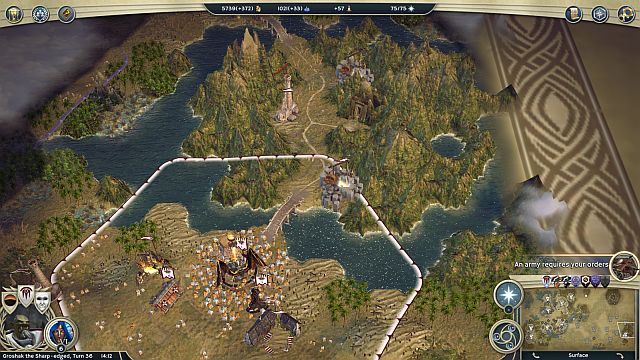 Entrance to the undergrounds.
After you have defeated the first two opponents, command your armies ahead, to the East of the map. On the surface, you will find Svengir's Throne City, which you need to capture. If he is not around, then you will, most probably, find him in the undergrounds. The entrance is close to one of Drugal's cities. Capture Svengir's Throne City, and descend into the underground, where you will encounter the next opponent.
 Drugal's Throne City.
You can find the cities that belong to the last opponents both on the surface and in the undergrounds. The Throne City itself is located under the ground, in the corner of the map(the South-Eastern corner). Defeating this opponent may be more difficult, due to his class and his combat machines, which is why you should remember about taking an appropriate number of units, for the final showdown.
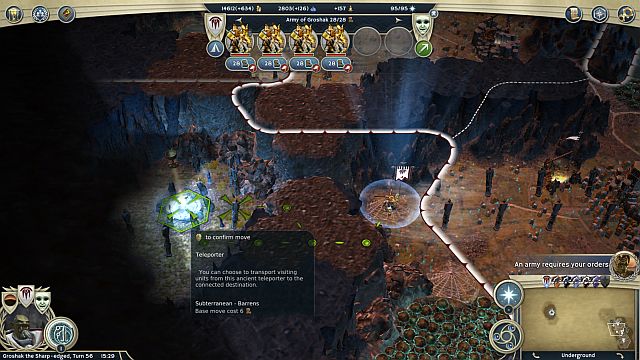 The way to the teleporter.
You can find the teleporter in the undergrounds, close to the cities that used to belong to dwarves. You can gain access with units that can cross Dirt Cavern Walls e.g. Dwarf Firstborns. Entering the field with the teleporter will end this mission (after you have defeated the opponents, of course).
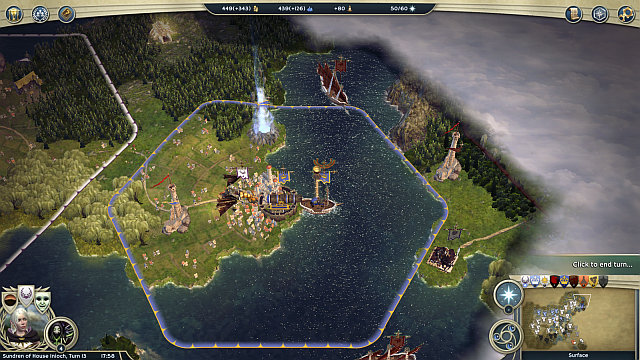 Teleporter to the North-East. After you teleport into the undergrounds, you will receive a lot of units.
1. At the very beginning, secure the cities to the South and to the West of the starting point. They are located away from the spots where you fight the final battles, which is why they will serve as your economic base, and, in case you need that, they will be able to produce new units.
2. Slit your armies (or command them quickly from one point to another), which will allow you to defeat, quickly, both Colm and Sulthor. Thanks to this, after several turns, you should be able to eliminate both of the opponents from further game, without allowing them to gather larger armies.
3. Follow the river to the North-east of the map, where you will find the teleporter. After you enter, you will be teleported to the undergrounds, where there will be allied units waiting for you. After a while, there will be even more of them. They will come in handy, on the way to the South and during the fight with Dwarves.
4. Do not attack Awanessa - she is neutral and she will not bother you. If you attack and defeat her, in the nearby Dwelling, there will start units to spawn, which will be hostile towards you and the fight with them is not that easy. It is cumbersome, first of all.
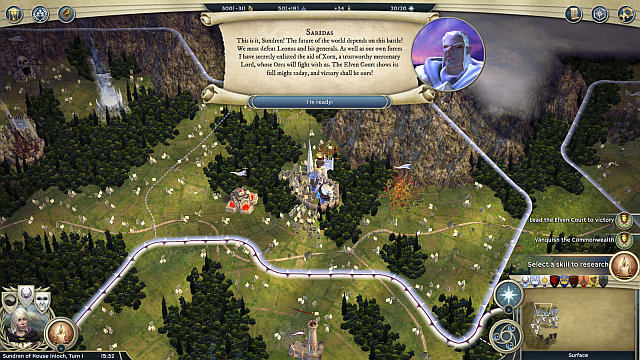 The beginning of the end of the human race.
Conditions of victory:
1. Vanquish the Commonwealth
a) Slay Leonus
b) Slay Grimdotter
c) Slay Baradir
d) Slay Yzzo
2. Lead the Elven Court to victory
a) Protect Saridas
b) Protect Julia
The final mission in this campaign. The offshoot of your choice in mission four (Destroy the Humans) and completing the Wild Magic mission. Your main objective is to defeat Commonwealth and prevent your allies - Saridas and Julia from losing. Gather the necessary forces and split them into two armies - one of them order to the North and the other to the South.
 Time to avenge brother's death.
From the very beginning, one of your armies should go South-East. Along your way, you will find several cities that belong to Yzzo, and which you can capture. However, this will, most probably, weaken your units and postpone the final attack on the Throne City, which is located in the center of the map. Defeat Yzzo and capture his Throne City, to eliminate him from fight. In the meantime, you should also be moving your armies to the North of the map and in the center, to capture Leonus's cities.
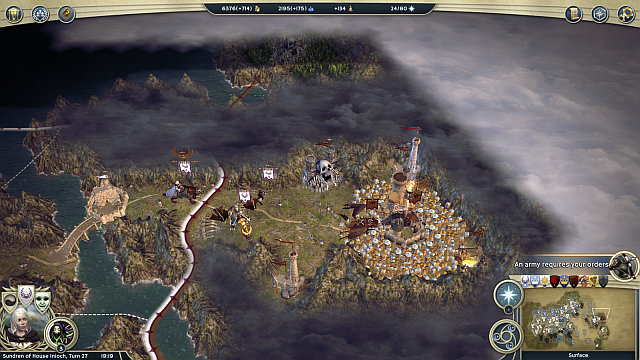 Baradir is a tough nut.
Baradir's cities are to the North and his Throne City is in the center of the map. The opponents has lots of very good units so, if possible, do not waste your own ones over attacking them, in the case of a balanced battle, because losing numerous units may put off the final victory. The best thing to do is go to the opponent's Throne City straight away and capture it. If, by a coincidence, Baradir will be there, the thing will be over. Otherwise, it is enough to defeat him in the ensuing battle and his whole army will cease to exist.
The die will be cast... in a moment.At first, capturing Leonus's cities will not be too much of a problem, which is why it is best to capture them. After Rubicon is crossed (the water fields, more or less, in the center of the map) you will receive a message that Leonus will present his machines in the incoming battles. And indeed - because of these machines, capturing cities will be much more difficult and more time-consuming. If there is opportunity to strike at his Throne City straight away, ignore the rest of the cities. Otherwise, prepare for the tough siege. Leonus's Throne City is in the North-Eastern corner of the map. Before you attack, it is a good idea to destroy the nearby Spelljammers, which make it impossible to cast spells in battle.
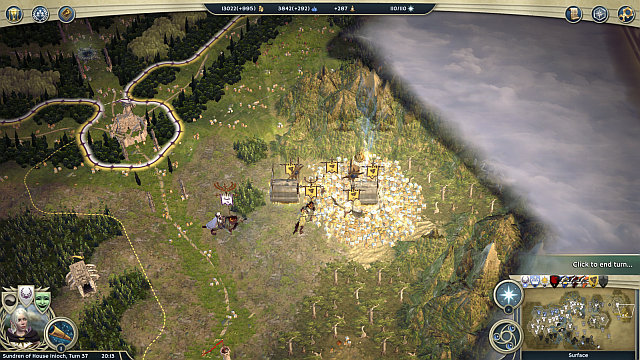 It is going to be tough. You need to wait for reinforcements.
The Throne City of the last opponent is near Leonus's Throne City. It is going to be heavily guarded so do not forget about a sufficiently strong army. A good idea is to attack the edges of the city, instead of its center "in installments". This way, more of your units, and less of the opponent's will participate the battle. After several takes, or one big battle, you will defeat him also, which will end the campaign. If Grimdotter is not in the Throne City look for her in the cities on the Southern edge of the map.
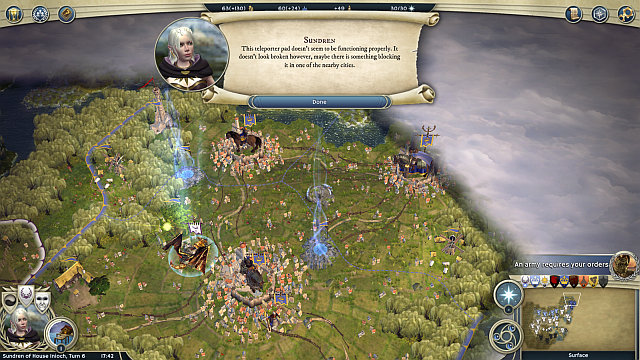 Activating teleporters will allow you to summon units into the battlefield quickly.
1. At the beginning, you should be careful with developing your cities, because you are not going to have too much gold, and it is a stupid idea to lower morale of the army, or even lose some of it.
2. Remember that your allies, Saridas and Julia, cannot die. Most probably, if you are constantly progressing into the center of the map, they will not be threatened by that but, be careful if any units approach their cities.
3. Gather all of your armies, at first, and go East. Your cities will not be threatened from any side, apart from the East, where you will be going anyways.
4. Leonus's cities will be weakly guarded, at first, which is why you should be capturing one after another without major problems. It is not worth to leave them here in the opponent's hands, because this may cause trouble at your back, later on.
5. In the game, close to your initial cities, there are several teleporters. You can activate them by finding the other end and clearing the field, or by capturing the nearby city (this will be the solution suggested by Sundren in her speeches). This will allow you to summon reinforcements, later on in the game, from your initial cities.
6. Before you attack Leonus's Throne City destroy the nearby Spelljamers. you will then be able to cast spells in the battle.
7. The leaders that accompany you can die in this scenario, but it is better to "let" them live. They have lots of experience, which makes them very useful in battle. That is why it is better for you if they accompany you until the end.
The map is not too big, there is only one opponent - Oscar here. First, start your cities in [1] and [2], and clear the area [3]. The first settlement that you can capture is in [4]. AS you progress, you will run into more cities that belong to Oscar, as well as a Dwelling that belongs to giants [5]. You can find an encampment of the frost giants in the Eastern side of the map. As for the Western side, you can mostly find there cities that belong to Oscar, including his Throne city [6].
You start off in the Eastern end of the map. Start by capturing the city in [1] and include it in your empire; then deal with [2]. In [3] you will find the Throne City of the, initially, independent player (Tannah). The most important descent into the undergrounds is in [4]. After you have retrieved the gem, go to the allied settlement [5].
After you descent into the underground, watch out for armies belonging to Werlac [1]. Then, you will run into a Dwelling that belongs to Archons. The most important point is [3], where your main objective is located.
The most important information about this map is your starting point [1] and the place which you capture right before being betrayed [2]. Then, when the war against everybody starts, the whereabouts of the enemy Throne Cities will become the most important points They are in [3], [4], [5].
This map consists of only one level - the surface. You start in [1]. If you want to, you can go a bit to the North, after you get there, where you will find a good spot to start fortress [2]. As you proceed to the East, you will run into Carishar's first city [3] and Laryssa [4] (remember that, after you approach her city, you will have to make a choice, which will determine the following part of the campaign). Finally, go to the South of the map, where, apart from more cities, you will also find Carishara [5].
You start in [1]. The order in which you defeat your enemies is up to you. Their Throne Cities can be found in [2], [3], [4] and [5]. The dam that you can to blow up, to find one of the opponent's cities is in [6].
In the Underground, there are many independent groups, treasures and places that are worth visiting in free time. The most important here, is the exit from the cave, which will allow you to go to the surface, without being spotted, near the dam [1].
You start in the very center, surrounded by enemies [1]. One of them is, most probably, in the East [2], and the other one to the West [3]. It is worth noting that, on the map, there are, as many as, 4 Dwellings.
The most important spot in the Underground is to the North of the map [1] - it is here that Leonus and Saridas will be imprisoned. It is also a good idea to visit [4] where there are many gold chests, which you will surely find use for, in case of financial problems.
The starting point has been marked as [1]. Right next to it [2] there is a good place to found the Throne City. The most important places on the map are the other players' Throne Cities, and also the spots, after capturing of which, Sulthor will betray you [8].
In the Underground, the most important spot is the exit, which will take you to Leonus's palace [1]. Also, it is a good idea to capture the Dwelling [2]. Watch out in [3] for the attack of the enemy units.
The most important spots on the map are the Throne cities of the other players, because it is the main objective of the mission to defeat them. It is also a good idea to dispatch sizeable enough forces to [6], to help dwarves, for which you will receive a satisfying reward - cities and units.
In the Underground there are not too many interesting things. Still, it is worth turning your attention to cities and dwarven keeps [1] as well as numerous treasures.
After you start, go towards [3]. Then, descend into the Underground [4], march or directly towards the enemy Throne City [5].
In the Underground, there is only one important location- the teleporter [2] which allows you to teleport right under the enemy Throne City.
You start in the Eastern end of the map, where you can found your first city nearby [1]. As you go West, you will find locations connected with side missions [5] and [6]. then, in a wavy line, go to [3], [4] where you find enemy Throne Cities.
In the Underground, apart from the standard locations, where you can find treasures and some gold, as well as get involved in several battles with various units, the most important thing is the teleporter [2], which takes you to the surface, right next to the elven villages, as well as the Throne City of one of your enemies - Shnaga.
On the surface, the most important locations are the cities that you need to capture in the first place [1]. Then, you can attack Gorsmog's cities, or descend into the Underground [3where there is his Throne City. The last stop is Voraditius's Throne City [4].
In the underground, the most important spot is Gorsmog's Throne City [1]. After you capture it, you should go to the South-West, where there is a teleporter that transports you to the surface, right next to Voraditius main city [2].
The most important spot on the map is, of course the city [2], after the capturing of which, you will have to take a decision that will influence the course of the campaign, from this point. In the vicinity of another enemy city, you will find a dungeon [3], where you will liberate Bormac (Stop the war), as well as a teleporter [4] which will transport your army straight into Isabell's Throne City.
After you start [1] enter the underground, quickly, and back to the surface, in [2]. You need to defeat all of the opponents so, regardless of which way you go, you will not miss all the fun connected with fighting.
In the Underground, arguably the most important spot is the Throne City [1] and the surrounding cities. It is a good idea to start one of your own, across the river [2]. After you have dealt with everything here, take the exit [3].
You start in the very center, surrounded by opponents [1]. You can find one of them, most probably, in the East [2], and another one to the West [3]. It is worth noting that, on the map, there are, as many as, 4 Dwellings.
The most important spot in the Underground is to the North of the map [1] - it is in this "prison" that Leonus and Saridas will be kept. Also, it is a good idea to visit [4], Where there are many gold chests, which you will definitely put to use, in the time of shortage.
After you start in [1] it is a good idea to capture all the cities, first. Your next step should be the elimination of the opponents in [2] and [3], and travelling to the East. As you go towards [5] you will make it into the underground, where you will be granted several new units. Then, go towards Svengir's Throne City [6] and the nearby entrance to the underground[8].
The places that are worth visiting, in the underground, are of course the places where the rite will be performed [1], after which you will receive new units. In the Underground there also is Drugal's Throne City [2], as well as a teleporter [3].
Remember that you need to protect your Throne City and your allies ([2] and [3]). First, you should eliminate Yzzo [4]. Then, make your way towards the center of the map and capture cities, one after another. This map is very big so, you will take some time to reach opponents ([6] and [7]).
Age of Wonders III is a game established in the realms of fantasy, which allows for both single and multilayer game. The requirement of the game are not exorbitant however, the comfort of playing and details will be considerably different, depending on the specifications. This guide has been drawn up on a medium-class computer (Intel(R) Core(TM) i5-2410M CPU @ 2.30 GHz, NVIDIA GeForce GT 520M, 4.00 GB RAM), which allowed running the game wit, at most, medium details. The game ran smoothly but, with larger numbers of opponents, it required more time to change turns. Also, the game chopped a little, during larger battles. Age of Wonders III is integrated with the Steam platform, so it requires activation on this platform.
Game modes
Singleplayer: Yes
Offline Co-op (hot seat/split screen): No
Internet Co-op: No
Multiplayer Mode: Yes (up to 8 players).
Our system
This guide has been drawn up on the computer of the following specifications:
OS: Windows 7 SP1, 64 bit
CPU: Intel(R) Core(TM) i5-2410M CPU @ 2.30 GHz
RAM: 4.00 GB
GPU: NVIDIA GeForce GT 520M, 1 GB own memory
The above specification allowed a smooth gameplay on medium settings. The exception here are the larger battles and larger number of players, when the waiting times, for a turn to end was longer and the game was slightly choppy.
PC - general information
OS: Windows XP/Vista/7(SP1)/8
Internet connection during the game: Not required
Necessity to activate over the Internet: Yes -Steam
Controllers: Keyboard+ mouse
Age of Wonders III - minimum system requirements
OS: Windows XP/Vista/7(SP1)/8
CPU: Intel Core 2 Duo E6600 (2,4 GHz) / AMD Athlon 64 X2 5000+ (2,6 GHz);
RAM: 2GB RAM
GPU: NVIDIA GeForce 8800 / AMD Radeon HD 3870 (512 MB, DirectX 9.0c).


 Among The Sleep Walkthrough PrologueAssassins Creed II Game Guide & Walkthrough
 Alien: Isolation Walkthrough Closing the Book
 Assassins Creed (XBOX360) Game Guide & Walkthrough
 Assassins Creed III Game Guide & Walkthrough