
There is hardly any cover available on Hoth with the sole exception of some mountain ranges. It is important to have personal shield, squad shield, and berserker to help you regenerate HP faster.
Our guide provides an overview of Hoth and all its locations:
Supremacy
The first capture point is located inside the base with surrounding walls. You should get it as soon as possible because it is very easy to defend.
During the Empire’s ‘Push Forward’ phase, the control point shifts to a side-area of the outpost which does not contain any cover, but have a couple of turrets to defend and capture the area.
As for the Rebel’s ‘Push Forward’ phase, the points shift to a lower side of the outpost with a trench nearby. Since this is a narrow area, you should consider dropping squad shield to protect your allies inside the base.
The Rebels’ last defend point is below the Rebel transport with a trench which can be used to eliminate enemies at close-quarter, but you should be aware of enemies hiding behind cargo containers and corners.
As for the Empire’s final point, it is near the crashed AT-AT and has some narrow area on the backside which can be used to defend the area. The Rebels should toss in a couple of Thermal and Contact nades to clear out the path before heading in.
Walker Assault
The first uplink that you need to activate or deactivate is located near the downed AT-AT with a single trench and a couple of turrets. Due to the openness of the area, smoke grenades and contact grenades really shine here.
The second uplink is located on the far side of the large canyon having a couple of trenches which can be used to reach the area undetected. You should consider using the trenches as cover and Scout trait in order to be away from map.
After the first phase, the first uplink appears near a large cliff in the center of the map without any trenches. Since the area is near AT-AT’s line-of-sight, it is good to deploy some turrets before heading in.
As for the second uplink, it is near the main hanger entrance which should be captured using smoke screen and once you have done so; head deep in to find some cover and defend the area.
Finally, as for the last couple of uplinks, these are located inside a deep system of treches and surrounded by multiple turrets, not to mention natural cover. This phase is a little in the favor of the Rebels side, but the Imperials can use the trenches as cover to reach the Rebels.
Fighter Squadron
All the power-ups and repair pick-ups are located near the deep canyons all around the area. Due to this fact, only decent pilots survive in this map. In case you are good enough, you can have enemies chase you in this area. It is also worth noting that the transport ships do not fly close to surface, but are susceptible to attacks from all sides.
Blast
In Ice Caves, you need appropriate blasters in order to win the game.
The caves are pretty narrow where you can expect to find enemies in corners. However, you will come across some open areas such as x-wing storage area and the area nearby. These are pretty strong garrison positions where you can setup with your teammates and wait for enemies to come to you.
The Rebel Base, on the other hand, has a lot of cover which can be used to move from one position to another and avoid getting hit by enemies.
Since all players are located in almost the same area, Thermal Detonators and Thermal Imploders are quite strong weapons. As for the blasters, you should consider using CA-87 or DH-17 and run along the perimeter of the map while running and gunning your opponents.
Droid Run
In the Rebel Base, the droids are located in the middle of the base, inside one of the intelligence room, and inside the med bay. In the first location, enemies can come in from any location which is what makes it difficult to capture or defend the area.
In the Ice Caves, the droids tend to roam outside the narrow caves or inside the large areas. It is a good idea to control these checkpoints as quickly as possible and also try and use Infantry Turrets or Blaster Cannons to setup a perimeter around the area.
Drop Zone and Cargo
While playing Cargo on the Rebel Base, it is crucial that you control the center of the map which will allow you to access both cargo stations with ease and gain an overall control of the map.
Finally, do note that the Rebel cargo is located in the backside of the med-bay and the Empire cargo is located in the intelligence room.
In Drop Zone, although there are no specific locations as to where the drop pods might land; there are some areas where you should definitely check. You should check the insides of caves and cave entrances for potential locations.
However, the best idea is to roam around the outer edge of the map which will not only provide you a chance to eliminate enemies, but you will find yourself near the drop pods most of the times.
Hero Hunt and Heroes vs. Villains
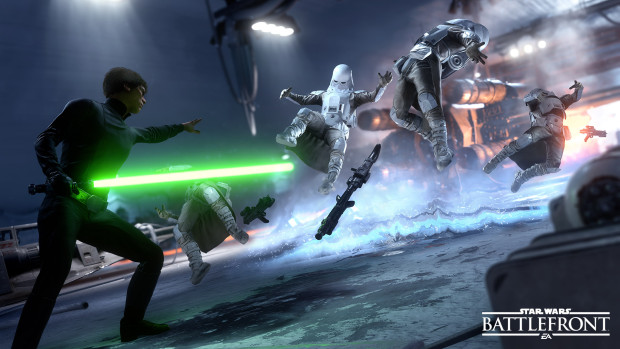
Due to structure of Ice Caves, almost all the special character shine on this map, but some who really shine include Luke Skywalker, Han Solo, and Princess Leia due to this fact that these characters have great defense capabilities, mid-ranged blasters, and deflection abilities.
Similar to Ice Caves, the Rebel Base has almost same strategy where Luke Skywalker, Princess Leia, and Han Solo outshine their opponents.
In Heroes vs. Villains, due to closed structure of Ice Caves, all the melee characters really overpower the ranged ones. Both Luke and Vader are able to deal with Han Solo and Boba Fett effectively.
While playing as Boba Fett, you should try and use the jetpack as much as possible and try to catch enemies off-guard. As for Palpatine, he can wipe out an entire team if he comes across them in a narrow corridor.
In Rebel Base, once again the powerful characters include Luke Skywalker and Darth Vader. Team these characters up with Princess Leia and Palpatine; and your enemies will have a hard time bringing you down, thanks to all range of attacks.
Finally, as for Boba Fett and Han Solo, both these characters struggle due to closed nature of the multiplayer map.
This is all we have on Star Wars: Battlefront multiplayer map Hoth. If there is something else you would like to know, make sure to let us know in the comments section below!

 Star Wars Battlefront Hero Hunt Tips and Strategy Guide
 Star Wars Battlefront Drop Zone Tips and Strategy Guide
 Star Wars Battlefront Best Loadouts Guide - Best Hands, Blasters
 Star Wars Battlefront Supremacy Tips and Strategy Guide
 Star Wars Battlefront Star Cards and Charged Star Cards Guide