Once you gain control of Link, run to the northeast and enter the first house. Speak with the old man here who eventually tells Link to seek out Linebeck at the east side of the island.
Walk back outside. Once you begin walking away from the house you will here a rumbling, which is the sound of the bridge collapsing that leads to the east side of the island. Walk to the northwest part of the area and head up a screen. You will be confronted by a trio of red Chuchu enemies. With no means of attacking these enemies, turn back and return to Oshus.
After speaking with Oshus for a second time, exit the house and walk to the east. There is a cave that is blocked off by a barrel. Lift the barrel and enter the cave. Walk northward and you will see a sign. You have to write the number of palm trees that are found on this side of the island. The correct answer is 7, so draw the number accordingly. Open the treasure that is behind the door to get Oshus’s Sword.
Exit the cave and you will find Oshus standing outside. In order to continue you will have to properly train with the sword. Go through the training process with Oshus, learning the various sword techniques.
OPTIONAL: There is a house at the west side of the island. If you clear the rocks in the yard, the man will reward Link with a single green rupee. However, he’ll also give Link a hint about a secret at the other side of the island, so be sure to mark it on your map.
Travel northward to encounter the red Chuchus once again. Now that you have a sword, you should be able to do them in with a single slash. Walk around the path and you’ll find some trees that are blocking your way. Slash them down and enter the cave.
Defeat the red Chuchus that appear and climb the steps to find a treasure chest. Grab the small key and use it to unlock the nearby locked door.
There are four levers here that Link will need to pull in the correct order to proceed. There are three stone tablets in this cave that hint to the proper order. Additionally, there is a treasure chest on the right side that contains a red rupee. From left to right, the correct order in which to pull the switches is 2, 1, 4, 3.
This will cause a small key to drop. Grab it and head through the locked door.
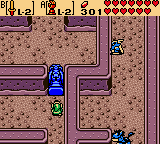
Defeat the enemy rats and you’ll find that one of them is quite evasive, running into the small holes at the northwest part of the cave. Push the nearby block so that it covers the hole on the left side. Walk back to the right side of the room and keep a lookout on your map. Once you see the rat with a small key run out of the hole on the right, follow him to the left. Since he won’t be able to go through the blocked hole, slash at him to recover the small key.
Use the small key on the locked door to the right. Make your way around the path and exit the cave.
Once you arrive at the east part of Mercay Island, you can run on over to Linebeck’s ship at the southeast part of the map, but he is nowhere to be found. The man by the boat suggests looking for him at the Milk Bar, the large building located to the west. Enter the Milk Bar and speak to the owner. The owner will point Link towards the Temple of the Ocean King, located at the northwest part of the island.
OPTIONAL: Back outside you could visit the shop nearby, but anything useful is a bit too expensive. However, there is a treasure chest we can reach. Throughout the village there are Cuccos that are hopping around. Walk over and pick one of them up. Now walk just southwest of the Milk Bar and you’ll see some land across the water. Use the Cucco to float across the water and then toss the Cucco aside. Open the treasure chest here to get a common treasure. These will come in hand later on in the adventure.
Run to the northeast part of town and head northward through the opening to encounter some more enemies. Defeat the red Chuchus as well as the enemy crows that appear. NOTE: When Link cleaned out the farmer’s yard at the West end of the island, the farmer pointed out a secret tree in this area. Roll into this tree, causing a big green rupee to appear worth 100 rupees!
Follow the path to the west a screen and then go ahead and enter the Temple of the Ocean King.
Once you enter the temple, walk forward through the door ahead and watch the cut-scene that triggers. The purple areas are safe zones, but if Link is standing on any other ground, his health will start to deplete.
Run to the northwest part of the area and hit the crystal orb that is found here, causing the spikes to be lowered. Run back to the south end of the room and speak with Linebeck. During the cut-scene, Linebeck will give Link a small key.
Run back to the northwest part of the room and use the key on the locked door. At the far northwest part of the room there is a crystal switch. Strike it and it will lower the nearby spikes. Quickly run to the northeast part of the room where you will find a second crystal switch. Strike it and it will cause a door near the top of the room to open up.
Run over to the top of the room and open the large treasure chest to get a Sea Chart. Run back to the south end of room and you’ll find that Linebeck has disappeared. Exit the Temple of the Ocean King and you’ll find Linebeck back outside.
After speaking with Linebeck, return to the village. Before taking off, it might be a good idea to purchase a shield from the shop. They are available for 80 rupees, which you should have by now seeing as you have just gotten a big green rupee.
After acquiring a shield, walk over to Linebeck’s ship at the southeast part of the island. Speak with Linebeck and Oshus and Link will be asked to mark the map. Trace over the island at the southeast part of the map to reveal a secret. Oshus will indicate that this is the next destination. Speak with Linebeck and set sail.
There isn’t too much to do on the Great Sea at the moment. You can stop at Cannon Island, but there isn’t much to do at this time. You will see a face on your map which indicates the location of Beedle’s Shop Ship. You can sail over, but most of his goodies are a bit too pricey for your wallet at this time.
Draw a line for the Isle of Ember at the southeast part of the map. Along the way you will see a Golden Frog, but we cannot do anything with him yet. Set sail and arrive at the Isle of Ember.
Once you arrive at the Isle of Ember, you will see that there are three houses on the island. Walk to the right and climb the steps to enter the northern most house. This is Astrid’s house, but she is nowhere to be found. Climb down the stairs to reach the basement.
The door behind will close and you’ll find a group of enemy Octoroks. Defeat them with simple sword slashes. Astrid can be seen behind the door on the right. You’ll need to yell, or just blow into the microphone for her to hear you. You’ll have to find her assistant Kayo in order to complete the puzzle. Climb the steps and exit the house.
Kayo is located at the far east end of the island. If you look at the map, there is a tiny island just to the east of the main island. Make your way over to this location. Here you will find a fallen adventurer. Walk up to the stack of bones and the ghost of Kayo will appear. He will tell you that there are three torches on the island and they are the key to solving the puzzle.
One of the torches is found on the tiny island to the east. You can make a note of the torch on the map. Another torch can be found just east of the small island at the north end of the map.
There is a third torch inside of Kayo’s house. Of the three houses on the island, Kayo’s is the southern-most. After noting the locations of all three torches, return to Astrid’s house.
Return to the basement and tap on the map on the right side. Mark the locations of the three torches on the map and it will cause the door to open up. After speaking with Astrid, Link will appear back upstairs alongside Linebeck. Astrid will tell Link his fortune and say that he must head towards the Temple of Fire.
Back outside make your way to the southeast corner of the map where there is a closed gate just west of a bridge. Tap on the door to open it and climb the steps. Walk clockwise around the volcano, avoiding the enemies as well as the falling rocks.
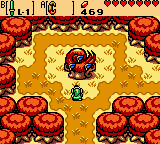
You will come to the entrance of the temple where there are two lit torches to the sides. Stand in front of each torch and blow into the microphone. Blowing the torches out will cause the door to open.
Before entering the temple, there is an optional treasure chest nearby. Continue walking clockwise around the volcano and you’ll find a treasure chest on the higher ledge that contains a red rupee. Grab it and then enter the Temple of Fire.
Maneuver around the flames to make it to the center part of the map. Watch out for the revolving flame and make your way to the right. Leap over the lava and travel to the southeast corner of the room where the door will close behind you.
Defeat the four Keese that appear and open the treasure chest to get a small key. Backtrack northward and be sure to examine the picture on the wall. The picture is identical to the map of the northeast part of this floor, however, it shows where the false walls are located.
Use the small key on the locked door and carefully navigate through the pathway. Open the treasure chest along the way to get a red rupee. At the end of the pathway there are four crystal switches. Stand at the center of the switches and perform a spin attack to hit all of them. This will unlock the door in the center of the room. Backtrack through the maze and head up the staircase.
Walk around the center platform and hit the crystal switch, causing the red blocks to lower and the blue blocks to rise. Walk around the platform to the east end of the room and then travel southward.
Defeat the Slime enemies to get the dungeon item, the Boomerang. You can use the Boomerang by drawing lines on the screen with your stylus. On the right side of the screen, use the Boomerang to hit the crystal switch, causing the nearby flames to go out.
Travel to the northwest part of the map and you’ll find two switches on the other side of the lava. Trace a Boomerang path so it hits both switches, causing the nearby flame to go out. Walk down the steps to get back down to the previous floor.
Defeat the yellow Chuchu and then stand just to the right of the red blocks. Use the Boomerang to trace a pathway to the crystal switch, lowering the blue blocks to the south.
In the next area there is a similar puzzle where you need to trace a Boomerang path to the crystal switch. This will lower the nearby flames, allowing Link quick access to the dungeon entrance.
Continue southward and you’ll find a pair of Fire Bubbles. These enemies cannot be defeated while they are surrounded by flames. Instead, you will first need to use the Boomerang to stun them, removing the flames that surround their bodies. Finish them off with sword slashes and then climb the nearby staircase.
On this floor you will find a group of Fire Keese. These enemies cannot be defeated with the sword, and instead will require the use of the Boomerang. There are two Fire Keese on the left side of the room and a third one on the right side of the lava. Defeat all three and a treasure chest will appear containing a red rupee.
At the south end of the room there are two levers that can be pulled. Pull both of them and the door on the left side of the room will open up.
At the west end of the room there is a rat that is moving around with a small key dangling from its tail. You cannot defeat this enemy with a sword, and instead must use your Boomerang. Trace a path out in front where the rat moves and then unleash the Boomerang to acquire the small key.
Make your way to the southeast part of the room and hit the crystal switch with the Boomerang. Defeat the Octorok and then stand between the red and blue blocks. From there, use the Boomerang to hit the crystal switch again. Use the small key on the locked door and then head up the staircase.
Avoid the Slime enemies and make your way to the bottom-right part of the room. Here you will find a picture that has four numbers on it. The picture correlates to the top-right part of the dungeon map. Be sure to jot the numbers down.
Travel back northward and use the microphone to blow out the two candles, lowering the flames that block your pathway. There are four switches here which you need to hit in the proper order. Hit the bottom-left, then top-right, then top-left, and then bottom-right.
Hitting all four switches will cause a small key to appear. Use the Boomerang to grab the key. Run over to the south end of the room and use the key on the locked door.
Make your way to the southwest corner of the map and the door will close behind you. Use your Boomerang to defeat the four enemies and the doors will open. Travel northward and you’ll find a pair of Fire Bubbles. Use the Boomerang to defeat them both and the nearby flames will go out.
Travel northward and step on the switch to light the torch on the left. Use the Boomerang to trace a path through the flame and then towards the two other unlit torches. With all three torches lit, the nearby flame will go down.
The pathway to the right is blocked, but there is a crystal switch on the right side of the wall. Use the Boomerang to trace a path to the switch, causing a platform to appear. Run over to the large treasure chest to get the big key.
Carefully maneuver back through the room to get to the large lock at the south end of the map. Tap on the locked gate to toss the big key at it, revealing the way. Climb the steps to the next floor.
Hit the jars on the right to recover any lost health. Before climbing the steps, read the tablet to the left, causing a blue warp portal to appear. This will allow you to quickly travel to and from the dungeon entrance. Once you are ready to take on the boss, climb the steps.
At the beginning of the battle, Blaaz will split into three smaller versions of itself. These pesky enemies will roam around the room, occasionally shooting slow fireballs out toward Link. While in this phase, these enemies are invulnerable to Link’s sword.
Instead, take a look at the top screen and you’ll see that the three icons of Blaaz each have a distinctive amount of horns. Use the Boomerang to first target the mini-Blaaz that has just 1 horn, then the one with 2 horns, and then 3 horns. With all three targeted, release the Boomerang.
When the three small versions of Blaaz come together, Blaaz will reform and will now be vulnerable to sword slashes. Unleash a fury of slashes on Blaaz and he’ll eventually start teleporting around the room. During this phase, Blaaz will also occasionally swipe at Link with his hand if Link gets too close.
After a while, Blaaz will split back up into three mini-versions of himself. Repeat the same process by using the Boomerang. Later in the battle, Blaaz will start to summon large boulders of fire that will fall from the ceiling, but these are easily avoidable. Keep slashing at Blaaz until he has been defeated.
After defeating Blaaz, Link will meet up with Leaf, the Spirit of Power. After a short talk, be sure to open the treasure chest to get a Heart Container. Step into the blue warp portal to get back outside of the dungeon.
 Metal Gear Solid V: A Beginners Guide
 Guides: How to Get Your Musical Creations Off Your DS
 Assassin’s Creed IV – General Cheats and Easter Eggs Guide
 Lego Batman 3 – Adam West in Peril Guide
 Guides: Upscaling Your Retro Consoles for HDTV Sets