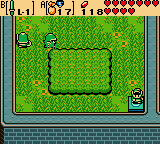
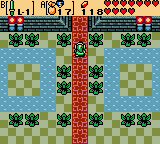
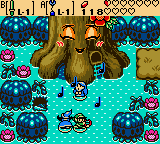
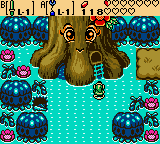
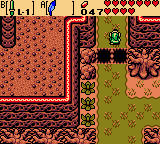
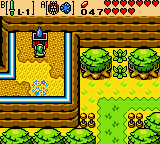
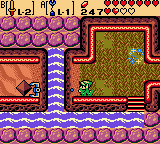
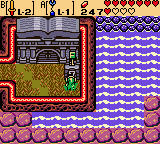
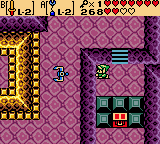
Exit the cave where the Mermaid’s Cave is located and swim ashore at Rolling Ridge Base. Take out the Seed Satchel and use a Gale Seed to warp to the South Shore of Lynna Village. Head up two and left one screen, then climb the steps above and continue up one and left one more screen. Ralph, who also caught word of Ambi leaving her palace, will be here attempting to save Nayru yet again. After he runs off towards the palace, follow him up two screens into the palace grounds.
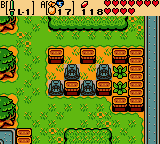
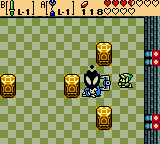
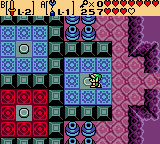
While Queen Ambi may have left, the palace is still heavily guarded by her knights. Four buttons in each corner of the palace grounds must be pressed to open a secret passage under and into the palace, though each area will be heavily guarded. If Link is seen by a guard, he will be thrown out of the palace grounds though any buttons that have been pressed will remain so.
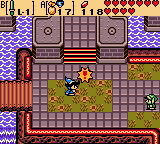
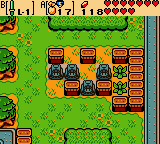
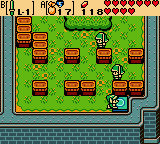
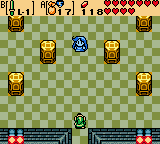
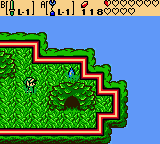
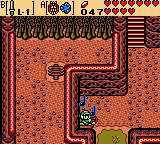
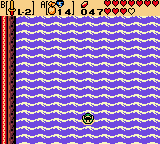
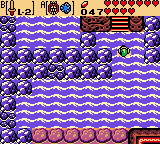
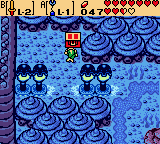
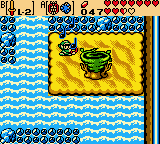
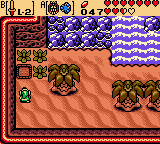
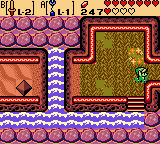
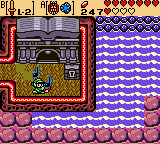
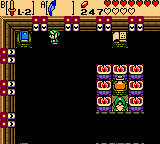
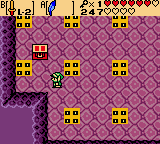
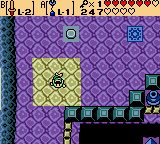
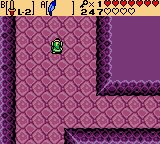
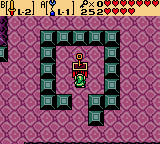
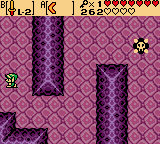
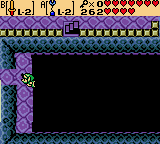
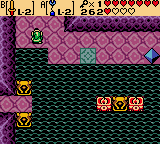
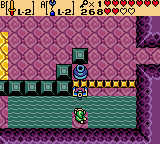
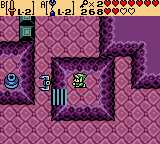
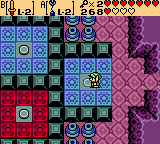
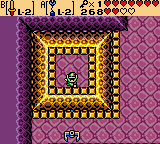
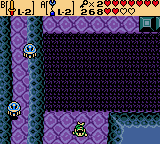
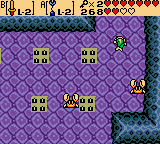
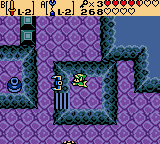
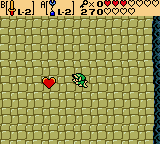
Start by heading left one screen. Swipe the Scent Seeds down from the tree and continue down one screen from there. Let the guards walk around the left side of the central bush growing so they won’t see Link step on the button in the lower-right corner. Doing so will move one of the statues blocking the hidden passage.
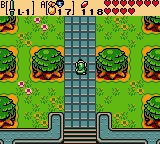
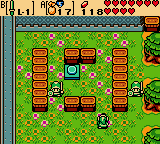
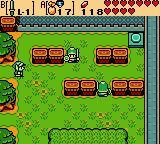
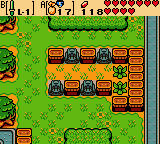
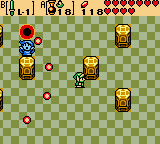
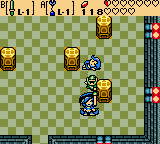
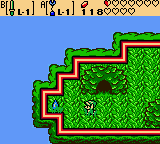
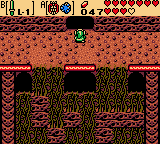
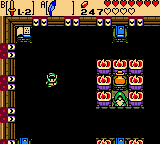
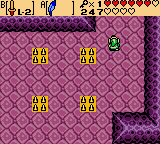
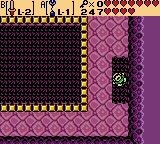
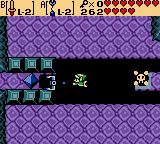
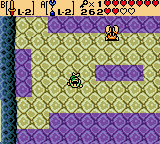
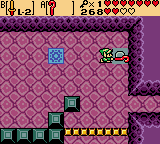
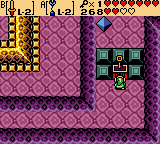
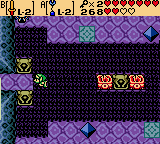
Head up two screens to the next button. Stand beside the rightmost vertical wall, also beside the middle wall at the bottom, until the guards pass to the lower section of the screen. When they do, head up and step on the button to move the next Ambi statue.
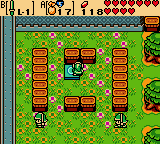
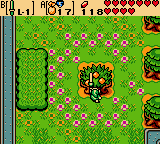
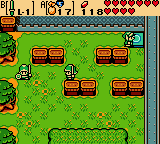
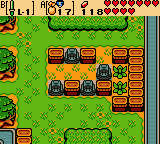
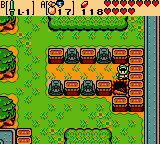
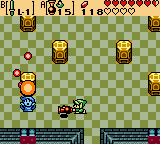
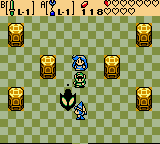
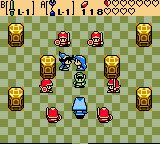
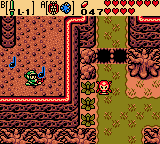
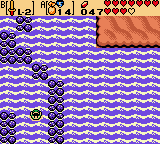
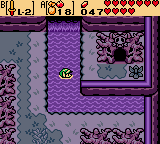
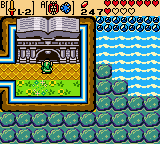
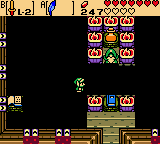
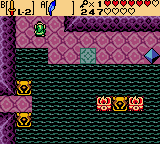
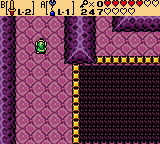
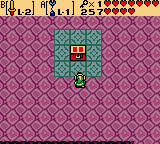
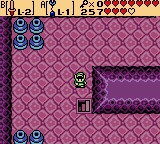
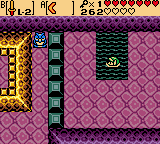
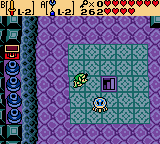
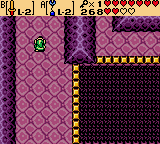
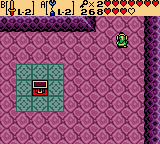
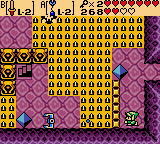
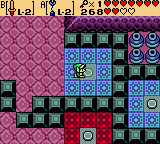
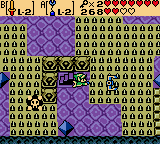
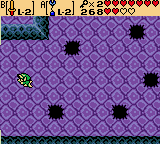
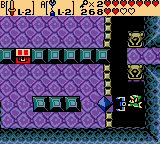
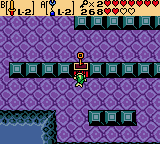
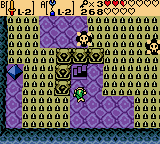
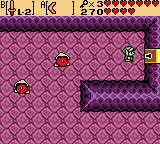
Go right two screens next. Quickly run along the upper path towards the button and step on it, avoiding the guards in the process and moving the third Ambi statue, then head down two screens to the final area. Simply walk straight down here and over to the button as the guards will not look Link’s way for a moment. Once the final statue has been moved, head back up one screen and slash the bushes on the right to uncover the passage and enter it.
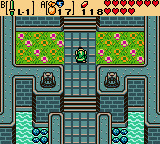
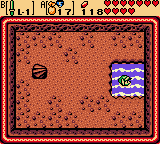
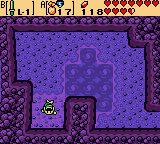
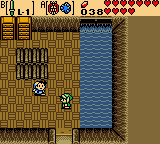
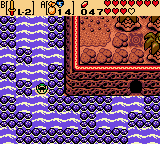
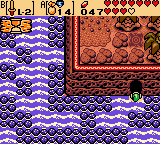
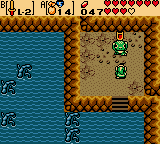
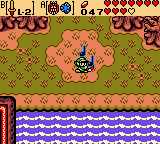
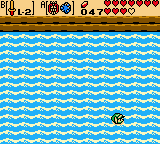
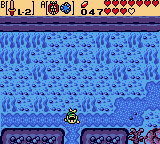
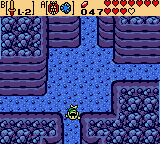
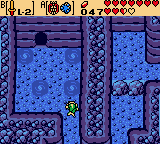
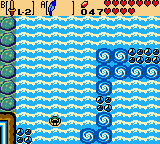
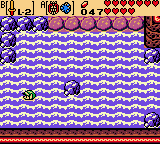
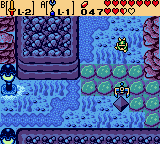
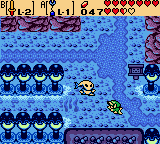
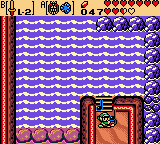
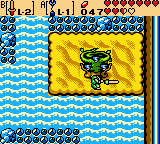
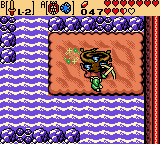
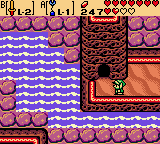
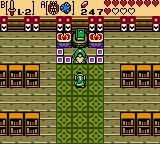
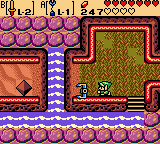
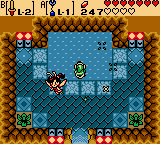
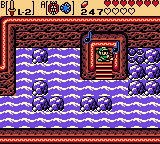
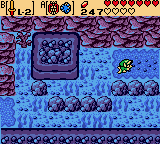
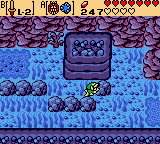
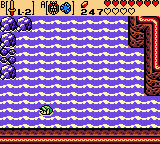
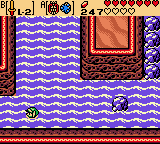
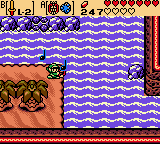
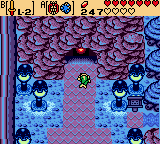
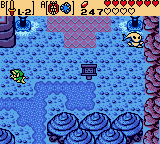
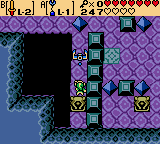
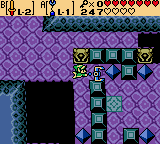
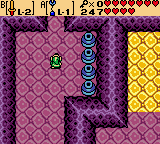
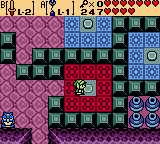
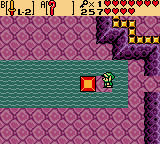
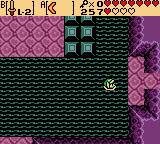
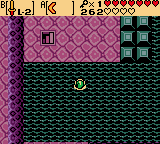
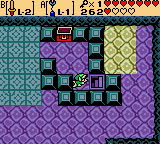
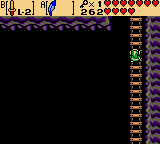
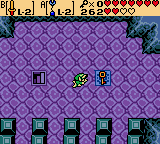
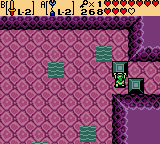
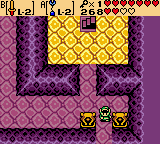
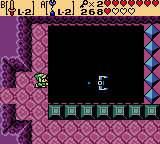
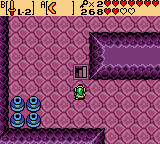
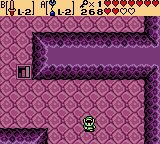
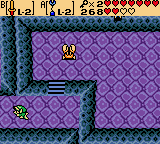
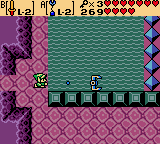
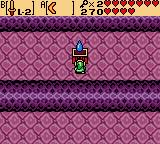
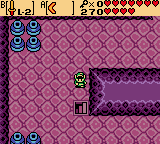
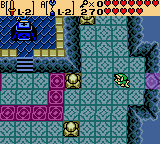
Jump into the water on the right and dive down. Swim left two screens while avoiding the whirlpools and resurface in the lighter colored area at the end. Walk up the staircase from the small cave and Link will be inside Queen Ambi’s Palace. Though there will be guards inside the palace who will see Link, they will attempt to attack him instead of throwing him out. If this happens, simply slash away at them with Link’s sword until they retreat.
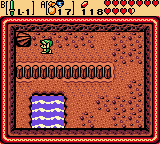
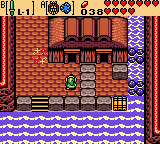
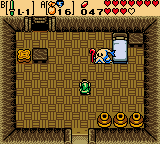
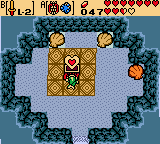
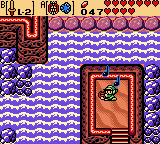
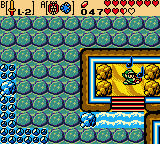
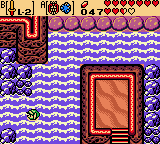
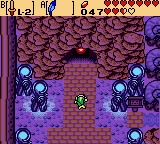
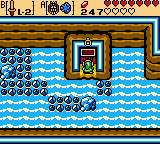
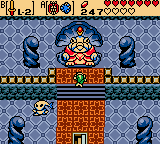
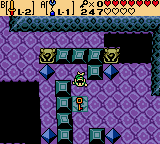
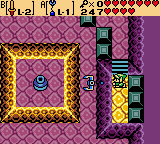
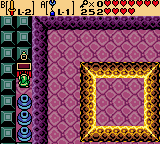
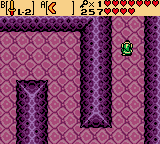
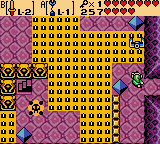
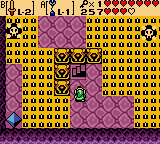
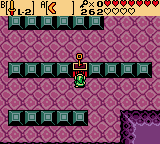
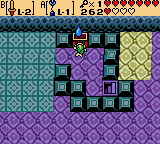
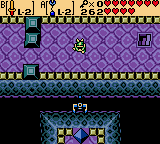
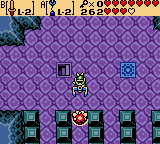
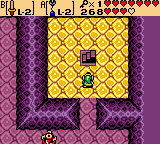
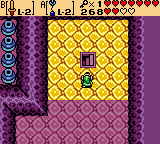
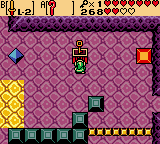
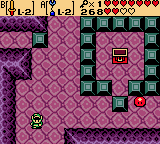
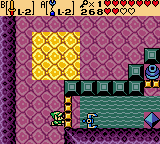
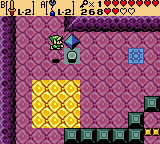
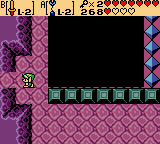
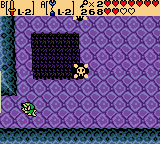
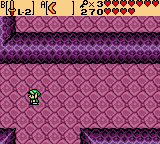
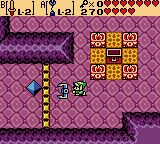
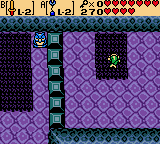
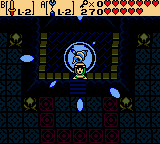
From the staircase, push the first block in the horizontal row “down” to get outside of the blocks and head right and up one screen each. Open the chest in this room to obtain a Magical Ring that will appraise as the Gold Luck Ring, cutting the damage taken from falls in half. Exit this room down one screen, then head left two screens. Up one screen from here is a room with two Fairies if needed. Head up the staircase to the upper level once getting passed the guards.

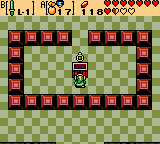
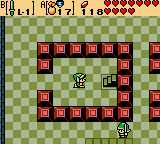
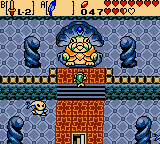
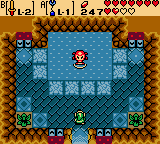
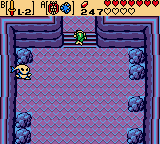
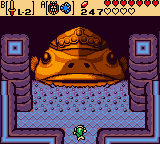
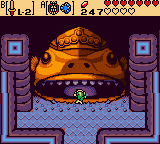
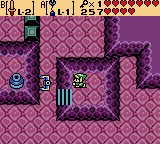
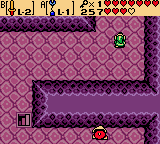
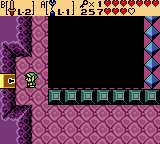
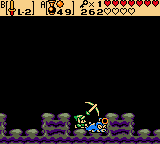
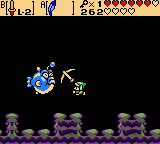
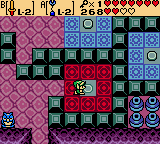
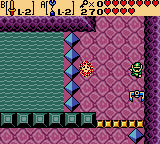
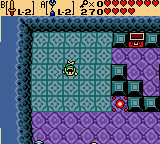
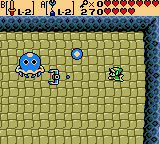
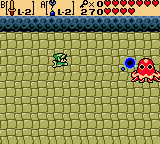
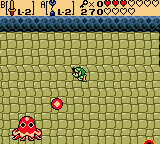
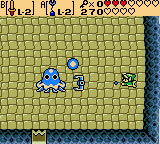
Continue right two screens passed an array of guards and up one into the room where Veran is located. After a few words, a fight will ensue between Link and Veran. Because Veran still has control of Nayru’s body, attacking her will take some process to assure Nayru herself isn’t damaged. Veran will teleport about the room and end up next to one of the statues. Follow her until she starts to attack, shooting multiple orbs out in a circle throughout the room. When she stops to attack, shoot her with a Mystery Seed from the Seed Shooter. Veran’s essence will lift out of Nayru’s body for a moment, enough time to use the Switch Hook on her, moving her away from Nayru’s body. Veran will form into her human form at this point, making her vulnerable to an attack from Link’s sword. After three successful hits on Veran, the battle will be over.
Queen Ambi will return after the fight and realize a difference in the Oracle of Ages. Veran, apparently out-of-sight, will rush in after a few words from Nayru and take over Queen Ambi’s body. Shortly after Ralph shows up, Veran will call Ambi’s guards on the group. Nayru will use her powers to transport everyone back to the Maku Tree’s area in the present, safe and sound.
With the Oracle of Ages now safe from Veran’s influence, many problems across Labrynna will be shown returning to normal. Nayru will then teach Link the Tune of Time, allowing him to travel from past to present, or vice-versa, from any location. Right after, a mysterious old woman will appear, revealing that saving Nayru did nothing to prevent the sorrow that had befallen the land of Labrynna, suggesting that this was the very goal of Veran from the start. Once the woman vanishes, Ralph will run off to return to the past and investigate, Nayru will retreat back to her house, and the Maku Tree will reveal the next Essence is echoing from “inside a fish”…
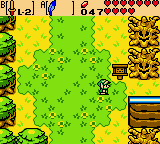
Walk into the Maku Tree and climb to the very top, where many bushes are now open as a result of Link’s progress thus far. The bush straight ahead in back has a Great Fairy Fountain if ever needed. Walk right one screen and grab the Gasha Seed laying here, then head back left two screens to the other side of the tree to find another Gasha Seed. Head back down the Maku Tree when finished and exit her area down one screen.
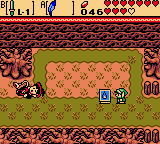
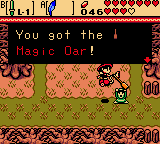
By this point, Link should have encountered Maple since getting the Touching Book in Chapter 5 and now have the Magic Oar in his possesion. With the Oar in hand, head down two, left one, and down two more screens. Swim over to the steps on the left and continue down two more screens along the path. Take out the Harp of Ages and play the newly aquired Tune of Time to teleport Link to the past.
 ~ Past ~
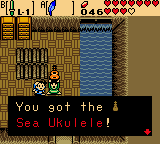
Walk into Rafton’s place and head right a screen. Talk to him and he will reveal his wish to enter a raft race but doesn’t have a decent oar to do so. Give Rafton the Magic Oar, to which he will trade Link the Sea Ukulele.
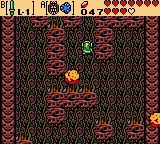
Exit Rafton’s place when finished and use a Gale Seed to warp to eastern Rolling Ridge. Jump off the ledge below, down one screen, then continue down another screen and jump into the water. Swim left three screens and down one and enter the small cave on the left, which is actually the house of the Elderly Zora. Give the Elderly Zora the Sea Ukulele which helps ease his longing for the sound and smell of the sea. In return, the Elderly Zora will give Link a Broken Sword, calling it a “Hero’s Sword” which was given to his people long ago. While there isn’t much use in a sword that’s broke, Link luckily happens to know a man who can fix broken things. Exit the Elderly Zora’s house when finished here.

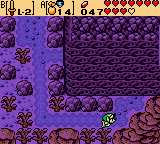
Outside, use a Gale Seed and warp to Lynna Village, then head up one and left five screens into the base of the Talus Peaks area. Jump over the holes above and head up one screen, then stand close to the western wall which is noticably indented a little bit and play the Tune of Time. Link will teleport to the present, next to the Happy Mask Shop. Here, walk over and stand in front of the Shop and play the Tune of Time again to go back to the past. Link will now be on the ledge just below Restoration Wall.
Walk down one screen and play the Tune of Time again. Open the chest here to obtain a Gasha Seed, then step back into the time portal and head back to the past. Head up one screen, climb the vines up Restoration Wall three more screens up, then enter Patch’s house at the top. Speak with Patch to participate in his ceremony again, this time to fix the Broken Sword. This second time around, the ceremony will be more difficult by having two waves of enemies to knock into the pits rather than just one. When the cart comes close to running into the sword, stand on the button in the room to alter the tracks so that the cart circles around again, giving Link plenty of time to take out both waves of enemies.
For a decent strategy here, stand to the right of the pit in the upper-left and continuously jump using the Roc’s Feather. The enemies will all crowd together and not be able to knock Link into the pit at the same time, so once they are all in one bunch Link can jump to the other side of them and knock all down at once.
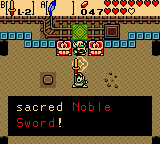
Once the ceremony is complete, the Broken Sword will be fixed and become the Noble Sword! This sword does twice the damage to enemies as the L-1 sword, can shoot sword beams when Link is at full health, and can smash vases. Leave Patch’s house when finished and use a Gale Seed to warp to Lynna Village.
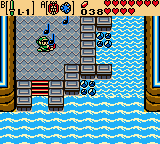
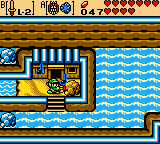
Walk down one screen and enter the water, then swim down three screens and right one. Continue swimming down along this path for two screens until reaching the end, then dive down. Swim to the end of the path underwater and resurface, now in front of the cave opening. Enter the cave and swim around to the right side, where a Tokay can be found holding a shield. Walk up and speak with the Tokay and he will give Link the L-2 Iron Shield!
Swim back out of the cave and dive down. Follow the path underwater up two screens and left one, then continue up three and resurface. On shore, play the Tune of Time to travel to the present.
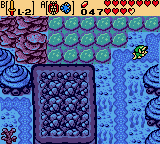
~ Present ~Head down the steps and down one screen to the shore. Enter the water and swim right four screens, then dive down and swim down one screen through the narrow path into an underwater maze. Continue down three screens, then left, down, and left one screen each and finally up two screens to reach a cave. Inside this cave, open the chest to obtain Piece of Heart #10! Swim back out of the cave and backtrack opposite the way in, then resurface and head west until reaching the shore.
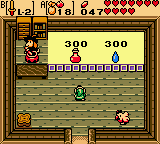
Link will need a Magic Potion in this section. If Link doesn’t already have one, either by running into Maple or purchasing one at some point, head up two and right one screen from the shore into the Forest of Time. From there, continue up another screen and right one into Yoll Graveyard. Head right, up, and right one screen each to reach Syrup’s Potion Shop, where a Magic Potion can be purchased for a hefty 300 Rupees.
Exit the shop, then use a Gale Seed to warp to the South Shore of Lynna City. Head down two screens, then down another along the coast to the left of the water. Enter the water from the bottom of this coast and swim left two, down two, and left one screen. Stand in front of the house on the small isle here and play the Tune of Time to transport Link to the past, where the landscape was noticably further east.

 ~ Past ~
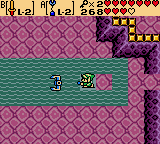
This next section includes traveling between past and present to navigate the poisonous waters surrounding Zora Village. From the house, swim left two screens, then walk up the steps above up one screen. While standing on this island, play the Tune of Time and travel back to the present.
 ~ Present ~
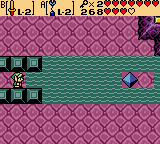
Dive underwater and head right one screen. Equip the Switch Hook and grab the diamond stone at the bottom of the screen, then swim to the right into the clearer area to resurface. Walk up onto the island here and play the Tune of Time to travel back in time again.
 ~ Past ~
Swim left two and down one screen, then walk onto the island in the lower-right and, while standing directly in front of the steps, play the Tune of Time again to return to the present.
 ~ Present ~
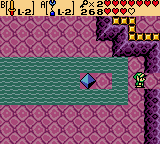
Dive underwater and swim down one screen. Use the Switch Hook on the diamond stone to cross the poisonous section blocking the way to the lower path, then swim left one screen into Zora Village.
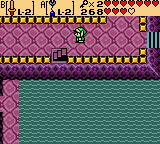
Resurface and swim up one screen. Swipe the Gale Seeds down from the tree, then swim left one screen. Enter the water surrounded by land and dive down to discover a chest containing a Gasha Seed, then resurface and swim back right a screen to the isle with the Gale Tree. Play the Tune of Time to travel to the past.
 ~ Past ~
Swipe the seeds down from the Gale Tree in this age, then swim left and down one screen each. Growing on the left of the isle below are four bushes, the one on the bottom-left hiding a Soil Patch underneath. Swim back up and right one screen, then dive down and swim up two screens and enter King Zora’s Palace.
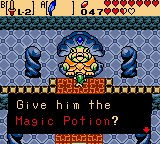
Swim up to the staircase and head up to the next floor, where a very ill King Zora could use the Magic Potion Link is carrying. After giving him the potion, King Zora will deny Link’s request to enter Lord Jabu-Jabu, but admit he will never forget Link’s deeds in saving his life.
Exit the palace and swim down two screens. Resurface and step onto the island, then play the Tune of Time to return to the present.
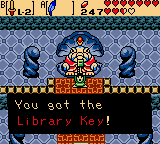
~ Present ~Dive underwater and swim up two screens. Enter King Zora’s Palace, then swim to the upper-left section of the room to find a chest containing 200 Rupees! Swim upstairs and speak with King Zora, who will remember Link from saving him long ago but still not permit him to enter Lord Jabu-Jabu. Instead, the king will request Link find a way to save Jabu-Jabu’s life by cleansing the filthy seas and give him the Library Key.
Exit the palace and swim right three screens. Resurface and climb the steps on the right, then use the Tune of Time to warp to the past.
 ~ Past ~
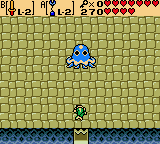
Use the Switch Hook to switch places with the diamond stone on the isle to the left, then walk left one screen and enter the home of the Queen Fairy, guardian of the seas, who Link finds has been transformed into the form of an Octorok. The queen reveals that a curse placed on the sea by Veran is to blame for both her figure and the poisoning of the waters. She will ask if Link will search for Fairy Powder to cure the curse on her so she may return the sea to normal.
Exit the Queen Fairy’s cave and walk right one screen, then jump into the water and climb the steps on the right. Head right one screen to the Eyeglass Library, then use the Library Key on the keyhole outside, causing the Library’s door to open. Play the Tune of Time again to return to the present.
 ~ Present ~
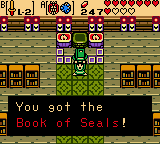
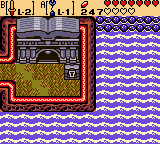
Enter the Library and head to the back room. Speak with the wise old man in the back who will tell Link about the Book of Seals. Believing he can solve the riddle of the book, the old man will give it to Link. Exit the Library and return to the past.
 ~ Past ~
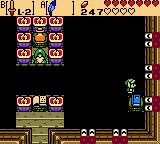
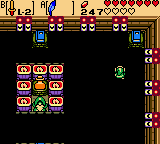
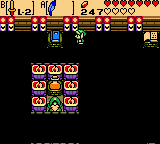
Re-enter the Eyeglass Library from this time period and head to the back room. Place the Book of Seals on the green pedestal and read it, revealing a directions to take to the next book in the room. The book must be open in order for the path directed to actually be present in the room. Using the Cane of Somaria, Link can push a block along this path until it eventually falls into a bottomless pit, revealing where he should no longer step. If Link falls into a hole, he will have to start over from the beginning.
For reference, the paths of the books are as follows:
–First to Second: Right(x4), Up(x2), Right(x2)
–Second to Third: Up(x2), Left(x1), Up(x2), Right(x1), Up(x1)
–Third to Fourth: Left(x2), Up(x1), Left(x3)
–Fourth to Fifth: Down(x1), Left(x3), Up(x1), Left(x3)
–Fifth to Sixth: Down(x1), Right(x1), Down(x2), Left(x2), Down(x3)
–Sixth to Old Man: Right(x1), Down(x1), Right(x2), Up(x1), Right(x1), Up(x1), Right (x2)
At the end of the path, speak to the old man who will give Link the Fairy Powder! Link will be transported back to the first room. Exit the Library and head left one screen. Use the Switch Hook on the diamond stone to reach the isle on the left and head left one screen. Enter the Queen Fairy’s cave and give her the Fairy Powder, returning her to normal so she can cleanse the seas of evil.
Link will be outside of the cave when the Queen is finished. Head right one screen and jump into the sea, then swim down two and left one screens. Continue swimming down and right one screen each, then climb onto the small isle on the right and play the Tune of Time to travel to the present.
 ~ Present ~
Dive underwater and swim right one screen, then resurface as far right as Link can swim. Open the chest on this small isle to obtain a Magical Ring, which will appraise into the Whimsical Ring, lowering sword attack power but making a strike deadly at random. Re-enter the water and swim back left one screen, then resurface and enter the time portal created from time traveling before to the past.
 ~ Past ~
Swim left three screens and walk onto the land on the left. Play the Tune of Time to travel to the present.
 ~ Present ~
Dive underwater, then swim up three screens and enter King Zora’s Palace. Head upstairs and talk to King Zora, who will finally permit Link to enter Lord Jabu-Jabu. Exit the palace and swim down and left one screen each, then continue up two screens into Jabu-Jabu’s Shrine. Jabu-Jabu will open his mouth, allowing Link to enter where he finds himself in the seventh dungeon, Jabu-Jabu’s Belly.
Link enter’s the dungeon in room 1F-??. Head left one screen to 1F-?? and swim around to above the gold statue on the lower-left. Aim up at the diamond stone above and switch with it. Swim to the right and switch with the next diamond stone at the bottom. Swim back around the top of the room and in front of the upper-left gold statue, then switch with the diamond statue on the right. Grab the Small Key that falls and head up one screen to 1F-??, then resurface in the yellow square to the second floor.
 ~ Second Floor ~
Head left one screen to 2F-D2 and open the chest on the left side of the room to obtain the Dungeon Map. Continue up three screens to 2F-A2, then head to the upper-right corner of the room. Push the lower blue block “right” and the one above it “up”, then head right one screen to 2F-A3 through the path. Bypass the Spinning Blade Traps and unlock the blue block on the right. Walk up the staircase above to the third floor, room C2.

 ~ Third Floor ~
Head down one screen to 3F-C2. Walk clockwise around the blocked center portion of the room and head up one screen from the left side. Continue up another screen to 3F-B2, a room where three switches separated from each other by blue blocks lie about. These switches control the water levels throughout Jabu-Jabu’s Belly. Step on this first one, surrounded by red tiles, to hear water rushing out, removing all the deep water from the dungeon.
Walk back down one screen to 3F-C2, then counter-clockwise around the center and up one screen from the right side. Head down the staircase to the second floor, room A3.
~ Second Floor ~Walk down one screen to 2F-B3 and fall down the holes on the right to the first floor, room A2.
~ First Floor ~Use the Switch Hook on the vase to the left to switch to the raised platform in the center of the room. Switch again with one of the vases on the ledge to the left, then open the chest on this ledge to obtain a Magical Ring! Jump off the ledge and head down one screen to 1F-B2. Push the out-of-place blue block surrounding the chest aside and open the chest to obtain a Small Key.

Head right and down one screen each to 1F-C3. Defeat all three enemies in this room for a chest to appear in the middle of the green tiles. Open the chest to obtain the Compass, then head back up one screen to 1F-B3. Place a block onto the button using the Cane of Somaria, then head through the opened doorway on the right to 1F-B4.
Swim right until reaching a set of steps and walk up them onto the ledge. Head up the staircase on the left to the second floor.
~ Second Floor ~Head up one screen to 2F-B5. Walk along the path on the right and head up another screen to 2F-A5. Head up the steps to the raised platform on the right, then switch with the vase on the left platform to reach that side of the room and continue left one screen to 2F-A4.

Use the Switch Hook on the diamond stone directly above Link when he first walks in the room, then continue along the outter edge of the room counter-clockwise switching with the various other diamond stones. Head up the staircase at the end of this passage to the third floor.

 ~ Third Floor ~
Go up one screen to 3F-B3, then head through the locked door on the left to 3F-B2. Step on the switch here, surrounded by blue tiles and to the right of the other switches, to have water rush back into the dungeon and fill the first floor.
Head back right and down one screen each to 3F-C3, then take the staircase back down to the second floor.
~ Second Floor ~Switch with the diamond stone to the right of Link, then head right and down one screen each to 2F-B5. Continue down another screen to 2F-C5 and swim across the water towards the right side of the room, then head right one room to 2F-C6. Defeat both Mini-Moldorms in this room and grab the Small Key from the chest that appears, then head back left one screen to 2F-C5.
Swim across the water and head up one screen to 2F-B5, then continue left one screen to 2F-B4. Dive into the area of deep water down to the first floor, room A3.
 ~ First Floor ~
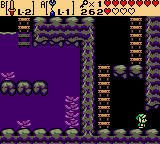
Swim to the left side of the room and open the chest there to obtain a Gasha Seed, then head down the staircase to an underwater cave area below. Swim towards the right, then take the series of ladders eventually right one screen. Here, Link must face the dungeon’s mini-boss, the Angler Fish.
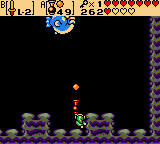
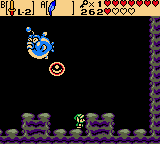
* Mini-Boss: Angler Fish *
Angler Fish will bounce up and down throughout the room shooting bubbles towards Link. Contact with Angler Fish or one of these bubbles will do damage to Link, though avoiding either is fairly simple here. Often, the bubbles can be slashed to obtain Scent Seeds, which can be shot at Angler Fish from the Seed Shooter to make him deflate and land helpless on the floor for a moment. The boss can be damaged by slashing the orb on its head, whether he is deflated or not. The easiest method to defeating Angler Fish is to shoot him with a Scent Seed and slash at him repeatedly, then repeating the process as soon as he inflates again.
After defeating the mini-boss, head up the ladder that appears on the right to resurface on the first floor, room A4. Unlock the block on the left and open the chest it was guarding to obtain the Long Switch! This upgraded version of the Switch Hook has better range, allowing Link to switch with objects or enemies from greater distances away.

Switch with the diamond stone below to reach the lower ledge and swim down one screen. Head down the steps and swim left two screens and up one to 1F-A2. Take the staircase in this room down to an underwater cave area below, then swim left one screen along the passage and back left one screen through the path above the one Link just came through. Head up the ladder here and walk left. Use the Long Hook on the vase to the far left to reach the ledge it is setting on, then jump into the water here and swim up and out of the cave and into 1F-A1.
Immediately shoot the Rope charging towards Link from the right in this room, then defeat the Goponga Flower and Bari to have a Small Key fall onto the blue tile and also unlock the doorway below. Grab the key and swim down one screen to 1F-B1, then surface in the area of yellow floor up to the second floor, room C2.
 ~ Second Floor ~
Head up two screens to 2F-A2. Push the blue blocks aside as before and continue right one screen to 2F-A3, then head up the staircase on the right to the third floor, room C2.
 ~ Third Floor ~
Walk down one screen, head around the central area, then back up one screen from the left side. Continue up another screen to 3F-B2. Step on the switch surrounded by red tiles again, emptying the water from the dungeon, then head back down one screen, around the room and up one screen from the right side back to 3F-C2. Head down the staircase back to the second floor, room A3.
 ~ Second Floor ~
Head down one screen to 2F-B3, then fall down the hole on the right to the first floor, room A2.
 ~ First Floor ~
Jump from the ledge and head down two screens to 1F-C2. Stand in the lower-left section of this room to the left of the blocked-in diamond stone and use the Long Hook to switch places with it. Hook to the vase above to get out of the blocked-in area and head over to where the diamond stone now lies. Use the Long Hook on it to pull it up and onto the button above, then place a block using the Cane of Somaria on the button to the right. A chest will appear on the blue tile containing a Small Key, so grab it and head right and up one screen each to 1F-B3.
Stand on the button above and Long Hook towards the left, pulling the diamond stone onto the button and unlocking the doorway to the right. Head through the unlocked doorway right one screen to 1F-B4.
Swim to the steps on the right and head up them, then walk up the staircase to the left of the steps to the second floor, room C5.
~ Second Floor ~Head up two and left one screen to 2F-A4. Hook to the diamond stone on the far left, setting directly below the staircase, then head up the staircase to the third floor, room C3.
 ~ Third Floor ~
Walk up one screen to 3F-B3, then left one screen to 3F-B2. Step on the button here to flood the dungeon’s first floor again, then head back right one screen to 3F-B3.
Hook to one of the diamond stones on the right to cross the gap and head up one screen to 3F-A3. Unlock the block on the left side of the room and head left one screen to 3F-A2, then head down one screen through the opening to 3F-B2. Step on the button surrounded by blue tiles at the top of the room to have more water rush into the dungeon, this time flooding up to the second floor.

Head back up one screen to 3F-A2, then backtrack right and down one screen to 3F-B3. Hook to the diamond stone below to reach the other side of the small yellow blocks, then continue down two screens to 3F-D3. Walk up the steps on the right and hook to the diamond stone on the yellow ledge to the left. While on the ledge, shoot the Long Hook down to switch with another diamond stone on a lower ledge in the room. Head right along this ledge to reach a chest containing a Small Key. After getting the key, jump off the ledge and head back up one screen to 3F-C3, then take the staircase down to the second floor.
 ~ Second Floor ~
Hook to the diamond stone directly to the right and swim right one screen to 2F-A5. Continue down three screens to 2F-D5, then swim left three screens to 2F-D2. Next, head up and left one screen each to 2F-C1. Switch with the diamond stone below to reach the side of the room with the chest. Open the chest to obtain a Small Key, then head right, down, and right one screen each to 2F-D3.
Swim up the steps in the upper-right corner of this room and hook to the vases below to reach the lower ledge. Swim right two screens to 2F-D5, then up three screens to 2F-A5. Continue left one screen to 2F-D4 and hook to the diamond statue on the left, directly below the staircase. Once Link has switched places with the stone, head up the staircase to the third floor.

 ~ Third Floor ~
Head up one screen to 3F-B3 and hook to one of the diamond statues across the water. Continue up another screen to 3F-A3, then go left two screens to 3F-A1. With three keys in-hand, head through the first locked door at the upper-right corner of the room. Open the chest in this hall to obtain a Gasha Seed, then continue through the next two locked doors by heading right two more screens. Open the chest surrounded by torches to obtain the Boss Key!

Long Hook to the diamond stone to the left of the yellow blocks, then head left and down one screen each to 3F-B3. Hook to the diamond stone below to bypass the yellow blocks in this room and continue down another screen to 3F-C3. Take the staircase down to the second floor, room A4.
 ~ Second Floor ~
Swim right and down one screen each, then head left one screen to 2F-B4. Dive down into the black hole at the top of this room to the first floor momentarily, room 1F-A3, then swim to the left where the green tiles are and resurface back to the second floor. Swim up the steps below onto the ledge and head right one screen, down two, and left one along the ledge to reach the door to the boss’ lair. When ready, head through the door to room 2F-C4 to face Plasmarine.

** Dungeon Boss: Plasmarine **
Plasmarine will start out blue in color, shooting orbs of the same color towards Link occasionally while also moving towards him. Using the Long Hook on Plasmarine switches places with it while also changing its color (blue to red or red to blue), which must be done in order to have the boss land in the path of its own orb. While red, only blue orbs can hurt Plasmarine and vice-versa. Continue to bait Plasmarine into its own attacks until it is defeated.

Grab the Heart Container which appears in the middle of the room and head left one screen. Swim up the steps to the altar and claim the seventh Essence of Time, the Rolling Sea!
After being teleported outside of Jabu-Jabu’s belly, an old hag will appear to be standing amongst blackness, announcing the completion of the Black Tower. Queen Ambi, possessed by Veran, will be shown atop the tower recieving dark powers from above. With this power, Veran begins once again wreaking havok throughout Labrynna’s past. The Maku Tree will then speak to Link, admitting that she cannot hear the echo of the final Essence but knows it must be somewhere in Labrynna…
 Batman: Arkham Origins – Guide to Defeat Anarky Guide
 FIFA Soccer 13 Achievements / Trophies Guide
 Assassin’s Creed IV – General Cheats and Easter Eggs Guide
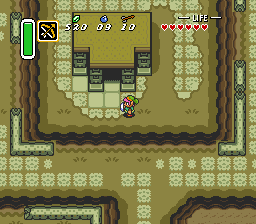
 A Link to the Past Walkthrough – Eastern Palace –
  The Adventure of Link Walkthrough – Maze Palace –