

~ Treasure Chest Game ~
Our next destination is the Shadow Temple. But real quick, there’s a Heart Piece we can get. In the past in the Hyrule Town Market, there’s a shop next to the exit that leads to the drawbridge. It’s only open at night, and it’s horridly unfair. You go through a series of rooms, choosing a chest, giving you 50% chance each time to win or lose. Suffice to say, the odds against you are considerable.
Pay the man the Rupees, then use your new Lens of Truth in each room to see what’s inside the chests. Make your way to the very end to get a Heart Piece.
Treasure Box Shop The game progresses you through various rooms where you open one of two chests, each time getting a 50% chance to go on or lose. The odds are certainly not in your favor and it’s nearly impossible to win. That is of course, unless you cheat.
Once you get the Lens of Truth, use it in each room to see which chest holds the goodies, allowing you to make it all the way to the end.
~ Entering The Shadow Temple ~ To get to the Shadow Temple, you’ll need the Nocturne of Shadow and the Lens of Truth. Become and adult again if you aren’t already and when you’re ready, teleport to the Graveyard using the Nocturne of Shadow, then go on down. Here, you have to stand on the circle platform and use Din’s Fire to light all the torches. This is the only part in the game where it’s actually required.
After lighting all the torches, the door will open. Yipee!
~ Getting The Hover Boots ~
Entry Room
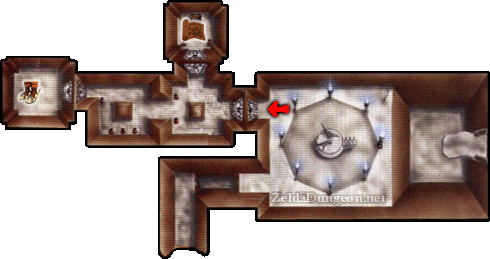
As you enter, you’ll immediately be confronted by a pit. Longshot across it and walk towards the fake wall. A voice will proclaim that you need the “eye of truth” to progress through the temple. If you don’t yet have the Lens of Truth from the Well in Kakariko Village, refer to the last chapter.
Go on through the fake wall and we’ll encounter a little puzzle… We’ll get to it in a bit though. Turn to your left and use the Lens of Truth to see through one of those skull plates in the wall where a hidden corridor with a door resides. Go on through.
Taunting Rooms of Illusion The following two rooms are filled with voices that speak of hatred and death… So much fun. Just ignore them and keep walking. Follow the right wall and you’ll find a door.
Dungeon Map Room In this room, quickly play the Sun’s Song to stun the ReDead. Now kill the two Keese while it’s stunned so they don’t fly around and make your life miserable. Finally, kill the ReDead to make a large chest appear containing the Dungeon Map. Collect the goodies in the jars if you like, then exit.
Taunting Rooms of Illusion Follow the right wall again and enter the hidden corridor between the two jars. The voices will proclaim more oddities.
In this second half of the room, there’s some floating jars on the left side… Follow the right wall again, which leads to the next area.
Hover Boots Room This should look familiar. We have to face another Dead Hand, but there’s a little twist now. You can use the Lens of Truth to see where he’s burrowed, so do so then go away from where he’ll pop up, let the hands grab you, then confront him. He should be easily defeated since you do more damage now, especially if you use the Biggoron’s Sword.
Once he’s dead, open the chest that appears to get the Hover Boots. With them in hand, go back to the entrance room (just keep walking straight).
~ Leap of Faith ~
Entry Room Now that we’re finally back in this room, approach the bird statue. It tells you to point its beak in the right direction. If you use the Lens of Truth, you’ll see that the unlit torches are all fake, except for one, which has a skull on it (it’s random from game to game). Push or pull the statue to point towards it, then step away. If you chose correctly, the gate will open across the way.
Equip your new found Hover Boots and run across. You should just barely make it, grabbing onto the tongue. Go down the hallway.
~ Compass And Small Key ~
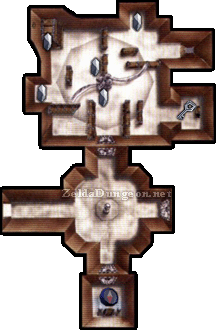
Beamos Corridor This small room splits into four directions, including the one you just came from. You can kill the Beamos in the middle, but it’ll keep coming back when you re-enter the room. However, if you do kill it, play the Song of Storms while facing the middle to make a fairy appear. Regardless, the wall on the left and right are fake. Take the latter.
Compass Room This leads to a small room with two Gibdos. Play the Sun’s Song to stun them, then kill them from behind. Open the chest to find the Compass.
Go back and the door across the way (left one this time).
Scythe Shortcut Room This room has a giant two grim reaper statue thing that has spinning scythes. Basically the exact same as the ice blade you encountered in the Ice Cavern. Maneuver around the room, using the R button to duck (or just roll) and avoid the blades. Collect all five Silver Rupees. There’s two in the middle. Two in alcoves on either side of the room, and one atop a stack of logs that you have to Longshot onto, then jump off to snag.
Collecting them all will open the grating on a nearby cell, which holds a chest containing a Small Key. There’s nothing else we can do in this room for now, so go on back to the previous room.
~ Invisible Platform Secret ~
Beamos Corridor Two walls were fake, so this seems awfully suspicious, no? Bomb the remaining wall to reveal a hidden locked door (the shape of this room on your map should give it away too). Use your only Small Key to go through.
Guillotine Cavern Go slowly down this ramped, “S” shaped hallway. There are three Skulltulas that pop out of the ceiling, just waiting for you to run into them. Use your Longshot to kill them quickly. At the end, jump down and run through the first guillotine, kill the Skulltula, then run through the second guillotine.
Round the corner and Navi will warn you about the Wallmaster. It’s only in this corner, so kill it if you like, or just run right past…

Next, you’ll find a series of guillotines on floating platforms. I know it seems like you’re supposed to use the Hover Boots here, but they actually make it harder because your momentum can cause you to slip into the next slicing blade. Also, the third one has a Red Bubble that pops out of nowhere. Use your shield to deflect him (he should jump off on his own afterwards), then jump to the final platform.
A Stalfos will appear. You can use this small space to your advantage by stabbing him repeatedly so he backs himself into the bottomless pit. Again, you can play the Song of Storms to make a Fairy appear.
Before you jump on down to the next area, turn left and use your Lens of Truth to see invisible platforms. Jump/hover along them, following the outer wall until you come to a door.
Invisible Scythe Room This next small room is very simple. Within the round design on the floor is another spinning grim reaper statue, but this time it’s invisible. Use your lens to avoid the blades and work your way around the room, killing the Keese on the walls and the Like Like on the other side. When all enemies have been defeated, the grating will open.
Inside, you’ll find two chests (one invisible) that have Arrows and a shield, should your other one have been eaten. Kill the Skulltula and snag the token. Return to the previous room.
~ The Stone Umbrella ~
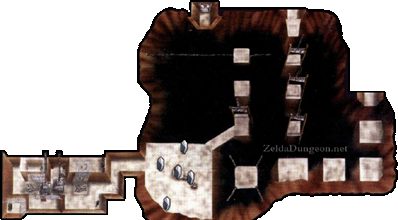
Guillotine Cavern Jump back across the invisible platforms and return to where the Stalfos will appear yet again. After you kill him, wait for the platform nearby to fall down low, then jump onto it. When it cranks back up high, jump onto the lower area, on the right side. It is possible to go forward instead, but it’s difficult…
Follow the skinny bridge to a Beamos and two circling Blade Traps. There’s five Silver Rupees here we need to collect. There’s on near the ledge, one against the wall, two between the Blade Traps, and one underneath the Beamos. Once you’ve collected all five, the door will grating will lift.
Spikey Falling Trap Room
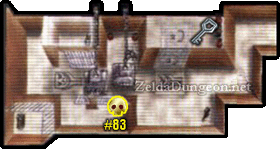
This room can be fairly intimidating at first glance. If you step under one of the spikey platforms that are smashing the ground, you’ll start the room over again. You can’t sprint through them, so you’ll have to find another way.
If you read the sign, it says you need a “stone umbrella.” I sure am glad I packed one of those this morning… Use the Lens of Truth to find a stone block in a hidden cubby. Pull it out and push it under the traps. You can position it between the two as well so you can safely navigate the area, there’s a mark on the floor to make it easy.
In one of the side alcoves is a Gold Skulltula, so snag it then return. Get on the other side of the block (opposite where you entered from) and pull it the rest of the way. Climb on top of it, then jump on the platform on your left.
Use the spikey platforms to your advantage and get to the right side, where there’s a switch. Stepping on it makes a small chest appear in the far corner of the room. Work your way over there using the other spikey platform, then open it to find a Small Key. Return to the big cavern.
~ The First Skull ~
Guillotine Cavern
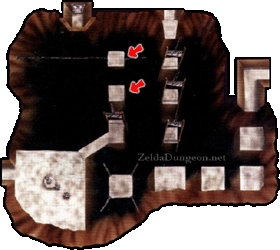
In the middle of the cavern is a little stretch of land with a single guillotine. It seems to lead to a dead end, but there’s a door across the gap…
Use the Lens of Truth to see two invisible platforms, one of which is going back and forth. Use them to get to the locked door.
Invisible Spike Room
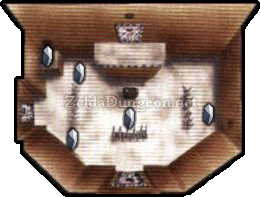
This small room has three sets of invisible spikes as well as two ReDeads. Use the Lens of Truth to avoid the former and the Sun’s Song to stun the latter. After they’ve been defeated, a chest will appear containing a miserable five Rupees.
Next, we must gather all the Silver Rupees. The first is in the middle of the room, the second and third are against the wall, just Longshot the target above them and fall down.
The last two are in the corner next to one another in mid air. Use the Lens of Truth to see the one is on a little platform. Longshot the invisible target, then jump (or hover) to the final Rupee.
Go in the door that opens.
First Giant Skull Room
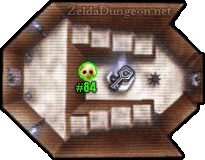
First off, kill the four Keese that are in this room. Two are directly above you when you enter, touching the nearby blue torches, becoming Fire Keese. I suggest using the Fairy Bow to take them out quickly.
Climb up either set of ledges, kill the remaining Keese, then toss Bomb Flowers into the giant flaming skull until you get one in. Jump down and collect the Small Key that popped out. Turn around and snag the Gold Skulltula that was hiding behind it.
Return to the previous room.
~ Wind ~
Invisible Spike Room It’s pretty obvious we need to get up to that locked door next. Use your Lens of Truth to see a target on the ceiling for you to Longshot to.
Fan Corridor
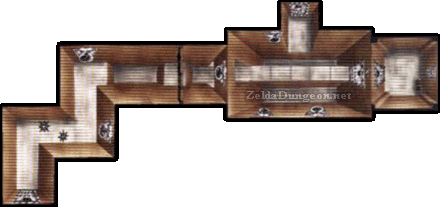
This next hallway is filled with Spike Traps and impish looking fans that turn on and off. The trick is to run to the other side when the fans aren’t blowing (or just wear the Iron Boots).
Round the first corner, then inch forward to make the Skulltula appear. Kill it with your Longshot, one hit.
At the next corner to find yourself confronted by a pit. There’s two ways to get across:
–Wait for the fan to stop and use the Hover Boots to run across. –Equip the Iron Boots and Longshot to the beam across the way.
Either way get across and fall down into the next area.
Wind Room You’ll drop down into a large open room with a bridge in the middle and fans against opposing walls trying to blow you off. Use your Iron Boots to walk past them.
Against the other wall is a trick Eye Switch above the door that shoots flames out (that can be deflected with your shield). Aim at it with your bow and shoot it as soon as it opens its eye.
Enter the next door if you wish, it’s optional. It just contains two ReDeads, a Fairy (Sun’s Song) and a picture on the wall with a secret hint.
(If you did go in the room, you’ll have to kill the stupid eye switch again -.-) Use your Lens of Truth to see a fake wall on one side of the room, in the lane closest to the door.
Wait for the fan to stop blowing, then stand in front of it and equip the Hover Boots. Resist it a little until it’s going full force, then run with it to get to the other side safely. Enter the door.
~ Making A Shortcut ~ 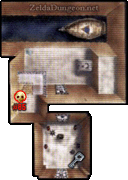
Gibdo Room As you enter this dark room, play the Sun’s Song to stun the Gibdos. Sneak past the first Spike Trap, then be ready to defend against the flying pots. Quickly take out the Gibdos before the stun wears off. A small chest appears containing Bombs. Foreshadowing!
If you look at your map, it indicates another chest in the corner. Blow up the funny looking dirt pile with the red crack in it to reveal…! Nothing… Suspicious? Use the Lens of Truth to find an invisible chest withholding a Small Key. Enter the locked door.
The “Boat Room” In this next, large room, turn left and pull back the giant stone block. Now push and pull it along the path and click it into the slot next to the ladder. Now we can proceed to the next area, but you’ve also opened a shortcut to the room with the spinning grim reaper-scythe statue. Nifty.
Now, climb up the ladder and get onto the boat. Before we go on, look to your left, above the shortcut area you just opened up. There’s a Gold Skulltula atop that ledge, and from here, Navi will fly up there and turn green. To get up there, play the Scarecrow’s Song and Longshot from here (atop the boat) to get there. Collect the token and jump down.
~ The Shadow Ferry ~
The “Boat Room”
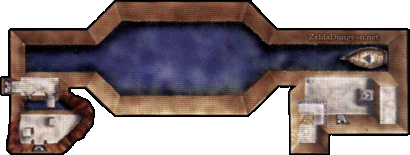
When you’re ready, jump onto the ominous boat, stand on the Triforce symbol and play Zelda’s Lullaby.
You’ll witness a short clip in which the boat begins to move, then be confronted by two Stalfos in a row. If you have one targeting, the other will leave you alone for the most part. Kill them both quickly if you can.
An effective strategy is to get right in their face and prepare to stab forward repeatedly. They tend to let their guard down when you do this…
Before too long, the boat will reach the end of it’s path and hit the wall. Shortly after, it’ll will fall into the abyss. Jump off onto the platform on the left side before that happens.
In this new area, we can go to the other side, but first, enter the door on your right.
~ The Three Rooms ~
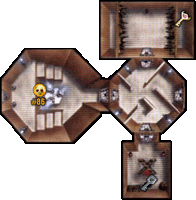
Invisible Maze This room is filled with invisible walls and a door in each corner. The two Floormasters in the middle of the room can be pretty annoying, especially since they reappear when you enter the room again.
Use the Lens of Truth to see the invisible walls if you wish, then work your way clockwise around the room, starting with the south door.
Invisible Floormaster Room As soon as you enter, whip out your Lens of Truth. There’s an invisible Floormaster in here. The unfortunate thing about this is you can’t use the Spin Attack and the Lens at the same time.
I suggest killing the big hand, then Z targeting and stabbing the smaller ones. After you’ve defeated them all, open the small chest that appears for a Small Key.
Return to the previous room and go clockwise into the west door.
Second Skull Room This room has three spinning skulls this time. You can blow them up if you want to, but it’s just some random goodies (magic jars, hearts, arrows, etc.) and some Rupees, which are useless at this point in the game. The only thing of importance in this room is just the final Gold Skulltula of the dungeon, hiding behind the skulls.
Again, go back to the maze and enter the last door, to the north.
Boss Key Room This room has two wooden spike traps that slowly try to crush you. Use Din’s Fire to burn them (Fire Arrows don’t work, how dumb). You’ll then find a ReDead on either side of the room. Kill them both and open the colorful chest to get the Boss Key.
Return to the room with the boat (where you got off it that is).
~ Final Stretch ~
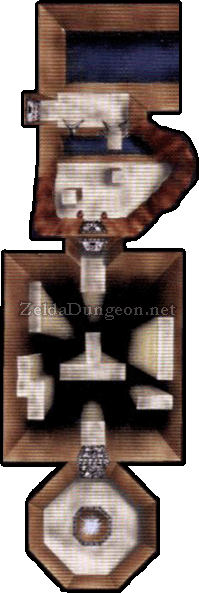
The “Boat Room” At long last, we’re ready to tackle the boss. You should have exactly one Small Key at this point. In the area where you got off the boat, you’ll see stuff on the other side of the abyss, but no way across.
On this side, there’s two doohickies sticking out of the ground to the right, and two suspicious jars on the left (containing arrows, hmmm…) Stand between them and check out the statue on the other side…
Fire an arrow at the Bomb Flowers at the base of the statue to blow out the bottom, making it fall over. “Tiiiiimmmbeeeeeerrr!”
Go across the other side. You can get the recovery hearts on the right by playing the Song of Time at the base of the broken pillar, then the Scarecrow’s Song to get on top of the really high platform. It serves no other purpose, so put away your curiosity 😉 Enter the locked door.
Invisible Platform Room This final room has several invisible odd-shaped pillars that are far apart. Use the Lens of Truth to see them, and the Hover Boots to make your way across. Either the left or right side is fine, just get a running start and you should be able to make it easily. When you’re ready, enter the boss door.
Boss Room Nothing left to do but fall down the pit.
Phantom Shadow Beast, Bongo Bongo
Bongo Bongo can be one of the hardest bosses in the game. Even though he can be killed quickly if you know what to do, he’s all about timing and reacting quickly, which can be hard, especially the first time you face him. His attacks do quite a bit of damage, so it’s not hard to quickly lose all your life. A couple fairies are recommended for this battle.
Ironically enough, the entire battle is on a giant bongo drum, with two hands hitting it. It may seem as though you should use the Hover Boots, but they actually make it harder. The drum is floating in a sea of poison, so you’ll have to jump back on as quick as possible should you be cast off.
This boss attacks by using two hands with generic, predictable punching, etc. His fastest attack is the swiping move, which is hard to avoid sometimes. The best way is to simply hold R to duck when you’re not Z targeting. The other moves are generally easily avoided by simply rolling.
The object of the battle is to stun both hands, to make Bongo Bongo vulnerable. You can do this using the Longshot, the Megaton Hammer, the Fairy Bow, or simply one of your swords. Both of the first two listed… well… suck… It’s possible to attack the hands while they’re in the middle of attacking you, but some attacks are invulnerable, etc, so it’s easier to attack the stationary one. Here’s the two best methods I’ve found to attacking the hands:
Method 1: Stand far back so you can see both hands. Z target and shoot one hand. Dodge the other when it attacks, and if it’s next to you for a second (such as after slamming the ground) stab it with your sword. Otherwise, Z target that one, and shoot it when it goes back to its starting position before it attacks again.
Method 2: Wait for one hand to attack. Run straight for the other hand that’s not moving. Smack it. Quickly turn and move to where the opposing hand will return to (left or right). Smack it as soon as it comes back to its original position.
Both of those tricks work very well (I like the second method better). However you end up doing it, you can use the Lens of Truth to see Bongo Bongo. He’ll now open his eyes and rush towards you, with hands on either sides. Hit his open eye to stun him, with which you can use all of the weapons listed earlier. A regular sword slash is kinda fun, but hard to time… The best methods are to use the lens of truth, z-target, and quickly shoot an arrow. Alternatively, you can stand between fists and use a spin attack.
He can be a pretty intimidating boss, but if you use the tricks I have listed above, and especially if you have the Biggoron’s Sword, this guy can be over within one minute.
After he’s been defeated, he’ll boil down into a puddle of shadow goo. Cool.
Be sure to snag the Heart Container, then head for the blue portal.
~ Temple of Light ~
Chamber of Sages You’ll witness a short scene in the Chamber of Sages with Impa, in which she reminisces about her side in what happened when Ganandorf attacked Hyrule Castle. She goes on to explain that he was really after the Ocarina of Time, which we already knew. She also says that Zelda is safe and that when the time is right, you will at long last meet her.
At long last, she’ll then give you the Shadow Medallion, alike all the other sages. Just one more!
 Batman: Arkham Origins - Easter Eggs and Exploits Guide
 Guides: How to Get Your Musical Creations Off Your DS
 Skyward Sword Walkthrough – Volcano Summit –
  Assassin’s Creed IV: Black Flag – Naval Contracts Guide
 Guide: Mario Kart 7 Top Tips