Earlier this week Nintendo published a handy video guide to a New Nintendo 3DS system transfer, but as promised we're providing a written equivalent that somewhat matches the pace of the process. Trust us, this'll take you longer than three and a half minutes, and we'll also aim to cover off any gaps in the information that need to be taken into account.
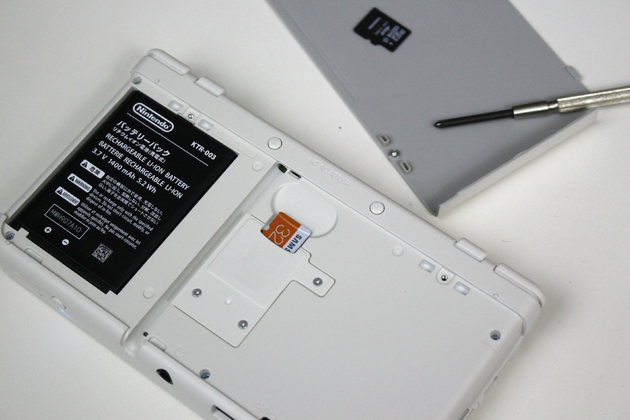
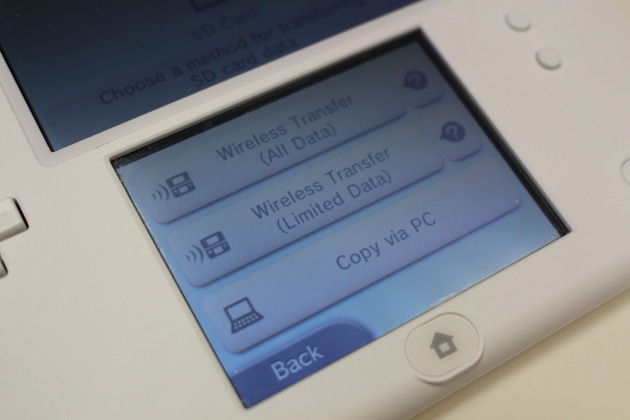
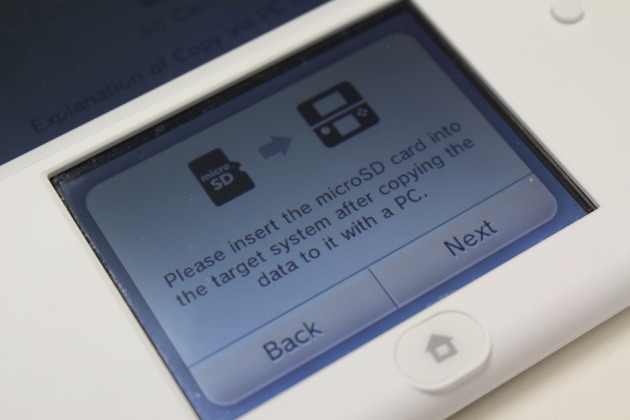
Like the video we'll be providing instructions for the best transfer option, that which uses a PC in the process. If completing a transfer wirelessly - which will take many hours - the process is largely the same just with tweaks after that step. We highly recommend the PC-based approach, however, even if you need to temporarily access one belonging to a friend, family member or particularly kindly neighbour. The main hassle, this time, is the transition from SD to micro-SDHC, areas we hope to cover off here.
Note: This guide is for a first transfer from an original 3DS to a fresh New Nintendo 3DS / XL. We'll post updated tips for New 3DS to New 3DS and any other variations besides in the future.
So, let's get to it.
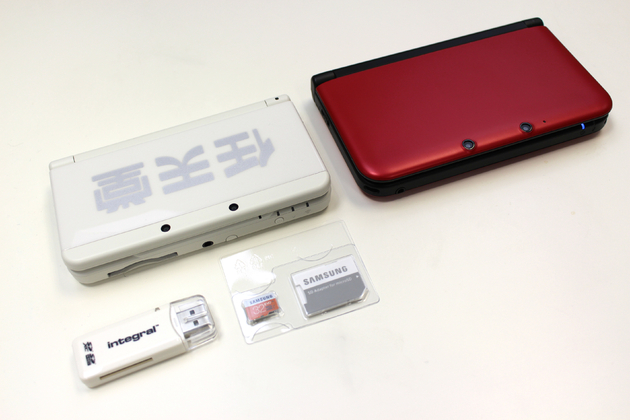
It's worth making sure you've got the following, if applicable, before you even contemplate kicking off the process.
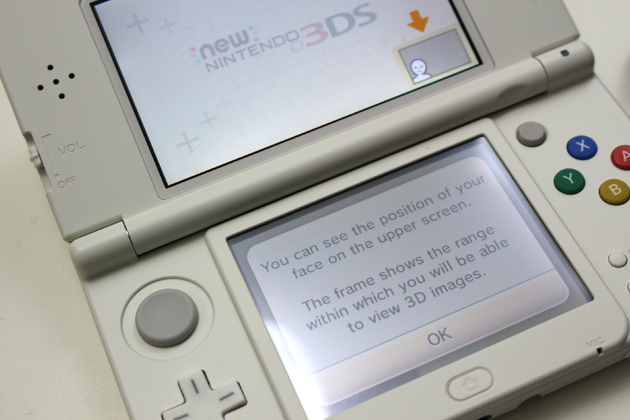
Moving onto the business end now, the first thing to do is to fire up your New Nintendo 3DS - plugging it in is a good idea - and work through the initial setup. This will involve picking a system name, applying a time / date and calibrating the 3D effect, among other things.
You shouldn't be prompted to set up or link a Nintendo Network ID in the early screens, but ensure that you do not setup an NNID under any circumstances.
Once initial setup is complete and you're on the familiar home screen, head into System Settings, Other Settings and select System Update, just to check it's on the latest firmware.
Once that's complete, boot up your old 3DS and get both systems to the main screen; head into System Settings, then Other Settings.
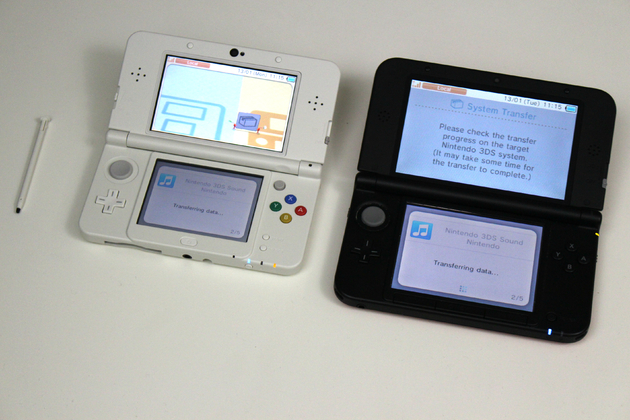
Select System Transfer on both consoles.

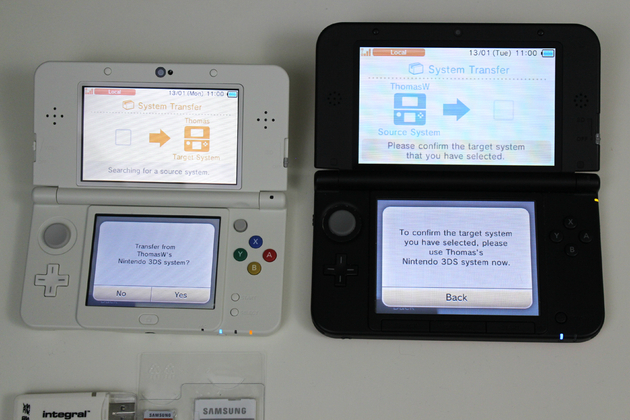
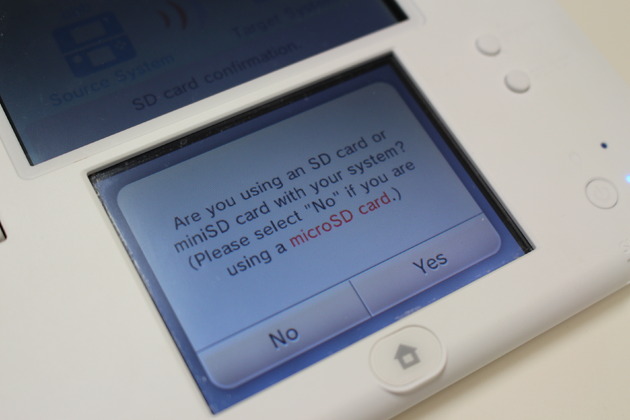
As the eagle-eyed may spot, we had to do another transfer after wrongly tapping No on another system - be sure to Tap YES on this screen
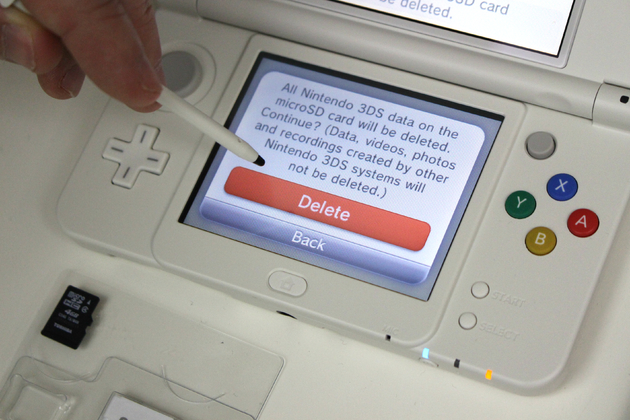
Continuing with a micro-SDHC already used in an original 3DS
If you are actually using a micro-SDHC card in your old 3DS (with an adapter) and want to keep using that same memory, then select No and the process below will be slightly different (easier, actually) as you'll be replicating the simple act (at the right time) of letting the systems process before simply moving your card into the New system.
Though the prompts will be different, the process should actually be simpler, as you won't be required to move files onto a PC and then onto a new card. Follow the prompts for a limited wireless transfer between the two units and, only when told to do so, switch both machines off and move the micro-SDHC across to the New Nintendo 3DS. This is far more reminiscent of the original System Transfer process.
If you buy a Nintendo Nintendo 3DS that comes with a game pre-installed - at launch some specific systems come with Monster Hunter 4 Ultimate or The Legend of Zelda: Majora's Mask 3D, varying by region - then it will be wiped as part of the System Transfer process. Nintendo's support page states that you will simply be able to re-download the affected game from the eShop. Simply find the game's page on the eShop and it should provide an option to re-download, or go into Menu / Settings / Other / Redownloadable software.
Finally, below we have Nintendo's official video guide, which is pretty useful.
Subscribe to Nintendo Life on YouTube
If you have any remaining questions about the transfer be sure to let us know in the comments below.

 A Link to the Past Walkthrough – Gargoyle’s Domain –
  Guide: Everything You Need to Know About Super Smash Bros. for Nintendo 3DS
 Batman: Arkham Origins – Guide to Defeat Anarky Guide
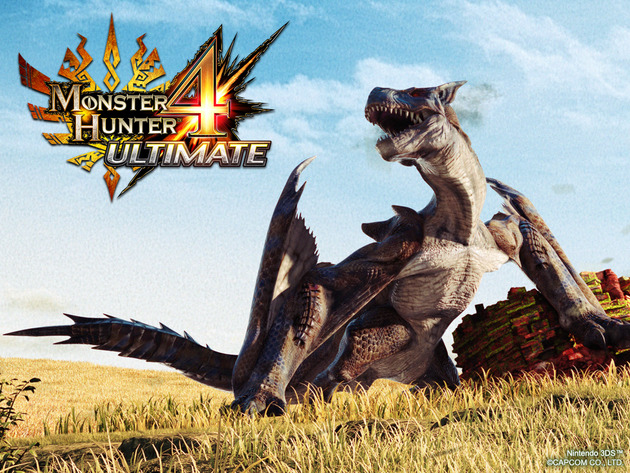 Guide: Getting The Most Out of Monster Hunter 4 Ultimate
 Guide: The Biggest Wii U and 3DS eShop Games Coming In 2014