

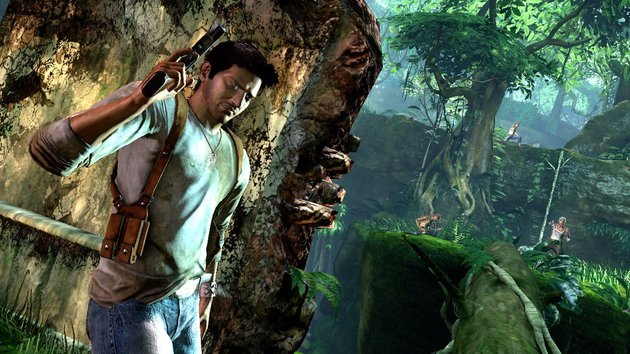
Nathan Drake may also be a comedian and serial killer, but he's a treasure hunter at heart. There are a whopping 61 treasures for you to find in Uncharted: Drake's Fortune, and to coincide with the release of Uncharted: The Nathan Drake Collection, we figured that we'd share the locations of them all. Without further ado, then, here's where you'll plunder all of the trinkets in Naughty Dog's classic 2007 campaign.
Silver Mosaic Inca Earring: At the start of the chapter, hug the left of the river bank until you reach a large rock blocking your way. Climb over it and you should see the treasure glinting in the sun. One down, many more to go.
Jewelled Silver Monkey: This one's in the area where you have to push the rock down to find the entrance to the ruined temple. In the centre of the area are three pillars. You need to jump onto the right pillar to progress, but hop onto the left pillar first to nab the treasure.
Decorated Gold Ring: In the ruined temple, there's a part where you need to shoot a red barrel in order to create a makeshift bridge. Before you cross it, though, run as far forward as you can without falling off the edge, and then move to the left. You'll find the treasure right in the corner.
Silver Llama: Once you've jumped down the hole in the ruined temple and raised the water level, jump down and swim to land. Instead of climbing up the rock directly in front of you, though, run around it to the right and you'll find a treasure hidden around the back.
Golden Inca Cup: After the collapsing bridge sequence, you'll get a cut-scene and find yourself in a new room. Turn around and look for a skeleton perched among some rubble. He's holding some riches that are desperate for your attention.
Silver Turtle: Directly outside of the ruined temple are four pillars. Climb onto the smallest one and jump to the larger one. Hop across all of the pillars until you land on the last one and snag the treasure.
Gold Tairona Pedant: After you've found the German boat, you'll need to do some climbing. Once you've reached the highest point, there's a section where you can shimmy either left or right. You need to go left to progress – but if you follow the path right you'll find a treasure.
Gold and Turquoise Inca Earring: When you're atop the boat, instead of entering it from the middle, run right to the end of it. You'll find the treasure hidden right at the very front of the boat.
Silver Inca Figurine: At the very start of the chapter, turn right around so that you're facing a tree. The treasure is to the right of its roots.
Silver Fish Charm: Move forward until you encounter a small waterfall directly ahead. Look in the alcove to the left and grab your treasure.
Gold Frog: Once you reach the first log crossing, drop down onto the platform beyond the one that you're standing on, and grab the goodie.
Intricate Gold Ring: In the large area where you come up against dozens and dozens of pirates, climb onto the pillars and up to the second level of the environment. Instead of moving to the right, though, look to the upper-most left corner, and you'll find the treasure.
Patterned Silver Ring: In the final section before you have to jump over the large gated wall, you'll need to do some platforming between some blown out walls. However, if you head to the left corner and climb up the ledge, you'll find a treasure.
Golden Jaguar: As you move forward, you'll reach an area with lots of pirates. Once you've killed them all, move to the left and you'll find the treasure among some trees hidden in the corner.
Silver Inca Vessel: There's a waterfall with two guards standing above it. Take them out and then follow the path around until you reach an area where there's a rock creating a makeshift plank for you to walk along. Don't climb it just yet, though: drop down to the area below and you'll find a treasure hidden among the greenery to the right.
Golden Toothpick: In the area with the plane that's stuck in the tree, kill all of the pirates and head through the doorway. Head immediately right once you're through, and the treasure is hidden among some grass.
Silver Bird Vessel: There's a platforming section after the previous treasure. Complete that and you'll reach an area with many pirates and booby traps. Before you enter the combat section, though, run to the trees to the right and follow them backwards, adjacent to the area where you just came in. You'll find the treasure right on the ledge.
Silver Inca Earring: After navigating all of the booby traps, before moving on to the next area, take the pathway up the big stone structure to the left and the treasure is hidden among the grass on the top of it.
Strange Relic: In the first outdoor area of the fortress, kill a bunch of guards. Then head up the stairs and run to the left beyond the tree. Jump across the gap over to the platform directly in front of you, and you'll find the strange relic sitting on top.
Silver Jaguar: In the same area, jump back across to the upper ledge that border the whole section and follow the perimeter until you reach the last white lookout point. The treasure is hidden inside.
Gold Mosaic Inca Earring: Drop down into the new area from the lookout point and run towards the gates. Climb over all of the rubble in front of the right hand gate, and you should happen upon the treasure that's in and amongst the debris.
Golden Spoon: In the waterway with the turret gunner, climb into the room on the right, and you'll find the treasure perched atop some ammunition creates. Be careful because there's a guard in here waiting to pick you off.
Silver Inca Mask: After clearing out the pirates, climb up to the upper level and look for a large tree around the perimeter of the fortress. There's a treasure sitting right behind it.
Spanish Silver Coin: Inside the fortress where you have a massive gunfight against a machine gunner and multiple pirates, run towards the gate beneath the area where the stationary gun is. Climb up the rubble to the left, and the treasure is sitting on the platform above.
Spanish Tairona Pendant: After using the machine gun to clear out all of the approaching enemies, run to the bottom of the stairs and examine right-hand corner at the bottom of the stair case.
Gold Llama: After defeating all of the pirates on the walkway overlooking the courtyard, enter the collapsed building and climb onto the partially collapsed second floor. The treasure is right at the back of the room behind the rubble and foliage.
Decorated Silver Ring: At the very start of the chapter, enter the area filled with pirates, and run to the right. You'll find the treasure nestled in the corner of the room.
Silver Frog: After dealing with the grenade launcher guy a little later in the chapter, look for the remains of house. There are guards in here so clear them out, and then hurry over to the right-hand corner, where you'll find the treasure.
Golden Fish Charm: After getting off the jet-ski, you'll find yourself in a firefight with multiple pirates. Before heading through the large arch doorway, though, you'll find a treasure towards the back-left part of the area.
Jewelled Golden Brooch: After taking the zipline into the building, ignore Elena's pleas for you to let her in. Explore the area behind the door first, and you'll find a treasure to the back right. Then you can let her in.
Silver Belt Buckle: Climb up the staircase right above the room where you entered after the cut-scene involving the customs ledger. You'll find this treasure right at the top.
Spanish Gold Coin: Instead of crossing the long log bridge which is reached by turning left at the top of the staircase after the cut-scene involving the boat, go to the right, and you'll find the treasure just behind the doorway.
Silver Spanish Chalice: Cross the bridge and watch the cut-scene. Now head down the stairs, and instead of going up the next set directly across, turn to the left and down again, and then at the bottom of the stairs look to the back left part of the platform that you're standing on.
Gold Coatimundi: After you've left the Customs House, you'll enter a small cave. There's a pirate up ahead who you need to stealth kill. Finish him and then look for a pile of boxes on the ground floor. The treasure is behind it.
Golden Turtle: After the jet-ski section there's a shootout with many pirates. Look for a broken bridge with a waterwheel nearby. Hop down from the bridge onto a platform with a pillar and the treasure's sitting atop it.
Silver Inca Cup: After the cut-scene with Elena, drop down beneath the dilapidated stairs directly ahead and into the river below. You'll find the treasure perched atop the rubble.
Jewelled Silver Cross: In the area where you need to shoot the red barrels in order to create a makeshift door for Elena, look for a little room nearby. You'll find the treasure inside.
Silver Toothpick: In the big open courtyard area, from the area that you enter hop over the railings to the right, and follow the path around to the area perimeter to collect another treasure.
Gold Spanish Chalice: Drop down back over the railings and run past where you entered, beyond the staircase, all the way to the opposite perimeter of the level. Right in the corner to the left is a big pile of rubble, with some treasure among it.
Silver Coatimundi: Turn around and run forward from where you got the Gold Spanish Chalice, hugging the left wall of the area. Run past the building, and then go up a teensy staircase and turn left into a sheltered section. Come out of the tunnel, down another small set of stairs, and the treasure is, once again, among some rubble on the ground.
Golden Cup and Cover: In the puzzle room where you need to turn the statues in accordance with Drake's Journal, you'll open a secret passageway. Head down the steps and in the room with the paintings you'll find the treasure sitting on the ground near to the left wall.
Golden Inca Vessel: Right at the very start of the chapter, head down the stairs, and go to the right directly at the bottom. The treasure is right here.
Golden Skull: In the area with the small waterfall next to the staircase, you'll find this treasure in the waterfall.
Silver Snuff Box: Eventually you'll make your way out of the catacombs and into the church area where there are a lot of enemies that you have to fight. Before you take them out, though, look behind the area where you entered for a treasure.
Silver Spanish Goblet: After you shoot the bells to open up the secret passage, you'll find yourself back in the catacombs. Down the tunnel is a square-shaped sarcophagus. Look behind it for the next treasure.
Silver Ingot: After the cut-scene with the villains, jump across the platforms and take the stairs down. Scoot around to the right and look to the side of the stairs that you just came down for the treasure.
Gold and Ruby Inca Mask: Right before the exit where you have to crank the chain wheel, look directly behind it to find the last treasure in this chapter.
Gold Inca Figurine: Right at the very start of the chapter, there's should be a staircase directly in front of you. At the bottom of it in the foliage to the right is some grass, and the treasure lurks among that.
Golden Bird Vessel: Make your way to the secret gallery that's mentioned by Sully over the radio, but as you approach the door, scoot left and follow the walkway around. You'll happen upon the treasure.
Golden Spanish Goblet: After re-entering the monastery through a stained glass window, there's a dark room to the right that two guards come out of. The treasure's pretty easy to spot inside.
Jewelled Golden Cross: After the key puzzle, climb onto the open window and into the secret room, but move around to the right. Follow the path and the treasure's right at the end.
Silver Skull: In the first cemetery area, head down the stairs, and look for a square sarcophagus beneath a broken piece of railing. The treasure is behind the tomb.
Golden Inca Mask: In the second part of the cemetery, there's a door that you're supposed to go through to progress the story. Instead, run beyond it and follow the railings right around to some tomb stones. The treasure is behind it.
Silver Cup and Cover: This bit is probably the worst part of Drake's Fortune, where you have to follow the numbers on the floor. Just follow V, then ignore II, then take IV up the stairs, and follow I where you'll happen upon the treasure.
Jewelled Silver Brooch: After activating all of the traps, climb up the stairs to the swinging lantern. Stop when you reach it and turn left to face the III on the pillar. Jump diagonally onto the ledge that's left of the pillar, and the treasure's on top.
Gold Snuff Box: Go up the first spiral staircase and then run down the stairs towards the next spiral staircase. On the way down, there's a treasure sitting on a platform attached to a piece of scaffolding. Carefully jump across it to nab it.
Gold Monkey Figurine: Follow the hall where the mutants attack you and turn to the right. Again follow the hall down as far as you can go, and the treasure is to the left among some rubble.
Golden Seadragon Pendant: Fight your way through the many pirates and monsters towards the end of this area with the many boxes. Climb on top of one, and then platform your way across to the pile leaning against the back wall for this treasure.
Gold Ingot: At the very beginning, as soon as you have control of Drake, swing around and walk back towards where you came from. The treasure is next to a rock.
Golden Skull Rosary: This one's in the catacombs in the room with the two sarcophagi. The treasure is on the right, next to some gnarly skeletons.
Sapphire and Silver Mask: Head down the stairs from the previous treasure room, and this one's perched behind a pillar right in the centre of the catacombs. And that's all of them. Hallelujah.
Have you found all of the treasures in Uncharted: Drake Fortune yet? Are you struggling to locate any? Let us know in the comments section below.
 Guide: Fallout 4 PS4 Character Builds That Will Keep You Alive and Kicking
 Guide: How to Beat the Blood
 Sharp Shooter Impressions and Killzone 3 PlayStation Move Tips
 Guide: How to Kill Vicar Amelia in Bloodborne on PS4
 Guide: How to Beat the Trial of Archimedes in God of War: Ascension