

Windows 10 comes in various editions, each with a slightly different feature set. If you’ve been using Windows 10 at home, you’re probably running the suitably named Home edition. If you would like to upgrade to the Professional edition, for example to be able to defer Windows 10 updates you have multiple options.
We’ll give a brief comparison of the Home and Pro editions of Windows 10, before offering up three strategies to upgrade from the former to the latter.
If you’re thinking about upgrading your version or have already done so, be sure to share your thoughts in the comments section below.
Everything that the Home version offers can be found within Pro. As such, you’re not losing out on any feature by changing versions – it’s just an upgrade. Pro offers a number of additional features when it comes to areas like security and control of updates. Let’s look at a few.
Windows 10 has forced updates, which means that you don’t get a choice in which updates you get, nor when you receive them. Home edition users get no leeway with this, but those on Pro have the ability to opt into the business branch. This means that the updates will only be pushed through once they’ve been trialed by Home users and deemed reliable enough to go out to the more sensitive business market.
BitLocker is another feature that Pro users get. This allows you to encrypt internal and external drives, plus create encrypted container files. Data security is hugely important and encryption is a very valuable process in keeping your files safe. While there are many third-party encryption tools available, it’s great to have one built-in to Windows.
A third, though not final, feature that Pro offers is the ability to create virtual machines. This is handled through a utility called Hyper-V. With virtual machines you can emulate other operating systems within your existing one, which is great for running software not available on your main operating system and for testing.
Before you consider upgrading, you might want to find out what edition of Windows 10 you are running in the first place. Press Windows key + I to launch the Settings menu, then head to System > About and check what it says under Edition.
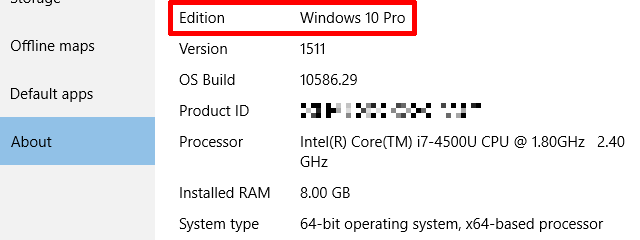
If your system check reveals what you already knew, that you’re on the Home edition, and if you’d like to upgrade, here are three ways you can go about it.
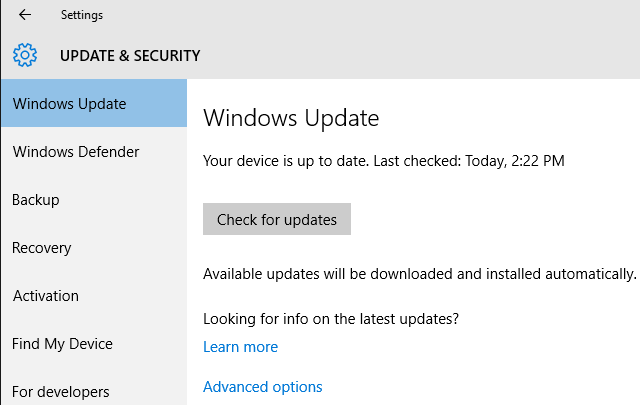
First, press Windows key + I to open the Settings menu. Then click Update & security, then select Activation from the left-hand navigation. Now click Go to Store.
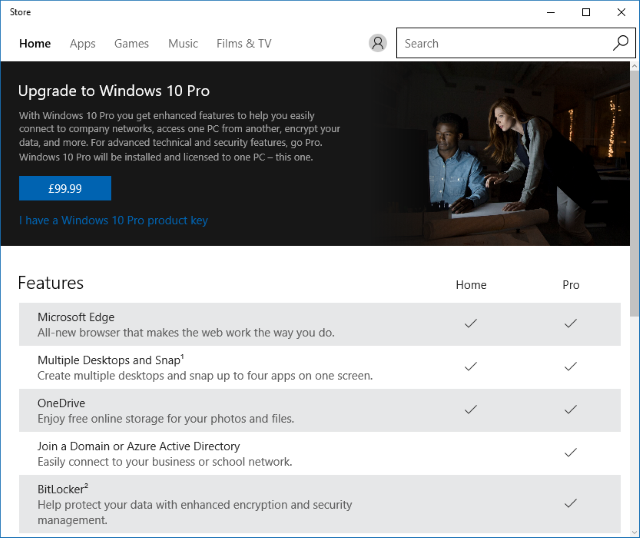
A new window will open which will give you a brief overview of the features that the Pro version will offer you over Home. Since you don’t own a copy of Pro, you’ll have to pay for the upgrade. To begin the process, click the price within the blue button (e.g. $99).
User Account Control might open at this point and ask if you want to run the Change Product Key app. Click Yes.
Now enter the password to your Microsoft account and click Sign in. A box will open which will warn you that the purchase is immediate and not subject to any “cooling-off” period.
If you haven’t used the Store in the past, click Get started! Add a way to pay. to use a credit card or your PayPal account for the purchase.
When ready, click Buy. Your system will begin downloading the necessary update and your existing Home license key will automatically become a Pro one.
If you’ve already got a Pro license key, it’s very easy to upgrade. First, press Windows key + I to open the Settings menu. Then select Update & security, followed by Activation from the left-hand navigation. Now click Change product key.
Depending on your system settings, User Account Control may ask if you want to run the Change Product Key app. Click Yes if this occurs.
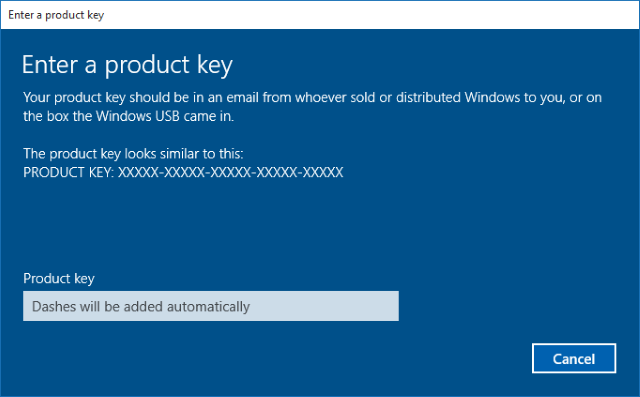
A window will open where you can enter your Pro product key. Type it without the dashes because they’ll be added automatically. Once you’ve typed your code it’ll be verified for authenticity.
When that’s complete, a new message will appear that reminds you to save your work and close any apps before the upgrade. When ready to begin, click Start upgrade. Your system will download the Pro update and then apply it, during which it’ll reboot a couple of times.
If you want to perform a fresh install of Windows 10, one way to do that is by using the Media Creation Tool. The problem is that this tool automatically detects your existing Windows edition and uses that. So if you’re on Home, you can’t upgrade to Pro during the process. However, Into Windows has found a workaround.
First, create a bootable USB of Windows 10 by following the instructions in our Get Windows 10 guide. Once complete, navigate to This PC (do a system search for it if needed) and open the USB drive.

The next step is to download a config file which Into Windows has created. Please note that we take no responsibility for files downloaded from external sources. Extract the zip and move the ei.cfg file into the Sources folder on the USB.
Now boot to the USB and follow the installation process through. You’ll find that you can now choose exactly which version of Windows 10 you want – in this case, Pro.
If the features of Pro are enticing you to it, have no fear with the upgrade process – hopefully you can see how simple it is to perform. Plus it won’t take much time either, so you’ll be back up and running with additional features like BitLocker and Hyper-V in no time.
To note, if you don’t currently have Windows 10 and aren’t eligible for the free upgrade, it’s cheaper to buy Windows 10 Pro outright than it is to buy Home and then go through the upgrade process.
Have you updated your Windows PC from Home to Pro? What features of Pro do you enjoy the most?



 How to update Playstation VITA firmware via Wi-Fi
 Five Nights at Freddys 3: tips
 Preview: Legends of Eisenwald - Storming the Wrong Castle
 Army Of Two: The Devils Cartel Hands On: The Bromance Is Over
 How to Figure Out Your Favorite Video Game of All Time