
Apple recently released their newest programming language, Swift, as open source. That means that anyone can now use this trending programming language, on any system. Apple has made it easy to get Swift going on Ubuntu, so we’ll show you how!
If you haven’t heard of it before, Swift is Apple’s newest programming language intended to replace Objective-C and become the primary language for building Mac OS X and iOS applications. It’s very easy to learn the language as it’s clean and has a similar syntax to other popular programming languages.
However, Swift was only available for Apple devices — it could not be run on Windows, Linux, or other systems. With Swift’s increasing popularity, more people were asking that Apple open-source Swift or at least make it available on more platforms. After some time, Apple has finally released Swift as open source. I think this is a good move for Apple, as it allows more people to become exposed to Swift, which in turn allows for more people to write Mac OS X and iOS applications in the future.
In any case, if you’re interested in using or learning Swift, it’s now available for Linux! Right now Apple only has released snapshots made for Ubuntu 14.04 and 15.10, but opportunities to install Swift support on other distributions will certainly come in the near future. For now, here’s how to get it going on Ubuntu.

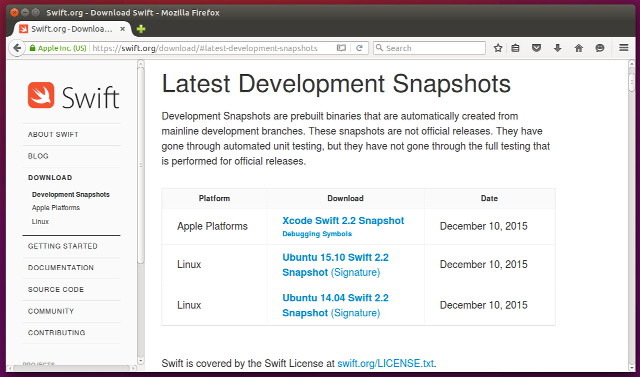
First, you’ll need to visit the Swift download page and grab the latest version (at time of writing, there are only development snapshots available — stable releases will come soon, so it’s your choice which of the two you’d like to use). Once it’s downloaded, open the .tar file by double-clicking on it and then extract the folder that lies within to any location of your preference. This will become the location of your Swift installation.

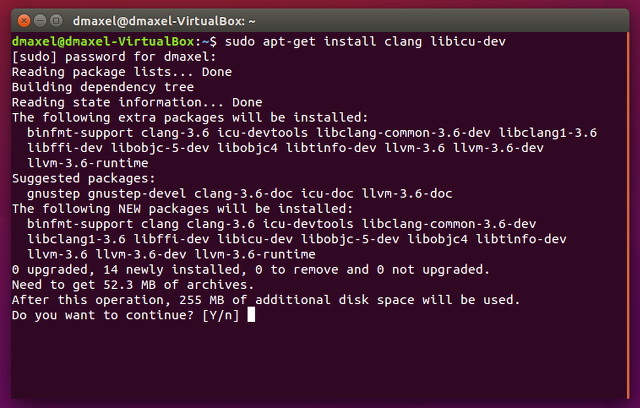
Next, you’ll need to install some dependencies that Swift needs to run. You can easily install them by opening a Terminal and running
sudo apt-get install clang libicu-dev
Finally, before you close the terminal window, type
gedit .profile
This will open up a text editor. Scroll all the way to the bottom and make two new lines. The first one should be empty, and on the second one put
export PATH=/path/to/usr/bin:"${PATH}"
where
/path/to/usr/bin
is the path to the bin folder inside the usr folder inside the Swift folder that you extracted out of the .tar file. So if you just extracted the Swift folder to your Downloads folder, the path would be something like
/home/username_here/Downloads/swift_folder_name_here/usr/bin
The export command will allow you to simply call
swift
in a Terminal and it will know where to look. Putting this line into the .profile text file will make this command permanent — otherwise its effect would be lost when you log out, shutdown, or restart your computer.

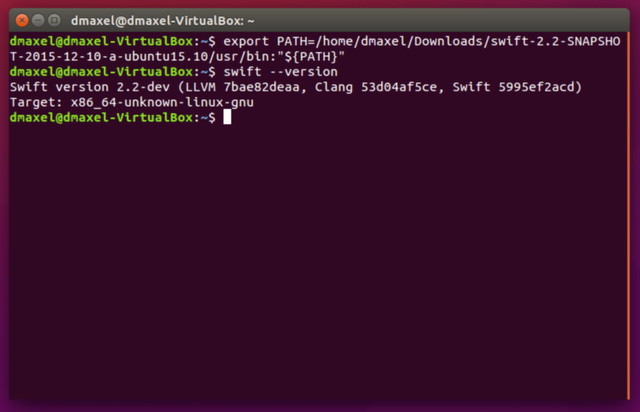
To make sure that Swift works, you can type
swift --version
into a Terminal and it should display some version information. Congrats! You now have Swift working on your Ubuntu system!

To run a Swift file, all you need to do is run
swift /path/to/file.swift
It will compile and run automatically. You can also simply just run
swift
which will bring up an interactive shell with which you can run Swift code line by line.
Finally, you can also make executables from your Swift code. All you need to do is the following:
import PackageDescription

let package = Package(
    name: "package_name_here_and_keep_quote_marks"
)
Finally, run
swift build
while the project folder is the working directory. You will find the executable under
.build/debug/package_name
Congrats! You’re now able to get started coding in Swift! Of course, this is a relatively simply guide meant to get anyone going with a quick and easy setup. If you need a bit more, such as key signing, you’ll need to visit the Swift homepage for more information. But other than that, feel free to start coding! Just note that (at least for the time being) you’ll still need Mac OS X and Xcode in order to write Mac OS X and iOS applications, but having Swift in Ubuntu will help you get accustomed to the language.
What do you think about Swift? Does it have a future as a common, universal language like C/C++ and Java? Let us know in the comments!


 8 Things We Know About Resident Evil: Revelations 2
 This App Would Be Every Pokemon Fan's Dream
 Interview: On The Future of Devolver Digital And Indie Games Publishing
 Tips and Tricks for Call of Duty: Advanced Warefare Reckoning DLC #4 Descent Zombie Map
 Fusion Genesis: The Gameranx Review