

Rockstar Editor is an exclusive feature of GTA V PC version, it allows you to create GTA V and GTA Online videos and edit them with cool video effects, audio, text, and markers etc. Then you can upload and share these videos with your friends or upload to the video sharing service YouTube.
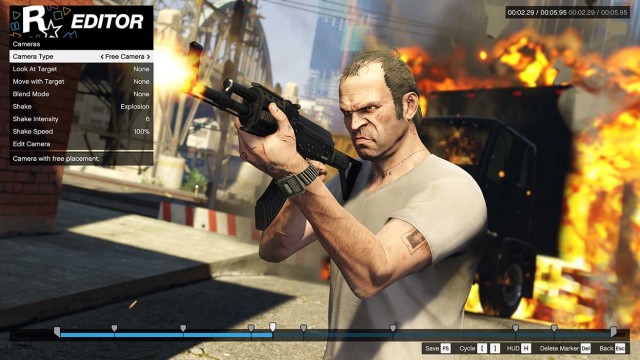
Check out the Rockstar Editor Overview and Introduction Video.
Let's go through basic features of Rockstar Editor for GTA V PC and How to utilize them:
Make sure you are in Story mode and pause the game. Go to rightmost tab, 'Rockstar Editor' and launch it.
To start recording a video, while playing GTA V perform following steps:
Manual Recording: Start and stop recording during gameplay with the push of a button. Or let the recording roll; clips will continuously record in the background until you press LEFT ALT and choose ‘Save Recording' [F1] or ‘Cancel Recording' [F3]. Saved clips will playback in sequence as continuous action.
Action Replay: This mode allows you to save moments after they have happened. With Action Replay activated, the game will constantly buffer recorded data in the background, but it will not save anything until you decide to create an Action Replay. When a noteworthy event happens you can retroactively choose to capture it by holding ALT and pressing F1 to choose ‘Save Action Replay'.
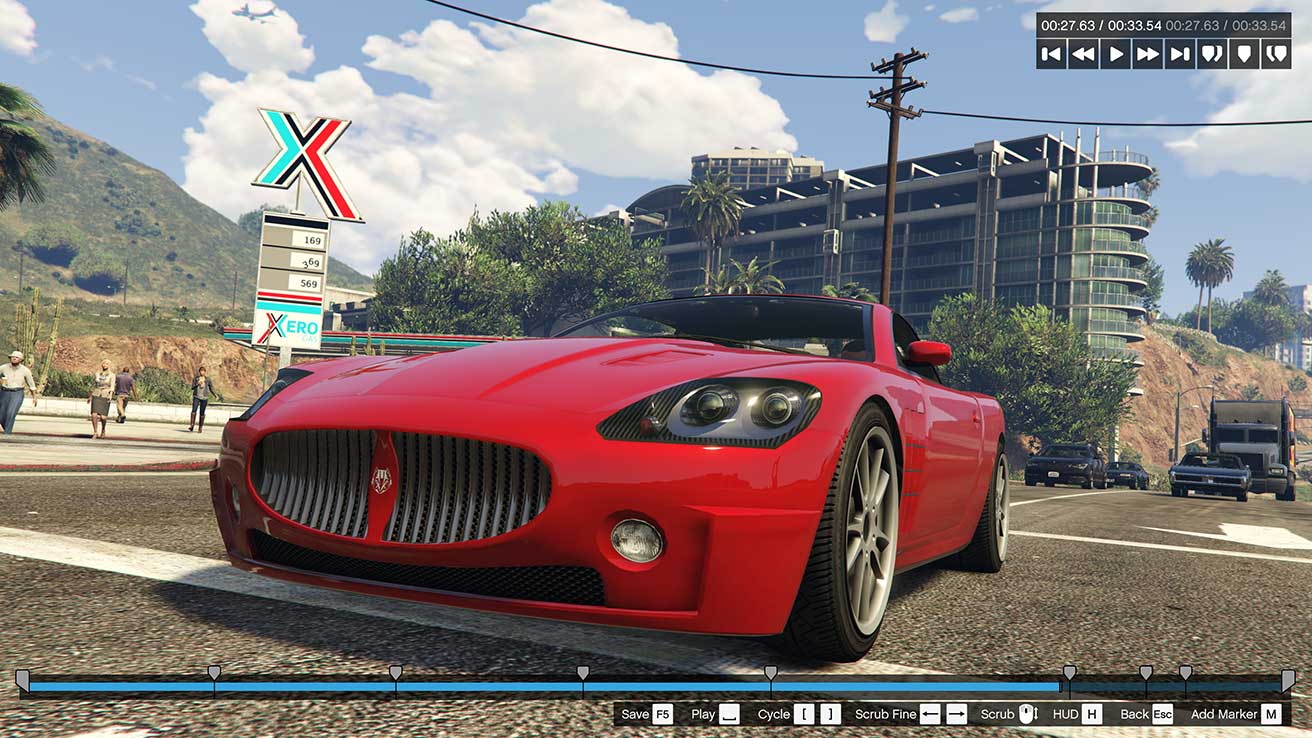
After you record the video in GTA V, it's time to edit it and make it look impressive and cool.
Utilize the following options to Edit your video:
The control panel is present in the top right of the screen, displaying the current clip time, total clip time, and has buttons to Return to the Beginning, Rewind, Play/Pause, Fast Forward, Go to the End, Skip to Previous Marker, Add New Marker, and Skip to Next Marker. Note, this control panel will not be visible when using a gamepad.
On each marker, there's the option to enable an anchor. If you enable an anchor on a marker, this places an anchor point at the same position on your Project Timeline which you can use to precisely position text or audio. There are three anchor options available:
You can edit the camera angles used in most clips; however, remember you will not be able to edit the camera view in some clips, such as any clips captured in First Person Mode. Clips that have camera angle restrictions will be designated as such while in the Clip Management menu. There are several different types of cameras to choose from:
Different effects can be applied to your footage, with customizable levels of intensity, saturation, brightness, contrast, and vignette.
A depth of field effect can be added, allowing you to customize what's in focus throughout your clip. You can adjust the type of focus and the intensity of the effect, and also set a focus target so that your settings track a chosen character.
Use this menu to adjust the levels of volume for sound FX, dialog and music throughout your clip. It is also possible to set the score intensity level in order to build the dynamic score to a crescendo in a scene or to reduce the pace of the score at any moment.
The speed of your footage can be adjusted to give the appearance of slow motion or speed up the action. Speed will be adjusted between the currently selected marker and the next marker after it.
Capture thumbnail images at any point and apply them to your clips in place of the default thumbnail, so you can easily identify certain clips on your Project Timeline.
After you've added, edited and ordered your clips in your timeline, select ‘Add Radio Track or ‘Add Score Track' from the Project Main Menu to add music to your project. You can choose from both GTAV Radio tracks and original pieces of the GTAV Score.
Choose which type of music best suits your project, select it and simply place it on your timeline, using the CURSOR to move the play head and LEFT MOUSE BUTTON or LEFT CTRL and V to place. Use the Skip to Beat function to sync to the beat of the music. You can reduce the length of your audio to fit your clip.
You can place multiple Radio Tracks to your project. If using more than one track in your project, each track must be a minimum of 0:30 each. Use the intensity levels of GTAV score tracks to escalate, diminish and resolve drama or action.
Once you have exported a video, you can choose to upload it to YouTube from your Video Gallery.
All videos will be uploaded to YouTube; any videos uploaded as Public or Unlisted will also be linked on Rockstar Games Social Club. You can set your YouTube upload status as Public, Private or Unlisted in the Rockstar Editor tab of the Settings menu. Any videos you upload will use the last defined status.

 Top Ten Video Game Animals
 Battlefield 3 – Back To Karkand DLC Guide
 6 Reasons You Need to Be Using a Custom ROM
 Halo 5: Guardian Complete Walkthrough and Guide
 Comics: The top 10 Marvel Heroes of 2014