Xenoblade Chronicles Beginner’s Walkthrough
The old-school Japanese RPG isn’t dead yet — not if Xenoblade Chronicles has anything to say about it. After a long wait in limbo, the game is finally coming to US borders for Wii gamers hungry for another game to add to their library.
Instead of following a narrow path forward, Xenoblade Chronicles has an open-ended design with a massive area to explore. Instead of using a stolid battle system, the game has been updated to follow more recent trends — like the real-time battle systems where each character will fight on their own and given orders to make special actions or attacks. A number of other small features have been implemented to make this classic JRPG feel fresh to old and new players alike, offering an special take on a popular genre.
Below you’ll find our massive Xenoblade Chronicles walkthrough, breaking down the main game and leading you to victory. For extra content related to the Wii’s next big game, check out our cheats page.
Check back soon for new updates.
INTRODUCTION
After the introductory cutscene, you’ll begin the game with the hero Dunban are two friends against an army of Mechons. An introduction to the art of combat in this game will immediately commence. Take note of this tutorial, you’ll be spending a great deal of Xenoblade in combat, afterall!
Just to reiterate, you’re Dunban, armed with the Monado — a special blade made specifically to destroy Mechons, or the evil robots invading. Now, onto the tutorial.
Tap [Z] to target an opponent, then use the nunchuk’s thumbstick to move in for combat. Once an enemy is targeted, the Battle Palette will appear at the bottom of the screen. The Battle Palette is like your menu bar, where you can select combat or support abilities. To initiate combat, select the center circle, labeled “Fight” on the Palette.
Once “Fight” is selected, you’ll auto-attack as long as you’re in range. You’ll have two Mechon enemies to fight, it doesn’t matter which you take on first.
To the left and right of the “Fight” icon are Arts. Arts are special support or combat abilities you’ll be able to select and later in the game. For now you only have two to choose from. To your left are Support Arts, and right are Combat Arts.
Give both a try against the Mechons. Support powers usually increase the stats of your party members, or heal them, or
After each use, the Art will have a short cool-down period before it can be used again. Give yourself sometime and save your attacks for the bigger enemies. The bigger they are, the badder. Try to circle around and attack the Mechon’s
If you want to destroy a group, line up your Buster Combat Art with other enemies. The attack has a long range and will destroy any closeby enemies straight ahead of the attack.
While you fight, your teammates will automatically attack and provide healing support when you’re in need. Later you’ll learn how to control your party, but for now they’ll work on their own. There’s nothing difficult in this first fight, so just keep attacking and using that Combat Art.
Three more Mechons will appear, followed by a large one. To really get your allies into the battle, use the Support Art called Enchant. The Monado and weapons enchanted by the Monado are the only things that can hurt the Mechon.
With the last group dead and gone, you’ll see the end of the battle and get zipped ahead one year later.
MECHON WRECKAGE SITE
Your first enemy in the game, and your first chance to die, begins right as the cutscene ends. Above every opponent is a yellow health bar, and above your characters is a blue health bar. The exact health point numbers are located on the left side of the screen, if you’re interested in the details.
The Colony Krabble isn’t the most dangerous enemy you’ll fight, but take your time here. Check out your new Arts. Here, you’re controlling Shulk — and you’ll learn that some Arts have requirements. Back Slash, for example, only works when you’re behind an enemy.
Your ally will absorb most of the damage, but Shulk comes with a healing power. Use it if your companion’s health is low, but you won’t need to worry about that for now. To select a companion, press up or down with the directional pad.
Certain Arts are called Talent Arts, and won’t be usable until you’ve landed a required number of auto-attack hits. When the icon lights up and is no long dimmed, you’ll be able to use the Talent Art.
After defeating the Colony Krabble, you’ll have some treasure. Take it all! And then take note of the green barrier around the area. These barriers indicate a battle zone, where you’ll need to defeat all the enemies inside before you can continue.
Most wild enemies won’t bother to attack your party, you’ll need to initiate the battle. The next enemy, a Common Caterpile, will not try to attack you. Target it and take it out!
Initiating the fight will teach you all about AGGRO. Aggro Rings let you know which party member is under attack and which enemies are targeting him or her. The character that does the most damage will draw the most aggro.
Shulk won’t do as much damage as your partner, Reyn. Let Reyn draw aggro, then use Shulk’s Back Slash to dish out plenty of damage.
Another critter dead, and another cutscene. Take a moment to read about the camera, controlled with the directional pad and the [C] button. You’ll also see a pointer at the top of your screen with a number. That points you to your next story objective, so you’ll always know where to go next.
Lastly, you’ll have access to your main menu. Press [-] on the Wiimote to bring up your options. Here you can save your game, look at items, equip, and much more. We’ll go over the other menu options as they become relevant.
This is also a good chance to read up on tutorials. Pressing [+] while the message pops up will take you to the Tutorial screen. Take a moment to read about Daze, Topple, and Break. They’re important abilities you’ll want to know more about!
Take on the enemies as you move down the narrow path to return to your Colony home. The enemies here stand no chance, your abilities can be used as often as you want, and your party heals as soon as a battle is finished. Nifty, right?! Don’t forget to collect your treasure!
Ahead, under the natural rock bridge’s shadow, you can spot a bright blue collectable. These collectables are special items that will provide you with a reward, if you fill up a row in your Collectopaedia, which is another option in your Menu!
You’ll face all Level 1 Bunnits and Little Skeeters, neither of which will attack you or put up a fight. Run by them if you’re not interested in finding too much loot.
Enemies don’t drop cash when they’re defeated, instead they’ll drop “junk” items. These items are only useful for selling at traders throughout the game, so make special note of their titles so you can dump them for a cash reward later.
Defeat enough enemies in your path and you’ll gain another level, with some new arts. You won’t be able to change your arts or level up your skill trees yet — that’s for a future tutorial! Just continue on your way.
But, your new art will automatically equip. Slit Edge lowers an enemy’s physical defence, making this a good ability to use at the beginning of a fight.
At the end of the pathway, you’ll reach your hometown of Colony 9 and the surrounding landscape.
COLONY 9
Arriving at Colony 9, Reyn will leave your party and you’ll hust have control of Shulk. In the town, you’ll find some shop denoted by little tents over an NPC’s head. Take this time to sell the junk you found on your way into town. You can also accept quests. Try to accept as many as you can before leaving, you’ll be rewarded with EXP, money, or items automatically upon completion. There are far too many quests to discuss in this beginner’s guide, so keep an eye out.
Another important feature to know about are trades. Many NPCs with names over their heads can be traded with. Save the items you have and check for trades before selling, as trading NPCs will always reward you with a special or rare item. Trading will also increase your affinity rating for a particular region. Trading more valuable items will further increase your affinity with others.
In the town, you’ll notice large exclamation points on your minimap. These are landmarks. You can quicktravel between landmarks by bringing up your map with the [1] button and selecting them.
At a shop, you’ll be able to sell items. Your junk items are located in the materials tab, or under the little bag icon. Sell your junk! Eventually you’ll want to sell other items too in the other tabs, but you’ll know which items are equipped by the “E” over the item’s icon.
Give the Buy option at the shop a try. You can’t purchase the grayed out icons, but check the rest of the tabs to find items for purchase. Pick up the Nine Cap, the Parlour Jacket, the Nine Cuffs, the Nine Bottoms, and the Nine Shoes to complete an ensemble for Shulk. As you choose items, you’ll see improvements to stats in blue, and negative numbers in red. Look for items with a net gain in stats for each of your party members.
After purchasing, don’t forget to equip! You can equip your party by selecting the Party Icon after bringing up the menu.
Spend the rest of your time exploring, checking out the sights, do whatever you want — your next objective is at the Laboratory located in the Military District. Follow your pointer north out of the market square, continuing toward a bridge leading to the Central Square of Colony 9. Push forward to the Fortress Entrance where your red flag objective marker is located on the minimap.
MILITARY DISTRICT
After the cutscene, you’ll be able to spot your first sidequest. Talk to the soldier and accept the job to kill some monsters down on the beach. Another little creature inside the Weapon Development Lab has a sidequest lined up. It doesn’t hurt to collect as many as you can, as early as you can, before venturing out into the wilderness.
Enter the building just ahead, labeled the Weapon Development Lab, and run down the corridor into the Monado Lab itself. You’ll be given a cutscene and learn more about the strange sword.
After the cutscenes, you’ll be put in control of Shulk’s friend and Dunban’s sister, Fiora. Accept the quest to bring Shulk food. Another event is waiting just outside Fiora and Dunban’s home. Afterwards, you’ll see a triangular exclamation point on your minimap. Cross to the wilderness over the town bridge, and follow the path south.
There are more Little Bunnits and Skeeters on the way. Kill them if you’re looking for extra loot and EXP, otherwise you’re safe getting the lunch to Shulk at the top of the hill.
Fiora isn’t the toughest, but she can inflict Break on enemies, and has her own backstab attack. But alone, she isn’t very effective or physical to survive combat. Kill the enemies quickly if you engage by using all your Arts, including your Talent Art, as soon as possible.
Down the path, you’ll reach steps leading up. Follow the linear path through the stairs, and you’ll find Shulk, and an event scene, at the top.
After that talk, Shulk and Fiora will team up. You’ll also learn about Affinity Cries. By pressing [B] at the right time, you can cure your allies of Daze or Topple, or get them fighting again.
You can also take the time to switch party leaders. Open the Menu, go to Party, press and hold [C] followed by selecting a character and pressed [A] to make them leader. Go ahead and make Shulk the leader again, and continue to the next objective.
Time to return to the Lab in the Military District. You know the way. Spend as much time crushing enemies or selling items as you like. With two party members, this is a perfect time to try out some new Arts and crush some insignificant creatures in the process!
If you don’t want to run, bring up your menu and select the “Skip” option to teleport to the Military District, without even a loud time! Enter the lab for another scene.
Afterward, Fiora will leave, but Reyn will return. Arts and Skill Trees are now available for leveling-up. Enter the Arts menu and use your AP to level up one Art each for Reyn and Shulk. At this early stage, it doesn’t matter which.
Then, switch over to the Skill Trees icon. Here, you’ll be able to learn new Skills down three distinct trees. Choose the tree you want to level-up, and as you fight monsters, each of the icons will fill up one at a time. You can switch between the trees whenever you want, but only one skill tree can be filled at any given time.
Next, you’ll need to travel to the Mag Mell Ruins in Tephra Cave. Follow the marker out of town, and don’t forget to spend some time equipping Reyn, before you leave for your quest. If you can afford it, the Battle Gear is all superior to Reyn’s starting equipment.
Leave the Colony town through the main entrance and follow the path west. Up the path you’ll reach Tephra Hill.
TEPHRA HILL
This is where you’ll find some new enemies, like Wood Bunnits, Hand Bunnits, and Little Vangs. Alone, none of them are more dangerous than what you’ve already fought.
Up the path, you’ll find a swarm of bugs called Ridge Anbols. Kill a few! Infact, kill everything in your path, unless you’re impatient. Some extra levels won’t hurt once you’re inside the cave. During the day, the Anbols will switch out with Caterpiles. Beware facing too many Caterpiles at once, or you might die!
Luckily, death in Xenoblade isn’t much of a hindrance. If the leader of the party dies, you’ll be taken to your last visited Landmark with no other penalties. Just prepare for another walk!
At the top of the hill, past the Knuckle Bunnits, you’ll find the entrance to Tephra Cave, and Fiora won’t let you go it alone. After the scene, Fiora will join your group, giving you an even three members to complete your first party.
Take some time to read about the Party Gauge and how it works for you. Chain Attacks can be performed when your Party Gauge is full by pressing up or down on your Talent Art to toggle the Chain Attack Icon. Party Members can be revived at the cost of one Party Gauge block, and the Party Gauge is increased when your party completes bonuses, criticals, or is doing well in a battle.
Before entering Tephra Cave, speak with the soldier outside for another sidequest. When you’re all set up, run into the cave!
TEPHRA CAVE
Entering Tephra Cave will teach you all about different monster types. Regular enemies like wandering animals won’t bother to attack you unless you attack them, these monsters do not have an icon. When you see an eye icon, that means the monster will attack on sight of your characters. The aggro pointers will appear in those instances, showing you where an enemy is seeing you.
The first enemies ahead, the Bunnits, have an Eye Icon when you target them. They’ll attack on sight, and offer more of a fight than any enemy you’ve faced so far. Make sure to keep Reyn healed, he’ll draw the most aggro at this point in the game, usually. Use Shulk’s healing Art, easily located by it’s heart icon, and select Reyn to heal him.
Continuing through the cave, you’ll run into a couple of giant caterpillars with an enormous one in the center. Target him to see that it is a unique monster.
Unique monsters offer special rewards for defeating them, but they’re generally too difficult for you to fight your first time into an area. Avoid this level 10 creature for now. The Cellar Bugworm will attack on sight. Instead of passing through using the large main path, use the side passage to the left to go up and around the unique monster.
Cross the land bridge and use the ramp to go down into the chamber, where new Bunnivs are waiting at the bottom. In the corner of the room is another high level unique monster you should try to avoid for now.
Fight the large enemies in the chamber ahead, and you’ll find the Mag Mel Ruins.
Mag Mel Ruins
The ruins are marked by a red flag on your map. Once you’re inside, you can travel back to town using the skip travel option on your map, but you don’t need to stock up quite yet. Continuie ahead through the ruins after the cutscene.
Any Landmark you discover can be skip travelled to at any time, including the Mag Mel Ruins landmark. If your inventory is filling up to full, make sure to travel back to town to sell.
Inside Warehouse 2, move up the stairwell ramps and turn right, entering through the green door into a hallway. There a red door here, remember it for later because it won’t open now, and move through the green door up ahead.
Take the left path to avoid another unique monster, continuing down until it branches left into a cave that ramps upwards, ahead you’ll find the Rear Entrance and the Cylinder Hangar. Enter the Cylinder Hangar, it’s the large open building just ahead to your right.
If you’re not yet level 8, you may want to spend time attacking a few enemies. You’ll have to fight two enemies here that aren’t easy at low levels. When you feel up for it, with new equipment, go ahead.
Inside, you’ll run into another cutscene. After the event, you’ll have to defend yourself against two Ancient Machines.
Here is where you’ll learn about switching targets by holding [Z] and using the directional pad to choose which monster you want to attack. Use this and try to defeat the machines one at a time.
Here, you’ll also learn how to issue commands. [Z+A] will tell your party to attack your current target, [Z+B] will tell them to attack anything the AI deems a threat, and [Z+Down] will have your party regroup around you.
This will likely be your first change at a Chain Attack. Chain Attacks are initiated when your Party Gauge fills all three bars. You can begin a Chain Attack by cursoring over your Talent Art in the center and pressing up or down to scroll through to the Chain Attack icon.
Activating a Chain Attack will deplete your Party Gauge, but instantly recharge all arts. It will allow you to choose the arts of each party member, one at a time, in slow-motioon. This allows you to string devastating attacks that can knock an enemy down, stun, and topple.
Chaining together Arts of the same color will increase your damage or recovery. Talent arts are a wild card, they’ll chain with any colored art.
After the third art is chosen, a Chain Link will activate, so don’t forget to hit [B]. If you land the Chain Link, you’ll be able to launch an additional art. As long as you keep hitting those Chain Links you’ll be able to do another Art, but more Chain Links will only appear if your Affinity is high with your party.
If you’re having trouble, this is a good time to leave and get Fiora equipped back in town. You should also stop to speak with the Gem Man. He’ll explain how to craft gems from items dropped by enemies. Ether Gems can be slotted into your weapons or armor, and provide huge bonuses.
The Gem Man is located in the northern part of town. Talk to him and he’ll give you two gems. Slot them both into Shulk’s weapon to improve them. Gems provide huge bonuses, so it’s important not to forget about them.
Also, don’t forget to use your AP to upgrade your Arts in the Art Selection screen in the Menu. When you’re ready, return to the Cylinder Hangar with Quick Travel.
After the Ancient Machines are defeated, the Mechon will attack.
Colony 9 – Return
When you’re back in control of your party, jump into the water off the ledge below to rush back to your colony to help defend it from the Mechon army. Down in the water, swim to the shore and follow the pointer up the hill and to the Colony 9 main entrance bridge.
Inside, Fiora will split off and you’ll only have Shulk and Reyn to continue with. Mechons can only be damaged by the Monado or while toppled. You’ll need to topple this Mechon.
Start by inflicting Break, which will occur if you use any pink Art. Once an enemy is broken, they’re vulnerable to Topple, which are designated by a green Art icon.
To pull this off, while controlling Shulk, use Turn Strike, then wait for Reyn to use Wild Down. Reyn will use his ability automatically, and later in the game your Party will always attempt to Break, Topple, and Stun enemies on their own.
Once done, the Mechon will be stunned and Fiora will join the party again. This is where you’ll learn to Flee. Choose Flee the same way as choosing the Chain Attack. Highlight your Talent Art and scroll through your options up or down. You can also choose to Lure far away enemies toward you and away from friends to pick them off one by one.
The Commercial District is flooded with Mechons. Don’t try to fight them, run toward the Central Plaza, avoiding and fleeing from the Mechon soldiers. Enter the Fortess, and run towards the lab entrance. The place is blocked, you’ll need to collect some cylinders in the Residential District. Return to the Central Plaza.
At the Central Plaza, your party will be surrounded by Mechon. You’ll play as Shulk and Reyn again, inside a green circle indicating you’ll have to fight it out with the Mechon hoard.
Remember, you have to Topple these Mechon to hurt them. Target whichever you want, press [Z+A] to attack a single target with your party, and use Shulk’s Turn Strike or Stream Edge to Break an enemy. When Reyn Breaks them, finish them off with a few quick attacks then repeat the process.
With these three Mechons defeated, another scene will start. Gaining control of the party, Dunban will join you with the Monado in hand. Dunban can hurt the Mechons with regular attacks, but it still helps to Topple each enemy. Use one of Shulk’s Break Arts and these new Mechon won’t stand a chance.
Next, cut through the Commercial District with Shulk, Reyn, and Dunban. The Mechon won’t stand a chance now that your
Dunban and the Monado can Enchant the party, temporarily allowing everyone to inflict damage to Mechons whether they’ve
Through the Commercial District, run to the bridge for another scene. Afterward, you’ll have to fight more Mechon on the bridge. There’s no escape, but they won’t offer much resistance.
Also, Shulk now uses the Monado. His Talent Art will not allow him to choose from a variety of Monado Arts. Shulk can now Enchant your allies, allowing them to harm Mechon, or launch a powerful Buster attack that damages any enemies in front of Shulk at medium range.
Fight through the Mechons and follow the forest path left. Continue fighting through Mechon until you reach the bridge
This is your first boss fight, and there’s not much you can do. The Monado won’t harm the Face Mechon. Attack it for a few minutes until you see a quick scene. When you gain control of the party again, you’ll learn how to Topple Metal Face.
Inflict Break, then Topple. If you only have one, wait until your party uses the other automatically. One Metal Face is
If you’re having trouble, use a Chain Attack to inflict Break. Remember, use Pink Arts, then Green Arts in the chain, in that order, to Topple Metal Face.
Go ahead and do that right away at the beginning of the fight. Once Toppled, Metal Face’s health will drop face and you’ll see another scene.
Metal Face will retreat, and you’ll be left to pick up the pieces. Welcome to Xenoblade!


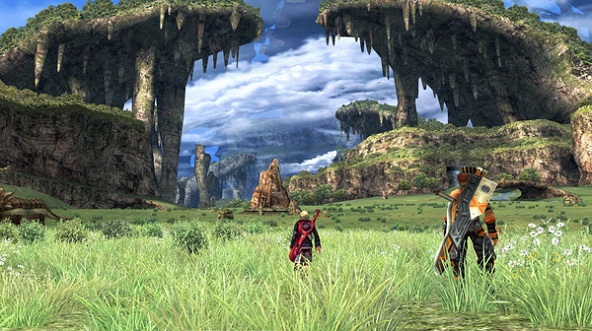



 Destiny: The Taken King Review
 One of the Best Street Fighter fan-art youll ever see
 Assassin's Creed Chronicles China Guide: All Animus Shard Locations In Sequence 3: The Port
 MGS V: The Phantom Pain PS4 Controller Layout Guide On Foot, Horse, Vehicles and Walker Gear
 Forza Motorsport 5 Wiki: Everything you need to know about the game .