Assassin’s Creed 3: Liberation Walkthrough
Welcome to the text walkthrough for Assassin’s Creed 3: Liberation. In this handhold spin-off to the main game, covered in our Assassin’s Creed 3 game guide, you’ll be in control of a different assassin stalking targets in New Orleans at the tail-end of the French-Indian War.
Join us as we show you how to complete the main story missions and survive a tumultuous time in America’s history. The war between the Assassins and Templars has never been so grey, so take our tips to become a stealth master.
Navigate your way through New Orleans with the full list of Assassin’s Creed 3: Liberation trophies. Find our compendium of secrets, guides, and extras with these Liberation cheats.
Sequence 1: Memory 1
In this spin-off of Assassin’s Creed 3, you will take on the persona of Aveline. Enjoy the opening cutscene, where all chaos ensues.
Go to your right around the corner and down the path.
Continue through the opening until the screen turns black and you have walked into another cutscene. Aaaaand we’re back to the days of slave trading.
After the cutscene, go down the alley to the left of where the two guards are standing. You will have to bypass them through the backyard. Press R to climb under the obstructions.
The next cutscene isn’t too friendly either. In fact, it will initiate your first battle. This fight is pretty simple- use your basic attacks against these bullies and keep good spacing between them so they can’t hit you all at once. You will reach a checkpoint after the battle.
The rest of Memory 1 is a cutscene. Hey, that’s to be expected from the beginning of a good game right? Exposition!
Sequence 1: Memory 2
Seems there are slaves that are now vanishing. It’s up to you to investigate. Go up the path towards the map marker, climb up the stairs, and jump over the fence.
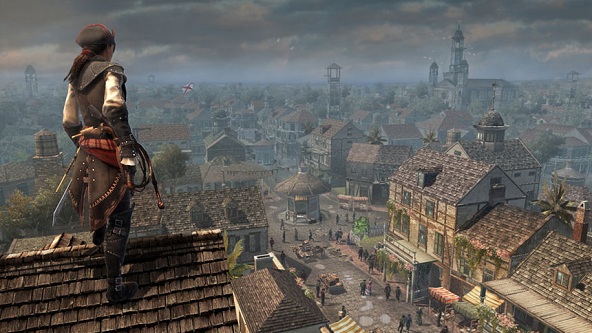
Make your way across the rooftop until you get officially introduced to the game with the title screen.
Sequence 1: Memory 3
Go through the door to reach A Slave in Trouble and a checkpoint. This will be followed by a short cutscene.
On your way, you will run into a weapon shop. Chances are that you won’t be able to get anything substantial yet.
Go up the path from the next checkpoint and another cutscene.
Climb up to the rooftops and move across to reach the next checkpoint. Keep moving until you run into Therese. Looks like there’s trouble.
After disposing of the guard, move along the path for the next cutscene. You will reach a checkpoint and the end of Memory 3.
Sequence 1: Memory 4
Head down the path through town and go through the big white door. You will be able to get slave outfits here.
Follow your map marker to the large staircase and go up it. At the top you will reach a cutscene which will play out Memory 4. This sure was a short mission.
Sequence 1: Memory 5
From your starting location in the house, go through the double doors to reach the outside.
Follow the map marker to the doors for a cutscene. You will reach Taking Care of Business here.
Follow the man without him stopping you. You will have to use your surroundings to blend in when he turns around to look. Take advantage of everything- you can hide behind the wheelbarrows and sit on the benches.
After the cutscene, approach the ship and talk to the captain. This last cutscene will conclude Memory 5.
Sequence 1: Memory 6
Move along the town path towards the map marker and you will run into a group of hostiles. Keep a decent amount of distance between them so they can’t all hit you all at the same time and you’ll get rid of them quickly. Remember one of the golden rules of proper gaming: always loot your victims! :]
Your task is to find a way into the warehouse. Be prepared to use your eagle vision here while navigating and to fight more hostiles. These ones go down easy too.
Have the guards follow you as you look for the remaining goods. Remember that you can press L to investigate an object while in Eagle Vision.
Return down the path to deliver the good news and to complete Memory 6.
Sequence 1: Memory 7
Go up the path towards the warehouse. You will have to meet Gerlard here.
There will be a cutscene once you reach the first checkpoint.
Dispose of the enemies in the alleyway as you make your way to purchase a dressing chamber.
Your next task is to find the map to the mansion. Follow the path until you reach the next checkpoint.
Be discreet as you are tailing the butler. Make sure he is completely done glancing around before coming from around corners and following him.
The last action to perform in Memory 7 is to steal the key from the guard. You will have to wait about a minute or so until he is in position, so be patient. Once your theft is successful, you’re ready to move on.
Sequence 1: Memory 8
To start this memory, you’ll ned to enter the governor’s mansion undetected. Go up the path towards the tree to reach the first checkpoint.
Climb the tree to get over the obstruction and reach the next checkpoint.
You will find yourself inside the governor’s mansion. Your next destination is his office. Take your time- it’s important that you remain undetected.
Go down the hallway until you run into the next cutscene.
This is where the battle begins, as your next goal is to kill the governor. You will have to go through a lot of his lackeys. Some of these guys will try to close distance quickly on you. Since the hallways are narrow, you can counter this by backing up.
After killing the governor and watching the cutscene in which the Templars are mentioned, go back and exit the mansion.
After the next cutscene, escape the mansion, go change your outfit, and make your break.
Sequence 1: Memory 9
Go across the city rooftops and towards the tavern. Refer to your map marker if you get lost.
Your target seems a little drunk for questioning. The next cutscene is pretty funny. And maybe a little sad.
After you question him, turn around and make your way home.
Go through your doors for a cutscene. This is another short Memory segment. Examine the parchment to complete Memory 9 and Sequence 1.
Sequence 2: Memory 1
The opening cutscene takes you into the depths of Louisiana. From your starting location, go across the bridge and towards the map marker.
After you reach the checkpoint, run up the ttree and head across. Use your Eagle Vision if you need to.
From the tree, dive down into the water and swim across. Keep moving across until you reach the next checkpoint. You will run into the last cutscene of the Memory shortly. This is another quick one.
Sequence 2: Memory 2
Shoot down the target, and then go towards the map marker to climb the tree.
Once at the top of the tree, you will have to shoot one of the targets with the blowpipe.
Sequence 2: Memory 3
Climb up towards the checkpoint and into the next cutscene. Sounds like there’s a smuggler afoot. And she sounds hot..
To find the smugglers’ hideout, head north and swim across the pond. Keep heading up the path until you reach the giant tree. Looks shady? That’s because that’s the hideout you’re looking for. Cutscene incoming..
Climb up the tree until you reach the checkpoint at the very top and jump down into the river.
To kill the thugs undetected, use any natural/artificial obstacles around you to remain hidden. Rocks and wheelbarrows work particularly well.
After you do all the legwork, disposing of the 4 smugglers easily. Enjoy your cutscene as a reward for completing this memory. Elise doesn’t seem too stoked about the situation.
Sequence 2: Memory 4
Go up the path until you are interrogated. We need a canoe? We’ve got a canoe!
Follow Elise in the canoe. Rowing it is kind of fun. You can listen to Elise’s babble if you get bored.
After reaching shore and the next checkpoint, there will be another cutscene.
Swim across the water to find Acolyne and his followers. Once you dispose of them, go on the ship to find the chest. Open it up for a checkpoint and the last cutscene of Memory 4.
Sequence 2: Memory 5
Climb up the tree. Your task here will be to find Elise and talk to her.
Keep moving across the trees until you reach a cutscene and a checkpoint.
After the cutscene, you will have to tail the acolyte. As usual, be patient when tailing and use the natural and artificial obstacles to conceal yourself. Tents, trees, and barrels work particularly well.
Once you get close enough, you will be able to take out the Acolyte. Get a good angle and assassinate the bugger.
Tail the thugs back to their hideout and enjoy the last cutscene of Memory 5.
Sequence 2: Memory 6
Go up the path until you walk into the Eve of St. John Quest. You will reach a checkpoint and hit a cutscene introducing Mackandal.
Backtrack to Elise. Get in the canoe. You will by serenaded by some more story dialogue on your way. The color scheme in this swamp is a little monotonous. Or is that just me?
At the end of the lake trial, you will come up on another cutscene.
Staying close to your partner, proceed towards the ceremony site without being seen.
After the next tribal cutscene, you will have to put your endurance to work and survive. You will be poisoned, so watch your movements and heal often.
Defeat the bodyguards by keeping constant space between them. After that, there will be nothing to stop you from talking out the false Mackandal and finishing Memory 6.
Sequence 2: Memory 7
The only thing you have to do to complete this memory is to go to Agate and talk to her. Easy pickings.
Sequence 3: Memory 1
Three years have passed. It is the French that rule now. Memory 1 starts with a cutscene.
Go down the stairs to leave the mansion. As soon as you reach the streets, you will hear some commotion. Go approach the group of people to check it out.
You will be thrust into an easy battle. Defend the kids and make sure they’re safe!
After the battle, talk to Gerald at the Warehouse. He can be found upstairs.
Follow Gerland. There will be some dialogue and a cutscene to close out the first part of Sequence 3.
Sequence 3: Memory 2
Head down the path until a bunch of muggers try to rob you. Take them out to start Elegant and Deadly.
Follow the informant to the warehouse.
When you get close enough, target the guard by the gate and press Triangle to fire. A cutscene will follow.
Go back and talk to Gerlard.
Go down the path and pass by the shop. After that, return to Headquarters for a cutscene and a checkpoint.
You will need to acquire a boat, and once you do so, head to the docks and take it to the Bayou.
Sequence 3: Memory 3
Head down the path until you see the crazy swinging his arms around. Subdue the “fevered patient” for a quick cutscene.
The next cutscene is just a little further down the path. When it ends, go talk to Elise.
After the next checkpoint, take out the wave of hostiles. That’s essentially it for this Memory.
Sequence 3: Memory 4
Most of this memory consists of swimming. Or at least half does. Once you reach the first cutscene, wait for it to pass.
Sneak around to give yourself a wide angle to take out the guards. Sneak up on them by navigating around the tents and rocks in the area.
Chase down the Spanish officer to reach the next checkpoint. There will be one more cutscene here.
Sequence 3: Memory 5
From your starting location, go to the right and report back to Gelrald.
Quickly run after Gelrald and follow him to your next destination.
After the next sequence of events and cutscenes, you will once again have to silently eliminate some guards. Sneak up behind them if you can, or use the structures in the area to give you high ground and a proper angle. The memory ends once the guards are eliminated.
Sequence 3: Memory 6
To start the Memory, go to the Warehouse for a cutscene.
Once you leave the Warehouse, make your way across the rooftops towards the docks.
Once you get to the shore, your task will be to try to board the shop and cut anchor. Swim towards the ship that’s closest to you and use the ladder to get on board.
Proceed onto the ship for the last cutscene of Memory 6. After the cutscene, kill the guards to move on.
Sequence 3: Memory 7
Head across the rooftops and down the town path to talk to Agate.
The next cutscene is an interesting one. Looks like there was an ambush. It will be your task to investigate the site.
You will need to kill 5 guards without being detected on your way. Exercise patience and make sure you are concealed. You will reach a checkpoint after.
To block the square, to up on the roof and knock over the water tower. You will have to do this before the clock expires to foil the ambush.
Head back to the Town Square to reach the next checkpoint.
To eliminate the last 5 soldiers, make sure you keep your spacing and are fighting them one at a time. They have a decent amount of endurance and will wear you down if you’re not strategic.
Talk to Agate. That’s a wrap for Sequence 3. Congrats on the completion!




 Fix for Playstation Move Error code 80022D03
 Bound by Flame Final Boss Guide: How to Defeat Him Easily
 Destiny Guide: How To Jump Crota's Bridge With Every Class
 Review: Nyrius ARIES Home+
 One Direction share BTS video of On The Road Again tour