

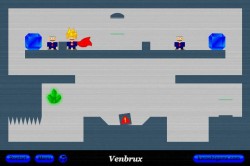
 I have just wrote about Super Karoshi (a game that was also awarded with the “Game of the day” award here at the Unigamesity) and now I’m willing to give a helping hand to all the poor souls that find it hard to end the poor salaryman’s trouble: a complete Super Karoshi walkthrough that will help you finish the game in no time. Check out this walkthrough below, level by level up to level 40!
Level 1: Simply move right, jump twice on the obstacles and make sure you land on the spikes.
Level 2: Again, climb the stairs and jump on the spikes below
Level 3: Activate the first two buttons, but avoid the third one. Jump up the platforms and activate the other three, then return and activate the inactive on. Voila!
Level 4: Move to the teleporter to the left (the one with a green light above), jump over it so that it is to your right. Enter the teleporter when the elevator to the right is at the base of the spikes and keep pressing the right button to land on the elevator. Then jump right again and hit the spikes!
Level 5: It’s all about timing. Jump on the bouncing platform two seconds after the spikes to the left start moving.
Level 6: Walk right until you hit the spikes
Level 7: Be careful here, you can only go right! Jump over the button on the platform, jump on the next platform and bounce on the small square. From there, jump to the teleporter to the right, enter and move to the spikes to the right.
Level 8: You are only allowed to jump four times here, so make sure that you get near the spikes in three jumps.
Level 9: Go first to the door to the right and walk by it, until the text “Secret stage” appears. Then simply jump on all the platforms and straight to the spikes.
Level 10: Walk to the right margin of the screen and jump up and to the right.
Level 11: Jump on the first “L”, then on the “O”, then jump down. Continue to jump up and left until you will find an invisible opening inside the “O”. Move left.
Level 12: You will have to jump carefully from tower to tower, until you reach the spikes.
Level 13: Keep the right arrow pressed until you eventually reach your destination
Level 14: Keep jumping up and right, up and left, until you leap high enough to hit the spikes on the ceiling.
Level 15: Jump on each platform once and hit the Blue toxic waste barrel.
Level 16: Touch both buttons, and then fly Super Karoshi to the green crystal by pressing the up arrow again and again while standing on the platform to the left. Jump back down on the spikes.
Level 17: Avoid the spikes and the jumping platform, and get the “K”. Fly to the two buttons on the upper platform, but via the opening to the left. Watch the first salaryman die, then take the green crystal and do the same.
Level 18: Walk left.
Level 19: Take the “K”, touch the blue gems, take the green crystal and die!
Level 20: This is pretty self-explanatory: Get the “K”, use the teleporter, fly to the blue gem then to the green crystal. Jump from platform to platform until you reach the spikes.
Level 21: You will have to move quick here: Get the “K” and move to the green teleporter to the left then fly quickly to touch the blue gem. If you don’t do it before the other salaryman touches it, you will fail the level. If you do it in time, simply go take the green crystal afterwards, use the teleporter and jump on the spikes.
Level 22: Move below the yellow K and hit the “k” key on your keyboard.
Level 23: Get the K and prepare to step on the button. Wait until the salaryman on top is getting close to the right side of the chamber he’s in, and step on the button. The whole point here is to time your pressing of the button perfectly with the movement of the salaryman above.
Level 24: Move left and right near the yellow creature until the counter reaches 7.
Level 25: Jump over the first teleporter and jump into the second one from below. Keep the right key pressed and keep reading the walkthrough.
Level 26: You will again have to act quickly: get the “K” and reach the first blue gem before the salaryman to the left does (but after the one to the right touches it), then move to the teleporter, and touch the four blue gems. Fly back to the green crystal and follow the same route back to the spikes.
Level 27: Simply move to the exact center of the screen and watch the credits roll.
Level 28: Keep the right arrow pressed.
Level 29: Walk over the two buttons, jump over the spikes and the teleporter and get the “K”. Move left to the teleporter, and fly to clear the blue gem. Jump back to the platform with the button and wait until both salarymen are above the spikes. When they are, step on the button then fly to the green crystal.
Level 30: Jump all the way to the last platform then hit the Shift key six times.
Level 31: Go right and get all the burgers. Jump to the teleporter, to grab the other burger then go back right. The button you have to step on is on the small square to the right. Go eat the other burgers, too.
Level 32: Take the “K” and liberate the two salarymen (the first by opening the gem to the left and the second by opening the gem to the right). Go take the green crystal and walk to the teleporter then into the spikes.
Level 33: Take the K and fly on the elevator. Touch the blue gem and wait: eventually, both salarymen will get to the spikes.
Level 34: Jump on the first bouncing platform and keep on hitting the above platform until it breaks. Go left to the spikes.
Level 35: Jump up and left, then move left.
Level 36: Get the K and fly above the crystals to the teleporter. Continue pressing the “up” key, so you continue to fly. Go touch the blue gems, then return left to the spikes below.
Level 37: Avoid all the spikes and move to the elevator, then jump from platform to platform to the “K”. Return to liberate the three slarymen and fly to the green crystal then go into the spikes.
Level 38: Move right under the biggest apple and wait.
Level 39: Get the K, jump over the box with an exclamation mark and touch the blue gem. Fly to the upper left corner and get the green crystal.
Level 40: Timing is important here. Liberate the salarymen so that they both reach the box with an exclamation mark at the same time (first the salaryman to the right, then the one to the left). Enjoy!
This is where my Super Karoshi Walkthrough ends now. I will be writing a follow-up with the next 20 levels soon, so remember to check back!
UPDATE: For the last 20 levels of the game, check out Super Karoshi Walkthrough Part 2.

 GTA 5: New Cell Phone Cheat Codes
 How to Instantly Switch Any Keyboard's Layout Wherever You Go
 The Fine Young Capitalists’ Seemingly Noble Goals Don’t Excuse them from Scrutiny
 How to Keep Quiet as a Buddy in MGS5: Phantom Pain (the “Quiet” Ending)
 Blade&Soul Guide: How to Get the Red Specter