Hello! Welcome back to our series of guides for the longest strand of new achievements in Halo: The Master Chief Collection. Par Times and Par Scores, for every single level in every Halo game. If you missed it, here is our guide for Halo: Combat Evolved. At the least, read the prologue there before continuing on. We recommend Score runs be done on Heroic difficulty, and Time runs keep it on Normal difficulty. And, as always, play the campaigns well enough to understand each level and the areas we mention in the guide.
Curiously, Halo 2‘s guide is a bit shorter than Halo: Combat Evolved‘s. And yet, it contains levels infinitely more difficult in nature for both Speed and Time runs. It is more versatile, complex – yet more succinct and forward; much like the game itself.
Without further adieu, we reconvene with our heroes on board….

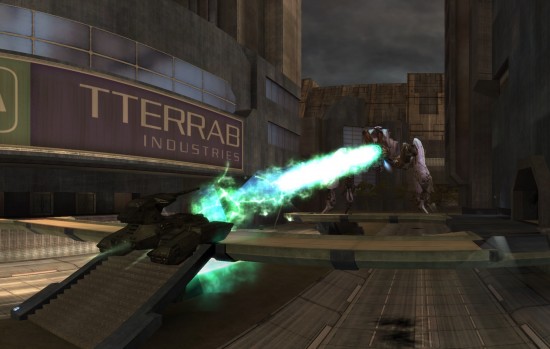
Hey, Sgt. Johnson’s a cinematic character now! Never mind how many times he died in Halo: Combat Evolved. And who was that Elite dude, anyway? Eh, whatever. Let’s get to it. The largest change to Halo 2 in comparison to the first game is the addition of dual wielding. This simultaneously opens up a lot of options and closes others – since the magnum of this game is less than ideal and much more rare, the noob combo of old is much less effective. On the plus side, however, is the battle rifle – a headshot machine with a bit more versatility than the magnum. And there is the ability to swap weapons with Marine allies, a big help later on.
Time run: Park yourself right next to the door with a battle rifle and an SMG. The moment it explodes, rush the Elite and kill him. Jack his plasma rifle and dual wield it with your SMG, then sprint through to the open hanger with the ships. You have to kill all the enemies in this room to unlock the next area, and wait until Malta explodes to get through the door. Once in the open habitat area, drop the plasma rifle and sprint through the room, headshotting the grunts on turrets. Get to the hanger and kill all the enemies quickly – this time you can use grenades, use them judiciously, and grab one of the plasma pistols from a Grunt in place of your SMG.
Once the door opens after the Athens explodes, get into the Armory and plasma pistol/battle rifle the Elites. Swap your plasma pistol for the shotgun and run. Memorize the zero-gravity section so you can turn and jump past all the Elites. The next fight you have to get into is against the Drones on the lift. Kill them with the battle rifle (get really good with headshots with this thing). Jump down the elevator and trigger the switch before it reaches the top, and use the shotgun to clear the deck. Swap the shotgun for a plasma pistol and run past the Elites in vacuum, killing the one on the turret. Once in the bomb room, swap the plasma pistol for a plasma rifle and SMG and get to work on the Elites in the room. Stay close to the bomb at all times to trigger the end cutscene faster.
Score: Get on that turret at the beginning and get merciless. Really, merciless is the name of the game on this level for Score; in the areas you sprinted through before, hunt down and kill all the enemies hiding in the side hallways. Not a whole lot to it, honestly. Try and chain combos together in the hangers with grenades and the battle rifle.
Now, time to take Halo 2 to the surface….
Yes, we’re combining these two. Halo 2 does this all the time, where levels are broken into two rather awkwardly. We’re going to recombine them when it is pertinent, like here. Outskirts and Metropolis are unified by a singular concept for Time runs; you can skip 90% of the levels.
On a time run, the only fight you have to get into is this opening one in the courtyard. Give the turret due justice against the drones that fly in and run around the courtyard during the waves of Covenant squads. When the Hunters show up, swing around to their left when they charge and pop them in the back with a battle rifle. Now go snatch Sgt. Johnson’s sniper rifle and run forward. Take out the snipers in the next courtyard and then use the boxes to jump onto the rooftop. Use the rooftops to skip all the way to Hotel Zanzibar, then run through them to where the Warthog spawns in. Hop in, and gun it. Memorize the upcoming beaches and tunnels and just keep on going till the cutscene.
Once Metropolis begins, don’t get in the tank. Grab the Warthog to the right and gun it across the bridge, and trick one of the Ghosts into running into the wall and hijack it. Then run that Ghost through the tunnel and over the barricade they normally force you to walk through on the right. Keep driving into the next open area and take control of the new Warthog. Once again – drive; get all the way to the city center. Now here’s the second fight you have to get into; drive the Warthog around to destroy the Wraith tanks from behind. Once done, sprint through the building to the upper catwalks with the weapon pods. Grab a sniper rifle and a shotgun, and start hitting the Elites on the Scarab’s top deck. Hop down onto it and get angry with the shotgun quick-like.
For Score; take your time and don’t skip to the rooftops. Take your time through the alleyways, and try to stay one or two steps ahead of the Marines so you can get the kills. Take your time on the beach with the Warthog. Take your time with the Scorpion tank and Warthog. Have fun with it and enact total annihilation upon your enemies – Halo 2 is far kinder toward Score runs than Time runs.
For example….

These two levels, the introduction to The Arbiter, are almost comically easy to do on a Score run. This is a combination infantry/airborne/Flood grouping of levels – hyper friendly to Score runs. Simply make judicious use of the sword and the carbine during the infantry segments of The Arbiter, and make sure you take out everyone with the Banshee, then borrow a buddy Elite’s sword and jack a Sentinel beam off a dead Sentinel for the Flood. This Score run practically solves itself.
However, a Time run is far more difficult – the beginning of a trend for Halo 2. Divide these two missions into three sections; The Station, Airborne, and the entirety of The Oracle.
The Station: Ugh. This is one of the hardest sections of the entire game to get through. There are an inordinate amount of areas in the first part of this that require you to clear everyone out before continuing. As such, you simply must be brilliant with the carbine and sword. Memorize where the enemies are and which doors are locked before you have to continue. When your sword runs out, switch to a combination that is useful for both Time and Score runs in the future; dual wield needlers. They can clear out a pack of enemies like no one’s business. Utilize the active camouflage to skip past larger groups of enemies or get into a better position to kill a group of them.
Airborne: Ah, the easy part. You can ignore all the enemies in the level and just fly straight to the exit, though you will have to kill all the enemies at the final door. Bombard them from the air with the Banshee’s fuel rod cannon, then grab one of the fuel rod guns from the dead Grunts.
Oracle: Just…fucking ugh. There is no easy way to do this. No shortcut, no easy path past enemies, and a lot of areas dependent on you killing everything in order to proceed. Everything leading up to the boss fight is simply a game of keeping the Sentinel beam close and energy sword closer. And try and save a few hits of the sword for the Heretic Leader boss fight. The boss fight is perhaps the hardest part of the level, consistently. There is no fast way to do it; simply hammer on one of the Heretic Leaders with the Sentinel beam until you can tell if he’s a hologram or not, and hammer on the Leader with the sword until he falls.
Once he’s dead, it’s on to….

Another Halo? God, Bungie, get some new ideas. Once again, this is a series of levels that are rather hostile to Time runs, though Delta Halo is far more kind.
Delta Halo: Time runners should hit the beach quickly and take out the turrets with extreme prejudice. Then, ignore all the other enemies in the area and just bolt for the passage in the rocks in the back. Run all the way to the bridge area and activate as quickly as you can. The Warthog that spawns in place of the Scorpion tank is your friend and savior. Use it to blow past the ruins of this coming area all the way to the Forerunner structure that Cortana talks about clearing out for a Pelican. Do so, and then collect a battle rifle and a plasma pistol from the carnage. Just run through the rock garden area with Jackals, maybe taking potshots at troublesome snipers, and on into the temple. In the temple, endeavor to only kill the Elite Honor Guards with the plasma pistol/battle rifle inside the temple proper – otherwise, a fourth Guard will spawn in the room and surprise you.
Score runs should hang around after killing the turrets in the beginning, and fight off the waves of Covenant. When the Pelican comes, hop in the Warthog that drops and take it to the bridge. Once you’ve triggered the bridge, get in the Scorpion and go wild – leave no enemy unscathed with the Scorpion, as it is your main point gatherer. Make sure to eliminate every Jackal in the rock garden with headshots. Really, Halo 2 just hands this one to you.
Regret: Oh, boy. Here is where Halo 2 starts to get comically hostile to Time runs. There is no short way to do this, much like Oracle. The gondolas are speed traps for this – you have to be very quick on the draw with a plasma pistol/battle rifle combo on the Jetpack Elites that will fly over to you. And every stop will not end until all enemies are dead. Thankfully, once the gondolas are through with, much of the level can be run through; the only area you have to clear out is the big hologram room that the Hunters spawn in, and you can run past them. Once you reach the final temple with Regret himself, you can just bolt past the Honor Guards and punch him to death on his throne.
Score runs…this one is also rather easy. You need to put on a clinic at the gondolas and make sure you clear them quickly. Take advantage of the underwater tunnels with invisible Covenant to chain together quick and easy headshots. Take your time to eliminate everyone in the last temple before going after Regret.
And now…the easiest two levels in the game.
Ah, the shortest guide of Halo 2. You know why? Because for Time runs, this the easiest series of levels in the game. There are only two stopping points in Sacred Icon, and if you play it right, zero stopping points in Quarantine Zone.
Sacred Icon: Time runners? Run. The first time you have to halt yourself and kill enemies is the fight against the Sentinel Major, where you have to kill him and clear the room before starting the gondola. The second time is the very end of the level, with the Spec Ops Commander in the snow outside the Quarantine Zone. Everything before and between the two you can blitz through.
Score runners? Utilize those Sentinel gates; they are infinite Sentinel spawners. Also make quick use of the two-way fights between Sentinels and Flood to score easy multipliers.
Quarantine Zone: Time runs? Get in a Ghost, and drive. You can skip the entire level in a Ghost. The only time you have to get out is the ending Gondola fight, and the speed with which you take the Ghost will leave you with enough time to fight the Flood as per normal. Just make sure you have Flood appropriate weapons.
Score runs? This is a vehicle level where all the enemies are the Flood and Sentinels. So…you’re fighting dumb creatures in control of vehicles and slow moving robots. Use the Scorpion tanks and Wraiths, and this one will be a breeze.
A brief one, too. Because from here on out Halo 2 is an absolute bastard.
Welcome to the longest level of the game. It is you versus two warring factions of Covenant. In a series of very purple corridors. With basically no ability to skip the larger fights – nearly every door is locked until all enemies are killed. And one of those warring factions is the Brute – an enemy with the strength of an Elite, minus the shield weakness, plus the ability to rush you when angered.
And then High Charity adds the Flood, and takes away the Elites. Note: High Charity is really just an epilogue to Gravemind rather than a mission into and of itself, so it gets combined here and referred to as one “level”.
This is, for Time runs, the most absolutely brutal level in possibly the entire Master Chief Collection. Imagine the Station section of The Arbiter earlier in Halo 2, but 4 times longer. You have exactly two saving graces; the needler and the Brute shot grenade launcher. They’re both plentiful enough in this level that you shouldn’t run out of ammo, and damaging enough to clear paths of enemies quickly. Take advantage of the outdoor sections, as they are the few areas in the level you can handily jump over. Actually, it’s a good time to mention: jump up and fire the Brute shot at the ground a couple of times. Watch your shield, but the boost it gives you in the air can get you past a battle relatively quickly.
Once The Flood show up at High Charity things become a little easier – if only because they fall apart like wet cardboard to the Brute shot. Re-use some tactics from The Library in Halo: Combat Evolved for Halo 2‘s equivalent here – if you find heavy weapons like the fuel rod cannon, use them as last ditch efforts. Be extra careful to not get turned around in the ship interiors. The heavy green mist over the Covenant flagship makes it easy to get turned around. And make sure you just sprint through the final run to the Forerunner Dreadnought.
Score runs on Gravemind are practically self-fulfilling. The Covenant Civil War (or Great Schism, as it is really called) is raging in High Charity and presents many opportunities to enter three way battles against Elites and Brutes. Utilize explosive weapons during the big battle sequences in the Mausoleum and Hierarch Chambers to rack up big multikills. But it is High Charity that actually poses a little bit of a problem; Flood have a nasty tendency to kill the Covenant in this level much faster than you can. Combined with its short length, High Charity requires more than a little bit of hustle to claim all the kills necessary for the Score. Take advantage of the final jog to the Dreadnought – there isn’t actually a time limit.
And now…the end of Halo 2!
Welcome to the end game! Halo 2 has sort of garnered an infamous reputation for ending with The Arbiter instead of the Master Chief, but seeing as Arby is way more interesting, I’ve never had a problem with it. What you will have a problem with is the bizarre dichotomy of these last two levels, their mix between being really conducive to Time and really just being assholes about Score and vice versa.
Uprising: Time runs really need to take advantage of the brief Ghost segments to really get ahead on Time here. Let your Elite friends do most of the work against the Brutes. Use your active camouflage to skip some of the more open battles, and use an energy sword to plow your way through those you can’t get around. And remember, this level gives The Arbiter access to a collection of human weapons against the Brutes – the shotgun? Also effective if the sword runs out.
Score runs need to minimize the effectiveness of your Elite allies. A solid tactic is to be a jerk and use the weapon swap ability to give them all plasma pistols and weaker weapons. Utilize the Brute shot to clear out packs of Brutes in quick order, and the sword to swipe up any resistance. Take your time in the vehicle segments and make sure your Elite friends are not also in vehicles. Basically, the key to this is to be a colossal dick.
The Great Journey: And now, chaaaaange plaaaaces! The roles are reversed for this one – Time runs are crazy easy, and Score runs are a real problem. We’ll divide this into two sections; Alliance, and Tartarus.
Alliance: Named so for the unexpected joining of Sgt. Johnson and The Arbiter, and indeed the Elites and Humanity. What helps alliances? Giant Covenant walking tanks. Johnson’s Scarab will do most of the work for you, so on a Time run you can just straight up fly to Control Room and Johnson’s Scarab will appear to blow down the door like a particularly pissed off wolf. No real problem…
…Unless you’re doing a Score run, in which case the Scarab is a nightmare. Keep the Banshee close to the ground and try and stay an area ahead of Johnson at a time, killing the Wraiths and various infantry units before he can turn his cannon on them. You need to be nimble and quick, and take advantage of the brief infantry section at the beginning by getting in front of the allied Hunters. The amount of enemies between you and the Scarab will allow you to pad out your score enough to survive the annoying next section.
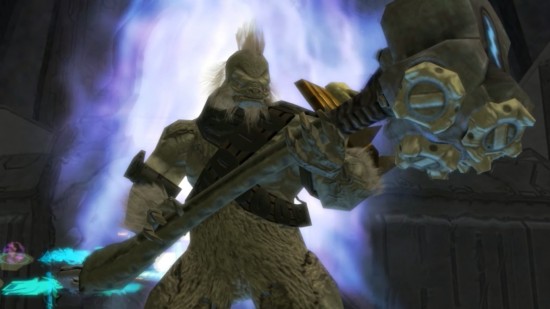
Tartarus: The final boss of Halo 2! Time runs can use their active camo to bypass the Brutes in the rooms proceeding the Control Room with little issue – just memorize the door they exit and enter. The boss fight proper, on the Wedding Cake of Doom that is the platform Tartarus stands on, is a bit more difficult. Time run advice? Learn to tango. You have to stay close to Tartarus so you can immediately whack him with a sword or other weapons when Johnson knocks down his shield – but far enough away so that his gravity hammer will not launch your ass off the Cake and into the abyss. It’s a delicate balancing act, particularly when Tartarus hops from level to level, but given enough practice this sections should not be a problem.
However, for Score runs you need to ignore Tartarus as long as possible, yet keep up the speed. You need to eliminate all the other Brute Captains (with the silly flags on their backs) and other Covenant before the Elite Counselors get to them. This is not easy, and is only practical with real practice and skill with the Brute shot and plasma grenades and the sword if you can get close. Oddly enough, this is one of the hardest sections of the game to land the Par Score on – a fitting way to end the game.
And that’s it for Halo 2! Stay tuned to Twinfinite for more Par Time and Par Score guides for Halo 3 and Halo 4 from the Halo: The Master Chief Collection. Thanks for reading!,


 Dropsy Review - A Heartbreaking Work of Staggering Clownness
 Madden 16 Guide: How to Get Coins Easy in MUT
 Learn how to transfer Pokemon from old games
 Limited Edition Consoles That Blow Away the Star Wars PS4
 Hotline Miami 2 - Wrong Number (PC) tips