While a team of any combination of Guardians can be successful, provided everyone has enough skill, some combinations are arguably more beneficial than others. This is especially true when dealing with a challenge as difficult as the King’s Fall raid in Destiny: The Taken King. There are nine subclasses (three per Guardian Class), so picking can be a problem sometimes, but we’ve narrowed down the best composition for you.
A strong team build includes:
Once you have your team situated, you’ll want to pick some weapons. Naturally, you should always bring what you’re most comfortable with, since that will help you out when things get hectic (which they will). I’d suggest going with weapons with a higher fire rate and reload speed. There are a few sections where you have to do a lot of damage within a very short period of time, so anything too slow will prove to be a detriment. Swords are powerful, but useless against Oryx himself, so make sure to bring a backup heavy weapon if you plan on taking the Conan approach for the other parts of the raid.
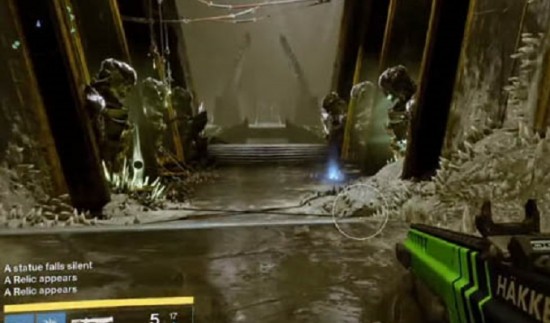
The opening of the King’s Fall raid will prepare Guardians for teamwork later on in the event, as well as some of the agility required for later challenges. The first challenge will task players with opening a portal. To accomplish this, all you need to do is place two orbs into a statue at the exact same time. After doing so, two more will appear.
Split up into two teams of three to bring the orbs to the center (they spawn to the far left and far right). The two guardians not carrying an orb can shoot down the barriers in the way. You are on a time limit, so move as swiftly as possible. There are a total of six statues, once they all receive their orbs, you can go through the portal and participate in some good old fashion Hive Ship Jumping.
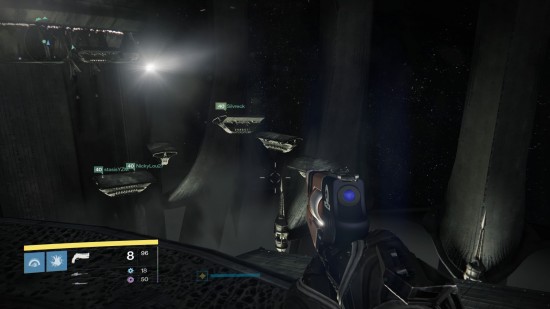
This is also really easy. Two Guardians stay back to hold the plates on the left and the right to shut down the forcefield. The other four Guardians platform their way to the other side. Once across, they trigger the same two plates allowing the remaining two who were left behind to make their way across and join the party. The next step is the Totem Room, and this will require players to use the same level of coordination, only in a much deadlier scenario as the King’s Fall raid presses on.
You mastered the art of jumping, now it’s time to master the art of your first King’s End encounter. This isn’t a boss, but the stakes here are still high. If you defeat this encounter, you will be rewarded with high Light Level gear. Let’s get started.
First things first, you need to assign people to go into the left and right chambers. You want two groups of three on each side. Initially, you can have two people stay in the middle to clear the Acolytes before rejoining their comrades in the chambers, but it isn’t necessary.
The encounter will start if you either shoot your weapon or start running inside the chambers. When you split into two groups and run to the chambers, you’ll find a white orb lying on a pedestal. One person will automatically pick that up, it will give you a buff Brand of the Weaver or Brand of the Unraveler. These buffs will protect any of the Fireteam who are in the room from constant damage ticks.
When each group gets both buffs, they will want to run to their respective totems inside the left/right rooms. The totems look like a large glowing pit. All three people on each side must stand inside this totem. Here you will see random weak Acolytes pop out from the bottom, the split Fireteams can easily handle them. Your priority target will be the Knights that will come in from the upper balcony of these chambers. They can wreak havoc with their boomer weapon, so the Fireteams must execute these Hive.
With either your Brand of the Weaver/Unraveler, you’ll notice you have a 30 second timer. You must stay on your totems until this buff completely dissolves, that way your shield passes to someone else who’s also standing on the totem.
After your Brand of the Weaver/Unraveler runs out, both initial Guardians will get a new buff called Deathsinger’s Power. You’ll have 10 stacks of this and both Guardians must run into the middle of the starting chamber and stand on the totem located there to charge the large door. The other Guardians in the left and right chambers (on the totems) stay right where they are to kill adds. The two Guardians who ran into the middle both want to focus on an enemy Wizard that flies out of the doors located on the balconies.
After the Guardians in the middle kill the Wizard, they MUST wait on the middle totem until their Deathsinger’s Power dissipates from their character, otherwise they will wipe the Fireteam. Once the buff runs out, they will want to run into the opposite chamber of where they started at — hence the Brand of the Weaver/Unraveler mechanic.
This is essentially the whole fight; people with the buffs must stay on totems unless they have Deathsinger’s Power then they must run into the middle to kill the Wizards. It’s not a difficult encounter but it will require some coordination. Again, make sure people are killing the Hive Knights launching Boomer shots down onto the totem, these guys HURT, much like in the Crota encounter.
After tackling the Totem Room, your fireteam is ready to move onto the next section of the King’s Fall raid.
After completing the Totem Room, you will be ready for the next part of the King’s Fall raid which is a boss fight; the Warpriest. This particular bad guy also drops one of the pieces necessary for obtaining the Touch of Malice exotic, so if you wanted that, you were destined to face this foe. This particular boss thankfully isn’t too difficult, but it will take a bit of coordination and one person being willing to go on a risky mission on their own.
There are three plates that must be triggered to begin this King’s Fall encounter. Once you do so, the battle will begin with a swarm of Hive Acolytes. Quickly take these guys down, but be mindful of the Majors (Yellow Health Bar). If they explode near any of the regular Acolytes, those Acolytes will transform into Ogres, making your task unnecessarily difficult. Leave the Yellow guys for last and you’ll be just fine. Once that’s done, three Hive Knights will spawn in for you to kill.
After all of the adds are gone, one person from your team should get on the higher platform where the Knights spawned in from (to the side of the Warpriest). From this area, that individual is going to keep an eye on the three totems in the middle of the room and call out the order in which they light up. The rest of the team members will need to stand on the corresponding plates in that order to trigger the Aura of the Initiate which is required to damage to the Warpriest.
This Aura will come with a countdown for the player that is holding it. The player must kill an enemy before the timer runs out to negate the effect of the aura killing them. They must do this until the stacked effect reaches zero. If they fail they will be wiped and another player will take on the Aura. Once the Aura has properly dispersed, a huge glowing orb will appear to kill everyone on the team. You avoid this by hiding in the shadow of one of the three totems in the room. After each round, one of the totems will disappear forever leaving less locations for your team to hide, so be mindful of this in successive rounds. Also, make sure you all hide behind the same totem, it’s the one being used that will disappear from what we can tell. If you split up you remove more totems.
After the second round of the exact same thing, the Warpriest will summon the Taken instead of the regular Hive. They will show up in greater numbers and will attack much more aggressively. Take them out to trigger the Aura for the third time and do as much damage as possible to the Warpriest. If you’ve been keeping count of the totems, then you will have realized there are none left after this third wave, which means if you haven’t killed the Warpriest yet, you only have one more try.
Finish him off on the next go around and you’ll emerge victorious and head to one of the toughest parts of the King’s Fall raid.
Before you get to the already infamous boss Golgoroth, your Fireteam must first navigate through his treacherous cavern. Here you’ll find yourself in a pitch black environment only able to see a few feet in front of you. Just like in the Crota’s End raid, you’ll have to watch out for huge pits located on the floor that you can accidentally fall through.
In order to continue to the next area of the raid, the entire Fireteam must make it to the final door of the catacombs. In order to find the last door, the raid crew has to walk in a Z-pattern towards the door.
Again, just make sure your team is being careful about the pits and this should be a relaxing stroll through the Dreadnaught. If anyone dies, just wait around and revive them, it’s not a big deal if they do. Once your Fireteam makes it to the door, it’s time for Golgoroth.
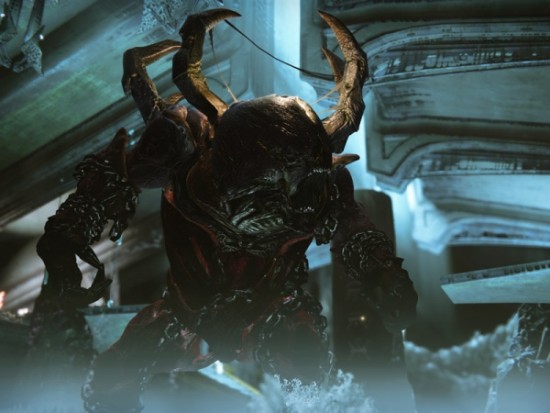
This Ogre-Spider mutant is a tricky fight and will require absolute coordination with everyone in your Fireteam. It is one of the more challenging parts of the King’s Fall raid. Make sure to communicate at all times since that will spell the difference between a team wipe and success.
There are two specific assignments that raiders need to hand out, and that’s Gaze Runners. The Gaze Runners’ main job will be to shoot Golgoroth in his weak spot (yellow-white mass on his back) so they focus Golgoroth’s attention on them. Only one Gaze Runner can have Golgoroth’s Gaze at a time and for 30 seconds, then the other Gaze Runner needs to shoot Golgoroth to apply the gaze to them. Gaze Runners will have to constantly switch Golgoroth’s Gaze between them otherwise the boss will stomp the rest of the raid.
The other four members of the raid will be focused on doing damage on the boss. It’s highly recommended that they use Supers and high impact Sniper Rifles so they can really put the hurt down — this is a long encounter and has a Rage Timer. The damage dealers will also have to down orbs on the ceiling and watch out for Cursed Thralls on the ground but we’ll get to that shortly.
There are two phases that you will have to pay attention to; one with Hive and one with Taken adds. The harder of the two (the one with the Taken) will be triggered when Golgoroth’s healh is low. There is also a counter on display behind Golgoroth. If your team accumulates Six deaths during the encounter the boss will cast a spell making victory impossible. Now let’s get down to business.
As mentioned before, two people will have to take on the role of Gaze Runners while the other four fireteam members handle the rest of this King’s Fall encounter. The Gaze Runners must always remember to keep the gaze on them or else Golgoroth will begin firing randomly making the boss fight much more difficult than it needs to be.
The damage dealers will focus on shooting down orbs off the ceiling. The orbs will drip white liquid on the ground near Golgoroth’s feet. Before the damage dealers drop down into the liquid, they need to handle the Cursed Thralls patrolling near the bosses feet. Once the Cursed Thralls are somewhat cleared, the damage dealers need to shoot at the opening of Golgoroth’s stomach to do considerable damage to the boss.
After you have positions assigned, look around the boss room and you’ll see a goo-filled orb dangling in the center of the ceiling. You’ll want to split your Fireteam in two groups of three on each side. Everyone in the Fireteam should be focused on two hallways, one hallway on each side. Once everyone is in position, shoot the nasty orb on the ceiling. Now the encounter begins.
The boss will be summoned and he will immediately start shooting purple eyeblasts at the entire raid. Luckily there’s plenty of cover for the Fireteam to hide behind. There’s boxes on the far side of the room overlooking the hallways, everyone should be positioned behind them to avoid the bosses fire.
As soon as the fight starts, these hallways will swarm with Hive adversaries. Everyone in the Fireteam should be focusing on killing these adds as fast as possible, the main target for the Fireteam should be the yellow bar Adepts spawning on each side. Once you kill a few on each side, have one Gaze Runner move up and the adds will stop spawning.
The Gaze Runner at this point needs to shoot Golgoroth on his weak spot on his back. The Gaze Runner then goes back towards the raid to position Golgoroth so his other weak spot (his white-yellow stomach) is faced towards the damage dealers. While this is going on, the damage dealers need to shoot ONE orb on the ceiling.
Before they drop down, the damage dealers need to take out some Cursed Thralls. The Cursed Thralls will continuously spawn in, so in between shots on Golgoroth, make sure you’re looking around to see if there are any in proximity. Damage dealers will need to jump out of the pit once the Gaze Runners swap the gaze rotation, that way they do not don’t get overwhelmed in the pit.
For the Gaze Runner that has Gorgoroth’s attention, the massive Ogre will shoot purple orbs at you that can easily be taken care of. Just shoot them before they hit you and you’ll be just fine. Around 3-4 seconds with his gaze timer, you need to alert the other Gaze Runner (who’s positioned behind Gorgoroth’s back) to shoot the boss and take his gaze off the first Gaze Runner.
The second Gaze Runner will position themselves around the same direction as an orb on the ceiling. The reasoning behind this is that way Golgoroth’s weakspot is in direct view of the damage dealers once they drop down.
Once the second Gaze Runner has the boss’s attention and is in position, the damage dealers will want to bring down another orb from the ceiling immediately so they can stand in the damage buff puddle on the floor. Again, watch out for Cursed Thralls and jump out after the Gaze Runner’s timer is ready to be switched.
Rinse and repeat said strategies and once his health gets low, Golgoroth will summon plenty of Taken Thralls. The damage dealers no longer have to worry about Cursed Thralls, but the Taken versions can easily overwhelm you with their persistent melee attacks, take care the best that you can while you’re down in the pit.
The Gaze Runners will have to deal with Taken Thralls as well, though they can easily be jumped over and ignored while you gather the boss’s attention. If any Taken Thralls get too close, blast them, but your main focus should be getting Golgoroth in good position for the damage dealers and shooting down the orbs he’s launching at you.
During this final stage, chances are Golgoroth is close to his Enrage Timer. When that happens, the Fireteam should step up the damage. Use Supers, Sniper Rifles and Heavy Machine Guns to really lay on the hurt. I recommend Weapons of Light on your team’s Defender’s Ward of Dawn and the new Shadow Shot Super that Hunters have.
This fight can be extremely frustrating but keep your cool, the fight isn’t particularly difficult so much as it just has numerous mechanics to be aware of. The most important thing to do in this fight is to communicate with your Fireteam, especially the Gaze Runners since their role requires the most coordination.
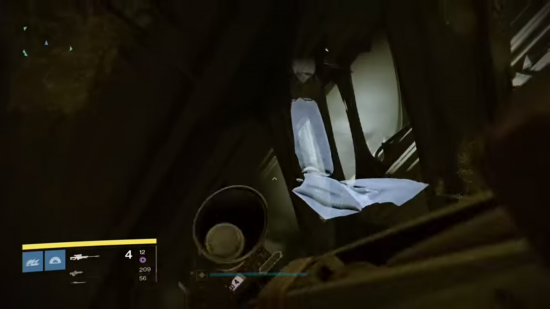
I hope your Fireteam enjoys more jumping puzzles, because this one is sure to test your timing. If you’re familiar with exploring the Dreadnaught, you’ll know to bring up your Ghost companion so he will show you invisible platforms to jump onto. Same concept here for this piston jumping puzzle.
One tip that will help your Fireteam immensely is to use your Ghost to help your team find the next invisible platform. You can hold out your Ghost so it will light up the next platform for everyone in the raid. I recommend hop-scotching your way to each invisible platform, helping each other out with your Fireteam’s Ghosts along the way.
While your raid team is platforming across invisible ledges and side panels, you’ll come to the piston portion of the puzzle. Just go one at a time, making sure to avoid getting bumped off the edge by the pumping pistons going back and forth. Going alone is advised because otherwise you might stumble and push one of your fellow teammates off the edge.
As you continue, you will have to jump in the air to land on the ledge above you. Just be aware where the pistons are that’s above your head, otherwise timing it wrong might get you pushed off. Once you’re up, continue slowly hugging closely to the slimy walls. If anyone gets pushed, just simply revive them or let them respawn at the nearest checkpoint.
Just take your time, don’t rush and the Fireteam will easily make it past this. I mean, you’ve already downed Golgoroth, so how hard could the rest of the raid be? Well, you’re in for a treat.
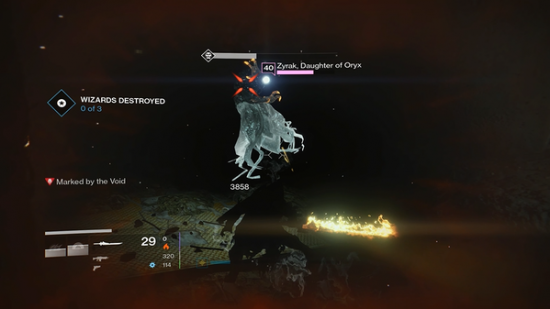
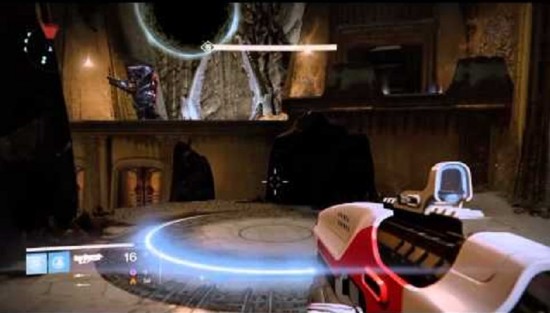
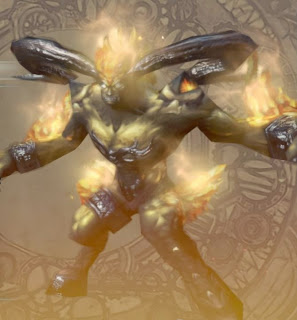
The Daughters of Oryx are seriously difficult wizards to deal with, and they are the last obstacle before fighting their father, The Taken King Oryx, and ending the raid. As with every other portion of this raid, communication and coordination will be key in finding victory. You will fight them in a room with four platforms.
An orb and a relic will spawn on these platforms. Players must activate each platform in a counter-clockwise rotation starting from the platform with the orb. This will summon a set of platforms that only one player can cross. That player will be torn between dimensions and will be the runner of the Relic. They will jump across the platforms to obtain the Spark and slam it into the left Deathsinger’s bubble and remove her defenses.
Everyone needs to rush over to this Deathsinger now and start wailing on her, but make sure not to kill her. Killing one of the Deathsingers makes the other really powerful. So you’ll want to balance out their health so you only have to deal with a supercharged one for as short a period of time as possible. The relic runner will have been granted a shield that blocks all incoming damage (like the relic from the Vault of Glass). This also protects against the Hymn from being sung by the Deathsingers which will kill any players outside of the shield’s effect.
Next, you’re going to run the same cycle and target the daughter on the right, only this time you will make sure to kill her since you’ve already seriously weakened the other. If for some reason you don’t get the kill, just run another cycle, but try your best to make this a one cycle move, extending any boss fight is never a good idea and often leads to fatalities.
Now you’ll just have to repeat one more cycle and take out the other daughter to approach the end of the King’s Fall raid.
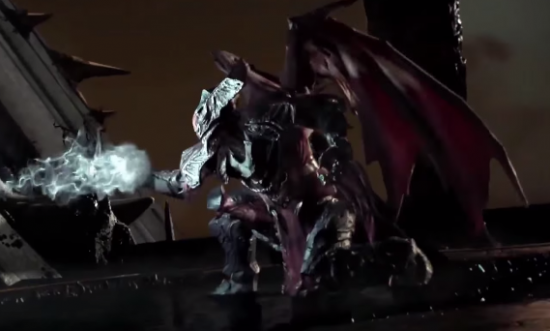
Oryx, The Taken King is one of the most interesting bosses to have ever graced Destiny. He trumps both Atheon and Crota in terms of mechanics and power. Oryx is a big dude, and he’s absolutely pissed at you and your friends (whether you killed Crota or not). Beating him will take perfect coordination since you’ll need to reach certain phases or face an instant wipe. Now let’s get started.
Beginning – Touching the small orb of light at back center of the fighting area will summon Oryx and trigger the end of the King’s Fall raid. He will bring along a ton of Taken minions for the ride, and these guys should be your first focus. Use them to generate as many orbs as possible. These are primarily for your team’s Defender, but having everyone supercharged will keep the cycle of constant supers rolling. The Titan’s Ward of Dawn will be your safe zone during the phases where you tear up Oryx, and other Supers will help with the constant influx of adds as well as keeping orbs littering the ground.
Once that is done, it’s time to focus on the arena itself. There are four pillars in each of the corners of the arena, you’re going to want to clear the enemies off of these to begin the damage phase for Oryx.
Platform Phase – Oryx will slam his fist down on one of the platforms nearest to him. This will spawn two things: a Dark Orb and a Relic. Players will need to step onto the platforms in a counter-clockwise order with the Dark Orb being the starting point (just like during the Deathsingers encounter). You will need four players to do this since there are four platforms. Once on the platform, be ready to take out the Major Ogres that spawn. Take them out as quickly as possible without leaving your platforms; if you do, then everything is messed up.
Quickly kill the Ogres and wait for one of your teammates to grab the relic. Then and only then can everyone get off of the platforms. The relic holder will use it on the Knight that spawns in the center. Quickly kill this Knight and the relic holder will now be able to use the Knight’s shield which grants the Aura of Immortality making Guardians completely invulnerable to attacks, but no effects.
Once the shield, is obtained hold down the center of the map and pump as many rounds into Oryx as possible. You need to remove about 20% of his health to cause him to stagger. At this point run back to where you killed that Ogre from before count to three and all four players jump into the orb and wait. A notification on the bottom right of the screen will state that you have detonated a Corrupted Light. Head back to the shield from before and use this opportunity to do even more damage to Oryx.
After a few seconds, those orbs will explode doing a massive amount of damage to The Taken King (approximately 25%). It’s time for the next phase.
Run For Your Life – This part is a bit tricky. You will have to split up and find an area where you can run in a circle alone without crossing the paths of your fireteam members. A light will chase you while constantly exploding. This is pretty scary but as long as you’re constantly sprinting you will take no damage.
Afterwards repeat the same strategy from before with zero change. The mechanics for this final fight will now change, so be ready for a very tough fight.
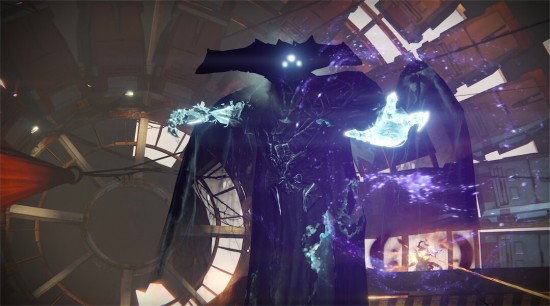
The Darkness Dimension- Oryx will now summon this huge dark orb that you need to protect. If enemies get to it, they will join you in the next section which will just make things incredibly difficult. One by one, Oryx will pull your teammates into the Darkness Dimension where the Shade of Oryx dwells. This is just like when you fought Oryx in the story, so watch the outside of the mist where he will be quickly moving around. Be careful, though, since he can charge into the center with a heavy sword attack that can one hit most Guardians. As soon as the first person gets in start doing damage to the Shade, with everyone joining in as soon as they spawn in.
You have to kill the Shade of Oryx relatively quickly or else the entire team will wipe (and ain’t nobody got time for that).
Repeat the Steps – The Relic phase will repeat again, followed by the Darkness Dimension phase two more times. Follow the same steps as above and you’ll be ready for the very last step.
Oryx will go down and it will seem like you have won, use these few seconds to reload absolutely everything. Oryx will pop up one last time on the side and open up his chest. This is the last stretch and you must kill him now or have to do the entire fight again.
Oryx The Taken King is now defeated and you have triumphed over the King’s Fall raid. Rejoice Guardian; the light has prevailed for now, but remain ever vigilant and continue your legend. Describe your victory or hardships in the comments below! And for more Destiny: The Taken King guides, tips, and tricks, check out our wiki!


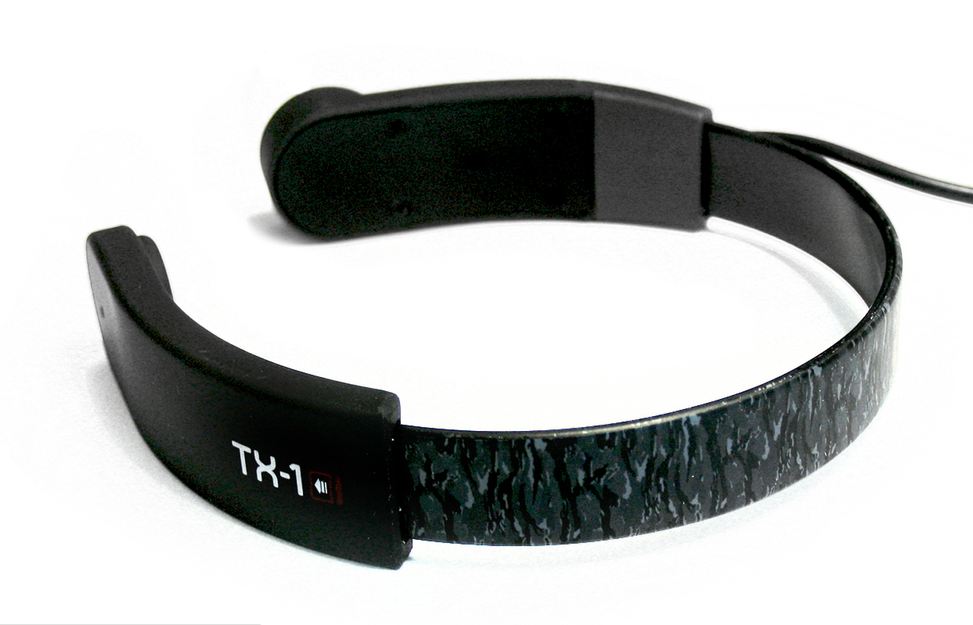 Review: TX-1 Throat Mic
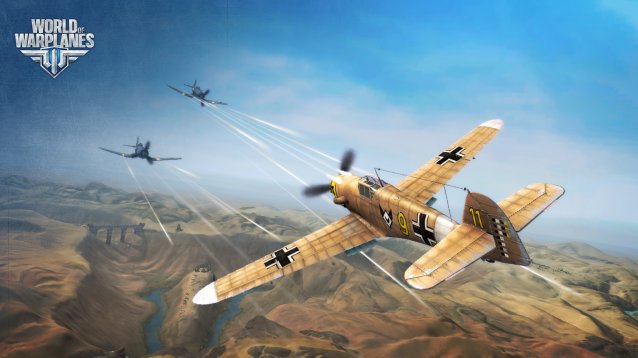 World of Warplanes 1.0 Review: Vanilla Ice Cream
 How to Unlock Rad Steez, Bro! Achievement in The Witcher 3 DLC Hearts of Stone
 Master Chief Collection Guide: How To Beat the Par Time and Score on Every Level in Halo 2
 What Other Major Websites Can Learn from Moonfruit's DDoS Attack