Unofficial Tom Clancy's HAWX 2 Guide by vhayste for
HAWX 2 is the second installment of Tom Clancy/ Ubisoft's air combat simulation. The game features 28 real-life planes and takes players to a 20-mission campaign/story mode. The game not only allows the player to take control of these aircraft, but will also take them behind the controls of recon/attack drones and in the gunner seat of an AC-130 attack plane. Like the previous version, OFF mode is still available and functions the same thing as the first installment. Crenshaw, the main pilot in the original HAWX will also make an appearance, as your mission operator. Experience System The good thing about this game is that you keep the experience you've earned if you reload a checkpoint after crashing, getting shot down or by reloading deliberately. This feature can be exploited to "farm" experience in a specific mission's phase. Just be reminded not to restart the game or all the accumulated exp points will be reverted back to zero. Plane Mastery Customizing Weapon Packs When customizing weapon packs, you should consider taking weapons suited for the plane. Usually, heat seeking missiles (HSMs) should be part of every plane as it will allow you to deal with air targets. Just play with various combinations then test them in the field to find what fits your style.

The Basics
The game also features an experience system which awards a player with a token that can be used to unlock passive skills, support skills for multiplayer games and of course, planes. Experience is earned by destroying targets, completing objectives and meeting challenges. You can check out these challenges in the game's main menu. See the P.E.C Challenges section of this guide for more details.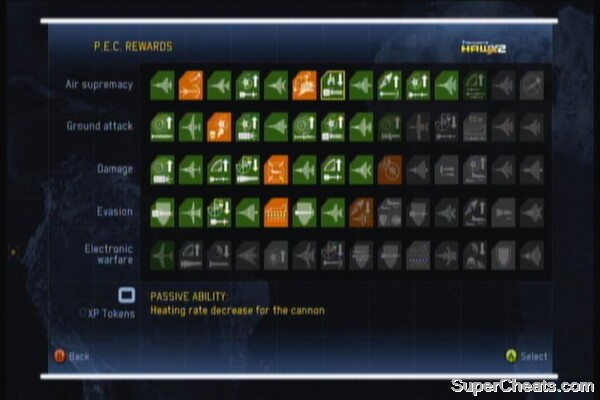
Not only the player earns exp but the unlocked planes as well. Unlocked planes start with a default weapon loadout and skin. Using those planes in missions will allow it to earn experience as well which will unlock various additional bonuses like enhanced abilities, weapon packs, skins and the ability to customize its weapon pack. Every plane has their own set of mastery skills and all of them can only be raised up to LV6. These enhanced abilities can stack with the passive skills unlocked through P.E.C rewards. 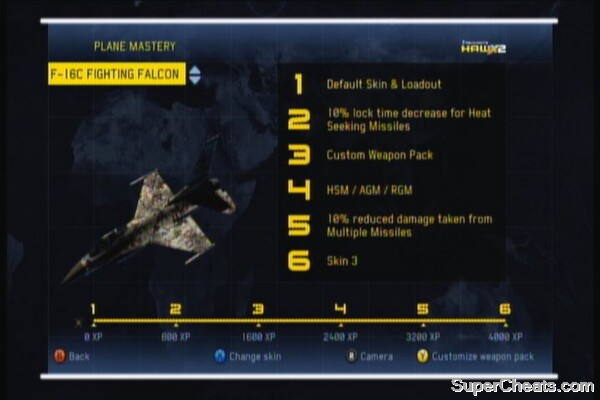
The ability to customize a plane's weapon loadout is one of the best perks you can get by mastering a plane. This will allow you to arm your plane with the weapons of your choice. You can attach up to 3 different weapons, as long as your plane's payload is capable of carrying them all.
OFF Mode
If you have played the previous installment of the game, then you're already familiar with this unique yet helpful system. OFF mode will remove the plane's limiter and unlock its full potential. You'll have full view of the plane and it will be capable of pulling off those impossibly tight manuevers, as well as increased weapons accuracy. It may take a bit of practice to master it but it is an invaluable tool against the enemy aces later in the game. Activate/ Deactivate OFF mode by double-tapping RT or LT.
Off Mode
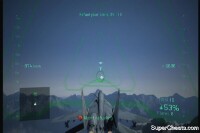
Before flying, you'll need to carefully taxi your plane to the runway. Just push RT a little to accelerate but not too hard to avoid collision. Carefully taxi to the runway and wait for your clearance to take off. Accelerate hard until you reach the required speed and pitch up to take off.
Taxi
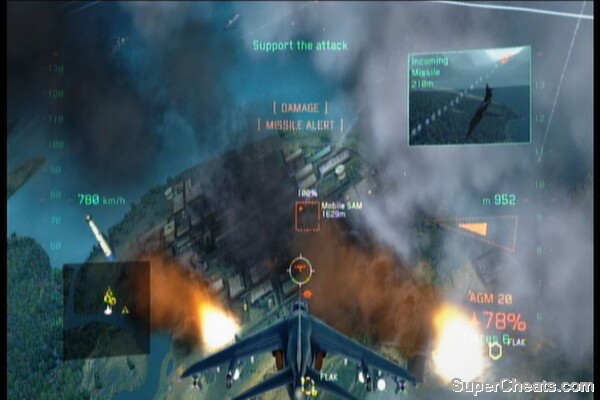
Once airborne, follow the instructions and fly over the designated areas. After flying under the bridge, you'll get a notification about a suspicious convoy in the nearby village. Head there and you'll get your weapons free. You're not carrying missiles here but some form of grenade launcher. Just approach the settlement slowly and maintain your speed. After the allied chopper gets shot down, you'll be weapons free. Enter precision mode by pressing A and take care of the enemies from your altitude. The explosion has a destructive radius so as long as you target the center of the hostile groups, you should be able to destroy them all in one run.
Bombing Run
Lt. Colin Munro
Callsign: Polaris 4
Aircraft: Eurofighter Typhoon
Weapon loadout: Heat Seeking Missile x100, Flares x12
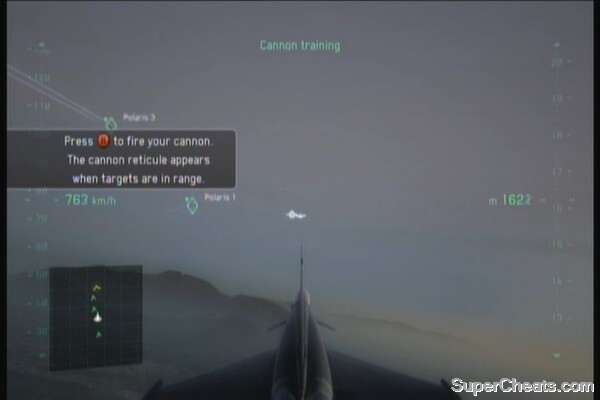
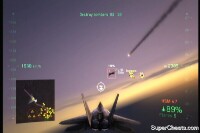
After taking off, join the other polaris unit and stick close to them until your first task. For your first task, you need to engage and attack the AWACs then Polaris 1. After getting cleared for the current training segment, you'll then need to use your missiles. Engage and shoot down the targets. Make sure that you release the missiles once the reticule turns red. After clearing this segment, fly to the next training area.
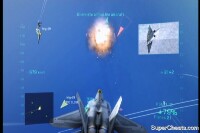
In this segment, you'll learn the basic defensive manuevers. Make sure to learn them by heart as you'll need them in the upcoming missions. First training is flare deployment. Evade three missiles using flares to clear this lesson.
Flares
Next, you'll need to evade the missiles using evasive manuevers. Just make a sharp turn by braking hard and pitching in any direction. Kick the afterburners as you exit the turn to prevent your plane from stalling and to recover.
Evasive Manuevers
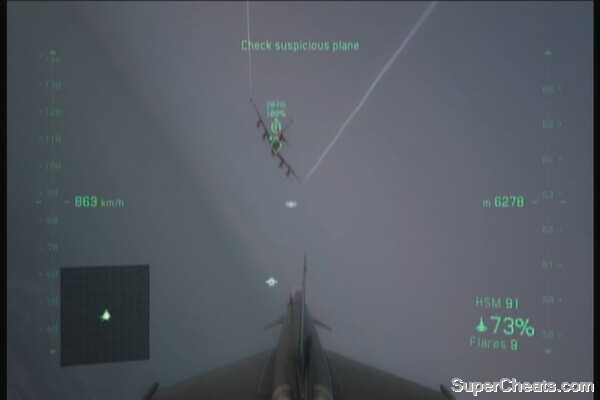
Once done with those two, fly to the dogfighting area. Put all the offensive and defensive manuevers you've learned moments ago and take out the assigned targets. After getting evaluated, fly to the next training area. A civilian aircraft will enter the area and you'll be asked to do a visual inspection. Approach the aircraft and watch the scene.
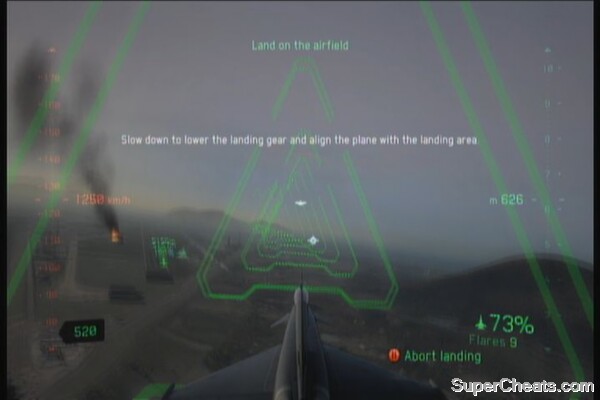
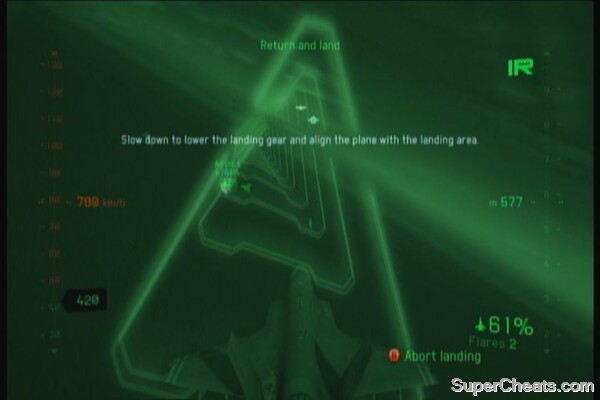
After the explosion, your plane will be stalled. Pitch up and hit the afterburners to recover from the freefall. Finally, you'll need to land your plane. You can turn on the assistance if you want. Slowly approach the landing field then lower the landing gear when you're prompted to do so. Carefully descend and reduce speed. Once your tires touches the ground, hit the brakes hard to stop the plane. If the angle of your landing is way off, fine tune your direction using the yaw buttons (RB/LB).
Mission 3 – The Prisoner
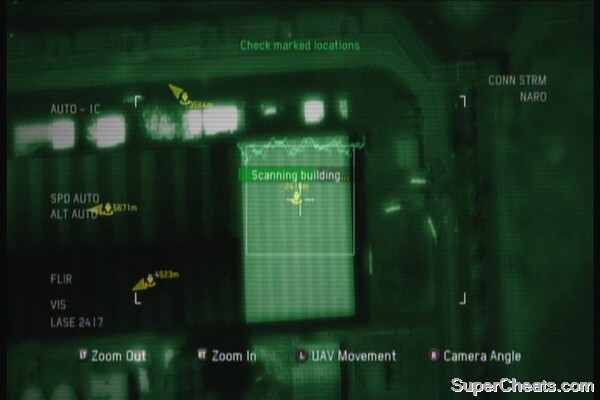
You need to take control of the drone. Just scan the marked targets as instructed. After finding the building where Crenshaw is held, the mission is completed.
Captain Dimitri Sukov
Callsign: Fighter 808
Aircraft: Mig-29 Fulcrum
Weapon loadout: Heat Seeking Missile x36, Flares x2
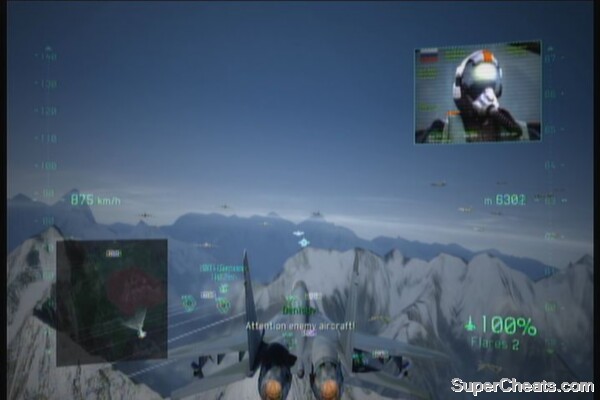
Maintain formation and wait until your squadron intercepts the large group of rogue aircraft. After a few moments, your formation will be broken by enemy ambush. This is the perfect time to try OFF mode to familiarize yourself with the system. Take out the enemy targets, starting with the enemy fighters and any nearby bombers/tankers. Your squadron will do a good job bagging the bandits and shooting down the larger aircraft so don't hesitate to take out as many as you can as well.
Dog fight OFF
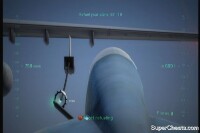
After getting rid of the last target, you'll need to refuel your plane. Wait for the signal and turn on the assisted approach if you need. After passing through the green circle at the end of the assisted approach, you need to manually connect your plane's fuel nozzle to the tanker. You need to increase your speed gradually and carefully attach your plane's nozzle to the other end of the tanker's fuel transfer cable.
After refueling, enemy bogeys will appear from behind. Engage and destroy them to protect your retreating allies. The enemies will be flying near the mountains so it will be a bit treacherous. They'll also tend to use flares regularly, making it harder to hit them with missiles. You need to get close and shoot them down with your cannon. Shoot down all targets to complete the mission.
For this mission, you'll be thrown behind the gunnery seat of an AC-130 plane. Modern Warfare players should be familiar already with this setting. In any case, keep an eye out of the AA guns on the ground. You have three weapons at your disposal so make sure you switch in between them to maximize your efficiency. They're not immediately distinguishable on the ground so watch out for those targets on the ground that'll fire at you or the transport plane.
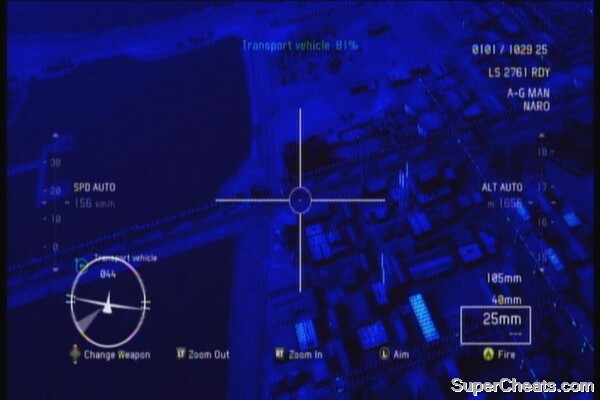
After the rescue unit lands, enemy personnel will start pouring in. Zoom in and destroy them before they even reach the rescue team's perimeter. The Ghost Team will then move using a transport vehicle. Your task now is to take out any enemy that will be attacking the team. Take note that there's no civilians here to watch out for; if you see anything moving, shoot it. Take note that you'll have limited ammo except for the vulcan cannon so use them sparingly. Continue protecting the enemy transport until they reach the transport ship. It will be to your advantage to zoom out to check enemy positions then zoom in to land your shots accurately. Don't fire too close to the team or you risk damaging them.
The Rescue
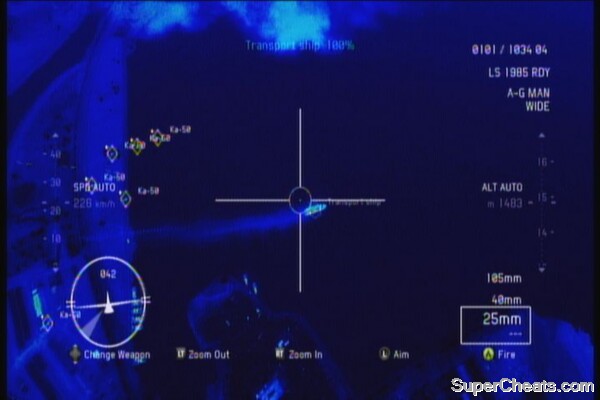
Once the team reaches the transport ship, two squadrons of attack helicopters will appear from the lower left and upper left of the area. Shoot them down at a distance then take care of the enemy ships that will appear from the north. Continue providing cover fire until they reach the USS Marshall. Enemy helicopters and ships will throw everything to the fleeing team. Use your cannon to take out the helos and your artillery shells to take out the ships. Don't rely on the reticule too much; make appropriate adjustments since they are moving targets and you're in a moving plane as well.
Major Alex Hunter
Callsign: Viper 2-1
Aircraft: FA-18E Superhornet
Weapon loadout: Heat Seeking Missile x48, x4 Anti-Ground Missiles, Flares x4
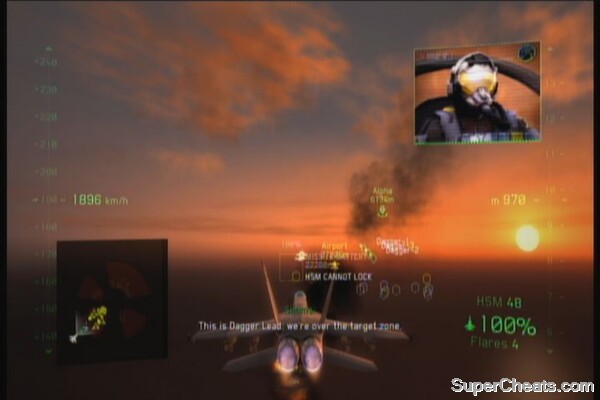
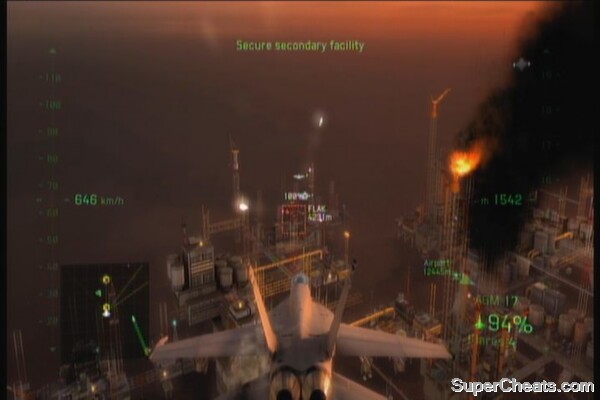
After taking off from the carrier, go to full thrusters and meet up with Dagger flight. As you get near the mission area, switch to your AGMs and destroy the ground targets. Take out the missile batteries, ships and helos as you approach the area. The enemy resistance is quite fierce during this initial stage so its crucial to destroy as much target as possible – as quickly as possible.
After securing the area, you should be able to land on the airstrip to repair, refuel and rearm your plane. Make sure to take out as much targets as you can and exhaust your ordnance before resupplying. Take out as much enemies as you can; concentrate on taking out the ground targets first then go after the enemy fighters to earn as much points (EXP).
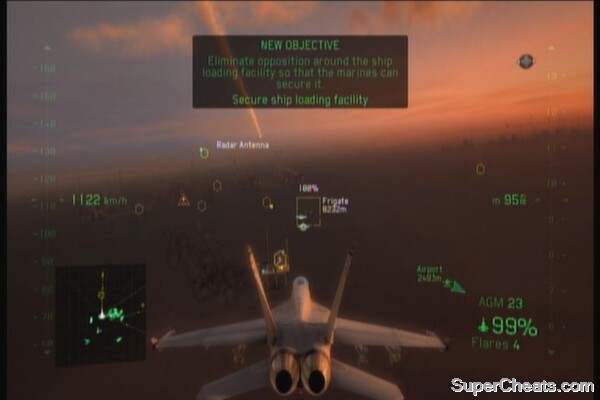
Clear the targets on the two oil stations on both sides. After taking out the main targets, you'll now attack the main oil depot. It is advisable to resupply now; otherwise, just join the fray and destroy the ground-based AA defenses first. Enemy bogeys will be flying in between the platforms so be careful when you're pursuing them since the chances of crashing in any of the platforms is quite high.
This is yet another UAV recon mission. Just check out the points of interests as instructed by your mission lead. You need to plant air strobes on the marked targets. After planting the strobe on the first target, keep and eye on Wolfhound's car. It should be easy since his vehicle is blinking. Once he stops, wait for the next objective. You need to track the target's car and keep it in your reticule to track the calls he's made.
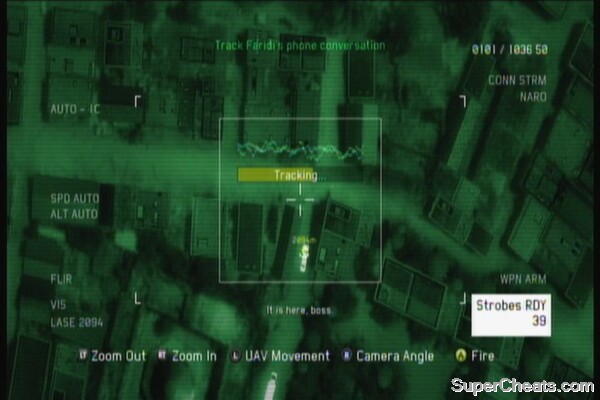
After recording the call, plant another strobe on another building as marked in your map then track Faridi's car again. His car will be temorarily covered by a nearby smokescreen. It will turn north so make sure to adjust your sights so you won't lose his signal. Keep tracking him until you fill up the gauge. Keep doing this until Wolfhound disembarks from his vehicle and attacks the target.
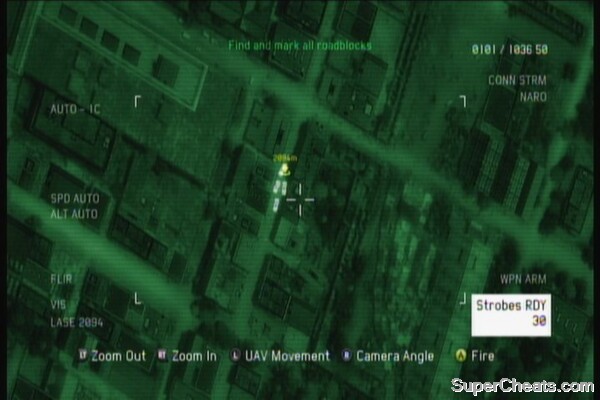
Next, you'll need to mark the roadblocks in the area. The first one will be marked but for the others, you need to find them manually by scanning the major roads. It will be easier to find them by maximizing your zoom. After marking all the roadblocks, the mission is completed.
Major Alex Hunter
Callsign: Reaper 1-1
Aircraft: F35 Lightning II
Weapon loadout: x4 Precision Bomb (40), Flares 4
You need to switch on your nightvision before you can take off. Press left or right then press A to switch it on. Once airborne, climb up to 15,000ft or 5,000m. The first set of targets will be marked. The precision bombs you're carrying won't activate or lock if its below 15000ft. While in that altitude, enter precision mode and start your bomb run. Don't forget that you can zoom in and deliver your ordnance right on target. Destroy the first set of marked targets.
Seek and Destroy
Next you need to take out the enemy helo. You don't have HSMs so you'll need to get close and use your cannon to take it out. After shooting it down, proceed to the next objective marker. Make sure to return to 15000ft to avoid the barrage of AA fire.
After destroying the next set of marked buildings and warehouses, you'll need to take out a couple of enemy helos near ground level. Fly it and take them out fast; otherwise, there's a risk of getting ripped by enemy AA fire. Take care of the occasional missiles that will track and lock you.
Next, you'll need to take out targets in an airport. Take out the fighters taxiing up the runway since they'll be airborne if you don't. Take out the parked aircraft next. If the fighters do get airborne, you have no choice but to deal with them using your cannons. When that happens, prepare to engage the fighters and fight below 5000m, near the barrage of AA fire. Take out all marked targets to proceed to the next phase of the mission.
Finally, you need to take out the target vehicles. You need to adjust your aim a little since they're moving targets. The bomb's large detonation area should also help destroy these vehicles. You won't be able to fire your bombs unless there's no risk of collateral damage so be patient and release your weapons as soon as you get a clean shot.
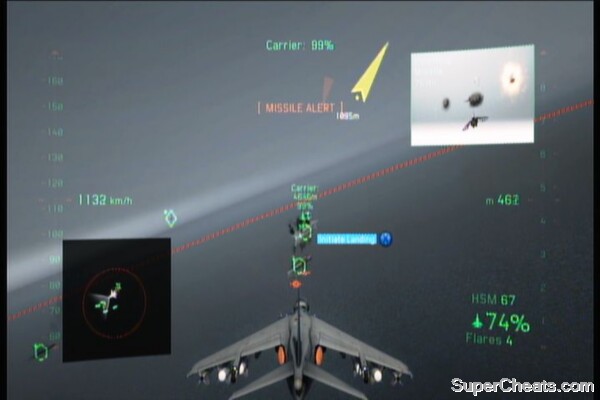
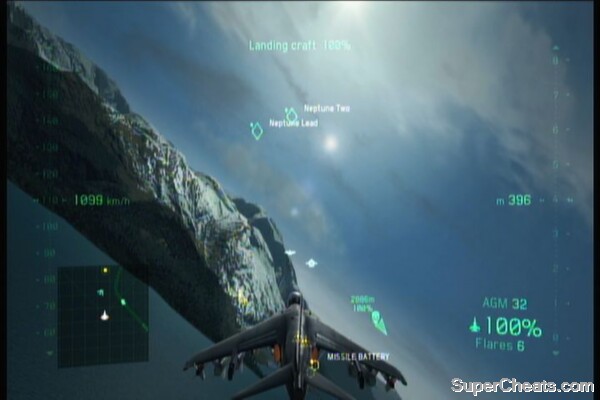
Finally, you'll need to land at the carrier. Turn on assistance if you want. Like before, approach the carrier and make sure you have lowered your landing gear. Align your level and slow down to the preferable speed to touch down and complete the mission.
Major Alex Hunter
Callsign: Firebird 1-5
Aircraft: F-15C Eagle
Weapon loadout: HSM (36), Multiple Missiles (24), Flares (3)
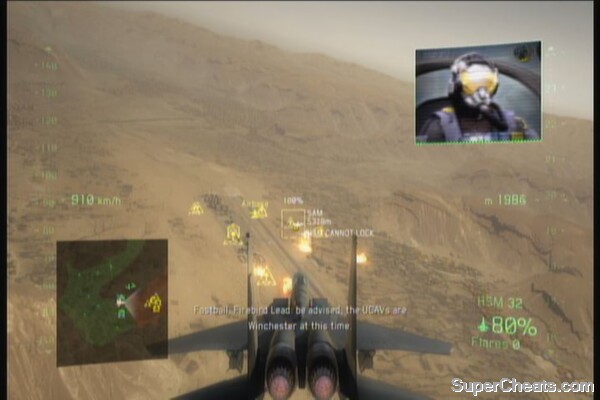
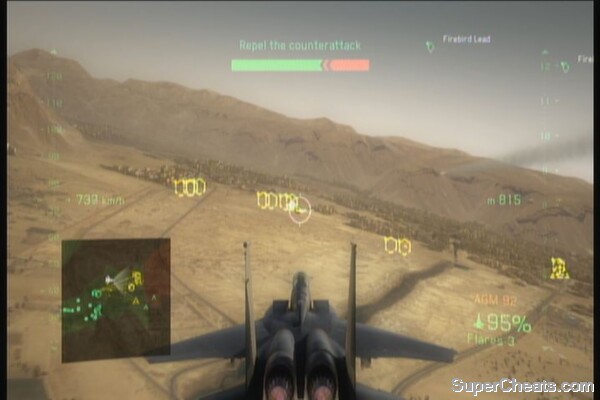
You'll need to fly low to perform a suprise attack to the insurgents. Follow your squadron and fly through the winding valley until you reach the mission marker. The first set of targets will become visible here. Take them out then more enemy ground targets will be marked. Use the UACV to destroy the targets. Belieive it or not, you're using an attacker-type plane with NO anti-ground weapons/ordnance.
After destroying the intial wave of ground targets, you'll need to take out the enemy bogeys from a nearby airport. Clearing them will allow you to use your UACVs again – but only for a limited time. Destroy as much enemies as you can before time runs out. If that happens, new wave of enemies bogeys will appear. Your ability to use the UACV will be disabled until the bogeys are destroyed. Remember that you must eliminate all bogeys at the soonest time possible otherwise your ground team will suffer tremendous losses. You also need to make sure that your UACV rockets hit the targets or at least very close to them. Otherwise you'll need to repeat the whole process of clearing the skies first before you can use your UACV. Once the assault team breaks through the enemy defenses, wait for a few minutes as they take out the last few remaining targets.
Land your plane to repair and resupply. Thankfully this time, you'll be given with purely anti-ground ordnance. Take off and head to your next objective. This time, you'll need to take out ground forces. Your AGMs and Cluster Bombs are powerful enough to take out several targets in close proximity so make sure to target the ones in the middle of the group. As for cluster bombs, don't bomb too close or you'll also get damage from the explosion.
Major Alex Hunter
Callsign: Firebird 1-5
Aircraft: A-10 Thunderbolt
Weapon loadout: Rocket Pod (100), 4x Stand-off Missile (20), Flares (5)
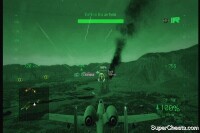
Switch to nightvision then take off. Approach the objective area and stay within the jammers' effective range to avoid getting hit by SAMs. However, you can't stop the flaks and AA guns from targeting you. The jammers will keep moving so move along with them to stay in their protective range. Otherwise, all enemy fire will be drawn towards you. Continue destroying the power plants. Take note that destroying the power plants will also disable the surrounding AA defenses.

This time enemy fighters will attack one of your EW planes. You must select your Wingman and order it to attack the target once its in range.
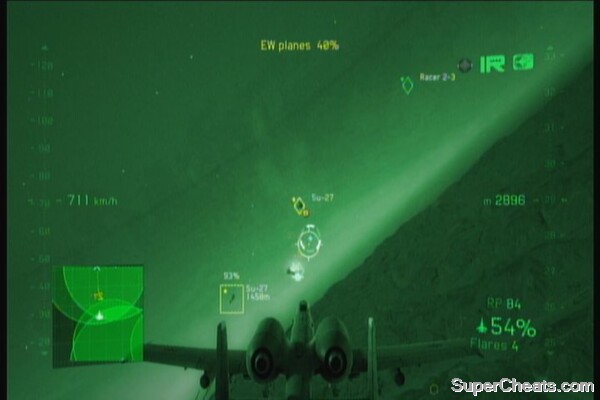
After rescuing the EW plane, continue taking out ground targets. You can control the trajectory of your secondary weapon so use it to take out targets that are outside the jammer range. After destroying the last power station, head back to the base as fast as you can. Enemy forces will start attacking it and you'll need to defend it for a set time. Just keep warding off the enemy ground forces. Your rocket pods should be able to take them out as long as you aim for the center of their formations. After getting rid of the advancing enemy units, wait for a few seconds and the allied reinforcements will appear. Select your targets and order your Wingman to attack them. After taking out the last enemy fighters, land of the airfield to complete the mission.
Major Alex Hunter
Callsign: Firebird 1-5
Aircraft: F-16C Fighting Falcon
Weapon loadout: HSM (40), AGM (20), Radar Guided Missiles (16), Flares x4
For the first part, take out all the enemy targets that needs to be taken care of. Prioritize taking out enemy aircraft since they'll give you a hard time dealing with the ground reinforcements that will appear later on. After a few minutes, long range mobile batteries will be moved into place. You'll have a problem taking them out if you have several fighters on your tail so make sure to use your AGMs to get rid of them quickly. Take note also that you need to support both the AC-130 group and the ground assault team for this operation to succeed.

After taking out the enemy long-range units, take out the fighters surrounding the AC-130 group to help them. The fighters will concentrate on the AC-130 so make sure to use your RGMs to take them out from a distance. Your AC-130 group should not have below 30% of their force when this phase triggers; otherwise, you'll be forced to restart the game and make sure that they don't get too damaged from the initial wave of enemy fighters. This is the toughest part of this mission since the AC-130s are easy prey. If your plane is not that badly damaged, you may want to endure a few missile hits if that means you can take out the enemy in front of you. Just make it a habit to release missiles once you get a clean lock.
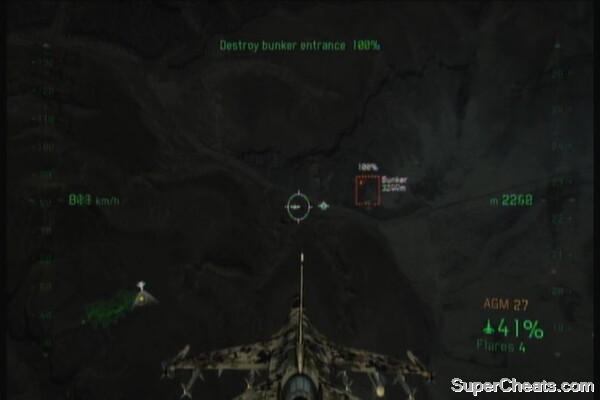
Finally, you'll need to destroy the bunker. Approach it and release your AGMs to destroy it. Land on the airfield to complete the mission.
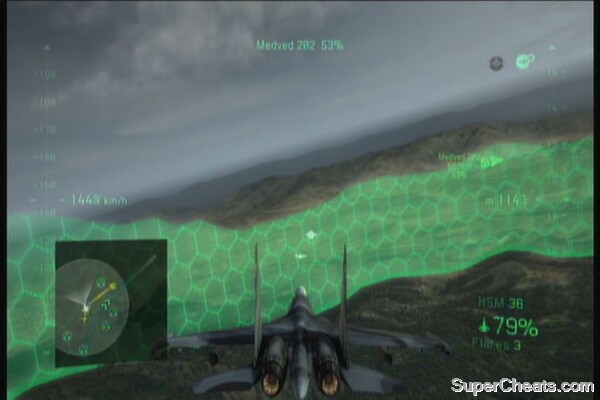
Captain Dmitri Sokov
Callsign: Medved 612
Aircraft: SU-34 Fullback
Weapon loadout: HSM (90), Rocket Pod (60), Flares (5)
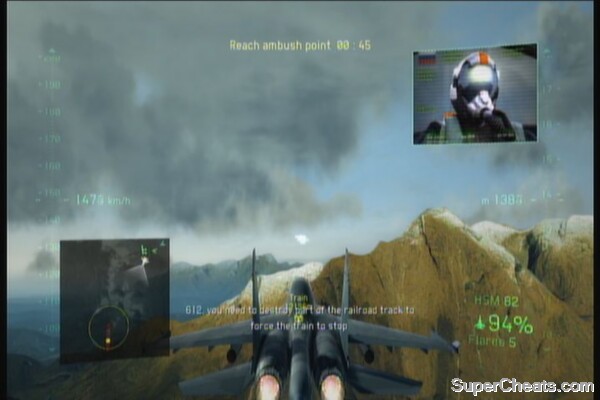
Engage the enemy aircraft and shoot them down. Next, take care of the AA defenses so your transport planes can drop troops safely. After that, head to the ambush point marked in the map, switch to your rocket pods and shoot the railroad track to stop the train. Watch for the following scenes and the next part of the mission will commence.
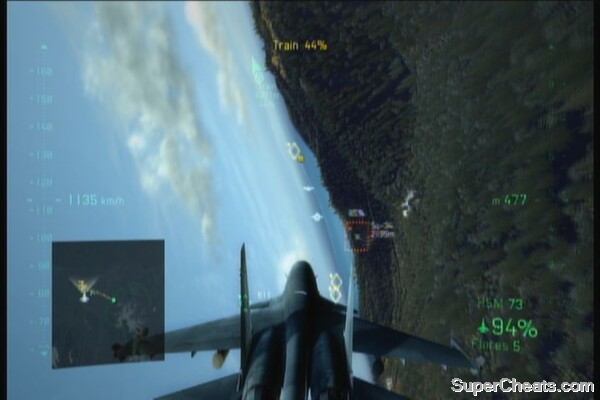
Enemy low altitude intercepters will appear. Like the ones you've faced before, these guys will keep deploying flares, making it hard to shoot them down. You'll need to fly close and use your guns but you also need to be careful of the terrain since the enemy loves to use them. Defend the train from the incoming interceptors and ground forces until it reaches the airfield.
Captain Dmitri Sokov
Callsign: Medved 612
Aircraft: SU-27 Fulcrum
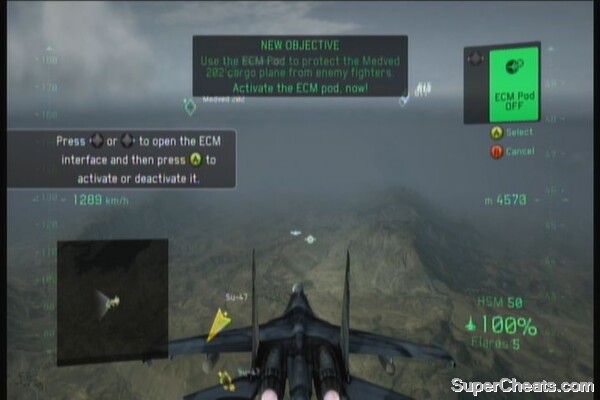
Weapon loadout: HSM, Rocket Pod, ECM Pod (5), Flares (5)
This is an air-to-air escort mission so you'll be fighting your way out of the enemy territory. Engage the first wave and destroy the fighters that you can. After a few minutes, enemy stealth fighters will appear and attack the cargo planes. Activate your ECM pod and keep close proximity to the cargo planes to prevent them from being targeted.
Keep the cargo planes in your jammer range and engage targets. Thankfully, your allies are reliable enough to destroy the enemies, especially the pesky SU-47s. After clearing the wave of fighters, you'll learn that allies have captured ground AA batteries. Lure enemies to these "killzones" to make the battle easier for you. Take care of a few more waves of enemy fighters to end this phase.
Behind Enemy Lines
For the third phase, you need to defend the crashed cargo plane from incoming enemy ground forces. Put your rocket pods to work and make sure to target middle of the enemy formation to get rid of multiple targets at once. You have very limited RP ammo so make sure don't go all the way wasting it. Make sure to save at least 6 of them since you'll need it to destroy the last objective. Keep destroying enemies as you can. Finally, after being almost overwhelmed, you'll get the order to destroy the dam. Shoot all your remaining rockets to destroy the dam and complete the mission.
Note: If you are after grinding exp, this is another great spot to farm for experience. During the last checkpoint, where Dachev says that they're completely surrounded, a long line of enemy ground units will appear. Destroying them will usually yield 180 to 210 experience per group; if you managed to destroy them all, you'll earn you 2000 experience. After using all your ammo, just crash yourself or reload the checkpoint and repeat the process. This is the fastest way to grind for exp though you can't use this mission to master other planes since it doesn't have a custom setting option when replaying it. Thus, only the story mission loadout of the SU-27 can be used. You may want to try this trick using Recruit (Easy)difficulty so you can have more ammo.
Experience: Farming Method
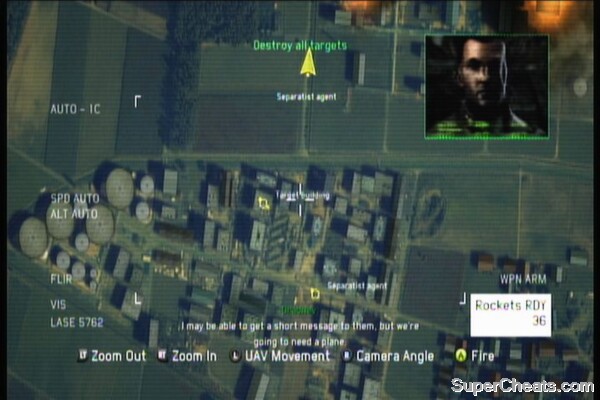
You'll be in control of an armed russian drone. Head to the marked location and zoom in to find the vehicle. Keep your eye on it as it moves around area. It will be the only moving white vehicle so it shouldn't be hard to track it. Keep tracking the target until you get the order to destroy the marked targets. The mission will be completed after taking out all the marked targets.
Your plane is unarmed and you need to take off with a hail of gunfire behind you. Taxi out the runway and take off as fast as you can. Be careful of the enemy vehicles and other obstacles to avoid collision. Once you're airborne, do not fly above the "ceiling" and follow the waypoints marked in your map. This is narrow canyon littered with bridges so make sure to fly carefully.

After clearing out the canyon, your former squadmates will engage you. Since you don't have any weapons, you need to fly defensively until reinforcements arrive. Thankfully, you have a lot of flares and your plane should be capable of pulling off evasive maneuvers you'll need.
After the reinforcements arrive, you'll need to refuel your plane. Head to the target marker and refuel your plane like you did before. After this refueling sequence, the mission will end.
Major Alex Hunter
Callsign: Viper 3-1
Aircraft: Rafale M
Weapon loadout: None
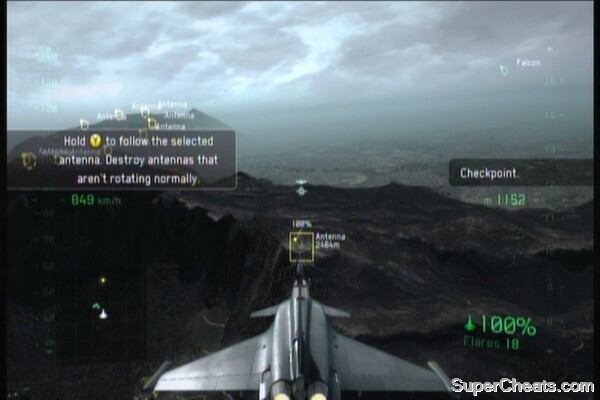
Head to the first mission marker then fly to the mountain. Don't destroy the antennas that are rotating; just the ones pointed at you or is still. You still have your cannon so you need to carefully move in and shoot them. There are only three hacked antennas that you need to take care of. They should be easy to spot. There's a time limit so don't go slacking off.
Next, you'll need to find the mobile jamming helos. Adjust the frequency of your radar bit by bit to spot them. Upon finding them, get rid of them quickly otherwise, they'll just vanish again from your radar. Like before, there is a time limit for this objective so make sure to locate and destroy them quick. These three targets should be flying around the mountain so don't stray that far in search for them.
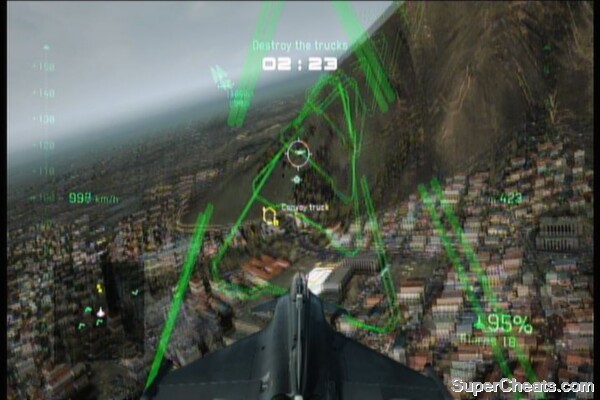
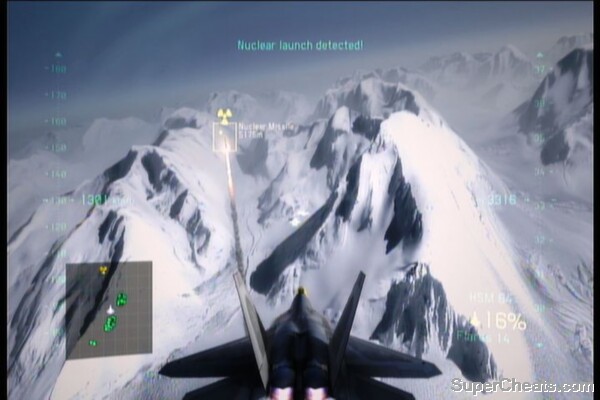
After taking out the helos, regroup with the allied AWACS formation and wait until the convoy is spotted. You need to take out the front and rear escort vehicles to stop the truck. DO NOT by any means attack the truck or you'll risk detonating the nuclear warhead. Approach the targets and activate your assistance for a precision strike. Take your time following the assistance gateways and it will lead you to optimal firing position to take out the trucks.
Lt. Colin Munro
Callsign: Sabre 3
Aircraft: Harrier GR9
Weapon loadout: HSM, AGM, Flares
Engage and take out as many enemy fighters as you can for the initial enemy wave. As soon as the enemy ships appear, switch priority and take them out first. More ships will appear; concentrate on taking them out since they'll deal more damage to the carrier compared to enemy fighters. Continue taking out the enemy ships first; take out a few enemy fighters if they keep bugging you.
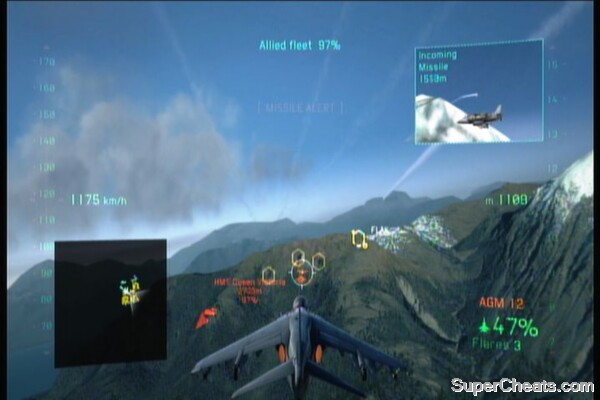
Finally after repelling the waves of enemy ships, an aircraft carrier and a battleship will appear, along with more escort ships and fighters. These two are priority targets since they carry firepower that will certainly put your flagship in danger. Be careful of the ships' mounted SAMs as they can release several missiles at once. A combination of dive bombing and strafing should do the trick, especially for huge targets like them. After destroying the last enemy ship, engage and destroy the remaining enemy fighters to complete this phase.

Don't give a sigh of relief yet; heavy bombers will be approaching from the west. Engage and destroy them before they release their ordnance to the crippling Queen Victoria. After clearing the sky, your plane when ordered to complete the mission.
Lt. Colin Munro
Callsign: Neptune 3
Aircraft: Harrier GR9
Weapon loadout: HSM, AGM, Flares
Start by clearing out enemy patrol ships and ground batteries. Sweep them clean using your AGM and strafe them whenever you can to take them out faster. After taking out all ground targets, enemy fighters will appear from the mountain range. Engage them and eliminate them to complete this phase.
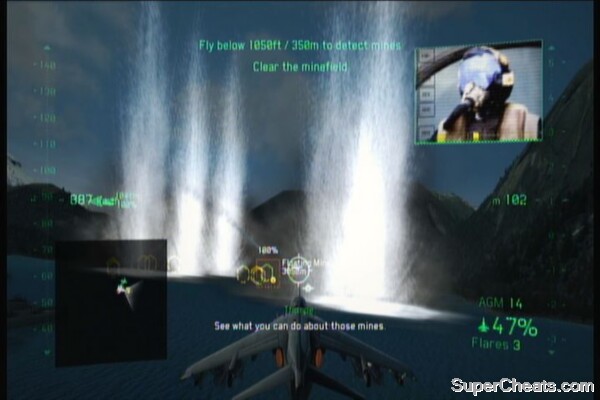
For the second phase, you need to destroy the mines to clear a path for your battlegroup. You can take them out easily using short cannon bursts or just use an AGM in the middle of the minegroups to destroy several of them at once. However, you can only see them when you're flying at around 150 to 350m.
After clearing the mines, you'll have to deal with the heavy gun batteries on the mountainside. You may want to get rid of their AA defenses first then release your ordnance while strafing them to maximize your attack runs. The batteries themselves are sturdy as hell so expect that it will take 2-3 AGMs to take one down. Use quick cannon bursts as you approach the targets to deal more damage.
Finally, approach the unidentified target and recon the enemy base. More enemy targets will appear. This is the final phase of this mission. Take out the ground targets first, as well as the patrol ship and frigate that will appear nearby. After getting rid of the annoyances on the ground, engage the last remaining fighters to complete the mission.
Maj. Alex Hunter
Callsign: Raider 5-5
Aircraft: F-22 Raptor
Weapon loadout: HSM, AGM, Precision Bomb, Flares
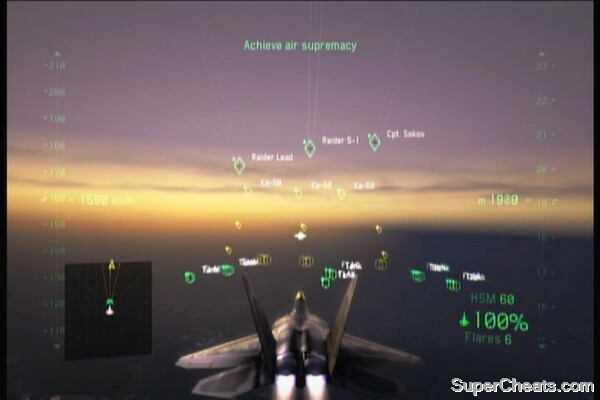
To start off, fly straight ahead and take out enemy forces along the way. Several waves of enemy fighters will appear from the north. Take out as many as you can until all bandits are shot down to achieve air supremacy. You may knock out some enemy ground forces if you want for extra points.
The objective will be updated and you'll need to take repel advancing enemy ground forces next. Concentrate on taking out the tanks and flaks advancing along their projected path. There will be a couple of fighters that will engage you to disrupt your attack runs. Just take care of them quick so you can concentrate on destroying more ground forces. Keep the enemies off the defensive perimeter the best that you can until the mission updates.

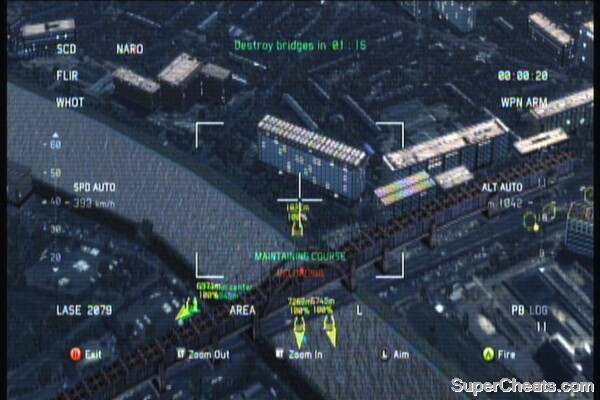
In this part, you'll need to destroy 4 bridges using precision bombs. If you can't remember how to use them, select it as your active weapon, approach the target and when you're near, press A to enter precision mode. Aim at the target and zoom in for better accuracy. Release the bomb in the middle of the bridges to destroy them. You need to bring down all four bridges in 2 minutes time. Don't worry about enemy fighters since your squadron will keep them off you.
Note: This is the part of the mission is also another way to farm EXP. The stream of enemy tanks will keep on coming for the whole two-minute duration so you can easily farm them using bombs. As mentioned earlier in this guide, you'll keep the EXP you've earned even after reloading the chapter. I find UGBs and Precision Missiles most effective in taking out several targets at once.
Next, head to the ERS waypoint and activate your ERS to cut through their AA defenses. It is possible though, to fly through the enemy defenses and bypass the ERS path though you should have several flares left to protect yourself from enemy fire. Once you're past their defenses, hit your afterburners and engage the three bombers. Destroy them all to complete the mission.
Maj. Alex Hunter
Callsign: Striker 3
Aircraft: F-22 Raptor
Weapon loadout: HSM, Precision Missile, Flare
This is it, the final battle. Here you'll need to engage enemy fighters and also provide ground support to your allies. The enemy pilots here are really skilled so it will be a challenge for you to destroy them without using OFF mode. In any case, shoot down as many fighters as you can, then do a bombing run using your precision missiles when you're clear. Make every shot count as more bandits will appear again in a few minutes. When using precision missiles, aim in the middle of the enemy formations for best results. You need to keep repeating this process until your ground forces breaks through the base defenses.
Air Ground Support
For the final part of the mission, you'll need to shoot down all airborne warheads that will launched from the base. To make matters worst, the enemy will be deploying orbital lasers that you must avoid at all costs since it will instantly kill you. Fortunately, the laser beams aren't that large in diameter so you just need to adjust your direction a little to avoid crossing through it. The number of lasers and missiles will increase as this mission nears the end so do you best cris-crossing through the deadly lasers while attempting to shoot down the missiles.
Finally, after taking down all warheads, you'll need to fly low and enter the tunnel to destroy the general's command bunker. Approach it straight from a distance since the passage is narrow. Once inside, try to release short cannon bursts even if the cannon reticule doesn't appear yet. This way, you can destroy the command bunker from a distance and you should be able to go through the tunnel. Watch the ending scenes... congratulations from finishing the game!
Tunnel Run
After the story mission, you can now replay missions using the custom setting. Here, you can bring in planes you've unlocked in your hangar and use them to earn exp and unlock more perks for them. Take note that not all missions have custom setting available.
Upon level up, players earn 1 XP token (2 tokens past LV30). This token can be used to unlock passive skills, support skills or planes. Rewards are divided to five different categories.
Air Supremacy
1.Aircraft: Mig-31 Foxhound (AA: 6/10, AG: 2/10)
2.Support: Guided weapons fired by you won't get affected by enemy flare
3.Aircraft: Mirage F-1 (AA: 6/10, AG: 4/10)
4.Passive: Damage increase for Heat Seeking Missiles (HSM)
5.Aircraft: Mig-29 Fulcrum (AA: 6/10, AG: 4/10)
6.Passive: Your plane can't be locked while it is in stall
7.Passive: Heating rate decrease for the cannon
8.Aircraft: Saab-39 Gripen (AA: 8/10, AG: 6/10)
9.Passive: Speed increase for Radar-Guided Missiles
10.Passive: Damage increase for Joint Strike Missiles
11.Aircraft: SU-27 Flanker (AA: 8/10, AG: 4/10)
12.Passive: Range increase for Multiple Missiles
13.Aircraft: SU-37 Terminator (AA: 9/10, AG: 6/10)
14.Support: Guided weapons fired by your team members won't be affected by enemy flares.
Ground Attack
1.Passive: Area of effect increase for Unguided Bombs (UGB)
2.Aircraft: SU-25 Frogfoot (AA: 1/10, AG: 8/10)
3.Passive: When shot down, your plane provokes massive explosion
4.Passive: Damage increase for rocket pods
5.Aircraft: Mirage IV P (AA: 3/10, AG: 7/10)
6.Passive: Area of effect increase for Precision Bombs
7.Passive: Damage increase for cannon
8.Aircraft: F-2 (AA: 6/10, AG: 6/10)
9.Passive: Area of effect increase for Precision Missiles
10.Aircraft: A-10A Thunderbolt (AA: 4/10, AG: 10/10)
11.Passive: Locking time decrease for Joint Strike Missiles
12.Passive: Your plane can't be tracked while flying close to the ground
13.Aircraft: SU-30MKI (AA: 8/10, AG: 7/10)
14.Aircraft: SU-34 Fullback (AA: 7/10, AG: 8/10)
Damage
1.Passive: Area of effect increase for rocket pods
2.Aircraft: Harrier GR9 (AA: 6/10, AG: 6/10)
3.Passive: Range increase for Joint Strike Missiles
4.Passive: Lock-down decrease for Anti-Ground Missiles
5.Support: Trigger an EMP blast that forces nearby enemy planes to stall.
6.Aircraft: F-16 Fighting Falcon (AA: 7/10, AG: 6/10)
7.Passive: Range increase for Heat Seeking Missiles
8.Aircraft: F-15C Eagle (AA: 7/10, AG: 5/10)
9.Support: No lock warnings sent to enemy team
10.Aircraft: Rafale M (AA: 9/10, AG: 6/10)
11.Support: Spawns repair drones that gradually repair damage for your team
12.Support: Increased damage done by your team
13.Aircraft: SU-35BM Super Flanker (AA: 8/10, AG: 7/10)
14.Aircraft: Eurofighter Typhoon (AA: 9/10, AG: 7/10)
Evasion
1.Passive: Reduced damage from enemy cannon
2.Aircraft: EF-111A Raven (AA: 4/10, AG: 5/10)
3.Passive: Lock time decrease for Heat Seeking Missiles
4.Aircraft: Mirage 2000-5 (AA: 7/10, AG: 6/10)
5.Support: Camouflage yourself in a brief period
6.Passive: Reduced damage taken from Radar-Guided Missiles
7.Aircraft: FA-18E Superhornet (AA: 7/10, AG: 7/10)
8.Support: Decrease the speed of enemy planes for a brief period
9.Support: Jams radar of the enemy team
10.Passive: Reduced damage taken from Heat Seeking Missiles
11.Aircraft: F35 Lightning II (AA: 9/10, AG: 8/10)
12.Passive: Speed increase for your planes
13.Passive: Flares are automatically launched against enemy missiles
14.Aircraft: F22 Raptor (AA: 10/10, AG: 7/10)
Electronic Warfare
1.Aircraft: EA-68 Prowler (AA: 3/10, AG: 6/10)
2.Passive: Lock down decrease for Radar-Guided Missiles
3.Passive: Reloading time decrease for Cluster Bomb units
4.Aircraft: F-117 Nighthawk (AA: 4/10, AG: 7/10)
5.Support: Increase damage done by all your weapons for a brief period
6.Aircraft: F-14A Tomcat (AA: 7/10, AG: 4/10)
7.Passive: Lock time decrease for Multiple Missiles
8.Passive: Reduced damage from Multiple Missiles
9.Passive: Reduced damage from Joint Strike Missiles
10.Support: Camouflage your entire team for a brief period.
11.Aircraft: SU-47 Berkut (AA: 9/10, AG: 7/10)
12.Passive: Decreases cooldown of support abilities
13.Support: Each team member ignores a fixed amount of damage for a brief period
14.Aircraft: Mig-MF1 (1.44) (AA: 9/10, AG: 5/10)
LEVEL 1
Bring'em closer
Destroy 50 air targets using the cannon
450XP
Rain of Steel
Destroy 50 ground targets using the cannon
550XP
Cut the Heat
Destroy 135 air targets using heat seeking missiles
600XP
LocksRus
Destroy 135 air targets using joint strike missiles
600XP
One against Legions
Destroy 150 air targets using multiple missiles
1000XP
Callsign: Sonar
Destroy 150 air targets using radar-guided missiles
1000XP
From high above
Destroy 150 air targets using anti-ground missiles
450XP
Popcorn
Destroy 120 air targets using cluster bomb units
400XP
Let it go
Destroy 120 air targets using unguided bombs
700XP
Bullseye
Destroy 120 air targets using precision bombs
700XP
X Marks the Spot
Destroy 120 air targets using precision missiles
1200XP
Rocketeer
Destroy 50 air targets using the rocket pod
600XP
Old School
Destroy 50 ground targets using the rocket pod
400XP
Iceman
Recover from stall at 10m or lower to the ground
500XP
Unbound
Score 125 kills while flying in OFF mode
750XP
No time to waste
Score 90 enemy kills while your plane travels in Mach 1.5 (1837 kph)
750XP
Go Juice
Refuel your plane in 90 seconds or lower during a single or coop game
250XP
Gotta Go
Perform a ground takeoff on a distance shorter than 600m
250XP
Brake Free
Perform a landing on a ground shorter than 500m
250XP
Bomber Pilot
Score 300 ground skills in story mode
700XP
Fighter Pilot
Score 300 air kills in story mode
700XP
LEVEL 5
Brutality
Inflict 150000 damage to the enemy team
1500XP
Avoidance
Escape a total of 300 missiles
300XP
Greenie Board
Perform a carrier landing without taking any damage
350XP
Perseverant
Score 120 kills in Survival Mode
600XP
Afterburner
Fly faster than Mach 2 for 60 minutes (2451 km/h or 1522 mph )
750XP
More can play this game
Complete a mission in coop mode
350XP
Vertigo
In OFF mode, fly below 20m for 30 seconds without crashing
500XP
Lucky Shot
Destroy 3 ground targets with the cannon while flying in OFF mode
500XP
Teasing
In multiplayer matches, damage and destroy 5 aerial targets using 2 different weapons on each.
500XP
Pain is temporary
Complete a mission on Expert Diffulty
650XP
LEVEL 10
Blind Fire
During multiplayer matches, destroy 5 aerial targets using the cannon in OFF mode.
500XP
Good old days
Hit an enemy plane with a missile without being locked on the target
500XP
Precision Strike
Destroy 10 land or sea targets using ERS for ground attack
300XP
Computed Path
Perform 10 landings without ERS
800XP
No room for error
Refuel your plane 10 times without using ERS
550XP
No restrictions
Spend 60 minutes flying on OFF mode
500XP
Devastating Salvo
Destroy 4 targets with one salvo of multiple missiles in a Team Battle game
900XP
Cratering
Destroy 4 ground units with one UGB
500XP
Obliteration
Destroy 6 targets with one cluster bomb
450XP
Reverse
Fly upside down in an altitude of 40 meters for 120seconds in one mission in story mode
600XP
Jamming
Activate jamming support for your team
300XP
Radar Suppression
Activate camouflage to your teammates
300XP
Damage increase
Increase the damage of your teammates
300XP
Medic
Activate repair drones for your team
300XP
Dragon Punch
Force 2 enemies into stall by using the EMP strike
700
LEVEL 15
Opportunist
Kill 5 stalled enemies in multiplayer matches
500XP
Resourceful
In multiplayer matches, score 2 consecutive kills using the cannon when you're out of missiles
500XP
High Caliber
In multiplayer matches, score 20 kills using the cannon pod
500XP
Team Ace
Win 10 Team Battle games when your team is outnumbered
1000XP
Splash One!
Destroy an enemy air unit using the 105mm cannon in gunship mode
400XP
Micro Management
Destroy 3 enemy ships using the 25mm weapon in gunship mode
350XP
One Man Army
Inflict a total of 75000 damage when playing alone
900XP
No I in Team
Inflict a total of 150000 damage with your team in coop games
1000XP
Frenzy Support
Destroy 12 targets in under 10 seconds in gunship mode
400XP
Martyrdom
Destroy an enemy player using the Exploder upgrade
450XP
Marksman
Shoot down a player with a cannon while your damage has been increased
350XP
Ambush!
Score a kill with the cannon while camouflaged
450XP
Soak it up
Absorb 150 damage using the Damage Absorb ability
550XP
Drone Hunter
Destroy 30 enemy repair drones in multiplayer matches
550XP
LEVEL 20
Nemesis
Shoot down the same player 3 times in a row in a multiplayer match
1500XP
Fast Approach
Score 3 kills using a Radar-guided missile while your plane travels faster than Mach 1.5
1500XP
Serous Business
In multiplayer matches, destroy 10 aerial targets with the rocket pod without being shot down
1500XP
Unstoppable
In survival mode, shoot down 20 targets in 4 waves without being shot down
1500XP
Flight Leader
Win 20 Team Deatchmatch games
1500XP
Room for only one
In multiplayer matches, score 20 kills against planes identical to yours.
1500XP
Immortals
Win 10 Team Battle games without a team member being shot down
1500XP
Clean Sweep
Win 10 Team Battle games without using any flares
Air Supremacy?
Bring down 30 F-22 planes in multiplayer matches while using a different plane.
1500XP
Suvivor
Beat 10 waves in surival mode
1500XP
This section will provide details on how to unlock various achievements in the game. Obvious or self-explanatory achievements will be skipped for your convenience.
Crash test (5G)
Complete the first story mission "Contact" on any difficulty.
Eye in the sky (15G)
Complete the story mission "The Prisoner" on any difficulty.
Ground support (15G)
Complete the story mission "The Rescue" on any difficulty.
Nightvision (15G)
Complete the story mission "Thieves in the Night" on any difficulty.
Red is not dead (40G)
Complete the story mission "Stand-Off" on expert difficulty.
Till the end (50G)
Complete all story missions on any difficulty.
Team play (30G)
Complete any story mission in coop.
No restrictions (40G)
In story mode, fly for 60 minutes in Assistance OFF.
This is the accumulated total of time you spent using OFF mode. If you're using OFF mode frequently, you'll be able to unlock this achievement early.
Peripheral vision (40G)
Fly faster than mach 2 for 60 minutes in story mode.
This is the accumulated total of time you spent flying at speeds not less than 2451 km/h or 1522 mph. You need to do this during the story mode.
Confident (30G)
Perform a carrier landing without using the Assisted Approach.
It may take some practice for new players but this one should be easy. First, you must line up yourself on the deck. Hit the brakes and gradually slow down while slowly descending. Once you've entered the recommended landing speed, press A to lower your landing gear then slowly touch down.
Going tough (50G)
Inflict 4000 damage on enemy players in a single Team Battle game.
Spoils of war (15G)
Win a Team Battle game.
Can I keep it? (15G)
Fully master a plane.
You can wait until you unlock the SU-27 Flanker then use the farming method in Mission 13: Behind Enemy Lines to fully master it or you can keep using an aircraft of your choice until you fully master it.
Hard work pays off (50G)
Fully master 15 planes.
This is best done after your initial playthrough in the story mission. Unlock more planes by using XP Tokens.
The way I like it (15G)
Create a custom weapon pack.
Customizing a weapon will still depend on a plane's mastery level. You can only customize weapon packs in most planes once you've fully maxed their mastery level though there are certain ones (like the F-16C) that allows you to costumize a weapon pack as early as LV3.
Swiss cheese (40G)
Shoot down a player while using a plane equipped with 4 gun pods.
Fly a plane equipped with 4 gun pods and shoot down an opponent using it
Rushed (15G)
Score 3 kills in 15 seconds in Survival mode.
It is easier done by targeting helicopters using Multi missiles.
Still alive (50G)
Complete any of the Survival mode maps.
Resilient (30G)
Complete 5 waves in Survival mode without being shot down.
I, Support (30G)
Use 3 different team support abilities.
Engineer (30G)
Repair 90 hp by using repair drones.
Copycat (50G)
Kill 100 opponents that use the same plane as you in Team Battle games.
Veteran (50G)
Participate in 100 Team Battle games.
Nimble (30G)
Dodge a total of 100 missiles without using flares in Team Battle games.
Nice skill, captain! (30G)
Using a Mig-23, shoot down a player flying an F-22.
You can arrange this with a friend by having him use an F-22 and voluntarily get shot down by your Mig-23
Overpowered (30G)
Score 5 player kills in a Team Battle game without being shot down.
Coup de grace (30G)
Using only the gun, bring down 10 players that have been damaged by your team members.
It doesn't matter how much HP is left on the target; as long as your team mates damaged it and you successfully shot it down using your gun, it will count.
Bad luck (30G)
Reach level 13.
Refer to experience farming trick in Mission 13: Behind the Enemy Line
Maxed (50G)
Reach level 50.
Refer to experience farming trick in Mission 13: Behind the Enemy Line
Getting there (20G)
Purchase 5 different upgrades for all your planes.
Spend your XP tokens to unlock passive and support skills for your planes.
Still counting (30G)
Purchase 5 different team support elements for your planes.
Spend your XP tokens to unlock support skills for your planes.
Who needs them? (30G)
Win 10 Team Battle matches while your team is outnumbered.


 How to do all the Most Wanted Missions in Batman Arkham Knight Part 6
 Review: Homeworld Remastered Collection
 Pokemon Ruby and Sapphire Video Game Cheat
 How to Fix Far Cry 4 Graphics Issues, DirectX Errors, Sound Issues, DLL error, Black Screen / Shadow Issue and more
 Knack Review: Decent Enough