
When an infectious virus was released in Penn Station, it changed Alex Mercer, turning him into a veritable killing machine. Alex has no memory of the events that took place before his transformation, and must use his shape-shifting, mind-delving abilities to piece together the memories of the military personnel surrounding the outbreak—and take revenge on those responsible.
This guide contains a walkthrough covering every mission, including comprehensive strategies for defeating every boss character encountered, as well as maps revealing the location of every Hint and Landmark collectible. You’ll also find tips for earning the coveted Platinum medal in every optional event, and listings of every Xbox 360 achievement and PlayStation 3 trophy.
Note: This guide was written based on the NORMAL difficulty level. The strategies and instructions contained within still apply to other difficulty levels, but enemies deal more damage and have more health on higher difficulty levels. Furthermore, though this guide was written using the Xbox 360 version of the game, everything is still applicable to the PlayStation 3 and PC versions, as they differ only in control scheme.
Xbox 360 Controls
Left Trigger - Hold to target.
Left Bumper - Hold to access Powers Actions wheel.
Right Trigger - Hold to Sprint/Fire (Vehicle)/Primary Fire (Vehicle)
Right Bumper - Hold to access Disguise Powers wheel/Switch Weapon (Vehicle)/Secondary Fire (Vehicle)
Left Stick - Move, Pitch/Roll, Steer/Drive
Right Stick - Camera
Y Button - Special Attack/Hijack Vehicle (tap)
B Button - Grab/Throw, Enter Vehicle/Start Hijack/Exit Vehicle
A Button - Jump/Ascend (helicopter)
X Button - Basic Attack/Fire Gun/Descend (helicopter)
D-pad UP - Offensive Power (Quick Activation)
D-pad DOWN - Defensive Power (Quick Activation)
D-pad RIGHT - Disguise Power (Quick Activation)
D-pad LEFT - Senses Power (Quick Activation)
Back Button - Access Web of Intrigue.
Start Button - Pause.
Hold X Y (Critical Mass) - Groundspike Graveyard Devastator
Hold Y B (Critical Mass) - Tendril Barrage Devastator
In Air X Y (Critical Mass) - Air Groundspike Graveyard Devastator
In Air Y B (Critical Mass) - Air Tendril Barrage Devastator
Hold X B (Critical Mass) - Critical Pain Devastator
In Air X B (Critical Mass) - Air Critical Pain Devastator
PlayStation 3 Controls
L2 Button - Hold to target.
L1 Button - Hold to access Powers Actions wheel.
R2 Button - Hold to Sprint/Fire (Vehicle)/Primary Fire (Vehicle)
R1 Button - Hold to access Disguise Powers wheel/Switch Weapon (Vehicle)/Secondary Fire (Vehicle)
Left Analog Stick - Move, Pitch/Roll, Steer/Drive
Right Analog Stick - Camera
Triangle Button - Special Attack/Hijack Vehicle (tap)
Circle Button - Grab/Throw, Enter Vehicle/Start Hijack/Exit Vehicle
X Button - Jump/Ascend (helicopter)
Square Button - Basic Attack/Descend (helicopter)
D-pad UP - Offensive Power (Quick Activation)
D-pad DOWN - Defensive Power (Quick Activation)
D-pad RIGHT - Disguise Power (Quick Activation)
D-pad LEFT - Senses Power (Quick Activation)
Select Button - Access Web of Intrigue.
Start Button - Pause.
Hold Square Triangle (Critical Mass) - Groundspike Graveyard Devastator
Hold Triangle Circle (Critical Mass) - Tendril Barrage Devastator
In Air Square Triangle (Critical Mass) - Air Groundspike Graveyard Devastator
In Air Triangle Circle (Critical Mass) - Air Tendril Barrage Devastator
Hold Square Circle (Critical Mass) - Critical Pain Devastator
In Air Square Circle (Critical Mass) - Air Critical Pain Devastator
The Web of Intrigue is essentially an intricate side mission; complete it to learn what happened to Alex Mercer. Nearby Web of Intrigue targets will appear on the mini-map, denoted by a red profile icon, and sometimes a blue DNA strain icon during a mission. Some Web of Intrigue targets are tied to objectives in the main storyline, while others are optional and will appear during Free Roam, an unrelated mission, or event.
Whenever the Web of Intrigue icon appears on the mini-map, pursue and Consume the marked character to unlock another node.
Each target that is not associated with a mission spawns in a set area of the city. Consuming a target unlocks more nodes, thus causing more Web of Intrigue targets to spawn around the city. If a Web of Intrigue target spawns and is killed, he will eventually respawn; just return to the area the target appeared at a later time and he should appear again.
There are 131 Web of Intrigue targets total. Several secret achievements and trophies are unlocked through the Web of Intrigue, so pursuing the targets when they appear is definitely worth your while.
Following 'The Wheels of Chance,' bases that contain a Web of Intrigue target and one or more officers that yield an upgrade when consumed will have a plus sign affixed to the Military Base icon on the city map. Be sure to visit these bases between missions as they become available.
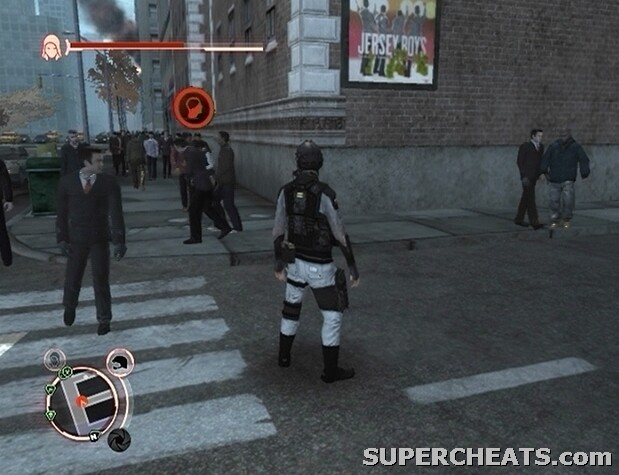
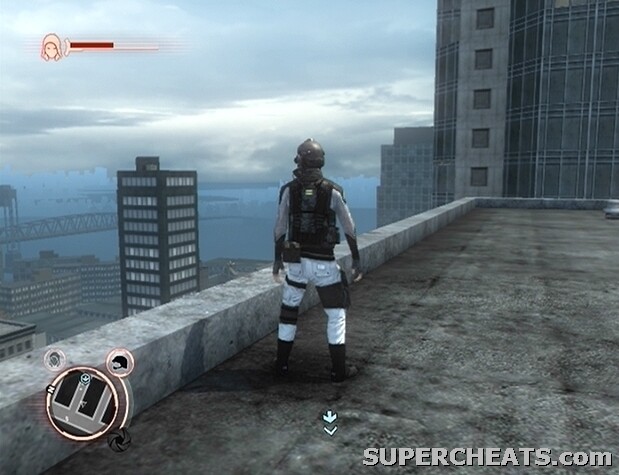
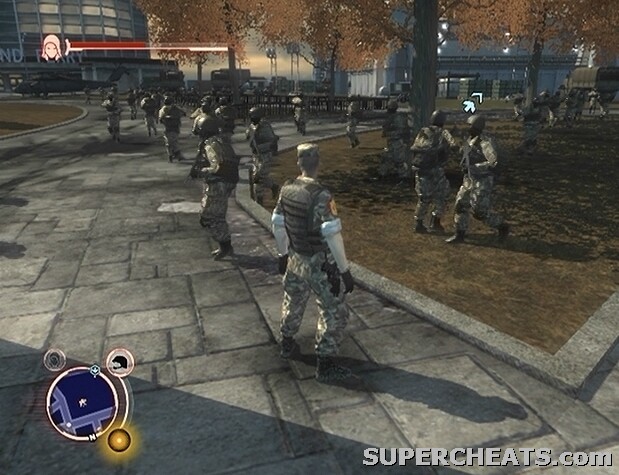
Infiltrating a Military Base is simple. First, you must assume a military disguise to enter the perimeter of the base undetected. If you don't currently have access to a military disguise, try to Stealth Consume one of the soldiers patrolling the streets outside the base.
While disguised, certain actions will fill the meter below the disguise icon. When the meter is completely full, your disguise is compromised, and the military will be set on alert. Performing movement abilities (such as Sprint and Glide) while disguised does not fill the meter, but attacks do, as does having a power equipped. To evade the military once they've been alerted, get out of sight and change to an uncompromised form. Read through the in-game tutorial to learn more.
Once you have a suitable disguise, you'll need to locate the base Commander. The Commander is distinguished by his short-sleeved shirt, fitted military cap, and sunglasses. When you've found the Commander, use Stealth Consume to assume his identity. Then, stand in the yellow marker outside of the base and press the Y/Triangle button to enter. You're in!
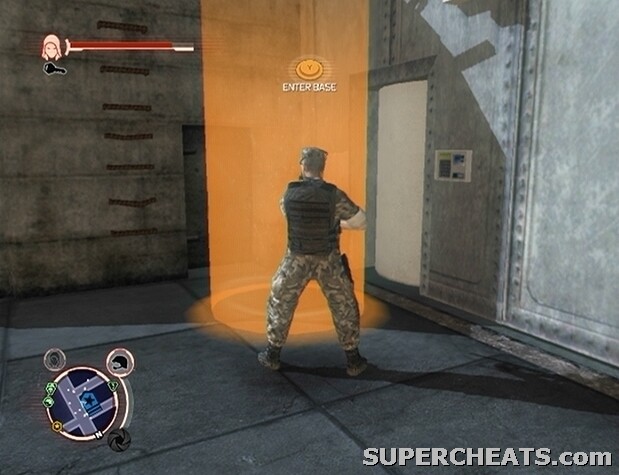
Assume the identity of the base Commander to gain entry to the Military Base undetected.
Once inside, you should notice one or more marked units. Units marked by a blue DNA strain icon yield an upgrade and perhaps a Web of Intrigue node when consumed, while units marked by a red profile icon are Web of Intrigue targets exclusively. You'll want to Stealth Consume these targets before alerting the military to your presence. Follow the target around until they are out of sight of the other soldiers and perform Stealth Consume to acquire the upgrade or Web of Intrigue node. If it helps, try stealth consuming nearby soldiers to ensure that you are not being watched.
You'll receive a Stealth Infiltration and Base Capture EP bonus after consuming each of the marked targets in the base interior. If the military is alerted, the base will be locked down, and you'll be forced to fight the waves of soldiers that come through before you can set back outside. Alternatively, you can easily evade the military to end the alert by ducking behind the munitions crates on the raised platform as Alex Mercer, waiting until your military disguise is safe to use, and then switching back to it.
Consider destroying the Military Base once you have acquired the skills from each marked target, as doing so yields a large amount of EP and will cut down the military presence in the area of the city the base is situated.
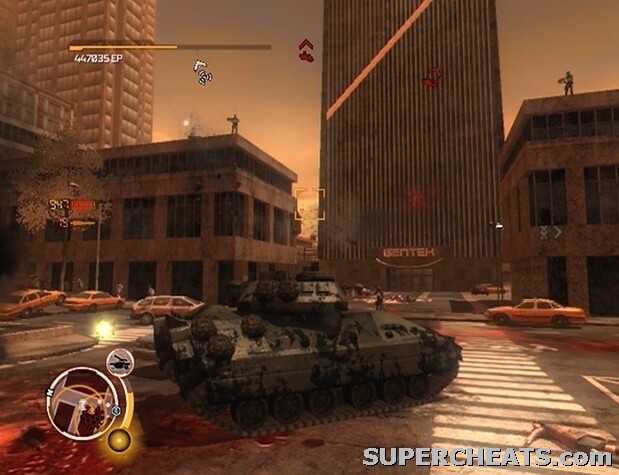
To level the building, you need to damage its exterior considerably. Outside, you'll need to get your hands on a Missile Launcher, or find a tank that can be used to significantly damage the building. Cause a stir to alert the military, and then hijack one of the tanks that arrive. Once in a tank, start by blasting any other manned tank in the perimeter, and then turn your attention to the building. Hit the building with primary and secondary fire until it crumbles.
Infected Hives can be destroyed in much the same way; just hit the Hive with cannon fire until it crumbles. Destroying Hives and infiltrating and destroying Military Bases is a good way to amass EP early on.
Infiltrating bases will become tougher as you progress through the storyline, as the military begins to employ Viral Detectors, UAVs, and turret emplacements. Inside the base, however, security remains the same throughout.
Viral Detectors can see through Alex's disguise, and will alert the military to his presence if he remains within the radius of one for a long enough period. The radius of each Viral Detector is outlined on the mini-map. A Viral Detector won't rat you out immediately; it'll take time for the meter below the disguise icon to fill completely. The longer you stand in the radius of a Viral Detector, the more the meter will fill. Once full, the military will be alerted, and you'll be forced to fight or flee. To avoid alerting the military, just Sprint away from the detector and the meter will slowly empty.
UAVs can make remaining undetected rather difficult, as they tend to follow whatever triggers their detection system. As with Viral Detectors, the detection radius of each UAV is outlined on the mini-map. Avoid standing in the radius of a UAV for too long, as the longer you remain, the more the disguise meter fills.
During 'The Altered World,' Alex gains the ability to sabotage Viral Detectors, and retains this ability afterwards. To begin the sabotage process, approach the detector and press the Y/Triangle button. Then, you have five seconds to input the sequence of buttons that appears onscreen to deactivate it. If you take too long or mess up, the Viral Detector will go off and the military will be alerted to your presence.
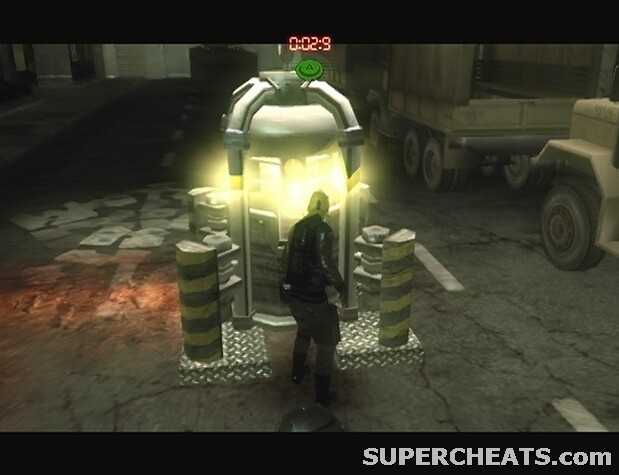
Get close to the Viral Detector and press Y/Triangle to begin the sabotage process. Correctly press the sequence of buttons that appear onscreen before time runs out!
Sabotaging every Viral Detector in the perimeter can take awhile, so rather than using Stealth Consume to acquire the key from the Base Commander, consider just running in there, picking up the Commander with a Sprinting Grab, and then fleeing somewhere safe to Consume him. Then, evade the military, and return to the base with your new disguise. You just need to gain access to the base interior—where there aren't any Viral Detectors or UAVs—undetected.
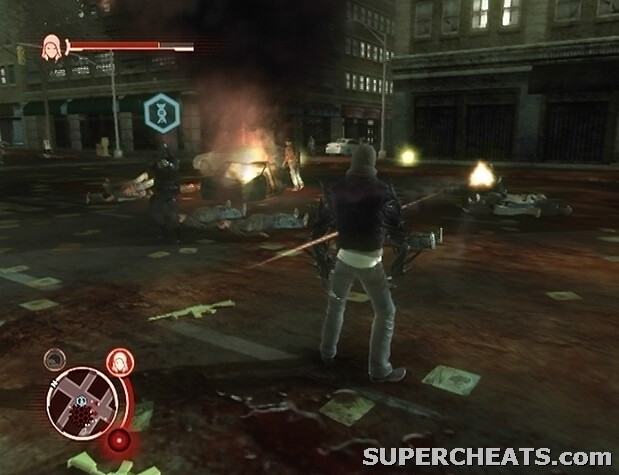
Mission Objective: Kill the Military Personnel
Kill the marked enemies on the mini-map to move on. Use the X and Y buttons on the Xbox 360 and the Square and Circle buttons on the PS3 to punch and kick. Consuming targets replenishes lost health; to perform this move, first grab an enemy with the B button (Xbox 360) or the Circle button (PS3), and then press the Y/Triangle button to consume the hapless target. You can also pick up assault rifles dropped by Blackwatch Soldiers with the B/Circle button. Fire using the X/Square button, hold LT/L2 to lock-on to a target, and flick the Right Thumbstick/Analog Stick to cycle through targets.
Other objects, such as cars and rubble, can be picked up and thrown with the B/Circle button.
Mission Objective: Go to Times Square
Follow the blue marker on the mini-map to reach Times Square. Hold RT/R2 to Sprint.
Mission Objective: Kill the Military Personnel
Kill the marked enemies on the mini-map to move on. Alex is now equipped with the Claws Power; use the X/Square and Y/Triangle buttons to rip through the Blackwatch Soldiers. Hold the Y/Triangle button to perform the Groundspike attack.
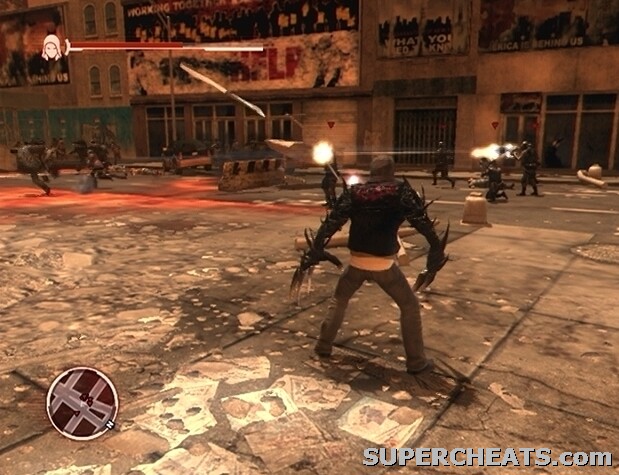
Use the Claws Power to tear through the marked Blackwatch Soldiers in Times Square.
Mission Objective: Continue through Times Square
Follow the marker on the mini-map to trigger the next objective.
Mission Objective: Destroy the Tanks
There are four tanks to destroy in Times Square. Alex is now equipped with the Hammerfist Power. The Elbow Drop attack can be used to effortlessly destroy the enemy tanks; to perform this move, first press the A/X button to jump up into the air, then while in mid-air, lock-on to one of the tanks by holding LT/L2 and press the Y/Triangle button to hit the tank with the attack. Destroy all four tanks to move on to the next objective.
Mission Objective: Continue through Times Square
Follow the marker on the mini-map to the next objective.
Mission Objective: Kill the Hunters
There are five Hunters to kill in Times Square. Alex is now equipped with the Blade Power. Use the X/Square button to perform a basic attack, and then press the Y button to perform Fury Swipes. You can also jump into the air, lock-on to a target, and press the Y/Triagle button to perform the Blade Air Slice attack. With Alex's stats as they are now, taking down the five Hunters should be a snap.
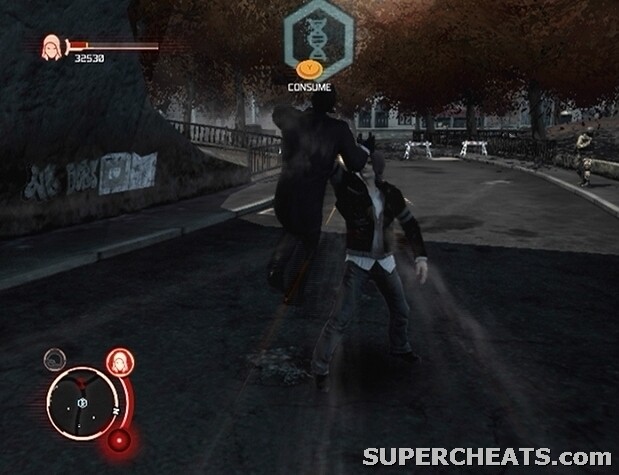
Mission Objective: Consume the Commander
You must not kill the marked Blackwatch Commander by normal means, but consume him. To consume a target, first press the B/Circle button to grab hold of the target, and then press the Y/Triangle button to consume them. Sprint over to the marked Commander at the other end of the square, lock-on, grab him, and consume him to trigger a cutscene.
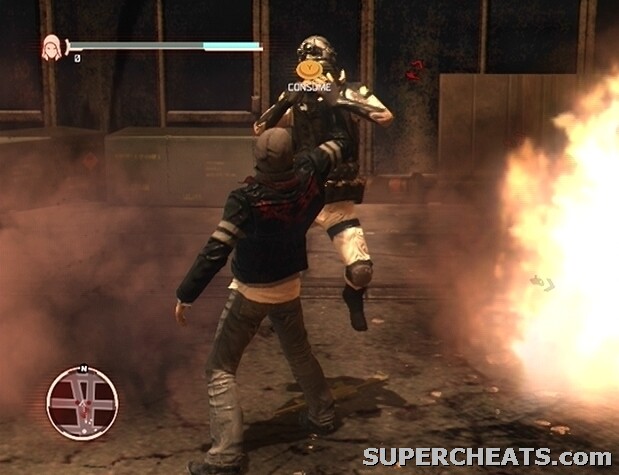
Grab and Consume the marked Blackwatch Commander to complete the mission.
Mission Objective: Escape the Gentek Facility
Sprint over to the marked gate and press the A/X button to hop over. Next, Sprint over to the marker in the distance to trigger a cutscene.
Mission Objective: Deal with the Helicopter
Hold LT/L2 when prompted to lock-on to the helicopter, and, when prompted, press the B button to throw the car that Alex is holding.
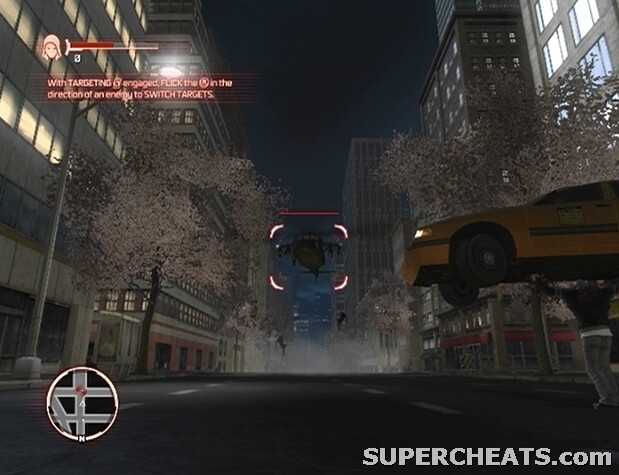
Use the taxi to down the helicopter.
Mission Objective: Get to Higher Ground
Hold RT/R2 to Sprint and connect with the side of the building marked on your mini-map to start wall-running. You can press the A/X button to leap up the side of the building; hold the button and release for a bigger boost. Run up to the top of this building, and then make your way to the top of the second marked building.
Mission Objective: Deal with the Helicopters
Rip up one of the air conditioners on top of the building here by pressing the B/Circle button, then lock-on to one of the helicopters and press the B/Circle button again to throw the object at the helicopter. Destroy both helicopters in this fashion to trigger a cutscene.
Mission Objective: Find out who you are
After the cutscene, grab the Blackwatch Commander when prompted, and press the Y/Triangle button to consume him. The Blackwatch Commander here is Lt. Charles Perri, a Web of Intrigue target. For more information on the Web of Intrigue, refer to the corresponding section of this guide.
After the cutscene, follow the marker on the mini-map to Dana's Apartment. You'll come to a roadblock; make you way to the top of the building across the street and hit the marker there. You'll have to use a disguise to make it past the Blackwatch Soldiers. To switch to a disguise—in this case, the Blackwatch Commander that was consumed in the alley—press Left on the D-Pad. Do not change forms if the shutter below the identity meter is open, as doing so will set the military on alert.
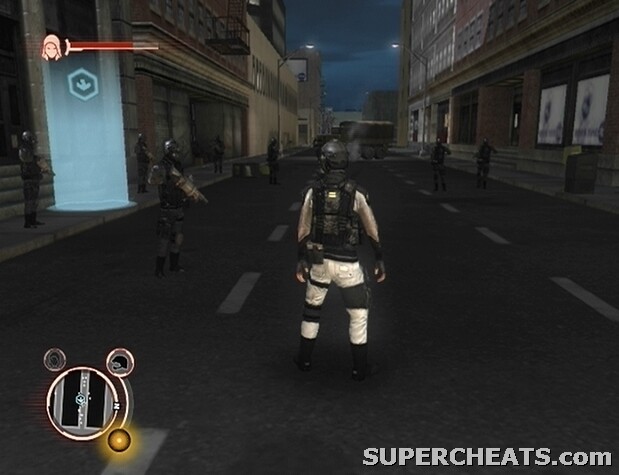
Use a disguise to avoid alerting the military.
While disguised, certain actions will fill the meter below the identity icon. When the meter is completely full, your disguise is compromised, and the military will be set on alert. Performing movement abilities (such as Sprint and Glide) while disguised does not fill the meter, but attacks do, as does having a power equipped. To evade the military once they've been alerted, get out of sight and change to an uncompromised form. Read through the in-game tutorial to learn more.
Stand in the marker outside of Dana's Apartment and press the Y/Triangle button to complete the mission.
Mission Objective: Look for Clues about your Past
Follow the marker to Alex's old apartment to complete the objective and trigger a cutscene.
Mission Objective: Find out who tried to kill you
Soon after you gain control over Alex, a pop-up describing the Strike Team Request system will appear on-screen. Basically, when you spot the Strike Team Request icon (a red circle with radio waves emitting from it) above a soldier's head, get to the soldier and kill him before he can finish the request. Most often, another soldier will pick up the duty immediately after, so the arrival of the Strike Team is almost inevitable while you remain engaged with the military.
If the soldier is able to call the Strike Team, you'll have to either evade or destroy the helicopters that fly in to track you down. Evading the Strike Team can be as simple as running up the side of a building, dropping down to the other side, and changing forms. The Switch prompt indicates the ideal time to change forms, so do so when the prompt appears above the mini-map to successfully evade the military.
Evade or Destroy the Strike Team if the soldier manages to radio in for support.
Next, race to the Extraction Point in Central Park. Get there before the helicopter can land.
Your next task is to destroy the APC in the park. A Missile Launcher can do the job; kill the soldier by the bridge who is wielding one and pick it up with the B/Circle button. Lock-on to the APC and hit it with two missiles to destroy it.
When the APC has been dealt with, Sprint over to the Web of Intrigue target, grab him using the B/Circle button, and consume him by pressing the Y/Triangle button. Watch the memory of Capt. Mac Marshall, and then navigate through the Web of Intrigue lesson.
The Web of Intrigue is essentially an intricate side mission; complete it to learn what happened to Alex Mercer. Nearby Web of Intrigue targets will appear on the mini-map, denoted by a red profile icon, or a blue DNA strain icon during a mission. Some Web of Intrigue targets are tied to objectives in the main storyline, while others are optional and will appear during Free Roam, an unrelated mission, or event.
There are 131 Web of Intrigue targets total. Several secret achievements and trophies are unlocked through the Web of Intrigue. For more information on the Web of Intrigue, refer to the corresponding section of this guide.
Grab and Consume the Web of Intrigue target to complete the objective.
Mission Objective: Evade the Military
Kill all of the military units in Central Park or flee and successfully evade them to complete the objective.
Follow the yellow marker on the mini-map to Dana's Safe House near Times Square. Before you can start this mission, you must purchase the Diveroll manoeuvre via the Upgrades menu. Since you've surely amassed a decent amount of EP by completing the last three missions, now is a good time to purchase some of the more essential upgrades. Start with Diveroll, of course, which is luckily only 100 EP. Once you have Diveroll, consider purchasing Airdash and Glide in the Movement category, the Critical Mass Ability in the Survivability category, and Sprinting Grab in the Combat category. You should have enough EP to purchase all of these.
When you're ready to get started, stand in the yellow marker outside of Dana's Safe House and press the Y/Triangle button to start the mission.
Mission Objective: Rescue Elizabeth Greene
Make your way to the blue marker on top of the building across from the Gentek Facility. To gain entry to the facility perimeter without alerting the military, you must assume a military disguise. If you started this mission coming off the tail-end of the last, you should still have Captain Mac Marshall's form as a disguise; this will suffice.
Assume a Military Disguise and use it to enter the perimeter of the Gentek Facility.
If you've since traded your military disguise for a pedestrian one, you'll have to consume one of the soldiers outside of the facility to acquire a suitable form. Since you don't yet have access to the Stealth Consume ability, you'll have to cause a bit of a scene. Provided you've purchased the Sprinting Grab ability, just grab one of the soldiers as you Sprint by, drag them into an alleyway and consume them. Then, lose the military by switching to the disguise while not being watched (i.e., when the shutter below the disguise meter is closed).
There are a couple of Viral Detectors around the facility. As is explained via an in-game pop-up, Viral Detectors can see through Alex's disguise, and will alert the military to his presence if he remains within the radius of one for a long enough period. The radius of each Viral Detector is outlined on the mini-map. A Viral Detector won't rat you out immediately; it'll take time for the meter below the disguise icon to fill completely. The longer you stand in the radius of a Viral Detector, the more the meter will fill. Once full, the military will be alerted, and you'll be forced to fight or flee. To avoid alerting the military, just Sprint away from the detector and the meter will slowly empty.
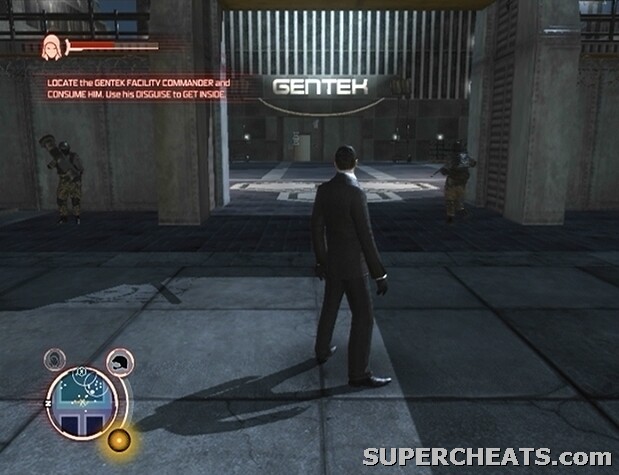
While any military disguise is sufficient to gain entry to the perimeter, you'll need to consume the Gentek Facility Commander and use his form as a disguise to actually enter the facility. The Facility Commander is marked by a blue DNA strain icon. Since you do not have access to the Stealth Consume ability yet, your best bet is to Sprint Grab the Commander, consume him, and then evade the military before returning to the facility with your new disguise. The Facility Commander is Todd Chupka, a Web of Intrigue Target.
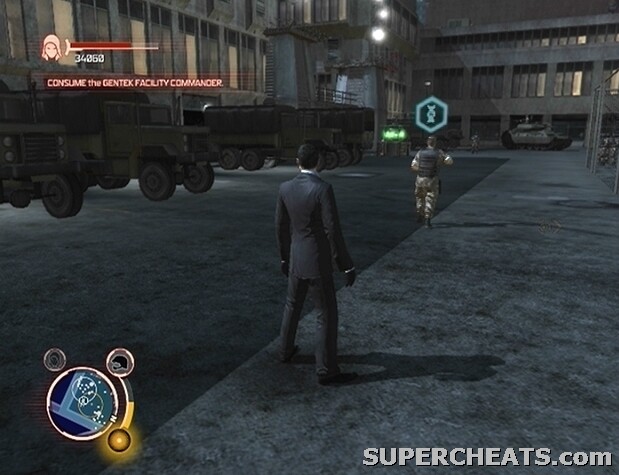
Consume the Gentek Facility Commander and use his form as a disguise to gain entry the facility.
Once you've managed to evade the military, return to the facility perimeter and stand in the blue marker outside. Press the Y/Triangle button to trigger a cutscene.
Mission Objective: Escape the Hunters
After the cutscene, Sprint away from the Hunters and start toward the Military Base marked on the mini-map. The Hunters are strong, and fast, so use Airdash and Glide as you make your way to the Military Base to keep your distance. Hit the marker on the roof of the Military Base to drop down inside. Attack the soldiers that are firing at you to trigger a cutscene.
Mission Objective: Defeat the Hunters
You have to defeat this Hunter by depleting its health bar, which is visible in the top-right corner of the screen. By far the most effective weapon to use against the Hunter at this point is a Missile Launcher. There are several Missile Launchers scattered around the base from the get-go; two can be found by the door on the platform in the northeast corner of the room. Actually picking up the Missile Launcher can be a challenge, as the Hunter will surely be right on your coattail. Try leading the Hunter to the other end of the area, then Glide to the platform and quickly pick up the Missile Launcher.
Once you have a Missile Launcher, jump into the air, lock-on to the Hunter, and press the X/Square button to fire. The Hunter is quite quick and its attacks damaging, so use Glide to remain out of reach and fire at it while in the air. Hit the Hunter with two or three missiles to weaken it severely. When the Hunter starts staggering about and a red DNA strain icon appears above its head, run up to the creature, grab hold of it using the B/Circle button, and then press Y/Triangle to consume it.
Two more Hunters drop through the skylights. Fantastic. Fortunately, consuming a Hunter grants Alex the Claws Power, which is much more powerful than stand-alone melee attacks. Since you're up against more than one Hunter now, you'll have to work much harder to avoid taking damage. Use the Diveroll manoeuvre to dodge the Hunter's swipes, then move in and slash away. If your health bar is low, Sprint Grab a soldier, hop up onto one of the platforms in the base and consume the target there to regain health. Additionally, if you notice the red DNA strain icon above the head of Hunter, be sure to consume the staggering creature for a sizeable health boost.
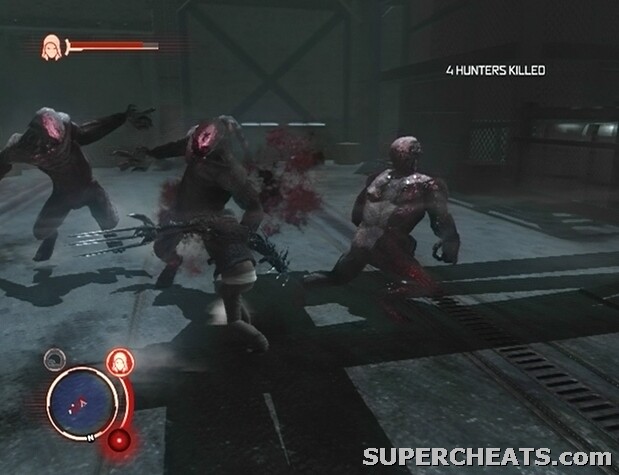
Use the newly acquired Claws Power to rip up the Hunters.
Even more Hunters will enter the base shortly. You'll likely be facing three to four Hunters at once; at this point, you'll want to rely on using a Missile Launcher more than Alex's Claws Power, as you'll need the range to avoid getting pummelled. The large green containers scattered throughout the base interior are packed with explosives and deal a fair amount of damage when thrown.
As if things weren't bad enough, even more Hunters enter the facility. It's clear that only one option remains, and that is to blow up the Military Base. To accomplish this, you must destroy the six marked fuel tanks in the interior. Soldiers wielding missile launchers will continuously spawn by the gate along the north side of the base interior at this point; Sprint Grab one such soldier, consume him, and pick up the dropped weapon. Now you must fire at the fuel Tanks, while avoiding the Hunters' attacks; just jump and Glide away from the Hunters, lock-on to one of the fuel Tanks, and fire. It will take two or three missiles to destroy one tank. Destroy all six fuel tanks to level the place and complete the mission.
Acquire the Stealth Consume ability in the Disguise section of the Upgrades menu, as well as the Health Boost 1 upgrade in the Survivability section if you have EP to spare. If you have an abundance of EP, consider Airdash Double and/or Air Recovery as well.
Stand in the yellow marker outside of Dana's Safe House and press the Y/Triangle button when you're ready to get started.
Mission Objective: Contact Karen Parker
Follow the blue icon on the mini-map and hit the marker there to trigger a cutscene.
Mission Objective: Acquire an APC to Transport Karen Parker
To complete this object, you first must acquire the Hijack Armored Vehicle ability. This ability cannot be purchased via the Upgrades menu; you'll need to consume an Armored Vehicles Officer to acquire it. One such officer can be found in a Military Base, which can be pinpointed by consuming the target marked by the DNA strain icon. There is a Hunter in the area, so Sprint Grab the marked Blackwatch Soldier and consume him somewhere out of harm's way.
The soldier is Capt. Charles Conley, a Web of Intrigue target.
Consume the marked Blackwatch Soldier to locate the Military Base.
Once you've consumed the soldier, assume the disguise and head to the marked Military Base. To enter the base undetected, you'll need to consume the Commander and use his form as a disguise to gain entry.
With the Stealth Consume ability in your arsenal, getting into the base undetected is simple. First, locating the Commander, who is marked by a blue DNA strain icon. Once you've located the Commander, walk up behind him, hold RB/R1 and press the B/Circle button while not being watched. If done correctly, Alex will grab the Commander, discreetly consume him, and automatically assume his form. A failed attempt will not result in a military alert. It should be noted that it does not matter if pedestrians witness the consumption; you need only remain out of sight of the military.
When assuming the appropriate disguise, stand in the yellow marker by the door and press Y/Triangle to enter the Military Base. The APC Driver that you need to consume to acquire the Hijack Armored Vehicle ability is marked by a blue DNA strain icon. The APC Driver is Gunnery Sgt. Mark Mead, a Web of Intrigue target.
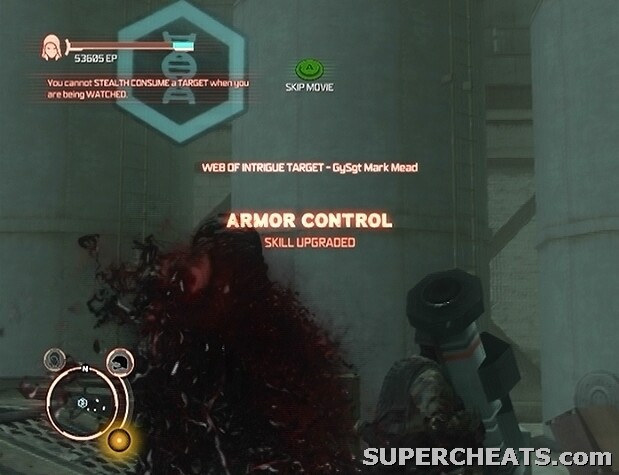
Stealth Consume the APC Driver in the marked Military Base to acquire the Hijack Armored Vehicle ability.
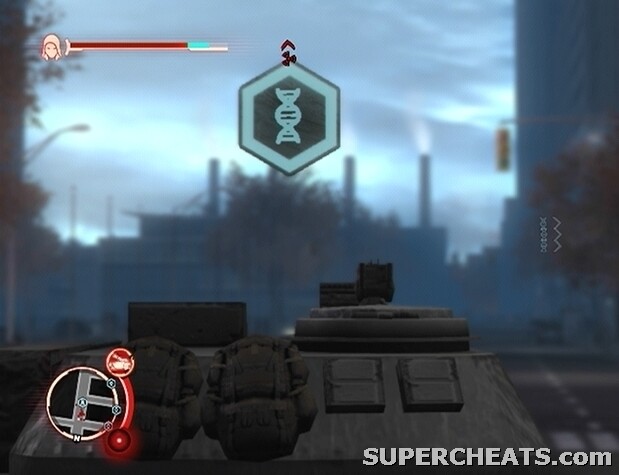
Once you have the ability, head back outside, approach the marked APC in the yard, and press the B/Circle button to get in.
Mission Objective: Test out the APC
The APC is simple to operate; use the Left Thumbstick to move, the Right Thumbstick to aim the turret, LT/L2 to lock-on to a target, RT/R2 to fire the cannon, and RB/R1 to fire the secondary weapon. Running over military units will fill up the disguise meter, but running over pedestrians will now. Perhaps take a quick detour to unlock the 'Speed Bumps' achievement/trophy, which is unlocked by running over 500 characters in a single tank.
You're headed to an Infected zone to test out the APC; follow the blue marker on the mini-map to reach this location. Lock-on to the marked Infected targets and blast them with the APC's weaponry. Destroy the marked targets to complete the objective.
Mission Objective: Rescue Karen Parker
When the Infected zone is clear, follow the blue marker on the mini-map. The marker will soon change to a red skull icon; you'll have to destroy the Hive here before Karen Parker can be rescued. The Hive Integrity meter displayed in the top-right corner of the screen indicates how much more damage the Hive can take before it crumbles. There are Hunters and other Infected in the area, but ignore them and just blast the Hive with primary and secondary fire until the Hive Integrity meter is depleted.
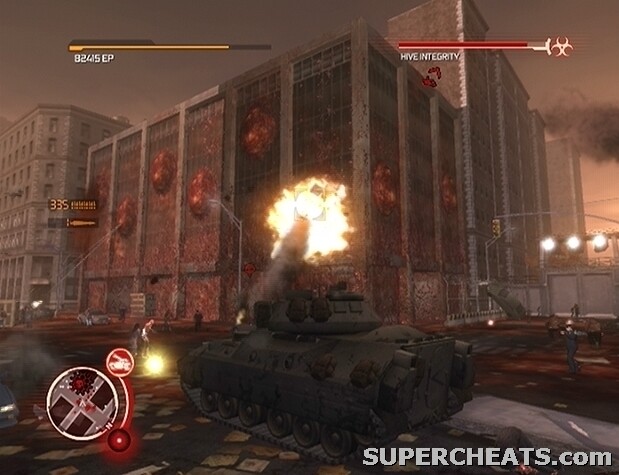
Deplete the meter in the top-right corner of the screen completely to destroy the Hive.
When the Hive falls, drive into the blue marker in front of the building to pick up Karen Parker. Afterwards, evade the military if necessary, then drive the APC to the blue marker and park there to complete the mission.
Before starting this next mission, you'll want to visit the two Military Bases currently on the map and Stealth Consume the marked officers there to acquire the upgrades they offer. From now on, bases that contain a Web of Intrigue target or one or more officers that yield an upgrade when consumed will have a plus sign affixed to the Military Base icon on the city map. There is one such Military Base at this time.
Infiltrating a Military Base is simple. First, you must assume a military disguise to enter the perimeter of the base undetected. If you don't currently have access to a military disguise, try to Stealth Consume one of the soldiers patrolling the streets outside the base. Once you have a suitable disguise, you'll need to locate the base Commander. The Commander is distinguished by his short-sleeved shirt, fitted military cap, and sunglasses. When you've found the Commander, use Stealth Consume to assume his identity. Then, stand in the yellow marker outside of the base and press the Y/Triangle button to enter. You're in!
Assume the identity of the base Commander to gain entry to the Military Base undetected.
Once inside, you should notice one or more marked units. Units marked by a blue DNA strain icon yield an upgrade and perhaps a Web of Intrigue node when consumed, while units marked by a red profile icon are Web of Intrigue targets exclusively. You'll want to Stealth Consume these targets before alerting the military to your presence. Follow the target around until they are out of sight of the other soldiers and perform Stealth Consume to acquire the upgrade or Web of Intrigue node. If it helps, try stealth consuming nearby soldiers to ensure that you are not being watched.
You'll receive a Stealth Infiltration and Base Capture EP bonus after consuming each of the marked targets in the base interior. If the military is alerted, the base will be locked down, and you'll be forced to fight the waves of soldiers that come through before you can set back outside. Alternatively, you can easily evade the military to end the alert by ducking behind the munitions crates on the raised platform as Alex Mercer, waiting until your military disguise is safe to use, and then switching back to it.
Consider destroying the Military Base once you have acquired the skills from each marked target, as doing so yields a large amount of EP and will cut down the military presence in the area of the city the base is situated.
To level the building, you need to damage its exterior considerably. Outside, you'll need to get your hands on a Missile Launcher, or find a tank that can be used to significantly damage the building. Cause a stir to alert the military, and then hijack one of the tanks that arrive. Once in a tank, start by blasting any other manned tank in the perimeter, and then turn your attention to the building. Hit the building with primary and secondary fire until it crumbles.
Before starting this mission, be sure to purchase the Hammerfist Power upgrade. When you're ready to begin, stand in the yellow marker outside of Karen Parker's Lab and press the Y/Triangle button.
Mission Objective: Collect Genetic Material from Infected Water Towers
Follow the marker on the mini-map to reach the Infected zone. Hit the marker on top of the building that you come to, and then read the pop-up that appears onscreen. You're tasked with collecting Genetic Material, and you'll initially be targeting Infected Water Towers. Infected Water Towers house Hunters, and will erupt if you remain near for too long. Destroy the Infected tower before it erupts, however, and the Hunter inside will die and release the Genetic Material you seek.
The Hammerfist Power is best used to bust an Infected Water Tower before it can hatch. If you haven't acquired this upgrade yet, do so now if you have the EP to spare. Select the Hammerfist Power by holding LB/L1 and selecting it from the upper half of the power wheel. With Hammerfist equipped, Glide to the marked water tower and land on top of it or at its base. Quickly tap the X/Square button twice to perform a couple of attacks, effectively destroying the tower. Collect the yellow orbs to partly fill the Genetic Material meter in the top-right corner of the screen. Fill the meter completely in this fashion to complete the objective.
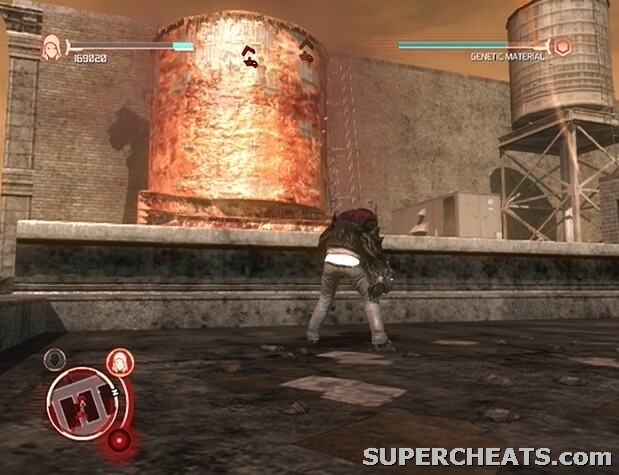
Use the Hammerfist Power to destroy the Infected Water Tower before it can hatch.
If you are not quick enough and the Infected Water Tower is able to hatch, one or more Hunters will be set loose. Ignore them, and instead follow the red skull marker on the mini-map to reach the next Infected Water Tower.
Mission Objective: Collect Genetic Material from Hive
Once you've collected enough Genetic Material from the Infected Water Towers, you'll need to collect more from the Hive in the marked Infected zone. The Hive consistently manufactures Genetic Material, but the military is currently working to destroy it. You'll have to defend the Hive from the military until you manage to collect an adequate amount of Genetic Material.
If you have EP to spare, acquire the Hammerfist Smackdown upgrade via the Upgrades screen. This attack is particularly effective when used against tanks, which is what you'll be up against while in the Infected zone. Hit the marker atop the building across the street from the Hive to get started.
The Hive at the heart of the Infected zone will regularly spew out Genetic Material, which appear as yellow orbs in the world. To finish this mission, you must completely fill the Hive Genetic Material meter in the top-right corner of the screen by collecting the Genetic Material output by the Hive. A message will pop-up onscreen each time the Hive loses a quarter of its integrity; if the Hive is destroyed and you have not collected enough material, you'll fail the mission and have to retry.
Hunters—and soon the military—occupy the Infected zone. The Hunters are a nuisance, but can be ignored, and may even help you fight off the military.
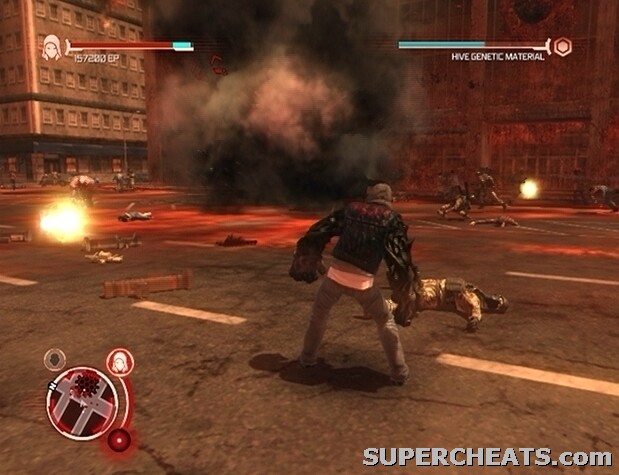
Collect the Genetic Material that the Hive spews out before it's destroyed.
Start by sprinting around and collecting the Genetic Material peppered throughout the area. When the military arrives, destroy each of the tanks that roll in using Hammerfist Smackdown. The Tanks may be destroyed by the Hunters as well, but make certain that there are no tanks in the zone, as they can inflict a large amount of damage on the Hive. Alternatively, you can hijack a tank and use it to destroy the other tanks, as well as the Hunters. Note that you cannot pick up Genetic Material while in a tank, so you would have to occasionally hop out to do so.
The second largest threat to the Hive are soldiers equipped with a Missile Launcher. Once the tanks have been dealt with, continue to Sprint around the area collecting Genetic Material, but whenever you spot one of these troops, prioritize killing them. If the military calls in the Strike Team, ignore the helicopters that arrive, as they don't seem to be interested in attacking the Hive.
Continue sprinting around the zone collecting Genetic Material, destroying any tanks that appear and killing any Missile Launcher-equipped soldiers that you spot, until the meter in the top-right corner of the screen is completely full. Mission complete!
Once you've completed the mission, consider hijacking one of the tanks in the zone and using it destroy the Hive, as doing so yields a significant amount of EP and will cut down the amount of Infected in this area of the city for a short period.
Check the Military Base icons on the city map and visit any that has a plus sign affixed to it. Consume the marked units inside, and then level the place if you see fit. At this point, there are likely two such military bases; each should contain one or more marked officers that yield a skill upgrade when consumed, as well as a Web of Intrigue target.
Upgrades to consider purchasing at this point are Health Boost 2 (Health Boost 1 first if you haven't already) and Critical Mass Boost 1 in the Survivability category, as well as Consume Boost 1 in the Disguise category.
When you're ready to get started, stand in the yellow marker outside of Dana's Safe House and press the Y/Triangle button to trigger a cutscene.
Mission Objective: Investigate the Base
As you can see, there's a ridiculous amount soldiers outside of the base; as such, you'll need to use stealth to gain entry. First, you must locate the Blackwatch Commander and consume him to assume his form. You won't be able to enter the perimeter of the base without alerting the military unless you assume a military disguise. So, if you do not currently have access to an appropriate disguise, locate a soldier outside of the radius of the base on the city map and Stealth Consume him. Or, you can Sprint Grab one of the soldiers below, consume him, then evade the military and return disguised.
This base is well-stocked with Blackwatch soldiers, so don't try anything rash.
The Blackwatch Commander is marked by a blue DNA strain icon on the mini-map. Two Viral Detectors are set up beyond the walls; keep out of the white radii on the mini-map to avoid alerting the military prematurely. The amount of soldiers in the base can make it difficult to Stealth Consume the Blackwatch Commander, since you are most certainly always being watched. So, Sprint toward the Blackwatch Commander, use Sprinting Grab, then duck behind the terminal building and consume him. With any luck, you will have evaded the military in the process.
The Blackwatch Commander is 2nd Lt. Joel Brunner, a Web of Intrigue target.
Mission Objective: Stop the Military from Discovering the Safe House
Once you have assumed the identity of the Blackwatch Commander, you'll need to prevent several patrol units from discovering Dana's Safe House. Follow the red skull icon on the mini-map to reach the first patrol unit.
A mobile, unmanned version of the Viral Detector, called a UAV, is now being employed by the military. UAVs can make remaining undetected rather difficult, as they tend to follow whatever triggers their detection system. As with Viral Detectors, the detection radius of each UAV is outlined on the mini-map. In the future, avoid standing in the radius of a UAV for too long, as the longer you remain, the more the disguise meter fills. As for now, the military is on to you.
Your best bet is to hijack one of the enemy tanks and use it against them. Once you're in a tank, immediately turn your attention to any other tanks in the vicinity and destroy them. Watch out for soldiers that are equipped with a Missile Launcher as well. When the area is clear, blast the UAVs out of the sky with cannonfire. If the Strike Team is called in, be sure to shoot their helicopters out of the sky, as they can deal some serious damage to the tank.
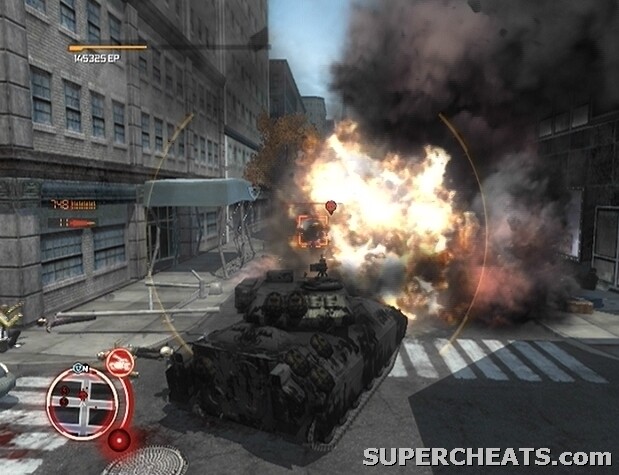
Hijack one of the tanks and use it to obliterate the rest of the patrol unit.
When the first patrol unit has been dismantled, another will appear on the mini-map. Since there is a time limit, you have to move fast. Get out of the tank and start toward the next unit. Try your best to evade the military on your way to the next patrol unit, because while assuming a military disguise undetected, you can automatically hijack an occupied tank without having to tear open the hatch. The presence of the UAVs means you won't remain undetected for long, so quickly approach one of the tanks and hop in.
Initially, there are four patrol units, each consisting of two UAVs and two tanks. After destroying each unit, be sure to get out of the hijacked tank, as you can travel much faster while not in a vehicle. When the first four patrol units have been destroyed, three more will appear at once. This time, remain in the tank and quickly make your way to the first patrol unit. Destroy the marked units at each location to complete the mission.
When you're ready to get started, stand in the yellow marker outside of Dana's Safe House. If you haven't purchased the Sprint Speed 1 upgrade yet, you are required to do so before this mission can begin. Consider purchasing Sprint Speed 2 as well if you have the EP to spare. Once you have acquired the upgrade, stand in the yellow marker and press the Y/Triangle button to trigger a cutscene.
Mission Objective: Stop the Military from Discovering the Safe House
This mission consists entirely of destroying the Viral Detectors that are set up around the city. Each Viral Detector is surrounded by several soldiers, and perhaps a helicopter. Regardless, with Alex's abilities as they are now, you shouldn't have any trouble taking them out and then the Viral Detector. If any of the soldiers around the detector have a Grenade Launcher or a Missile Launcher equipped, consider picking it up for your own use.
The Hammerfist Power can destroy a detector with only three to four standard hits, so consider acquiring this upgrade if you haven't already.
Mission Objective: Draw Military Attention Away from the Safe House
Once you have destroyed the first two Viral Detectors, the locations of ten more will be revealed. Each city block in Chelsea that contains a Viral Detector is filled in with turquoise on the mini-map and marked with a blue arrow icon. Viral Detectors are usually set up on top of buildings, so Glide and scour the rooftops below for military personnel and the target.
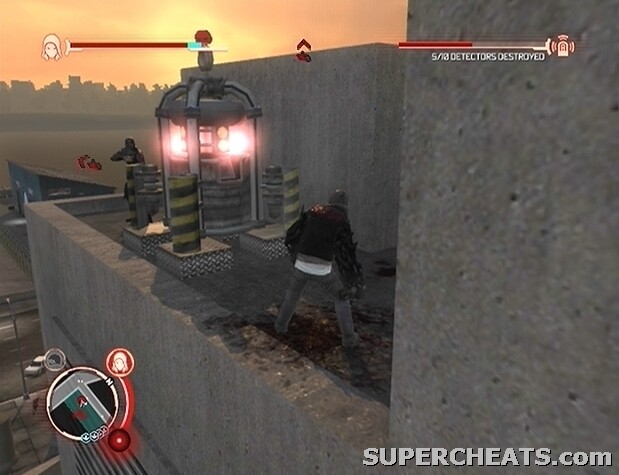
Locate and destroy the Viral Detectors in Chelsea.
You may want to disguise yourself to first get close to the detector, as this way you'll avoid having the soldiers firing at you from the rooftop. You'll have to act fast, however, as it won't be long before your cover is blown by the Viral Detector.
Again, if you can get your hands on a Missile Launcher, do so, as one would definitely make things easier. The Strike Team will likely be called several times during this mission, so take the time to evade or destroy them. Keep an eye on your health as well; if it becomes low, consume a couple of soldiers to restore a fair amount.
Once all ten Viral Detectors have been destroyed, evade the military if necessary to complete the mission.
Stand in the yellow marker outside of Dana's Safe House and press the Y/Triangle button to get started.
Mission Objective: Locate McMullen
Follow the blue marker on the mini-map to reach the Infected zone. Assume a military disguise and drop to the battleground below. You must locate and consume the Blackwatch Commander, who should be out in the street in front of the Hive at the center of the zone. When the blue DNA strain icon appears, make a Sprinting Grab for the Blackwatch Commander and consume him on the spot. The Blackwatch Commander is Capt. Derrick Kaufman, a Web of Intrigue target.
Make your way to the blue marker on your mini-map to move on to the next objective.
Mission Objective: Bring McMullen to the Site
There are four Viral Detectors in the landing site below. You are not to destroy these, but rather sabotage each one to lure McMullen there under the pretence that the area is safe. If any of these detectors is destroyed, the mission is failed, so be careful. You'll need a military disguise to get close enough to sabotage the detectors.
Get close to the Viral Detector and press Y/Triangle to begin the sabotage process. Correctly press the sequence of buttons that appear onscreen before time runs out!
Sabotaging a Viral Detector is simple. First, approach the detector and press the Y/Triangle button to trigger the sabotage process. Then, you have five seconds to input the sequence of buttons that appears onscreen to deactivate it. If you take too long or mess up, the Viral Detector will go off and the military will be alerted to your presence.
When all five detectors have been sabotaged, make your way to the landing zone, denoted by the blue marker on the mini-map, and press the Y/Triangle button to signal McMullen. After the cutscene, evade or defeat the military to complete the mission.
The sabotage option is available henceforth, which is a good thing, as the military will step up their use of Viral Detectors as you progress through the storyline.
Before getting started, acquire the Whipfist Power, Street Sweeper, and Flying Kick Boost upgrades, as they are essential to defeating the boss character encountered during this mission. If you lack the EP needed to purchase these upgrades, destroy the military bases and hives in the city until you have amassed enough. The Airdash Double and Airdash Boost upgrades would be of use too.
When you're prepared, make your way to Karen Parker's lab at the north end of Central Park and hit the yellow marker there to trigger a cutscene.
Mission Objective: Collect Genetic Material
Follow the blue marker on the mini map to reach the nearby Hive. Hit the blue marker on top of the building to enter the Hive. Once inside, Sprint around and collect the Genetic Material until a cutscene is triggered.
Mission Objective: Defeat Specialist Cross
The Specialist is outfitted with a laser-guided missile launcher and an electrified baton; both decidedly deadly weapons. He is quite agile too, and can dodge most attacks, making him a formidable opponent indeed.
The key to winning this fight is to keep your distance. If you try to battle the Specialist up close, he'll equip his electrified baton and zap a large portion of your health bar. The two most crucial upgrades here are Flying Kick Boost and the Whipfist Power. If you do not have both of these, acquire them via the Upgrades menu now. Be sure to equip the Whipfist Power at the start of the fight.
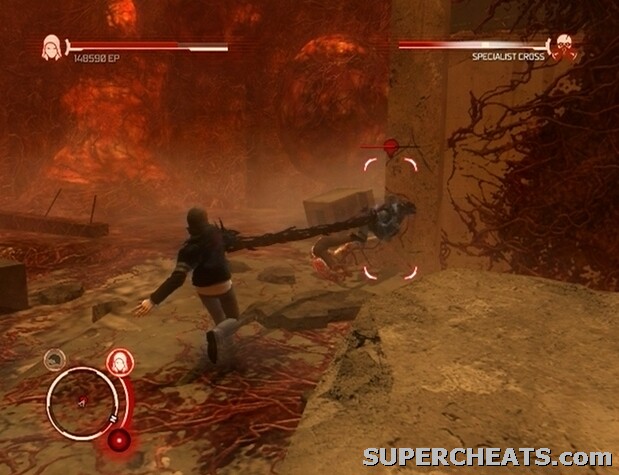
Use the Whipfist Power to strike the Specialist from afar.
With the Whipfist Power equipped, you can attack the Specialist from afar, keeping out of range of his severely damaging electrified baton. Flying Kick deals a fair amount of damage per strike, and can be made even more effective through the Flying Kick Boost upgrade. Be careful however, because if you try to hit the Specialist with a Flying Kick while he has his baton equipped, you'll get zapped
The ideal time to get a hit in is while the Specialist is aiming his laser-guided missile launcher. When you spot the green laser guide from this weapon, lock-on to the Specialist, jump up into the air, use Double Airdash to move in closer, and then hit him with a Flying Kick to knock him to the ground. Immediately upon landing, lock-on to the Specialist and hold the X/Square button for a few seconds to charge an attack. A fully-charged basic attack with the Whipfist Power will knock off a large amount of the Specialist's health if it connects. He is quite adept at dodging, but if he immediately crouches down and equips his missile launcher again, the attack should connect. Be warned, however, as you can still get zapped by the electrified baton if he has it equipped.
Flying Kick can be used to hit the Specialist even while he is not aiming his gun, however there is a chance that he will equip his baton before the kick reaches him. Try to avoid going in with a Flying Kick head on; always use Airdash to get behind or above him.
Also use Whipfist when the Specialist crouches down to use his laser-guided missile launcher. Flying Kick works particularly well, however, because as you are in the air, you can use Airdash to dodge the missiles he fires off, and then move in for the attack. To use Airdash effectively, lock-on to the target while gliding through the air and press RT/R2 while pushing the Left Thumbstick/Analog Stick in the direction you want to dash. If you've acquired the Double Airdash upgrade as well, Glide for a split second at the tail end of the first and then perform the second to get the most distance. Try to fly behind the Specialist, and then hit him with a Flying Kick while he is vulnerable.
Hit the Specialist with a Flying Kick or a charged Whipfist strike when you hear him call out 'Empty!' or 'Reloading, Reloading!' because he will enter a reloading animation, leaving himself open to attack.
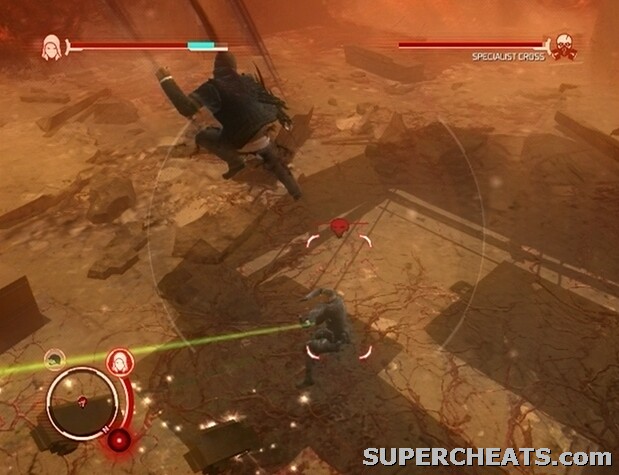
Specialist Cross is vulnerable while aiming his laser-guided missile launcher.
Keep your distance from the Specialist while he has his baton equipped, and continue to hit him with Whipfist and flying kicks while he is aiming his missile launcher.
Once you've knocked off about a quarter of the Specialist's health bar, he will briefly retreat, and a flood of Evolved Infected will enter the Hive. This is when the Street Sweeper upgrade becomes particularly useful. The Infected that enter the Hive will make a beeline for you, but with the Street Sweeper upgrade, you can easily keep them at bay. To perform Street Sweeper, first press X/Square with the Whipfist Power equipped, and then press and hold the Y/Triangle button to perform an elongated sweep of the space in front of you. Killing the Infected in this fashion actually serves as an efficient way to replenish lost health, as they yield red EP orbs when defeated.
When the Specialist rappels back down into the Hive, immediately turn your attention back to him. Go about attacking him in the same way you were before the Infected arrive. It may be a bit tougher now, as the lock-on system can get a bit sketchy with so many targets to choose from. The Infected serve as a distraction as well as a means of replenishing health; if you're critically low on health, Sprint Grab one of the fat Evolved Infected and consume in one of the far corners of the Hive.
With about half of his health bar gone, the Specialist will call for support. Several soldiers will rappel down into the Hive, each equipped with a weapon. These guys can be a bit of a problem, but the weapons they bring down into the Hive can be of use if you can get your hands on one. The Grenade Launcher, while rather inaccurate, can deal a fair amount of damage with a direct hit.
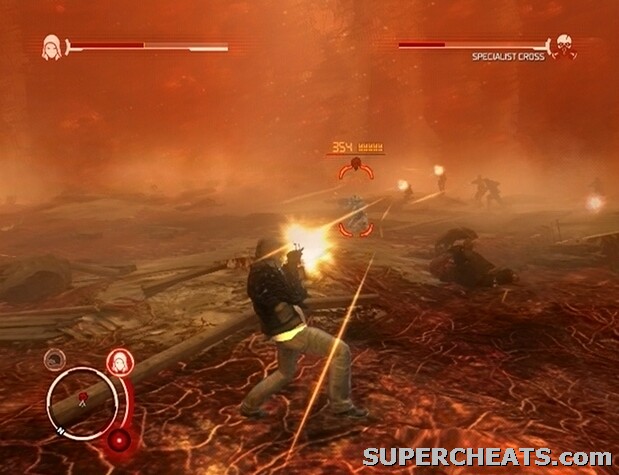
Weapons dropped by the military are quite effective.
Be careful when using a gun against the Specialist, as he will equip his electrified baton and enter a frenzied state. While in this state, he is very quick and can dash across the floor to swing the baton at you. So, if you manage to pick up a weapon, stay in the air while attacking him; jump up and Glide away from him if he gets too close.
While guns are effective, because things are so hectic in the Hive, it may be best to just keep attacking the Specialist as you were before.
Beat the Specialist within an inch of his life to trigger a cutscene.
Mission Objective: Kill or Evade the Military
While Alex has lost his powers, he retains his movement upgrades. Kill or evade the military (the latter option is definitely the better at this point) to complete the mission.
The Confessions mission consists of only a cutscene; hit the yellow marker outside of Dana's Safe House and watch the ensuing cutscene to complete the mission.
Before getting started with this next mission, check the Military Base icons on the city map and visit any that has a plus sign affixed to it. Consume the marked units inside, and then level the place if you see fit. At this point, there are likely three such instances of this; each should contain one or more marked officers that yield a skill upgrade when consumed, as well as a Web of Intrigue target. You should be able to attain the Skyjack Helicopter skill through one of the marked targets. Since Alex currently does not have access to his powers, you'll want to play it safe and use stealth all the way.
You must acquire the Knuckle Shockwave ability before you can begin this mission. As Alex has momentarily lost his ability to equip powers, it may be a good idea to purchase a few of the Combat upgrades that have opened up. These upgrades serve to flesh out Alex's unarmed arsenal, which is all you have access to at this point. You can find these abilities in the Upgrades menu, under the Attacks category in the Combat section.
When you're ready to get started, stand in the yellow marker outside of Dr. Ragland's Morgue and press the Y/Triangle button to trigger a cutscene.
Mission Objective: Locate Patient Zero
Follow the blue icon on the mini-map and hit the marker there to complete the current objective. Next, you are to hijack an APC to consume a Blackwatch Commander. There are four APCs in the streets below, each denoted by a blue DNA strain icon on the mini-map. Assume a military disguise to get close to the APC and quickly press the B/Circle button to hop in and consume the Commander inside. There is a UAV hovering around each APC, so you'll have to move fast to avoid being discovered. The Commander you consume is 1st Lt. Steven Yarish, a Web of Intrigue target.
Hijack one of the marked APCs to consume the Blackwatch Commander inside.
Next, you must locate Captain Lim, whose location is marked by a blue arrow icon on the mini-map. Remain in the 5ank you hijacked and start toward the marker; you should be able to lose the military on the way there. Lim is surrounded by UAVs, the mobile version of the Viral Detector. Regardless, you're next tasked with destroying the Blackwatch Specter Vehicles at the spot. Doing so is simple when driving an APC; just lock-on and hit each marked APC with primary and secondary fire.
The Blackwatch Specter Vehicles are stationed in an Infected zone, which means there are sure to be Hunters about. The Hunters can really do a number on armoured vehicles, so yours may be destroyed. If the APC you are driving is destroyed, hijack one of the marked APCs to both take control of it and eliminate the target inside. It can be difficult to hijack a vehicle in the middle of so much commotion, but persevere. If you must, retreat momentarily and consume a target to replenish lost health. If you return to battleground in a military disguise, you can automatically hijack a marked or unmarked Tank without being fired upon by the military.
When the first batch of Blackwatch Specter Vehicles has been dispatched, reinforcements will be sent in; use the time before they arrive to blast any Hunters in the area. The Missile Launcher-equipped soldiers atop the buildings surrounding the Hive can be quite a nuisance, as they will most likely target your vehicle exclusively. This can be a problem, since an armoured vehicle can only take so many hits from a Missile Launcher. If you're having trouble keeping a working APC, you can instead snag a Missile Launcher from one of these soldiers and use it to destroy the marked targets. You'll have to move around quite a bit, however, as the Hunters are sure to be clawing for you.
Use a hijacked APC to dispatch the Blackwatch Specter Vehicles, or a Missile Launcher from the soldiers stationed atop the roofs of the buildings around the Hive.
A couple more waves of reinforcements will enter the Infected zone, so dispatch of them in the same fashion. When all of the reinforcements have been dealt with, leave the area and evade the military, as doing so will make this next step much easier. Your task now is to consume Capt. Eric Lim, a Web of Intrigue target. Assume a military disguise while undetected by the military and follow the blue DNA strain icon onscreen to locate Lim. Approach Lim's APC and hijack it to have Alex hop inside and automatically consume him. You have to act quickly, however, as there are likely a couple of UAVs in the area.
Hit the yellow marker outside of Dr. Ragland's Morgue to get started.
Mission Objective: Get Transport for Ragland
You need to hijack a tank and drive it back to the morgue to pick up Dr. Ragland. Armoured vehicles can be found most readily near military bases. There should be a base nearby, so check the city map and make your way there. If a tank can't be found near the perimeter of the base, you'll need to alert the military to have them send one over. When a tank reaches the scene, hijack it and destroy any other tanks in the vicinity. Level the Military Base if you wish, and then evade the military.
Mission Objective: Get Samples from the Penn Station Corpses
Drive the tank back to Dr. Ragland's Morgue and hit the marker there to pick him up. With Dr. Ragland in tow, start toward the blue marker at the north end of the city.
While Ragland collects samples from the corpses in the lab, you must prevent the Infected from breaking through the Lab Wall. The meter in the top-right corner of the screen indicates how much more damage the Lab Wall can sustain. The timer at the top of the screen counts down from four minutes, so you must fight off the Infected until the timer reaches zero. A considerably difficult task without the powers you've acquired.
Luckily, there are guns scattered on the floor of the abandoned base. There is a great variety of weapons here, but to start with, pick up a Machine Gun or an Assault Rifle. There should be a Machine Gun on the floor in front of you, right by a Grenade Launcher. Avoid firing a Missile Launcher or Grenade Launcher at Infected that are right at the Lab Wall, as doing so will damage the wall significantly. Since your own attacks can damage the Lab Wall, you'll want to stick with an Assault Rifle or a Machine Gun while facing Evolved Infected.
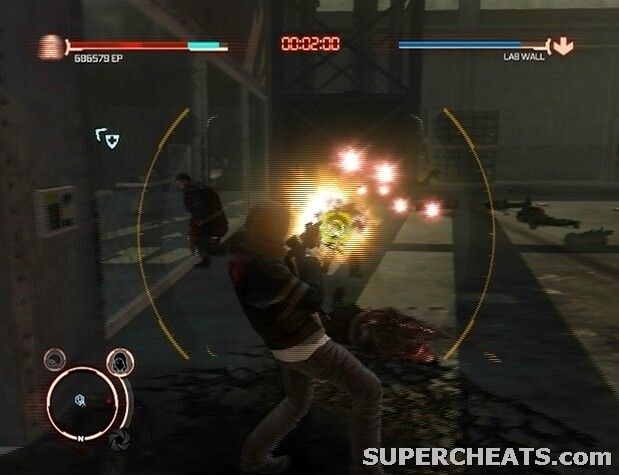
Prevent the Infected from breaking through the Lab Wall!
Move up to the large hole in the wall at the other end of the base and wait for the first wave of Infected to come through. When the Infected appear, lock-on to one of them and hold down the trigger. If one of the approaching Infected runs past you, spin around and gun it down before it can reach the Lab Wall. Always prioritize the Infected closest to the Lab Wall, and don't be afraid to leave a target standing in favour of pursuing another.
Luckily, staying alive won't be a problem, as each Evolved Infected yields two red EP orbs when killed, which serve to restore a bit of health when collected.
When the first few Infected have been dealt with, Sprint back to the Lab Wall and ready for the next wave. This time, Infected will drop down from the platforms on either side of the Lab Wall. Wait until the first Infected lands before gunning him down. Then, immediately spin around and take out the Infected that dropped down from the other side. Eliminate the Infected that emerged from the hole at the other end of the base to clear this wave.
Things get a bit more hectic after the few waves. A Hunter is due through the hole shortly after the second wave; you'll need to use a Missile Launcher to take him out. Keep an eye on the mini-map, as a larger red blip is telling of a Hunter. These guys are far more interested in clobbering you than breaking through the Lab Wall, so you'll need to take the time to get them off your back. When you spot a large red blip on the mini-map, throw down your current weapon and pick up a Missile Launcher. Then, jump up into the air, lock-on to the Hunter, and fire off a couple of missiles. Provided you've upgraded your Missile Launcher skill by infiltrating bases and consuming marked officers between missions, it should only take two direct hits to bring down a Hunter. Just be sure not to shoot at the Hunter if it is near the Lab Wall, as doing so is likely to damage it. Glide to the middle of the room to lure the Hunter away from the wall to avoid damaging it.
When the Hunter has been dealt with, empty the Missile Launcher on any Infected that are not yet by the Lab Wall, and then immediately return to the wall to pull off the Infected that have gathered there. This is where the Knuckle Shockwave upgrade comes in; it deals a minimal amount of damage to the wall, but can effectively knock away the Infected working to break through. To perform this move, press B/Circle and Y/Triangle together. Spam this attack if there are a lot of Infected swarming around the Lab Wall. You can also Grab and Throw Infected at each other, consume them, and use standard attacks as well.

Use Knuckle Shockwave to knock the Infected away from the Lab Wall.
If there is any downtime between waves, look for a Missile Launcher on the ground that can quickly grabbed in the event that a Hunter appears. As the timer counts down and the number of Infected increases, ditch the guns in favour of Knuckle Shockwave to clear away the Infected gathered at the Lab Wall. With about thirty seconds left on the clock, two Hunters will enter the base; at this point it is best to just ignore them, and instead continue using Knuckle Shockwave to keep the Lab Wall clear. If the Hunters have made it to the wall, Glide and Airdash to the middle of the base to lure them over, and then quickly return to the wall and take to the Infected there.
Mission Objective: Get Ragland to Safety
When the timer reaches zero, clear out the Infected that remain in the base so Ragland can exit the lab. Then, you'll have to drive Ragland back to the morgue. Let the military deal with the Hydra that pop-up along the way and just concentrate on getting to the marker. Hit the blue marker outside of the morgue to complete the mission.
Return to Dr. Ragland's Morgue and hit the yellow marker there to trigger a cutscene.
Mission Objective: Find a Suitable Hunter to Inject
You need to steal the Transport Helicopter in the area below. Assume a military disguise if you have one; if not, drop down to street level and consume a patrolling Blackwatch Soldier. If you don't have a suitable disguise, do not drop down into the military base, as the soldiers will open fire and the military will be alerted.
Once you're in the base perimeter undetected, Stealth Consume the Helicopter Officer on the landing zone to acquire the Skyjack Helicopter ability if you don't already have it. The marked officer is Capt. Marcus Graves, a Web of Intrigue target.
Hop in the helicopter and study the list of controls that pop-up onscreen. Then, ascend and start toward the marked Infected zones south from here. When you reach the Infected zones, you then must locate an Infected Water Tower that contains the required DNA. The Signal Strength meter in the top-right corner of the screen indicates how close you are to such a water tower.
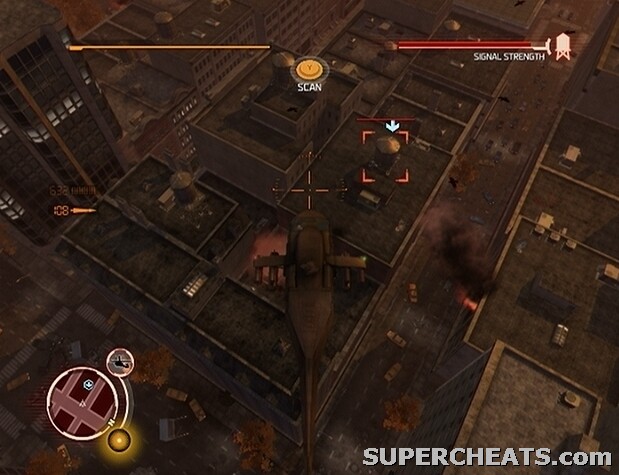
Use the Signal Strength meter to locate the Infected Water Tower that contains the required DNA.
While searching for the water tower, you can lock-on to and destroy other Infected Water Towers to gain a considerable amount of EP. Press RB/R1 to switch secondary fire and hit a targeted tower with missiles to quickly destroy it. You have to be flying fairly close to the tower for the lock-on system to recognize it as Infected and target it. Destroying an Infected Water Tower yields EP, and also brings you one step closer to unlocking the 'Misconception' achievement/trophy, which requires that 25 such towers be destroyed before they hatch. Each Infected Water Tower is worth 8000 EP; since the Infected zone here is so large, consider taking the time now to both earn the Misconception achievement/trophy and rack up some much needed EP.
When you've located a water tower that contains the required DNA, lock-on to it and press the Y/Triangle button to perform a scan.
Mission Objective: Inject the Parasite into the Hunter
When the scanned Infected Water Tower hatches, start attacking the Hunter that emerges from it with the helicopter's primary weapon. Be careful, however, as the Hunter can throw cars and rubble great distances; all it takes is one hit to down the helicopter. When a red DNA strain icon appears above the Hunter's head, stop attacking and drop down to street level. Grab the Hunter while it is in this state to inject the parasite.
Diminish the Hunter's health bar and Grab when the red DNA strain icon appears above its head.
Mission Objective: Allow the Hunter's Antibodies to Build Up
Follow the Hunter, which is now denoted by a blue arrow icon on the mini-map, until a checkpoint is reached.
Mission Objective: Absorb the Antibodies
Damage the Hunter by throwing a couple cars at it. When the red DNA icon reappears above its head, grab and consume it to regain your powers and complete the mission.
Before this mission can begin, you must purchase the Tendril Barrage Devastator, which can be found under the Area Effect section of the Combat category in the Upgrades menu. If you haven't purchased Airdash Boost, Airdash Double, Airdash Double Boost, and all of the Jump and Sprint upgrades in the Movement category, consider doing so now; you'll need to do a lot of moving around in the missions to come.
When you've acquired at least the Tendril Barrage Devastator, stand in the yellow marker outside of Dana's Safe House and press the Y/Triangle button to get started.
Mission Objective: Rescue Dana
A Leader Hunter—a larger, more powerful version of the standard Hunter—has Dana, and is carrying her through the city. The Distance meter in the top-right corner of the screen indicates how much further you can fall from the Hunter before it escapes. You must not let the meter drain completely, otherwise the mission is failed. Use Glide and Airdash Double to keep up. To use Airdash Double effectively, wait until Alex has flown as far as the first boost will take him, then enter Glide, release, and immediately press RT/R2 again to perform the second dash. If you find yourself keeping pace with the Hunter, scale to the top of a building if one is nearby and Glide from there to cover more ground.
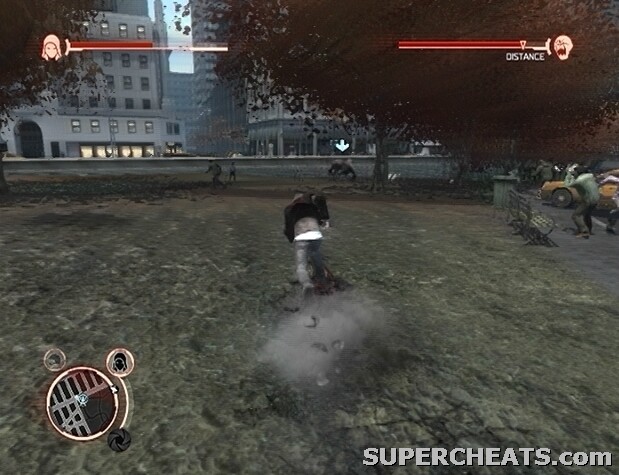
Keep pace with the Leader Hunter!
The Leader Hunter will eventually lead you to an Infected zone, which is crawling with other Hunters. Do not engage any of the enemies here, and instead focus on following the marked Hunter. If you're on street level and the Leader Hunter starts swinging at you, dodge its attacks and Sprint up a building until it starts moving again.
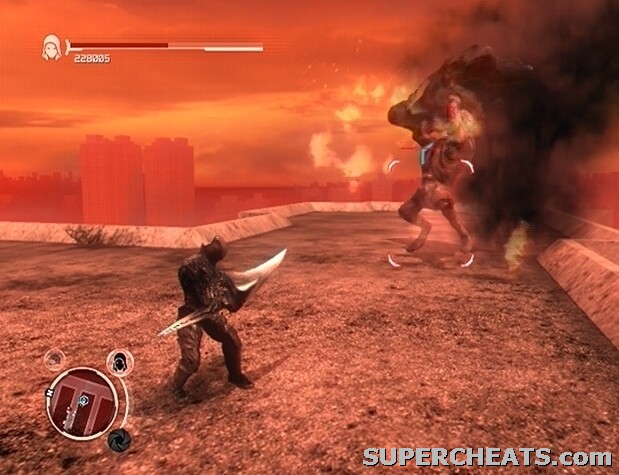
Once through the Infected zone, you'll come to an area where you are ambushed by four or five marked Hunters. You must defeat each marked target before the Leader Hunter will continue on its path. Now is the time to test out the Blade and Armor Power. Note that while the Armor Power is equipped, Alex's movement is limited, and he thus cannot Glide or Diveroll. For this reason, the Armor Power is best used when stuck in a corner and faced with one or more large enemies. Four or five basic attacks with the Blade Power equipped are enough to bring down one of the marked Hunters here.
When the marked Hunters have been dealt with, immediately unequip the Armor Power and continue trailing after the Leader. The Leader will soon lead you to a construction site, which marks the end of this mission.
Make your way to Dr. Ragland's Morgue, stand in the yellow marker outside, and press the Y/Triangle button to begin the mission.
Mission Objective: Find Dana
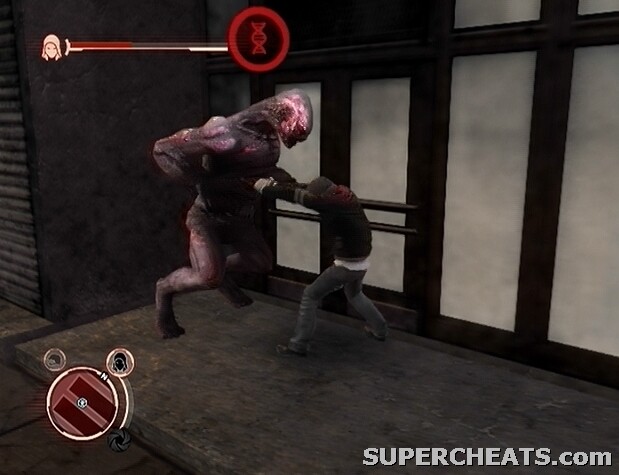
Head to the blue marker in the Infected zone south of Ragland's Morgue to spot the Leader Hunter. You have to inflict enough damage on the marked Hunter to set it staggering, allowing you to consume it. So, begin by equipping the Blade and Armor powers and drop down to street level. The military, as well as a batch of standard Hunters, occupy the Infected zone, making this battle somewhat chaotic. The Hunters will engage the military and vice versa, so luckily you'll have some room to breathe.
The Leader Hunter has a sizeable health bar, and you must deplete it just enough to turn the blue DNA strain icon above its head to red. Then, you must Grab the creature to consume it. The Leader Hunter seems just as interested in attacking the military as it does Alex, so the best opportunity to get a few strikes in is while it is busy swiping at a tank or group of soldiers. While its back is turned, you should be able to get two or three hits in before it turns around. Basic attacks with the Blade Power equipped are more than adequate. When the Leader Hunter spins around to swipe at you, jump to the side to avoiding taking damage.
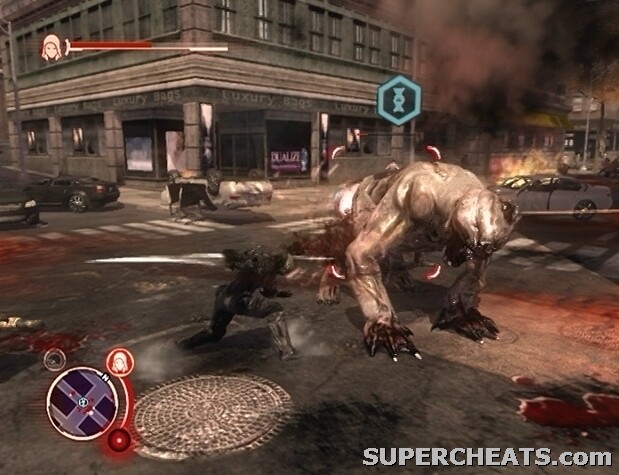
Use the Armor and Blade powers to weaken the Leader Hunter.
If you're health drops to critical level, either consume one of the soldiers in the zone or destroy a Hunter or tank to yield some red EP orbs. The Genetic Material (gold orbs) dispensed by the Hive can be used to replenish health too. Also, if you spot a red DNA strain icon above the head of a standard Hunter, Sprint over to the staggering creature and consume it to regain a large amount of health. If you reach Critical Mass, or the Adrenaline Surge ability is triggered, you can perform the Tendril Barrage Devastator by pressing and holding B Y (X360) or Circle Triangle (PS3).
When the DNA strain icon above the Leader Hunter's head changes to red, Sprint over to it and press the B/Circle button to consume it. The attempt is unsuccessful, however, and the creature runs off.
Mission Objective: Trap the Leader Hunter for Ragland
The Leader is headed for its Hive, which is just a few blocks from your current location. Unequip the Armor Power and start toward the blue icon on the mini-map. Hit the marker there to trigger an ambush.
Four or five Hunters will drop down from above the Hive. Facing this number of Hunters at one time is rather tough, so if you wish, take to the streets to give yourself room to move around. It is likely that the military will soon become involved, so they may serve to distract the marked Hunters as well. Be sure to equip the Armor and Blade powers, as they are currently the most efficient Hunter-disposing tools in your arsenal.
When the marked Hunters have been dispatched, your next task is to lure the Leader to an abandoned Military Base at the north end of the city. The Leader Hunter will only follow if you keep its interest. The meter in the top-right corner of the screen indicates how much longer the hunter will trail after you. If the meter empties completely, this means that the creature has lost interest, causing it to take to attacking the military rather than follow you.
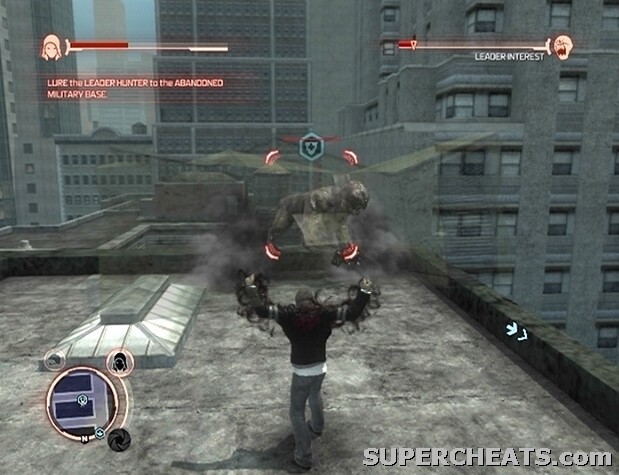
Hold the Leader Hunter's interest to lure it to the abandoned Military Base.
To retain the Leader's interest, you must attack it periodically. Grab an Assault Rifle from a downed soldier on your way out of the zone and use it to hit the Hunter from afar. Otherwise, as the creature's interest dwindles, stop to pluck an air conditioning unit from atop a building, wait for the target to near, and then hit it with the object to refill the meter.
Follow the blue arrow onscreen to reach the abandoned base. When you've managed to lure the Leader Hunter there, you then must subdue it. Facing a Leader Hunter one-on-one is not the easiest of tasks, so you'll want to avoid fighting it up close. Instead, scour the area and Grab and Throw military transport trucks and green containers at the Hunter to weaken it. Each hit should knock off a good amount of health, and the green containers are packed with explosives. Keep your distance and continue pelting the creature with objects until it falls.
Stand in the yellow marker outside of Dr. Ragland's Morgue and press the Y/Triangle button to get started.
Mission Objective: Consume the Leader Hunter
Drop down to the area below and hit the blue marker below to enter the military base. Inside, equip the Blade Power and strike the Leader Hunter once. Then, while it is staggering on the spot, Grab and Consume it.
Consuming the Leader Hunter grants Alex the Infected Vision ability, which allows him to discern Infected Carriers among the populous. As soon as you regain control of Alex, equip the Infected Ability power to spot one such character. Consume the highlighted soldier to learn more.
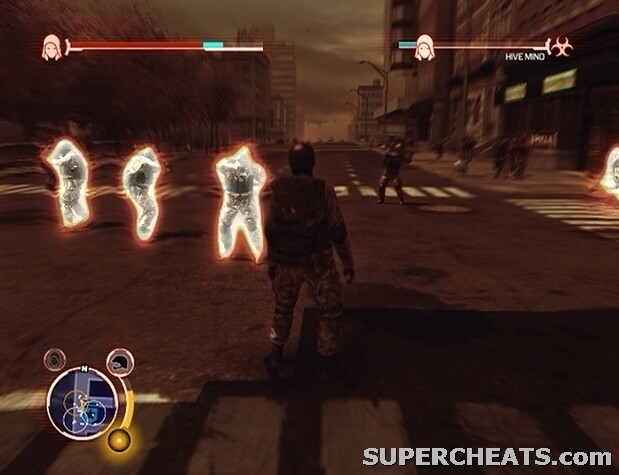
Use the Infected Vision power to distinguish Infected Carriers among the populace.
Mission Objective: Hook into the Infected Hive Mind
You must consume enough Infected Carriers to fill the meter in the top-right corner of the screen. The meter slowly depletes as time goes by, so you'll need to Consume a number of Infected Carriers in succession.
Ignore the remaining soldiers and head back outside. Change forms to evade the military, and then start toward the base marked by a blue arrow. It is best to Stealth Consume the Infected Carriers in the base, as the Consume animation can be interrupted if you're damaged.
There are three Viral Detectors in the perimeter of the marked Military Base, so start by sabotaging those; the military personnel around you will think nothing of it. To begin the sabotage process, approach the detector and press the Y/Triangle button while the prompt is onscreen. Then, you have five seconds to input the sequence of buttons that appears onscreen to deactivate it. If you take too long or mess up, the Viral Detector will go off and the military will be alerted to your presence.
You will need to consume three of four Infected Carriers in relatively quick succession to achieve a connection to the Hive Mind.
Mission Objected: Find Out Where Dana is Being Held
Once you've managed to establish a connection to the Hive Mind, start toward the blue marker on the mini-map. You'll find the Mutated Hunter there, so Sprint to the top of the building, equip the Armor and Blade powers, and get to attacking it.
Locate the Mutated Hunter, weaken it significantly, and then Consume it to complete the objective.
The Mutated Hunter is unlikely to follow you down to street level, so you'll have to remain atop the building and battle it there. Just Sprint and Jump around to avoid the creature's attacks, and then strike it from behind. Other Hunters may get involved; if their presence is making this particularly difficult, consider dropping down to street level and dispatching them there. Keep this up until the DNA strain icon above the Mutated Hunter's head turns red. At this point, grab and consume the creature to complete the mission.
Consider acquiring all of the Critical Mass Boost and Health Boost upgrades if you have the EP to spare, because you'll be thrown into a mission involving a rather tough enemy right after this one. Most importantly, make sure you have enough EP to purchase the Musclemass Power and the Musclemass Throw upgrades, as having them in your arsenal will significantly lessen the challenge. The Sprinting Grab, Sprinting Throw, and Charged Throw upgrades would help too.
When you're ready to get started, hit the yellow marker atop the Infected Military Base to begin.
Mission Objective: Rescue Dana from the Core Hive
The Thermobaric Tank employed by the military is the only weapon able to push through the defences of the Core Hive. Accordingly, you're tasked with defending it as it makes its way there. The meter in the top-right corner of the screen indicates the condition of the Thermobaric Tank. The main threat against this tank is of course, the Hunters that are rampaging through the streets. With the Armor and Blade powers equipped, you should be able to fight them off with relative ease.
Unfortunately the military does not see you as an asset, and will attack you too. Try your best not to engage the military and just concentrate on clearing away Hunters and any other Infected that take to attacking the Thermobaric Tank. If the unmarked armoured vehicles employed by the military prove to be too much of a nuisance to ignore, a few basic attacks with the Blade Power equipped should be enough to bust one.
Keep your Armor Power equipped at all times, as you'll need the defensive boost it offers. Though you cannot Glide with Armor equipped, you can easily keep pace with the marked Tank just by sprinting.
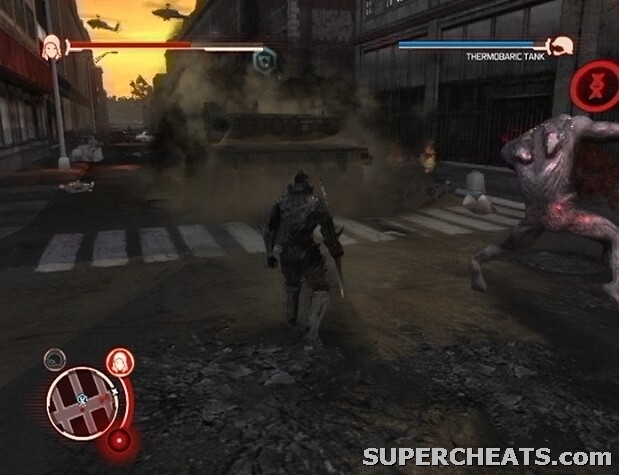
Defend the marked tank from Hunters and other Infected as it blasts its way through the Infected zones.
The Thermobaric Tank is on a fixed course, and will first move to level three armoured Hives before it reaches the Core Hive. You must defend the marked tank each step of the way to ensure that it makes it through to the Core Hive. The Thermobaric Tank is able to level the first armoured Hive that it reaches seemingly effortlessly. When you reach the second marked Hive, however, you must first remove the marked Infected in the zone before the tank can fire. There are several Hunters, as well as a number of Evolved Infected, marked on the mini-map; red skull icons denote hunters, and red arrows denote Evolved Infected. Destroy each marked Infected in the zone and a Leader Hunter will spawn. Though powerful and fast, the Leader Hunter can be easily taken care of with thrown vehicles.
Be sure to collect the Genetic Material (gold orbs) that the hives spew out to replenish your health.
The situation at the third armoured Hive is similar to the last, in that the marked Infected in the area must be dispatched before the Thermobaric Tank can raze the building. Rather than a Leader Hunter, however, a Hydra will appear at the end and pound the Thermobaric Tank, killing the officer inside. You'll have to finish the job yourself; hop in the marked tank and use it to demolish the armoured Hive.
When the third armoured Hive has been levelled, start toward the Core Hive, which is denoted by a blue arrow on the mini-map. As you make your way there, several Hydra will rise up from the ground. Luckily, the Thermbaric Tank's weaponry is top-notch, and thus can eliminate Hydra with a single blast. Push through the waves of Infected until you reach the Core Hive; blast the Hive to break through its defences.
Mission Objective: Defeat the Supreme Hunter
Within the Core Hive, you'll encounter the abomination that is the Supreme Hunter. This guy is deadly close range, so the Musclemass Power and Musclemass Throw ability are the tools to use here. If you haven't acquired either of these upgrades yet, do so now as to afford yourself a bit of an easier time. Purchase the Sprinting Grab, Sprinting Throw, and Charged Throw upgrades as well if you don't already have them.
Thrown objects can knock off quite a bit of the Supreme Hunter's health when coupled with the Musclemass Power and Musclemass Throw upgrades. The military transport trucks and the green munitions crates are especially effective when pelted with a Charged Throw.
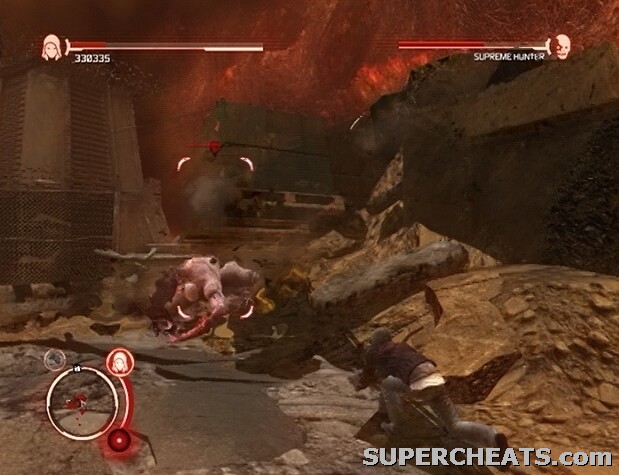
Use the Musclemass Power to pelt objects at the Supreme Hunter.
The Critical Pain Devastator is very effective against the Supreme Hunter. However, it is difficult to retain the amount of health needed to perform a Devastator because of the commotion, and you likely wouldn't last long enough after falling to the amount of health required to trigger Adrenaline Surge. The Critical Pain Devastator is a powerful attack and definitely has its uses, but for this fight, stick to the Musclemass Power.
When the battle commences, the Supreme Hunter is accompanied only by a few lesser Infected, so things seem fairly simple. With the Musclemass Power equipped, Sprint around the arena and pick up a truck or green munitions crate with Sprinting Grab. When you have a suitable projectile, lock-on to the Supreme Hunter, hold down the B/Circle button for a few moments to charge the throw, and then release. Unless the creature is dangerously close, you'll want to charge each throw to deal maximum damage. The green crates and ammo containers are packed with explosives, so they are particularly effective.
When you've knocked off about a quarter of the Supreme Hunter's health, it may become stunned. While stunned, you can Grab to climb up onto its shoulders; from there, mash the X/Square button to deal damage. Shortly after this moment, more Infected will enter the area. Two Hydra, two Hunters, and a number of Evolved Infected join the fray. At this point it can be tough to continue lobbing objects at the Supreme Hunter, as the lock-on system may become sketchy with so many targets to choose from. This just means you'll have to take your time when aiming an object for a throw.
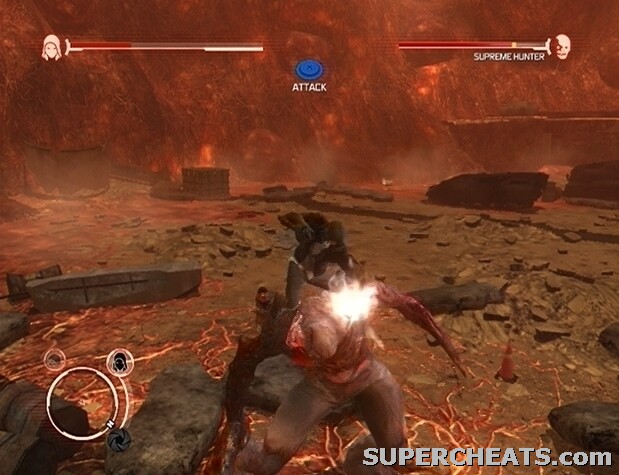
Climb atop the stunned creature and mash the X/Square button once the prompt appears to deal a significant amount of damage.
Try to ignore the new adversaries and focus exclusively on whittling away the Supreme Hunter's health bar. The military will eventually muscle their way into the Hive, which doesn't make things any easier. They serve to distract the Supreme Hunter and the other Infected at times, if nothing else.
The number of effective, throwable objects will become sparse as you continue to pelt military trucks and explosive containers at the creature. Guns are surprisingly ineffective, so avoid them completely and continue hurling rubble instead. Though tanks fare better in the damage department, actually getting inside of one and not having it destroyed within seconds is not so easy. Thrown rubble will knock off much more health than a Missile Launcher, even when not launched with a Charged Throw. There is plenty of rubble scattered around the arena, so Sprint around, pick one up with a Sprinting Grab, then take a moment to lock-on to the Supreme Hunter and throw it.
If your health is low, either Sprint around the arena until it replenishes naturally, or Sprint Grab one of the soldiers or lesser Infected and Consume somewhere far from the Supreme Hunter. Also, if you spot a Hunter staggering on the spot with a red DNA strain icon above its head, Sprint over to it, Grab hold and press the Y/Triangle button to Consume for a sizeable health boost.
The key to bringing down this beast is to keep your distance, so just continue Sprint Grabbing and throwing rubble at it until it falls.
Check the Military Base icons on the city map and visit one that has a plus sign affixed to it. Consume the marked units inside, and then level the place if you see fit. At this point, there is likely one such military base; it should contain one or more marked officers that yield a skill upgrade when consumed, as well as a Web of Intrigue target.
When you're ready to get started, follow the yellow icon on the mini-map to reach the Contact's Phone Booth. Stand in the yellow marker in front of the phone booth and press the Y/Triangle button to start the mission.
Mission Objective: Infiltrate the Blackwatch Air Wing
Follow the blue arrow onscreen to reach a rooftop overlooking the parking spot of the helicopter. You need to assume a military disguise to get close to the helicopter without being gunned down. If you don't currently have access to a military disguise, drop down to the street below, where there should be some soldiers working to destroy the Hive in the Infected zone. Consume one of the soldiers there, evade the military if need be and then switch to the disguise.
Once you've made it onto the roof where the helicopter is parked, you'll need to consume a Rooftop Blackwatch Sentry. All of the soldiers on the rooftop fit the bill, so Stealth Consume any one of them. The character you consume is Pfc. Timothy Lamons, a Web of Intrigue target. When you have a suitable disguise, enter the helicopter.
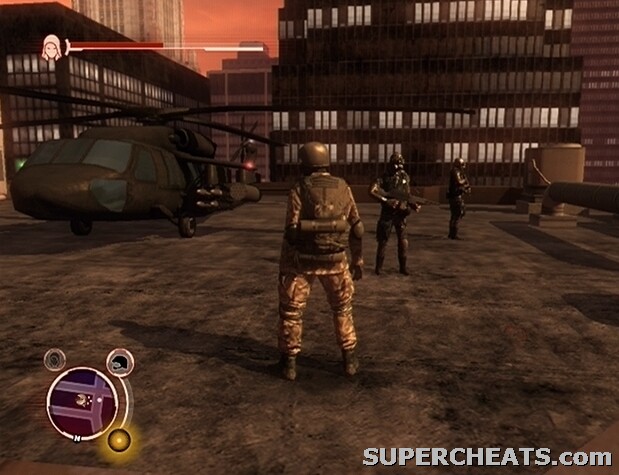
Assume a military disguise to get close to the parked helicopter.
Mission Objective: Assist the Military Until Called Back to Base
Once at the helm, ascend and start toward the marked location on the mini-map; there are soldiers there that need to be evacuated. During the entirety of this mission you won't be fighting the military, but rather aiding them. So, attack no military units during this masquerade, lest your true identity become known. Also, if the helicopter is destroyed, you'll fail the mission, so control it with care.
When you reach the spot, land on the blue marker on the rooftop to collect the soldiers waiting there. Then, you're tasked with destroying a Hive, which is simple with the helicopter's weaponry at your disposal; just hover above the Infected zone, lock-on to the Infected building, and continuously hit it with primary fire—which you have an infinite amount of—until it crumbles. Next, eliminate the marked targets in the zone until a blue marker appears below. Land the helicopter in the blue marker to drop off the troops.
Head to the next evacuation zone and pick up the soldiers there. A couple of Hydra will rise up from the depths of the earth when you hit the blue marker. These creatures are a big threat to the helicopter due to their ability to launch vehicles and rubble long distances. Quickly ascend and shift to the side to dodge any incoming projectiles from the Hydra.
When you're high enough up, switch to the helicopter's secondary weapon and use these tracking missiles to destroy as many of marked Hydra as you can. When a Hydra's health bar drops to about halfway, it will retreat underground to avoid taking further damage. At this point, you have to get a bit closer to tempt the creature back to the surface. Just descend a fair amount until the target Hydra reappears, and then get to blasting. Keep an eye on each Hydra so you'll know if you have to shift to the side to avoid an incoming projectile.
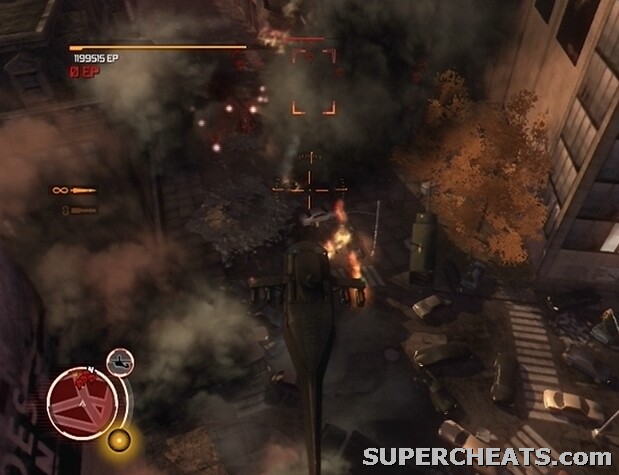
Help the military clean up the city.
When the Hydra have been dealt with, descend to the waypoint below to drop of the troops. Head for the next evacuation point and attempt to pick up the soldiers waiting there. Quickly ascend to avoid being smacked by the Hunters that appear. Drop the soldiers off at the waypoint across the street to complete the objective.
Mission Objective: Head to the Special Briefing
Fly to the blue marker at the south end of the city and land the helicopter there.
Mission Objective: Escape
You won't last long while Bloodtox is being pumped into the base. Bloodtox is a pink-coloured gas that slowly saps the health of Infected life forms caught in the cloud. The military will henceforth employ Bloodtox Blowers, which are used to deploy the substance around the city. There is one such machine along the west side of this base, which, as you will surely notice, is causing your health to drop. A quick Hammerfist Elbow Slam and a follow-up punch is all it takes to destroy this machine. If you have yet to purchase the Hammerfist Elbow Slam upgrade, consider doing so at this moment to afford yourself an easy time in putting the Bloodtox Blower out of commission.
Immediately Glide over to the Bloodtox Blower with the Hammerfist Power equipped, lock-on to the machine, and press the Y/Triangle button while in the air to perform Hammerfist Elbow Slam. This attack should put the machine in critical condition, so quickly hit it with a basic attack to destroy it completely. If you haven't acquired the Hammerfist Elbow Slam upgrade, the green munitions crates scattered around the base are packed with explosives, and throwing two or more of these should be enough to destroy the machine.
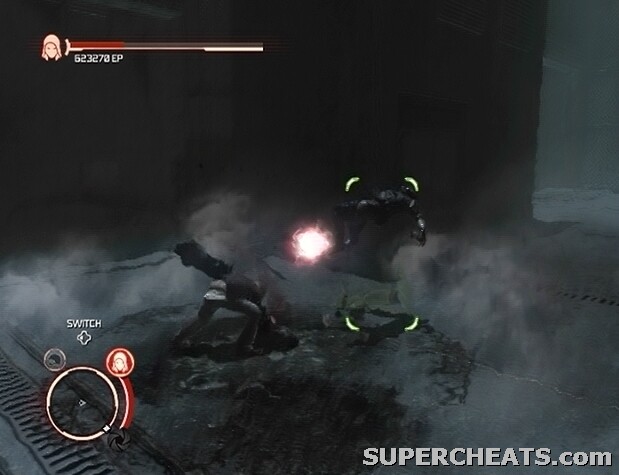
Clear the base of Blackwatch soldiers to escape!
When the base is clear of Blackwatch soldiers, a more powerful, steroid-pumped variant of the run-of-the-mill soldier will drop in. Meet the Supersoldier, an all-around pain in the neck. These guys are fast, powerful, and can see through your disguise in the same fashion as a Viral Detector or UAV. They excel at hand-to-hand combat, and frequently employ crushing grapple moves. Their power is analogous to the Hunter, and they can be dealt with in very much the same way.
The Armor and Blade power can make short work of a Supersoldier, however you still must remain wary of their grapple moves. When grappled, a button prompt will appear at the top of the screen; press the correct button quickly enough to counter the grapple. If you press the wrong button or take too long, the Supersoldier will perform a powerful attack that can diminish your health bar greatly.
The key to bringing down a Supersoldier is to take your time. Don't mash the attack button, as by doing so you may inadvertently botch a counter attack when your adversary attempts to grapple. Know the attacks you want to perform, and only perform a second attack when the animation of the first is complete. You are given more than enough time to press the correct button to break out of a grapple, so it's just about paying attention. Also, if the Supersoldier is guarding against attacks, Grab him to perform a damaging attack. If you want to keep your distance, guns work well enough, as do thrown objects with the Musclemass Power equipped.
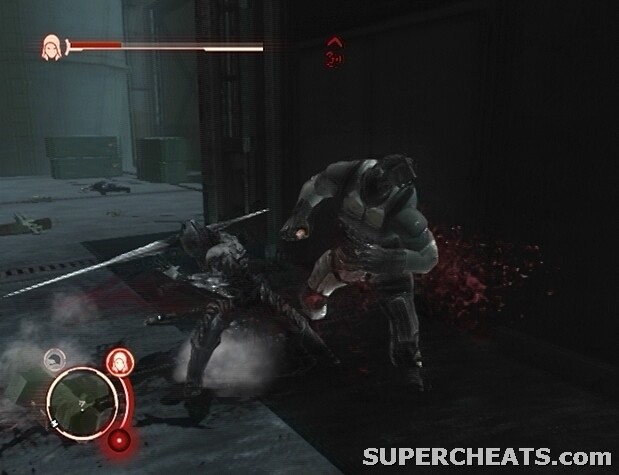
The Supersoldier is a genetically-enhanced variant of the run-of-the-mill soldier, able to see through your disguise much like a Viral Detector or UAV.
When the first Supersoldier has been taken care of, reinforcements will pour into the base; among them are four more Supersoldiers. The Armor and Blade powers are definitely the way to go here. If you're taking too much damage from the lesser soldiers, Sprint around the base and chop them up with the Blade Power equipped, and then take to the Supersoldiers. Since all eyes are on you at this point, it is unlikely that you can forego facing all four or so Supersoldiers at once. While equipped with the Blade and Armor powers, however, you should be able hold your own. The Supersoldiers drop a large amount of red EP orbs when killed, so be sure to collect these to restore some health.
Once the reinforcements have been dealt with, you'll find yourself outside. Unequip the Armor Power and evade the military to complete the mission.
When you're ready to start the mission, make your way to the Contact's Phone Booth, stand in the yellow marker there, and press the Y/Triangle button to begin.
Mission Objective: Halt the Deployment of Bloodtox
Follow the arrow onscreen to reach a blue marker overlooking the Bloodtox staging area. There are nine marked Bloodtox Blowers that must be destroyed. As getting too close to one of the blowers can prove fatal, you'll have to act quickly; get in, destroy the thing, and then get out. The Hammerfist Elbow Slam upgrade, followed by a quick punch, is enough to destroy one of these machines. If you haven't yet purchased the Hammerfist Elbow Slam upgrade, do so now if you have the EP to spare. The Thermal Vision Power is also useful here, as with it, you can see through the thick clouds of Bloodtox.
When you have acquired the upgrade, start toward the first machine. Glide high above the marked Bloodtox Blower, lock-on, and press the Y/Triangle button while in the air to perform the Hammerfist Elbow Slam attack, then follow-up with a basic punch or two and be on your way. Destroy each Bloodtox Blower thusly.
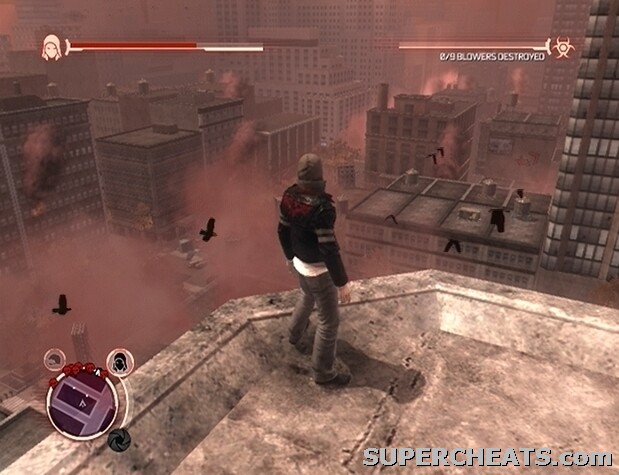
Destroy the Bloodtox Blowers around the city.
If you're having a difficult time dealing with the military, you can evade them as you move to the next machine. Then, while assuming a military disguise, Glide over the Bloodtox Blower, equip the Hammerfist Power while in the air, then follow through with Hammerfist Elbow Slam and a quick punch or two.
If your health drops to a near-critical level, Grab and Consume a soldier or two to bring it back up. Alternatively, if you've recently hit a Checkpoint and are very low on health, you can revert back to that checkpoint to restore your health bar to partway full. To revert to the last checkpoint, select the Quit option in the pause menu and then the Restore Checkpoint option at the top of this list. There should be a Checkpoint after two and then six Bloodtox Blowers have been destroyed.
There may be a Supersoldier or two around a Bloodtox Blower, and there are surely Hunters roaming the streets. Try your best to ignore these enemies; just stay on street level long enough to destroy the machine there and move on.
Once all nine Bloodtox Blowers have been dismantled, kill or evade the military to complete the mission.
Stand in the yellow marker outside of the Contact's Phone Booth and press the Y/Triangle button to start the mission.
Mission Objective: Deploy the Bloodtox Pumper to Times Square
This time, you'll be aiding the military. To get close to the Bloodtox Pumper, you must assume the form of the Bloodtox Facility Commander, who is denoted by the blue DNA strain icon on the mini-map. You'll need a military disguise to get close enough to Stealth Consume him without being gunned down. If you lack a military disguise, drop down to the street level and Stealth Consume one of the soldiers outside of the Bloodtox Facility.
When you have an appropriate disguise, enter the Bloodtox Facility and locate the Commander. Stealth Consume him to assume his form, and then hit the blue marker in the distance; press the Y/Triangle button while standing in the blue marker to start the convoy.
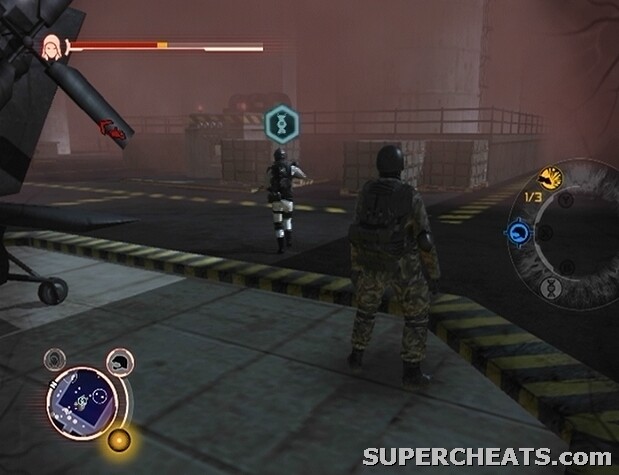
Consume the Bloodtox Facility Commander and assume his form to start the convoy.
Mission Objective: Defend the Bloodtox Pumper
Since you need to remain in good terms with the military throughout this mission, you'll have to resort to using their weapons. There should be a tank parked by the blue marker, so hop in and start following the Bloodtox Pumper to its destination. There are two other tanks in the convoy, as well as a couple of helicopters flying overhead, so stick by either side of the Bloodtox Pumper and scan the mini-map for signs of opposition. The meter in the top-right corner of the screen indicates how much more damage the Bloodtox Pumper can sustain. If the meter is completely depleted, the mission is failed, so you'll need to work with the military to escort the vehicle to Times Square.
When the 'Convoy Under Attack' text appears onscreen, quickly look to the mini-map to locate the enemies that set off the alert. The tank is equipped with a chain gun that has infinite ammo, as well as a sizeable supply of ammo for its main cannon. When engaging an enemy, lock-on, hold down the RB/R1 button to continuously fire the chain gun, and tap RT/R2 to fire the cannon. Do this and the target should soon fall.
The Hydra encountered along the way are a big threat to the mission, as they can hurl vehicles and rubble and tend to target the Bloodtox Pumper. Projectiles can be blasted out of the air; if you spot a Hydra launch a projectile, flick the Right Thumbstick/Analog Stick toward the object to target it and then try to shoot it out of the air.
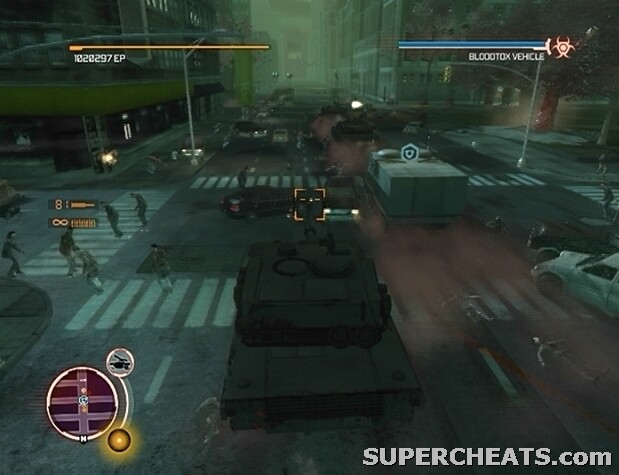
Defend the Bloodtox Vehicle on its way to Times Square.
If you spot an enemy and the convoy simply passes by, don't engage it yourself and instead continue to follow the Bloodtox Pumper. Things get increasingly hectic in Central Park, as several Hydra will rise up from the depths of the earth at the south end. Blast these creatures relentlessly to quickly put them out of order, and try to blast any projectiles out of the air before they can hit the pumper.
The last push is the toughest, as you'll be facing four Hydra at the same time. Provided the Bloodtox Vehicle has made it this far in relatively good condition, just don't let up and you should be able to clear the way to complete the mission.
Before activating the Bloodtox Pump to trigger this mission, know that by doing so, you will be entering a mission that is followed by an excessively lengthy boss battle. This boss battle is made even more tedious without the right upgrades, so before starting this mission, make sure you have purchased the following: Groundspike Graveyard Devastator, Shield Power, Blade Air Slice, Hunter Dirtnap; as well as all of the Health Boost, Jump Upgrade, Sprint Speed, Critical Mass Boost, and Consume Boost upgrades. Quite a lot to purchase, but you will be thankful when the time comes to face this boss. You'll receive 275000 EP at the end of this mission, so keep that in mind.
If you lack the amount of EP necessary to acquire all of these upgrades, consider collecting it before starting this mission. Of the upgrades listed above, the Groundspike Graveyard Devastator is the essential-cannot-do-with-out attack. If the Groundspike Graveyard Devastator does not appear on the Upgrades menu under the Combat category, you are missing its prerequisite; purchase Groundshatter to unlock it.
Once you're completely prepared, activate the Bloodtox Pump to start the mission.
Mission Objective: Force Elizabeth Greene Out into the Open
As soon as you gain control of Alex, scour the area for a tank (vacant or otherwise) and hop in. You must defend the Bloodtox Pumper while it does its job. The meter in the top-right corner of the screen must not be depleted, otherwise the mission is a failure. Waves of Infected will come through and attempt to thwart the military's plan.
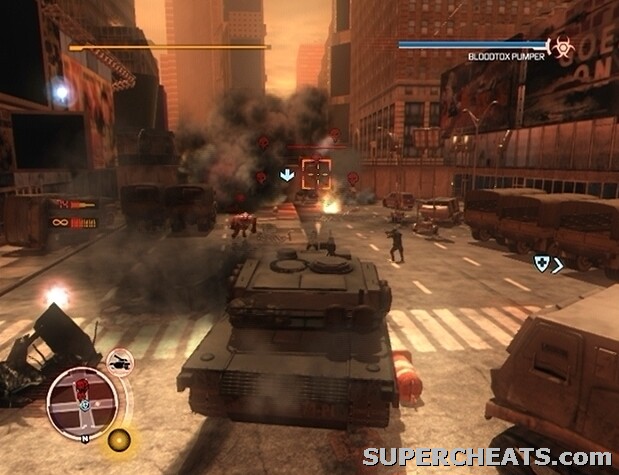
Defend the Bloodtox Pumper!
The tank is likely equipped with a chain gun that has infinite ammo, as well as a sizeable supply of ammo for its main cannon. When engaging an enemy, lock-on, hold down the RB/R1 button to continuously fire the chain gun, and tap RT/R2 to fire the cannon; your target should soon fall.
First, a wave Hunters will attack from the northern perimeter. Position the tank by the Bloodtox Pumper and blast the Hunters as they leap over the wall and hurtle towards you. Next, another batch from the southern perimeter, then from the eastern perimeter, and finally from the western perimeter. The Tank's cannon fire doesn't seem to damage the Bloodtox Pump, so don't hesitate to blast any Hunter that manages makes it through.
After the western attack has been thwarted, Infected will begin to pour in from all sides. You should have hit a checkpoint following the western attack; if your tank is heavily damaged or out of ammo, you can revert to the last checkpoint to restore both its condition and its ammo supply. To revert to the most recent checkpoint, select the Quit option in the pause menu and then the Restore Checkpoint option at the top of the list. Kind of cheesy, but it is an option.
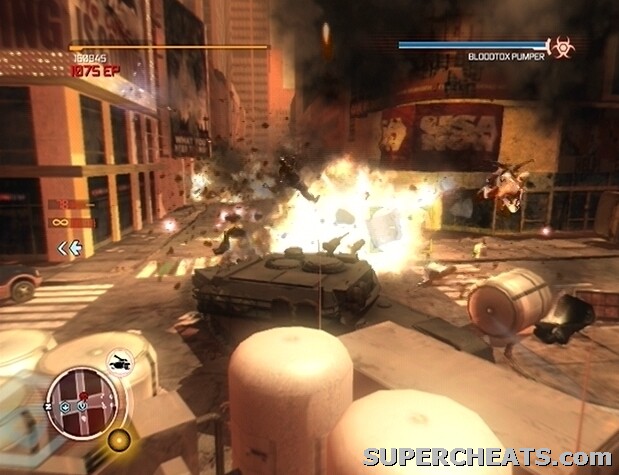
Cannon fire will not damage the Bloodtox Pumper.
There are two Hydra among the multiple Hunters that make up this last wave. The Hydra can be a threat, since they can hurl vehicles and rubble to severely damage your tank or the Bloodtox Pumper. Projectiles thrown by Hydra can be blasted out of the air; if you spot a Hydra launch a projectile, flick the Right Thumbstick/Analog Stick toward the object to target it and then try to blast it out of the air when the turret lines up.
Kill all of the marked Infected to complete the mission.
This mission is just a pain; there's no way around it. This battle isn't so much difficult as it is tedious and excessively lengthy. If you have acquired the right upgrades, however, you can make this mission much less of a trial.
The essential upgrades to have here are the Groundspike Graveyard Devastator, the Shield Power, and Blade Air Slice. Optional upgrades, but ones that would certainly help, are all of the Health Boost, Jump Boost, Sprint Boost, Critical Mass Boost, and Consume Boost upgrades. If you have EP to spare, consider purchasing Hunter Dirtnap as well.

Elizabeth Greene's horrific true form.
Mission Objective: Defeat Elizabeth Greene
Elizabeth Greene has an arsenal of damaging and troublesome attacks; from afar, she will frequently fire a number of tracking, green projectiles, and at medium range, spew out a ridiculous amount of boulders. Get too close, and she'll slap you with her tentacles. To make matters worse, there are Hunters and other Infected prowling the streets, and you're their number one target.
The health bar in the top-right corner of the screen is Greene's health bar, and indicates how much more damage she can sustain. The three groups of divided bars below Greene's health bar represent the health of her tentacles and spine; before you can damage her directly, you must deplete each of these bars. When the three appendages have been damaged enough to deplete the three bars, Greene will fall, allowing you to chip away at her actual health bar. You'll have to stun and damage her in this fashion a total four times to completely deplete her health bar.
The Groundspike Graveyard Devastator and the Shield Power are your two biggest assets during this fight. To perform the Groundspike Graveyard Devastator, you must be in Critical Mass. To achieve Critical Mass, you need to fill your health bar completely—and then some. Due to the number of Hunters and lesser Infected in the streets here, achieving Critical Mass is quite easy.
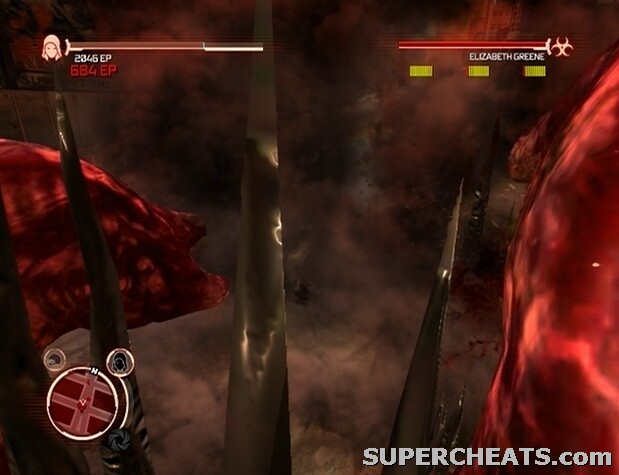
Use the Groundspike Graveyard Devastator to severely damage Greene's appendages.
Greene is planted in the middle of a four-way intersection; there are parallel streets on either side of this intersection. Duck down one of the parallel streets to keep out of range of Greene's projectiles. The streets on either side of Greene's location are packed with Infected, including the fat, brute-like variety. Whenever you head down one of these streets, you are likely to be rushed by four or five of these brutes; these Infected yield a sizeable amount of health when consumed, so with the Blade Power equipped, Grab and Consume a few of them to fill up your health bar. If there isn't any of this type of Infected in sight, just Grab Infected Civilians and quickly Consume them.
By far the quickest way to reach Critical Mass is by consuming Hunters; this is where the Blade Air Slice attack comes in. To perform Blade Air Slice, equip the Blade power, lock-on to a Hunter, and press the Y/Triangle button while in the air. This attack will nearly kill the Hunter with a single hit; just hit it with one or two basic attacks as a follow-up and a red DNA strain icon should appear up above its head. When the red DNA strain icon appears above the Hunter's head, Grab and Consume it to regain an unmatched amount of health.
Once you've reached Critical Mass, equip the Shield Power and start sprinting toward Elizabeth Greene's location. While sprinting with the Shield Power equipped, Alex will hold the shield out in front of him and use it to push aside enemies and block projectiles. If Alex doesn't take out the shield, release RT/R2 for a moment and press it again. Sprint all the way over to Greene; the Shield is able to deflect her green, tracking projectiles, but likely not the rubble she spews out; you'll have to dodge to the side to avoid the boulders. There is still a chance that you could be hit by a projectile and thrown back, but you should be able to muscle your way through unharmed. When you are near enough to Greene, she will attempt to smack you down with one of her tentacles; circle around her in an attempt to dodge this attack, and try to get as close to her as possible before performing the Groundspike Graveyard Devastator.
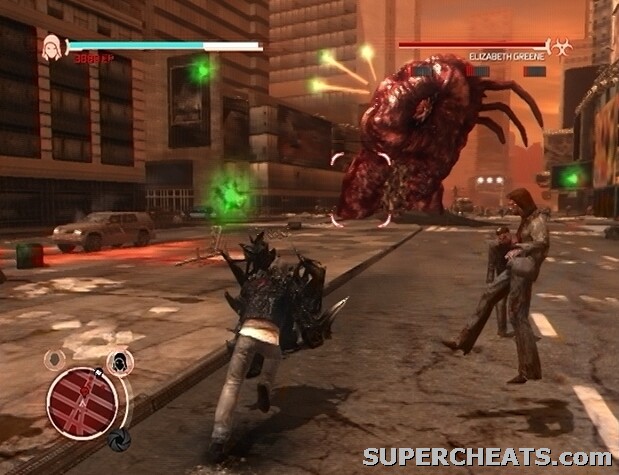
Equip the Shield Power and Sprint to get close to Greene.
To perform the Groundspike Graveyard Devastator, you must hold the X/Square and Y/Triangle buttons at the same time for several seconds. If given enough time, Alex will enter the Devastator animation. Once in this animation, he may sustain minimal damage, but he will follow through with the Devastator to its completion. The Groundspike Graveyard Devastator is likely to attack each of the three targets at once, and has the potential to damage them significantly. If you are hit at all while charging the Devastator, try to dodge Greene's tentacle and get close again. If the hit takes you out of Critical Mass, Sprint back to either of the streets parallel Greene's location and Consume more enemies to get back to that point. Repeat this tactic until all three of the sectioned bars below Greene's health bar have been completely depleted.
When all three targets have been attacked to depletion, Greene will fall, allowing you to attack her directly. She appears to remain in this position until a set amount of health has been drained, but she may retreat if you aren't quick enough. If you are still in Critical Mass, perform the Groundspike Graveyard Devastator again, otherwise just slash away at her with the Blade Power equipped.
Once a certain amount of damage has been dealt, Greene will retreat momentarily. Take the time now to Consume any Infected in sight to reach Critical Mass. When Greene re-emerges, Glide and Airdash as far from her as you can, because she is about to perform an incredibly damaging attack.
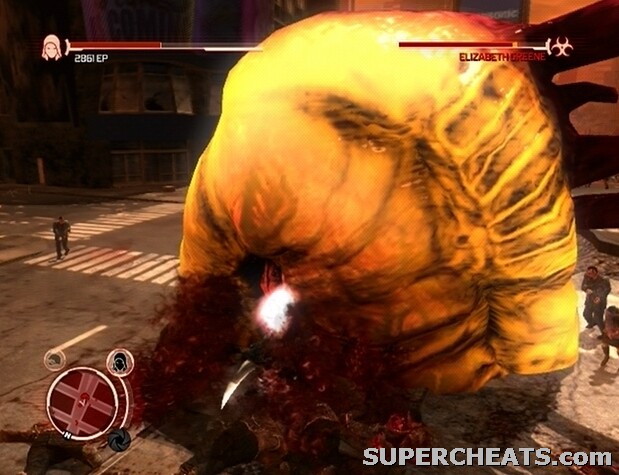
Equip the Blade Power and attack Greene while she is stunned.
The military soon get involved, and are of absolutely no help. Don't even bother trying to hijack a tank or helicopter, as the vehicle would likely be destroyed in seconds anyway. Just stick to the Groundspike Graveyard Devastator and Shield Power strategy outlined above.
Things seem to get progressively tougher as Greene's health bar becomes less and less. The number of Hunters steps up, and they seem to target you exclusively. If you have acquired the Hunter Dirtnap move, you can use it to get an annoying Hunter out of the way; to perform this manoeuvre, first Grab the Hunter, then press the B/Circle button to throw down and stun the creature momentarily. The Hunter won't stay down for long, so quickly be on your way. With the Air Blade Slice attack, however, you can quickly damage and Consume Hunters to reach Critical Mass.
Again, if you take enough damage to fall out of Critical Mass once you reach Greene and are unable to perform the Devastator, retreat back to one of the side streets and consume more Infected until you're back up to Critical Mass.
Avoid hitting any of Greene's targets with an attack other than the Groundspike Graveyard Devastator, because as her appendages become more damaged, she is prone to let off a shockwave that can deal a ridiculous amount of damage. If you're close to Greene and you notice black and red streams of energy, followed by the screen shifting to grey, Glide and Airdash as far from her as you can to avoid getting caught in the blast.
This mission requires time and patience. You'll have to stun Greene a total of four different times and chip away at her health bar each time to kill her completely. The video below (edited for time) exemplifies the strategy outlined above. If done correctly and luck is on your side, this battle will be over soon enough.
Stand in the yellow marker in front of the Contact's Phone Booth and press the Y/Triangle button to begin.
Mission Objective: Destroy the Bloodtox Production Facility
Follow the blue arrow onscreen to reach a rooftop overlooking the Bloodtox Production Facility. There are eight filters to target and destroy in the area below, each marked with a red skull icon on the mini-map. The filters are not only being watched over by armed soldiers and Supersoldiers, but are also surrounded by a thick cloud of Bloodtox, which is damaging to Alex when inhaled. Alex is safe from the fumes while in a tank, however, so one will have to be your means of destroying the filters.
First, to assume a military disguise. If you don't have access to a suitable disguise, Stealth Consume one of the soldiers patrolling the street outside of the facility. Change forms while undetected and stroll through the front gate. There should be an unoccupied Tank right by the entrance; Sprint toward the vehicle and quickly hop in to reduce exposure to the fumes. As long as you have assumed a military disguise and remain undetected, you should be able to forego the hijack process when attempting to enter an occupied tank.
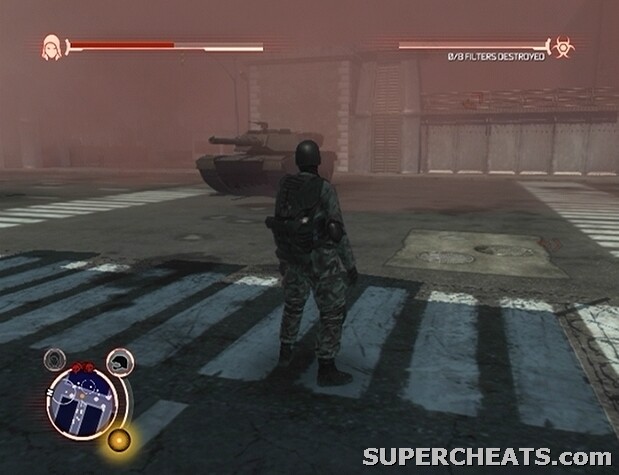
Look for an unoccupied tank just beyond the Bloodtox Production Facility gate.
There are a number of UAVs and Supersoldiers in the perimeter, so it is unlikely that you will be able to remain undetected for long. The Thermal Vision Power is actually a huge help here, as with it, you can see through the Bloodtox.
With the amount of soldiers and turret emplacements in the production facility, your tank likely won't last for very long. Thus, the basic idea here is to hit and run; get in a tank, drive through the facility with Thermal Vision equipped, and cause as much destruction as you can before the tank is destroyed.
When the health indicator in the top-left corner of the screen is nearly depleted, start toward the exit so you can quickly make your escape when the tank is destroyed and reduce exposure to the Bloodtox. Then evade the military, Stealth Consume targets to restore health, return to the facility in military disguise, hop in an occupied or unoccupied tank, blast as many filters as you can before the tank is destroyed, and repeat until all eight filters have been destroyed. There are likely plenty of tanks patrolling the perimeter, so finding one shouldn't be a problem.

Use the Thermal Vision Power to see through the thick cloud of Bloodtox that engulfs the facility.
Depending on the model, your tank may be equipped with a chain gun that has infinite ammo, as well as a sizeable supply of ammo for its main cannon. When working to destroy a target, lock-on, hold down the RB/R1 button to continuously fire the chain gun, and tap RT/R2 to fire the cannon. If your Tank is equipped with a Missile Launcher, employ the same method. Do this and the Filter should soon be destroyed.
Destroy all eight filters to complete the mission.
Check the Military Base icons on the city map and visit one that has a plus sign affixed to it. Consume the marked units inside, and then level the place if you see fit. At this point, there should be one such Military Base; it will contain one or more marked officers that yield a skill upgrade when consumed, as well as a Web of Intrigue target.
When you're ready to get started, make your way to the Lookout Point, stand in the yellow marker there and press the Y/Triangle button to begin.
Mission Objective: Prevent Taggart Escaping By Air
You're tasked with destroying a number of helicopters before they can leave the city. Blasting a helicopter out of the sky is simple, provided you've acquired all of the Missile Launcher upgrades by infiltrating bases and consuming marked Blackwatch soldiers between missions.
Follow the blue arrow onscreen to reach the first helicopter staging area. Once there, Stealth Consume the Missile Launcher-equipped soldier right by the marker. Then, it's just a matter of catching up with the marked helicopter that is in flight, locking-on, and firing off a single missile. Use the Glide and Airdash abilities to chase after the target; having the Jump skill fully-upgraded helps, too. The missile tracks fairly well, but may miss if the helicopter flies over a building. If the missile does connect and you have maxed-out the Missile Launcher skill, one should be enough to down the helicopter.
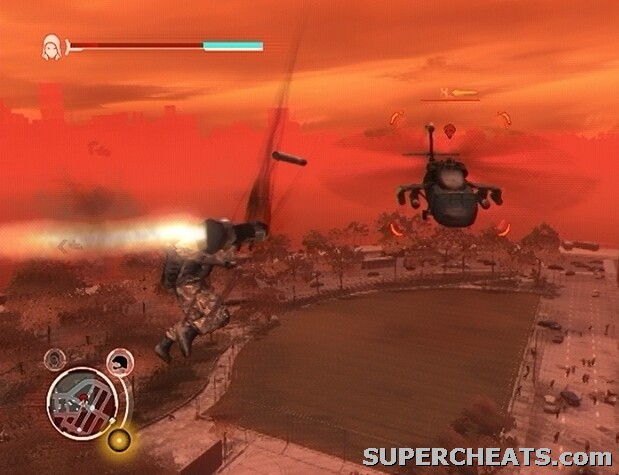
Use a Missile Launcher to destroy the marked helicopters before they can leave the city.
The Missile Launcher should be packed with five or six shots, so that's five or six helicopters that can be shot down before you have to find another. There are Missile Launcher-equipped soldiers positioned on several different rooftops, so just scour the area below while gliding toward the target; when you spot one such soldier, kill or consume him, pick up his Missile Launcher, and be on your way.
There are three helicopters to shoot down in the first staging area. With that done, make your way to the second staging area and prepare for three more. The third target here should spawn just beyond a large, circular building. There is almost certainly one or more Missile Launcher-equipped soldiers on top of this building, so stop by there and acquire a new weapon.
Though there may be more than just marked helicopters in the sky, the lock-on system seems to do a good job of prioritizing the marked over the others. Even still, take your time to ensure you are locked-on to a marked helicopter to avoid wasting ammo on an unimportant target.
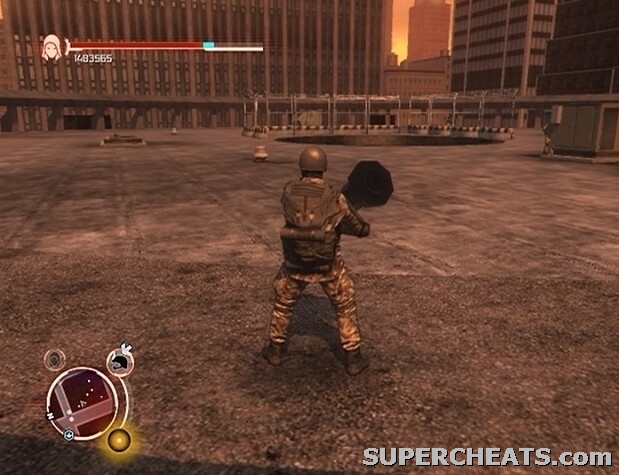
Look for Missile Launcher ammo atop the circular building near the second staging area.
When you've shot down all of the helicopters from the second staging area, return to the roof of the circular building, swap your Missile Launcher for a full one, and then follow the blue arrow on-screen to reach the third staging area. Multiple helicopters will take flight at the same time from here, so try to quickly blast each target before they can get too far apart. Destroy this last batch of helicopters to complete the mission.
The Blade Air Slice upgrade is vital here, so make sure you've acquired it before getting started.
Furthermore, before starting this mission, make sure you have acquired the following upgrades: the Critical Pain Devastator, Sprint Grab; all of the Health Boost, Jump Upgrade, Sprint Speed, Critical Mass Boost and Consume Boost upgrades. You'll need these for the boss battle that follows immediately after this mission.
If you lack the amount of EP necessary to acquire all of the aforementioned upgrades, consider amassing it before starting this mission. Of the upgrades listed above, the Critical Pain Devastator, Consume Boost Max, and Sprint Grab are absolutely necessary. If the Critical Pain Devastator does not appear in the Upgrades menu under the Attacks category, you are missing its prerequisite; purchase Palm Slam to unlock it.
Make your way to the Lookout Point, stand in the yellow marker there and press the Y/Triangle button to begin
Mission Objective: Force Taggart into the Open
Follow the blue arrow onscreen to reach Taggart's base. You have to destroy his base to draw him out. The base is heavily guarded by turret emplacements, Viral Detectors, and UAVs. Even if you manage to hijack a tank and get it in there, it won't be long until it's destroyed. Before attempting to level the base, it is best to destroy the turret emplacements first. Bust up the turret emplacements, and then search the area for a tank. Hijack a tank and immediately target any enemy tanks in the vicinity. Then, fire away at the building to diminish the Base Integrity bar in the top-right corner of the screen.
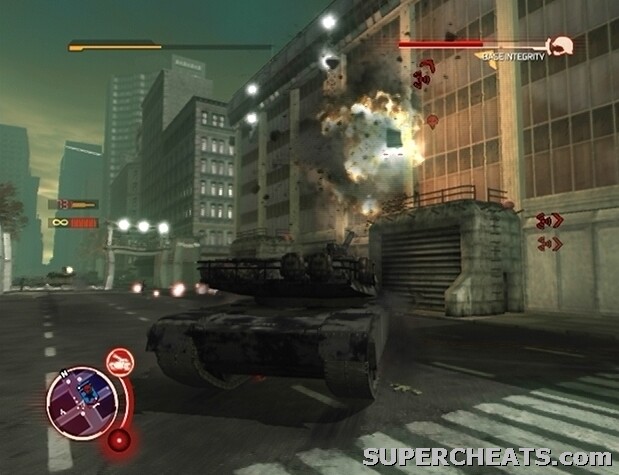
Destroy Taggart's base to force him out.
If your tank is destroyed, retreat momentarily to regain health if necessary. Once you're prepared, hijack another tank and finish demolishing the building.
Depending on the model, your tank may be equipped with a Missile Launcher that has infinite ammo, as well as a sizeable supply of ammo for its main cannon. When working to destroy a target, lock-on, hold down the RB/R1 button to continuously fire the Missile Launcher, and tap RT/R2 to fire the cannon. Do this and the building should soon crumble.
Mission Objective: Pursue Taggart
The Taggart Distance meter in the top-right corner of the screen indicates how much further Taggart must be from you to successfully escape. If the meter completely depletes, Taggart will escape, and the mission will be a failure. If you're still in a tank, the military should no longer be alerted, so follow the blue marker onscreen before Taggart can escape.
Mission Objective: Force Taggart to Flee
Taggart will soon reach a convoy, and will remain there until the marked tanks are destroyed. While stationary, Taggart can fire the Thermabraic Tank's cannon, which will deal a ton of damage if it hits you. To avoid this, try to remain close to Taggart's tank, and while you're sprinting toward his position, climb up buildings and duck between vehicles to keep out of range.
Armor and Blade are the powers to use to destroy the marked tanks. The Blade Air Slice attack can bust a tank with two hits; to perform this attack, jump into the air, lock-on to the target, and press the Y/Triangle button to veer descend upon the tank with a damaging strike. Each destroyed tank will release a number of red orbs that restore health when collected; these orbs should be enough to keep you going as you move on to the next target. Just perform one Blade Air Slice after another until all of the marked tanks have been destroyed. While you're close enough to use this attack, Taggart should not be able to fire the Thermabaric Tank.
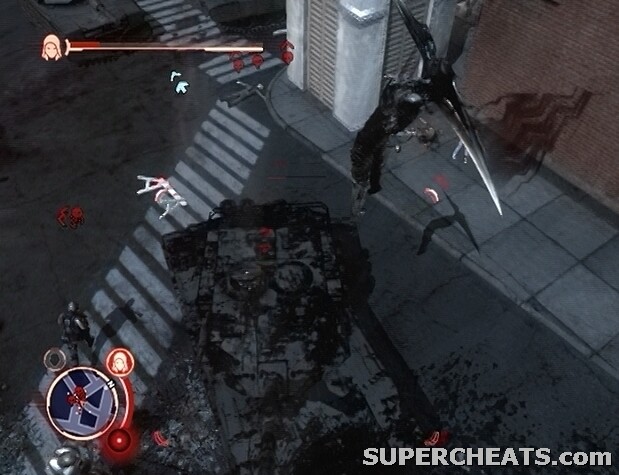
Use the Blade Air Slice attack to bust the marked tanks.
Mission Objective: Pursue Taggart
When Taggart begins to flee again, keep the Armor and Blade powers equipped, and Sprint after him. Provided you have maxed-out the Sprint upgrade, you shouldn't have any difficulty keeping up with Taggart. Ignore the Supersoldiers and tanks trailing after you, but move from side to side as you Sprint down the street to avoid incoming cannon fire.
Mission Objective: Force Taggart to Flee
Continue pursuing Taggart until he reaches another group of Tanks. Use Blade Air Slice to bust each of the marked tanks to force Taggart to flee. He will eventually reach another group of marked tanks, which you'll have to destroy too.
Mission Objective: Consume Taggart
When you've destroyed the last group of tanks, hijack Taggart's tank to Consume him and complete the mission.
The essential upgrades to have here are the Critical Pain Devastator, Sprint Grab, Consume Boost Max, and Critical Mass Boost Max. If you have the EP to spare, purchase all of the Health Boost, and Jump Upgrades if you haven't already. If the Critical Pain Devastator does not appear in the Upgrades menu under the Attacks category, you are missing its prerequisite; purchase Palm Slam to unlock it.
Mission Objective: Defeat the Supreme Hunter
You've faced this abomination before, but luckily the conditions aboard the U.S.S. Reagan make reaching Critical Mass and performing the Critical Pain Devastator consecutively a possibility. At this point, the soldiers onboard are far more interested in firing at the Supreme Hunter, so they will likely leave you alone for the majority of the battle, making them ripe for consumption.
Right at the start of the fight, Sprint and Grab the nearest soldier. The Supreme Hunter will pursue you almost exclusively, so continue sprinting and spin the camera around to keep an eye on it. Keep sprinting until the creature either loses interest momentarily, or takes a swing and misses. Immediately consume the soldier, then Jump and Glide away from the Supreme Hunter.
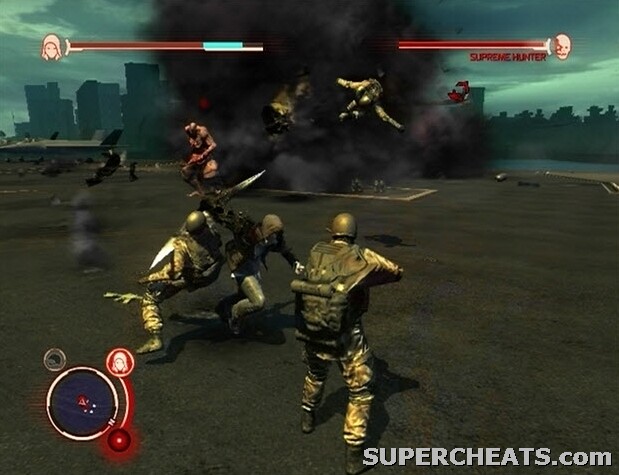
Grab and Consume Blackwatch soldiers to reach Critical Mass.
As you are sprinting around in search of a soldier to Grab, hold the A/X button to charge a Jump. Grab a soldier using Sprinting Grab and release the A/X button to jump high into the air in an effort to gain some distance from the abomination on your tail. Spin the camera around while in mid-air to locate the Supreme Hunter. If you are far enough from the creature to Consume the soldier in-hand without being interrupted, do so, and then search for another target to Consume. Repeat until you have maxed out the Critical Mass bar.
When you have reached the peak of Critical Mass, get as far as you can from the Supreme Hunter and prepare to use the Critical Pain Devastator. To perform the Critical Pain Devastator, first lock-on to the creature, then press and hold the X and B buttons on the Xbox 360, or the Square and Circle buttons on the PS3. Alex is vulnerable while charging this attack, but if the Supreme Hunter is far enough away, he should be able to enter the attack animation, at which point he is invulnerable.
Immediately after the Critical Pain Devastator has finished, Jump and Glide away from the Supreme Hunter to preserve the Critical Mass meter. If you have enough Critical Mass left to cast the Devastator again, wait until the opportune time and do so. If not, Consume more soldiers to fill the Critical Mass bar. If at any point the Supreme Hunter becomes stunned, ignore him and use this time to Consume more soldiers.
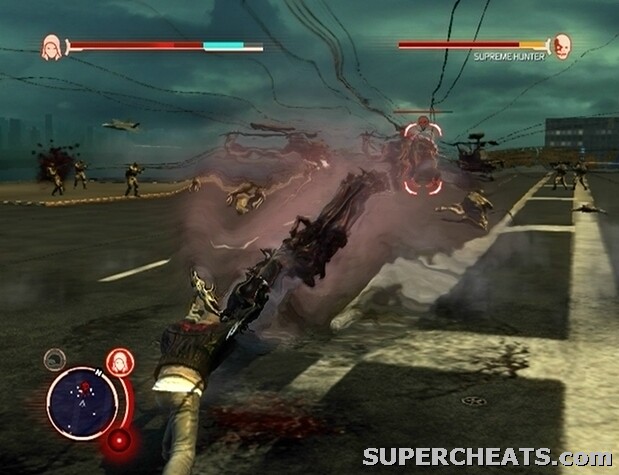
Use the Critical Pain Devastator while in Critical Mass to severely damage the Supreme Hunter.
Perhaps the best time to hit the Supreme Hunter with the Critical Pain Devastator is right after it performs the Tendril Barrage Devastator. This is a devastating attack if you get caught by one of the tendrils, so if you spot the creature crouching down to charge the attack, get as far from it as you can. The Supreme Hunter is invulnerable while performing the Devastator, so lock-on and wait until the tendrils are completely withdrawn before using the Critical Pain Devastator.
With a full Critical Mass bar, you can perform three Devastator attacks, provided you don't take any hits. The Supreme Hunter can withstand three or four Critical Pain Devastators before the timed portion of this battle triggers.
Mission Objective: Defeat the Supreme Hunter Before the Bomb Detonates
At this point, you have two minutes to deplete the rest of the creature's health bar. If you fail in this and the timer reaches zero, you'll have to retry from the start of the mission. Not fun.
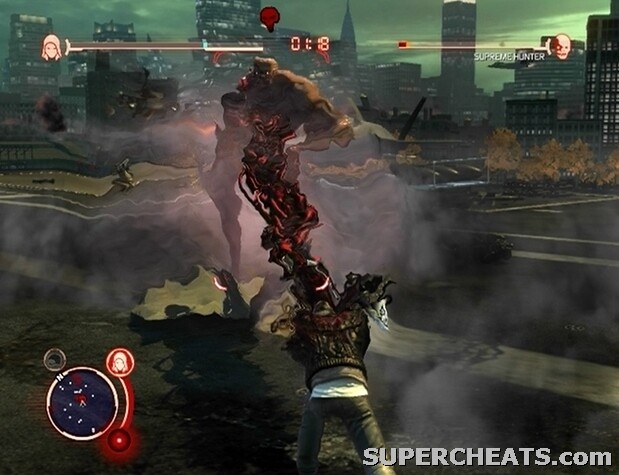
Finish the Supreme Hunter before the timer reaches zero!
The Critical Pain Devastator is just as effective here, so by all means use it. If you are still in Critical Mass, hit the Supreme Hunter with a Critical Pain Devastator right off the bat. The number of soldiers on the platform becomes sparse as the military works to evacuate its troops. Quickly Grab and Consume these soldiers to max-out Critical Mass, and then get into a position to perform the Critical Pain Devastator again.
The Supreme Hunter should fall after being hit by two Critical Pain Devastators. If it survives, however, equip the Blade Power and quickly chip off the remainder of its health.
If you've succeeded, congratulations! That's the end of the Story Mode. Check out the other sections of this guide for the Landmark Collectible locations, Hint Collectible locations, and more!
Powers – Blade Power
Blade Power
Cost: N/A
Acquired: At the end of Biological Imperative.
Description: 'The Blade is a powerful and deadly cutting and thrusting weapon; perfect for slicing and swiping through even the toughest armoured vehicles or infected hides. This attack power allows access to the most powerful strikes available.'
Notes: As far as powers go, the Blade Power offers the highest damage output.
Blade Air Slice
Cost: 1000000 EP
Acquirable: After Children of Blacklight.
Description: 'Slice and dice from the air. Cleave your enemy in half with this drop-down cutting attack.'
Perform: [In Air] to Y/Triangle with Blade Power equipped.
Blade Frenzy
Cost: 700000 EP
Acquirable: After Children of Blacklight.
Description: 'Unleash a series of slashing attacks from a standing start.'
Perform: Y/Triangle with Blade Power equipped.
Blade Sprint Frenzy
Cost: 1200000 EP
Acquirable: After Shock and Awe.
Description: 'Slice your foes with a lunging blade sweep out of a sprint.'
Perform: Hold RT Left Thumbstick to Y; Hold R2 Left Analog Stick to Triangle with Blade Power equipped.
Powers – Claws Power
Claws Power
Cost: N/A
Acquired: During Behind the Glass.
Description: 'Transform your hands into deadly edged weapons: slice and dice for up-close crowd control."
Groundspike (Core)
Cost: 50000 EP
Acquirable: After Behind the Glass.
Description: 'Shift your mass into a deadly spike that erupts beneath your enemies. Combine with targeting for pinpoint strike precision.'
Perform: Y/Triangle while Claws Power is equipped.
Notes: Effective against enemy armor.
Groundspike Upgrade 1
Cost: 80000 EP
Acquirable: After A New Order.
Prerequisite: Groundspike
Description: 'Improved damage and area effect of the Groundspike.'
Groundspike Upgrade Max
Cost: 80000 EP
Acquirable: After Biological Imperative.
Prerequisite: Groundspike
Description: 'Maximum damage and area effect of the Groundspike.'
Dashing Slice
Cost: 65000 EP
Acquirable: After A New Order.
Perform: Y/Triangle with Claw Power equipped.
Description: Combo that is quite effective against human enemies.
Notes: Best used to destroy APCs and Tanks.
Powers – Defensive Powers
Shield Power
Cost: 10000 EP
Acquirable: After Past and Present.
Description: 'This shield will absorb damage on impact, preserving your health completely – until it breaks. Once broken, the shield must regenerate before it will once again repel damage.'
Notes: Sprint with Shield Power equipped to knock aside civilians and block some projectiles.
Armor Power
Cost: N/A
Acquired: At the end of Biological Imperative.
Description: 'Armor increases damage resistance overall, at the cost of movement abilities such as Glide or Diveroll. Alex doesn't clear obstacles when armored; instead he will shoulder a path through vehicles and minor enemies.'
Powers – Hammerfist Power
Hammerfist Power
Cost: 48000 EP
Acquirable: After Behind the Glass.
Description: 'Trade speed for power — shift biomass to your forearms to allow deadly area-effect attacks, crush guarding enemies and shatter armoured vehicles.'
Hammerfist Smackdown
Cost: 48000 EP
Prerequisite: Hammerfist Power
Acquirable: After Behind the Glass.
Description: 'Blast enemies out of your path with this powerful combo. It is slow, but powerful — especially against enemy armor. Be wary of using against faster opponents.'
Perform: Y/Triangle with Hammerfist Power equipped.
Hammerfist Elbow Slam
Cost: 675000 EP
Prerequisite: Hammerfist Power
Acquirable: After Biological Imperative.
Description: 'Jump up, drop down. Deadly against armor. Add extra height to increase your damage and area of effect. With the right conditions, you can crack an enemy tank with a single blow.'
Perform: Y/Triangle with Hammerfist Power equipped.
Notes: Damage output is dependent on how far you travel before landing. In terms of busting tanks, Air Blade Slice is superior.
Hammertoss
Cost: 900000 EP
Acquirable: After Making the Future.
Description: 'Sprint into a self-throw; put all your weight into a single, concentrated attack. The Hammertoss is dangerous when you miss – and deadly when you hit.'
Perform: Hold RT Left Thumbstick to Y; Hold R2 Left Analog Stick to Y with Hammerfist Power equipped.
Powers – Whipfist Power
Whipfist Power
Cost: 55000 EP
Acquirable: After A New Order.
Description: 'A thin, flexible blade-edged arm that can be used to attack at extreme range, or whip through entire crowds of enemies.'
Street Sweeper
Cost: 57500 EP
Acquirable: After A New Order.
Prerequisite: Whipfist Power
Description: 'Dismember all nearby enemies with a wide seeping crack of Whipfist.'
Perform: Press X/Square to Y/Triangle with Whipfist Power equipped.
Notes: Hold Y/Triangle to charge, which will increase damage and coverage.
Longshot Grab
Cost: 250000 EP
Acquirable: After Biological Imperative
Prerequisite: Longshot Grab
Description: 'If there is an enemy at long range, use Longshot Grab to reel them in. Combine it with Sky Jacking and zip your way up to a helicopter.'
Perform: B/Circle with Whipfist Power equipped.
Notes: Hold B/Circle to charge, improving range.
Powers – Musclemass Power
Musclemass Power
Cost: 80000 EP
Acquirable: After A New Order.
Description: 'Increases strength twofold. Throws go further and all strike attacks carry more damage.'
Musclemass Boost
Cost: 1000000 EP
Acquirable: After Children of Blacklight.
Prerequisite: Musclemass Power
Description: 'Greatly increase the damage of your Muslemass attacks, hitting for yet more increased damage with basic hand to hand attacks.'
Musclemass Throw
Cost: 250000 EP
Acquirable: After A New Order.
Description: 'Greatly increases the range and damage of your Musclemass throws.'
Powers – Sensory Power
Thermal Vision Power
Cost: 30000 EP
Acquirable: After Behind the Glass.
Description: Lets you see through obscuring smoke and other thin obstacles at the expense of a limited visual range.
Notes: Not the most useful upgrade, at least not until later on.
Infected Vision Power
Cost: N/A
Acquirable: During The First Monster.
Description: 'See the world as the Infected see it; tune into the Hive Mind itself with Infected Vision. Use this to spot enemies at range, and pick out hostile characters from simple bystanders.'
Movement – Air Upgrades
Airdash (Core)
Cost: 2500 EP
Acquirable: Past and Present.
Description: 'While jumping, redirect with the Airdash. Airdash can be used to avoid projectiles, get extra distance in a jump, or charge your trajectory in mid-flight.'
Perform: [In Air] press RT (X360), [In Air] press R2 (PS3)
Glide (Core)
Cost: 15000 EP
Acquirable: Past and Present.
Prerequisite: Airdash
Description: 'Glide is a vital ability to increase your movement options. Perfect for covering a lot of real estate in short order, or dropping into bases without attracting attention.'
Perform: [In Air] hold RT and press A, [In Air] hold R2 and press X (PS3)
Notes: An essential ability. Glide, when coupled with a fully-upgraded Airdash, makes moving around the city a breeze.
Airdash Boost
Cost: 20000 EP
Acquirable: After Past and Present.
Prerequisite: Airdash
Description: 'Increase the speed and distance of your Airdash with this upgrade.'
Airdash Double
Cost: 48000 EP
Acquirable: After Behind the Glass.
Prerequisite: Airdash
Description: 'Add a second Airdash for each and every jump.'
Perform: [In Air] RT/R2, RT/R2.
Airdash Double Boost
Cost: 80000 EP
Acquirable: After A New Order
Prerequisite: Airdash Double
Description: 'Increase the distance of the Airdash Double with this upgrade. Dash further and faster with each Airdash!'
Airdash Recovery (Core)
Cost: 30000 EP
Acquirable: After Behind the Glass.
Prerequisite: Airdash
Description: 'Launched by an explosion or attack? Use the Air Recovery two twist out early'
Perform: [Launched by Enemy Attack] A/X.
Notes: Essential later on, so buy early.
Movement – Sprint Upgrades
Diveroll (Core)
Cost: 100 EP
Acquirable: After Past and Present.
Description: 'Use Diveroll to avoid projectiles and attacks.'
Perform: [Directional] Left Thumbstick/Analog Stick and press RT/R2
Sprint Speed 1 (Core)
Cost: 10000 EP
Acquirable: After Past and Present.
Description: 'Boost your joints and streamline your body structure to Sprint faster than ever before.'
Sprint Speed 2
Cost: 45000 EP
Acquirable: After Behind the Glass.
Prerequisite: Sprint Speed 1
Description: 'Sprint faster than ever before. A vital evolutionary edge.'
Sprint Speed Max
Cost: 100000 EP
Acquirable: After Confessions.
Prerequisite: Sprint Speed 2
Description: 'Increase sprinting capability even more. An important upgrade.'
Movement – Jump Upgrades
Jump Upgrade 1
Cost: 10000 EP
Acquirable: After Past and Present.
Description: 'Jump further and faster.'
Jump Upgrade 2
Cost: 30000 EP
Acquirable: After Behind the Glass.
Prerequisite: Jump Upgrade 1
Description: Jump even further and faster.
Jump Upgrade 3
Cost: 100000 EP
Acquirable: After A New Order.
Prerequisite: Jump Upgrade 2
Description: Jump even further and faster.
Jump Upgrade Max
Cost: 135000 EP
Acquirable: After Confessions.
Prerequisite: Jump Upgrade 3
Description: 'Max your jump capabilities. This upgrade is vital for high-speed, long-distance movement.'
Wall Jump Latch
Cost: 32500 EP
Acquirable: After A New Order.
Description: 'Chain quick wall jumps together with the Wall Jump Latch upgrade. Useful for quick redirects and enhances overall movement control.'
Perform: [Against Wall] A/X.
Survivability – Critical Mass Upgrades
Critical Mass Ability (Core)
Cost: 15000 EP
Acquirable: After Past and Present.
Description: 'Go beyond the constraints of maximum health, and enter Critical Mass mode for increased attack damage, and the ability to deploy Devastator attacks.'
Perform: Reach maximum health and gain additional health.
Notes: A very important upgrade, as it serves to both extend Alex's health bar and unlock the powerful Devastator abilities. The different Devastators must be purchased individually, however.
Adrenaline Surge
Cost: 20000 EP
Acquirable: After Past and Present.
Prerequisite: Critical Mass Ability
Description: 'Gain a moment of invulnerability and access to a free Devastator attack when your health is low.'
Critical Mass Boost 1
Cost: 80000 EP
Acquirable: After A New Order.
Prerequisite: Critical Mass Ability
Description: 'Critical Mass capacity increase. Go further into the zone, allowing for a maximum of two Devastator attacks.'
Critical Mass Boost Max
Cost: 400000 EP
Acquirable: After Biological Imperative.
Prerequisite: Critical Mass Boost 1
Description: 'Critical Mass maximum. When health is maxed, this allows for up to three Devastator attacks.'
Survivability – Health Upgrade
Health Boost 1
Cost: 36000 EP
Acquirable: After Past and Present.
Acquirable: After Behind the Glass.
Description: Increases health bar, allowing you to absorb more damage.
Health Boost 2
Cost: 130000 EP
Acquirable: After A New Order.
Prerequisite: Health Boost 1
Description: 'Further increased Health, increasing your ability to absorb damage from enemy attacks.'
Health Boost Max
Cost: 550000 EP
Acquirable: After Biological Imperative.
Prerequisite: Health Boost Max
Description: 'Maximum Health. This is the maximum increase of Health possible through upgrades'
Survivability – Health Regeneration
Regen Rate Boost 1
Cost: 80000 EP
Acquirable: After A New Order
Description: 'Outside of combat, your health will regenerate at a steady pace. With this upgrade your health will recover at an increased rate.'
Regen Rate Boost Max
Cost: 10000 EP
Acquirable: After Confessions.
Description: 'Outside of combat, your health will regenerate at a steady pace. With this upgrade, your health will recover at an increase rate'
Regen Delay 1
Cost: 135000 EP
Acquirable: After Confessions.
Description: 'Some time after taking damage, you will automatically begin to heal. This upgrade reduces the delay required for Regeneration to begin the healing process.'
Regen Delay Max
Cost: 475000 EP
Acquirable: After Biological Imperative.
Description: 'Some time after taking damage, you will automatically begin to heal. This upgrade reduces the delay required for Regeneration to begin the healing process.'
Combat – Air
Flying Kick Boost (Core)
Cost: 10000 EP
Acquirable: After Past and Present.
Description: 'Increase Flying Kick range, speed and damage with this upgrade.'
Notes: One of the steps to upgrading Flying Kick to its maximum potential. Once maxed out, Flying Kick can be effective against helicopters, even more so with the Musclemass Power equipped.
Flipkick Launcher
Cost: 75000 EP
Acquirable: After A New Order.
Description: 'Flipkick Launcher turns your enemy into a projectile. Jump kick, and then charge for launch!'
Perform: [In Air] Hold X/Square and [Connect with Target] X/Square.
Body Surf
Cost: 120000 EP
Acquirable: After Confessions.
Description: 'Don't stop moving with the Body Surf; turn your enemy into a new form of movement. Will only work with human-class enemies.'
Perform: Hold LT/L2 [On Human] and [In Air] Hold X/Square.
Air Stomp
Cost: 50000 EP
Acquirable: After Confessions.
Description: 'Perform a quick drop to create a powerful shockwave. Useful to clear out a tight grouping of enemies, or stun a larger opponent for an immediate followup attack.'
Perform: [In Air] Y/Triangle.
Bulletdive Drop
Cost: 1500000 EP
Acquirable: After Children of Blacklight.
Description: 'From the Glide move, drop hard, drop fast for a maximum-impact splash effect with the Bulletdive Drop. The Bulletdive drop doesn't track well, but it hits extremely hard – your most powerful drop attack.'
Perform: [Glide] to Y/Triangle.
Cannonball
Cost: 80000 EP
Acquirable: After Confessions.
Prerequisite: Palm Slam
Description: 'Tuck and roll; slice through the air and unleash a deadly splash impact on your opponents. The Cannonball has excellent range and tracking, making it an outstanding attack against aircraft.'
Perform: Hold X/Square and B/Circle [In Air].
Spike Driver
Cost: 550000 EP
Acquirable: After Children of Blacklight.
Prerequisite: Air Combo
Description: 'Spike your enemy downwards. Charge the Spike Driver to increase damage.'
Perform: [From Air Combo] to X/Square.
Combat – Area Effect
Groundshatter
Cost: 40000 EP
Acquirable: After Behind the Glass.
Description: Pound the ground. Can be charged
Perform: X Y (X360); Square Triangle (PS3)
Air Groundspike Graveyard Devastator
Cost: 540000 EP
Acquirable: After Children of Blacklight.
Description: 'Drop from the sky and deliver a wave of deadly Groundspikes to impale nearby enemies. Very powerful against vehicles. Devastators can only be used when in Critical Mass.'
Perform: [In Air, In Critical Mass], Hold X Y (X360), Square Triangle (PS3)
Groundspike Graveyard Devastator
Cost: 60000 EP
Acquirable: After Behind the Glass.
Prerequisite: Groundshatter
Description: 'One of the most powerful moves available. Devastat with a cascade of deadly groundspikes to everything nearby. Devastators can only be triggered when in Critical Mass.'
Perform: [In Critical Mass] Hold X Y (X360); Square Triangle (PS3)
Knuckle Shockwave (Core)
Cost: 24000 EP
Acquirable: After Behind the Glass.
Description: 'Pound your fists together to blast opponents away from you. Not damaging, but can buy you a lot of time when you blast enemies out of your way. Great for clearing an area among weaker foes. Charge for more power.'
Perform: Y B (X360); Triangle Circle (PS3).
Tendril Barrage Devastator (Core)
Cost: 54000 EP
Acquirable: After Behind the Glass.
Description: 'Deadly tendrils erupt from your body to impale all nearby enemies. Most powerful against biological foes. Can only be used when in Critical Mass.'
Perform: [In Critical Mass] Hold Y B (Xbox 360); Hold Triangle Circle (PS3).
Air Knuckle Shockwave
Cost: 380000 EP
Acquirable: After Biological Imperative.
Prerequisite: Knuckle Shockwave
Description: 'Pound your fists together to create a powerful shockwave blast. Not the most damaging attack, but great for clearing the air. Use during jumps to clear away weak or damaged aerial opponents.'
Perform: [In Air] Y B (Xbox 360); Triangle Circle (PS3).
Air Tendril Barrage Devastator
Cost: 450000 EP
Acquirable: After Biological Imperative.
Description: 'Air version of the Tendril Barrage Devastator. Tendrils erupt from your form to impale all nearby enemies. Most powerful against large numbers of weaker enemies or fast-moving evasive enemies such as helicopters.'
Perform: [In Air, In Critical Mass], Hold Y B (X360); Hold Triangle Circle (PS3).
Combat – Attacks
Breakdown Smash
Cost: 45000 EP
Acquirable: After Confessions.
Description: 'A devastating attack move with extra charge potential. Combo into this and charge for outstanding damage.'
Perform: X, X, Hold X (X360); Square, Square, Hold Square (PS3)
Uppercut Launcher
Cost: 35000 EP
Acquirable: After Confessions.
Description: 'Launch your enemy with a chin-shattering Uppercut Launcher. Follow-up while in the air, or Air Stomp down as a followup.'
Perform: Hold LT to Left Stick [Away] to Hold X; Hold L2 to Left Analog Stick (Away) to Hold Square.
Air Combo
Cost: 135000 EP
Acquirable: After Confessions.
Prerequisite: Uppercut Launcher
Description: 'Bash your target towards the horizon with a bone shattering combo! Follows right out of the Uppercut Launcher.'
Perform: Uppercut to [Enemy in Air] X/Square, X/Square, X/Square.
Curb Stomp
Cost: 120000 EP
Acquirable: After Confessions.
Description: 'Introduce your defeated enemy's face to the hell of your shoe.'
Perform: [Downed Opponent] X/Square.
Palm Slam
Cost: 75000 EP
Acquirable: After Confessions.
Description: 'Let your enemy know how you feel about them with a fast Palm Slam. Clears nearby enemies from your path with a directed force attack. Allows access to the Critical Pain Devastator.'
Perform: X B (X360); Square Circle (PS3).
Notes: A good upgrade to purchase, if only to unlock the Critical Pain Devastator.
Critical Pain Devastator
Cost: 475000 EP
Acquirable: After Biological Imperative.
Prerequisite: Palm Slam
Description: 'Let your enemy know how you feel about them with a fast Palm Slam. Clears nearby enemies from your path with a directed force attack. Allows access to the Critical Pain Devastator.'
Perform: [In Critical Mass] Hold X B (X360), Hold Square Circle (PS3).
Air Critical Pain Devastator
Cost: 500000 EP
Acquirable: After Biological Imperative.
Prerequisite Critical Pain Devastator
Description: Air version of the Critical Pain Devastator attack. Does massive damage to anything in the line of fire; air version allows the player to jump and charge the attack without exposing himself to a counter-attack.'
Perform: [In Air, In Critical Mass], Hold X B (X360), Square Circle (PS3).
Snapkick Launcher
Cost: 900000 EP
Acquirable: After Shock and Awe.
Prerequisite: Palm Slam
Description: 'Use the Snapkick Launcher to launch a single enemy far into the air. Charge to increase effect.'
Perform: Hold LT/L2 to Left Thumbstick/Analog Stick (Away) to Y/Triangle.
Combat - Grab and Throw Upgrades
Sprinting Grab (Core)
Cost: 5000 EP
Acquirable: After Past and Present.
Description: Allows you to grab ammo or victims without sacrificing movement.
Perform: Hold RT/R2 to Left Thumbstick to B/Circle.
Notes: Very useful ability—one of the essentials. Use this ability to grab targets while sprinting and consume them somewhere safe.
Charged Throw
Cost: 30000 EP
Acquirable: After Behind the Glass.
Description: Throws can by charged to increase range and power.
Perform: [Holding Object] Hold B/Circle.
Sprinting Throw
Cost: 25000 EP
Acquirable: After Behind the Glass.
Description: Throw objects while moving.
Perform: [Holding Object] Hold RT to Left Thumbstick to B/Circle.
Long Range Throw
Cost: 50000 EP
Acquirable: After A New Order.
Prerequisite: Charged Throw
Description: 'Increase your object throw range; pick off opponents more than a block away when combined with targeting. Excellent against distant enemy grounds, Infected hives or military bases.'
Hunter Dirtnap
Cost: 250000 EP
Acquirable: After A New Order.
Description: 'Grab and slam a Hunter to the ground. A good tactical option when you're surrounded by a pack of infected, or want to get away from a single troublesome Hunter.'
Perform: Grab Hunter (B/Circle) and press B/Circle.
Notes: A useful ability, but rather costly when it first comes available. Definitely acquire it when EP is more plentiful.
Combat – Grapple
Grapple Slam
Cost: 195000 EP
Acquirable: After A New Order.
Description: 'Whiplash any human into a shockwave knockout with the Grapple Slam, a powerful one-shot shockwave attack.'
Perform: [Holding Human] X/Square
Powerbomb
Cost: 500000 EP
Acquirable: After Children of Blacklight.
Prerequisite: Air Combo
Description: 'Face, meet cement. Share the fun of a communal gravity experience with the Powerbomb. Excellent against the more resilient humanoid opponents.'
Perform: [Holding Enemy in Air] Y/Triangle.
Disguise – Consume
Disguise Power
Cost: N/A
Acquired: During Past and Present.
Description: 'Use Disguise to conceal yourself as a perfect copy of the last individual you consumed.'
Stealth Consume (Core)
Cost: 3000 EP
Acquirable: After Behind the Glass.
Description: 'Consume an enemy without raising an alert.Particularly useful for infiltrating bases.'
Perform: Hold RB/R1 and press B/Circle while behind an enemy undetected.
Stealth Consume Boost
Cost: 100000 EP
Acquirable: After Confessions.
Prerequisite: Stealth Consume
Description: 'Increases the speed of your Stealth Consume.'
Notes: Essential and cheap. Buy early.
Consume Boost 1
Cost: 40000 EP
Acquirable: After A New Order.
Description: 'Gain increased health from those you Consume.'
Consume Boost Max
Cost: 550000 EP
Acquirable: After Biological Imperative.
Description: 'Gain more health from those you consume.'
Disguise – Patsy
Patsy
Cost: 100000 EP
Acquirable: After Confessions.
Description: 'Use your disguise to accuse another of being hostile.'
Perform: [While in Military Disguise] Hold RB/R1 and press X/Square while targeting a soldier
Notes: Useful for shifting the attention of nearby soldiers to someone else, allowing you to then Stealth Consume a target.
Patsy Range Boost
Cost: 270000 EP
Acquirable: After Confessions.
Description: 'A range boost to the Patsy move.'
Disguise – Artillery Strike
Artillery Strike
Unlock: Consume one marked Blackwatch Commander
Acquirable: After Behind the Glass.
Description: Call for the immediate vicinity to be shelled.
Perform: While assuming military disguise, hold RB/R1 and press Y/Triangle.
Artillery Strike Upgrade 1
Unlock: Consume one marked Blackwatch Commander.
Acquirable: After A New Order.
Prerequisite: Artillery Strike
Description: 'Upgraded firepower, radius, and duration.'
Artillery Strike Upgrade 2
Unlock: Consume one marked Blackwatch Commander.
Acquirable: After Confessions.
Prerequisite: Artillery Strike Upgrade 1
Description: 'Upgraded firepower, radius, and duration.'
Artillery Strike Upgrade 3
Unlock: Consume one marked Blackwatch Commander.
Acquirable: After Biological Imperative.
Prerequisite: Artillery Strike Upgrade 2
Description: 'Upgraded firepower, radius, and duration.'
Artillery Strike Upgrade 4
Unlock: Consume one marked Blackwatch Commander.
Acquirable: After Children of Blacklight
Prerequisite: Artillery Strike Upgrade 3
Description: 'Upgraded firepower, radius, and duration.'
Artillery Strike Upgrade Max
Unlock: Consume one marked Blackwatch Commander.
Acquirable: After Shock and Awe.
Prerequisite: Artillery Strike Upgrade 4
Description: 'Maximum firepower, radius, and duration.'
Vehicle – Hijack
Hijack Armored Vehicle
Unlock: Consume one marked Armored Vehicle Officer.
Acquired: During The Wheels of Chance.
Description: Hijack an armoured vehicle.
Perform: Hold B/Circle when near vehicle. If occupied and the military is alerted, tap Y/Triangle to open the hatch once on the turret.
Notes: When assuming a military disguise and undetected by the military, occupied vehicles can be hijacked without causing a stir.
Skyjack Helicopter
Unlock: Consume one marked Helicopter Officer.
Acquired: After Confessions.
Description: 'Skyjack enemy helicopters. Jump onboard and take control.'
Perform: Grab Helicopter B/Circle
Notes: Jump Kick Boost makes reaching helicopters that are in flight much easier.
Vehicle – Armored Vehicle
Armored Vehicle 1
Unlock: Consume one marked Armored Vehicle Officer.
Acquirable: After Behind the Glass.
Prerequisite: Hijack Armored Vehicle
Description: 'Increased effectiveness for armoured vehicles.'
Armored Vehicle 2
Unlock: Consume one marked Armored Vehicle Officer.
Acquirable: After A New Order,
Prerequisite: Armored Vehicle 1
Description: 'Increased effectiveness for armoured vehicles.'
Armored Vehicle Max
Unlock: Consume one marked Armored Vehicle Officer.
Acquirable: After Confessions.
Prerequisite: Armored Vehicle 2
Description: 'Maximum effectiveness for armoured vehicles.'
Vehicle – Helicopter
Helicopter 1
Unlock: Consume one marked Helicopter Officer.
Acquirable: After Confessions.
Prerequisite: Skyjack Helicopter
Description: 'Increased effectiveness for helicopters.'
Helicopter 2
Unlock: Consume one marked Helicopter Officer.
Acquirable: After Biological Imperative.
Prerequisite: Helicopter 1
Description: 'Increased effectiveness for helicopters.'
Helicopter Max
Unlock: Consume one marked Helicopter Officer.
Acquirable: After Children of Blacklight.
Prerequisite: Helicopter 2
Description: 'Maximum effectiveness for helicopters.'
Weaponry – Assault Rifle
Assault Rifle 1
Unlock: Consume one marked Base Weapon Master.
Acquirable: After Behind the Glass.
Description: 'Increased effectiveness for the Assault Rifle.'
Assault Rifle 2
Unlock: Consume one marked Base Weapon Master.
Acquirable: Biological Imperative.
Prerequisite: Assault Rifle 1
Description: 'Increased effectiveness for the Assault Rifle.'
Assault Rifle Max
Unlock: Consume one marked Base Weapon Master.
Acquirable: After Confessions.
Prerequisite: Assault Rifle 2
Description: 'Maximum effectiveness for the Assault Rifle.'
Weaponry – Machine Gun
Machine Gun 1
Unlock: Consume one marked Base Weapon Master.
Acquirable: After A New Order.
Description: 'Increased effectiveness for the Machine Gun.'
Machine Gun 2
Unlock: Consume one marked Base Weapon Master.
Acquirable: After Biological Imperative.
Prerequisite: Machine Gun 1
Description: 'Increased effectiveness for the Machine Gun.'
Machine Gun Max
Unlock: Consume one marked Base Weapon Master.
Acquirable: After Shock and Awe.
Prerequisite: Machine Gun 2
Description: 'Maximum effectiveness for the Machine Gun.'
Weaponry – Missile Launcher
Missile Launcher 1
Unlock: Consume one marked Base Weapon Master.
Acquirable: After Confessions.
Description: 'Increased effectiveness for the Missile Launcher.'
Missile Launcher 2
Unlock: Consume one marked Base Weapon Master.
Acquirable: After Biological Imperative.
Prerequisite: Missile Launcher 1
Description: 'Increased effectiveness for the Missile Launcher.'
Missile Launcher Max
Unlock: Consume one marked Base Weapon Master.
Acquirable: After Children of Blacklight.
Prerequisite: Missile Launcher 2
Description: 'Maximum effectiveness for the Missile Launcher.'
Weaponry – Grenade Launcher
Grenade Launcher 1
Unlock: Consume one marked Base Weapon Master.
Acquirable: After A New Order.
Description: 'Increased effectiveness for the Grenade Launcher.'
Grenade Launcher 2
Unlock: Consume one marked Base Weapon Master.
Acquirable: After Confessions.
Prerequisite: Grenade Launcher 1
Description: 'Increased effectiveness for the Grenade Launcher.'
Grenade Launcher Max
Unlock: Consume one marked Base Weapon Master.
Acquirable: After Biological Imperative.
Prerequisite: Grenade Launcher 2
Description: 'Increased effectiveness for the Grenade Launcher.'
The objective in a Movement Event is to hit the waypoints as fast as possible.
Hit every waypoint within a set time to earn either a Bronze, Silver, or Gold medal. There are also Platinum medals, which are unlocked by earning Gold in every single event (all Glide, Kill, and War events included). Even if you have yet to unlock the Platinum targets, completed events that fall at or under Platinum time will be bumped up once you have.
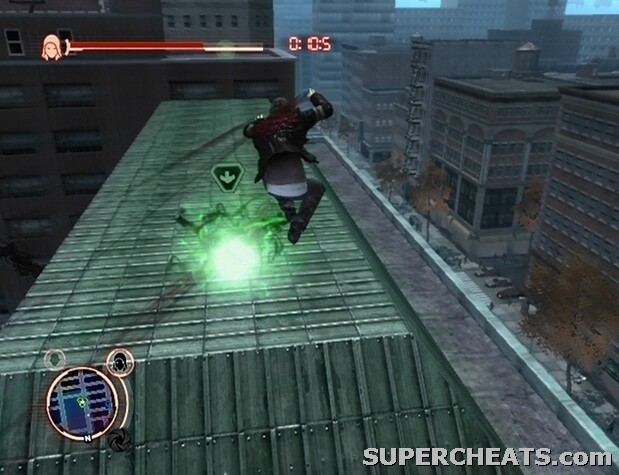
Hit the waypoints as fast as possible!
Achieving Platinum on all events unlocks Radical medals, which tend to require that an event be completed in a ridiculously short amount of time.
To achieve a Platinum time in the Movement Events, having all of the Movement upgrades is essential; without them, you'll almost surely fall short. Learning to use the Airdash ability correctly is the key to success here.
Most importantly, know that performing Airdash directly after a jump will push you higher, and performing an Airdash out of a Glide will allow you to travel further.
High Flying
Platinum
Time: 0:23:0
Reward: 8500 EP
Gold
Time: 0:26:0
Reward: 6500 EP
Silver
Time: 0:33:0
Reward: 4000 EP
Bronze
Time: 0:38:00
Reward: 2500 EP
High Flying Platinum
Eaves-Jumping
Platinum
Time: 0:38:0
Reward: 8500 EP
Gold
Time: 0:45:0
Reward: 6500 EP
Silver
Time: 0:55:0
Reward: 4000 EP
Bronze
Time: 1:05:0
Reward: 2500 EP
Eaves-Jumping Platinum
Point to Point
Platinum
Time: 0:18:0
Reward: 8500 EP
Gold
Time: 0:21:0
Reward: 6500 EP
Silver
Time: 0:27:0
Reward: 4000 EP
Bronze
Time: 0:32:0
Reward: 2500 EP
Point to Point Platinum
Tower of Babel
Platinum
Time: 0:25:0
Reward: 40000 EP
Gold
Time: 0:30:0
Reward: 30000 EP
Silver
Time: 0:35:0
Reward: 16500 EP
Bronze
Time: 0:40:0
Reward: 13000 EP
Tower of Babel Platinum
Skyscraping
Platinum
Time: 0:35:0
Reward: 85000 EP
Gold
Time: 0:40:0
Reward: 65000 EP
Silver
Time: 0:50:0
Reward: 40000 EP
Bronze
Time: 1:00:0
Reward: 25000 EP
Skyscraping Platinum
Among the Clouds
Platinum
Time: 0:58:0
Reward: 85000 EP
Gold
Time: 1:02:0
Reward: 65000 EP
Silver
Time: 1:12:0
Reward: 40000 EP
Bronze
Time: 1:25:0
Reward: 25000 EP
Among the Clouds Platinum
Rooftop Runner
Platinum
Time: 0:36:00
Reward: 102000 EP
Gold
Time: 0:42:0
Reward: 78000 EP
Silver
Time: 1:00:0
Reward: 45500 EP
Bronze
Time: 1:15:0
Reward: 32500 EP
Rooftop Runner Platinum
Corners
Platinum
Time: 1:45:0
Reward: 102000 EP
Gold
Time: 2:00
Reward: 78000 EP
Silver
Time: 2:20:0
Reward: 455000 EP
Bronze
Time: 2:30:0
Reward: 32500 EP
Corners Platinum
Free Running
Platinum
Time: 1:12:0
Reward: 102000 EP
Gold
Time: 1:18:0
Reward: 78000 EP
Silver
Time: 1:25:0
Reward: 45500 EP
Bronze
Time: 1:45:0
Reward: 32500 EP
Free Running Platinum
Center of Power
Platinum
Time: 1:10:0
Reward: 120000
Gold
Time: 1:15:0
Reward: 80000 EP
Silver
Time: 1:22:0
Reward: 55000 EP
Bronze
Time: 1:35:0
Reward: 40000 EP
Center of Power Platinum
In a Glide Event, the goal is to land as close to the green arrow as possible.
If you land within a set distance of the center, you will earn either a Bronze, Silver, or Gold medal. There are also Platinum medals, which are unlocked by earning Gold in every single event (all Movement, Kill, and War events included). Even if you have yet to unlock the Platinum targets, completed events that fall at or under Platinum score will be bumped up once you have.
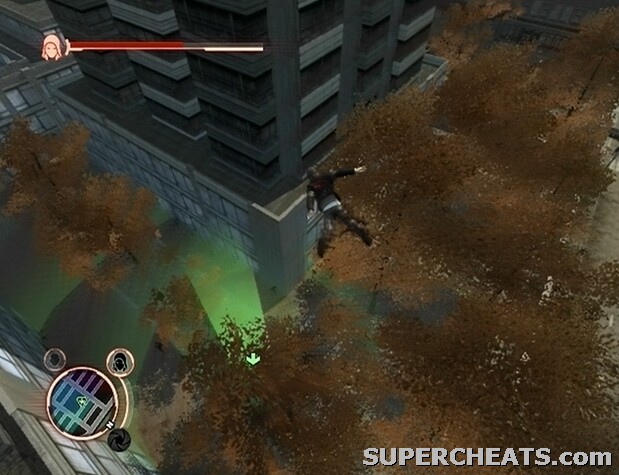
Land as close to the target as possible.
Achieving Platinum on all events unlocks Radical medals, which all require a ridiculously precise landing to unlock.
To achieve Platinum time in the Glide Events, having all of the Movement upgrades is essential.
From on High
Platinum
Mark: 2.00
Reward: 4300 EP
Gold
Mark: 5.00
Reward: 3300 EP
Silver
Mark: 12.00
Reward: 2000 EP
Bronze
Mark: 25.00
Reward: 1300 EP
From on High Platinum
Over-Arching Triumph
Platinum
Mark: 2.00
Reward: 10000 EP
Gold
Mark: 5.00
Reward: 8000 EP
Silver
Mark: 12.00
Reward: 4500 EP
Bronze
Mark: 25.00
Reward: 3300 EP
Over-Arching Triumph Platinum
Fountain of Youth
Platinum
Mark: 2.00
Reward: 20000 EP
Gold
Mark: 5.00
Reward: 15000 EP
Silver
Mark: 12.00
Reward: 8300 EP
Bronze
Mark: 25.00
Reward: 6500 EP
Fountain of Youth Platinum
On a Pedestal
Platinum
Mark: 2.00
Reward: 20000 EP
Gold
Mark: 5.00
Reward: 15000 EP
Silver
Mark: 12.00
Reward: 8300 EP
Bronze
Mark: 25.00
Reward: 6500 EP
On a Pedestal Platinum
Bullseye
Platinum
Mark: 1.00
Reward: 20000 EP
Gold
Mark: 5.00
Reward: 15000 EP
Silver
Mark: 12.00
Reward: 8300 EP
Bronze
Mark: 25.00
Reward: 6500 EP
Bullseye Platinum
Stone Skipping
Platinum
Mark: 0.50
Reward: 43000 EP
Gold
Mark: 4.00
Reward: 33000 EP
Silver
Mark: 12.00
Reward: 20000 EP
Bronze
Mark: 60.00
Reward: 12500 EP
Stone Skipping Platinum
Go West
Tip: Smash the two fire escapes along the target area and then trigger the event to have the area unobstructed.
Platinum
Mark: 0.50
Reward: 43000 EP
Gold
Mark: 2.00
Reward: 33000 EP
Silver
Mark: 7.00
Reward: 20000 EP
Bronze
Mark: 14.00
Reward: 12500 EP
Go West Platinum
Curvaceous
Platinum
Mark: 2.00
Reward: 50000 EP
Gold
Mark: 5.00
Reward: 40000 EP
Silver
Mark: 12.00
Reward: 25000 EP
Bronze
Mark: 25.00
Reward: 16500 EP
Curvaceous Platinum
Cloverleaf
Platinum
Mark: 2.00
Reward: 50000 EP
Gold
Mark: 4.50
Reward: 40000 EP
Silver
Mark: 12.00
Reward: 25000 EP
Bronze
Mark: 25.00
Reward: 16500 EP
Cloverleaf Platinum
Wrong Side of the Tracks
Platinum
Mark: 2.00
Reward: 50000 EP
Gold
Mark: 5.00
Reward: 40000 EP
Silver
Mark: 12.00
Reward: 25000 EP
Bronze
Mark: 25.00
Reward: 16500 EP
Wrong Side of the Tracks Platinum
In a Kill Event, the goal is to kill as many Infected or Military targets within the allotted time limit as possible. Each type of enemy is worth a set amount of points, and in most cases, you aren't constrained to killing marked targets to rack up score. For a kill to count toward your score, you must use the weapon provided. If you are given a Power, only killing enemies with attacks that fall under that power will count.

Kill targets with the provided weapon to rack up score.
Reach a set score within the time limit to earn either a Bronze, Silver, or Gold medal. There are also Platinum medals, which are unlocked by earning Gold in every single event (all Movement, Glide, and War events included). Even if you have yet to unlock the Platinum targets, completed events that fall at or above Platinum score will be bumped up once you have.
Achieving Platinum on all events unlocks Radical medals, which all require a ridiculously high score to unlock.
To achieve Platinum time in all Kill Events, it is a good idea to have completed the main storyline and unlocked all of the Power, Combat, and Movement upgrades.
Disembowelment
Weapon: Claws Power
Target: Military
Time Limit: 1:00
Run into the middle of a group of soldiers and perform Groundspike. Attack individual soldiers with basic attacks. Eventually, more soldiers should spawn and gather into a group to fire at you. Use Groundspike while standing in the middle of this group. Repeat this tactic until the target score has been reached.
Platinum
Score: 32
Reward: 8500 EP
Gold
Score: 28
Reward: 6500 EP
Silver
Score: 22
Reward: 4000 EP
Bronze
Score: 16
Reward: 2500 EP
Disembowelment Platinum
Dismemberment
Weapon: Claws Power
Target: Infected
Time Limit: 1:00
Spam Groundspike in the middle of a large group of Infected citizens; you are likely to kill Evolved Infected in the process. Glide away to another group to keep your distance from the Hunter.
Platinum
Score: 95
Reward: 20000 EP
Gold
Score: 80
Reward: 16000 EP
Silver
Score: 65
Reward: 9000 EP
Bronze
Score: 40
Reward: 6500 EP
Dismemberment Platinum
Infected Patrol
Weapon: APC
Target: Infected
Time Limit: 2:00
Continuously drive down the street while holding down the RB/R1 and RT/R2 buttons; direct the cannon fire at groups of marked and regular Infected.
Platinum
Score: 300
Reward: 20000 EP
Gold
Score: 270
Reward: 16000 EP
Silver
Score: 210
Reward: 9000 EP
Bronze
Score: 150
Reward: 6500 EP
Infected Patrol Platinum
Grind the Bones
Weapon: Hammerfist Power
Target: Infected
Time Limit: 1:00
Spam fully-charged Hammerfist Smackdown in the middle of large groups of enemies. Glide and Airdash away from the Hunter in search of large groups of Infected.
Platinum
Score: 140
Reward: 20000 EP
Gold
Score: 120
Reward: 16000 EP
Silver
Score: 80
Reward: 9000 EP
Bronze
Score: 60
Reward: 6500 EP
Grind the Bones Platinum
Street Sweeper
Weapon: Whipfist Power
Target: Infected
Time Limit: 1:00
Jump and Double Airdash to a large group of Infected and perform a fully-charged Street Sweeper (hold Y/Triangle). Then, spam basic attacks (X/Square) and spin the camera around in search of another group of Infected and Jump and Double Airdash over to them. The larger Infected are worth more points, and will chase after you, so they are likely to get swiped when Street Sweeper is performed.
Platinum
Score: 250
Reward: 40000 EP
Gold
Score: 200
Reward: 30000 EP
Silver
Score: 150
Reward: 16500 EP
Bronze
Score: 100
Reward: 13000 EP
Street Sweeper Platinum
Raining Fire
Weapon: Helicopter
Target: Military
Time Limit: 2:00
Ignore the marked UAVs and instead head for the large military compound in the southwest corner of the city. Switch to the helicopter's secondary weapon (use RB/R1 to cycle through) and blast the soldiers and any tanks you can spot below. You should be able to rack up quite a score this way.
Platinum
Score: 75
Reward: 40000 EP
Gold
Score: 65
Reward: 30000 EP
Silver
Score: 50
Reward: 16500 EP
Bronze
Score: 25
Reward: 13000 EP
Raining Fire Platinum
Friendly Fire
Weapon: Helicopter
Target: Military
Time Limit: 2:00
Each helicopter shot down is worth 10 kills; use the Gunship's primary fire (as it is the most accurate) and shoot down the enemy helicopters as they spawn. Having the Helicopter Max upgrade is essential.
Platinum
Score: 180
Reward: 40000 EP
Gold
Score: 150
Reward: 30000 EP
Silver
Score: 110
Reward: 16500 EP
Bronze
Score: 75
Reward: 13000 EP
Friendly Fire Platinum
Irony
Weapon: APC
Target: Military
Time Limit: 2:00
Start south down the long road and spin the camera around. Hold down LT/L2, flick the Right Thumbstick/Analog Stick to target a soldier and press the RB/R1 button to fire off a homing missile. Do not remain locked-on to the soldier once the missile has been fire, and instead immediately cycle to a new target and fire again.
The biggest threat here are other tanks, marked by the red skull icon on the mini-map. When a red skull icon appears on the mini-map, flick the Right Thumbstick/Analog Stick to face the enemy tank and hit it with the Missile Launcher (RB/R1); the tank should be destroyed in a single hit, provided you have acquired the Armored Vehicle Max upgrade. Continue heading south, blasting the groups of soldiers that appear behind you, and keep an eye out for tanks using the mini-map.
Platinum
Score: 105
Reward: 40000 EP
Gold
Score: 85
Reward: 30000 EP
Silver
Score: 65
Reward: 16500 EP
Bronze
Score: 45
Reward: 13000 EP
Irony Platinum
Explosive
Weapon: Grenade Launcher
Target: Military
Time Limit: 1:00
Don't focus on individual targets; just walk through the streets blasting Infected Civilians that are far from you. Ignore the marked targets; they shouldn't be able to strike you often if you walk at a normal stride.
Platinum: 115
Reward: 50000 EP
Gold
Score: 100
Reward: 40000 EP
Silver
Score: 70
Reward: 26000 EP
Bronze
Score: 40
Reward: 20000 EP
Explosive Platinum
Armor
Weapon: Tank
Target: Military
Time Limit: 2:00
Destroying an enemy tank is worth five points, so target these almost exclusively. Hold the LT/L2, RT/R2, and RB/R1 buttons at all times; when a tank appears on the mini-map (denoted by a red skull icon), flick the Left Thumbstick/Analog Stick to target the tank. Provided you have acquired the Armored Vehicles Max upgrade, the targeted tank should be destroyed within seconds. Target groups of soldiers while you wait for more tanks to spawn, but immediately target a tank whenever one appears.
Attaining a Platinum score seems to require a bit of luck here, as the number of tanks that spawn at once and where they spawn is random.
Platinum
Score: 175
Reward: 50000 EP
Gold
Score: 125
Reward: 40000 EP
Silver
Score: 90
Reward: 26000 EP
Bronze
Score: 60
Reward: 20000 EP
Armor Platinum
Catch
Weapon: Grenade Launcher
Target: Military
Time Limit: 1:00
Tanks are worth 5 kills apiece. Lock-on to any tank that appears on the mini-map (denoted by a red skull icon) and quickly destroy them. Blast groups of soldiers to rack up your kill count while waiting for another tank to spawn. The Grenade Launcher Max upgrade is essential.
Platinum
Score: 60
Reward: 50000 EP
Gold
Score: 50
Reward: 40000 EP
Silver
Score: 40
Reward: 26000 EP
Bronze
Score: 25
Reward: 20000 EP
Catch Platinum
Projectiles
Weapon: Helicopter
Target: Infected
Time Limit: 2:00
Ignore the marked targets and start flying south down the road. Blast the Infected Civilians in the street with the helicopter's secondary weapon (press RB/R1 to cycle through). Keep flying south above this road, targeting the Infected Civilians below, to reach the target score.
Platinum
Score: 220
Reward: 50000 EP
Gold
Score: 175
Reward: 40000 EP
Silver
Score: 120
Reward: 26000 EP
Bronze
Score: 80
Reward: 20000 EP
Projectiles Platinum
Ordnance
Weapon: Tank
Target: Infected
Time Limit: 2:00
Hold the RB/R1 and RT/R2 buttons while driving down the street blasting the groups of Infected Civilians. Ignore the Hunters and marked Infected unless they're directly in your path.
Platinum
Score: 400
Reward: 50000 EP
Gold
Score: 325
Reward: 40000 EP
Silver
Score: 220
Reward: 26000 EP
Bronze
Score: 150
Reward: 20000 EP
Ordnance Platinum
Nothing Left Alive
Weapon: Blade Power
Target: Military
Time Limit: 1:00
Tanks are worth 5 points apiece, so target these. Lock-on to a tank and use the Air Blade Slice attack, which should destroy it in a single hit. Continuously destroy the tanks in this fashion as they spawn until the target score has been met.
Platinum
Score: 100
Reward: 85000 EP
Gold
Score: 85
Reward: 65000 EP
Silver
Score: 60
Reward: 40000 EP
Bronze
Score: 45
Reward: 25000 EP
Nothing Left Alive Platinum
Aerial Assault
Weapon: Missile Launcher
Target: Military
Time Limit: 1:00
Stand in the middle of the rooftop and hold down the LT/L2 button. Fire a missile at one of the helicopters, and then immediately flick the Right Thumbstick/Analog Stick to switch between targets. Fire at the second target, and then right after firing, switch to the next target; continue this pattern to hopefully reach and exceed the target score..
Platinum
Score: 310
Reward: 85000 EP
Gold
Score: 270
Reward: 65000 EP
Silver
Score: 200
Reward: 40000 EP
Bronze
Score: 120
Reward: 25000 EP
Aerial Assault Platinum
Knuckle-Dragger
Weapon: Hammerfist Power
Target: Military
Time Limit: 1:00
This one requires a lot of luck. At the start, try to hit several of the soldiers in the street below with Hammerfist Elbow Slam. Then, look for a tank, which is denoted by a red skull icon on the mini-map. When a tank appears, Sprint, Jump, and Airdash toward it and perform a string of basic attacks to bust the tank. Succeeding here really involves luck, since tanks seem to spawn randomly.
The easy way to achieve a Platinum score requires a bit of preparation and is somewhat exploitive. First, hijack five or six tanks and park them along one side of the building that the event marker is on. Bust the tanks up a bit, take note of which side of the building they are parked, and then start the event. At the start of the event, drop down the side of the building where the tanks are parked and hit them with Hammerfist Smackdown and basic attacks. Once all of the prepared tanks have been destroyed, target the soldiers and marked tanks and kill them in an attempt to reach the target score.
Platinum
Score: 55
Reward: 85000 EP
Gold
Score: 45
Reward: 65000 EP
Silver
Score: 35
Reward: 40000 EP
Bronze
Score: 25
Reward: 25000 EP
Knuckle-Dragger Platinum
Rolling Thunder
Weapon: Thermabaric Tank
Target: Infected
Time Limit: 2:00
Hold the RB/R1 and RT/R2 buttons while driving down the street blasting the groups of Infected Civilians. Ignore the Hunters and marked Infected unless they are directly in your path.
Platinum
Score: 750
Reward: 85000 EP
Gold
Score: 650
Reward: 65000 EP
Silver
Score: 450
Reward: 48000 EP
Bronze
Score: 250
Reward: 25000 EP
Rolling Thunder Platinum
Clear Cutting
Weapon: Blade Power
Target: Infected
Time Limit: 1:00
At the start, Glide and Airdash over to a group of Infected Civilians; the Hunter and other marked Infected should run over to your location. Use basic attacks to rip apart the marked and civilian Infected. Evolved Infected are worth more points than Infected Civilians and are easier to kill than Hunters, so favour targeting them when they appear. Use Blade Air Slice and Blade Frenzy to kill Hunters when they spawn.
Platinum
Score: 125
Reward: 85000 EP
Gold
Score: 110
Reward: 65000 EP
Silver
Score: 85
Reward: 40000 EP
Bronze
Score: 55
Reward: 25000 EP
Clear Cutting Platinum
Fire in the Sky
Weapon: Helicopter
Target: Marked Infected
Time Limit: 2:00
You must kill marked targets to rack up score. Just fly along the road by the water east of the event starting location and continuously fire the helicopter's secondary weapon along the road.
Platinum
Score: 400
Reward: 85000 EP
Gold
Score: 300
Reward: 65000 EP
Silver
Score: 200
Reward: 40000 EP
Bronze
Score: 100
Reward: 25000 EP
Fire in the Sky Platinum
You Called the Thunder...
Weapon: Missile Launcher
Target: Military
Time Limit: 1:00
Stay on street level and hold down the LT/L2 button. Flick the Right Thumbstick/Analog Stick to target an enemy tank, which yield 10 points each when destroyed. With the Missile Launcher Max upgrade, two missiles are enough to destroy one tank. Tanks are denoted by a red skull icon on the mini-map, so when you spot one, flick the Right Thumbstick/Analog Stick to target the recently-spawned tank.
Platinum
Score: 95
Reward: 102000 EP
Gold
Score: 85
Reward: 78000 EP
Silver
Score: 65
Reward: 45500 EP
Bronze
Score: 35
Reward: 32500 EP
You Called the Thunder... Platinum
...Now Reap the Whirlwind
Weapon: Missile Launcher
Target: Infected
Time Limit: 1:00
Ignore the marked targets, and go after groups of Infected Civilians. Jump up into the air and shoot a missile into the middle of a group of Infected Civilians without locking on.
Platinum
Score: 100
Reward: 102000
Gold
Score: 90
Reward: 78000 EP
Silver
Score: 60
Reward: 45000 EP
Bronze
Score: 40
Reward: 32500 EP
...Now Reap the Whirlwind Platinum
Death from Above
Weapon: Helicopter
Target: Military
Time Limit: 2:00
Each helicopter shot down is worth 10 kills; use the Gunship's primary fire (as it is the most accurate) and continuously shoot down the enemy helicopters. Having the Helicopter Max upgrade is essential.
Platinum
Score: 180
Reward: 102000 EP
Gold
Score: 160
Reward: 78000 EP
Silver
Score: 120
Reward: 45500 EP
Bronze
Score: 80
Reward: 32500 EP
Death from Above Platinum
Overkill
Weapon: Whipfist Power
Time Limit: 1:00
Use Street Sweeper on grouped soldiers, and Long Grab and basic attacks on scattered targets. Soldiers should naturally group together; pick off individual troops until some gather together, and then hit them with a fully-charged Street Sweeper.
Platinum
Score: 40
Reward: 135000 EP
Gold
Score: 35
Reward: 80000 EP
Silver
Score: 25
Reward: 55000 EP
Bronze
Score: 15
Reward: 40000 EP
Overkill Platinum
Demolition
Weapon: Thermabaric Tank
Target: Military
Time Limit: 2:00
Start south down the road with the camera spun around and fire at the marked targets that spawn behind you. Tanks are worth five points apiece, so favour targeting those.
Platinum
Score: 200
Reward: 135000 EP
Gold
Score: 180
Reward: 105000 EP
Silver
Score: 150
Reward: 60000 EP
Bronze
Score: 110
Reward: 4600 EP
Demolition Platinum
In a War Event, the goal is to help your side beat out the opposition by depleting their ranks as quickly as possible. The number of fighters on each team is indicated in the top-right corner of the screen. If all of your allies fall, the event is failed.
There are three different variants of War; Infected Ally, Military Ally, and Military Ally Disguised. In Infected Ally and Military Ally War Events, you have access to all of Alex's abilities. In Military Ally Disguised, you are forced to use the weapon you are originally equipped with; dropping the weapon will end the event.
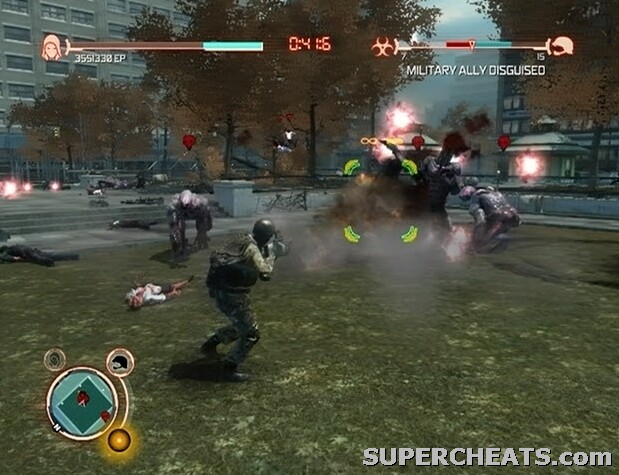
Help your side decimate the opposition.
Defeat the opposing side within a set time to earn a Bronze, Silver, or Gold medal. There are also Platinum medals, which are unlocked by earning Gold in every single event (all Movement, Glide, and Kill events included). Even if you have yet to unlock the Platinum targets, completed events that fall at or under Platinum time will be bumped up once you have.
Achieving Platinum on all events unlocks Radical medals, which all require the opposing team be decimated in a ridiculously short amount of time.
To achieve Platinum time in all War Events, it is a good idea to have completed the main storyline and unlocked all of the Power, Combat (the Devastators especially), and Movement upgrades.
Enemy of my Enemy
Allegiance: Infected Ally
Equip the Blade Power and use Blade Air Slice (lock-on and press the Y/Triangle button) to destroy the tanks that spawn. Use Glide and Airdash to quickly get close to the next tank. Just focus on destroying the tanks, and attack soldiers while you wait for more tanks to spawn. When the tanks stop spawning, take to the soldiers lining the rooftop.
Platinum
Mark: 2:10:0
Reward: 20000 EP
Gold
Mark: 2:30
Reward: 16000 EP
Silver
Mark: 2:50
Reward: 9000 EP
Bronze
Mark: 3:10
Reward: 6500 EP
Enemy of my Enemy Platinum
Strange Bedfellows
Allegiance: Military Ally
Immediately hijack an allied tank. Use the chaingun (RT/R2) to pick off the marked Evolved Infected. Use the cannon (RB/R2) to bring down the marked Hunters. If your tank is destroyed, use Blade Air Slice (lock-on and press Y/Triangle while in mid-air) and then Blade Frenzy (Y/Triangle) to defeat the Hunters.
Platinum
Mark: 1:30:0
Reward: 40000 EP
Gold
Mark: 1:50:0
Reward: 30000 EP
Silver
Mark: 2:15:0
Reward: 16500 EP
Bronze
Mark: 2:45:0
Reward: 13000 EP
Strange Bedfellows Platinum
Battle Field
Allegiance: Military Ally Disguised
The Grenade Launcher Max Upgrade is essential. Just blast the marked Hunters and Evolved Infected without targeting. Lock-on to a Hunter if it is charging toward you, however.
Platinum
Mark: 01:05:0
Reward: 50000 EP
Gold
Mark: 1:15:0
Reward: 40000 EP
Silver
Mark: 1:30:0 EP
Reward: 26000 EP
Bronze
Mark: 2:00:0
Reward: 20000 EP
Battle Field Platinum
Raid
Allegiance: Military Ally Disguised
The Grenade Launcher Max upgrade is essential. Just blast the marked Hunters and Evolved Infected without targeting. Lock-on to a Hunter if it is charging toward you, however.
Platinum
Mark: 1:25:0
Reward: 50000 EP
Gold
Mark: 1:45:0
Reward: 40000 EP
Silver
Mark: 2:10:0
Reward: 26000 EP
Bronze
Mark: 2:45:0
Reward: 20000 EP
Raid Platinum
Final Combat
Allegiance: Military Ally
Perform Tendril Barrage Devastator (hold Y B, Triangle Circle) while in Critical Mass. Kill Hunters with Blade Air Slice (lock-on and press the Y/Triangle button) and basic attacks with the Blade Power equipped. Collect the red orbs dropped by Hunters when killed to reach Critical Mass.
Platinum
Mark: 02:30:0
Reward: 85000 EP
Gold
Mark: 2:50
Reward: 65000 EP
Silver
Mark: 3:20:0 EP
Reward: 40000 EP
Bronze
Mark: 3:40:0
Reward: 25000 EP
Final Combat Platinum
Stairway
Allegiance: Military Ally
Do not use Devastators near the military, as doing so is likely to quickly deplete their ranks. Head to the north end of the warzone and perform Tendril Barrage Devastator (hold Y B, Triangle Circle) or Groundspike Graveyard Devastator (hold X Y, Square Circle) while in Critical Mass. Kill Hunters with Blade Air Slice (lock-on and press the Y/Triangle button) and basic attacks with the Blade Power equipped. Collect the red orbs dropped by Hunters when killed to reach Critical Mass.
Platinum
Mark: 2:10:0
Reward: 850000 EP
Gold
Mark: 2:30
Reward: 650000 EP
Silver
Mark: 3:00
Reward: 40000 EP
Bronze
Mark: 3:30:0
Reward: 25000 EP
Stairway Platinum
Power to the People
Allegiance: Infected Ally
Do not use Devastators while too close to your Infected allies, as doing so is likely to quickly deplete their ranks. Perform Tendril Barrage Devastator (hold Y B, Triangle Circle) or Groundspike Graveyard Devastator (hold X Y, Square Circle) while in Critical Mass, but only when surrounded by a large enough group of soldiers to justify some lost allies. Destroy tanks with Blade Air Slice (lock-on and press the Y/Triangle button) and basic attacks with the Blade Power equipped. While marked tanks are on the mini-map (denoted by red skull icons), target them exclusively and leave the soldiers to your Infected allies. Collect the red orbs left by destroyed tanks when killed to reach Critical Mass.
Platinum
Mark: 2:25:0
Reward: 102000 EP
Gold
Mark: 2:40:0
Reward: 78000 EP
Silver
Mark: 3:30:0
Reward: 45500 EP
Bronze
Mark: 4:00:0
Reward: 32500 EP
Power to the People Platinum
A Walk in the Park
Allegiance: Military Ally Disguised
The Grenade Launcher Max upgrade is essential. Just blast the marked Hunters and Evolved Infected without targeting. Lock-on to a Hunter if it is charging toward you, however.
Platinum
Mark: 2:30:0
Reward: 102000 EP
Gold
Mark: 2:45:0
Reward: 78000 EP
Silver
Mark: 3:00:0
Reward: 45500 EP
Bronze
Mark: 3:30:0
Reward: 32500 EP
A Walk in the Park Platinum
Close Contact
Allegiance: Infected Ally
Kill scattered Supersoldiers with Blade Air Slice (lock-on and press Y/Triangle) and basic attacks with the Blade Power equipped. Build up your Critical Mass meter by collecting the red orbs left by dead Supersoldiers, and then perform Groundspike Graveyard Devastator (X Y, Square Triangle) while standing near more than one Supersoldier.
Platinum
Mark: 3:15:0
Reward: 135000 EP
Gold
Mark: 3:35:0
Reward: 105000 EP
Silver
Mark: 3:55:0
Reward: 60000 EP
Bronze
Mark: 4:15:0
Reward: 46000 EP
Close Contact Platinum
There are two types of Consume Events: Military and Infected. Each type has three groups of missions, divided by difficulty. To move on to a higher difficulty level, you must complete the number of missions contained in the first tier.
To begin a Consume Event, travel to either the green military icon or green Infected icon and consume the soldier or Evolved Infected there to trigger the mission briefing.
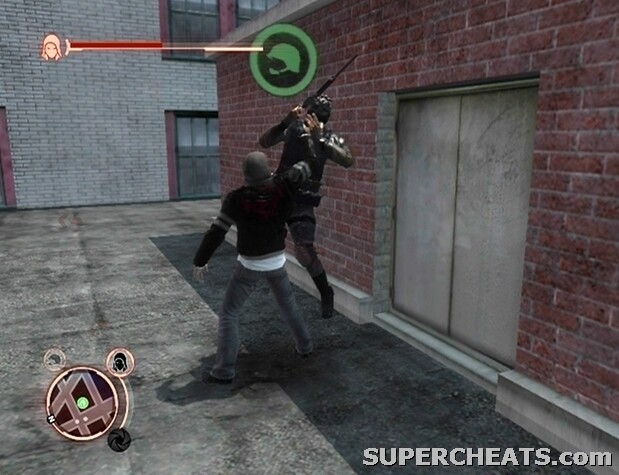
Consume the marked soldier to start a Military Consume Event.
There are four different Military Consume scenarios, and one Infected Consume scenario. The mission given upon consumption of a target appears to be random. The descriptions and requirements of each scenario are outlined below.
Military [Easy]
There are ten Easy Military Consume events total.
[Scientist Hunt]
Difficulty: Easy
Time Limit: 1:50
Overview: Blackwatch Scientists are deployed in the field. Consume enough to reveal Karen Parker's location.
Objectives:
1. Reach the Science Team within the time limit.
2. Consume at least one Scientist.
3. Kill Defenders for bonus reward.
Rewards:
2400 EP for each scientist consumed.
Bonus – 2400 EP for killing all defenders.
[Web Targets]
Time Limit: 2:50
Difficulty: Easy
Overview: There are personnel in the area with knowledge of the viral outbreak. Consume them before they can move to new positions
Objectives:
Consume the Marked Targets (3).
Rewards:
3000 EP for each target consumed
9600 EP for consuming all targets
[Military Base Destruction]
Time Limit: 3:30
Difficulty: Easy
Overview: A nearby Military Base has amassed troops to push deeper into the city. Destroy the base before they can fortify the area.
Objectives:
Destroy the marked base.
Rewards: 14400 EP
[Military Base Infiltration]
Time Limit: 3:00
Difficulty: Easy
Overview: A high ranking Commander is overseeing operations at a nearby base.
Objectives:
1. Infiltrate the base within the time limit.
2. Consume the marked target.
3. Exit the base.
Rewards:
12000 EP
Military [Medium]
There are nine Medium Military Consume events total.
[Scientist Hunt]
Difficulty: Medium
Time Limit: 1:20
Overview: Blackwatch Scientists are deployed in the field. Consume enough to reveal Karen Parker's location.
Objectives:
1. Reach the Science Team within the time limit.
2. Consume at least two Scientists.
3. Kill Defenders for bonus reward.
Rewards:
3600 EP for each scientist consumed.
Bonus – 3600 EP for killing all defenders.
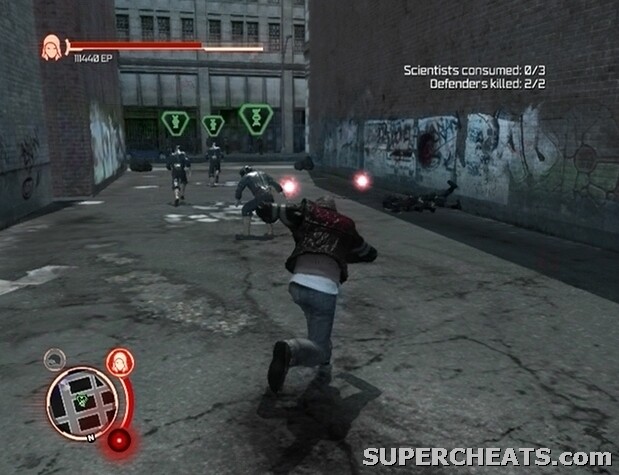
Consume the required number of marked scientists to complete the event.
[Web Targets]
Time Limit: 2:45
Difficulty: Medium
Overview: There are personnel in the area with knowledge of the viral outbreak. Consume them before they can move to new positions
Objectives:
Consume the Marked Targets (4).
Rewards:
31000 EP for each target consumed.
14400 EP for consuming all targets.
[Military Base Destruction]
Time Limit: 3:00
Difficulty: Medium
Overview: A nearby Military Base has amassed troops to push deeper into the city. Destroy the base before they can fortify the area.
Objectives:
Destroy the marked base.
Rewards:
19200 EP
[Military Base Infiltration]
Time Limit: 2:45
Difficulty: Medium
Overview: A high ranking Commander is overseeing operations at a nearby base.
Objectives:
1. Infiltrate the base.
2. Consume the marked target.
3. Exit the base.
Rewards:
21600 EP
Military [Hard]
There are seven Hard Military Consume events total.
[Scientist Hunt]
Difficulty: Hard
Time Limit: 1:00
Overview: Blackwatch Scientists are deployed in the field. Consume enough to reveal Karen Parker's location.
Objectives:
1. Reach the Science Team within the time limit.
2. Consume all Scientists.
3. Kill all Defenders for bonus reward.
Rewards:
4000 EP for each scientist consumed.
Bonus – 6000 EP for killing all defenders.
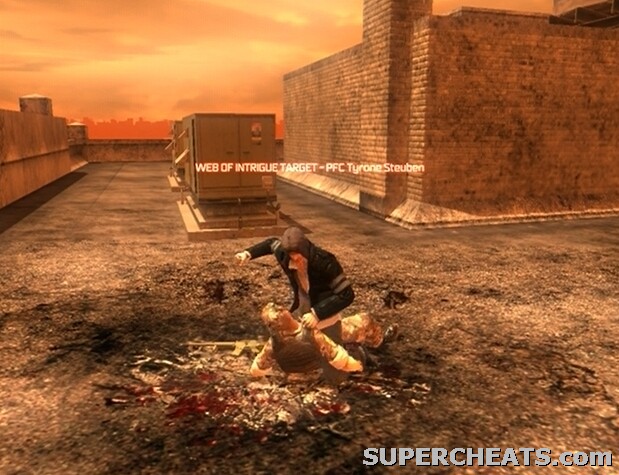
Consume the Web of Intrigue targets within the time limit to complete the event.
[Web Targets]
Time Limit: 3:00
Difficulty: Hard
Overview: There are personnel in the area with knowledge of the viral outbreak. Consume them before they can move to new positions
Objectives:
Consume the Marked Targets (5)
Rewards:
31000 EP for each target consumed
19200 EP for consuming all targets
[Military Base Destruction]
Time Limit: 2:30
Difficulty: Hard
Overview: A nearby Military Base has amassed troops to push deeper into the city. Destroy the base before they can fortify the area.
Objectives:
Destroy the marked base.
Rewards:
24000 EP
[Military Base Infiltration]
Time Limit: 2:30
Difficulty: Hard
Overview: A high ranking Commander is overseeing operations at a nearby base.
Objectives:
1. Infiltrate the base.
2. Consume the marked target.
3. Exit the base.
Rewards:
30000 EP
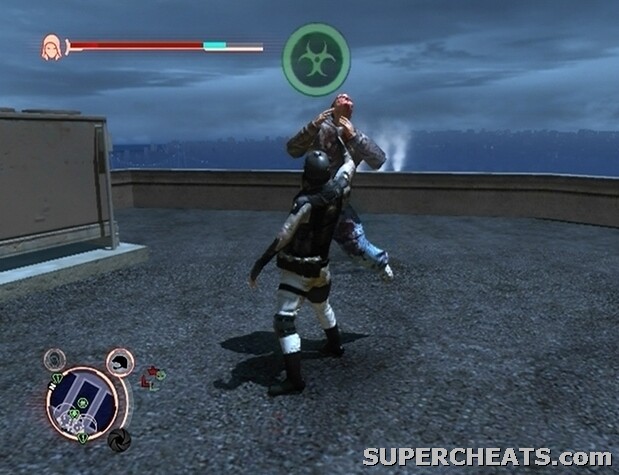
Consume the marked Infected to start an Infected Consume Event.
Infected [Easy
There are three Easy Infected Consume events total.
[Hive Destruction]
Time Limit: 3:30
Difficulty: Easy
Overview: A nearby Hive has been attempting to infect another structure. Destroy the Hive before it spreads.
Objectives:
Destroy the marked Hive.
Rewards:
14400 EP
Infected [Medium]
There are three Medium Infected Consume events total.
[Hive Destruction]
Time Limit: 3:00
Difficulty: Medium
Overview: A nearby Hive has been attempting to infect another structure. Destroy the Hive before it spreads.
Objectives:
Destroy the marked Hive.
Rewards:
19200 EP
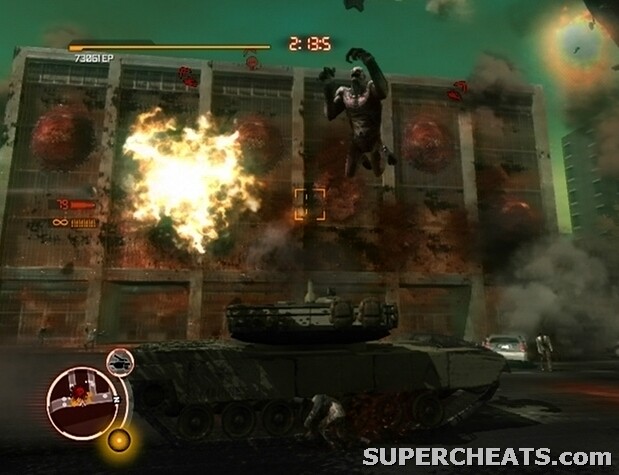
Destroy the marked Hive within the allotted time limit to complete the event.
Infected [Hard]
There are three Hard Infected Consume events total.
[Hive Destruction]
Time Limit: 2:30
Difficulty: Hard
Overview: A nearby Hive has been attempting to infect another structure. Destroy the Hive before it spreads.
Objectives:
Destroy the marked Hive.
Rewards:
24000 EP
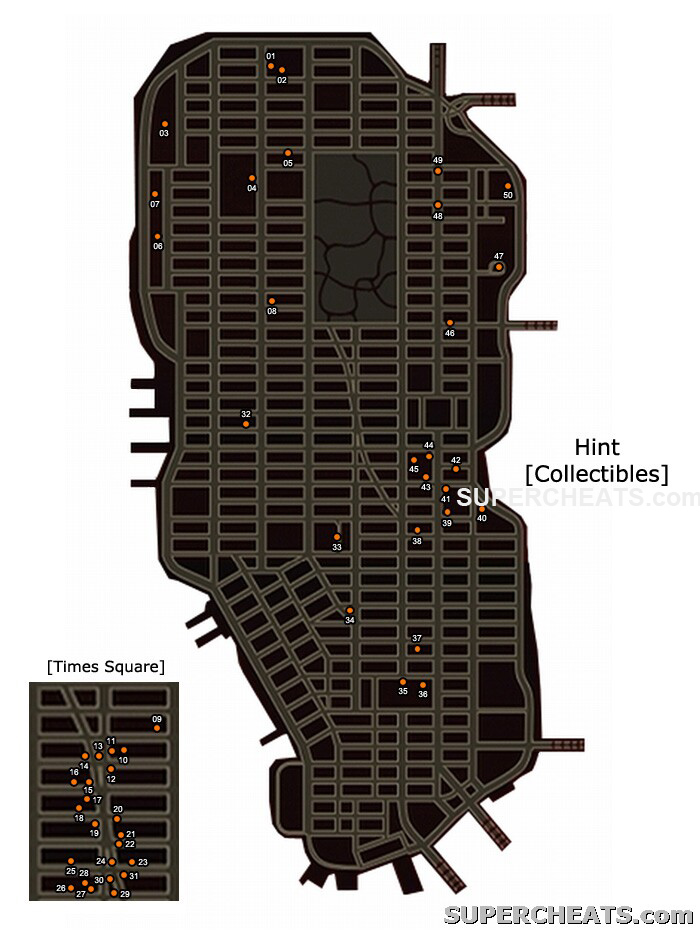
Hint Collectible Locations
There are 50 Hint Collectibles scattered around the city. Each collectible appears as a pink orb in the world. Each time an orb is collected, a random hint will appear in a pop-up onscreen. Each hint is recorded under Hints in the Logs section of the pause menu.
Picking up a Hint Collectible yields some EP; the EP-worth of each Hint Collectible increases as each time a set amount has been collected.
Gathering all 50 Hint Collectibles unlocks the 'Polymath' achievement/trophy.
You can see hint images for all 50 of the collectible locations spotted on the above maps on the following page.
Below you'll find images of all the collecible locations, to give you an exact pin-point for where you can find them on our map. Our map for these collectibles can be found here.
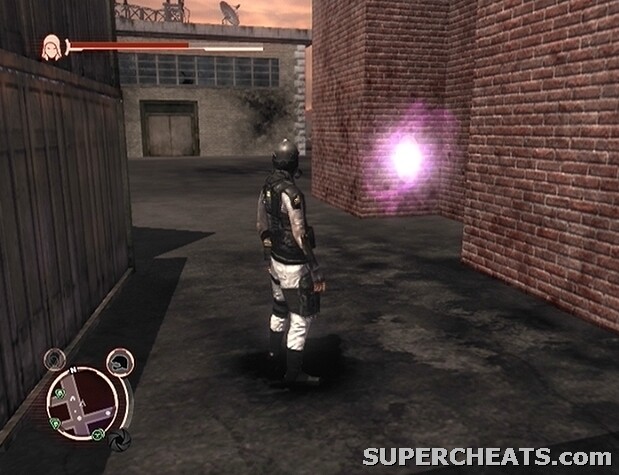
Hint Collectible (01/50)
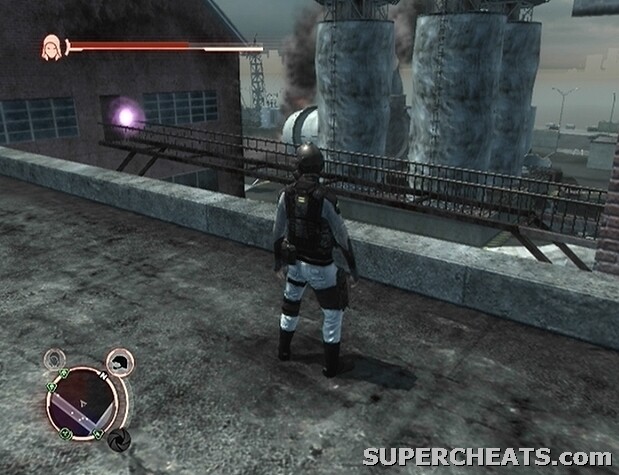
Hint Collectible (02/50)
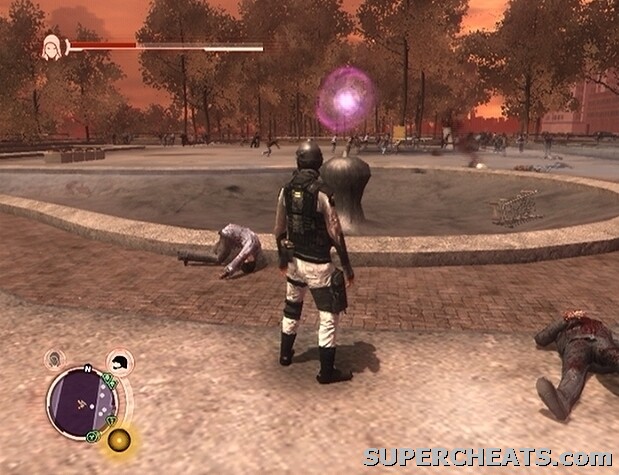
Hint Collectible (03/50)
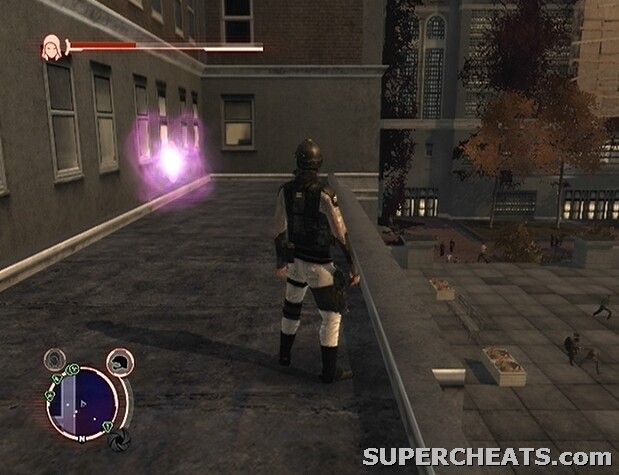
Hint Collectible (04/50)
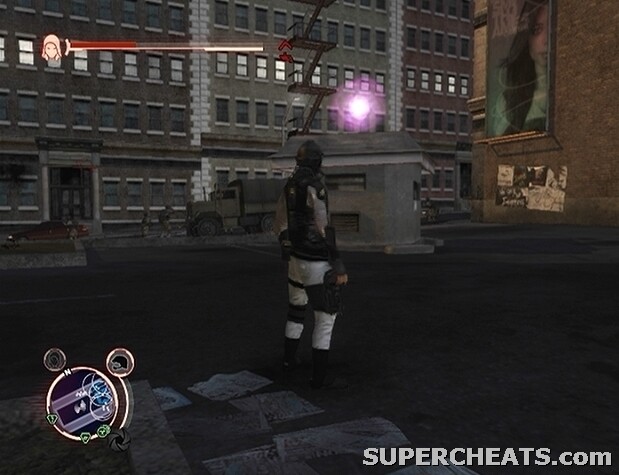
Hint Collectible (05/50)
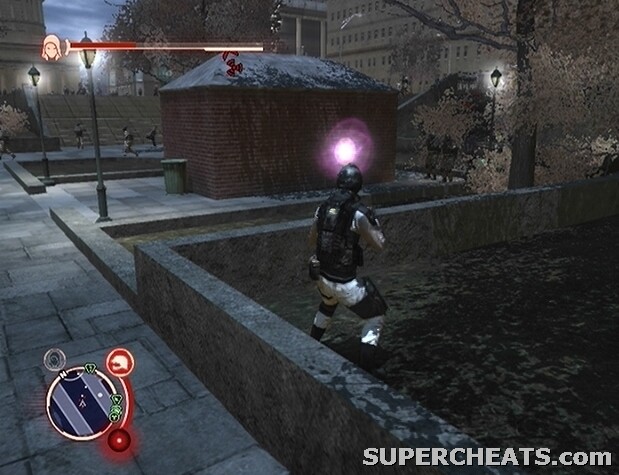
Hint Collectible (06/50)
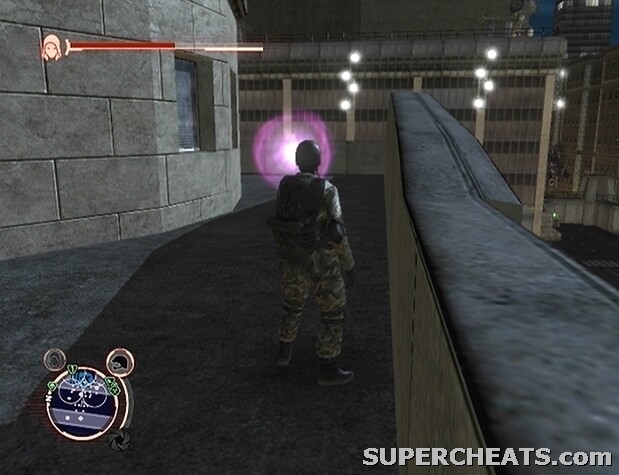
Hint Collectible (07/50)
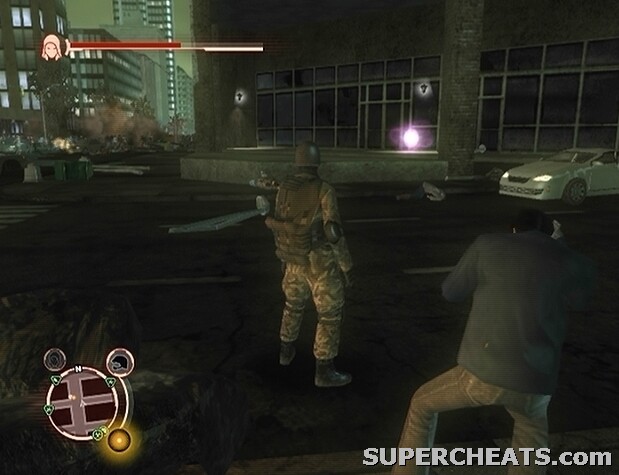
Hint Collectible (08/50)
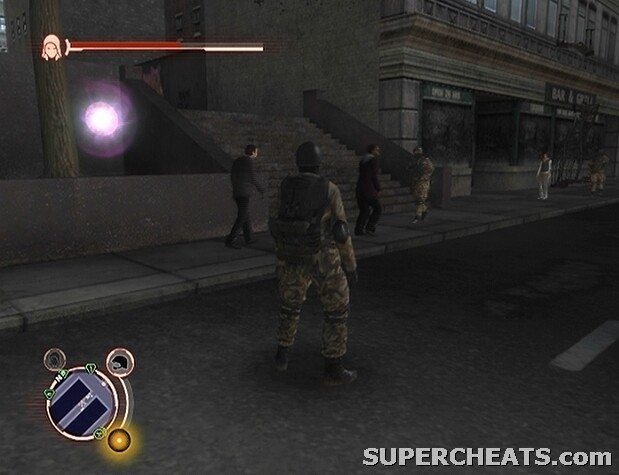
Hint Collectible (09/50)
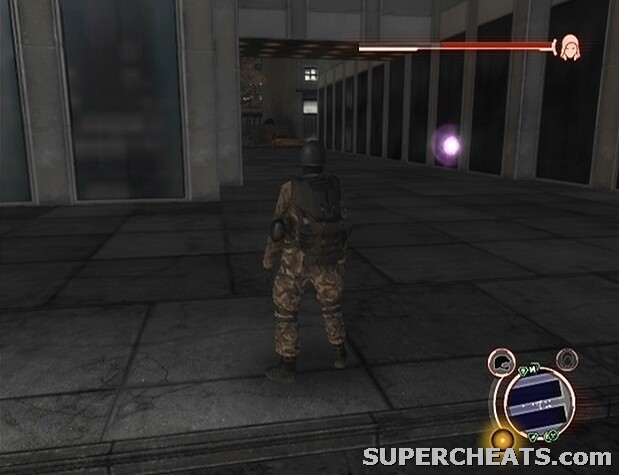
Hint Collectible (10/50)
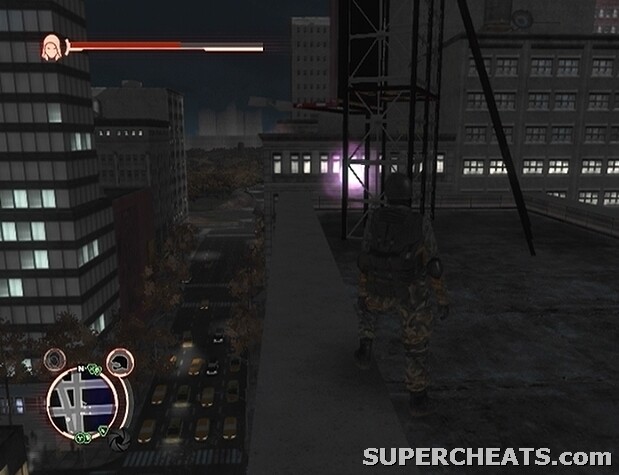
Hint Collectible (11/50)
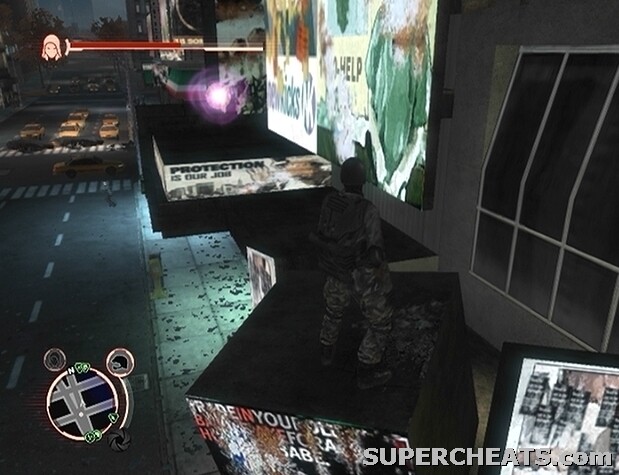
Hint Collectible (12/50)

Hint Collectible (13/50)
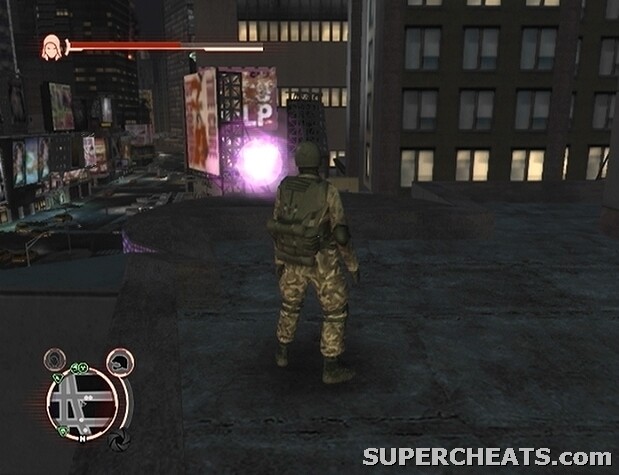
Hint Collectible (14/50)
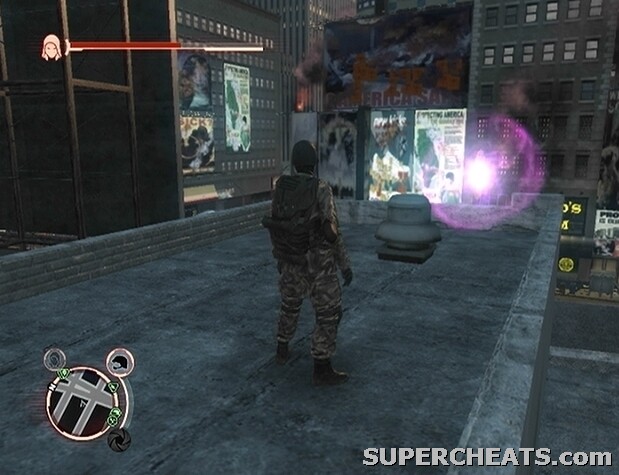
Hint Collectible (15/50)
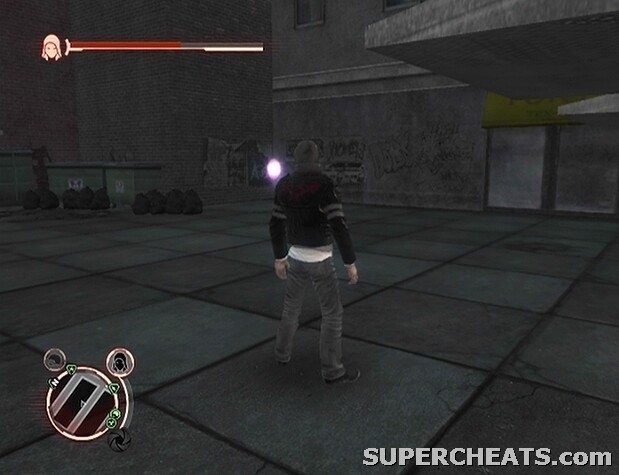
Hint Collectible (16/50)
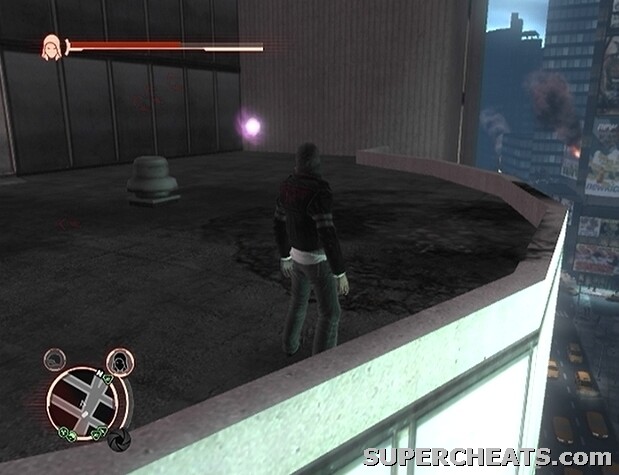
Hint Collectible (17/50)
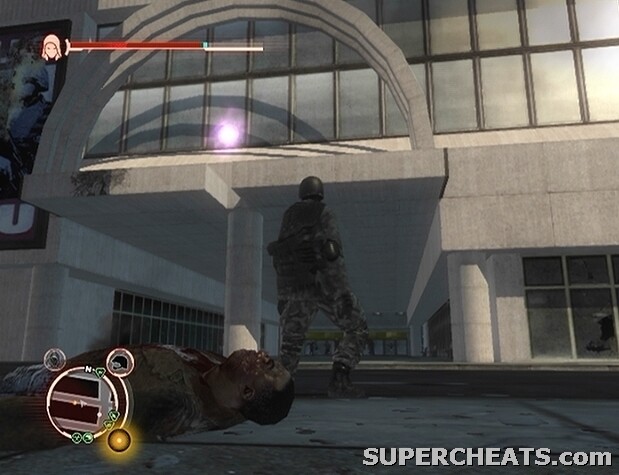
Hint Collectible (18/50)
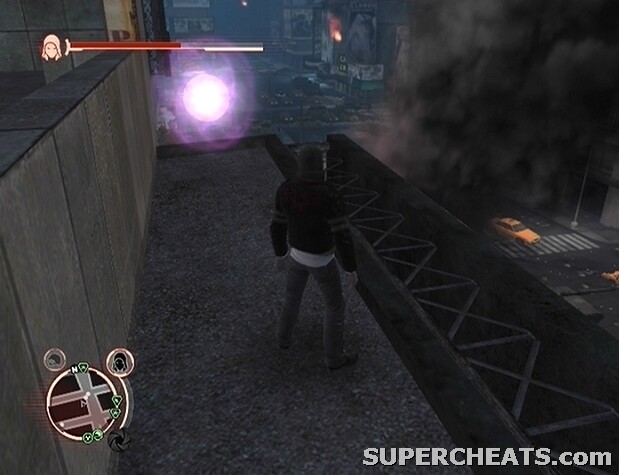
Hint Collectible (19/50)
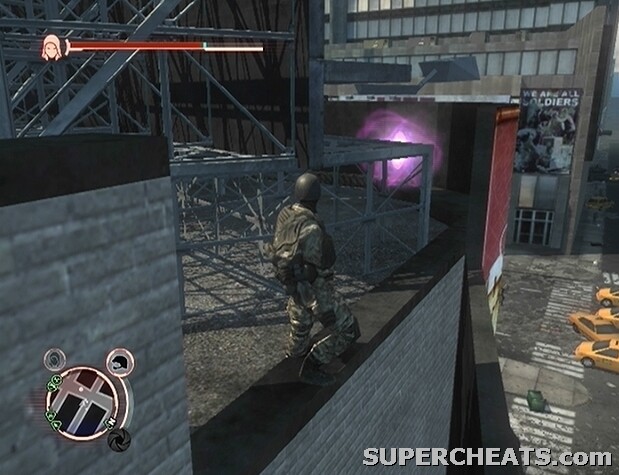
Hint Collectible (20/50)
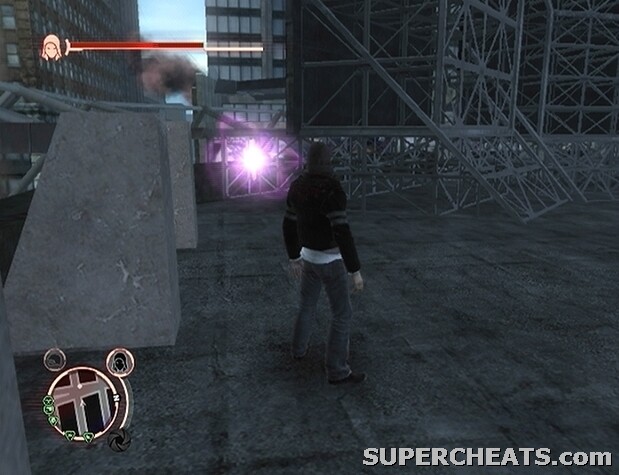
Hint Collectible (21/50)

Hint Collectible (22/50)
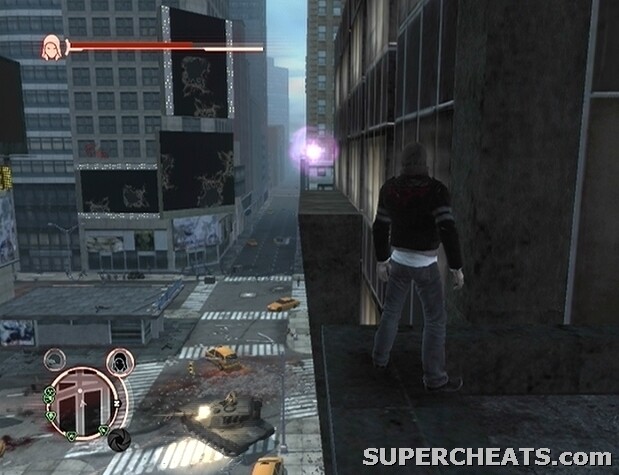
Hint Collectible (23/50)
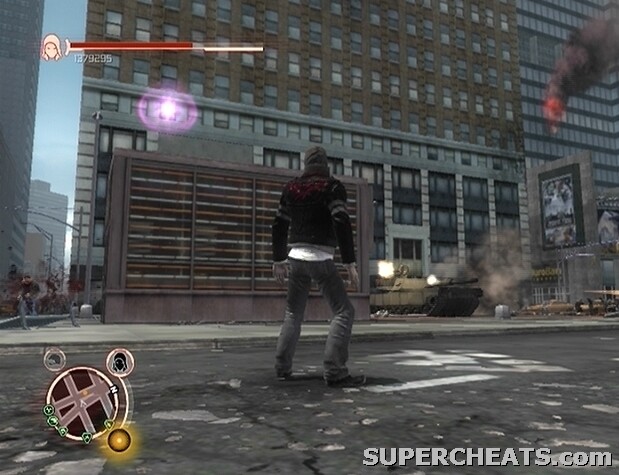
Hint Collectible (24/50)
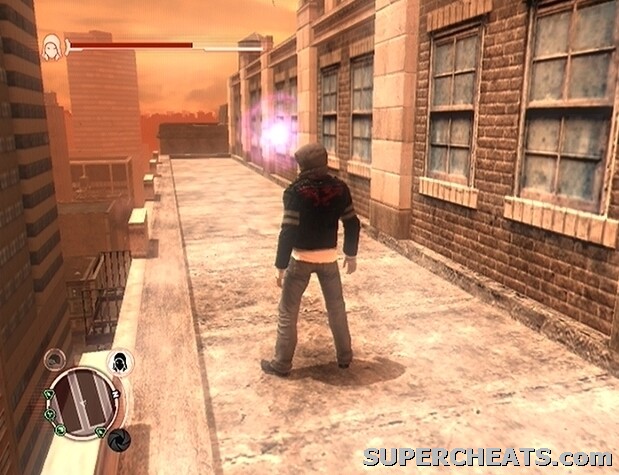
Hint Collectible (25/50)
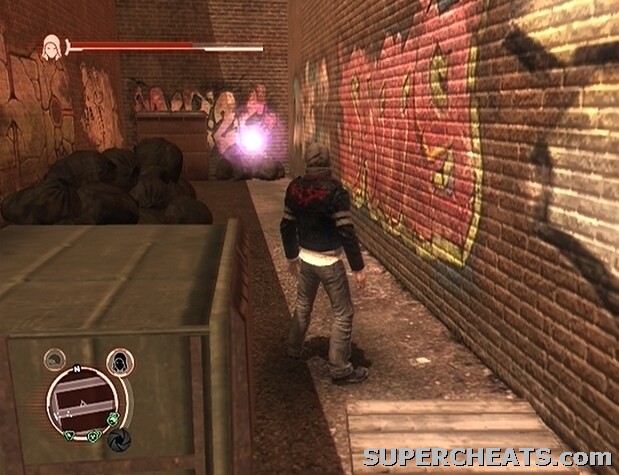
Hint Collectible (26/50)
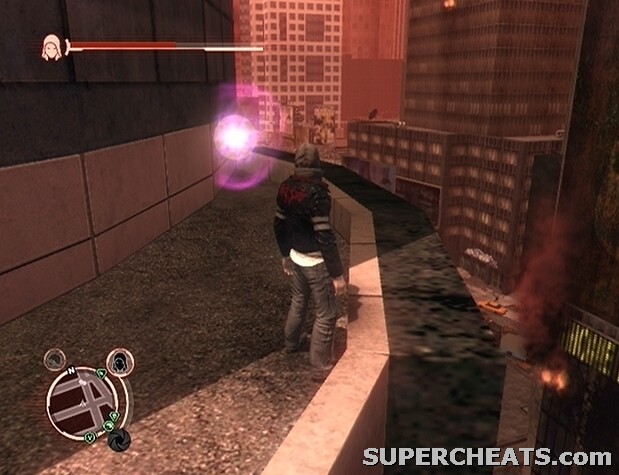
Hint Collectible (27/50)
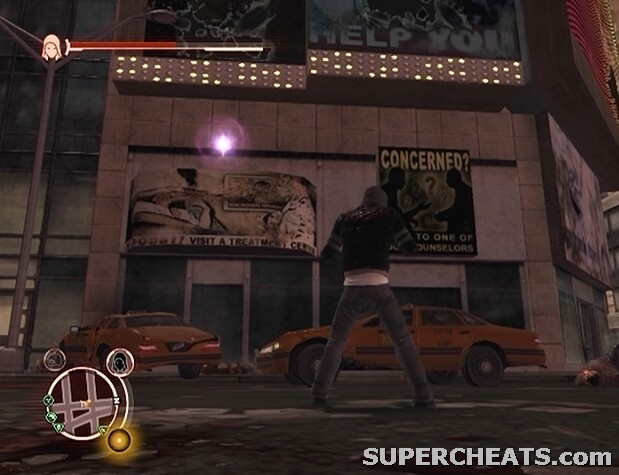
Hint Collectible (28/50)
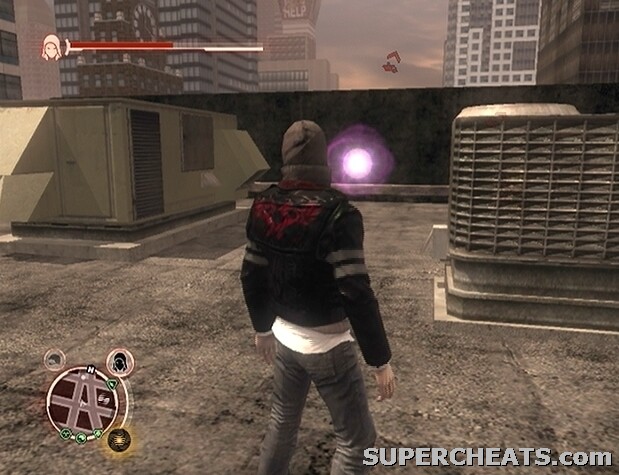
Hint Collectible (29/50)
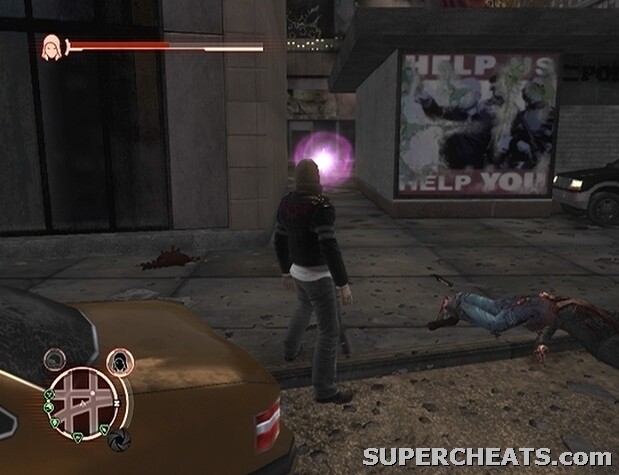
Hint Collectible (30/50)
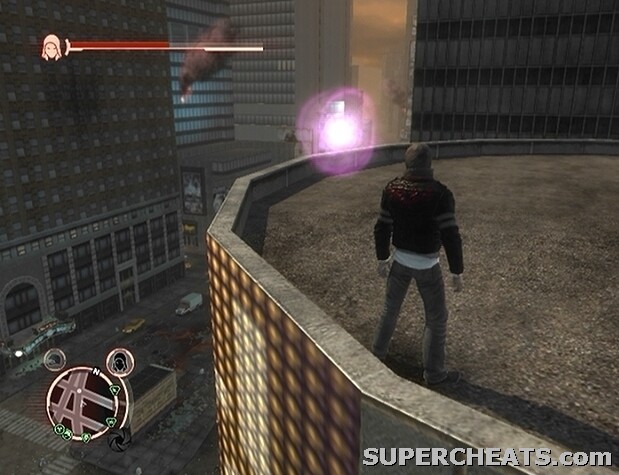
Hint Collectible (31/50)
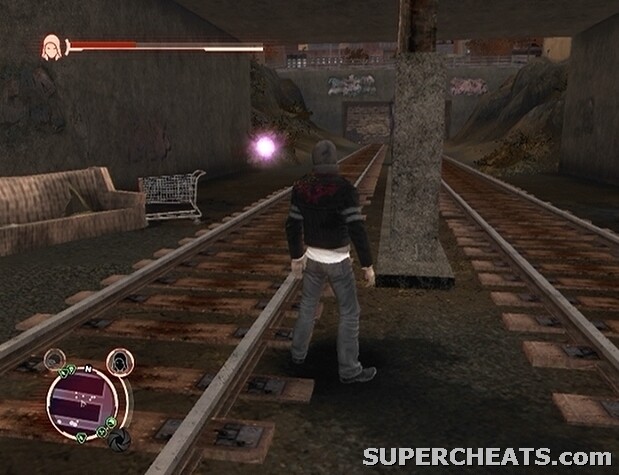
Hint Collectible (32/50)
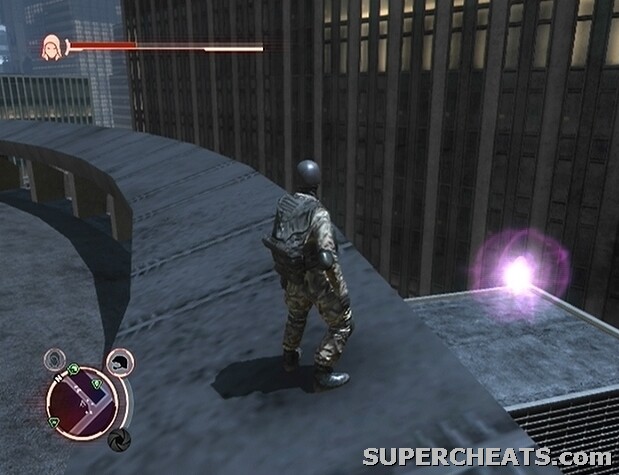
Hint Collectible (33/50)
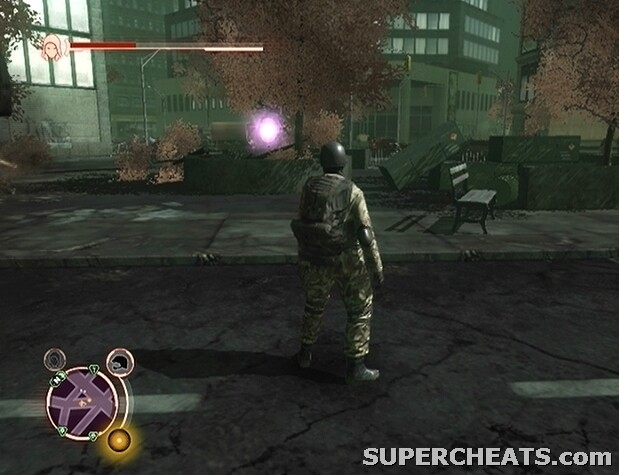
Hint Collectible (34/50)

Hint Collectible (35/50)
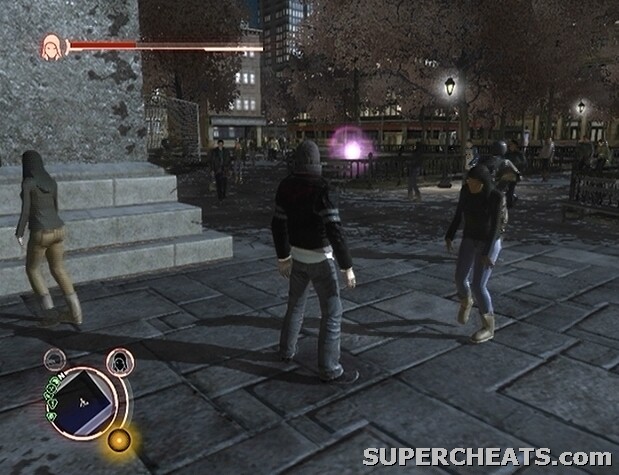
Hint Collectible (36/50)
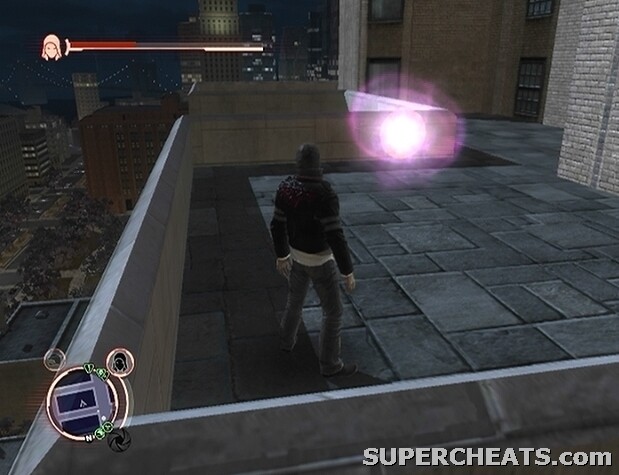
Hint Collectible (37/50)

Hint Collectible (38/50)
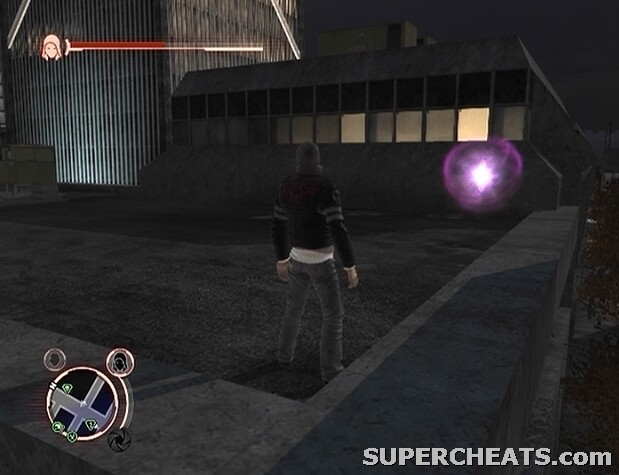
Hint Collectible (39/50)
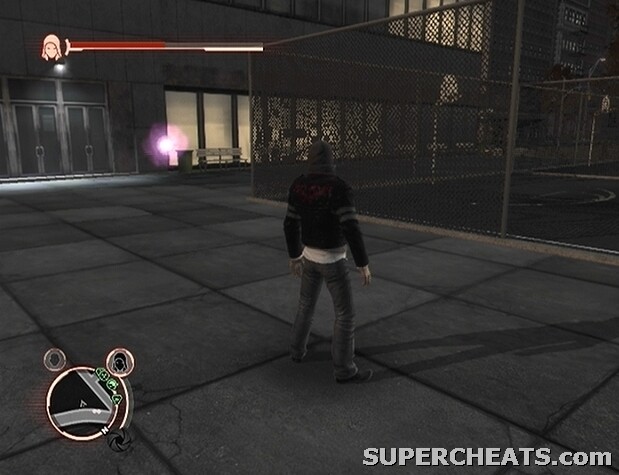
Hint Collectible (40/50)
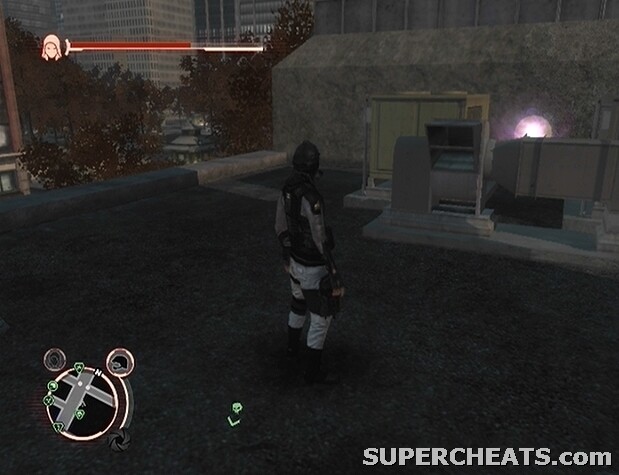
Hint Collectible (41/50)
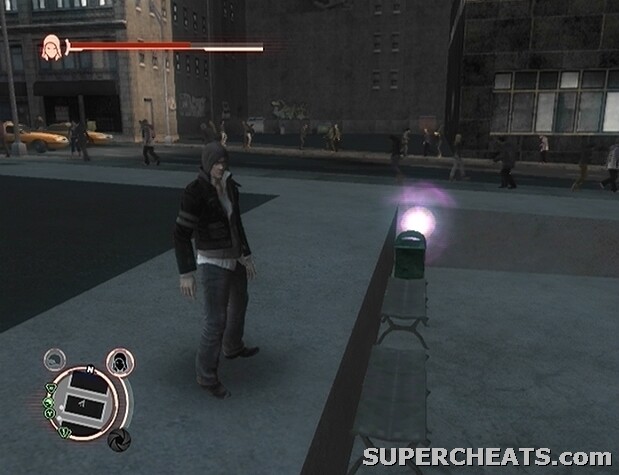
Hint Collectible (42/50)
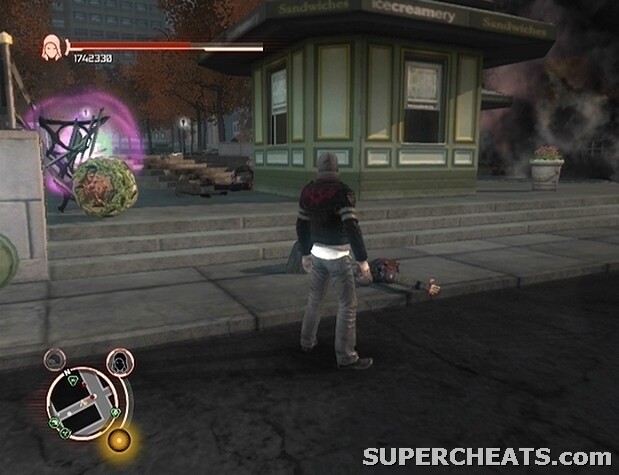
Hint Collectible (43/50)
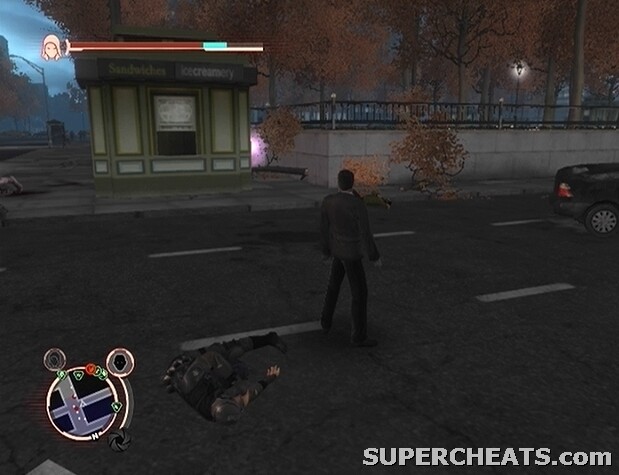
Hint Collectible (44/50)
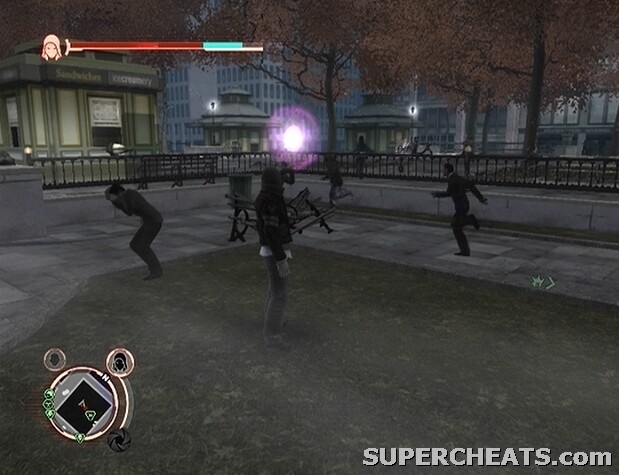
Hint Collectible (45/50)
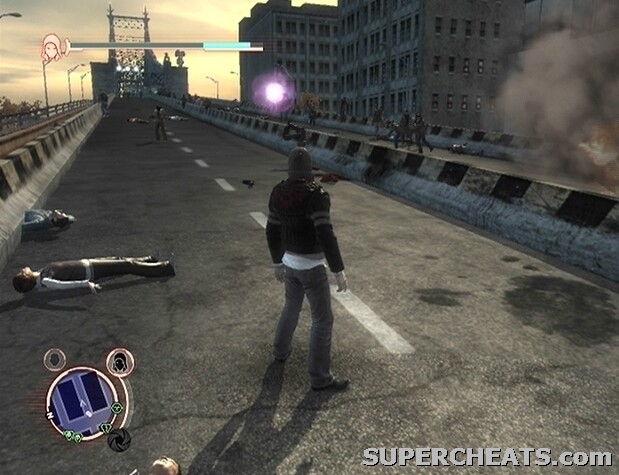
Hint Collectible (46/50)
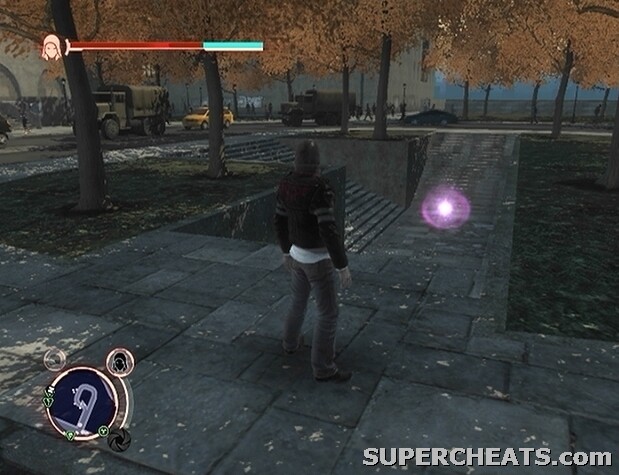
Hint Collectible (47/50)
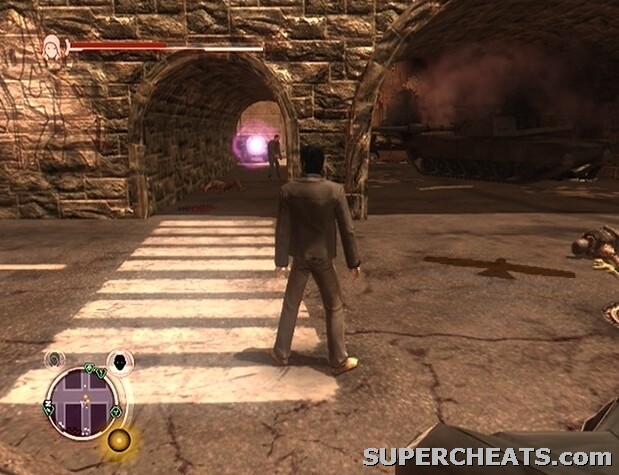
Hint Collectible (48/50)
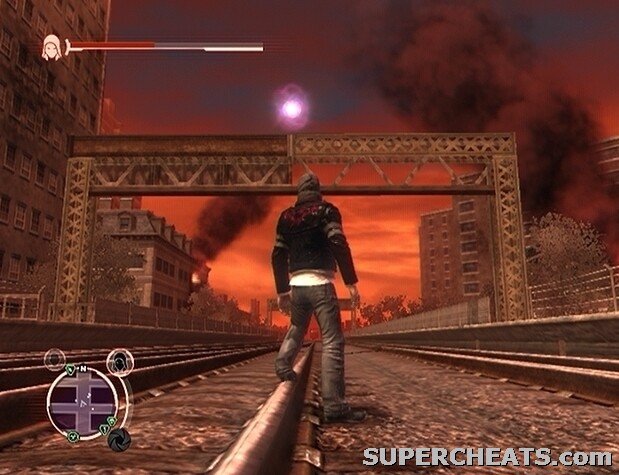
Hint Collectible (49/50)
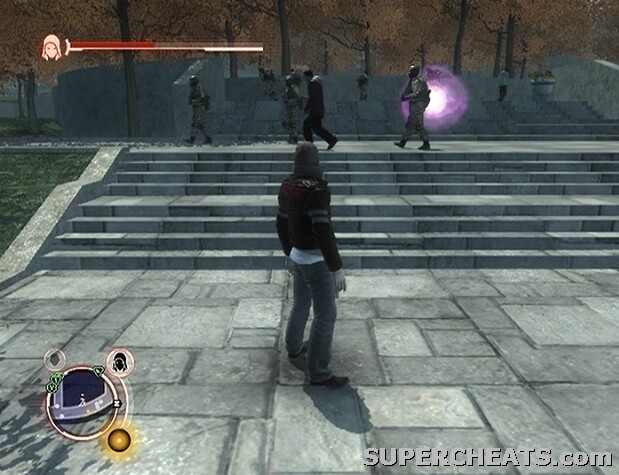
Hint Collectible (50/50)
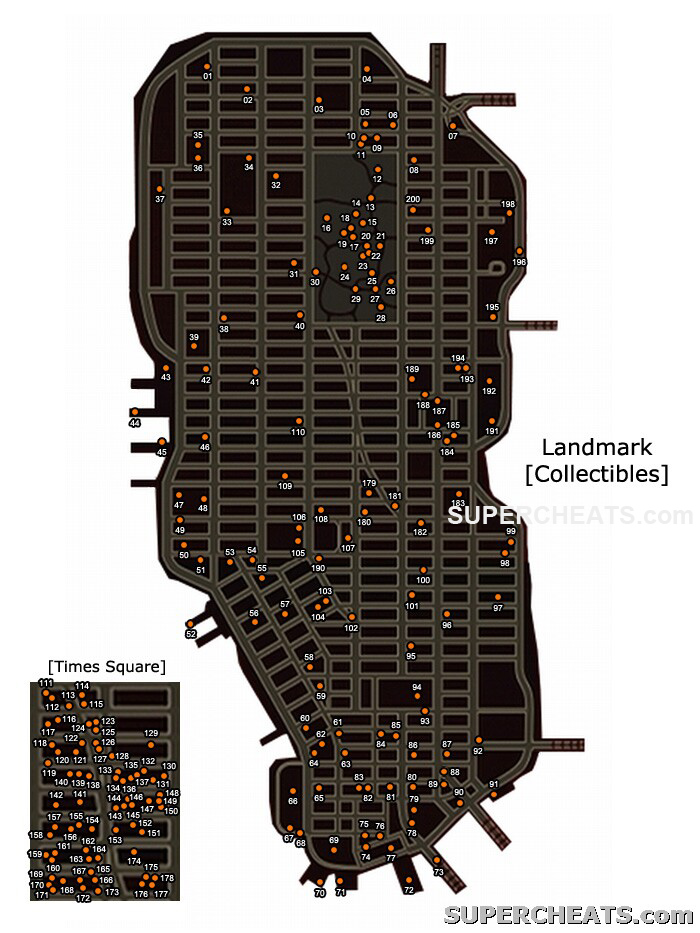
Landmark Collectible Locations
There are 200 Landmark Collectibles scattered around the city. Each collectible appears as a blue orb in the world. Picking up a Hint Collectible yields some EP; the EP-worth of each Landmark Collectible increases each time a set amount has been collected.
Gathering all 200 Landmark Collectibles unlocks the 'Streetwise' achievement/trophy.
You can see hint images for all the 200 landmark collectibles on the following pages.
Below you can find the first 50 landmark location hint images. Use the map on this page to find out which each image refers to.
Landmark Collectible (01/200)
Landmark Collectible (02/200)
Landmark Collectible (03/200)
Landmark Collectible (04/200)
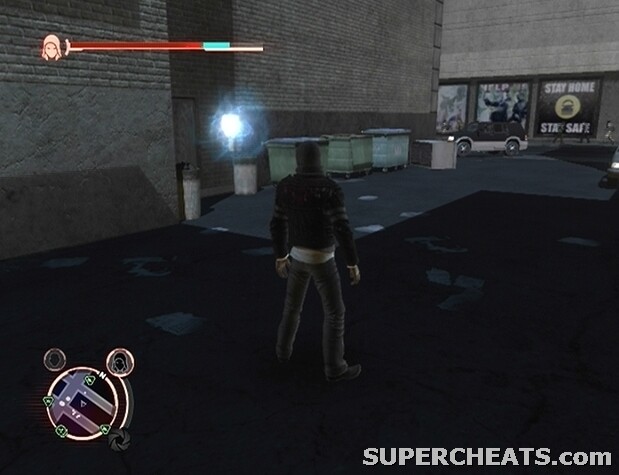
Landmark Collectible (05/200)
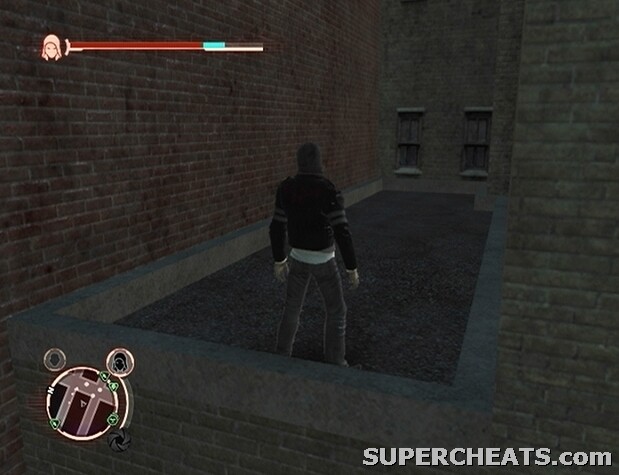
Landmark Collectible (06/200)
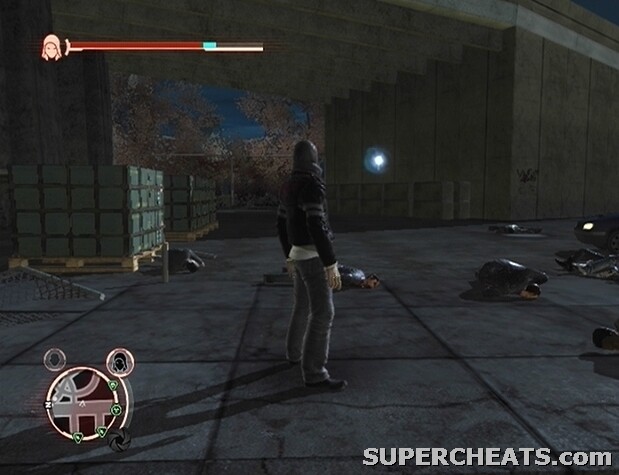
Landmark Collectible (07/200)
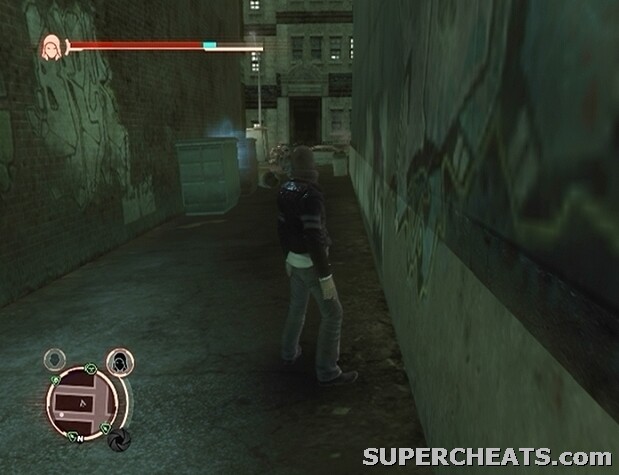
Landmark Collectible (08/200)
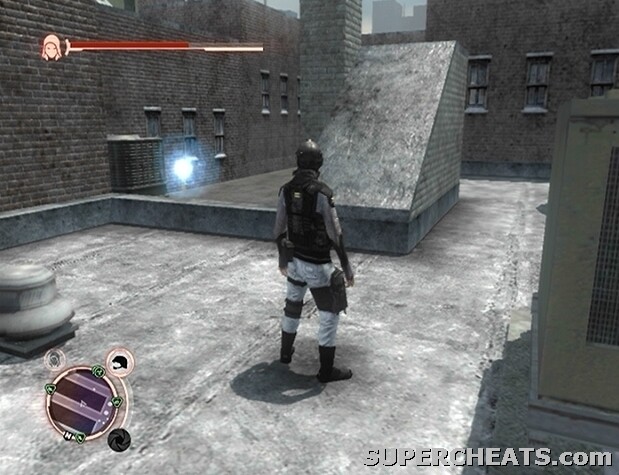
Landmark Collectible (09/200)

Landmark Collectible (10/200)
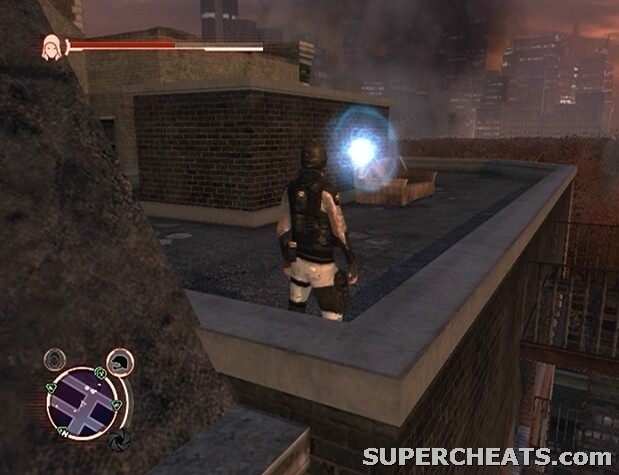
Landmark Collectible (11/200)
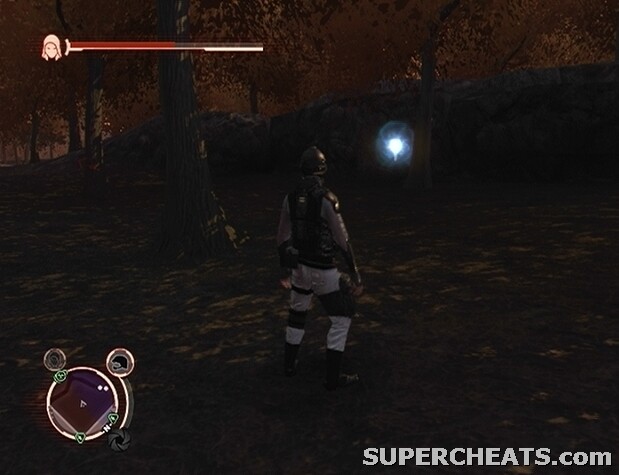
Landmark Collectible (12/200)

Landmark Collectible (13/200)
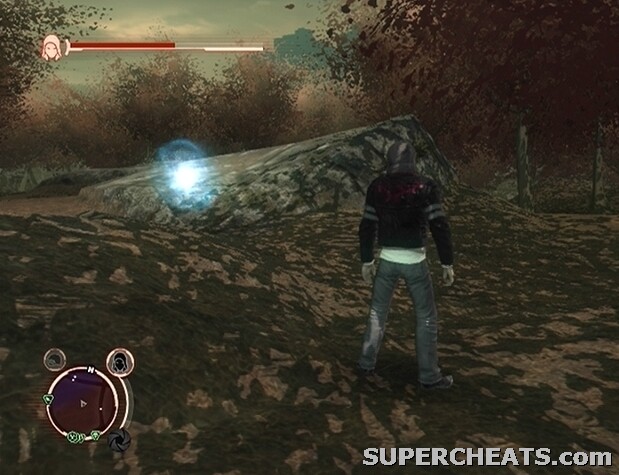
Landmark Collectible (14/200)
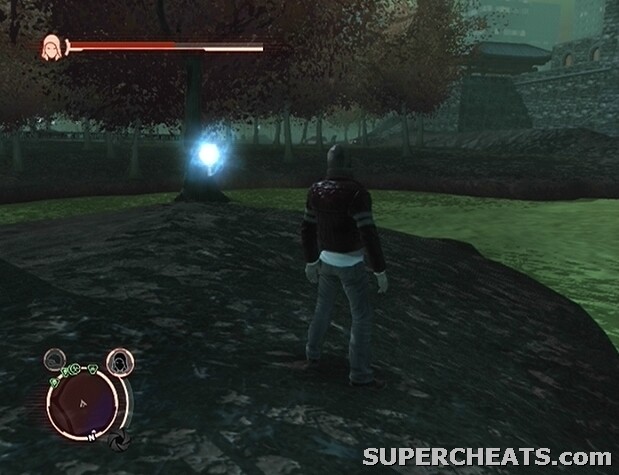
Landmark Collectible (15/200)
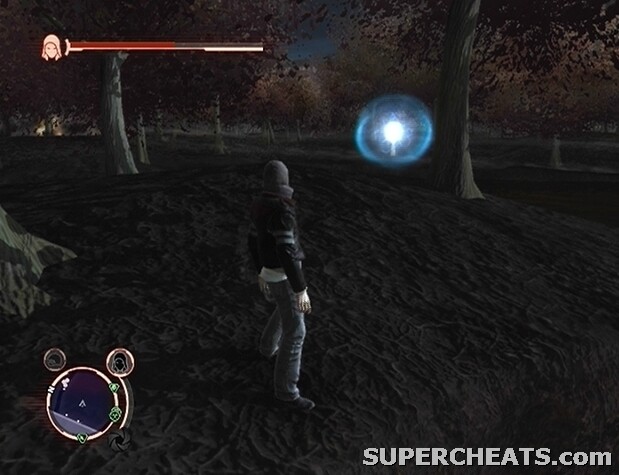
Landmark Collectible (16/200)
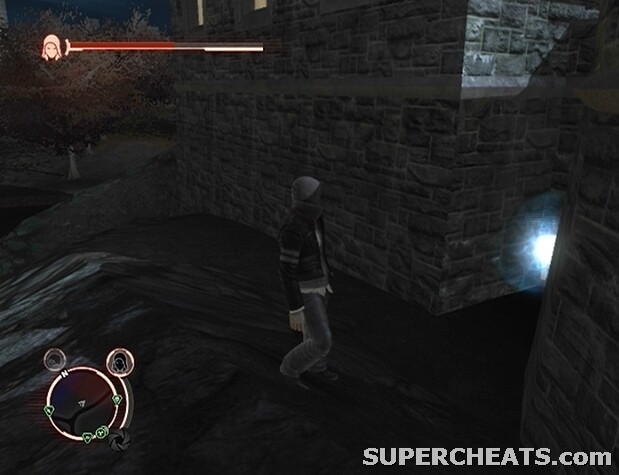
Landmark Collectible (17/200)
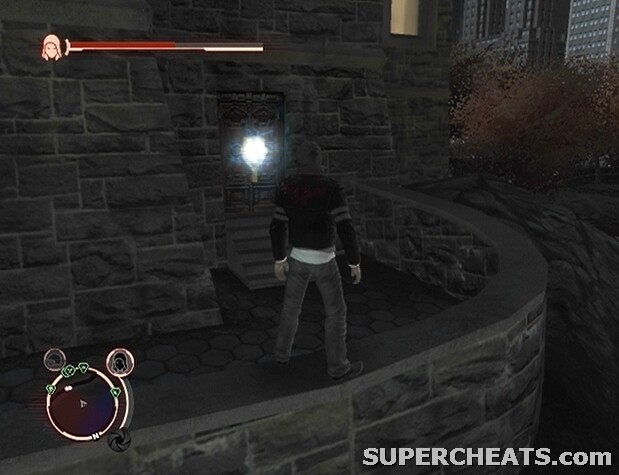
Landmark Collectible (18/200)
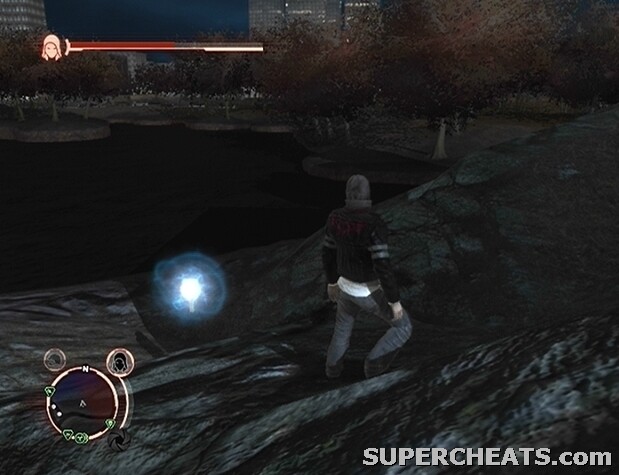
Landmark Collectible (19/200)
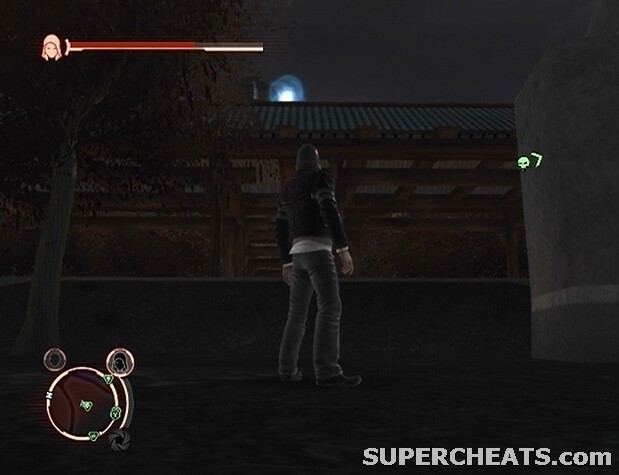
Landmark Collectible (20/200)
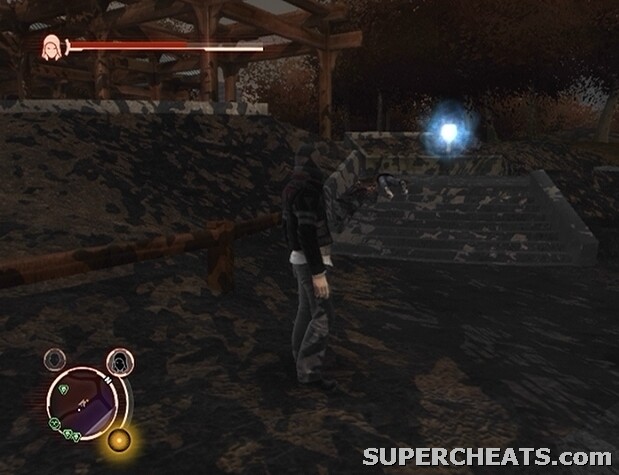
Landmark Collectible (21/200)
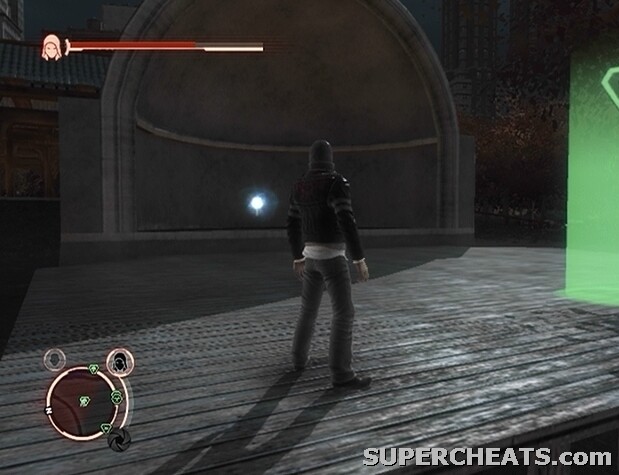
Landmark Collectible (22/200)
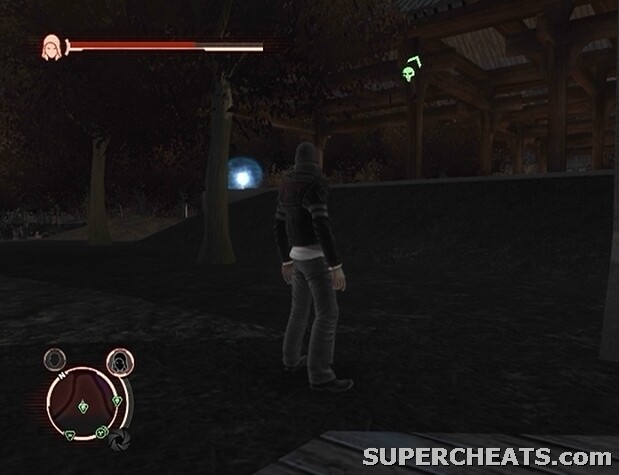
Landmark Collectible (23/200)

Landmark Collectible (24/200)
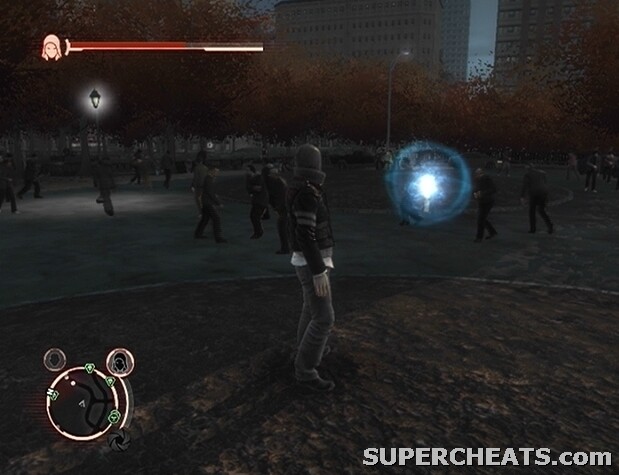
Landmark Collectible (25/200)
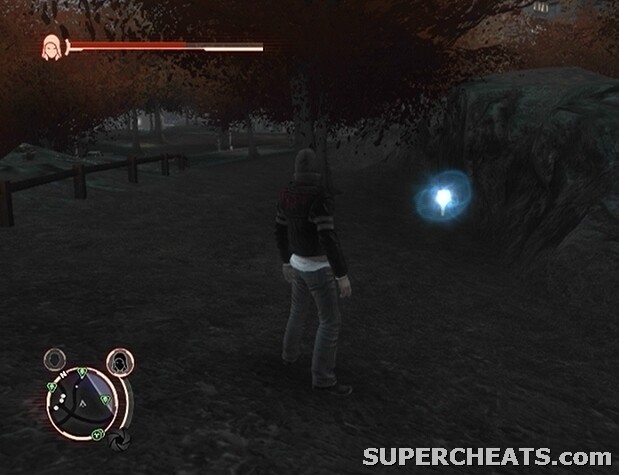
Landmark Collectible (26/200)
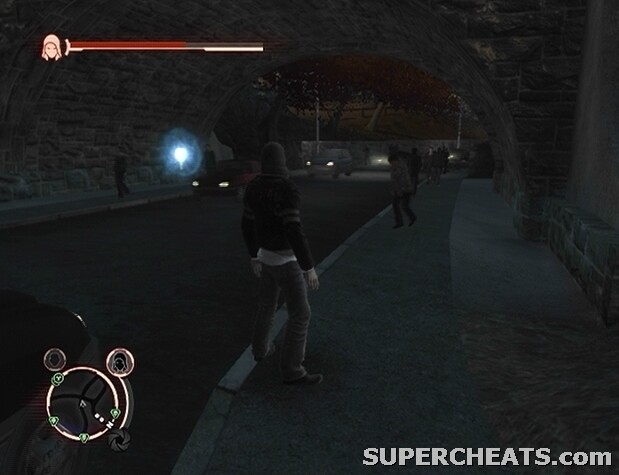
Landmark Collectible (27/200)
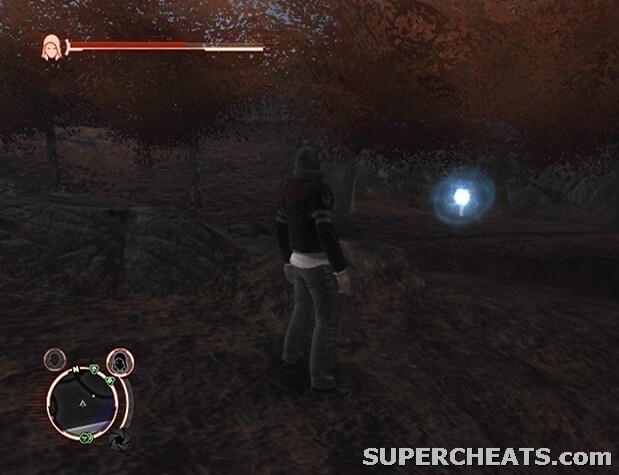
Landmark Collectible (28/200)
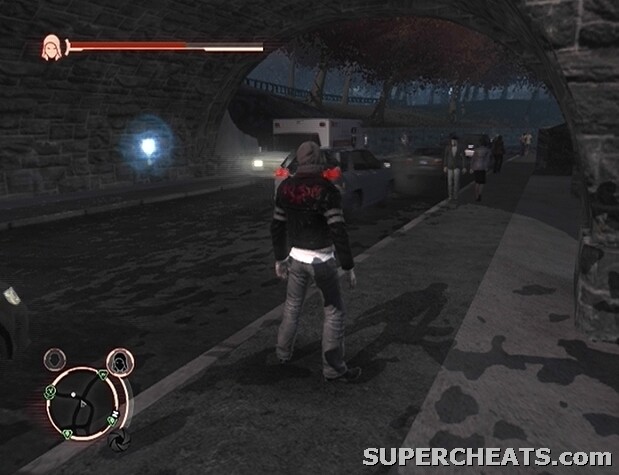
Landmark Collectible (29/200)
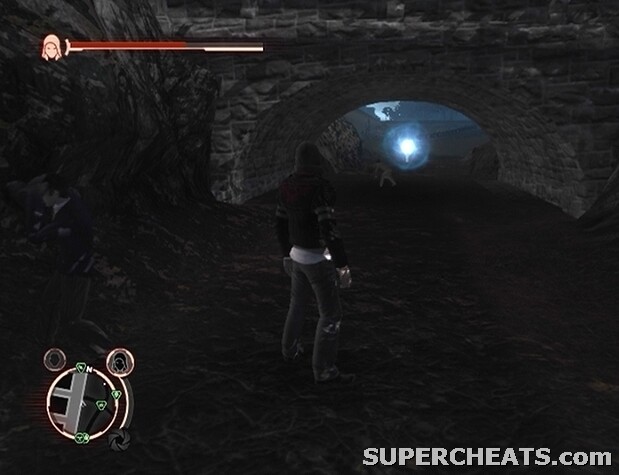
Landmark Collectible (30/200)
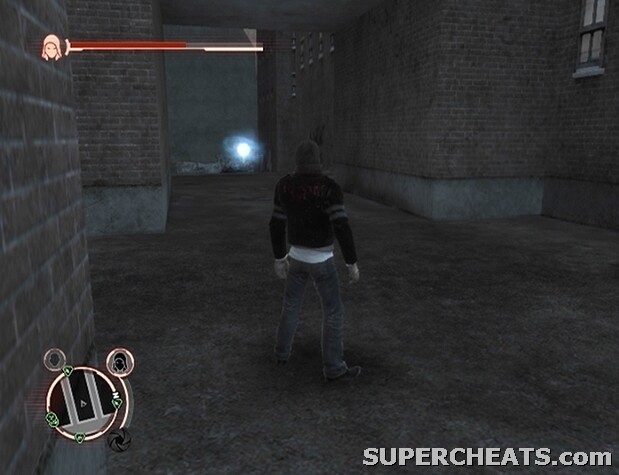
Landmark Collectible (31/200)
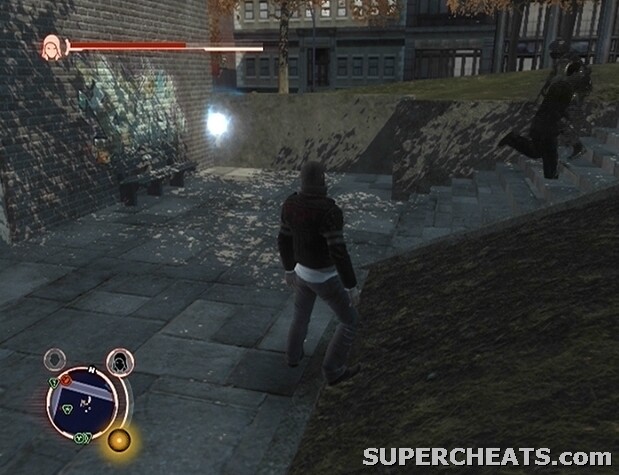
Landmark Collectible (32/200)
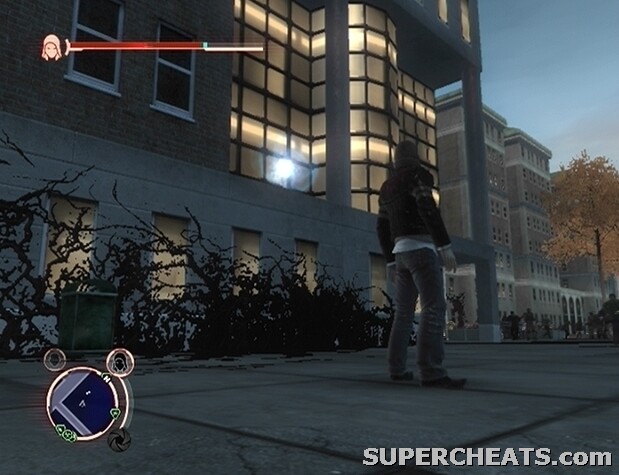
Landmark Collectible (33/200)

Landmark Collectible (34/200)
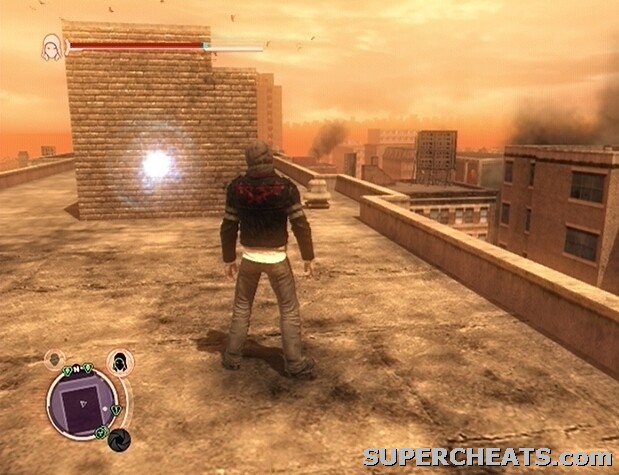
Landmark Collectible (35/200)
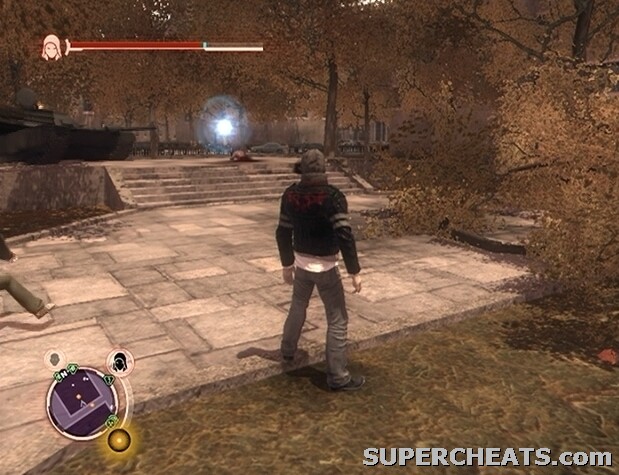
Landmark Collectible (36/200)
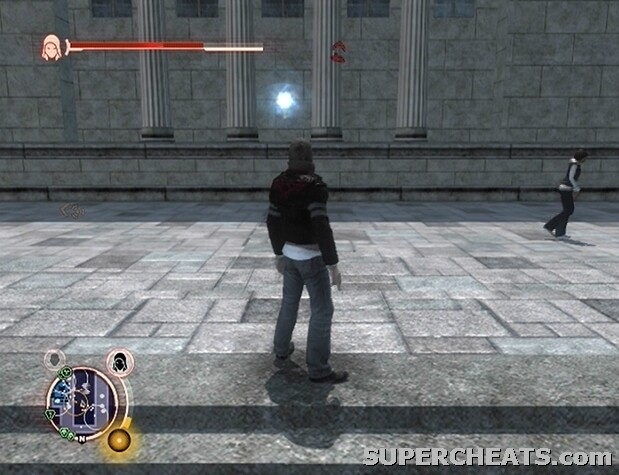
Landmark Collectible (37/200)
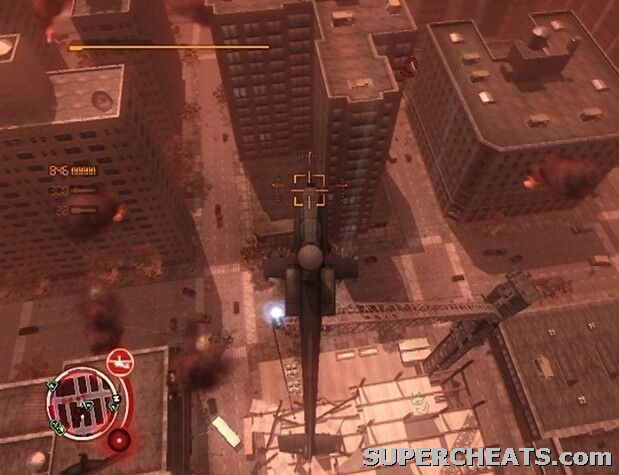
Landmark Collectible (38/200)
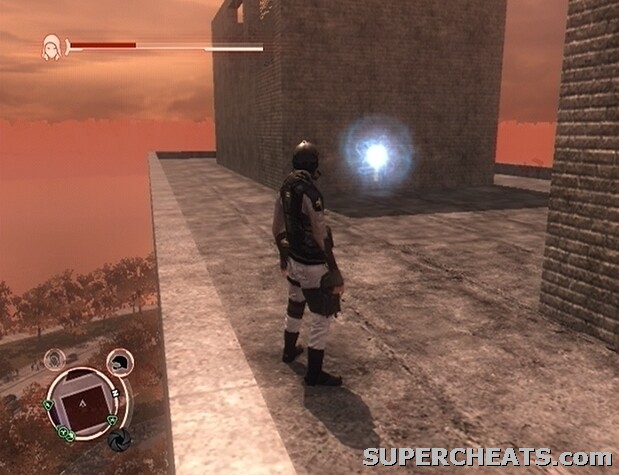
Landmark Collectible (39/200)
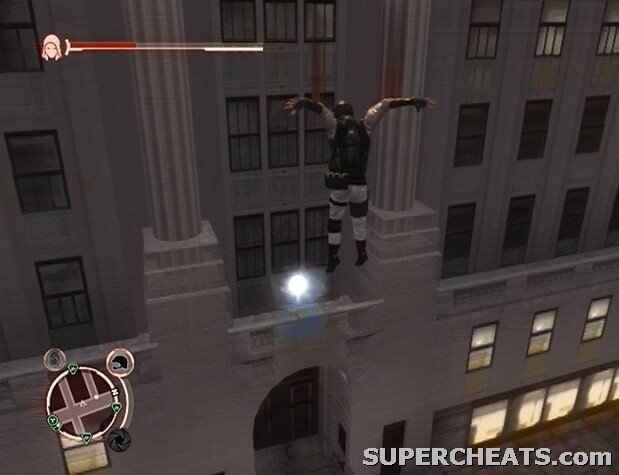
Landmark Collectible (40/200)
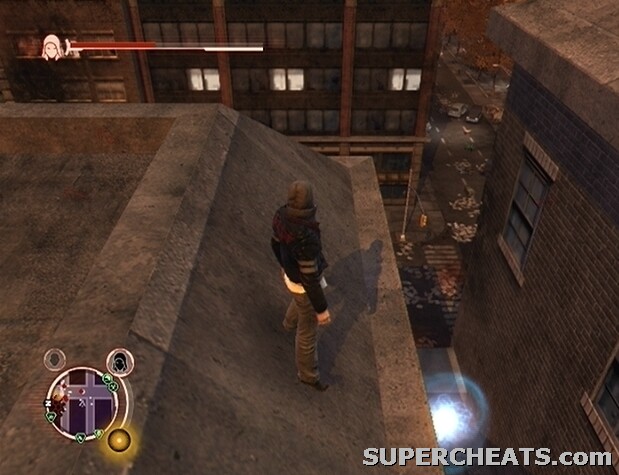
Landmark Collectible (41/200)
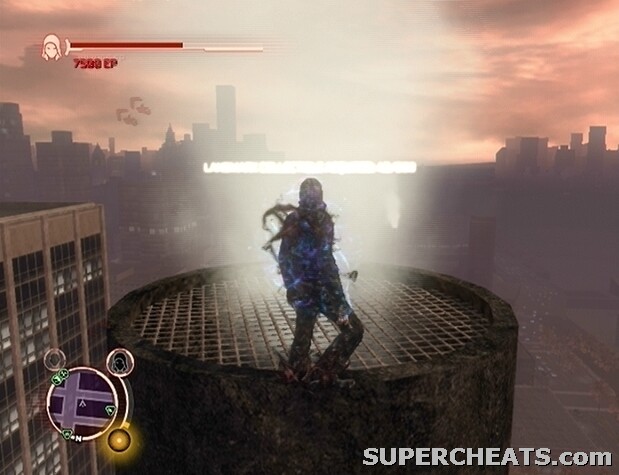
Landmark Collectible (42/200)
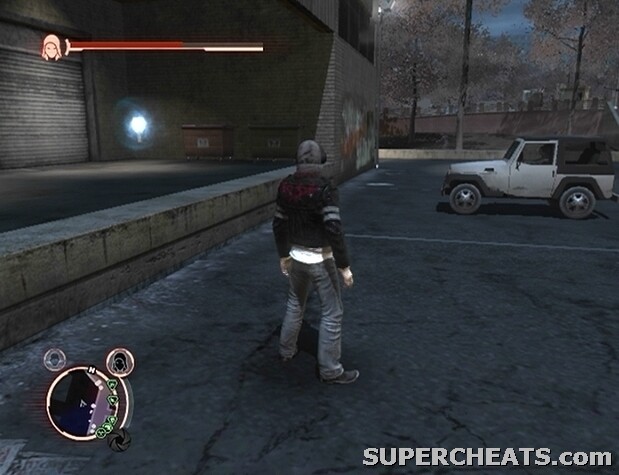
Landmark Collectible (43/200)
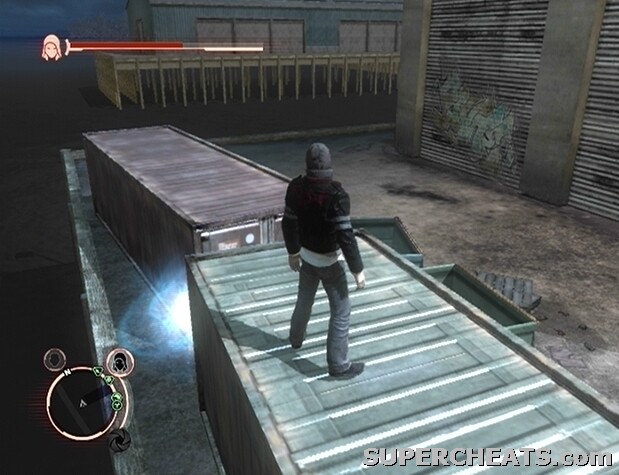
Landmark Collectible (44/200)
Landmark Collectible (45/200)
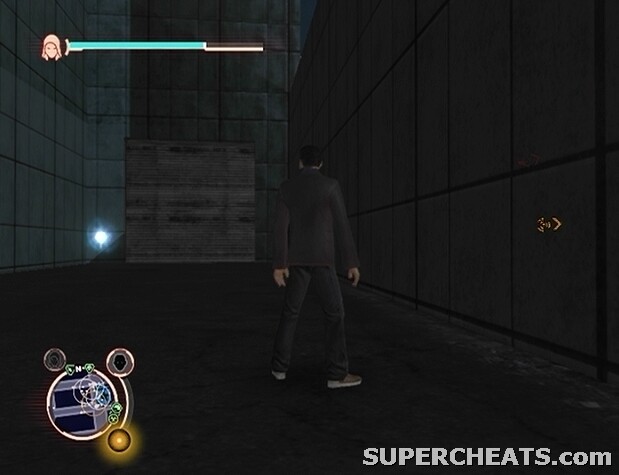
Landmark Collectible (46/200)
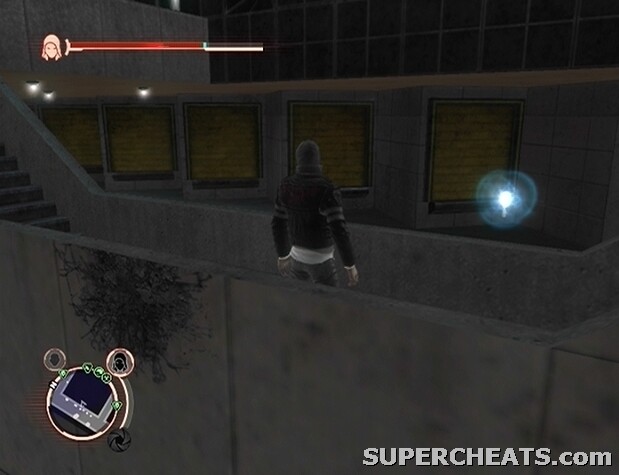
Landmark Collectible (47/200)
Landmark Collectible (48/200)
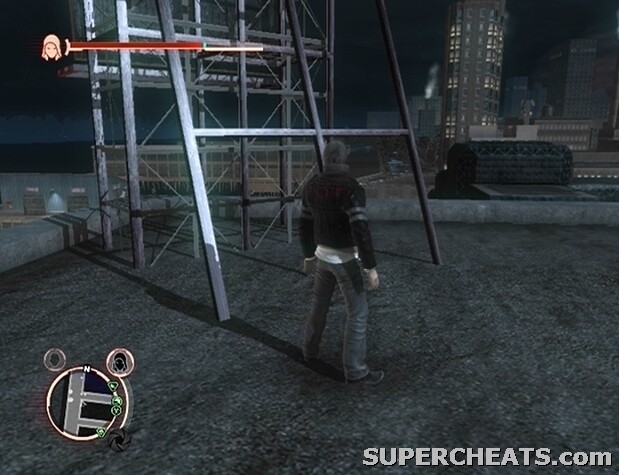
Landmark Collectible (49/200)
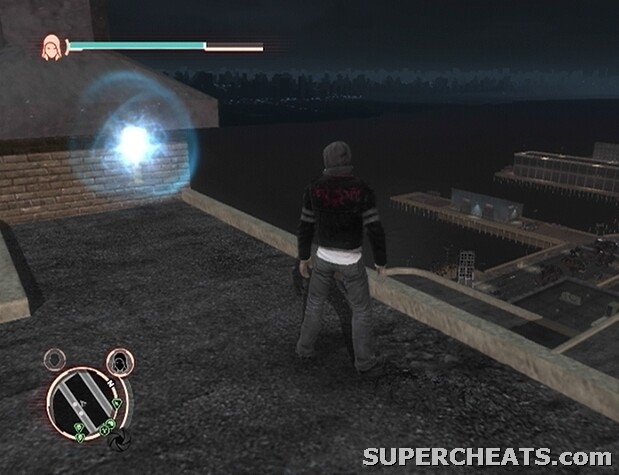
Landmark Collectible (50/200)
Below you can find landmark location hint images for spots 51-100. Use the map on this page to find out which each image refers to.
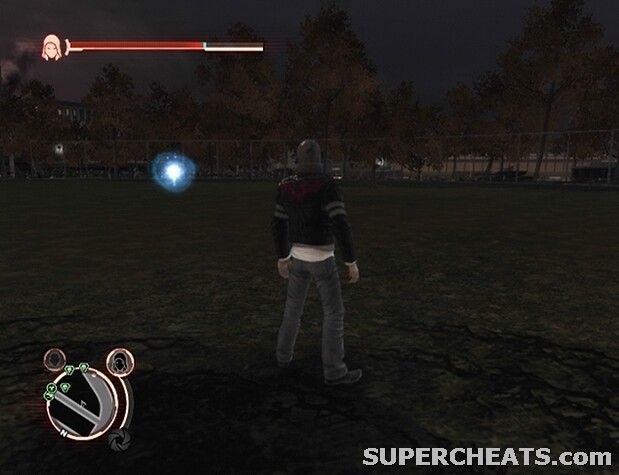
Landmark Collectible (51/200)
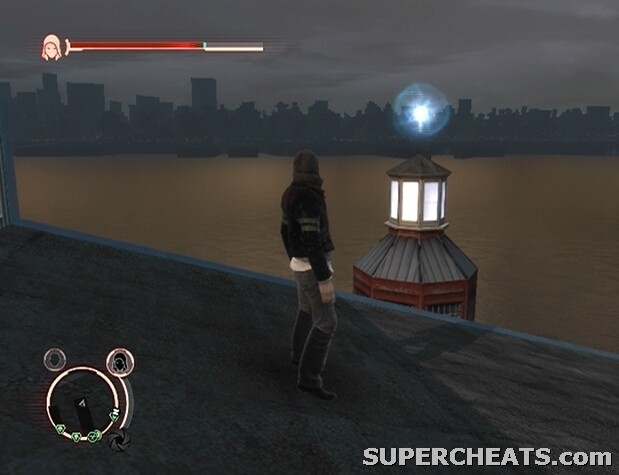
Landmark Collectible (52/200)
Landmark Collectible (53/200)
Landmark Collectible (54/200)
Landmark Collectible (55/200)
Landmark Collectible (56/200)
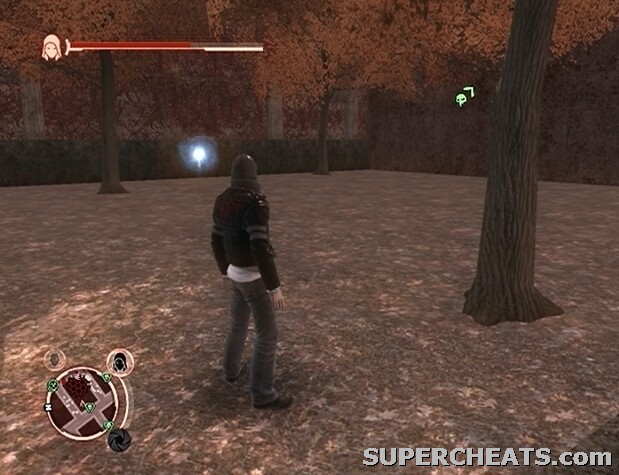
Landmark Collectible (57/200)
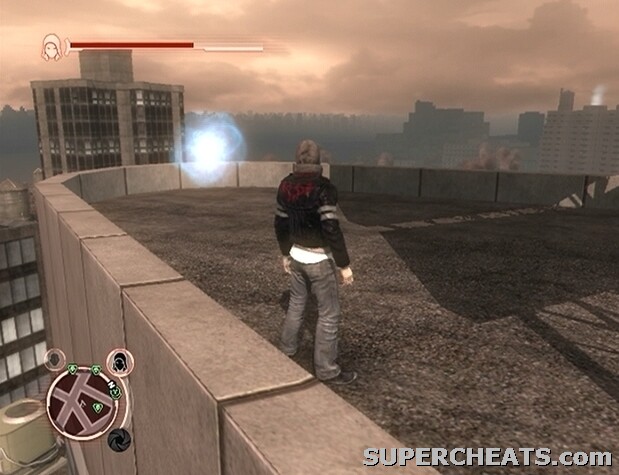
Landmark Collectible (58/200)
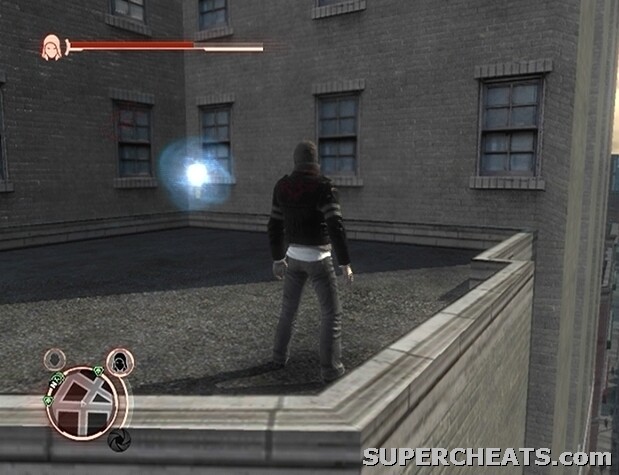
Landmark Collectible (59/200)
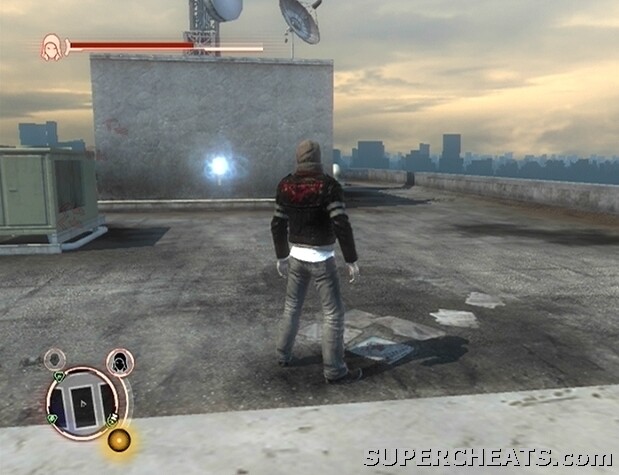
Landmark Collectible (60/200)
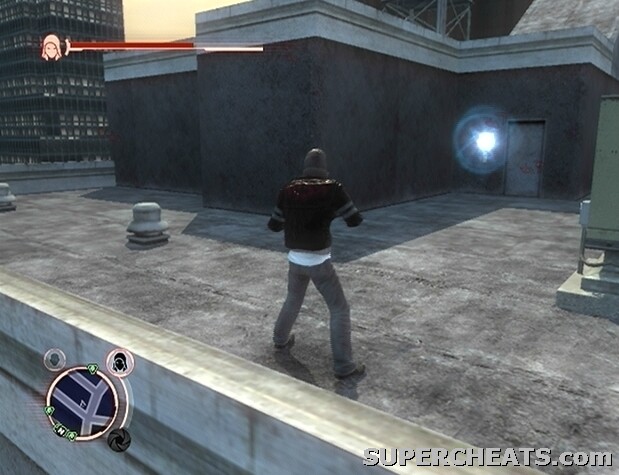
Landmark Collectible (61/200)
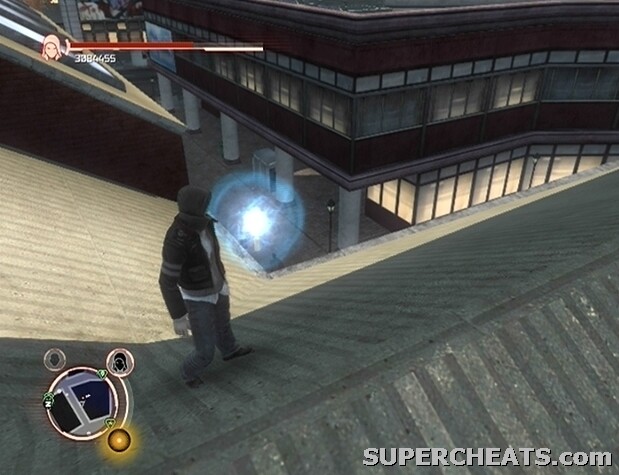
Landmark Collectible (62/200)
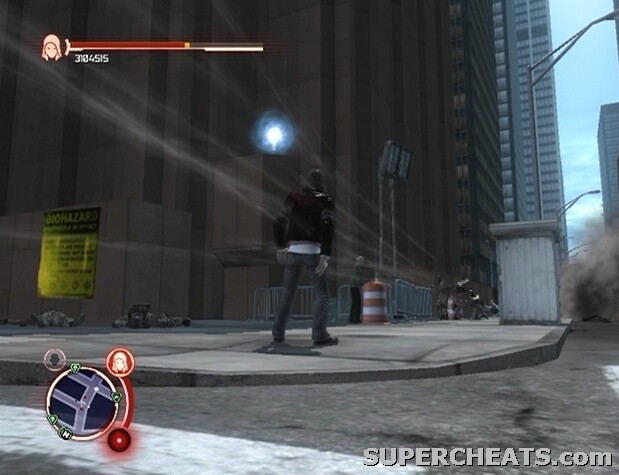
Landmark Collectible (63/200)
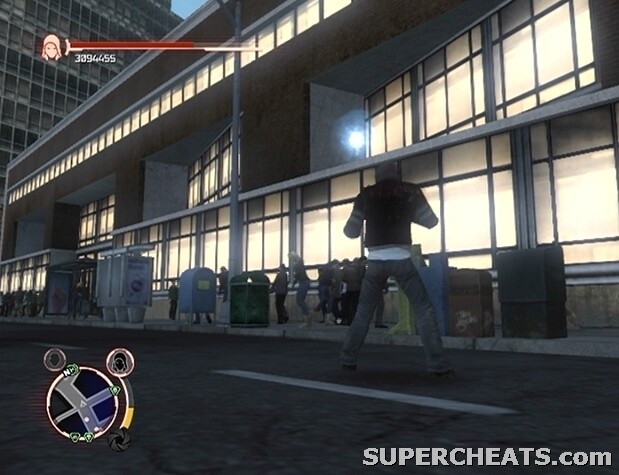
Landmark Collectible (64/200)
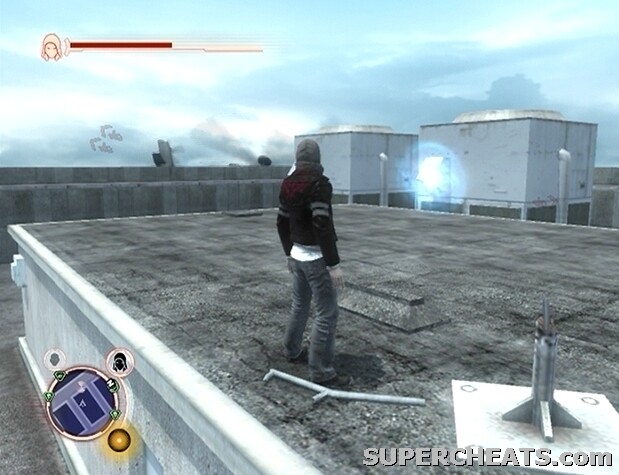
Landmark Collectible (65/200)

Landmark Collectible (66/200)
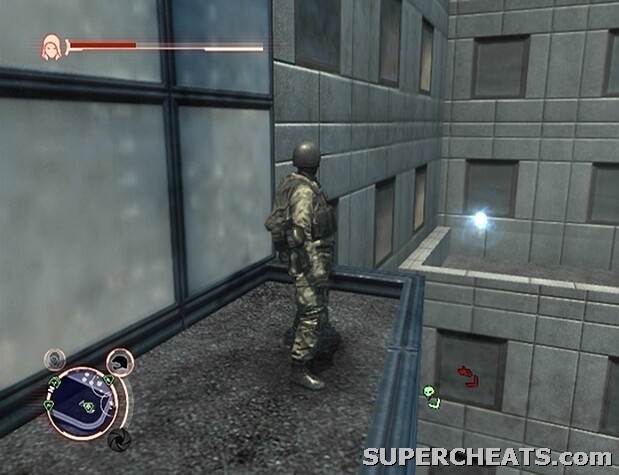
Landmark Collectible (67/200)
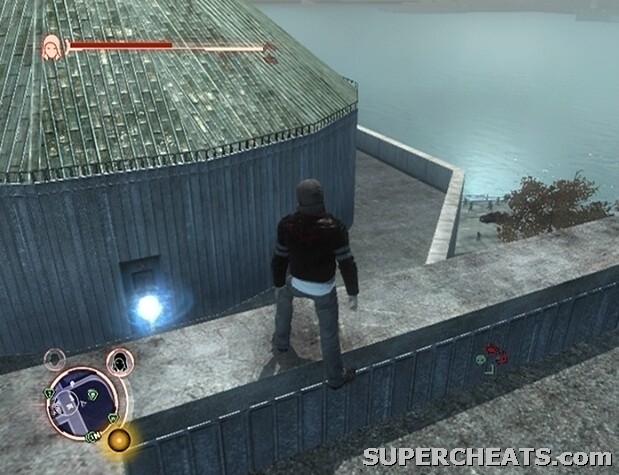
Landmark Collectible (68/200)
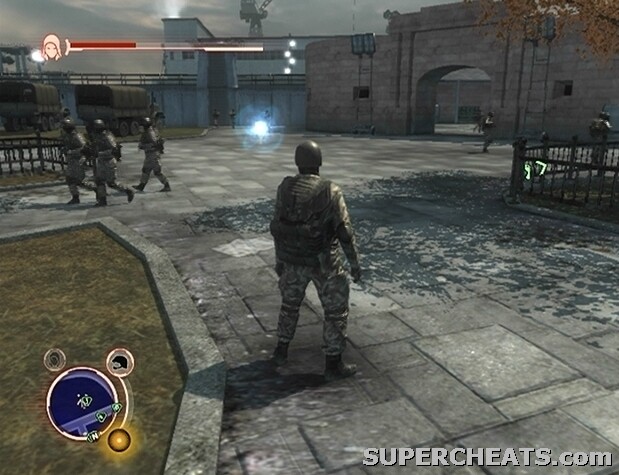
Landmark Collectible (69/200)
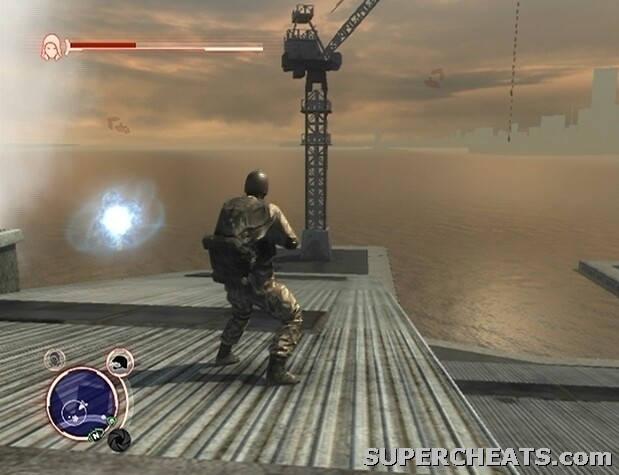
Landmark Collectible (070/200)
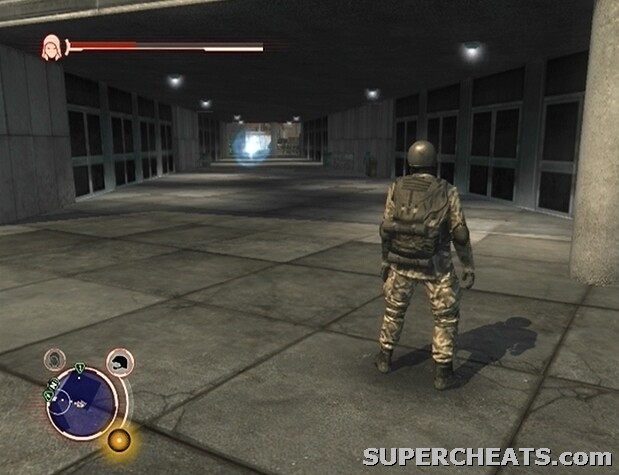
Landmark Collectible (71/200)

Landmark Collectible (72/200)
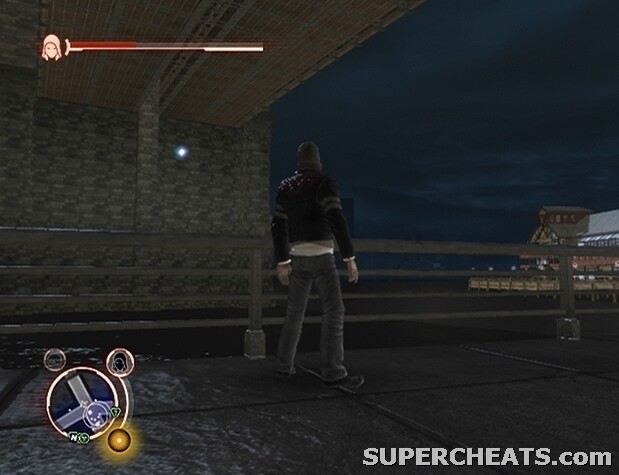
Landmark Collectible (73/200): Use a Helicopter.
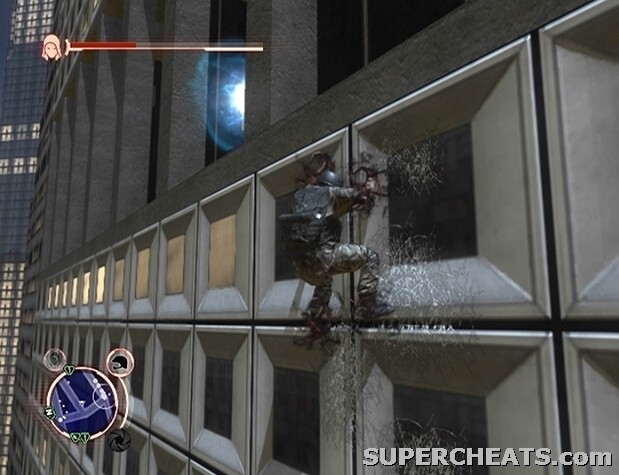
Landmark Collectible (74/200)
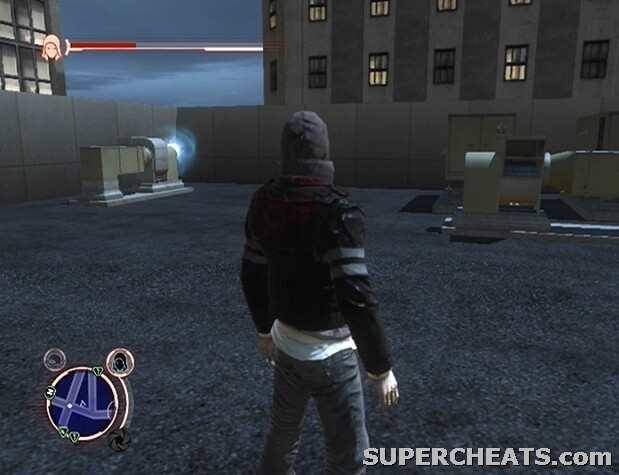
Landmark Collectible (75/200)
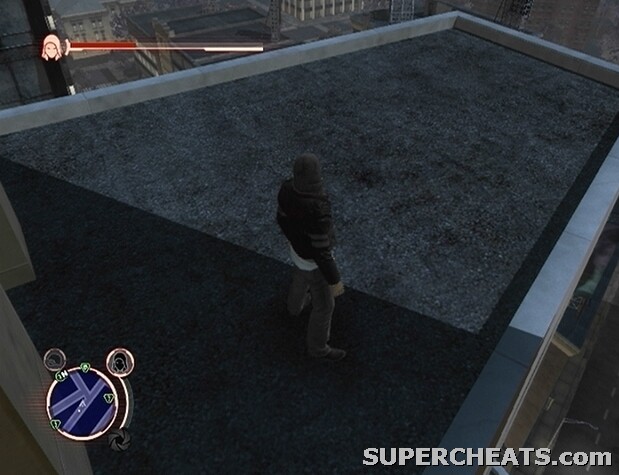
Landmark Collectible (76/200)
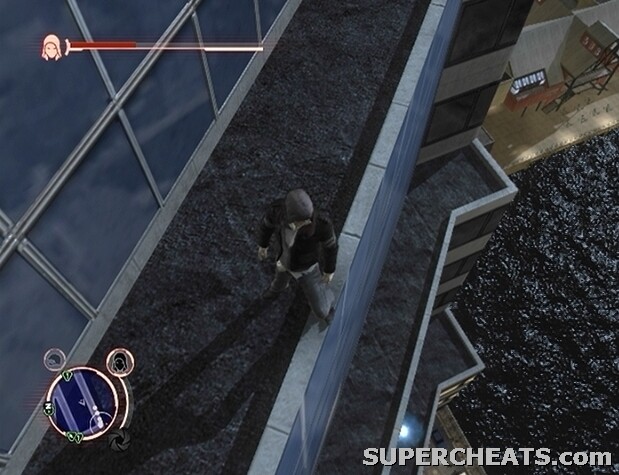
Landmark Collectible (77/200)
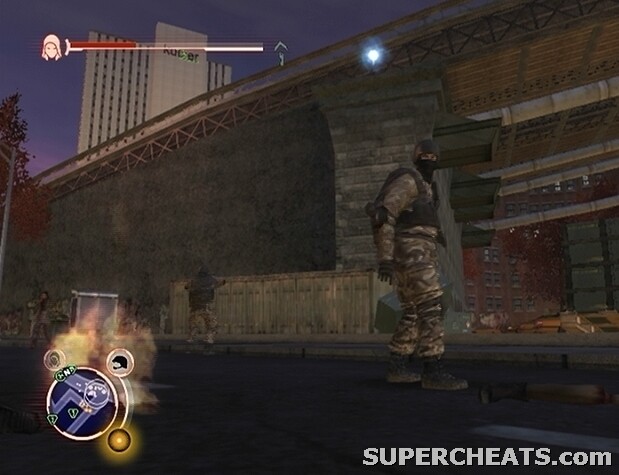
Landmark Collectible (78/200)
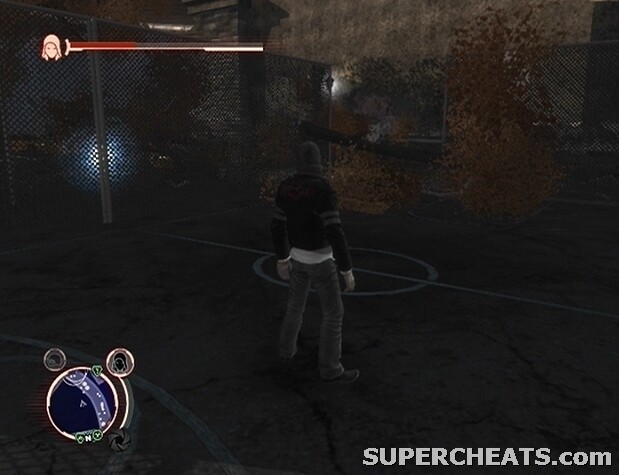
Landmark Collectible (79/200)
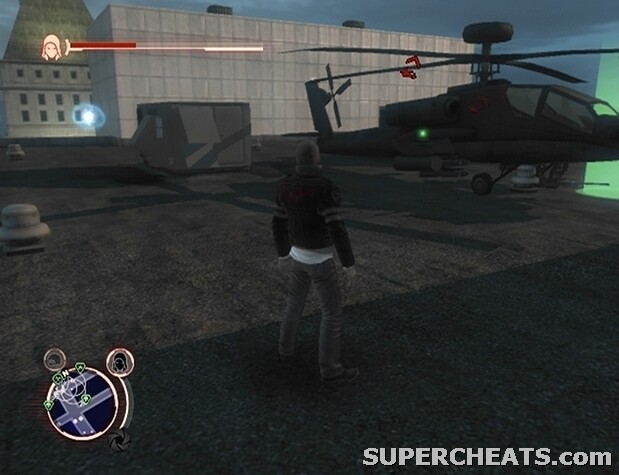
Landmark Collectible (80/200)
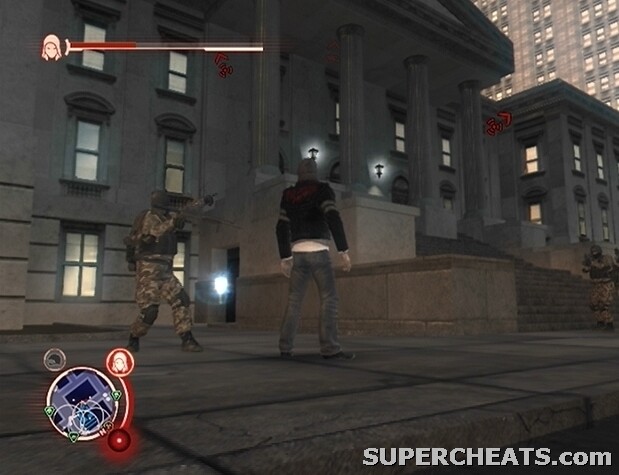
Landmark Collectible (81/200)
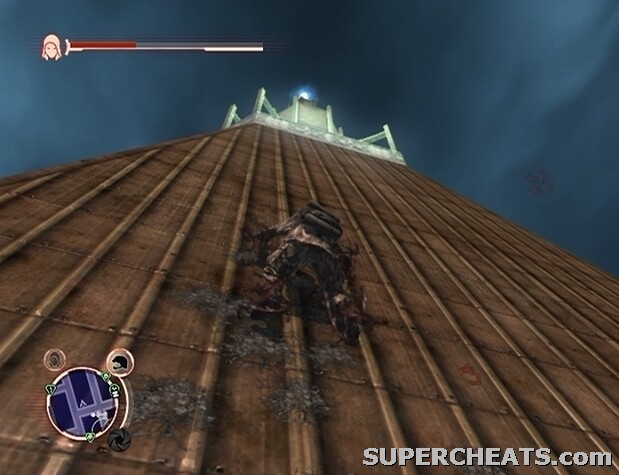
Landmark Collectible (82/200)
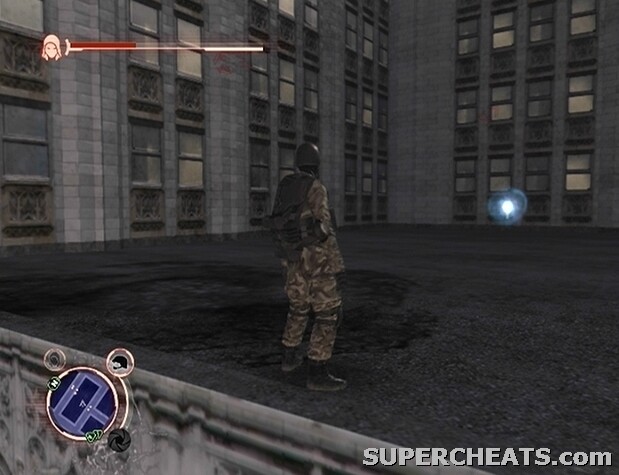
Landmark Collectible (83/200)
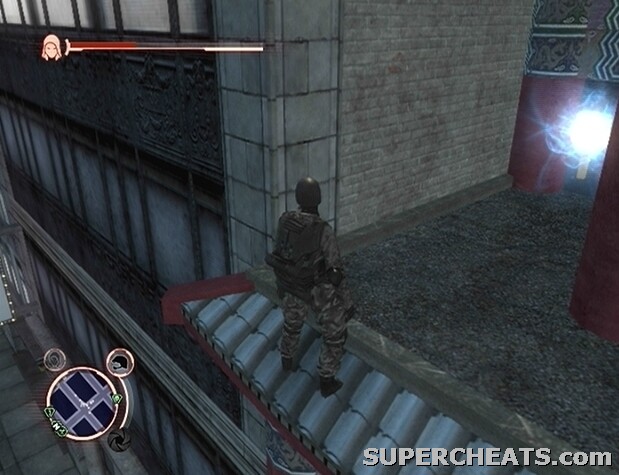
Landmark Collectible (84/200)
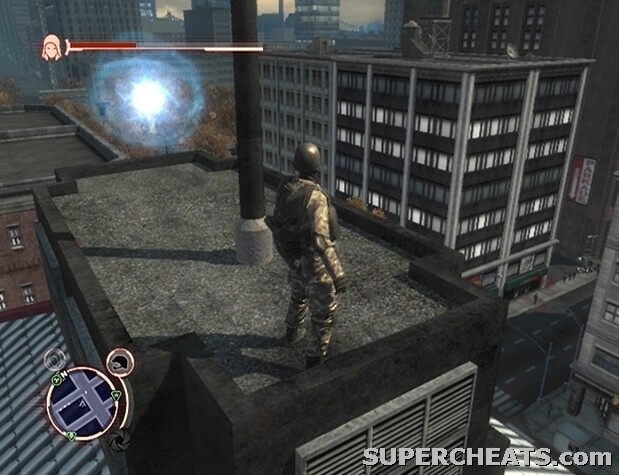
Landmark Collectible (85/200)
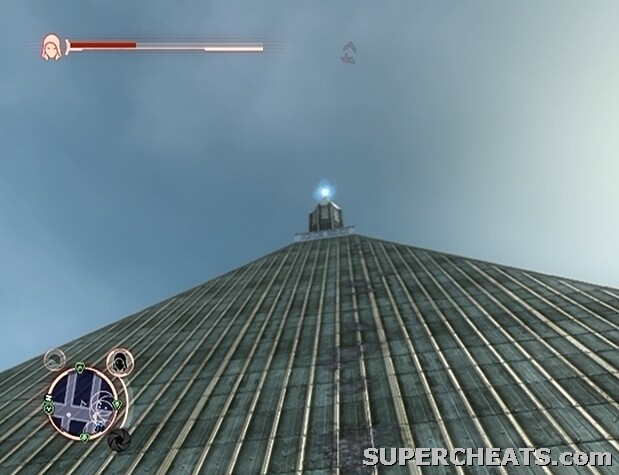
Landmark Collectible (86/200)
Landmark Collectible (87/200)
Landmark Collectible (88/200)
Landmark Collectible (89/200)
Landmark Collectible (90/200)
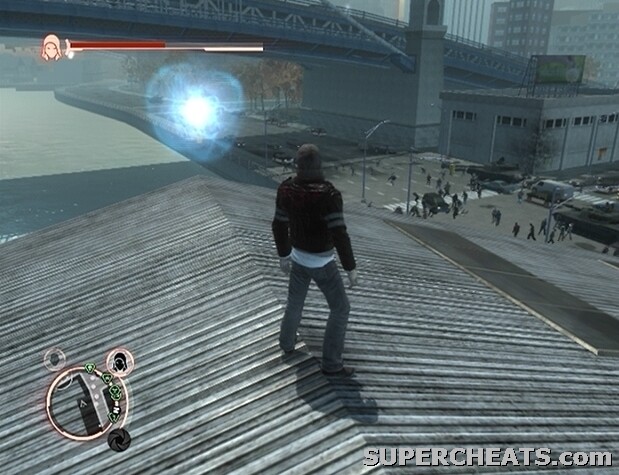
Landmark Collectible (91/200)
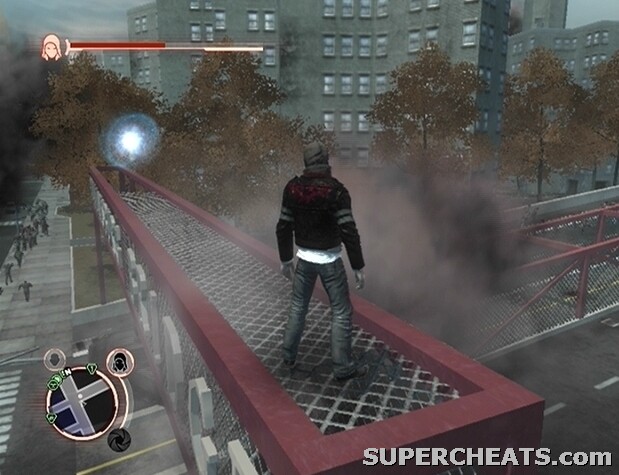
Landmark Collectible (92/200)
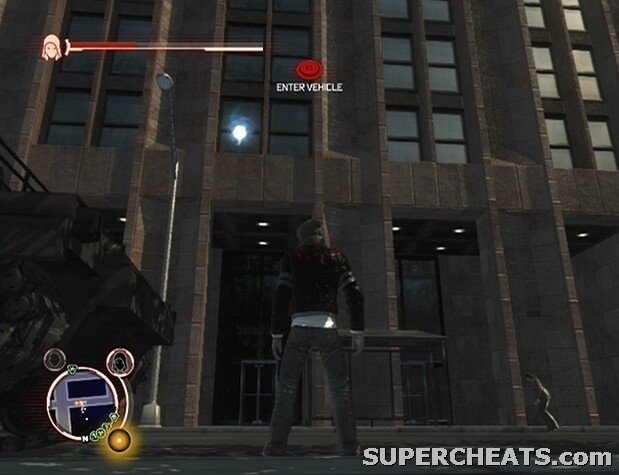
Landmark Collectible (93/200)

Landmark Collectible (94/200)
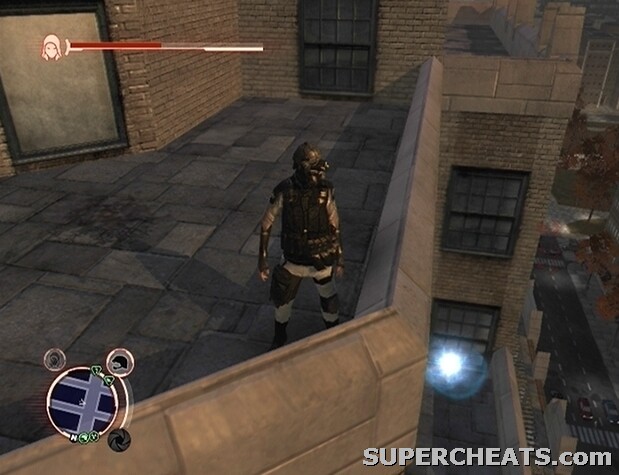
Landmark Collectible (95/200)

Landmark Collectible (96/200)
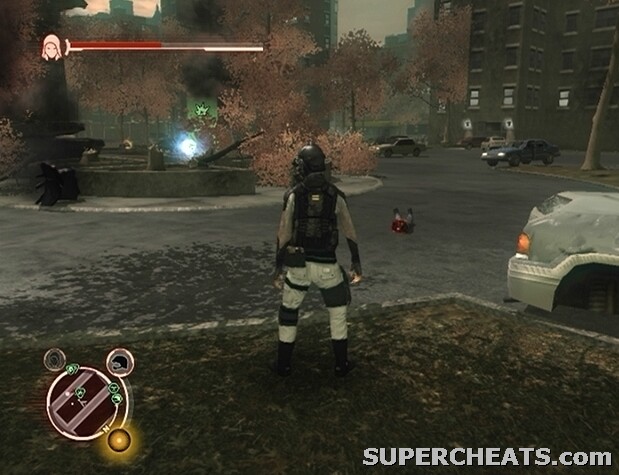
Landmark Collectible (97/200)
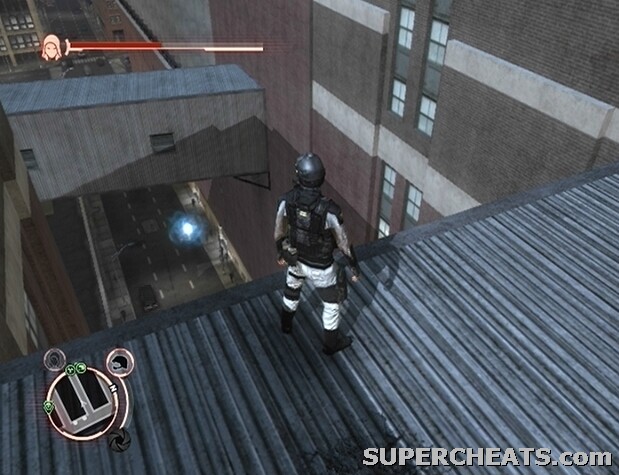
Landmark Collectible (98/200)
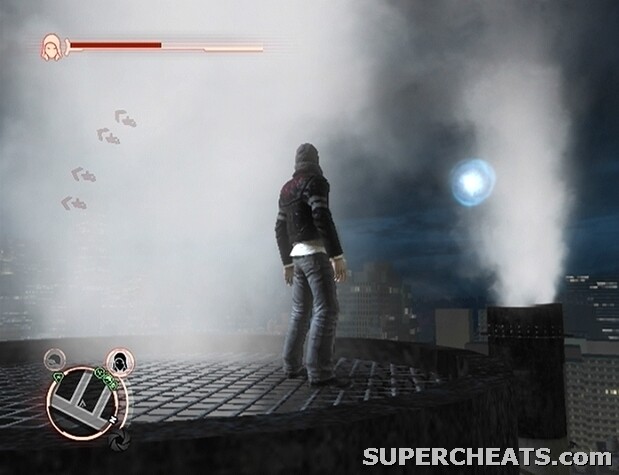
Landmark Collectible (99/200)
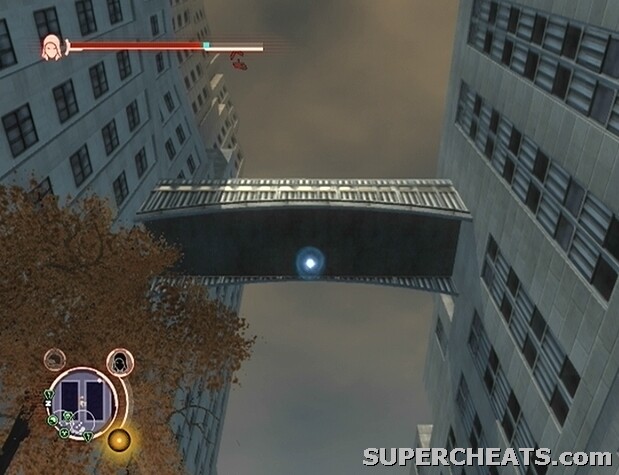
Landmark Collectible (100/200): Stand below the collectible and perform a fully-charged Jump.
Below you can find landmark location hint images for spots 101-150. Use the map on this page to find out which each image refers to.
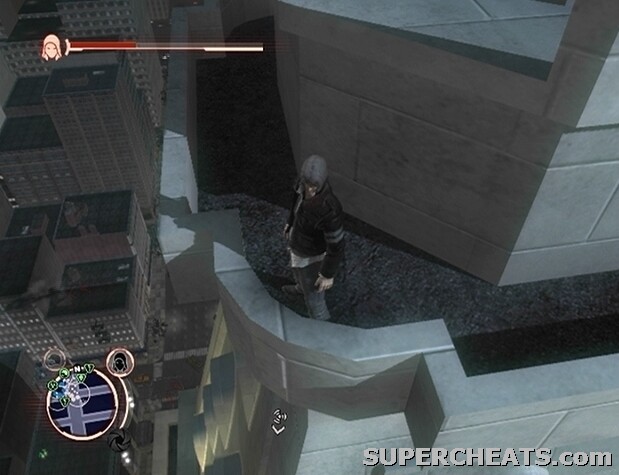
Landmark Collectible (101/200)
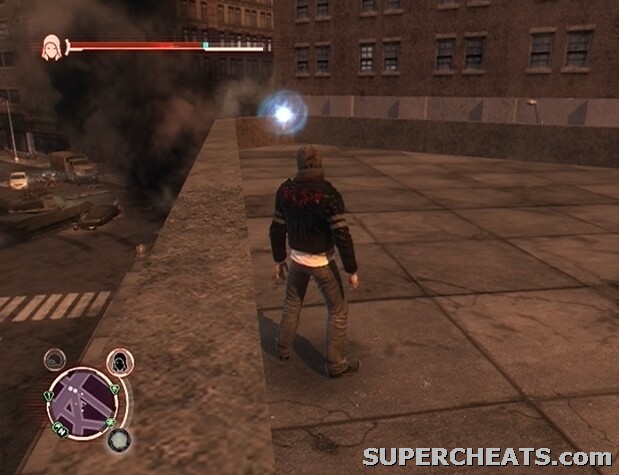
Landmark Collectible (102/200)
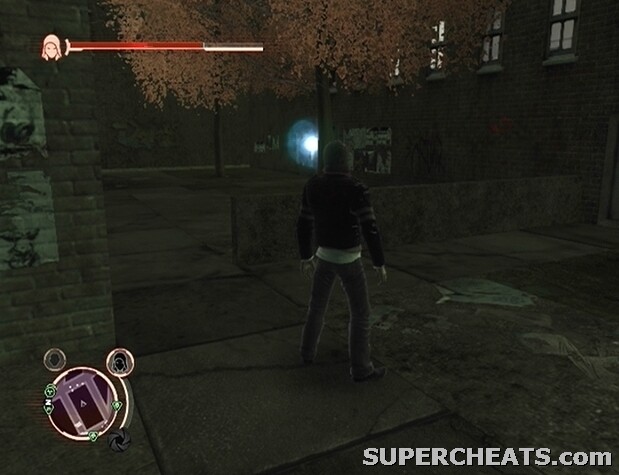
Landmark Collectible (103/200)
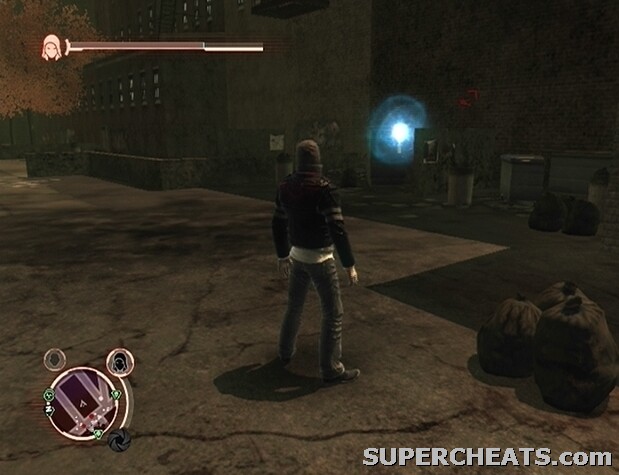
Landmark Collectible (104/200)
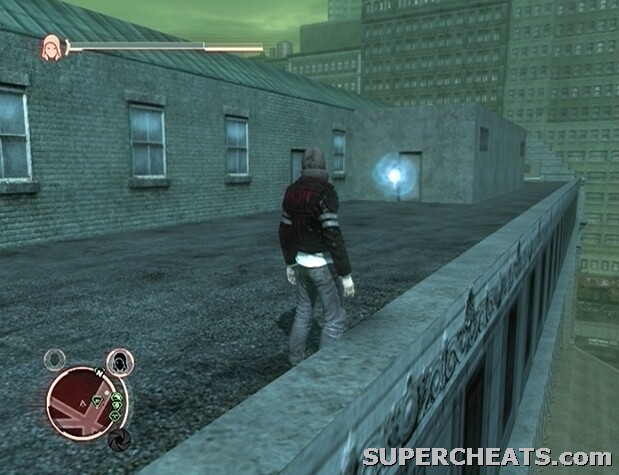
Landmark Collectible (105/200)
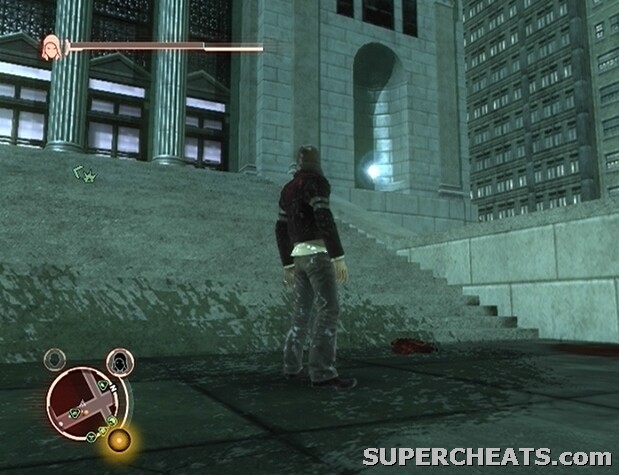
Landmark Collectible (106/200)
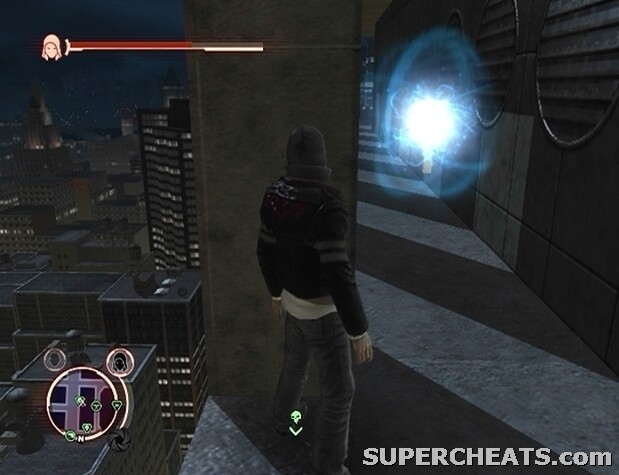
Landmark Collectible (107/200)
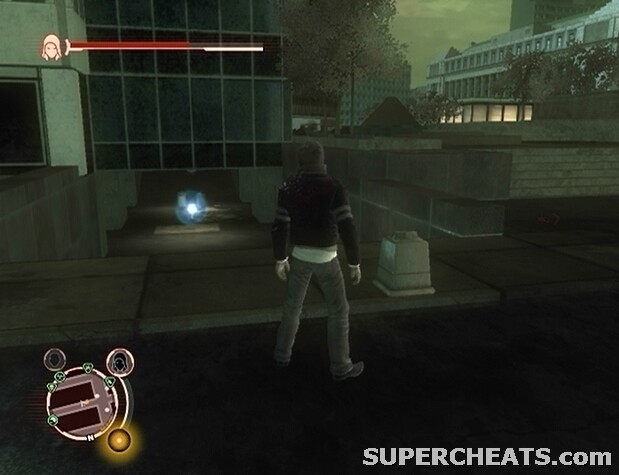
Landmark Collectible (108/200)
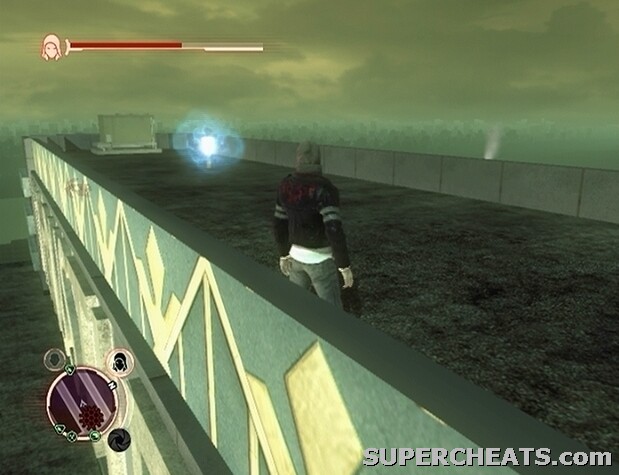
Landmark Collectible (109/200)
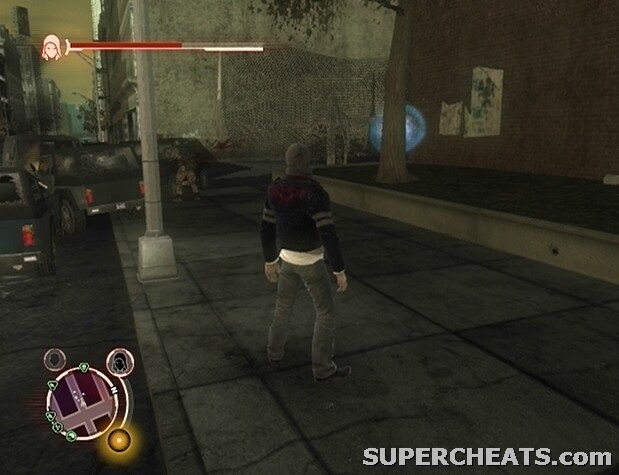
Landmark Collectible (110/200)
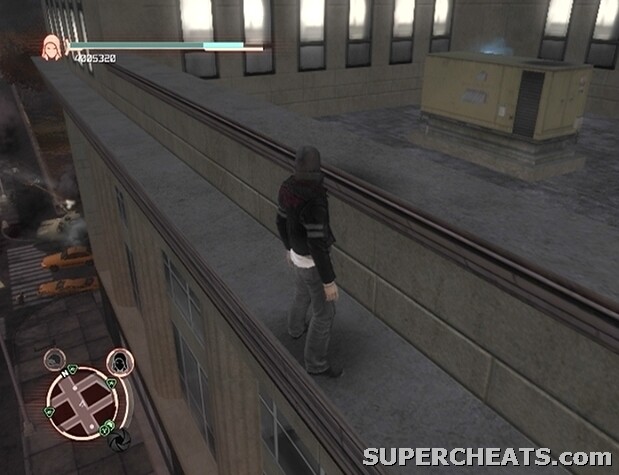
Landmark Collectible (111/200)
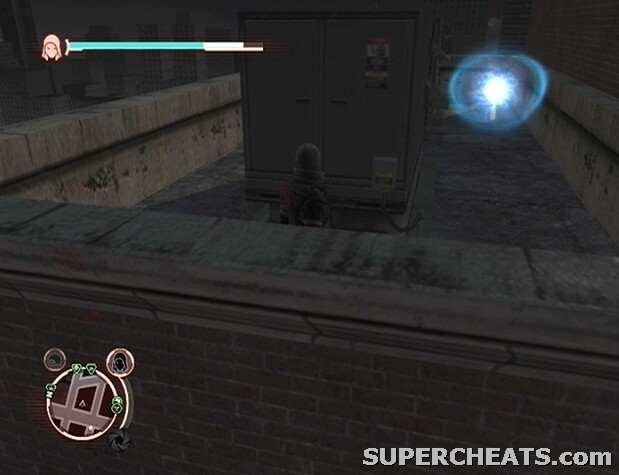
Landmark Collectible (112/200)

Landmark Collectible (113/200)
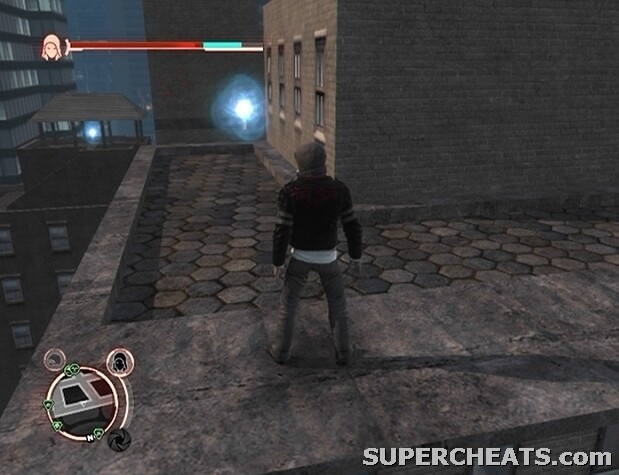
Landmark Collectible (114/200)
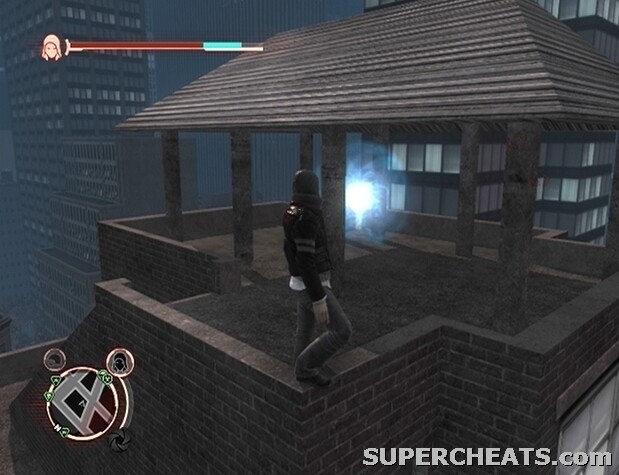
Landmark Collectible (115/200)
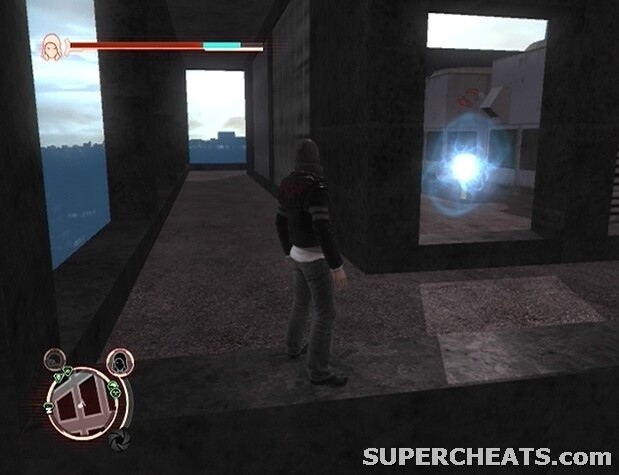
Landmark Collectible (116/200)
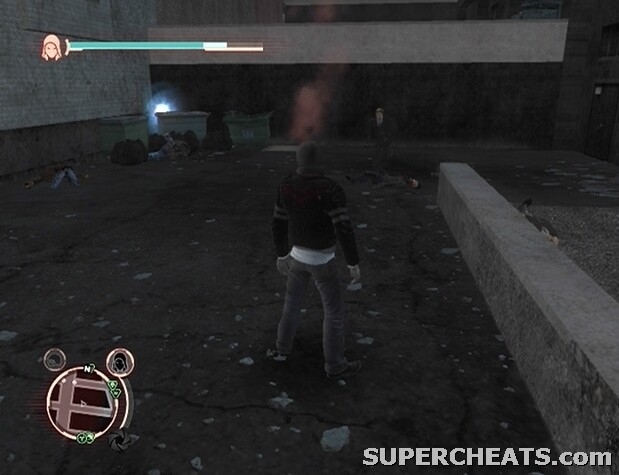
Landmark Collectible (117/200)
Landmark Collectible (118/200)
Landmark Collectible (119/200)
Landmark Collectible (120/200)
Landmark Collectible (121/200)
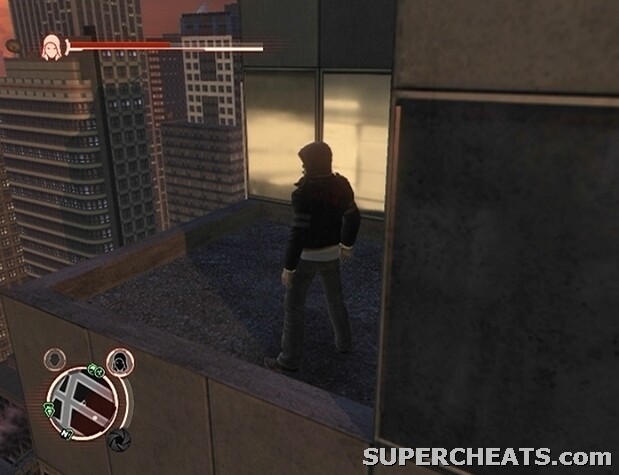
Landmark Collectible (122/200)
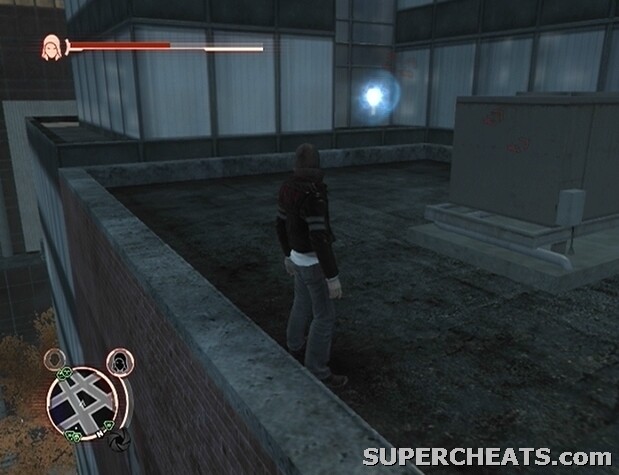
Landmark Collectible (123/200)
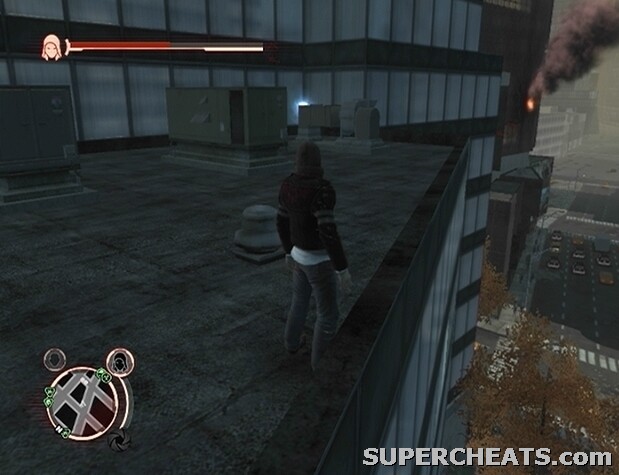
Landmark Collectible (124/200)
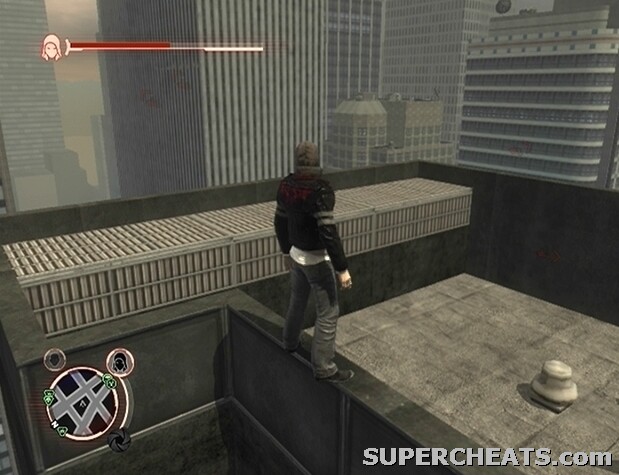
Landmark Collectible (125/200)
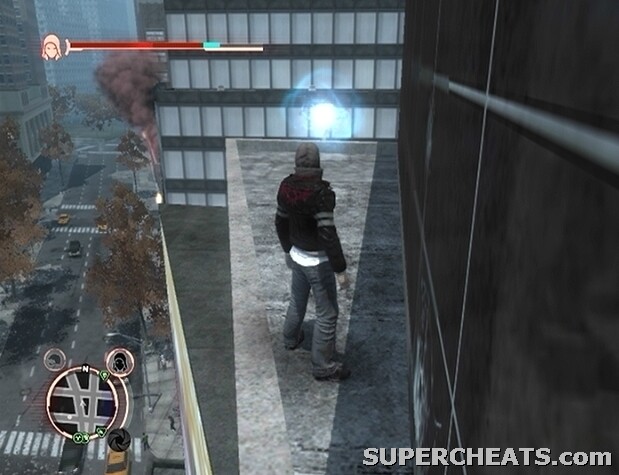
Landmark Collectible (126/200)
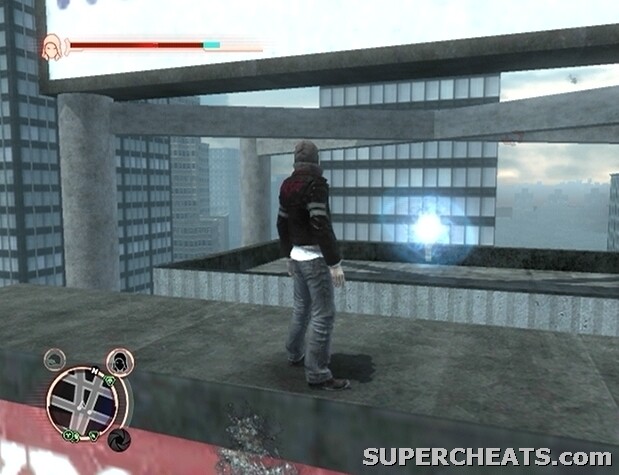
Landmark Collectible (127/200)
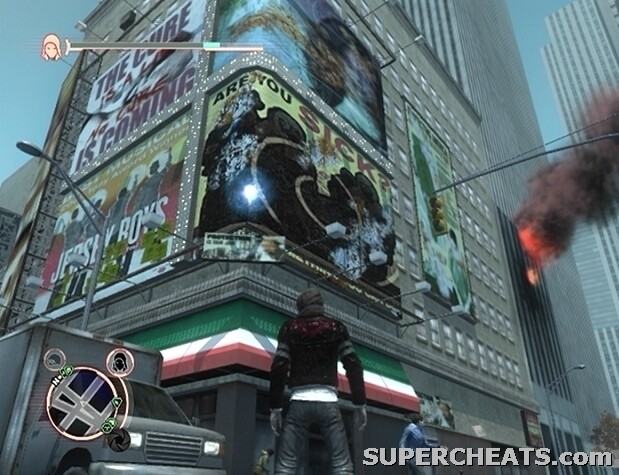
Landmark Collectible (128/200)
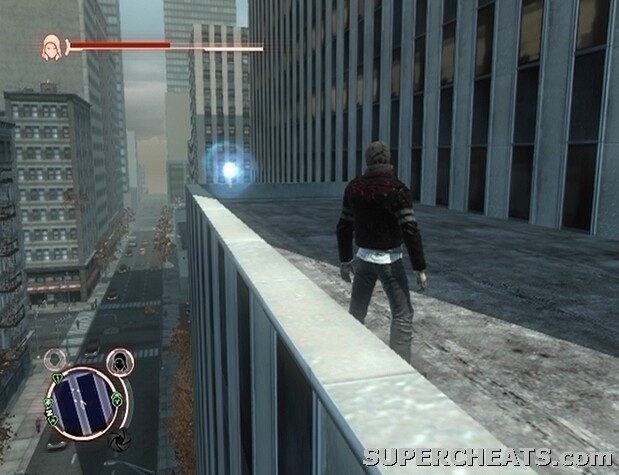
Landmark Collectible (129/200)
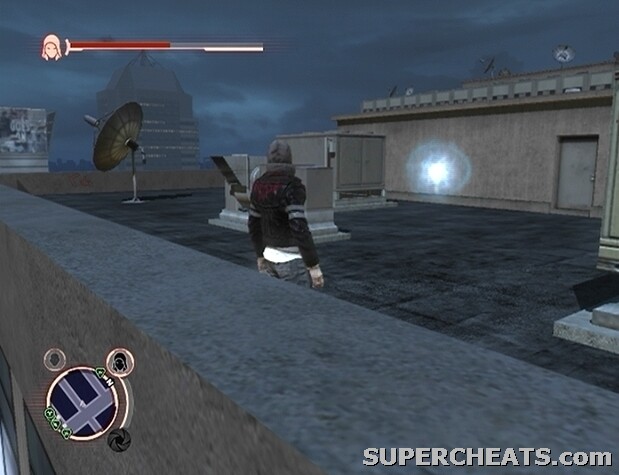
Landmark Collectible (130/200)
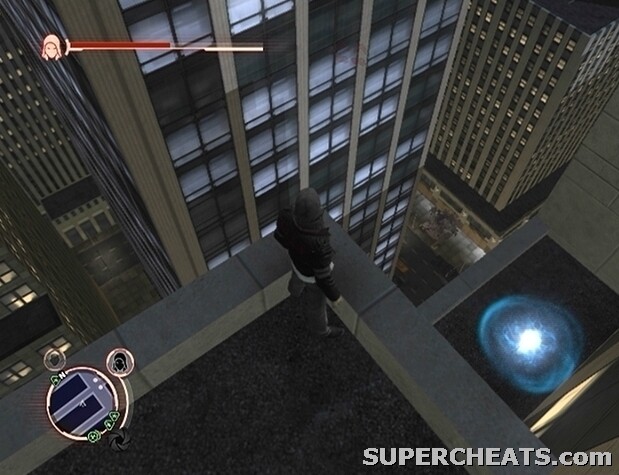
Landmark Collectible (131/200)
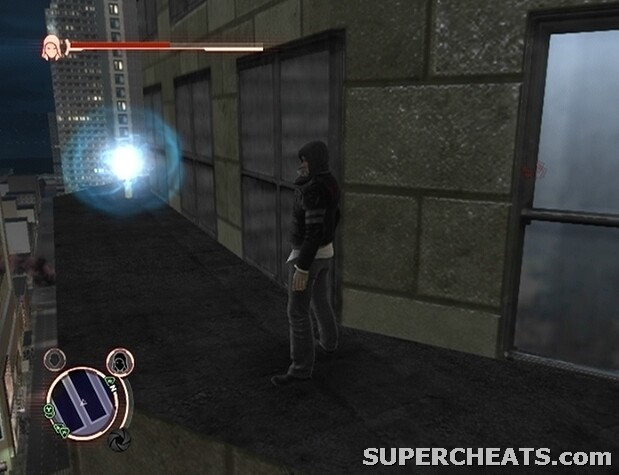
Landmark Collectible (132/200)
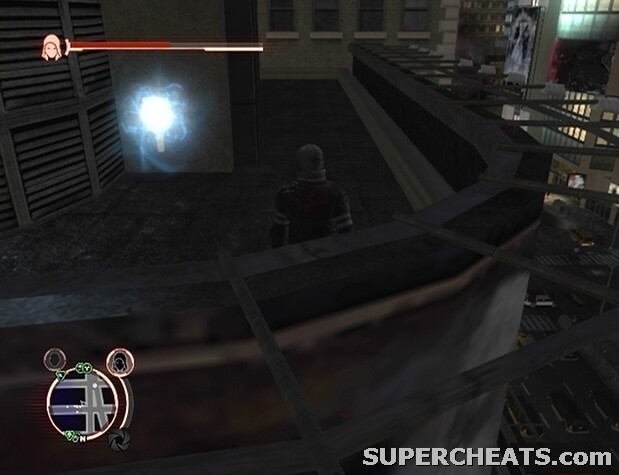
Landmark Collectible (133/200)

Landmark Collectible (134/200)

Landmark Collectible (135/200)
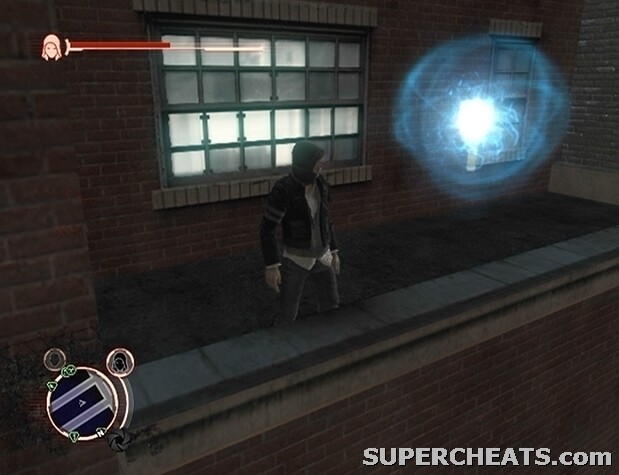
Landmark Collectible (136/200)

Landmark Collectible (137/200)
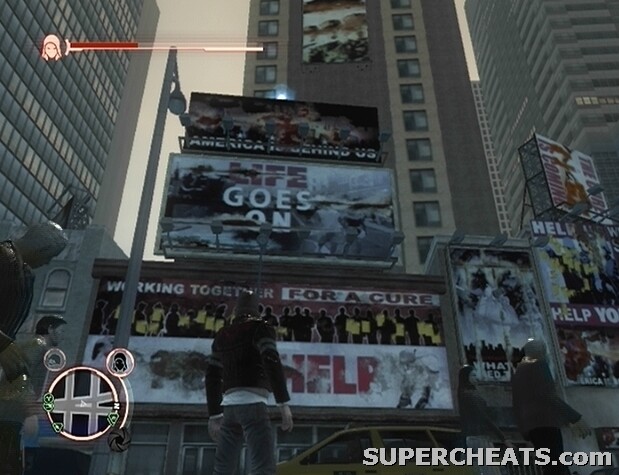
Landmark Collectible (138/200)
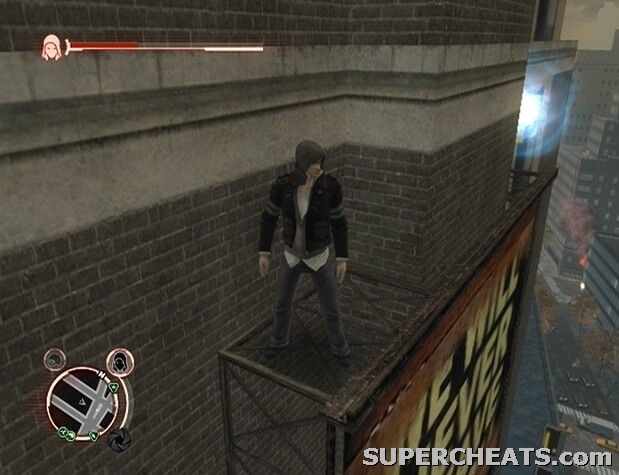
Landmark Collectible (139/200)
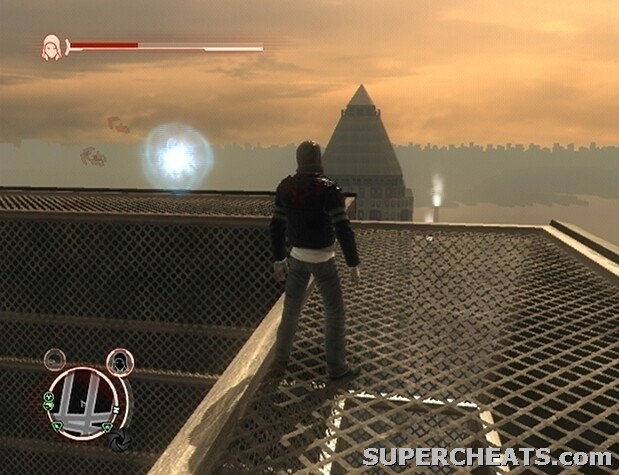
Landmark Collectible (140/200)
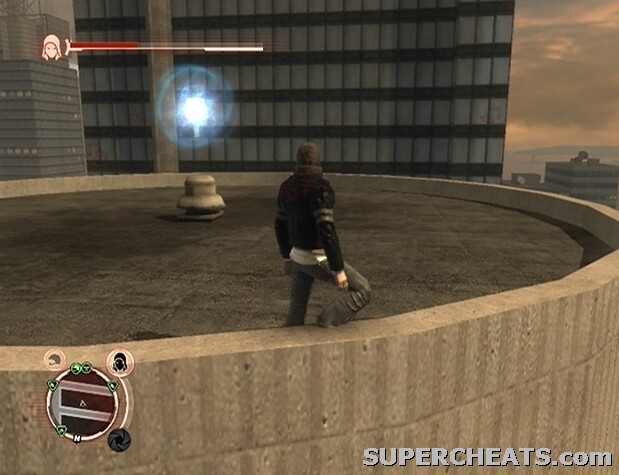
Landmark Collectible (141/200)
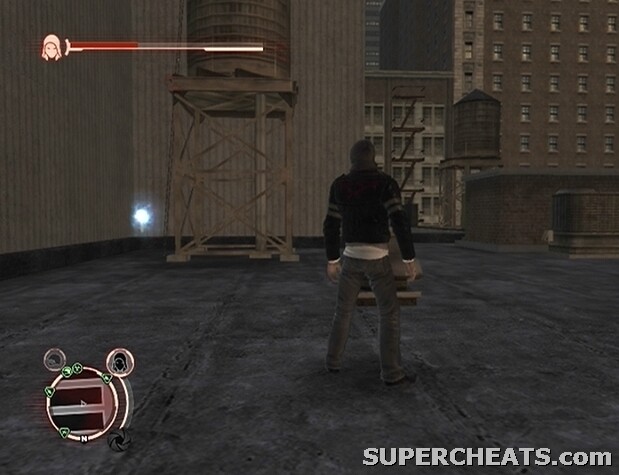
Landmark Collectible (142/200)

Landmark Collectible (143/200)
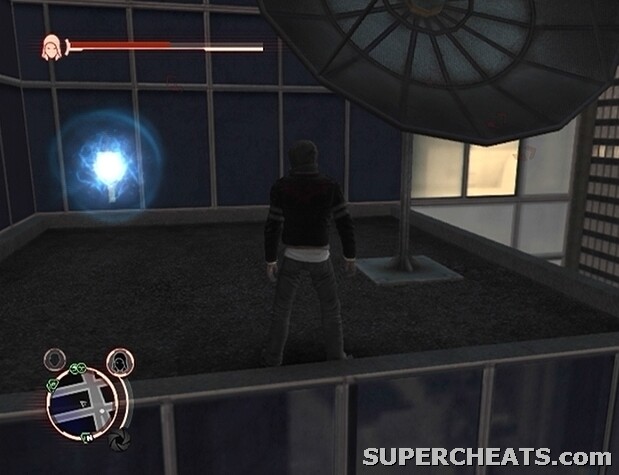
Landmark Collectible (144/200)
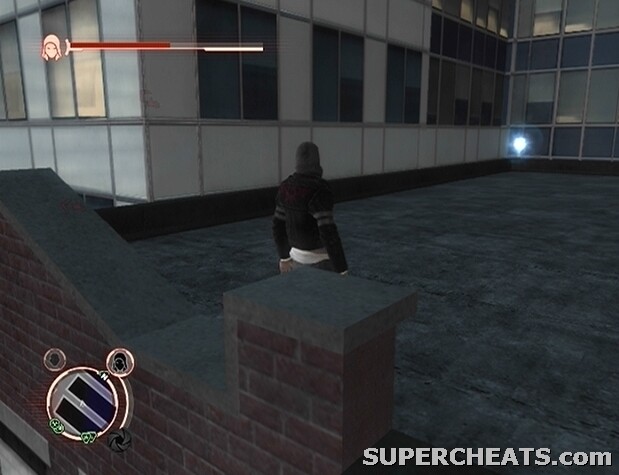
Landmark Collectible (145/200)
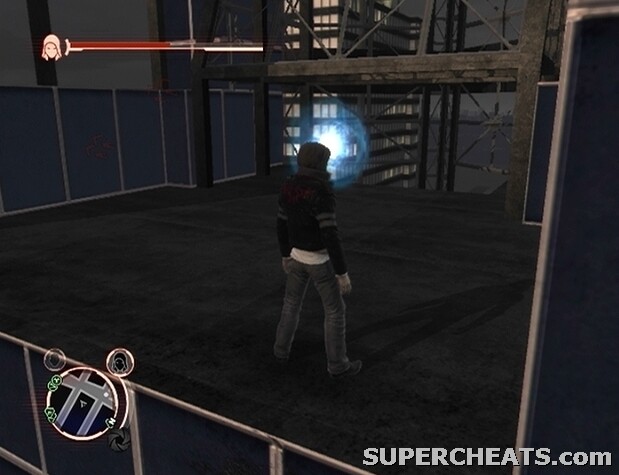
Landmark Collectible (146/200)
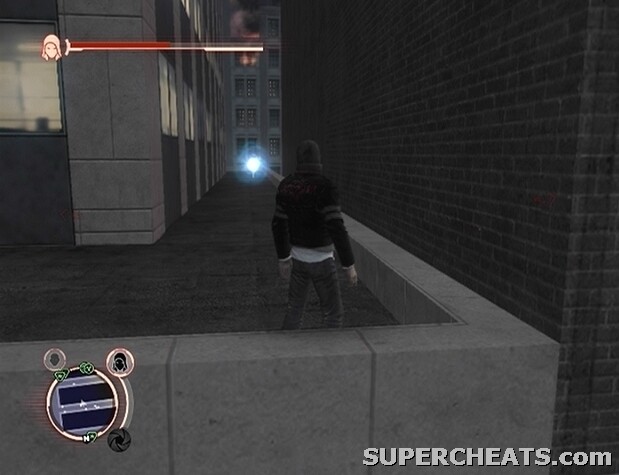
Landmark Collectible (147/200)
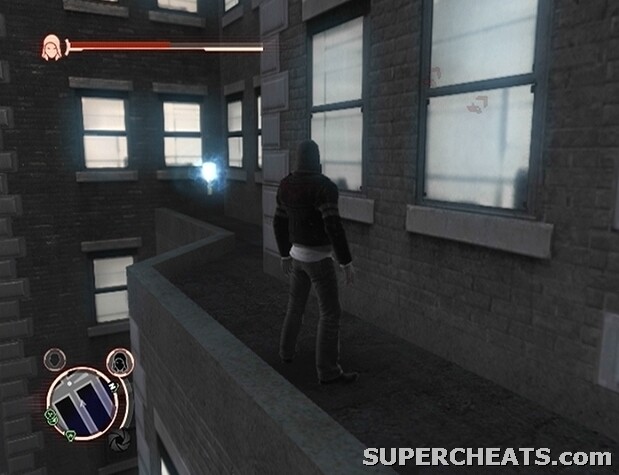
Landmark Collectible (148/200)
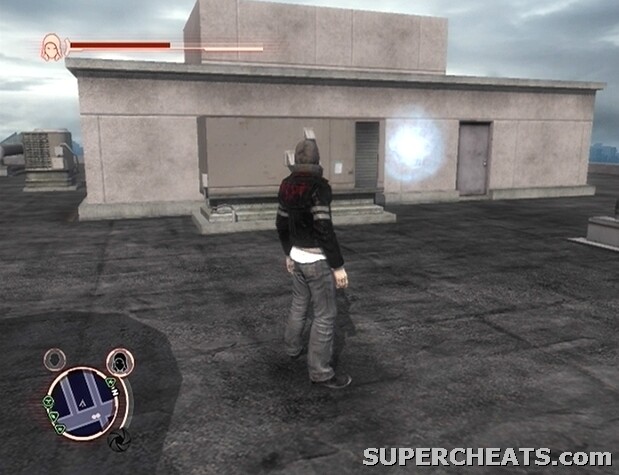
Landmark Collectible (149/200)
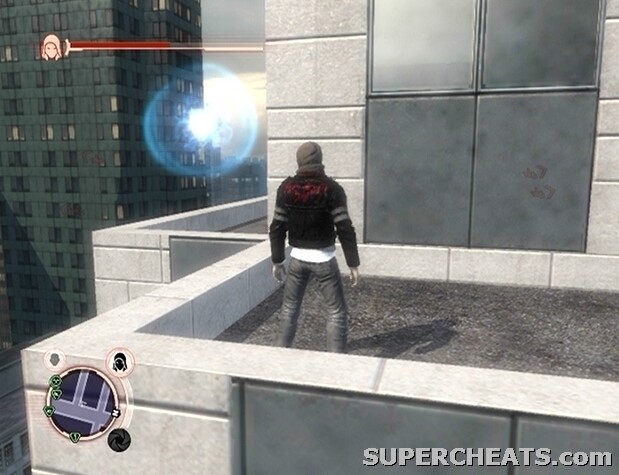
Landmark Collectible (150/200)
Below you can find landmark location hint images for spots 151-200. Use the map on this page to find out which each image refers to.
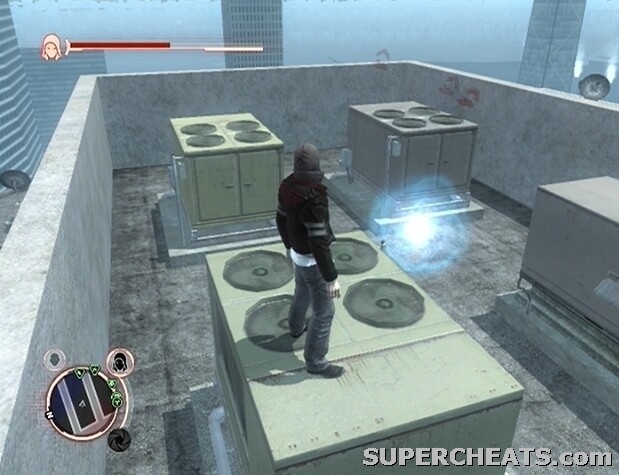
Landmark Collectible (151/200)
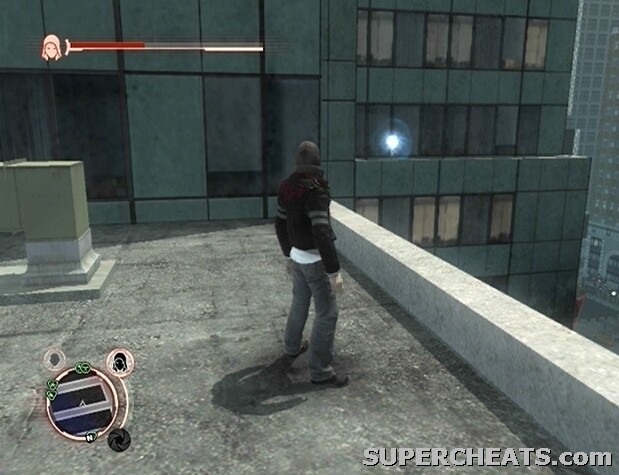
Landmark Collectible (152/200)

Landmark Collectible (153/200)
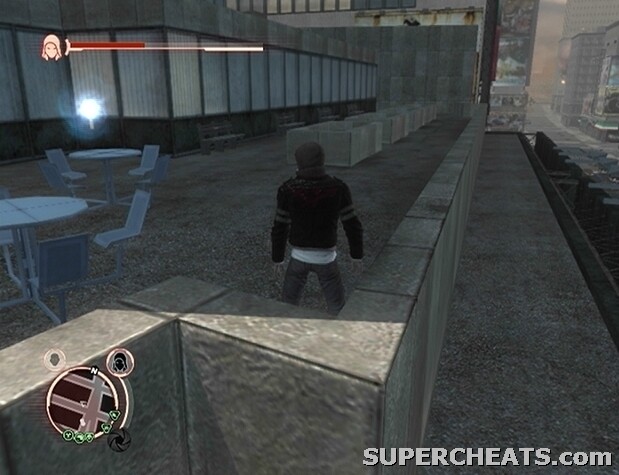
Landmark Collectible (154/200)
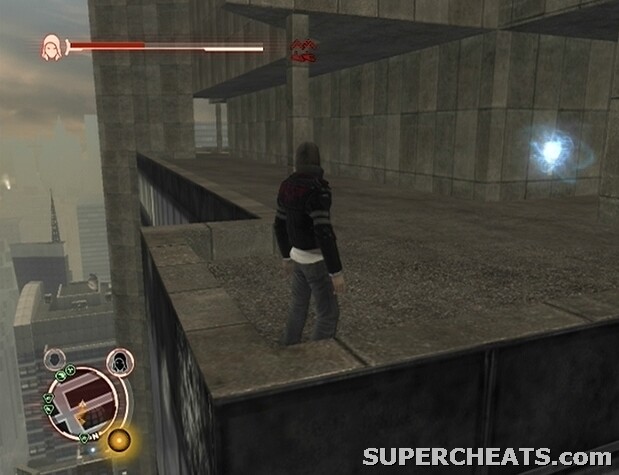
Landmark Collectible (155/200)
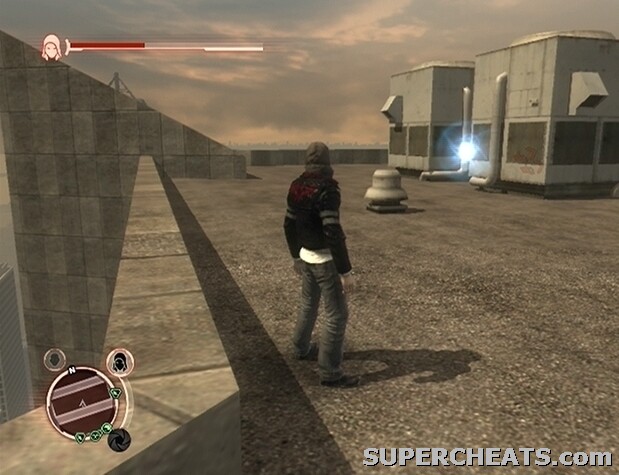
Landmark Collectible (156/200)
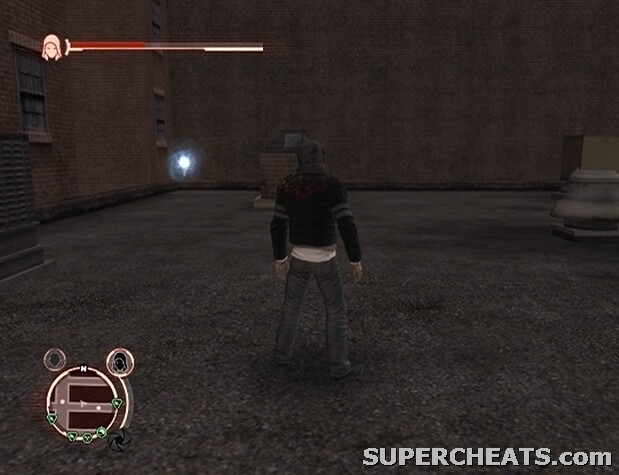
Landmark Collectible (157/200)
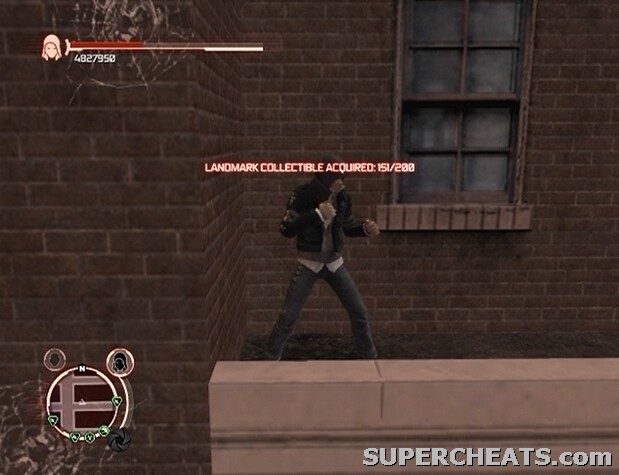
Landmark Collectible (158/200)
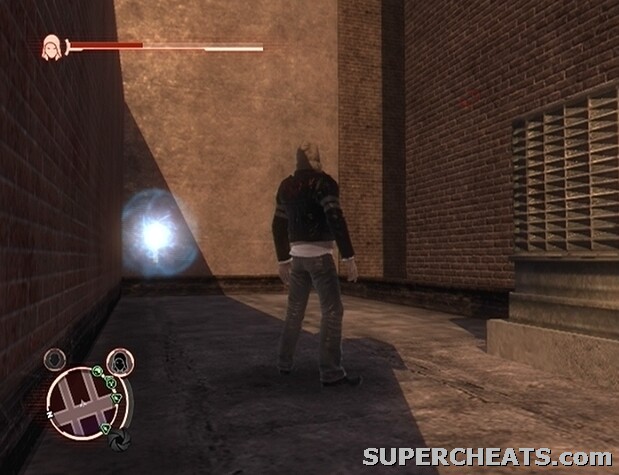
Landmark Collectible (159/200)
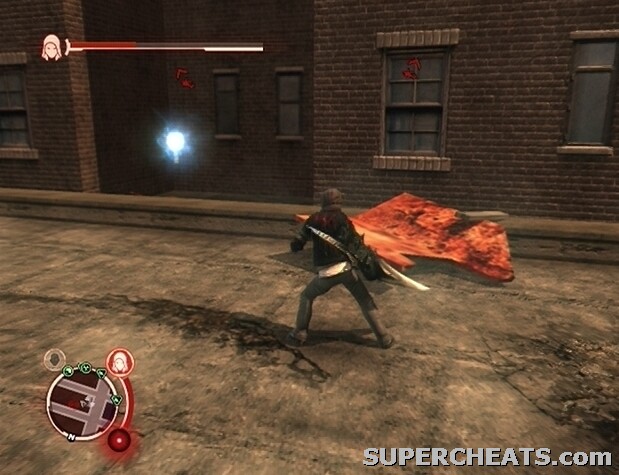
Landmark Collectible (160/200)
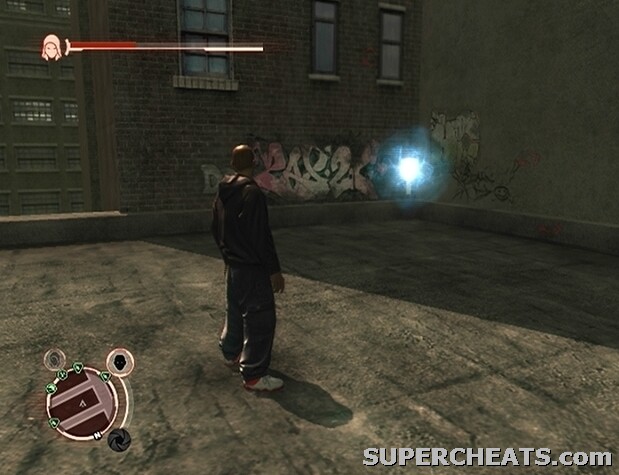
Landmark Collectible (161/200)
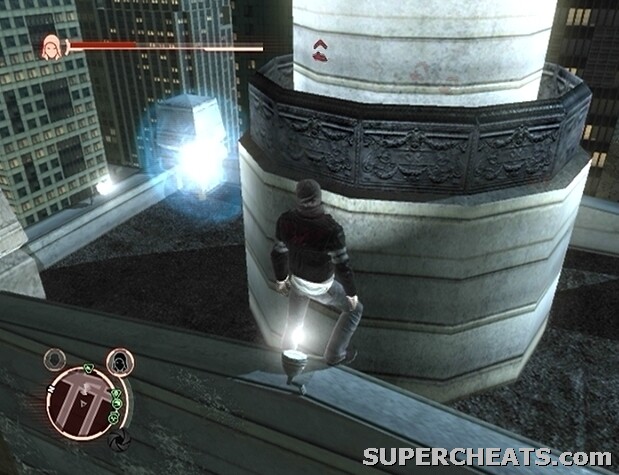
Landmark Collectible (162/200)
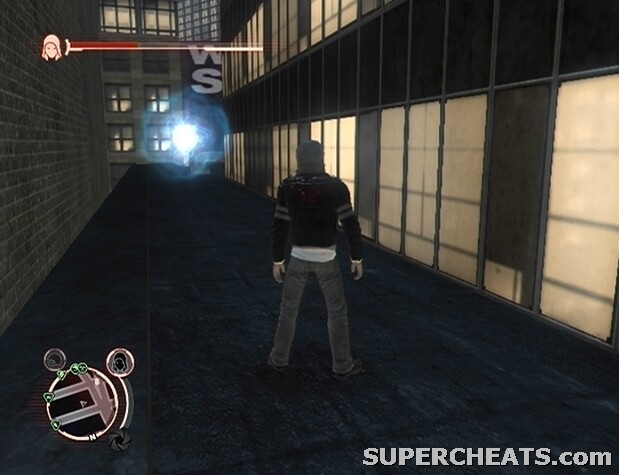
Landmark Collectible (163/200)
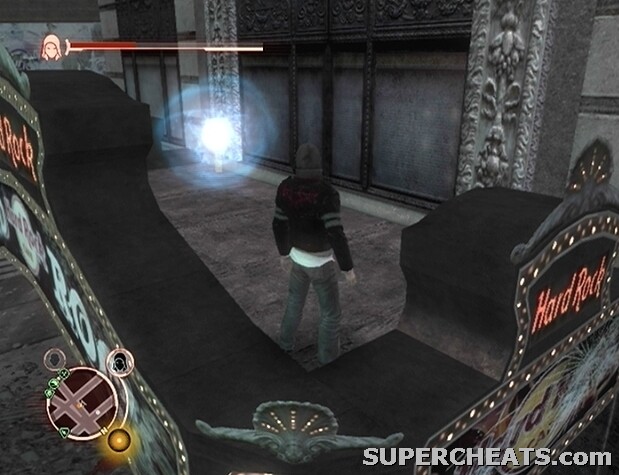
Landmark Collectible (164/200)
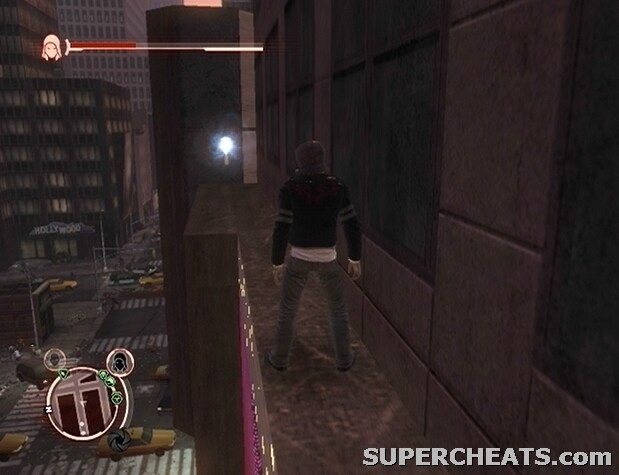
Landmark Collectible (165/200)
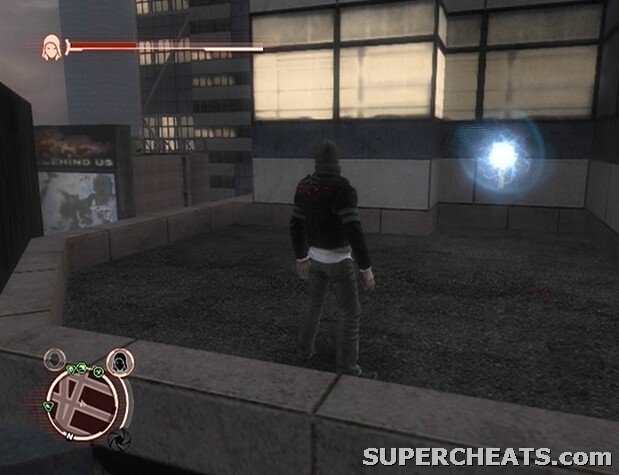
Landmark Collectible (166/200)
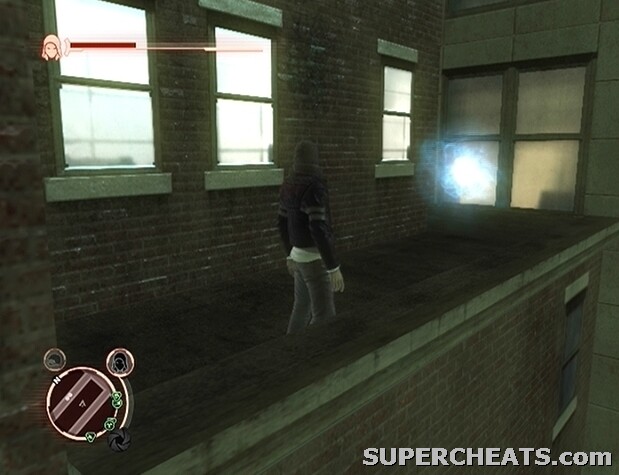
Landmark Collectible (167/200)
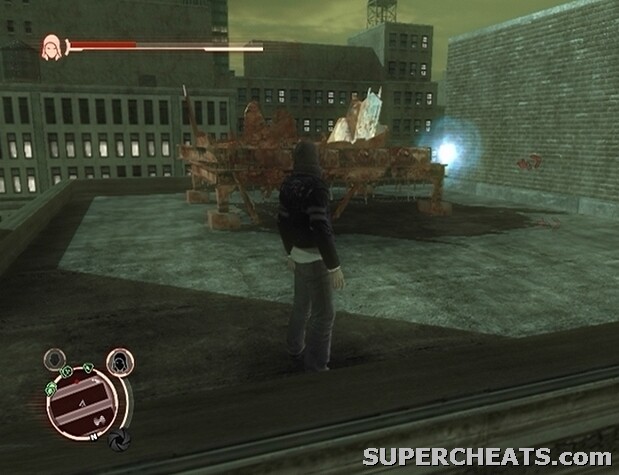
Landmark Collectible (168/200)
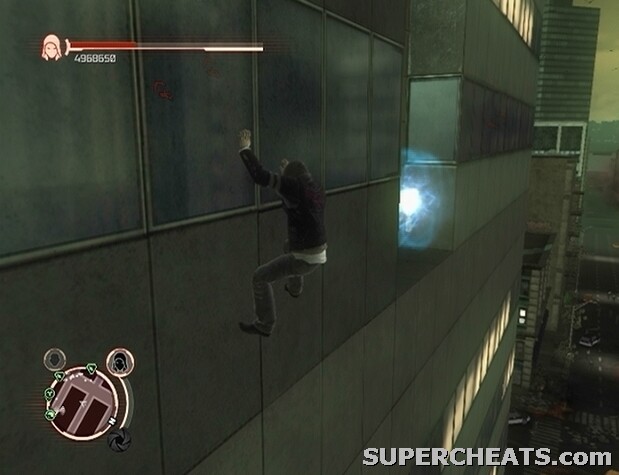
Landmark Collectible (169/200)
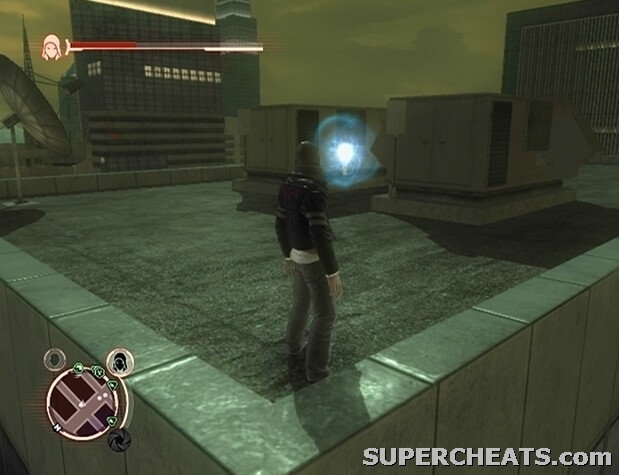
Landmark Collectible (170/200)
Landmark Collectible (171/200)
Landmark Collectible (172/200)
Landmark Collectible (173/200)
Landmark Collectible (174/200)
Landmark Collectible (175/200)
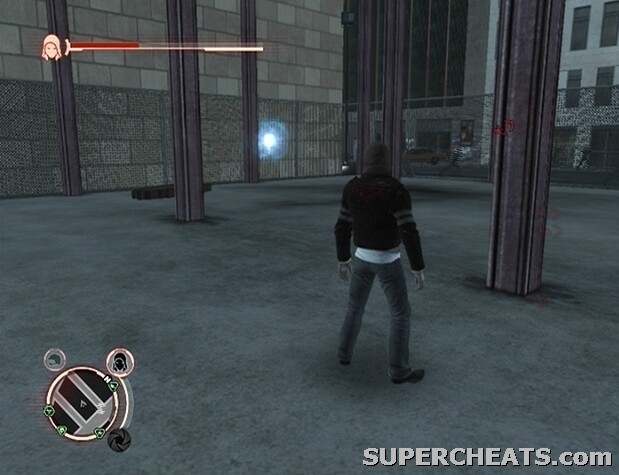
Landmark Collectible (176/200)
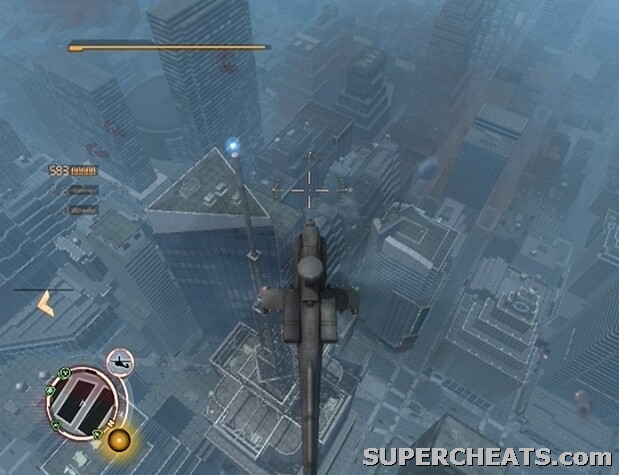
Landmark Collectible (177/200)
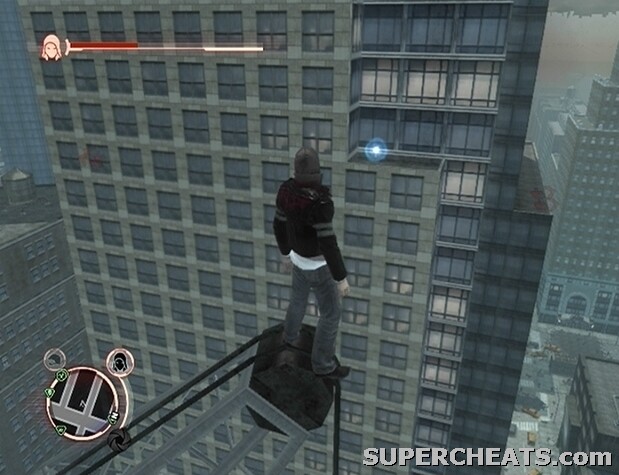
Landmark Collectible (178/200)
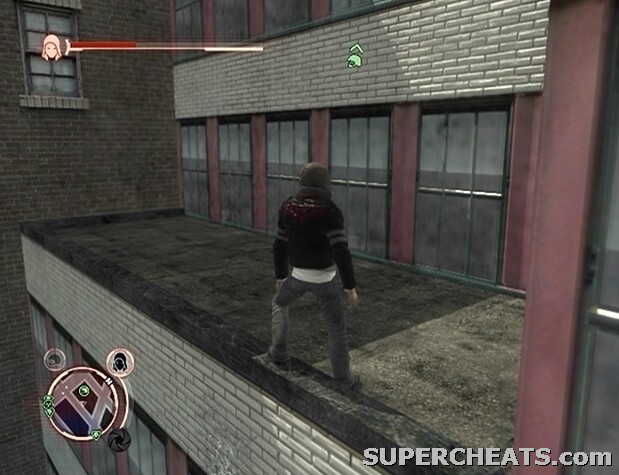
Landmark Collectible (179/200)

Landmark Collectible (180/200)

Landmark Collectible (181/200)
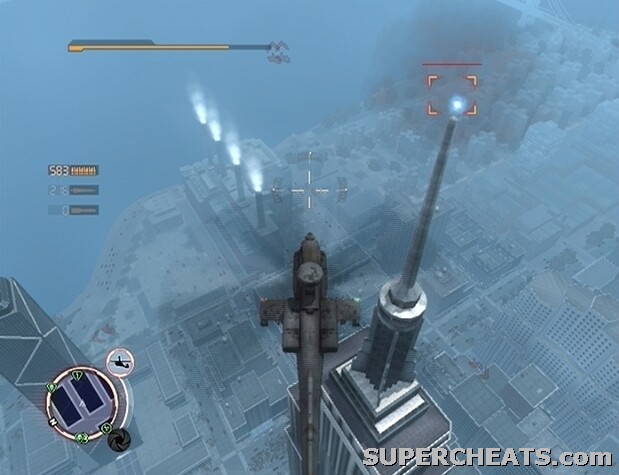
Landmark Collectible (182/200)

Landmark Collectible (183/200)
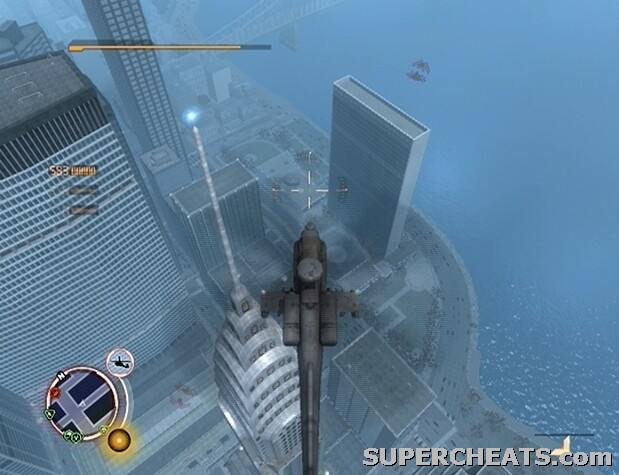
Landmark Collectible (184/200)
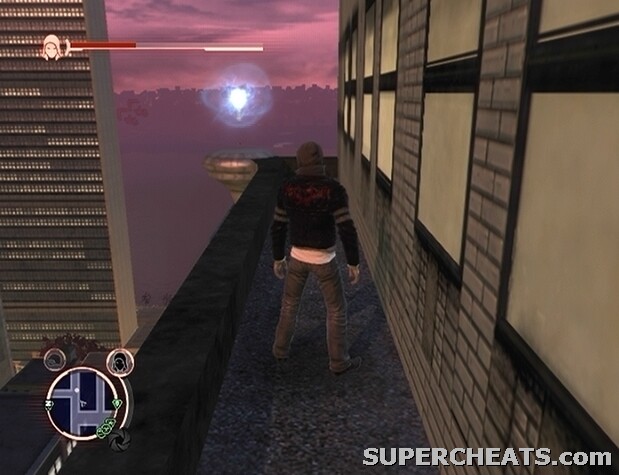
Landmark Collectible (185/200)

Landmark Collectible (186/200)
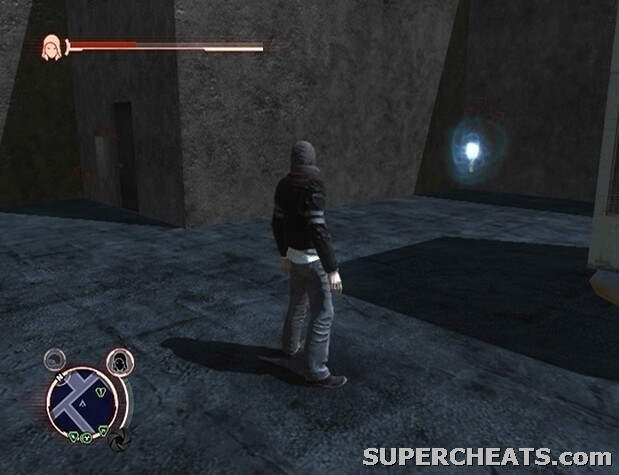
Landmark Collectible (187/200)
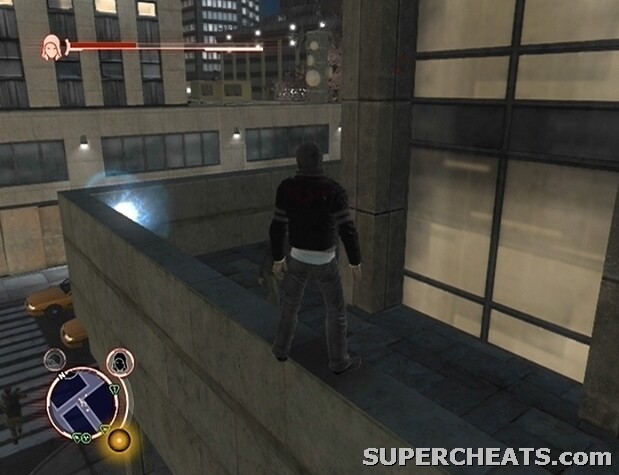
Landmark Collectible (188/200)
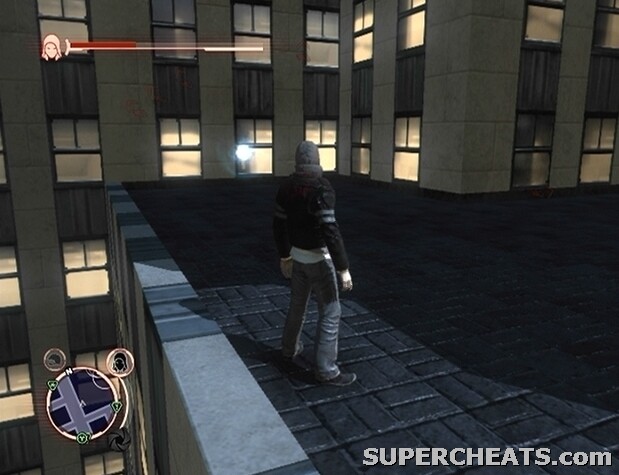
Landmark Collectible (189/200)
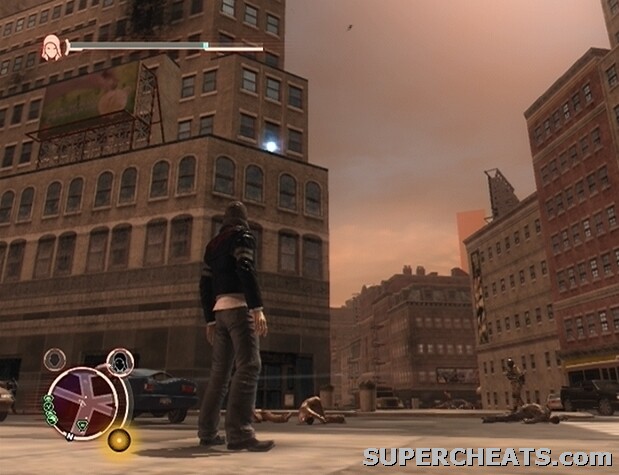
Landmark Collectible (190/200)
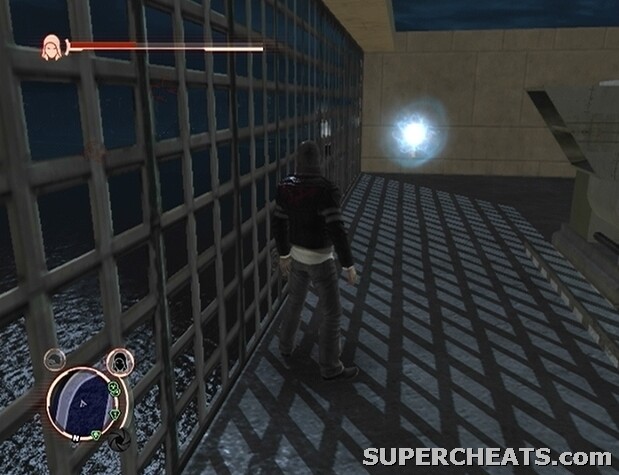
Landmark Collectible (191/200)
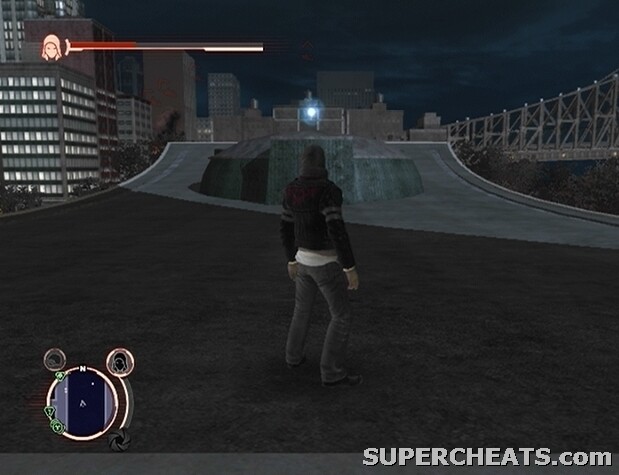
Landmark Collectible (192/200)
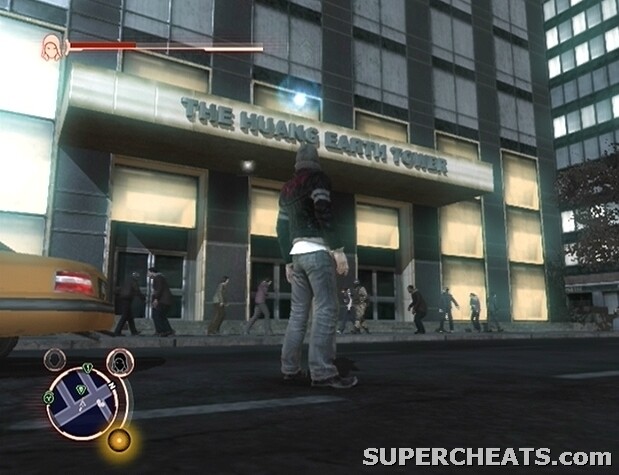
Landmark Collectible (193/200)
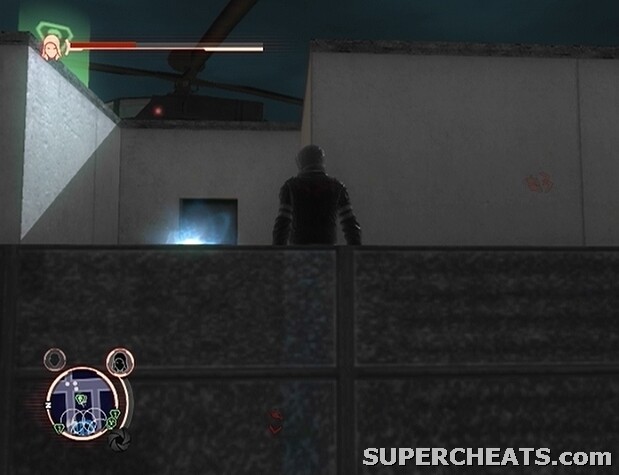
Landmark Collectible (194/200)
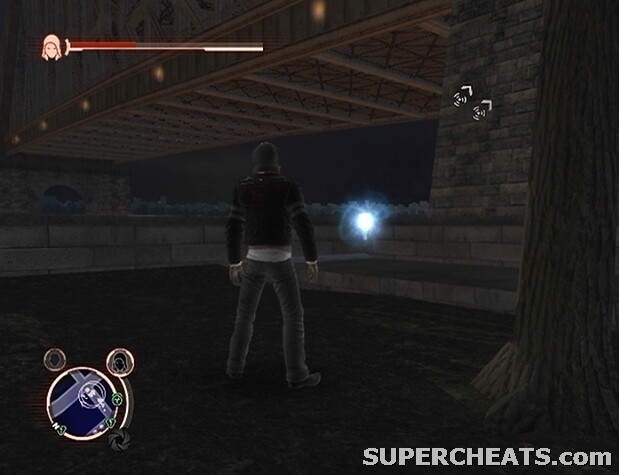
Landmark Collectible (195/200)
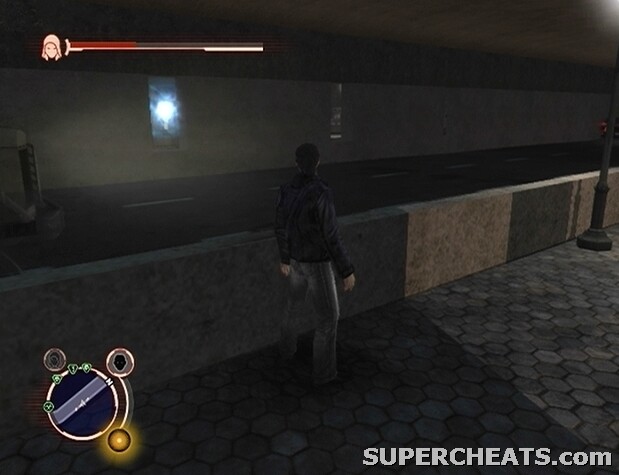
Landmark Collectible (196/200)
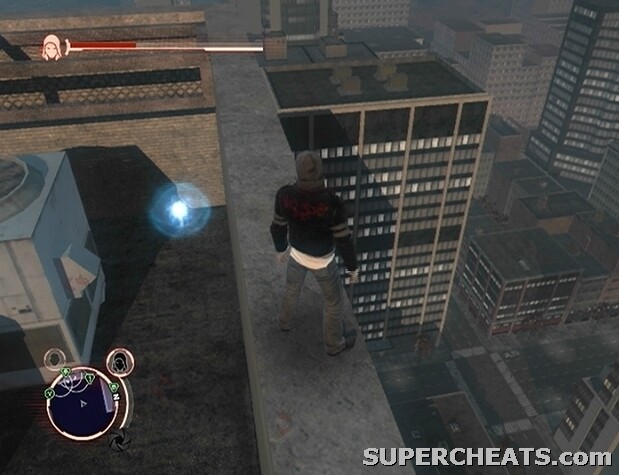
Landmark Collectible (197/200)
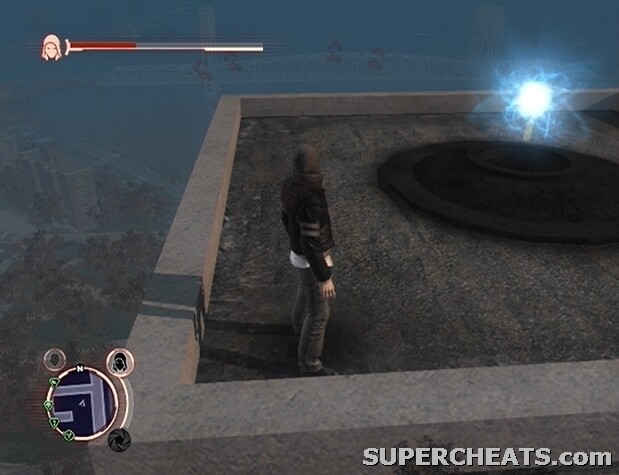
Landmark Collectible (198/200)
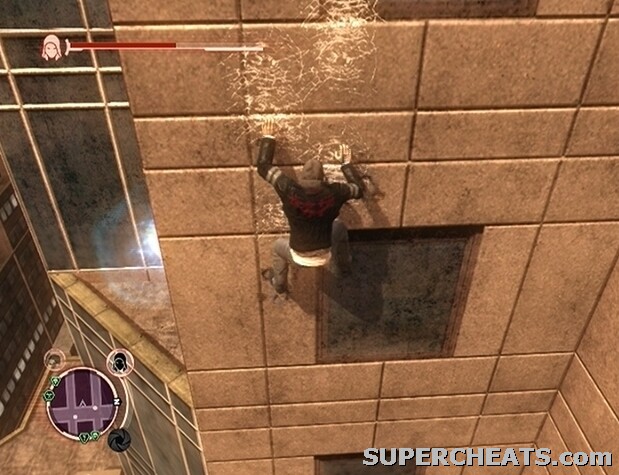
Landmark Collectible (199/200)
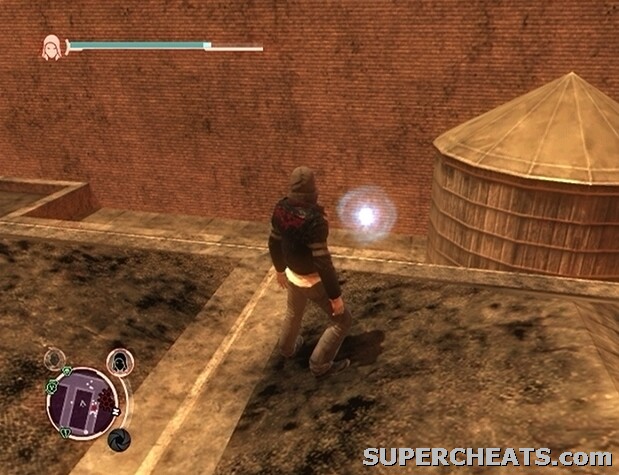
Landmark Collectible (200/200)
 1. Revenge Revisited
 2. Endless Hunger
 3. Trail Of Corpses
 4. Wrecking Yard
 5. Misconception
 6. Brain Trust
 7. Streetwise
 8. Polymath
 9. Half-Truths
 10. Mankind Is Your Mask
 11. The Butcher
 12. Return Fire
13. Gunning
12. Return Fire
13. Gunning 14. Cleanup
 15. The First Thread
 16. Self-Deception
 17. Web Of Knowledge
 18. It's Him!
 19. In Plain Sight
 20. Infiltrator
 21. Threat Elevated
22. Repossession
21. Threat Elevated
22. Repossession 23. SME
 24. Surface-To-Air
 25. Evolutionary Step
 26. Unnatural Selection
 27. The Cleaner
 28. In The Web
 29. Au
 30. Nice Guy
 31. Hard To Kill
 32. Speed Bumps
 33. Pt
 35. Errand Boy (Secret)
 36. Children Of Blacklight (Secret)
 37. On Instinct (Secret)
 38. One Thousand Suns (Secret)
 39. Hope (Secret)
 40. Origin (Secret)
Revenge Revisited
Complete Story Mode on hard difficulty.
Gold
Endless Hunger
Consume 200 characters to boost your health.
Silver
Trail Of Corpses
Kill 53,596 infected.
Silver
Wrecking Yard
Destroy 2,000 vehicles.
Bronze
Misconception
Destroy 25 Infected Water Towers before they hatch.
Bronze
Brain Trust
Complete all Consume Events.
Bronze
Streetwise
Collect all Landmark collectibles scattered across New York City.
Silver
Polymath
Collect all Hint Collectibles scattered across New York City.
Silver
Half-Truths
Complete a mission without causing a single Military Alert.
Bronze
Mankind Is Your Mask
Complete 3 missions without causing a single Military Alert.
Silver
The Butcher
Kill 50 characters in 5 seconds.
Silver
Return Fire
Catch any object tossed by a Hydra; and throw it back.
Bronze
Gunning
Destroy 20 Helicopters in a single Helicopter flight.
Bronze
Cleanup
Kill 15 characters with a single Whipfist attack.
Bronze
The First Thread
Unlock the Web of Intrigue.
Bronze
Self-Deception
Discover what happened to Alex Mercer through the Web of Intrigue.
Bronze
Web Of Knowledge
Acquire all nodes of the Web of Intrigue.
Gold
It's Him!
Patsy 5 military personnel.
Bronze
In Plain Sight
Evade 10 strike teams.
Bronze
Infiltrator
Infiltrate 10 Military Bases disguised as a Commander.
Bronze
Threat Elevated
Destroy 25 strike teams.
Bronze
Repossession
Seize 50 vehicles from enemy hands.
Bronze
SME
Gain the ability to drive and fly all vehicles.
Bronze
Surface-To-Air
Shoot down 50 helicopters while driving armor.
Bronze
Evolutionary Step
Use the Upgrade Menu to acquire an Upgrade.
Bronze
Unnatural Selection
Acquire all available upgrades.
Silver
The Cleaner
Destroy 10 Military Bases or Infected Hives in New York City.
Silver
In The Web
Consume 50 Web Targets.
Bronze
Au
Achieve a rating of Gold or better in all Events.
Silver
Nice Guy
Complete the game while consuming 10 Civilians or fewer.
Silver
Hard To Kill
Complete Story Mode in any difficulty without dying.
Gold
Speed Bumps
Run over 500 characters in a single tank.
Bronze
Pt
Achieve a Platinum Medal in all Events.
Gold
Crossing The T (Secret)
Complete the Hunter Boss Encounter.
Bronze
Errand Boy (Secret)
Complete the Specialist Boss Fight.
Bronze
Children Of Blacklight (Secret)
Complete the Supreme Hunter Boss Battle.
Bronze
On Instinct (Secret)
Complete the Mother Boss Battle.
Bronze
One Thousand Suns (Secret)
Complete the Supreme Hybrid Boss Battle.
Bronze
Hope (Secret)
Discover the truth behind Hope, Idaho through the Web of Intrigue.
Bronze
Origin (Secret)
Discover the history of Elizabeth Greene through the Web of Intrigue.
Bronze

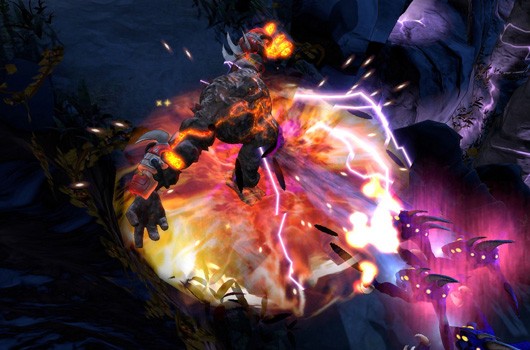


 Fallout 4: Unlock Cait as Companion, romance guide
 Skull Faces Role in MGS 5: The Phantom Pain
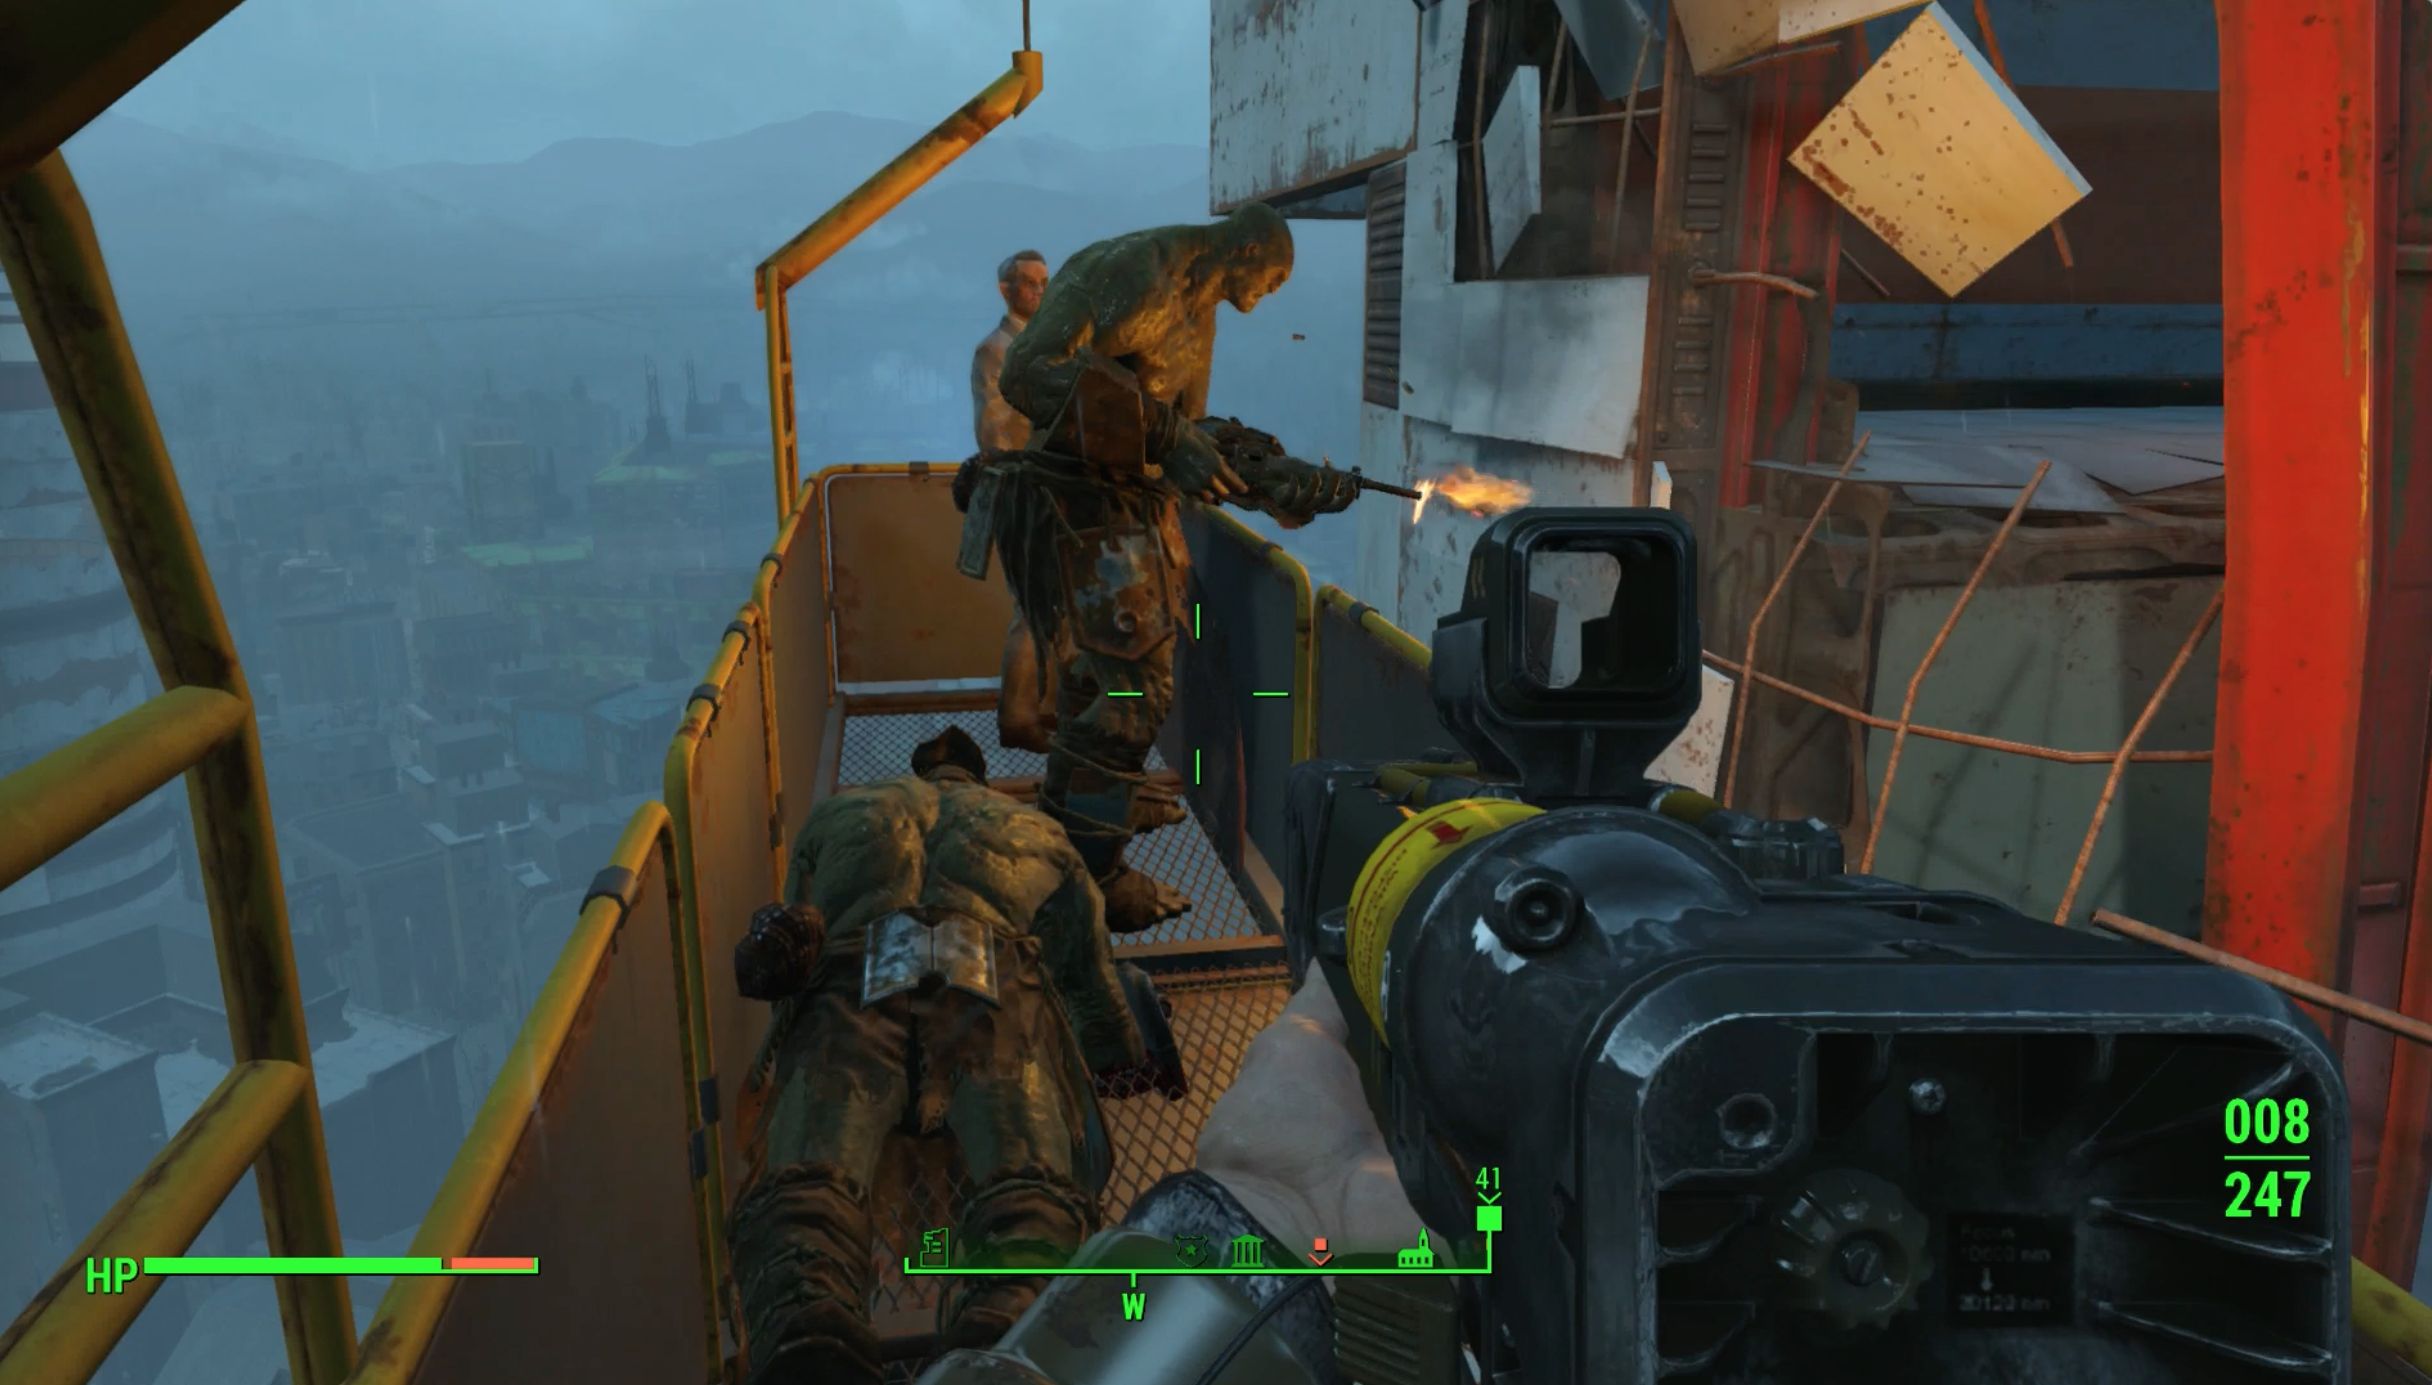 Fallout 4: Curtain Call walkthrough
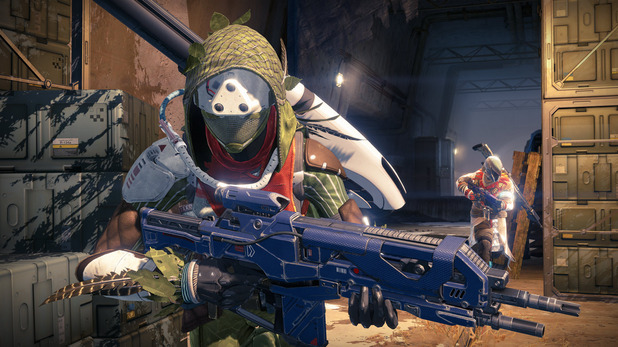 Destiny: The Taken King How To Open Dreadnought Scent Is The Key Chest and Location
 World of Final Fantasy Wiki – Everything you need to know about the game .